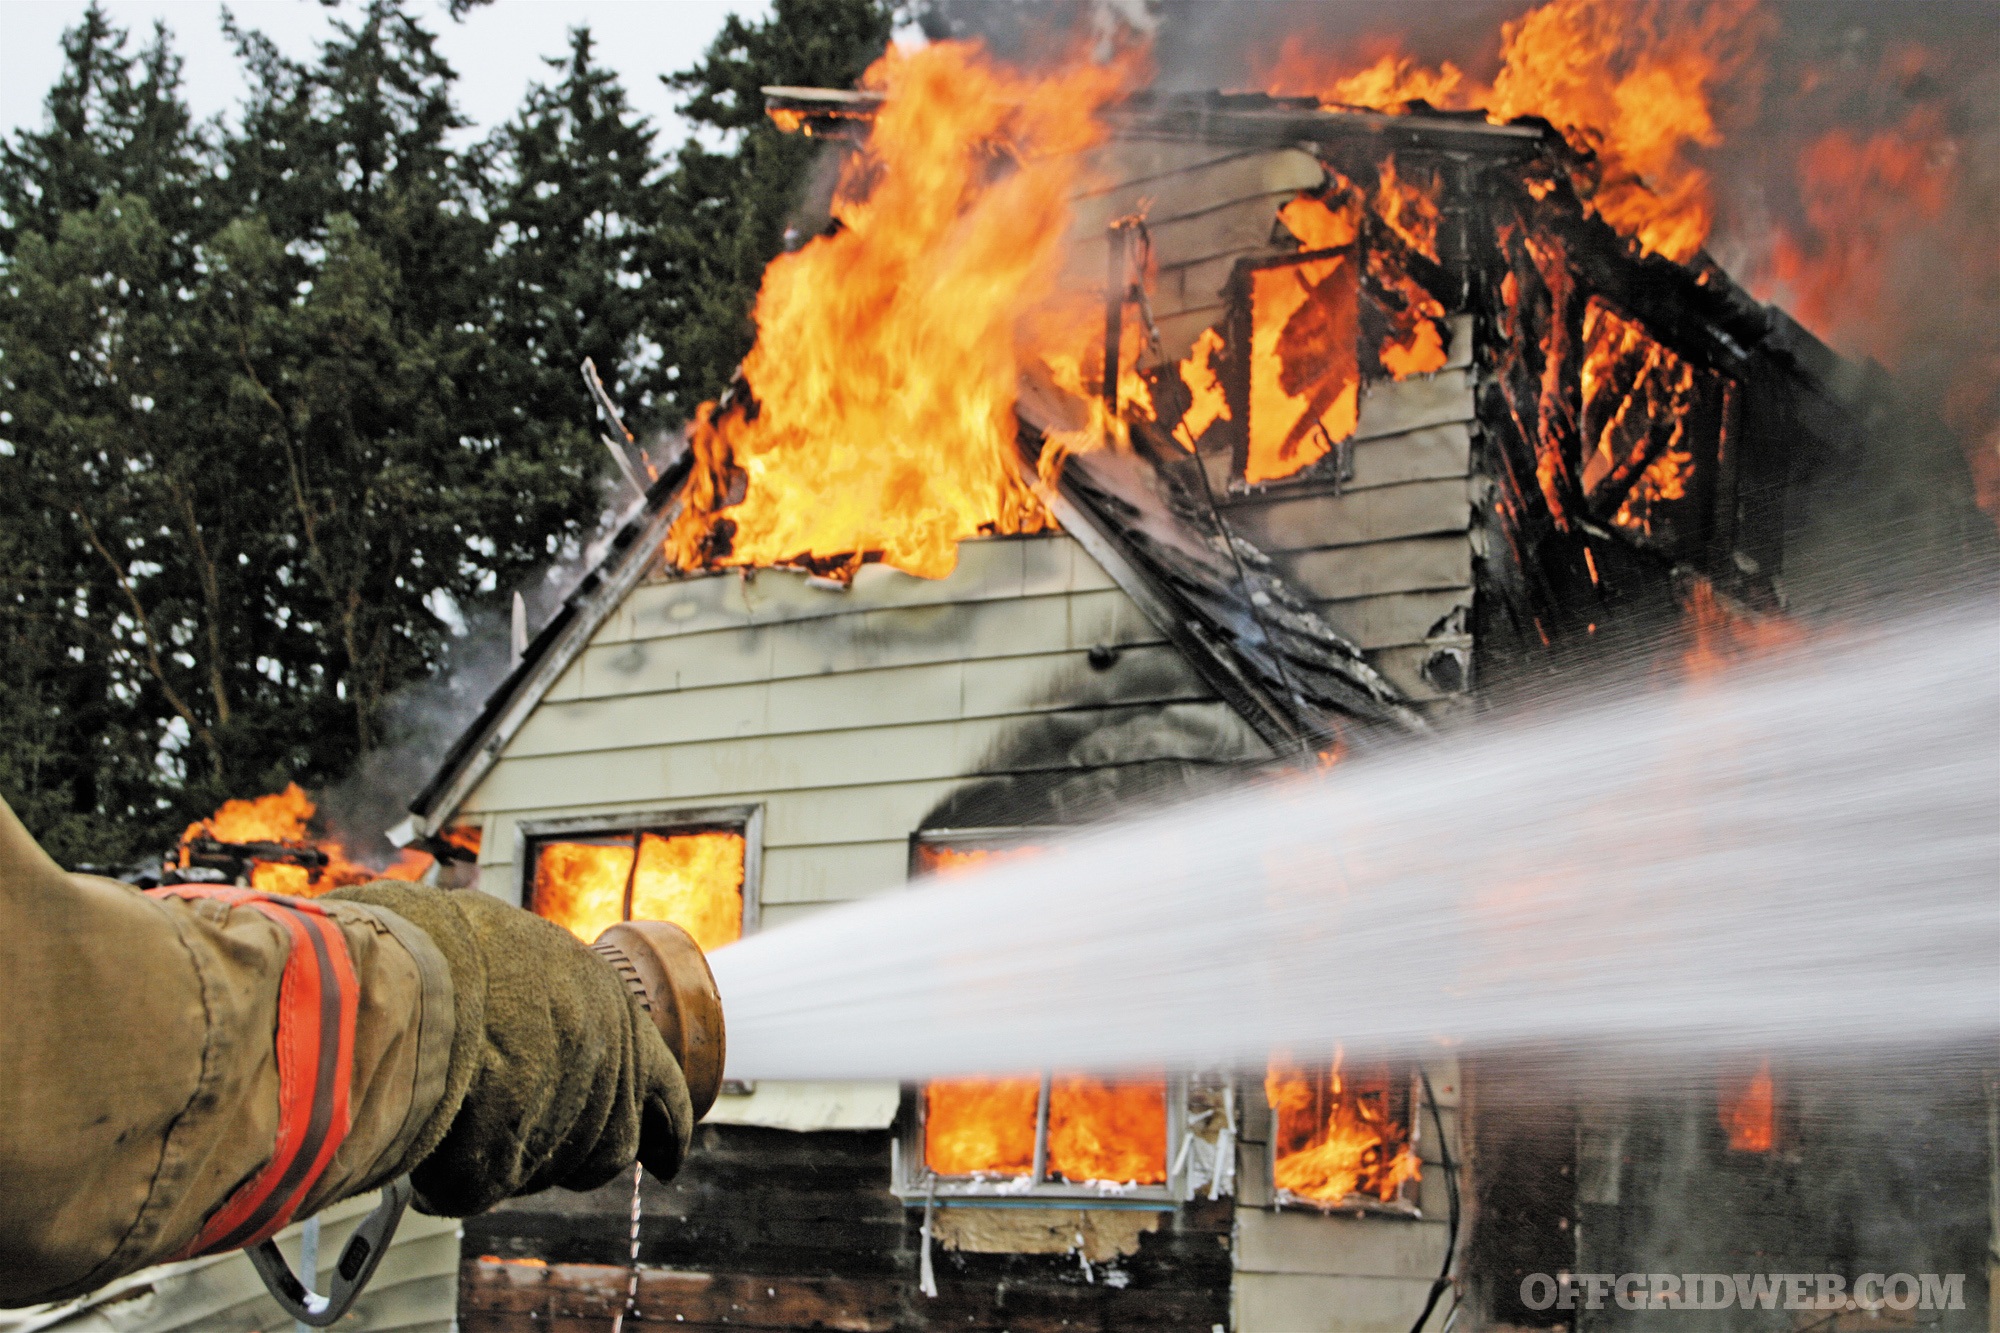
Anyone who has spent time outside on a muggy summer day knows firsthand that humid air can contain a lot of moisture. Humidity mostly serves to make us feel sticky and uncomfortable in its natural form, but what if it could be captured and repurposed as a survival resource? This is the concept behind devices known as atmospheric water generators (AWGs).
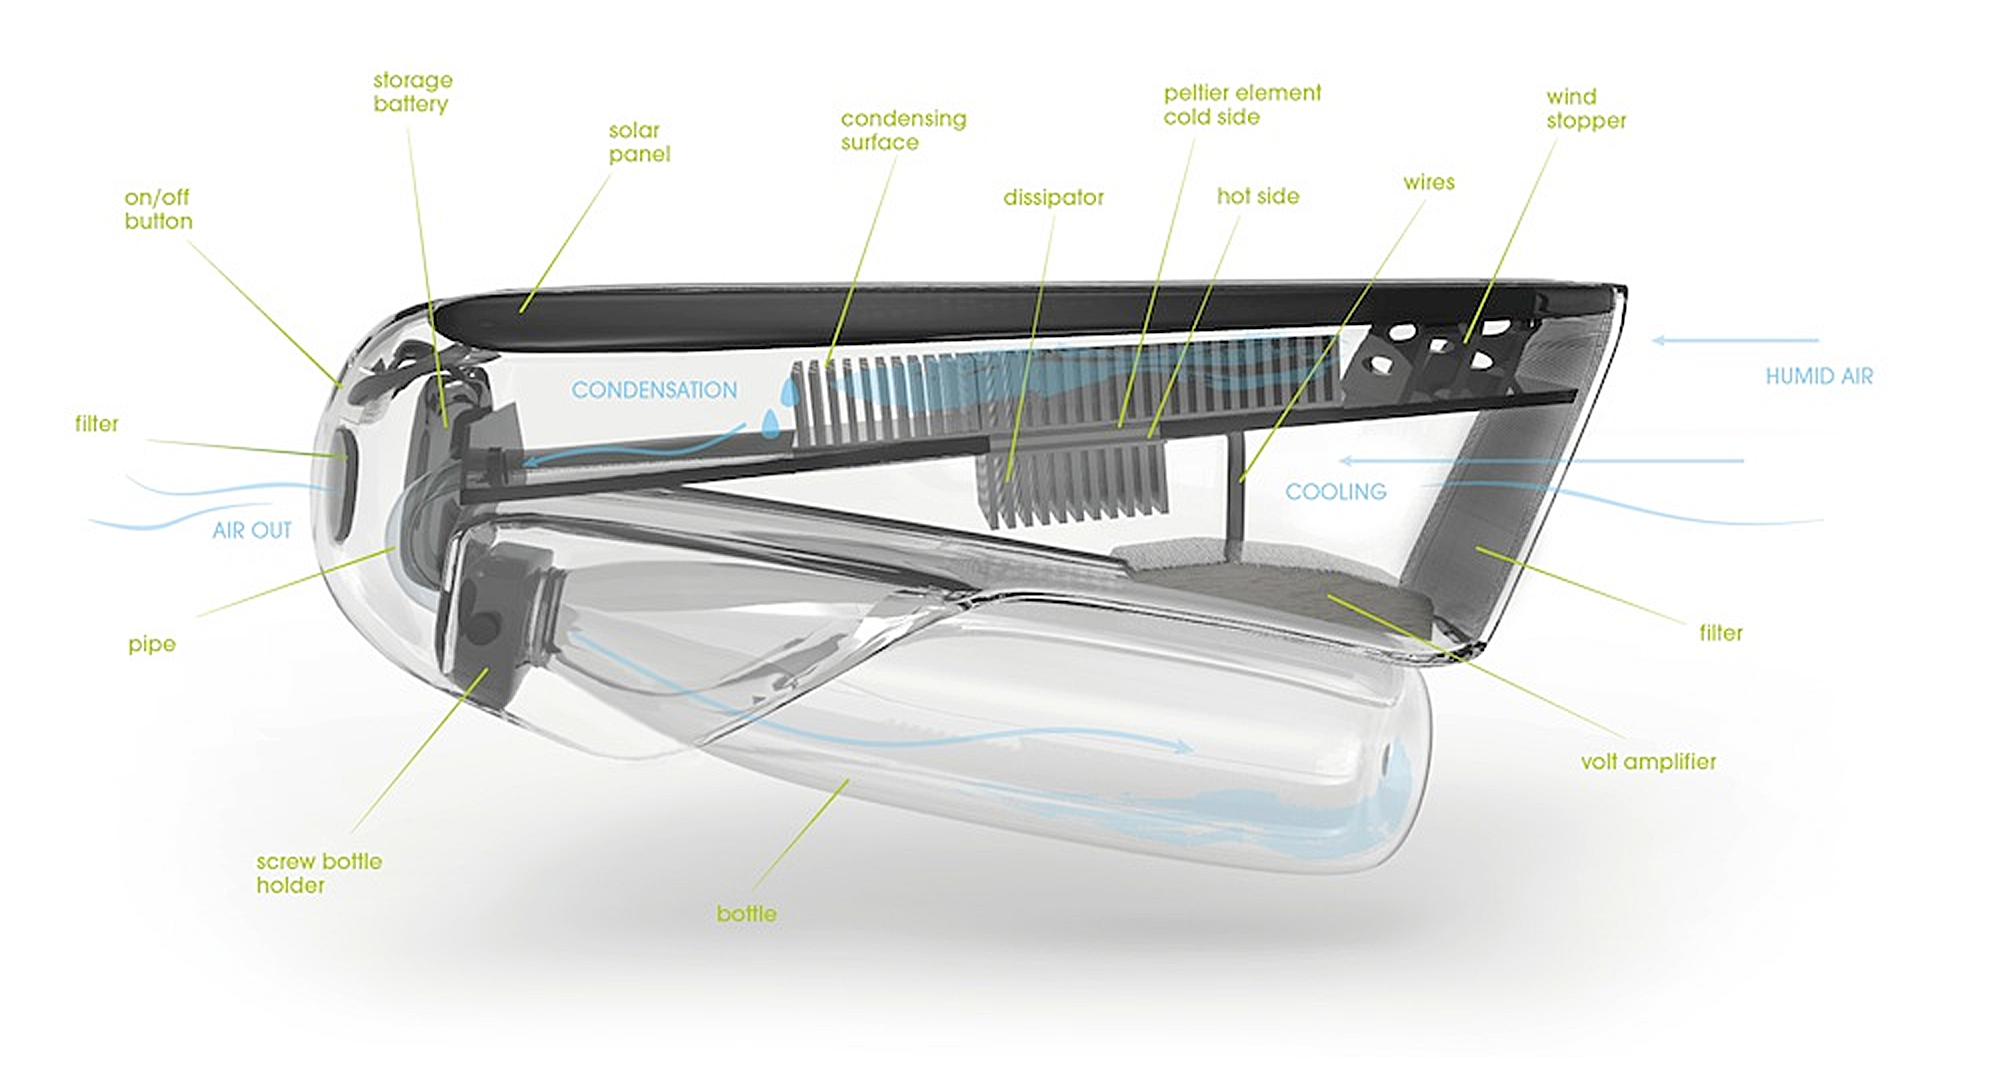
At their core, most AWGs use temperature control to harness condensation. If you’ve ever seen the water dripping out from under an air-conditioned car or running out from the drain on a home A/C unit, you’ve seen this effect at work. A significant temperature differential leads to condensation, drawing moisture out of the air and eventually forming tiny droplets of dew. Gather enough dew, and you’ll have a usable water source. This sounds great, but there’s a reason we don’t get all our water this way — it’s not an easy process.
Challenges to Overcome
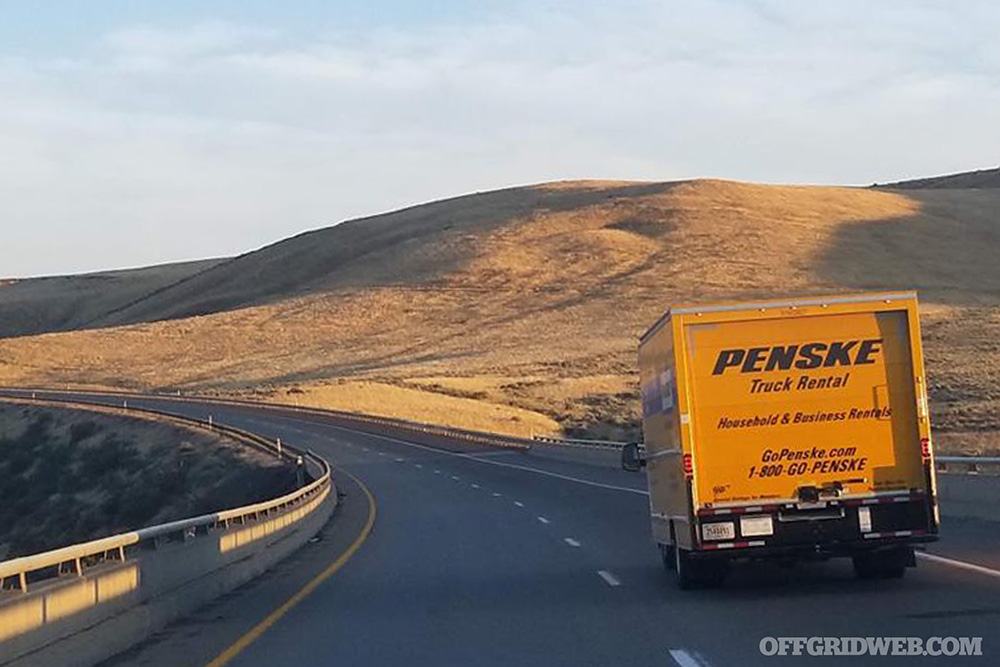
Flickr.com/sworldguy
Take a look at your electricity bill after running an air conditioner all month, and it becomes obvious that controlling air temperature is a very energy-intensive process. Inefficiency can be minimized, but thanks to the laws of thermodynamics, there’s no eliminating it completely. Therefore, capturing moisture from air through temperature control takes quite a bit of energy as well.
In the past, some atmospheric water generator companies have made bold claims about how much water they could generate. The Fontus comes to mind — we wrote a brief article about the announcement of that water bottle concept back in early 2016. We also mentioned our doubts about how quickly and efficiently it claimed to collect water, especially given its tiny size and lack of substantial power source. Unfortunately, that project fizzled quickly, with retrospective analysis suggesting it may have been a scam from the beginning.
Ironically, the Fontus bottle turned out to be vaporware, unable to fulfill the lofty promises made by its crowdfunding campaign.
However, those bad experiences don’t mean that AWGs are doomed. With sufficient energy input, humidity, and time, an AWG can produce substantial quantities of clean water. Researchers and engineers are working to refine this technology and overcome its inherent challenges.
Even in ideal conditions, an atmospheric water generator is never going to fill 55-gallon drums with water every few hours, or replace more traditional water sources (e.g. a well or system for purifying an existing natural water source). What it can do is produce small quantities of water in areas where clean natural water is very hard to obtain. Pairing an AWG with a solar panel array and batteries also enables it to be used entirely off-grid — requiring no reliance on the power grid or municipal water supply.
SunToWater’s Approach
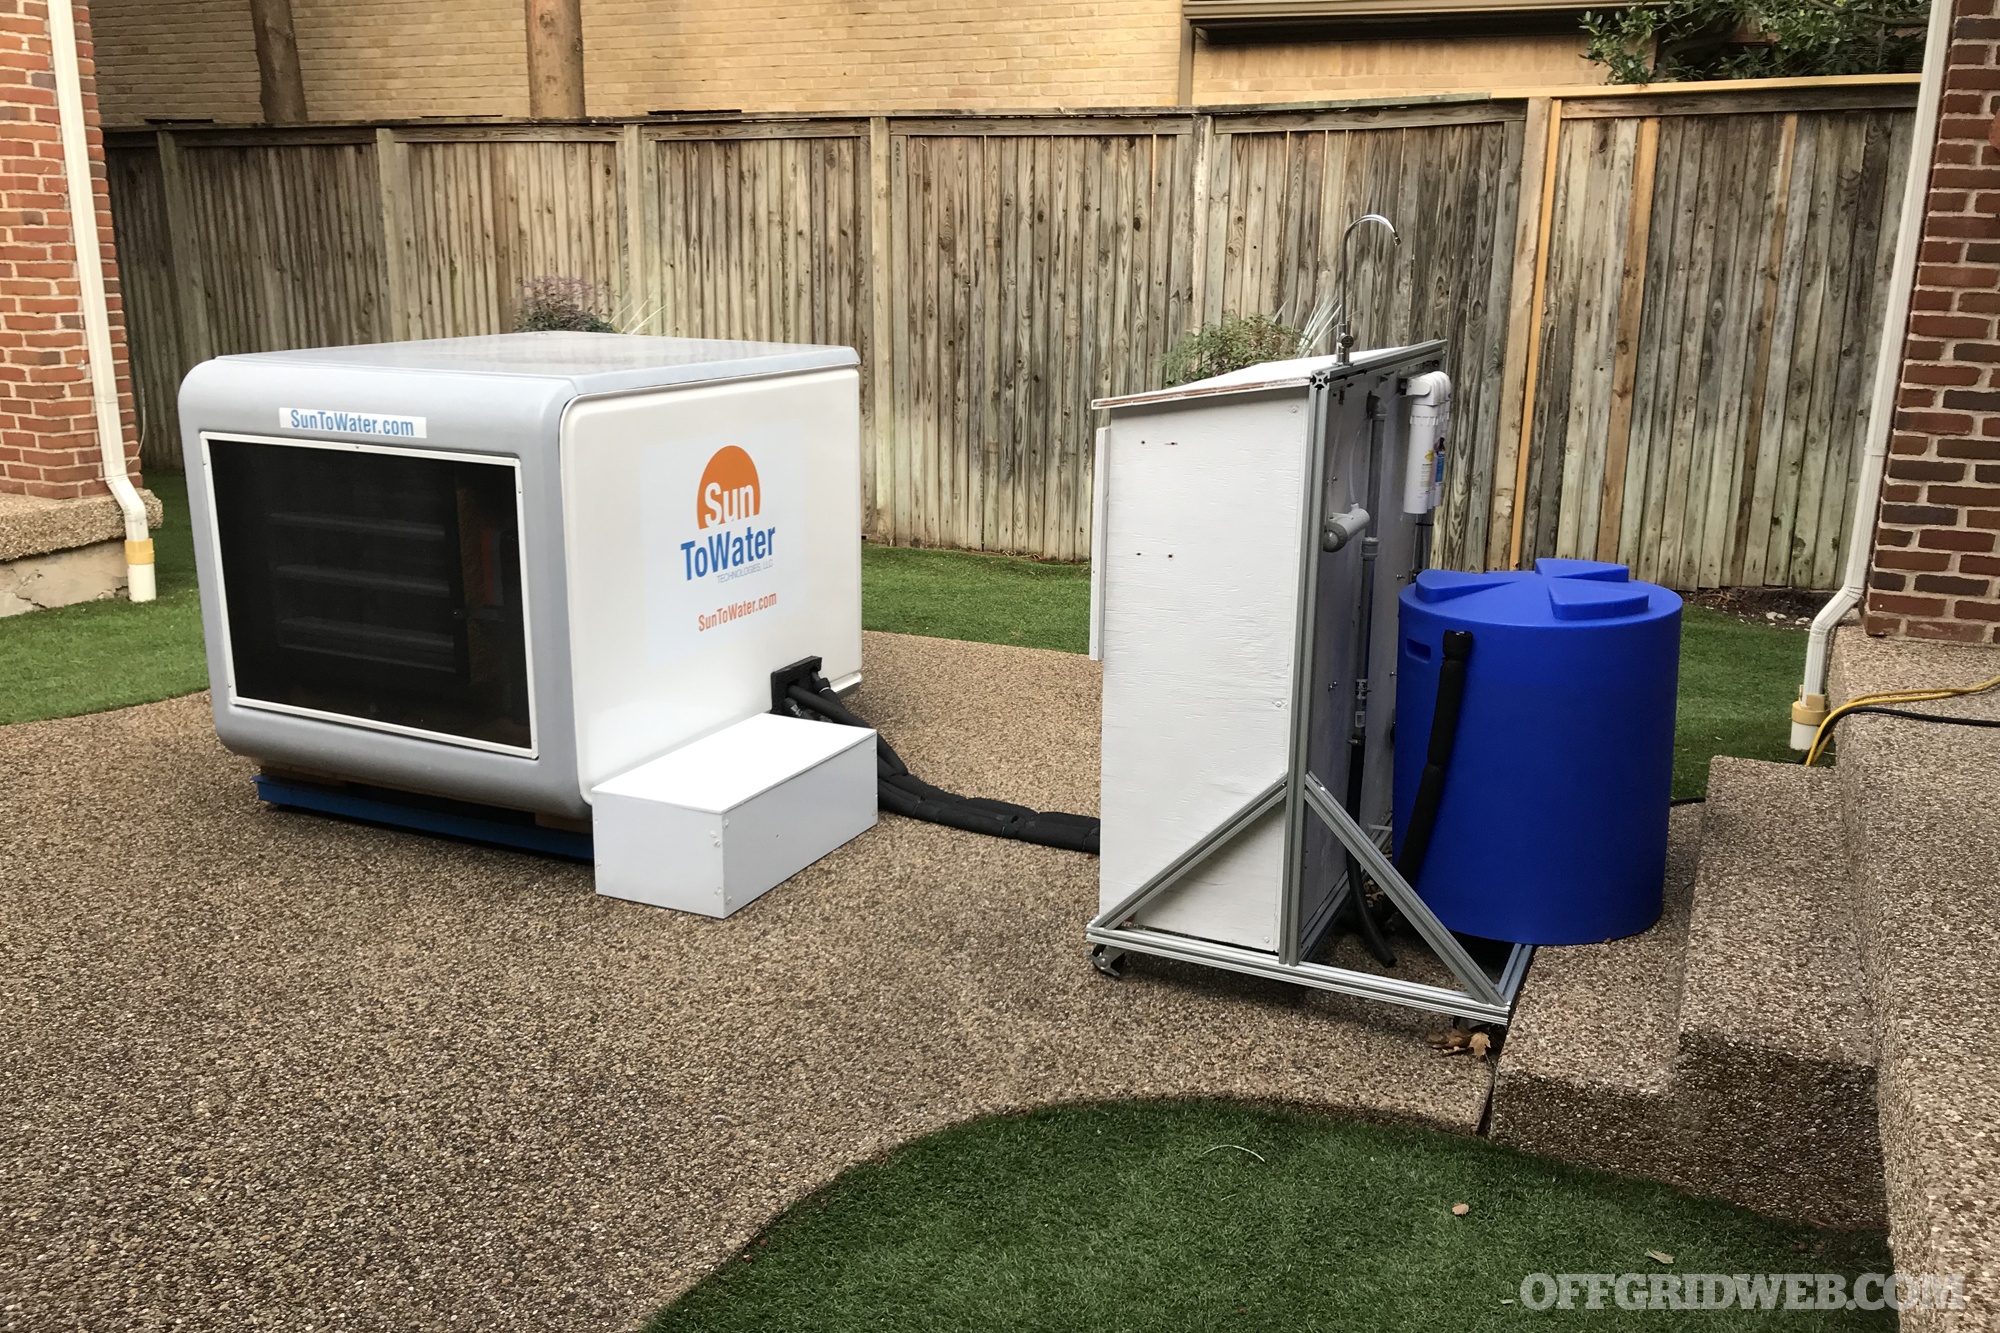
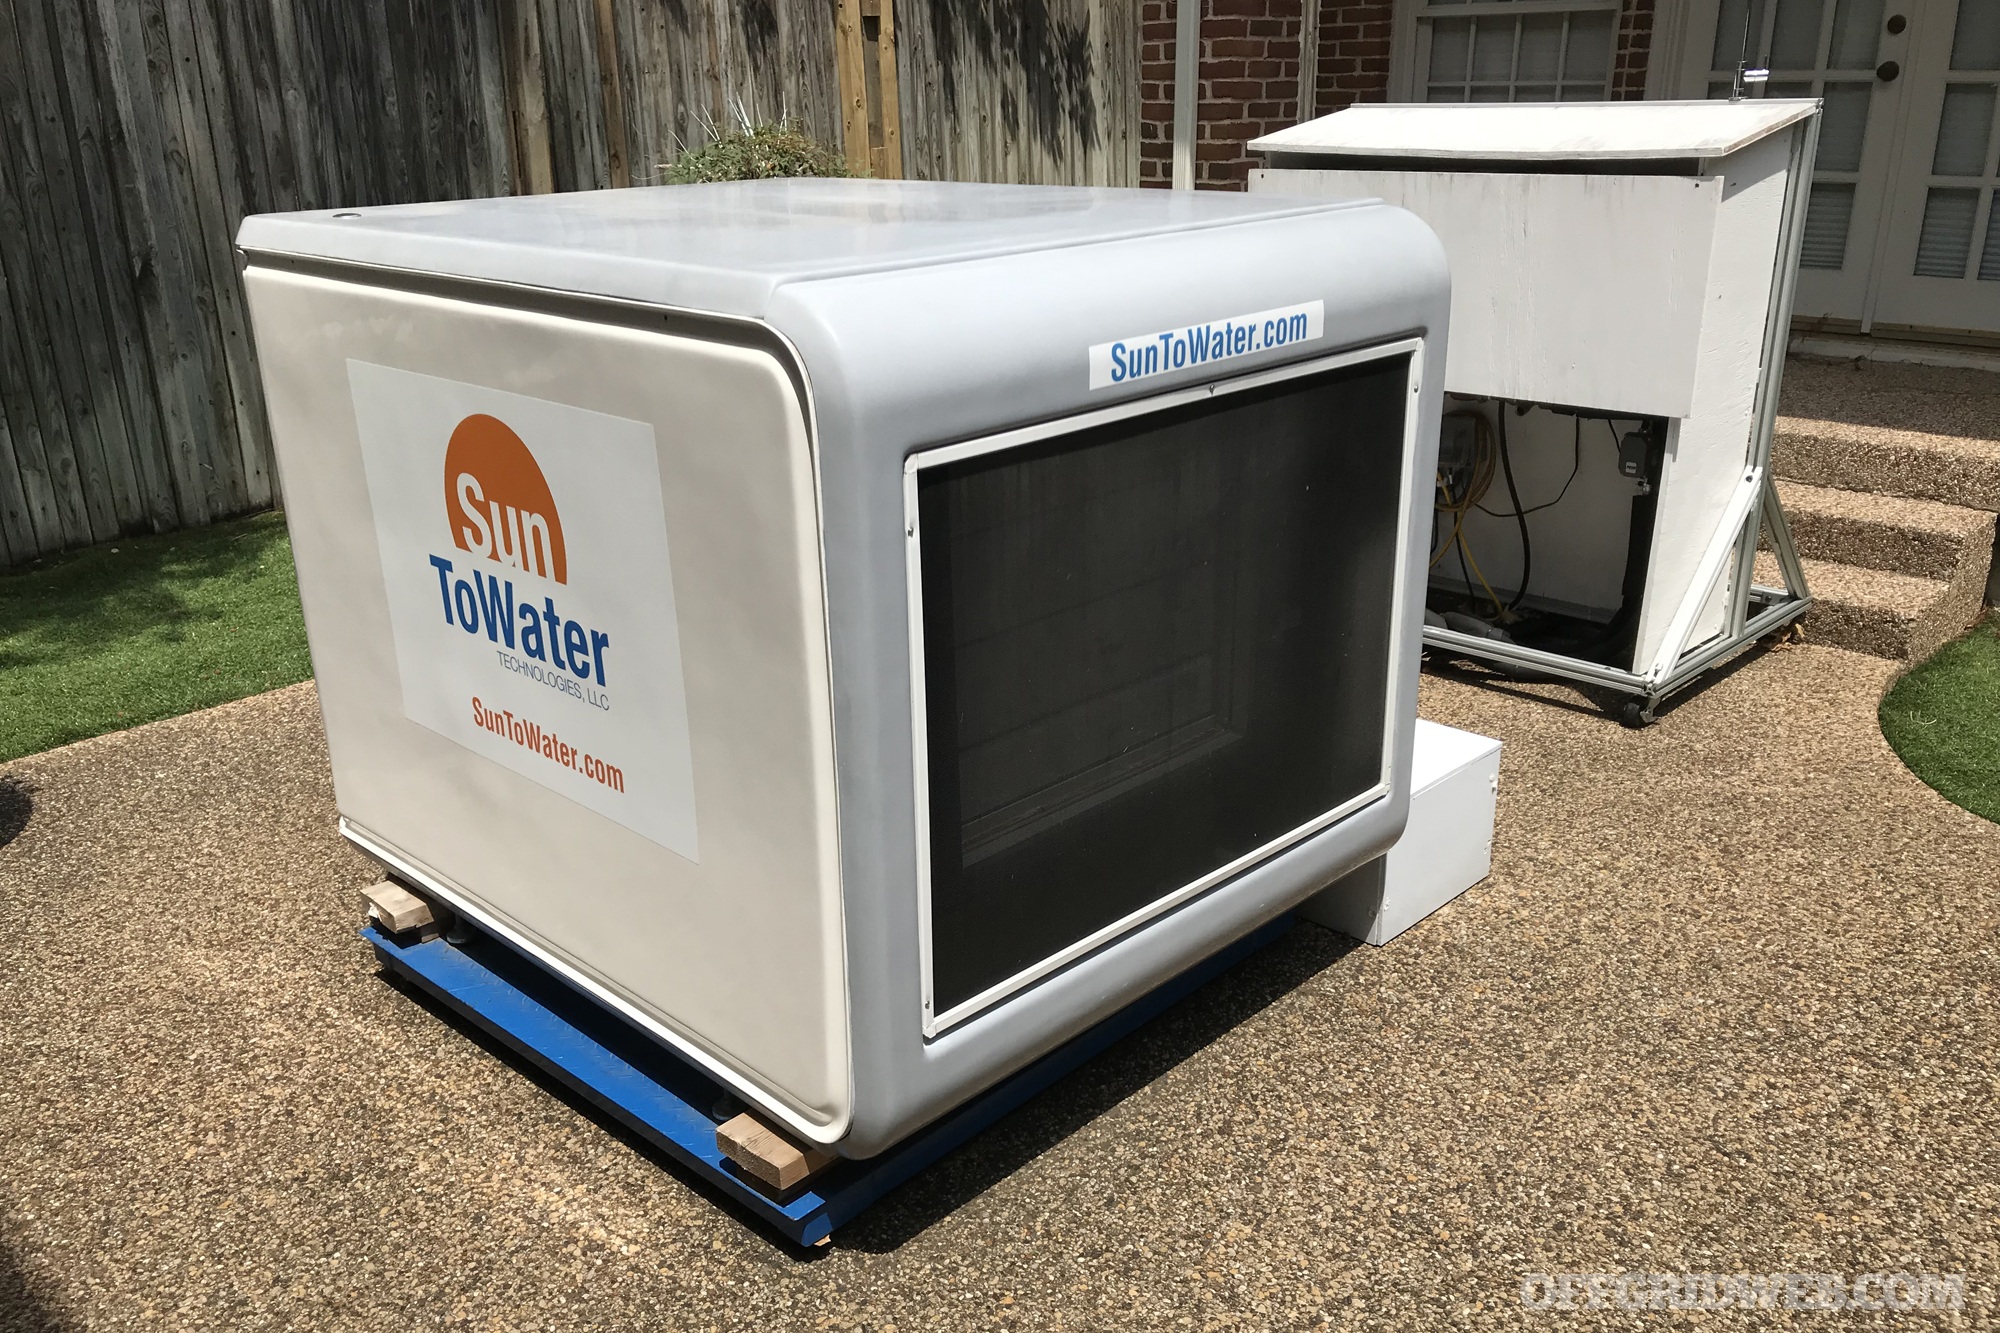
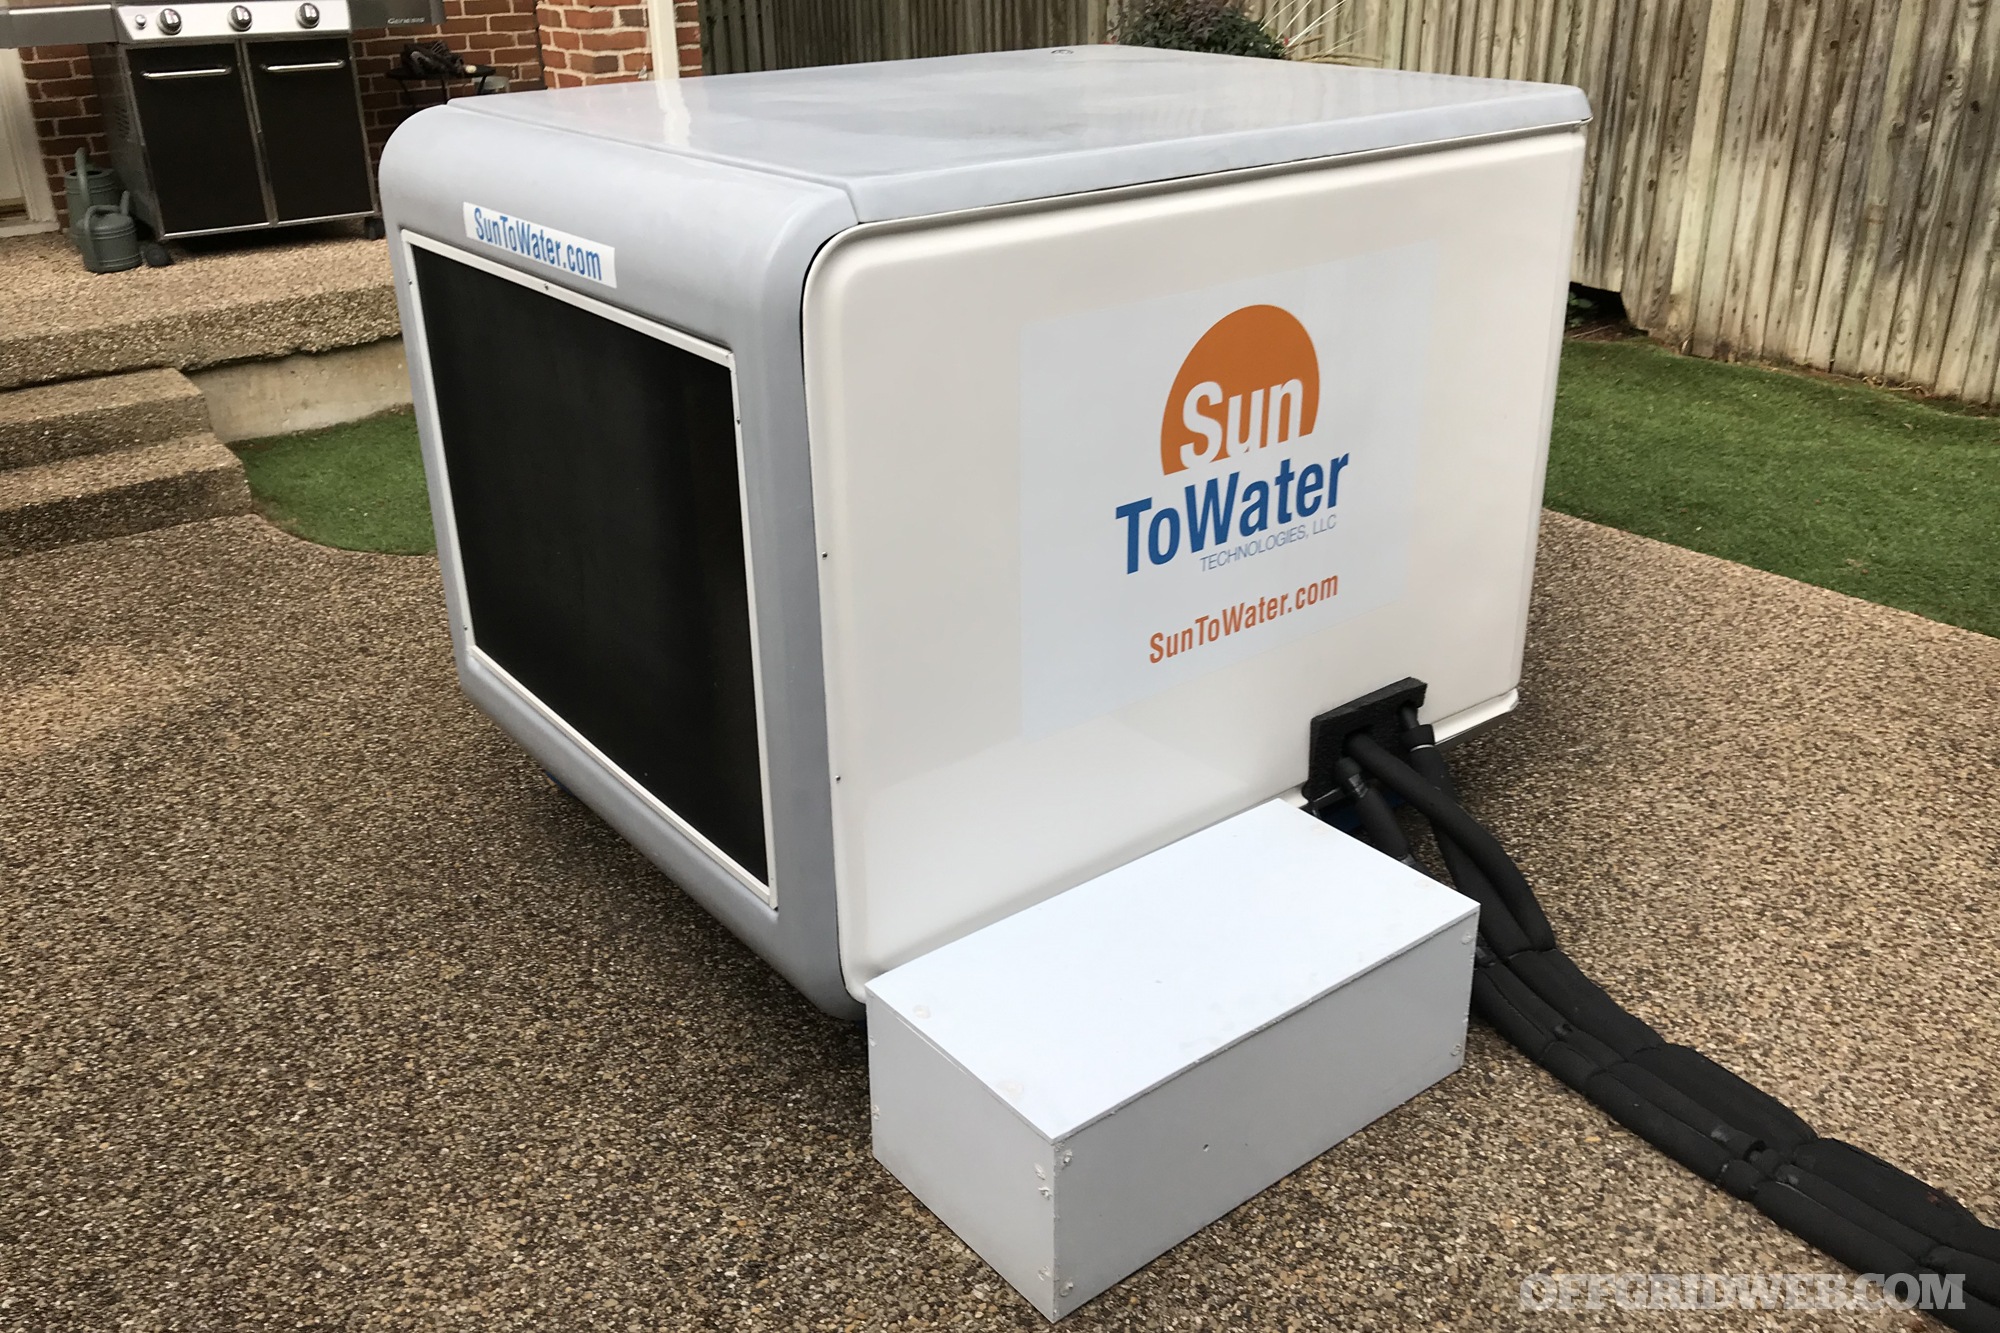
We recently received an email from Jay Lopez, the CMO of SunToWater Technologies. Jay had read our recent article on water distillation in the wild, and said he’d like to show us what SunToWater is working on in this field. The company is currently running field trials of its own approach to an atmospheric water generator, with proof-of-concept units set up in California, Arizona, and Texas. These field trial units are set up with laptops that collect data from their sensors, and send that data to a remote server for analysis.
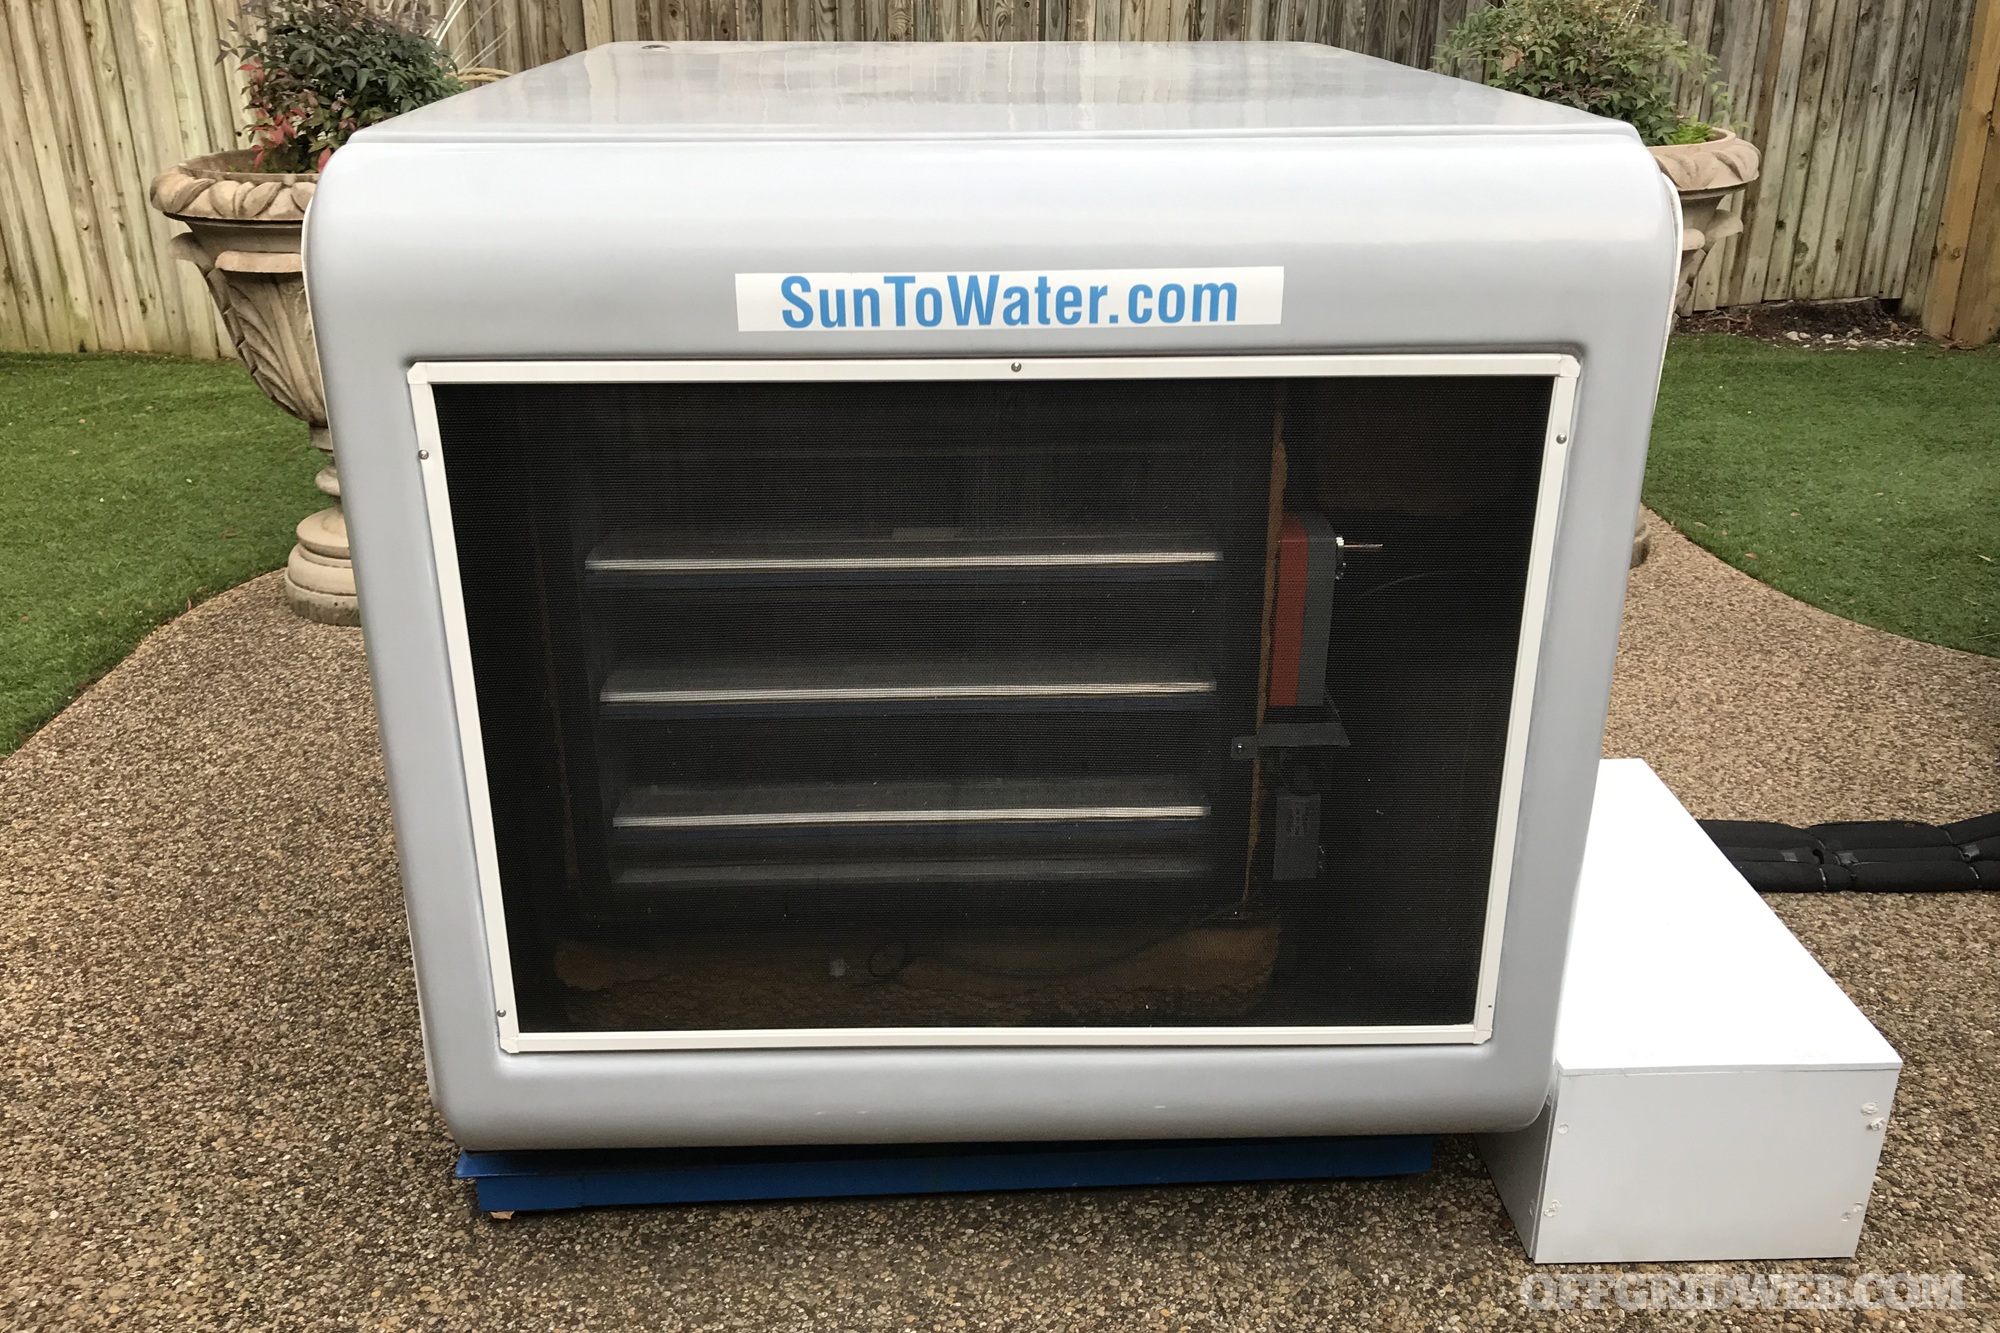
This is one of three SunToWater field-trial units, which is running continuously in Texas.
Once enough data has been collected and analyzed, SunToWater’s ultimate goal is to release a fully-operational, independently-certified, solar-powered AWG that can generate up to 2.8 gallons of clean water per day. Naturally, atmospheric conditions and humidity will vary this output (more about that later). We’re told that projected pricing for the finalized unit will be approximately $5,000.
This all sounds interesting, but as we mentioned earlier, we’ve learned to approach AWGs with a heightened degree of skepticism. But we wanted to understand how it works, so we got on a video conference call with Jay to see how the Texas field-trial unit works — it currently resides in his backyard.
The Technology
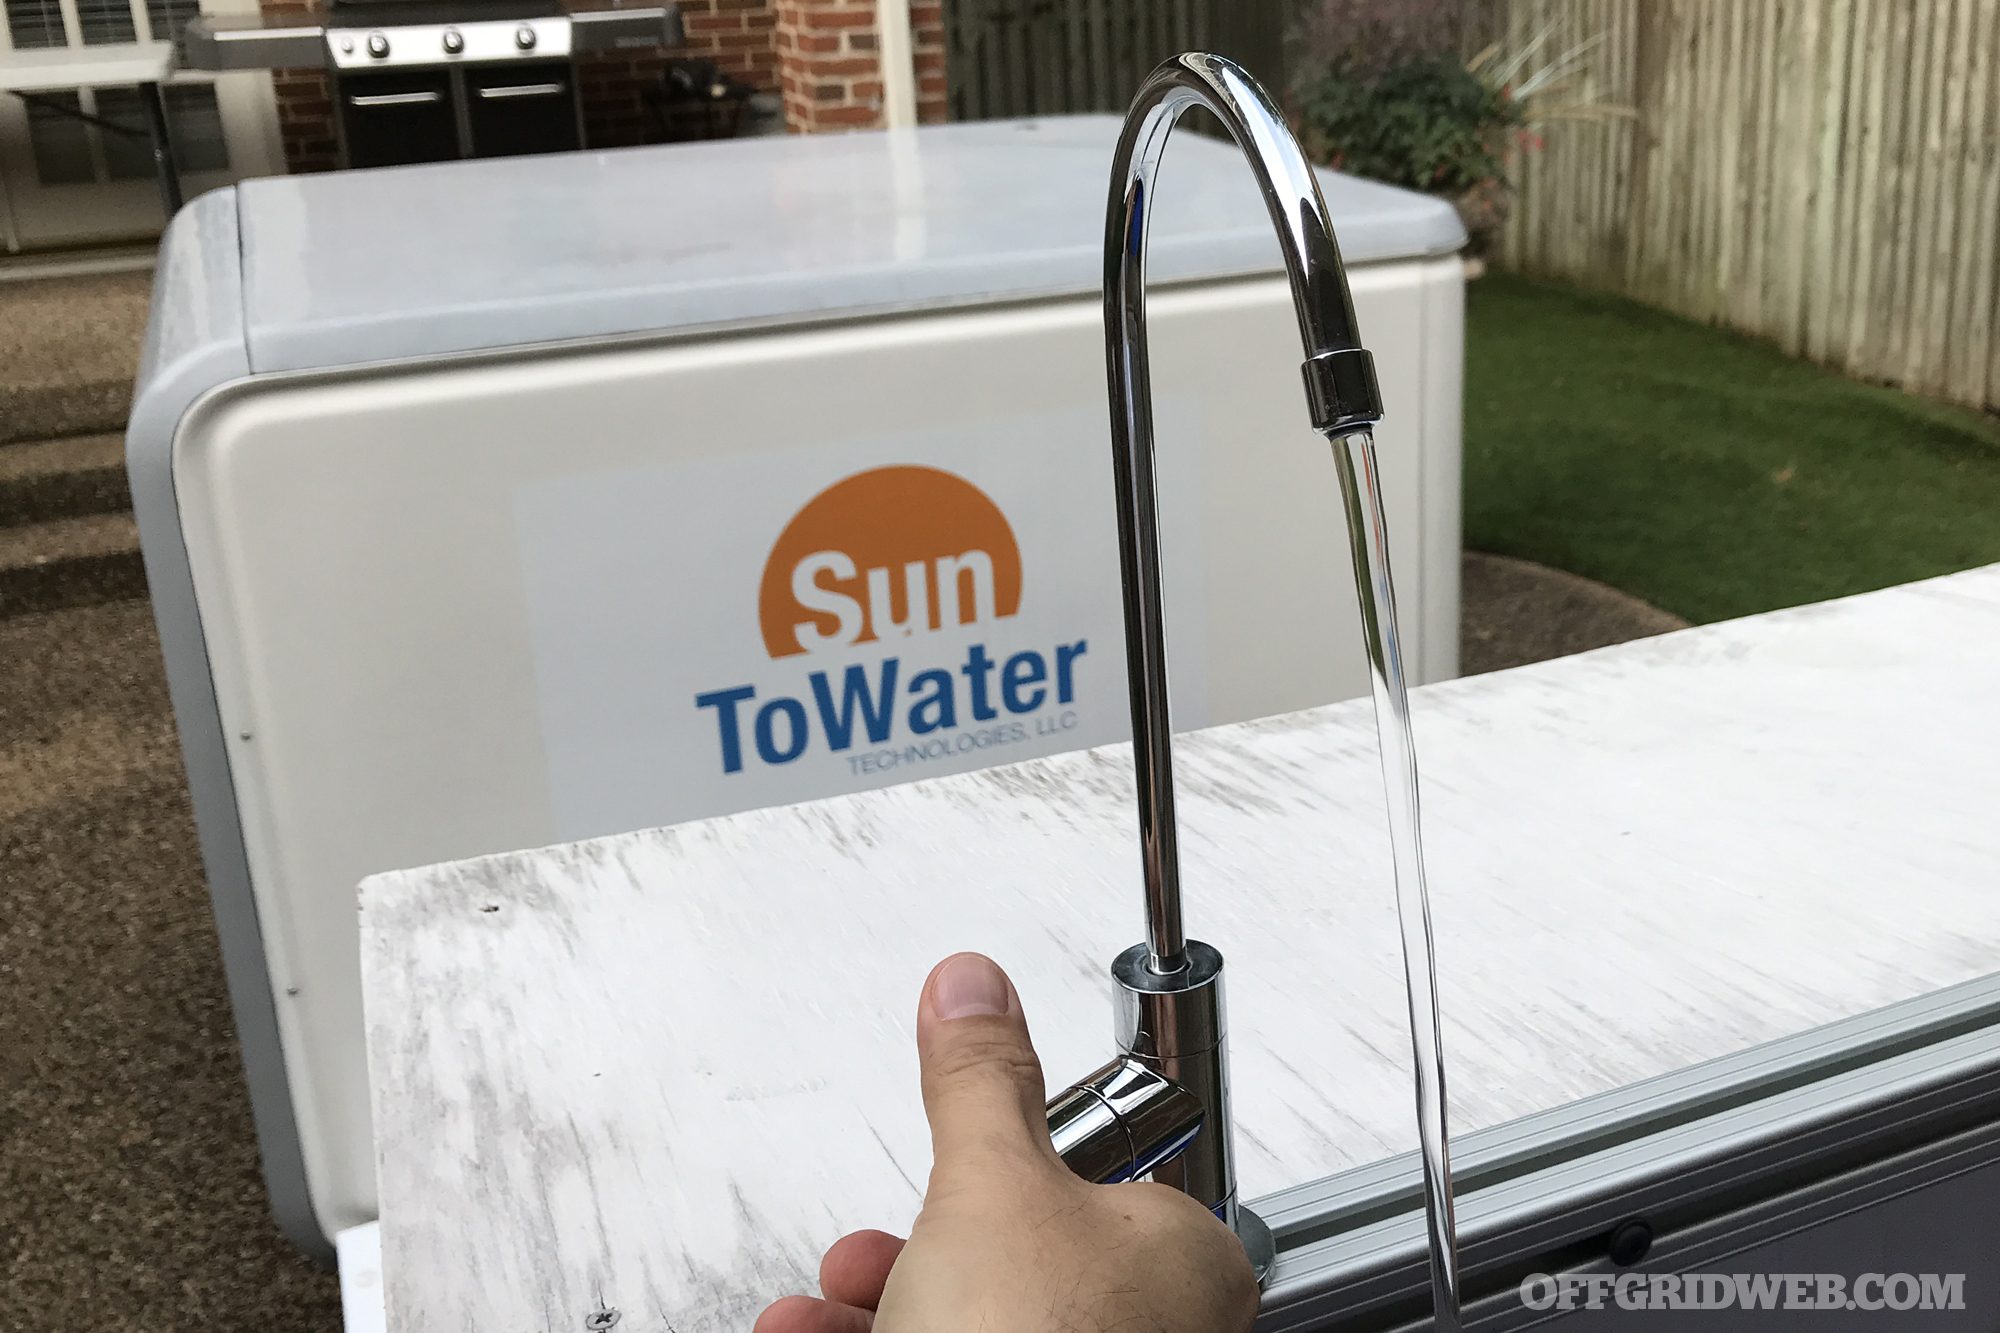
The key to each SunToWater unit is a desiccant compound that captures water. The little disposable silica gel packets in dehydrated food and other product packages are one example of a desiccant — a substance that absorbs moisture from the air. Each SunToWater AWG uses a patented array of tightly-packed panels, which are made of a salt compound contained in fabric. The company says this desiccant is reusable, so it can be soaked and dried out repeatedly without a need for replacement.
Desiccant panels are stacked behind metal shutters inside the generator. The shutters open in Absorption Mode.
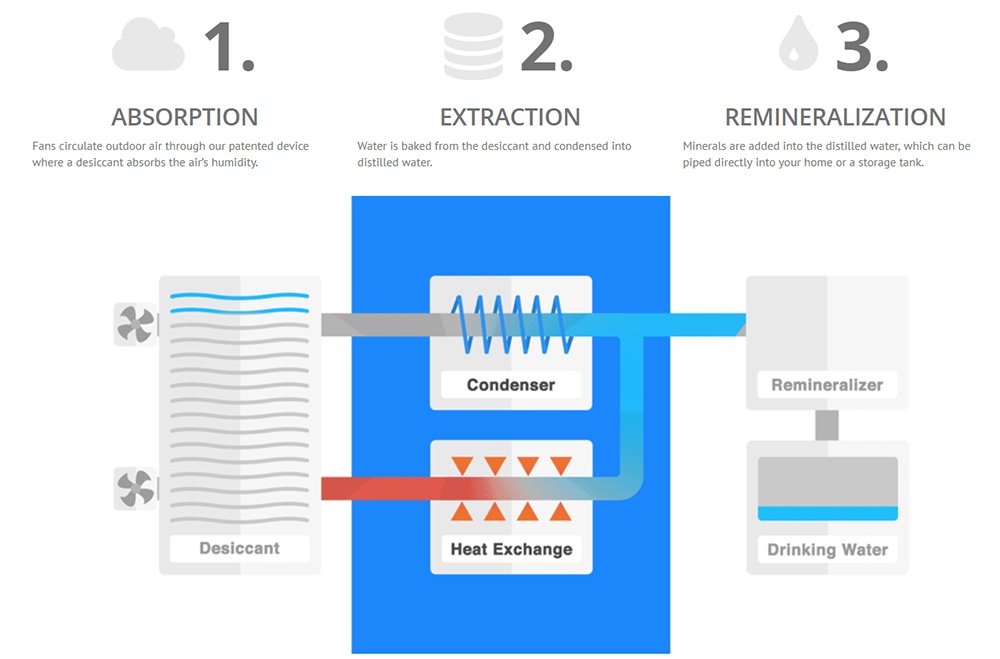
The operational cycle of the SunToWater unit begins at night, when a series of louvers open electronically to expose the desiccant panels. At the same time, fans activate to pull humid air through the system, allowing the desiccant material to draw out the moisture the air contains. This process, which is referred to as Absorption Mode, continues in the dark for several hours.
This diagram from SunToWater shows the steps it takes to gather water from humid air.
When the sun comes up, the SunToWater unit goes into its second phase: Extraction Mode. The louvers close, and heated air is circulated through the sealed desiccant container. This change in temperature bakes the water out of the desiccant media and condenses it as a liquid, effectively creating distilled water. An attached storage tank captures the water.
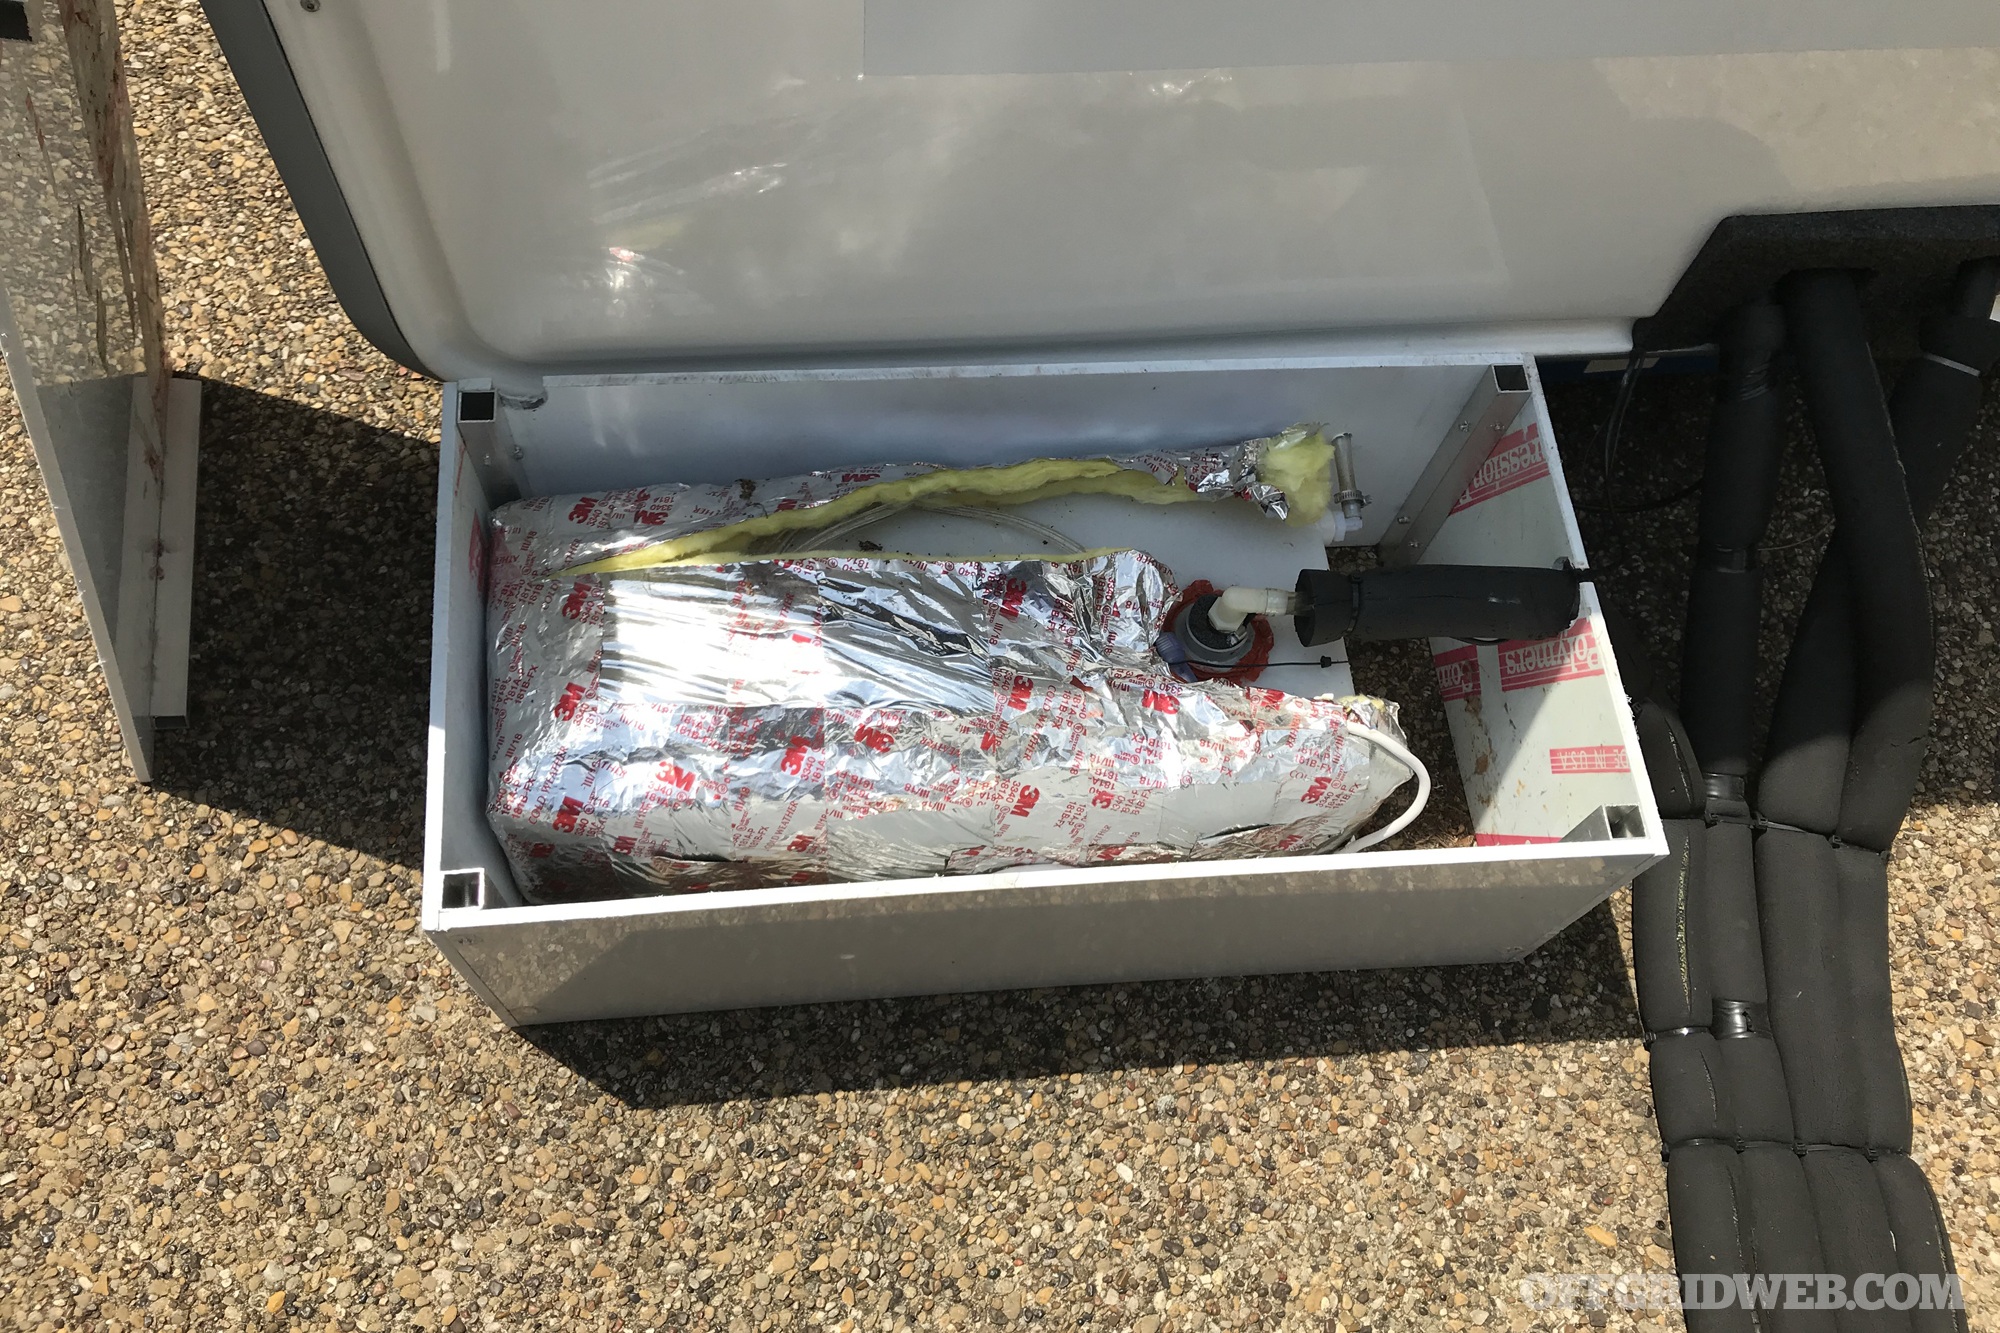
This small storage tank currently sits next to the field-trial unit, but will eventually be integrated into the housing.
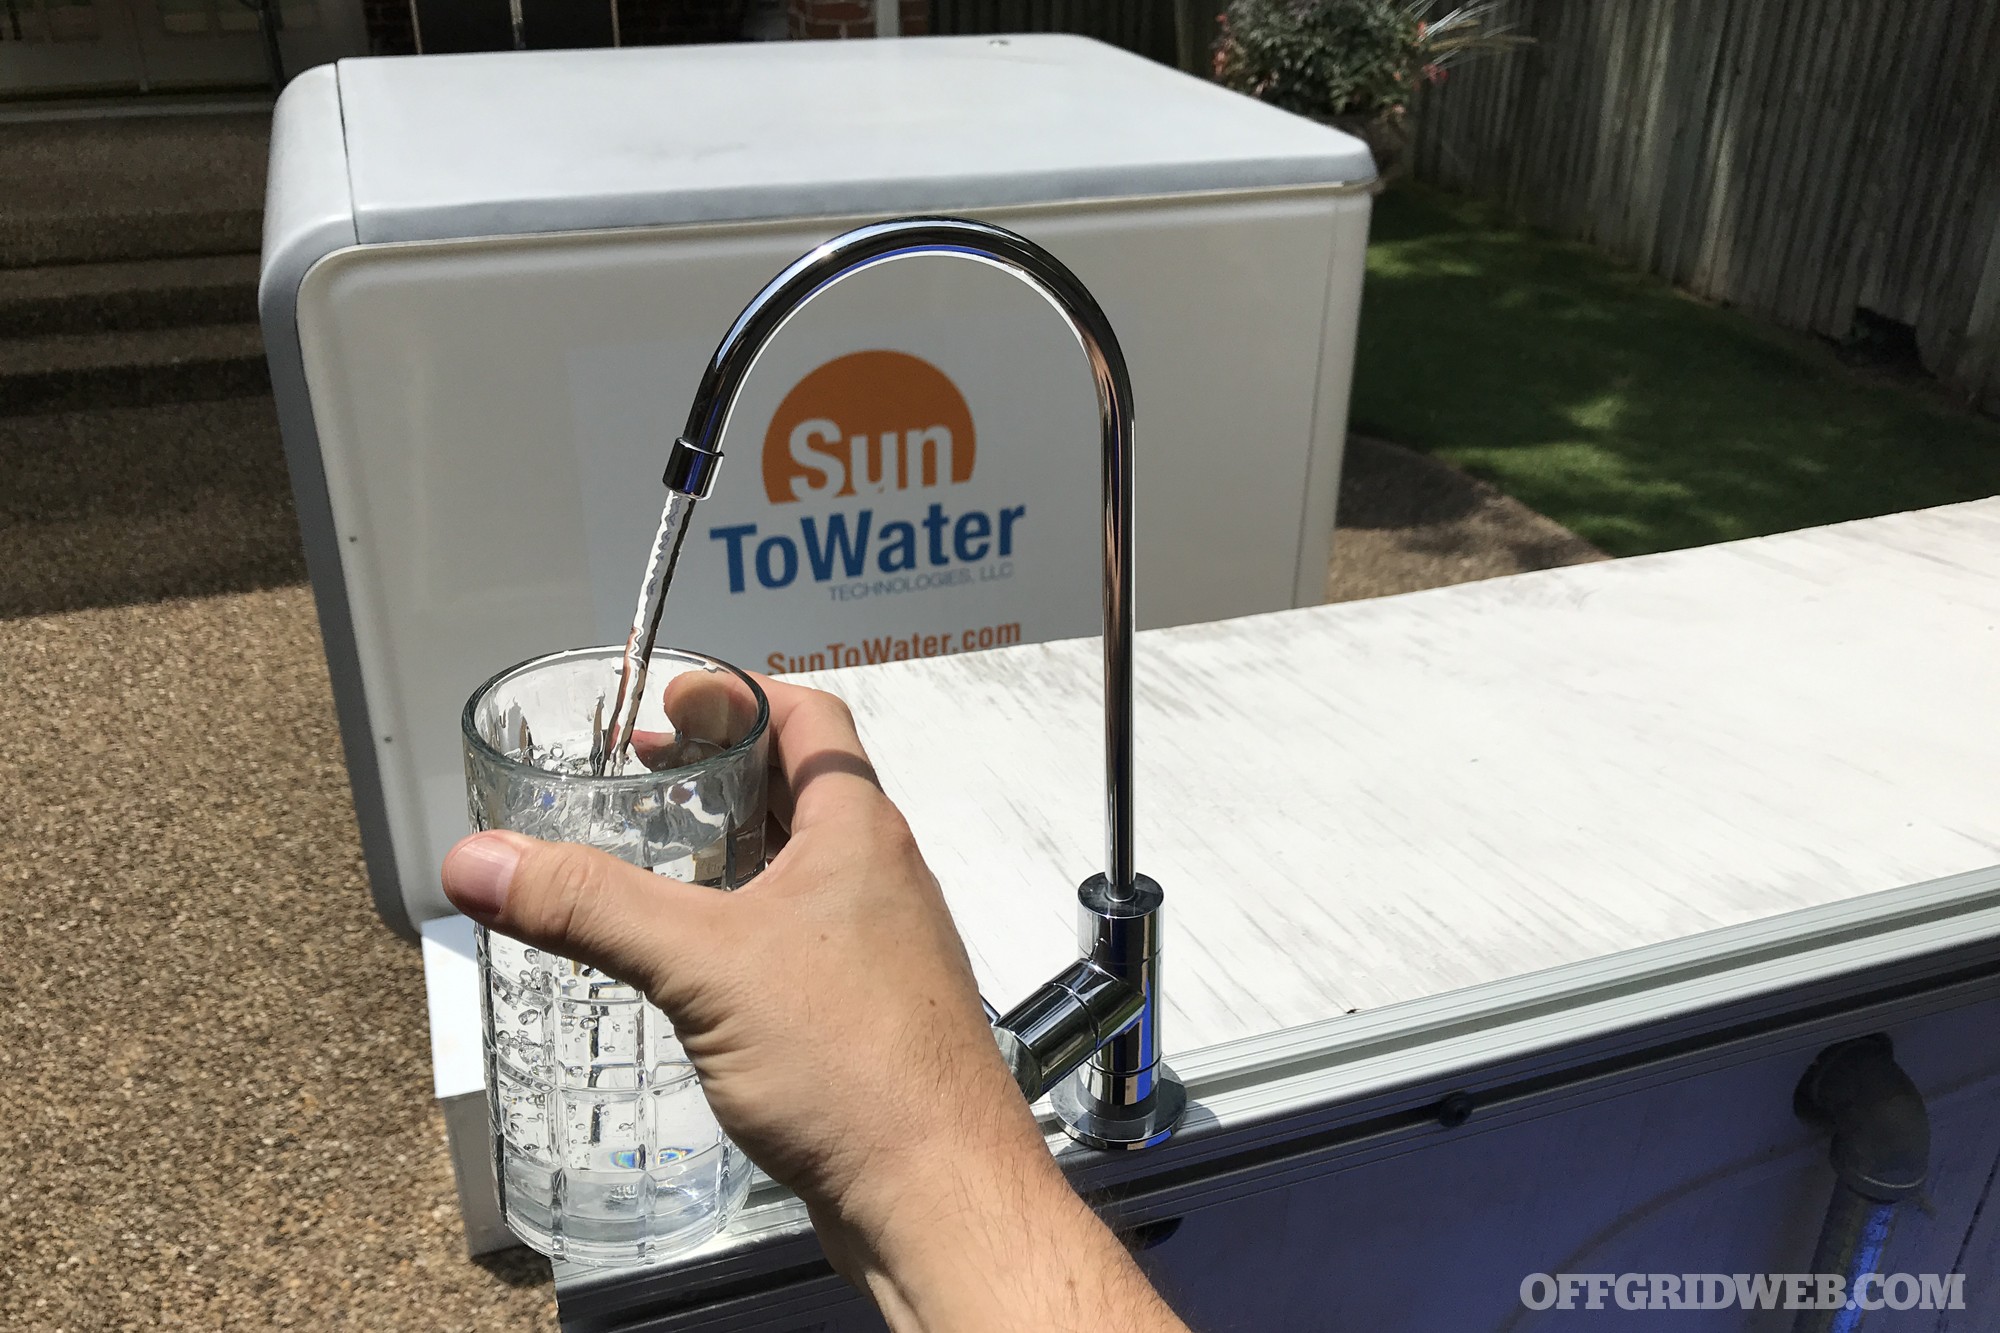
At this stage, the water is ready to use for purposes such as washing or crop irrigation. However, if you want to drink the water, there’s another step in the process to ensure its potability.
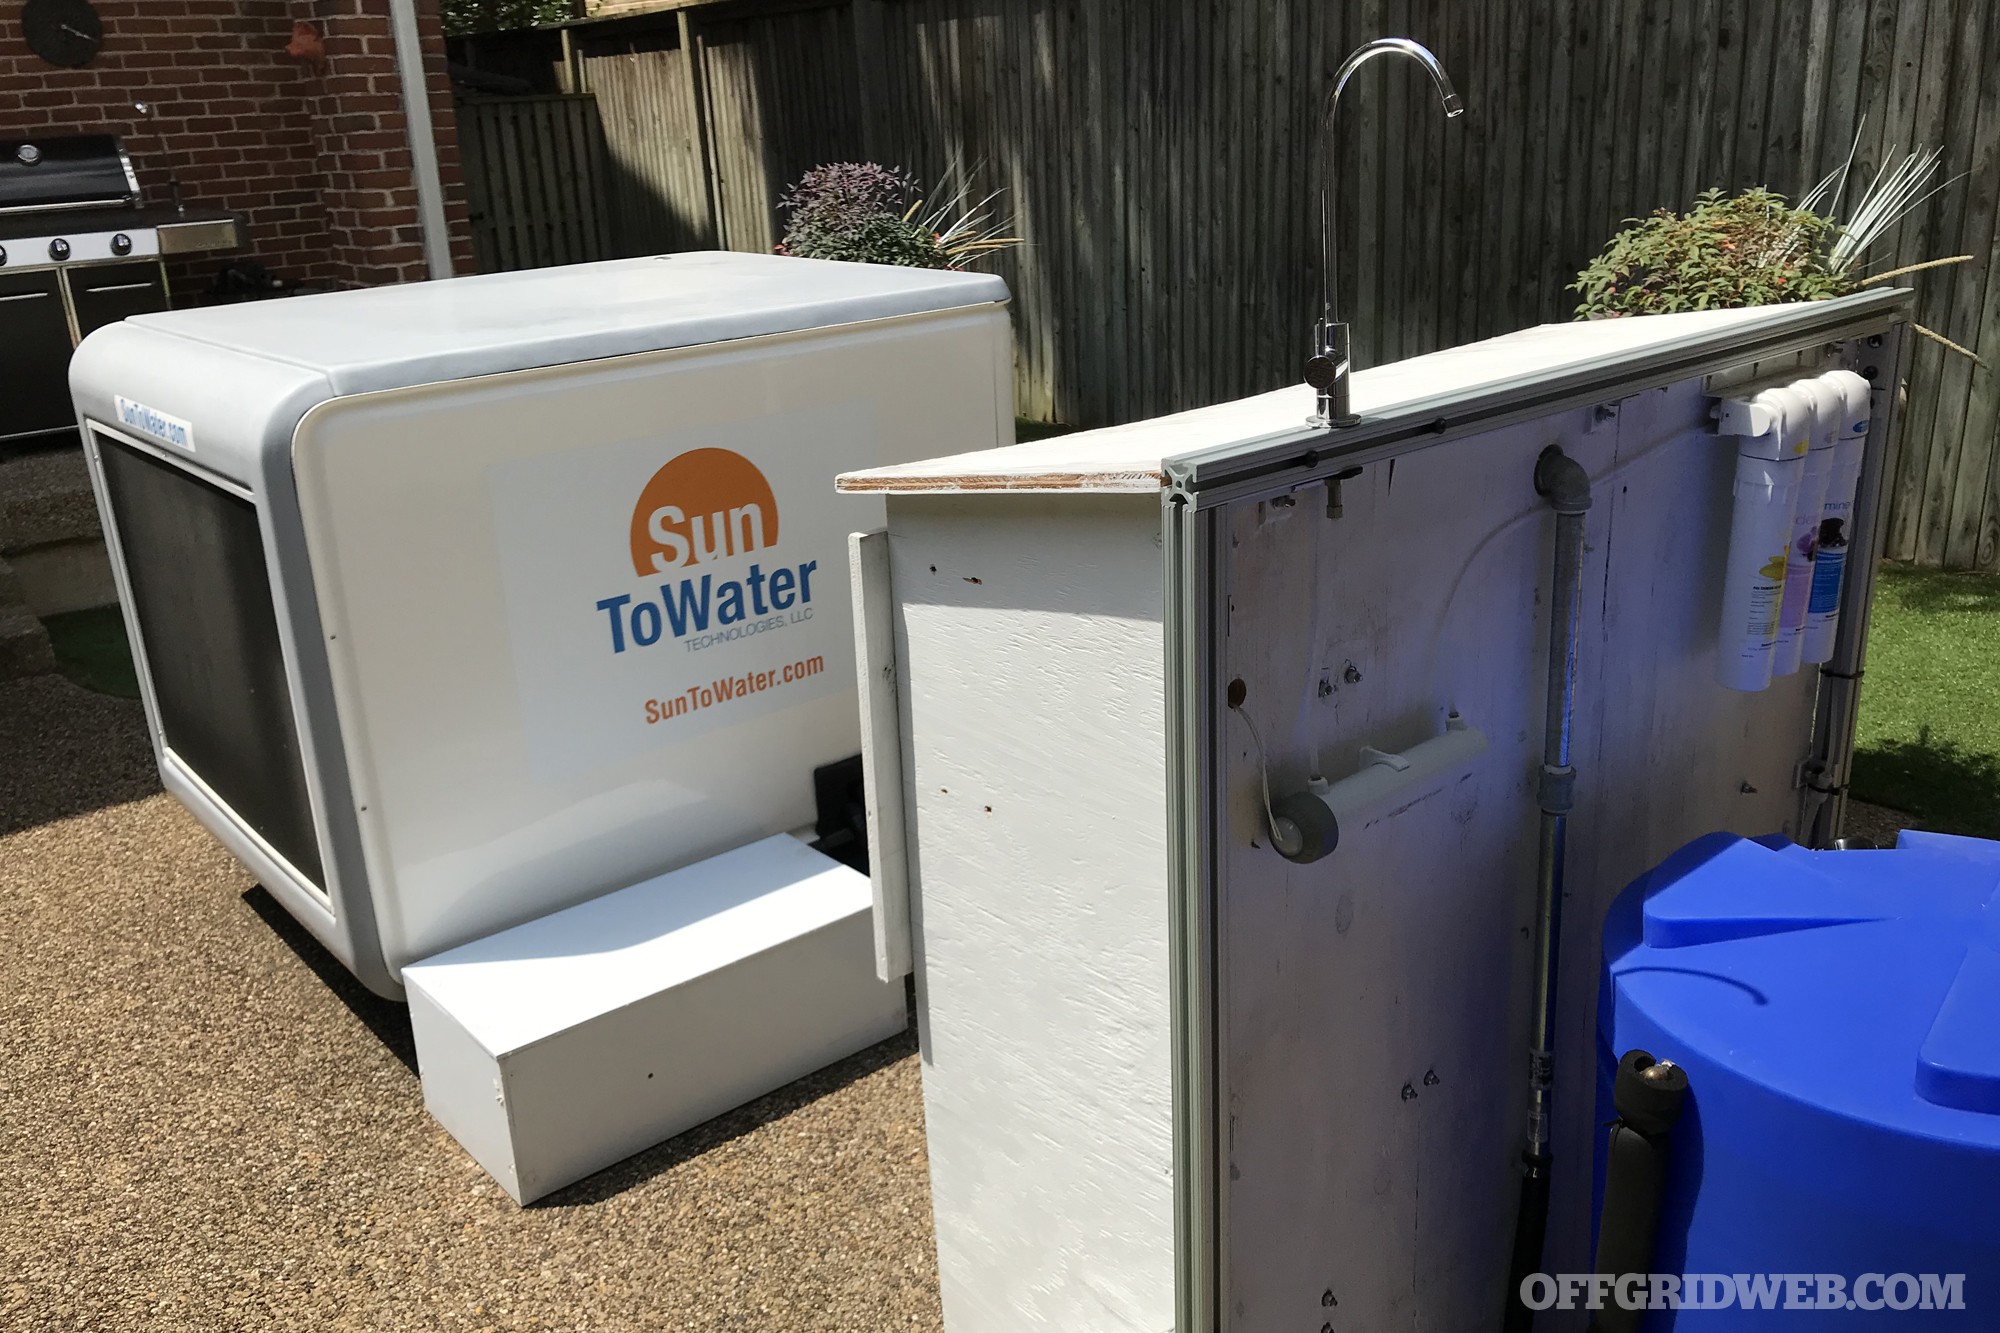
Above: This wood box beside the unit contains the filters, UV purifier, pump, and tap. These parts are separate for the field trial process, but will be integrated into the production version of the generator. The blue water drum serves as an overflow tank for clean water.
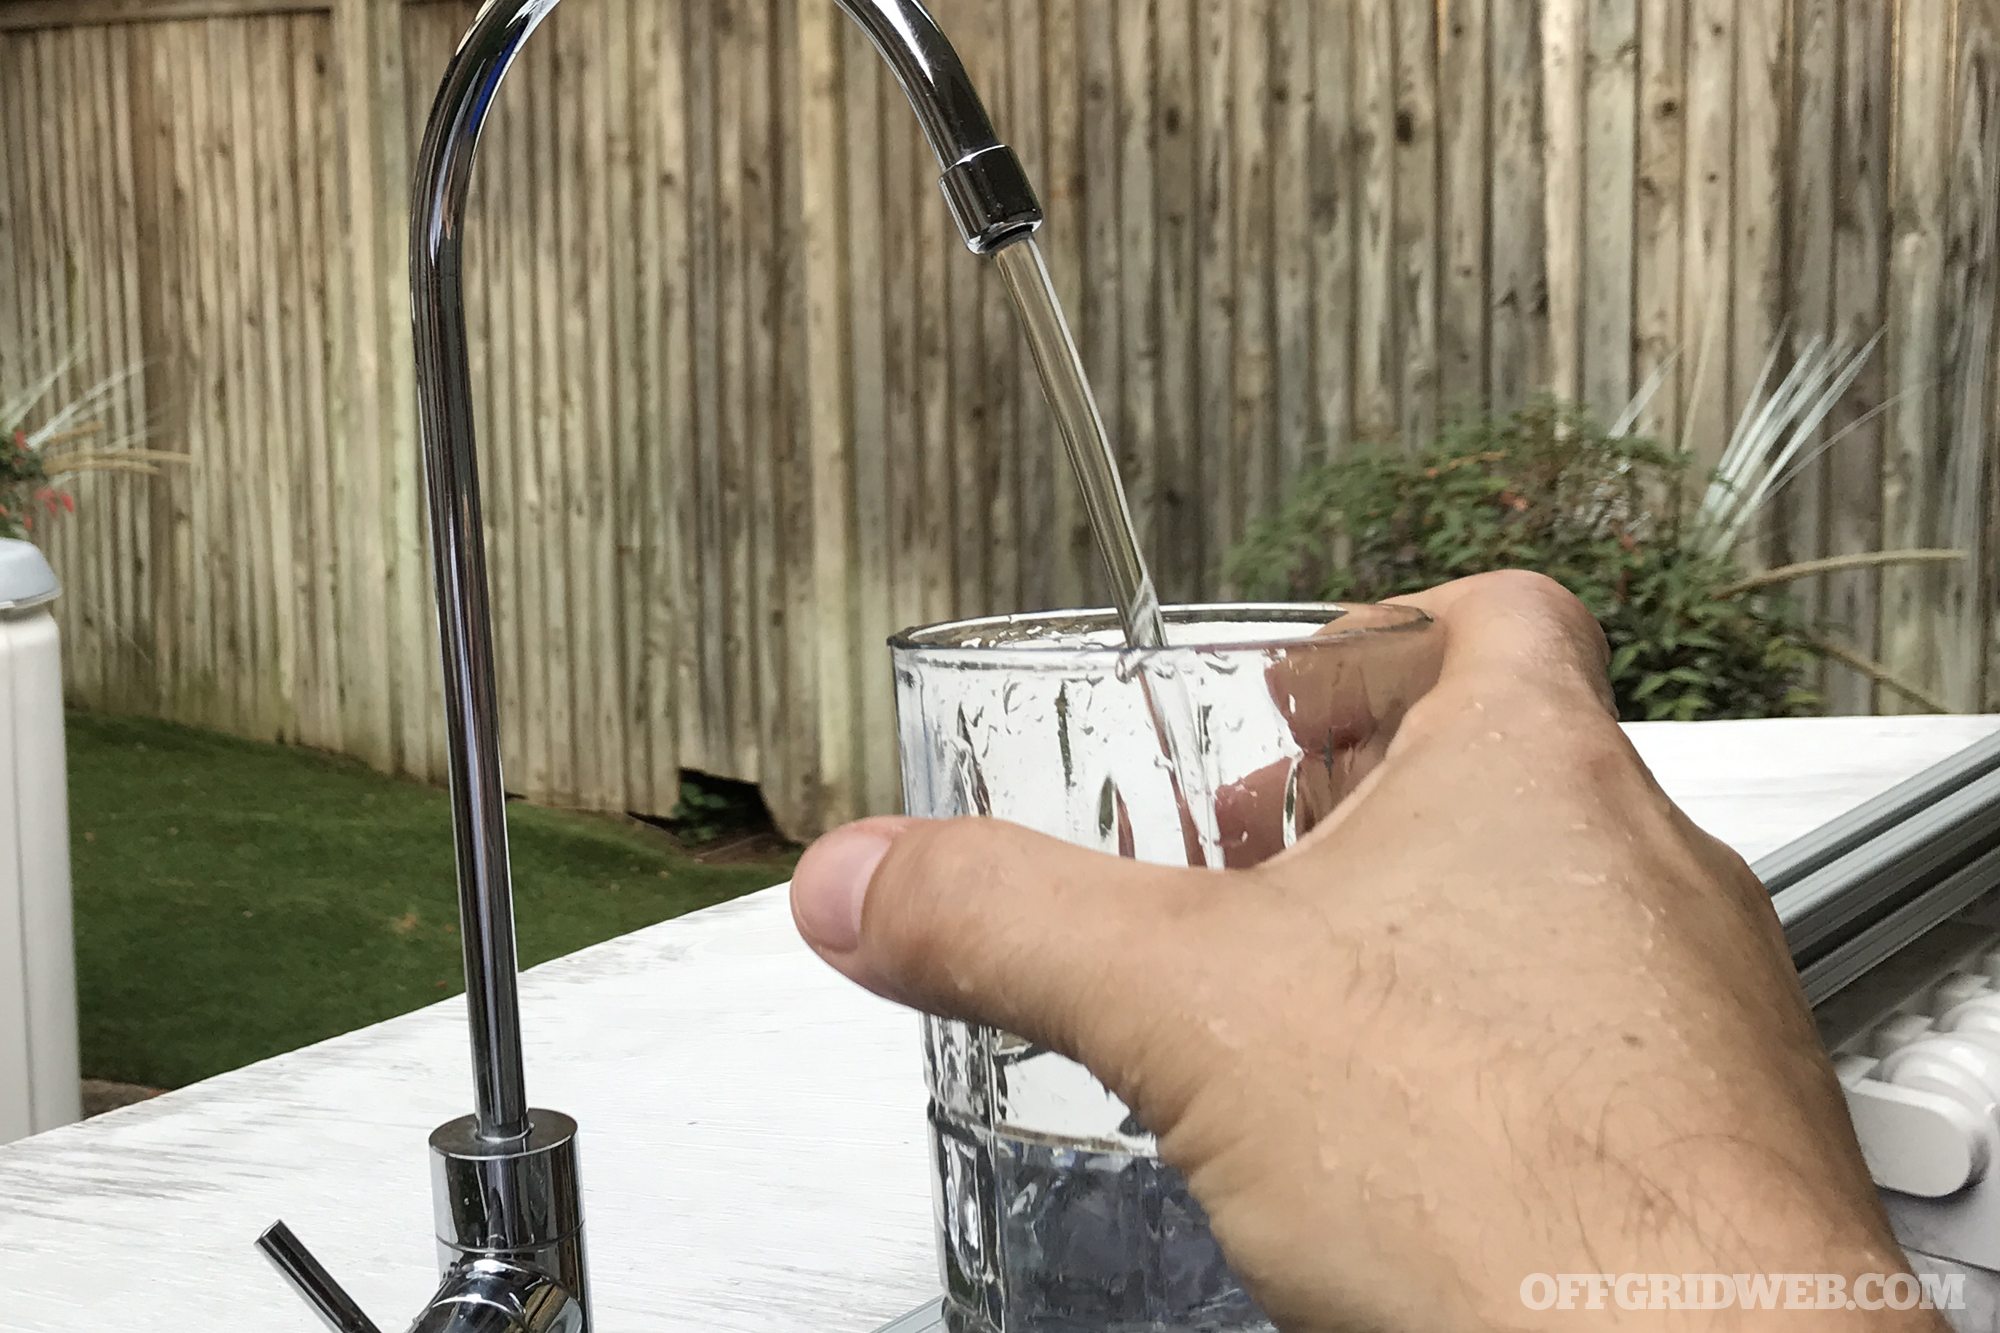
A pump in the unit pressurizes the water and passes it through two cleaning filters, plus a third re-mineralization filter to replace beneficial minerals that would normally be present in non-distilled water sources. This is intended to improve the taste and alleviate health concerns that may occur from exclusively drinking de-mineralized water for extended periods. Finally, the water is treated by a UV light purifier to kill any bacteria or other microorganisms that might be present. The faucet then delivers purified, re-mineralized, potable water.
Field Trials vs. Production
When we compare the current field-trial units (such as the one in these photos) to the plan for the finalized SunToWater system, there are some key differences that must be mentioned.
First, as indicated by the SunToWater name, the goal is to get these units functioning entirely off solar power. Currently, the Texas unit we saw is running on the power grid to evaluate the other parts of the system. This means the heat for the bake cycle is provided by an electric heater, and the rest of the unit’s electronics are also running off an outlet.
We’re told that the final version will use two large solar panels for power, similar to what you’d find on the roof of a home (exact specs haven’t been determined yet). Second, two external heat exchangers will generate heat for the bake cycle that enables water condensation. These parts will be separate from the SunToWater unit, so you can mount them in an optimal location to soak up the sun’s rays.
The production SunToWater unit will not require the separate components seen in these photos. The clean water reservoir will be internal, as will the faucet and re-mineralization system. So, aside from an optional oversized water storage tank like the pictured blue drum, you’d just need the unit plus two solar panels and two heat exchangers.
Now, if you’re thinking that the transition from municipal power to solar will result in a loss of efficiency, you’re absolutely right. That’s unavoidable. However, the claimed output still sounds quite respectable. Currently, Jay tells us that the plugged-in SunToWater field trial unit in his yard produces between 4-7 gallons of water per day. The projection for the solar-powered unit is 2.8 gallons per day in ideal conditions.
These numbers don’t appear to be outside the realm of possibility. A much smaller solar-powered prototype AWG created by researchers at U.C. Berkeley and MIT in 2017 was able to collect 2.8 liters of water over a 12-hour period. That’s 1.48 gallons per 24-hour day. It accomplished this feat in a regulated test chamber at 20% humidity — a relatively dry atmosphere.
Variability & Atmospheric Conditions
This brings us to the other major consideration for atmospheric water generation: Mother Nature. The SunToWater system is reliant on water vapor in the air, so it works best in humid conditions. Jay tells us that the field-trial units are functional as low as 18% humidity — a higher percentage will allow it to get closer to the maximum 2.8gal-per-day projection.
Fortunately, every state in the U.S. has more than 25% average hourly relative humidity throughout the year. Most of the country sits between 60% and 80%. The driest state in the nation, according to a 2018 study by climatologist Brian Brettschneider, is Nevada at a 38.3% average. SunToWater is also conducting its trials with this in mind — CA, AZ, and TX are all in the top ten states with the lowest average hourly relative humidity.
AWGs are able to function in drier climates, but output will be greatly reduced. Photo: Flickr.com/habibkaki
Temperature is another factor that affects AWG functionality. Obviously, sub-zero temperatures will cause water to freeze and make it impossible to collect dew. SunToWater says they haven’t yet found a high temperature limit that causes the unit to stop working. Lastly, as with any solar-powered device, you’d need clear and sunny conditions to keep the system charged. So, the optimal conditions for the SunToWater AWG would be a warm and muggy summer day.
Jay told us that SunToWater plans to add an estimated output calculator to its web site before the production version of its AWG goes on sale. This will allow prospective customers to enter in the atmospheric conditions of their home or bug-out location to gauge roughly how much water they’ll be able to collect there.
Closing Thoughts
For anyone who wants to live sustainably in an off-grid location, the idea of continuously gathering water from the air is an appealing one, especially when it’s powered entirely by solar energy. As we said before, depending on your location, there may be several easier and more efficient methods of collecting clean water — rainwater collection, a well, or filtration of river/lake water, for example. But even in those cases, an AWG could serve as a backup in case the other water sources dry up. It would also be an option if groundwater sources were inaccessible, or if those sources became contaminated.
However, AWGs are still a developing technology, and one that has some substantial hurdles to overcome before it reaches mainstream acceptance. Based on the limited glimpses we’ve seen so far, we’re interested to watch as the SunToWater generator trials continue. We still approach atmospheric water generation with a healthy degree of skepticism, but hope that SunToWater and other companies in this field can make AWGs into a viable option for off-grid water collection in the future.
No matter what system — or better yet, systems — you rely on for water, it’s wise to be prepared for a day when tap water shuts off and bottled water runs out.
What would society be like without laws? This is a complex question, and one that will inevitably produce a wide range of answers depending on who you ask. Some will claim a lawless society would be a paradise, while others will say it’d fall into unsustainable chaos. No matter your stance, it’s an interesting question to consider, and one that’s applicable to the survivalist mindset. After all, a post-apocalyptic world has often been referred to as WROL — without rule of law.
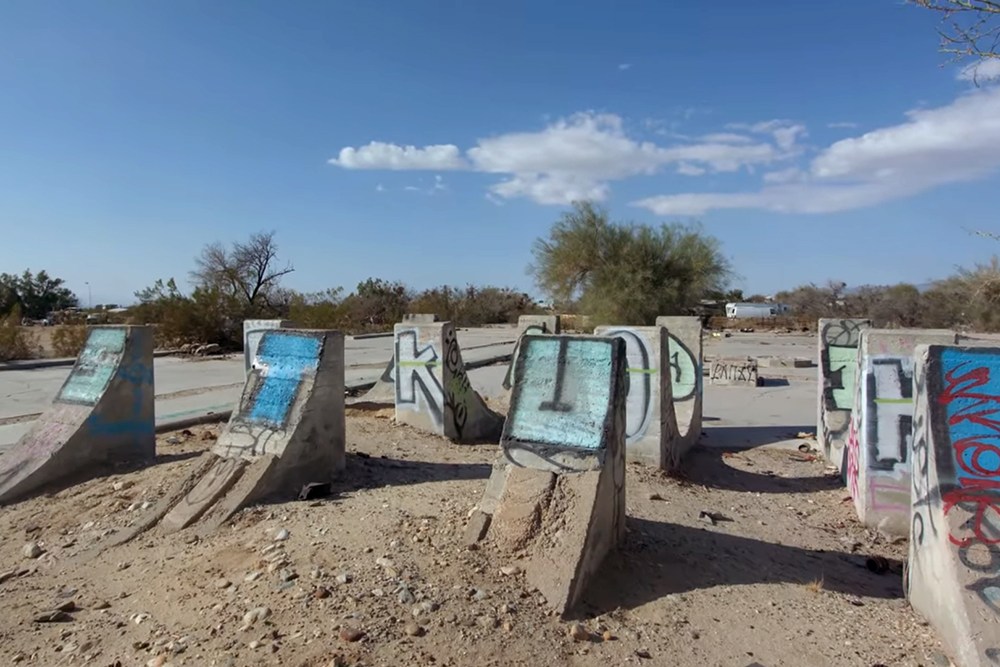
We recently came across a 20-minute short documentary that takes a look at a community that exists without organized and enforced laws. “The Last Lawless Land in America” was created by the indie filmmaking duo known as the Flutter Brothers for their YouTube channel Off the Cuf. It examines Slab City, an informal settlement in a remote patch of the California Badlands.
Slab City grew from the remains of Camp Dunlap, a U.S. Marine Corps training installation that was decommissioned and torn down in 1956, leaving behind an assortment of concrete slabs. Squatters took up residence on the abandoned land, and improvised buildings and art installations there over the decades. The land is officially owned by the state of California, so state and federal laws still apply, but officials seem to have no interest in dedicating resources to enforce them. It’s therefore considered effectively lawless by its residents — or at least close enough.
The resulting community is difficult to describe, including solitary hermits, peaceful hippies, heavy drug users, and all sorts of misfits. According to a woman known as Cornelius, the self-appointed librarian of Slab City, “Everybody’s always talking about how it’s an anarchist utopia, they’ll say everything’s perfect and wonderful. And then on the other side, you get people who are like, ‘it’s a tweaker dystopia, and it sucks.’ It’s kinda both of those things at the same time.”
Watch the short film below for a glimpse of the “lawless land” of Slab City.
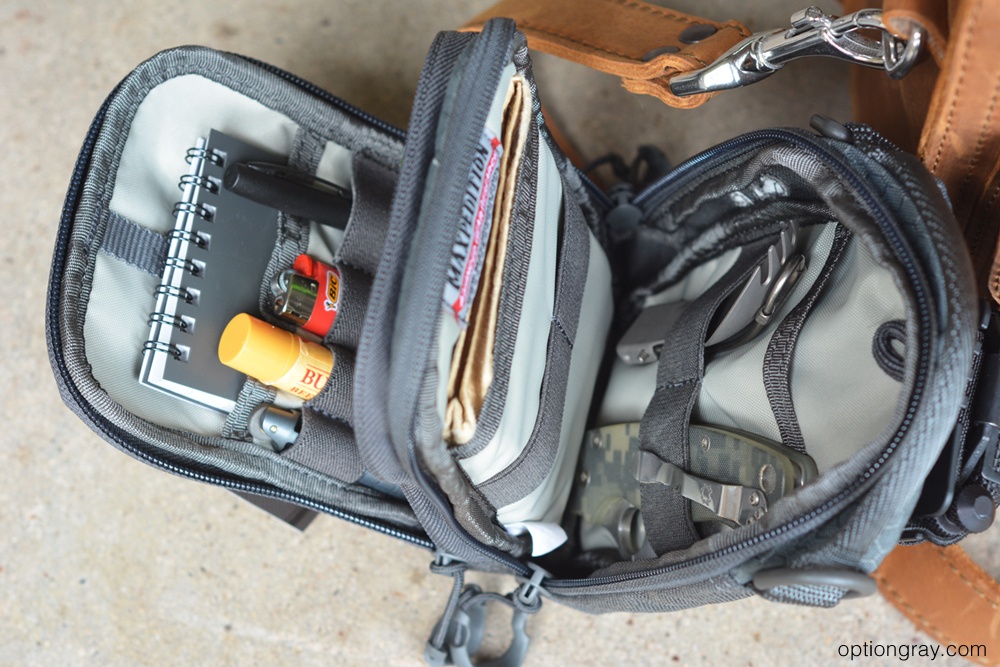
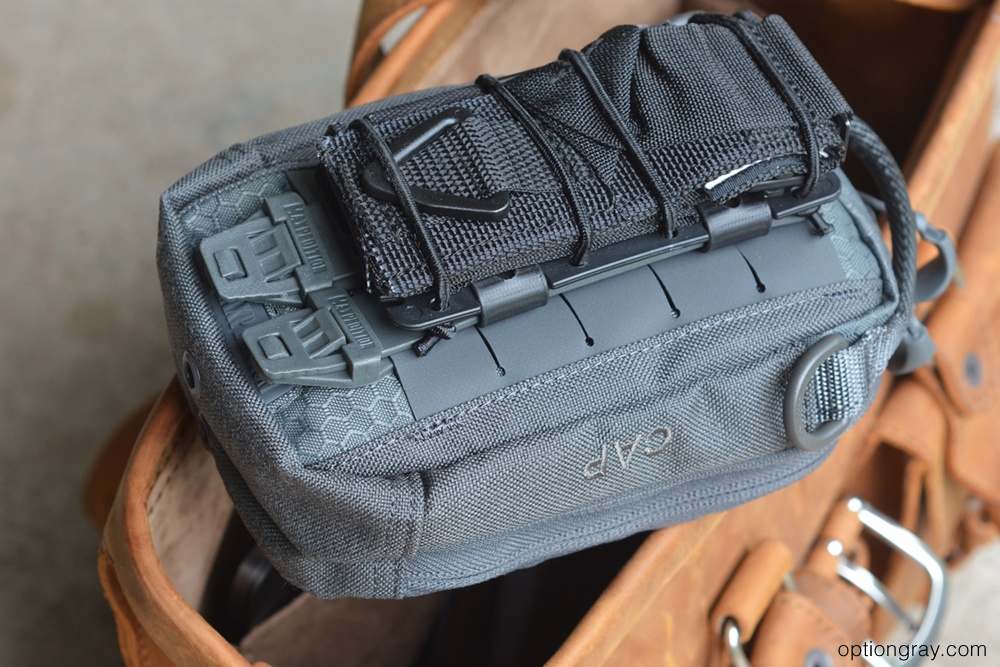
Every-day carry (EDC) gear is a subject we’ve discussed at length on many occasions — we even dedicated our recurring Pocket Preps column to this topic. Your EDC could be as simple as a wallet, cell phone, and keys, or it might contain numerous other tools and self-defense weapons.
However, most of these items are found in our waistband or pockets — there’s also a case to be made for “Tier 2” EDC gear that’s carried off-body in a bag or pack that goes everywhere you do. This gear is less comprehensive than a full get-home bag, but more so than what’s usually found in a pocket dump.
In the following article, Cody Martin of Option Gray explains the value of a secondary EDC kit. We’ve shared the post in its entirety with his permission. For more of his articles, check out OptionGray.com.
In Part 1 of this series, we discussed the basics of building a Primary EDC kit, which is the gear you carry on your person, like a pocket knife, flashlight, phone, and wallet. We also provided a few gear combinations to help get your mind working in terms of how to pair items together. In this post, we are going to move beyond what you carry on you and focus on your Secondary EDC.
What is a “Secondary EDC?”
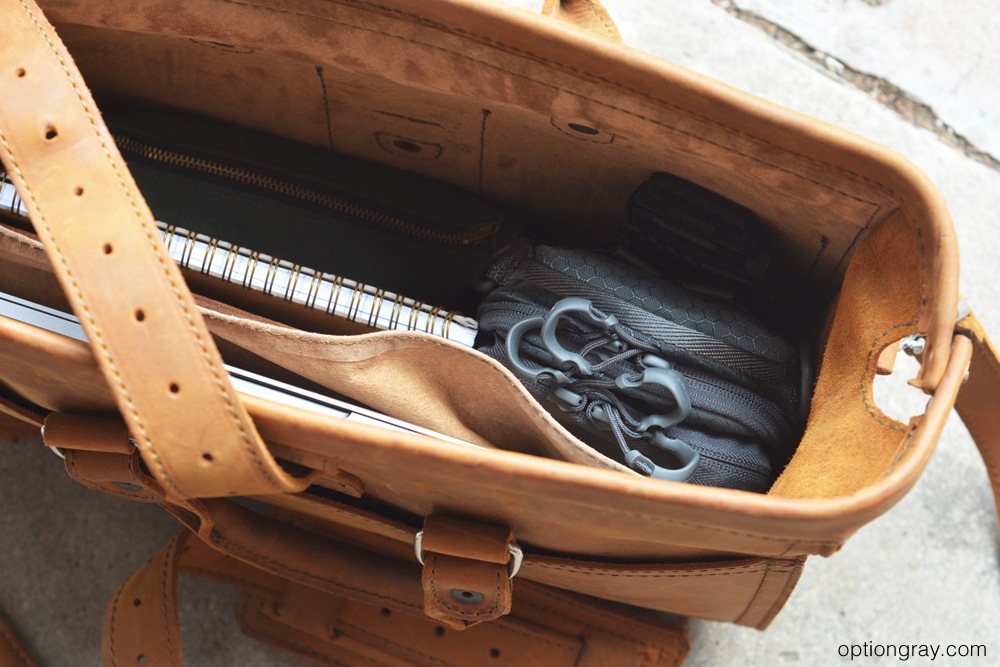
As a refresher of what we covered in The Three Tiers of Everyday Carry, your Secondary EDC is gear that is carried in a separate bag or container but is still with you as you go about day-to-day life. It can be carried in a backpack, briefcase, organizer, purse or a multitude of other methods. It is meant to supplement your Primary EDC in a way that expands your ability to handle a variety of things that may pop up during your day.
A Secondary EDC provides us the opportunity to expand our medical capabilities, carry additional tools, possibly spare ammo, basic survival gear, emergency food and extra cash to list a few.
Secondary EDC Items
With that in mind, let’s take a look at a few “categories” of gear you may want to consider for your Secondary EDC Kit.
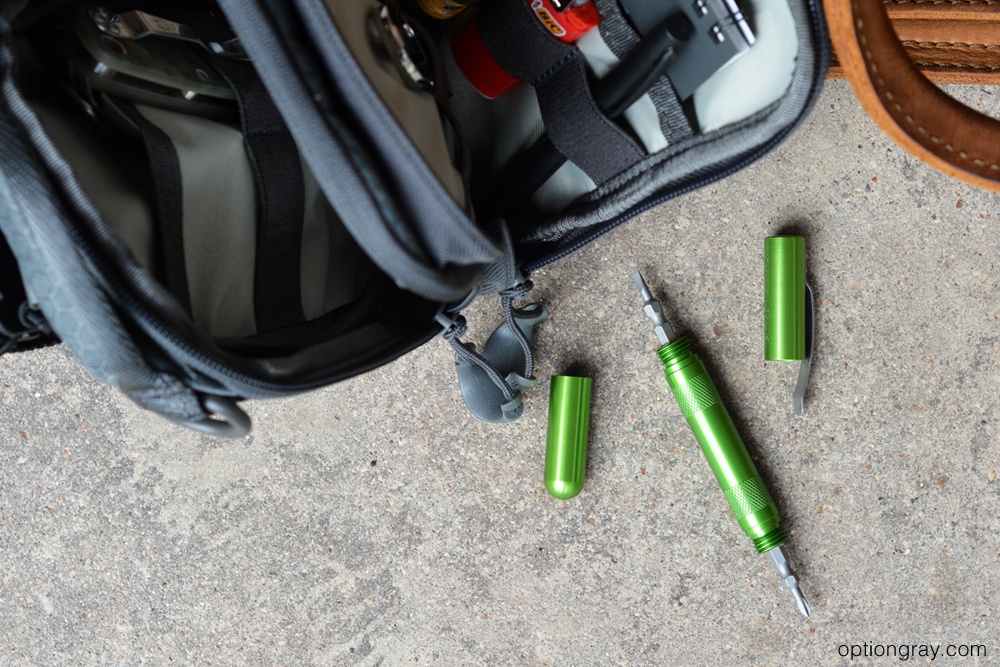
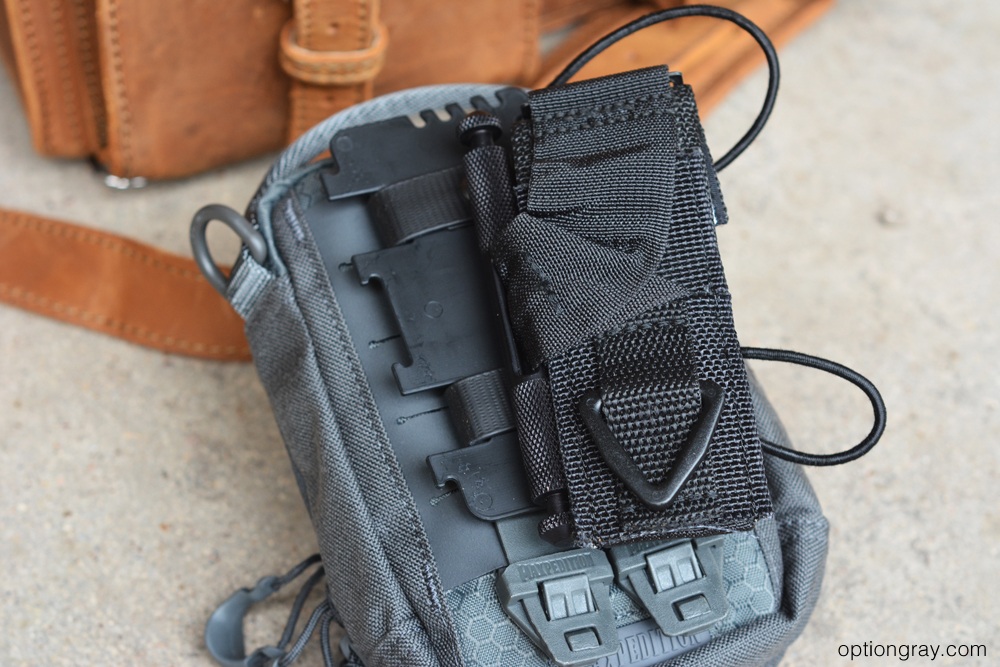
Multi-tool Multi-tools should have their place in every EDC. No matter what style you choose, make sure it serves your needs for what you may or may not be doing. Here are a few types:
Multi-use multi-tool
Leatherman-style
Swiss Army-style
One-piece multi-tool (OPMT)
Prybar
Personal preference in this category can range from a true multi-tool to any other solution. What is great about a multi-tool is that it can be used in a ton of different scenarios and is compact in terms of capabilities. Other types of multi-tools such as a prybar have their uses, but they can tend to be more specific or limited by their very nature. Pick the one that compliments you the best.
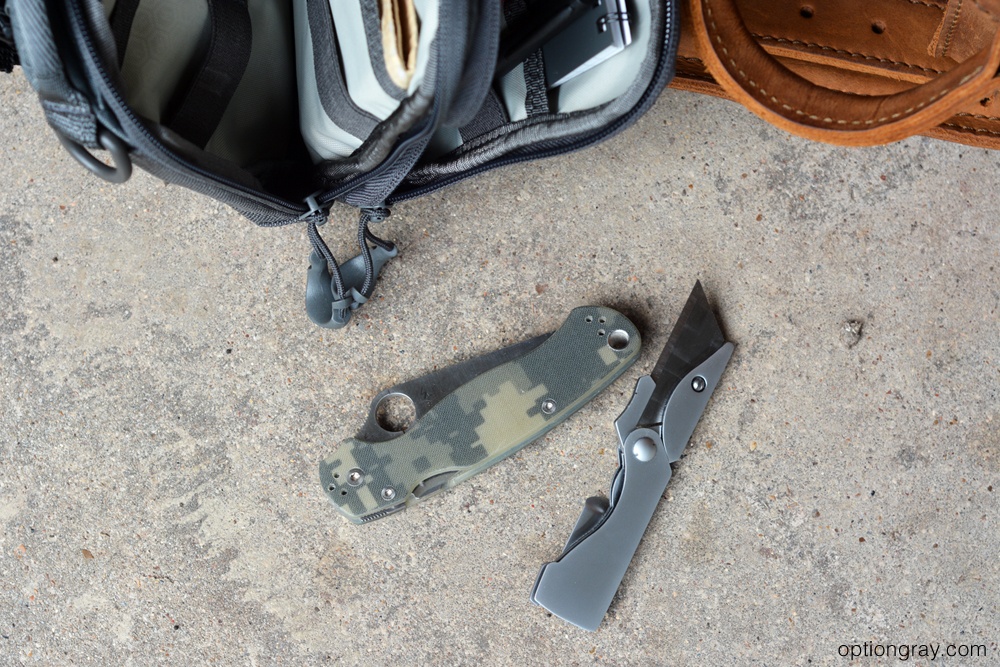
Knife What can we say? A good knife is one of those things that someone shouldn’t be without.
But, what’s better than one good knife? Two good knives. Why?
You carry a small folder for your Primary EDC and want to carry something bigger, for tougher jobs
Your primary blade is for self-defense and you want another blade for “work”
You want a second knife available if you lose or misplace your primary blade
You want a beater knife available for cutting open boxes or scraping work
Or maybe, you just like knives …
No matter what your reason, your Secondary EDC is a great way to carry that extra blade. When you are adding another knife, take a minute to see how it compliments what you are already carrying. It’s all about expanding capabilities. Consider your need for a:
Larger folder
Fixed blade
Bushcraft style knife
A knife is one of the most used tools in a Primary EDC kit, and having one in your Secondary EDC is always a good idea.
Fire-starter This is another one of those items you never need until you need it. Are you going to use your fire-starter every day? Probably not. It all depends on what you do, where you live, etc. But, with compact, lightweight designs, it doesn’t make any sense to not have one. A fire-starter can be the difference in life or death if that rare scenario strikes.
There are many different options available:
Plastic lighter: There are many steps to fire making: 1) spark –> 2) ember –> 3) full flame. A Bic Lighter jumps you all the way to Step 3. But, it does add mechanical functions to starting a fire, which can always fail. Plastic lighters don’t work well in colder temperatures, as butane stops vaporizing and remains a liquid (at about 40F/4C)
Refillable lighter: With many great options, such as the EXOTAC titanLIGHT or MARATAC, you can refill them and also keep the flint water-tight. This helps prevent evaporation, but just like a plastic lighter, the mechanical nature of the lighter leads to failure points
Ferro rod: When struck, a ferro rod can spark as hot as 3000-5000 degrees Fahrenheit, which can ignite a dry pile of tinder quickly. It works even after being submerged in water but takes some practice to learn how to use it consistently. It also takes two hands.
Sparker: A sparker is like a lighter, but with no fuel. So although it removes the worry about not having fuel or it evaporating, it does carry the same mechanical concerns as a lighter
Matches: Kitchen matches, stormproof matches, strike anywhere matches, the freebie cardboard matches you pick up at the bar … there are many different kinds of matches you can carry. Matches are a great idea, especially with new technology allowing them to be almost impossible to extinguish, like with the UCO Titan Stormproof matches. You still need to store them in a dry place, so a match case is always a good idea.
Tinder: Emergency tinder is invaluable, especially in bad weather
Fire is one of man’s most basic needs. A fire-starter allows you to never be caught without it.
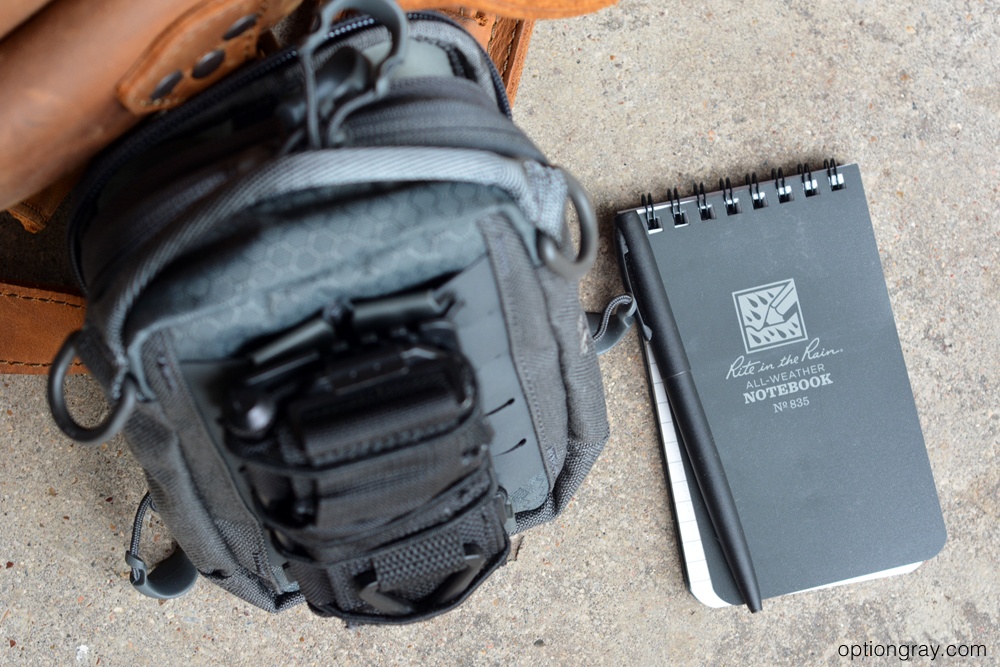
Notebook with emergency contact information Make sure you never have to rely on the battery of your smartphone. You may be able to get to a phone, but the “art” of memorizing phone numbers is a thing of the past. Check out our previous article on this very topic. Very few people can recite the numbers of all the important people in their lives. Do yourself a favor and keep a good notebook on hand with any emergency numbers you may need.
For paper, consider:
Regular, plain-paper
All-weather paper
Spiral top
Stapled spine
Larger notebook for taking additional notes, journaling, etc.
For a writing utensil, consider:
Lightweight plastic pen
Screw top tactical pen
Small and compact pen (e.g. Fisher Space Pen)
Pencil
The ability to write something down is critical, especially when the digital world. Especially if you don’t carry a pen and paper in your Primary EDC, having it in your Secondary EDC kit is critical.
Flashlight You never need one until you need one, which can be pretty often, believe it or not. Besides being able to hand everyday tasks such as finding your keys, etc., they can also be used as a form of self-defense. Interested in how to use a flashlight for self-defense? Check out this article for the basics.
When looking for the right flashlight for your Secondary EDC, consider:
Size: How big do you need? What do you need to compliment your Primary EDC?
Purpose: Where are you going? What do you plan to do? Is there a different purpose you may need a flashlight for?
Battery life: For long-term storage of a flashlight in a Secondary EDC kit, consider keeping extra batteries on-hand or consider a flashlight that can be easily charged in your car, if you find yourself on-the-go.
Medical One of the most overlooked categories of everyday carry, if not the most overlooked, is medical. From simple scrapes, cuts, headaches and upset stomach to something as major as significant hemorrhage, why not be prepared? With the addition of very little weight, you can improve or potentially save a life.
Gear to consider adding to your Secondary EDC:
Tourniquet
Expanded First Aid Kit: Cuts, burns, stings, medical, and other day-to-day first aid can easily be tackled with a simple first aid kit
Dental floss
Tweezers: Bee stings, splinters, or doing any detail work
Whether you’re putting a band-aid on your child’s cut or saving someone’s life after a horrific car accident, take the time to take an intentional approach to carry medical equipment.
Charging cables As much time as society spends on their electronic devices, charging cables have almost become mandatory. Make sure you have what you need to keep your gear up and running.
Especially if you rely on any electronic devices for communication (almost everyone does), don’t count on getting access to a power source. During an emergency or crisis, you are not going to have the luxury of finding an open plug and then waiting for your phone to charge. Charging cables for laptops, work equipment, diabetes supplies, or other medical supplies you rely on is critical.
Having a backup USB power bank can save you if you’re unexpected stranded or away from a power source.
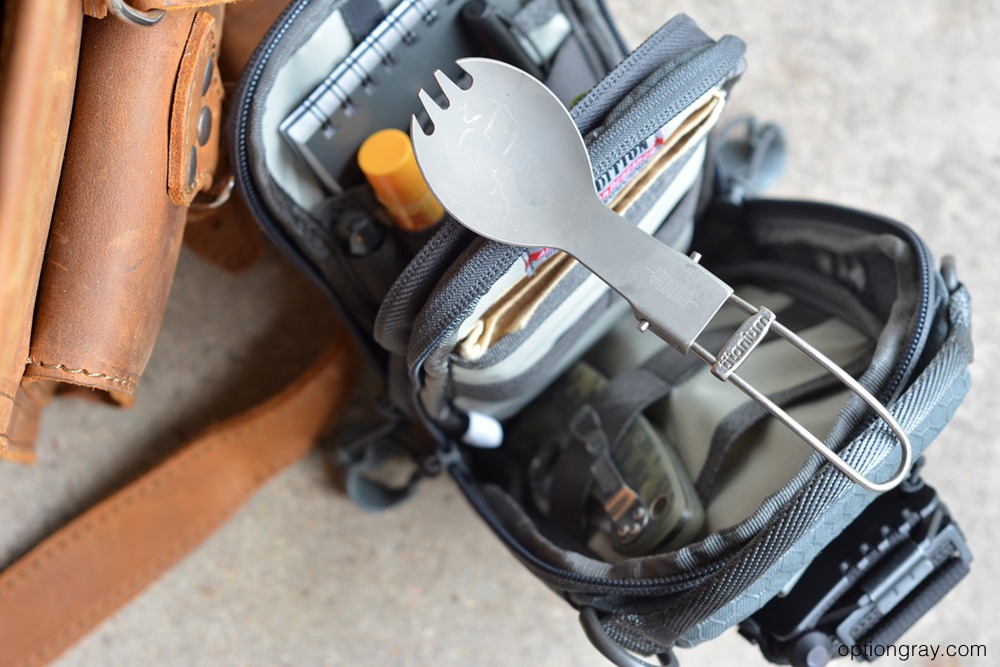
Pictured: Vargo titanium folding spork
Spork or other eating utensil We’ve talked at length before about why you should consider a titanium folding spork as part of your EDC. They are lightweight, durable, TSA-friendly, compact, and utilitarian.
If a spork isn’t your thing, consider another eating utensil. There are countless options, including plastic, titanium, even foldable models. The ability to eat is a critical human need. Make sure you have the gear to make that happen without going caveman.
Additional items
The best part of a well-thought, intentional Secondary EDC is that it is unique to you, your work, where you’re going, where you’re traveling to, etc.
If you work in healthcare, consider adding back-ups of hygiene and work gear. If you travel a lot, consider adding additional TSA-friendly gear that allows you to function if you are without your luggage. If you commute via public transportation, consider adding gear that can help you get home safely in case of an accident, terrorist attack, etc.
Ideas include:
Whistle
Tweezers
Mirror
Snacks
Space Blanket
Paracord
Lip balm
Superglue
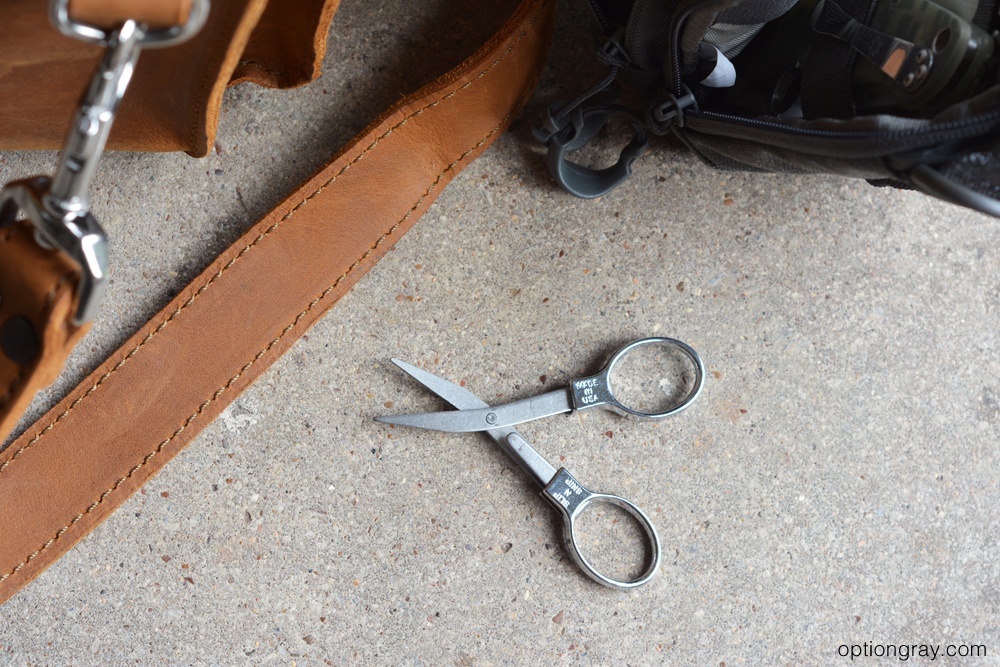
Scissors
Spare batteries
Cash
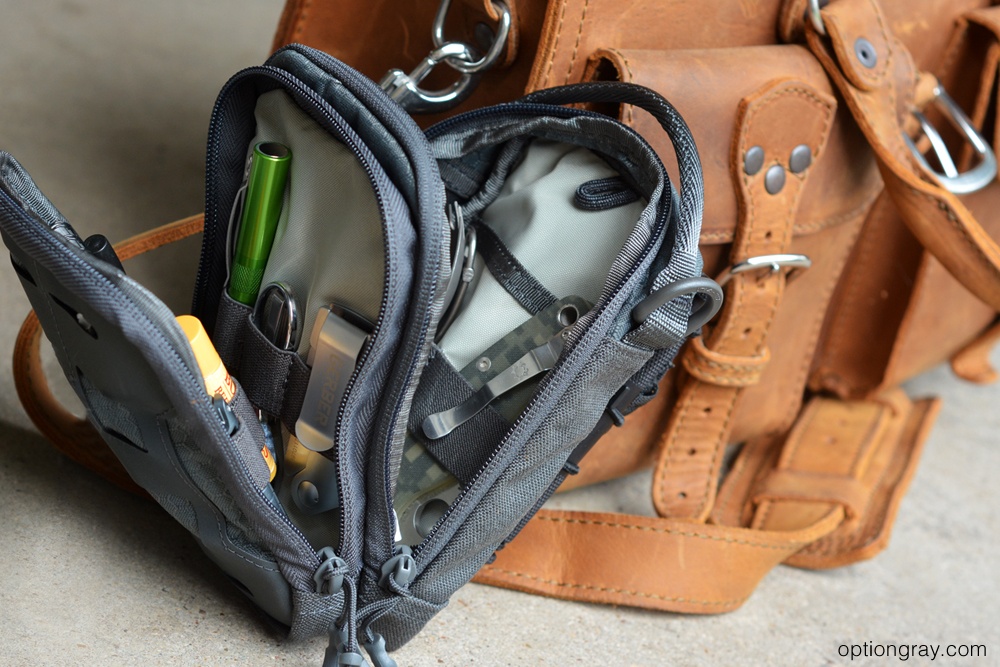
Carrying case Now, how are you going to carry these items? Well, it depends on which ones you choose to carry as well as what fits into your environment.
Organizers are an easy way for a person to keep their gear organized and accessible. There are a number of benefits of EDC organizers, but here are just a few:
Gear is accessible
Gear is organized
Can be grabbed and easily taken with you in an emergency
Compact
Can serve many different uses in addition to EDC items
Easily fits into most briefcases, purses, backpacks
Conclusion
As with most things in the everyday carry world, any EDC kit is very subjective and highly debatable. What I’ve offered are just a few areas for consideration and is by no means a definitive list. You should tailor your kit to your individual needs, what you are doing, where you are going, etc.
Also, keep in mind, you are building on what you are already carrying with you in term of your Primary EDC. Don’t be afraid to duplicate “categories” of items. Redundancy is not a bad thing as long as you think it through. Gear that serves multiple purposes is also highly recommended.
Wherever there’s money, there are complexities and danger. This is especially true for travelers converting currency. While just about every international traveler must undertake this task, most don’t see the inherent threats that come with it.
Before we dive into the monetary aspects of this discussion, be aware that there are places in the world that still have a deeply ingrained bartering culture. Knowing what’s valued in the places you visit is golden. I once paid for a couple of nights of lodging and food with a multitool and a military field jacket. Realize that things are valued differently in different places. Do your homework.
Travel forums and backpacker blogs will almost always have some valuable insights on this. Your skill sets can also be a commodity. If you’re good at fixing things, know your way around a computer, have a skilled trade, or just aren’t afraid of manual labor, that can pay for things in the third world. The main thing to realize is that you have to adjust what’s possible in your mind when you travel. You can’t get away with paying for a meal at Chipotle by fixing the manager’s Kia, but that might work in Chiapas at a roadside taco stand.
There will, however, be times when you’ll have to use some form of good old-fashioned currency, and this is where things can get a little bit complicated if you aren’t careful.
When it comes to the actual logistics of carrying money, I recommend adopting a three-tiered strategy.
Cash as your primary form of currency
A prepaid card as your contingency form of currency
A credit card for emergencies
Cash
Traveling with cash is an art. There are times and places where going cashless and utilizing only plastic might make more sense, but in most places cash is still king. A form of currency that has a value outside of a debit card terminal is the preferred option for most experienced travelers.
Above: A variety of tools can be carried discretely to protect not only yourself, but your valuables as well. This Waterproof Go Tube by Oscar Delta is one example.
Legalities
The first question one needs to ask is: How much money can you legally carry with you, and is it worth carrying large cash amounts internationally? It’s a question that has different answers depending on where you’re traveling to and where you’re coming from.
If you’re carrying more than $10,000 U.S., or its equivalent in other currencies — cash, checks, money orders, any other monetary instrument, or any combination of these — you must declare every dollar that exceeds that sum. You will not have to pay duties or taxes, but you must declare it on the Customs Declaration Form.
Not declaring your currency can be a mistake, and one that you need to be aware of, as this is what makes your money “irregular” and can open you up to legal liabilities. Conversely, you should also be aware that any such declaration will have eyes on it that might not necessarily be friendly. It’s not unheard of for people in positions of authority at the Mexican border to act as spotters for local criminal elements that thrive on robbing tourists who declare large amounts of money.
Above: Faraday cage bag and waterproof cellphone pocket used for concealed cash carry under your clothes.
Exchanging Currency
Is it worth exchanging your dollars for the local currency? In some places, you won’t have a choice. In other places, the dollar goes a long way.
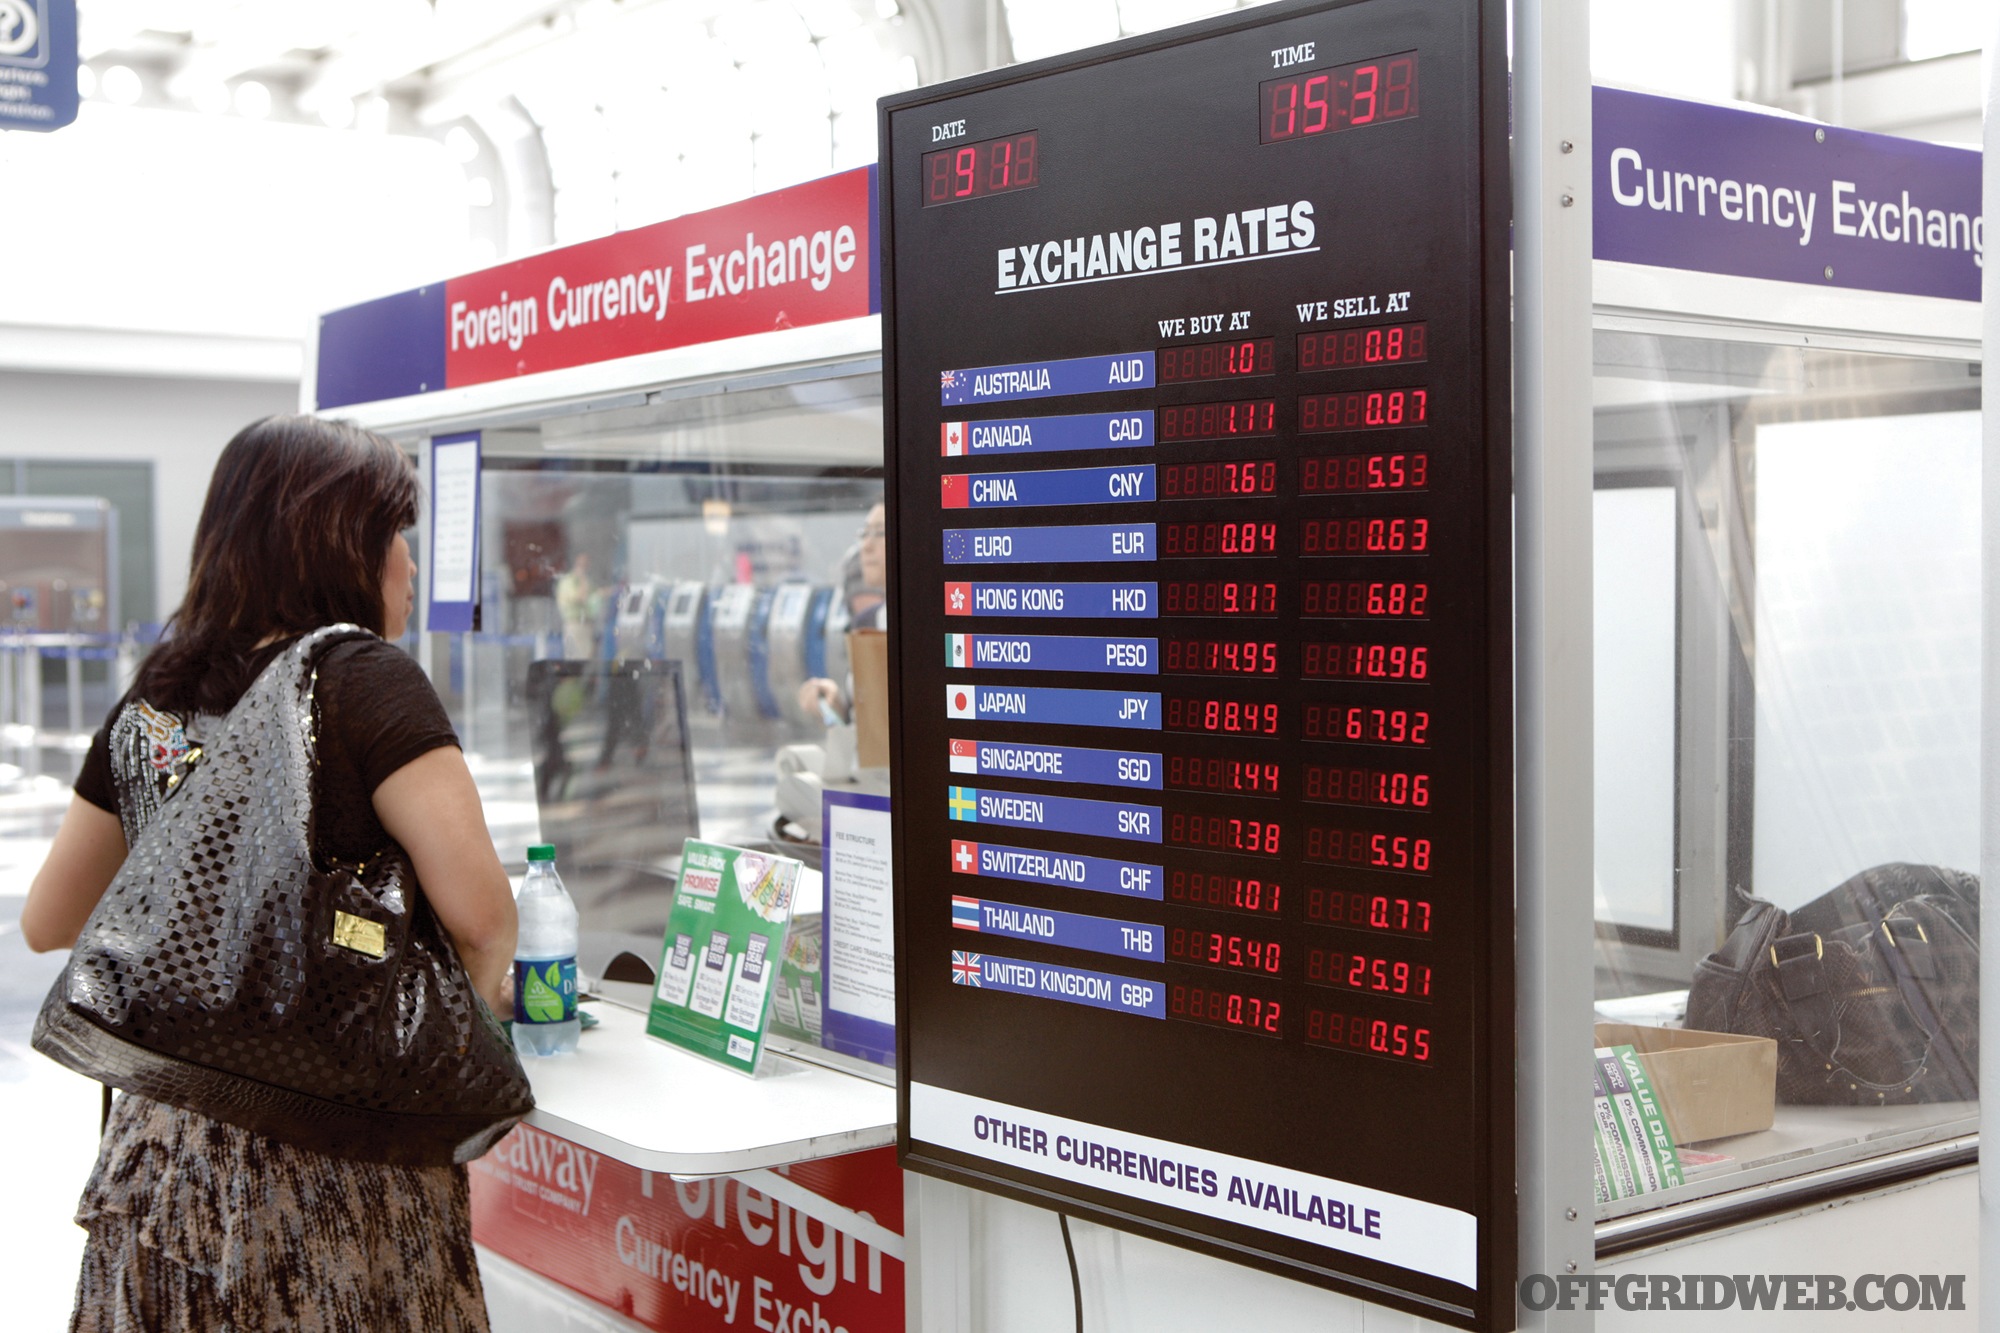
If you do find yourself needing to exchange your currency, it may be tempting to utilize the conveniently placed currency exchange kiosks and ATMs at airports, but these options, more often than not, target the unsuspecting traveler. They boast some of the worst exchange rates in the industry.
While you’ll often see signs advertising “no commission or fees,” exchange companies will frequently make up the difference through manipulating the exchange rates. This is due, in large part, to the fact that businesses in airports usually have to negotiate a bidding process to set up shop and then contend with much higher overhead once established. Of course, in the end these costs are passed on to the customer. Foreign travelers are especially susceptible to these manipulations, as they generally don’t have a full grasp of the local economy.
The better course of action would be to do some research ahead of time and locate reputable money exchange options outside of the airport. When it comes to maximizing personal safety, it’s imperative that the traveler avoid money exchange businesses in highly trafficked tourist areas. Not only will they generally have unfavorable rates, but in many areas they’ll also be home to a thriving criminal ecosystem that preys on disoriented outsiders.
You may be able to exchange currency stateside, before you being travel. The problem with this is trying to find places carrying the specific currency for fair rates. Also, make yourself aware of the legal limits for bringing cash currency into a given country. If you do bring cash currency into a country, spread it out into multiple packets to reduce the visual/physical signature. Instead of dropping a brick or thick roll of bills into your check bag, break the money up into smaller amounts and place them in plain envelopes. Mark the envelopes with generic use-indicators, like “gas” and “food expenses,” to provide a narrative to anyone who might see it. Never place cash in your checked bag. Split it between a backpack, other carry-on, and your physical person.
Above: If you intend to exchange currency as part of your travel plan, make sure you know the current official exchange rates. Only exchange cash at reputable locations. Also be aware that U.S. dollars may be more desirable to locals than their own currency.
No matter where you choose to do business, never engage in a transaction without seeing a printout of the exchange rate you’re agreeing to and never lose sight of the money you hand over or the money you get back. Unscrupulous operators won’t shy away from bait-and-switch tactics that leave the unsuspecting customer with a fraction of what they exchanged. As with most things in life, always keep your eye on the prize.
Oftentimes, the most cost-effective option is to find an established internet currency exchange company, make arrangements online, and arrange to pick up your local currency when you arrive at your destination. As there’s less overhead involved, these online options will generally be more affordable than their physical counterparts.
Another option is to wire money to yourself and withdraw it at your destination. But these services aren’t available everywhere, and the fees for using them are all over the place. Wire transfer services are also a known hotbed for fraud and theft. If you go this route, do the math on exchange rates and fees, and make the best decision for your wallet. Many places around the world don’t have a discreet option for you to send money to yourself, and using this option may draw the attention of both local authorities and criminal elements.
Make sure to educate yourself on the local currency and the security features these bills might have to make sure the cash you’re getting is legit. I’ve seen high-level people with high-level skill sets get fooled by laser-printed cash, so trust me, learn to identify your money. A small portable black light might be good investment to look at bills closely. Don’t put all your faith in counterfeit markers. Criminals now know a few ways of treating the cash to make them non-reactive to ink and dyes. Know what it feels like, know what it looks like, and make sure you’re getting the real thing. There are also a couple of online resources you can use to get savvy on popular counterfeiting techniques. Check the websites below for more information:
Using prepaid cards and, in some cases, credit cards is another option — but these forms of payment come with their own risks.
Prepaid Cards
A prepaid card is basically a debit card disconnected from any type of checking account. You can purchase them at stores or online — the latter is usually cheaper. You then sign up for service, load it with funds, and use it like a credit or debit card. They usually come with a few security features, depending on the company, like requiring a pin number and signature to complete a transaction. You can’t spend more than what’s loaded onto the card, making it a great option for people on a tight budget. The drawback to prepaid cards are the fees involved in using them internationally. But for the security they provide, and the security of being wholly detached from your personal financials, these make for a great option.
Above: Shielded wallets may be a good option to keep your credit/debit cards safe from radio frequency identification (RFID) scanners that can “lift” information off the chips and strips in your cards.
There are also general-purpose gift cards now offered by most major credit card companies. The biggest difference between the two reflects their permanence: Prepaid cards can be reloaded and used indefinitely, while gift cards can generally only be used until the dollar amount on them is exhausted. Look for cards offered by reputable, well-established companies. Some have hotlines or contact info specifically for customer support while travelling outside the United States. These tools can typically be found on the credit company’s website and should be researched before pre-paying anything.
Credit Cards
Credit cards are also an option for worldwide travel. Visa and Mastercard are the two almost universal ones. Visa is what I use. The main consideration is to make sure you understand any international fees or restrictions that apply to card use outside of the U.S. Again, check the terms and conditions of your card to be sure. If you do plan on using a credit card overseas, call the company ahead of time and let them know what dates you’ll be out of the country and what country you’ll be in. This does two things, in terms of fraud protection.
The first is making sure your card doesn’t get shut off when you make your first purchase overseas. If you’re not a regular traveler and your credit card company suddenly sees a series of charges from Europe or Africa or South America, they may shut off your card automatically without your permission as a fraud-protection measure, inadvertently leaving you financially stranded. But if they know your travel plans ahead of time they’ll often put a note on your account to allow charges from that area.
The second reason you want them to know where you’ll be and when is that if your card does get cloned while you’re travelling, the company can spot actual fraud quickly. For example, let’s say you take a trip to South Africa. You notify your credit card company, so all your South African purchases go through without a hitch. But two days into your trip, your card number is used for a transaction in Belarus. The card company knowing your location and timeline can help separate legitimate transactions from fraud that occurs in real time during your trip.
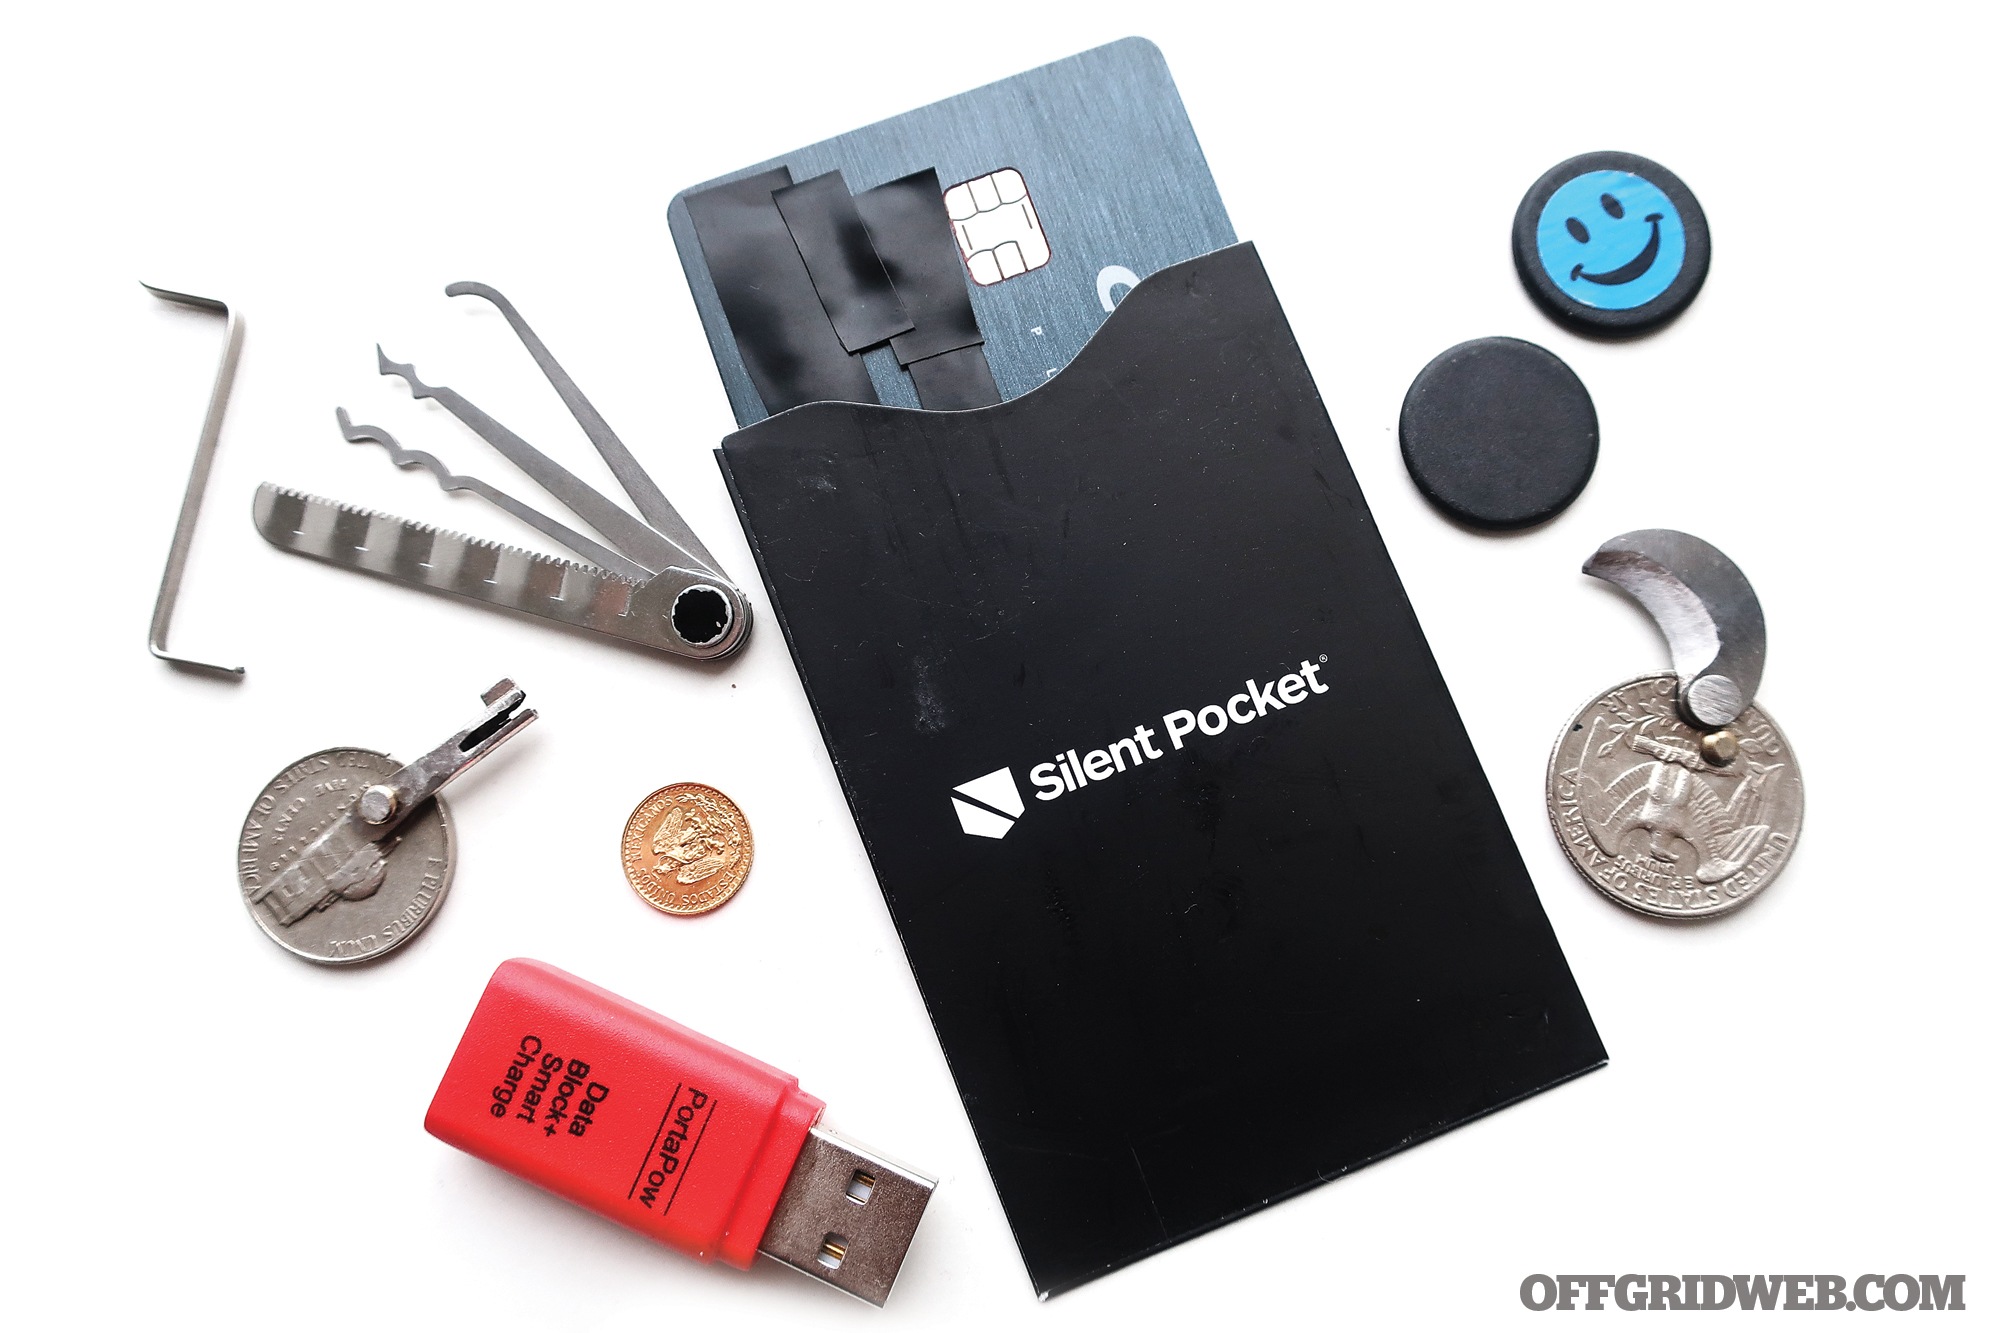
Above: RFID blocking card protector are just some of the items seen here. The coins with embedded tools are made by @jollyrogerthree.
For the budget-conscious traveler, credit cards might not be the best option. When lost in the excitement and inherent confusion that comes with travel, people tend to go overboard with them and not factor in the fees involved with using them internationally. The risk of a card being cloned is also ever-present, and can be a nightmare to deal with when you’re thousands of miles from home. RFID-blocking sleeves or wallets can help mitigate remote cloning or mining of your data. But also be conscious of skimming units that can be installed over legitimate card readers at ATMs, gas pumps, and similar unmanned locations. Make sure to inspect any port you put you card into, and try to compare it against similar ones around you. Even less sophisticated are cameras or human surveillance, where your card might be photographed or even memorized by someone while you have it out in the open to use it.
Furthermore, losing a card when abroad can be a disaster, as getting a replacement card can be next to impossible while in another country. This being the case, credit cards will often be a last resort. All of this being said, should there be an emergency that requires a large expenditure, a credit card may be the only option. Also, in some cases I have been aware of, medical attention was withheld to some people till they produced a card to put the expenses on. Again, this should be an emergency-only option.
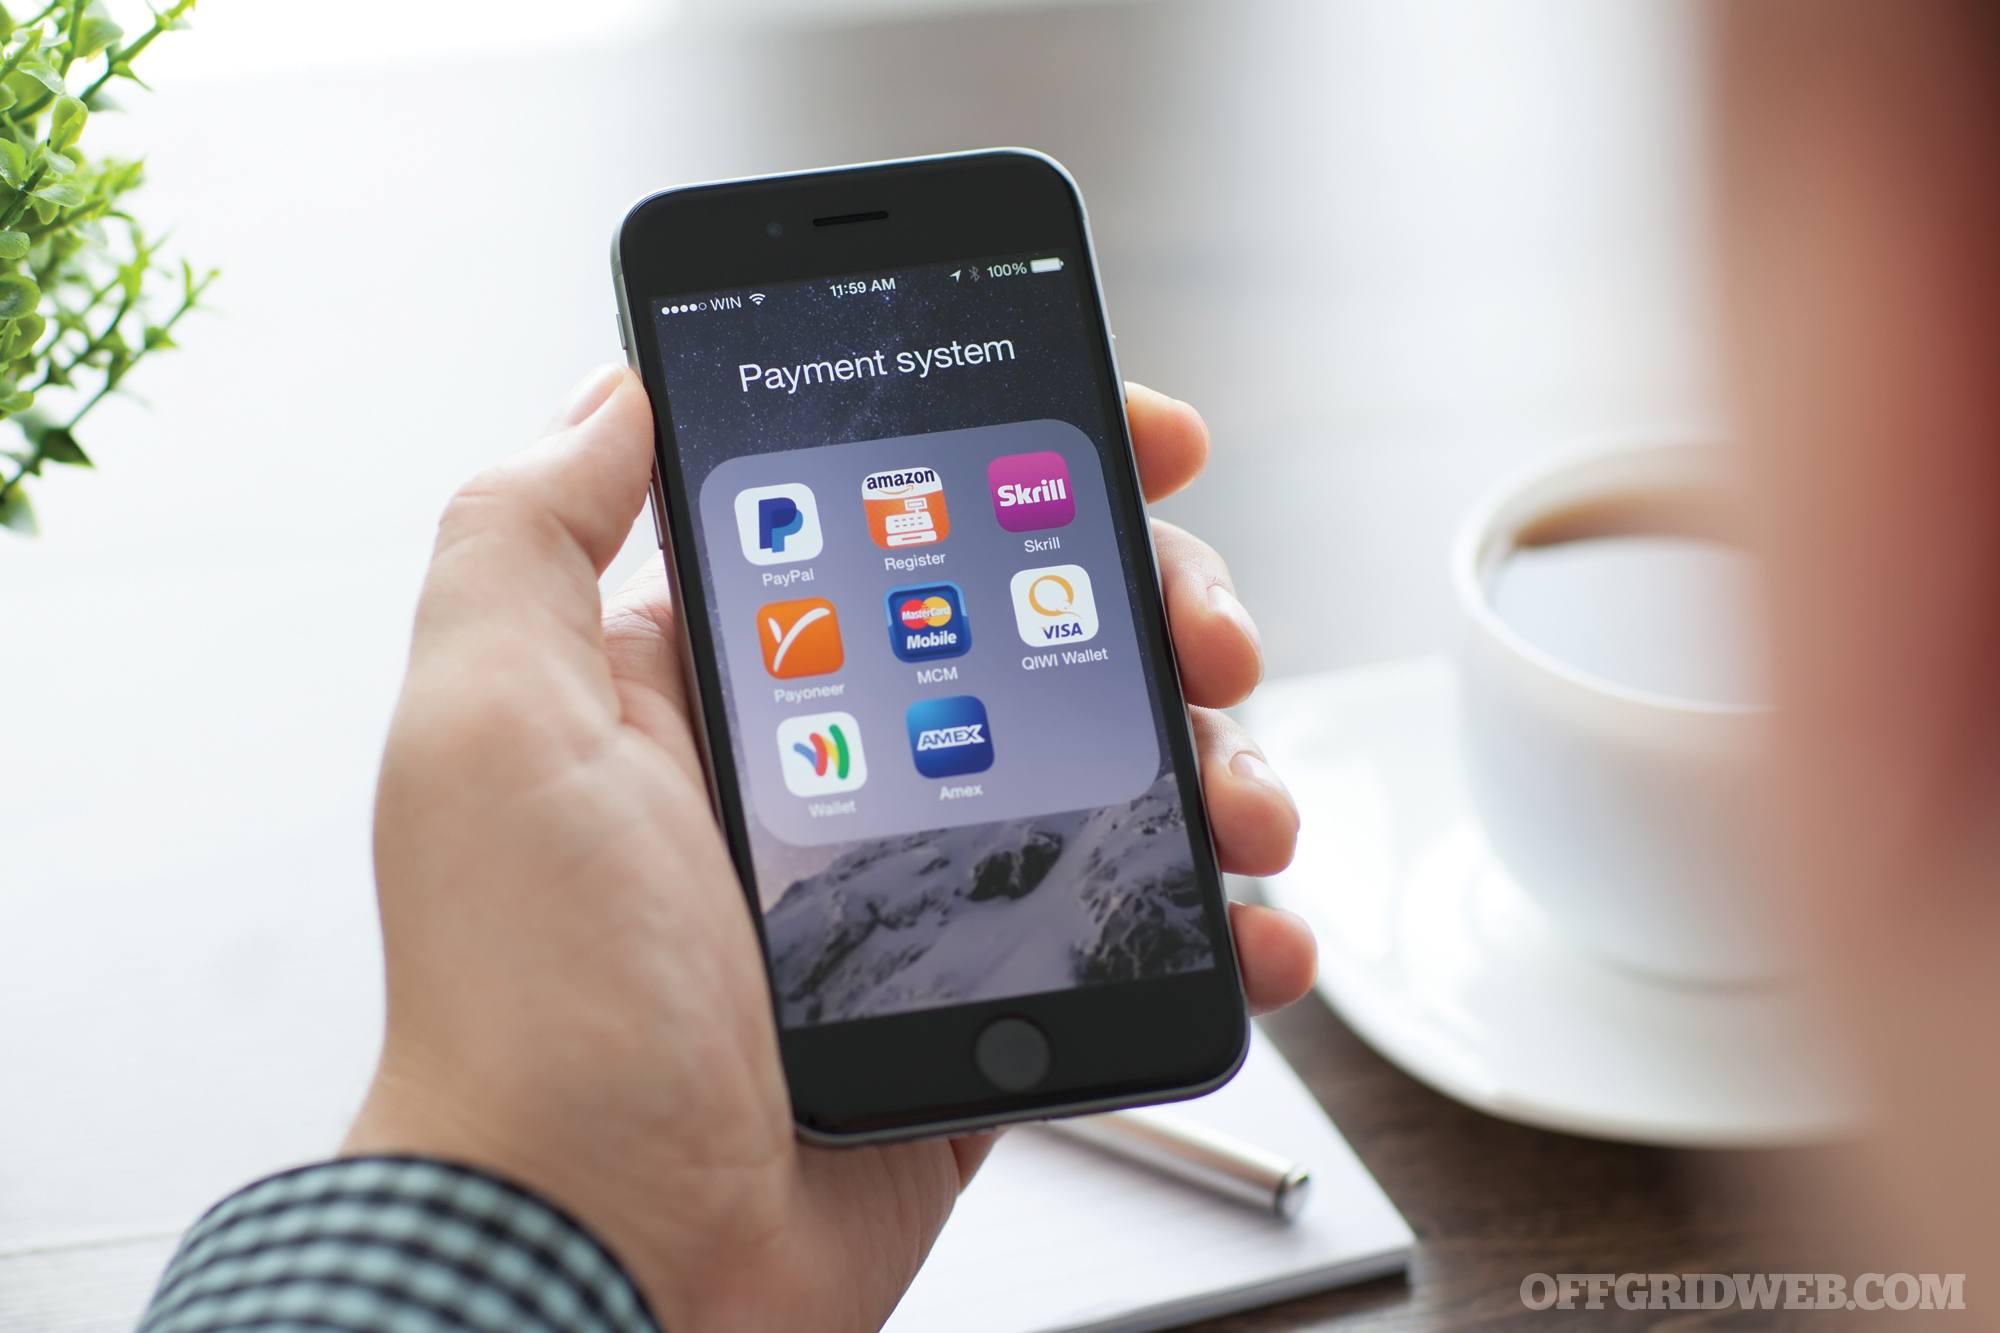
There are some alternate devices and apps, like Coin or Apple Pay, that can put an extra layer of separation between your financial accounts and the outside world. I haven’t seen many options out there that don’t suffer from glitches, bugs, or developmental issues, other than Coin. Apple Pay might work in some places, but large portions of the world are years or even decades behind these technologies. It all boils down to two things: having multiple, redundant payment options and being aware of the threats against you. The human element is always the weakest link in the security chain. So get educated on local and regional-specific risks at your destination and layer your financial security plan.
Above: Depending on where you travel to, you may be able to transact via payment apps. However, many countries have not caught up with the proliferation of this technology seen in the U.S.
Bribery
Bribery is the act of offering someone money or something valuable in order to persuade them to do something for you (or not do something to you). It goes by many names in many different places. In Mexico for example, they call it mordida — literally a bite. For many in the western world, the option of bribing an authority figure might seem completely foreign and may even make them feel guilty.
Trust me, the world outside doesn’t care and the practice of “greasing the wheels” is common in most places. Locals know this, and it’s a good idea to do research about the places you’re traveling through to see if it could be an option. How will you know if it’s a situation that will call for it? Well, from my experience, the situation and the people involved will usually send you every single discreet message in the book to indicate that they’re open to it. From asking you to pay a fine right there, to telling you how much trouble you’re in without making any effort to actually arrest you. Money carried for such purposes should be carried high on the body, like in a shirt pocket or jacket. If you’re driving, be sure to have said money in a place visible to any one speaking to you if you’re inside the car to keep movements from being misunderstood. Make people feel safe. Also, keep cameras and cellphones away from your hands, as some people out there are afraid of being recorded during such an event.
At the end of the day, many places still place the good old greenback above all else.
Smile, be polite. Ask how much it’ll cost to pay the fine on-site, take out the money you need, and set it on the seat next to you or in the vehicle’s registration papers to be handed over. Don’t show all of your money if you can help it — again, carry money and cards spread out on your person.
Note: Dollars will open more doors than pesos in some parts of Mexico. Keep the money destined for such things separate and in small denominations like fives, tens, and twenties. A thick stack of bills helps grease the gears on a psychological level.
Conclusion
Do your homework. Learn what value people give to the dollar where you’re traveling, and figure out if the country is an all-cash environment or a mix of electronic and cash. Carry payment options accordingly. Spread your cash and cards on your person, and if you do have a secure place that you’re staying in, you might want to leave a backup stash there in case your other options are taken.
About the Author
For over a decade, Ed Calderon worked in the fields of counter-narcotics, organized crime investigation, and public safety in the northern-border region of Mexico. Learn more about his survival courses at edsmanifesto.com.
More in Fiscal Security, Survival, and Preparation
Staying cool during the summer months is a major priority. In some places the heat may be misery-inducing, while in others it can be downright dangerous. At my own home near Phoenix, Arizona, the thermometer read a high of 115°F this week. This got me thinking about my family’s dependence on air conditioning, and by extension the functionality of the power grid. The YouTube channel 50 Acres & a Cabin recently posted a video that’s relevant to this topic — it shows one way to build a DIY whole-house fan as an “off-grid alternative to air conditioning.”
The concept of a whole-house fan is not a new one. Hot air rises, and the enclosed space of a building serves as a trap for that hot air to build up. By placing a high-flow fan near the top of the house, the hot air can be sucked out and replaced by cooler air drawn in through ground-floor windows. In the video below, 50 Acres & a Cabin encloses, mounts, and wires a powerful fan into the loft of his off-grid home.
However, this cabin runs on a 24-volt DC electrical system. It has some advantages, but also makes plug-and-play fan options more limited than they would be on a standard 12-volt system. So, the builder got creative and selected a 24-volt truck radiator fan — it’s designed to pull large amounts of air through a radiator to prevent a vehicle from overheating, so it provides more than enough flow for this application. The downside is that it’s extremely loud. The builder commented that he plans to wire in a controller to allow the fan to run at lower speeds, and this sounds like a good idea to us.
While I won’t be taking a sawzall to my attic and slapping on a radiator fan, this video got me thinking about installing a whole-house fan as a backup (or supplement to) my home’s existing A/C system, ideally in conjunction with solar panels and a battery bank.
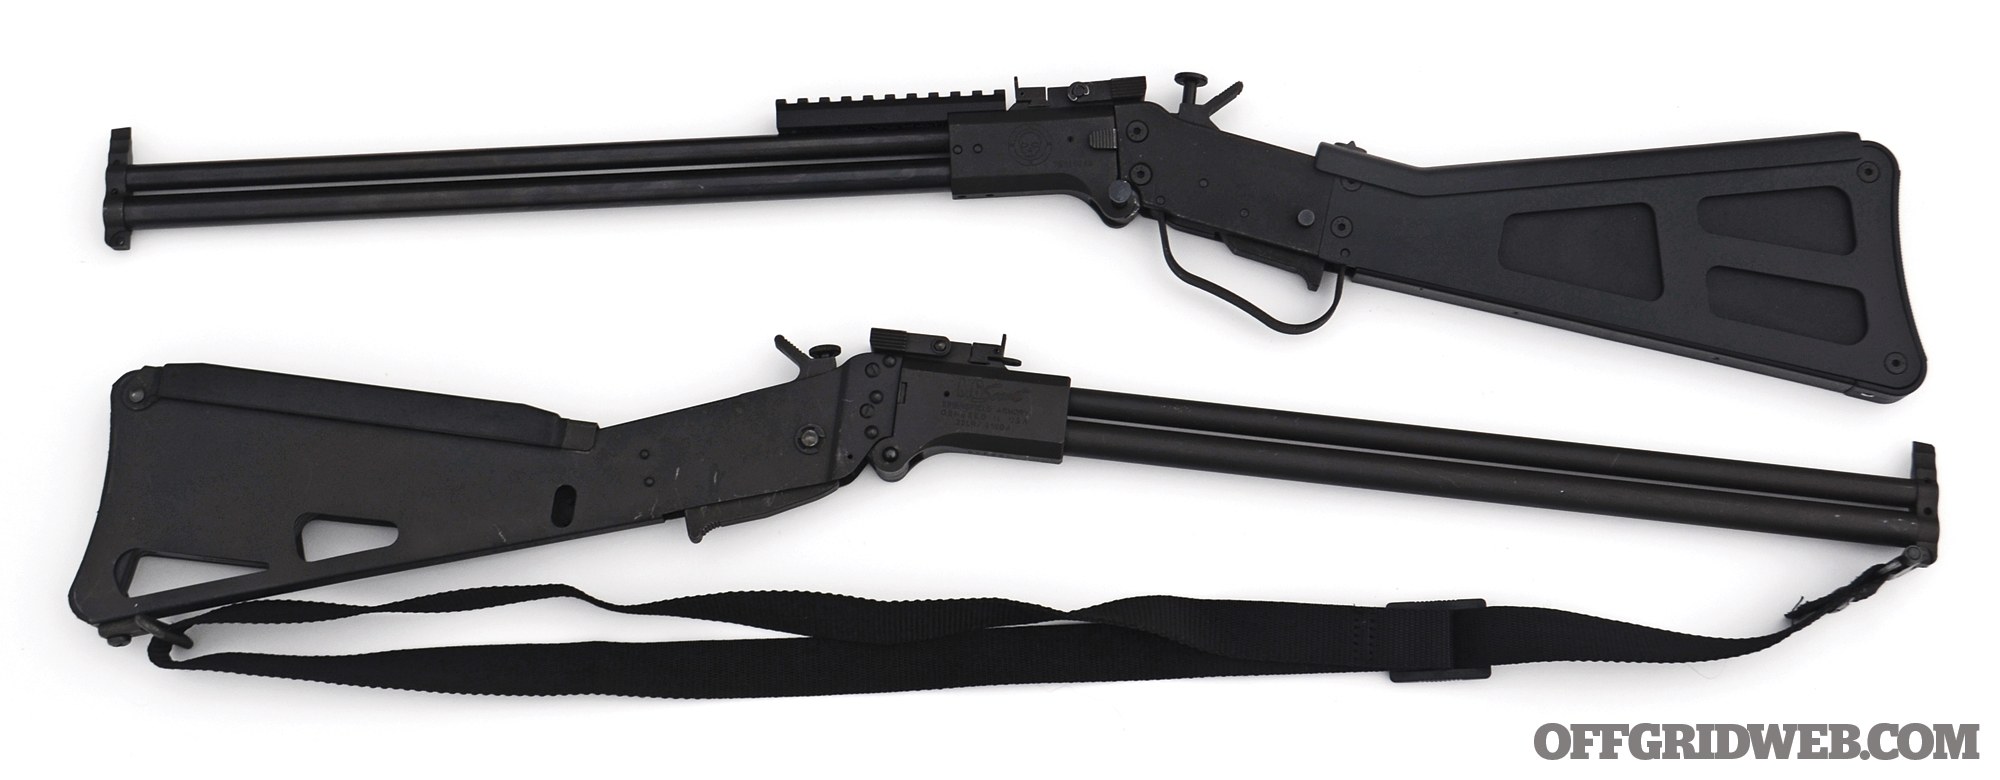
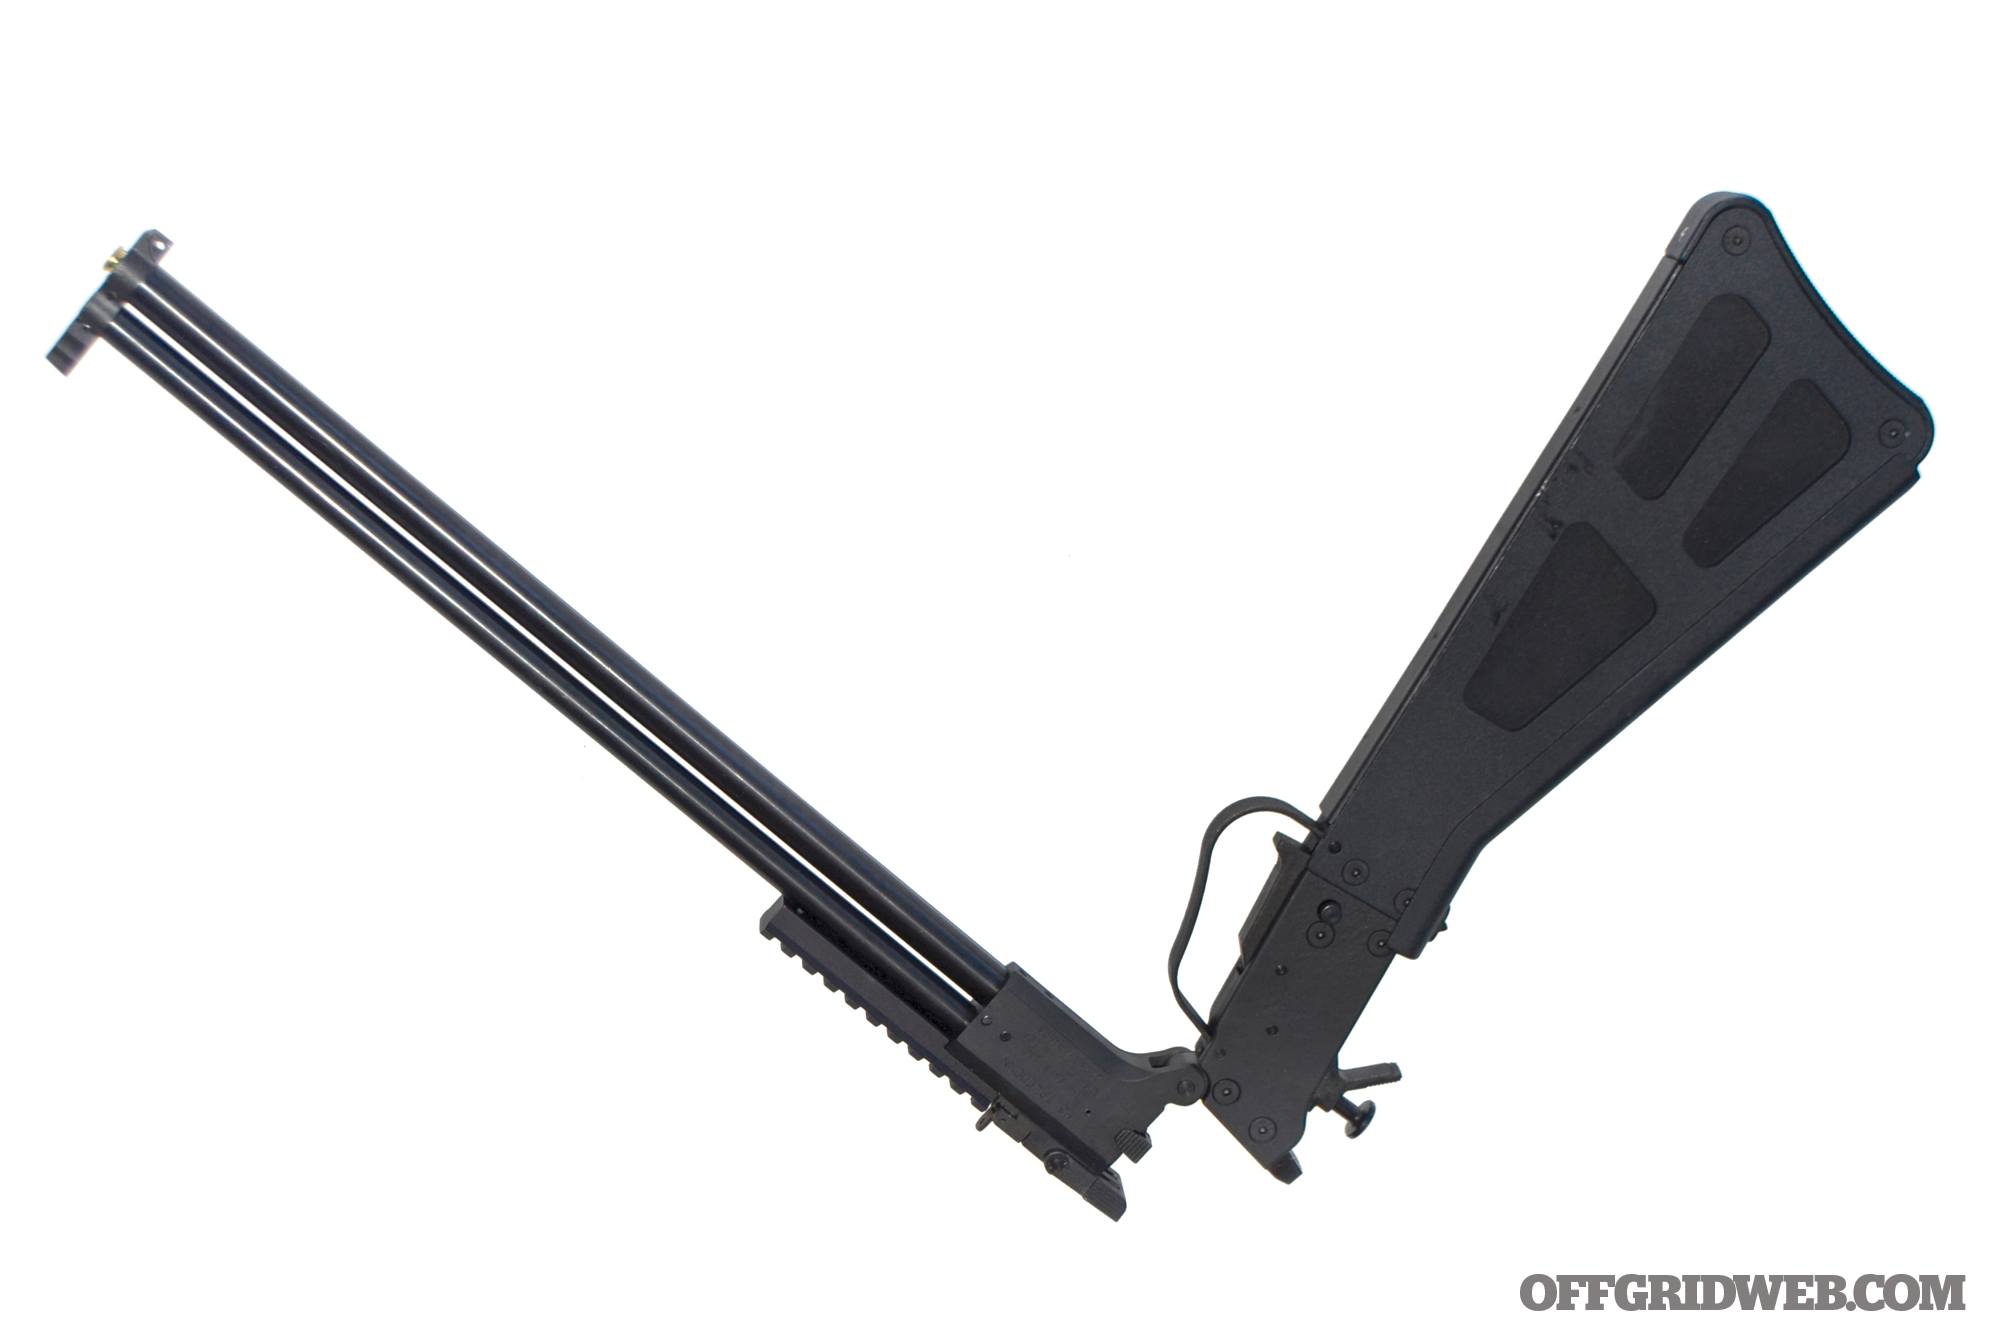
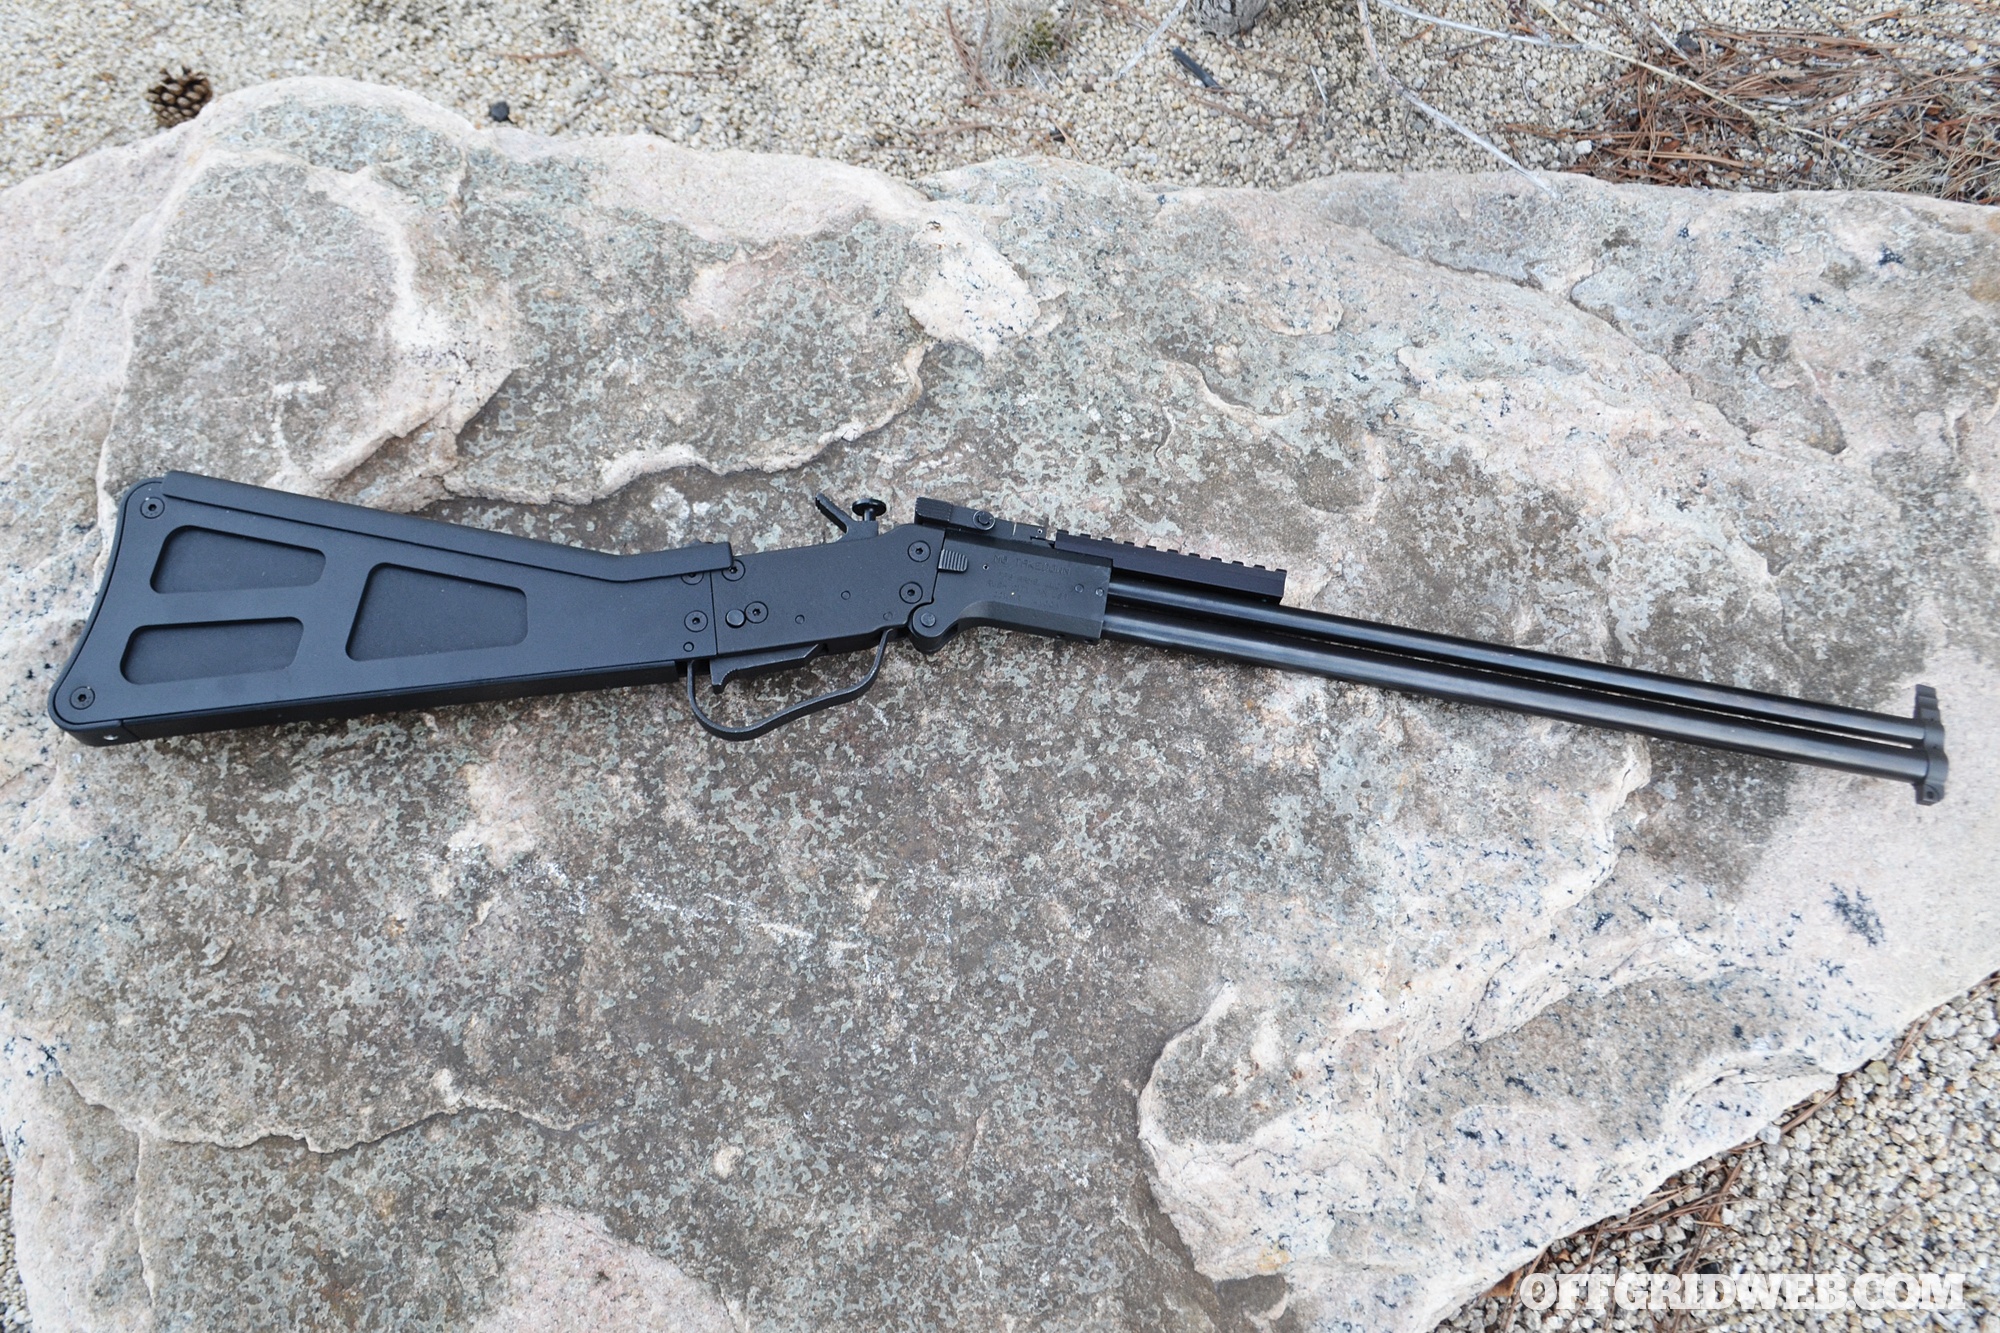
In the years following World War II, a number of unique rifles were developed for survival use by downed pilots and aircrews for the U.S. military. Not intended as fighting weapons, they were more or less designed to help a downed pilot or crew forage for small game. One of my favorites has always been the M6 Aircrew Survival Rifle.
This was a superposed combination of a rifle barrel mounted atop a shotgun barrel. The rifle was chambered in .22 Hornet, and the shotgun was designed for a .410 shotgun shell. Each barrel measured 14 inches in length. The M6 could be folded in half for compact storage with nine rounds of .22 Hornet and four shotgun shells (the original loadout specs were two bird loads and two rifled slugs) stowed in the buttstock. It was made by Harrington & Richardson under contract with the Army’s Ordnance Corps and was designed by Lieutenant Colonel Franklin S. Allen. More thought went into this simplistic design than you might think.
For one thing, it’s probably the only military-issued weapon without a trigger guard. The reason being was that during the Cold War, many aircrews found themselves flying over the Arctic. Extreme cold weather dictated the wearing of mittens or heavy gloves. A worse-case survival situation in the Arctic can expose you to subzero temperatures for long periods of time while awaiting a rescue or trying to seek help. This isn’t a situation where you want to have exposed flesh for any length of time.
The engineers who designed the M6 had this figured into their requirements and incorporated a trigger bar that must be depressed in order to fire the rifle as opposed to a conventional trigger that’s squeezed. Again, this wasn’t a firearm intended for fighting like most military rifles; this was primarily intended for foraging and small-game hunting in an extreme survival situation.
The M6 Scout makes for a versatile multicaliber trail gun suitable for small game.
The Springfield Armory Version
Having 14-inch barrels made an exact copy of the M6 Aircrew Survival Rifle a no-go as a Title 1 firearm (non-NFA), and prior to around 2005, everyone and their mother thought that having a dealer complete a single-sided federal form was a paperwork hassle. So, Springfield Armory had a replica made in Czechoslovakia with 18-inch barrels and called it the M6 Scout. The M6 Scout could be had in either stainless or the original stamped steel and parkerized finish and offered the rifled barrel in the cheaper .22 LR as well as .22 Hornet. A .22 WMR (Winchester Magnum Rimfire) version was listed in their catalog for years, but I personally never saw one.
For liability reasons, Springfield added a trigger guard, through which only a child’s hand will fit. Because the M6 Scout was made in Europe, they made a smaller diameter sling swivel at the front, but unexplainably made no provision for attaching a sling at the rear of the buttstock.
To attach a sling, most shooters drilled out the front swivel mount to accept a standard sling swivel. I went with a smaller European-style swivel, as I like leaving my firearms as much intact as possible, and attached a spare M1 Garand swivel on the buttstock. Lastly, I removed the unsightly and useless sheetmetal trigger guard to be able to shoot it properly and actually fold the Scout in half for storage purposes. Otherwise, you must separate it into two pieces and hope you don’t lose the hinge/takedown pin along the way.
You can buy scope mounts for the M6 Scout, but since the rifle is long out of production, these can be expensive and of limited use, as you must sight in two separate barrels. The only other addition I made was adding a nylon sling.
Shooting the M6 Scout was quite a challenge if you were used to using your trigger finger. Simply put, this will never be a precision rifle. Still, its compact size and light weight make it a no-brainer to tote as a small-game piece if you’re a backpacker, cross-country skier, hiker, rider, bush pilot, or find yourself in a survival situation with minimalist gear.
It may be tempting to add a red-dot sight or attach a light, but this isn’t meant as a primary hunting rifle/shotgun or an entry gun. This is a basic survival kit with enough onboard ammunition storage to score a few meals off the grid.
The TPS Version
I’m not certain when Springfield Armory stopped making the M6 Scout. I can recall seeing a new one in a gun shop in either 2003 or 2004. As much of a niche firearm as it was, when used versions began approaching the $1,000 price point, a lot of preppers and people who had a need for one flinched at that price.
Thankfully, TPS (Tactical Parts Supply) Arms came to the rescue and revived the design in mid 2018. They incorporated a few much-needed improvements as well.
First, they added a choke tube system based on the Winchoke system by Winchester for the shotgun barrel to make that portion more versatile. TPS offers these chokes in Improved cylinder, Modified and Skeet.
Secondly, TPS Arms offers a removable Picatinny rail, allowing the shooter to mount a scope or red dot sight if they so choose.
The third major improvement is the introduction of a captive takedown pin similar to a lower receiver pushpin found on an AR-15. This keeps you from losing the pin in the field.
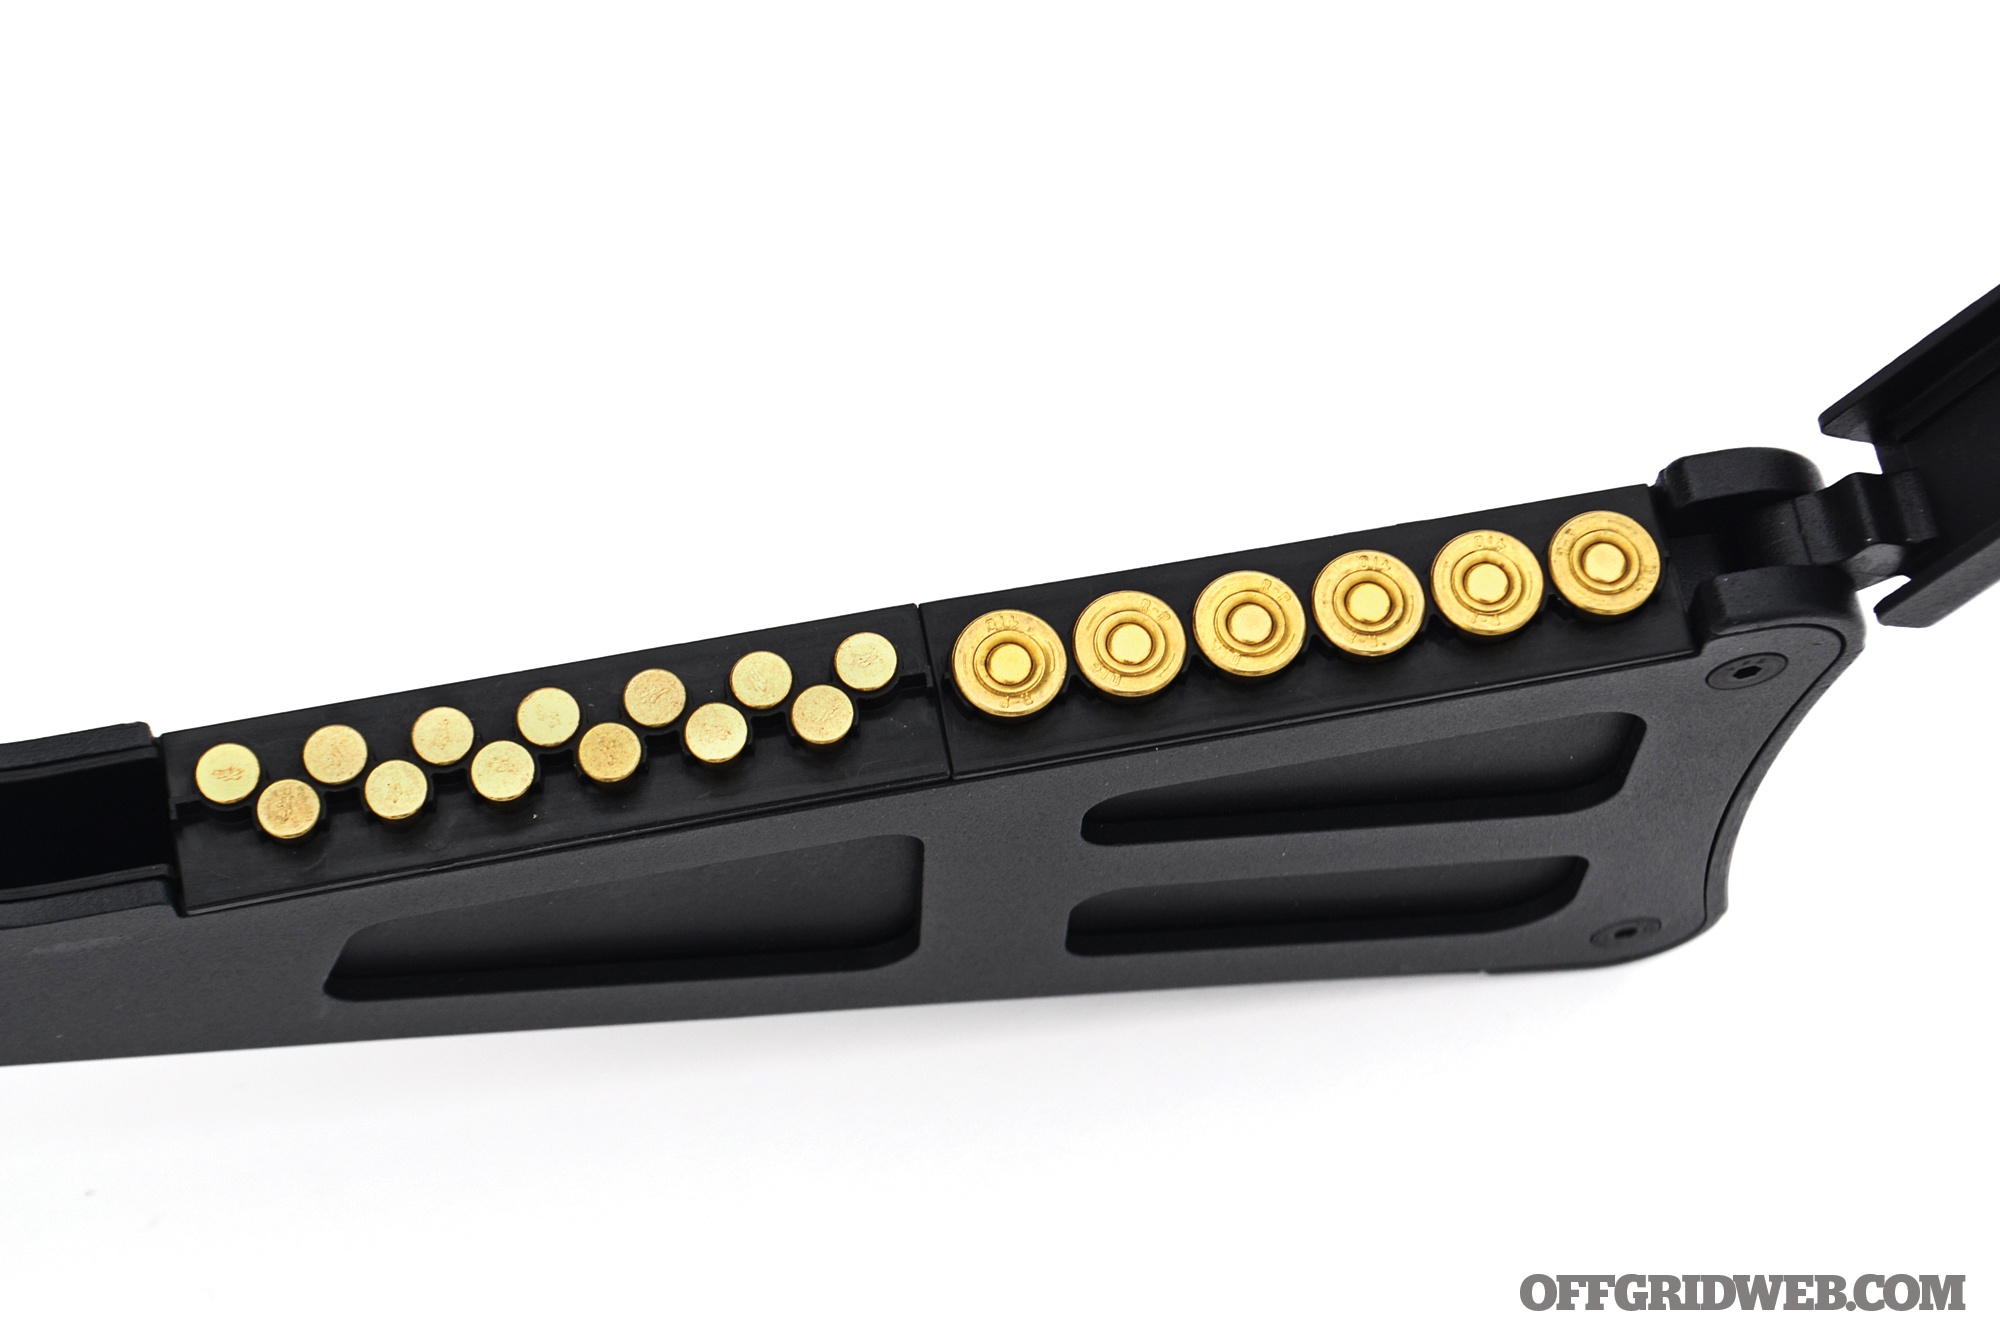
Other improvements include a wider butt pad, improved trigger pull, and a front swivel stud that’ll take a standard sling swivel. Lastly, there’s the improved onboard ammunition storage component. Current ammunition choices for the rifle barrel include 22 LR, 17 HMR, and 22 WMR.
The original USAF M6 stock held nine rounds of .22 Hornet ammunition and four .410 shells. Whereas, the SA M6 Scout holds 12 rounds of .22 Hornet and four shotgun shells. For the rimfire models, the stock holds 15 rimfire cartridges and four shotgun shells. TPS Arms upped their game on this feature as well, and the company offers customizable storage compartments if 13 rounds of rimfire and six shotgun shells are too limiting for you. The choke wrench stores neatly underneath these compartments as well.
Testing the TPS M6 Takedown
Before we took the test rifle off to the range, we performed some testing that we don’t normally conduct. Taking advantage of the winter storms in the Sierra Nevada in early 2019, we left the TPS M6 out in the elements for three days. Ice, snow, freezing rain, and three days of subfreezing temperatures might cause certain firearms to fail; such wasn’t the case with the TPS M6.
The one problem I did run into was trying to reassemble a rifle that had been taken down while I was on the range. Aligning the holes on the barrel group with the pin located on the stock was problematic. Be it the cold or me being a spaz, after 30 minutes I simply couldn’t get the M6 back together, as the captive pin kept me from checking for proper alignment. I had no such problems while disassembling and reassembling the rifle in the house where it was warmer.
As luck would have it, I had an AR hammer pin in my truck (no, I don’t know why) and sliding it in from the opposite side allowed me to align the holes and get it back into action. A similar tool, such as a Philips head screwdriver or other narrow tool, should help anyone else out of this situation, particularly if you’re doing so in adverse weather while wearing gloves.
You can add an optic to the rail of the M6 Scout or use its built-in sights, shown is the peep sight when firing the rifle barrel.
In discussing this with TPS Arms, I’ve learned that their new pin has more of a taper to it, which should eliminate this problem in the field.
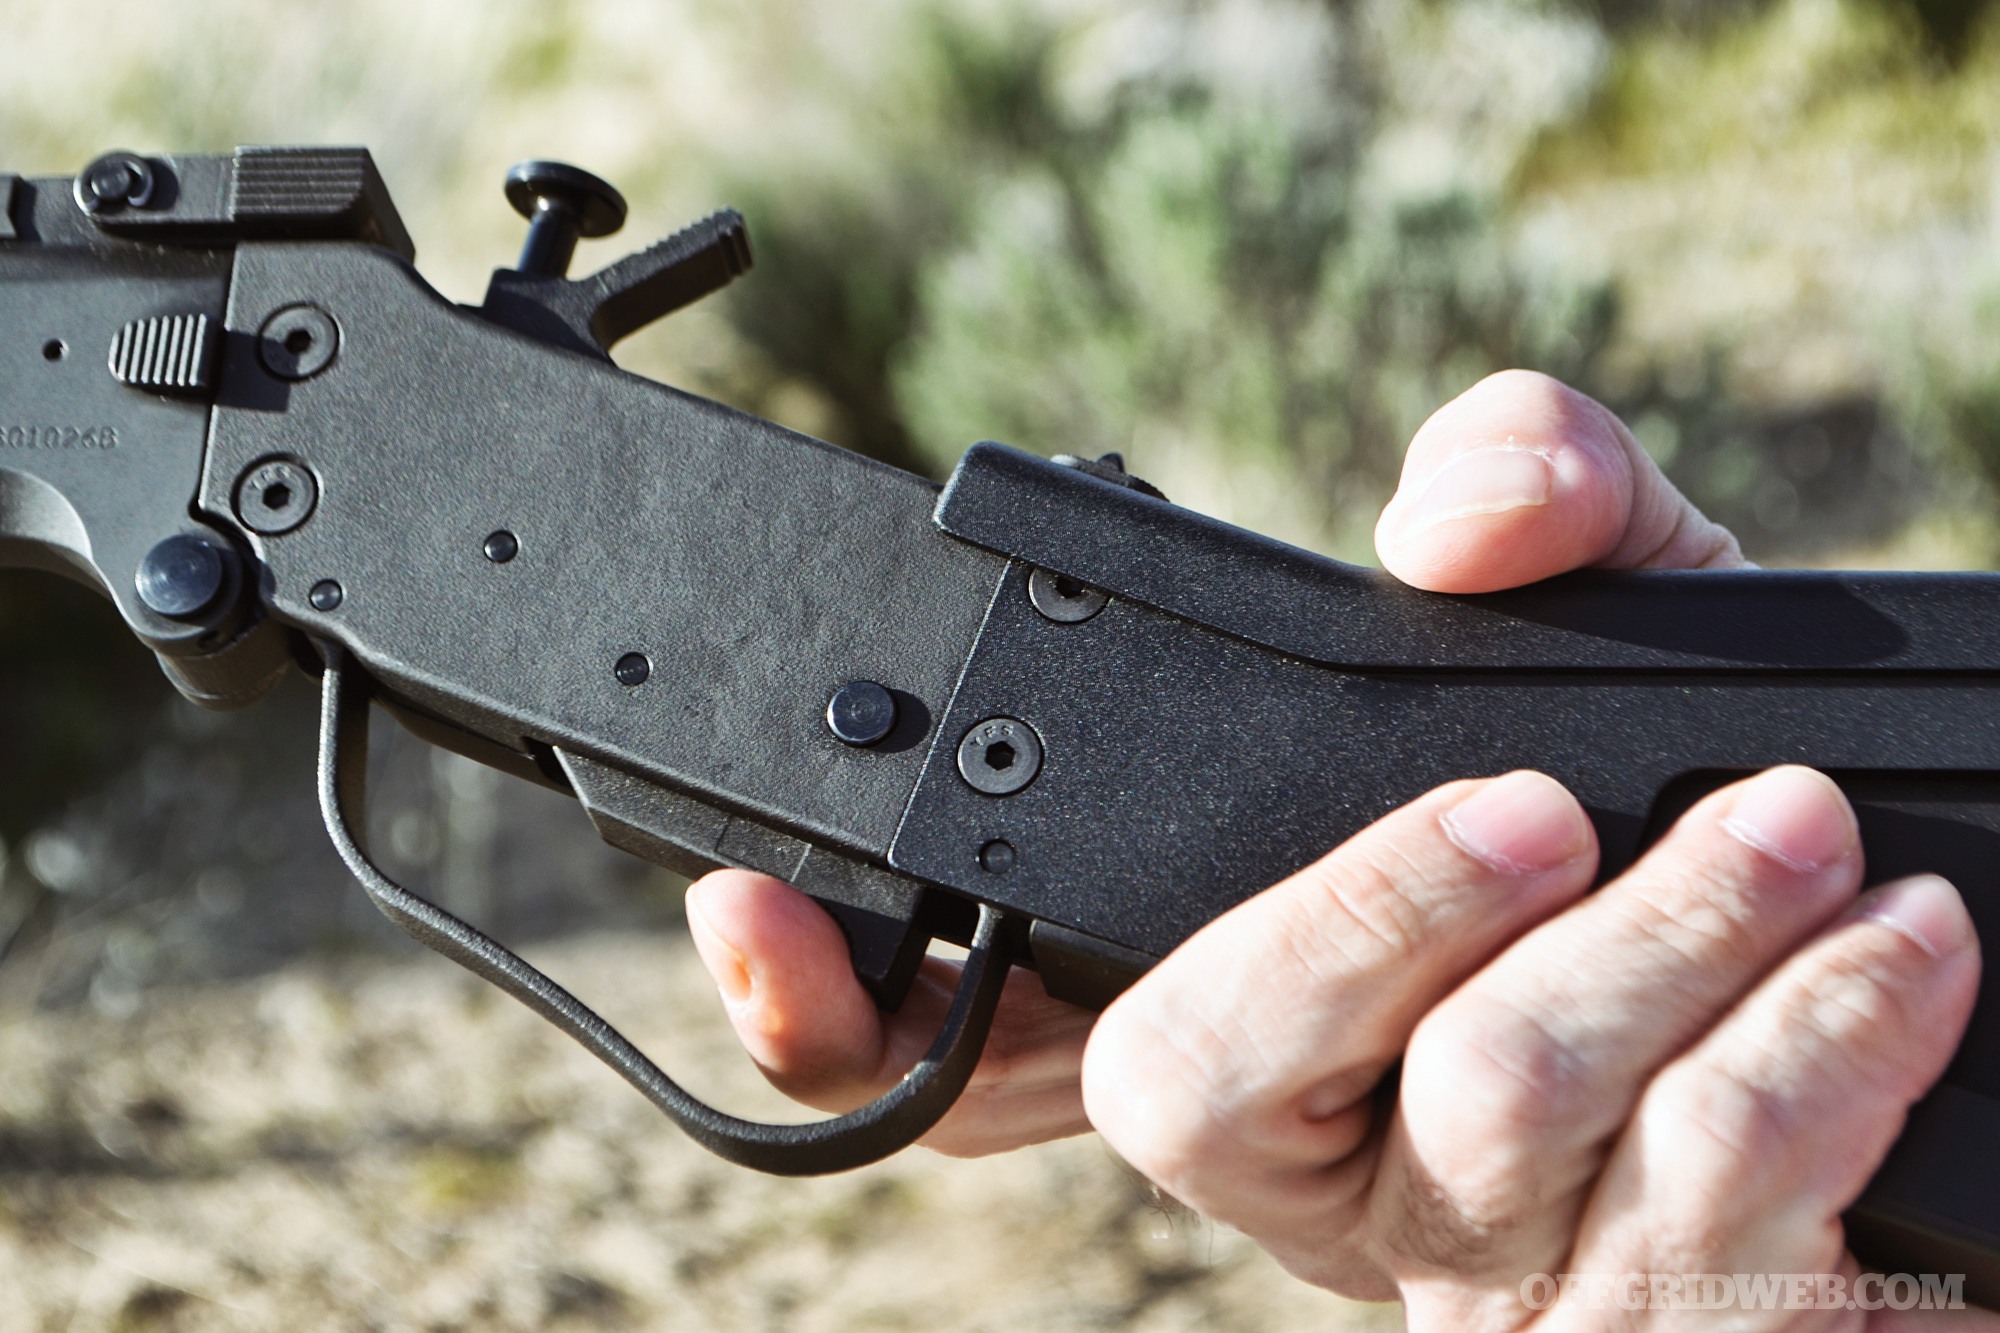
When firing the M6, you select which barrel to fire by means of a pull knob on the handle. Pull up to fire the rifle barrel, push down to fire the shotgun barrel, and leave it in the middle to keep the striker in a neutral position. With the striker in the correct position, you simply manually cock the hammer, and it’s ready to fire.
It’s important to note that the striker in the neutral position doesn’t make the M6 completely safe, as it can be bumped out of position with enough impact. So, the M6 makes use of a safety button mounted above the trigger bar.
Like the original, TPS Arms incorporated a folding rear sight that uses one position for firing the rifle barrel and a secondary notched blade for use with the shotgun barrel.
At the range, the TPS M6 shot true to point of aim at 25 yards using a wide variety of .410 ammunition. We fired slugs, small-game loads, and a few 3-inch buckshot rounds. While TPS offers a skeet choke, I don’t see anyone running a skeet or five-stand match with one of these little guns. However, it could make for a decent patterning option when using birdshot or a small-game load.
Shooting the 22 WMR barrel with Hornady V-Max and its 30-grain bullets gave us about a 1-inch-sized group at 50 yards, except the occasional flyer when we rushed the shot due to the cold weather.
I used the factory sights, which are a very smart and forward-thinking feature regarding the rear sight system. The rear sight flips to either the rifle position in a peep sight or a wider V-type rear sight for the shotgun. Of course, if you cannot shoot well with iron sights, there’s a Picatinny scope mount available or a red-dot sight if that’s your preference.
As mentioned previous, the buttstock is a bit wider than the original military version and the Springfield Armory version, which makes the TPS M6 much easier to shoot well.
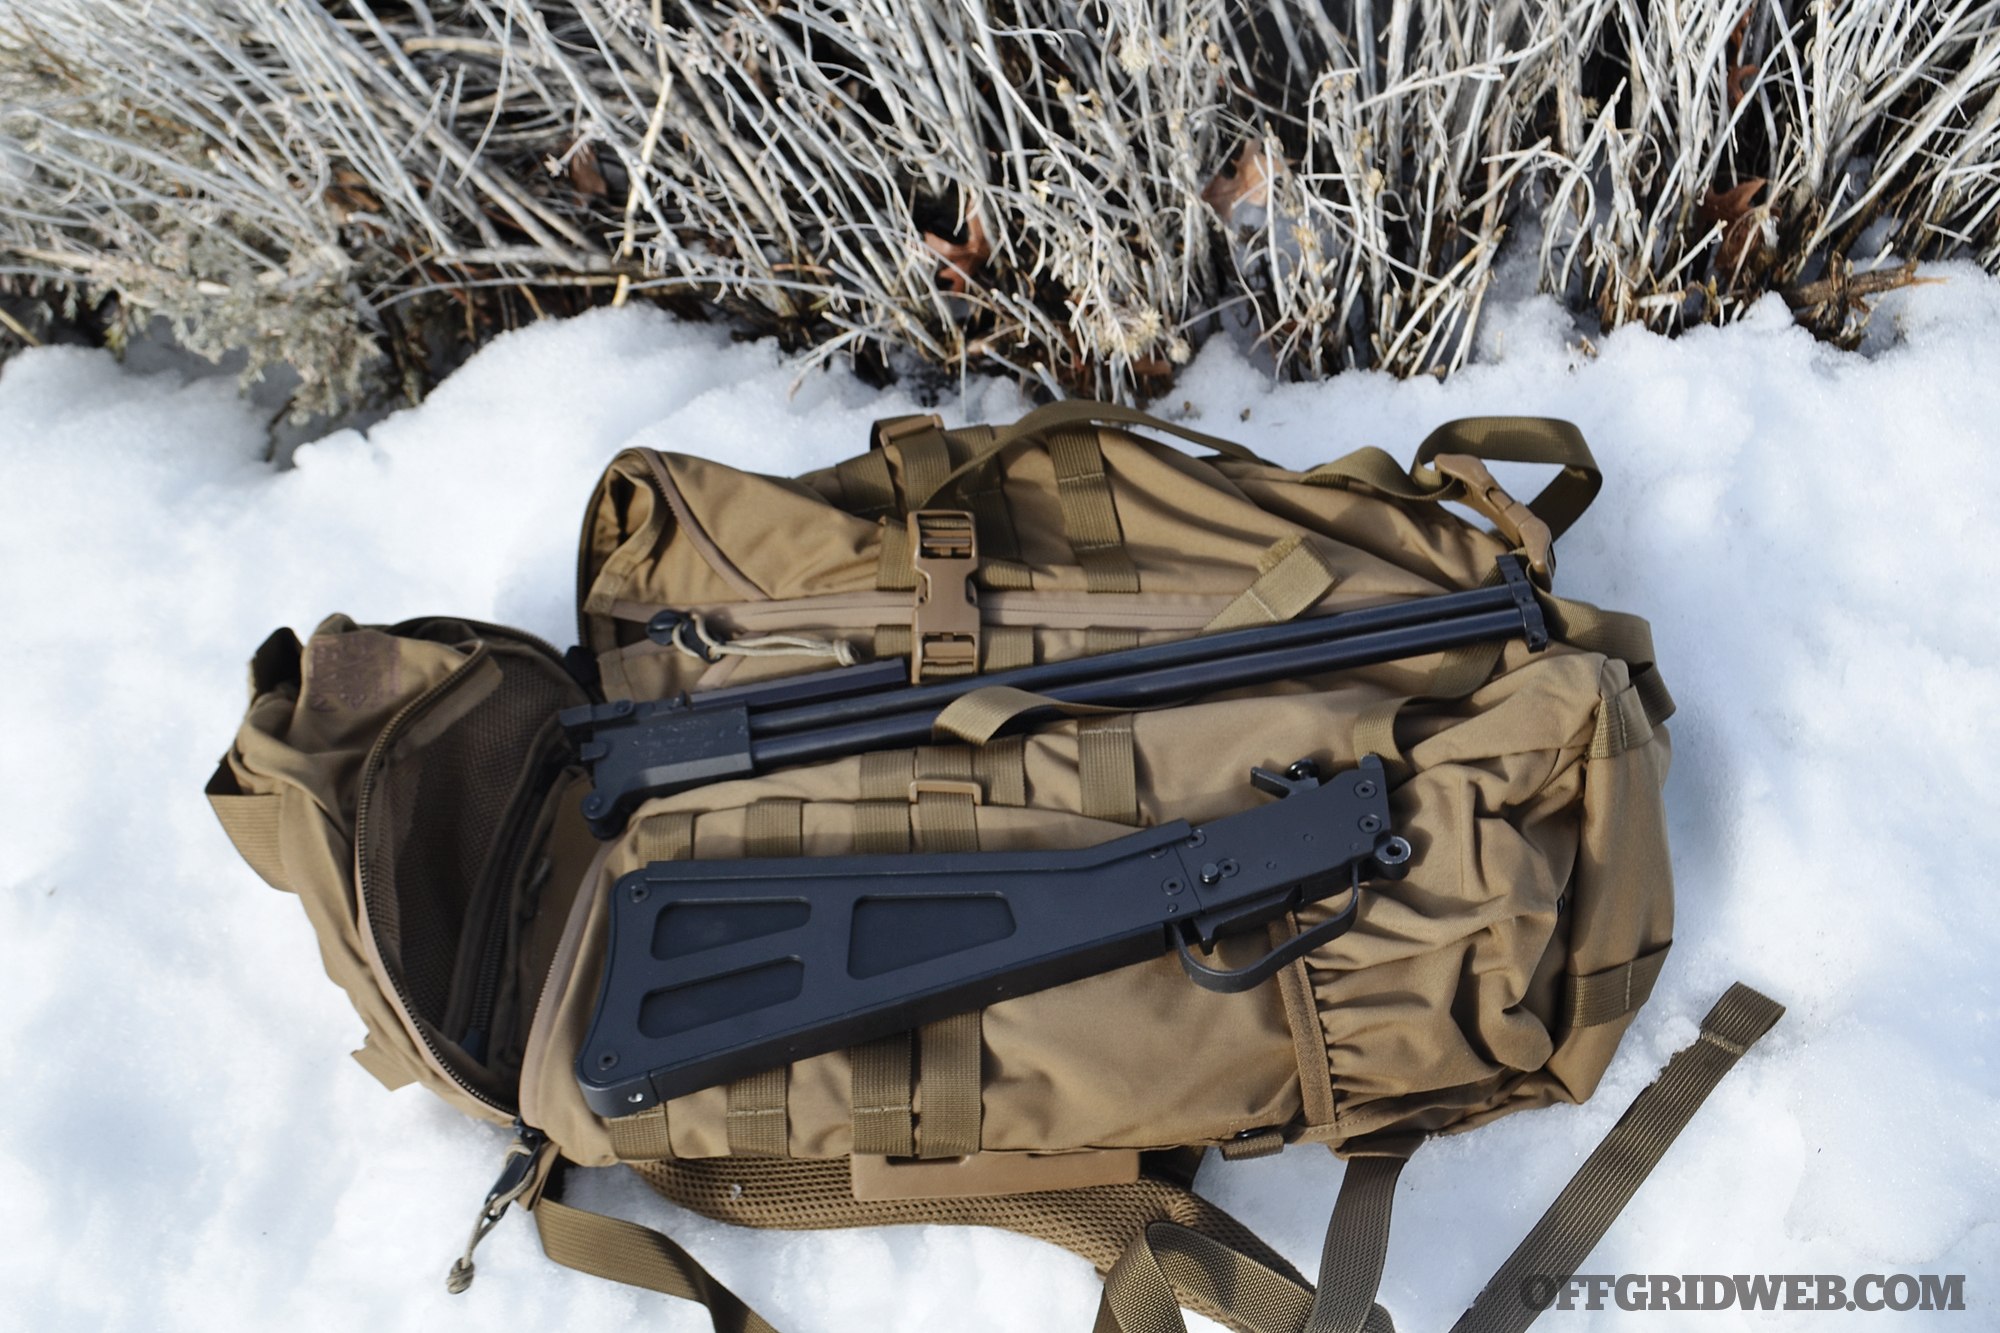
While lightweight and portable at a hair over 5 pounds, the M6 Scout can be broken down for more compact storage if needed.
TPS Arms turned a good rifle into a great one and has completely revitalized this survival tool. In speaking with the owner, I got the impression that they’re completely invested in this project and may have several exciting options planned for the future of this rifle.
This updated take on a classic survivalist piece is a great tool for harvesting game, should you find yourself in a true off-the-grid survival situation.
Trigger Hack
You can use your fingers to mash the trigger bar with your whole hand if you want to recreate the original intent of shooting the M6. It’s fun for a while, but we figured out a better way of manipulating the trigger for improved accuracy by using just the trigger finger to squeeze the “toe” of the trigger bar like a conventional trigger.
TPS Arms M6 Takedown Specs
Action Superposed
Caliber 22 WMR / .410 Gauge (additionally, the rifle barrel is offered in 22 LR and 17 HMR)
Editor’s Note: In case you missed them, be sure to check out the two web-exclusive articles that preceded the following article from Issue 33 of our magazine. Part 1 covers traveling with firearms, and Part 2 addresses the all-important topic of situational awareness.
While you may not be Mad Max driving the last V-8 across the wasteland, traveling long distances through unfamiliar places comes with inherent risks. For instance, many of you may be familiar with the story of James Kim, a TV personality whose vehicle became immobile in inclement weather during a holiday road trip. He died of exposure after deciding to leave his family in the car to go search for help in rural Oregon.
You may have also heard about the case of Denise Huber, whose car was found abandoned on the side of the freeway in 1991. Years after her disappearance, her body was discovered in a freezer in another state. It’s believed that Denise pulled over with a flat tire and her killer approached her under the pretenses of offering help before abducting and murdering her.
Aside from the traditional dangers presented by hundreds of miles of high-speed driving, there are less obvious ones you’ll want to think about and plan for, as our road trip experiences have illustrated. We’ll discuss where we’re going, how we’re getting there, what to take, and where to stay. We’ll talk maps, apps, and safety as well as a host of other topics to keep you protected on the road — whether you’re traveling a few hundred miles or a few thousand.
Recently, I completed my second coast-to-coast crossing. As a parent, I found myself confronted with a plethora of challenges presented by traversing 3,500 miles from Washington State to North Carolina in two vehicles with a wife, five children, two dogs, and everything we owned packed into a 16-foot box truck. The following considerations are based on the lessons my family learned while traveling across the country.
Preplanning
Preplanning the trip consists of gathering information on routes, driving schedule, accommodations, and vehicle inspection. I want to know where I’m going, how I’m getting there, what kind of pace I need to maintain to make it happen, and feel assured that my vehicle is good to go before we roll out. Much like my days in Afghanistan, we found ourselves surrounded by locals at temporary stops in strange towns, and not everyone we met along the way may have had the best of intentions toward us.
A homeless guy screaming at his dog at a gas station at 10:30 at night in Las Cruces, New Mexico, can be either an annoyance or something entirely unpredictable. So, while you fill up your tank with your entire world in the car and a mental breakdown 10 feet away, your decision to deal with him or avoid the situation entirely should’ve been made before you left your driveway. Let’s do some planning and avoid these types of situations altogether.
Route Planning
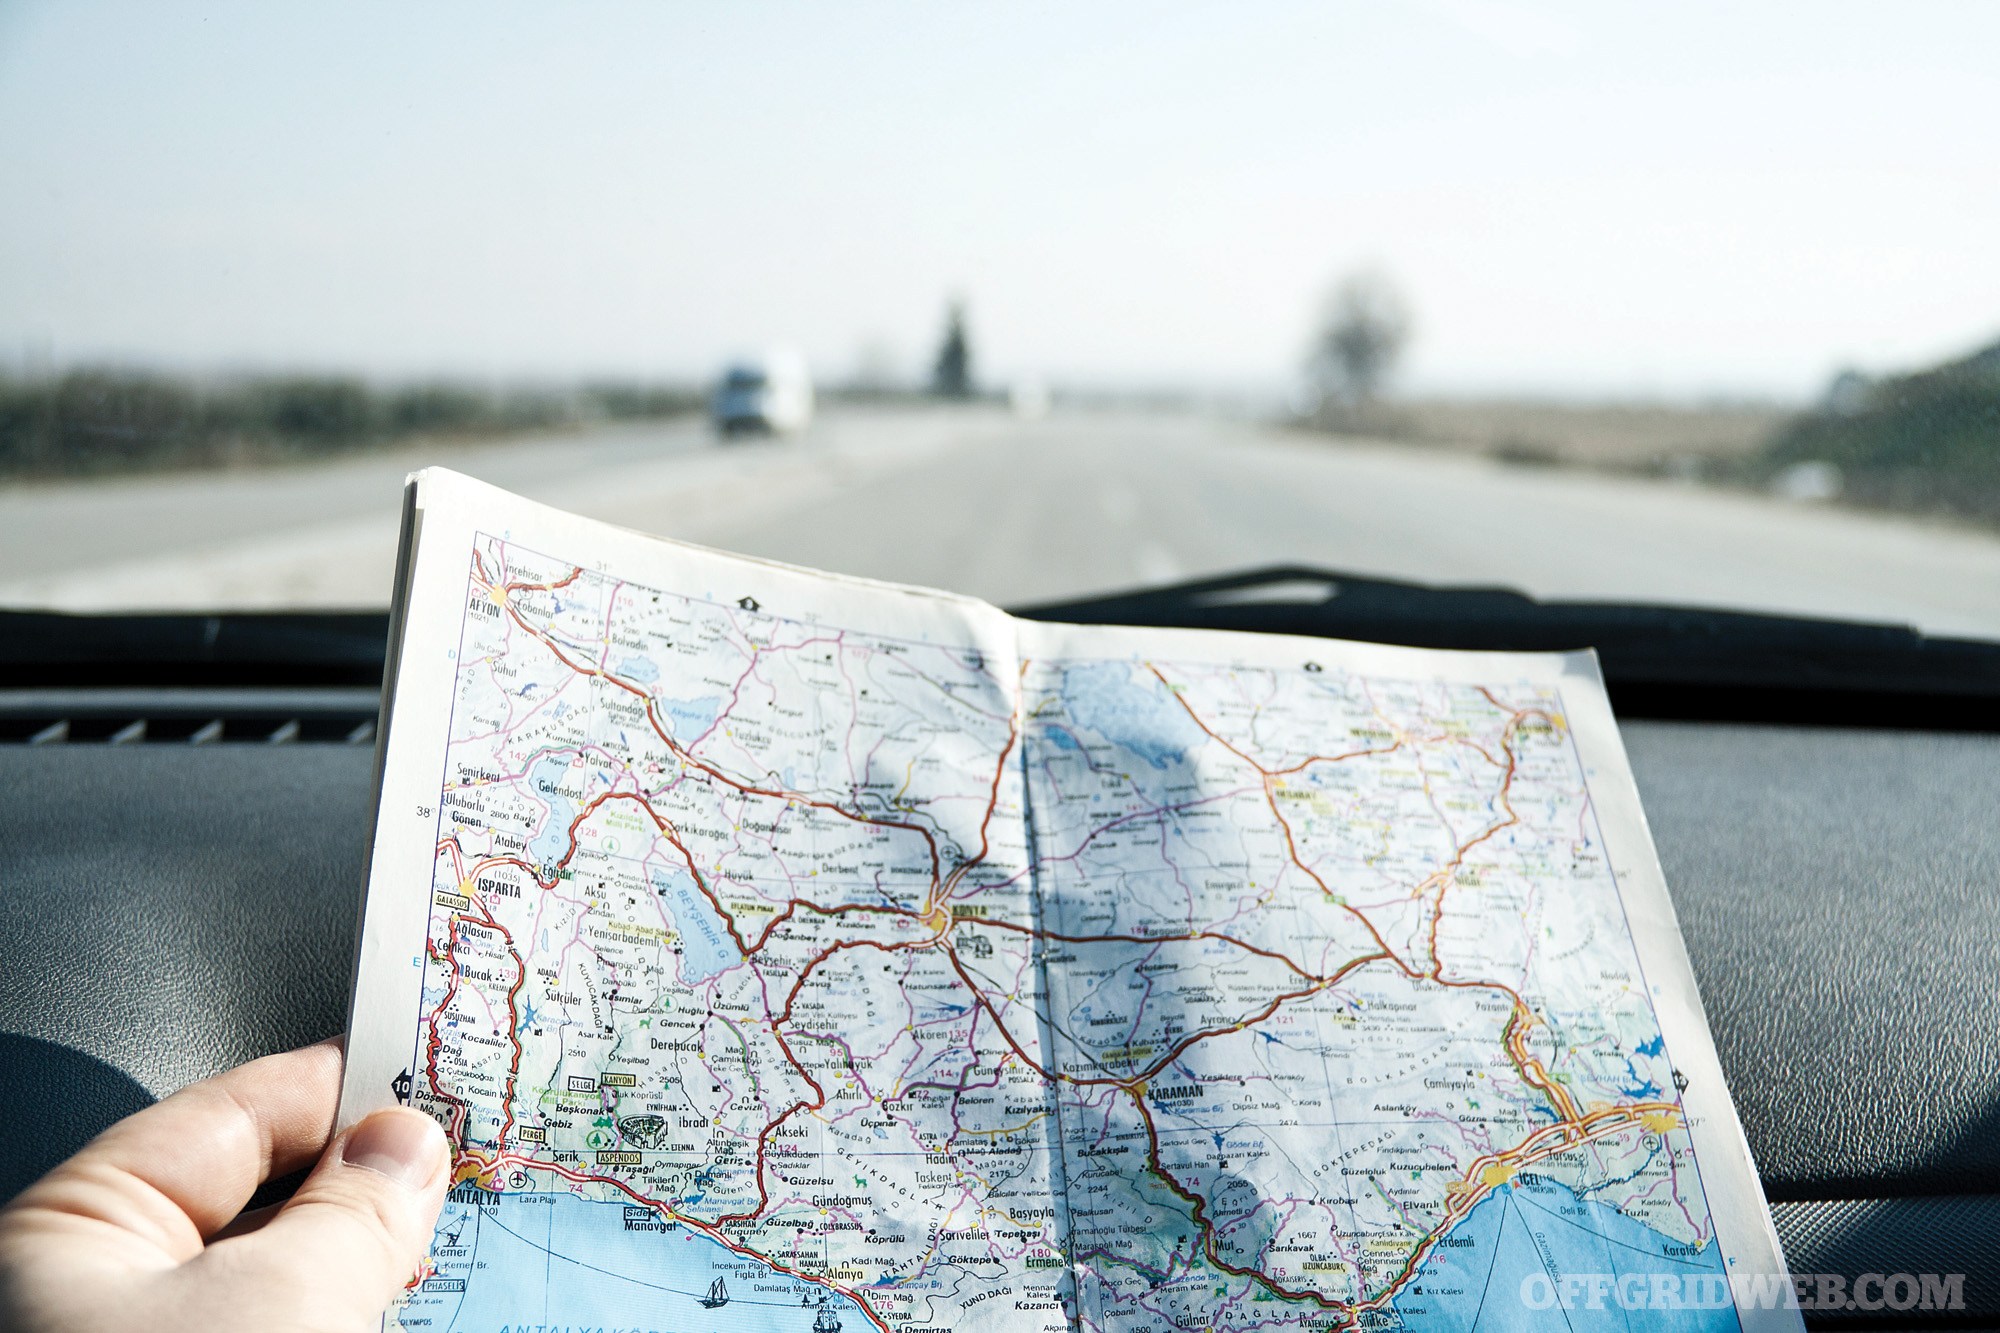
Above: Often overshadowed by the crippling convenience of route-planning apps, traditional paper maps have a lot of info to offer and never have to be plugged in.
Fire up the Google machine and take a look at your intended route. And I don’t mean simply inputting your start and end points. Google or Apple — or whichever dystopian tech conglomerate is currently ruling your digital life — will likely take you on the most direct route, but not necessarily the smartest or safest. You want to get an overview of where you’ll actually be staying or stopping along the various points of your journey. The way I like to do this is a good, old-fashioned paper map (laminated if you can find it).
Incredibly, you can actually unfold these and lay them out on a table and see the entire country and its various roadways without pinching and zooming on a 6-inch screen while going blind. Though redundant, it’s rather like insurance — you rarely use it, but it’s invaluable when you need it. This road warrior recommends the latest Rand McNally spiral-bound Road Atlas. It covers the entirety of the United States and can be had for around 15 bucks. For another option, Michelin — yes, the tire company – also makes a nice atlas that features GPS coordinates to parks as well as information on events and festivals in your area of travel.
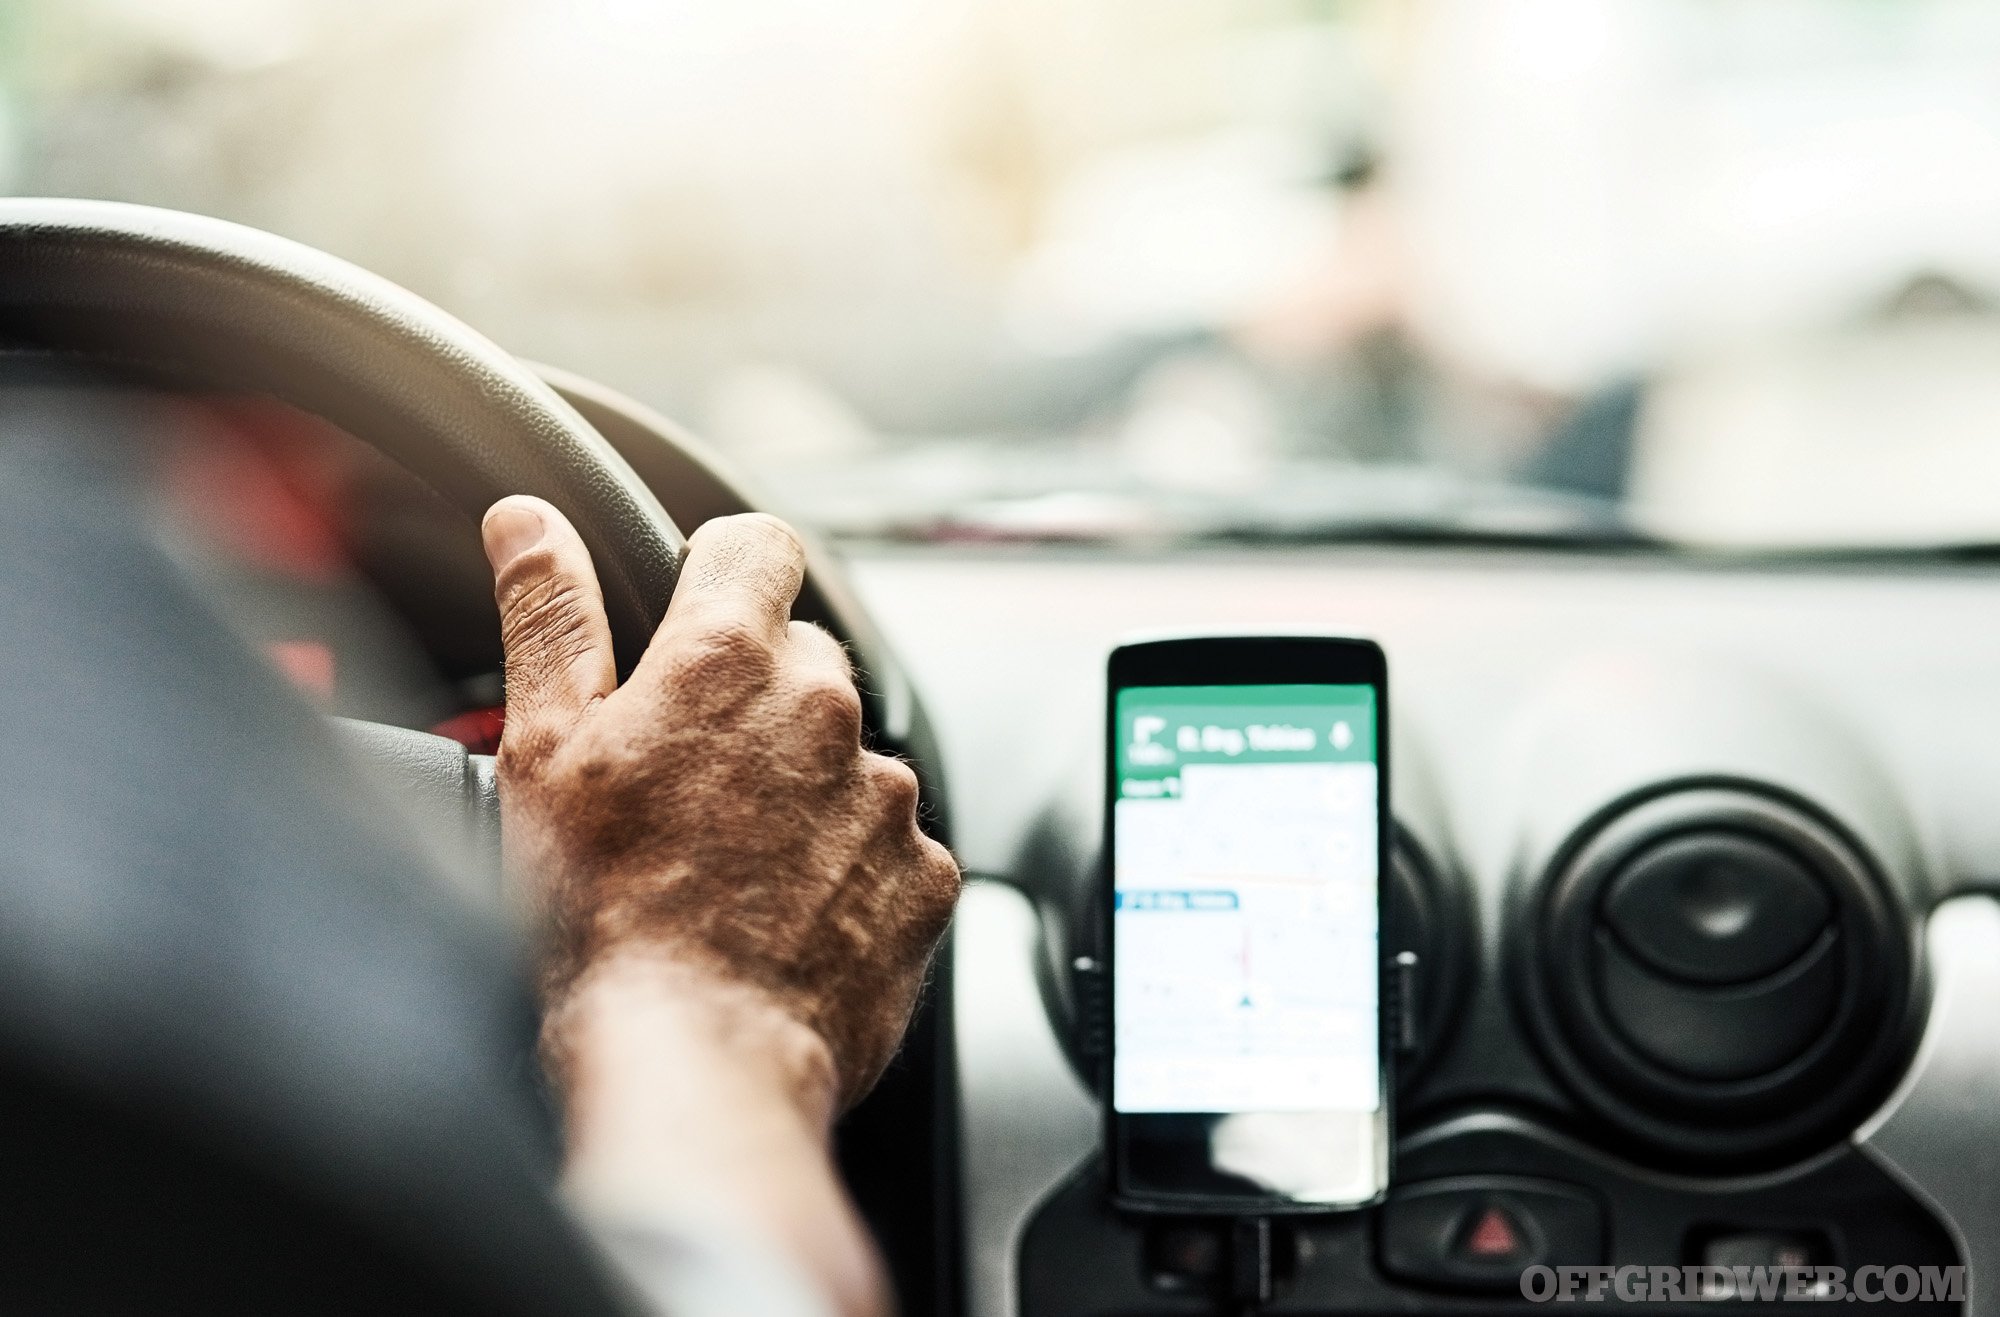
Undoubtedly, you’ll use some type of navigation mobile app. That’s fine. Something I learned was to make sure everyone on the trip is using the same one. This is critically important if you’re caravanning in two or more vehicles. While my wife drove her Suburban, I drove the rental box-truck. Being an Android guy, I was using Google Maps. Her being an Apple devotee used whatever navigation sorcery was loaded onto the iPhone. Turns out different map apps do things slightly differently and can (and will) cause issues along the way. Pick one app and ensure all drivers use it. Waze is a good one. It offers driver-updated road and traffic conditions among other bits of relevant information, such as warnings about obstructions on the road and speed traps. It’s free and available on both Android and iOS.
Above: Of course, digital GPS is an excellent real-time resource to keep you on track and notify you of changing traffic or weather conditions.
When planning the route, look at potential areas of concern. For us, one leg of our trip took us down to Tucson, Arizona. Part of my concern for that leg was its proximity to the U.S.-Mexico border. After our visit, we had choices that included dropping down to El Paso and using Highway 62 to head east. Instead, we chose to give the border a wider berth and stick to more northerly routes. This isn’t to say El Paso is unsafe — it’s simply a mitigation technique. I have had friends tell me stories of areas along the border (on the U.S. side!) that are simply not smart to travel on or near due to heightened criminal activity. Cartels are known to zealously guard their trafficking routes into the U.S. Tactics include emplacing men in OP’s (Observation Post) to monitor activity in their territory as well as the use of snipers for area denial. So why risk it?
Speaking of risk, let’s mitigate some more of it by getting familiar with crime in and around our areas of travel with LexisNexis. LexisNexis provides all kinds of tools to allow businesses and individuals to prioritize safety. Their Community Crime Map is the one I like to refer to when traveling. It’s a lot like looking at Google maps, but it provides crime data for your area of interest. Passing through a major city? How many car-jackings or muggings have occurred there over the last week or month? LexisNexis can show you that and a whole lot more. Visit LexisNexis at CommunityCrimeMap.com and get familiar with this incredible and free resource.
Driving Schedule
Do not wing it. I did this, and it didn’t work. We ended up stuck on the road more than once driving way too late into the evening. Remember what mom said: Nothing good happens after midnight. Further, many hotels won’t let you check in past a certain time, or if they do, they may already be booked up. Sticking to a schedule will also help prevent fatigue. Driving tired can be just as dangerous as driving drunk. A schedule ensures you’re not on the road too long trying to make up lost time.
Figure out how far you need to travel each day and come up with a road schedule that’ll allow you to make it happen. Up at 0600. Depart at 0700. Drive eight hours. Hotel reservations for the evening. Boom, done. The bigger your family, the earlier you’ll need to be up. You can easily get “trapped” on the road with no lodging availability and a car full of tired and angry kids. Avoid this by preplanning a driving schedule and sticking to it.
Keep your tank filled by identifying your fuel stops ahead of time. I like to use Google Maps to search ahead for gas stations along my planned route. You can add them as stops along the way depending on your schedule and vehicle range. Gas Buddy is another great option. The free app allows you to filter for your station of choice by brand, amenities, etc. It also features user reviews and its data is crowd-sourced and constantly updated.
Above: Despite the stress and perils of multi-state road trips, they can also be an educational bonding experience for younger children and a chance for quality time with your spouse.
Accommodations
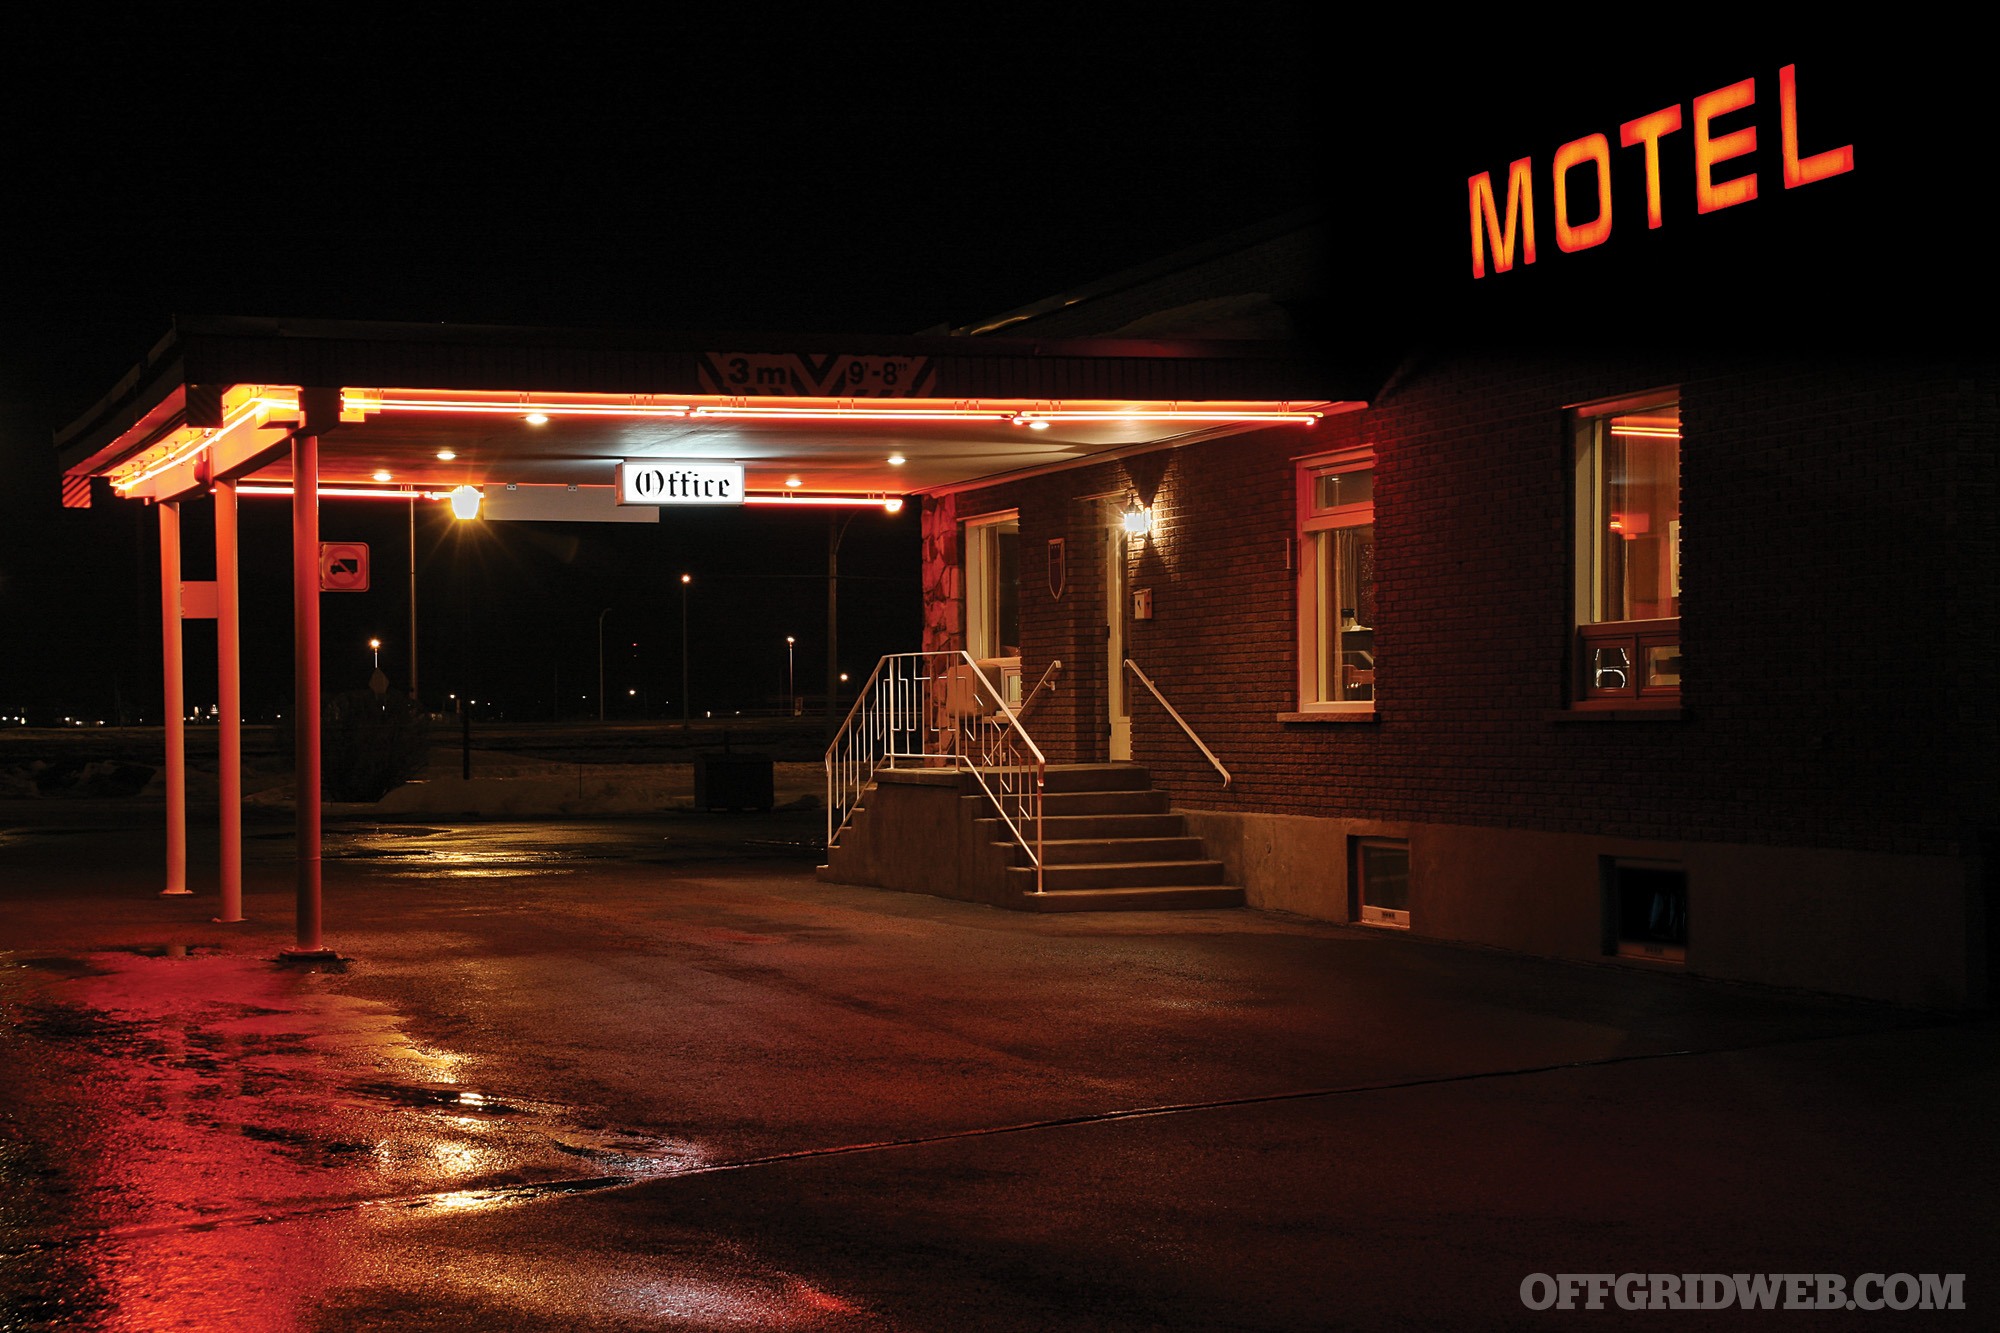
Have your hotel booked in advance. Guess who else is traveling during the summer, weekends, and holidays? Every red-blooded American on the continent, and they all need a place to stay. Places will get booked up, so don’t get screwed by assuming they’ll have a vacancy. Book in advance. I’d rather pay the fee for missing my check-in, should our plans change, than get stuck sleeping in a rest stop. Trust me. I did it, and it sucks.
If at all possible, don’t let cheap rates on accommodations drive your decisions on where to stay. I noticed a demonstrable correlation between a hotel’s cost and the part of town it was located in. Spend a little more on the rate to be in a nicer area surrounded by nicer folks. Unsurprisingly, seedy motels tend to attract seedy characters. Cross-reference crime rates using the tools we mentioned previously to find an area that’s relatively safe.
When traveling with your family you’re soft and vulnerable. Remove this vulnerability by not being in areas where it’s likely to be exploited. Also, use Google StreetView, or a similar tool, to take a look at your chosen hotel’s location. You can pan around 360 degrees and get an idea of the surrounding area. If your hotel is flanked by liquor stores, smoke shops, payday loan centers, and bail bond offices, you may decide to stay elsewhere. While your map app is open, this is also an excellent time to make a couple notes on where the nearest major hospital is relative to where you’ll be staying as well as the local “doc-in-a-box” urgent care clinic in cases of minor scrapes and bumps.
Further considerations for accommodations should include which floor you’re staying on in your hotel. Staying at a hotel may be relatively mundane, but it isn’t always — we learned this in Pendleton, Oregon. We had just pulled up to the hotel after many wearying hours of driving. As we arrived, so too did the local fire department with lights and sirens blaring. Apparently, something electrical was misbehaving in the hotel and caused a full-on evacuation of the premises that lasted over an hour.
Despite it not being a five-alarm fire, it did get me thinking about what I would and wouldn’t be able to do if it had turned into a serious incident. Watching the people mill about outside in the dark showed me that those on the bottom floor not only got out first, but they got out fast. In many hotels the ground floor has at least four exits. All you have to do is get into the hall and pick a direction. With my youngest son in a wheelchair, this is a part of our everyday logistical calculations. Stairs aren’t really an option for us, and during a fire, elevators are a bad idea. So, wherever possible, we try to get a room on the first floor. Whether you’re dealing with young children and strollers, or actually need to evacuate as we witnessed, a ground-floor room makes a lot of sense.
Finally, if you’re traveling with pets like we did, plan your accommodations accordingly. Some hotels will allow you a small pet or two, but larger dogs might pose a problem. Call ahead and find out about the pet policy of the hotel you’re looking to book.
Check out www.BringFido.com to help figure out where you and your four-legged children are welcome.
Vehicle Inspection
Above: You don’t have to be your own mechanic, but at least have a plan for roadside breakdowns and have a rough idea of where the next major town is that can offer repair services.
Modern family vehicles are amazing machines — they’re safer, more comfortable, and more capable than ever before — but they still need maintenance. My wife’s Suburban has performed like a champ all the years we’ve owned it just with regular maintenance. But before we hit the road for a short or long haul, I make sure we schedule a tune-up/inspection or perform one ourselves.
Basic inspection should at least cover the following: fluids, air filter, fuel filter, battery, plugs and wires, hoses and belts, tire pressure, tire tread and condition, markers and headlights, and a spare tire inspection (including the jack, tire iron, and associated tools). Also, check to see if your particular vehicle has any outstanding safety recalls and get those issues corrected before you travel.
Have children in car seats? If you do, now is a perfect time to ensure proper installation of their car seats. Your local fire department will normally offer a free inspection/installation to make sure the job is done right. Otherwise, make sure you follow the directions stipulated in the car seat’s manual. For more on pre-road trip inspections, car seat installation, and other automotive safety subjects, take a look at www.dmv.org/how-to-guides/pre-trip-maintenance.php. To see if your vehicle has any outstanding safety recalls check www.nhtsa.gov/recalls.
Gear
When considering what to bring, I break it up into the following subcategories: first-aid, recovery equipment, and vehicle sundries. It’s important to update your first-aid kit before a long haul. I keep a fairly well-stocked kit for bumps and bruises in our family vehicle. I didn’t replenish it after our last few road trips, and it bit me in the ass. Toward the end of our trip, my 2-year old daughter was promptly bit in the face by her great-grandmother’s very skittish Chihuahua. It was a very shallow, but wide-open laceration to her cheek, and I really needed a butterfly bandage (which I didn’t have) to close it temporarily. We ended up getting what we needed, but the lesson was painfully learned: I should’ve had it ready to go in the first place.
First-Aid
Above: Medical supplies are an important part of trip planning, especially if you’ll be crossing long stretches of interstate between towns. Whether you come across a severe car accident or suffer a few bumps and scrapes, having some supplies on hand could go a long way to easing the pain.
I have a two-part solution package for carrying first-aid while traveling. First and foremost, I want to be able to stop, or at least control, major hemorrhages regardless of how far we are from advanced care. Second, I want to be able to deal with all the mundane cuts and bruises that are much more likely to be the order of the day.
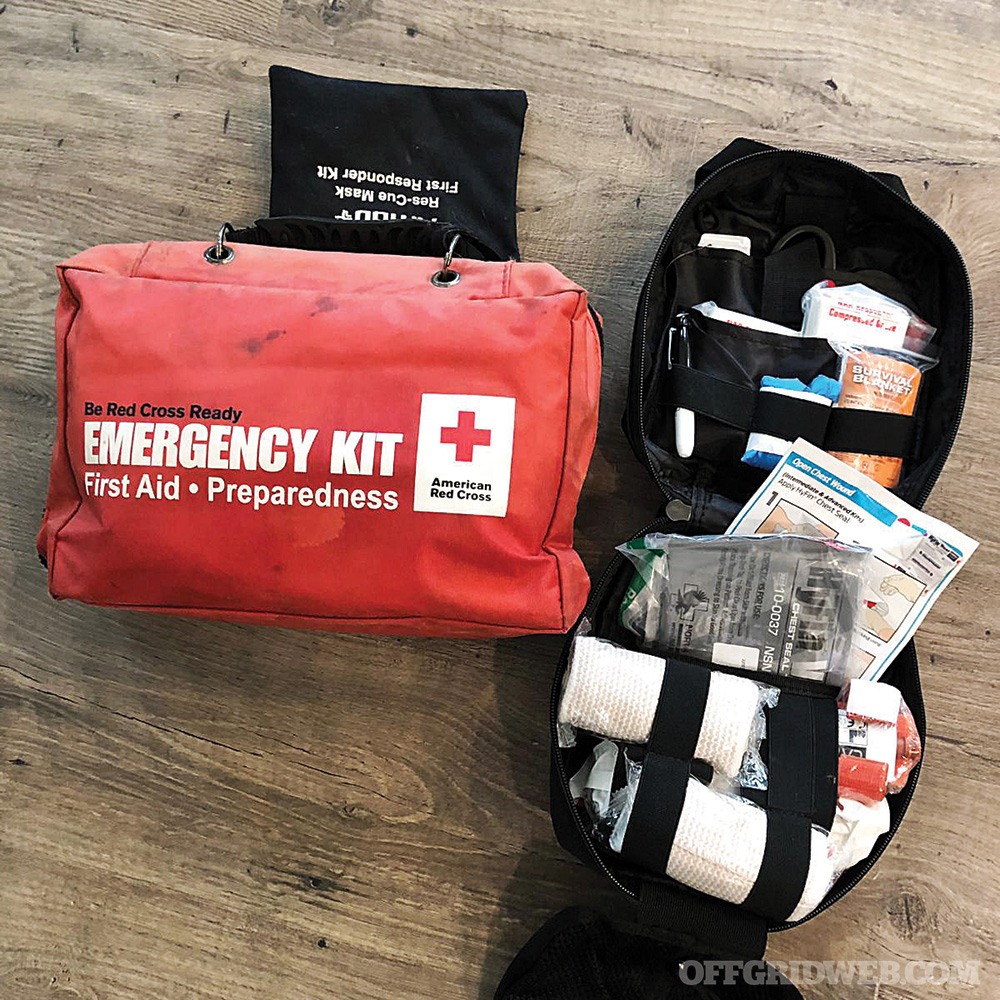
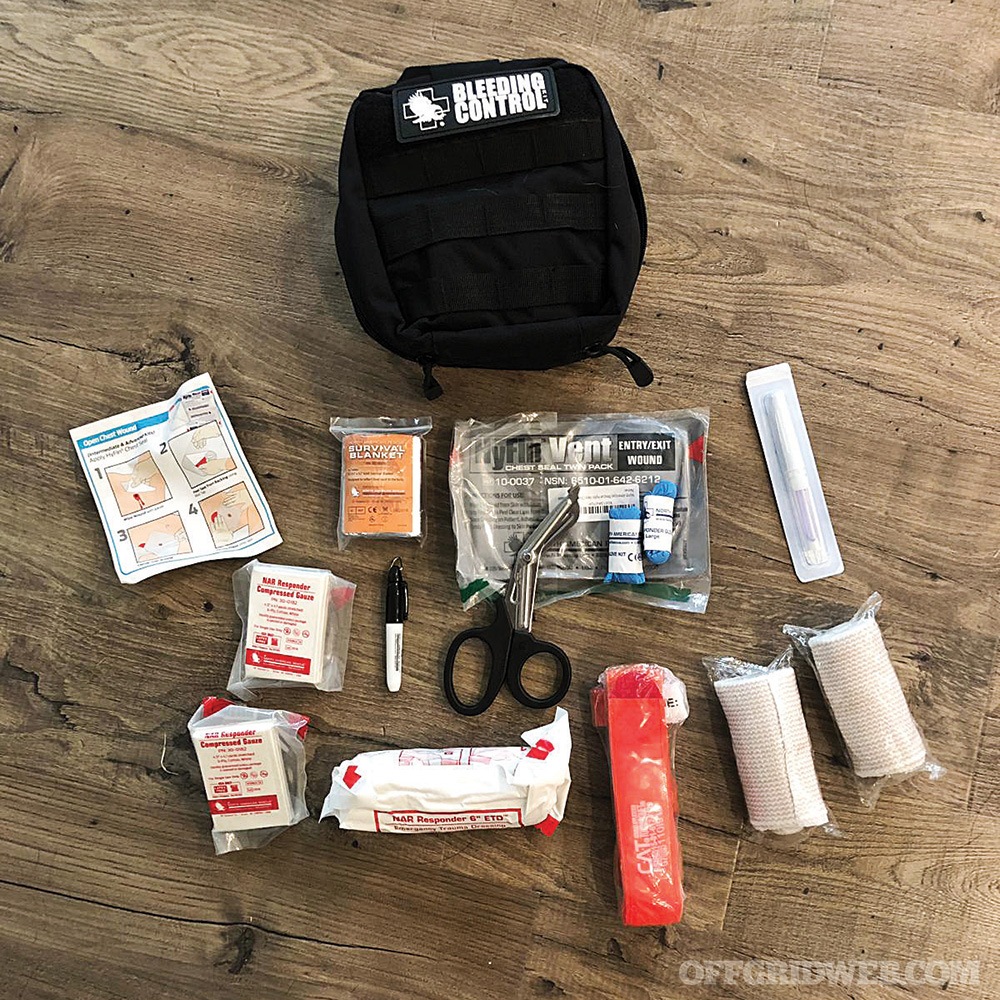
For major trauma, I carry and recommend North American Rescue’s Bleeding Control Kit. This kit includes a basic Bleeding Control laminated instruction card — I highly suggest keeping this with the kit so even an untrained person can follow the steps and properly apply first-aid. I also supplement my kits with additional gauze (Kerlix, if you can find it) as well as ACE wrap bandages and HyFin chest seals. The kit comes with the latest C.A.T. Tourniquet, but I’d recommend buying several more of these TQ’s on hand in case a car accident yields more than one life-threatening bleed. They’re inexpensive, and worth every cent should they be needed.
Above: The author has chosen to supplement a pre-packed first aid kit with additional supplies that seem to come in the highest demand.
Now, if you supplement your kit as I have, you might find it won’t all fit inside that handy red pouch the kit comes with. No sweat. Find yourself a slightly larger IFAK (individual first-aid kit) or any travel-size go-bag to neatly store all your trauma items. Mark the bag with one of those travel tag bag identifiers, a Velcro first-aid cross patch, or just some duct-tape that clearly labels the bag “first-aid.” Finally, make sure your family knows where it is and what’s in it. If you have a big family like I do, consider doubling or tripling up on the items in the kit in the case of multiple, simultaneous injuries. Larger squad-sized trauma bags can be had from North American Rescue that are more robustly stocked for MASCAL situations.
On the mundane but more common side of first-aid, any sizable kit that features lots of Band-Aids, Neosporin, bandages, and so on will generally fit the bill. You can order these online like your trauma kit, or they can often be found for fair prices at stores like Costco or Sam’s Club. Also, I like to keep this as a separate kit from my trauma stuff so don’t combine them. I don’t want my teenager pillaging my trauma gear for a Band-Aid or conversely, my wife looking for a tourniquet in the “bumps ’n’ bruises” bag.
Before you close the hatch on all that first-aid gear, throw a couple cases of water in the back somewhere as well, particularly if you’re traveling during the summer. It’s nice to have for washing out cuts and scrapes, topping off a radiator, or simply keeping kids and pets hydrated in hot, desolate areas. We faced down some long, dry stretches of road in New Mexico and Arizona with nary a gas station in sight and the water came in handy.
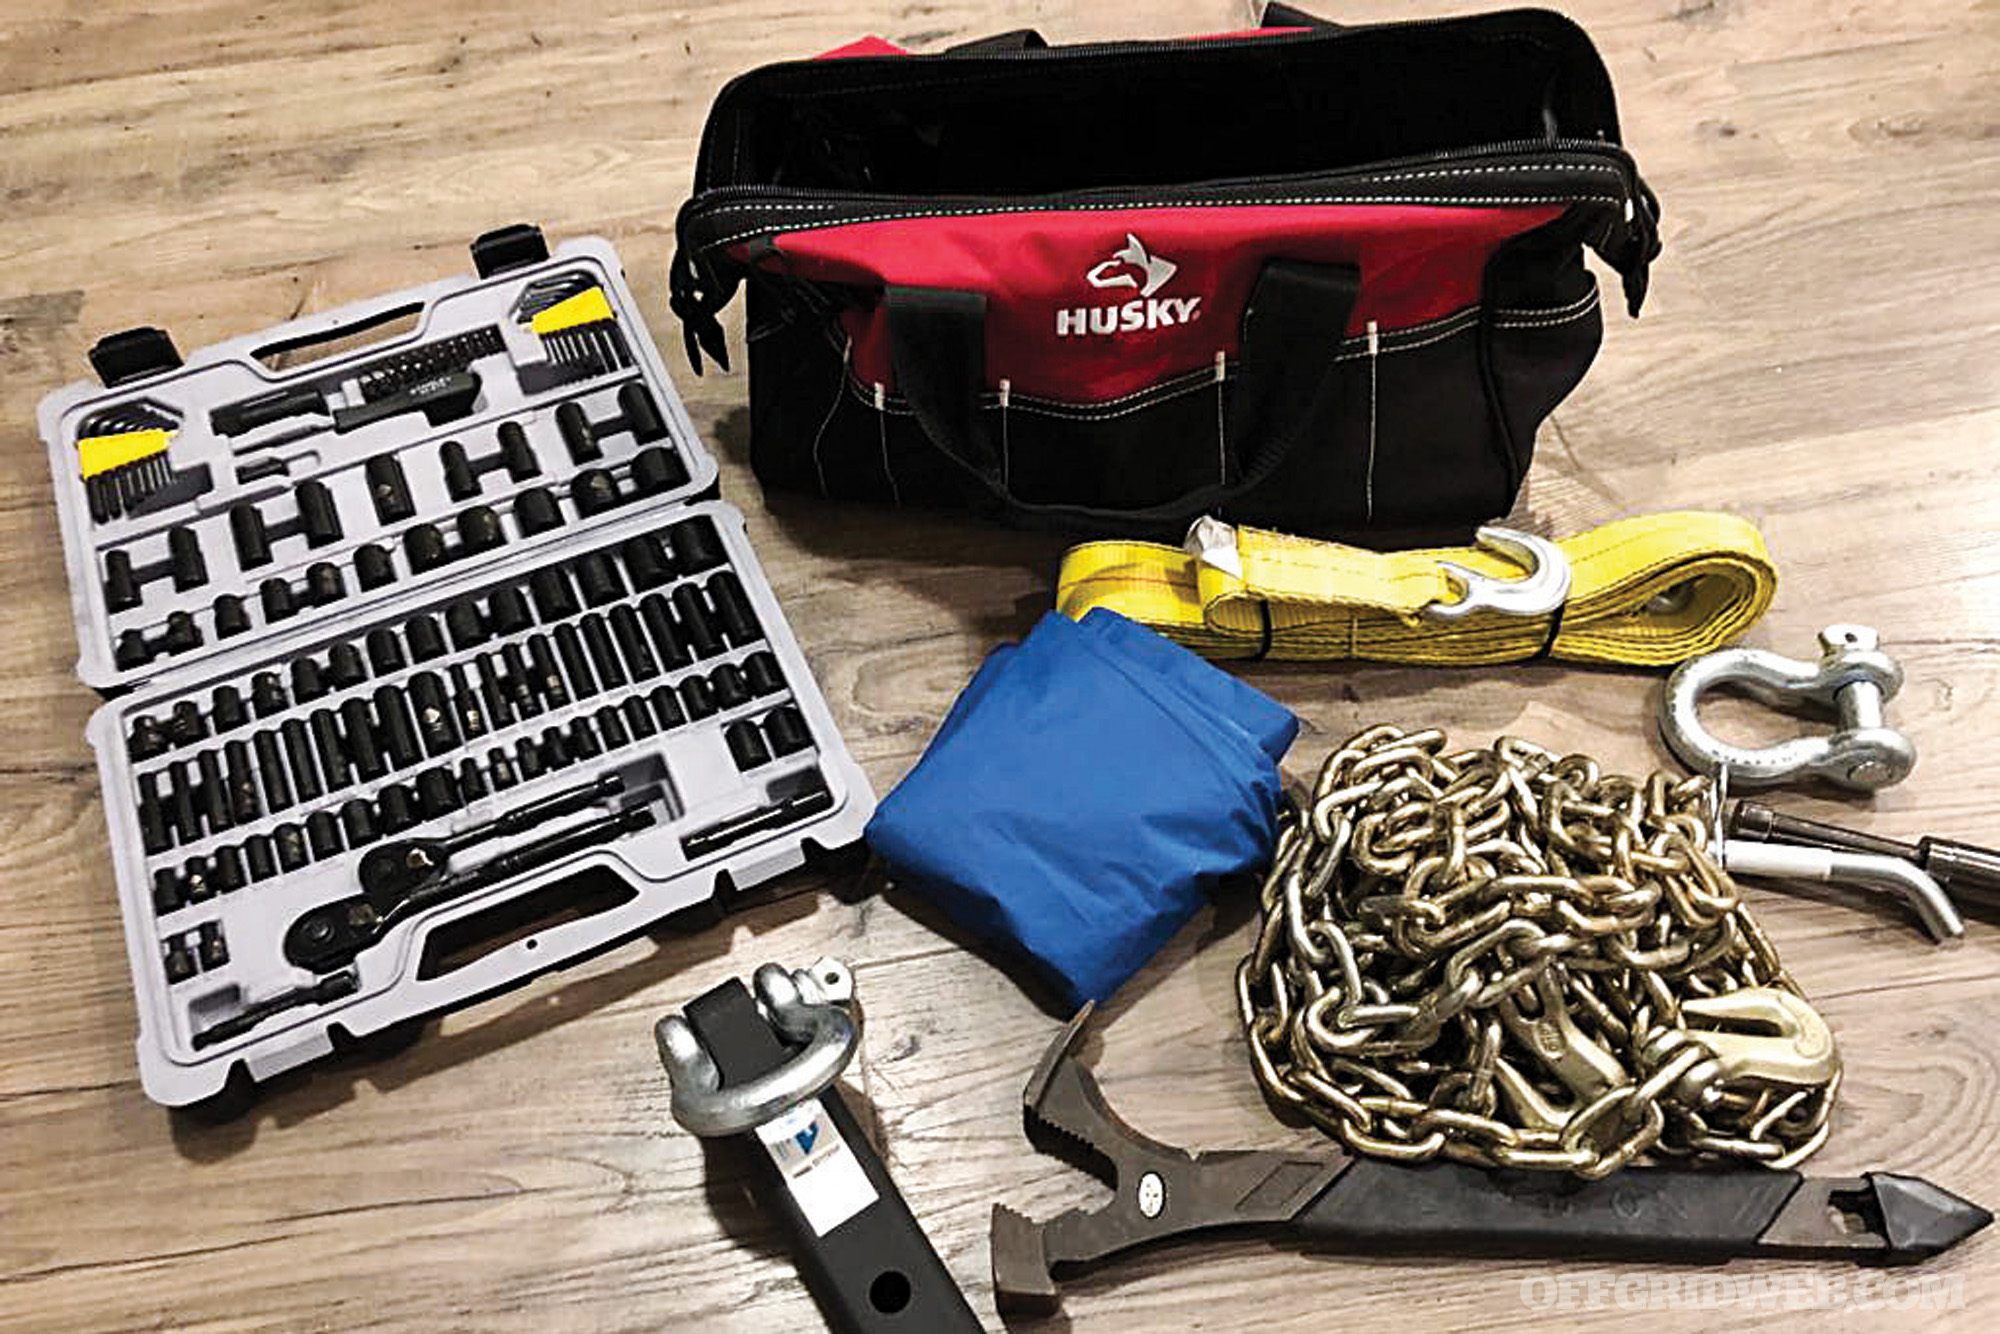
If you want to go a step further, you can do what I did and put together a basic off-road recovery kit as well. I chose to build my own kits for my vehicles, but companies like Warn and ARB also make some really nice (albeit more expensive) kits that include everything you’d need to get yourself unstuck.
These kits include things like recovery straps and chains, shackles, snatch blocks, and heavy-duty gloves. I also throw shackle hitches in my kits for additional attachment points if your vehicle is equipped with a trailer hitch receiver. Toss in a couple road flares and a shovel as well, and you’re set. If you build your own kit like I did, drop all this gear into a nice nylon tool bag from a company like Husky. You can find these bags in various sizes at Home Depot for $15 to $30.
Above: Simple hand tools and some tow straps or heavy chains can be improvised into a lot of useful trouble-savers. It never hurts to have this capability.
A good jack is also absolutely critical. In many situations, the bottle jack your vehicle comes with can be rendered useless. I prefer a Hi-Lift-style jack because it has so many additional uses beyond just jacking up a vehicle. It can act as a come-along, clamper, or spreader, and there are several awesome accessories available that further expand this tool’s capabilities. They’re inexpensive and should last a lifetime. Hi-Lifts also come in various sizes and can fit in your trunk. So just because your family vehicle is a sedan and not an overland monster-machine doesn’t mean you can’t upgrade your jack to something that can handle virtually any situation.
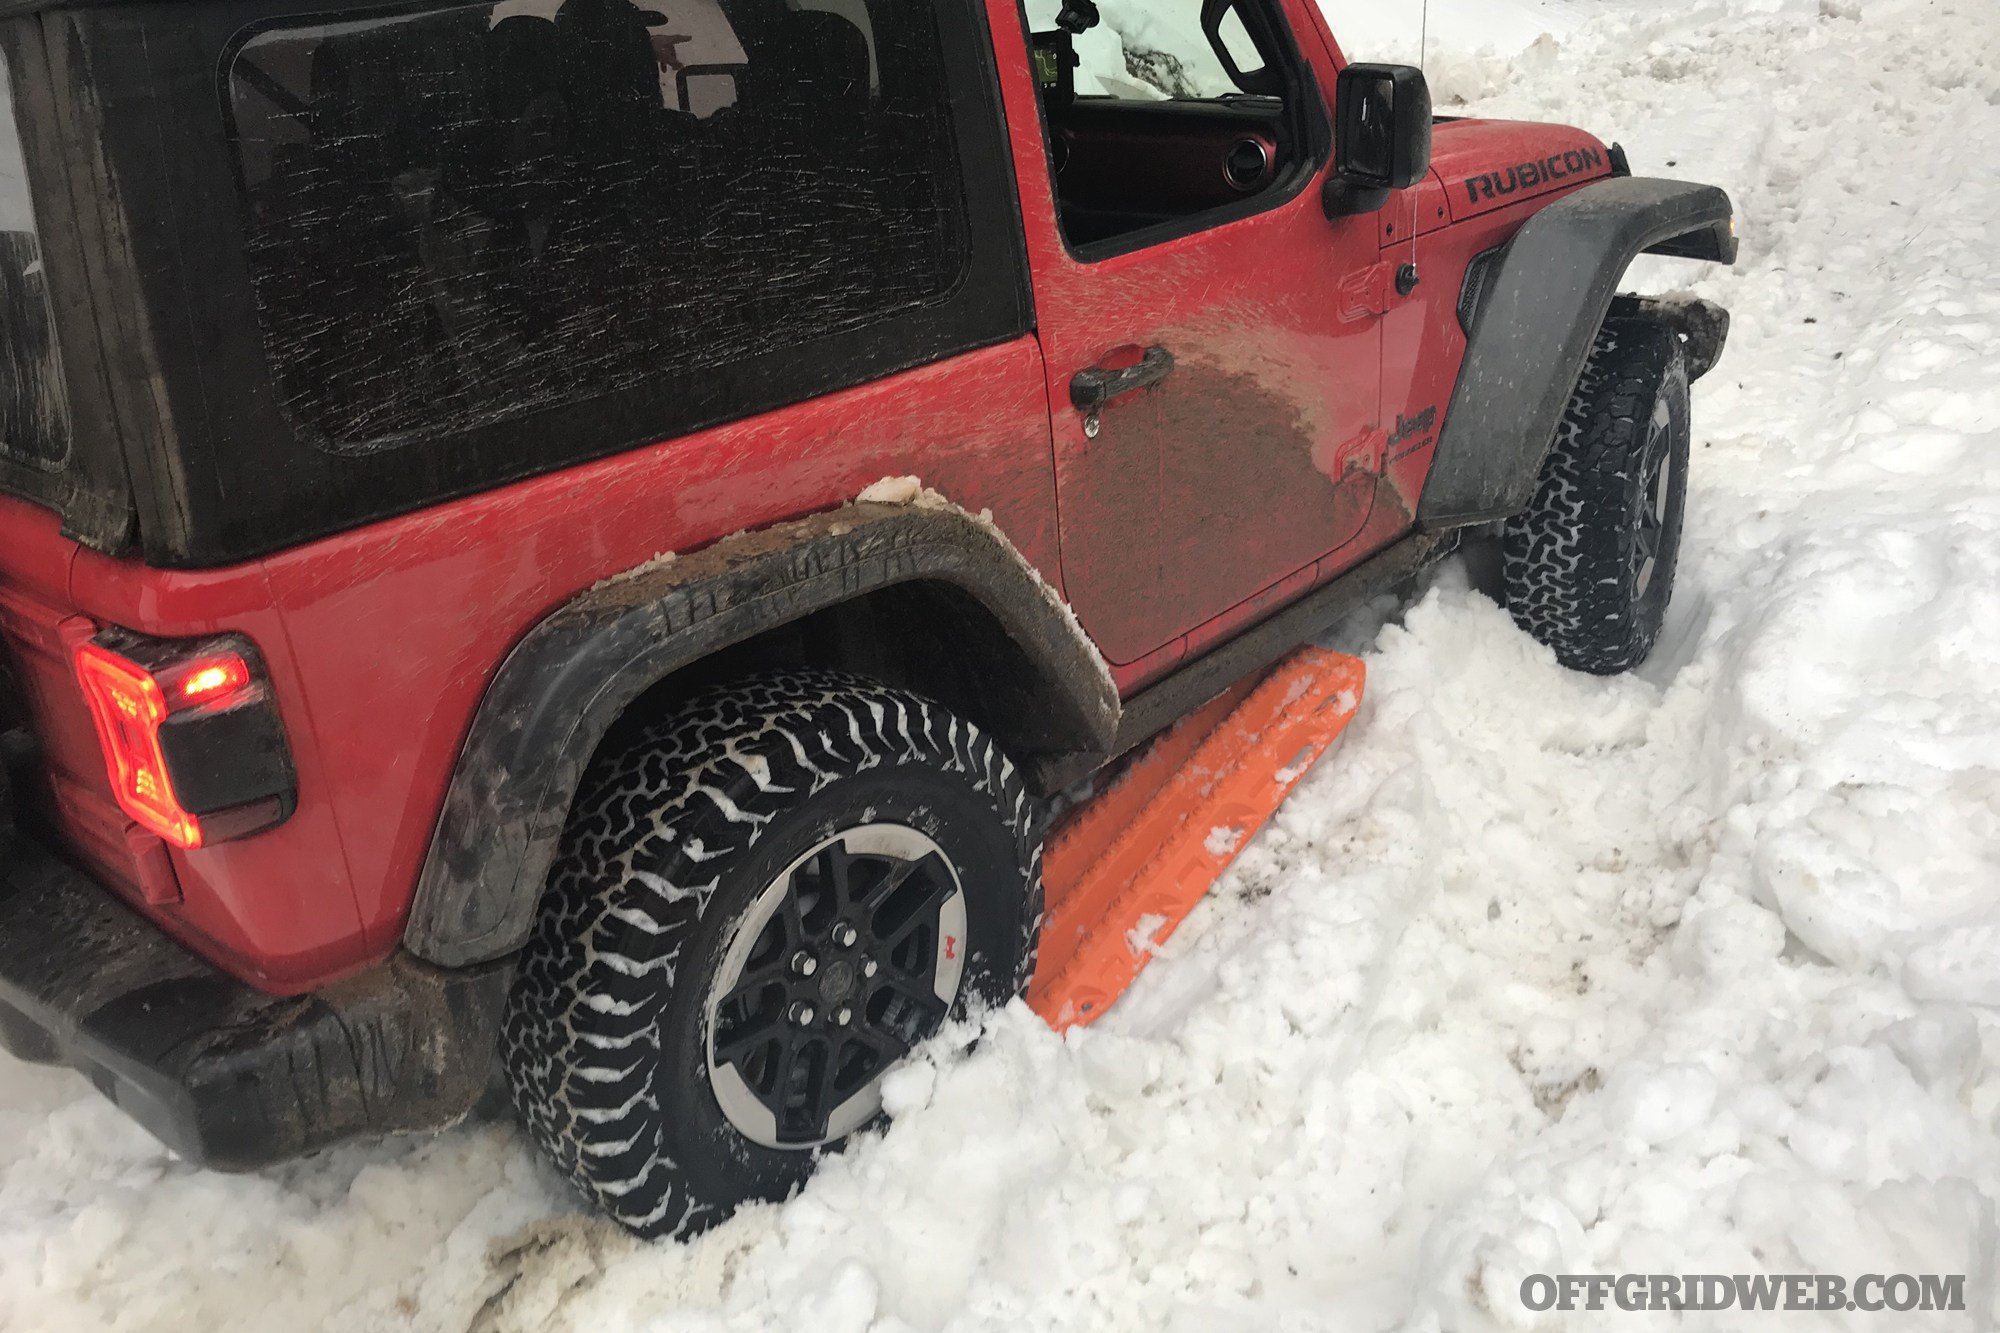
As we’ve learned firsthand, Maxtrax recovery boards are helpful if you get stuck due to poor road conditions.
Finally, consider a set of recovery boards. These can be as simple as throwing some scrap plywood in your trunk to give your tires purchase when stuck in sand, snow, or mud. This can often be the fastest and easiest way out of a sticky situation. Plywood scraps will do, but if you have the coin, I’d suggest a set of purpose-built recovery boards like MaxTrax MkII’s. They aren’t cheap, but their quality and utility easily exceeds their price. Take a peek at them on Amazon.
Add to this arsenal a roadside assistance plan like a AAA membership and you should be all set. Major insurance companies like USAA also offer roadside assistance if you’re a customer so be sure to ask your insurance agent if you’re covered and how to access their services. These days many vehicle manufacturers like Lexus feature complimentary roadside assistance. Check with your vehicle manufacturer or dealership. If your vehicle features a service like OnStar, ensure its function prior to traveling.
Other free, or low-cost services can be had through your cell phone carrier, believe it or not. Carriers like Verizon offer roadside assistance services so be sure to check with your provider for cost and options. Whichever roadside assistance option you choose, now you’re covered. You can call for towing or, if the situation dictates, you at least have the basic tools to try and recover yourself or someone else. If you want to learn more about off-road recovery and how to use some of the tools listed above, give www.offroadrecoveryguide.com a look.
Vehicle Sundries
I strongly believe we need to at least be able to deal with low fluids, dead batteries, and flat tires while on the road. These are common issues, but easily remedied if we have the right gear with us. Grab a milk crate and put a quart of your vehicle’s motor oil, a bottle of brake fluid, transmission fluid, power steering fluid, and a gallon of coolant and put it in the trunk or the back of your SUV or truck.
Next make sure you have some jumper cables, and I’d also recommend one of those handy little jump-starter batteries like a Micro-Start or NOCO Genius Boost. They’re small, portable, very powerful, and worth every penny. Many of them can also be used to charge cell phones and other portable USB devices.
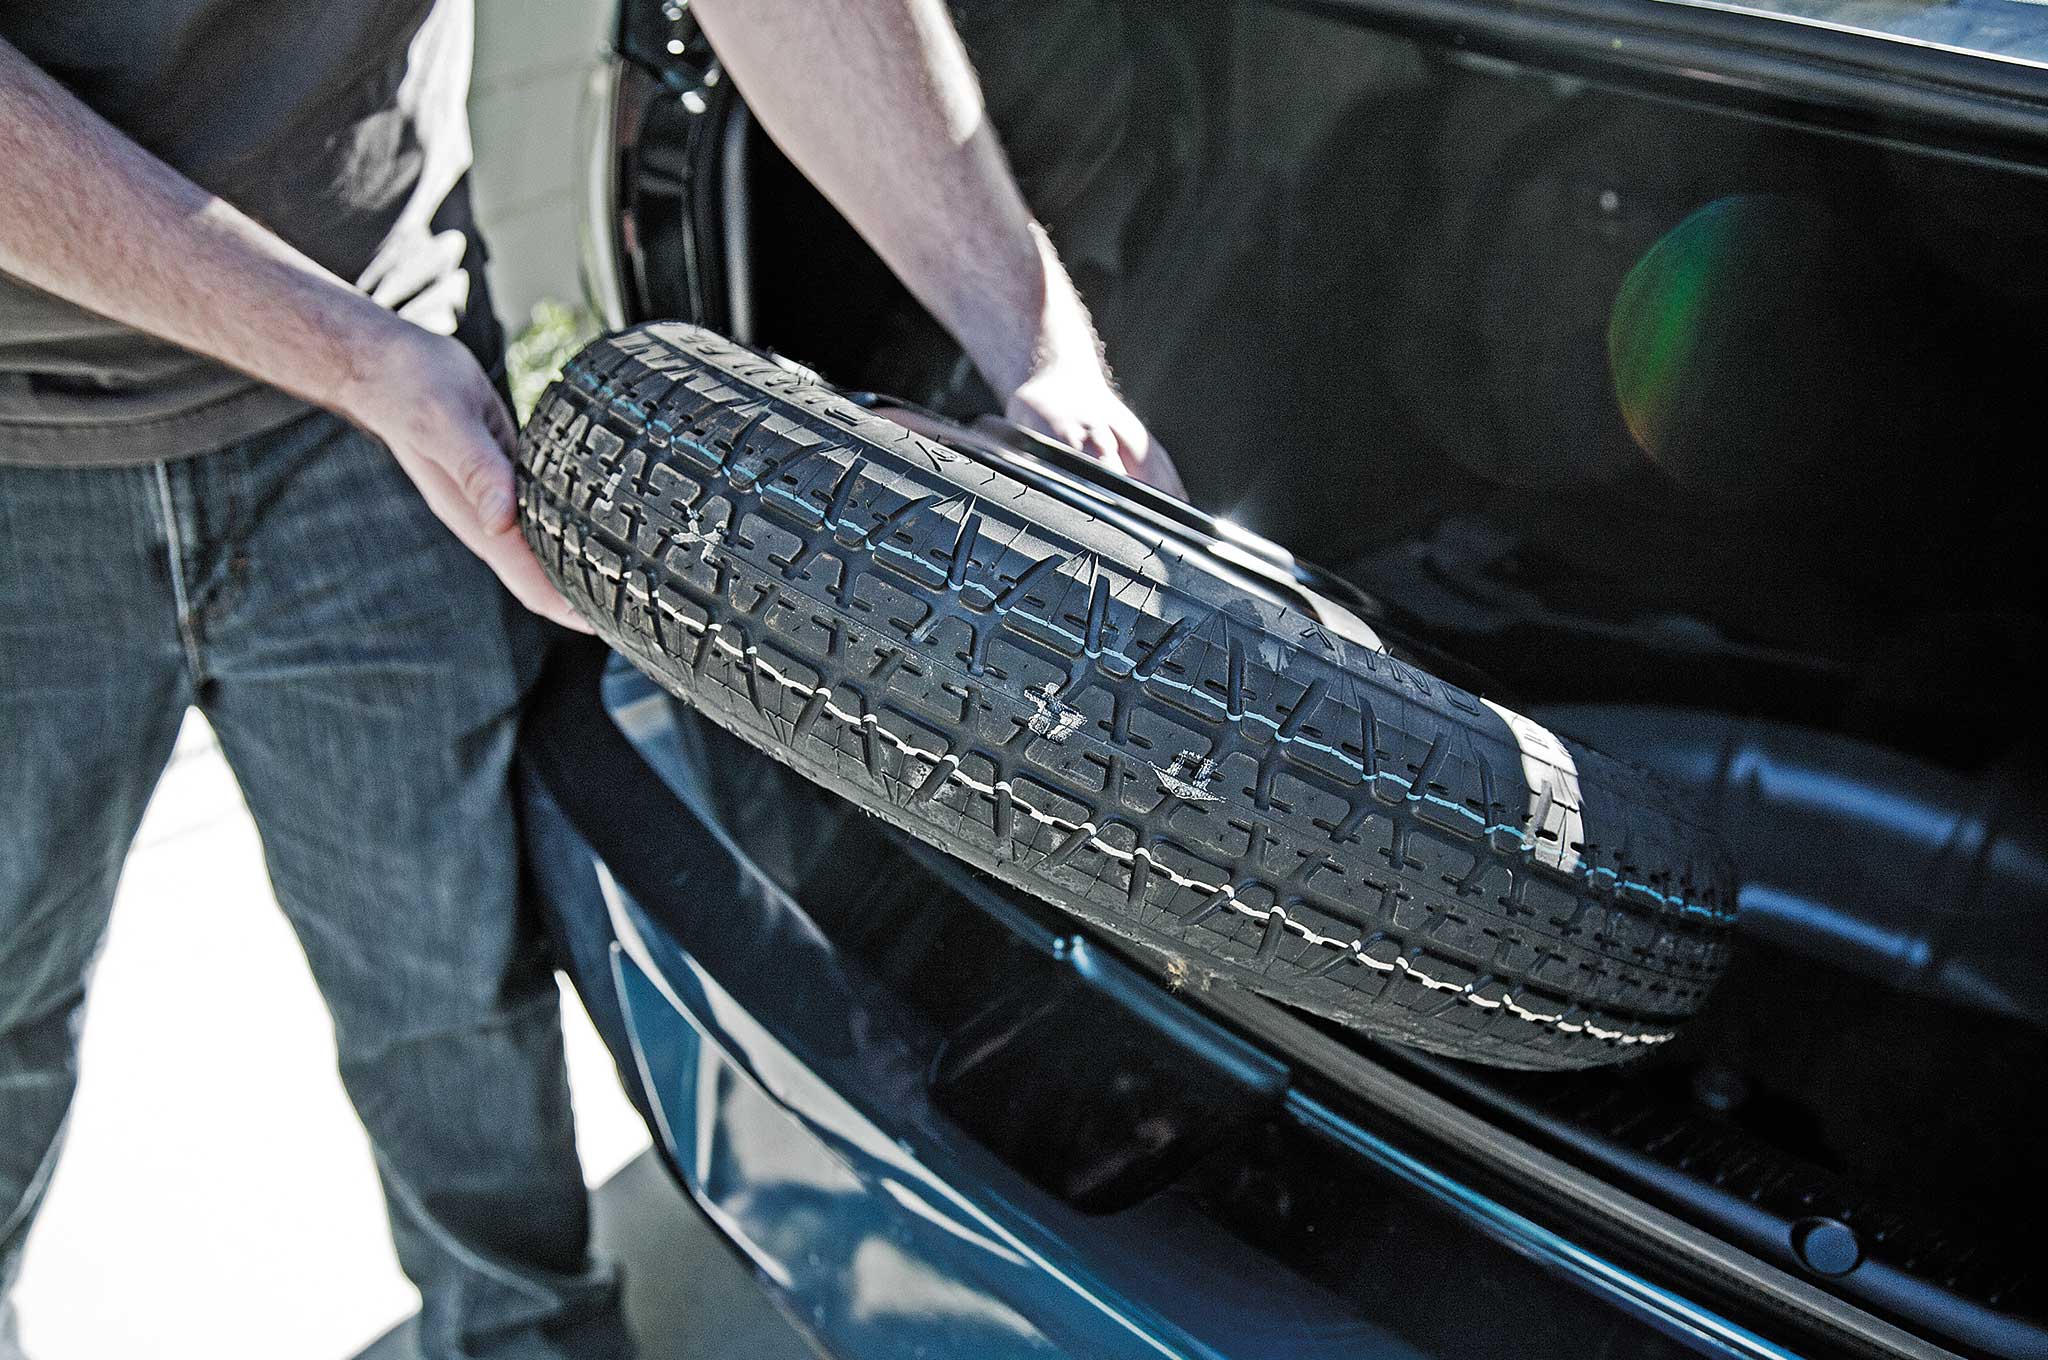
A “donut” or space-saver spare tire is better than nothing, but not nearly as helpful as a full-size spare.
Jacks and spares we covered in the previous section, but if you have the room, carry a full-sized spare with you. Donuts are for coffee. If we have to change a flat out on the highway, we can be ready to stay on schedule with a full-size spare rather than just ready to go to the nearest gas station on a donut. The next time you get new tires, keep one of the old ones for this purpose. An inexpensive spare wheel can be found on Craigslist or at a local scrap yard (be sure it’s the appropriate size and bolt pattern). One last tire-related item: If you’re traveling during winter, make sure you have a quality set of snow chains or traction cables for your tires. Cheap sets will break. Look for a brand like Security Chain Company.
That’ll cover the basics for emergencies. Now let’s address a few additional items to have in your vehicle to make life easier.
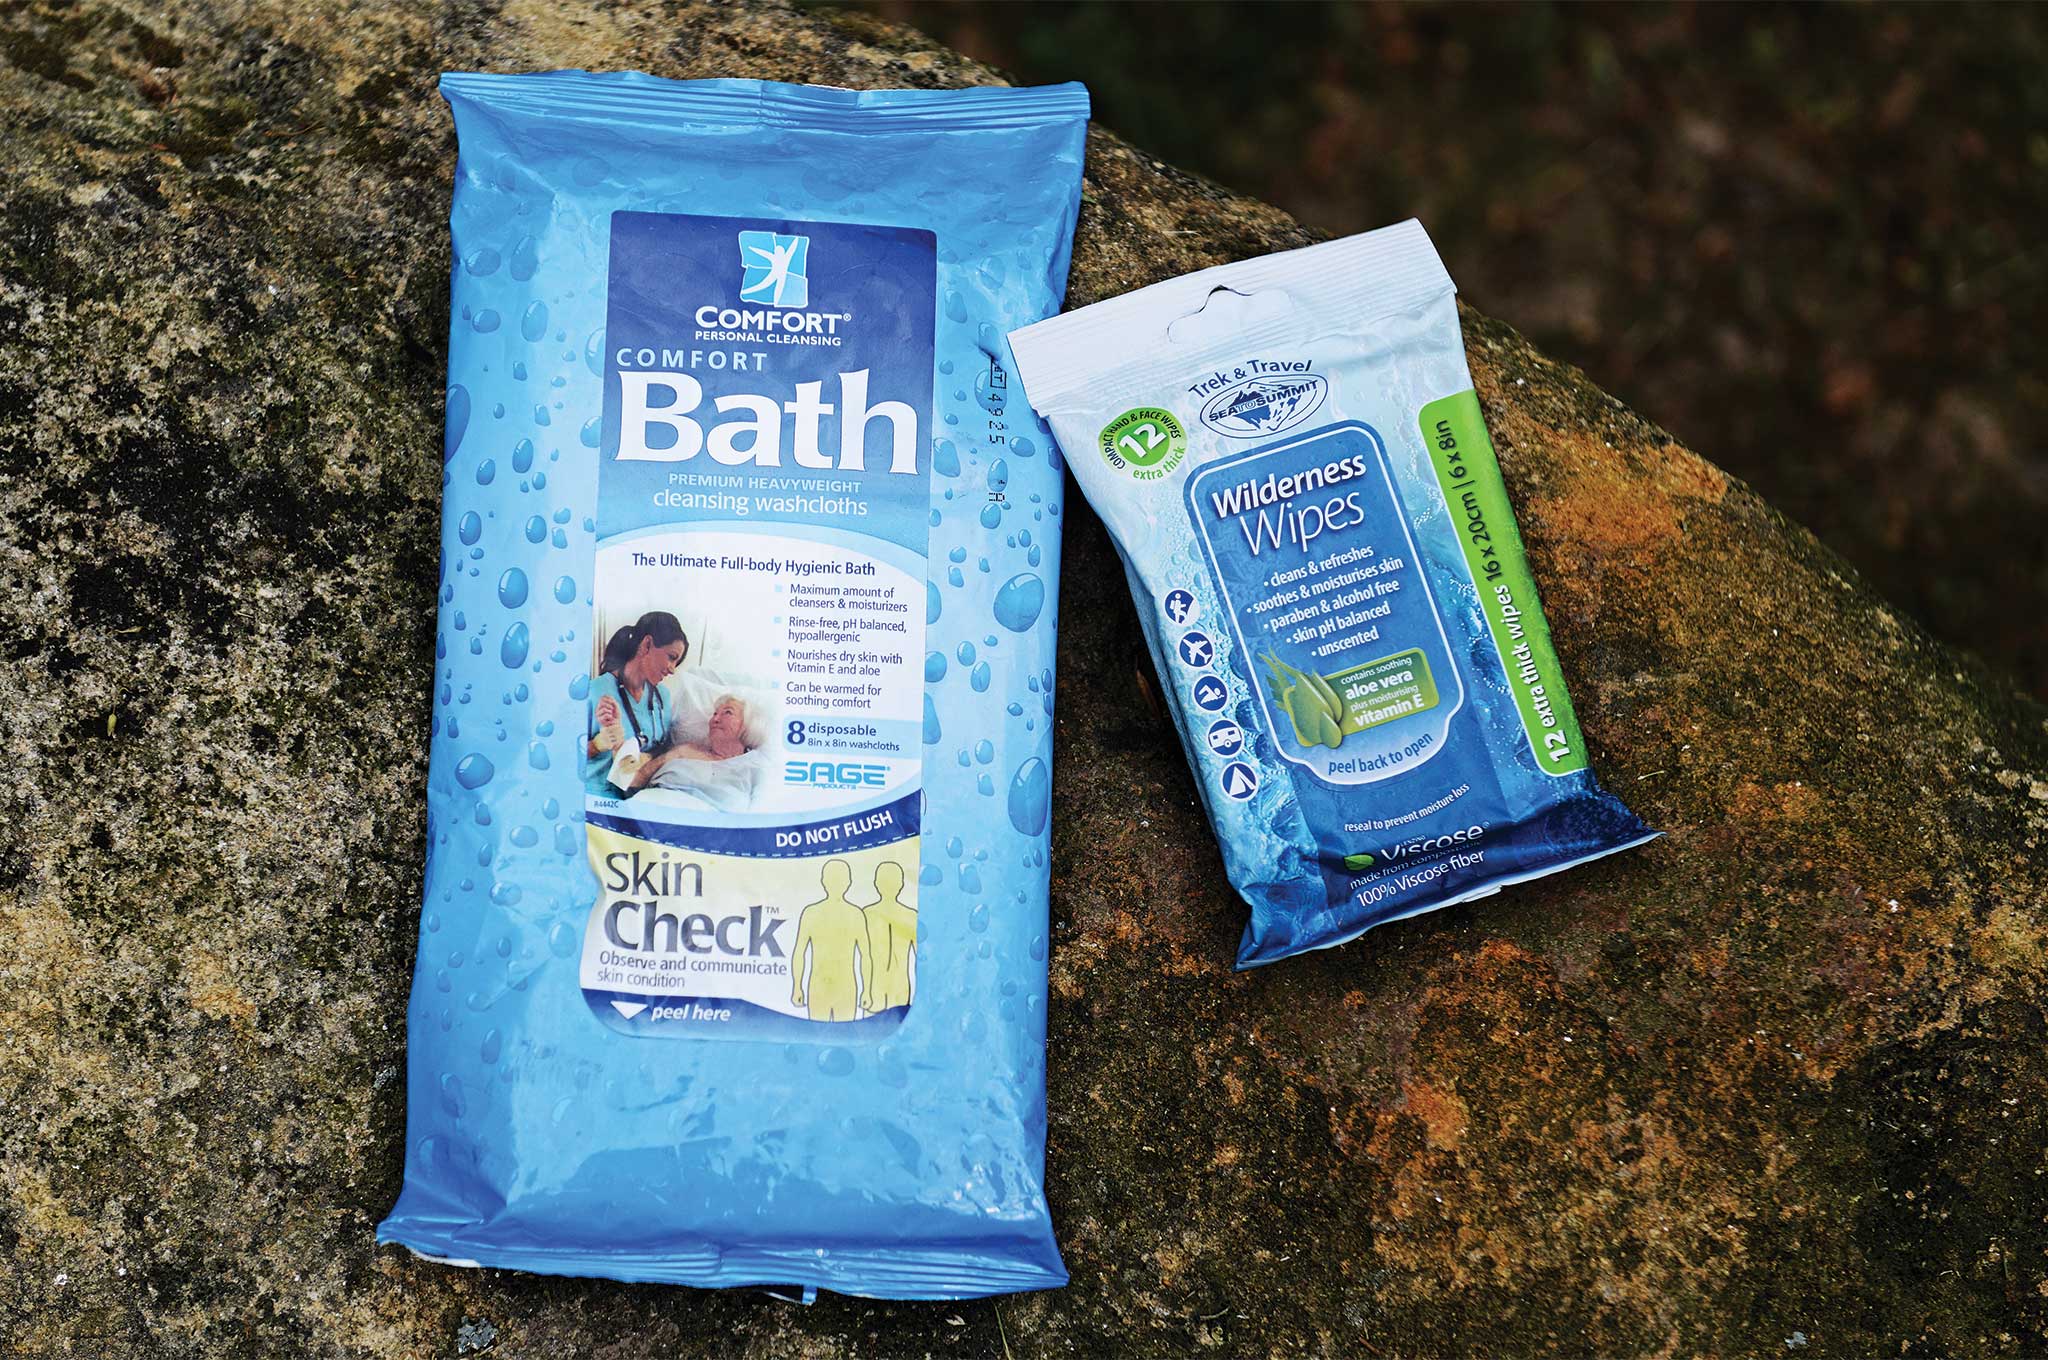
Toilet paper. The good stuff. I’m serious. Throw a roll in a Ziploc bag and put it in a backpack. There are still stretches of highway out there where bathrooms are as scarce as honest politicians. In that bag with the toilet paper, throw a pack of baby wipes in next to it, whether you have babies or not. Baby wipes are mission-essential equipment. I’ve never fought a war without them.
We’re also going to need things like flashlights, a headlamp, extra batteries, power banks for cell phones, and necessary medications, etc. On the subject of medications, ensure you have more than you need. In the case of my son, only certain pharmacies are able to fill his prescriptions so we have to account for this when traveling by taking extra in case we’re on the road longer than we planned.
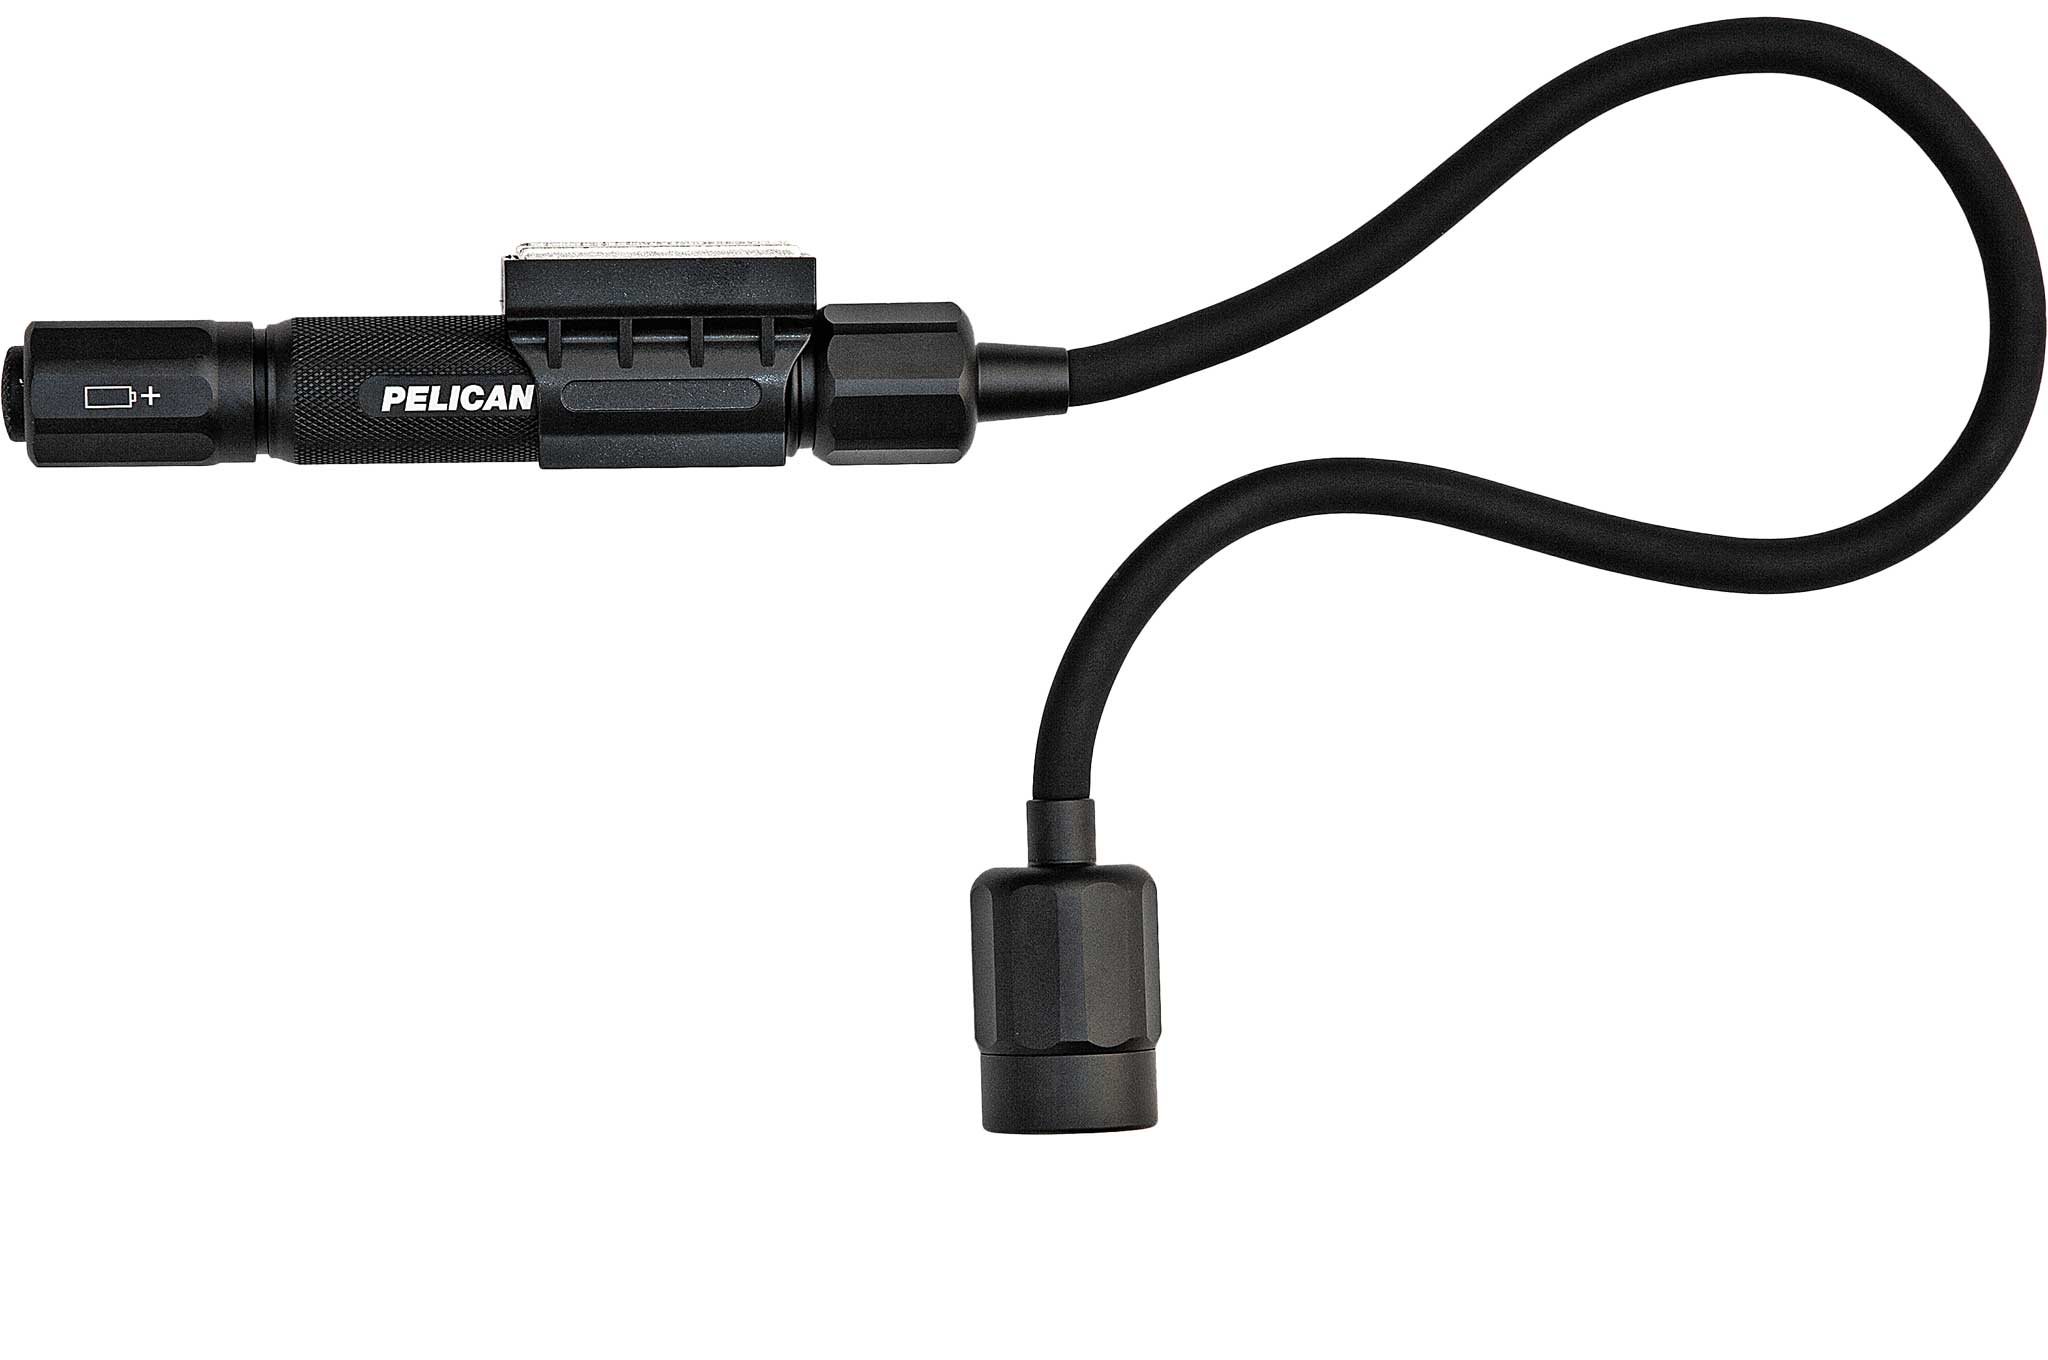
Above: Magnetic work lights, such as this Pelican 2365 Flex-Neck, can provide illumination while keeping your hands free for other tasks.
For flashlights, I prefer the kind equipped with magnets or hooks or some other method of attachment. A handheld light is fine, but it’s likely if I need my light, I also need to be doing something else with my hands simultaneously like changing a tire at night or topping up a radiator. Home Depot or Lowe’s carry an arsenal of these inexpensive work lights. Grab a headlamp, also in the same store, and you’re ready for night ops.
Cell phones are great, but coverage can vary. When caravanning, use a good set of hand-held radios for communication between vehicles. Companies like Cobra offer family packs of four radios that feature several miles of range, are rechargeable, and can also use non-rechargeable batteries. The ones we have also have a NOAA weather radio mode so you can listen to weather information if available. These are also great to have in the vehicle if your road trip will feature any hiking or camping destinations along the way.
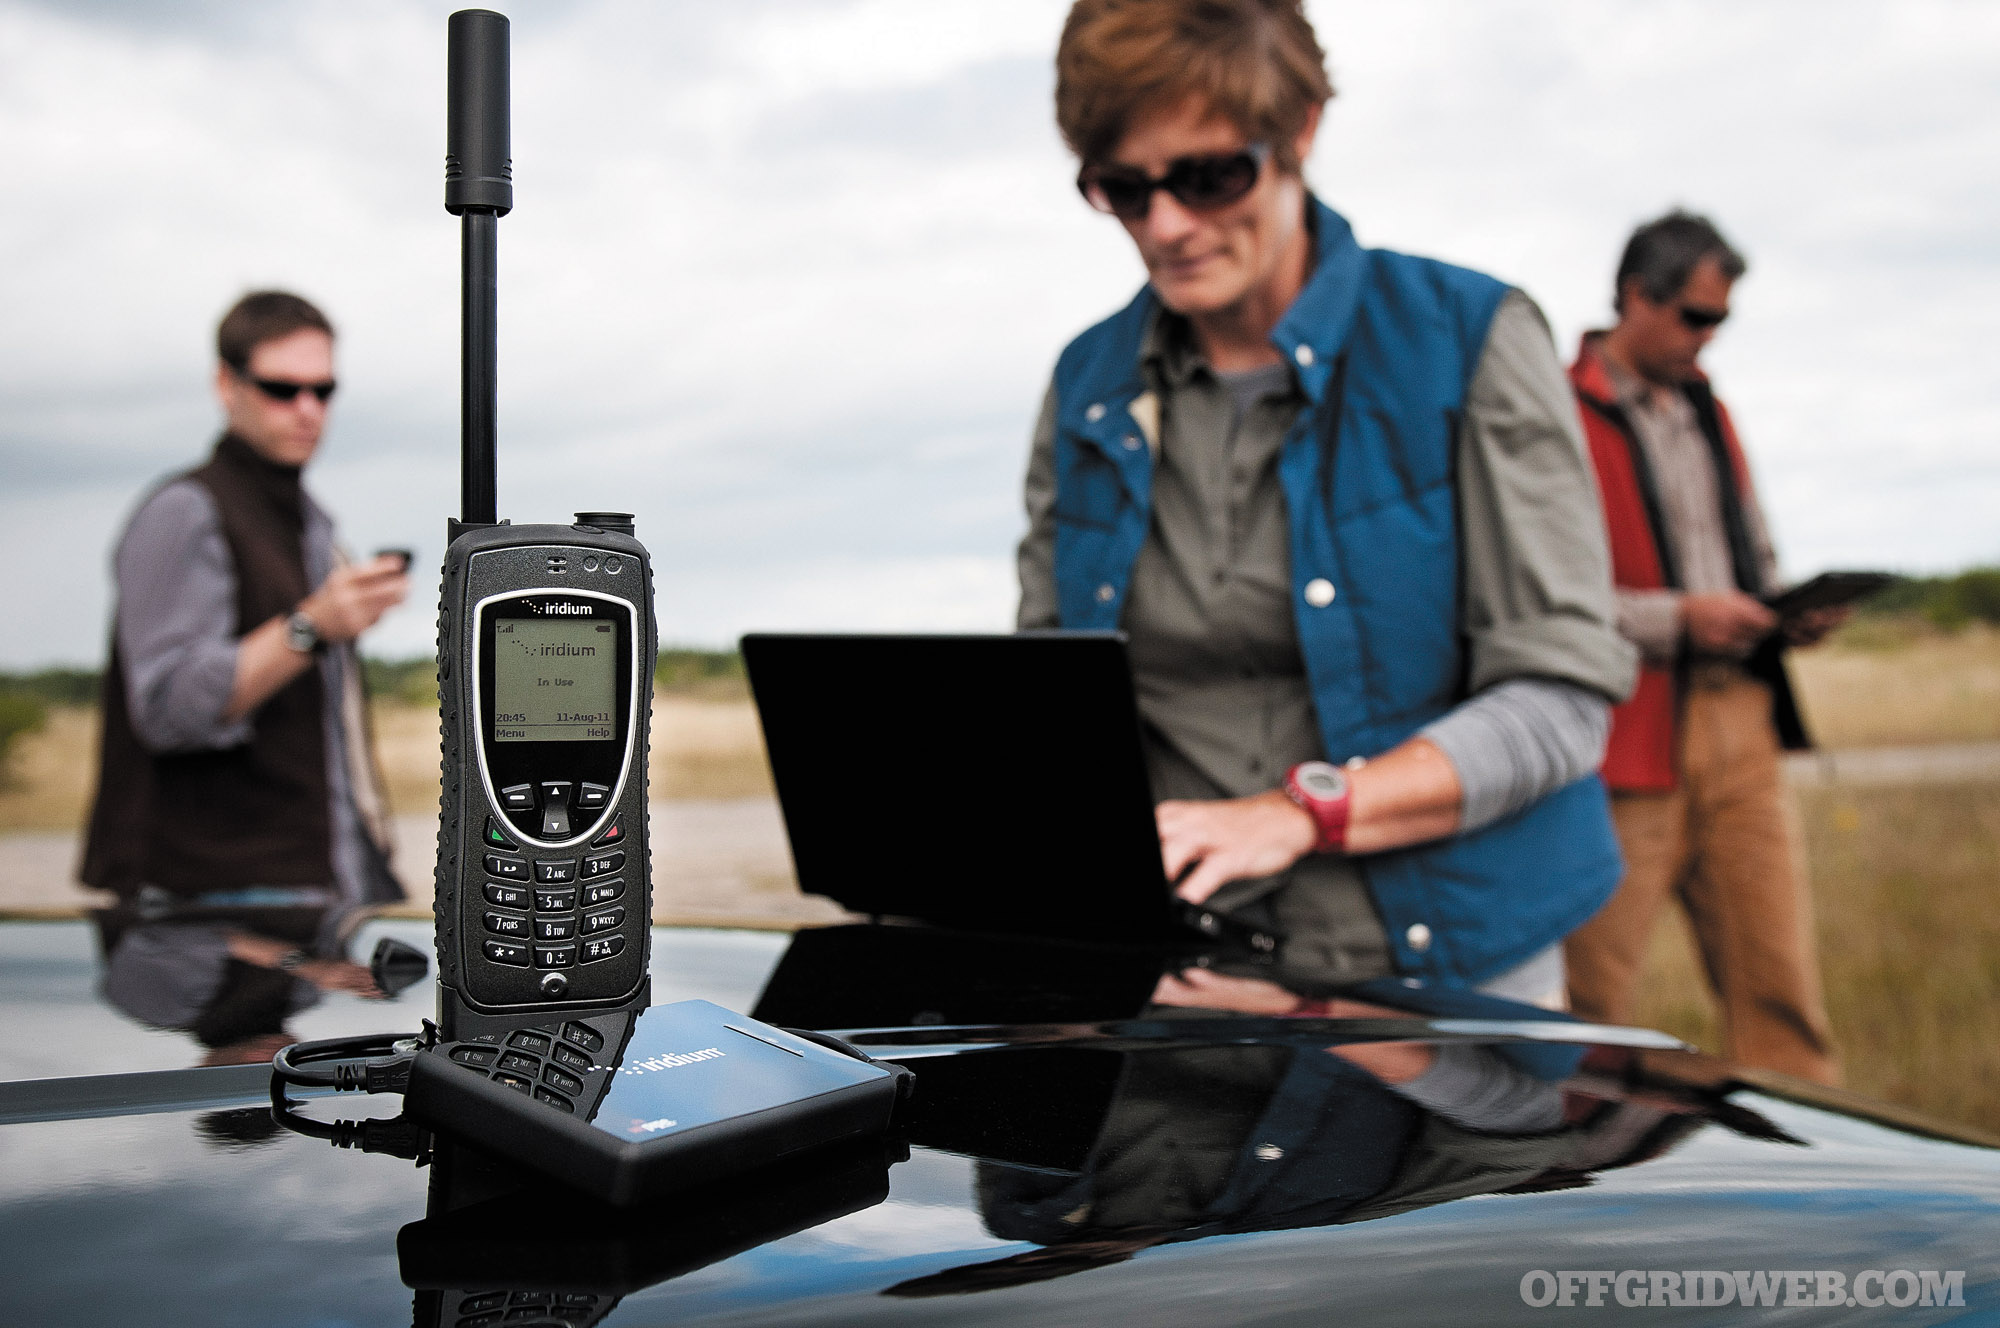
Satellite phones from companies like Inmarsat or Iridium are potential options as well. They offer pre-paid or monthly plans often managed by a third-party company like Bluecosmo. They can be expensive ($600-$1,200 USD or more) depending on the manufacturer and model, but in the event that cell coverage is absent, or cellular networks are overloaded in the case of a localized emergency, a sat phone in your go-bag could be the day-saver. The waters start to get deep when considering satellite networks, LOS (line-of-sight) considerations, etc., so be sure to do your research before investing. I found the reviews on Amazon to be helpful in zeroing in which phone would be best for our family.
Throw all this kit into the bag with the TP and wipes and you should have a pretty good start on the basic sundries to keep your family happy and hygienic even in the absence of modern amenities and services.
Defensive Driving
According to the National Highway Traffic Safety Administration, there were 37,133 lives lost on U.S. roadways in 2017 alone. When you’re putting in 3,500 miles of continuous driving over nine days, you’re bound to have some close calls. What this trip really emphasized for me was that sometimes the best defense really is having the best defense.
In Arkansas, we pulled out onto I-40 East. I was ahead in the rental truck; my wife entered the highway a minute or two behind me in her Suburban. A semi-truck travelling in the opposite, westbound lane overturned, entered the median, and began sliding toward her. The tractor-trailer ground to a halt before fully entering her eastbound lane, but it came so close to her that it threw dirt and debris across her windshield as she passed.
She had two hands on the wheel and the road had her full attention. She was driving defensively and alertly and used just enough of her lane to swerve around the chaos coming at her while not endangering others around her. Most of our family was in the truck with her, and she avoided that potentially lethal incident by being switched-on and not making a bad situation any worse with panicked over-corrections.
The incident made the local news as those types of events often do, but our family wasn’t part of the story thanks to my wife.
On this subject, I’d like to say driving defensively is a lost art, but that’d imply there’s some sort of elusive mastery of the skill few can attain. There’s no art to it. It simply requires focus. Driving defensively is driving alertly and safely, plain and simple. The road, your vehicle, and the vehicles around you get your full attention. Expect others around you to do foolish things like veer into your lane, brake suddenly, or run stop signs. If you’re thinking about these things while driving, instead of trying to post to your Instagram, you’re already several precious fractions of a second ahead of any potential situation.
Most of the accidents I see on the road these days are rear-end collisions. This tells me people simply aren’t paying attention and are following too closely, often while speeding. You need to maintain at least a 2-second gap between your car and the one in front of you. Impatiently tailgating other cars won’t get you to your destination any faster, but it might earn you a trip to the hospital. Anticipate traffic slowdowns around bends or as you approach intersections. Be thinking about what you’ll do if that car in front of you slams on its brakes right now. Where is my “out?” In other words, where can I safely steer (not suddenly swerve) to avoid the collision? The shoulder? The other lane? Is it clear?
These are the types of mental calculations we make every second on the road, but they require the majority of your attention, not the minority. Six million car accidents take place in the U.S. each year, according to the NHTSA. Nearly half of them are rear-end collisions. Start paying attention to your driving. With numbers like these, it’s likely those around you are not.
This may sound like overkill for a road trip, but when you place your entire family on a set of four tires barreling down the highway at 75 mph into unfamiliar places full of strange people, you really are leaving the wire. You’re leaving the safety and security of the known and trading it for the completely unknown. You had damn well better think about all the what-ifs that lie out there along those dark roads.
We traveled 3,500 miles over nine days coast-to-coast with our entire family in tow. We avoided potential danger areas. We chose nicer hotels to stay at to avoid bad areas of town. We ensured we were obeying the laws of each state and jurisdiction we passed through as it pertained to our firearms. We used technology to help guide us, but we didn’t rely on it. We brought gear, first-aid supplies, and equipment for all the just-in-case moments a lengthy road trip odyssey can present. We made sure our vehicles were maintained to avoid surprises. We didn’t do it all perfectly, but we did our best to cover a lot of “what-ifs.”
We did all these things because we know — as you now should if you didn’t already — that many of the situations we prepared for are not actually questions of “if,” but of “when.” Are you ready?
Editor’s Note: The following article is a web-exclusive accompaniment to “Road Warrior” by Mel Ward, as seen in the upcoming Issue 33 of our magazine (on sale 8/6/19). In the print article, Mel covers a variety of tips for maintaining safety and security while on a cross-country road trip. For the second portion of this two-part web series, Mel explains how situational awareness while traveling is crucial to your personal security and that of your loved ones.
Last week, we discussed considerations for traveling with firearms, whether they’re stored in your vehicle, in your hotel room, or on your person. But being armed isn’t always the first, second, or even third thing that will lead to your family’s safety on a road-trip. Your own personal situational awareness, and that of your family members, is critical and can prevent everything from side-swiping a car in your blind spot to potentially heading off a life-threatening situation.
Situational Awareness at Work
My family’s SOP actually paid off at Lake Powell, Arizona, as we waited in the parking lot of a grocery store for my wife to restock us on road snacks. While I was outside the vehicle dealing with a fussy baby tired of her car seat, my sons let me know a man was approaching from behind me. I was able to turn around and face the guy before he got much closer.
Even with the warning, I didn’t like where he was. Fortunately, he immediately stopped and didn’t take another step towards me once I turned and saw him. He asked me for money. Instead I gave him the most malevolent, “No, thank you,” he’d probably ever heard.
He actually backed away, said, “Have a good day,” and went wide around us. Fortunately, this was a completely benign situation, but thanks to our preplanning and awareness we were able to create a physical as well as psychological buffer between us and the unknown individual. We were polite, but used a tone that conveyed that there was absolutely nothing for him to gain from this encounter in any capacity.
Observation Tactics
Anytime you stop anywhere for food, fuel, or the much-dreaded diaper change, you should be assessing your surroundings. Before exiting the vehicle, use each of your mirrors as you would if changing lanes. They provide great situational awareness of what’s behind and beside your vehicle, so use them here too. Also, if you have a back-up camera, use it as well. Most back-up cameras use a fish-eye lens configuration that provides fantastic coverage, and they can provide an enhanced picture of dark areas. Shift into reverse and take an extra second to study what’s directly behind you.
When exiting the vehicle, after you’ve checked your mirrors and cameras, do a methodical 360-degree visual scan of your surroundings. Start from inside the vehicle looking through the windshield right to left. Look deep into your visual field and soak in details. As you exit, continue this scan where you left off all the way around behind you and back over the roof of your vehicle to where you started your scan through the windshield. This kind of awareness is its own layer of deterrence. It provides two advantages and it’s the less-obvious one that can pay the greatest dividends.
As good, upright mammals with excellent vision, simply looking around helps us identify potential nearby trouble — duh. However, we actually tend to ignore what our senses are trying to tell us. We look, but don’t see. We listen, but don’t hear. We subconsciously tune out important details. A conscious effort to actually see and hear what’s around us can help snap us out of that bad habit. The real payoff here is the flip-side benefit of anyone looking to cause trouble seeing you do this.
The Pack Mentality
We know bad guys prefer nice, soft targets. This is predatory behavior 101. Who would a predator take his chances with: a physically fit guy or gal who exits their vehicle and does a quick but methodical check of the savanna, or smartphone-with-earbuds-guy oblivious to the world?
Do a Google search for “jugging attacks” and watch some CCTV footage to see how robbers target those who are distracted or less observant than they should be. By taking a few seconds to consciously assess your surroundings you’ve organically lessened the threat simply by letting the bad guys know you’re paying attention. But what about that diaper change? Somebody’s gotta do it and your streak as rock-paper-scissors champion against your spouse can only last so long. So, it’s time for you to suck it up and get your hands dirty. But if you’re elbow deep in baby boom-boom, who’s watching your back?
In my case it was my two oldest sons, one a teenager and the other not far behind his brother. When I have to do my duty and deal with the “doody,” I simply tell my boys to, “pull security,” as I affect the road-side diaper change. It’s as simple as that. Just like in the old days. Short of having a fire-team of your bearded and tattooed buddies, an alert 14-year-old isn’t a terrible substitute.
Tell your wife, sons, daughters, traveling companions, etc., to simply look for people who are looking for you. All they have to do is keep an eye out while your back is turned and let you know if anyone approaches. Whether you’re occupied changing a diaper or a tire, simply have someone looking outward and paying attention.
“Road Warrior: Traveling Safely With Kids, Guns, and Pets”
If you’d like to read our full guide to safe cross-country travel, check back tomorrow for the web version of that article. It contains tips for route planning, driving schedule, accommodations, vehicle inspection, first aid, recovery gear, and much more. You can also read it in its original print format, along with several other emergency preparedness articles, in RECOIL OFFGRID Issue 33 — on shelves starting this Tuesday, August 6th.
Situational awareness is one of the foundations of preparedness. By observing your surroundings — and teaching your loved ones to do the same — you’ll gain an early warning of any trouble that’s headed your way. Even if it only buys you a second or two to react, that time can be a literal life-saver. Check back tomorrow for Part 2 of our Road Trip Safety web series, which focuses specifically on situational awareness. For now, here’s a real-life situation that illustrates this point.
Good observation and awareness skills are only part of the equation. You need to use that information to react quickly and defend yourself effectively — that means having the tools and the skills to take action. In the following video from Active Self Protection, instructor John Correia analyzes some CCTV footage of a defensive shooting in Brazil. His takeaways from this video are valuable to keep in mind.
The video begins with a woman preparing to move her car at night when her husband, reportedly an off-duty police officer, walks outside and stops her. While it’s possible that he did this for some innocuous reason, it’s more likely that he knew this area might be dangerous for someone alone and unarmed in a vehicle. If that’s the case, he was absolutely correct in that assessment. A man walks towards them with a gun in hand, and attempts to carjack them.
Fortunately, the husband was armed and was able to react quickly and get the upper hand, thanks in part to his wife watching his back and alerting him of the danger. As we’ll discuss more tomorrow, this is a great example of how a “pack mindset” and situational awareness are critical for the entire family.
Among all of the life lessons you were inundated with as a child, there are some that have probably stuck with you throughout your life. Look both ways before you cross the street, don’t run with scissors, and, from the time you were young, “stop, drop, and roll” in case your clothing ever catches on fire. As you got older, and realized your clothing doesn’t catch on fire quite as often as you were led to believe, perhaps you began to notice fire extinguishers for those times when virtually anything besides your clothing goes up in flames.
Fire extinguishers have been around for hundreds of years and have been a staple in fire safety for the past century. You walk by them every day and pay little or no attention to the red cylinders hanging on the walls or support posts of your local stores, schools, hospitals, office buildings, and other structures. They’re required by most, if not all, municipal codes to be easily accessible in commercial occupancies. The specific number of extinguishers and where they’re located can vary, but the National Fire Protection Association (NFPA) recommends no more than 75 feet between extinguishers. That number can fluctuate a bit based on type of occupancy, square footage, and layout.
The less regulated, but probably more important recommendation that all homes have at least one working fire extinguisher can be a source of guilt. No one can deny that having a fire extinguisher in an occupied home is anything but a good idea. But, unfortunately, most have placed a fire extinguisher on the “I’ll get it one of these days” list. If someone hasn’t experienced the immediate and critical need for an easily accessible, working fire extinguisher, the draw to prioritize having one in the home falls dramatically.
I conducted an informal social media poll asking who has a fire extinguisher in their home. I should also mention that I am a career firefighter, so a good number of my social media friends are fellow firefighters and our family members. A shocking 75 percent of those who responded don’t have a fire extinguisher in their home.
One of the primary reasons people give for putting off the purchase of a fire extinguisher is the intimidation factor. Most recognize the obvious: A fire extinguisher is used to extinguish a fire; it’s right there in the name. But it’s not as simple as that. There are different sizes, purposes, styles, and a wide range of costs. Unfortunately, it all adds up to most people overlooking an extremely important and easy-to-use safety tool.
Understanding Fire Extinguisher Classes
In an effort to simplify the purchase and use of a fire extinguisher, let’s begin with the label and discuss what it’s telling you. The principal information you should pay attention to is the part about the classes of fire that can be extinguished with that specific device. Believe it or not, it’s not as simple as one size fits all. Fire extinguishers aren’t simply pressurized canisters filled with water. As you may know, spraying water on certain fires can actually make a bad situation worse. Most fire extinguishers, in fact, have varying chemical agents or powders that allow them to extinguish a variety of different types of fires. This is where reading the label becomes important. Fires are classified by what’s actually burning. For the average homeowner and fire extinguisher customer, there are five classes of fire you may encounter.
These classes are easily distinguished from one another by differing colors and shapes for each class. The intent of this is so they can be identified, if there were to be any damage to the label, by its shape. To take the simplicity of identification a step further, many fire extinguisher manufacturers have included color coding. Not all fire extinguisher companies use the color coding, but all use the letters and shapes.
The most common types you’ll find are combination extinguishers. They’re known as “ABC” extinguishers, referring to the types of fire they’ll put out. These extinguishers contain a multi-purpose extinguishing powder (usually a combination of monoammonium phosphate and ammonium sulphate) that allows them to be approved by Underwriters Laboratories (UL) to suppress ordinary combustibles, flammable liquids, as well as energized electrical equipment. The aforementioned fire extinguishers that you encounter in all commercial occupancies and homes are almost exclusively ABC extinguishers.
In some specialty shops and industrial locations where flammable metals are prevalent, you may find Class D extinguishers. In most scenarios, though, a Class D extinguisher wouldn’t be needed. They act much like ABC extinguishers, but often use a sodium chloride-based powder. This substance can be used on other classes of fires, but, in short, Class D extinguishers are expensive and messy.
Class K extinguishers are becoming more common and are now available in most retail stores that carry fire extinguishers. These are specially formulated to put out grease-based kitchen fires. They spray a fine mist combination of alkaline chemicals that operate on the principle of saponification, a chemical reaction between a base and an acid to create a salt. (The same principle is used to convert fatty acid and lye into soap — see “All Washed Up” in Issue 30.) Class K extinguishers are able to snuff out the fire without the risk of spread or reignition.
How to Use a Fire Extinguisher
Knowing the purpose of the fire extinguisher is half the battle. Knowing what to do with it is the other half. The safe operation of a fire extinguisher could be a several hour class, but the basics are right there on the box when you purchase one. It’s broken down to a handy acronym: PASS.
Pull: Simply pull the plastic or metal pin sticking out the side of the handle. This pin is in place to prevent accidental discharge. If you’re not too overwhelmed at the moment and think about it, put the pin in your pocket, rather than throwing it. That way, if you wish to reinsert it in the extinguisher handle and carry it after the fire is out, you can.
Aim: Aim low, pointing the extinguisher at the base of the fire. The tendency is to point it at the bulk of the fire, but your most effective use of the contents of the extinguisher is to aim at the base first.
Squeeze: Squeeze the handle to discharge extinguisher.
Sweep: Sweep the fire from side to side until it’s completely extinguished and then back away.
Now that you’re versed on the use and operation of a fire extinguisher, it’s time to purchase one. When looking at your options online or at your local department store, they may all look similar. Which one is right for you? It can be daunting to say the least. Seven extinguishers, commonly found on the shelves of nationwide popular retail stores were put to the test and evaluated on:
Fire Class(es)
Discharge Range
Discharge Time
Weight
Rechargeability
Warranty
Cost
Comparing Performance
All seven fire extinguishers were discharged and evaluated. When fire extinguishers are tested and rated by UL, it’s done in a laboratory in a controlled environment. Our testing was done far less scientifically, but more practically. A mostly windless day (2 to 4 mph) was chosen and the test subject, Nick, had never utilized a fire extinguisher before. He was given minimal instruction (PASS). Each extinguisher was discharged for 2 seconds on a small fire and then that 2 seconds was added to a separate test for discharge time and distance.
The good news is, across the board, all extinguishers performed very well. In every instance the fire was out before even the 2-second mark. It’s in the subjective details that you can differentiate your own comfort level and which extinguisher would best work for you and your family. Listed cost for each extinguisher is based on an internet search at the time of writing.
Important Designations
Class A and B fires also use a numerical designation. Each “A” rating is the equivalent effectiveness that 1¼ gallons of water applied would be. Each “B” designation represents a square foot that can be extinguished by someone trained on its use.
For example: In the hands of a trained user, a 4A20BC extinguisher has the equivalent of 5 gallons of water (4A20BC), can extinguish 20 square feet of fire (4A20BC), and can be utilized on energized electrical equipment (4A20BC).
Summary
Although this is a small sampling of the many fire extinguishers found online or on retail shelves, it provides a broad overview of the high-quality options that you have when identifying which extinguisher is right for your home. There are additional extinguishers designed specifically for automotive use, flammable metals use, and a slew of others. The purpose of this evaluation wasn’t to tell you which fire extinguisher to buy, but rather highlight seven common-purpose fire extinguishers and demonstrate their uses so you can determine what factors are most important to you. Do your research, and make an educated decision about which one(s) to purchase for your home. The most difficult parts are committing to making the purchase and following through.
Notes The First Alert Tundra is a bit of a unicorn in the traditional fire extinguisher market as an aerosol-style extinguisher. More and more are becoming available over time. The Tundra breaks from the traditional labeling and uses pictures and simple descriptions to describe its use, rather than the classes. First Alert confirmed that the Tundra can be used with Class A, B, C, and K fires. In our testing, the Tundra remained effective far beyond the advertised 16-foot range, and our discharge time was a full 39 seconds. Impressive for its compact design!
Notes The First Alert Home 1 is one of the most commonly found extinguishers in retail stores and homes. It’s compact, inexpensive, and capable of putting out a good amount of fire for its size. Regardless of the brand you choose, a 1A10BC extinguisher makes a nice, multi-use tool that can be kept accessible, but easily tucked away so as not to stand out in a residential room.
Notes There are a few manufacturers that carry both residential as well as commercially available extinguishers. First Alert is one of them. The First Alert Home 2 Pro is the type of extinguisher you’d commonly see in a department store or school extinguisher cabinet, but it’s available for residential purchase as well. As you can see from the performance numbers, it’s just what you’d expect when compared to its smaller relative: slightly bigger, slightly more expensive, slightly further reach, and slightly longer discharge time. If your home habits lend themselves to a bit more of a fire hazard concern, this might be the extinguisher for you.
Notes The Kidde Basic Use fire extinguisher is a counterpart to the First Alert Home 1. It performed slightly better in our testing, but only by a marginal amount. Kidde has a strong and enduring reputation as a leader in home fire safety, but in 2017, announced a major recall to a few extinguishers due to clogging or the need of excessive force to activate. By all appearances, the company corrected the problem and has rebounded to regain its place among the home fire safety leaders.
Notes Like the First Alert Home 2 Pro, the Kidde Pro Series 210 is the larger of the residential Kidde options. It performed extremely well in our evaluation, leading the pack in discharge time and distance. Like its competitor, it’s slightly larger, but carries with it greater capacity for fire extinguishment. Some would consider these 2A10BC extinguishers overkill for a residential application, while others feel bigger is better.
Notes Cold Fire extinguishers are relatively new to the market and are in a class of their own. The company’s popularity is growing among police and fire departments. Although these extinguishers aren’t found on retail shelves, they’re commercially available through the manufacturer’s website and can be ordered by email at ed@desertmountaincf.com. Although their 20-ounce extinguisher performed on the low end of discharge time and distance, the fire knockdown power is unmistakable. Cold Fire touts a UL rating for A, B, D, and K fires, which means, although they lack the Class C rating for energized electrical equipment, the Class K rating makes them usable for kitchen grease fires. Cold Fire is 100-percent biodegradable, nontoxic, noncorrosive, and has six times the penetrating capability of water. Their small extinguishers pack an impressive punch.
Kidde Kitchen
Fire Class(es) 10BC
Discharge Range 15 feet
Discharge Time 22 seconds
Weight 3.9 pounds
Rechargeable No
Warranty 12 years
Price $15 (Menards)
URL www.kidde.com
Notes The Kidde Kitchen extinguisher isn’t like any of the other extinguishers evaluated for this article. It’s specifically formulated for kitchen fires. Although Class K extinguishers are specifically designed for burning cooking oils — the alkaline mixture combines with the burning oil to form a soapy foam layer — this extinguisher is rated for Class B fires, which basically eliminates the oxygen and puts out the fire. In our evaluation, it immediately snuffed out the grease fire, didn’t splatter or spread the fire, and left a film over the oil, suppressing the flammable vapors. This is a great option to have in your family’s kitchen.