The world may have changed significantly since the time a hairy guy in a loincloth struck a couple of rocks together and discovered fire, but the power of controlled combustion to sustain us is the same as it was so long ago. And, the use of fire as a way to prepare food hasn’t changed all that much either. Pots, pans, and ovens are modern adaptions of ancient technology, as is the stove itself.
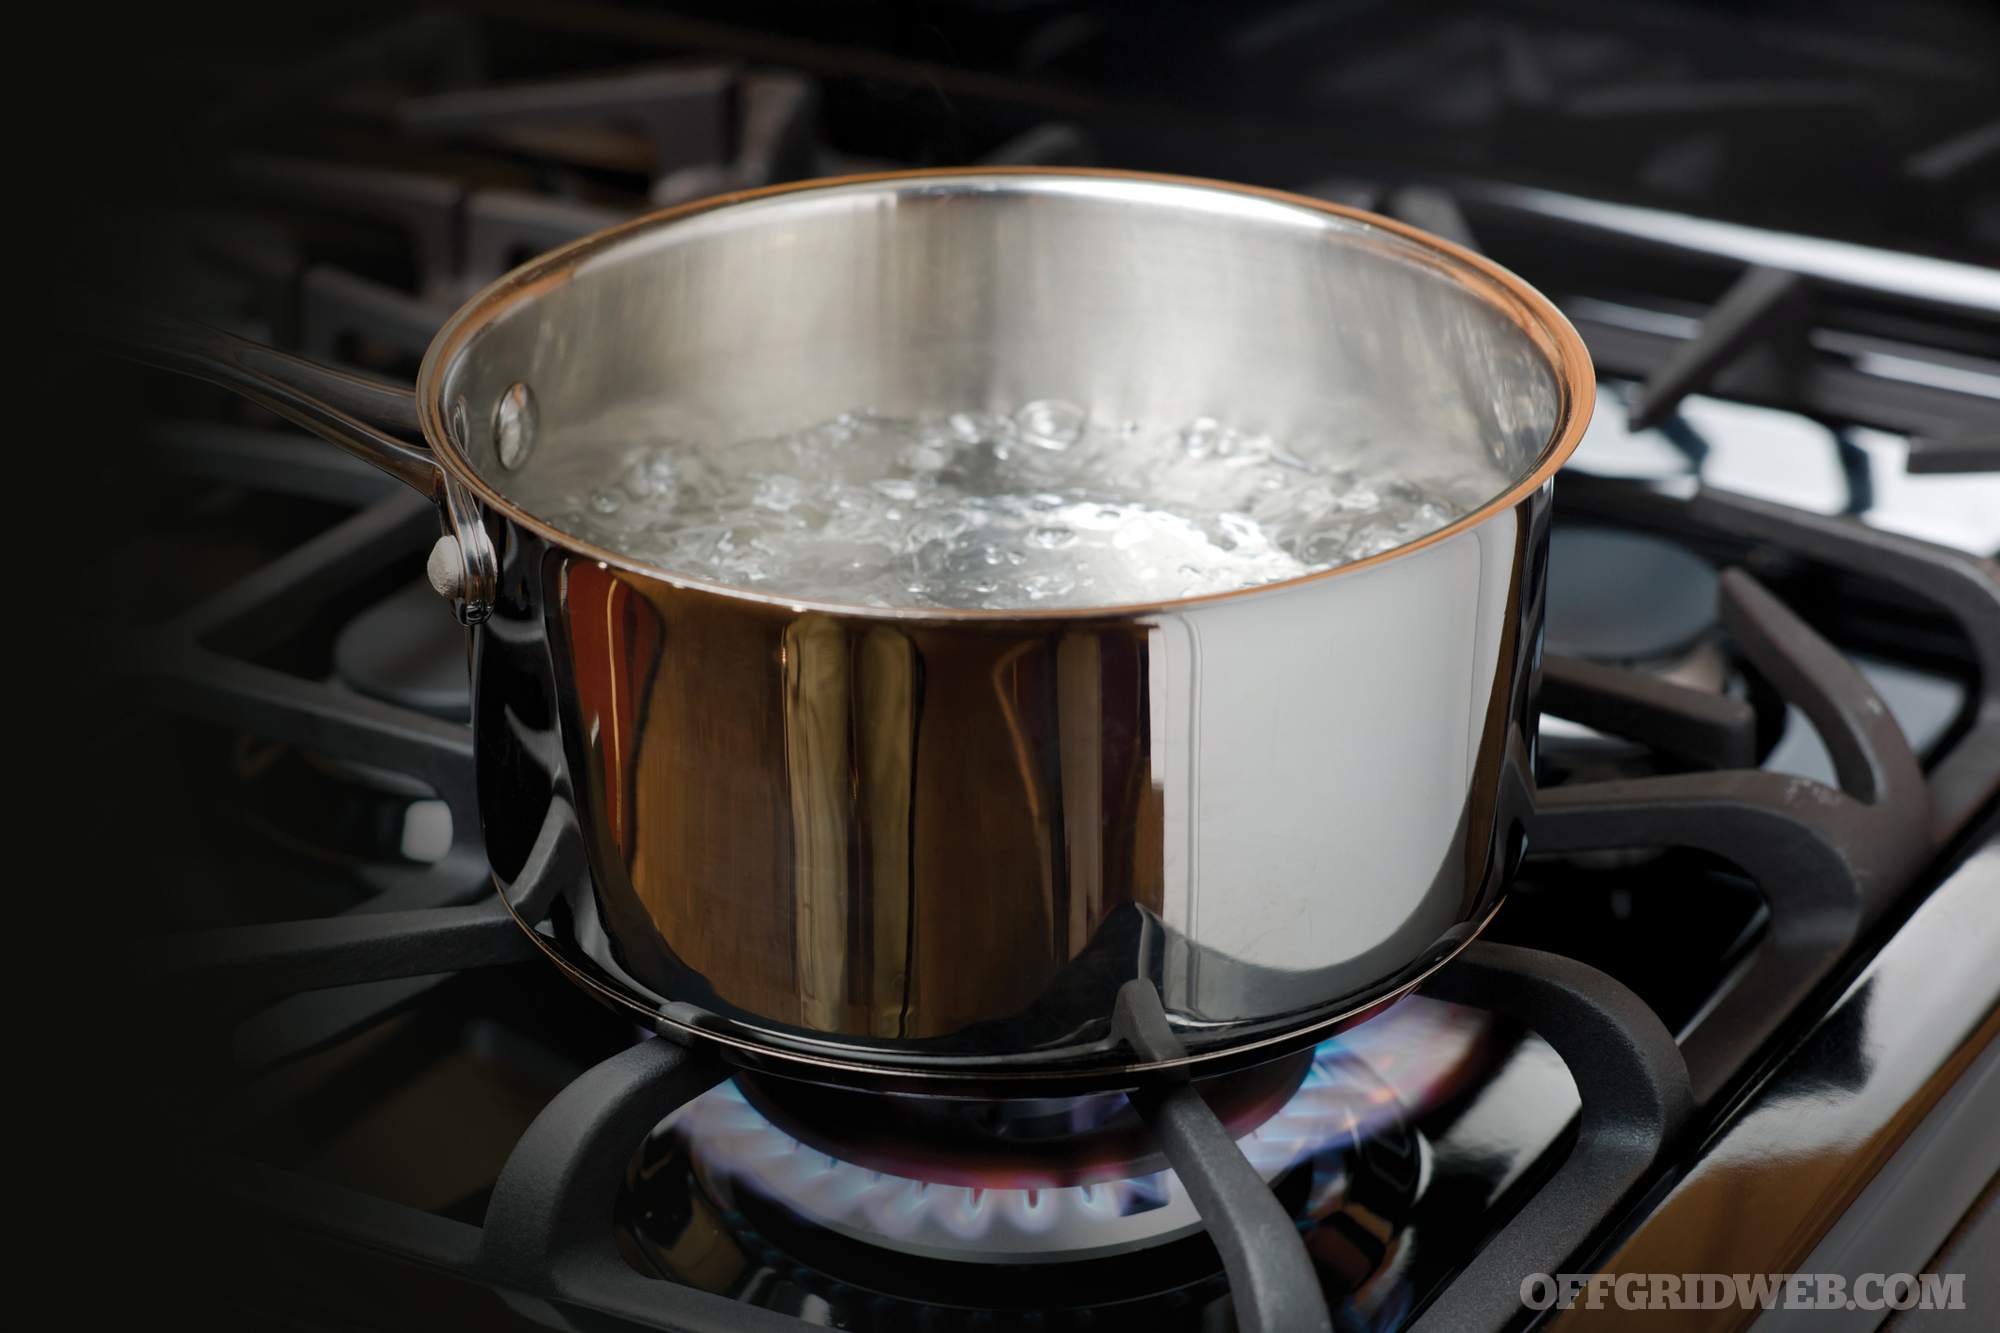
What’s changed are the materials, mechanisms, and fuels that make cooking far more convenient and safe. A portable stove is a must-have when you step off the grid — whether by choice or by circumstance. Cooking, purifying water, and even producing some simple household necessities, such as glue, are all within reach with a good stove at hand.
So, what do we look for in a portable stove that’ll suit life in a state of flux? We want a combination of features that mesh efficiency, performance, adaptability, and portability. We’ve pulled together a group of stoves to show what we get, and what we give up, when we move the faders on each of our four key traits.
Stove Types
The basic decision point when looking for a portable stove is the type of fuel it’ll burn. There are liquid fuel stoves, canister stoves, and solid fuel stoves. Liquid stove fuels need to be pumped into the stove from a manually pressurized fuel bottle. Canister stoves are self-pressurizing, so there’s no pumping. Solid fuel stoves burn anything that won’t evaporate, from found wood to manmade fuel tablets.
Solid-Fuel Stoves: These burn easily available biomass: twigs, branches, leaves, fuel pellets, etc. Some are set up for manmade hexamine fuel tablets, such as little white Esbit fuel tabs, that burn for about 10 minutes a shot. Solid fuel stoves generally require a flame, via a spark, to ignite the fuel. Hexamine can be lit with a spark, but doing so requires the crumbling of some of the tablet, reducing burn time.
Alcohol Stoves: This type is an unpressurized liquid-fuel stove. Alcohol vaporizes at room temperature, so it mixes with air and burns easily, cleanly, and quickly. Alcohol stoves have an intense following with the ultralight backpacking crowd, but there are significant downsides when looking at them for anything other than recreational use. They burn fuel very quickly, the flame is easily extinguished by wind, and there’s no controlling the output. Many alcohol stoves are also homemade from a tin can and are, therefore, as durable as…a tin can.
Liquid-Fuel Stoves: These are the most versatile options. Most are set up to burn white gas, kerosene, and diesel. There are two things to know about burning liquid fuel. One, the liquid doesn’t burn, the vapor it gives off does. Two, it has very low vapor pressure so the fuel must be pressurized manually to run a stove.
Beyond that, white gas is the cleanest form of liquid fuel, and everything else will be a huge, messy, smelly pain in the ass. Despite the easy availability of diesel and kerosene, we hate dealing with it because, no matter how careful we are, it gets everywhere. Using a diesel stove is like trying to change a playful chimpanzee’s diaper after feeding it beer and pizza; expect diesel on your hands, staining your clothes, getting up in your nose, and leaking inside your pack or vehicle. The upside of liquid fuel (LF) is availability and efficiency. With about 20 reps on the pump and some patient preheating, a good LF stove can burn anything that will flow through the fuel lines and vaporize in the jet.
Canister Stoves: These types run on sealed canisters of propane, butane, isobutane, or isobutane-propane mix. Propane is ideal if we’re not moving much. Its low boiling point means propane tanks will work when temperatures get down to -43 degrees F, but a stronger, heavier tank is required to contain the gas since it’s under more pressure than butane-type fuels.
Butane and isobutane are cheaper than propane and burn as easily until the temps drop. Below the fuel’s boiling point, canisters lose vapor pressure and the fuel gases won’t leave the canister. This happens at 30 degrees F for butane and at 11 degrees F for isobutane. Below these temps, the stoves won’t run, unless they can be used inverted (and most stoves can’t). On the plus side, butane and isobutane fuels are stored at lower pressure than propane, and use smaller, lighter fuel canisters.
Portability
We give up a few things to keep size and weight down. Grande gets us larger pots, bigger controls, increased durability, and greater stability. Better portability means giving up some, or all of that.
Canister stoves are the most portable option. Just make sure you consider the size and weight of a fuel canister, or five; and realize you can’t take fuel canisters on commercial aircraft. Liquid-fuel stoves are generally the second most portable option, and propane stoves are the least portable option because propane fuel containers are heavy, being made of steel.
Solid-fuel stoves run the portability gamut of tiny cups to hold a burning chunk of fuel to sizable contraptions with built-in blowers and batteries.
Efficiency
Fuel is just a storage medium for energy. Think of efficiency as the amount of energy released in combustion and divide that by the effort it takes to turn the fuel into energy. The RECOIL OFFGRID continuum of burnability runs from easily ignited gases, such as propane, to heavy liquid fuels that yawn when confronted by an open flame.
Butane, propane, and other gases will ignite and burn blue and clean with spark. Diesel, though, needs to be wined and dined before giving up its flame, and even then it’s a dirty yellow-tinged bitch that leaves its sooty mark on everything it touches.
Liquid-fuel stoves must be primed. Priming involves igniting a little fuel collected in a catch basin near the stove head. This heats up the burner or generator loop in the fuel line while the fuel flow is off. The heat adds pressure and helps vaporize the fuel in the line, so when it comes out of the jet, it’s going fast enough and the fuel particles are aerosolized, making them easier to burn.
White gas is closer to alcohol and doesn’t take nearly as much coaxing to give up its flame, and it burns cleanly. It primes faster than diesel and kerosene.
Solid-fuel stoves are tougher to ignite and generally require more fuel or time to generate the temps needed to cook compared to gas and LF stoves.
Versatility
Fuel availability is always a chief concern, and more so in a compromised world. Liquid fuel stoves offer the most versatility. Swap the jet, and you can burn any number of easily available liquid fuels. Some LF stoves with large fuel lines and efficient generator loops can burn just about anything that can be forced through the jet. They’ll also run in just about any environment that will sustain a flame.
Canister stoves only run on threaded, single-use fuel canisters. There’s no guarantee you’ll find fuel canisters on the road. If you’re relying on a canister stove for SHTF, you’d best stockpile scores of spare canisters.
Pure butane only run in moderate temps, isobutane will burn just below freezing, and isobutane/propane can operate a little further down the temp scale; but only a LF stove is going to burn reliably when temps go subzero or in alpine altitudes.
For solid-fuel stoves, biomass is generally available in the form of plentiful leaves and twigs. But, if you’re above the tree line, or in a desert, you’ll have to bring wood pellets or some form of engineered solid fuel.
Testing
Our testing was done at room temperature, with all water starting out at 72 degrees F. A thermocouple was submerged and held 1-inch above the center of each pot, and boil times were recorded when the temp hit 212 degrees F. Canister fuel pressure varies with use and temperature, and none of these stoves were meant to work indoors. To account for the reduction in canister pressure as fuel is used, we averaged all our boil times over five consecutive boil cycles, each canister stove starting with a fresh canister. We also threw each of the canisters in the freezer and got them down to 5 degrees F to see how the canister stoves might perform in cold weather.
To account for real-world environmental factors, we set up another boil test with a fan blowing a constant 3-mph breeze at the stoves. If the stove came with a windscreen, we used it. If it didn’t come with one, we didn’t add one.
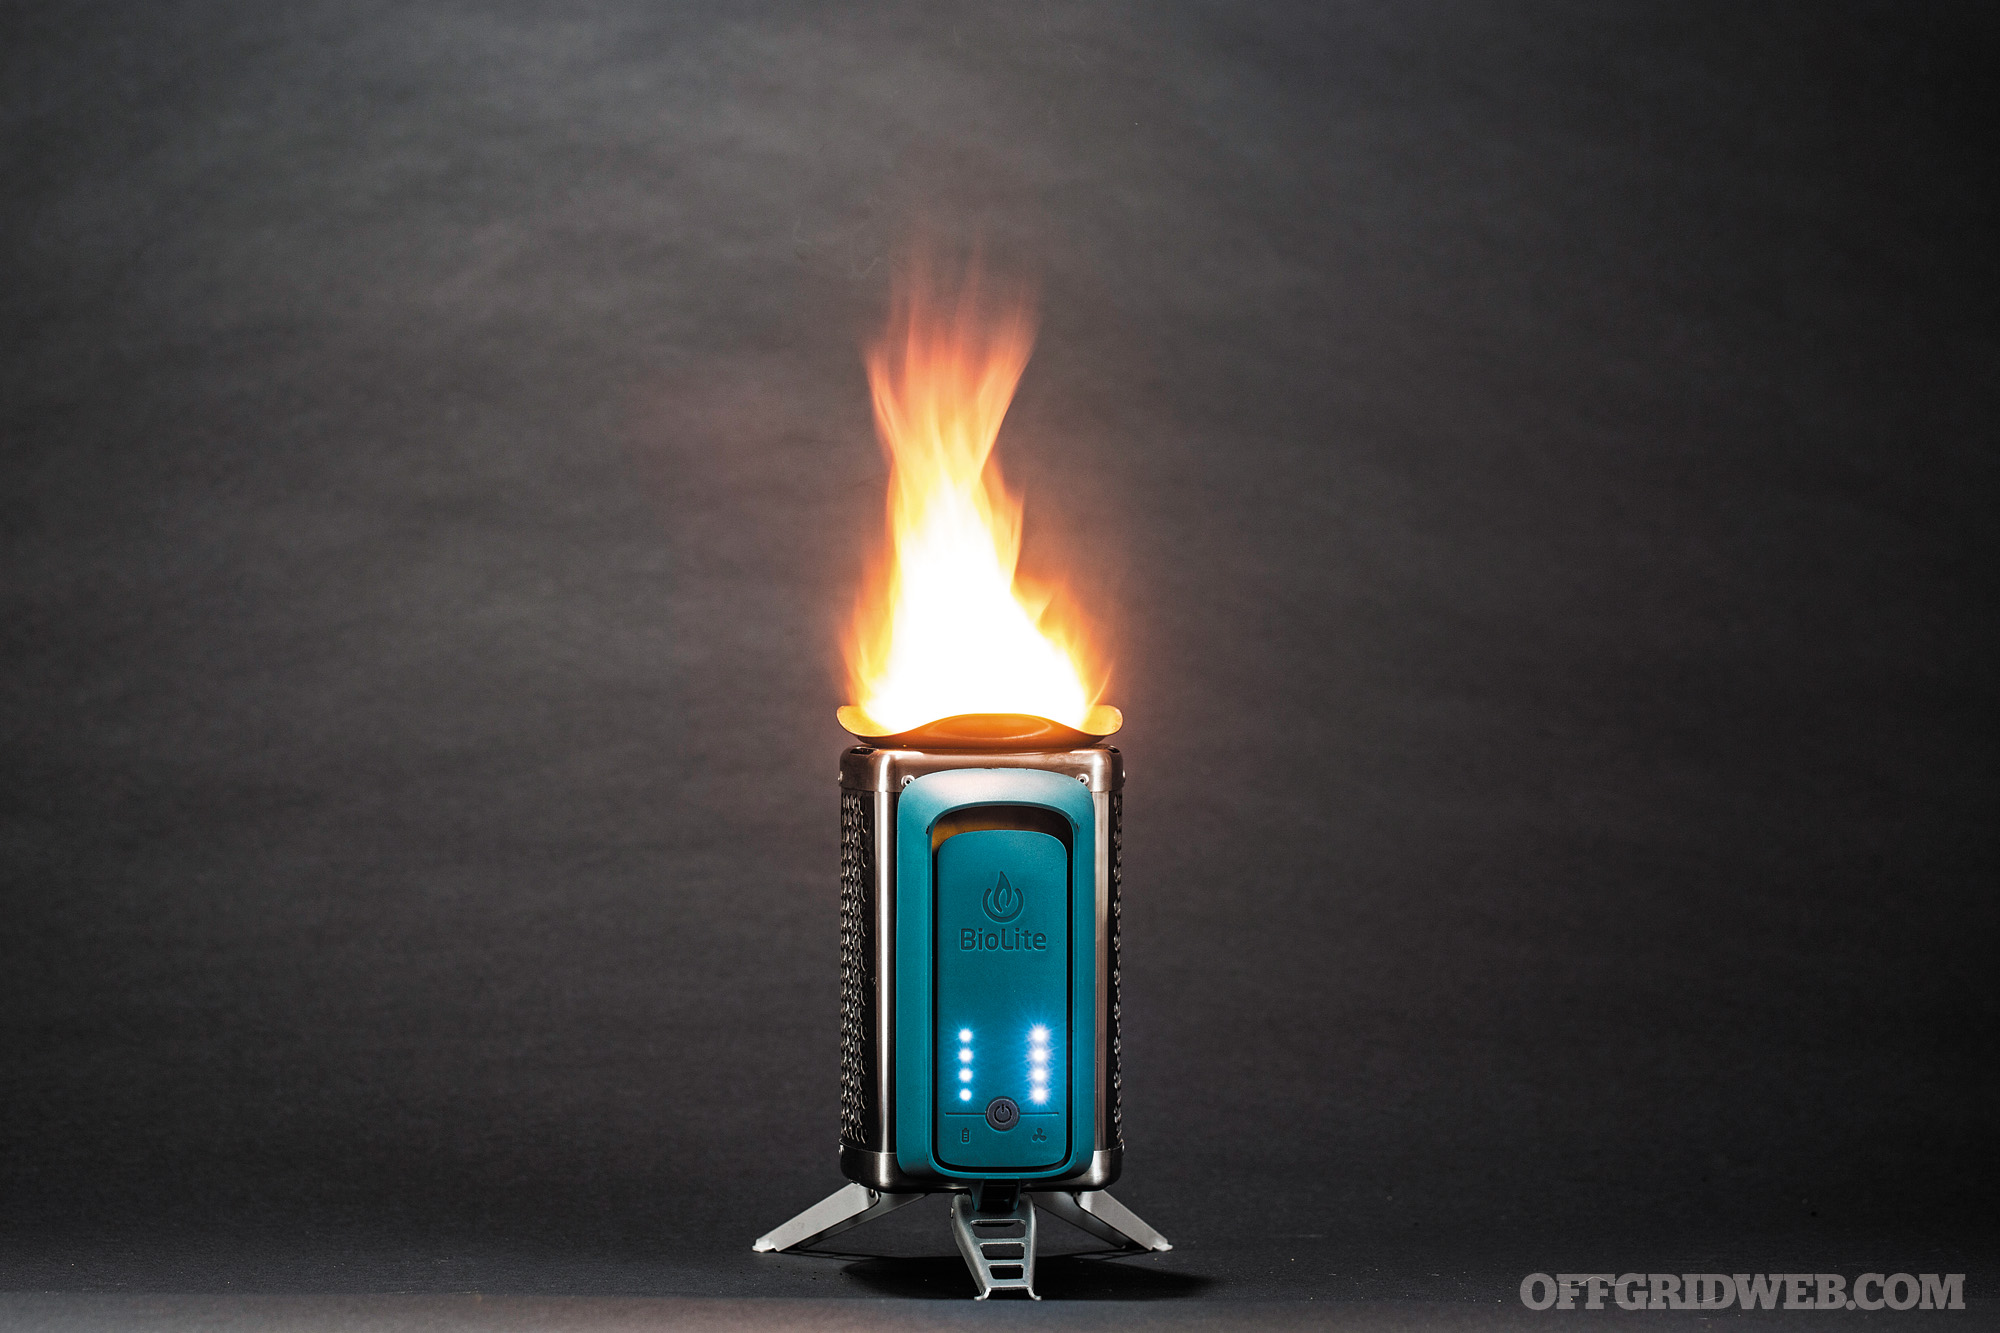
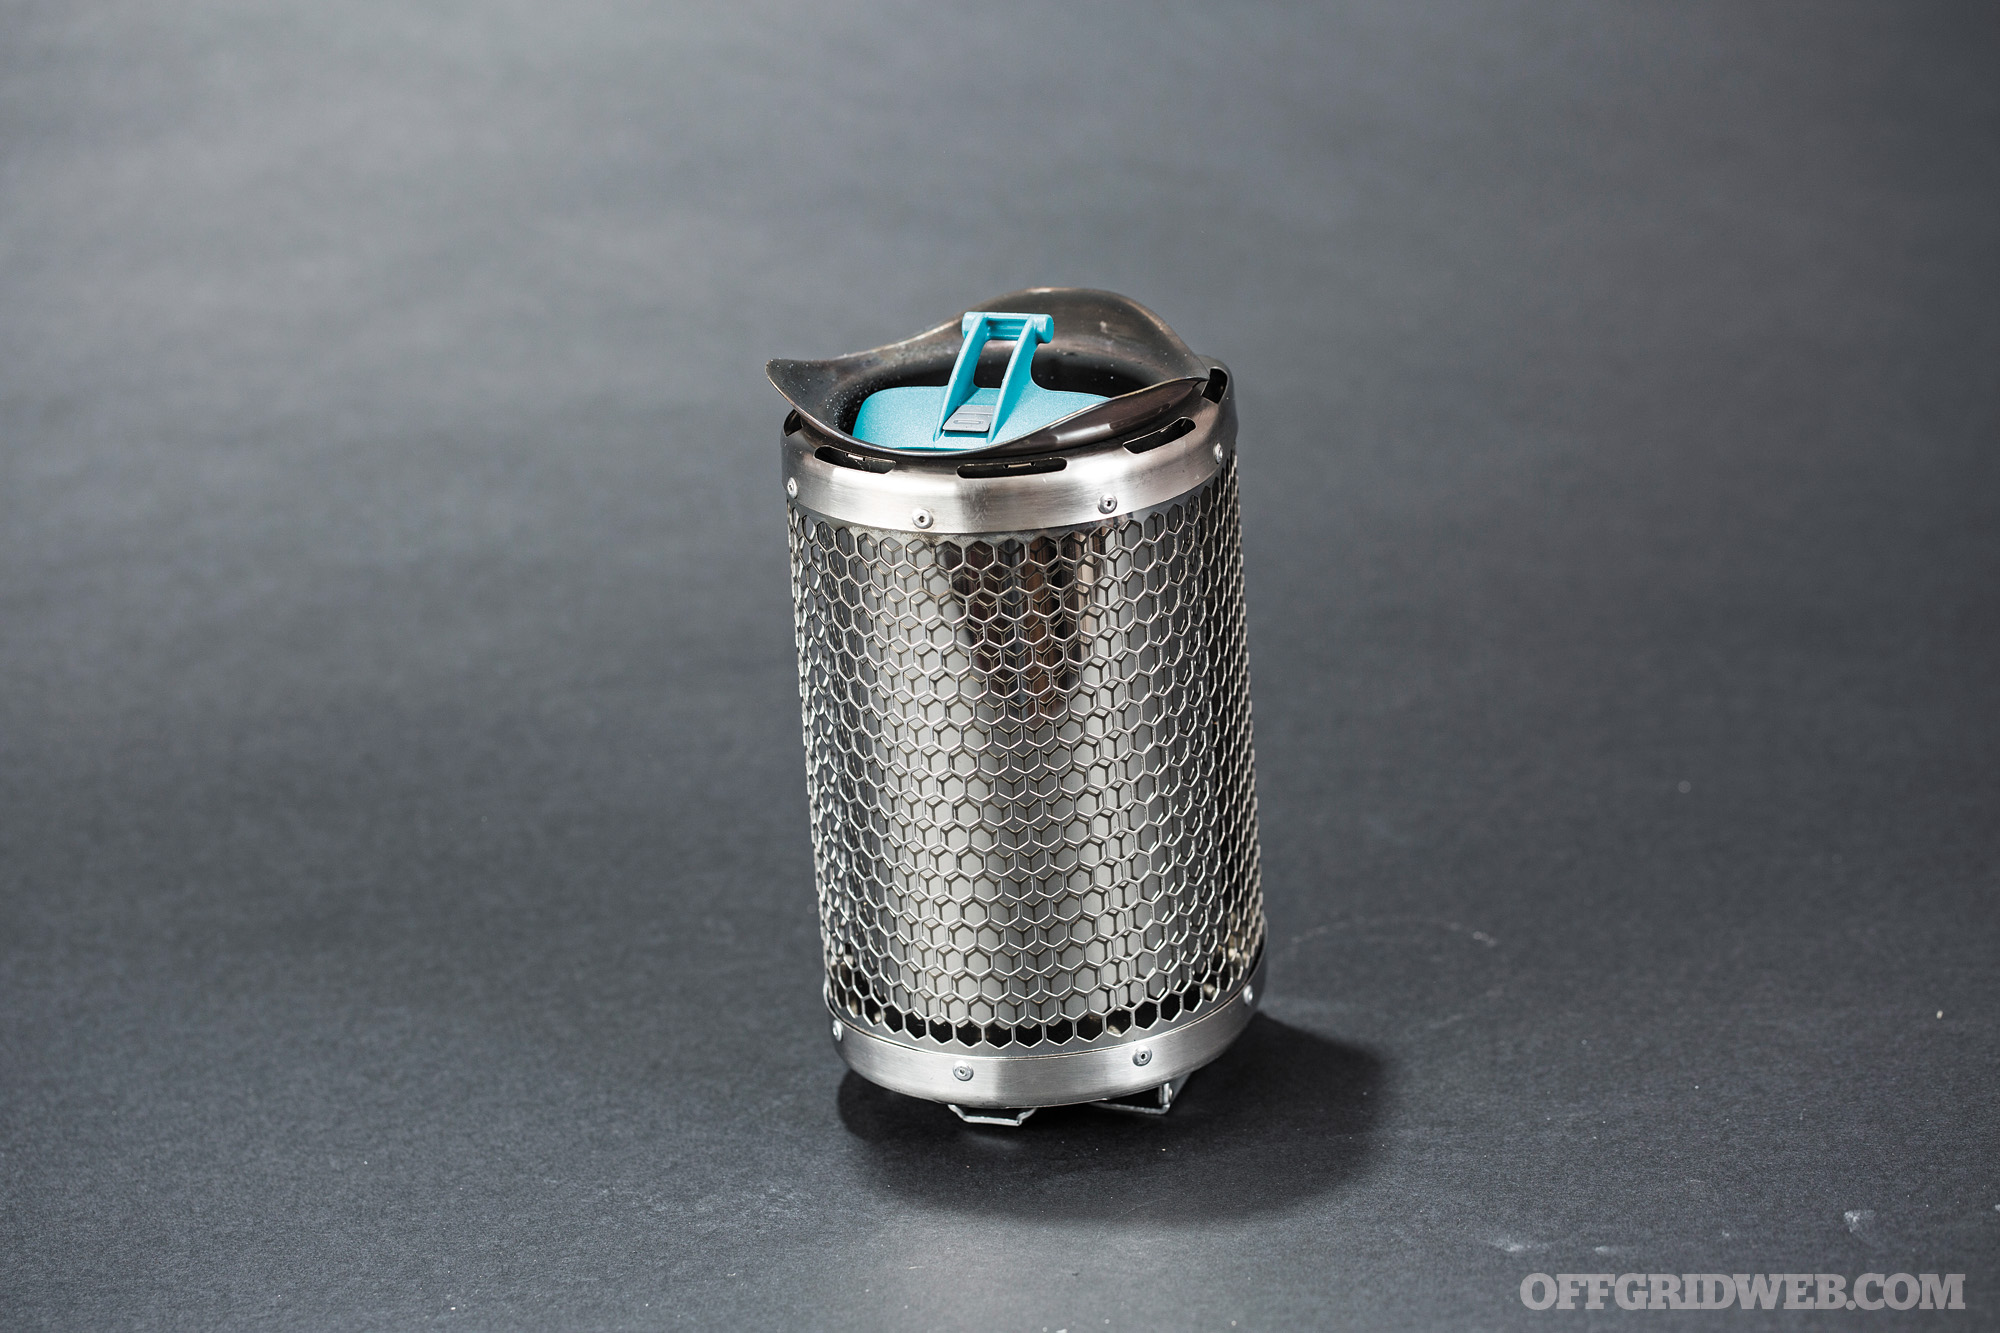
BioLite CookStove

SOLID FUEL
Weight
25.1 oz
Fuel Type
Biomass (wood)
Boil Time – Calm
2:30
Boil Time – 3 mph Wind
3:20
MSRP
$100
URL
www.bioliteenergy.com
Notes
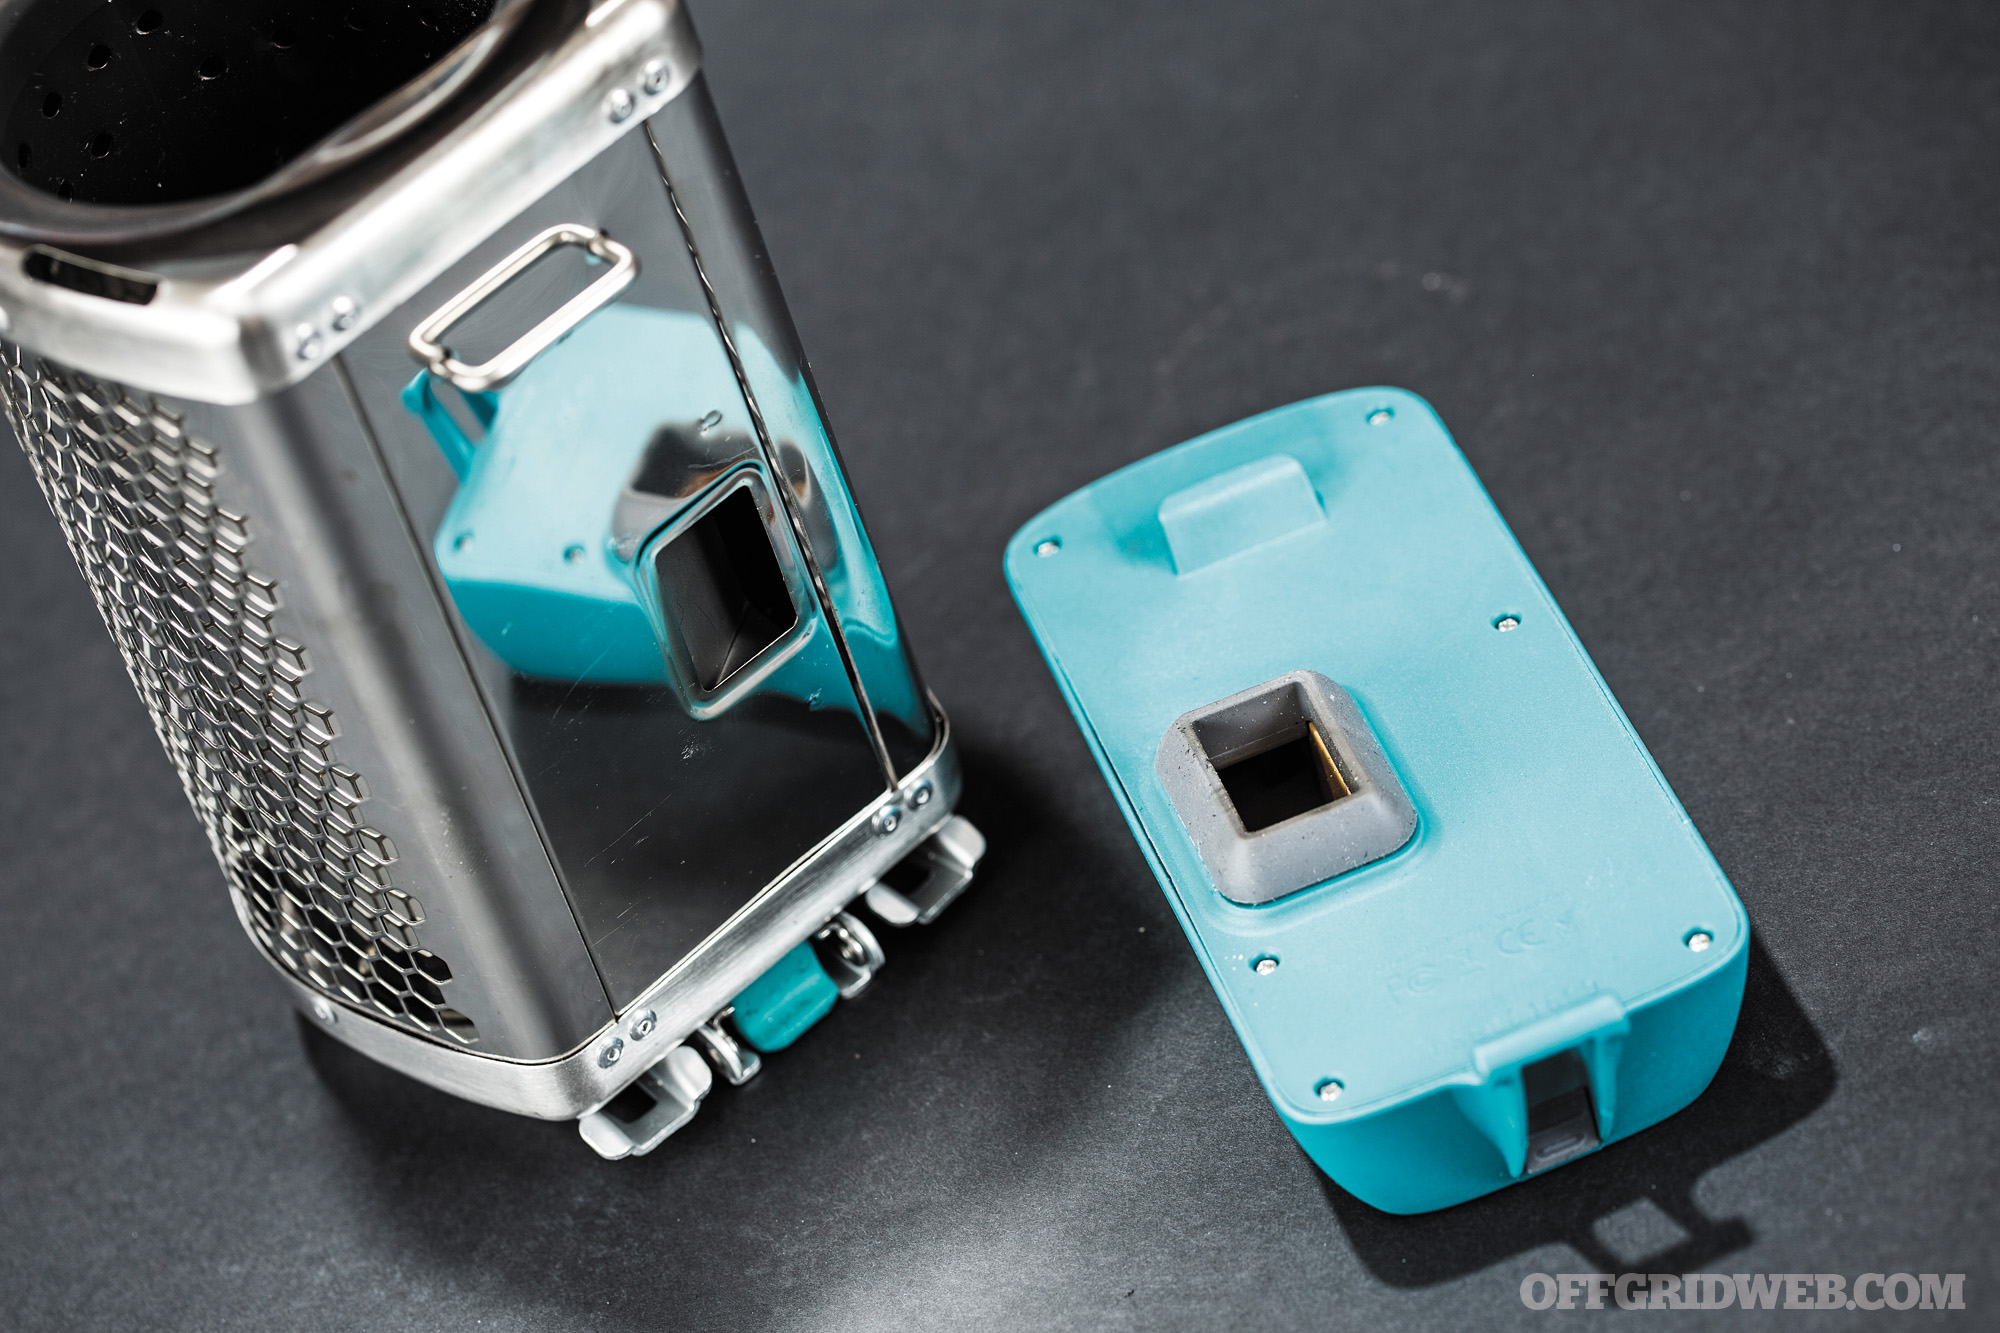
The CookStove is a multi-walled, perforated steel bucket a little larger than a Nalgene bottle. It uses a detachable fan pack that travels in the body of the stove and snaps to the exterior for use. Extend the folding legs, dump burning kindling inside, and start the fan to aid combustion. The interior of the stove is perforated to create a cyclonic ducting effect that cranks flames up like a bored pyro with a can of lighter fluid and a crate of matches.
Use: The stove works. The ducted air creates an awesome, hot burning fire from any dry fuel that fits inside. It’s heavy and a bit bulky when compared to every other backpacking stove on the market. Though, if you’re picking fuel on the trail, it may be a wash when it comes to weight and bulk. This thing does burn fuel fast, though. It burns a load of fuel boiling a couple liters of water. Keeping the stove going while cooking a conventional meal is a challenge. It’s a hungry little beast and access to its fuel chamber is blocked by cookware. Although the stove is clean-burning with the fan on, it gets pretty filthy. Plan on using the included carry pouch to keep the blackness from coating everything else in your pack.
Performance: Using commercial fatwood kindling sticks as a test fuel, the stove went bonkers, spitting flame like a portal from hell. Combustion is a lot more complete and cleaner than an open fire. We can’t say it’s smokeless, but it’s close. Using this cheater fuel, boil times are way faster than we expected, and as fast as any liquid or canister stove we’ve used. Using forest fuel, the stove runs well, but needs more tending. If you’ve got fire-starting chops, getting the CookStove roaring is child’s play. Once the stove has a thriving flame, start the fan and watch the flames shoot up. But, keep a lot of fuel ready to dump into its hungry little mouth. It burns hot and fast.

Pros:
- Weeks of fan use on a single charge
- Little need for commercial fuel
- Steel body is extremely durable.
Cons:
- Every time it’s used, Hades releases a demon from the underworld.
- Rips through fuel at a rapid pace.
- We question the service life of a device dependent on a seldom-used rechargeable battery.
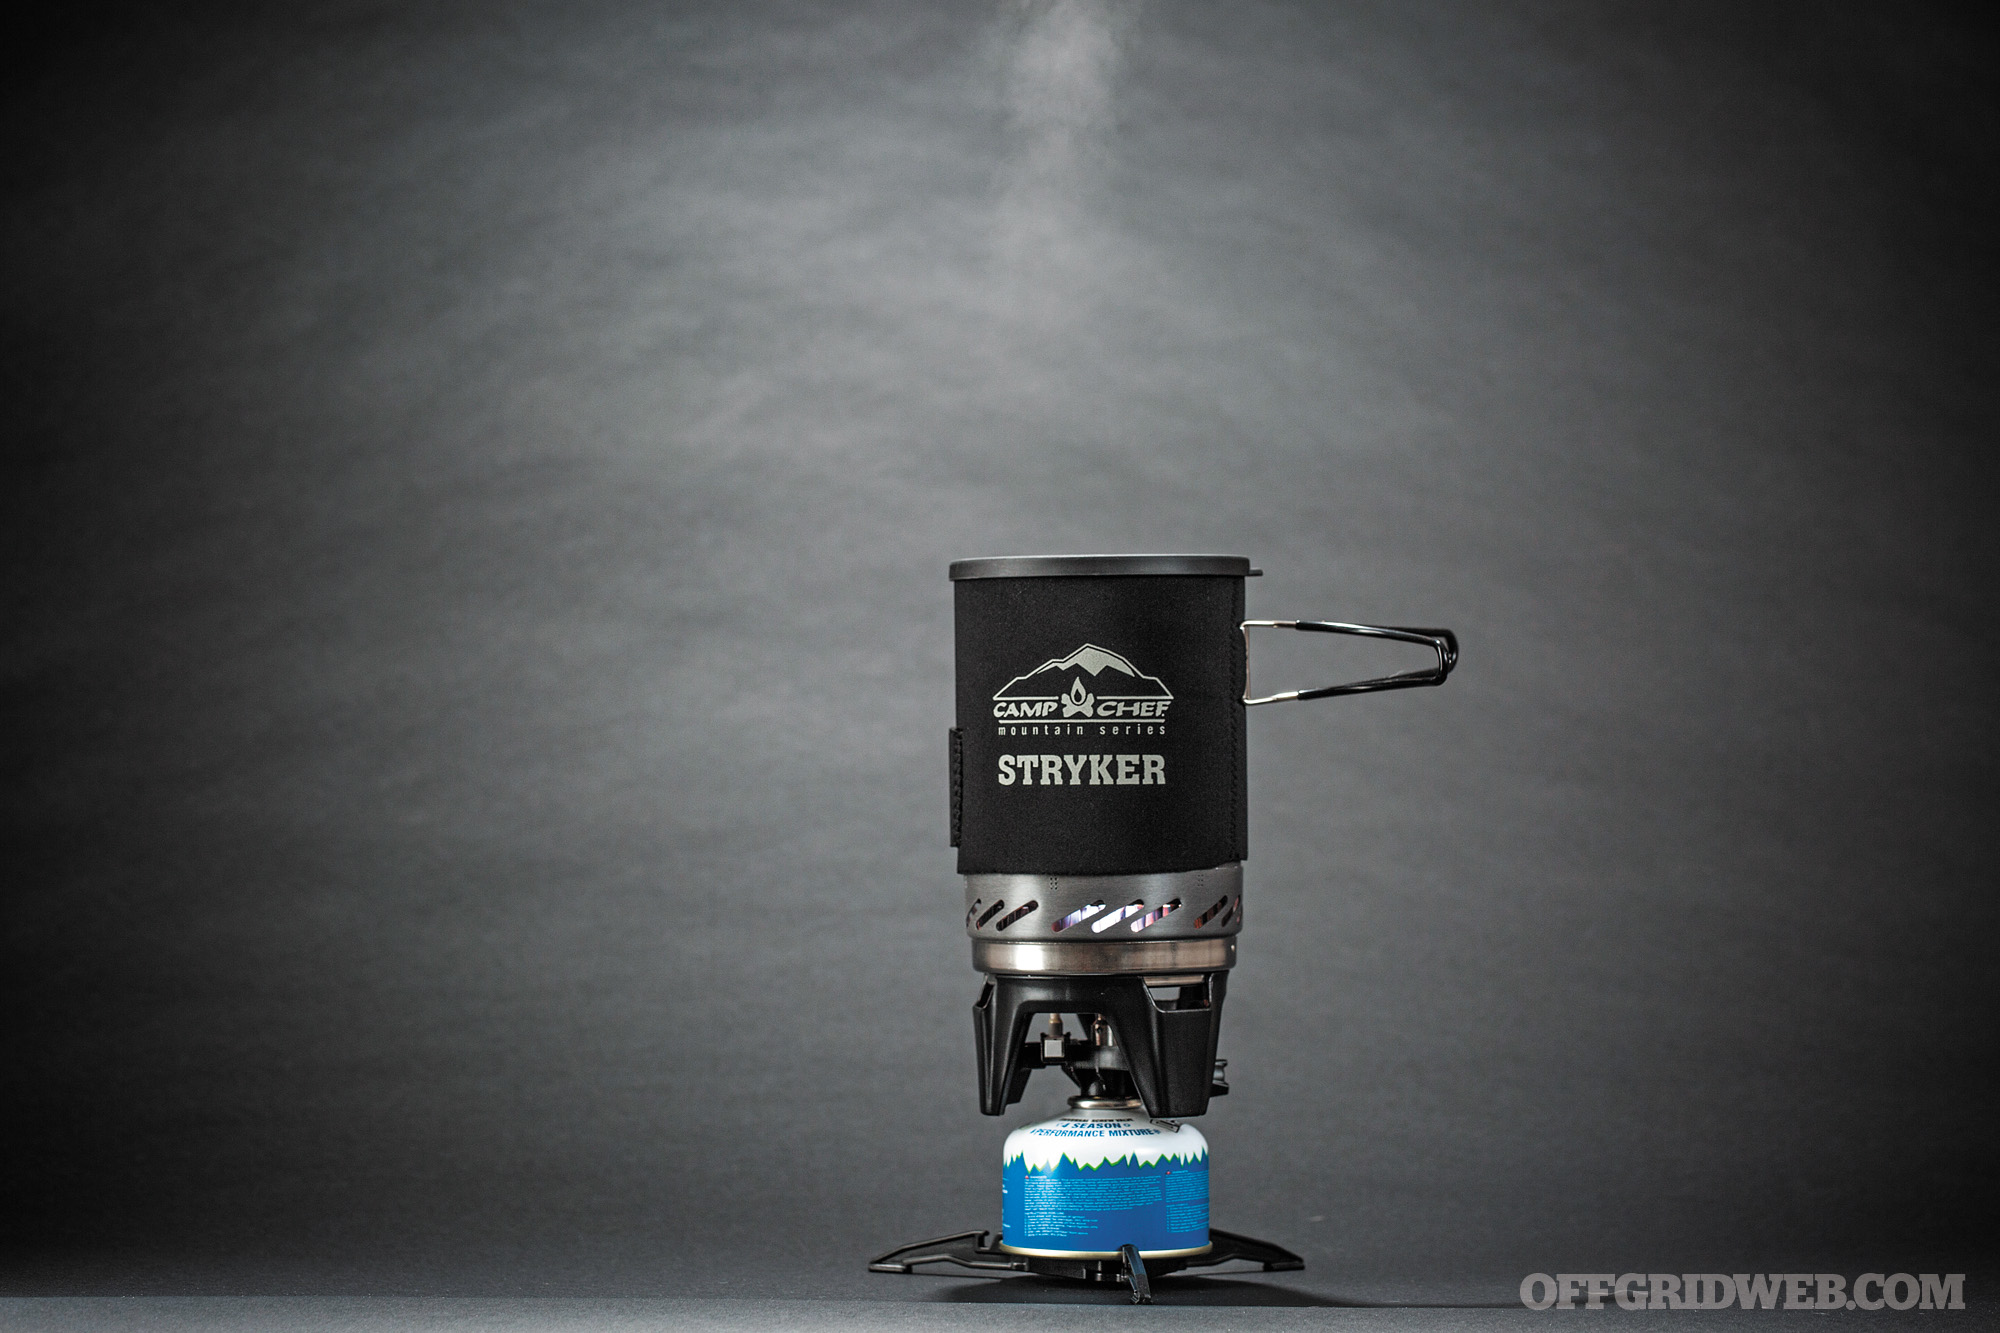
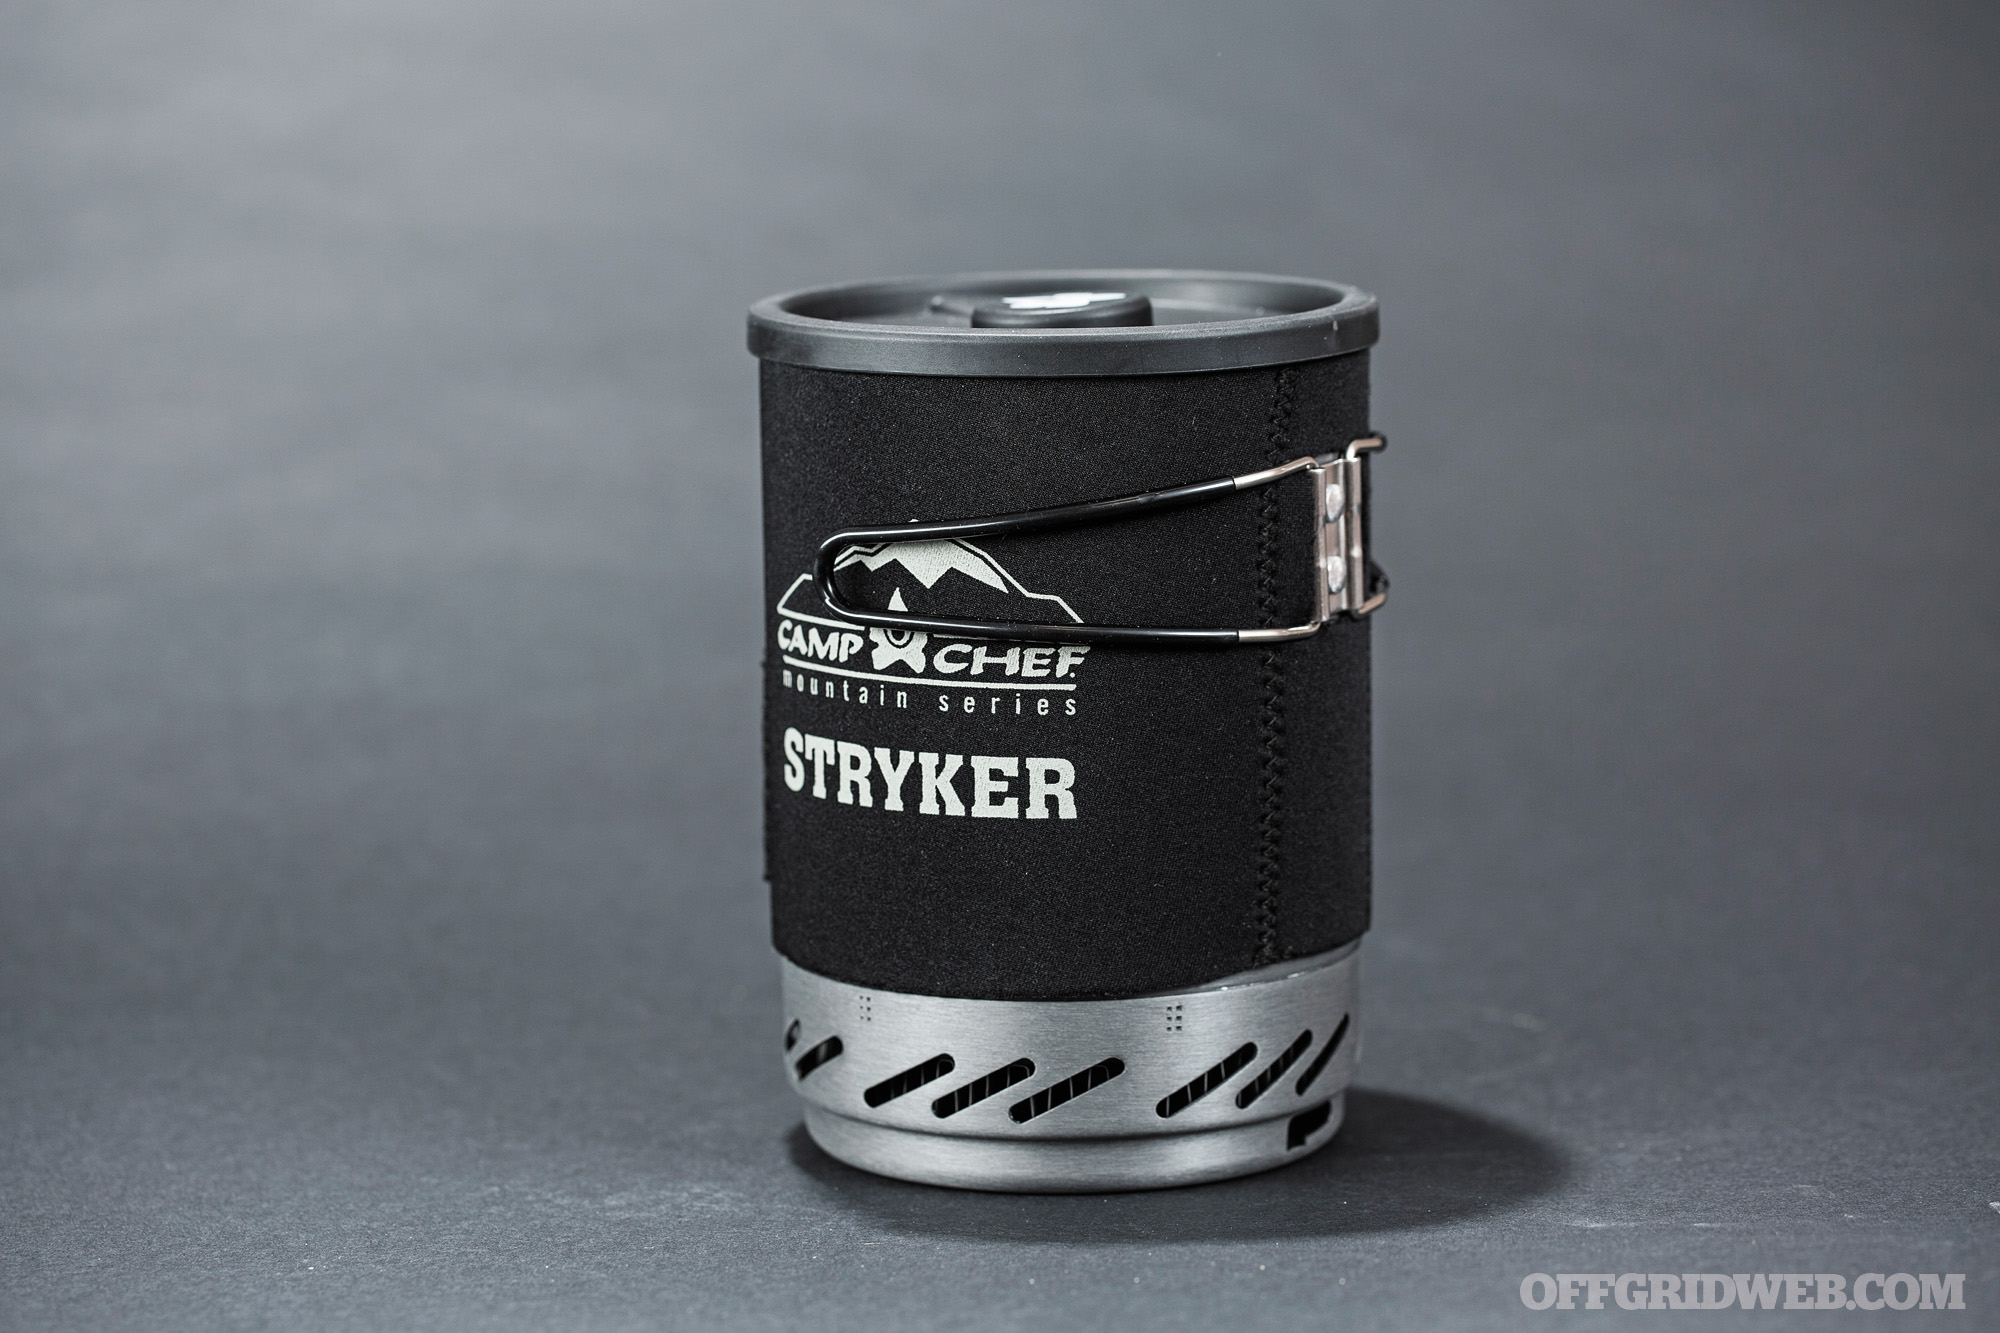
Camp Chef Stryker 100

CANISTER
Weight
17.7 oz
Fuel Type
Canister
Boil Time – Calm
2:20
Boil Time – 3 mph Wind
3:40
Boil Time – Cold Fuel
5:00
MSRP
$68
URL
www.campchef.com
The Stryker series doesn’t break new ground in the feature department, but it does in the value department. It’s hard not to avoid the comparison to the ubiquitous Jetboil Flash, so we won’t. The Stryker 100 should blush when the Flash walks by on the trail. Still, on the street, the Stryker stoves come in $20 to $30 under the cost of a competing Jetboil stove with a comparable set of features. Onboard ignition, heat exchanger, twist-and-lock base, neoprene coozy, pot cover, and stabilizing arms for the canister — it’s all there and it all works quite well. The Stryker 100 burns isobutane canisters, while the 150 model runs on 1-pound propane tanks. Out of the box, the Stryker is made to boil water for coffee and dehydrated meals. But, with the optional pot support accessory for $25, the Stryker gains some versatility and can make a real breakfast for a few people. Just be careful, anything this tall and top heavy is begging to be knocked over.
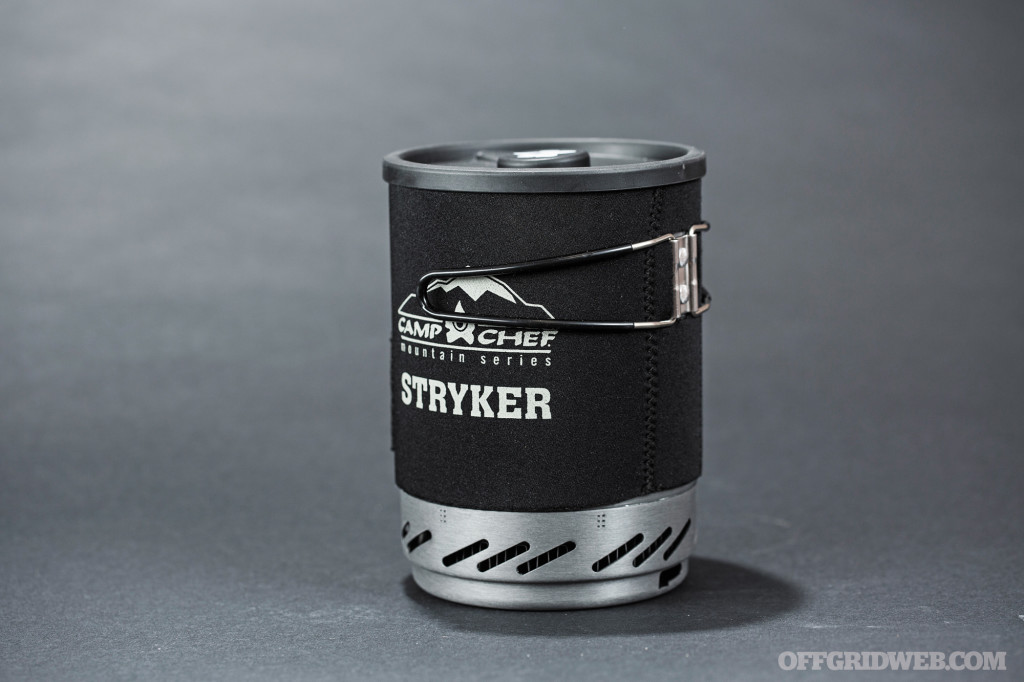
Use: Set up is painless. Just like its single-serve competitors, all of the basic components of the Stryker stove fit in its pot. The valve knob is easy to grasp and offers darn good control of the stove’s output. We like that the stove can be set up, filled with water, and ignited with the pot locked on the burner. No need to set the pot on the burner while the stove is running means less chance of burning something as you set the pot on a lit burner.
Performance: Compared to its peers in our test group, the Stryker 100 is near the back of the pack when it comes to boiling performance. Starting out, boil times were short, but they lengthened over the course of the five-boil test. This indicates the stove doesn’t use a fuel regulator. This is likely one of the ways Camp Chef keeps the price down.
Pros:
- Easy to light, piezoelectric igniter, solid pot to burner connection, built-in pot handles
- Even if the average boil time for the Stryker is behind the average, it isn’t by much.
- Best value for temperate climate use. We won’t say the stove is a Jetboil Flash clone, but it’s safe to say Camp Chef kept the R&D costs on the Stryker low and passed the savings on to its customers.
Cons:
- The Stryker is a solid lightweight option, but the saved weight feels like it’s paid for in durability.
- The walls of the metal pot are thinner than its competitors, and the pot insulator is about as thick as four layers of premium toilet paper — but a more useful when it comes to preventing burns.
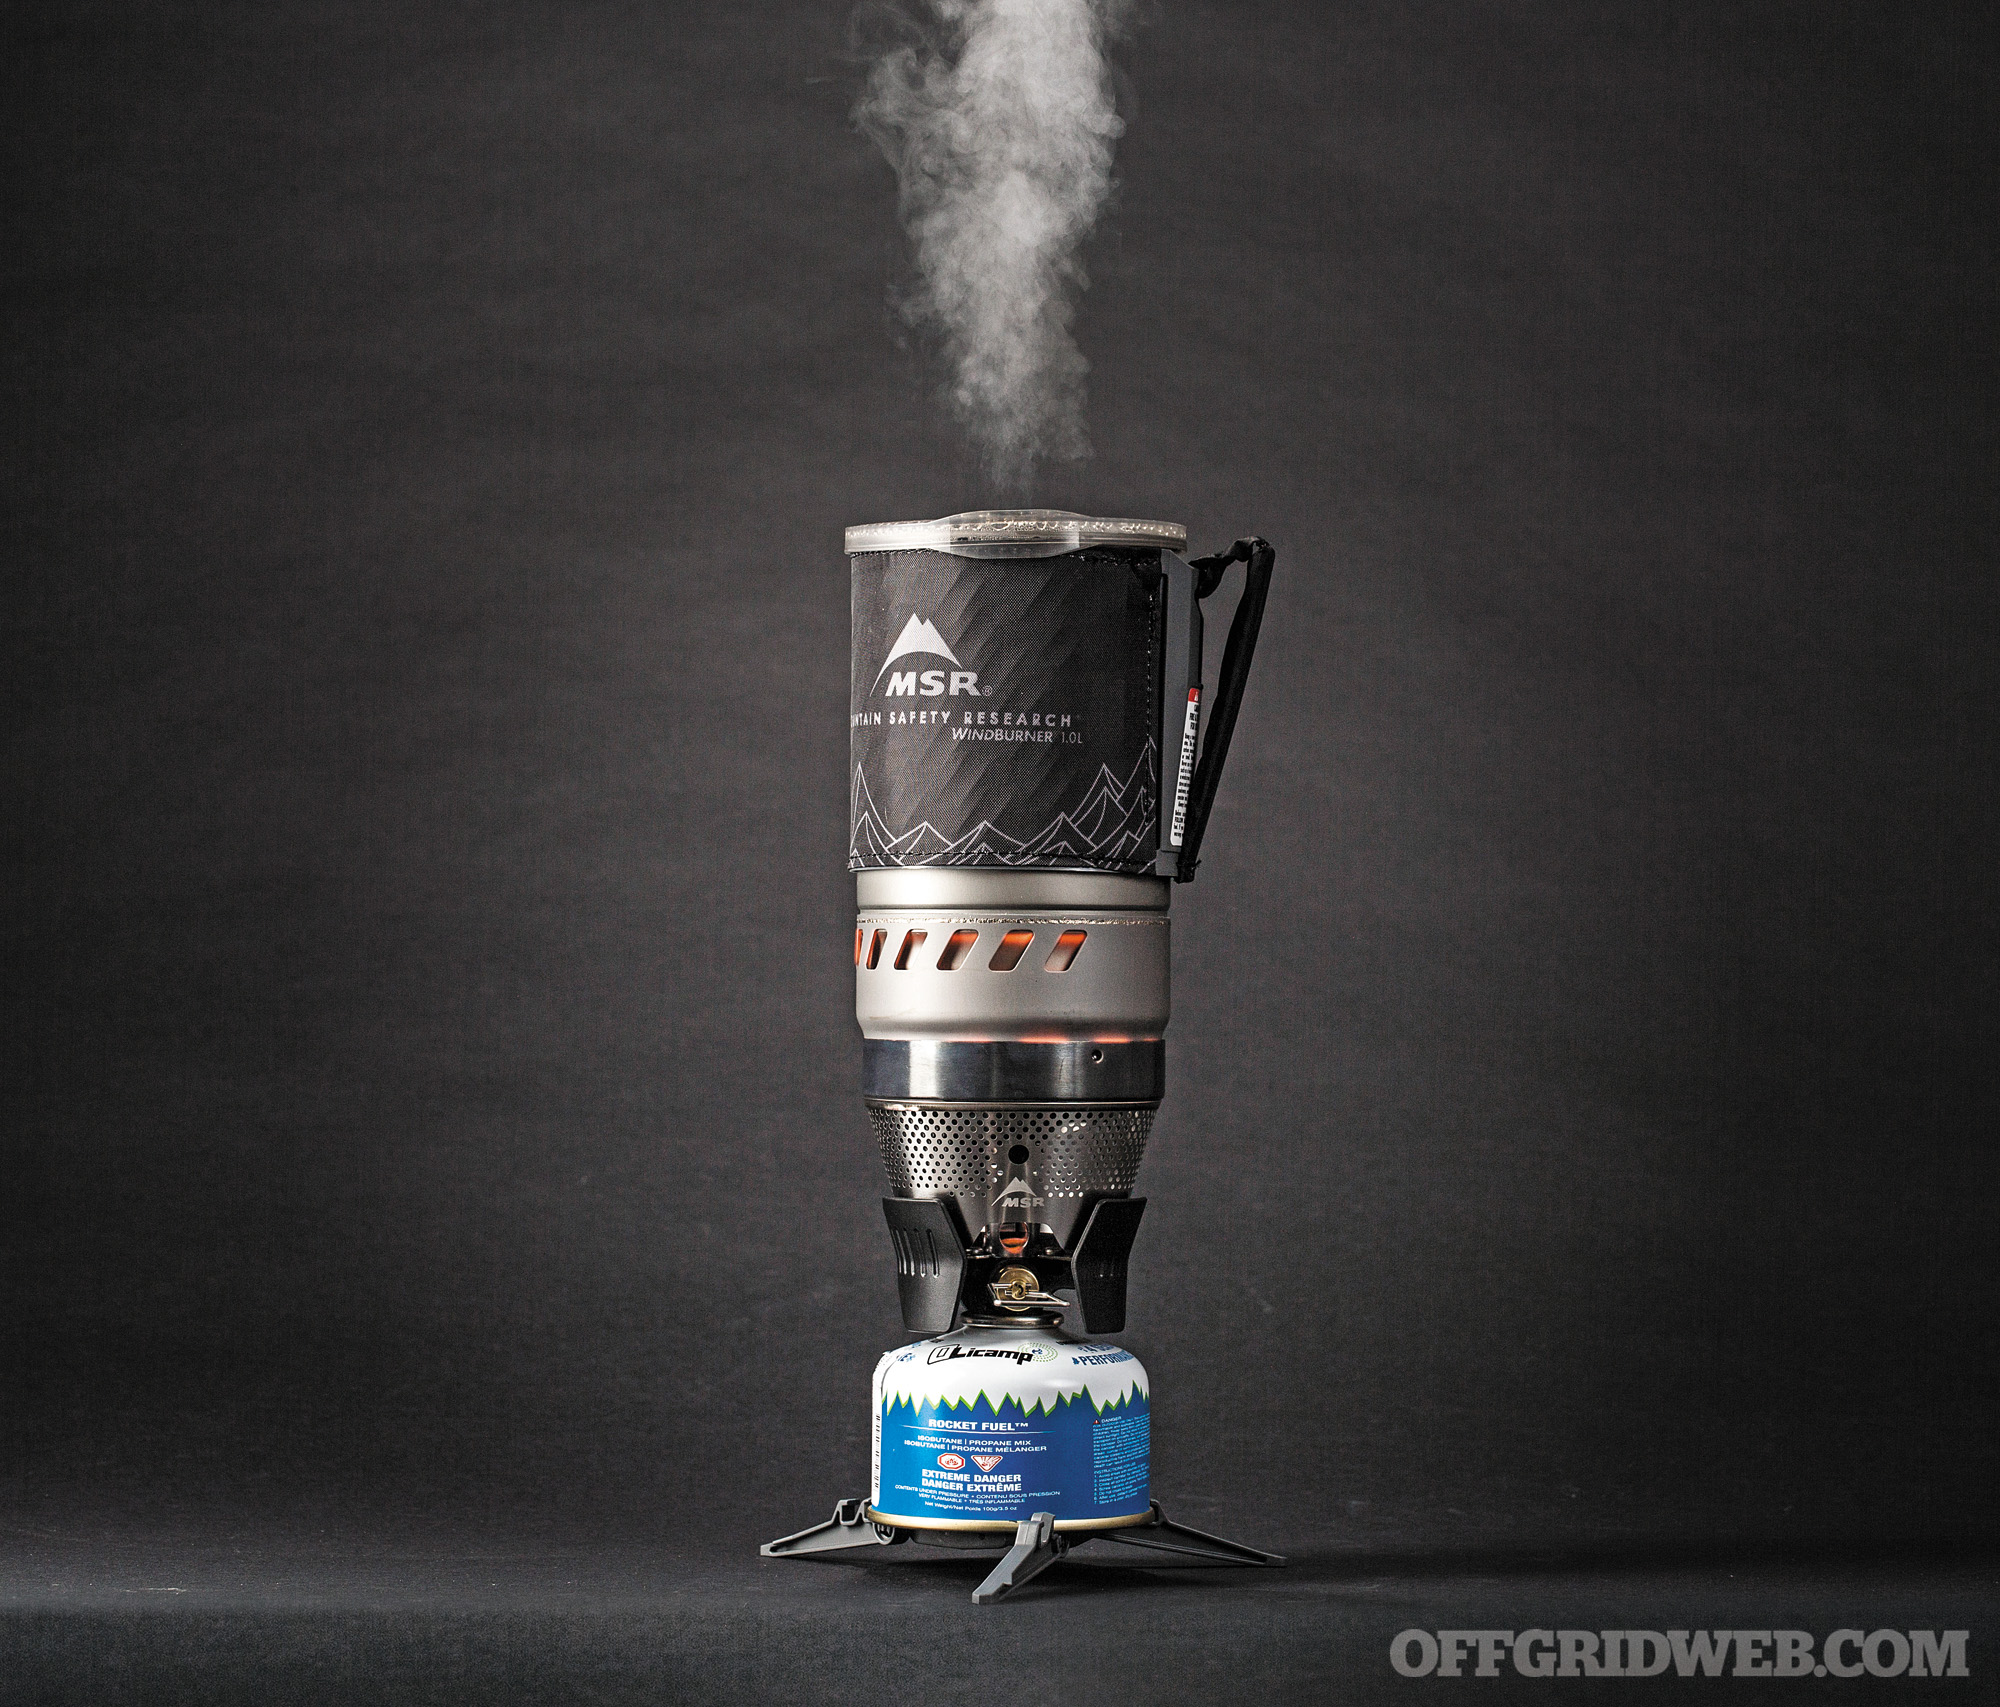
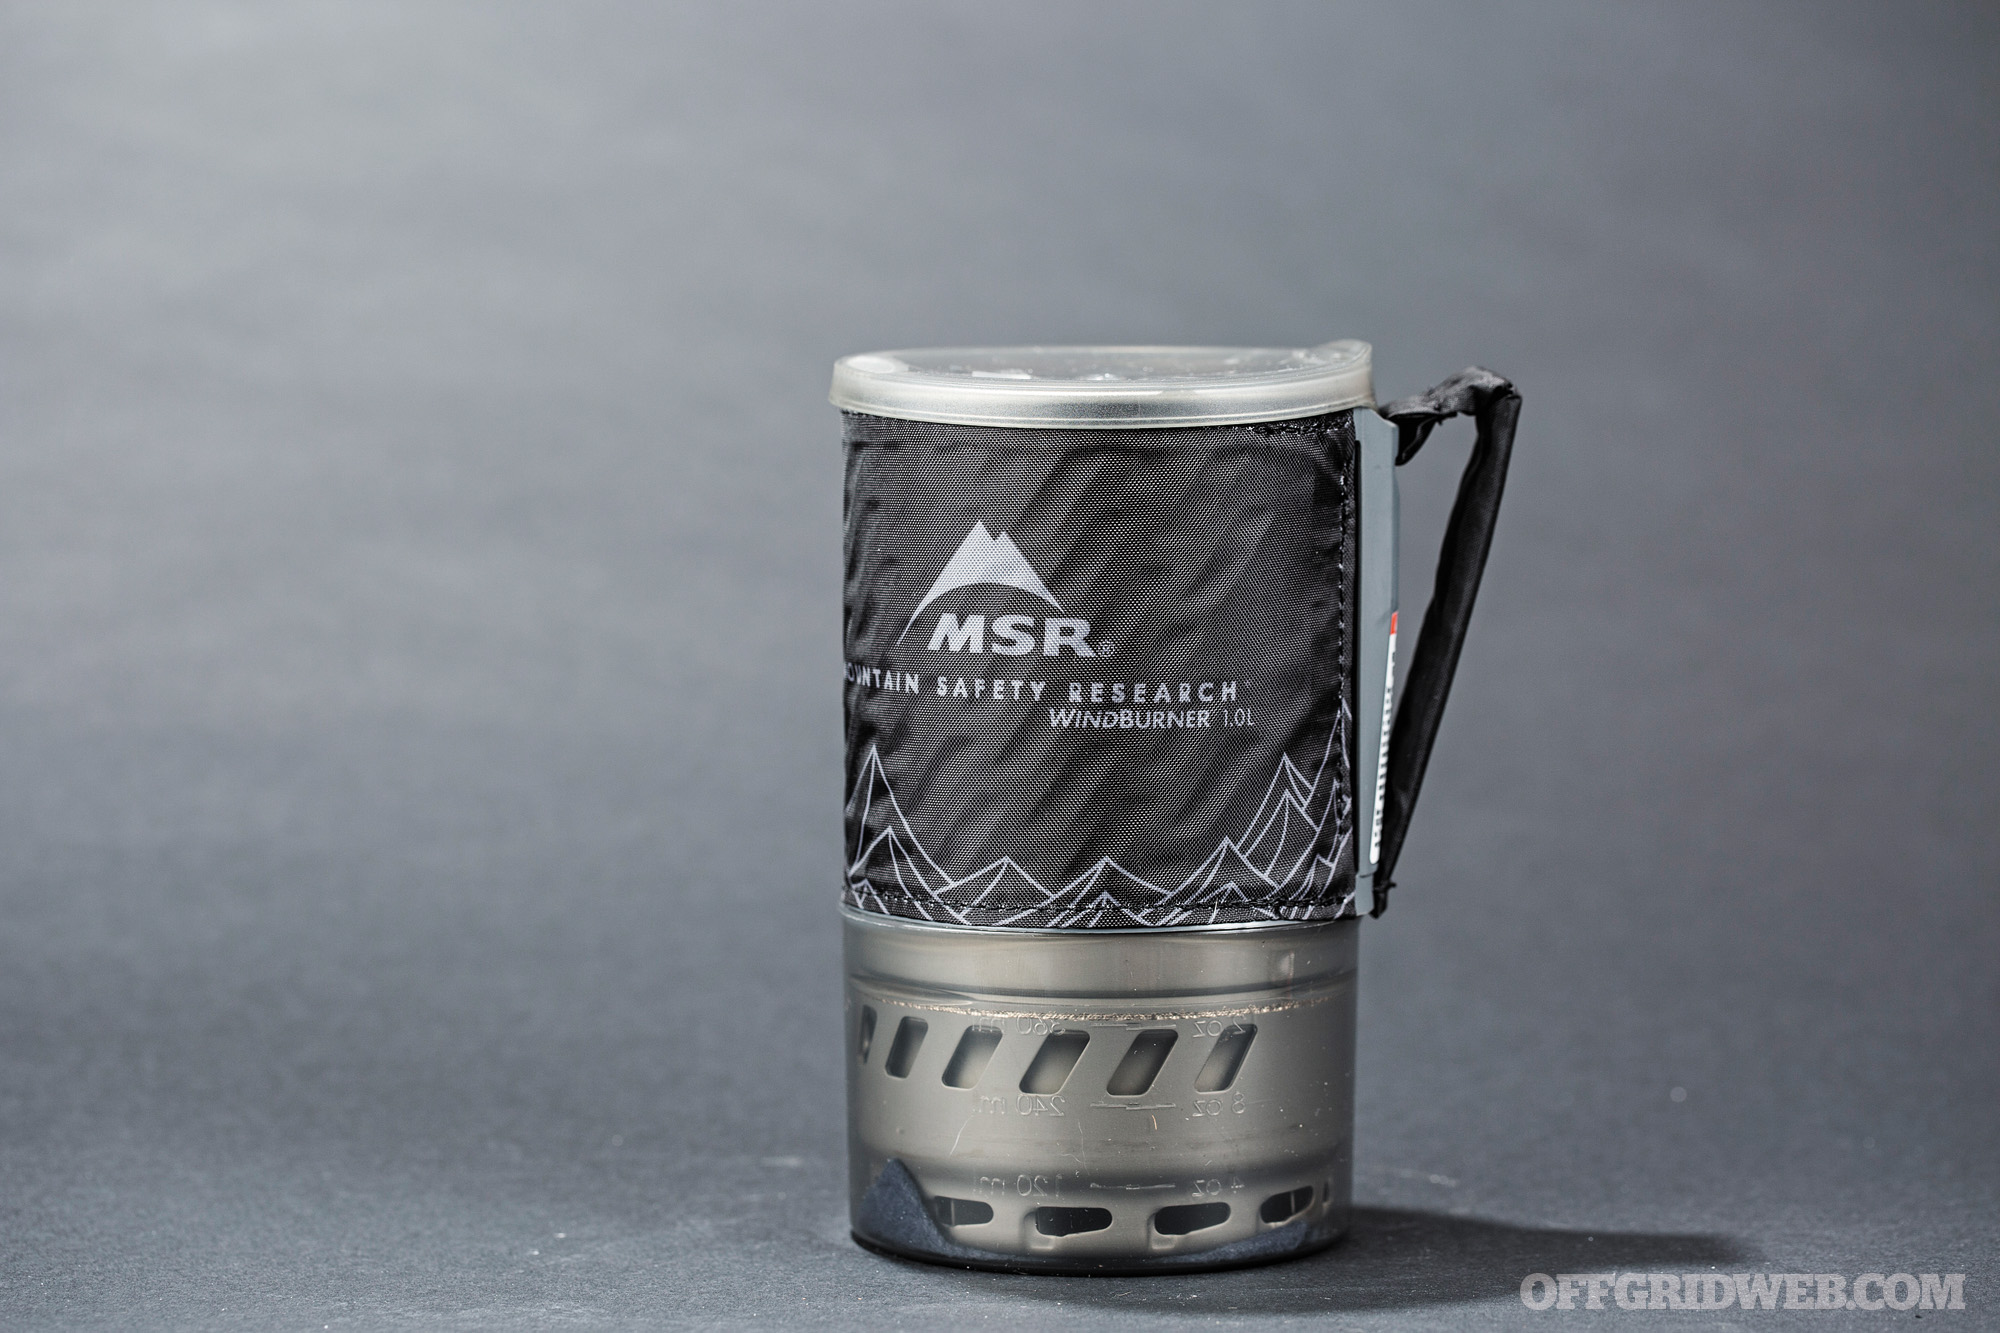
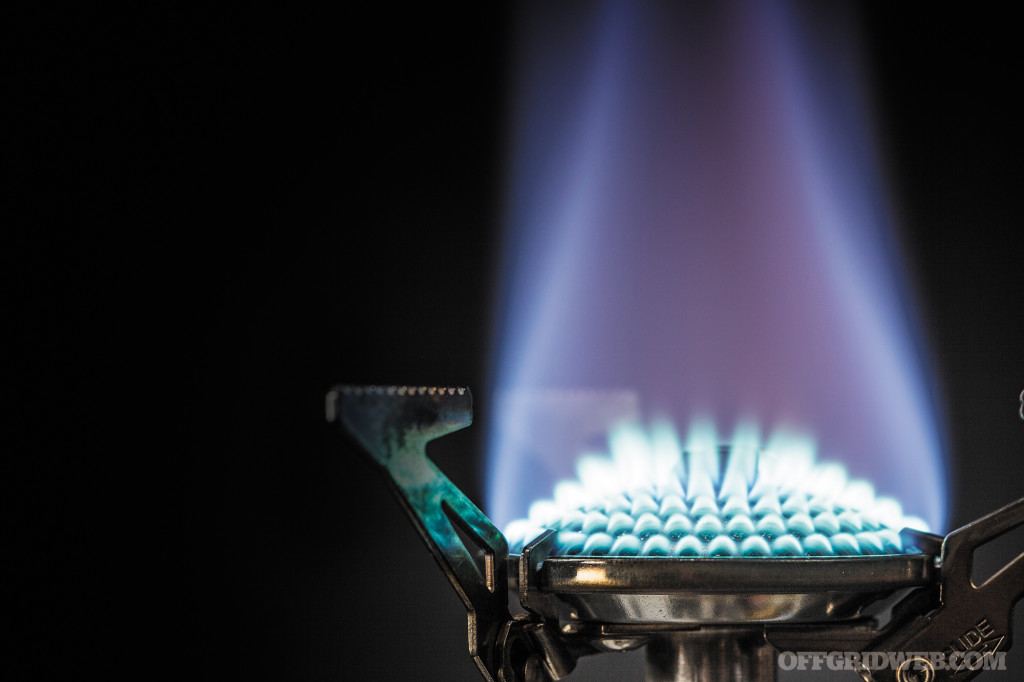
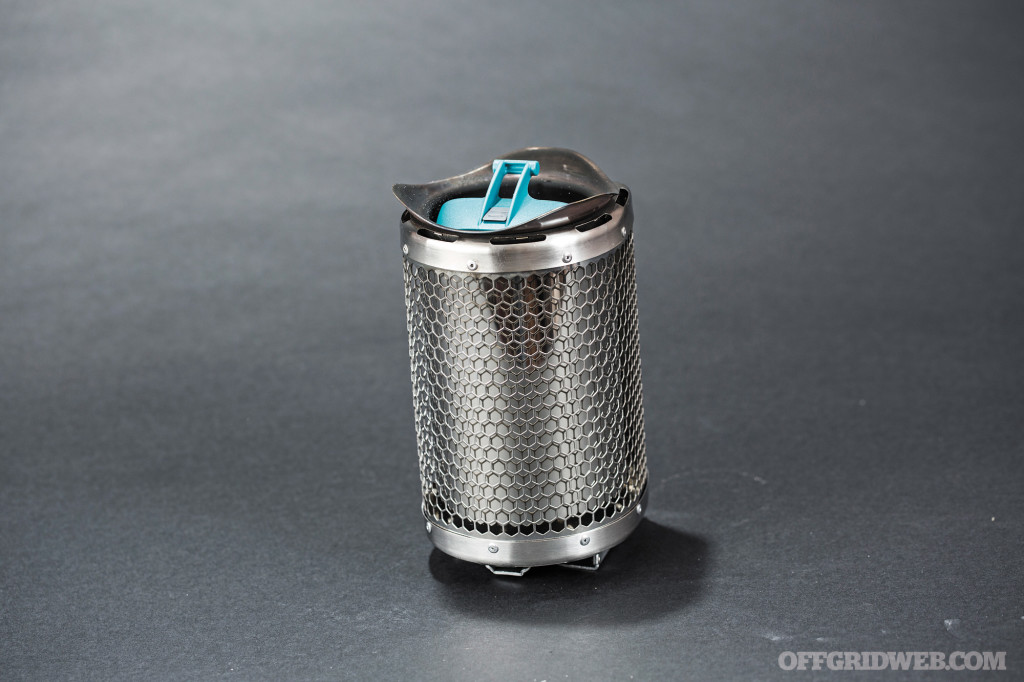
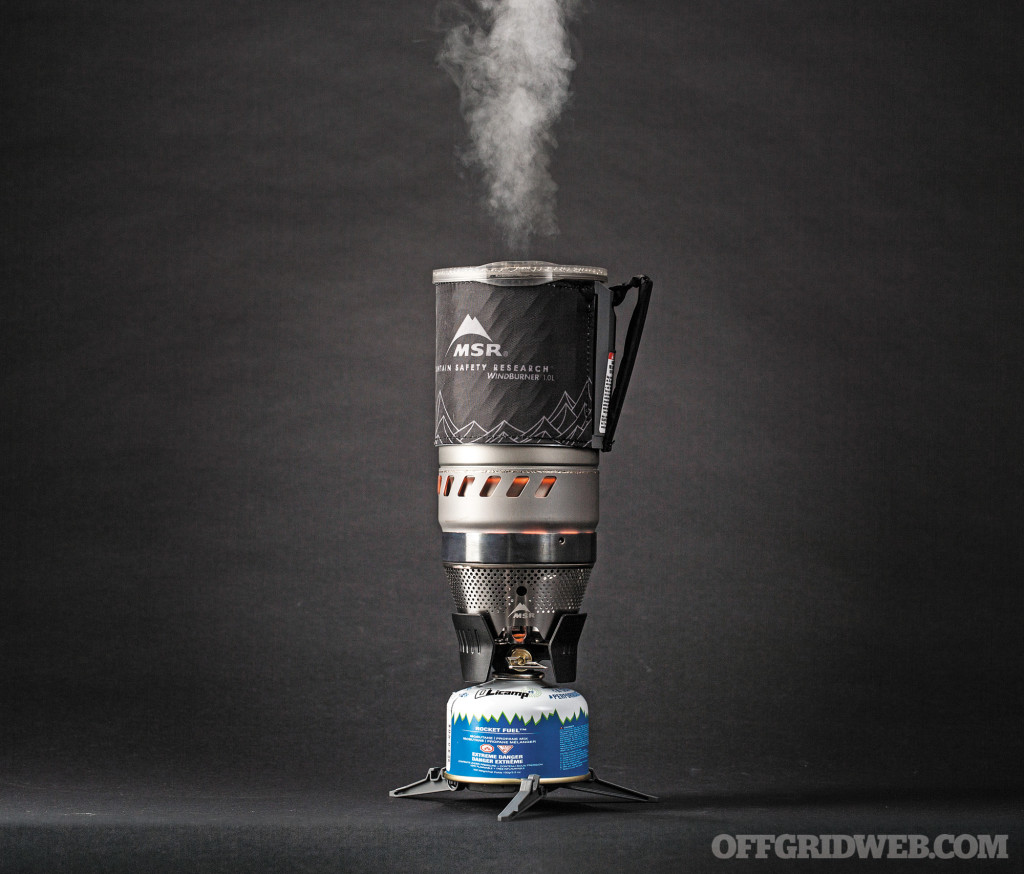
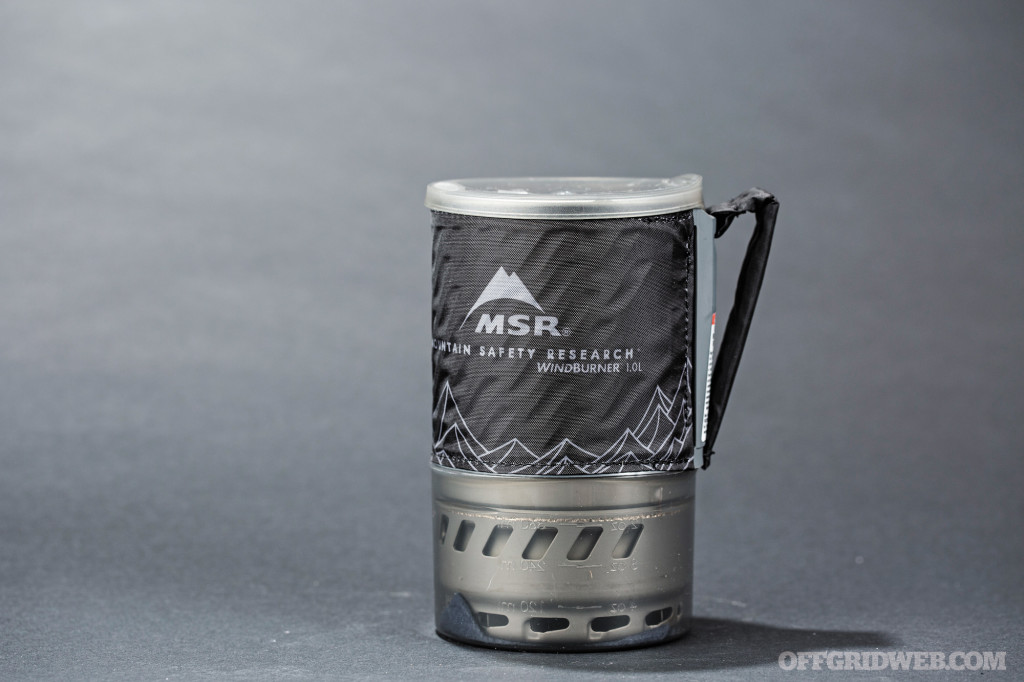
MSR WindBurner
CANISTER
Weight
16.6 oz
Fuel Type
Canister
Boil Time – Calm
2:34
Boil Time – 3 mph Wind
2:45
Boil Time – Cold Fuel
4:30
MSRP
$130
URL
www.cascadedesigns.com
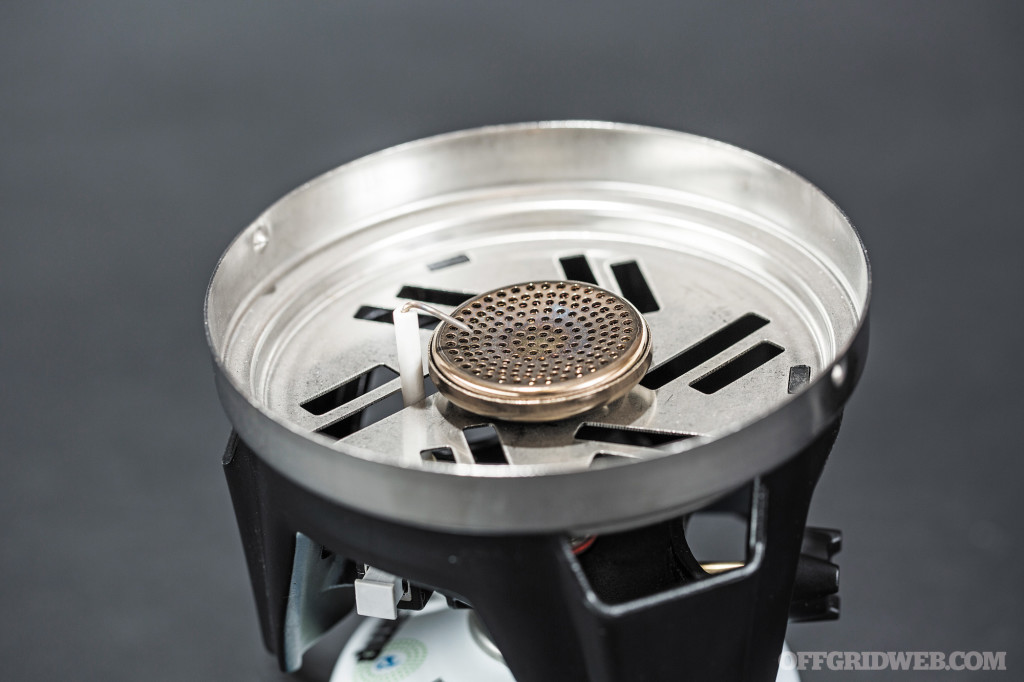
The MSR Windburner stove system is the descendant of the highly regarded Reactor stove. We’re big fans of the Reactor with a 1.7L pot. It’s our go-to for everything except light and fast overnights, especially when there’s a chance of weather. Like it’s bigger brother, the Windburner features radiant burner technology with an enclosed flame working with a specially designed heat exchanger pot system and a regulated fuel delivery system. But, where the Reactor is a larger, snow-melting beast designed for alpine adventures, the Windburner adapts the technology that makes the Reactor so efficient for solo, general backpacking use. It’s compact and light, a little slower to boil, but very frugal with fuel.
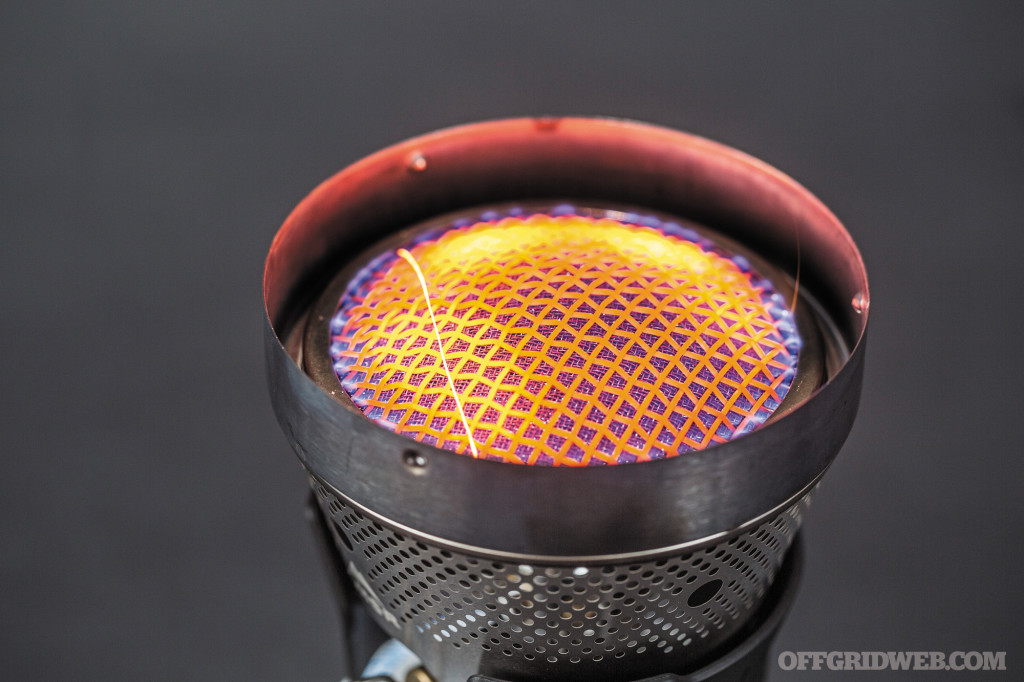
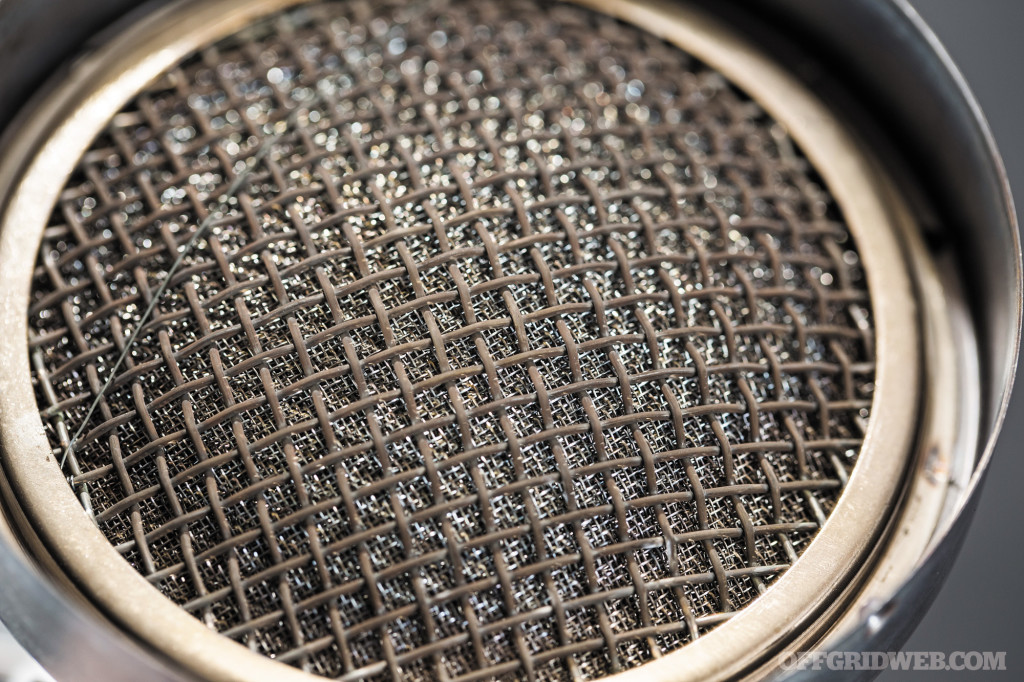
Use: The Windburner is a stove system and comes with its own 1L pot that can safely boil 0.6 liter (or 20.29 fluid ounces) of water. Anyone on the move will appreciate the speed and ease of setting the Winburner up. MSR suggests lighting the Windburner with an open flame, but it’s no trouble to light by dropping sparks from a ferrocerium rod. In bright daylight, it can be a little tough to see the flame as the stove gets going, so there’s a thin wire that glows brightly within a few seconds to indicate positive ignition (as shown, middle photo).
Performance: True to its heritage (and marketing), this stove laughs at wind. Successive boil times are nearly identical with no wind, in our 3- to 4-mph test wind, and even when out in a real world, high mountain breeze; all boil times range within seconds of 2:30. While we’re sure the stove uses a regulated fuel system, cold fuel slowed our boil times considerably. The pot locks to the stove head for an incredibly stable base when used with the canister base legs. The coozy and pot strap offer a safe way to handle the pot, and they’re easily removed for cleaning.
Pros:
- There’s a lot of tech going on in this stove that helps it run when other stoves cannot — all while using less fuel than its competitors.
- Packs down into a single, compact cylinder
- It’s practically maintenance-free.
- MSR designs, builds, and tests every component of its products in-house, in the USA.
Cons:
- Only works with Windburner compatible pots
- Slows down in the cold
- It’s more expensive than competing solo stove systems.
- No built-in igniter
- It’s not an MSR Reactor.
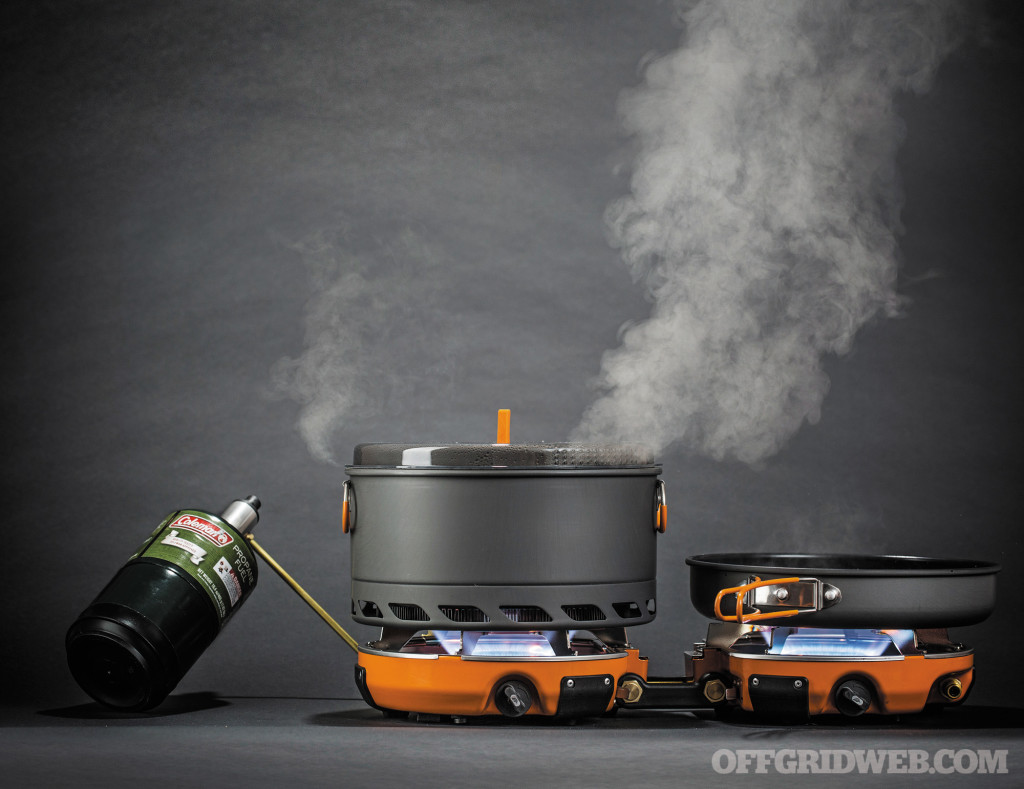
Jetboil Genesis Basecamp System
CANISTER
Weight
9.5 pounds
Fuel Type
Liquid Propane
Boil Time – Calm
2:17
Boil Time – 3 mph Wind
2:25
Boil Time – Cold Fuel
2:20
MSRP
$350
URL
www.jetboil.com
Bringing it all? The Genesis is your jam. For as much cooking convenience as this stove brings to the basecamp kitchen, it packs up tight. Sure, you’ll need to bring a canister of propane, but if you’re looking for the performance of a KitchenAid in the space of an Easy-Bake, then you’re already committed, and another few pounds of propane canister shouldn’t sway you away.
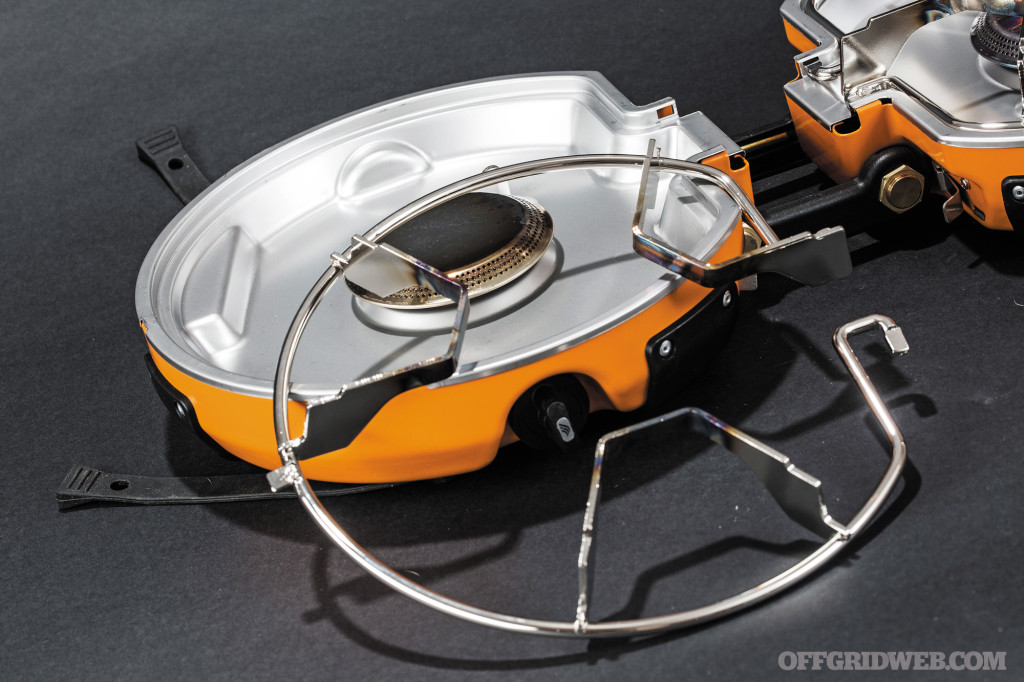
Use: Jetboil’s fold-open double burner stove is easy to set up — thread a fresh 1-pound propane tank into the valve, or use a hose adapter to run it from a 20-pound tank. Start the flow of gas with either of the two control knobs, and hit the piezoelectric starter for instant flame. The large grates provide a solid cooking surface that are easily removed for cleaning. The Genesis has some of the finest level of flame control of any portable stove on the market thanks to the valve’s fine thread pitch and the angle of the valve seat. The stove packs down to about half the size of most double-burner tailgate/camp stoves by folding in half. The system comes with a heat exchanger pot and a pan that’ll make breakfast for a four-person crew in one shot. If you’re settled in for a stay, the Genesis can run from a 20-pound propane tank with a $25 accessory hose.
Performance: The Genesis goes from car to cuisinator in 60 seconds. Boiling water with the heat exchanger pot is fast, so fast. And, the use of propane means you won’t suffer burger withdrawal during mid-football-season tailgate sessions. We cooked meals ranging from rehydrated camping fare to fully civilized breakfasts without wishing for a larger, or hotter, stove.
Pros:
- Fast setup for a camp stove
- Excellent for extended stays in mobile situations
- Runs on inexpensive, easily available, and temperature insensitive propane
- Push-button starters on both burners work out of the box without adjustment
- Nonstick ceramic coating on cookware is tough; ours shows no scratches or flaking from extended use as we’d see with Teflon.
Cons:
- There’s a lot to like about the Genesis, as long as it fits your budget.
- We did find the cookware focused heat in the middle of the pan. Not an issue when boiling water, but pay attention to prevent food in the center of the frying pan from burning.
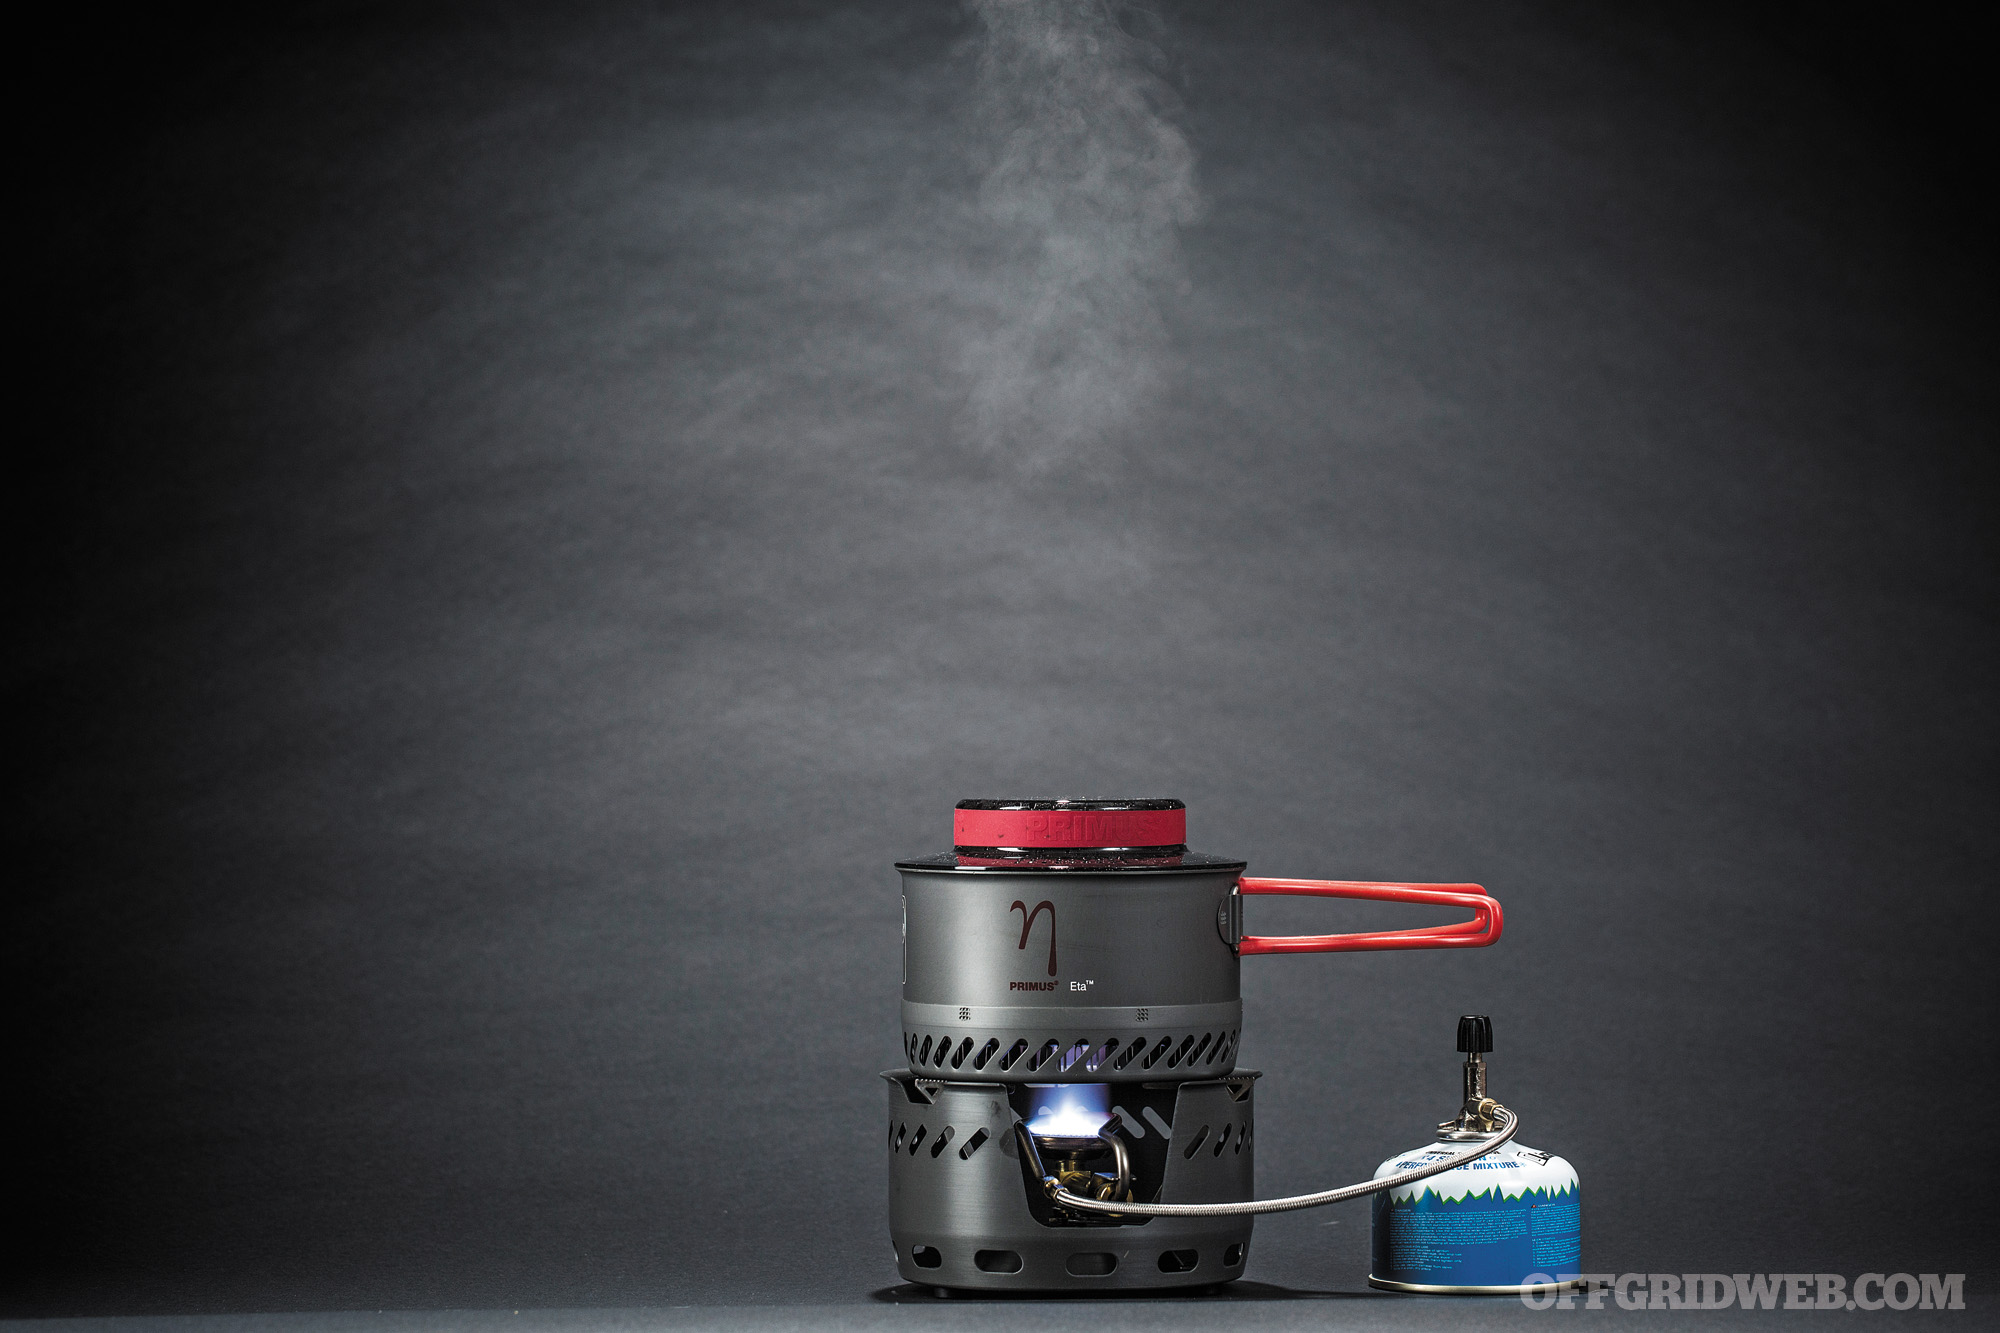
Primus Spider Stove Set

CANISTER
Weight
24.3 oz
Fuel Type
Canister/optional liquid fuel
Boil Time – Calm
2:25
Boil Time – 3 mph Wind
2:44
Boil Time – Cold Fuel
7:00
MSRP
$160
URL
www.primuscamping.com
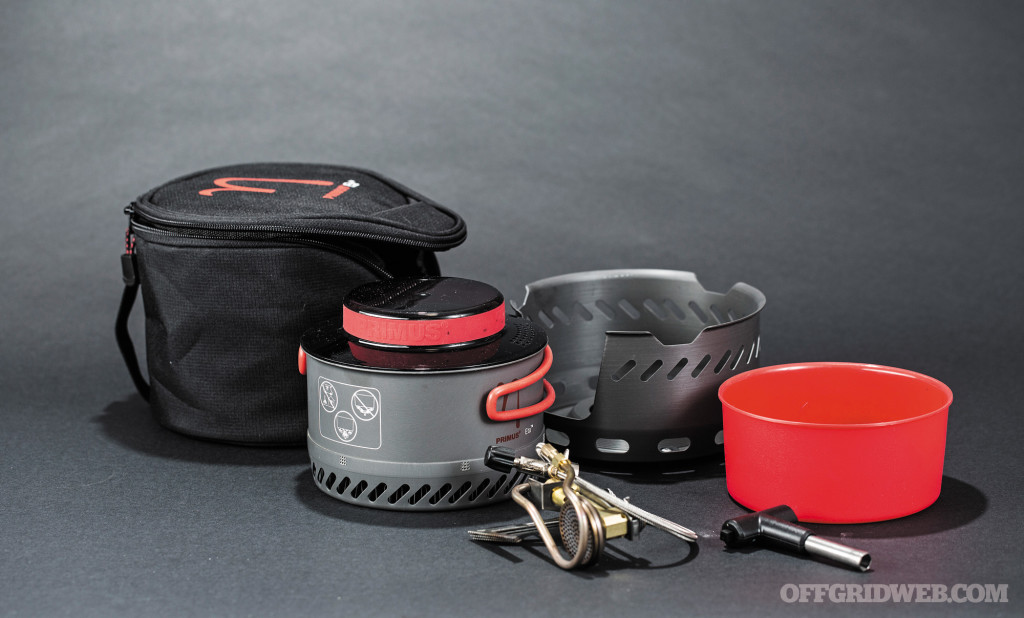
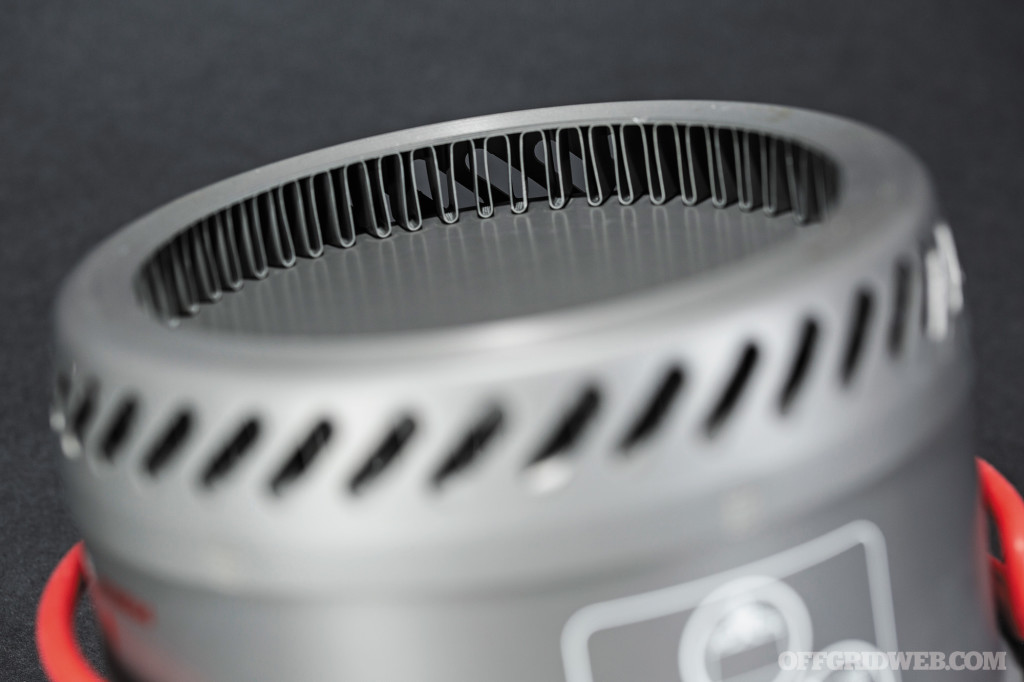
The Spider is one of the latest designs in the Primus stove lineup. It adheres to the company’s Eta concept, wherein the stove uses a heat exchanger pot, dedicated windscreen, and a directed flame all in concert to cook with higher efficiency (less fuel) than prior designs.
Use: For a backpacking stove of its capability, the Spider set is quite compact. Pulling the set apart reveals a three-legged burner, a hella-sturdy windscreen, and one of the most efficient pots we’ve used. The low and wide heat exchanger pot is both stable and fast to boil. The burner has magnets on its feet that adhere to the windscreen base for enhanced stability. The pot lid doubles as a strainer (as many lids do on portable stoves), and the folding pot handles make handling the hot pot a breeze.
Performance: The Eta concept is no joke. The Spider is a solid performer that doesn’t shine brightly in any single timed boiling test, but it’s nearly tied at the head of the pack for overall efficiency with the Soto Micro Regulator in our canister stove category. The low-slung, heat exchanger design of the Spider’s pot makes it the most efficient, easiest to use, and the most flexible pot in terms of types of food it can cook.
Pros:
- Awesome pot
- Passable simmering control
- Nesting storage
- Good durability
- Optional liquid-fuel pump and bottle. That’s a huge nod should it come time to use a stove for an extended time in an emergency situation.
Cons:
- We expected the shielded, heat-exchanger pot base and windscreen to have a larger effect on the stove’s efficiency in our mild-breeze test.
- The stove boils slowly with cold fuel, suggesting it doesn’t use a pressure-regulated fuel system.
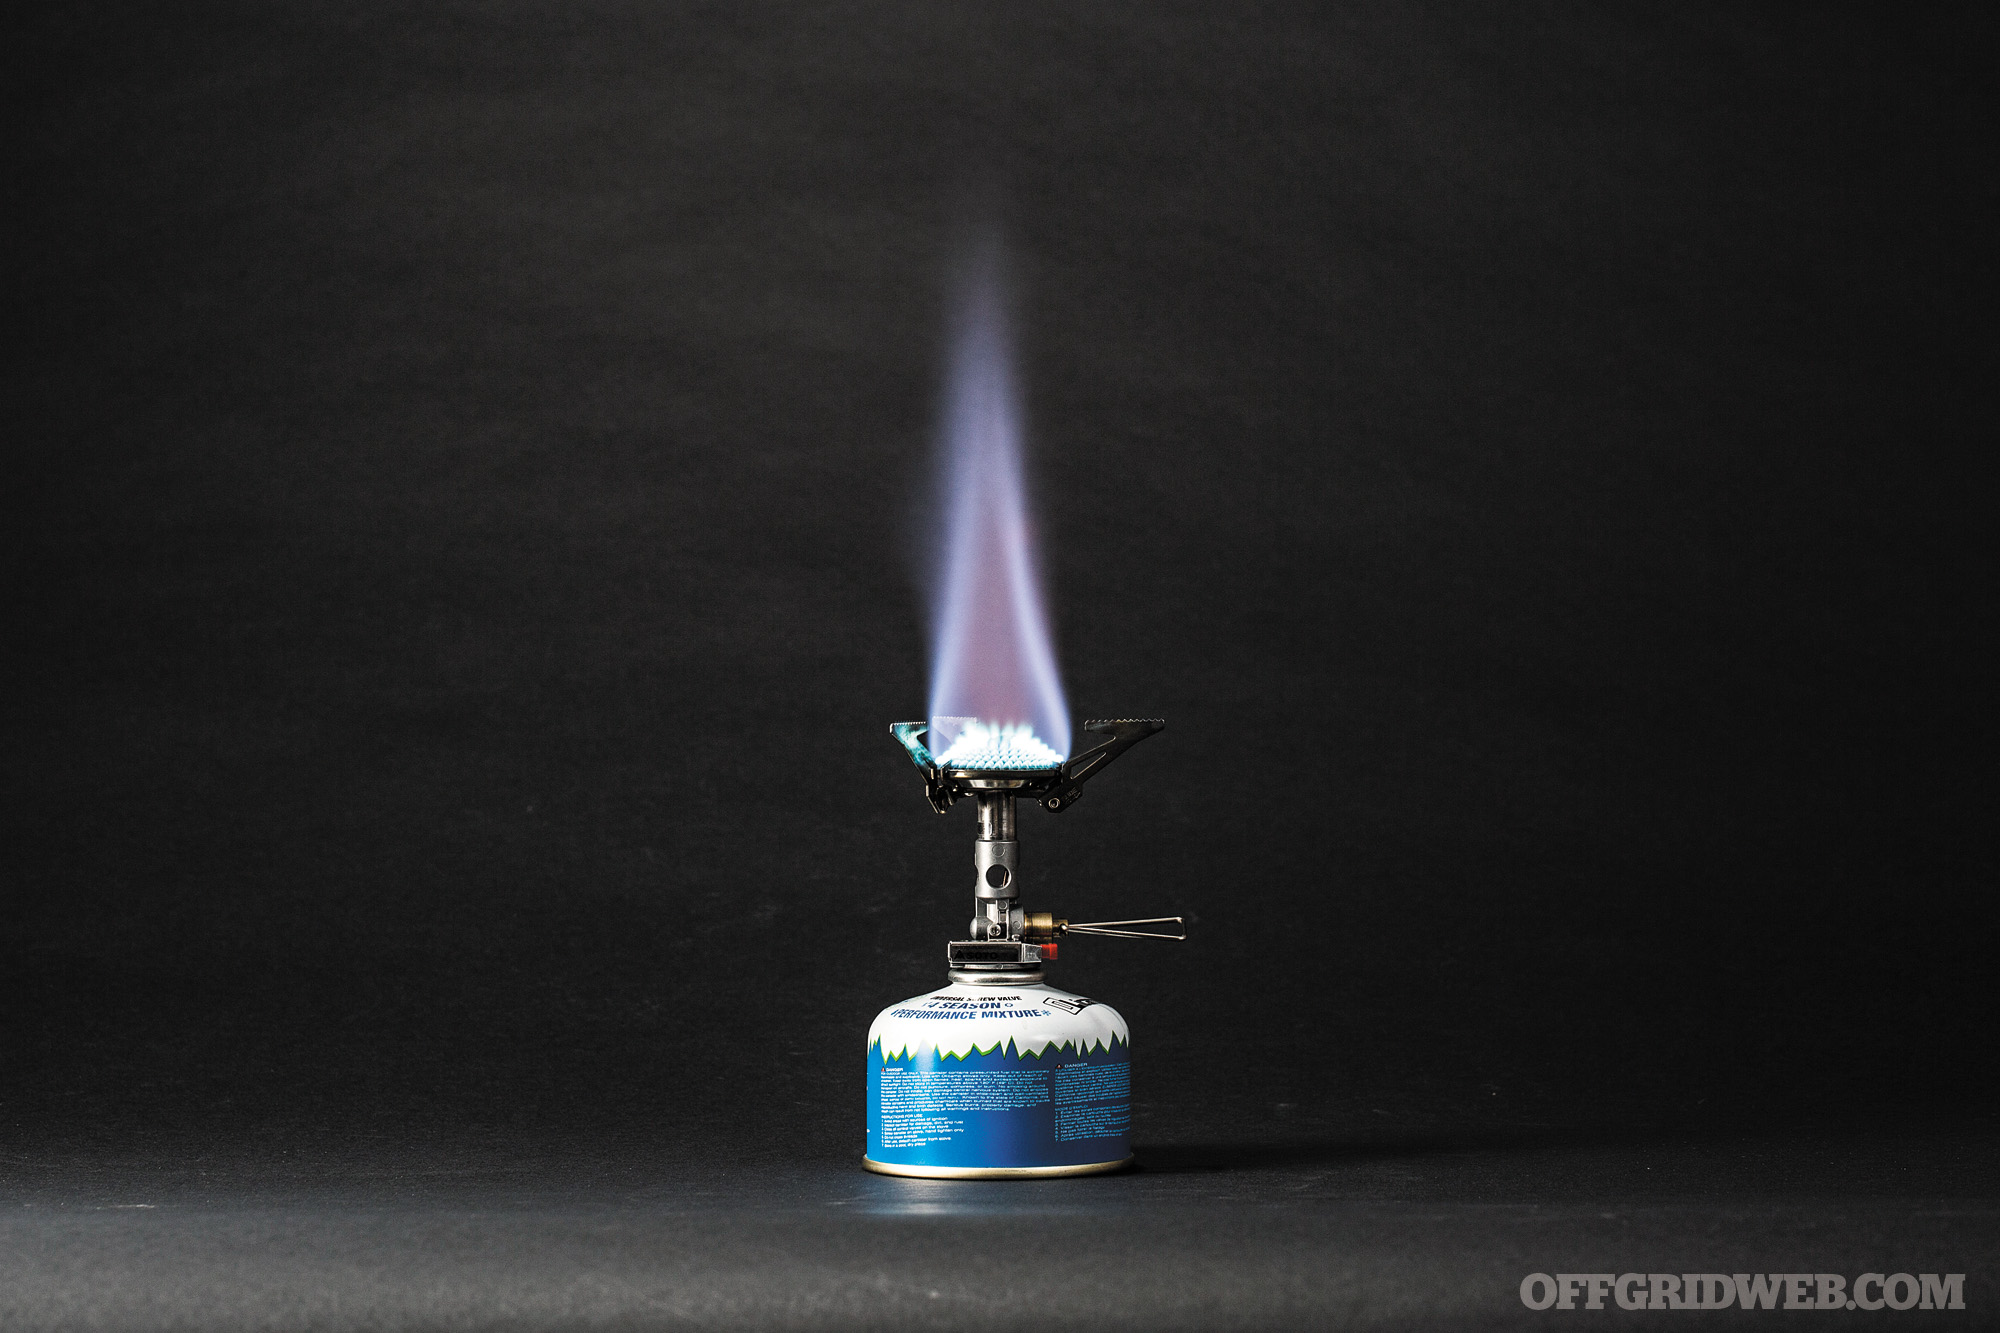
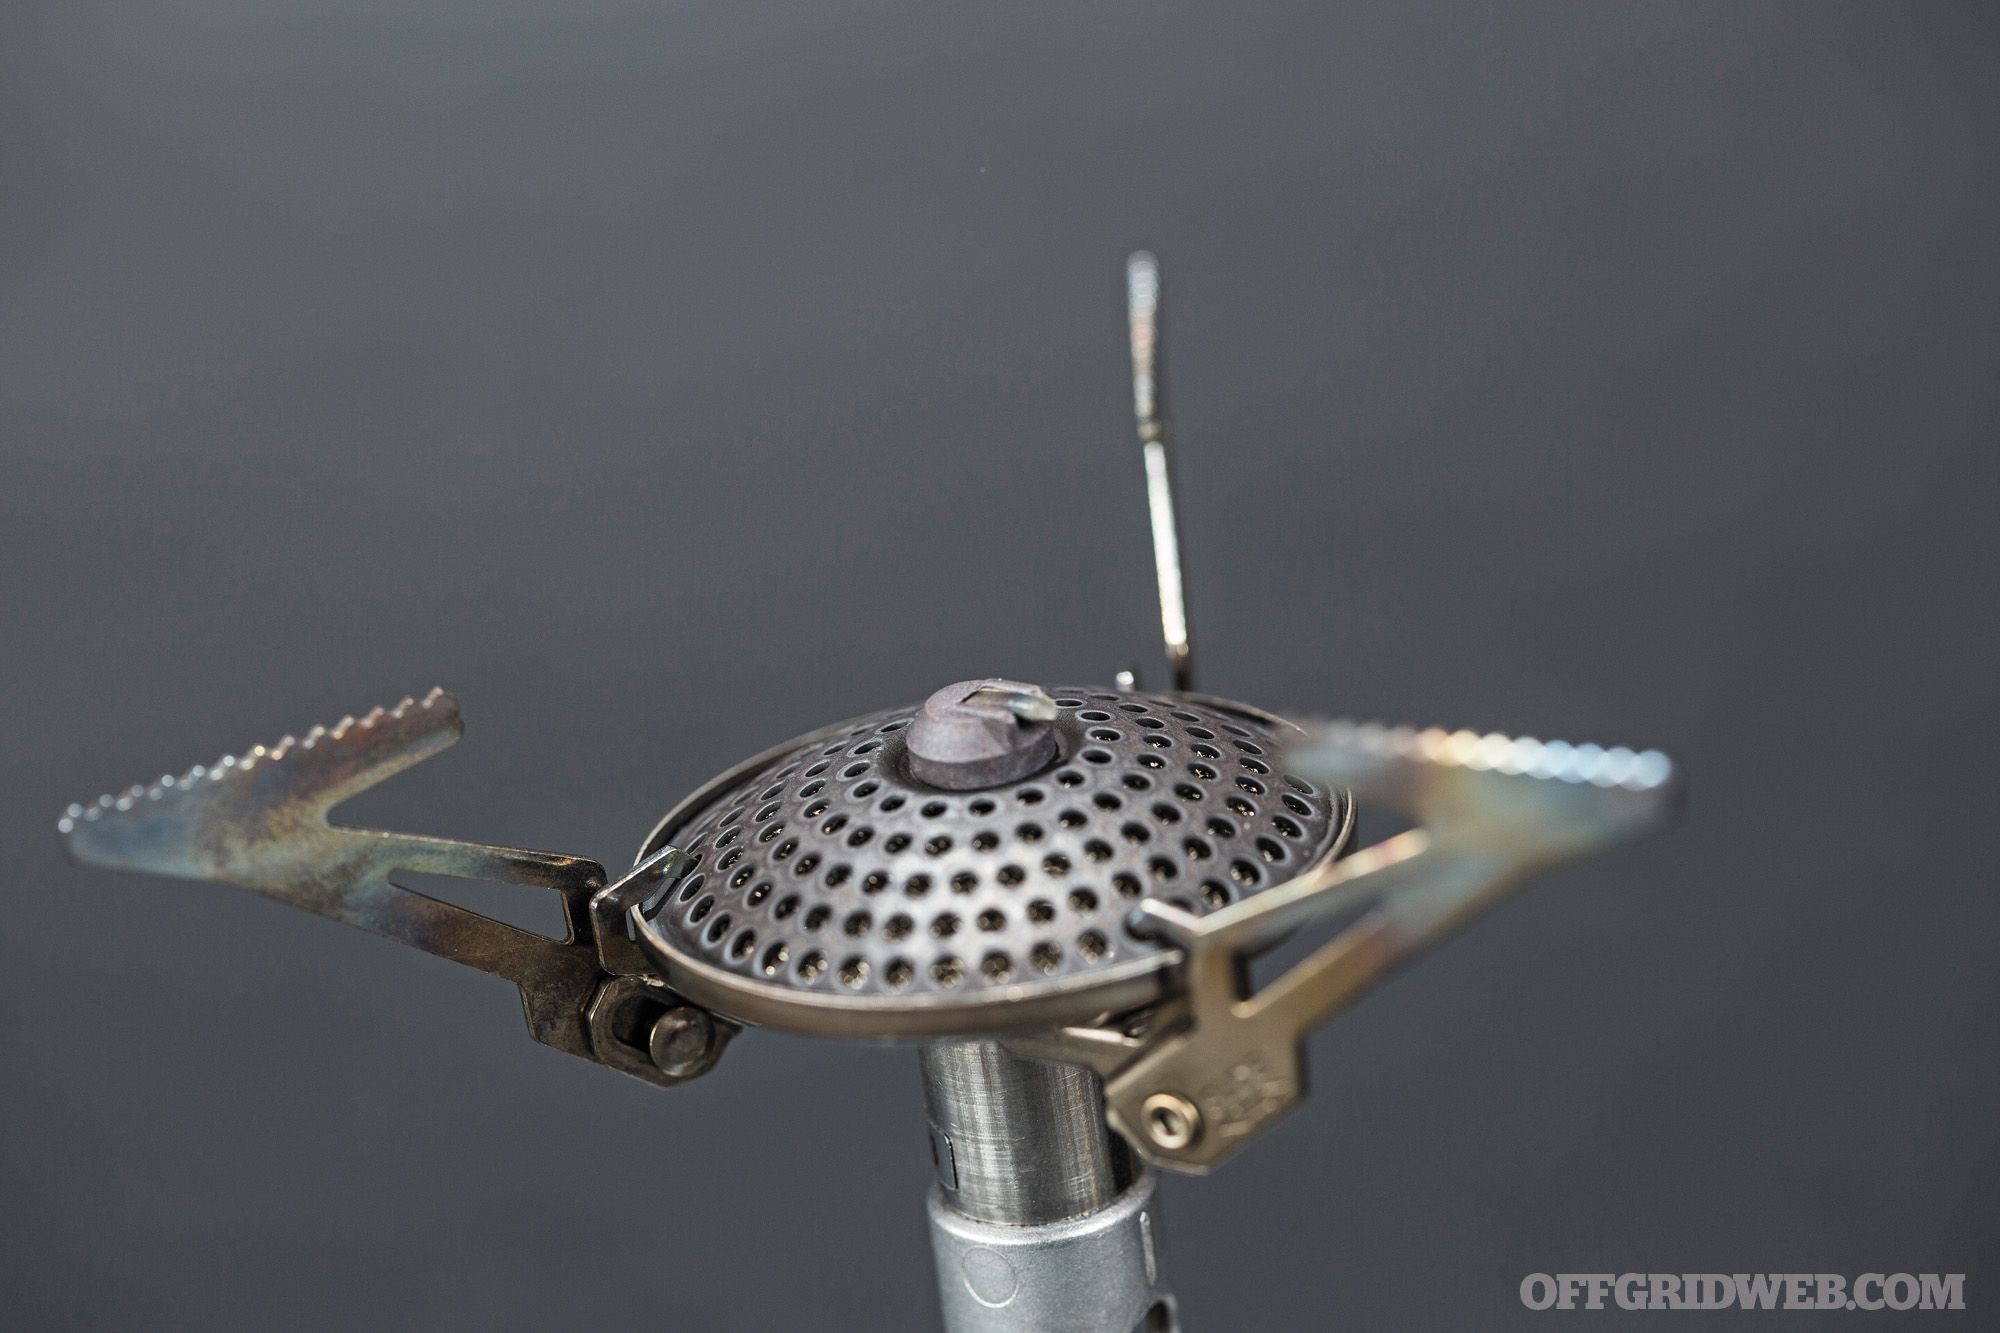
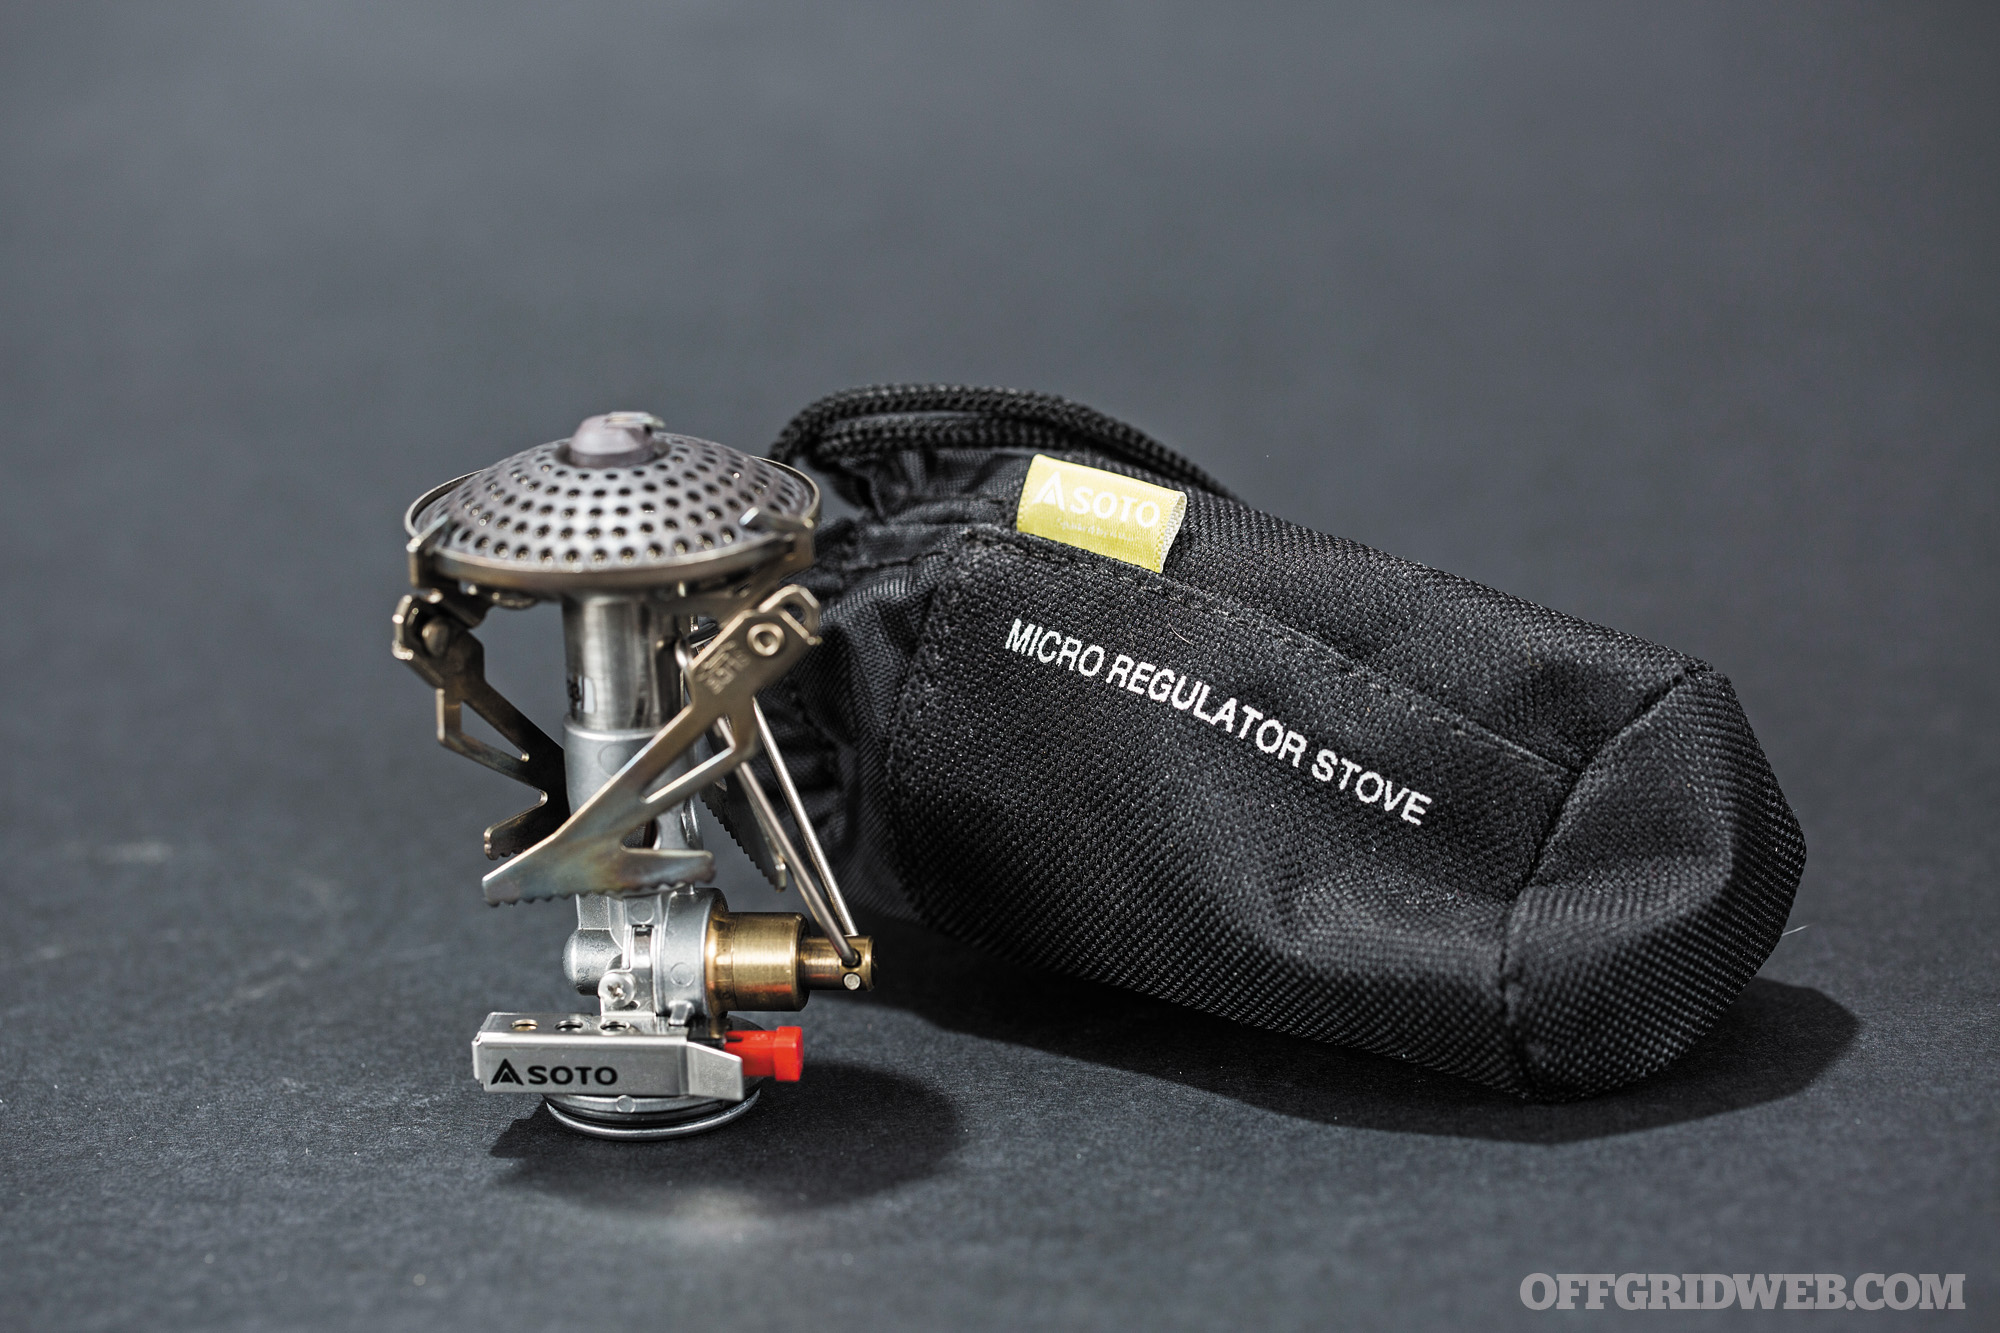
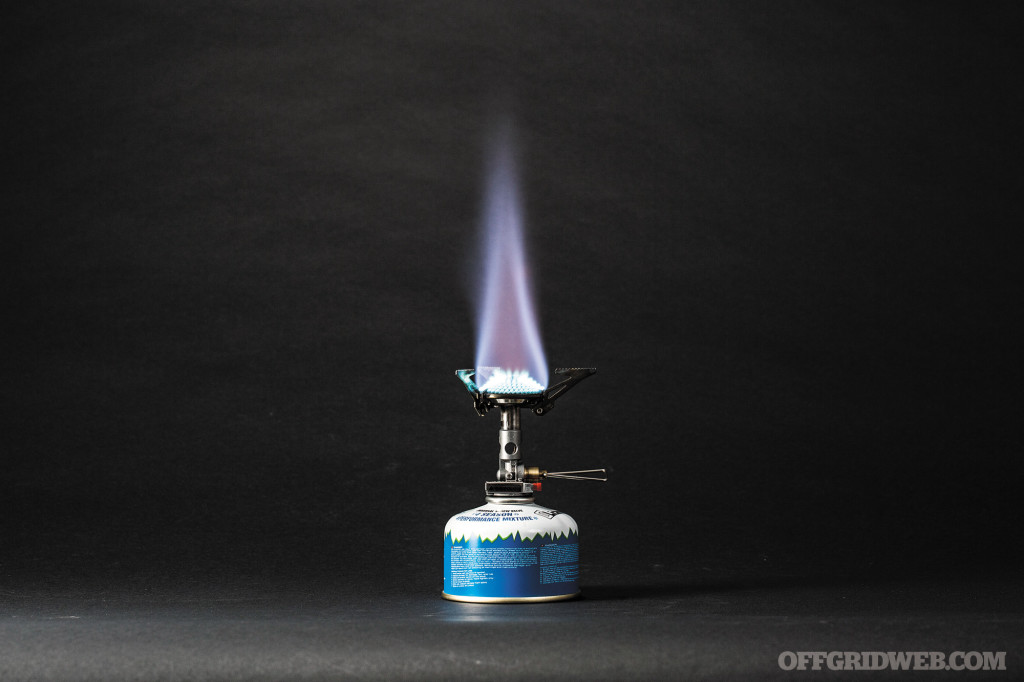
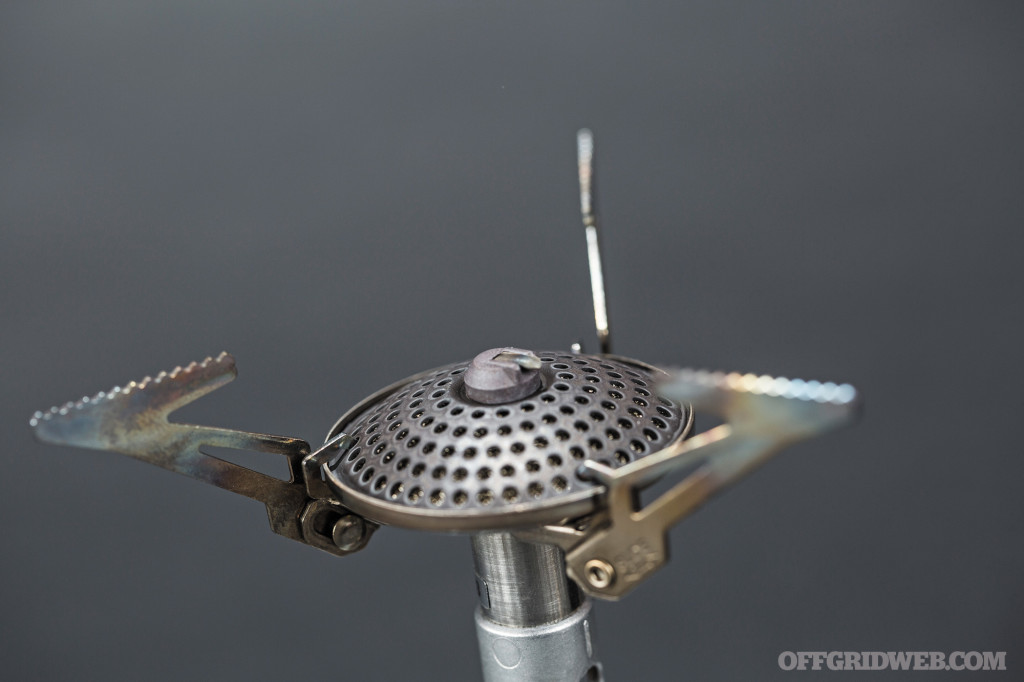
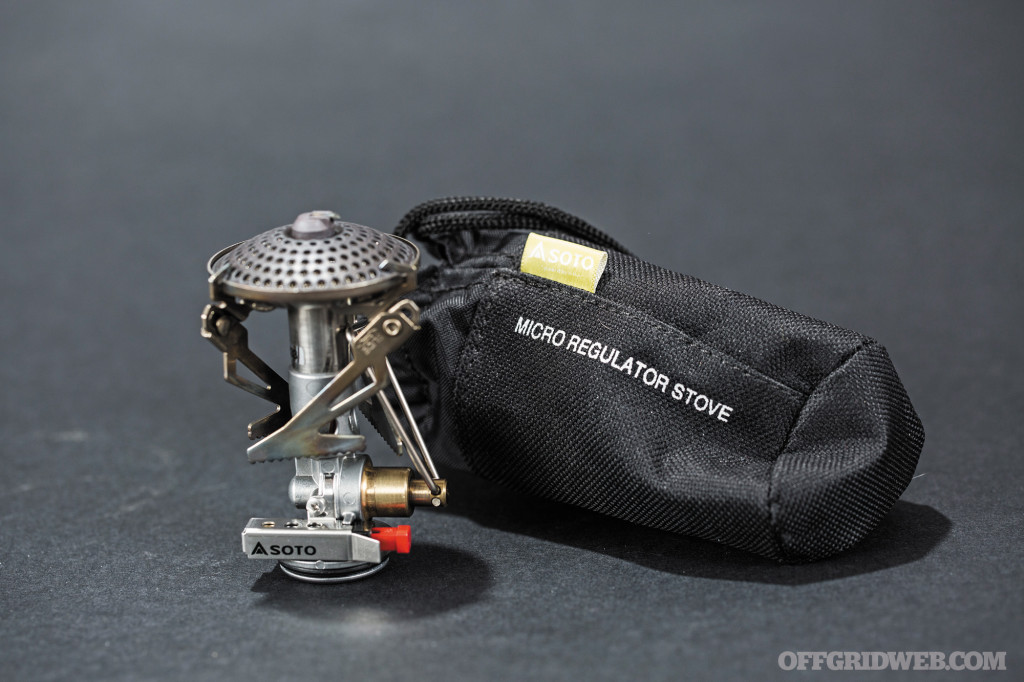
Soto Micro Regulator OD-1R
CANISTER
Weight
2.5 oz
Fuel Type
Canister
Boil Time – Calm
2:10
Boil Time – 3 mph Wind
3:07
Boil Time – Cold Fuel
2:36
MSRP
$65
URL
www.sotooutdoors.com
The Soto OD-1R Micro Regulator stove was a great success upon its release six years ago, but we thought the technology in the current crop of stoves would have them looking disdainfully on the tiny OD-1R. Whoops. This stove still kicks ass.
The OD-1R garnered accolades when it was released in 2010 for its combination of a tiny regulator, integral starter, microscopic size, and Space Shuttle-engine performance. We’re impressed to see how well it does when compared to the current crop of stoves.
Use: The Micro Regulator is not a stove system. It’s a head that screws directly to an isobutane canister, relying on the base of the canister for stability. It’s up to you to supply cookware, but it works with just about anything that’ll fit on its tri-legged platform. The stove takes up as much room as a saltshaker when packed, and the three legs fold out and lock into place with gravity. The built in piezoelectric starter is nestled into the stove’s gas tube, well protected during transport.
Performance: The burner head is made from an exotic material using a form of fission-based, thermal coefficient enhancing metallurgy called flame-rolled titonium. Yes, you read that right, and yes, we totally made that up. We have no idea how the stove puts out so much heat, but we surmise the head shape and spacing of the fuel ports have a lot to do with it. We do know the stove makes use of a regulated fuel system that laughs at cold temps and changes in fuel volume. Boil times are similar from the first boil on a new canister to the fifth, and cold temps slow things by about 10 percent. And, all of our boil times are with a regular-bottomed titanium pot from MSR. For the heck of it, we boiled a few times using the Primus Spider’s heat exchanger pot and boil times dropped to an amazing 1:40. A lot of this performance goes out the window when a breeze is present, so plan on using a windscreen to get the most out of the OD-1R.
Pros:
- Tiny, light, and powerful
- Relatively inexpensive
- Works well in cold temps
- Our 6-year-old stove has hundreds of uses and shows no signs of slowing down.
Cons:
- Isobutane fuel canisters can be scarce.
- The arms can seem locked-in when they’re not.
- Stove stability is based on the circumference of a fuel canister.
- Great at boiling water, but it’s a scorcher when trying to cook food.
- This guy doesn’t sip fuel.
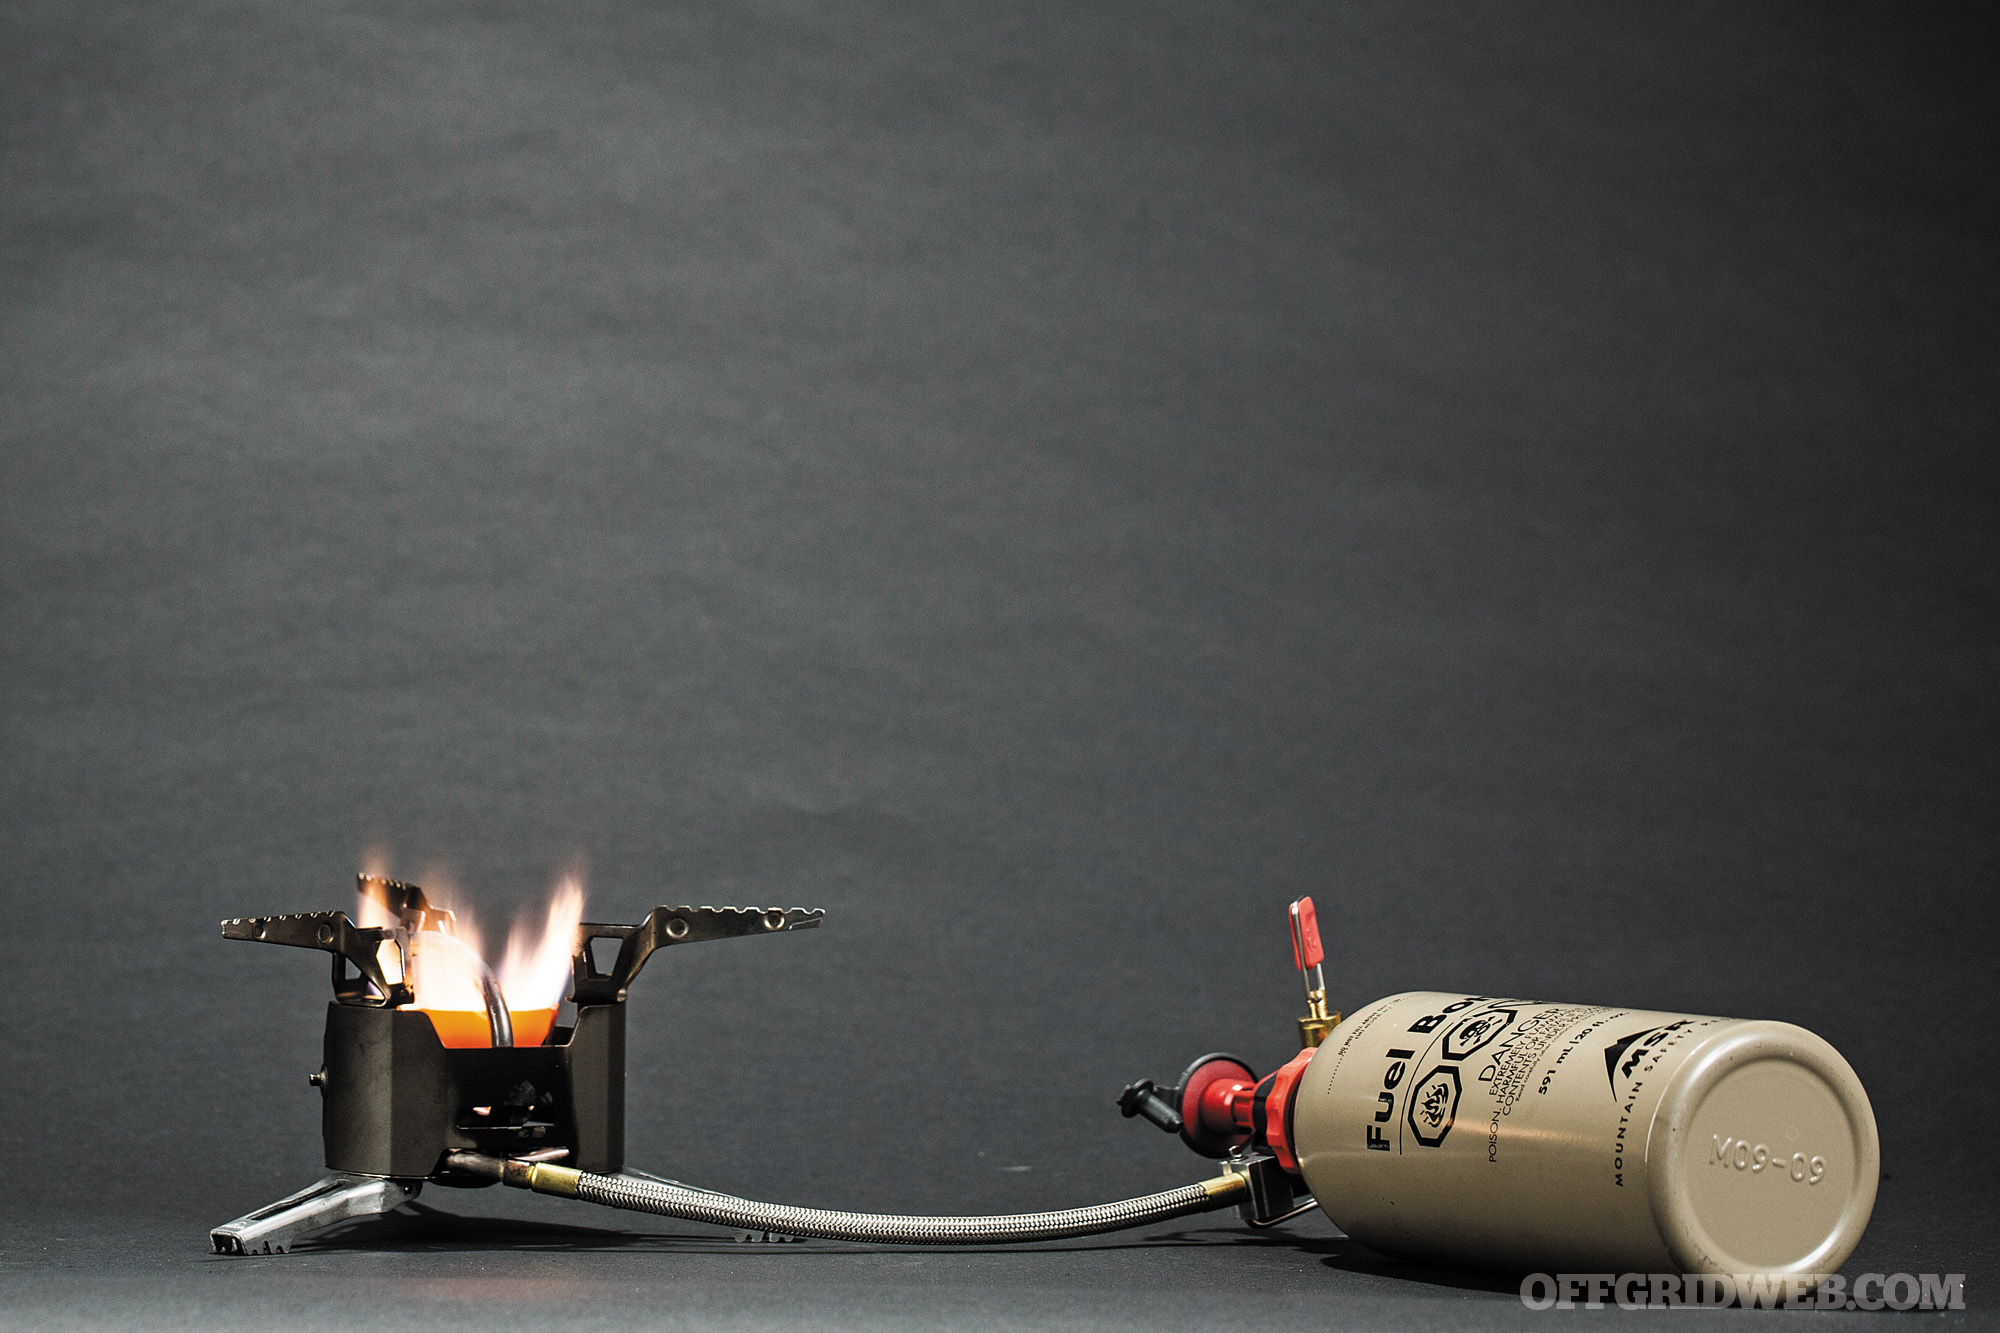
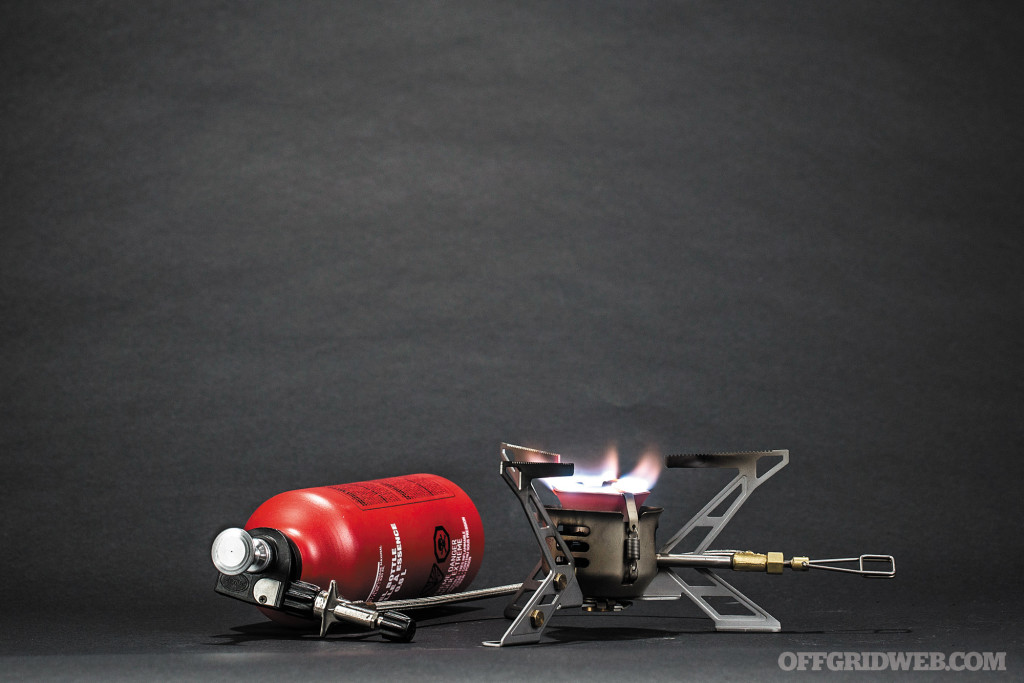
MSR XGK-EX Military

LIQUID / MULTI-FUEL
Weight
18.6 oz
Fuel Type
Liquid fuel (diesel)
Boil Time – Calm
2:29
Boil Time – 3 mph Wind
3:55
MSRP
$340*
URL
www.cascadedesigns.com

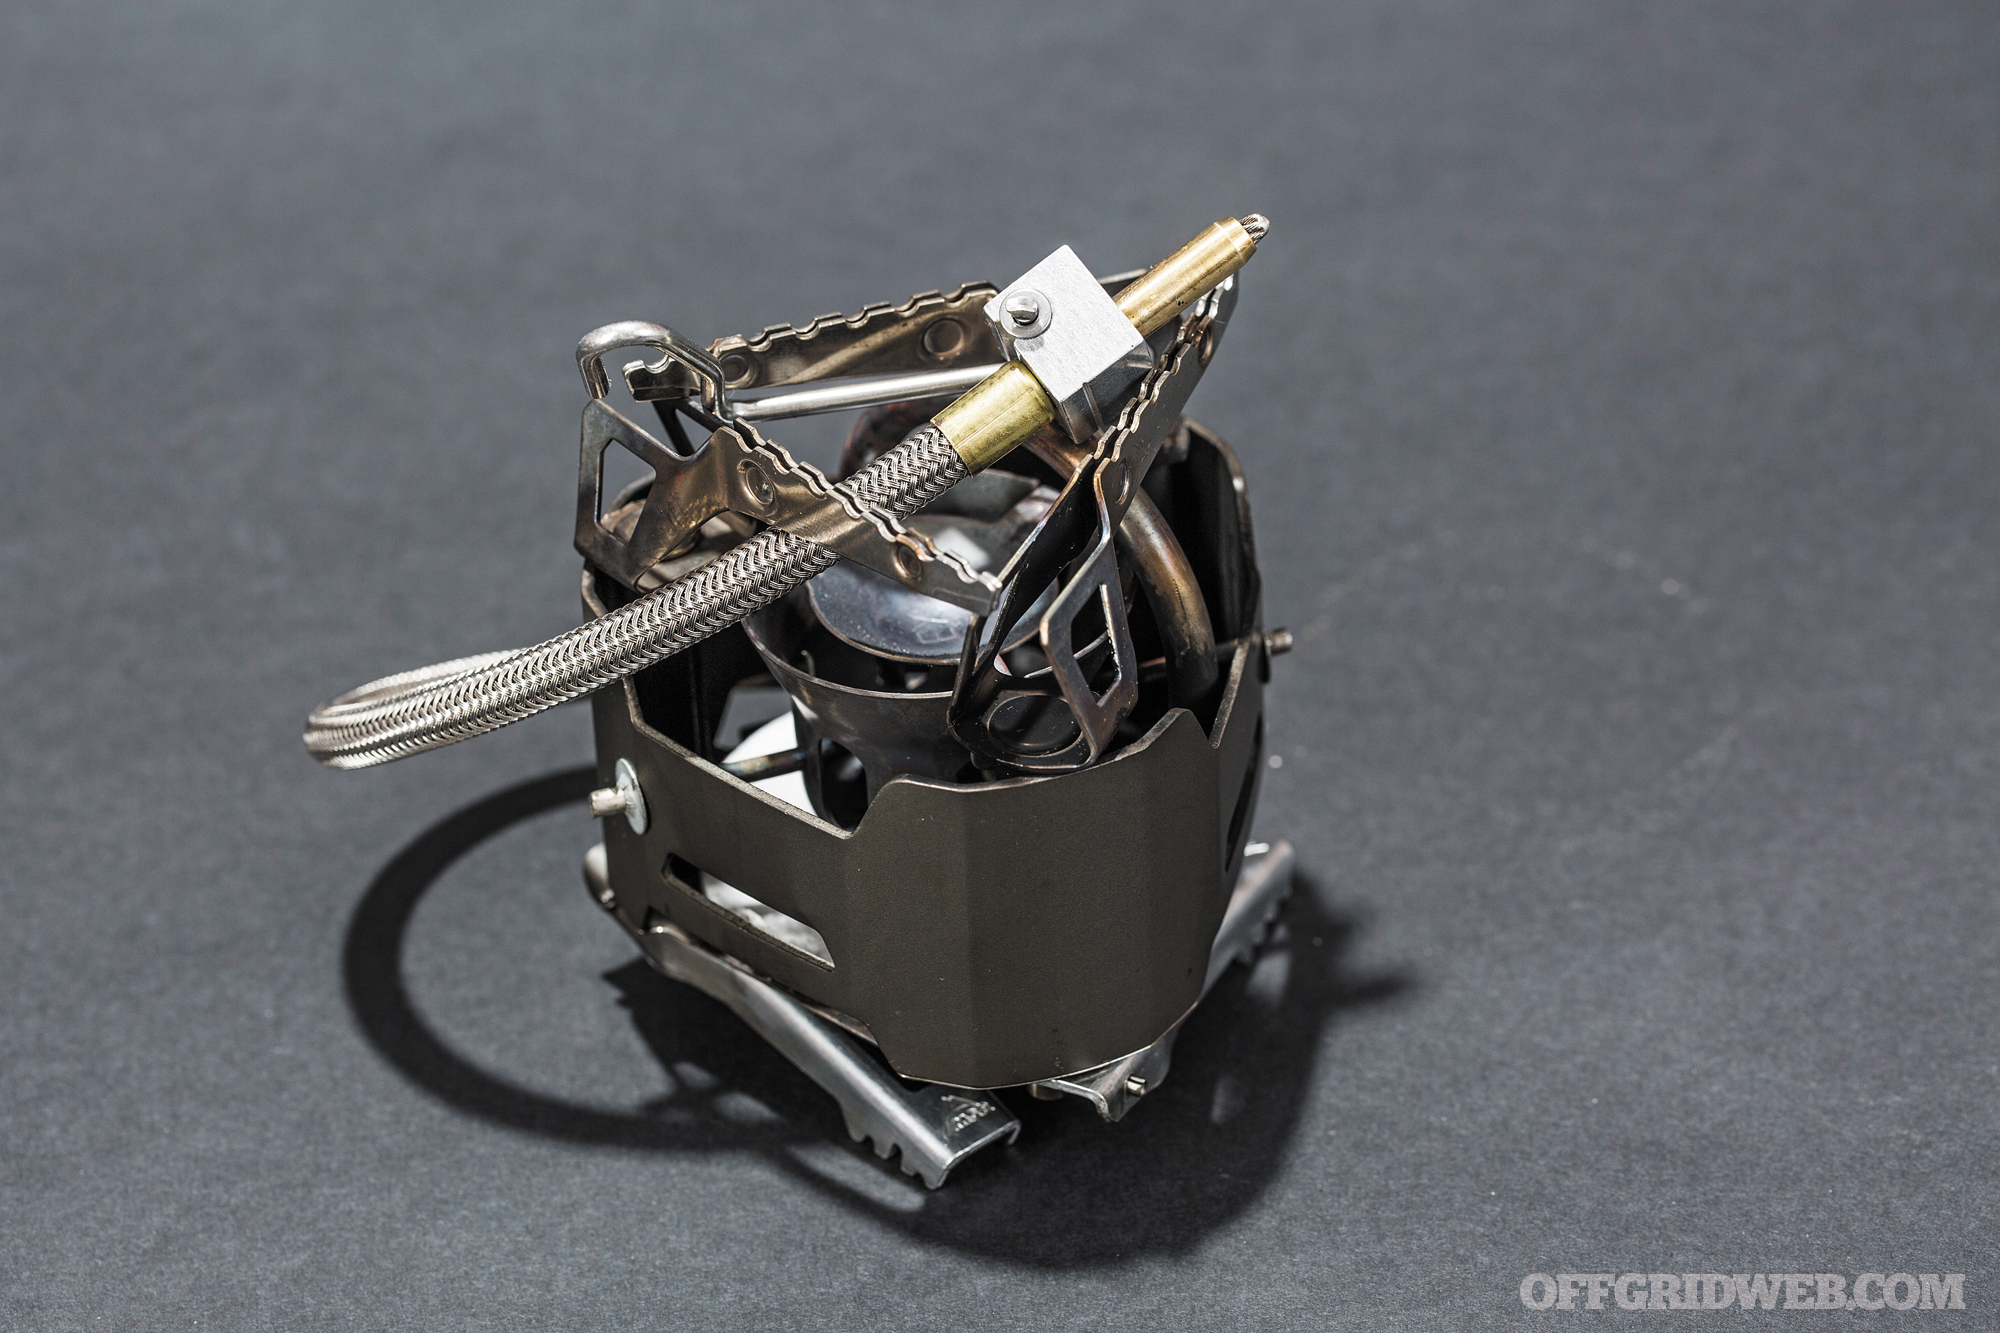
MSR’s flagship liquid stove has undergone constant refinement since the original Model 9 hit the market in 1973. It now features a compact, polymer body fuel pump that’s lighter and just as durable as an aluminum body pump, monstrous fuel lines feeding a stove that’ll burn anything it can pump and vaporize, and simple, sturdy construction. The stove body’s chunky shape is deceptive. It’s one of the lightest liquid fuel stoves around, and the legs fold in a way that makes it hard to bend anything out of shape.

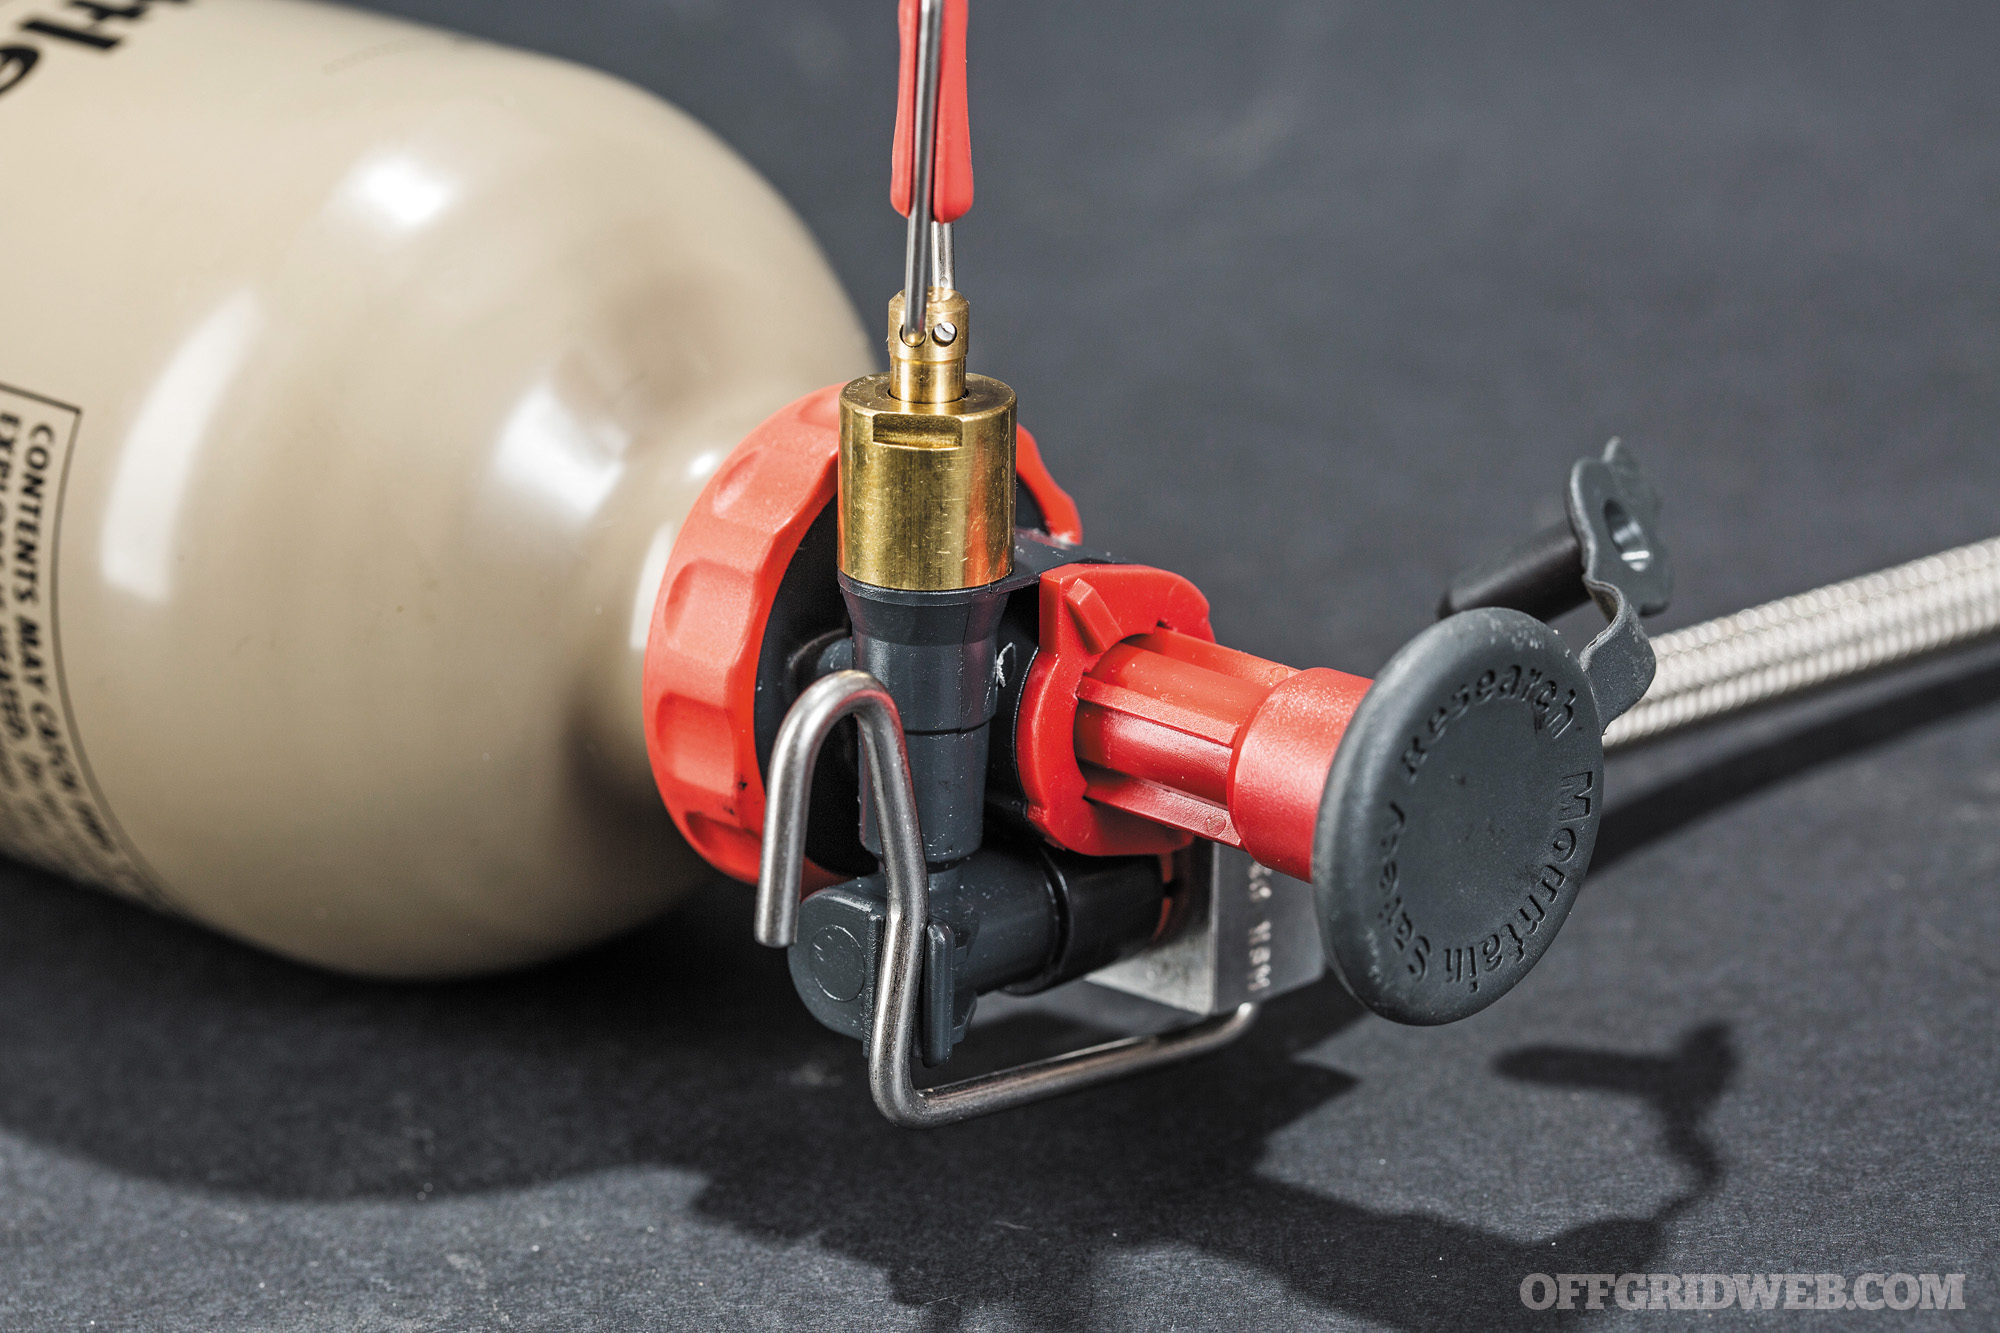
Use: Taking care of the XGK-EX is pretty easy. Burning white gas keeps the stove clean; burn kerosene, diesel, or JP-8 and you’ll need to punch the jet every couple dozen or so uses. The internal shaker pin clears a clogged jet in the field, but a deep cleaning after every long trip will keep the stove running for many years. Over time, the fuel pump and stove will need some love. MSR provides the tools, and you’ll appreciate the well produced how-to videos on its website.
Performance: Because we hate ourselves, we’ll skip the white gas and run all of our tests with diesel. Priming any liquid-fuel stove is a pain in the ass, and the XGK-EX is no exception. Mercifully, the large generator tube heats up quickly and the lighting holes line up well to ignite the priming pad. Once lit, it burns hot and loud. The stove sips diesel and cranks out impressive heat. Times are consistent between boil tests, and the fuel pump only needs a few maintenance reps to keep the stove running after a handful of boils. Despite its blowtorch visage, the stove’s valve is fine enough to simmer lighter fuels with ease. Like all liquid fuel stoves, the XGK-EX will run in cold temps that’ll render a canister stove impotent. Just plan on longer priming times as temps drop. Using the included windscreen will give the best efficiency in breezy conditions.

Pros:
- Easy maintenance
- Unaffected by low temps
- Stable with big, 1.5-liter pots
- Burns almost any liquid fuel; huge generator and fuel lines won’t clog
- Shaker jet means cleaning a clogged jet is as simple as shaking the stove.
- MSR provides excellent use and maintenance instructions, as well as great customer service.
Cons:
- Air purge sometimes leaves fuel in line.
- Synthetic pump cups can stiffen up in truly arctic temps.
- Liquid fuel in general can be messy.
*NOTE: The XGK-EX Military package shown here is sold only to the U.S. military. While the cool factor might be higher with that tan fuel bottle, the performance is identical to the $160 commercial offering. The only difference between the two is the included accessories. The commercial stove includes white gas and diesel jets, and no fuel bottles. The military kit includes jets for diesel and JP-8 (but no white gas jet), two 20-ounce, tan fuel bottles, and a SealLine drysack. To get the versatility of the military version, you can buy the outdoor store version and hit MSR up for the JP-8 jet if you think you’ll be scavenging fuel from an MRAP or MATV someday.
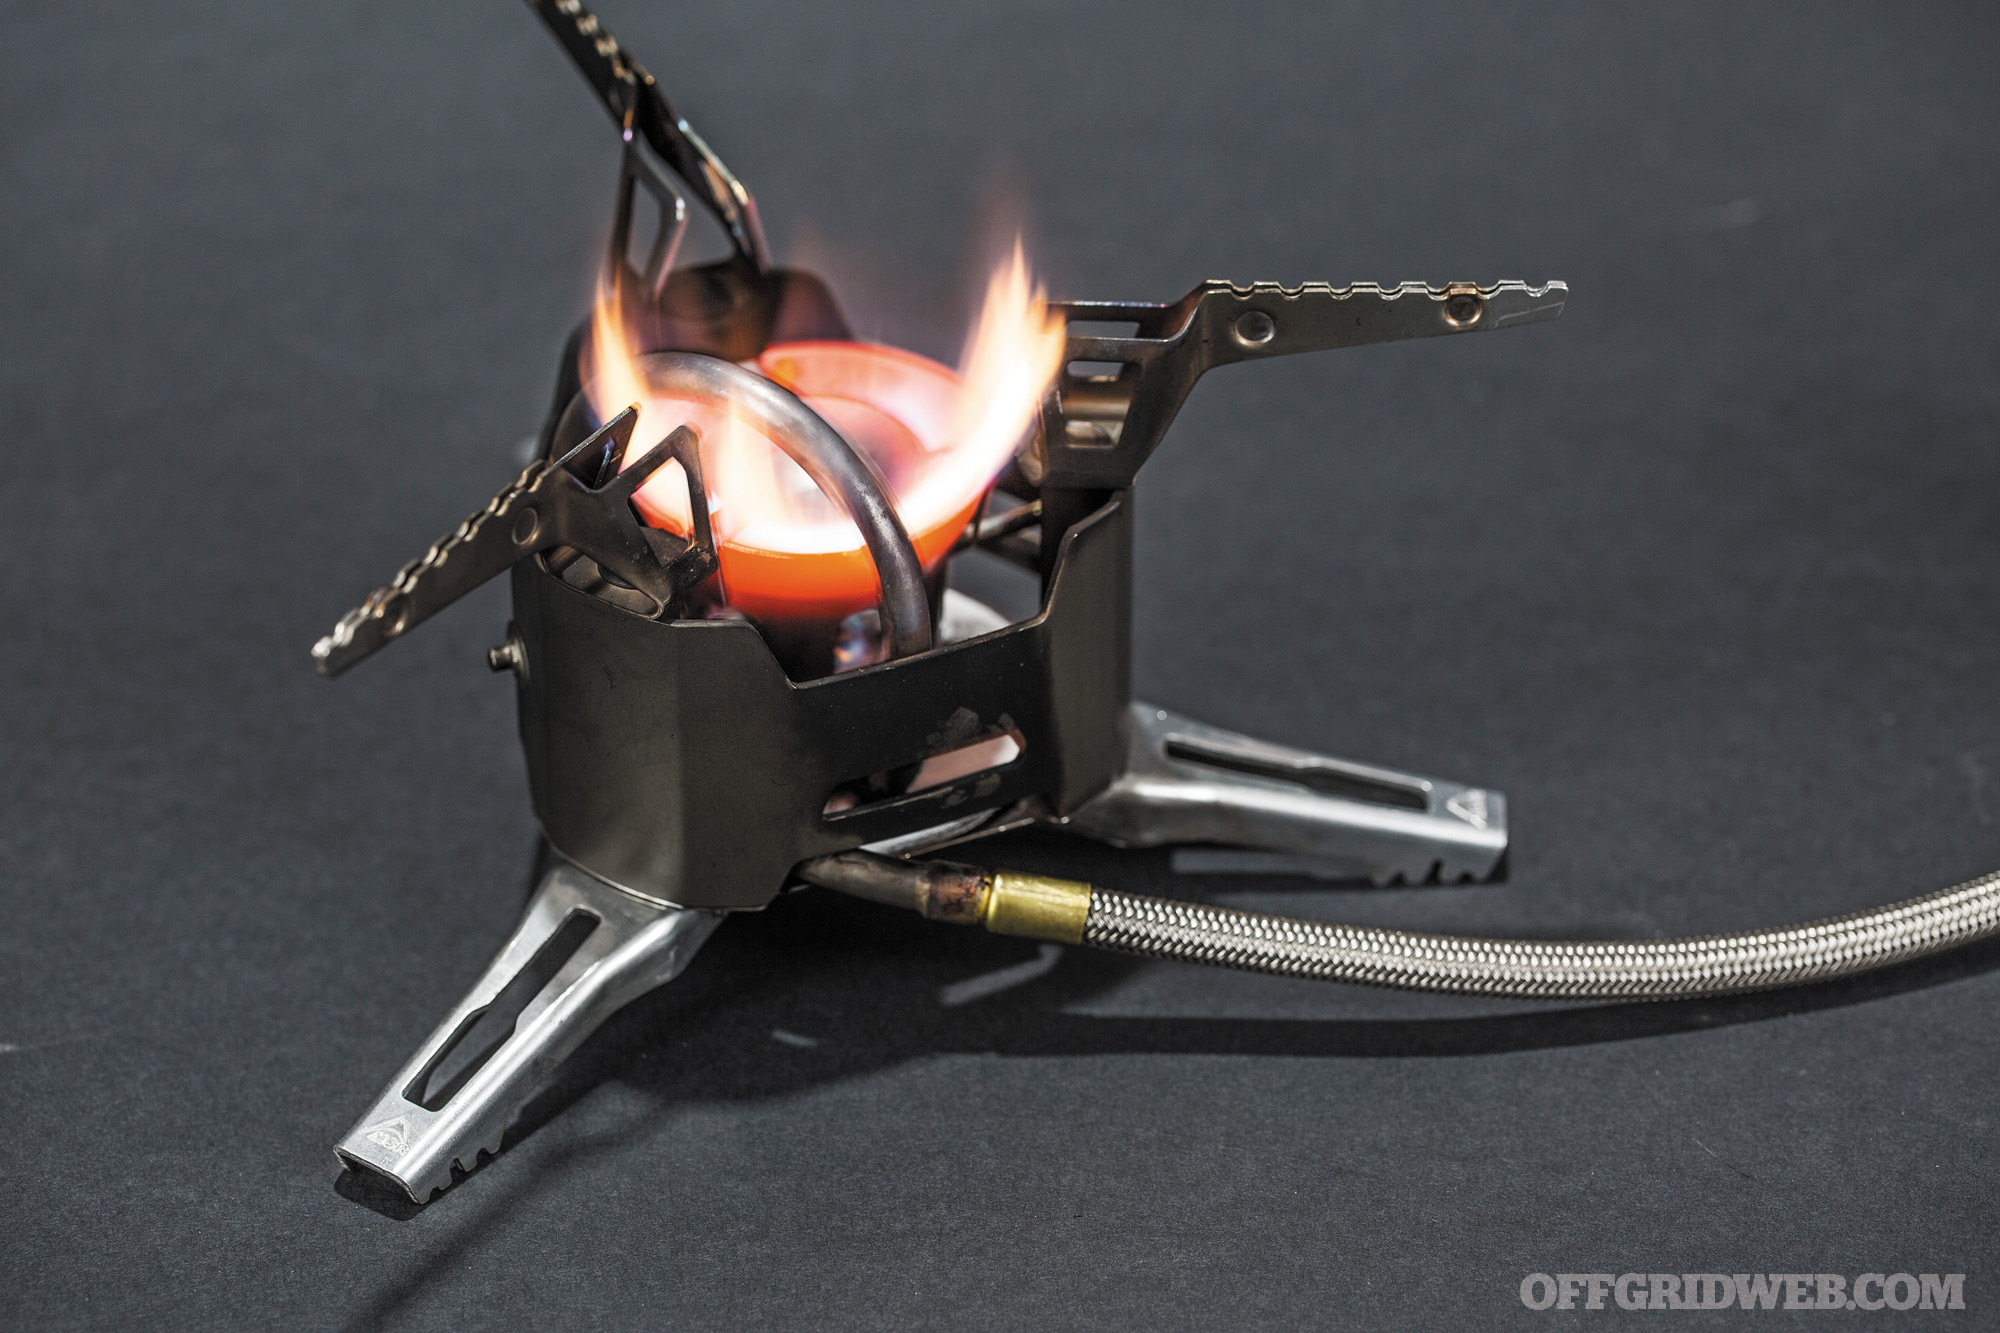
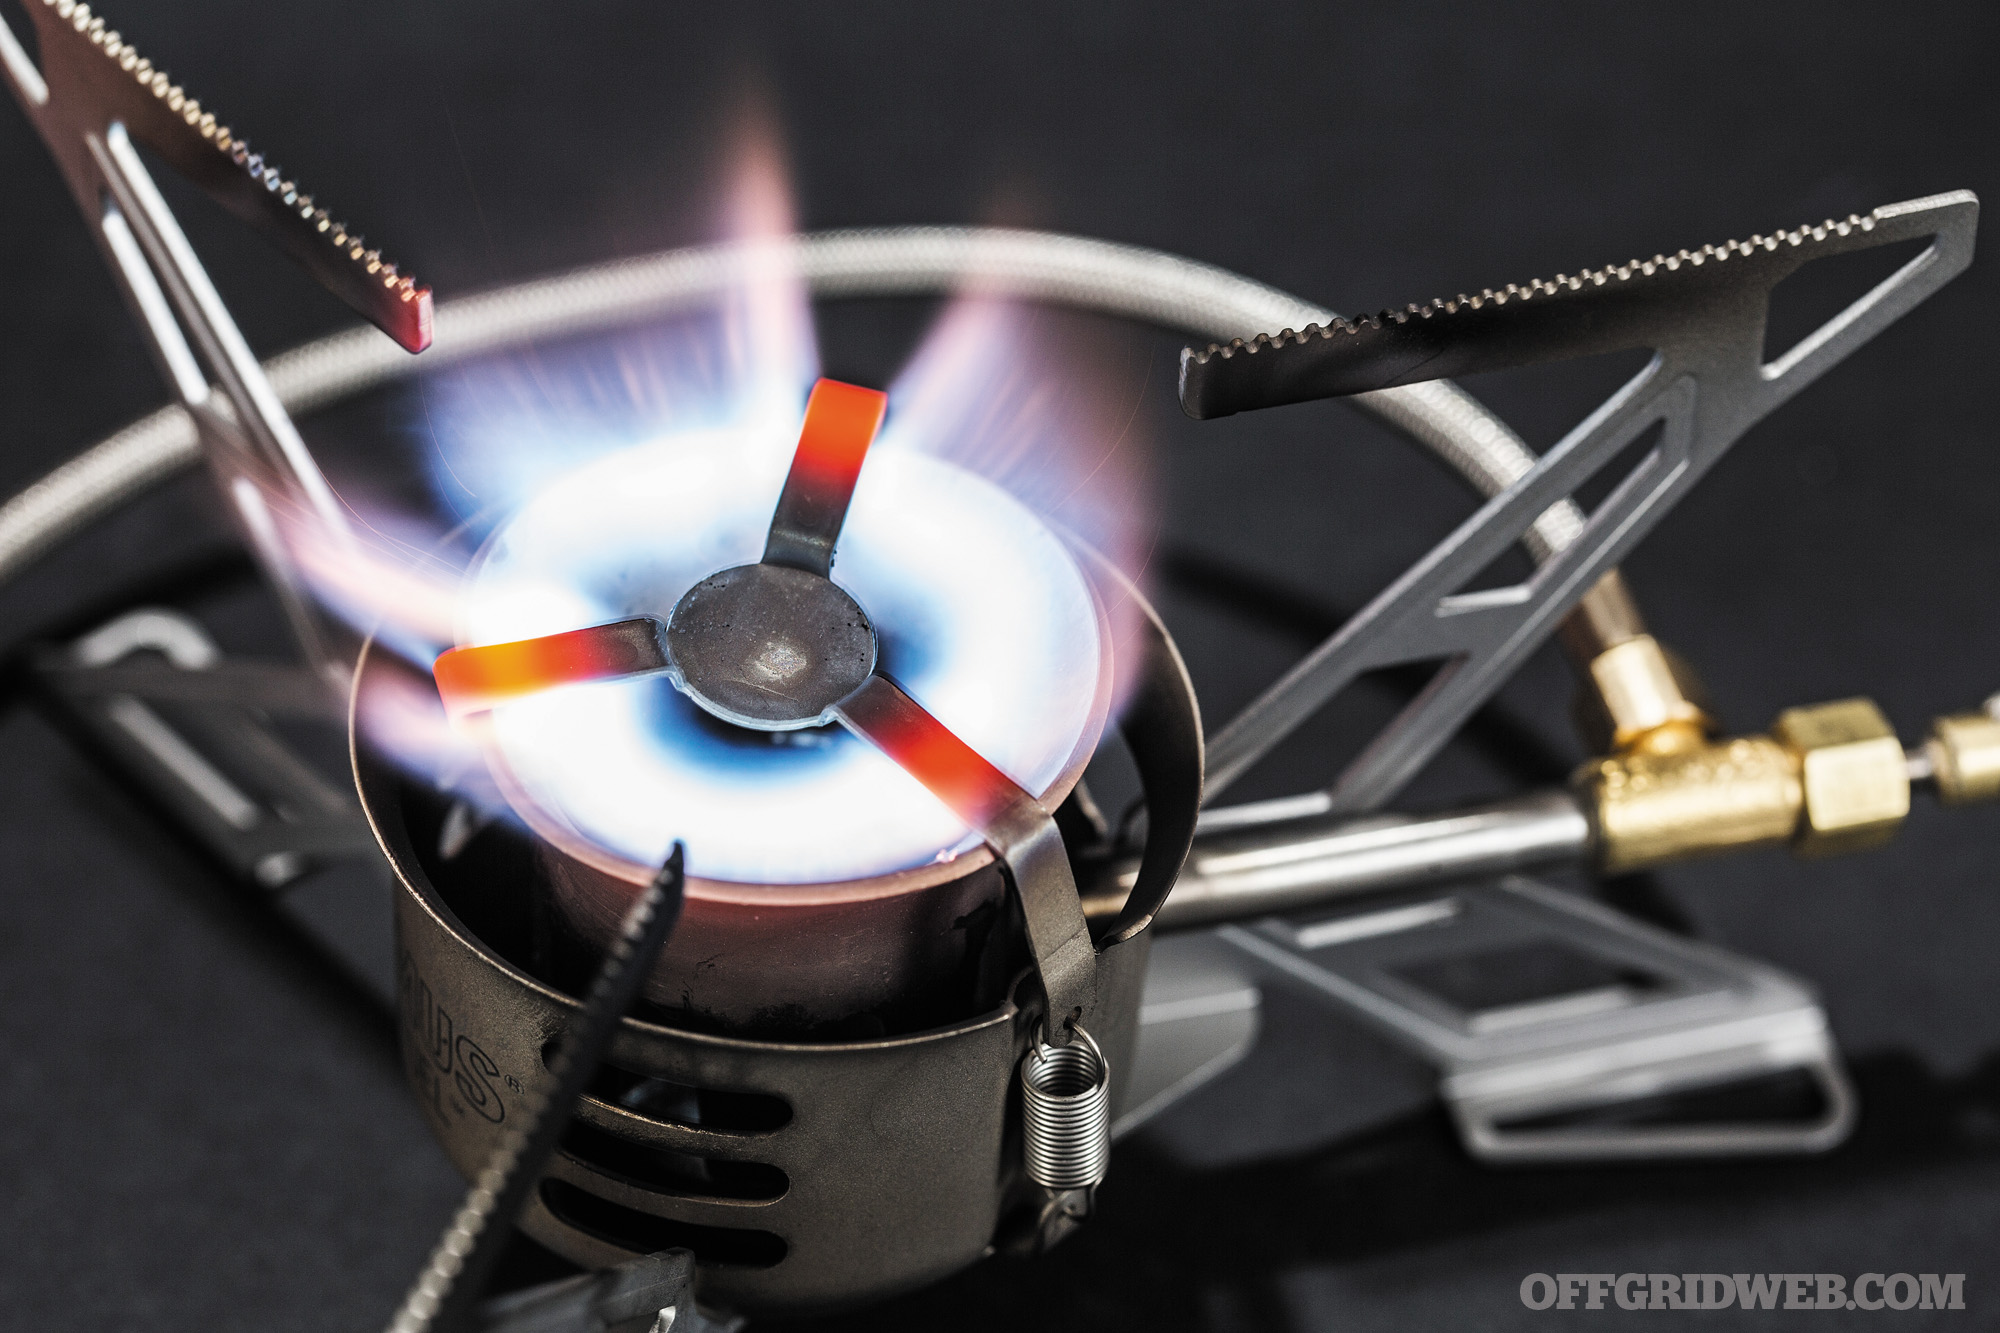
Primus Omnifuel Stove
LIQUID / MULTI-FUEL
Weight
24.1 oz
Fuel Type
Liquid fuel (diesel)/canister
Boil Time – Calm
2:48/3:40
Boil Time – 3 mph Wind
4:30/4:35
Boil Time – Cold
NA/6:20
MSRP
$170
URL
www.primuscamping.com
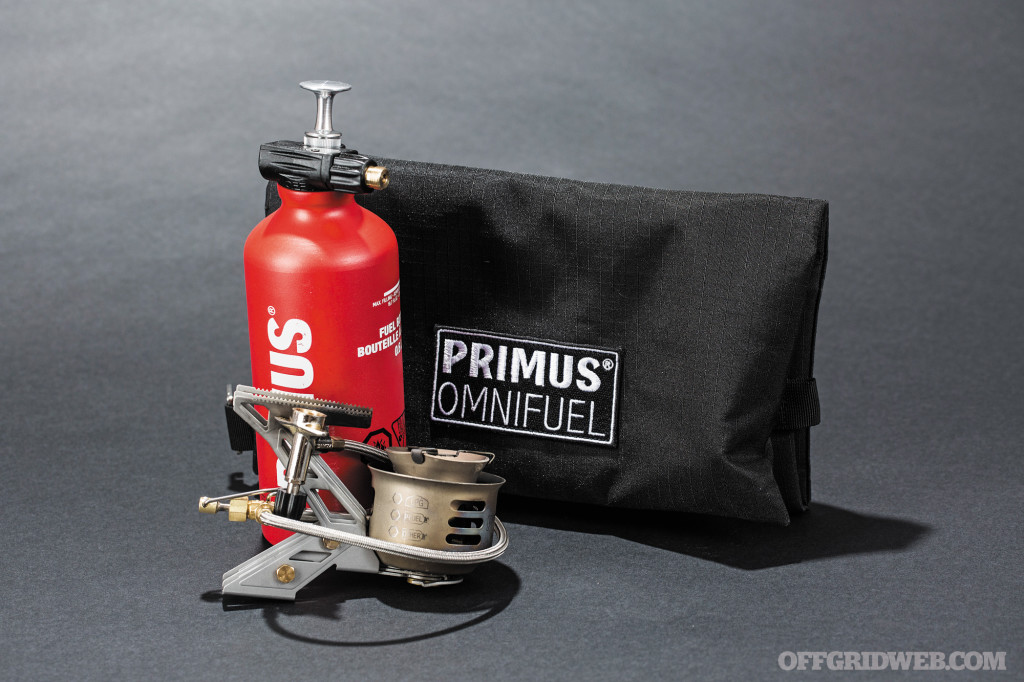
The Primus Omnifuel is a different animal. Not only is it a Swiss watch of camping stoves, it’s more omni than most omni stoves on the market. Normally, we’d call a liquid-fuel stove with interchangeable jets a universal stove in its own right. But this guy can run your standard liquid petroleum fuels and canister fuels straight out of the box. So, it’s more universal than you might think.
Use: This stove runs on canisters but is always ready to go into crisis support mode with any liquid fuel around. The fuel line terminates in threads compatible with both its liquid fuel pump as well as disposable fuel canister threads. The fuel pump is threaded for use with nearly any fuel bottle and the aluminum bodied pump is set to stand up to a lifetime of abuse. Priming the Omni for liquid fuel is straightforward, but there’s no wick. The fuel just pools in the stove’s base. There’s no downside as far as priming time, but the penalty for knocking the stove over during priming is a little greater when there’s an ounce of burning liquid fuel rolling around the burner bowl. The burner legs fold up, and the stove is quite compact for a liquid burner.
Performance: While there’s a lot to like about the Omnifuel in terms of its versatility, size, reliability, and cost when compared to other liquid fuel stoves, its boil times are slow. We aren’t sure why, but the stove is more like the tortoise than the hare. It’s going to get the cooking job done, but it isn’t going to be fast whether it’s using liquid fuel or isobutane canisters. Even without a regulator in the stove (and there isn’t a generator tube), we can get the stove running with cold fuel by turning the canister upside down, essentially feeding the burner liquid fuel. Again, it isn’t fast, but it’ll get the job done. Eventually.

Pros:
- Massive versatility and excellent construction
- Good flame control for a liquid stove
- Convenient onboard jet storage
- Liquid and canister fuel compatible
- Comes with basic windscreen and a decent dry bag that will help isolate the inevitable diesel fuel leakage and prevent your pack contents from reeking like a gas station.
Cons:
- Smaller fuel lines
- The stove clogged up during the third run in our boil test, and again while in the field. Pulling the stove apart to clean means risking the loss of small parts.
More From Issue 15
Don’t miss essential survival insights—sign up for Recoil Offgrid’s free newsletter today.
Read articles from the next issue of Recoil Offgrid: Issue 16
Read articles from the previous issue of Recoil Offgrid: Issue 14
Check out our sister publications on the web: Recoil | Gun Digest | Blade
Editor’s Note: This article has been modified from its original print version for the web.