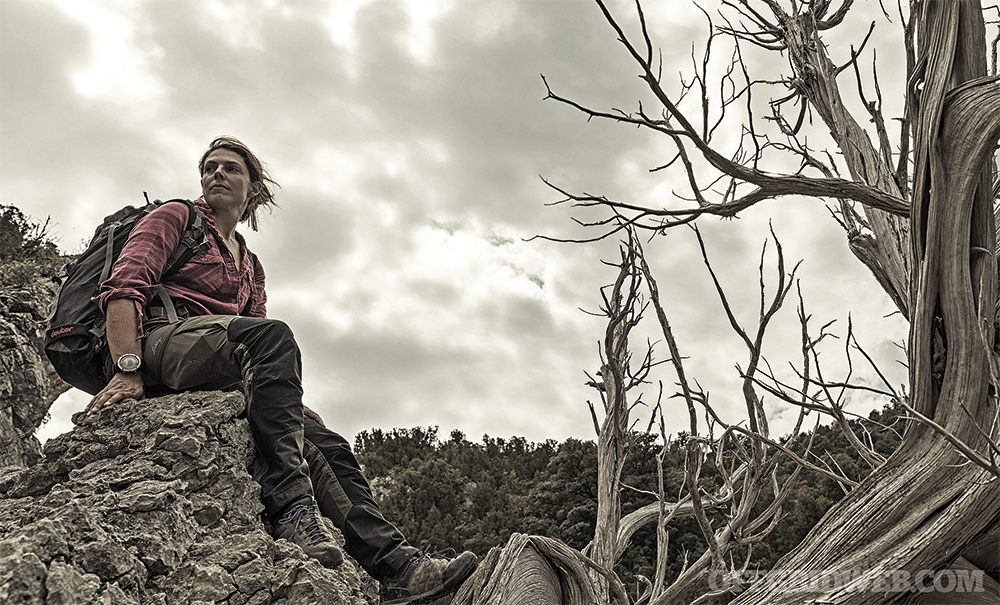
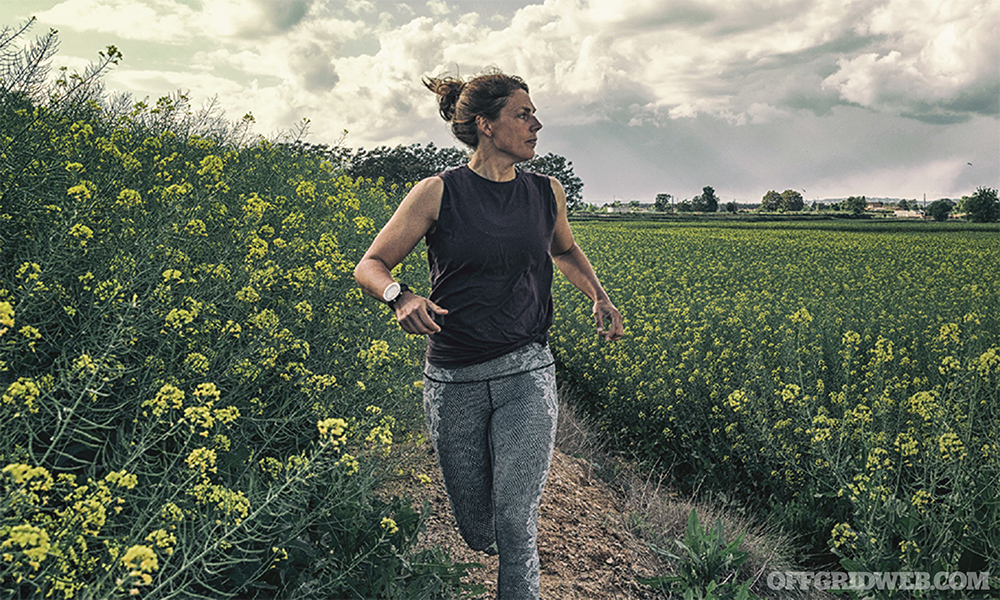
Physical fitness is essential for survival, but there’s more to it than spending all day pumping iron to build muscle. You also need proper nutrition to keep your body running strong, and you need to stay flexible to avoid muscle and joint pain.
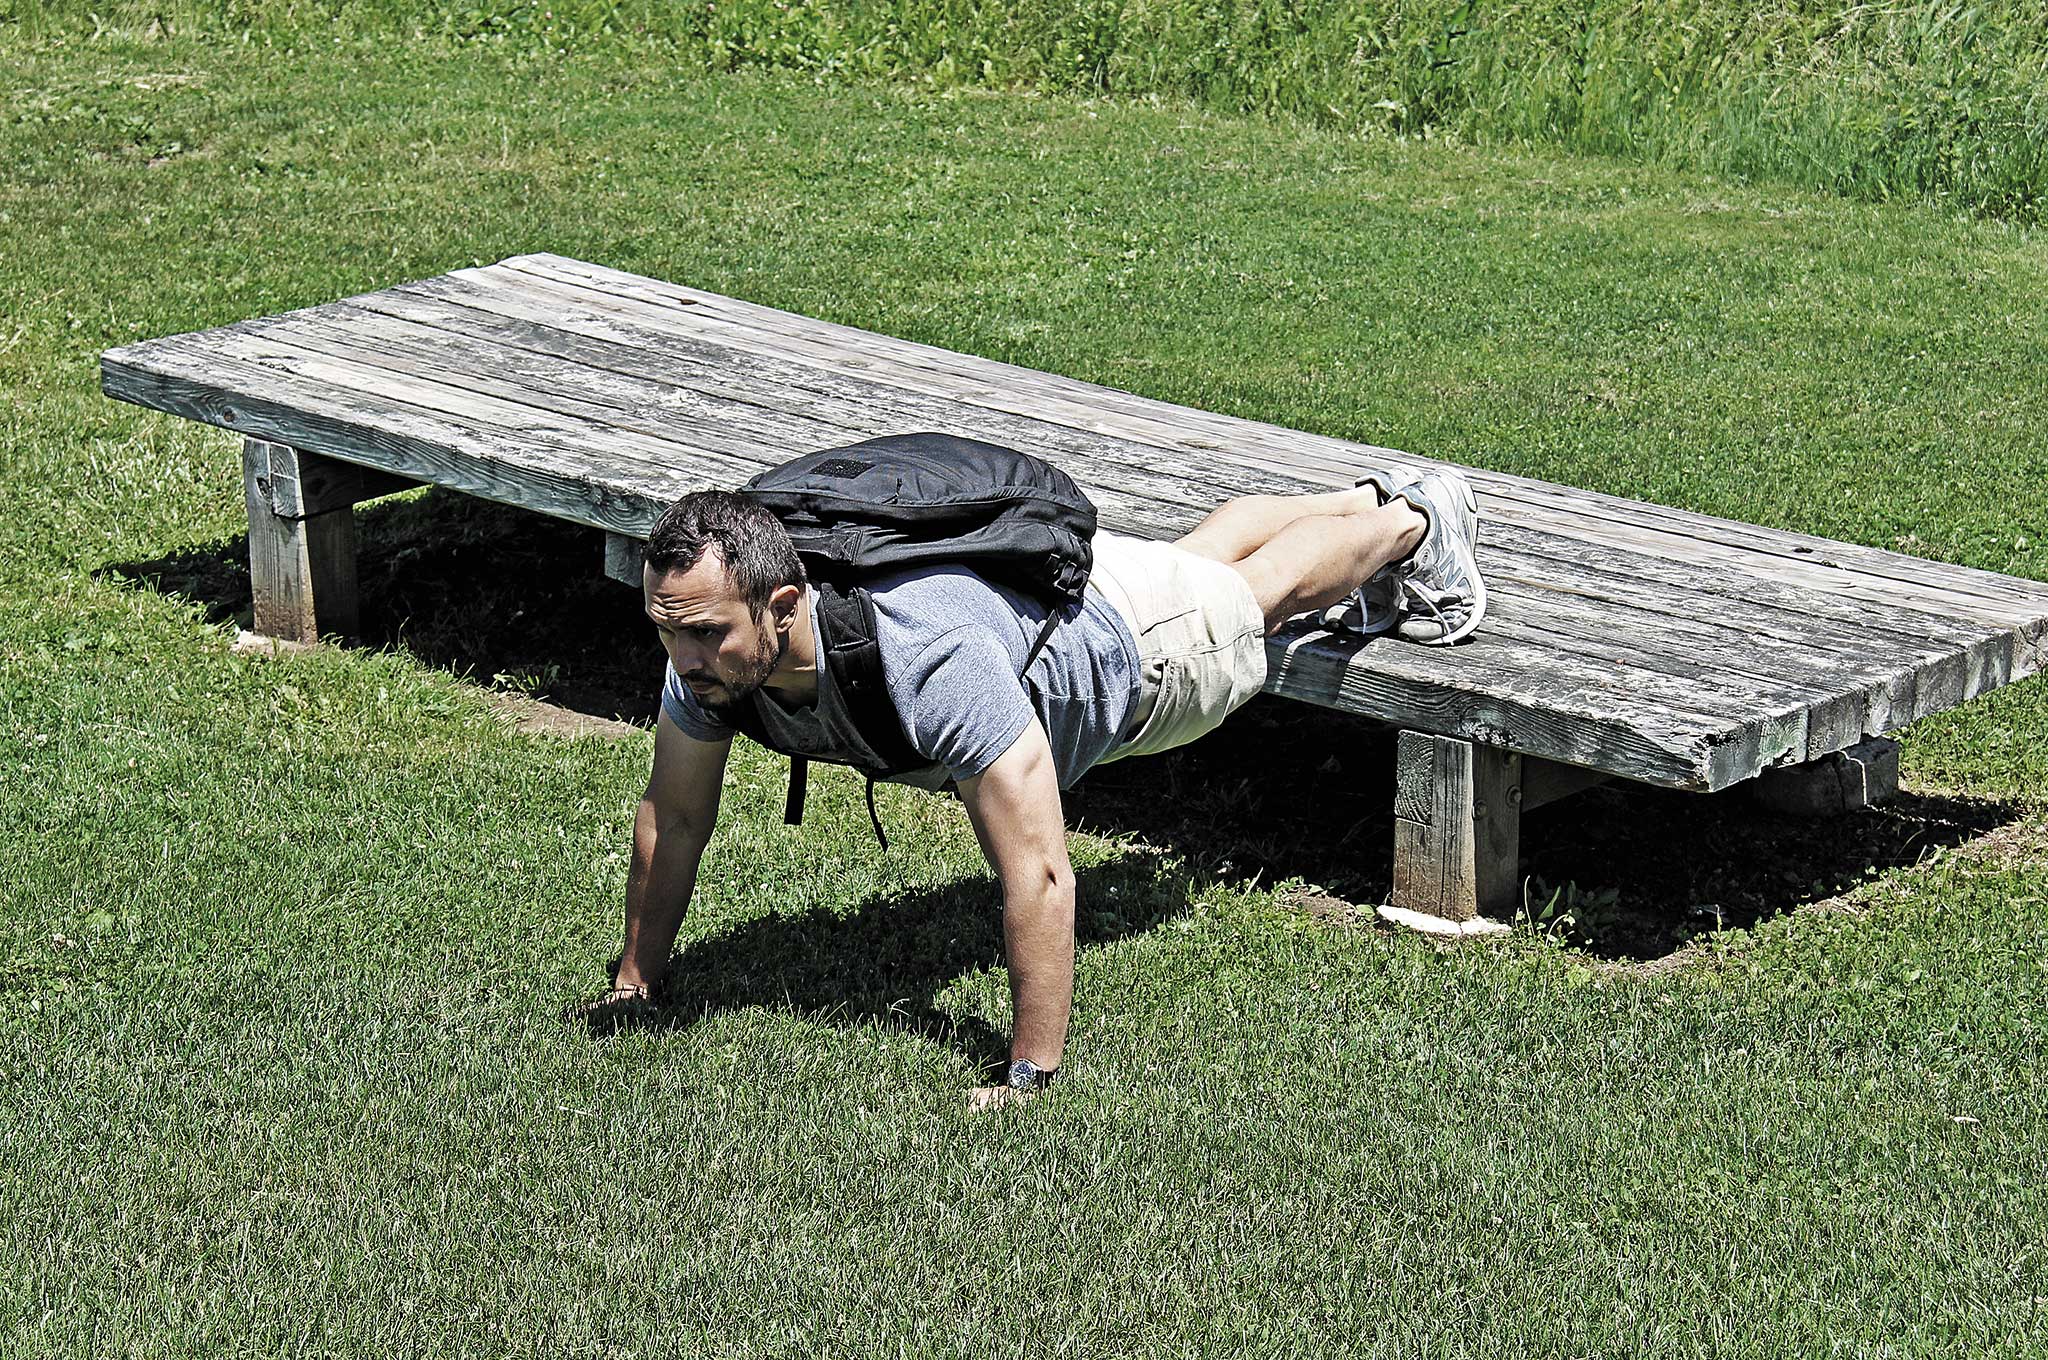
Working out builds strength, but stretching and maintaining good posture can help you avoid injury. Photo: Kevin Estela
Those who have experienced a bad sprain or extreme muscle cramping know exactly how debilitating these injuries can be during everyday activities — just imagine how much worse they’d be when you’re carrying a heavy bug-out bag and trying to escape a dangerous situation.
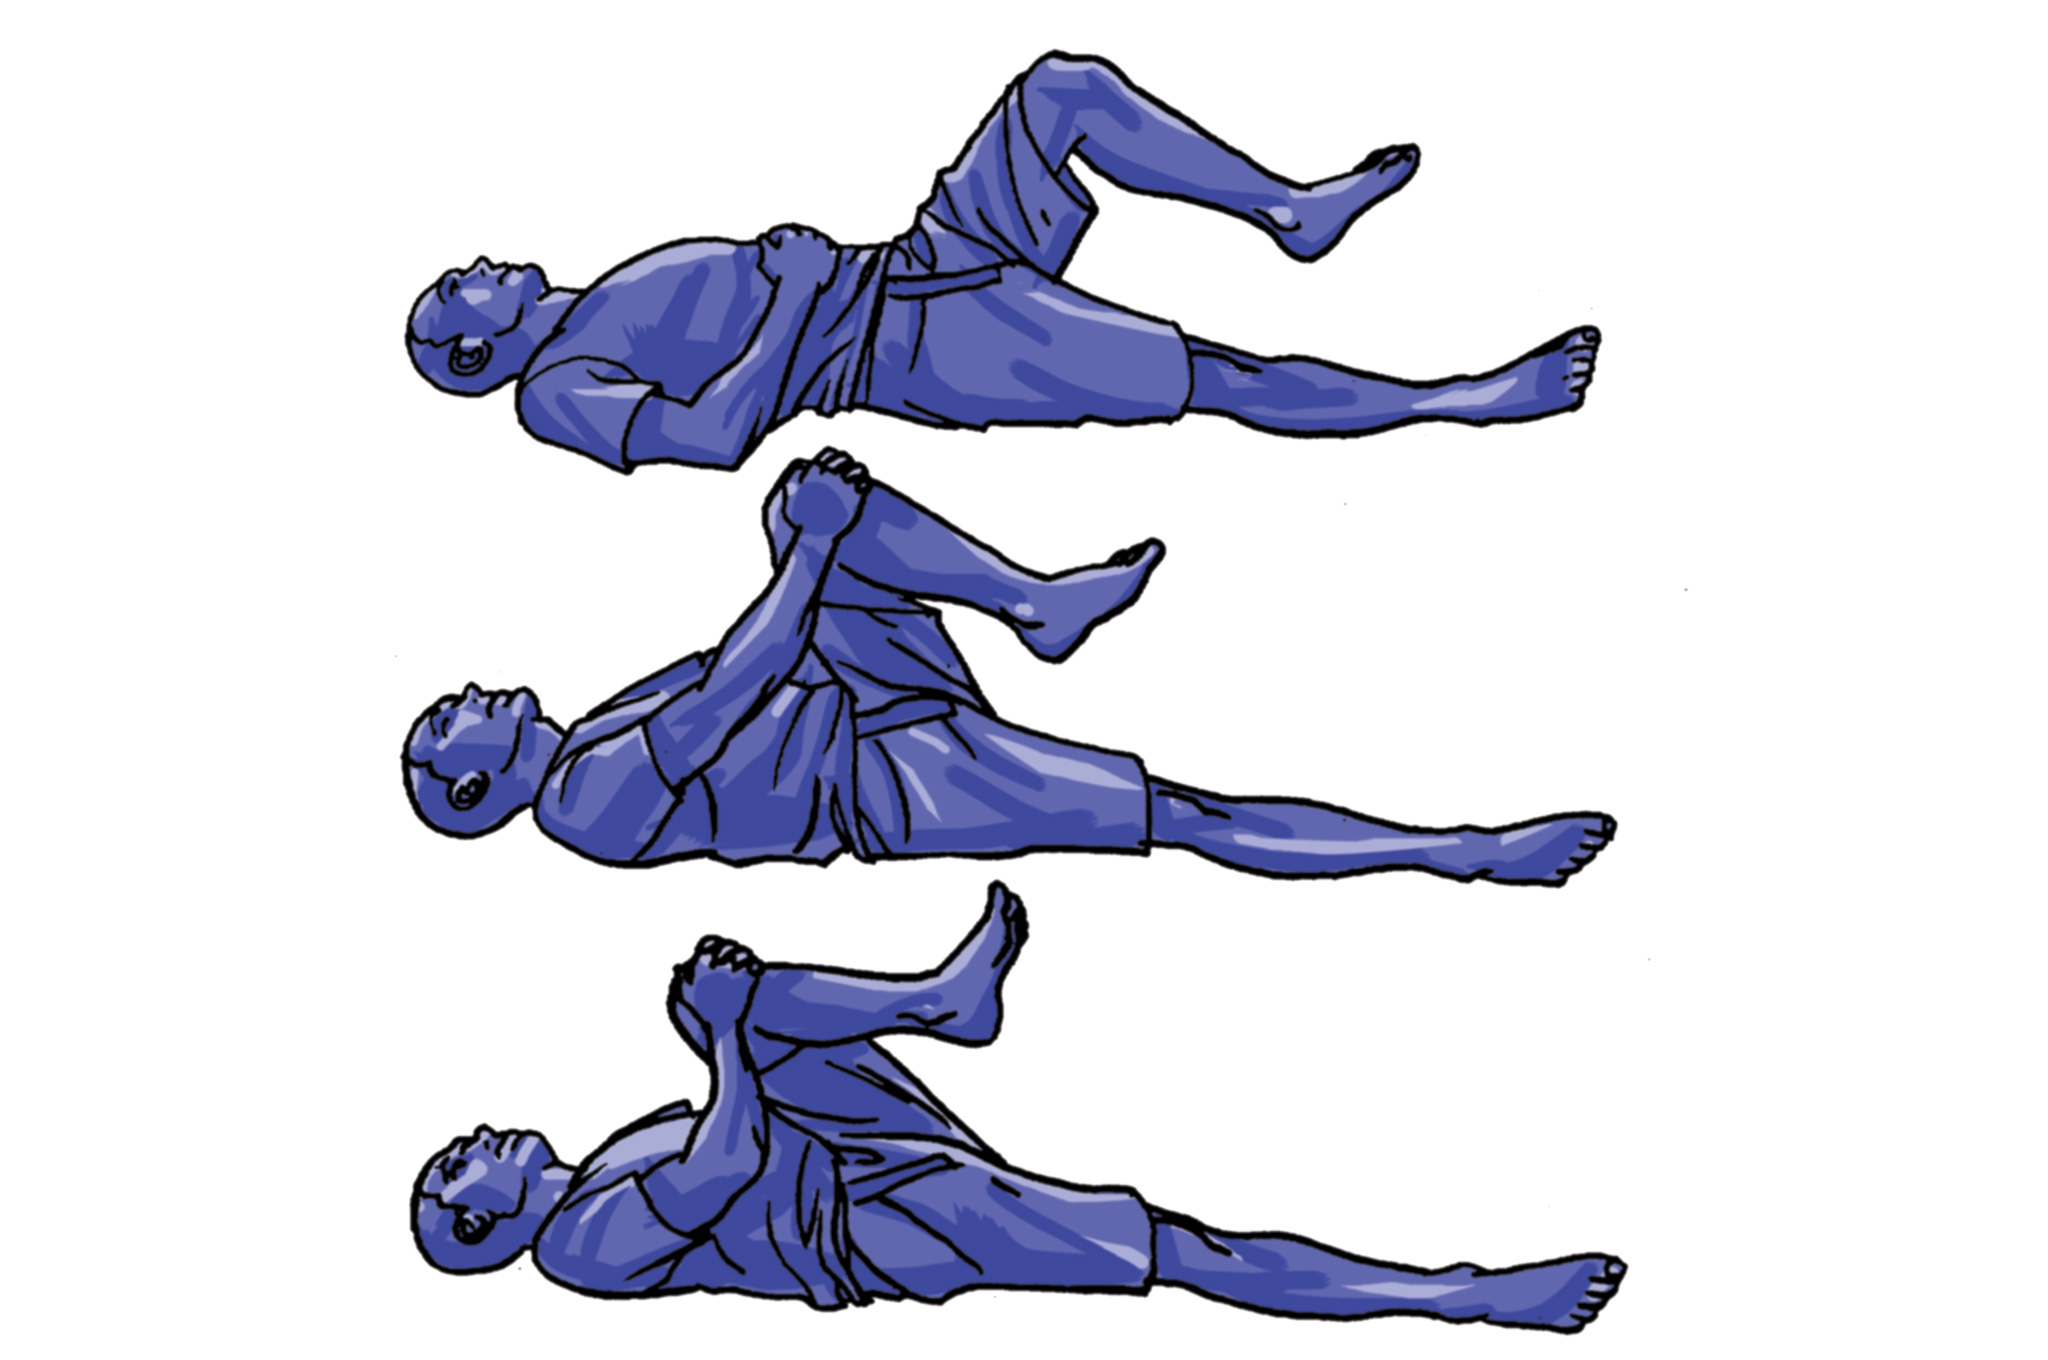
Stretching can relieve muscle pain and stiffness, but it can’t repair damage that has already been done.
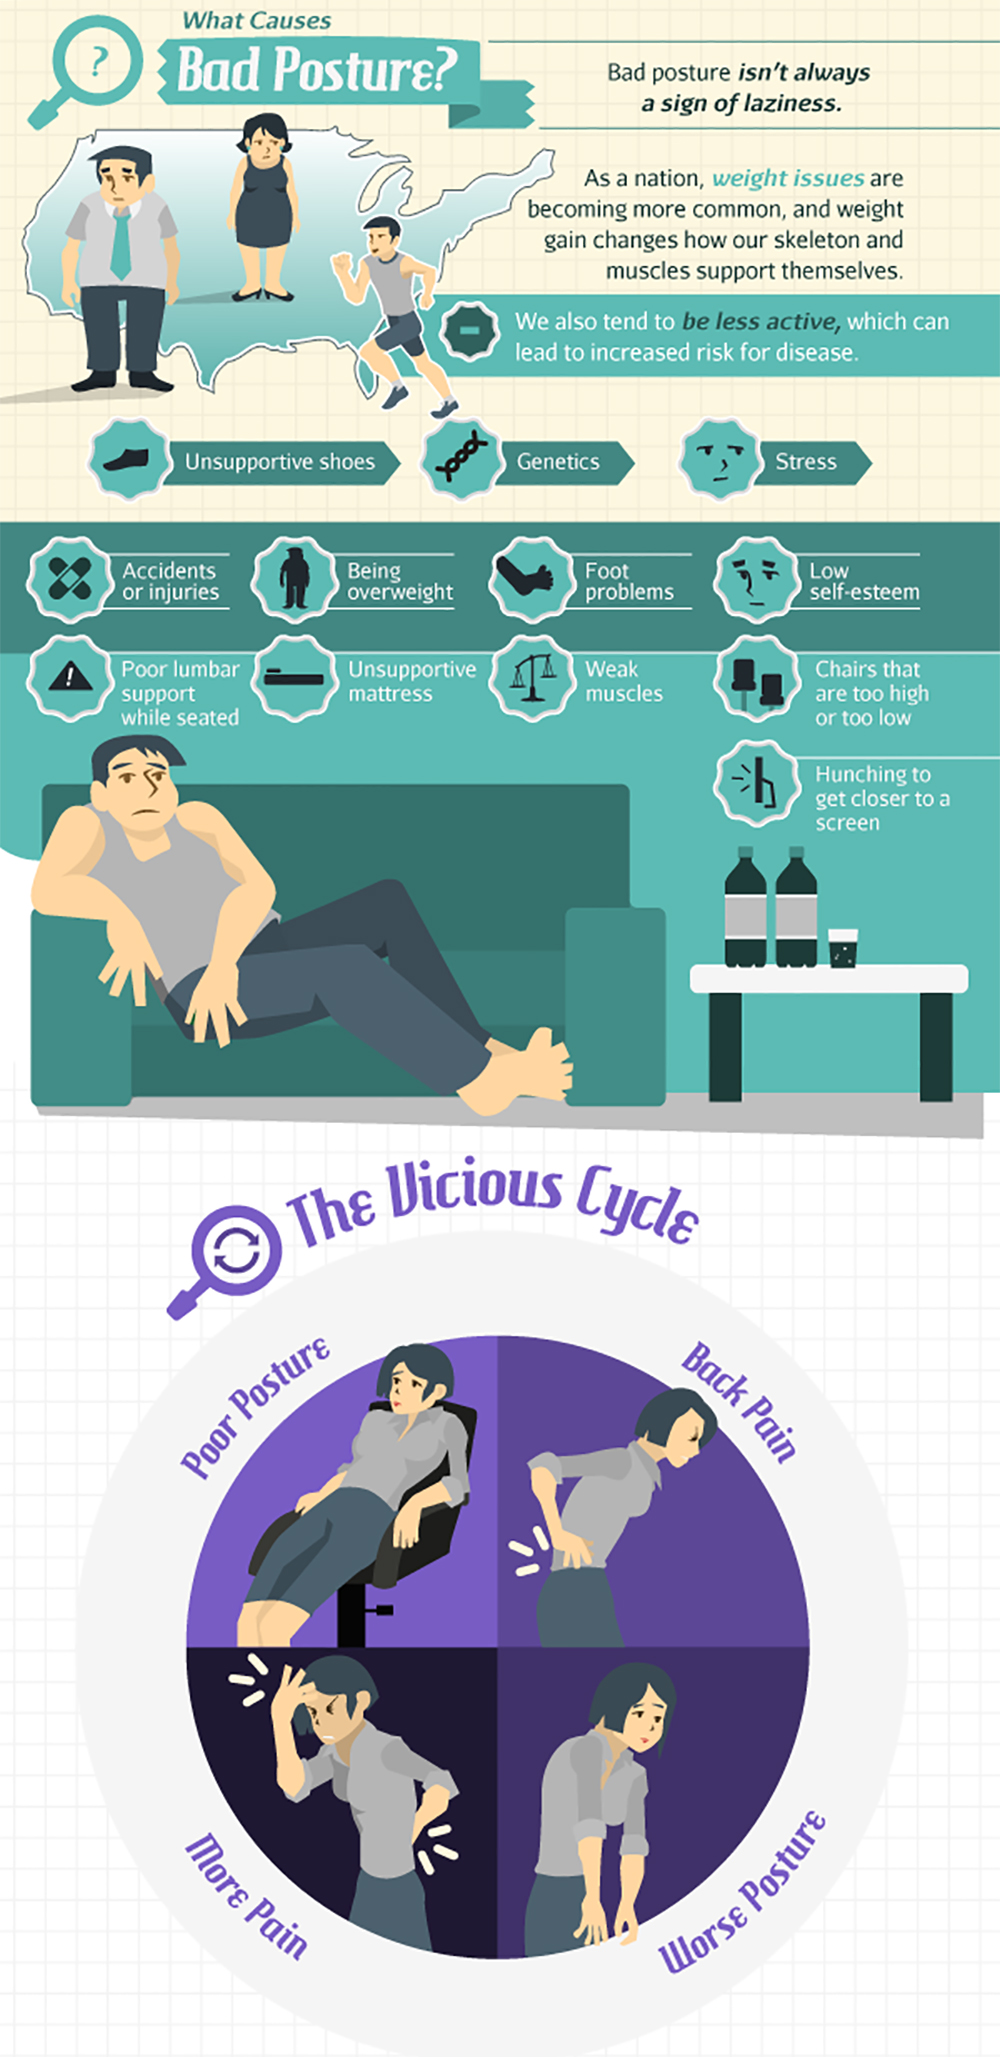
Back pain affects 50 to 80 percent of American adults, and severe cases can make it all but impossible to even stand up. Obviously, this isn’t the sort of injury you want during an emergency, so you should take steps to alleviate it during your daily routine. Back injuries often build up over weeks, months, and years, so taking a few small steps in the right direction now can save you decades of anguish down the road.
You can’t afford to be sidelined by back pain during a disaster, so take steps now to prevent it.
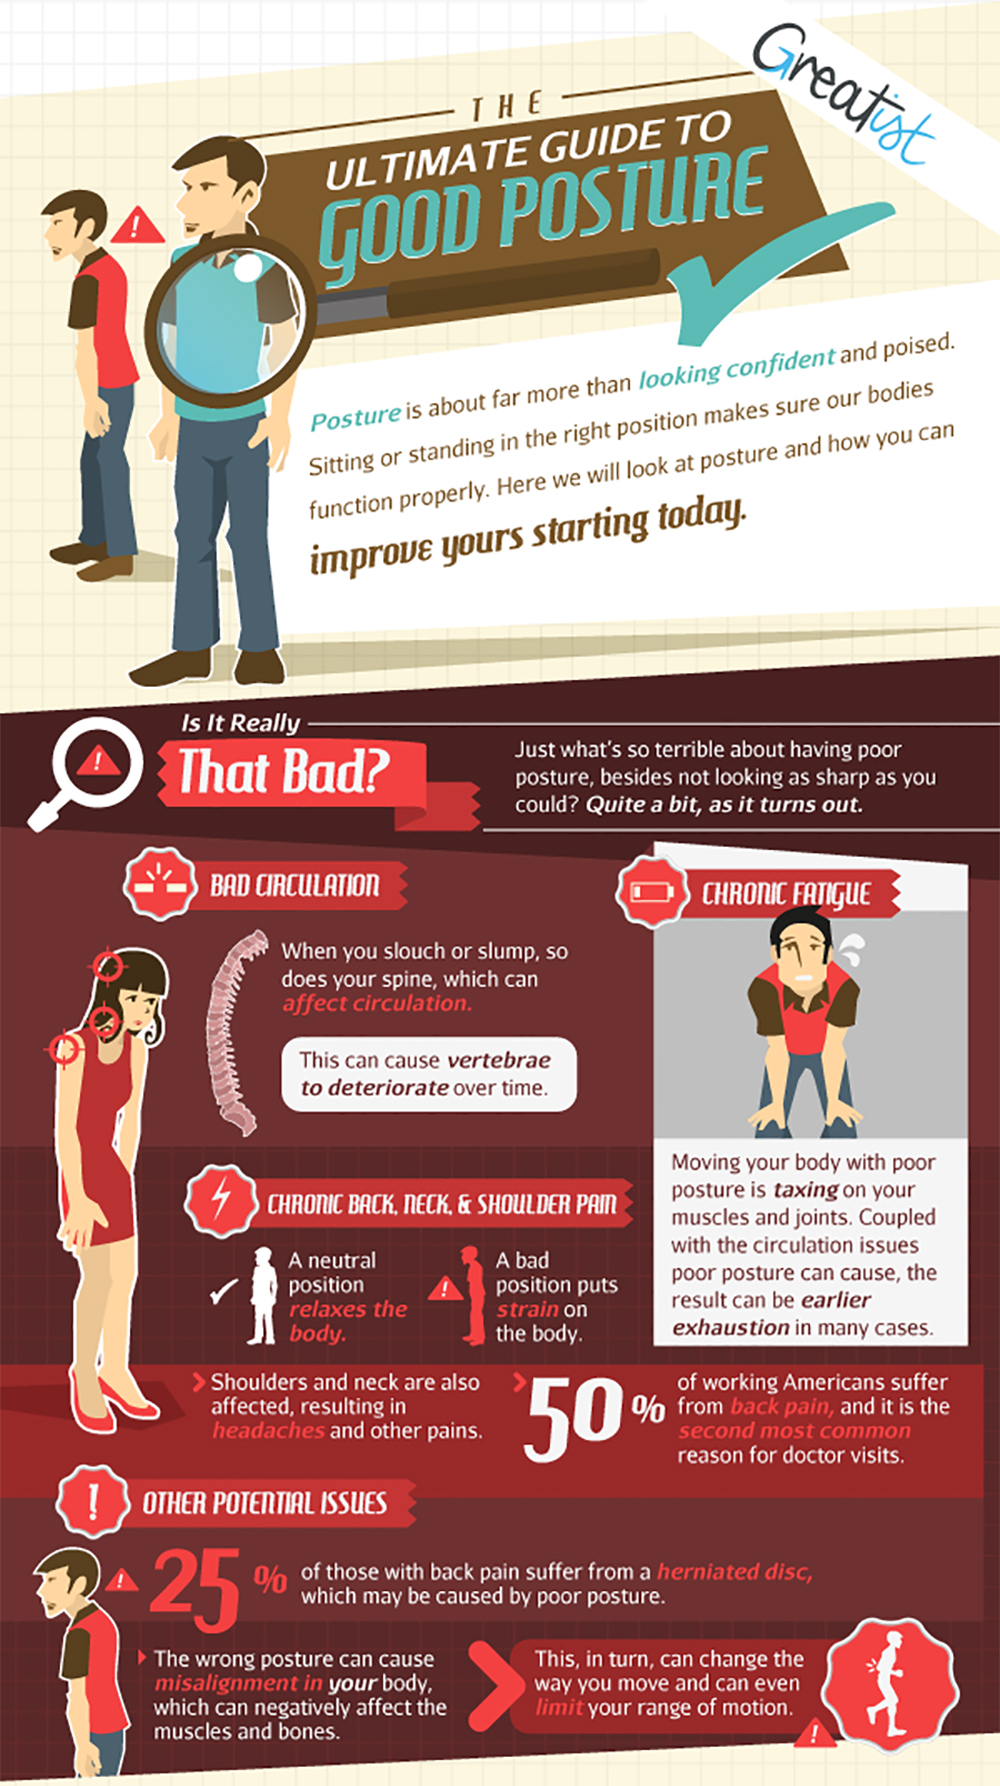
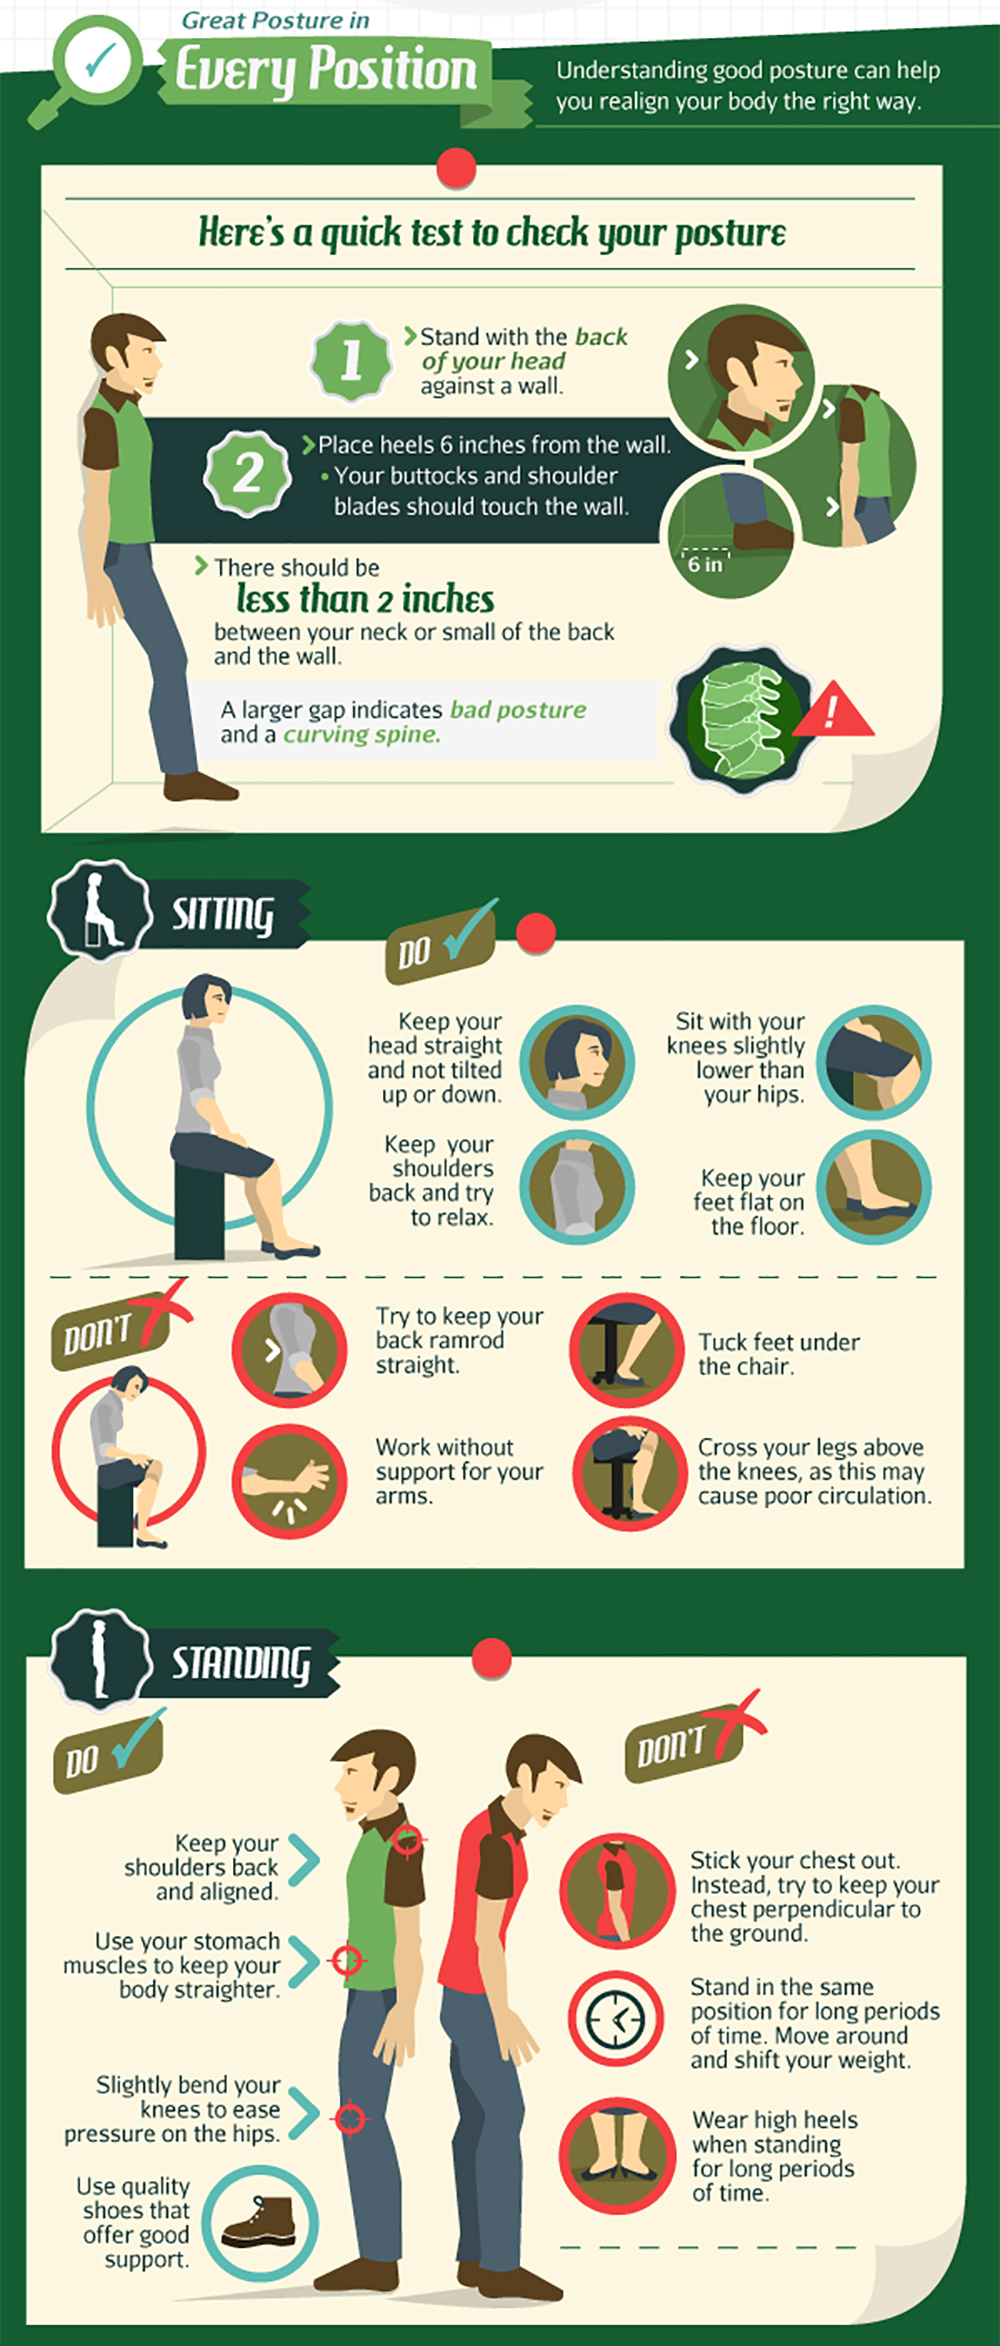
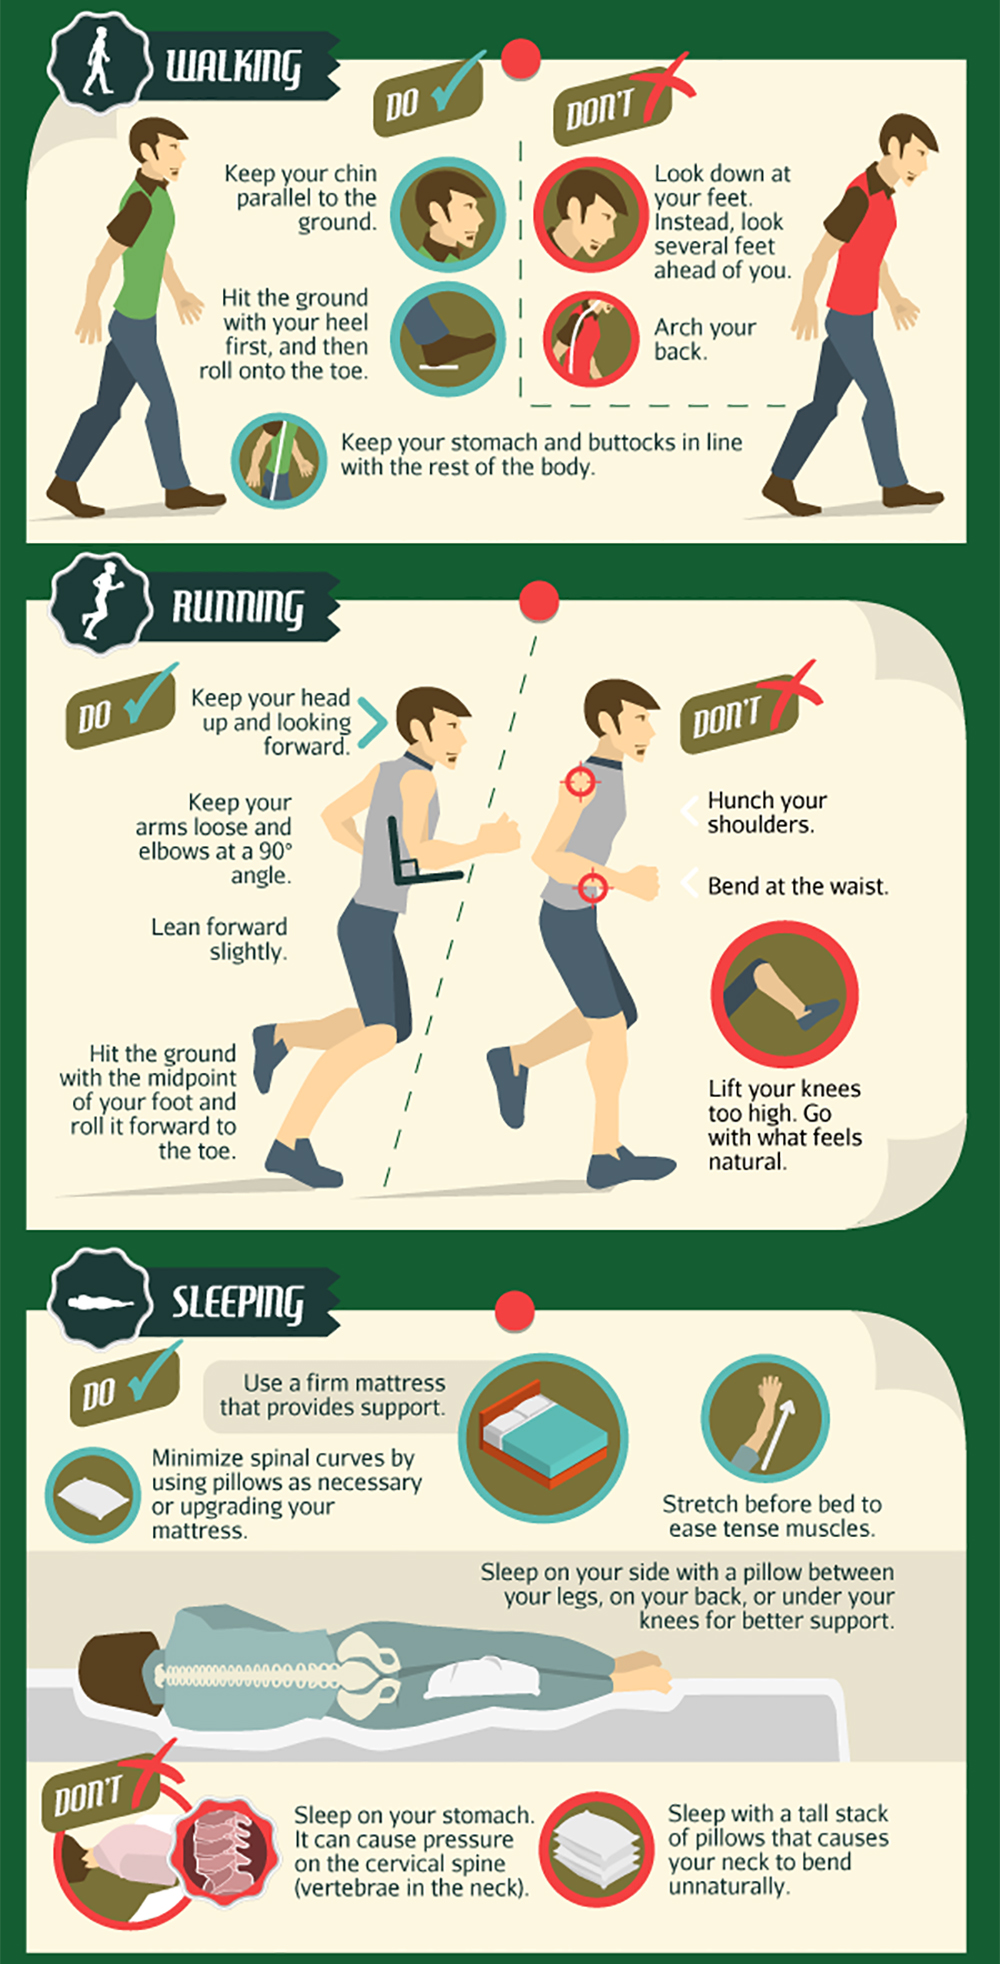
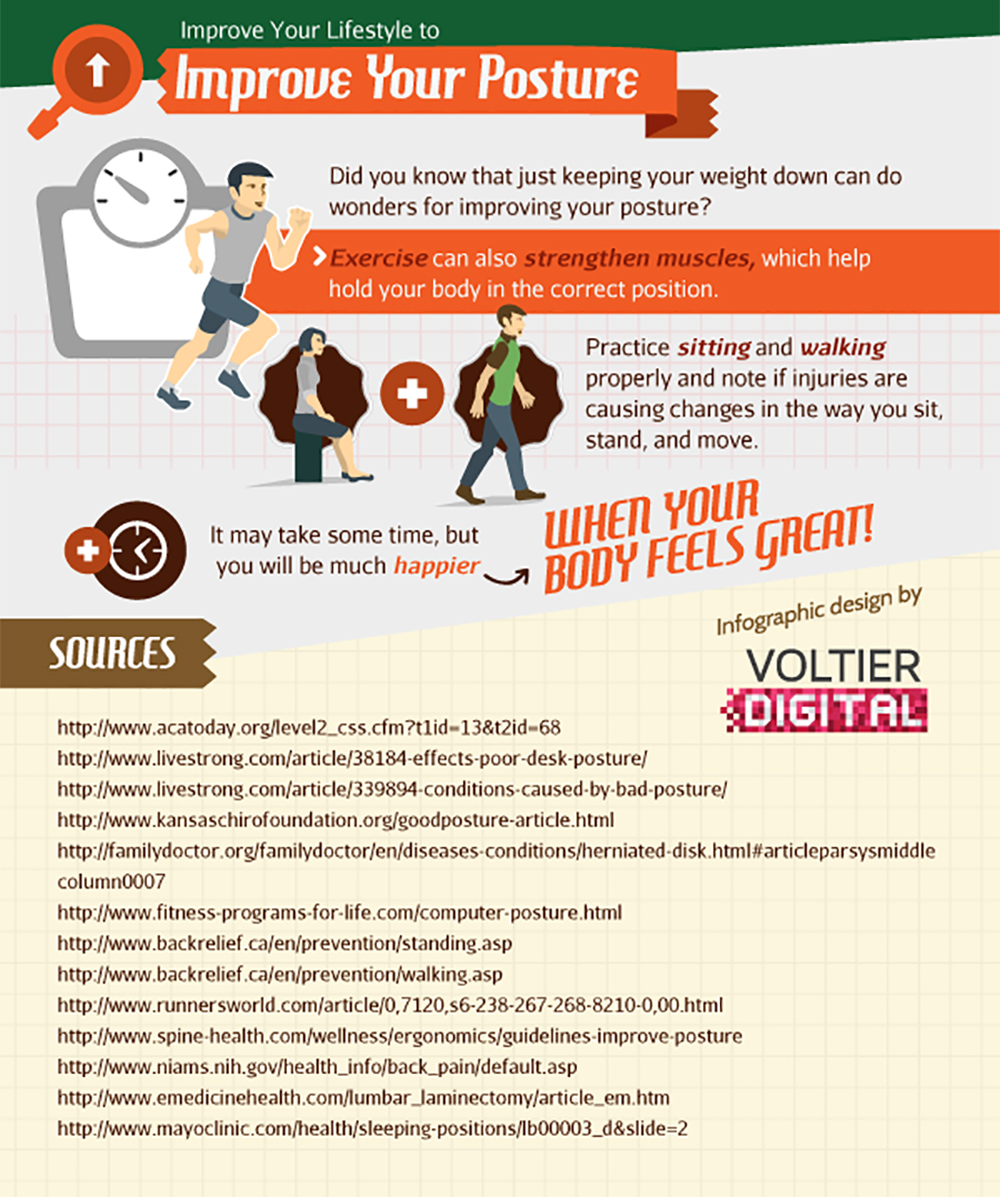
Maintaining good posture is one way to avoid back pain, since it prevents strain on your muscles, joints, and circulatory system. The following infographic from Greatist shows the physical effects of bad posture, its causes, and the dos and don’ts of posture in various body positions. Click here to download a full-size version of this graphic.
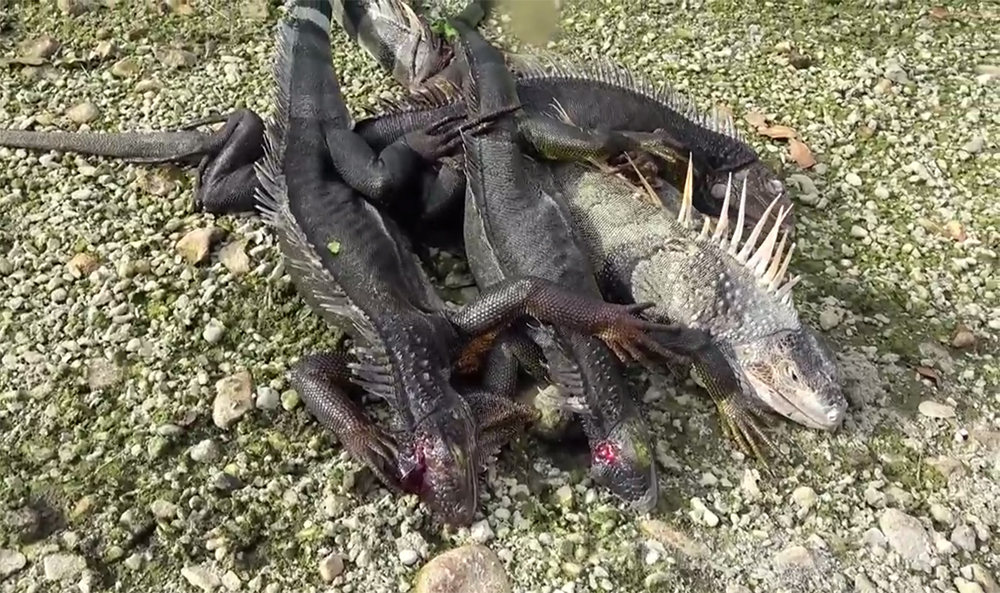
Invasive species, such as lionfish and wild boar, can be a major threat to the natural pecking order when they’re introduced to a new environment. Often, these animals have no natural predators, or they simply reproduce too quickly and out-compete rival species. This leads to damage to plant and animal life, and can even have a negative impact on the livelihoods of local farmers and ranchers.
Mango crops in Puerto Rico have been damaged by the out-of-control iguana population.
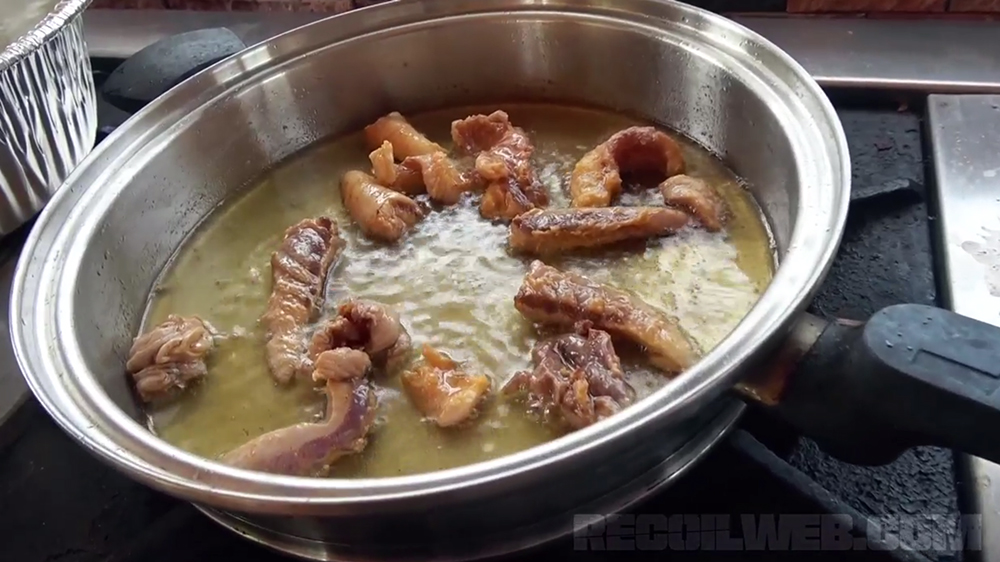
Despite these issues, there’s one upside to the invasive species problem: they’re an ideal target for hunting. By going after these species, hunters can help the environment by reducing the species’ population, and also put a steady supply of meat on the table. That’s a win-win.
In Puerto Rico, iguanas are considered an invasive species. While some may see these large lizards as pets, on the island they gobble up bananas, mangoes, and other valuable fruit crops. This has led the government to welcome bands of hunters, called iguaneros, to cull the population. Luckily, iguanas are packed with edible meat, which some say is similar to chicken.
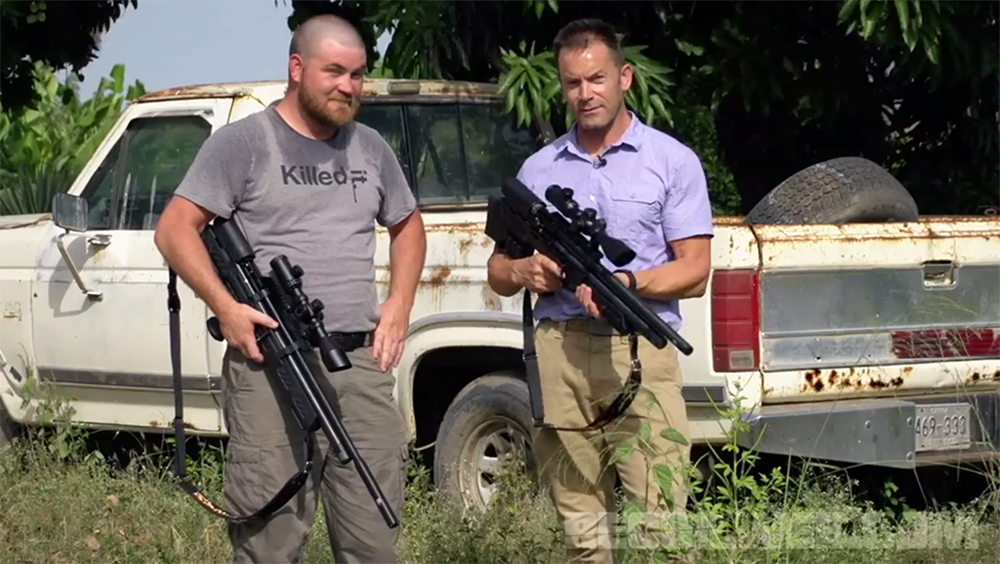
A few months ago, RECOIL editor Iain Harrison traveled to Puerto Rico to participate in some iguana hunting. He met up with Ray Moore, of Hatsan, who provided some high-tech air rifles for the excursion.
Check out the 8-minute RECOILtv video below for a recap of the hunt, from jungle to table:
For more new firearms news, reviews, and hunting videos, follow RECOILtv.
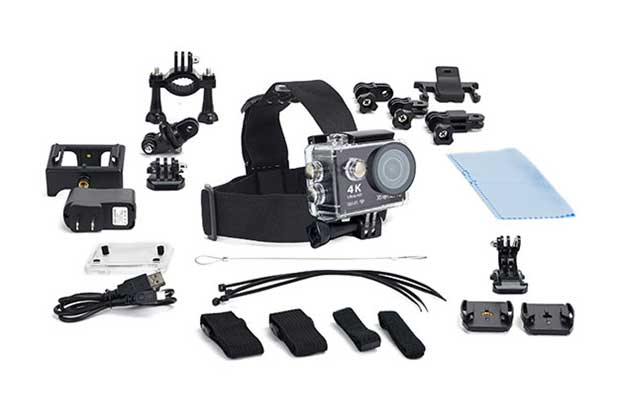
As much as we try to make it so, no memory is ever quite like the real experience. Luckily though, we live in an age where professional high-definition camera equipment is readily available, making it incredibly easy to relive our favorite adventures. Whatever the scenario, the XtremePro 4K Ultra HD Action Cam is ready to capture the insanity. Snowboarding? Mountain biking marathon? Hunt with the boys? Jet ski shark chase? This camera comes with over 20 mounts so you can hook it up to record any kind of extreme activity you’re getting into.
With 4K recording capabilities and 12-megapixel still photo resolution via a wireless wrist remote, you have the ability to record high definition footage from a camera that fits in the palm of your hand. And if your hands aren’t free, no worries. The mounts and accessories will let you attach it to a helmet, stick it on your car’s dashboard or take it up to 98 feet underwater. Plus, a built-in WiFi connection lets you mirror the camera’s screen on your mobile device for live previews of shots.
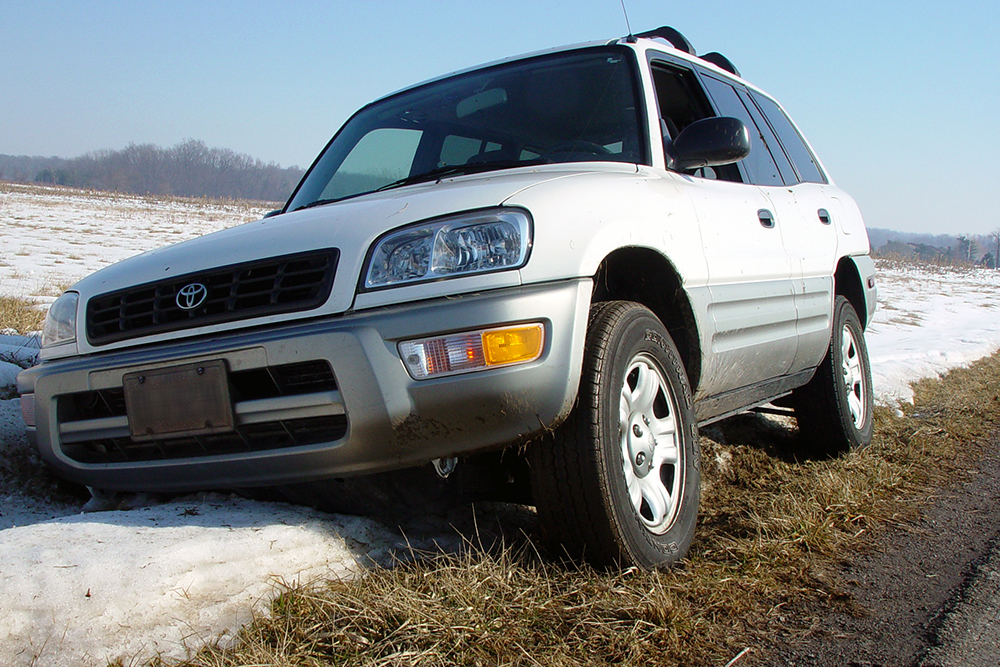
How much time each week do you spend in your vehicle? If you have a long commute to work, or often travel or run errands on the weekends, you may be spending many hours behind the wheel. On top of this, consider all the time you’re spending away from home. During these hours spent at work, at school, or shopping, your vehicle is both your escape route and your gear cache.
If your vehicle is damaged or breaks down, the gear inside can help you quickly repair it and get back on the road.
It’s only a matter of time until an emergency will occur in the vicinity of your vehicle, so you should prepare accordingly. This is why it’s wise to build a kit of essential vehicle emergency gear, and keep it in your car or truck at all times.
The kit should encompass automotive tools — jumper cables, tow straps, work gloves, wrenches, pliers, and so on — as well as food, water, and other survival supplies you might find in a bug-out or get-home bag.
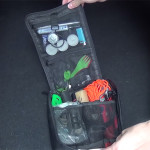
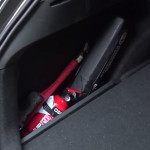
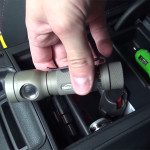
TinMan Bushcraft is a YouTube channel based in central Europe, and focused primarily on wilderness survival and bushcrafting. In the following video, the host shows off his vehicle emergency gear, which is separated into three tiers:
Tier 1 – small items, accessible from driver’s seat
Tier 2 – basic automotive emergency tools, accessible even when the trunk is fully-loaded
Tier 3 – more tools and gear for long-term survival, stowed under the trunk floor
This three-tier system is an interesting approach, since it provides the fastest access to items that might be necessary in the first seconds after a collision, such as a flashlight and seatbelt cutter. It also translates to almost any type of car or truck — while an apocalypse-ready bug-out rig might be useful in some situations, even the most ordinary commuter cars can (and should) be fitted with emergency kits.
What does your vehicle emergency gear consist of? Let us know in the comments what you’d add to or remove from this YouTuber’s loadout.
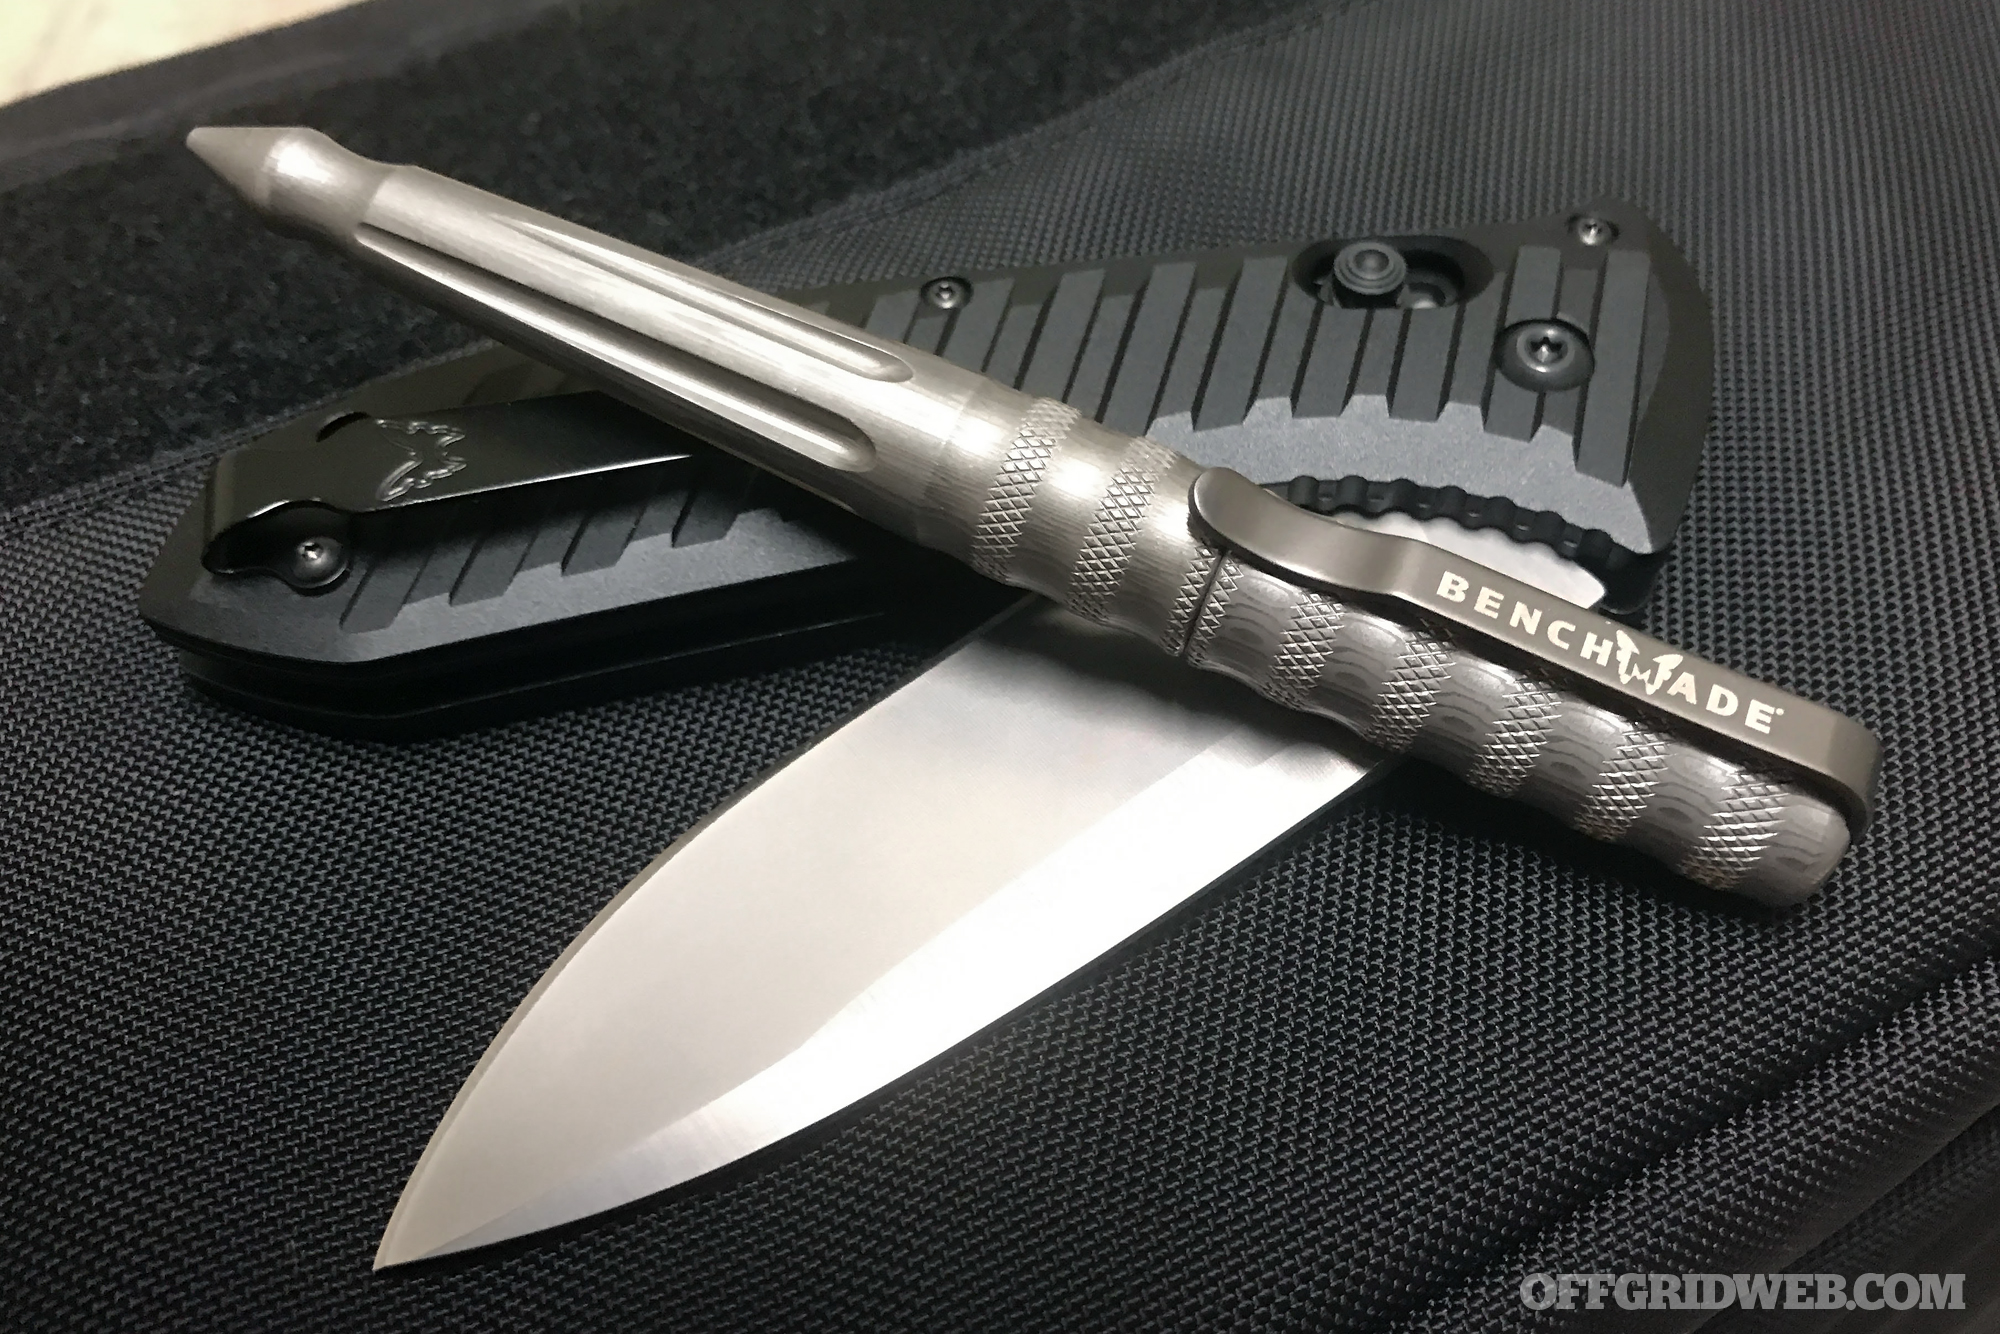
In Issue 22, on sale October 6th, we’re launching a new recurring feature called Pocket Preps. This department will feature buyer’s guides for various types of pocket-sized every-day carry gear, from multi-tools and carabiners to handkerchiefs and bottle-openers. In our first instance of Pocket Preps, we featured eight tactical pens, including the Benchmade 1100 series aluminum pen.
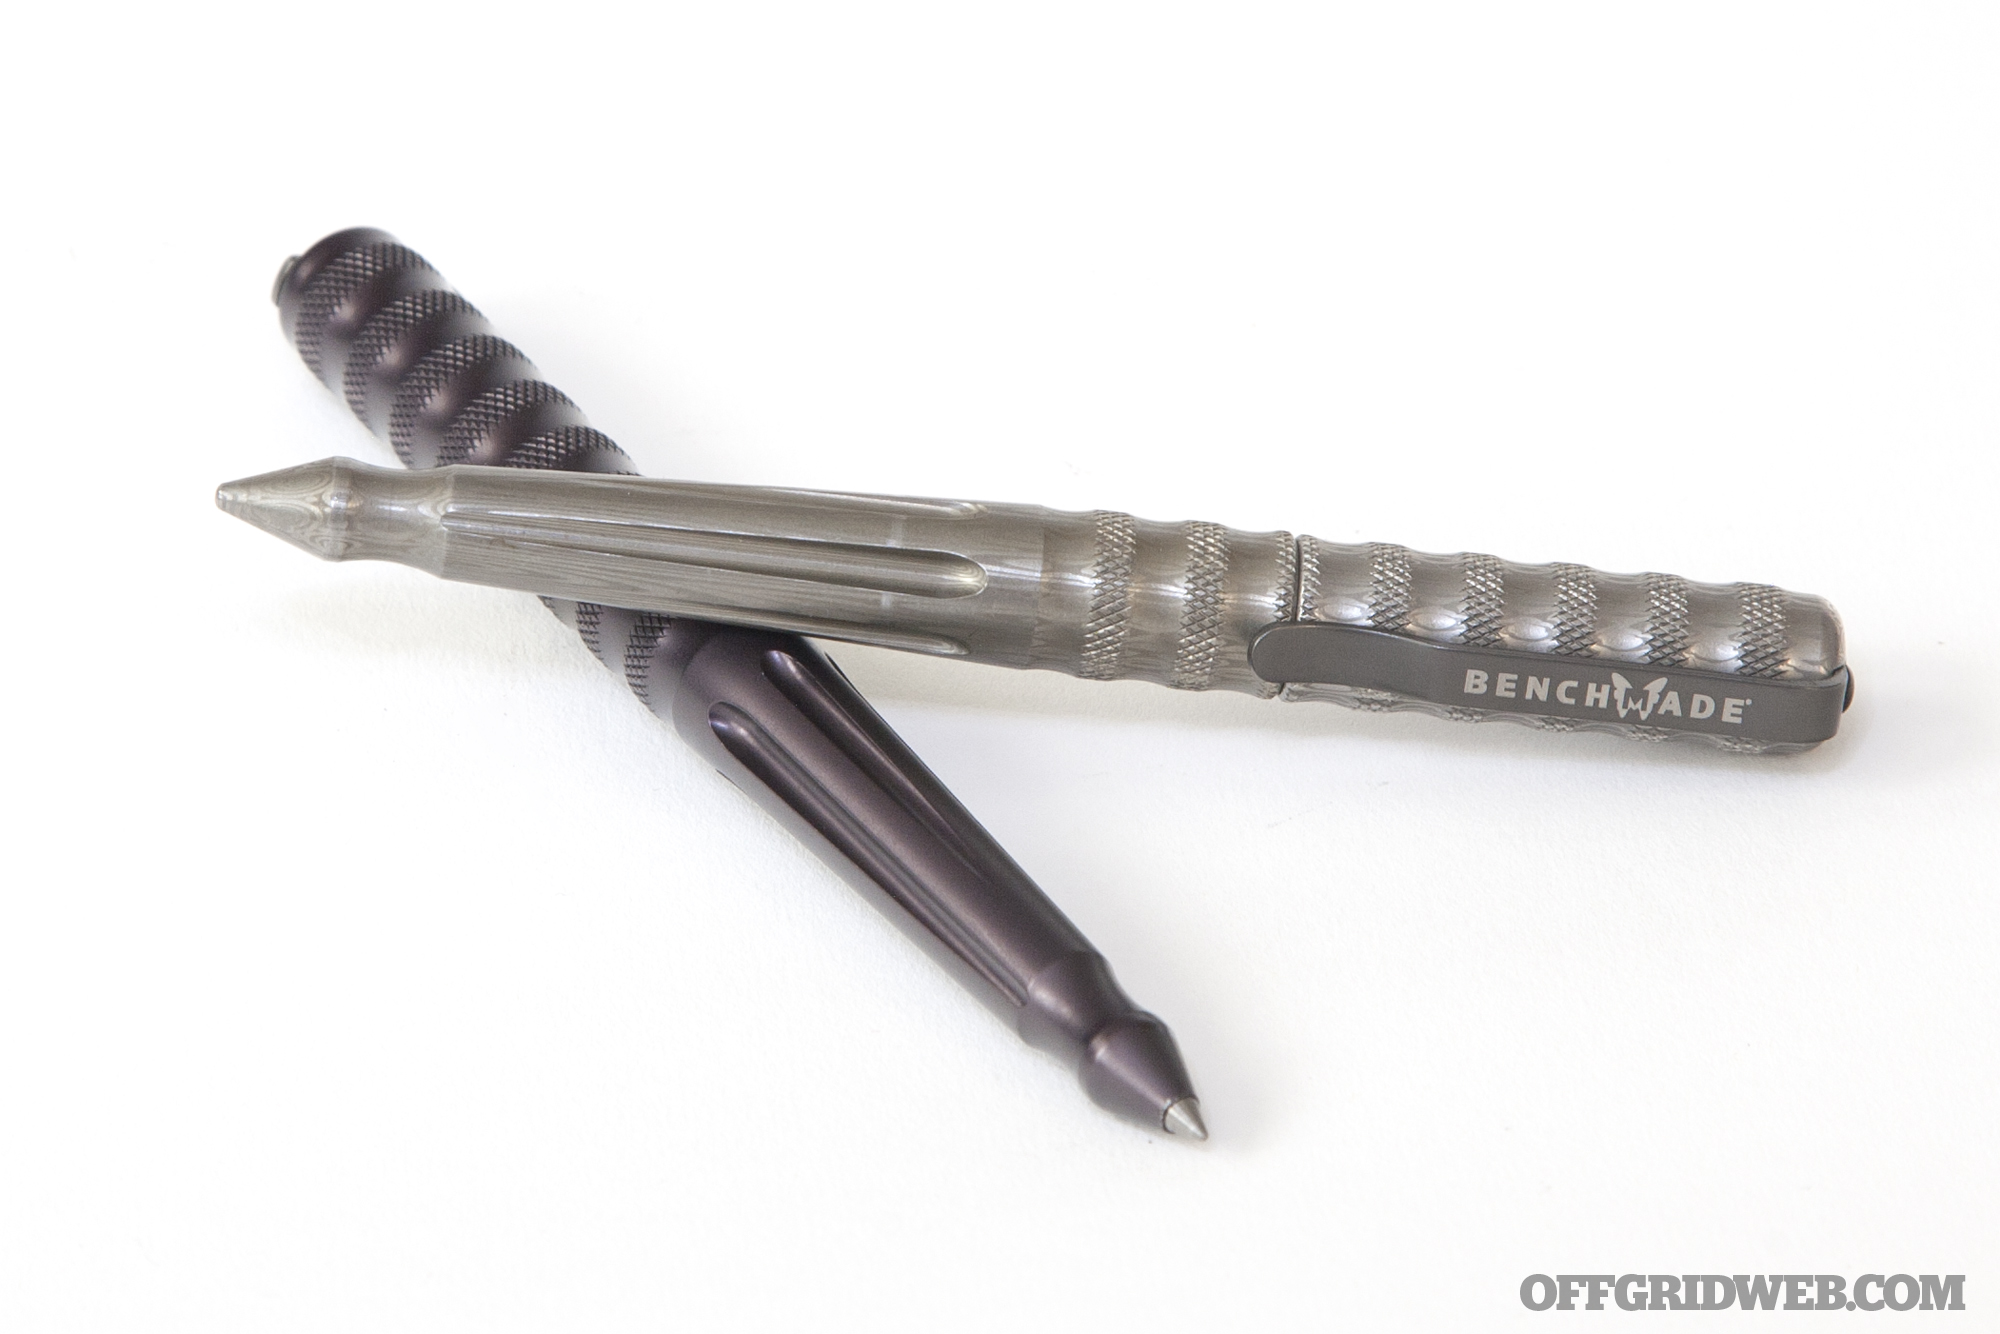
Bottom: the Benchmade 1101-1 aluminum pen from our print buyer’s guide. Top: the 1100-13 Damasteel pen.
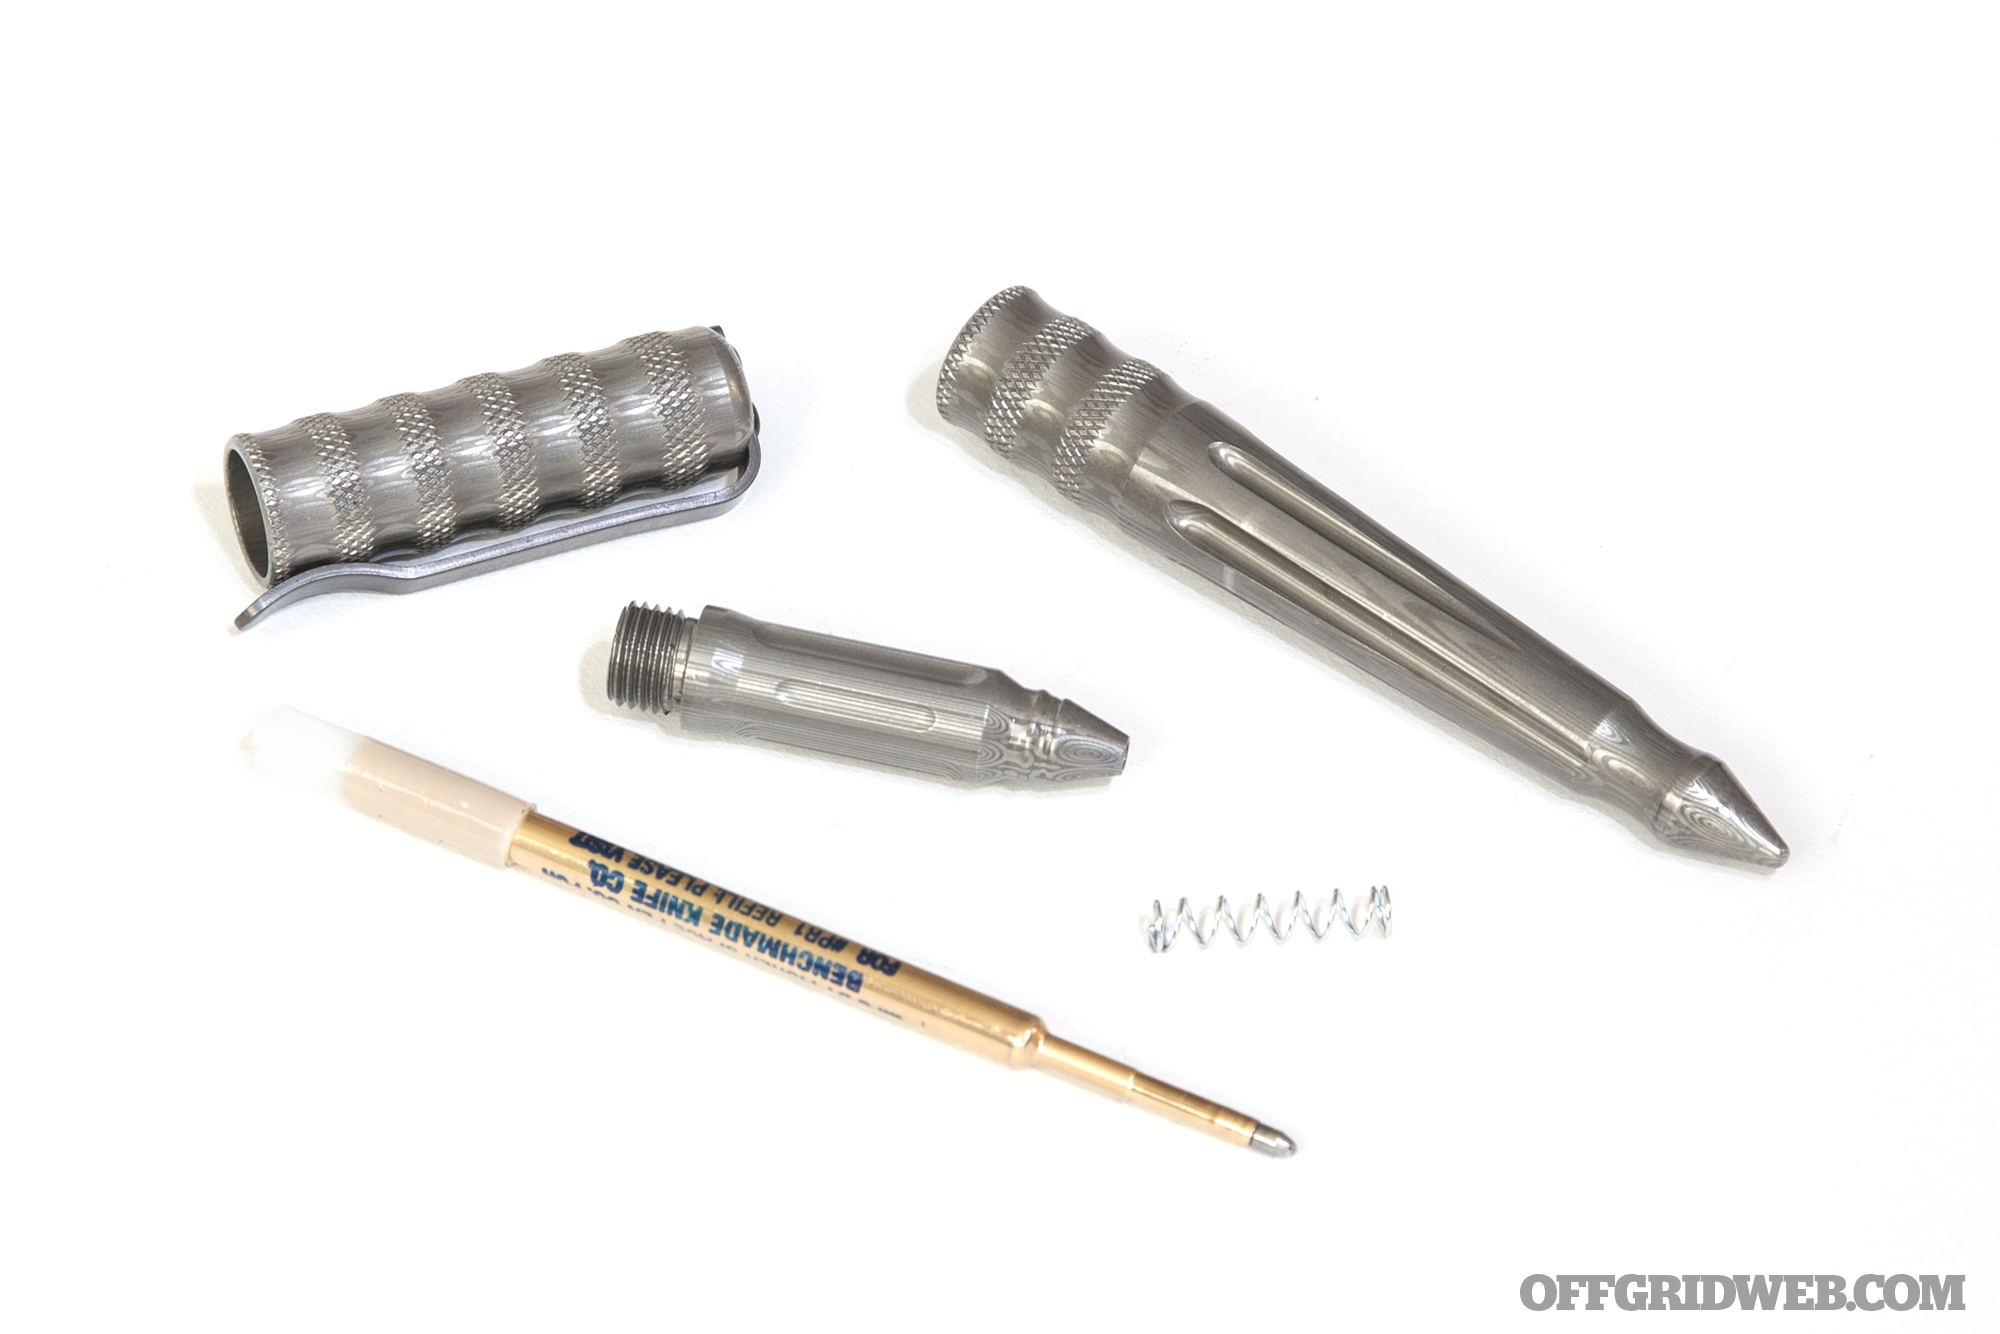
When we started researching Benchmade’s tactical pen offerings, we noticed aluminum, stainless, and titanium models — but there’s one pen that stands apart from all of these. The Benchmade 1100 Damasteel tactical pen (model 1100-13) exhibits a distinctive marbled appearance as a result of its special composition.
As those who recognize the name might suspect, the Benchmade 1100 Damasteel is made from the material of the same moniker. Damasteel is a Swedish brand of Damascus steel, a pattern-welded material composed of alternating layers of different metals. Once the layered steel is carefully forge-welded and acid-etched, it creates a beautiful marbled pattern.
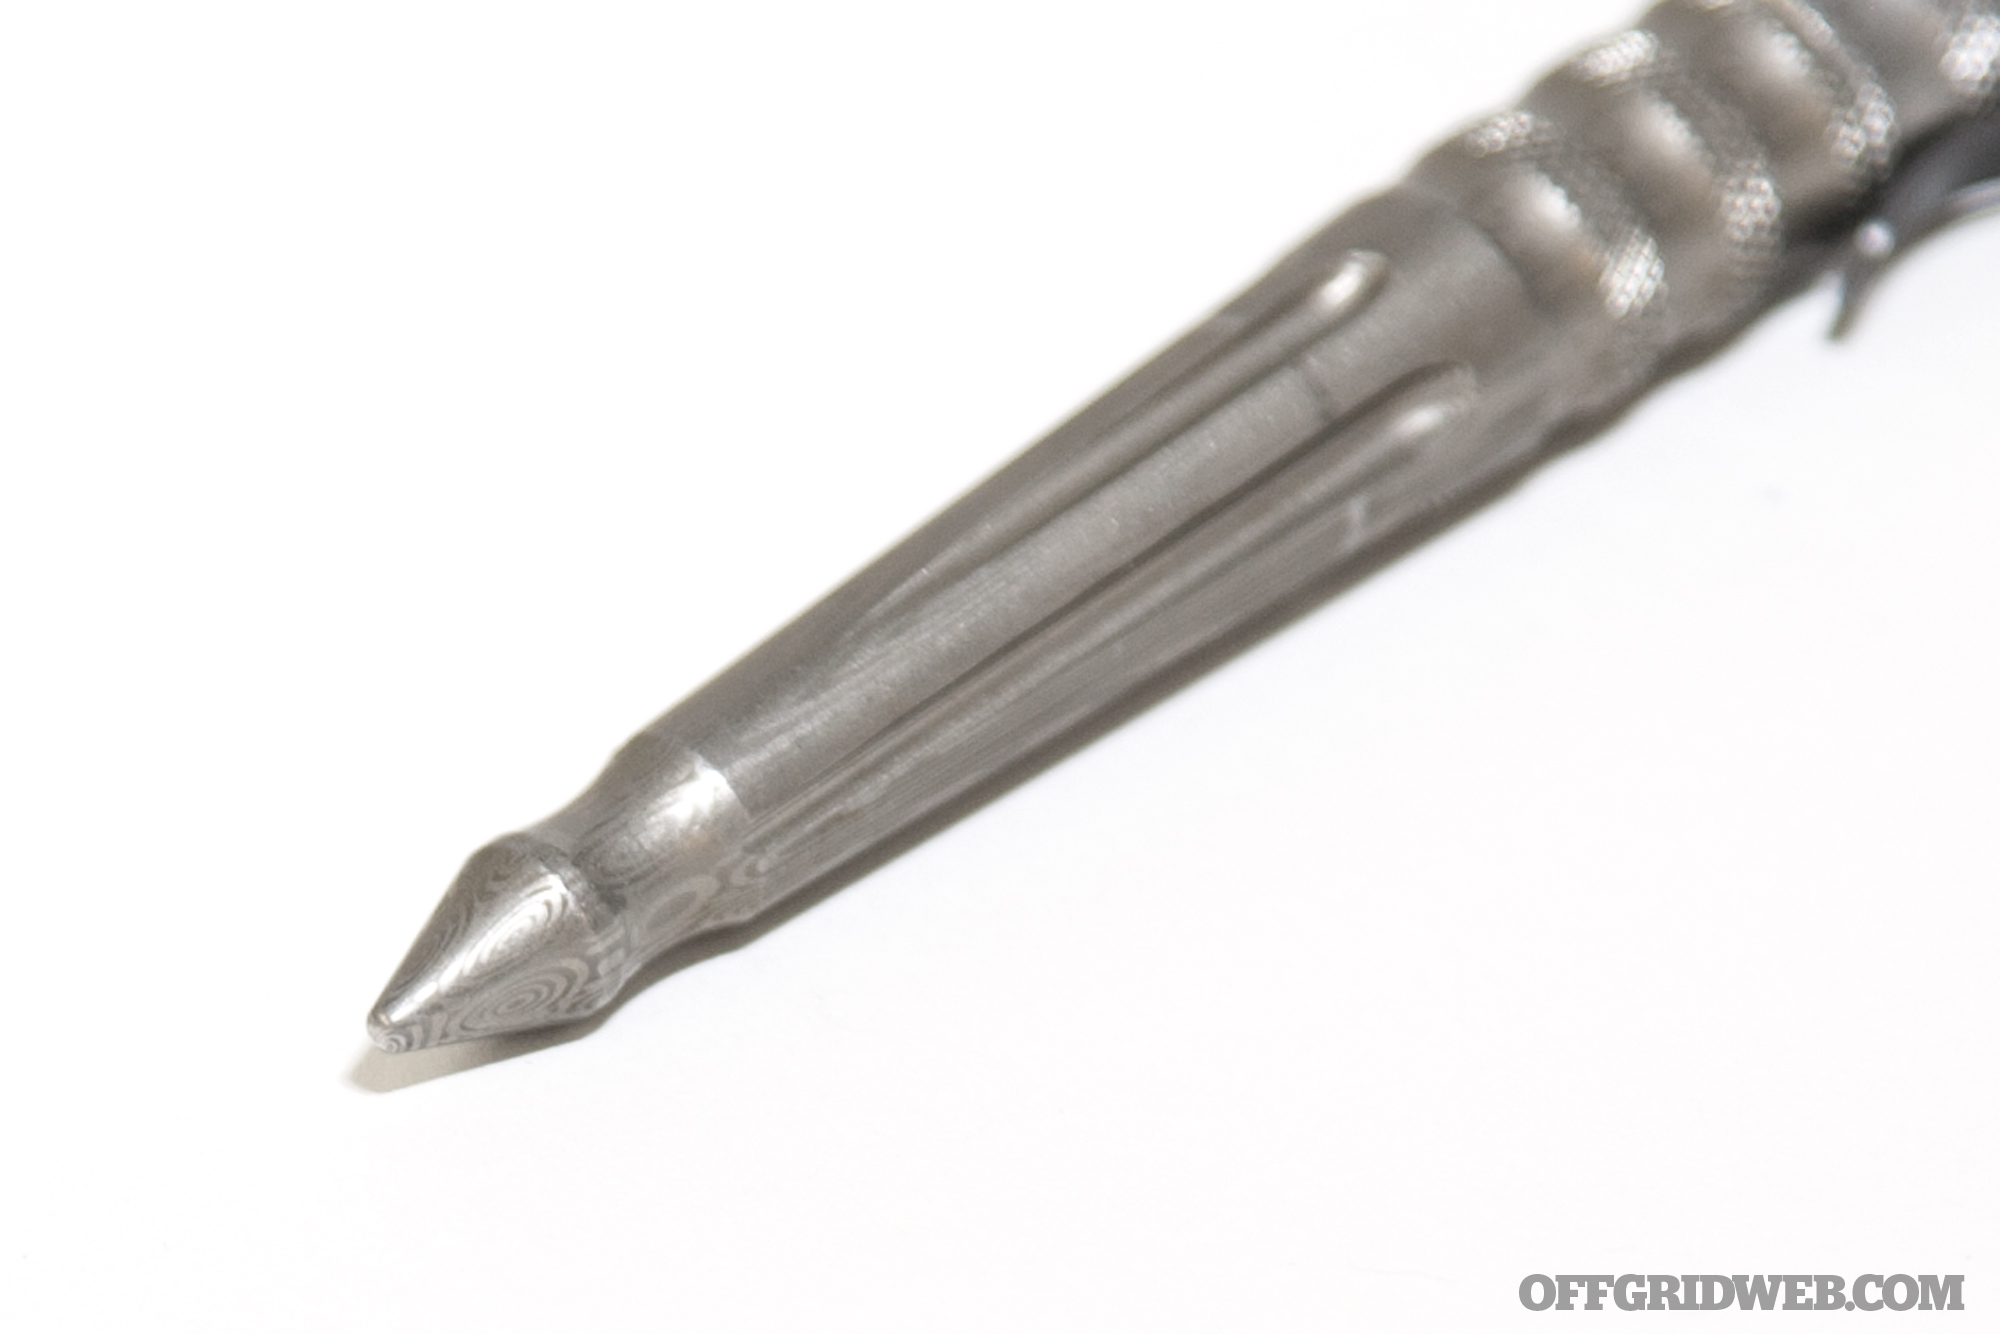
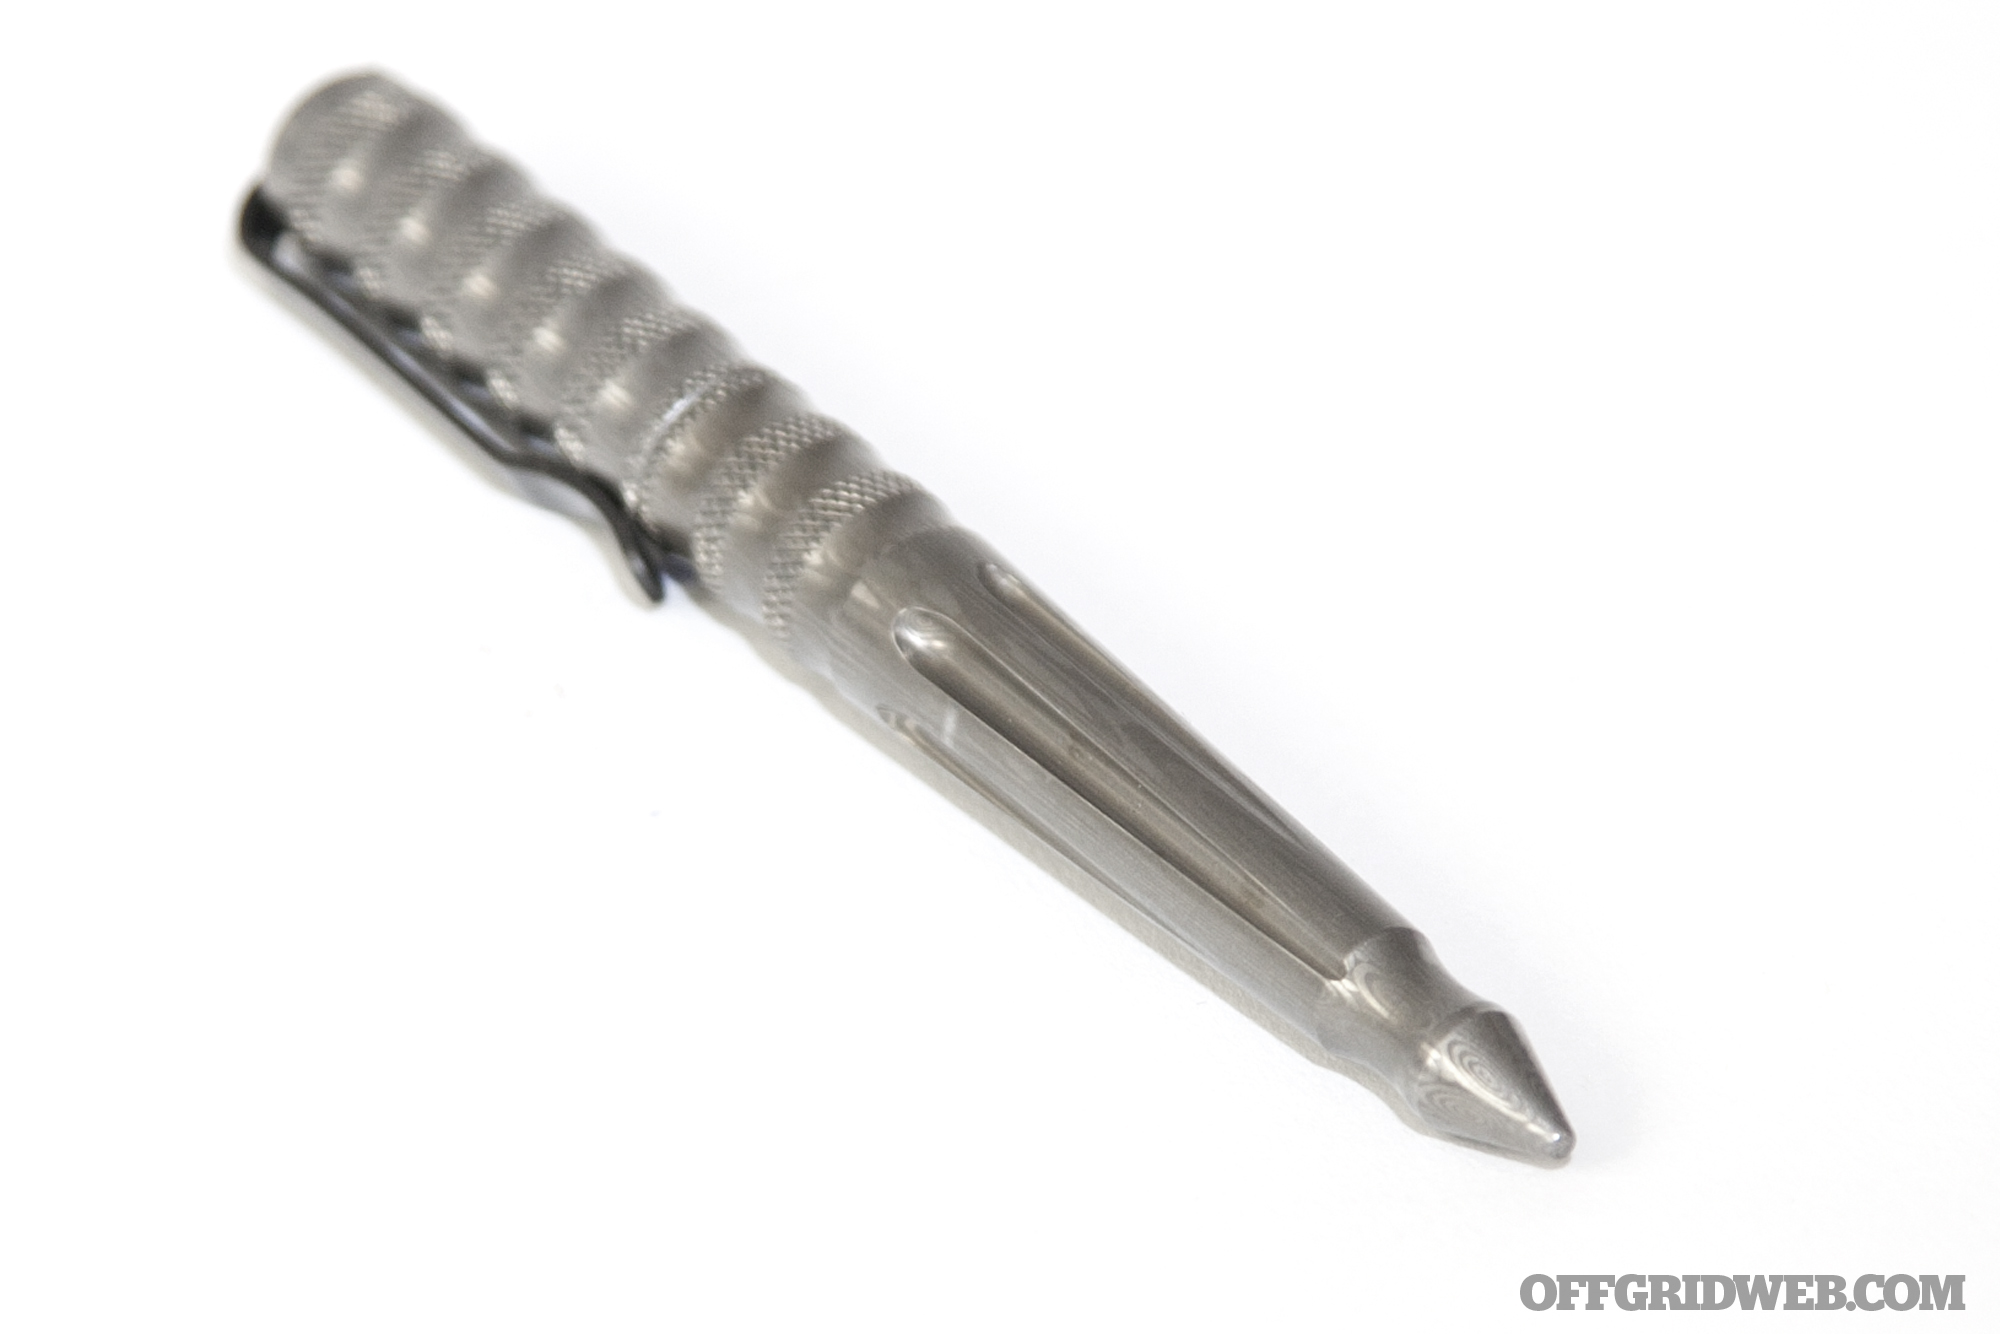
Specifically, the Benchmade 1100 Damasteel uses a layering pattern known as Bluetongue. The cross-section features dozens of tiny concentric rings, creating ovals near the tip and tail cap, and a streaked appearance along the sides of the pen.
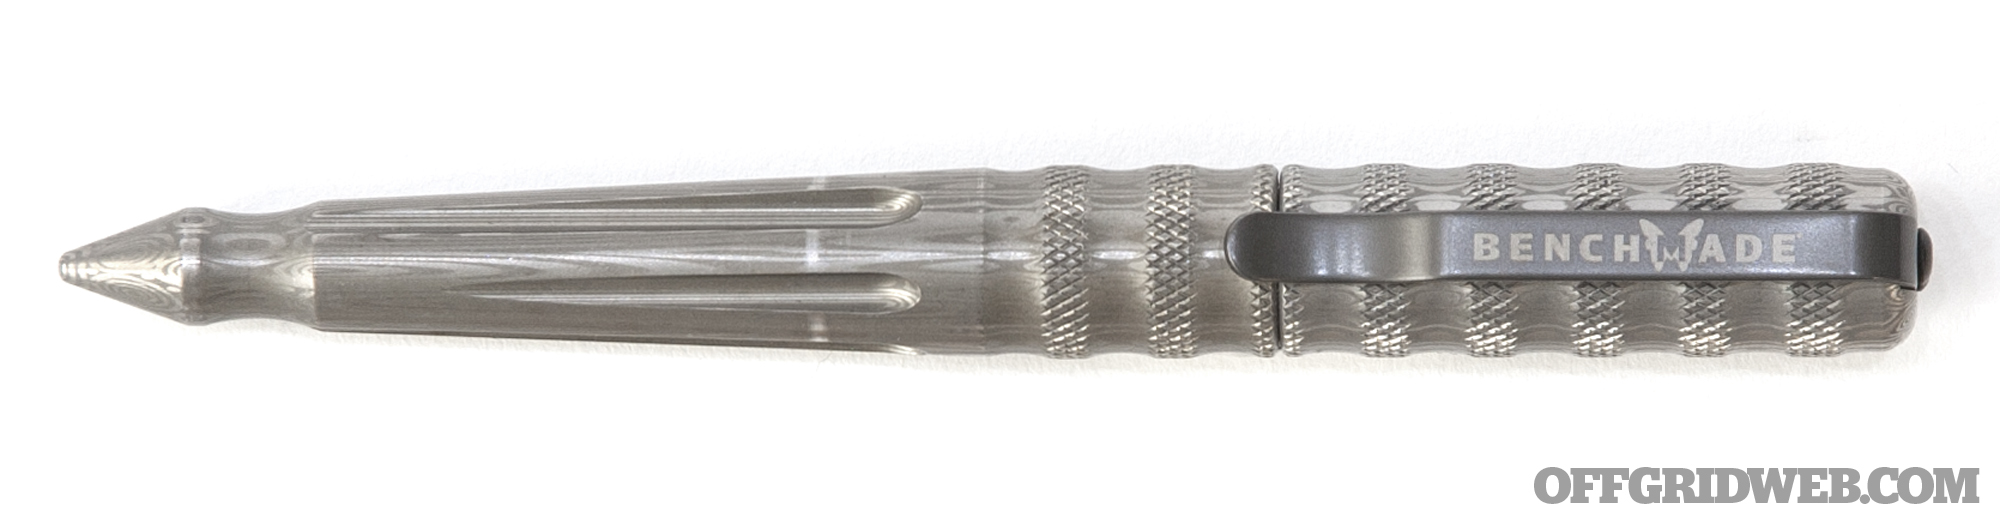
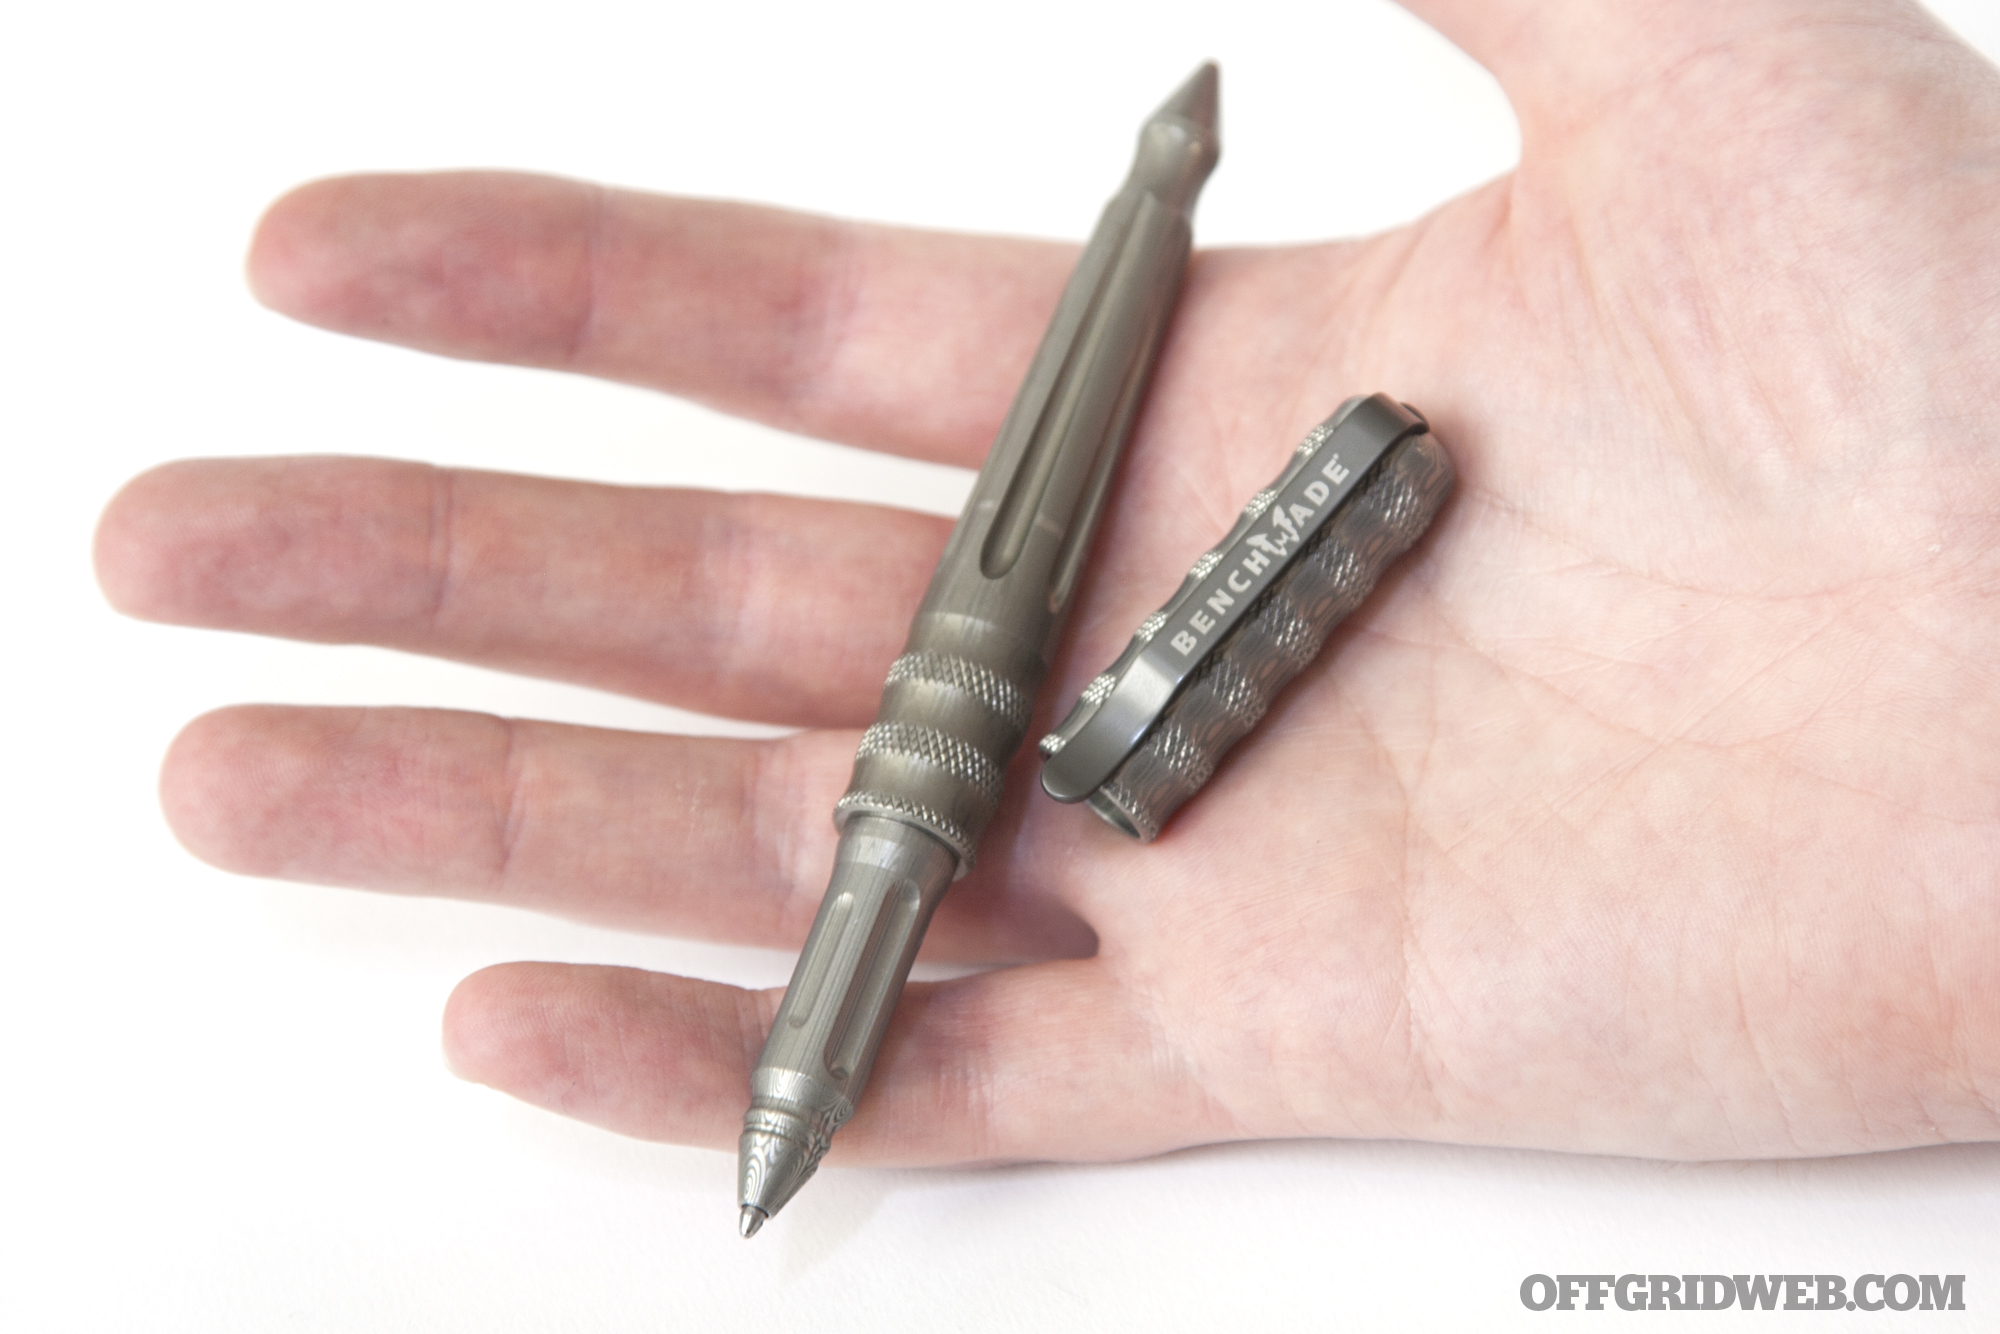
Aesthetics aside, the 1100 Damasteel is functionally similar to the 1100 aluminum pen we reviewed in print. Its American-machined and -assembled body features the same fluted and knurled texture, and its dimensions and deep carry clip are identical. As we mentioned in the print article, we like the way the clip positions these pens deep in the pocket, but weren’t as enthusiastic about how it tightly grips and clings to your pocket hem.
The 1100 Damasteel looks great next to our Benchmade Presidio II folding knife.
Benchmade includes a Fisher Space Pen ink cartridge in your choice of black or blue. Like the company’s stainless and titanium pens, and unlike the aluminum variant, it doesn’t include a glass breaker option.
The primary functional differences between the 1100 Damasteel and its aluminum counterpart are appearance, weight, and price. We’ve already covered the stunning etched finish, so we’ll address the other two.
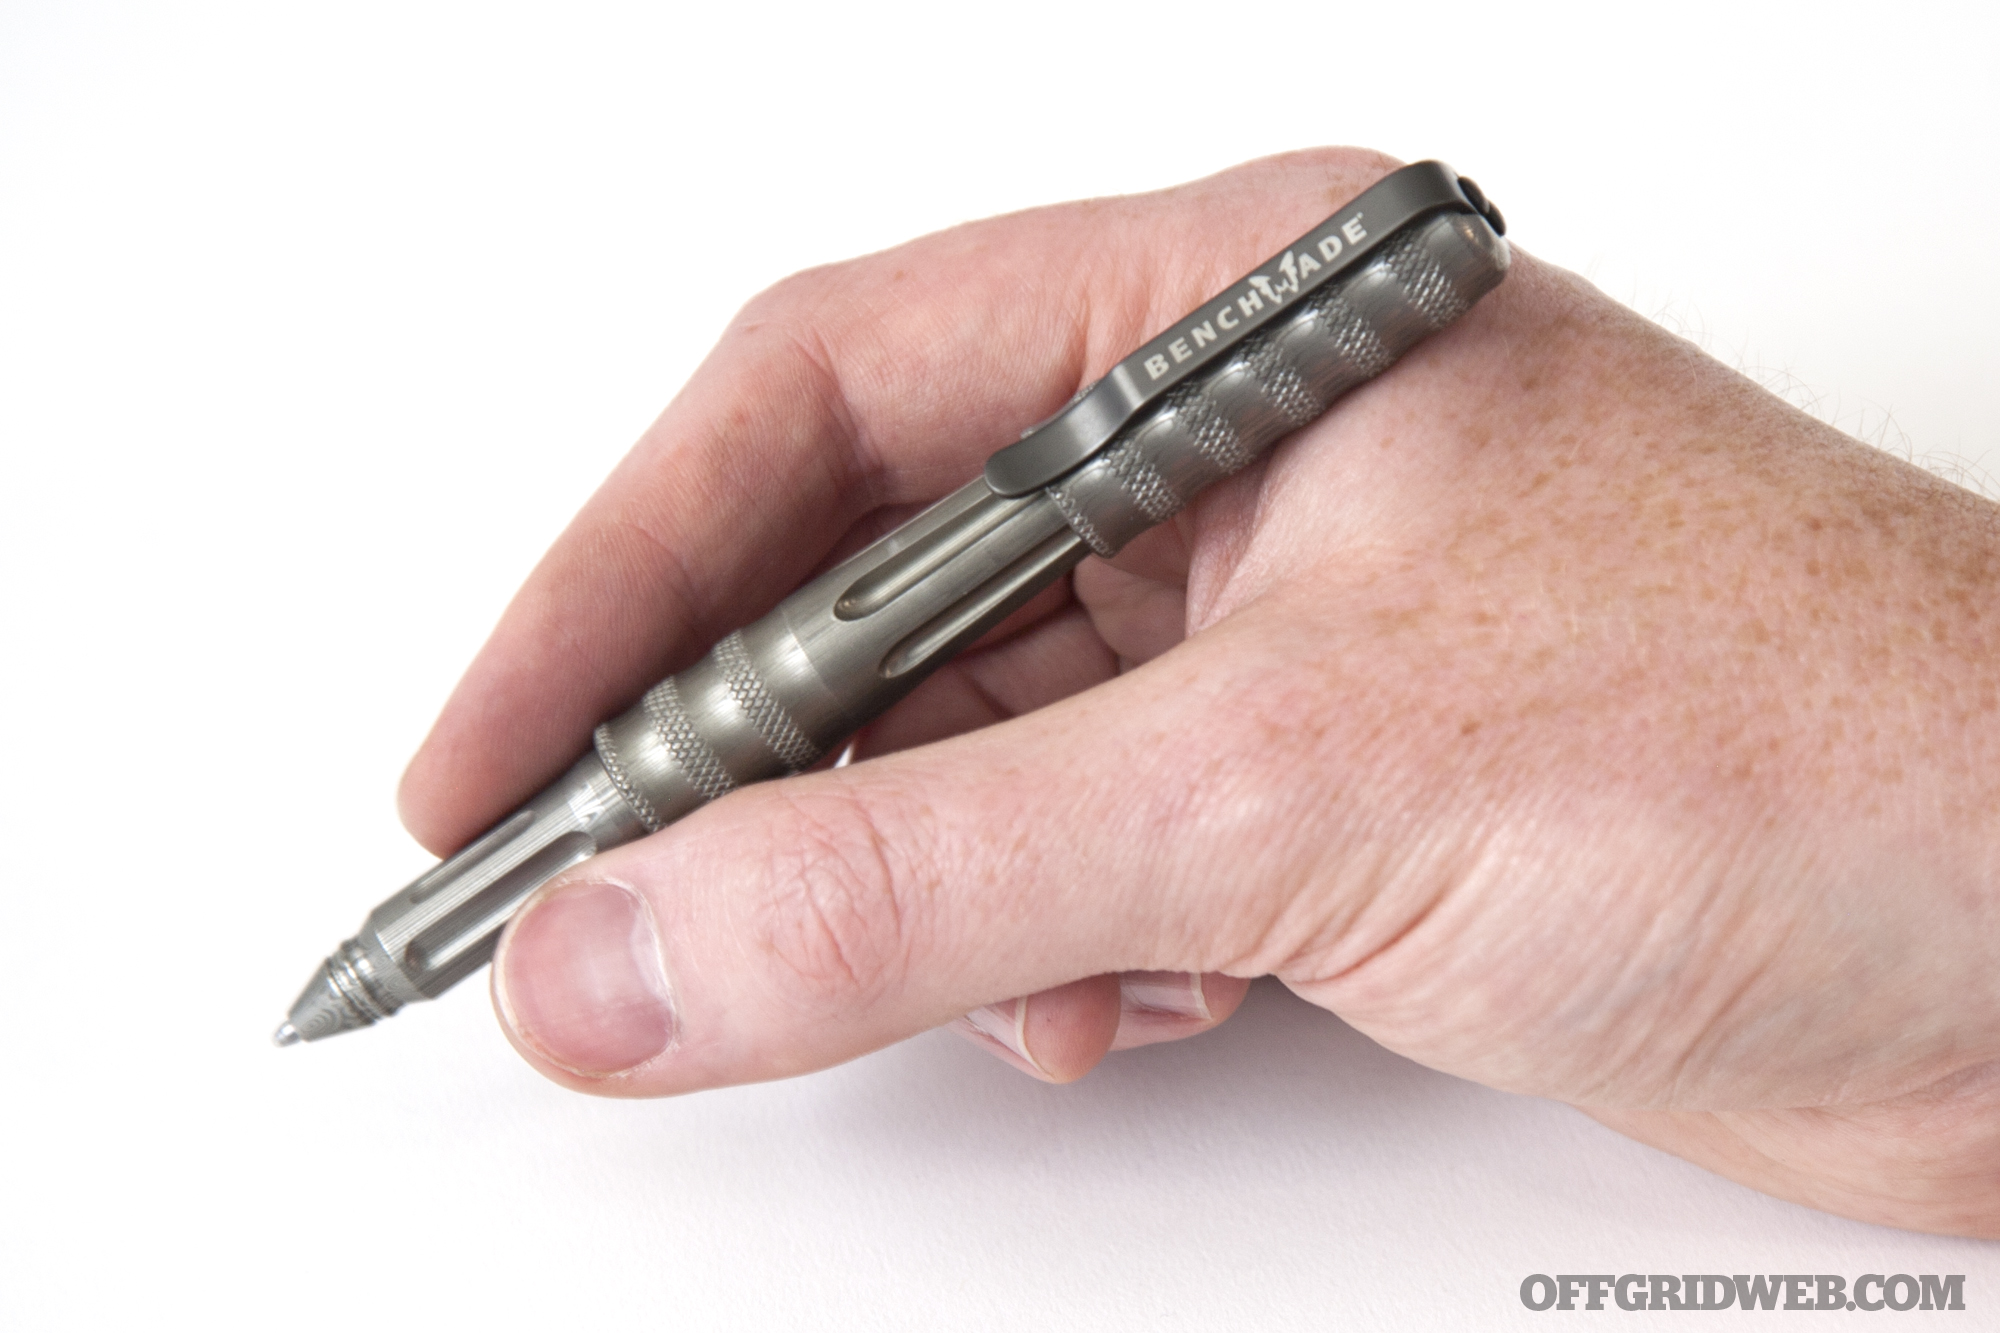
This pen weighs 3.2 ounces, 60% more than the aluminum pen, so it feels very substantial in hand. Writing with the pen is smooth, though it may not be as fast as you’d expect if you’re not used to heavy writing instruments.
The Benchmade 1100 Damasteel at an MSRP of $300, although street prices from most online retailers are $255. That’s more than many of Benchmade’s knives, so this is clearly a premium product for a small pool of buyers.
Most tactical pen shoppers will opt for the $125 aluminum or $185 stainless models, but it’s still cool to see Benchmade offering this high-end Damasteel model for those who are looking for a more unique EDC item. And we were pleased to find this pen fulfills its prime directive — it writes effortlessly.
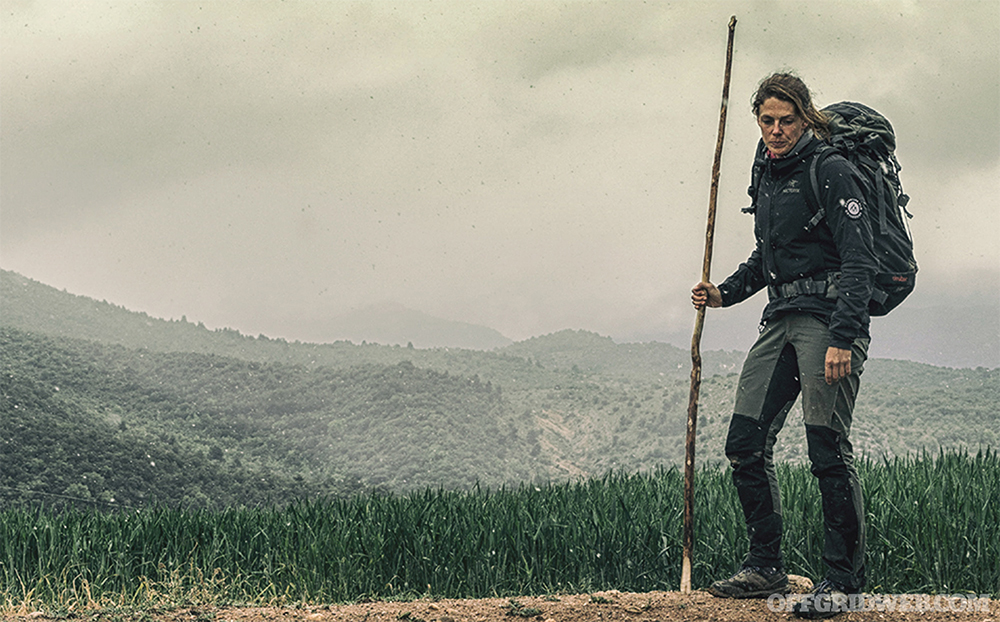
In Issue 22 of our magazine, we interviewed Megan Hine, a full-time survival consultant and expedition leader from the U.K. Megan has proven her survival skills time and time again in challenging environments around the globe, and led TV crews and celebrities safely through these same environments. She has even worked behind the scenes on adventure TV shows such as Man vs. Wild and Bear Grylls: Mission Survive.
For our full exclusive interview with Megan Hine, pick up a copy of Issue 22, on sale October 6th. After chatting with Megan about her survival skills, life-threatening experiences, and perspective as a female survivalist, we also had the opportunity to discuss her latest venture: her new book, Mind of a Survivor.
For an inside look at Mind of a Survivor and Megan’s motivations for writing it, check out the following OFFGRIDweb-exclusive supplement to our print interview.
RECOIL OFFGRID: Let’s talk about your book, Mind of a Survivor, which is on sale now — what caused you to decide to write your first book?
Megan Hine: I was really fortunate in that I was approached to write the book, and I realize how lucky I was with that now. It comes down to that question: what makes a survivalist? Are these traits that are transferrable from a wilderness environment to an urban environment? I really believe that they are.
Photo by Ben Simms
I see a lot of people now who are suffering from anxiety and depression, and it seems to be on the increase. I’m sure it’s because our lives are so structured that there’s little room anymore for discovering your identity and building creativity and exploring that side of things.
I think that in the wilderness, it’s much easier. For example, if you’re standing on top of a cliff 50 feet up, and someone is asking you to jump off this cliff into water below, it’s obvious that you’re going to be feeling fear. There’s fear of hurting yourself, fear of exposure—it’s high, it’s not natural to be up there. If you can learn to control those emotions in that position, you can then take the lessons that you’ve learned there back and apply them to everyday life. We’re so overwhelmed by so many different things that it’s hard to pinpoint exactly where those emotions are coming from.
In your book, you wrote, “In survival, people often talk about three minutes without air, three days without water, three weeks without food. I’d like to add another: three seconds without thinking.” What do you mean by that statement?
MH: Things go south very quickly. When things go wrong, it happens so fast. Staying alert, thinking — whether it’s thinking through your actions or being alert to the environment around you — could potentially save your life.
Photo by Ben Simms
I was down in London for the publicity tour over the past week, just walking around the streets, and so many people have their phones in their hands and their heads just locked into their phones. They’ve got no awareness of what’s going on around them. With the way the world’s going at the moment, actually being aware of people’s body language around you or factors changing in your environment might actually save your life.
The title, Mind of a Survivor, clearly emphasizes the psychological aspect of staying alive. How would you compare the significance of mental survival challenges to the physical challenges? Is one more of a threat than the other?
MH: You need your mind and your body working together to overcome something. You could be super physically fit, and you can have all the knowledge on how to survive in the environment, but if your brain’s not on board with that, that’s when you’re going to start making the wrong decisions or giving up. So I think to some extent they go hand-in-hand. The physicality would certainly give somebody an advantage, as long as they’ve got the mindset to pull themselves through.
What I’ve found really fascinating from reading lots of survival stories is just how many people survived extreme wilderness scenarios who have zero outdoor experience — just because their mind does not let them give up.
Your website states, “The principles covered in Mind of a Survivor are just as valid in the jungle being chased by armed men as they would be in an intense business meeting.” How do you relate the lessons in your book to the average person who may not be a wilderness adventurer?
MH: The way I aimed to use the wilderness was not to necessarily encourage people to go out and find themselves in a position where they’re being hunted by bears or lions. It’s more as a medium to be able to get people thinking.
Photo courtesy of MeganHine.com
If you can explain survival at the extremes, it’s easier to translate to when you’re sitting somewhere in the middle. At the extremes, it’s much easier to explain my decision-making processes at the time, and what my mind did to deal with the emotions. This could then be relatable back to any environment where you’re experiencing the same emotions. Our animalistic brains are amazing at trying to keep us alive, but they can’t distinguish between different threats. That’s what is so fascinating.
Looking at somebody’s Facebook post of their perfect life can trigger the same reaction as if somebody jumped out at you. It’s a target of your well-being, whether it’s emotional or physical. It’s like your brain has the same stressed reaction and response to it.
It’s about learning to be able to control and stop those emotions, because things like fear and stress are natural emotions. They let you know that something has changed within your environment. But what we’ve stopped doing is listening to those emotions, because they’ve become such a huge part of everyday life. All the stress — we now take for granted that it’s there, and it shouldn’t be. Our animalistic brains were never designed to experience it. Stress should’ve been a passing thing, a protection mechanism that then recovers.
Speaking of which, what are some of the best ways to combat fear in a daunting survival scenario?
MH: What I tend to do in those situations is take a couple of deep breaths, because it gives you something to focus on.
Then I separate out my emotions — I do it automatically now. I put any emotions that could potentially be overwhelming and stop me from being able to focus on the task at hand into what I call my mental box. This is something that paramedics, emergency crew, and doctors do a lot as well. They have to be able to separate out the human emotions from what’s going on, and put them away so they can get on with dealing with these extreme situations.
Photo by Ben Simms
Have you noticed any common psychological roadblocks or misconceptions among those who you’ve trained to survive?
MH: Well, lack of belief in yourself. As soon as you start doubting yourself, that’s when you lose the will to survive. It’s a good idea to question yourself—I think it’s always a good idea to question what you’re doing. You can only become better or make better decisions through questioning yourself. But it’s really when you start doubting yourself and doubting the fact that you’ll survive that problems occur.
When I’m giving a talk, I would always ask people at the end, “Would you survive?” A lot of people would say no. Well then, you probably wouldn’t survive. You’re already going in with that preconceived idea that you can’t do it and you won’t survive. Whereas if you’re in a genuine life-and-death situation, you don’t have the luxury of making that decision. You have to survive. The other option is death.
The final chapter of your book is titled, “The Selfish Mind”. What does that term mean to you, and how would selfishness affect survival?
MH: “The Selfish Mind” is a chapter where [laughs] there was a question about whether I’d put it in, because the way that I end the book is by questioning — because I don’t know the answer — is there a situation where I might abandon my clients to save myself? And that, for me, was a really interesting question.
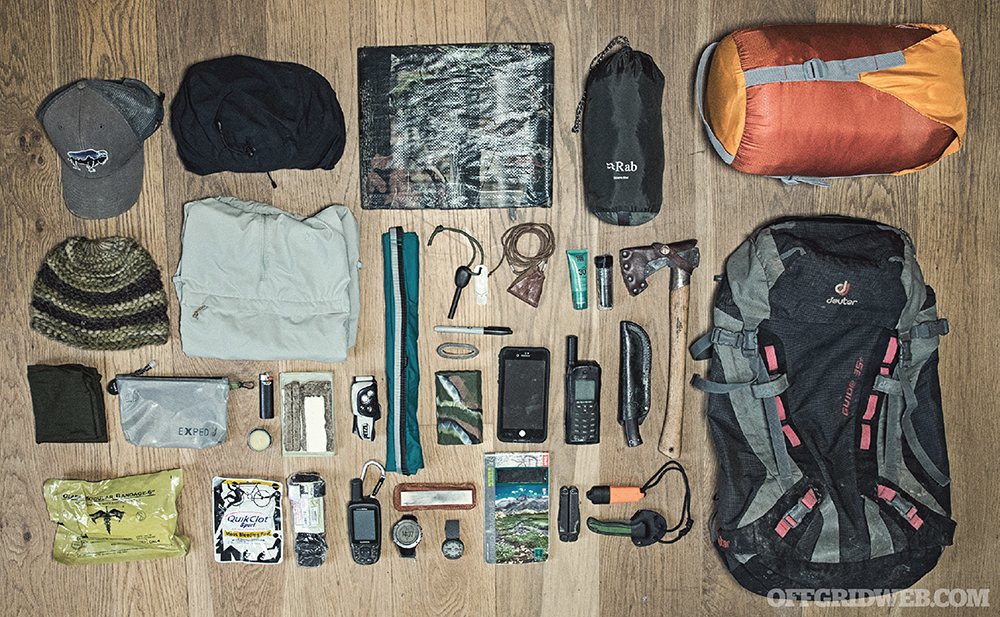
Megan’s gear contains several ways to start a fire, multiple bladed tools, and different forms of communications.
Although I have confidence in myself that I can survive a lot of situations, at the same time, survival is on a cellular level. Every part of your body wants to survive and is doing everything it can to survive. If you think about it on that level, it’s all about you and making sure you survive.
We live in this lovely society where you’re expected to help out other people, but when things go horribly wrong, society is very fragile. It breaks very quickly. You see the aftermath of natural disasters or terrorist attacks — a city will just go mental. Things like rape and murder and looting happen. And that’s really, really quickly. That’s in a matter of hours and days, not months and years, which is quite terrifying, really.
So, yeah, that chapter was more about making people question how they would honestly react in that sort of situation.
If our readers would like to find out more about you and your book, what is the best way to do so? Social media?
MH: Yeah, through social media. Obviously, I spend a huge amount of time actually out on the ground, often in places where there is no signal, so it makes it hard to keep my social media channels up to date, but that’s the best way to get in touch with me. [Editor’s note: You can follow Megan on Instagram at @megan_hine or at Facebook.com/officialmeganhine] I find it quite relaxing when I’m sitting in airports to look at other people’s Instagram pictures and adventures as well.
How far would you go to save your home and everything inside it? If you’re willing to put in a substantial amount of effort and money to prepare your property, it may be possible to save it from destruction, but this requires preparation, creativity, and quick thinking.
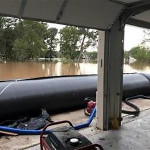
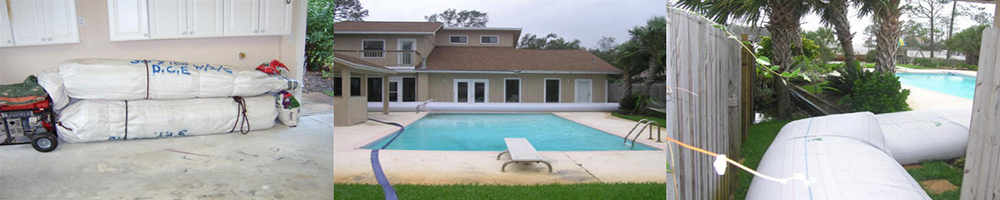
Randy and Jennifer Socha, of Rosenberg, Texas, had previously experienced severe flooding in 2016. Back then, $150,000 in damage was done to their home by the rising water, and this experience motivated them to prepare for the next flood. When Hurricane Harvey began its approach towards Texas, the couple took immediate action, and spent $18,000 for an Aqua Dam system. It was delivered within hours.
The Aqua Dam system comes in various sizes and configurations. Photo: Aquadam.net
This system consists of large waterproof fabric tubes, which can be rolled-up and stored in a garage or backyard until they’re needed. When water approaches, gasoline-powered pumps are used to fill the Aqua Dam from any nearby water source, creating a 360-degree barrier around the home.
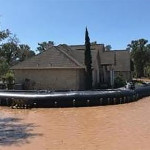
Left: An Aqua Dam system packed in a garage. Center/Right: The same system deployed. Photos: Aquadam.net
Fully inflated, the Sochas’ Aqua Dam was 3 feet high and 380 feet long. Even with this huge barrier, Randy Socha told KPRC-TV that he needed eight additional sump pumps around the perimeter to evacuate water that leached through the soil underneath. In the end, the system did its job and saved the Sochas’ home from Hurricane Harvey.
For the full story and more photos of the Sochas’ Aqua Dam, go to Click2Houston.com. For more information on Aqua Dam flood protection, go to AquaDam.net.
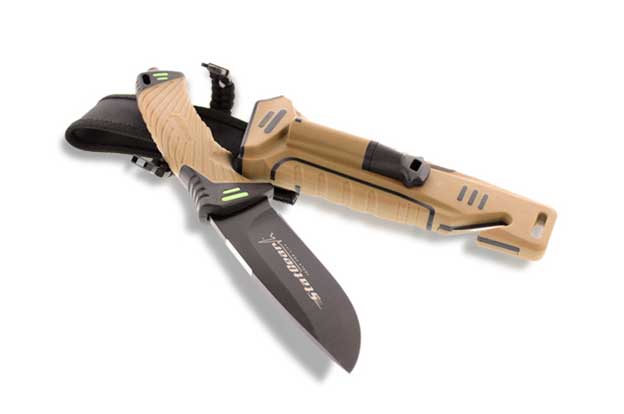
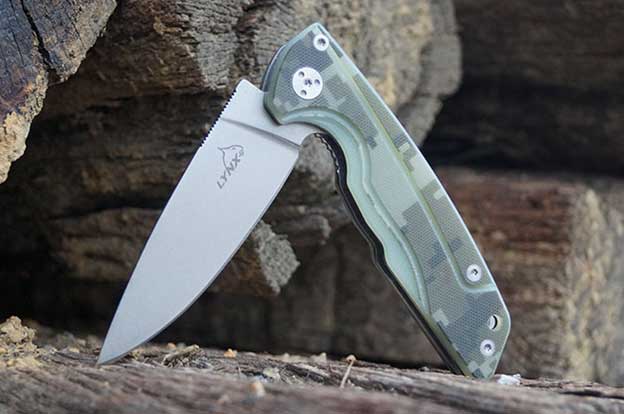
Knives are some of the most useful tools on the planet, doing everything from whittling wood for fire kindling to even protecting yourself from a potential attacker. With a plethora of uses comes a plethora of styles, and we’ve rounded up some great deals on some favorites.
1. The 5-in-1 Survival Knife
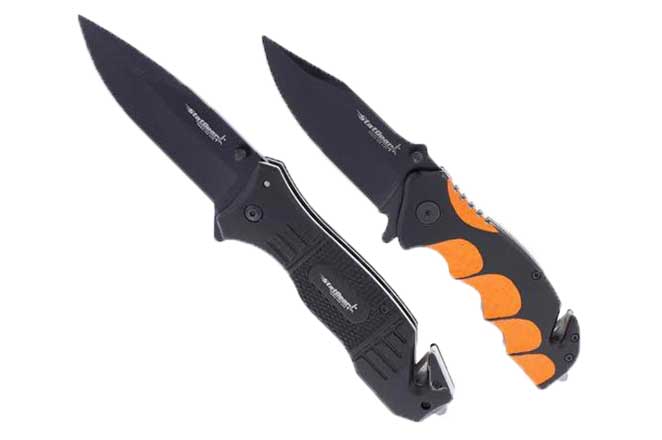
If you’re looking for an all-purpose blade, the Off-Grid Survival Knife should be your first choice. Boasting an LED flashlight, a fire starter rod and a window breaker, this knife makes the worst-case scenario look like a piece of cake.
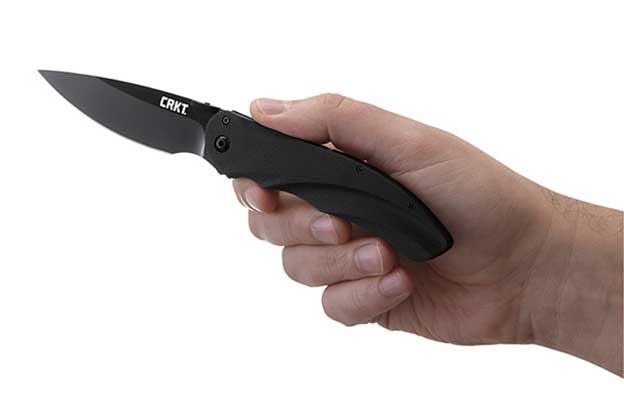
Sometimes art is functional—which happens to be the case with the CRKT Argus Folding Knife. The all-black AUS 8, 57-58 HRC blade with all-black cold-forged aluminum handle combo is sure to turn heads. It’s also sure to cut smoothly on any surface.
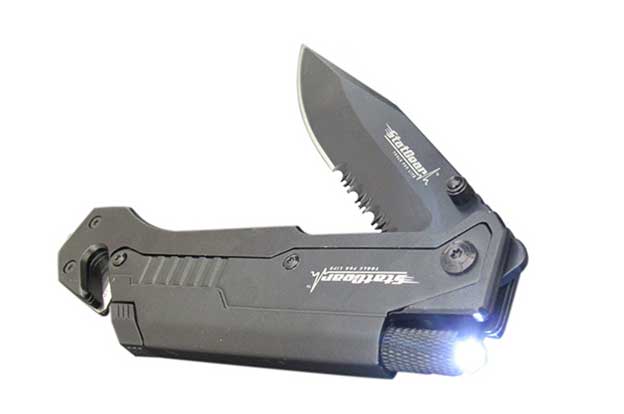
Be prepared for any situation with the StatGear Storm Rescue Knife. With a seatbelt cutter and a window punch, this knife is sure to make light of any heavy situation. Don’t get caught without this blade.
We tend to judge things by what they can do, but sometimes it’s better to judge by what they can’t do. A prime example is the Surviv-All Outdoor Knife, which seems like there isn’t very much it can’t do. Take control of any situation—starting a fire, sharpening another knife—in a jiffy. Buy Now: Get this versatile knife for 26% off at only $32.99
5. The Performance Knife
The Marine Marpat Flipper Knife is the everyday precision knife of your dreams. This knife features a simple but effective design, with a hollow grind and plain edge combined with a stainless steel back spear. And the G-10 handle, both impervious to water and easy to maintain, rounds out this beautiful blade.
“It is a tragedy of the first magnitude that millions of people have ceased to use their hands as hands. Nature has bestowed upon us this great gift which is our hands. If the craze for machinery methods continues, it is highly likely that a time will come when we shall be so incapacitated and weak that we shall begin to curse ourselves for having forgotten the use of the living machines given to us by God.” – Mahathma Ghandi
This quote from Gandhi emphasizes humans’ dependence on machines and technology, and what some would argue is an over-dependence on these time-saving tools. Whether you agree with this sentiment or not, it’s clear that there’s something beautiful about a truly handcrafted item, and that it would be tragic for traditional craftsmanship skills to be forgotten. These skills are historically-significant, but they’re also the methods we would fall back on if some catastrophic event eliminated our access to modern machinery.
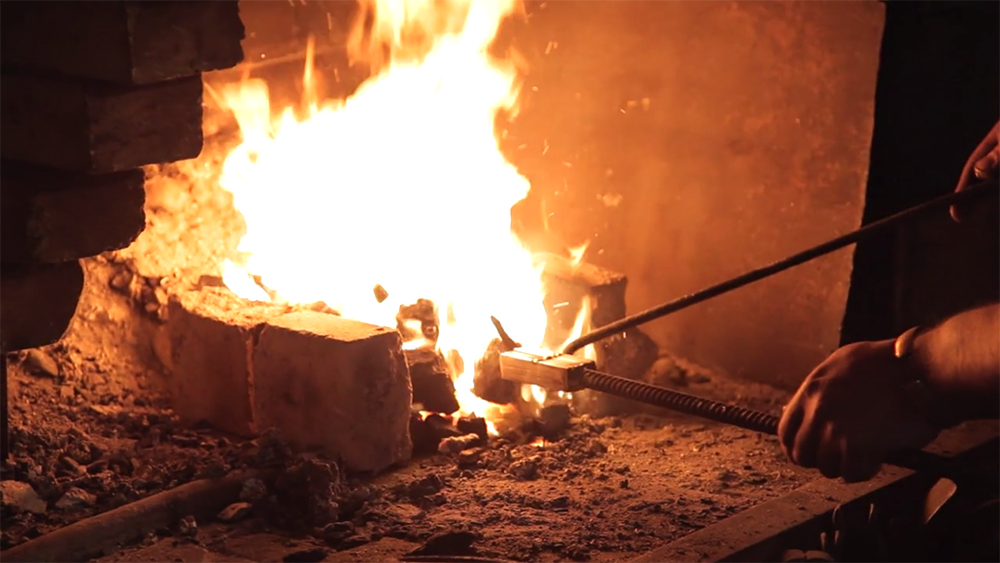
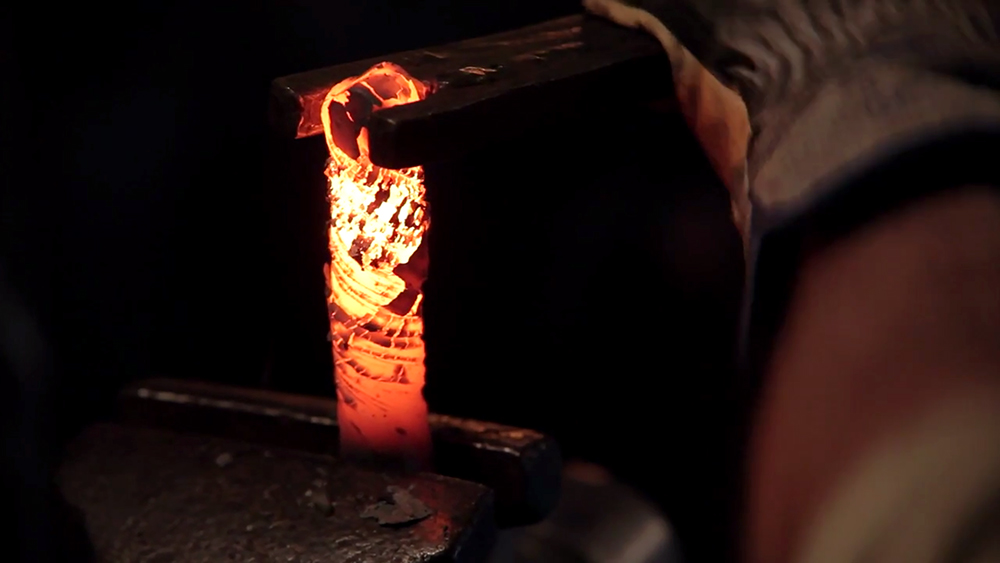
The Northmen Guild (formerly known as John Neeman Tools) is a group of northern European master craftsmen who “want to help people to remember how to use their hands… to achieve the true joy of creating something from humble beginnings”. The Guild does this by producing short films which document the creation process of traditional tools and structures. They also sell many of the items they produce, and even offer classes to train the next generation of craftsmen and women.
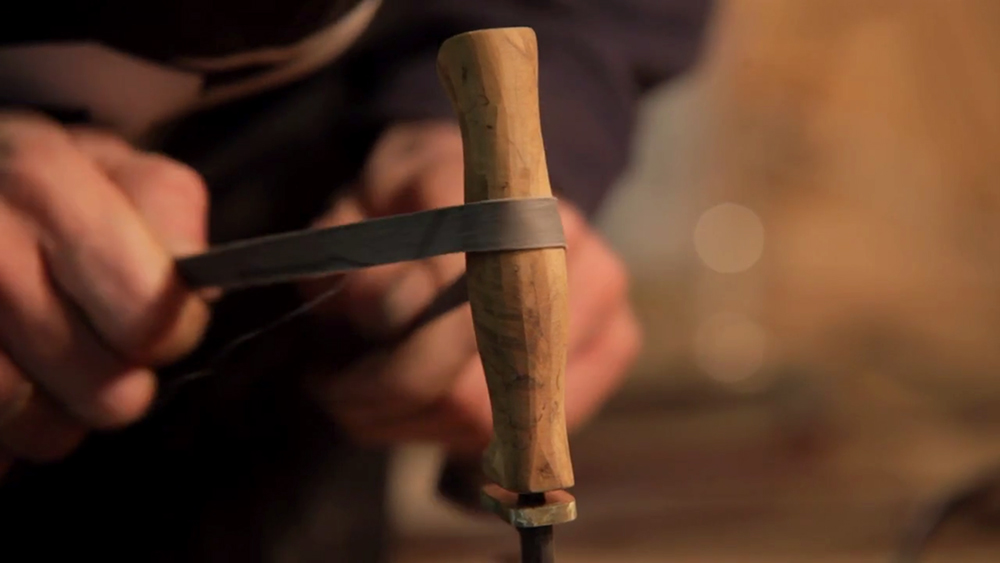
The multi-layered billet is folded and twisted during the forging process, creating a unique pattern.
The following video, titled The Birth of a Tool Part III: Damascus Steel Knife Making, is the third installation in a documentary series about bladesmithing. It shows craftsmen from the Guild producing a simple yet elegant Scandi-grind field knife from pattern-welded Damascus steel. While some modern tools such as a welder and power hammer are used in parts of the video, the end result is something that leaves no doubt about its handmade origin.
Nature. The Great Outdoors. A break from your wife. Whatever you call it, the wilderness is a beautiful place, but it can be difficult to navigate. Make sure you’re prepared for your next voyage with these essentials.
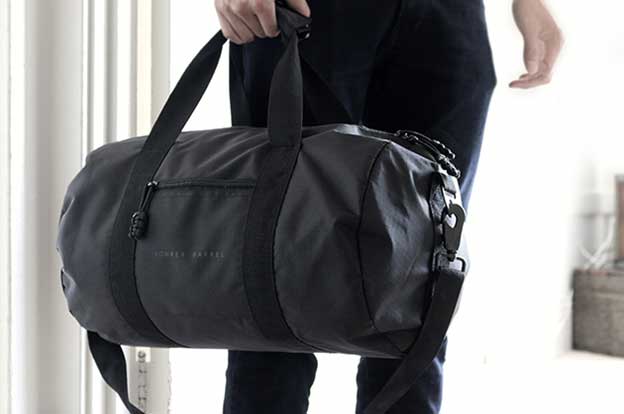
1. Lightweight Weather-Resistant Duffel
Going out in nature is supposed to be relaxing and fun, you’re not supposed to spend 20 minutes looking for your flashlight. The Bomber Barrel Duffel Bag Complete Set has got you covered with pockets everywhere and an additional travel kit for your essentials. Plus, it’s weather-tested and easy to carry.
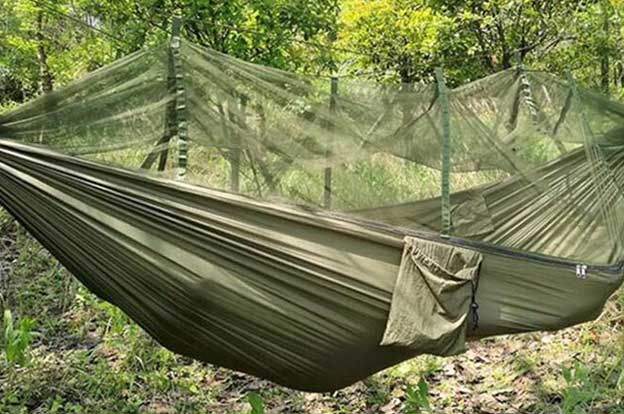
Every great trek results in a well-deserved rest. Take your break bug-free with this Military Hammock Tent. Easily packable and composed of military grade parachute fabric, this water-resistant, mosquito-netted hammock will let you sleep comfortably in the middle of nowhere.
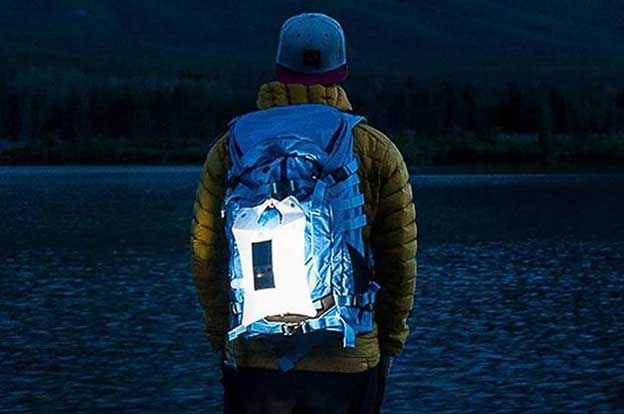
The LuminAID PackLite 16 Inflatable Solar Light is a must-pack. This foldable, solar charging 65-lumen light inflates to create a lantern, providing you up to 30 hours of light with a range of 125 sq. ft. It’s even water-resistant. A versatile light, it’s perfect as an extra light source yet capable enough to be your feature lighting. Buy Now: It’s 31% off at just $17