Whether you’re camping, backpacking, or preparing a bug-out bag, a good shelter is essential for staying warm and dry. In many cases, this means a tent, but tents have some noteworthy downsides. Many tents are heavy and bulky, and those that aren’t — especially those in the ultralight category — can be expensive and complicated to set up. If you’re looking for a minimalist shelter from the rain, a tarp is a great option. In the following video, British YouTuber MCQ Bushcraft shows how he constructed a quick-deploy tarp system for overnight stays in the woods.
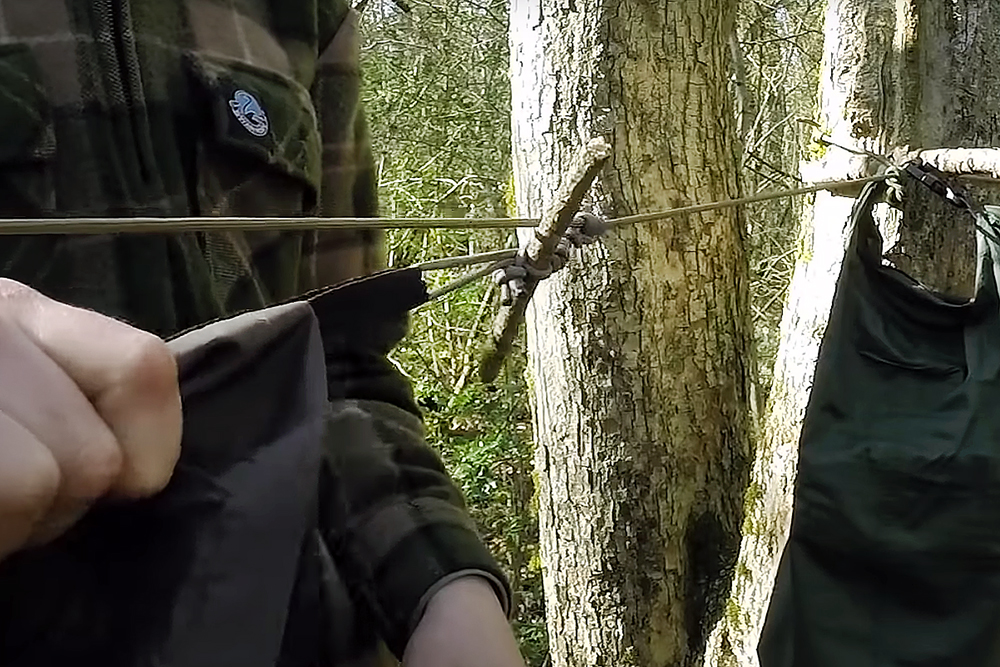
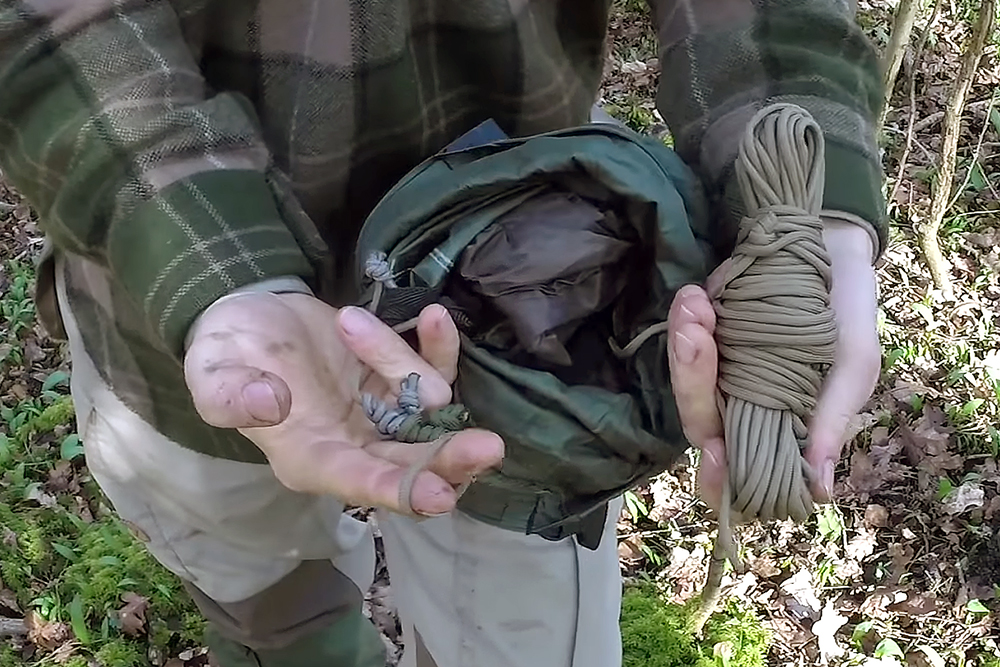
The tarp itself is nothing special, but the way it has been configured intrigued us. It’s packed with a permanently-attached paracord ridgeline with a pre-tied loop at one end and prusiks for tensioning. Short elastic cords have been added to the tie-out points, and these can be connected to the prusiks on the ridgeline with a simple toggle stick, as seen above.
Once it’s time to tear down the shelter, just pull out the sticks and start packing the tarp back into its waterproof stuff sack. Building a setup like this won’t cost much money, won’t occupy much space in a backpack, and won’t take much time to construct when you arrive at your campsite. It’s a great way to get out of inclement weather, even if you don’t have the luxury of a store-bought tent.
Check out the full video from MCQ Bushcraft below:
We’ve all been there — you swallow a piece of food that was too big and begin to panic that it won’t go down. For some people, it actually doesn’t go down and starts to become a medical emergency. However, taking too big a bite isn’t the only thing that could cause you to stop breathing. Let’s look at some common airway obstructions and methods to relieve them.
What is the Airway?
Let’s talk about the airway first. It’s the gateway to your respiratory system and can be divided into two sections: the upper airway and the lower airway. The upper airway is comprised of the nasopharynx (nose and throat) and the oropharynx (mouth and throat). The lower airway consists of the larynx (voice box) and trachea (windpipe) before it branches off into the lungs via bronchioles and, finally, alveoli, the small clusters of air sacs where oxygen and carbon dioxide are exchanged via the bloodstream.
What’s an AO?
An airway obstruction is, quite simply, some type of blockage in any part of the respiratory tract that’ll prevent you from being able to get enough oxygen to breathe. The obstruction can be partially or totally obstructed, and it may have various causes.
Types of AO
There are several ways to characterize different types of obstructed airways. One way is based on the location of the obstruction. If you have an upper airway obstruction, you would have an issue with the nasopharynx (nose and throat). A lower airway obstruction would be from your voicebox down to your lungs. A second way is to describe if there’s some air movement or no air movement in the airway. Some are partial, meaning that, while there’s some obstruction, air is still moving in and out of the airway, albeit with varying degrees of difficulty. The size of the obstruction will determine the level of difficulty breathing. In the event of a total, or complete, airway obstruction, the airway is 100-percent stopped up and no air will pass. Once the airway is blocked, respirations stop. This is called respiratory arrest (cessation of breathing). Once respirations stop, oxygenation stops, and, if not relieved quickly, cardiac arrest (cessation of heart activity) will follow.
The third way to characterize an obstruction is based on the timing of the obstruction. Some airway obstructions are acute, meaning they occur suddenly, while others are chronic — a result of issues causing the obstruction to stay in the airway for a long period of time. It might also refer to a blockage that has slowly grown and gradually closed off the airway.
Causes
The most common kind of airway obstruction we think of and see is an acute obstruction, either partial or complete, associated with the inhaling of some type of foreign object — also known as choking. These objects become lodged in the airway and either prevent or completely block off air from entering the lungs, thus preventing adequate oxygenation. The airway could also be blocked off as a result of an illness like epiglottitis, croup, tonsillitis, or any other type of inflammation in the airway, causing acute partial or chronic obstructions.
Airways can also be damaged via heat, as they are made of soft tissue — when injured, they swell quickly, thus compromising the airway. So a person who has inhaled a lot of smoke in a house fire could have some definite airway injuries due to a combination of smoke and heat, which could lead to an acute partial or complete obstruction. A fall, motor vehicle accident, or other traumatic injury could also lead to an acute partial or complete obstructed airway due to bleeding or soft tissue swelling in the airway or by introduction of foreign objects, like teeth, into the airway.
The biggest offender to the stability of the airway seems to be the tongue flopping against the back of the airway in an unconscious individual. When someone is rendered unconscious, the muscles in the body relax. The tongue happens to be a muscle. When it’s relaxed, it can fall against the back of the throat (pharynx) and block the airway. When that happens, we need to act quickly and decisively to open the airway because the longer we wait to get the airway open, the longer the brain is deprived of oxygen.
We can only live for a finite time without that and without suffering brain damage as a result of an anoxic (no oxygen) event. Some chronic disease processes like tumors, asthma, chronic bronchitis, COPD (chronic obstructive pulmonary disease), and emphysema can also cause a progressive narrowing of the airways, limiting the amount of airflow into the lungs. Over time, this can cause a chronic partial obstruction in the airway.
How to Recognize AO
How many of you snore? Yep, that’s a partially — and for some of you at times, a totally — obstructed airway (e.g. obstructive sleep apnea). Snoring is an easy-to-recognize symptom of an obstructed airway. However, depending on the level of obstruction, there are several other signs you can observe. One sign is our respiratory rate. Our normal, adult breathing pattern is fairly steady with a respiratory rate of around 12 to 20 breaths per minute. If we see any deviation from that normal pattern, we need to look closer at what could be causing it. If the patient is breathing more rapidly than normal or shallow, we need to discover the root issue before it gets worse. With partially blocked airways, the patient may be coughing, wheezing, or having other abnormal sounds, like stridor, which is a high pitched or even squeaking sound coming out of the airway.
If the patient can vocalize any sounds, their airway is only partially obstructed. One of the worst things you might see is absolutely no chest rise and fall or unorganized chest wall movements with no sound at all coming from the airway. These are very ominous signs. In a completely obstructed airway, you’d expect to see, in a conscious patient, panic and anxiety with the universal choking signal of putting the hands up to the throat and maybe even mouthing, “I’m choking” or “Help.” If the patient’s oxygen level is dropping, you might also notice a bluish hue in the lips, skin, or nail beds. This is called cyanosis. Finally, if the oxygen levels drop too much, then the brain isn’t getting what it needs — this can lead to unconsciousness in the patient. This is respiratory arrest and, as mentioned earlier, if not relieved, will lead to cardiac arrest and death.
How to Treat AO
If a patient’s airway is completely obstructed, it may be necessary to perform the Heimlich maneuver.
When you’re snoring and get elbowed to turn over, you self-correct your own partially obstructed airway by turning over. The offender in this situation is your own tongue. This type of scenario isn’t an emergency. However, if the person isn’t able to correct their own obstruction, it can most certainly turn into one, such as respiratory arrest leading to cardiac arrest. So, how do you treat an airway obstruction? Well, that depends on what’s obstructing the airway.
If the obstruction is an acute partial obstruction, then the patient is moving air and, more than likely, attempting to clear the airway on their own by coughing, which will hopefully dislodge the obstruction.
Rolling a patient into a recovery position can help reopen a partially obstructed airway.
If it’s an acute complete obstruction such as choking, performing the Heimlich Maneuver is the best option — with no sounds coming from the victim and/or no coughing, the responder wraps their arms around the victim’s waist, slightly above the belly button, makes a fist with one hand, bending the thumb with the knuckle pointed out, covers the fist with the opposite hand, and sharply pulls upward with sets of five abdominal thrusts until the obstruction is relieved. If the airway is partially obstructed due to swelling, either acute or chronic in nature (noted by abnormal sounding respirations, i.e. high pitch, wheezing, etc.), this is a definite emergency and definitive care must be sought out immediately.
Occasionally, you may be alone and have to self-administer abdominal thrusts. In order to do this, you’ll have to find something like a chair or couch to lean over, placing the top of it firmly around your belly button and forcing yourself downward to mimic the same movement of someone else’s hands performing upward abdominal thrusts. The same principle we just mentioned still applies: keep trying in sets of five thrusts until the obstruction is relieved. Different types of airway obstructions will require different interventions, usually based on the severity of the obstruction. This could range from medication inhaled via a nebulizer, placement of a nasal or oral airway, emergent endotracheal intubation, and in worst case scenarios, emergent surgical airway placement.
What to Do if You Can’t Relieve an AO
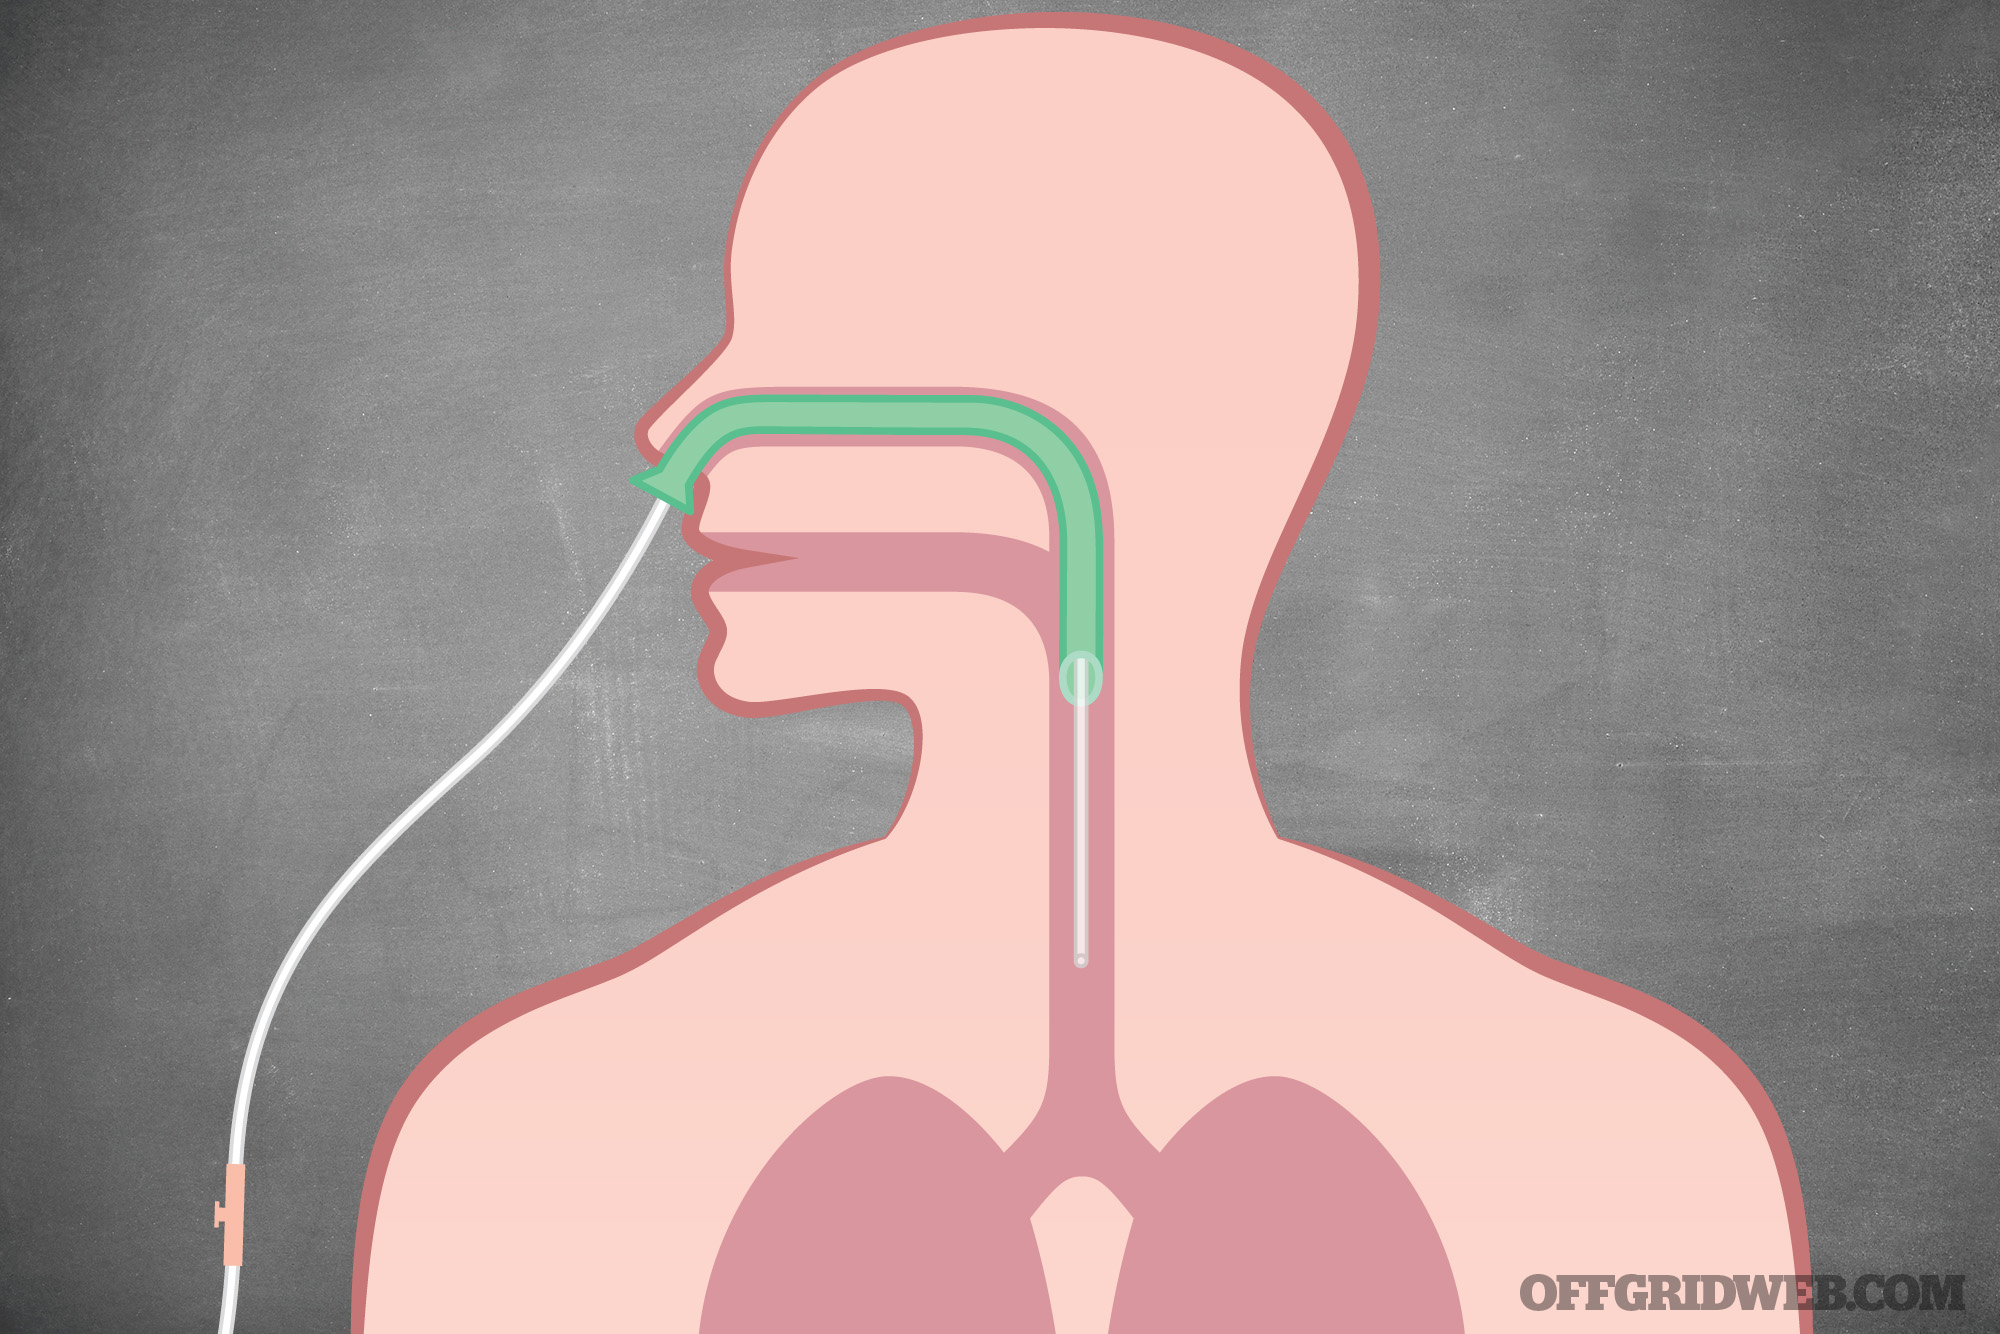
Above: The insertion of a nasopharyngeal airway (NPA) is one method of restoring airflow if the patient’s oropharynx is obstructed. It also offers a pathway for nasal intubation.
In the event the obstruction cannot be removed or the victim becomes unconscious, more actions must be initiated, like CPR. In addition, call 911 for emergency medical services. For more information on CPR and to gain certification, contact your local American Heart Association or American Red Cross office for classes.
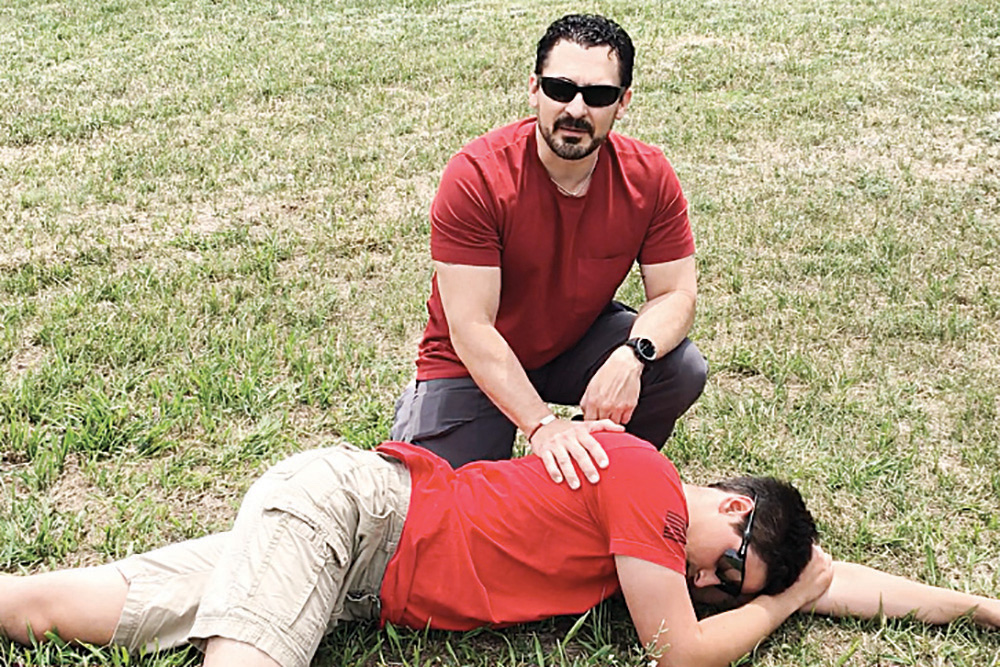
If the tongue is the offender and has flopped against the back of the airway, then we can place the affected individual into a recovery position. In this position, the person is rolled onto their side as a unit, with the bottommost arm up and underneath their head to act as support and the uppermost leg acting as a kickstand to support them as the bottommost leg is extended. The victim’s uppermost arm is then placed up in a bent position as a support for their head, while their head is angled toward the ground in an effort to allow gravity to pull the tongue from the back of the throat in order to open the airway.
This allows the person to breathe and also lets blood, saliva, emesis, or anything else to drain out onto the ground rather than going back down the airway, thus creating an aspiration risk. This position can be used if the person still retains a “respiratory drive” or a visible respiratory effort, which can be visualized by the chest rising up and down or the abnormal sounds of respiration from a partially obstructed airway (via the tongue), which in this case would be snoring sounds. This is a very quick and effective method to create a patent (open) airway in someone exhibiting these symptoms while keeping the patient’s airway protected.
Summary
No one wants to be unable to breathe. It’s terrifying. However, understanding what’s going on and how to alleviate it can make the difference between life or death. Seek out the proper training so that if one of these situations occurs, you can be mentally and physically prepared to react. If you act quickly and decisively, everyone involved will breathe a whole lot easier.
About the Author
Kerry Davis is the founder of Dark Angel Medical. He’s a registered nurse who has worked in the critical care and emergency department fields since 2003. Prior to 2003, he was a flight medic in the USAF and worked as a civilian paramedic.
By now you have certainly heard of coronavirus in the news. From the media reports, you would think we should be prepared for the end of days. But should we? We first need to understand what the virus is and what to expect from it. We should also compare it to some other outbreaks of viruses as well.
Currently, there are seven strains of coronavirus that infect humans. The newest is the novel coronavirus (nCoV). It is similar to a different coronavirus that has caused the Middle East Respiratory Syndrome (MERS –CoV), which has been sporadic in northwest Africa since 2012. This MERS – CoV infected nearly 2,500 people worldwide in 2019. As for the new nCoV, as of February 4, 2020, there have been 20,630 cases reported worldwide with 23 countries reporting cases. In the United States there have been twelve reported cases (as of Feb. 5), according to the World Health Organization. Eight of the cases in the US have been associated with travel from China, two from person to person contact within the US and two more that have yet to be classified. These cases have occurred in California (six cases), Illinois (two), Washington (one), Arizona (one), Massachusetts (one) and Wisconsin (one).
The website WuFlu.live tracks confirmed cases of the Novel Coronavirus around the world.
Coronavirus Origin
This particular novel coronavirus (nCoV) started in Wuhan, China and has been named the Wuhan Flu. It just so happened to have its epicenter near a lab that studies the virus.
Hubei, the province where Wuhan is located, has been hit the hardest. (Graphic: WuFlu.live)
Although reports suggest animal to person contact from a market in Wuhan, my suspicion is that there was probably a breach of protocol in that lab where someone became contaminated and allowed the virus to spread to other people. The reason it is called a ‘novel’ coronavirus is that it is a little different genetically than previous coronaviruses and had not previously been found to infect humans. Typically, the coronavirus is seen in animals and infrequently spreads to humans. When it infects humans, its symptoms and severity are worse than the typical influenza virus.
WuFlu.live also created this graphic, which represents the number of cases by country.
Symptoms
Once a human is exposed, symptoms can begin in 2 – 10 days with a mean of 5 days. Symptoms may include fever, cough, and significant shortness of breath, along with fatigue, muscle aches, and headache. Watery diarrhea may also be present. The shortness of breath can be progressive through the course and the diarrhea, if present, usually appears in week two of the illness. People who are at risk of infection are those people in close contact with those infected, as well as those with chronic diseases (e.g., diabetes, chronic kidney disease, chronic lung disease, and immunocompromised patients). The contagious period is most likely in the second week of illness.
Treatment
There is no specific treatment for the virus and care is supportive in nature. Hospitalization may be needed for administration of fluids for dehydration and supplemental oxygen for the shortness of breath. Acetaminophen can be given for the fever. Presence of concomitant diseases (mentioned above) also increases the risk of hospitalization. Of course, the patient should get as much rest as possible to allow the body to heal. Symptoms can last two weeks with recovery following according to the severity of disease.
How Contagious Is It?
(Graphic: CDC / Alissa Eckert, MS; Dan Higgins, MAM)
Regarding contagion, there is a mathematical term called R0, or R naught. This reflects the relative contagious capacity of infectious disease. If a disease has a R0 value of 1.0, this reflects that for every person infected, they will spread it to one other person. Influenza’s value is 1.28. MERS was reported to be less than one while SARS was estimated to be between 2 – 3. This Wuhan Flu is thought to have a R0 of 1.5 – 3.5 with some suggesting the upper limits of that range. Keep in mind that a value of less than one will cause the outbreak to diminish. Ways that public health can control the spread is to limit travel to endemic areas as well as to quarantine those travelling. We have already seen flights being limited to and from China as well as two cruise ships being quarantined due to case reports of Wuhan Flu on board the cruise ships.
Detecting the Virus
With the timing of this outbreak, in the midst of flu season, how do you know if you have influenza versus coronavirus?
Initially, you may not know the difference, as some of the symptoms overlap. As the shortness of breath progresses during the first week, it may require a visit to the doctor. But keep in mind that you should wear your N95 mask and take precautions as if you ARE infected. There is a test that can be done for flu in most physicians’ offices and in hospital labs to test for influenza; however, testing for the nCoV is only done by the Centers for Disease Control at present. The CDC is working on releasing the protocol to test on a more widespread basis. Another factor to distinguish between the two viruses is whether you have traveled to an area that has reported cases of the nCoV or have come in contact with someone who has tested positive. Last, if you were diligent in getting your flu shot this year, this will likely reduce your severity of illness due to the influenza virus. Although that vaccine has no impact on whether you catch coronavirus, it may help health officials decide how to distinguish between the two in the early phases.
Comparing the Mortality Rate
So why should we care if it’s the flu or coronavirus?
From what has been observed to date, this novel coronavirus kills about 3% of those infected. This is compared to about 0.01% of those affected by influenza. Keep in mind this percentage of nCoV is potentially an early underestimation of mortality while the number of total cases rises exponentially. It will only be after the dust settles that we truly know what the mortality was with this disease. And, while 3% doesn’t sound like much, it is certainly more deadly and more contagious than the flu.
Above: This graphic from The New York Times compares the fatality rate and contagious capacity of the Novel Coronavirus.
In addition, the number of severe complications for Wuhan flu is reported to be in the 20 – 30% range. These persons will spend time in the intensive care unit of the hospital and have prolonged hospitalizations as well. And as far as the two other coronaviruses mentioned above, in 2003, Severe Acute Respiratory Syndrome, or SARS –CoV, which was thought to have come from the Chinese civet cat, had a mortality of about 10%, and the Middle East Respiratory Syndrome (MERS –CoV) had a mortality of 35%. (This appeared as recently as last year in Saudi Arabia and was thought to be transmitted initially from camels.) Both of these two latter viruses had R0 factors less than what the nCoV show so far.
A highly-magnified, colorized view of MERS-CoV virions. (Photo: National Institute of Allergy and Infectious Diseases)
Because there are no vaccines for coronavirus, the Centers for Disease Control and the World Health Organization recommend avoiding crowds, frequent handwashing, wearing masks (N95 preferably) while in public, avoiding touching eyes, nose, or mouth, and using disinfectants or hand sanitizers. Common sense should also encourage you to stay home when sick.
Conclusion
From a public health perspective, this Wuhan Flu is potentially 3 – 4 times more contagious than the influenza virus and three times more likely to result in death. The World Health Organization declared the Wuhan Flu to be a global health emergency and, along with the Centers for Disease Control, is taking significant measures to limit the spread of the virus outside of China. Personal responsibility to limit your exposure should also come into play. Stay home if you are sick. Wash your hands frequently. Cover your mouth when you cough.
Anytime a new kid comes to town, or a new infectious disease, it gets people excited. This particular novel coronavirus is of interest because it has the potential, if it gets out of control, to have significant health and even economic impact globally (watch George Gammon’s YouTube video for more details).
We are all familiar with influenza and are too often blasé about its impact on our lives. But we have faith in our influenza vaccines and our ability to recover from influenza. Think about your chances of recovery if you contracted the Wuhan Flu, though. You may feel horrible for two weeks and be on the mend. Or you could be one of the 20% who end up in the intensive care unit and on a ventilator. Or you could be one of the 3% who die. So, should we be concerned? While a 3% chance of death doesn’t sound like much, in medicine, it’s more risk than we like to see.
About the Author
David L. Miller, DO FACOI, is an internist in private practice for 20 years. His experiences away from the office have included time as a fight doctor in regional MMA events and as a team physician for 10 years at a mid-major university in the Midwest. Currently, he serves as the lead medical instructor for the Civilian Crisis Response team based out of Indianapolis.
Weapons, like other tools, are often built with a specialized purpose in mind. Some, however, may have an officially-stated purpose that differs from how they’re typically used. Take the icepick, for example — it might be marketed for chipping pieces off a block of ice to cool a drink, but it serves a totally different purpose on the street. The B&T VP9 Veterinary Pistol seems to fall into this category.
As the name indicates, the official purpose of the bolt-action Veterinary Pistol is to quietly euthanize animals. Its barrel includes ports to slow down a standard supersonic bullet to subsonic speed, and it comes with a matching suppressor that includes consumable discs that enhance noise reduction for the first few shots. The end result is a very quiet weapon that can put an injured animal out of its misery without alerting the nearby populace. But as you’ve probably guessed, it’s capable of being used on more than animals.
The B&T VP9 bears a clear similarity to the Welrod pistol that was developed by the British Special Operations Executive (SOE) for use in assassination missions during WWII. Like the Welrod, the VP9 is a single-shot, bolt-action gun that’s easily dismantled and concealed. In the RECOILtv video above, B&T founder Karl Brugger explains the pistol’s origins, and RECOIL Editor in Chief Iain Harrison test-fires this unique weapon.
The Premise: In Issue 32, our feature “A Look at Locks” provided an overview on common household locks, and elsewhere in our latest issue Chad McBroom did up a nice primer on lockpicking as well. In many survival, escape, resistance, evasion (SERE) courses, you’ll find that lockpicking is often a common part of the curriculum. Whether it’s defeating locks to find food, seek shelter, or escape from unlawful incarceration, there’s no denying that understanding how to bypass locking mechanisms is a critical part of survival training. The Visual Guide to Lock Picking, 3rd Edition is a good starter manual to familiarizing yourself with the anatomy of many of the most common locks you’re likely to encounter.
The 411: The information is provided in very straightforward, easy-to-understand prose. Everything is clearly explained, and a helpful glossary of common terminology is provided at the end of the book. The authors dissect how to identify warded locks, tumbler locks, combination locks, tubular locks, lever locks, and wafer locks and describes what the differences are on each category’s variations. The book also discusses how the aforementioned locking mechanisms operate and the tools and techniques used to bypass them. Each chapter contains a healthy dose of black-and-white illustrations, so the reader has numerous references to visualize the instruments and systems described. Each chapter starts out explaining the basic theory behind how each lock category works and progressively builds on information from previous chapters.
The Verdict: Will you be an experienced locksmith by the time you finish this book? No more than you’d be an experienced doctor after you graduate with a degree in medicine. The next logical step, and the book encourages this, is to experiment with various locks and gain a tactile understanding of the methods and lock types described. However, the book does a good job explaining things clearly to give the reader a baseline of how common locks work and the differences between them.
Because the Visual Guide to Lock Picking, 3rd Edition is primarily focused on portable locks, it barely touched on dead bolts. Be that as it may, it’s bereft of security countermeasures, such as strike plates, security bars, and reinforcement locks. To be a bit more idealistic, the authors would’ve earned points with us if they’d included tips on defeating security latches commonly found on hotel room doors and older homes.
We were surprised there were no descriptions of different handcuff types and would’ve liked to have seen that included. It would’ve also been helpful if they’d included a few chapters dedicated to basic automotive locks. If you’re looking for information on electronically controlled locks, you won’t find it here. That’s a whole other animal involving a greater deal of technical savvy that this book isn’t intended to address.
Also, a page at the end of the book offers a DVD or VHS version of the book and is intended to be torn out and mailed in with payment info. What’s discouraging is that the website shown on the cover of the book is no longer active and a search for “Standard Publications” doesn’t turn up any info. It makes us wonder if the company has gone out of business since the book’s 2006 copyright. No such DVD or VHS could be found through an internet search either.
The book begins and ends with disclaimers about the potential legal implications of lockpicking, but understandably doesn’t go into detail about what exactly could provoke repercussions. Since laws change over time and vary from region to region, it’s basically letting the reader know it’s incumbent on them to do the research and make sure they aren’t breaking any laws.
Book & Author Visual Guide to Lock Picking, 3rd Edition by Mark McCloud and Gonzalez de Santos
You may have heard stories of foolish drivers obliviously following the directions from their map apps, only to end up stuck in the middle of nowhere. For example, last year nearly 100 drivers in Colorado ended up gridlocked in a muddy field after Google Maps redirected them there to circumvent a traffic jam. It’s easy to think that you’d never end up in that situation because you wouldn’t let a software glitch steer you off the pavement, but it might not be so simple. What if someone actively tricked your map app into redirecting you in a more subtle manner? This is exactly what happened when German performance artist Simon Weckert took to the streets of Berlin with a little red wagon full of smartphones.
Photo: SimonWeckert.com
Weckert’s plan was simple: he collected 99 used cell phones, loaded up Google Maps on each, and placed them in a wagon. Then he simply pulled the wagon down the road at walking pace, causing each phone to report a slow movement speed. This accumulation of data caused Google Maps to automatically turn the street from green to red, marking it as a traffic jam and redirecting nearby devices to a different route. He documented this in the video below:
This “virtual traffic jam” accomplished Weckert’s goal of creating “an impact in the physical world by navigating cars on another route to avoid being stuck in traffic.” He considered hacking Google Maps a form of performance art, and had no intention of harming anyone. However, others might use similar techniques for malicious purposes. Organized criminals could theoretically divert drivers away from an area to create a clear escape route, or worse yet, steer commuters into a choke point to create a real traffic jam prior to an attack. Consider how many people use Google Maps and similar apps on a daily basis, and you’ll understand the potential effects of such an incident.
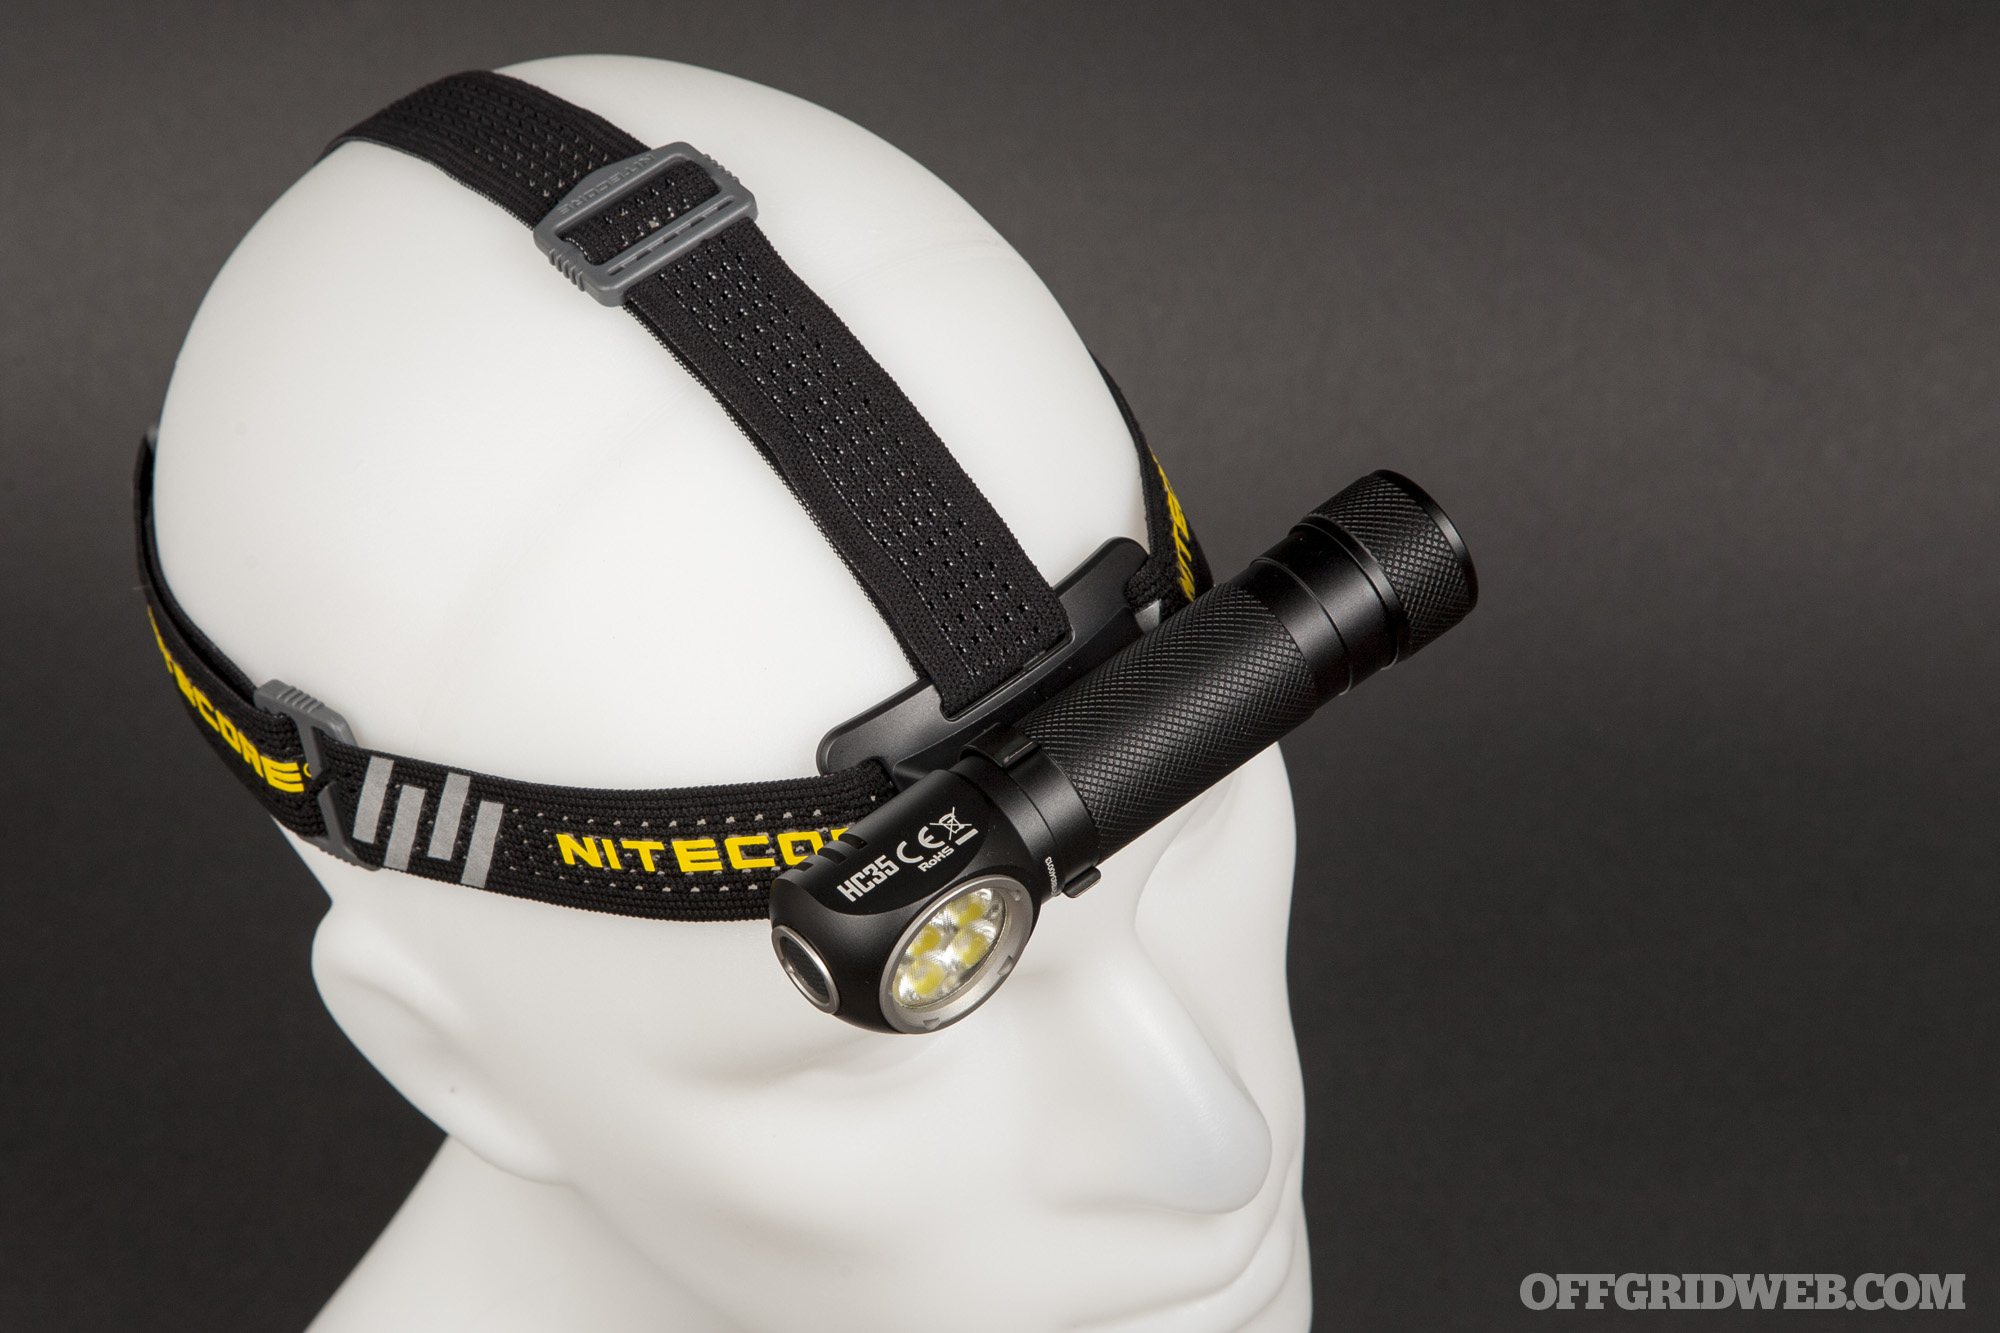
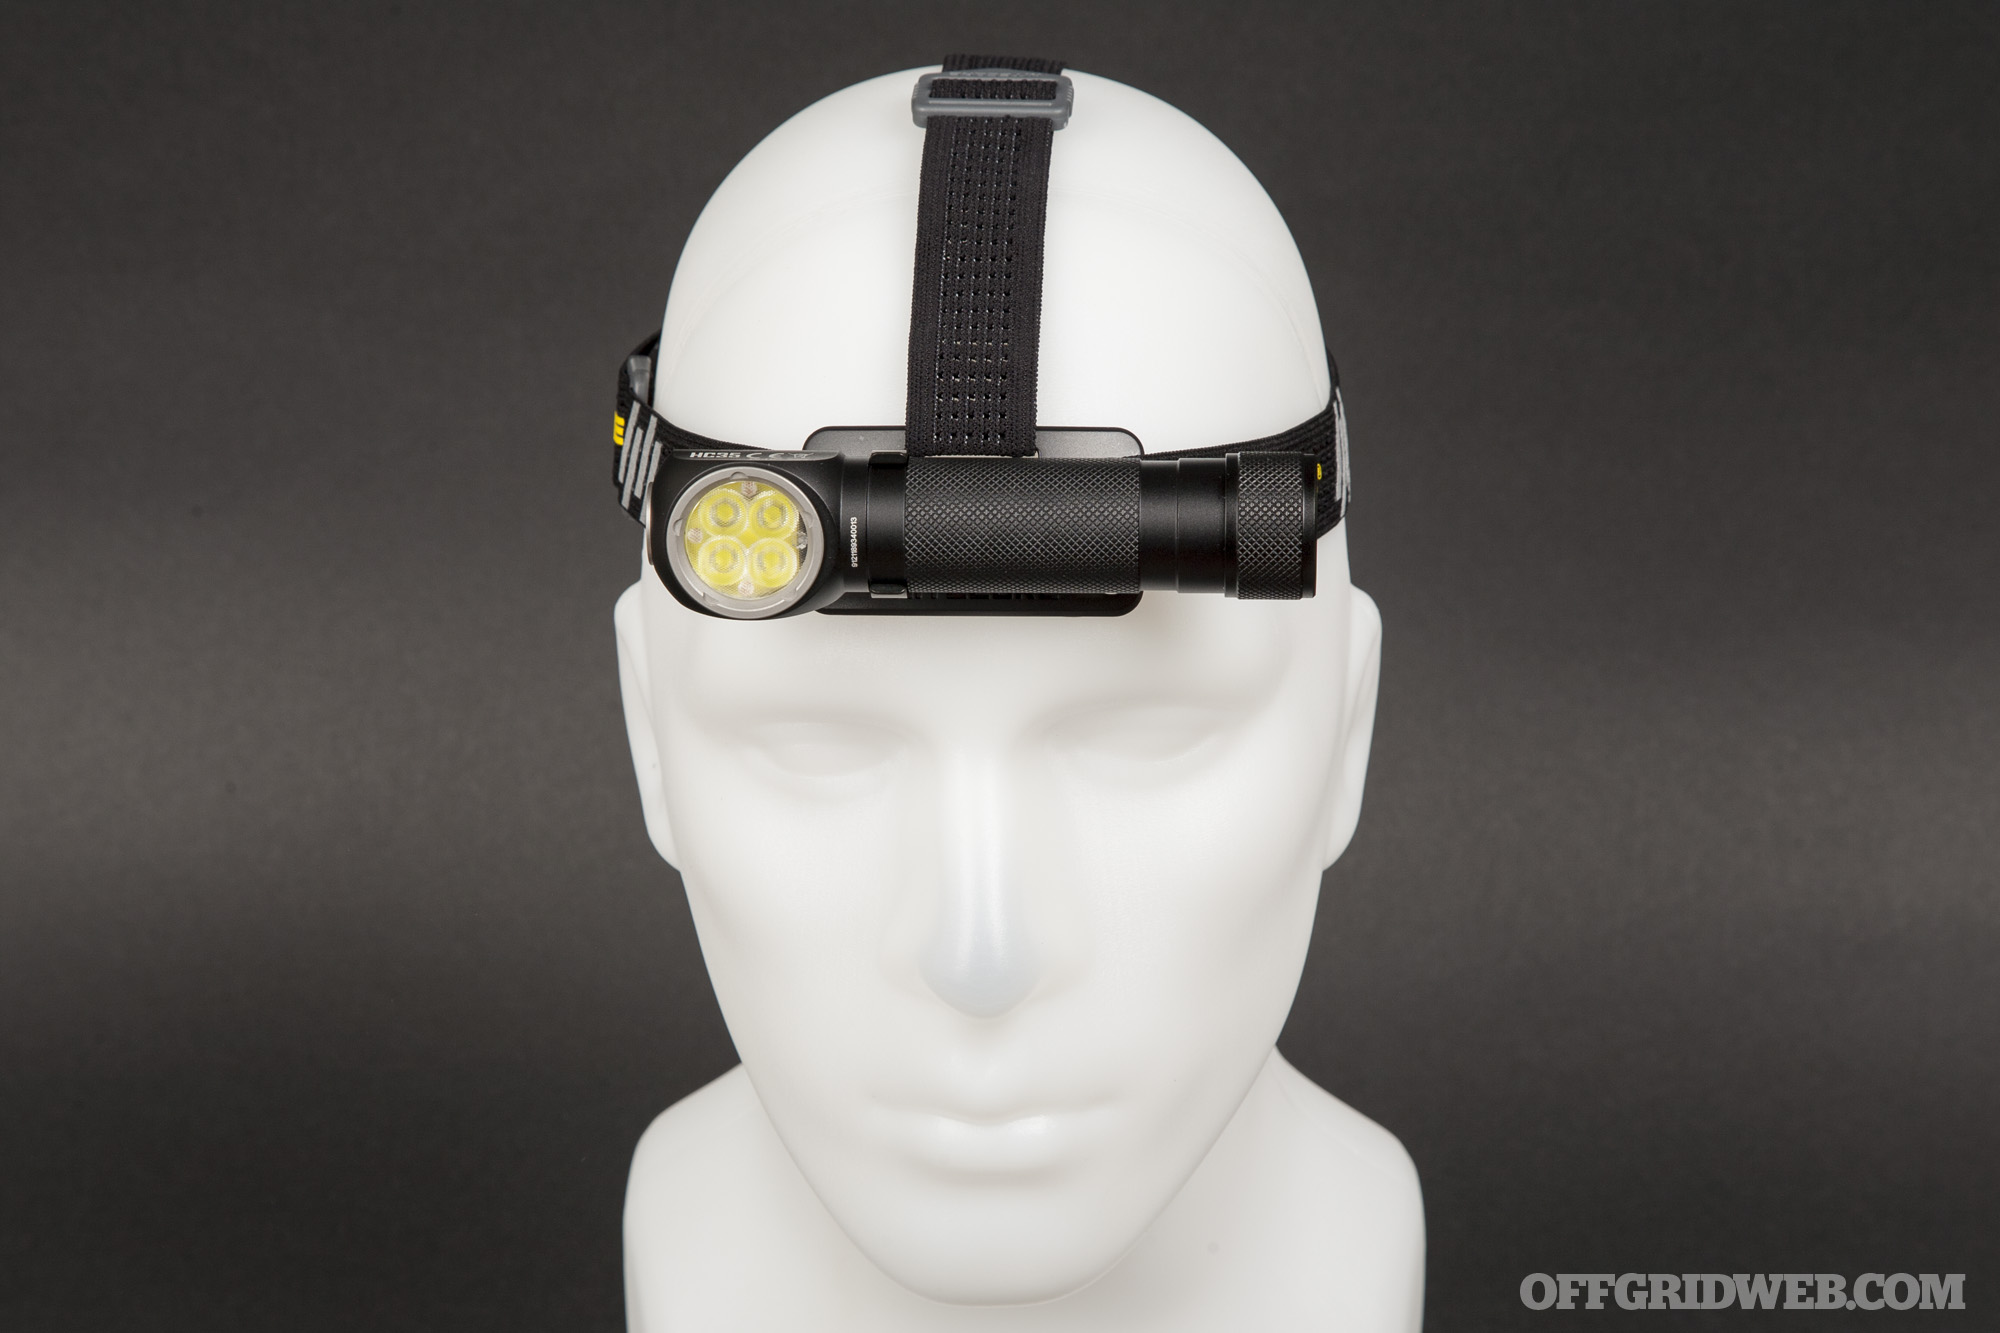
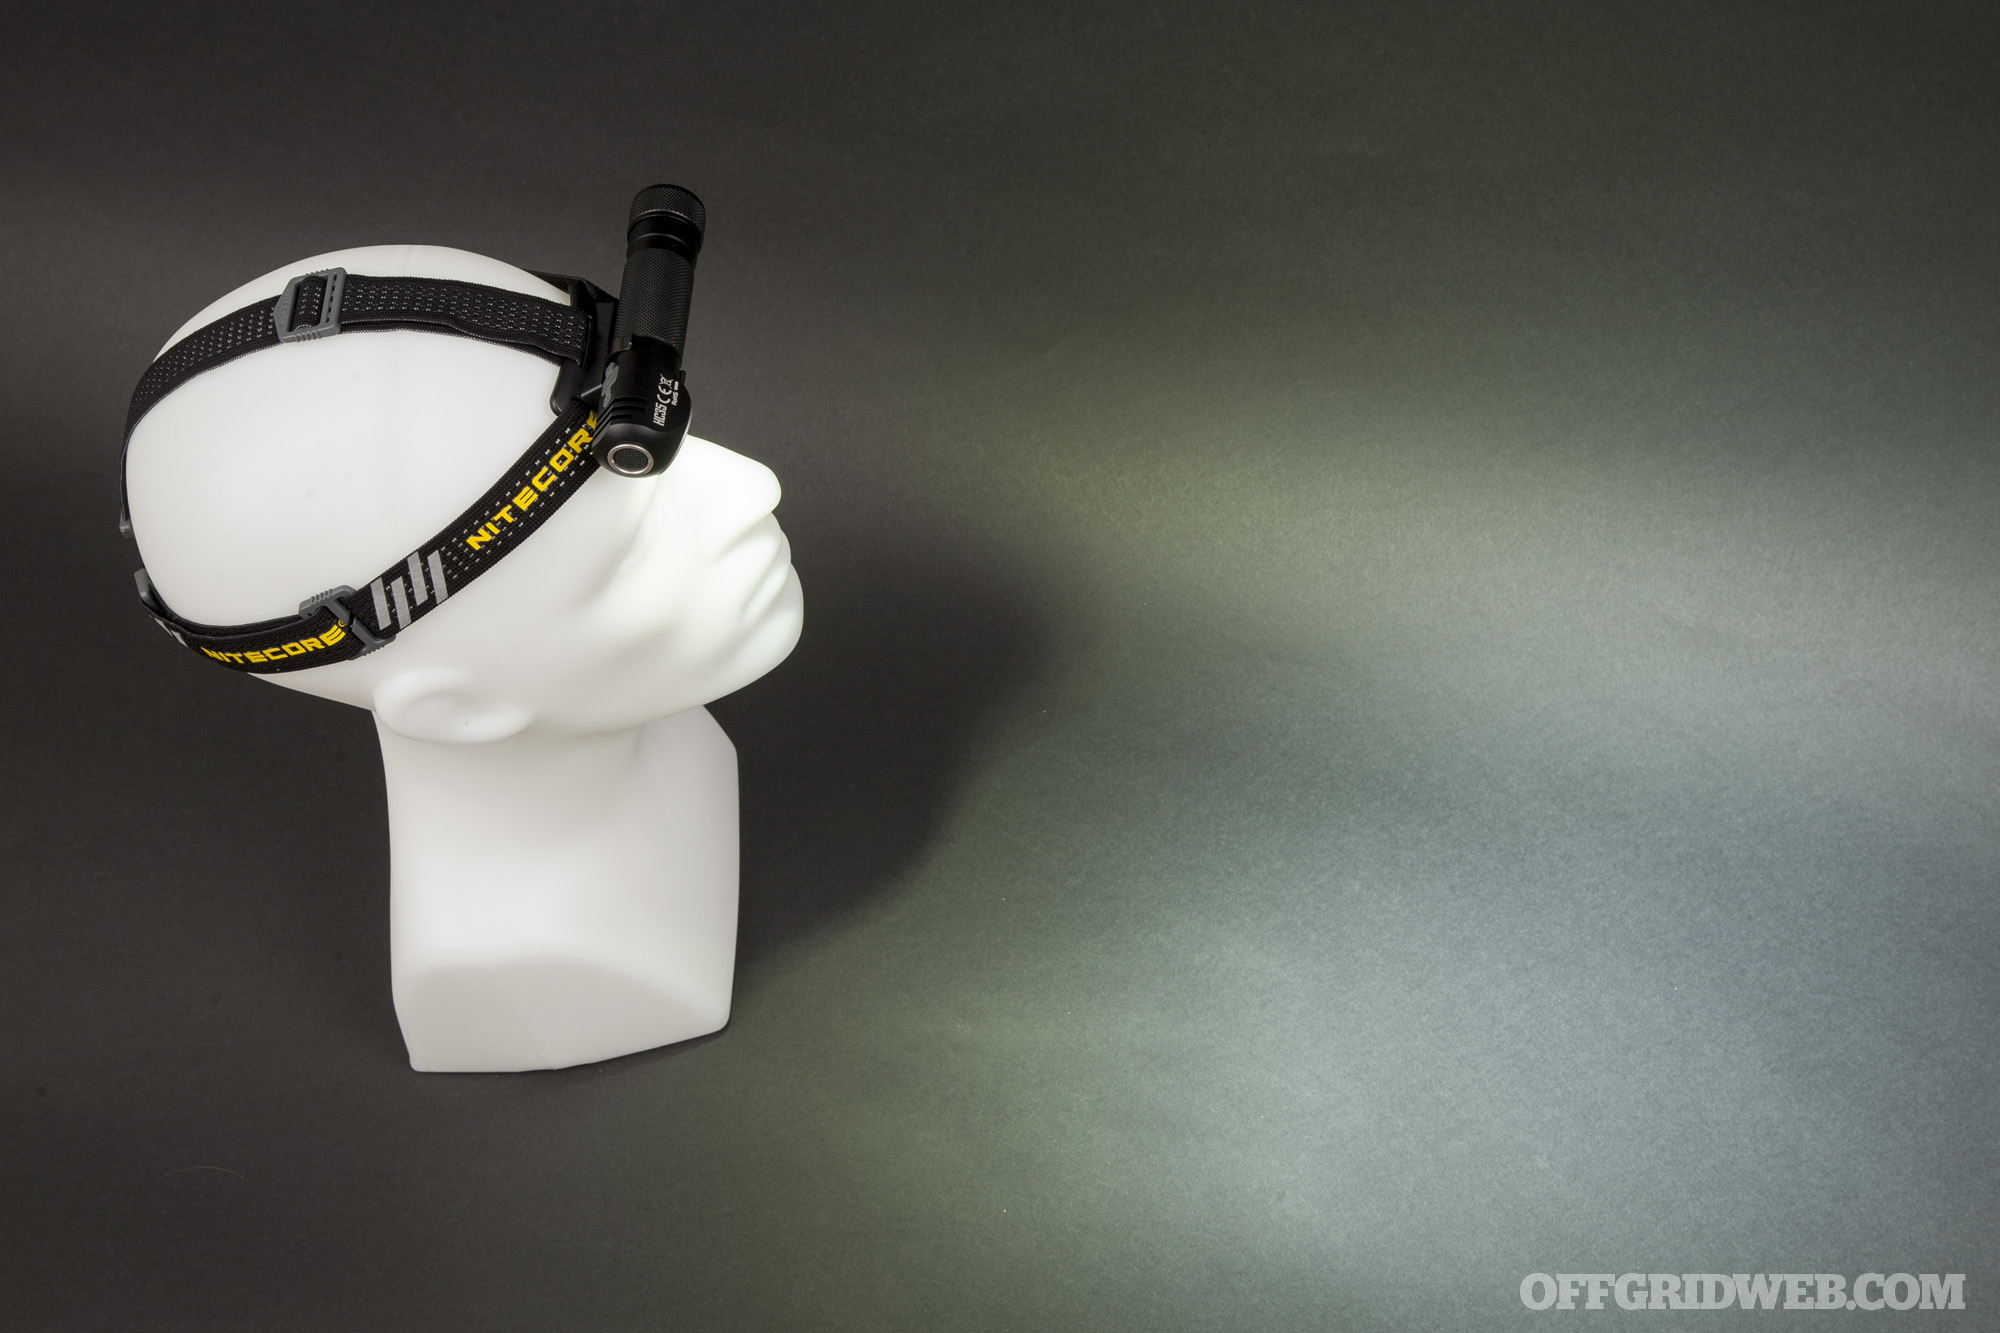
Nighttime visibility is paramount in any emergency situation, but so is your manual dexterity. You’ve probably experienced this dilemma while trying to use a handheld flashlight and work with both hands. This often leads to attempts to balance the light on nearby objects, juggle it between hands, hold it in your teeth, or pinch it between your neck and shoulder. The obvious solution is to simply get a hands-free light that aims wherever you’re looking — in other words, a headlamp.
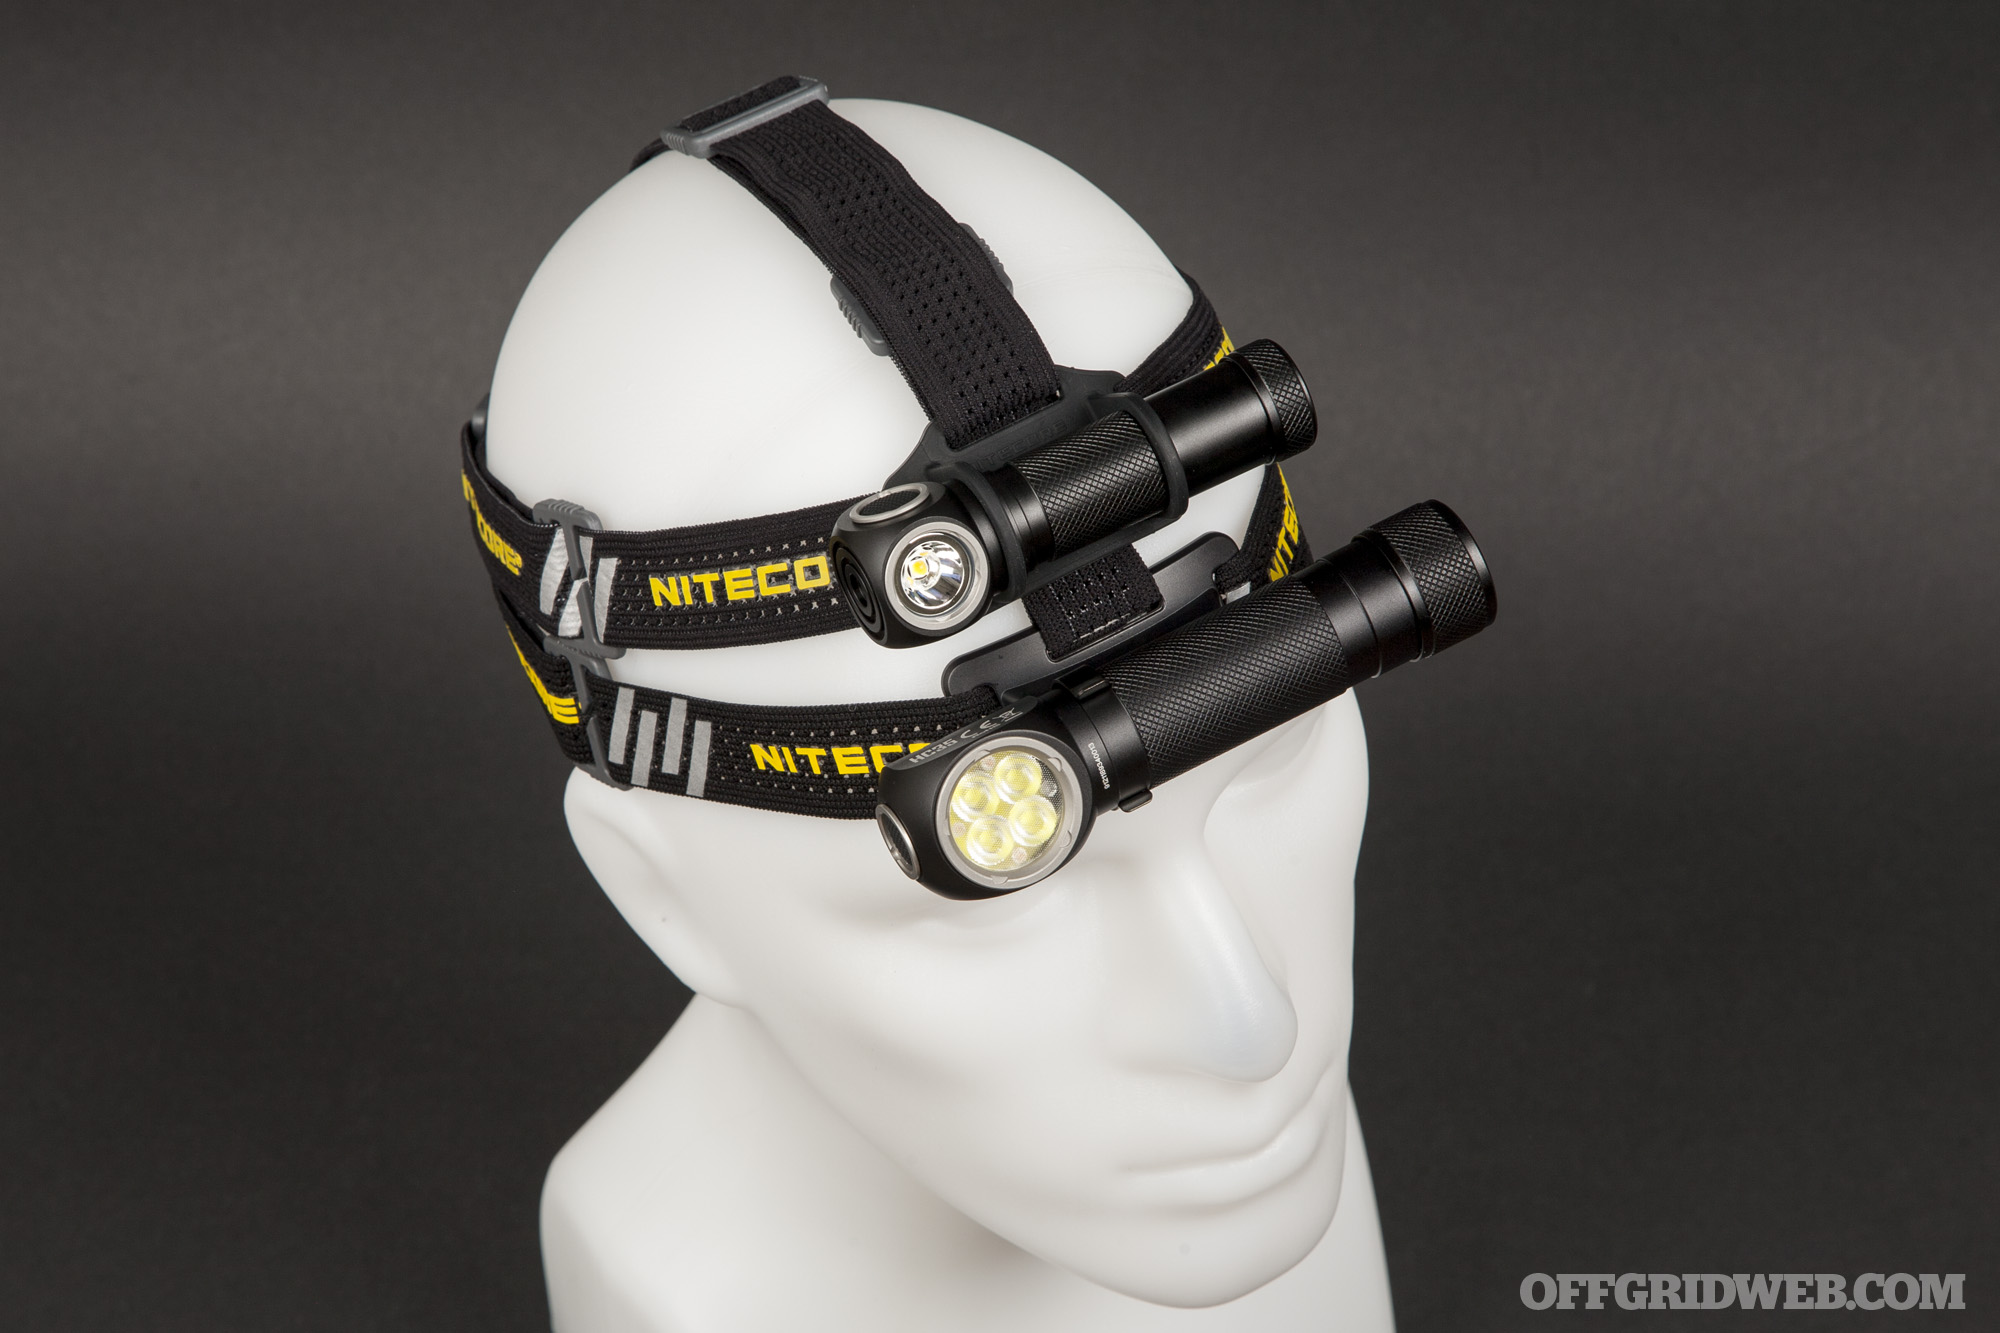
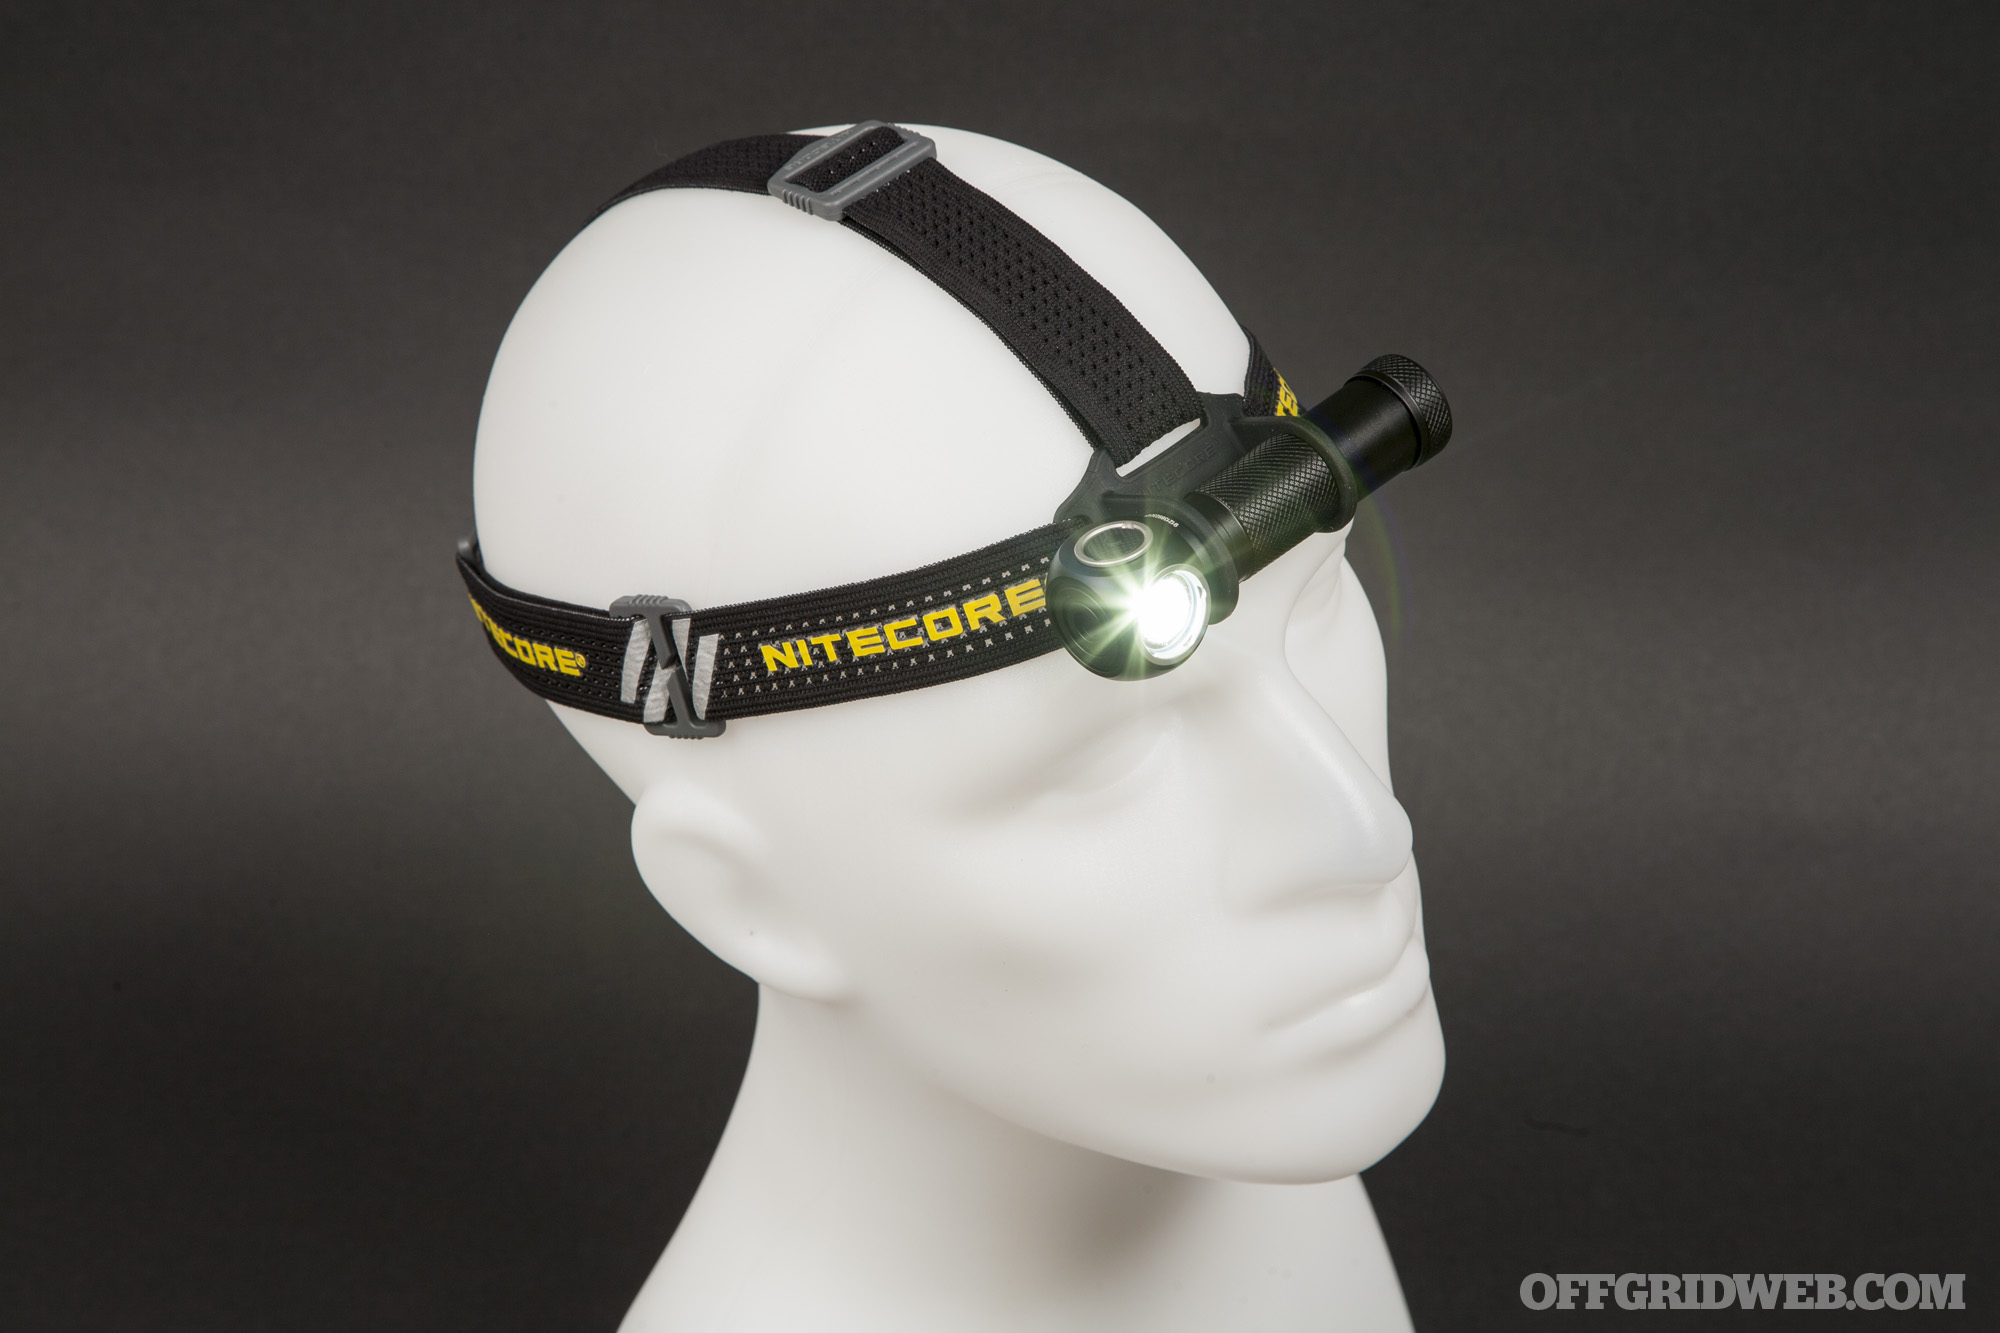
The Nitecore UT32 (top) and HC35 (bottom) are substantially different in size and purpose.
We’ve reviewed quite a few headlamps in the past, so we’re pretty well-acquainted with features we like and those we don’t. In our survival headlamp buyer’s guide in Issue 27, we gave our Top Pick award to the Nitecore HC65, so when we heard about two new models from that company, we were interested to try them out. The new Nitecore HC35 and UT32 occupy two different niches within the hands-free lighting market, so we’ll take a closer look at each headlamp below.
Nitecore HC35 Specs
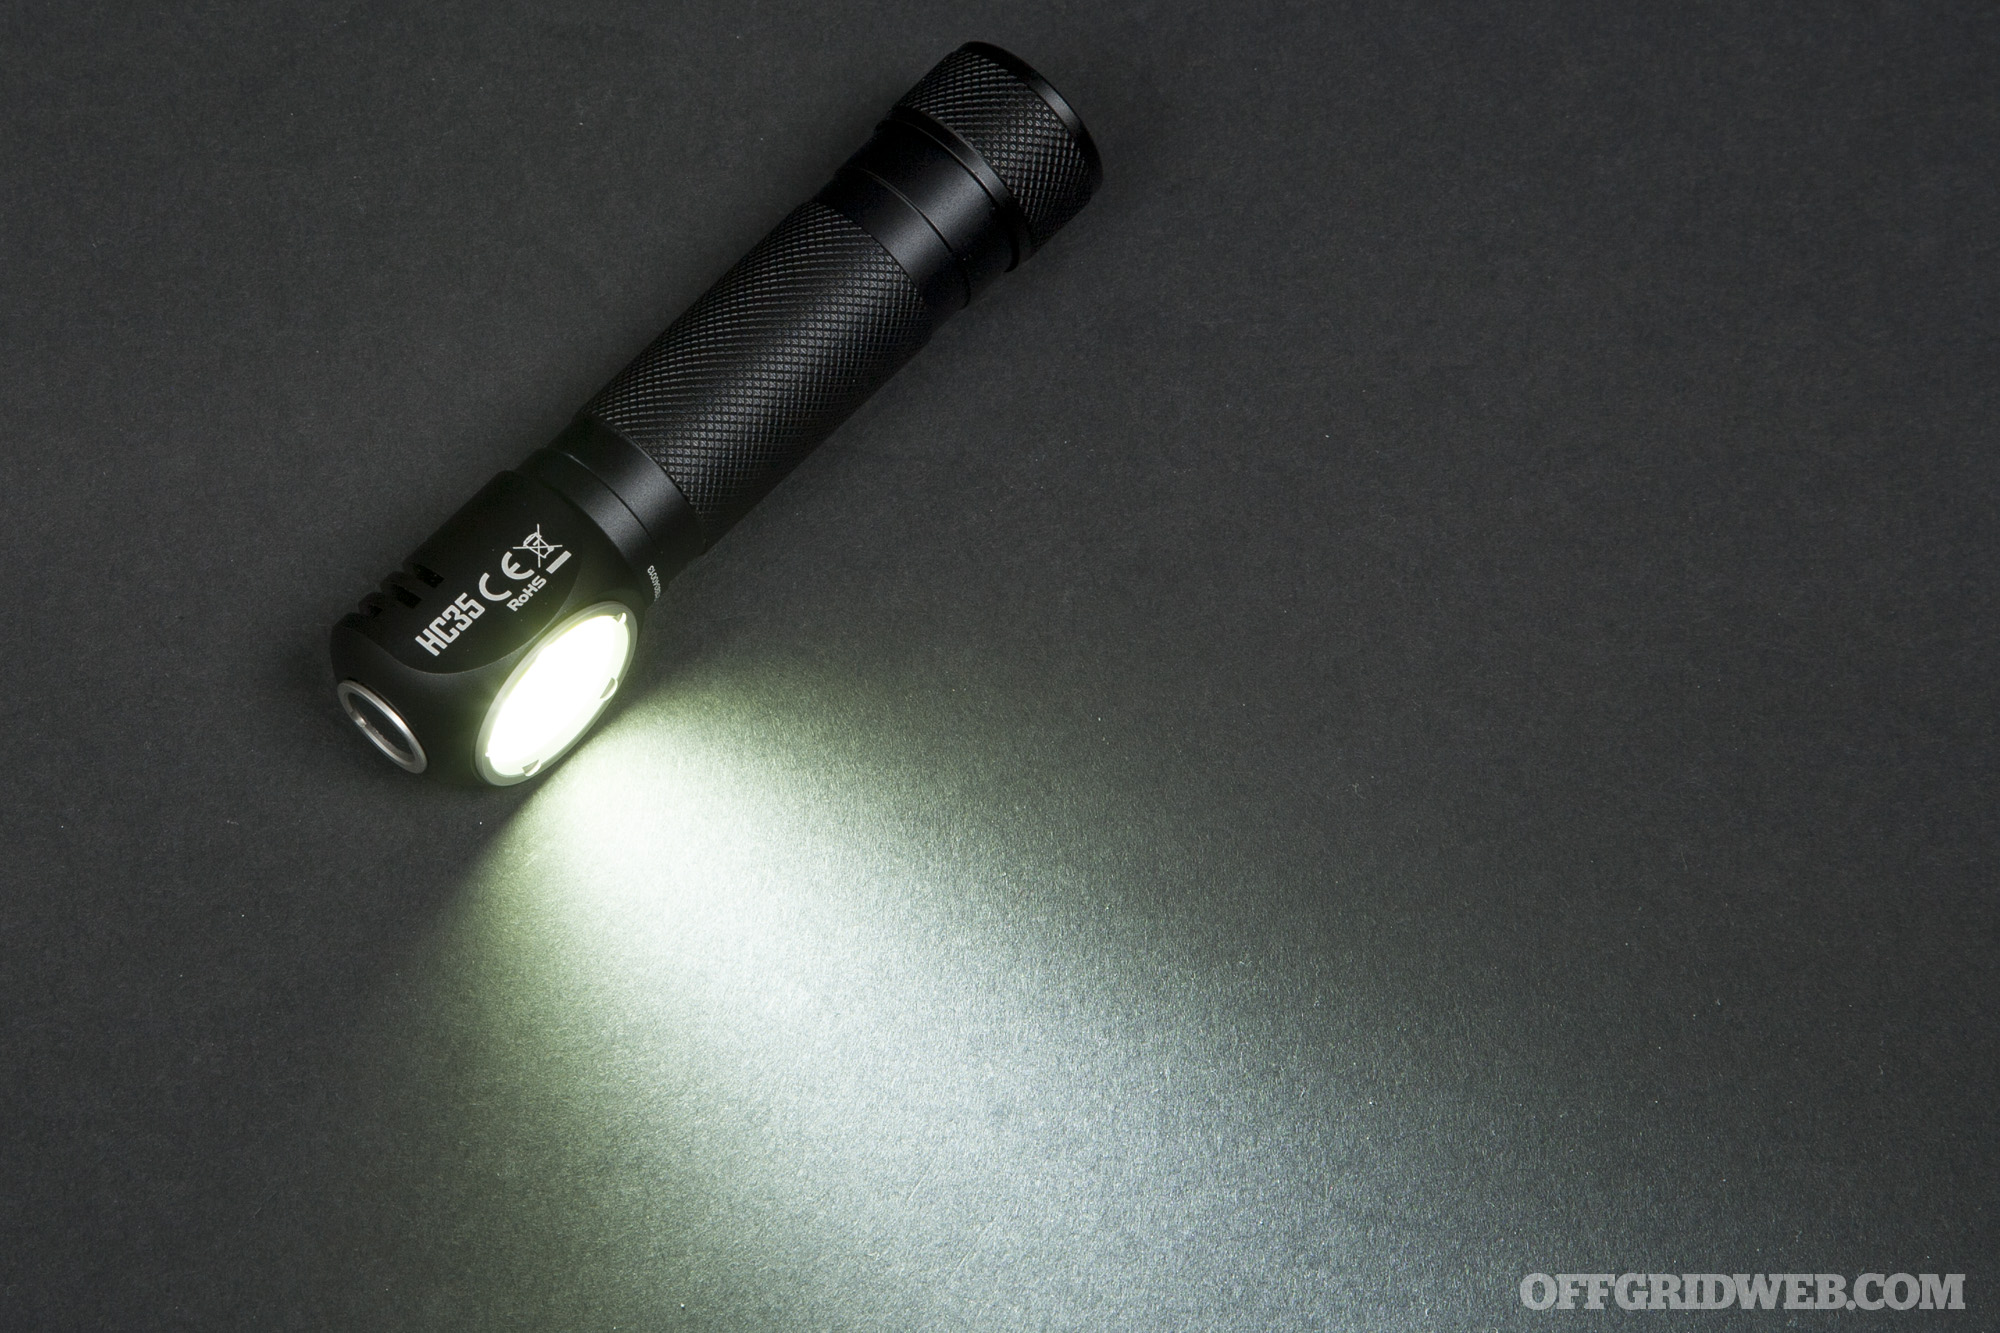
If maximum output is what you’re looking for, the Nitecore HC35 delivers. It can produce a staggering 2,700 lumens from four CREE XP-G3 S3 LEDs.
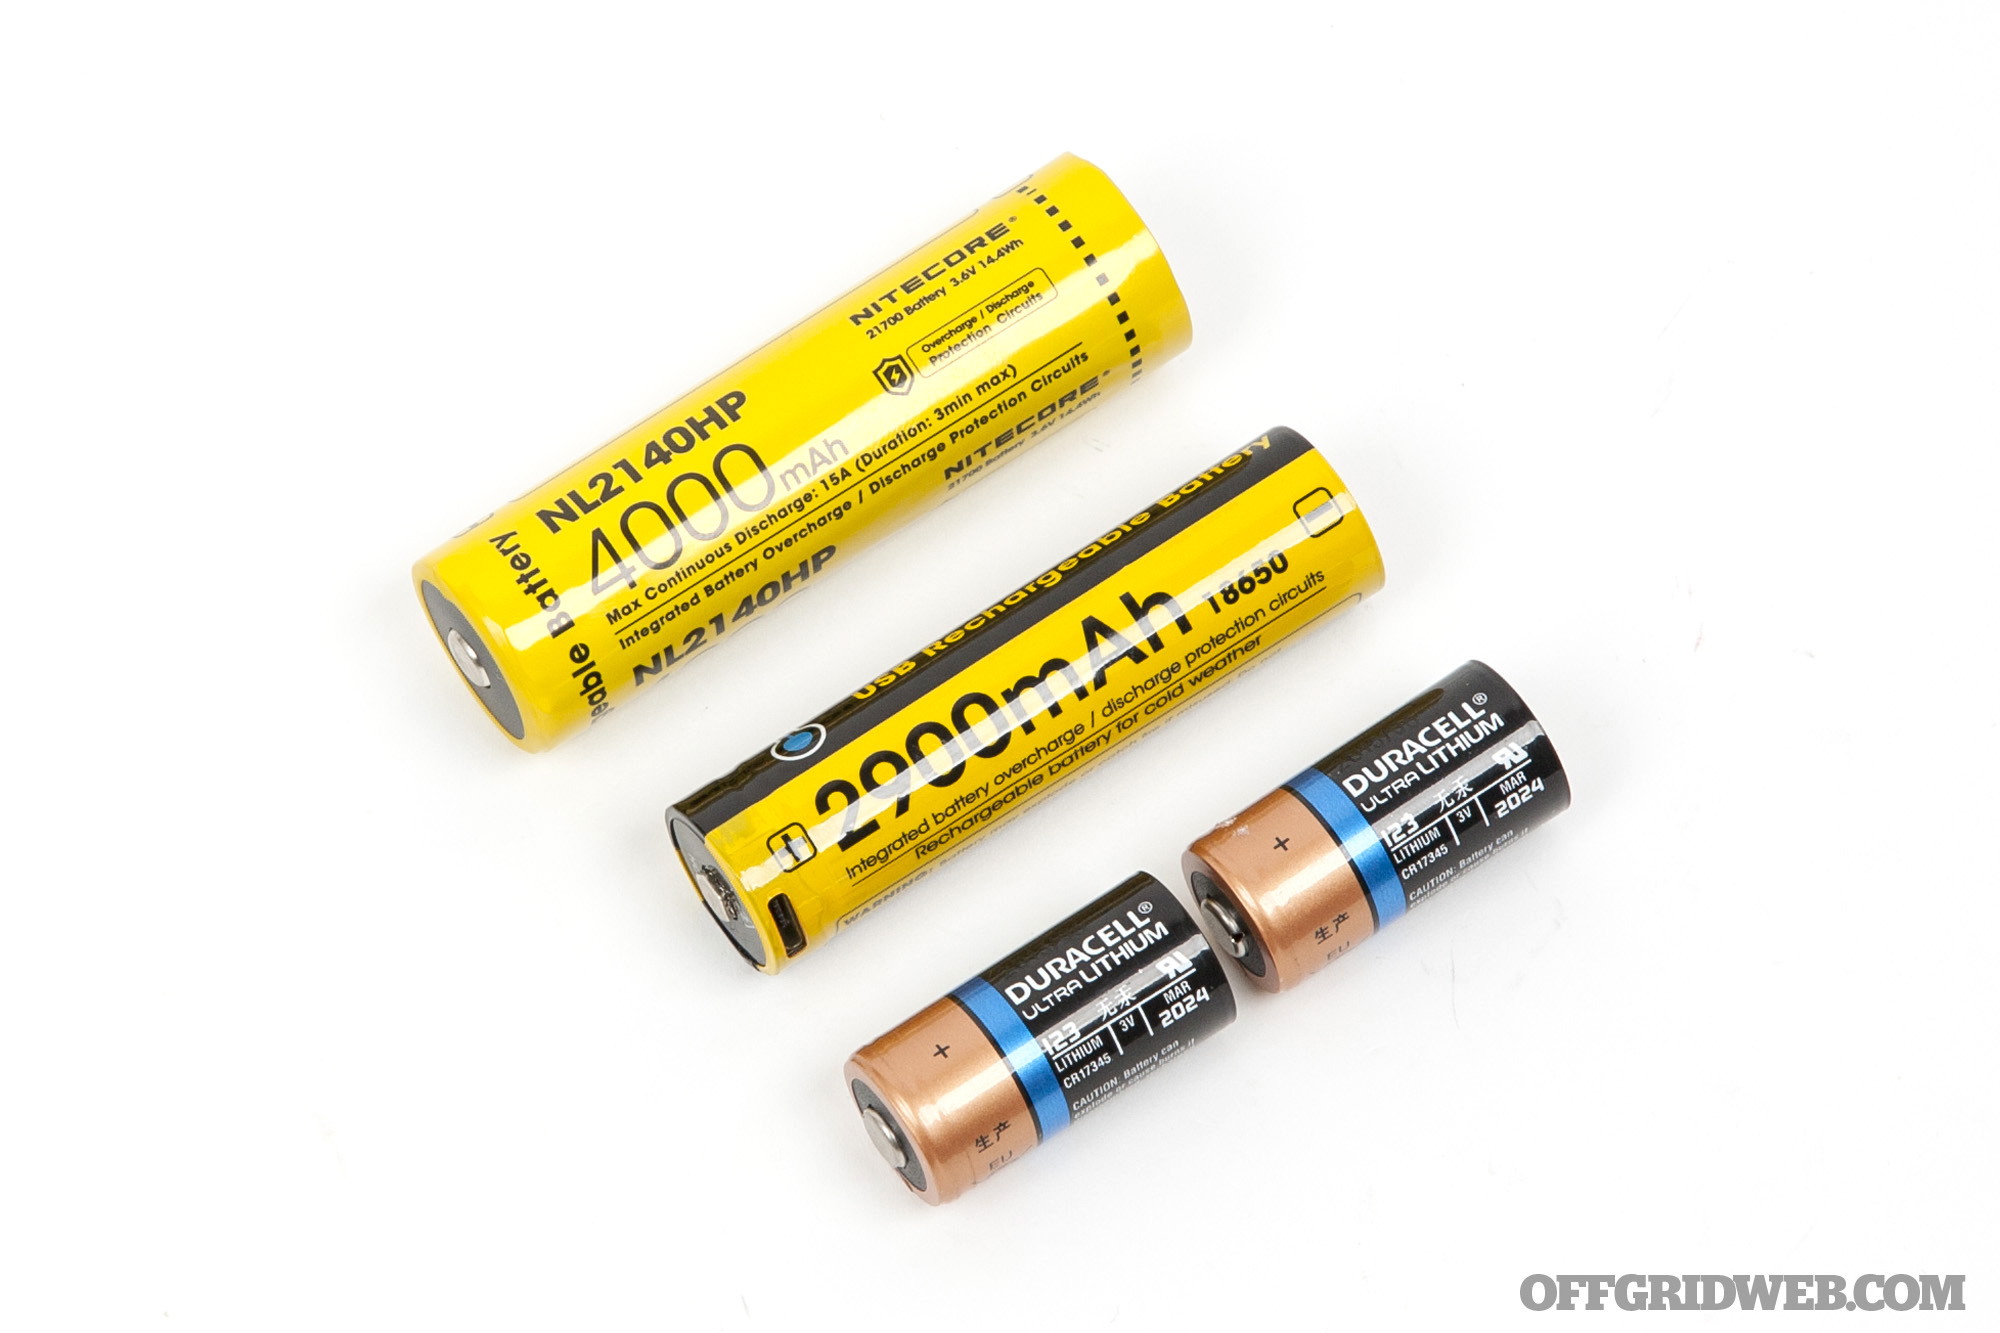
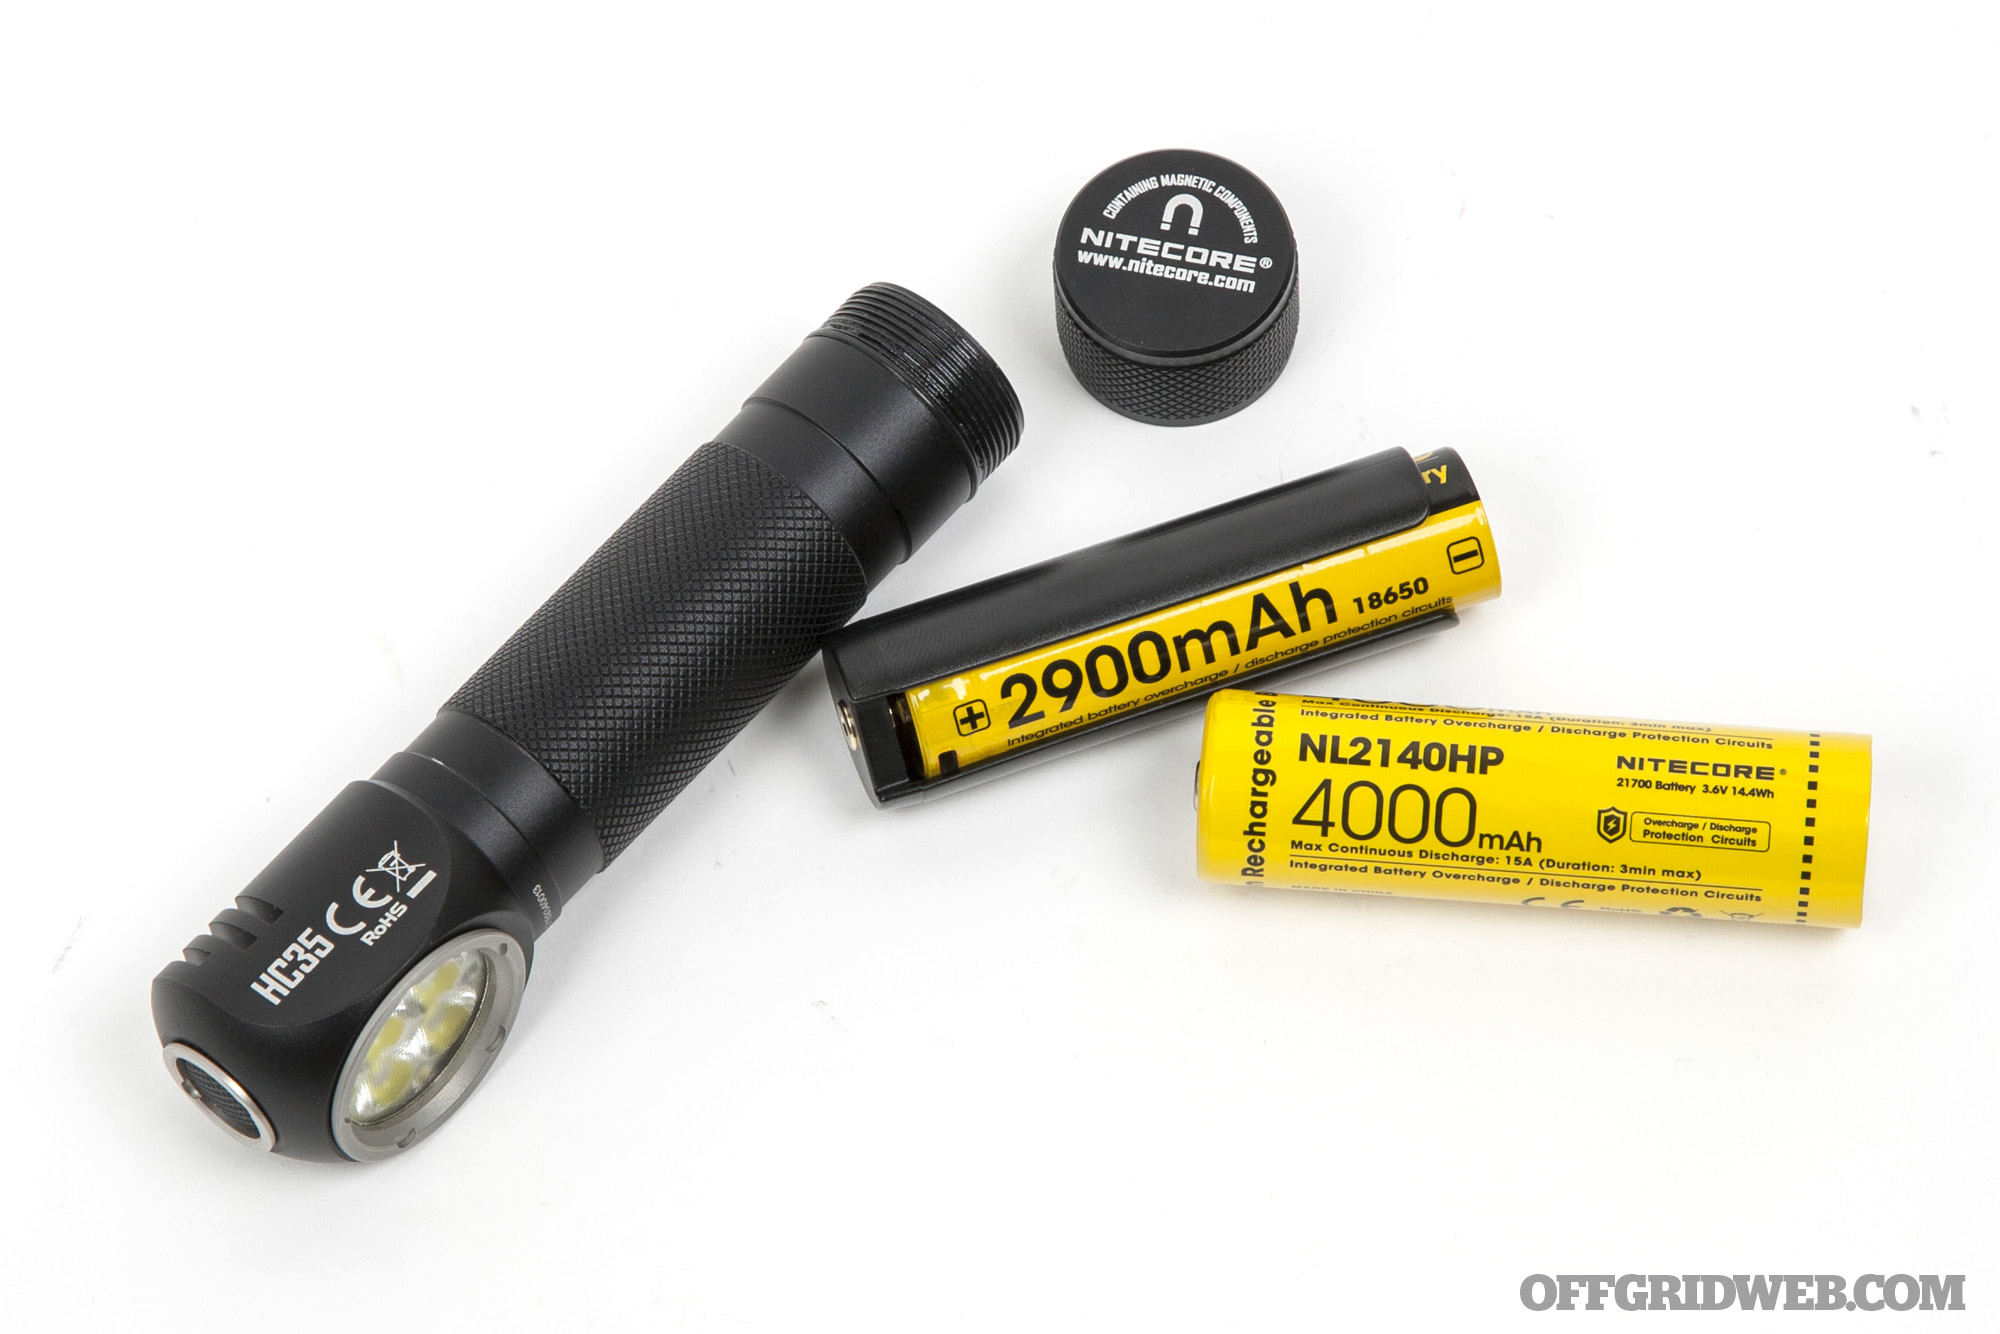
The HC35 is able to achieve this impressive output as a result of its power source, a large 21700 3.6V 4,000mAh lithium-ion battery (included). This battery is thicker than the 18650s or CR123s you’ll find in most flashlights, and offers continuous discharge of 15 amps for up to 3 minutes. All that juice means there’s enough power to push the LEDs to their limits.
A 21700 lithium-ion battery (top) is noticeably larger than an 18650 or two CR123s.
The 21700 battery is rechargeable via a micro-USB port built into the flashlight housing, protected behind a rubber dust cover. A blue LED under the power button flashes to indicate charge level once a battery is inserted or when the light is disconnected from a USB charger.
An adapter sleeve is included to allow the HC35 to accept 18650/CR123 batteries.
In a pinch, the light can be powered by a single 18650 or two CR123s. These batteries are slimmer, so they’ll need to be placed inside the included adapter sleeve. It’s also worth noting that the 2,700-lumen Turbo mode can only be used with a 21700 or high-discharge 18650 (8A or greater output); standard 18650s and CR123s will be limited to 800-lumen High output.
The HC35’s modes are as follows:
Turbo – 2,700 lumens / 45 minutes**
High – 800 lumens / 3 hours
Medium – 270 lumens / 8 hours 15 minutes
Low – 40 lumens / 52 hours
Ultralow – 1 lumen / 1,200 hours
Strobe – 2,700 lumens
Beacon – 2,700 lumens
SOS – 2,700 lumens
**According to the manual, this run time was achieved with the Advanced Temperature Regulation disabled. More on this later.
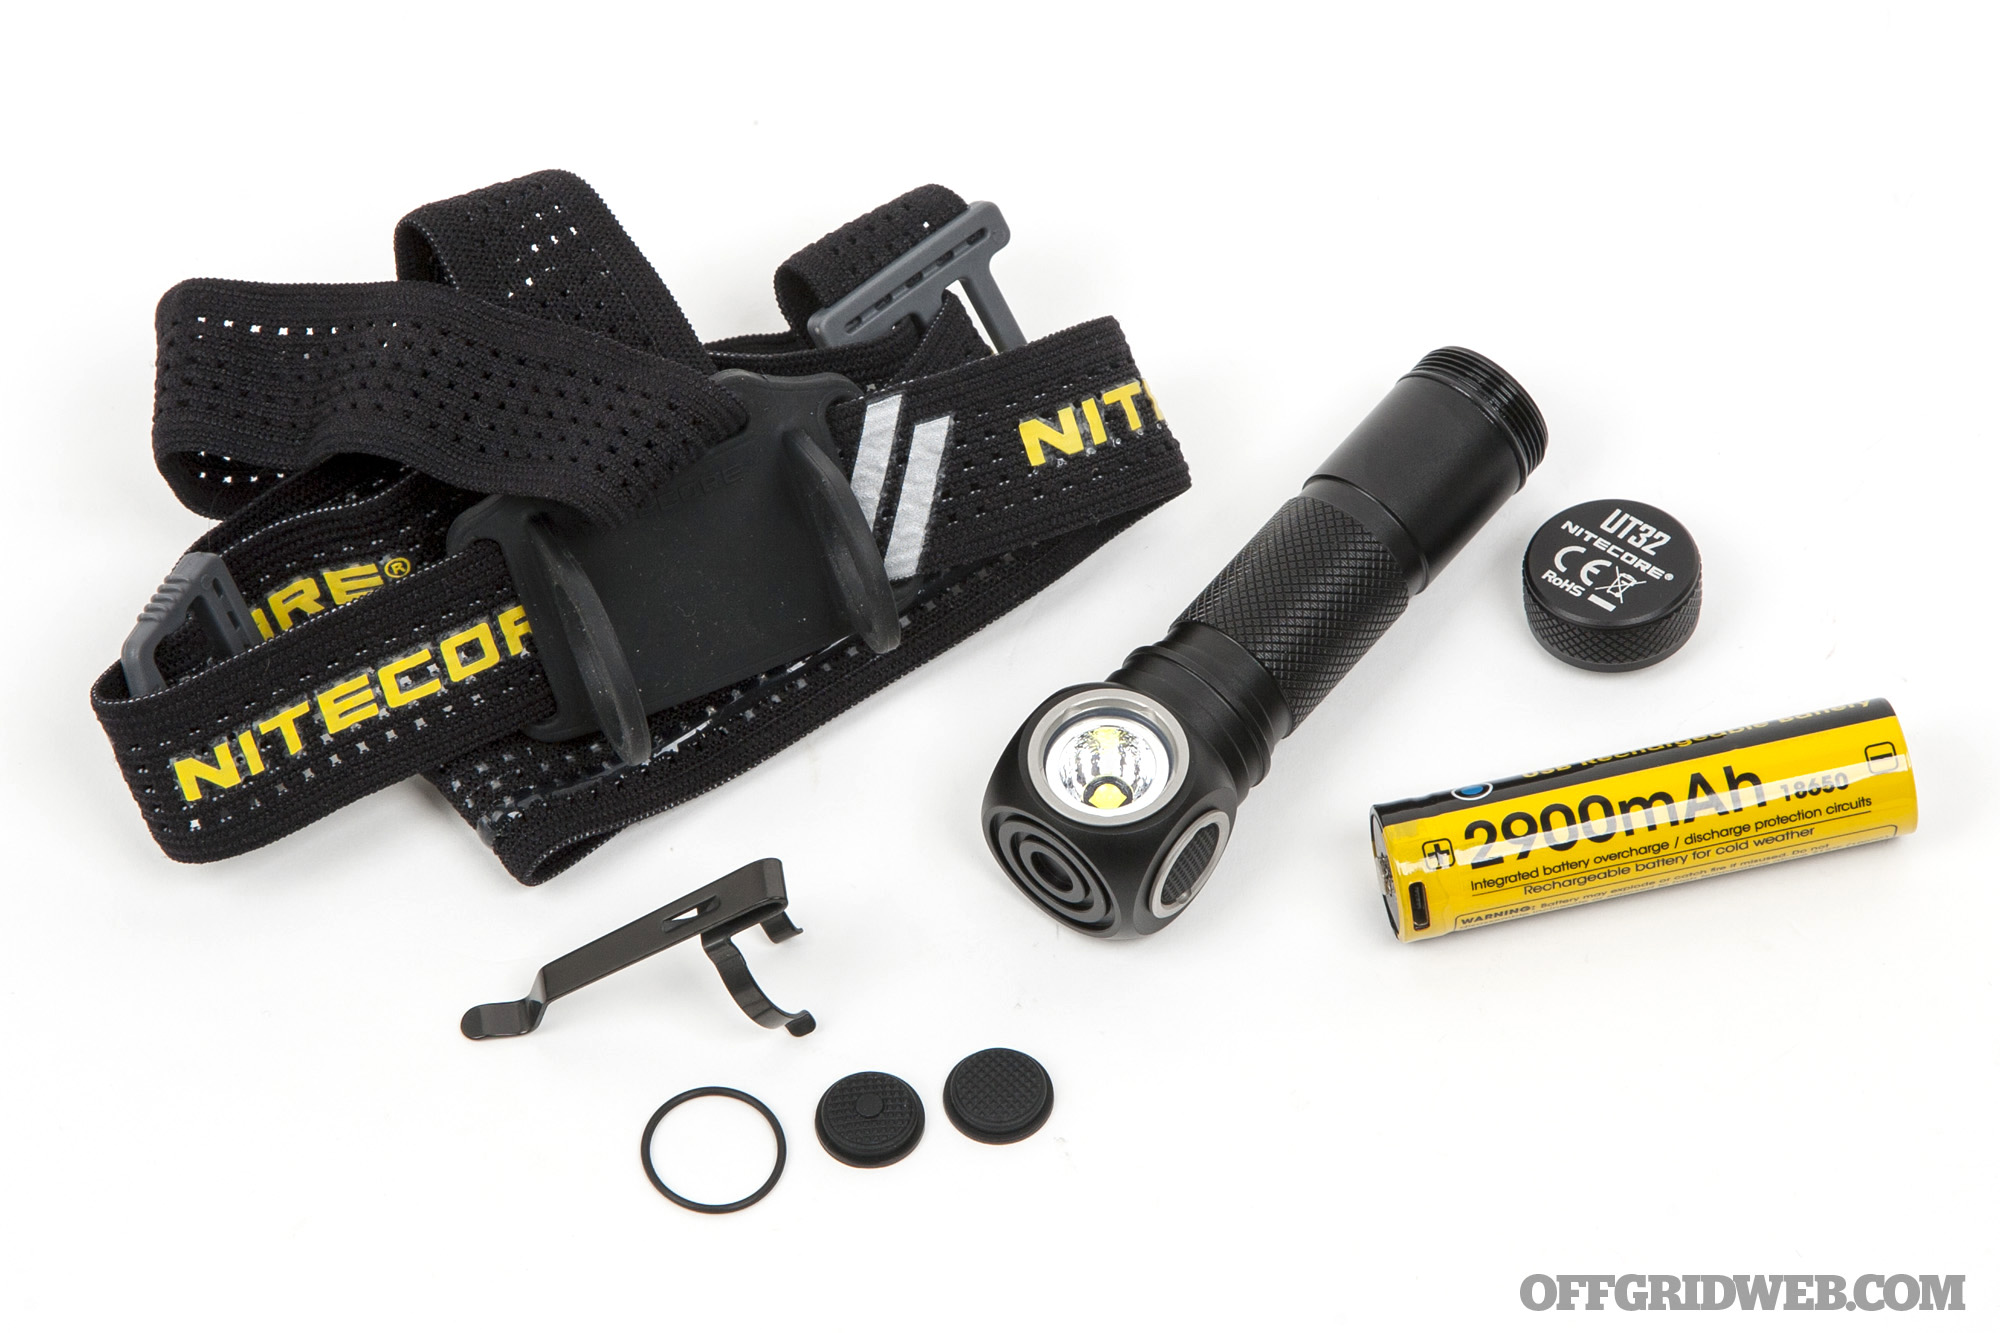
The light includes a 21700 battery, 18650/CR123 adapter sleeve, micro USB cable, reversible pocket clip, and head strap with mounting clip. This light is IP68 rated (waterproof/dustproof) and impact-resistant. MSRP is $100.
Our Impressions of the HC35
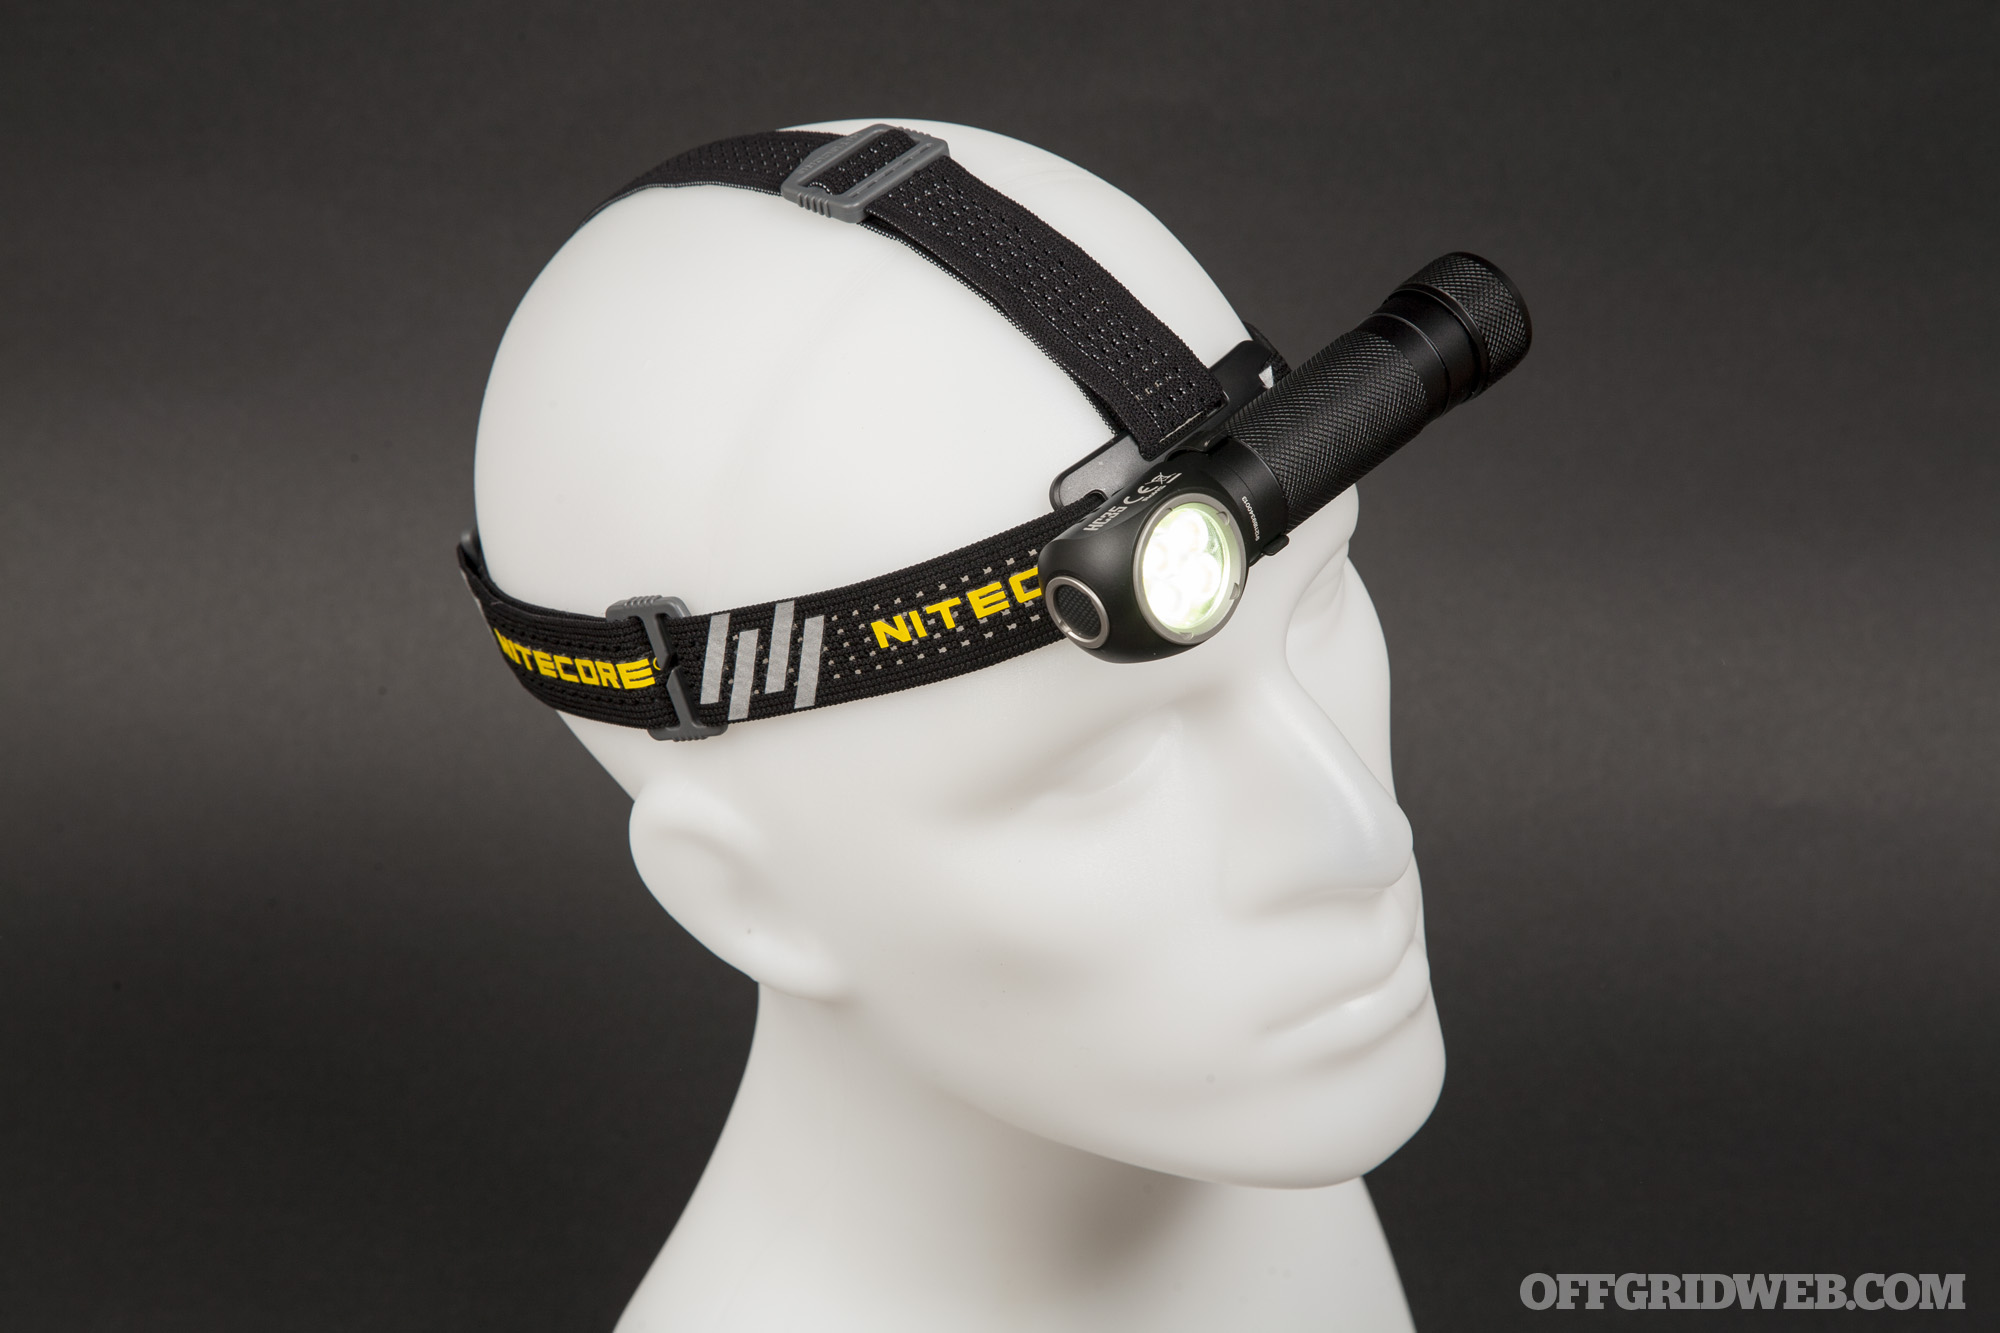
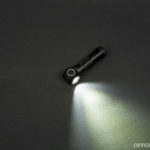
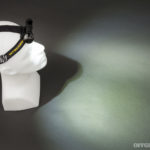
This is easily the brightest headlamp we’ve ever used — it’s nearly triple the output of the 1,000-lumen HC65 we previously reviewed. If this were focused into a tight spot beam, we’d say it’d be overkill for most tasks, but the frosted lens and quad-LED setup of the HC35 spreads the light into an extremely broad flood beam. That makes it quite useful for hiking and other medium-range outdoor tasks.
However, there’s a catch to this massive output: it generates a lot of heat. In order to avoid damage to the LEDs and housing, Nitecore added cooling fins to the head and built in Advanced Temperature Regulation (ATR) programming. ATR regulates the light’s output “according to working conditions and the ambient environment” — in other words, it steps down brightness to prevent overheating. That’s not necessarily a bad thing, because most high-output LED flashlights have similar safeguards built in, but our testing of this feature left us surprised and confused.
We tested this by activating the 2,700-lumen Turbo mode in a 68°F (20°C) room. It took exactly 30 seconds for the light’s output to drop from the full 2,700 lumens. We immediately switched back to Turbo mode to see if brightness would step down even faster as heat built up, but it reduced output at the 30-second mark again the second time. A third attempt produced the same result — 30 seconds every time. The head didn’t feel hot or even significantly warm after this testing.
So, although the light can produce 2,700 lumens, we were unable to force it to do so for even one full minute. The manual’s fine print states that the 45-minute advertised run time in Turbo mode was achieved temperature regulation disabled (!). As far as we can tell, there’s no way to disable ATR on the production version of the flashlight. This is disappointing, since the light’s biggest selling point comes with such a huge caveat.
That said, we did appreciate the light’s multiple mounting options, including a magnetic tail cap and a reversible pocket clip that can be used to mount it on a belt, backpack strap, or shirt pocket. The headband is comfortable but the HC35 is quite heavy for a headlamp, so this definitely wouldn’t be our first choice for night hiking or extended active wear. We feel this light is best suited to situations where a wide swath of bright light is necessary for short periods — use at a campsite or during a power outage, for example.
The HC35’s quad-LED array and diffuser lens produce a very wide flood beam.
Pros:
Immensely bright in Turbo mode (for 30 seconds)
Wide beam is useful for close- to medium-range tasks
Large 21700 battery offers long runtime in High and Medium modes, with plenty of output
Cons:
2,700-lumen max output almost useless in the real world as a result of its 30-second limiter
Large housing and heavy battery feel ungainly on the head during high-intensity activities
Its size and bulk are doubly annoying when you realize that this is effectively an 800-lumen headlamp with a brief 2,700-lumen Turbo boost. There are many smaller and more comfortable lights that can produce 800 to 1,000 lumens, as long as you can do without Turbo mode.
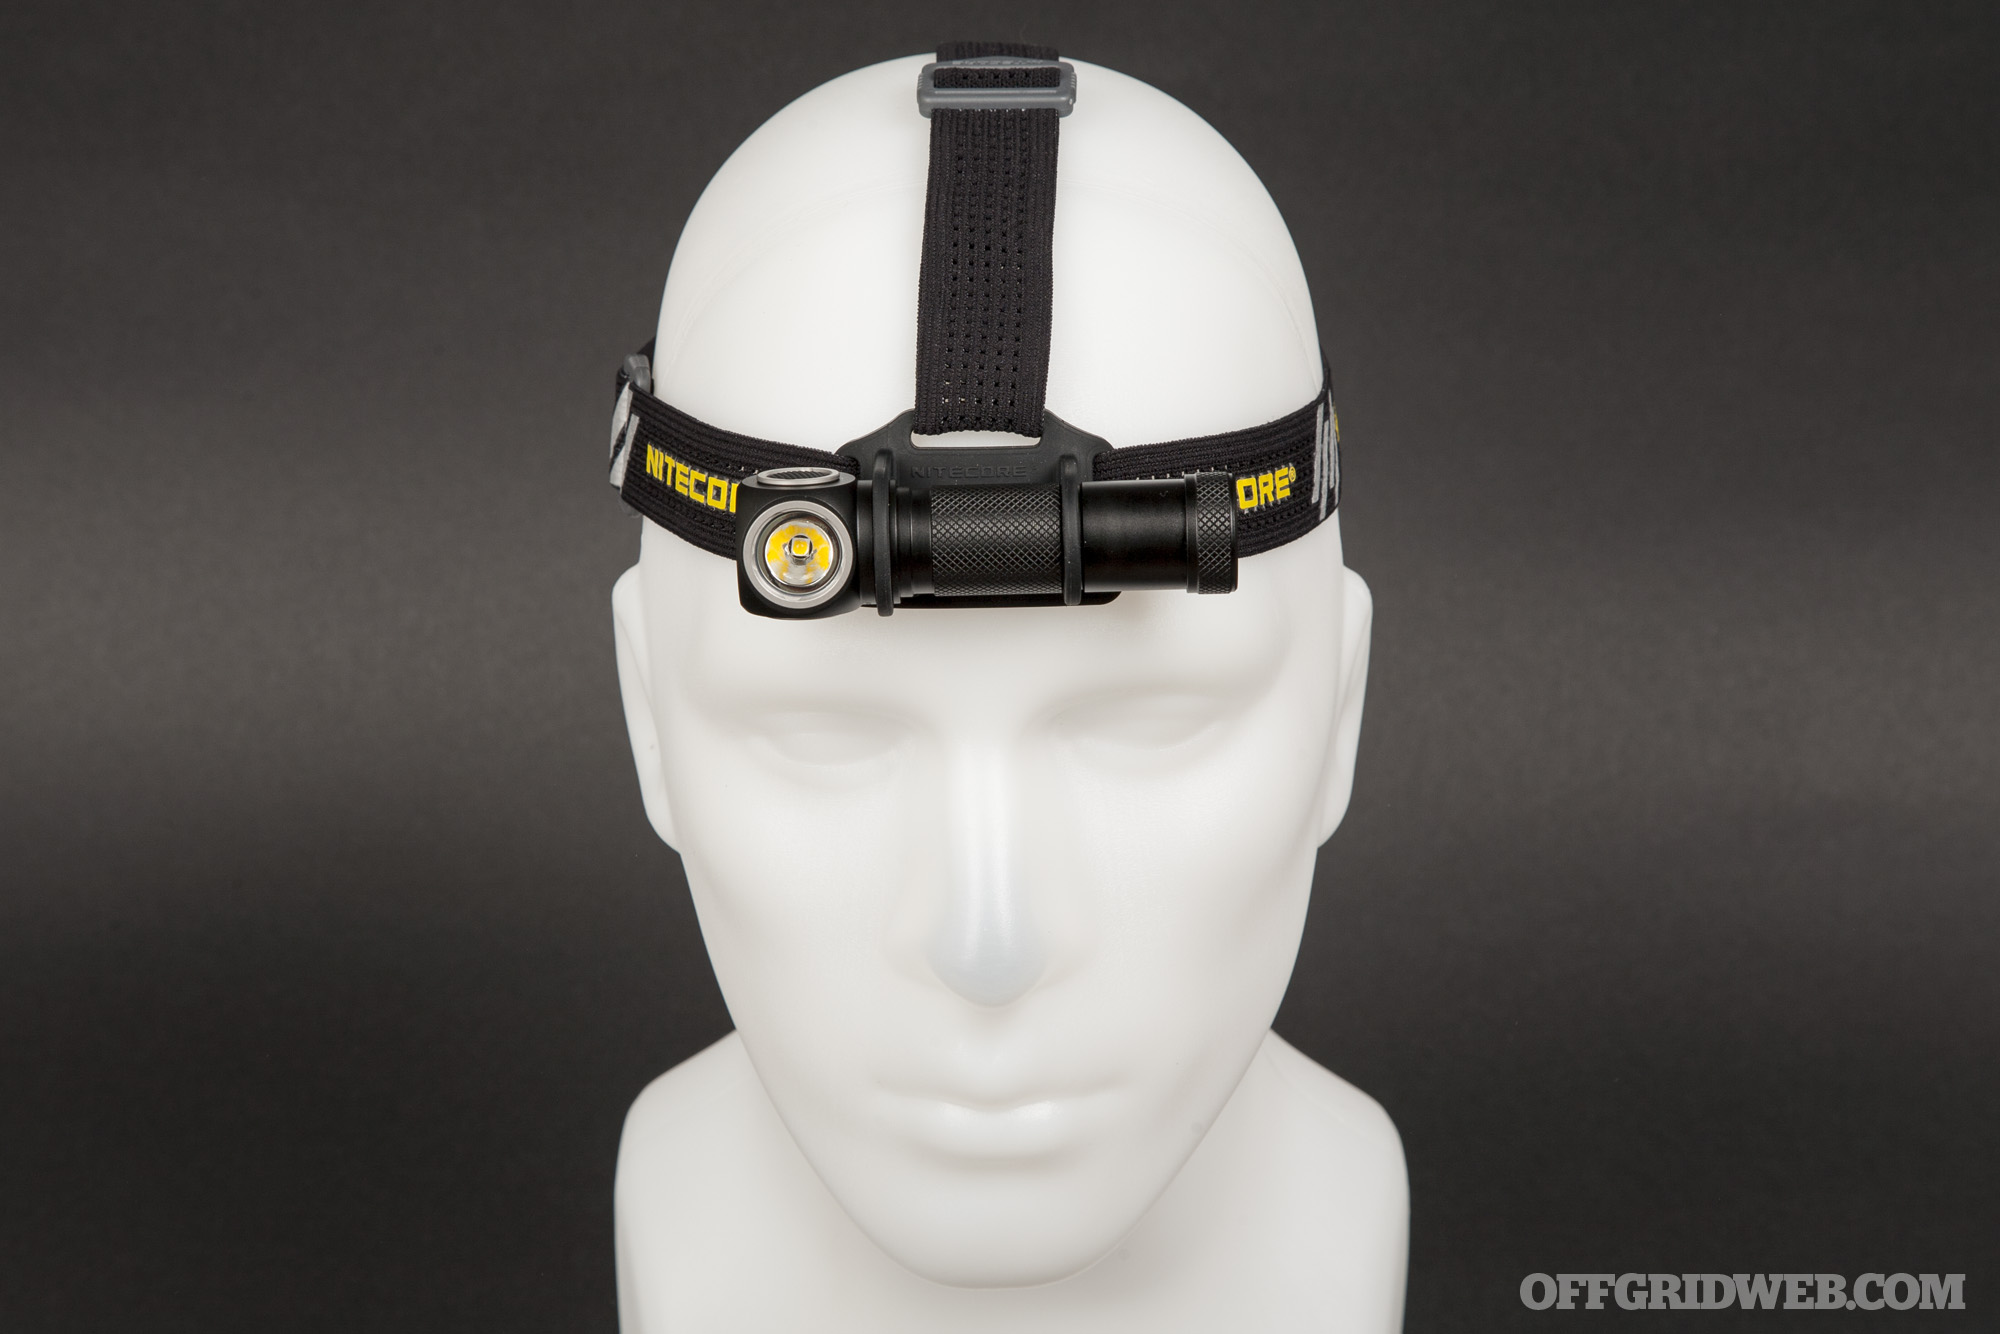
Nitecore UT32 Specs
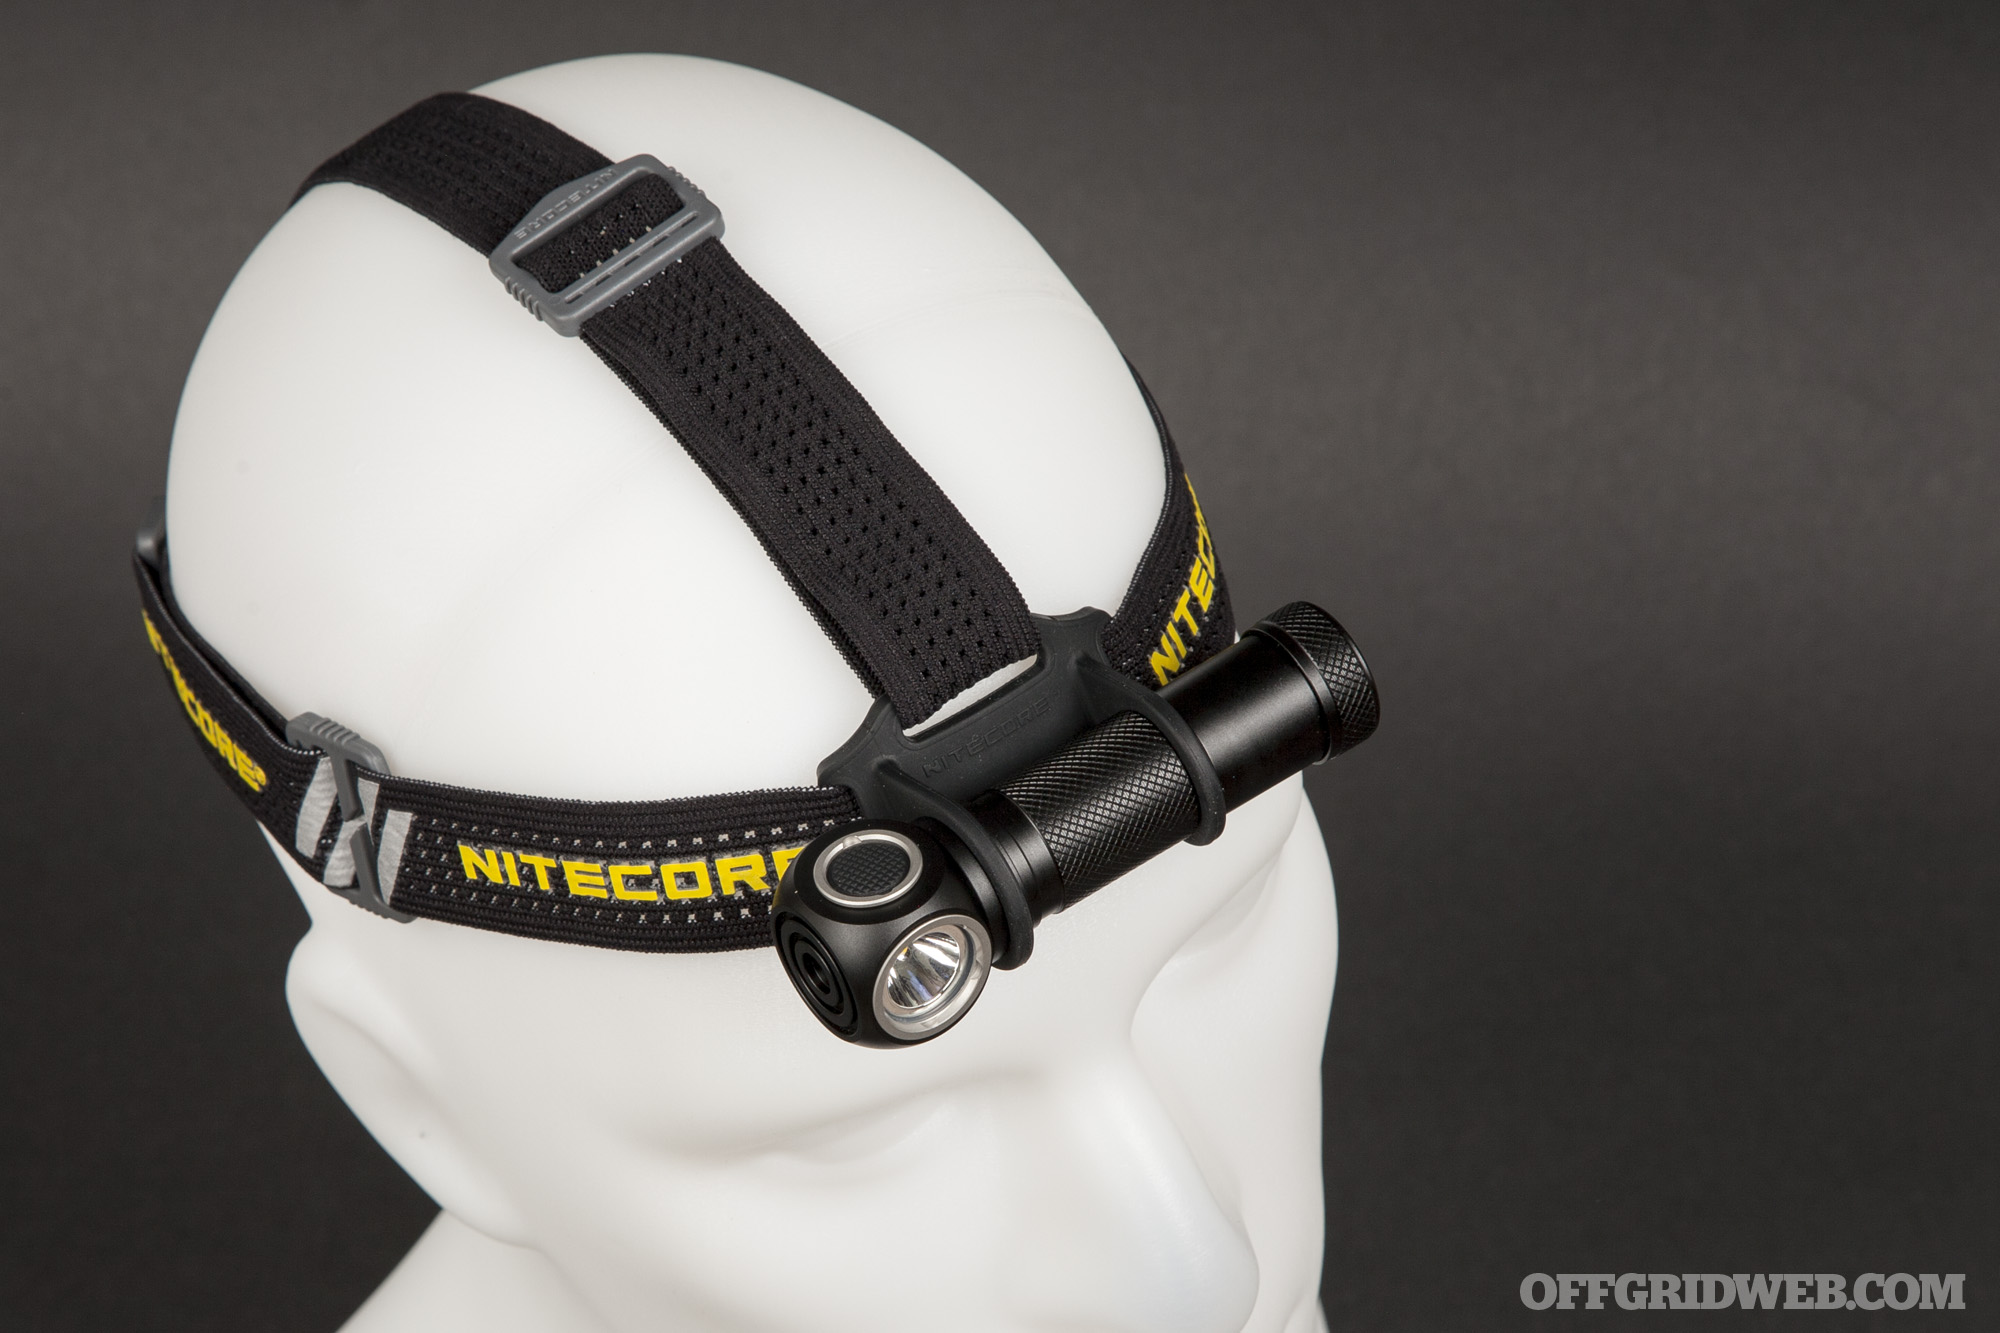
The UT32 occupies the other end of the headlamp spectrum from the bulky HC35, having been specifically designed for trail runners. Nitecore calls it an “Ultra Compact Coaxial Dual-Output Headlamp” — the first bit of that name is pretty straightforward, but the “Coaxial Dual-Output” portion intrigued us. It turns out that the UT32’s head is split in half, with each side containing a separate LED and reflector assembly.
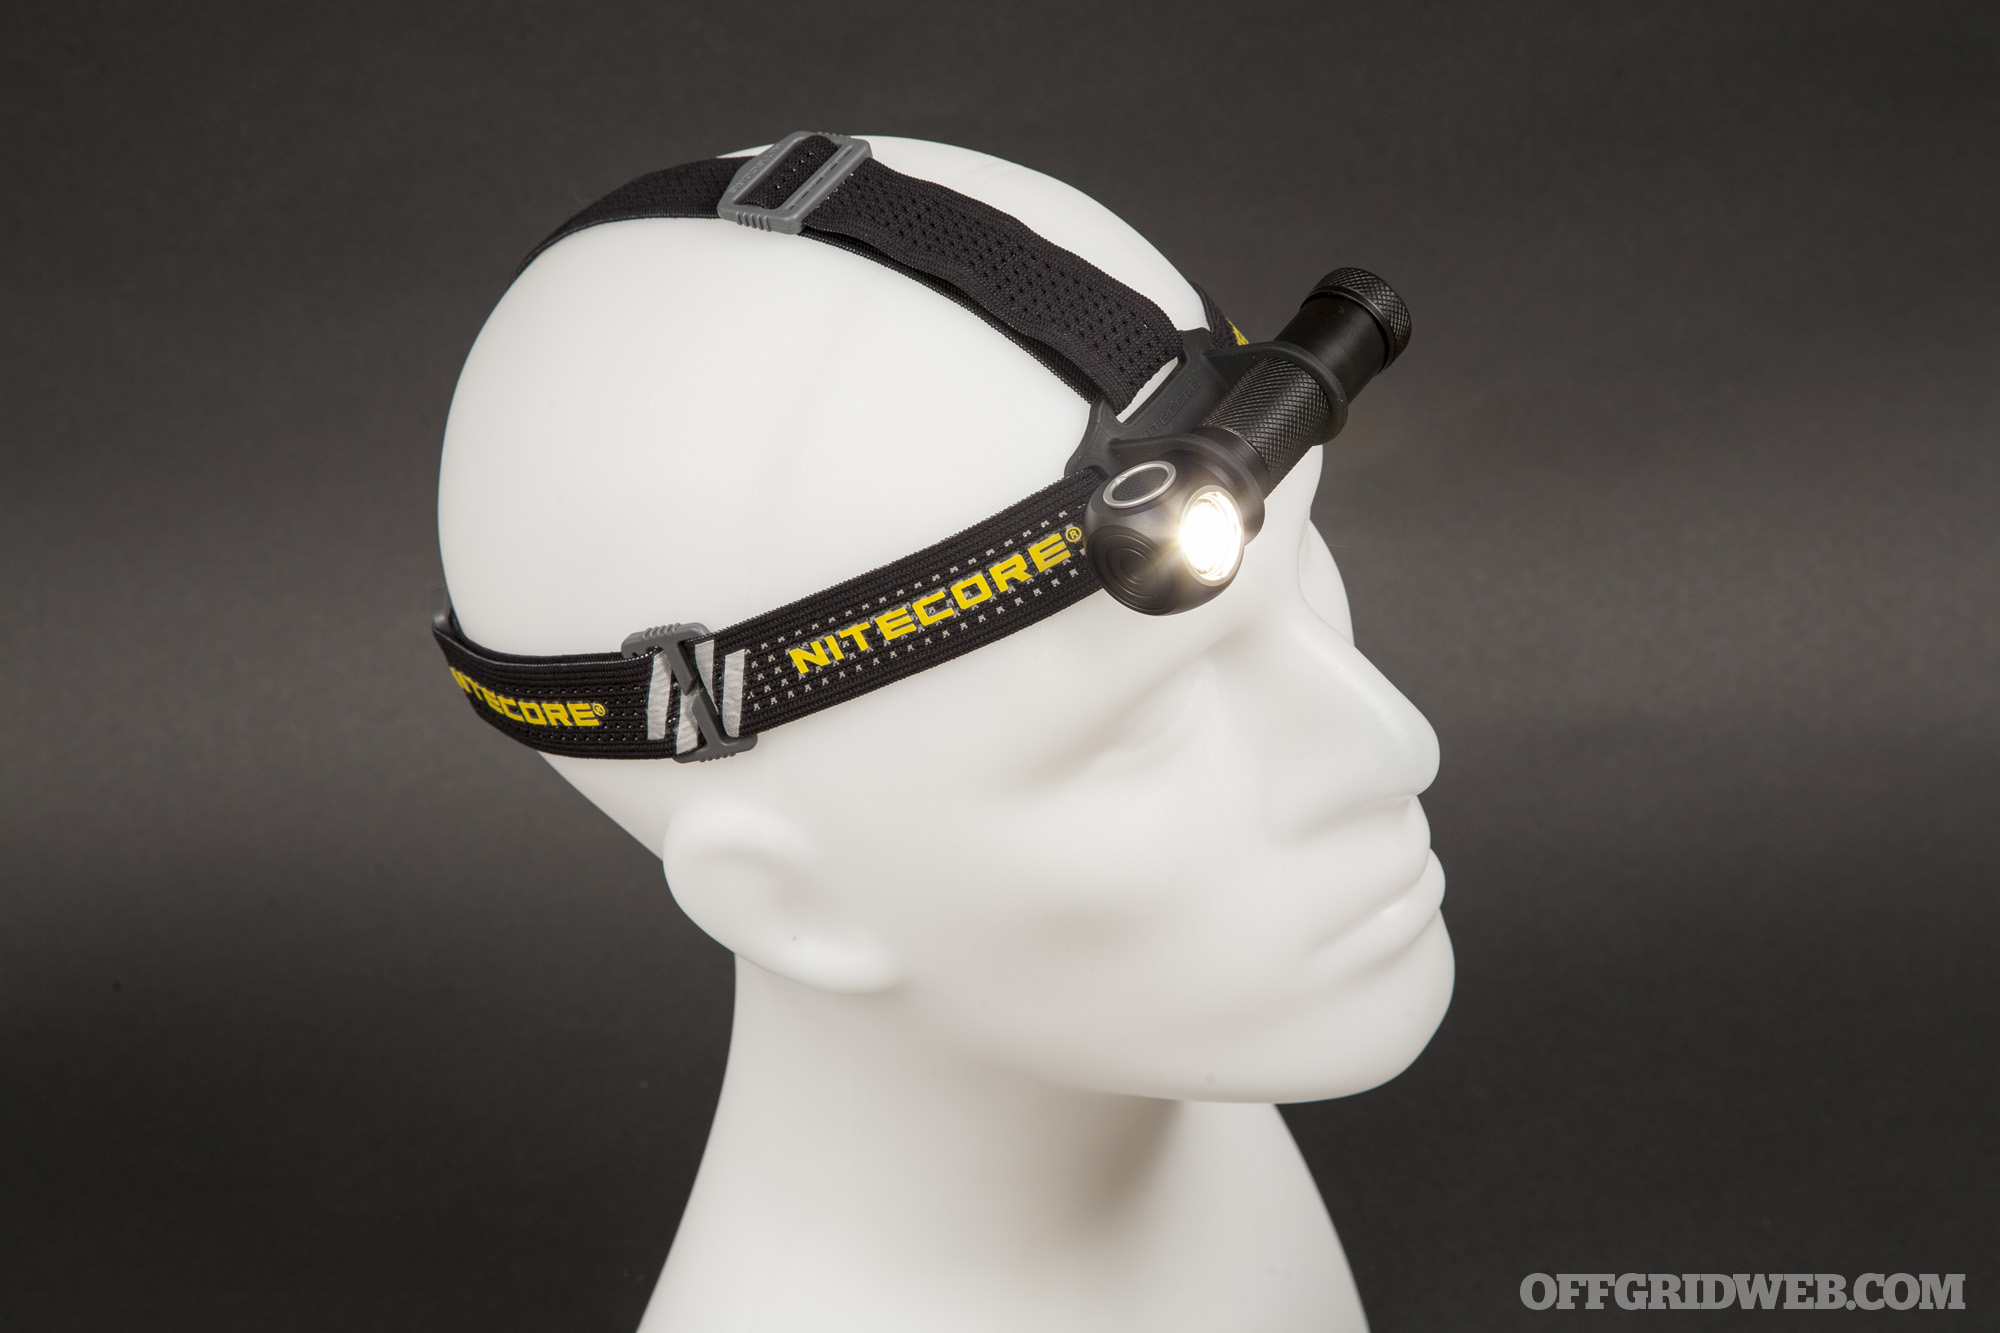
The first side of the Nitecore UT32 contains an 1,100-lumen TrueVision flood beam powered by a CREE XP-L2 V6 LED. This output offers a 5,700K color temperature, which is typically referred to as cool white. The reflector is designed to spread this light over a 100-degree area, mimicking the typical human field of view.
Above: The primary cool white and auxilary warm white LEDs are on opposing sides of the UT32’s head.
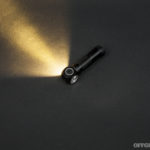
On the flipside of the UT32, there’s an auxiliary 920-lumen warm white spot beam. Nitecore says that scientific studies indicate this 3,000K color offers higher luminance contrast in low-visibility weather conditions — in other words, it does a better job cutting through fog and rain. Maximum throw with this warm white beam is 117 meters.
The UT32 is controlled by two buttons. Pressing both simultaneously turns on the light; pressing button A (the one with a raised bump) controls the cool flood beam; pressing button B (no bump) controls the warm spot beam. Each has the following modes:
High – 410 lumens / 3 hours 45 minutes with flood beam; 370 lumens / 3 hours 45 minutes with flood beam
Medium – 200 lumens / 8 hours with flood beam; 170 lumens / 8 hours with spot beam
Low – 70 lumens / 18 hours with flood beam; 60 lumens / 18 hours with spot beam
Beacon – 1,100 lumens with flood beam; 920 lumens with spot beam
SOS – 1,100 lumens with flood beam; 920 lumens with spot beam
**According to the manual, this run time was achieved “with fan cooling, as a simulation of the trail running environment.”
The UT32 includes a headband with rubber mounting bracket, a pocket clip, and spare O-ring and switch covers. You’ll need to supply a power source, either an 18650 or a pair of CR123s. Nitecore kindly sent us one of its own 2,900mAh Low Temperature High Performance 18650 batteries, which includes a built-in micro-USB charge port. Like the HC35 and most other Nitecore lights, this light is IP68 waterproof/dustproof and impact-resistant. MSRP is $75.
Our Impressions of the UT32
In comparison to the HC35, the UT32 feels light and maneuverable. It weighs 2.9 ounces compared to the HC35’s 4.9 ounces, and Nitecore says its mount was designed to maintain an optimized center of gravity while running.
The stretchy headband was also clearly designed with runners in mind. It features breathable perforations and a silicone band to prevent sweat from running down into your eyes. We also appreciate the addition of reflective strips on the outside of the band. Nitecore’s site says these strips “effectively guarantee the safety of the wearer at night” — that seems a bit optimistic, but we can see how they’d improve your visibility on a dimly-lit road or trail.
As for the Coaxial Dual-Output design, we found ourselves using the cool white flood beam most of the time. It’s plenty bright for jogging, hiking, or just walking around a dark campsite. The spot beam has much better throw, but we’d call its 3,000K color a “pale yellow” more than a “warm white.” It does seem to cut through foggy or dusty conditions better than the white color, but not to the degree that we feel it’s a feature we couldn’t live without.
Frankly, we prefer a more traditional dual-output headlamp design with spot and flood LEDs on the same side (the Nitecore HC65 is a good example). It’s simpler to use and nearly as effective, without the complexity of two activation buttons, two opposing reflectors, and a housing that must be rotated depending on the light that’s in use. Still, for those who frequently run or hike in foggy or rainy conditions, the UT32 is a good option.
Pros:
An appealing choice for runners or hikers who need a long-lasting light source
Cool flood beam is broad enough for use as an area light, but bright enough to use in wide-open spaces
Warm spot beam cuts through low-visibility conditions, and nicely complements the flood beam’s pattern
Cons:
3,000K light has one purpose — to cut through rain, snow, or fog. If you’re not frequently running in these adverse conditions, you’ll probably use the flood beam most of the time, in which case the second reflector and LED only serve to add complexity and weight.
With its 18650 battery, this setup is better-suited to long treks where runtime is a concern. For short jogs or casual early-morning hikes, an ultralight headlamp such as the Nitecore HA23, BioLite Headlamp 330, or Streamlight Bandit Pro might be preferable.
For more information on the Nitecore HC35 and UT32, go to Nitecore.com.
If you’re setting up a gun for home defense or emergency use in an indoor environment, adding a suppressor is a great idea. Let’s say you’re awoken in the middle of the night and have to go investigate a possible intruder. You may not have time to put on ear protection, but a suppressed gun can save your hearing and maintain your situational awareness in the event that you’re forced to shoot. On the other hand, the blast from a bare muzzle in a small room might leave you dazed and disoriented. KelTec had this in mind when it developed the new Sub2000 CQB, which comes with an integral suppressor.
Those who know the Sub2000 are no doubt familiar with its folding forend. It’s useful for transporting and storing the gun, but it posed a problem for mounting an integrally-suppressed barrel that required more space. KelTec’s solution was to allow the Sub2000 CQB’s barrel to unlock and rotate before folding. This design also allows for an optic to be mounted permanently on the top rail without interfering with the folding mechanism.
The integral suppressor is said to be user-serviceable, so the baffles can be removed and cleaned. MSRP will be $995 for the standard Sub2000 CQB, but it may also be offered as a package with an optic, light, and laser for approximately $1400. For more information, go to KelTecWeapons.com. And for more videos on new guns and gear, go to RECOILweb.com.
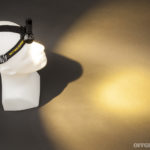
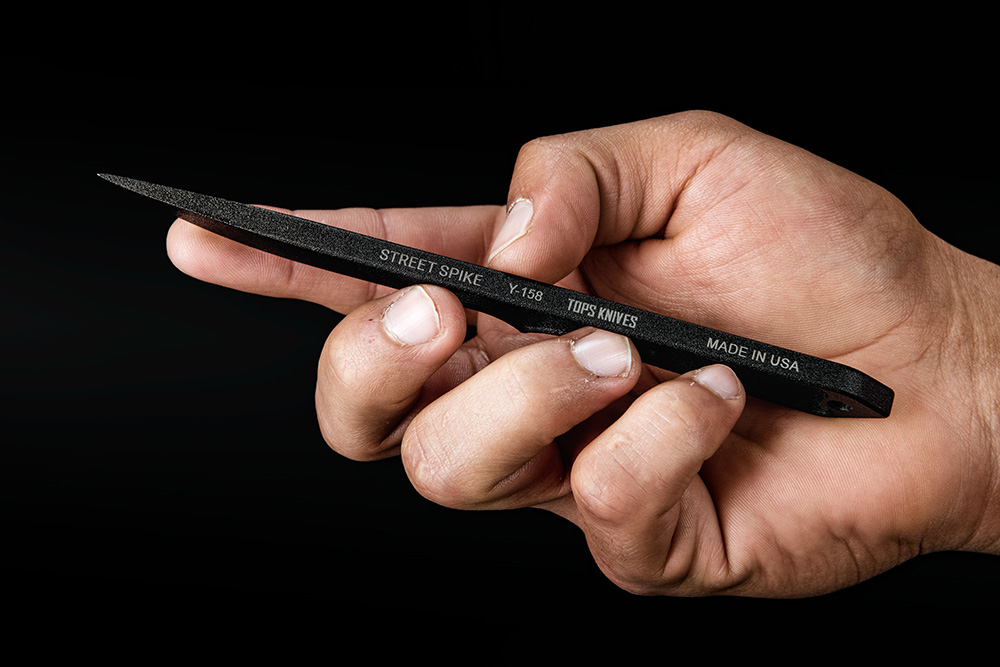
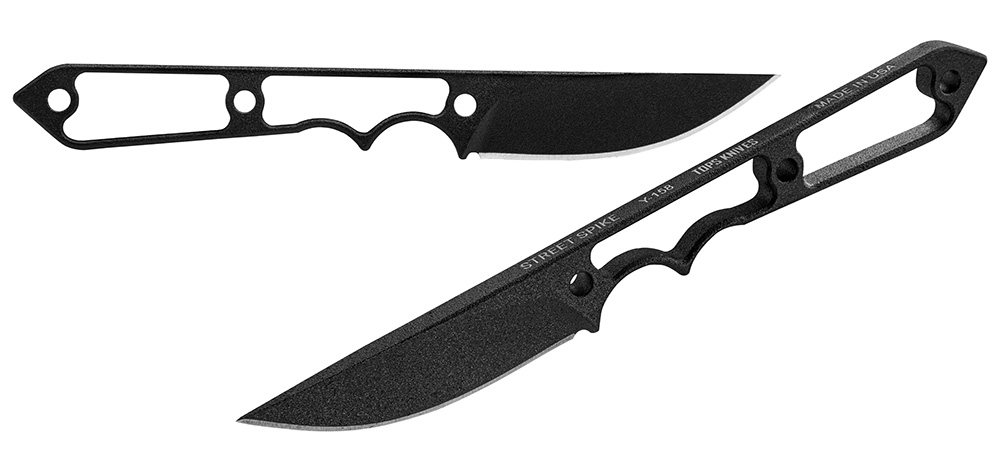
When it comes to self-defense with a knife, there are a few things you should keep in mind. First, it’s virtually guaranteed to be messy — as the old saying goes, the winner of a knife fight usually goes to the hospital and the loser goes to the morgue. Second, there’s a high likelihood that your knife will become expendable, whether it takes damage after glancing off hard bone or it takes a ride to the morgue along with the aggressor’s body. Third, your defensive knife should be a simple tool, not some flashy blade decked out with spikes and serrations. These principles paint a clear picture of this tool’s desirable characteristics — easy to control, affordable, simple, and effective for piercing and slashing. TOPS Knives set out to accomplish this with its new Street Spike.
The TOPS Street Spike is formed from a 1/4-inch-thick piece of the company’s signature 1095 high-carbon steel, and hardened to 56-58 RC. The business end is ground to a simple 2.75-inch drop point, a versatile shape that’s proven its worth everywhere from campsites to kitchens to street fights. The handle is skeletonized and absent of scales to reduce weight, but it features prominent finger grooves and holes that can be used to add a DIY paracord wrap.
To add grip and reduce the risk of corrosion, TOPS finished the steel in textured Black Traction powdercoat. Each knife includes a black Kydex sheath and multi-position spring steel clip, though it’s said to be light enough to wear on a neck lanyard. MSRP is $100, but the Street Spike is currently available for $80 on the TOPS Knives site. As always, it’s made in the USA. For more information, go to TOPSknives.com.
If something goes bump in the night in your home, how would you respond? Many of us would grab a handgun from the bedside and quietly go to investigate, clearing the house to determine whether that noise was just the dog knocking over a plant or an armed burglar stumbling over it. However, there are many considerations for how to clear a house safely and efficiently, especially when you’re doing so alone. In the following 30-minute video, Mike Glover of Fieldcraft Survival discusses some fundamental lessons for single-man CQB (close-quarters battle) that can apply to any solo room-clearing context.
Glover is a former Green Beret — go read our Survivalist Spotlight interview to get up to speed on his background. As a result, he has quite a bit of training and experience dealing with CQB scenarios. But he also understands that many of the principles of clearing a structure with a team, like a military unit or law enforcement squad, don’t directly apply to doing so on your own. “Remember that you don’t have a number two man in this case. It’s just you.”
Some of these lessons, such as thinking about angles and exposure, are easy to work on at home. Others, such as shooting with your non-dominant hand, may require substantial practice. As always, we recommend seeking out a qualified instructor and training regularly to confirm your skills. Because when something goes bump in the night, you’d better be prepared to deal with it.