Photography by Michael Grey
This article was originally published in Issue 1 of our magazine.
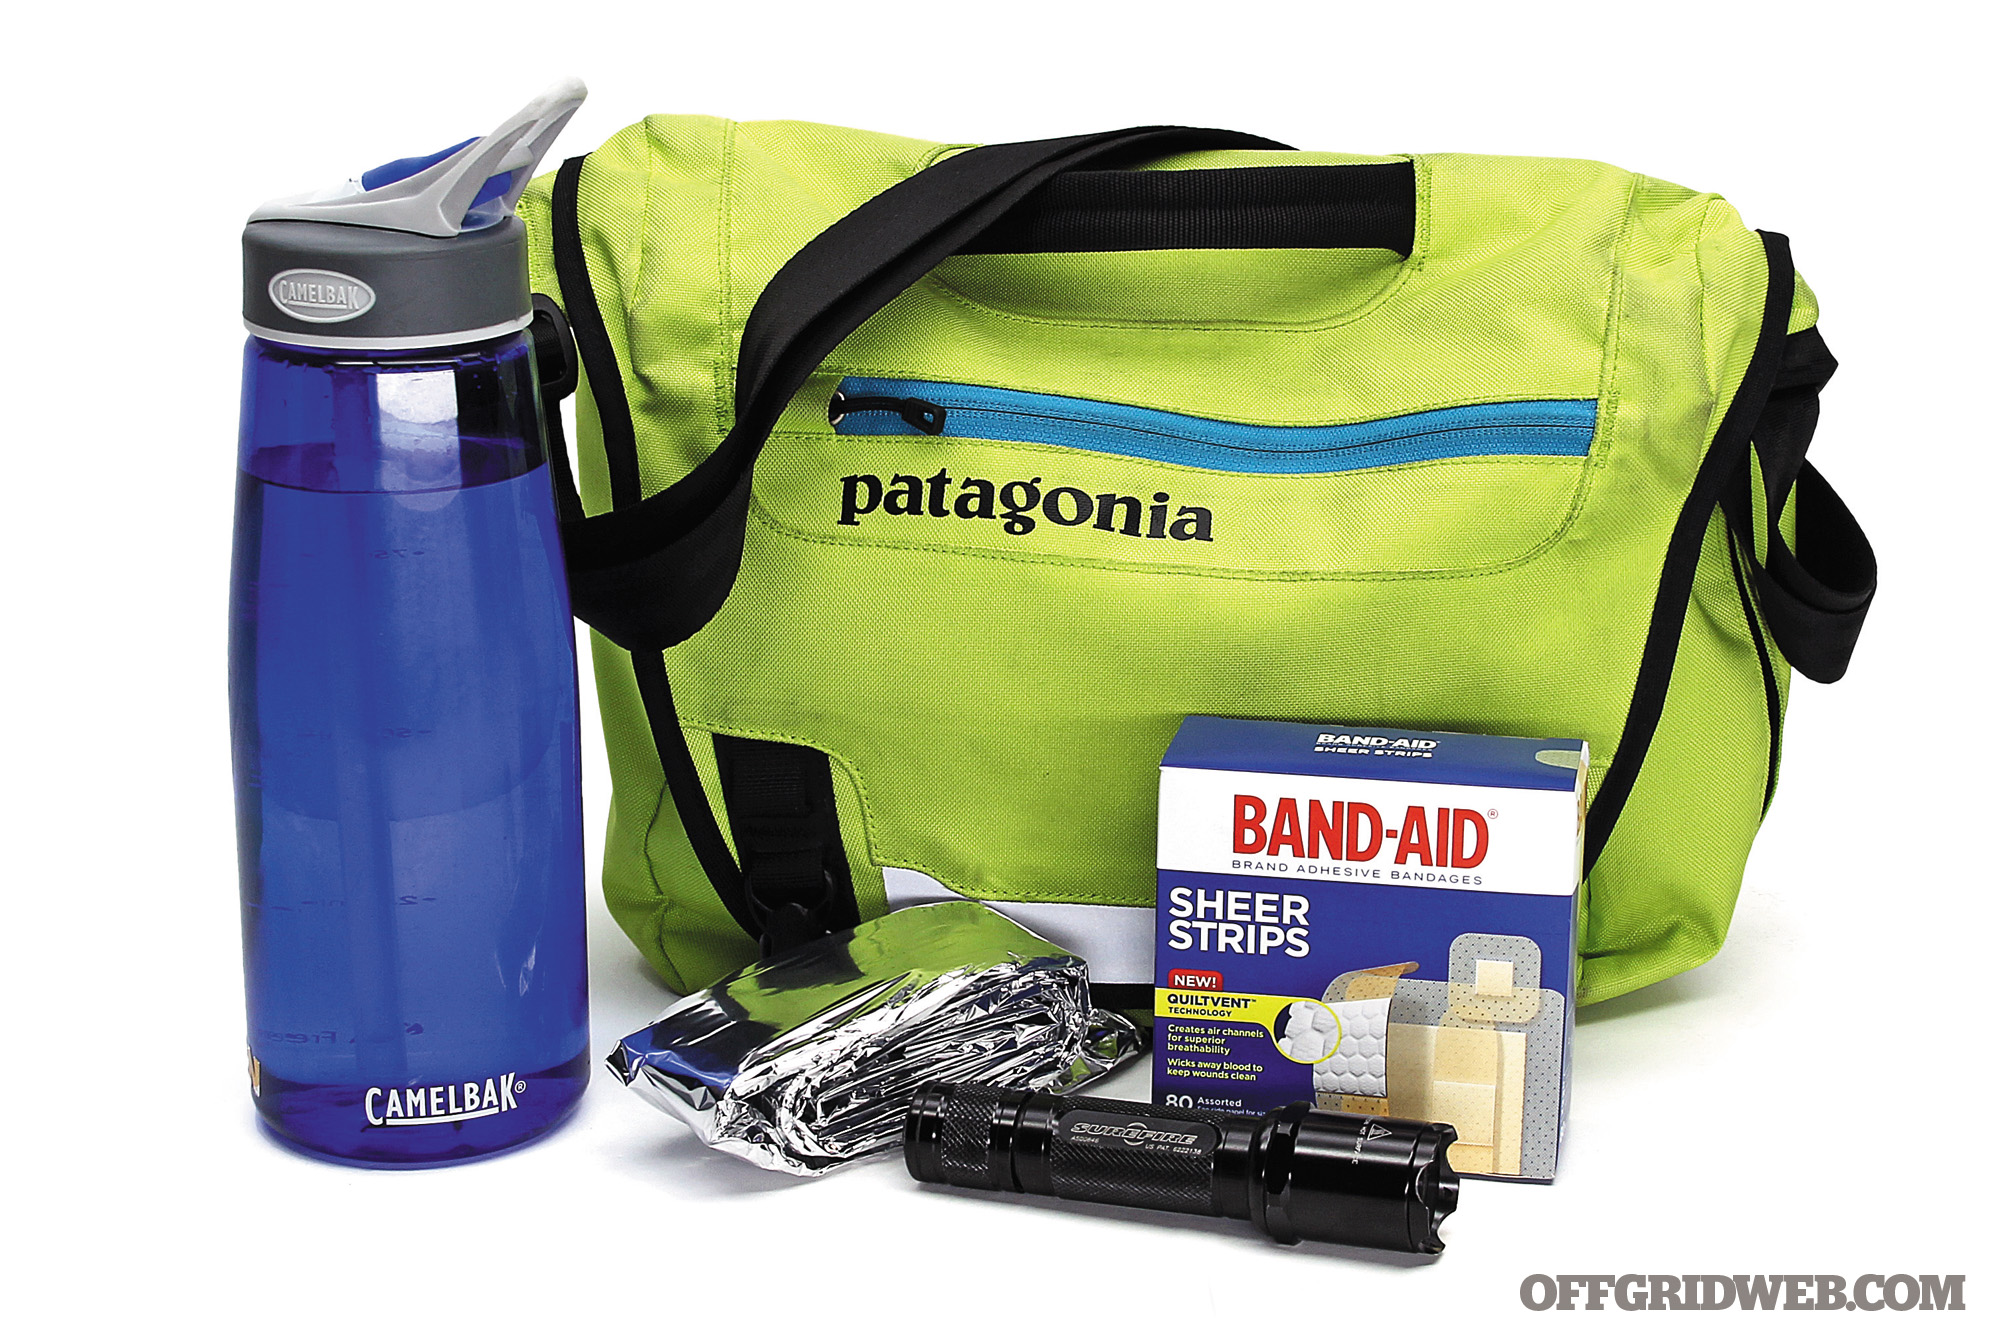
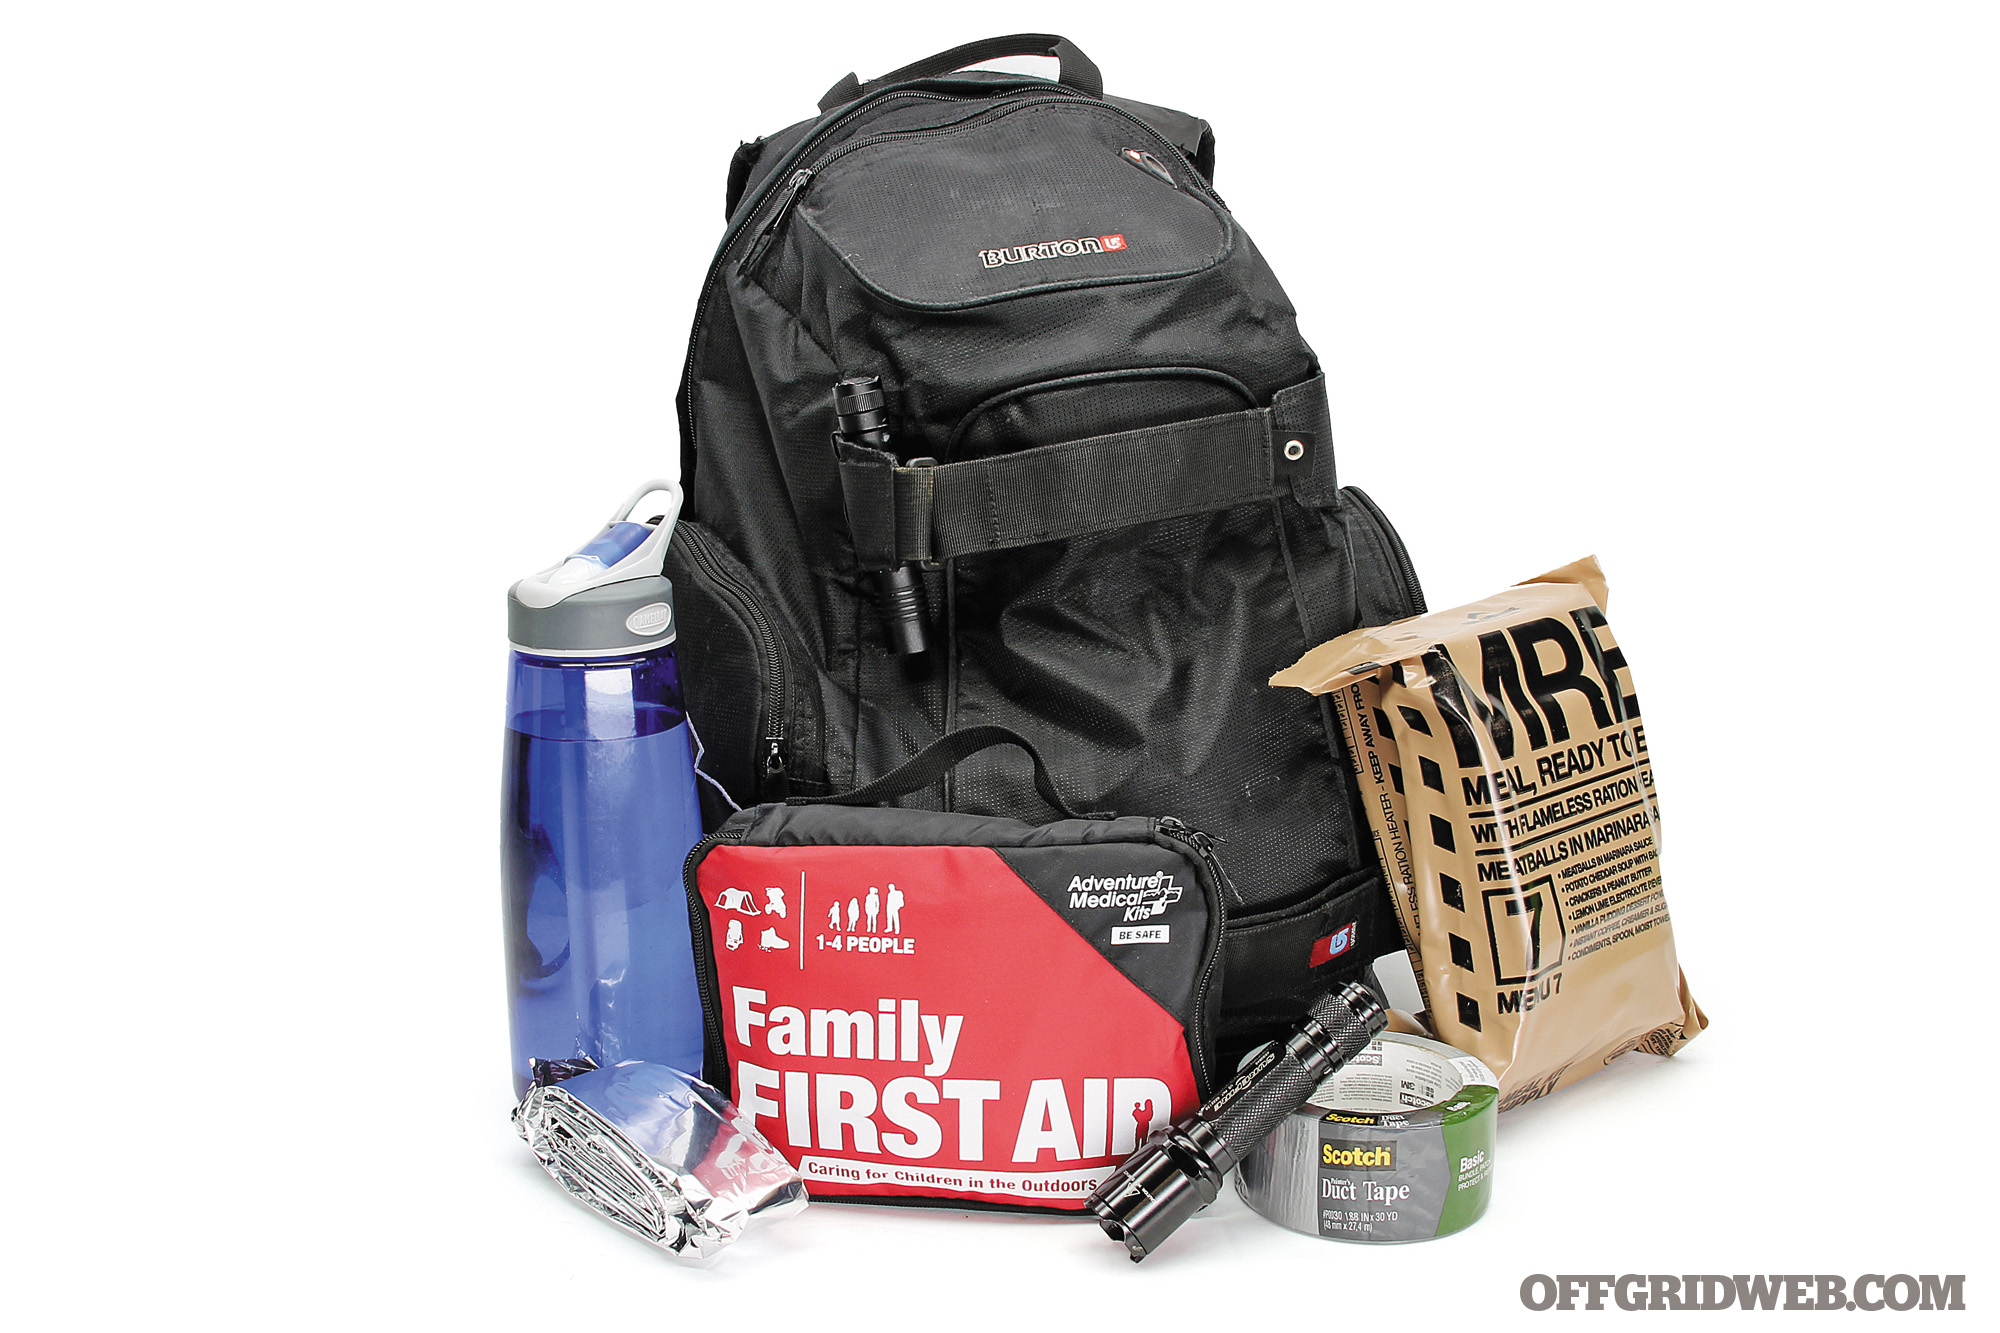
Plain and simple, after shelter and water, food is the most important thing to survive and thrive on in any off-grid situation. Your go-bag can be filled with all the cool tools and toys, but without proper nutrition, your body will weaken and slowly shut down in a matter of days. What do you do to prepare for the inevitability of being separated from your usual means of sustenance?
Refrigerated foods will begin to rot, and grocery stores will be the first places picked clean. You’re going to have to rely on what you’ve squirreled away for your body’s fuel source. You’ll need to keep fueled up to stay alert and physically ready to handle whatever might come next. You don’t want to just survive; you want to be one of the few who will thrive. That’s where the Meal Ready to Eat (MRE) comes in.
The MRE Concept
The MRE, as many know, has a storied military pedigree. Since Washington quartered troops at Valley Forge, our military has recognized the importance of our soldiers getting adequate daily rations. A tremendous amount of effort has been put into evolving combat rations from a daily helping of salted pork, hard bread, and beer to a meal designed specifically for the unique nutritional requirements of the embattled American war fighter.
It’s important to know why an MRE is what it is. We all know the government loves to research the hell out of everything, and feeding troops is no different. Without the boring details and science, the Institute of Medicine—yes, the IOM is a real department—decided that the active war-fighting U.S. soldier needs about 4,200 calories a day (1,400 per meal) to be at peak performance.
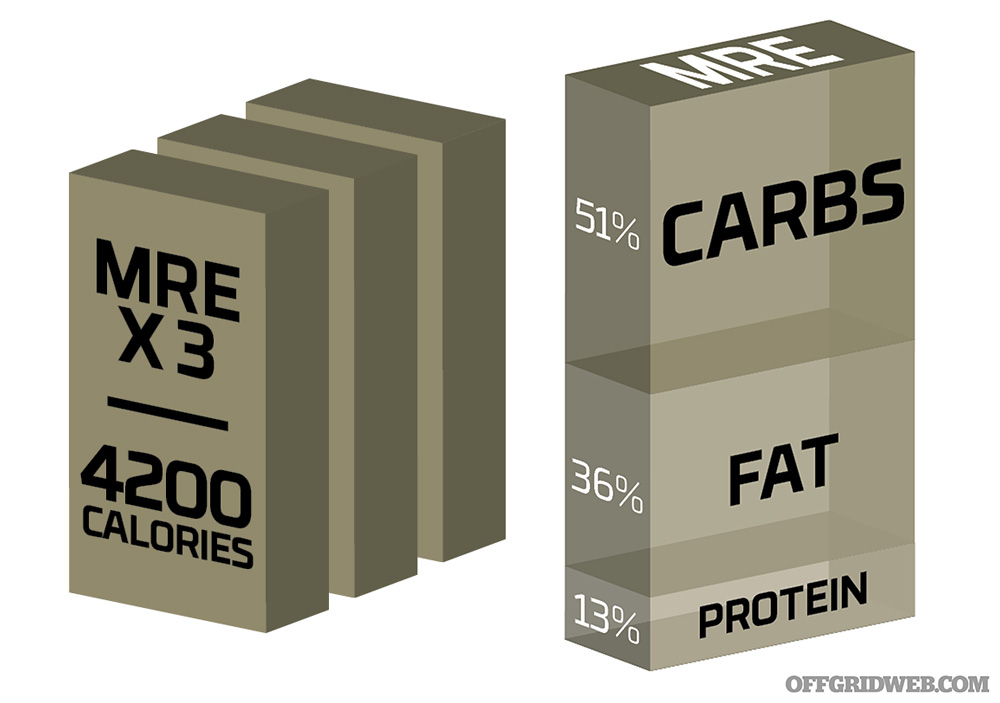
Because they are designed to enhance battlefield performance, MREs aren’t exactly diet food. The intent of each MRE is to meet one third of the warfighter’s daily requirements. Each MRE contains enough food to meet the 1,250-to-1,400-calorie goal.
To counter the physical demands of combat, the IOM determined that each meal should be heavy on carbs (about 51 percent) and fat (36 percent), which will give the body enough energy to make to the next meal. The other 13 percent of the meal is protein. The MRE is all about the soldier being able to sustain a high level of energy and exertion.
When SHTF, we want to maintain high energy levels for the stress and exertion of the situation. But, we probably won’t come close to needing the 4,200 calories a day our warriors require. If we regularly ate that much, we wouldn’t have to worry about bugging out; we couldn’t fit through the door. Splitting each package into more than one meal can really help you stretch out your supplies while you are waiting for help to arrive or looking for a safe place. We recommend buying a bunch in different flavors and do your own taste test, so you know what you’ll want to stock up on.
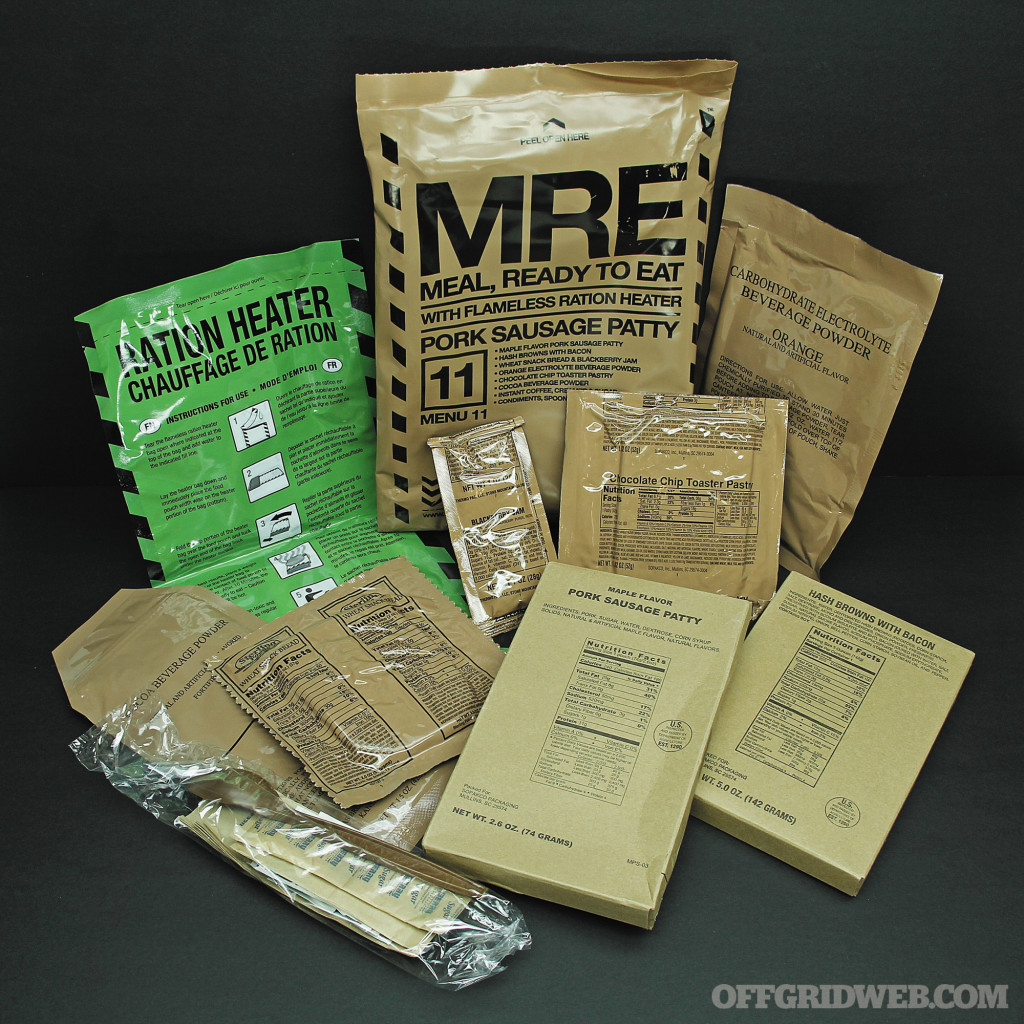
So, what’s in the little brown bag? If you’re a foodie, an MRE is not going to tickle your fancy, but it will keep you on your feet looking for real food.
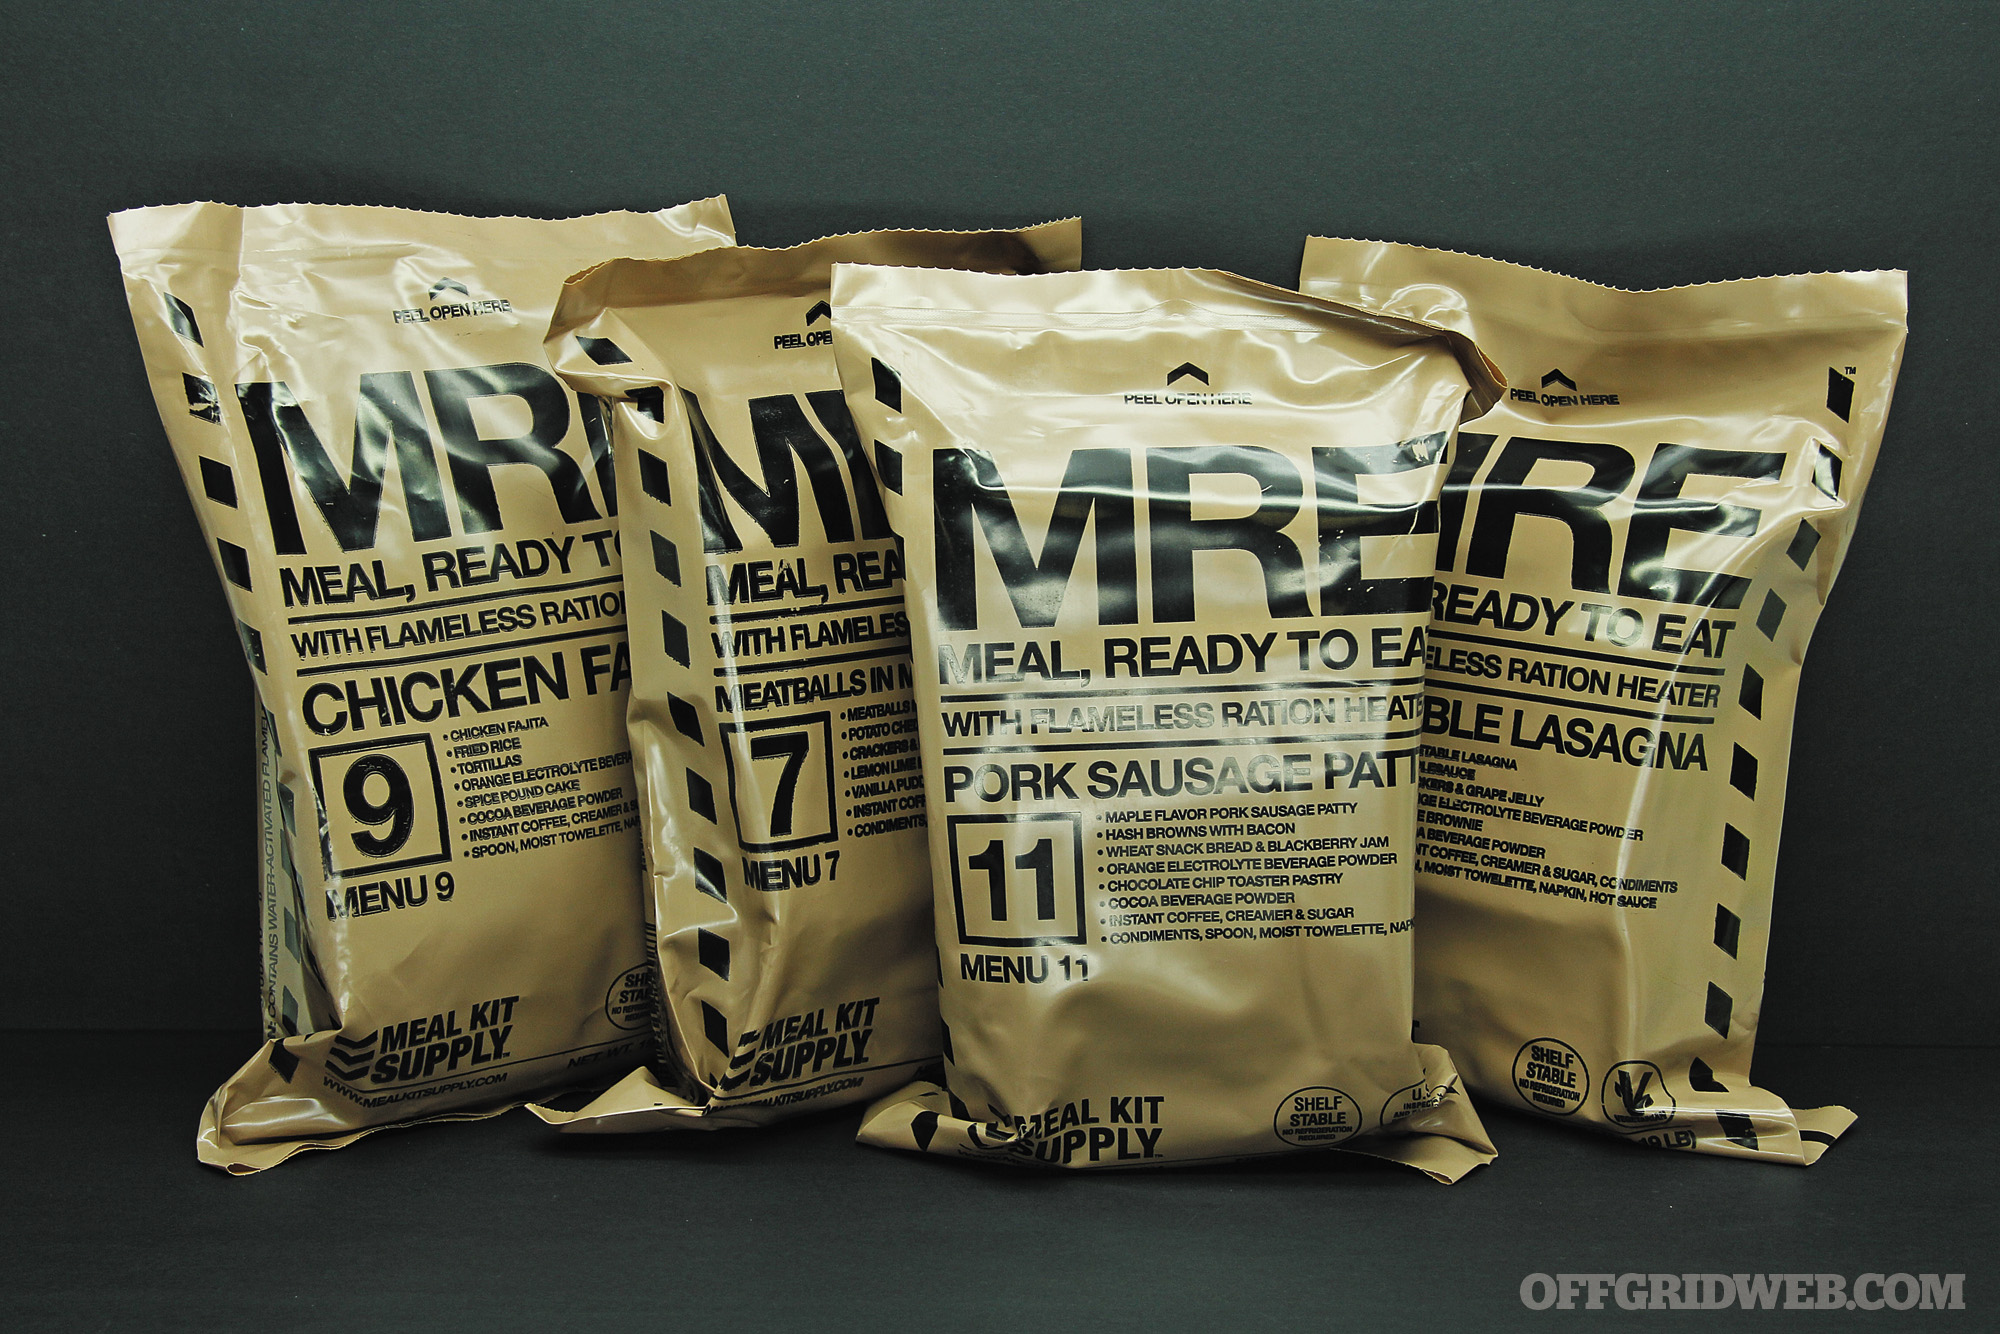
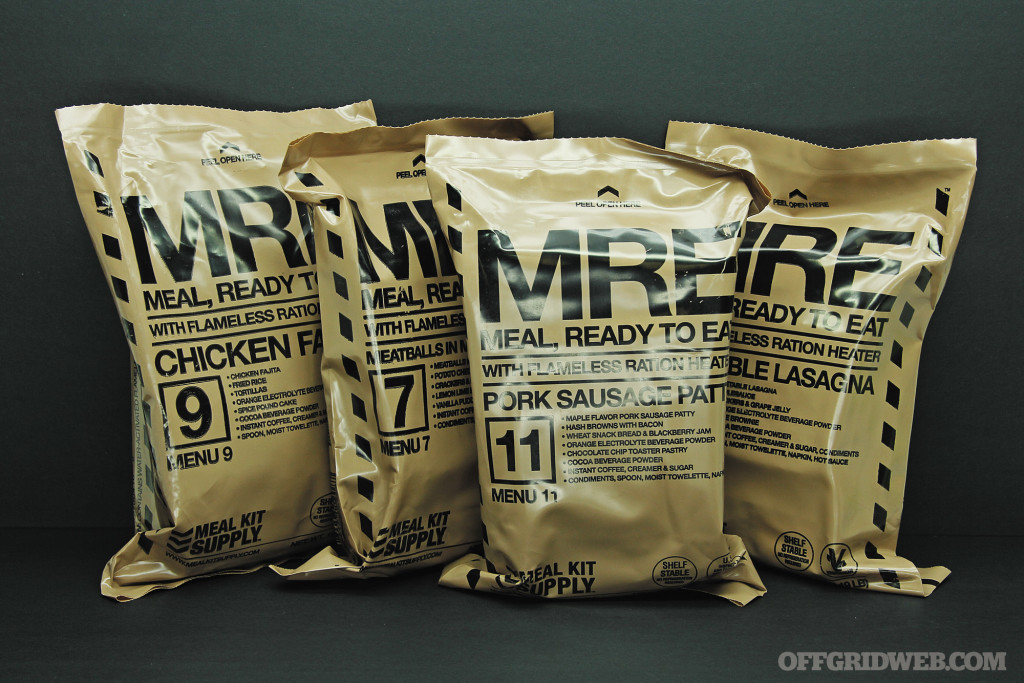
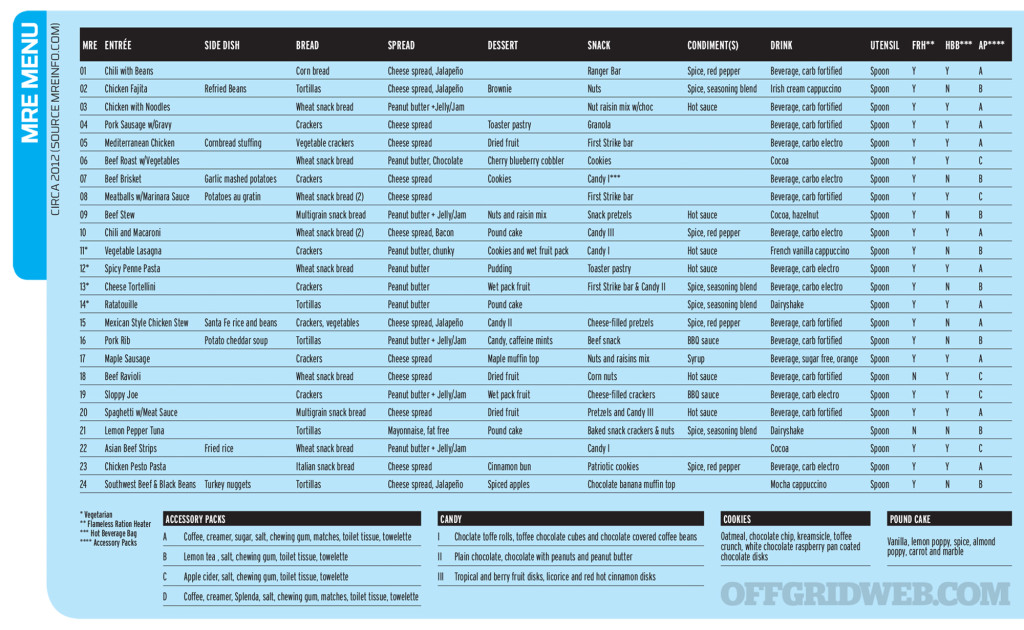
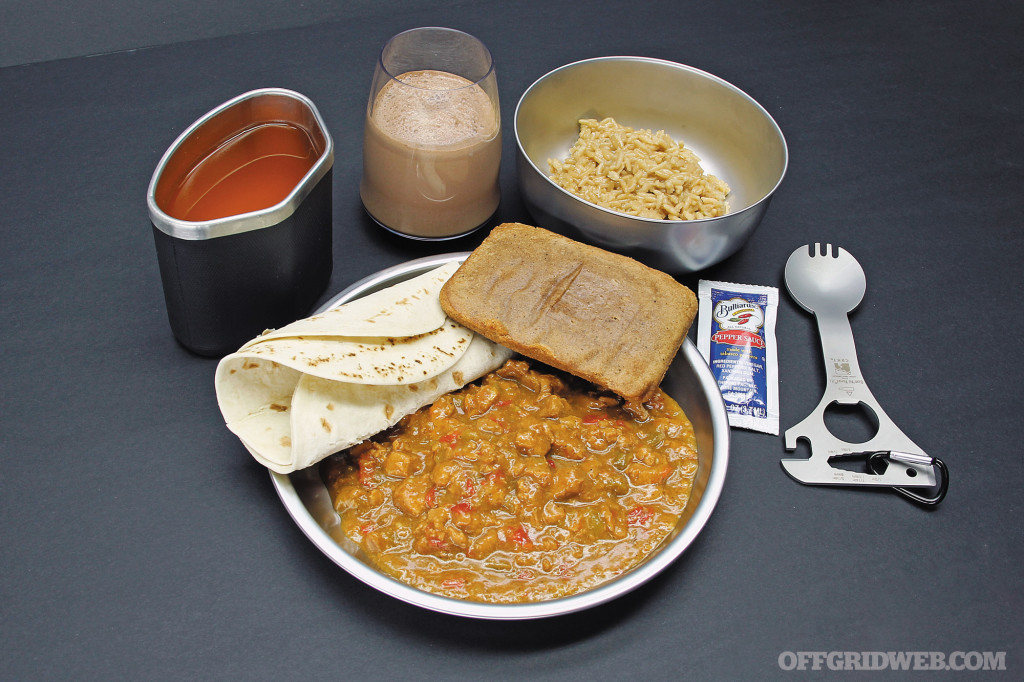
The MRE menu is more diverse than you might think. A complete MRE consists of an entrée, which is where you’ll find your meat proteins. Some meals include a starchy side dish, and all come with bread and a spread of some sort. You’ll also find something to satisfy your sweet tooth, some sort of cake, cookie, or wet/dry fruit. Most meals even include an easily pocketed snack.
Click here to download a full-size version of the above chart of common MRE contents.
MREs also combine a variety of secondary items. Beverages, sometimes the least enjoyable part of the meal, are usually high-carb, or electrolyte-replacing fruit drinks, or cocoa-based. Most meals come with condiments; hot sauce and “seasoning blend” are the usual suspects. (See taste comparison below)
The standard Mil-spec menu selection is heavy on the chicken and beef, though there are a few pork dishes and one tuna-based MRE. For the vegetarians, there are some pasta dishes and one vegetable entrée. The meals are labeled vegetarian, but depending on your definition, they may or may not be entirely true to their word. Some vegetarian meals may have some dairy-based items included.
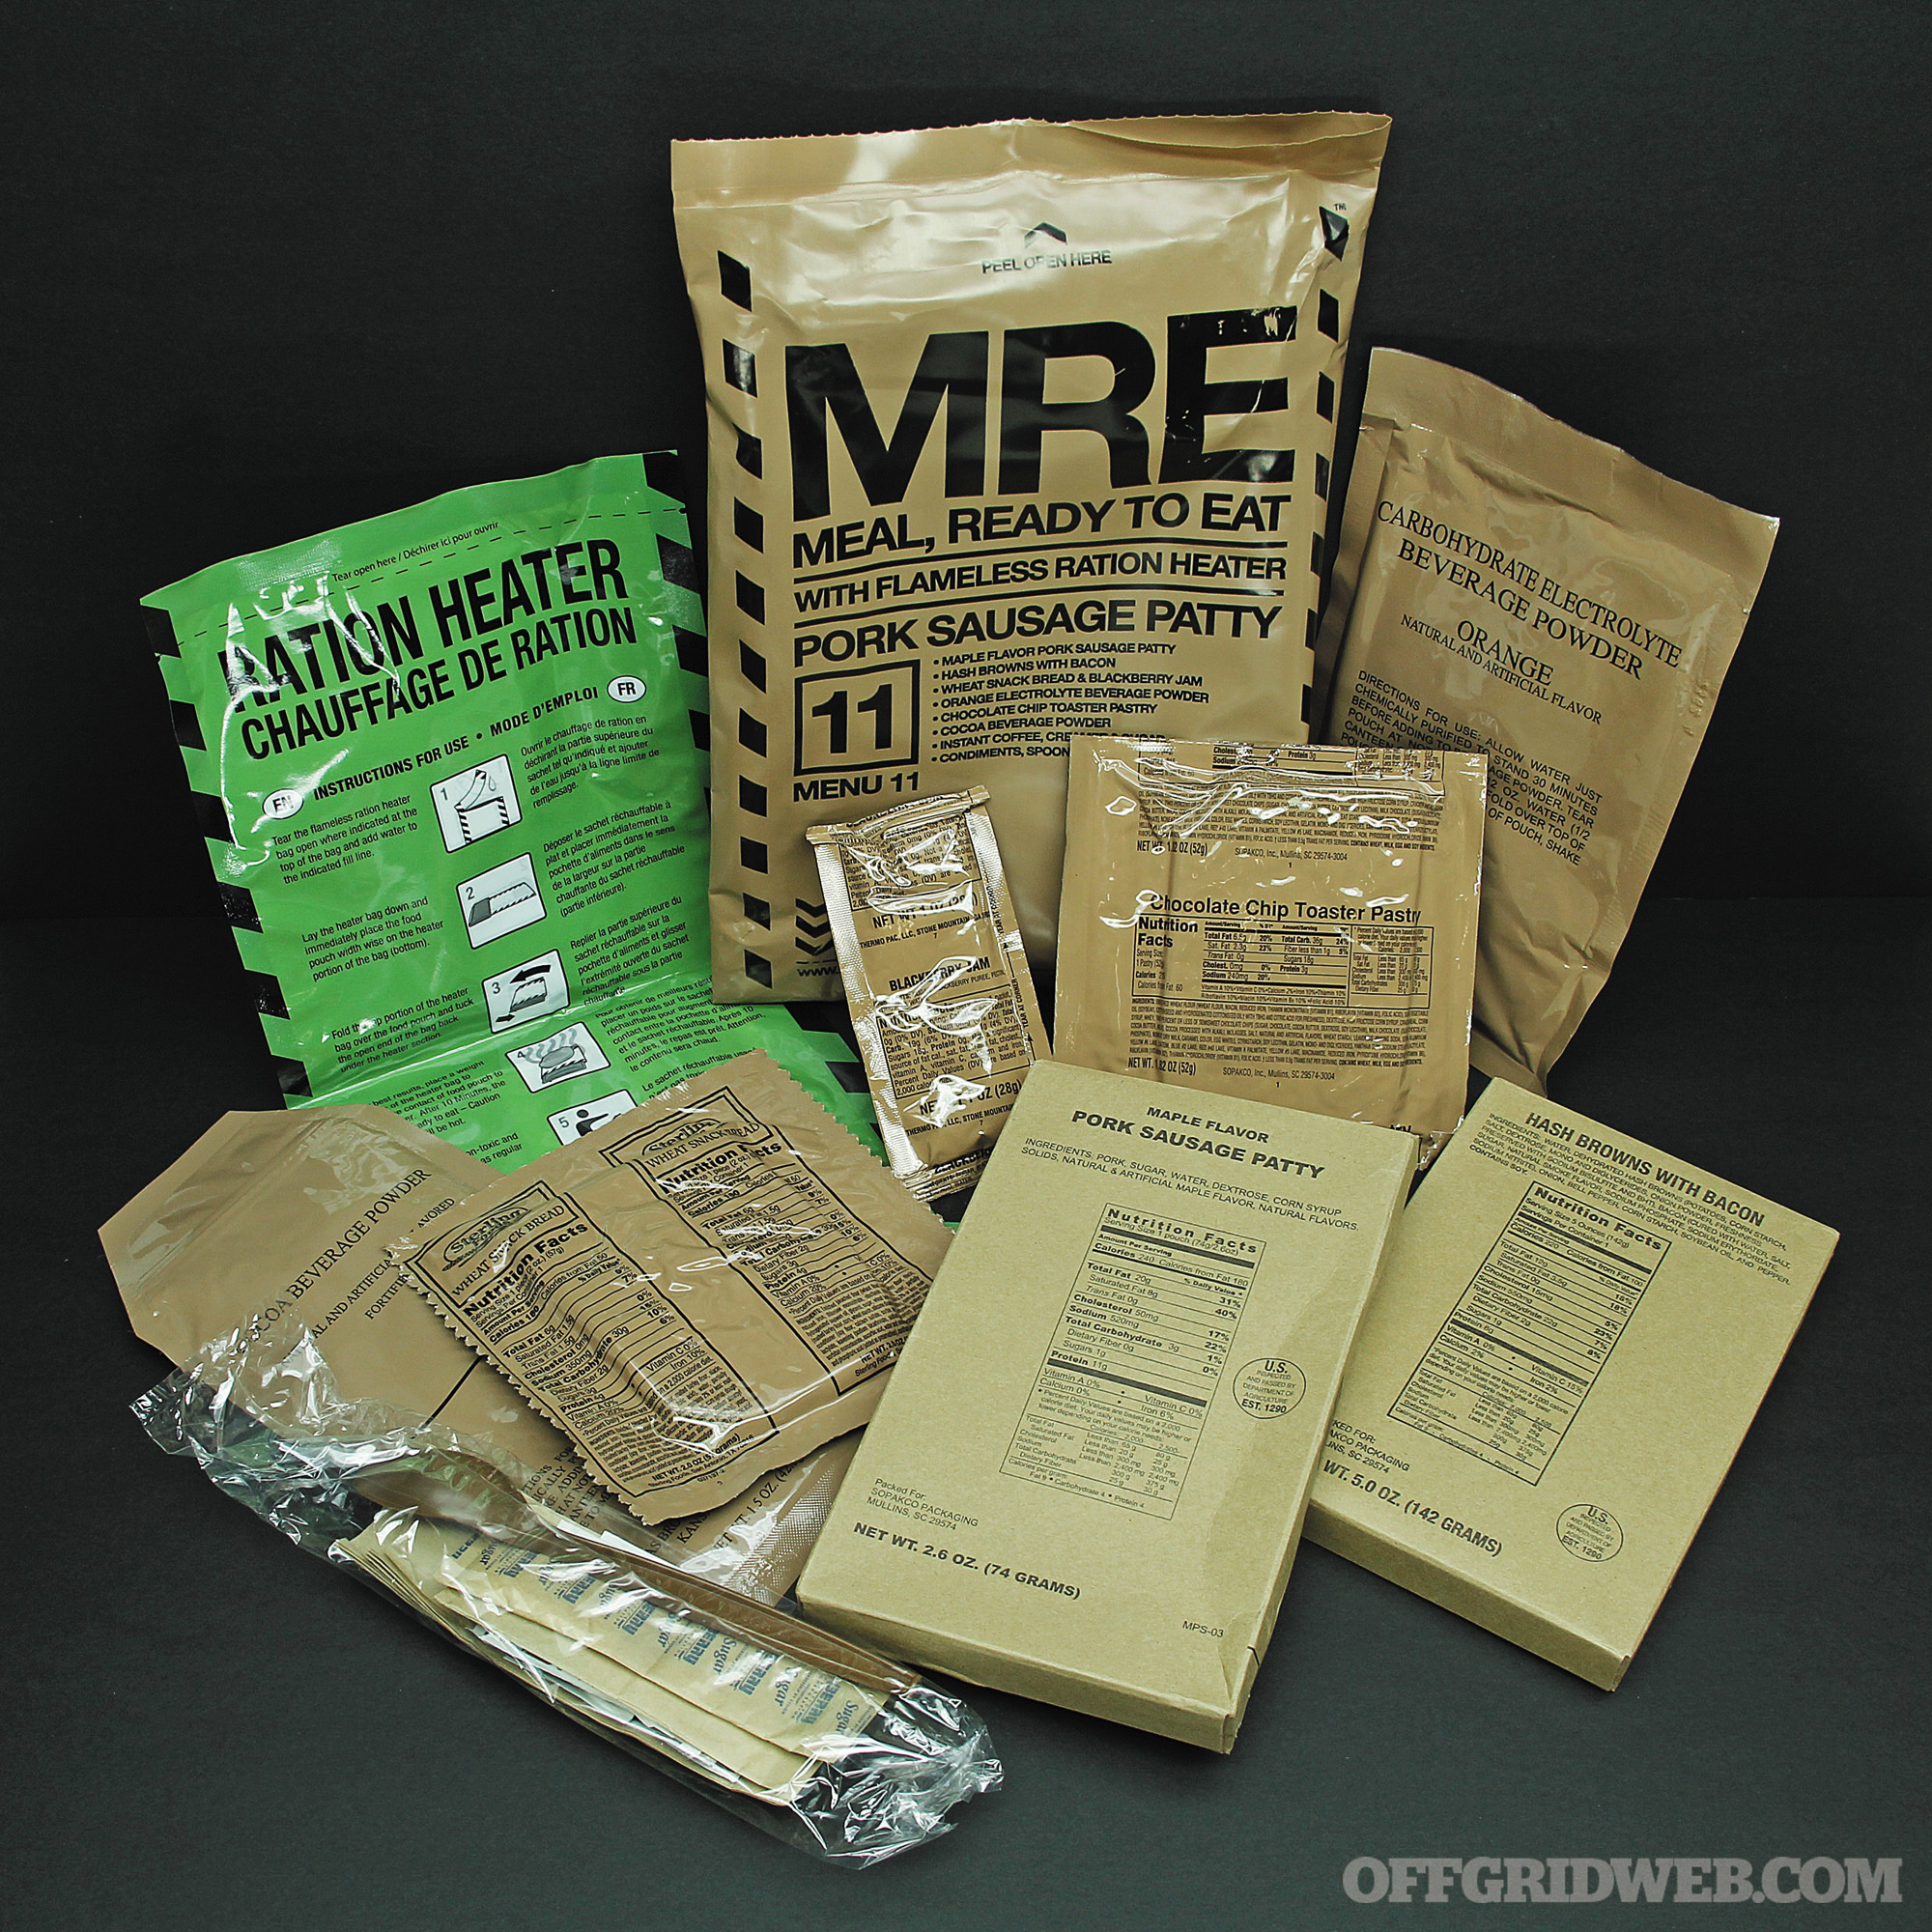
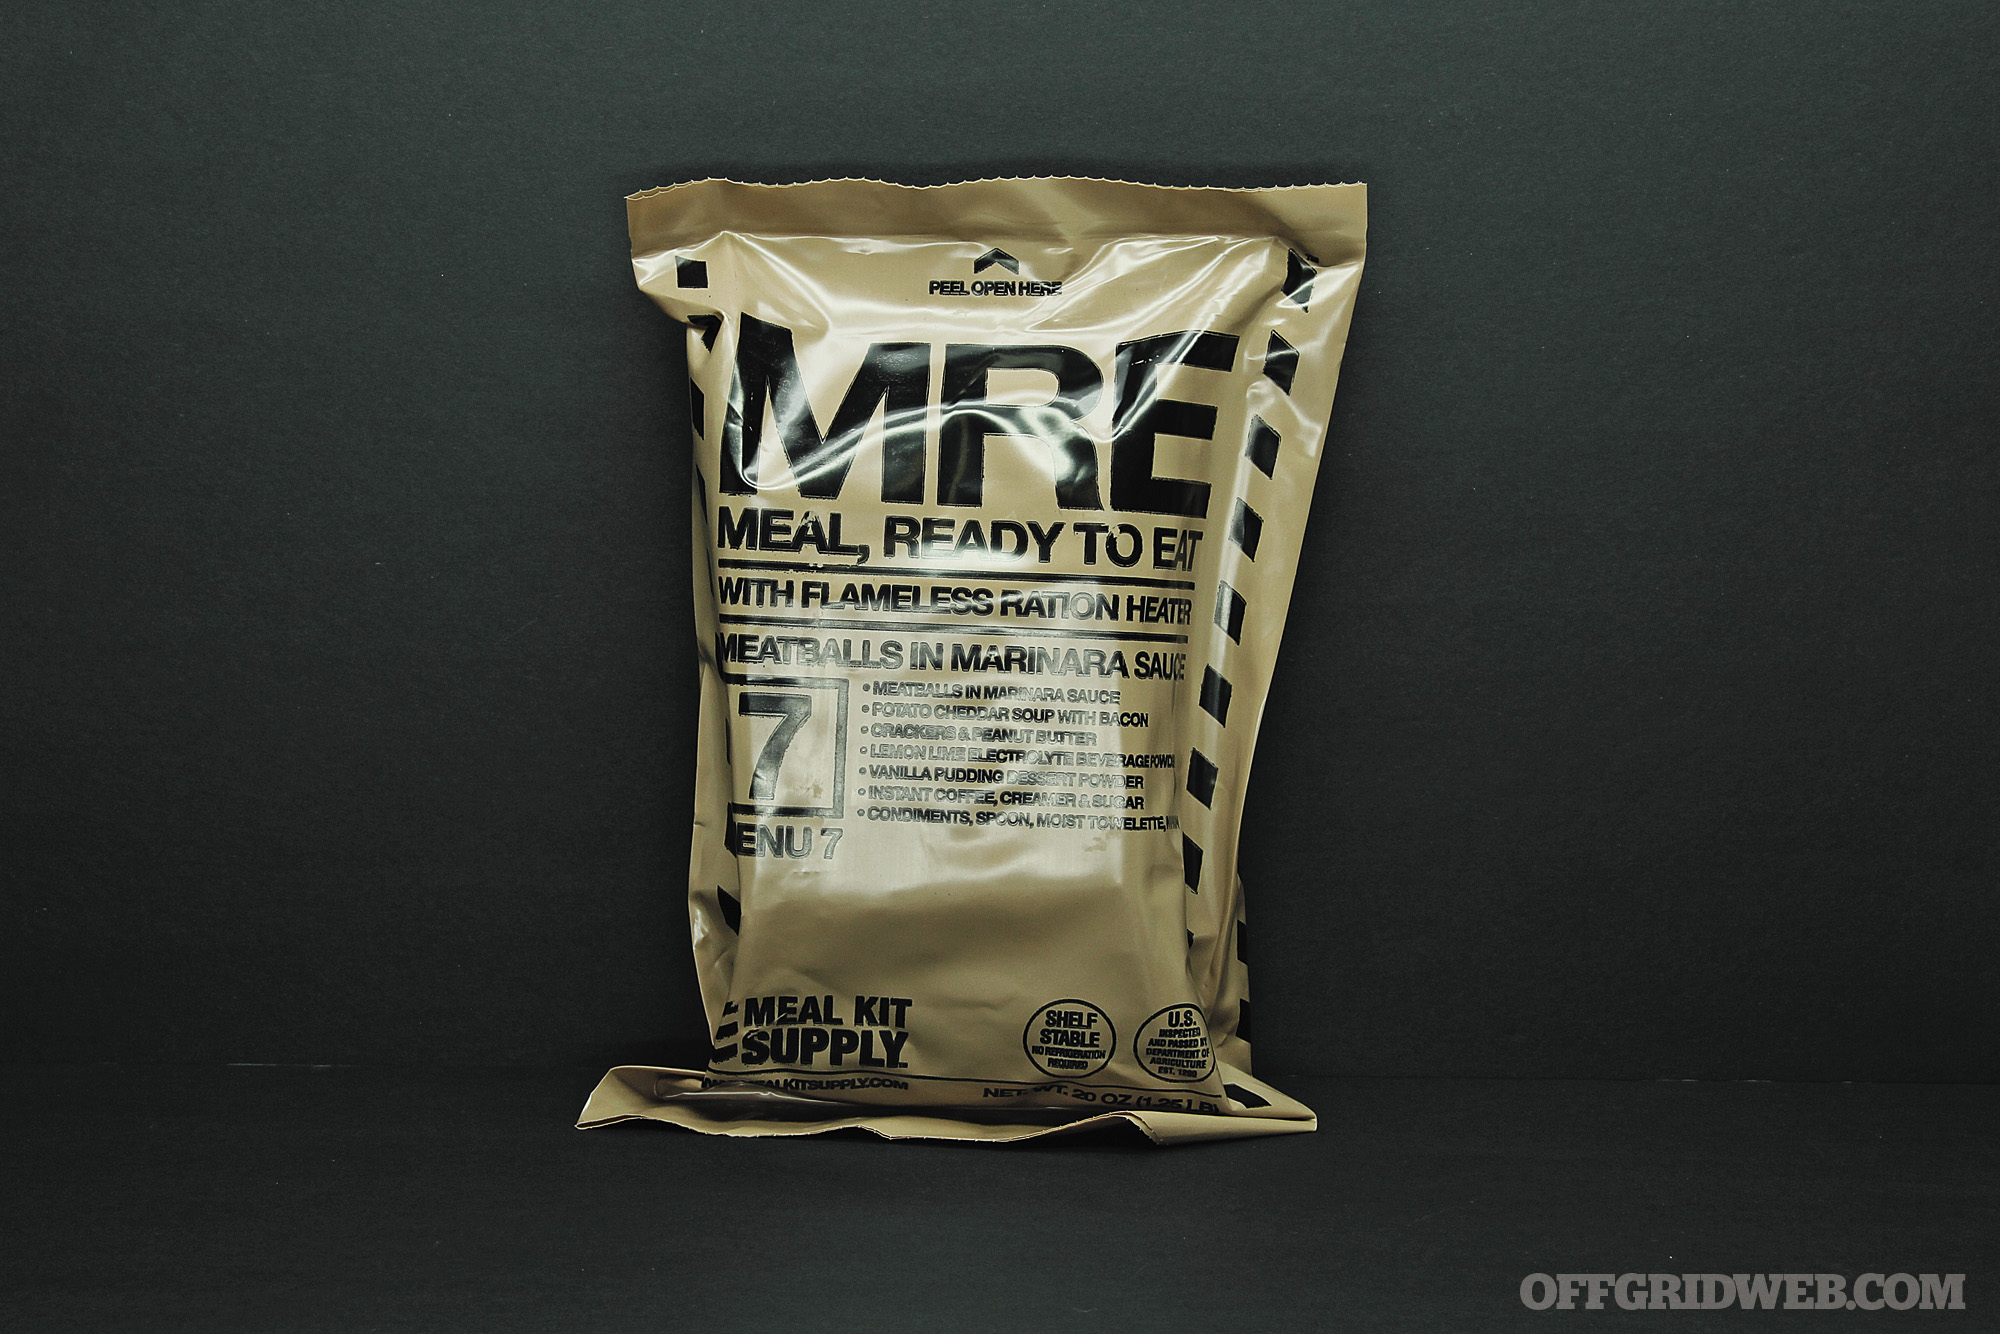
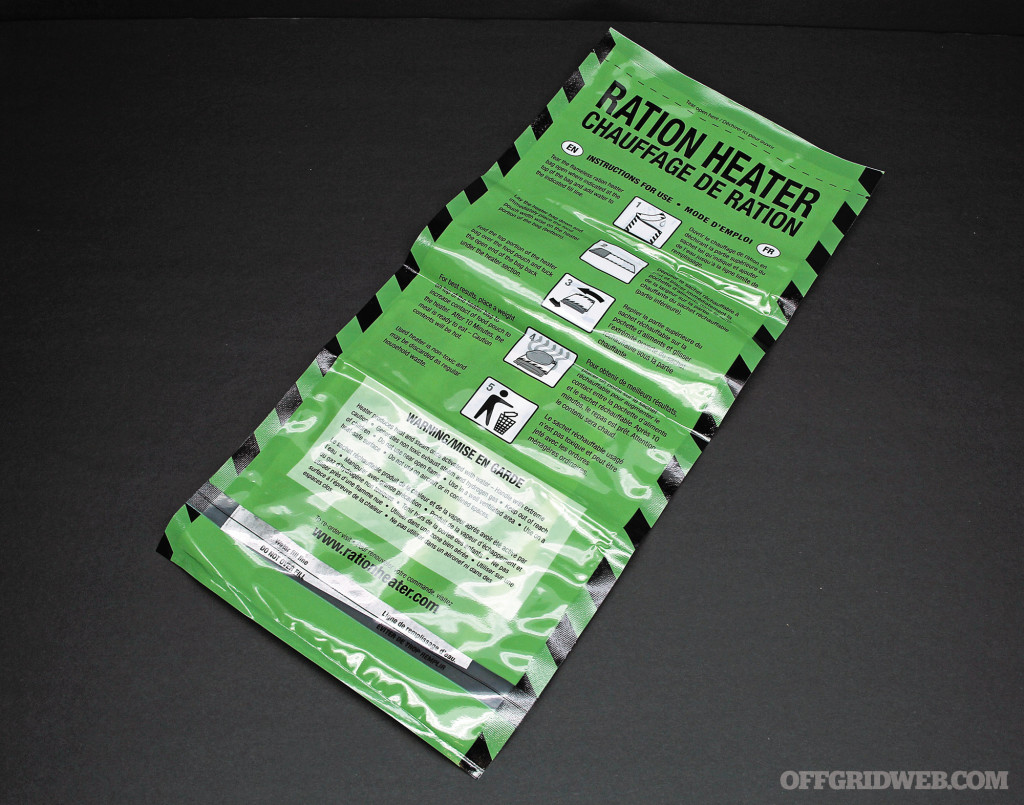
All the food in the MRE is precooked and can be eaten right out of the bag. Eating them hot, however, is a much better experience. In all but two MREs, you’ll find a self-contained easy-to-use Flameless Ration Heater (FRH). When adding the indicated amount of water, the FRH produces a surprisingly adequate amount of heat.
How Do I Get MREs?
Our advice, when looking to get your supply of MREs, is to stay away from the ones offered by questionable sources on eBay that claim to be acquired from the military. There’s no assurance as to the viability of the military MREs. For them to end up on eBay at a majorly reduced cost, you have to wonder why the military let them go in the first place. You have to ask yourself: Were these MREs stored properly? Are they past the three-year storage expiration date? Are you willing to risk getting sick from a questionable MRE?
Instead, we recommend buying your MREs from a known, reliable vendor. Fortunately, the same companies that make military MREs also make civilian versions: Sopako’s Sure-paks, Ameriqual’s Apacks, MREstar’s MREs, and Wornick’s Eversafes. Purchase MREs from any of these guys, and you’ll be assured of a reliable, consistent, and high-quality product.
It’s also worth noting that there are a few non-military vendors making equally, and in some cases better, MREs. Check out Cheaperthandirt.com, Longlifefood.com, and Mealkitsupply.com.
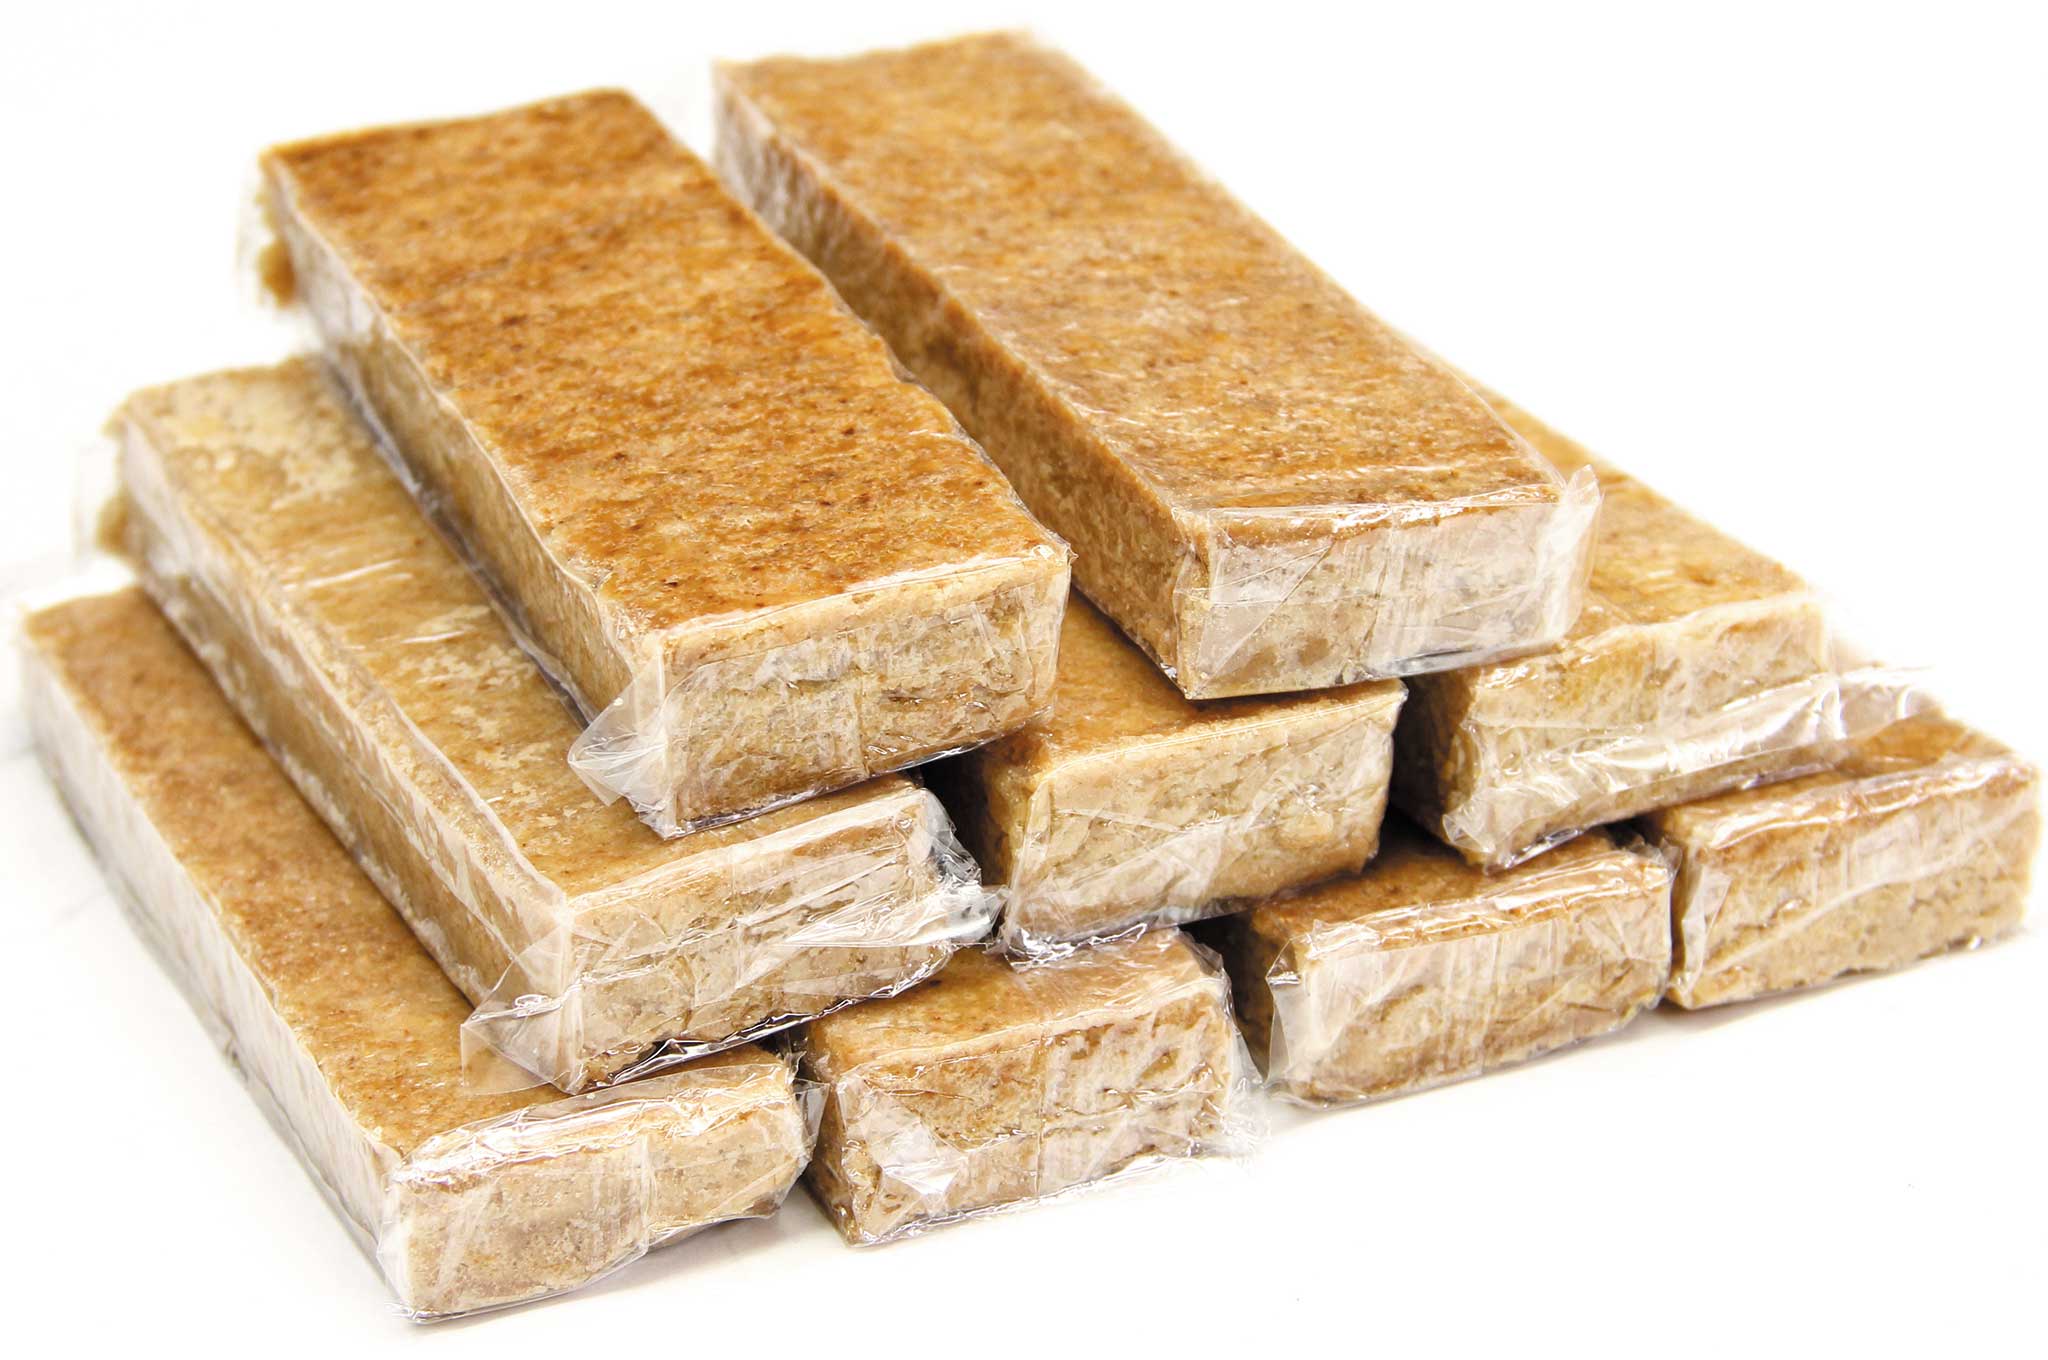
Besides a Twinkie, most have never had the pleasure of eating food with a shelf life not much longer than a Lindsay Lohan jail sentence. So, what can you expect after you’ve finally muscled open the brown bag o’ fun? We threw caution to the wind and prepared more than a few to see just what gastronomic adventure lie ahead.
First, we took a good look at its primary claim: Is it really a Meal Ready to Eat?
Meal? As a tolerable meal any MRE passes, but then again what you get in a school cafeteria is called a meal, too. All the components are there entrée, side, dessert, and drink. That’s more of meal than some get in an entire day.
Ready? Unless you’re the type who eats leftovers straight from the fridge, each meal is not quite ready. You’ll need to activate the FRH to bring the contents of the bag to a searing, lukewarm temperature. That being said, as one of our taste-testers put it, “It’s easier than hunting, killing, skinning, and cooking my own wild boar or deer, just not as tasty.”
Edible? This remains a subjective assumption. Lots of things are edible. Ask any parent of a toddler. Edible doesn’t mean palatable.
To evaluate the culinary value of MREs, we enlisted the help of four brave souls, who were willing to throw gastronomic caution to the wind and toss some MREs down their gullets. Since Gordon Ramsey was out of the country, we settled for a rag-tag band of culinary adventurers that included two editors from RECOIL magazine, a former active-duty special operations warfighter, and this writer, never one to turn down a free meal.
Comparing brands, we noticed that there’s little variation in taste, so these tests were not limited to a particular brand. From the standard fare, we taste-tested the chicken fajita, the meatballs, the sausage patty, and the veggie lasagna complete meals. Each brand offers these meals, so we could randomly choose who would get what to test.
First Impressions
The high calorie count, carbo-loading, and high sodium made it difficult to imagine eating three MREs a day. The more spices in the accessory pack the better. The FRHs were good enough to get the food lukewarm, but that’s about it. Using a camp stove and dunking the bags in boiling water works better. Bacon is always a flavor saver. The drinks are very sweet and make pretty good mixers. A spoon is not the most universal of all eating utensils.
The Taste Test
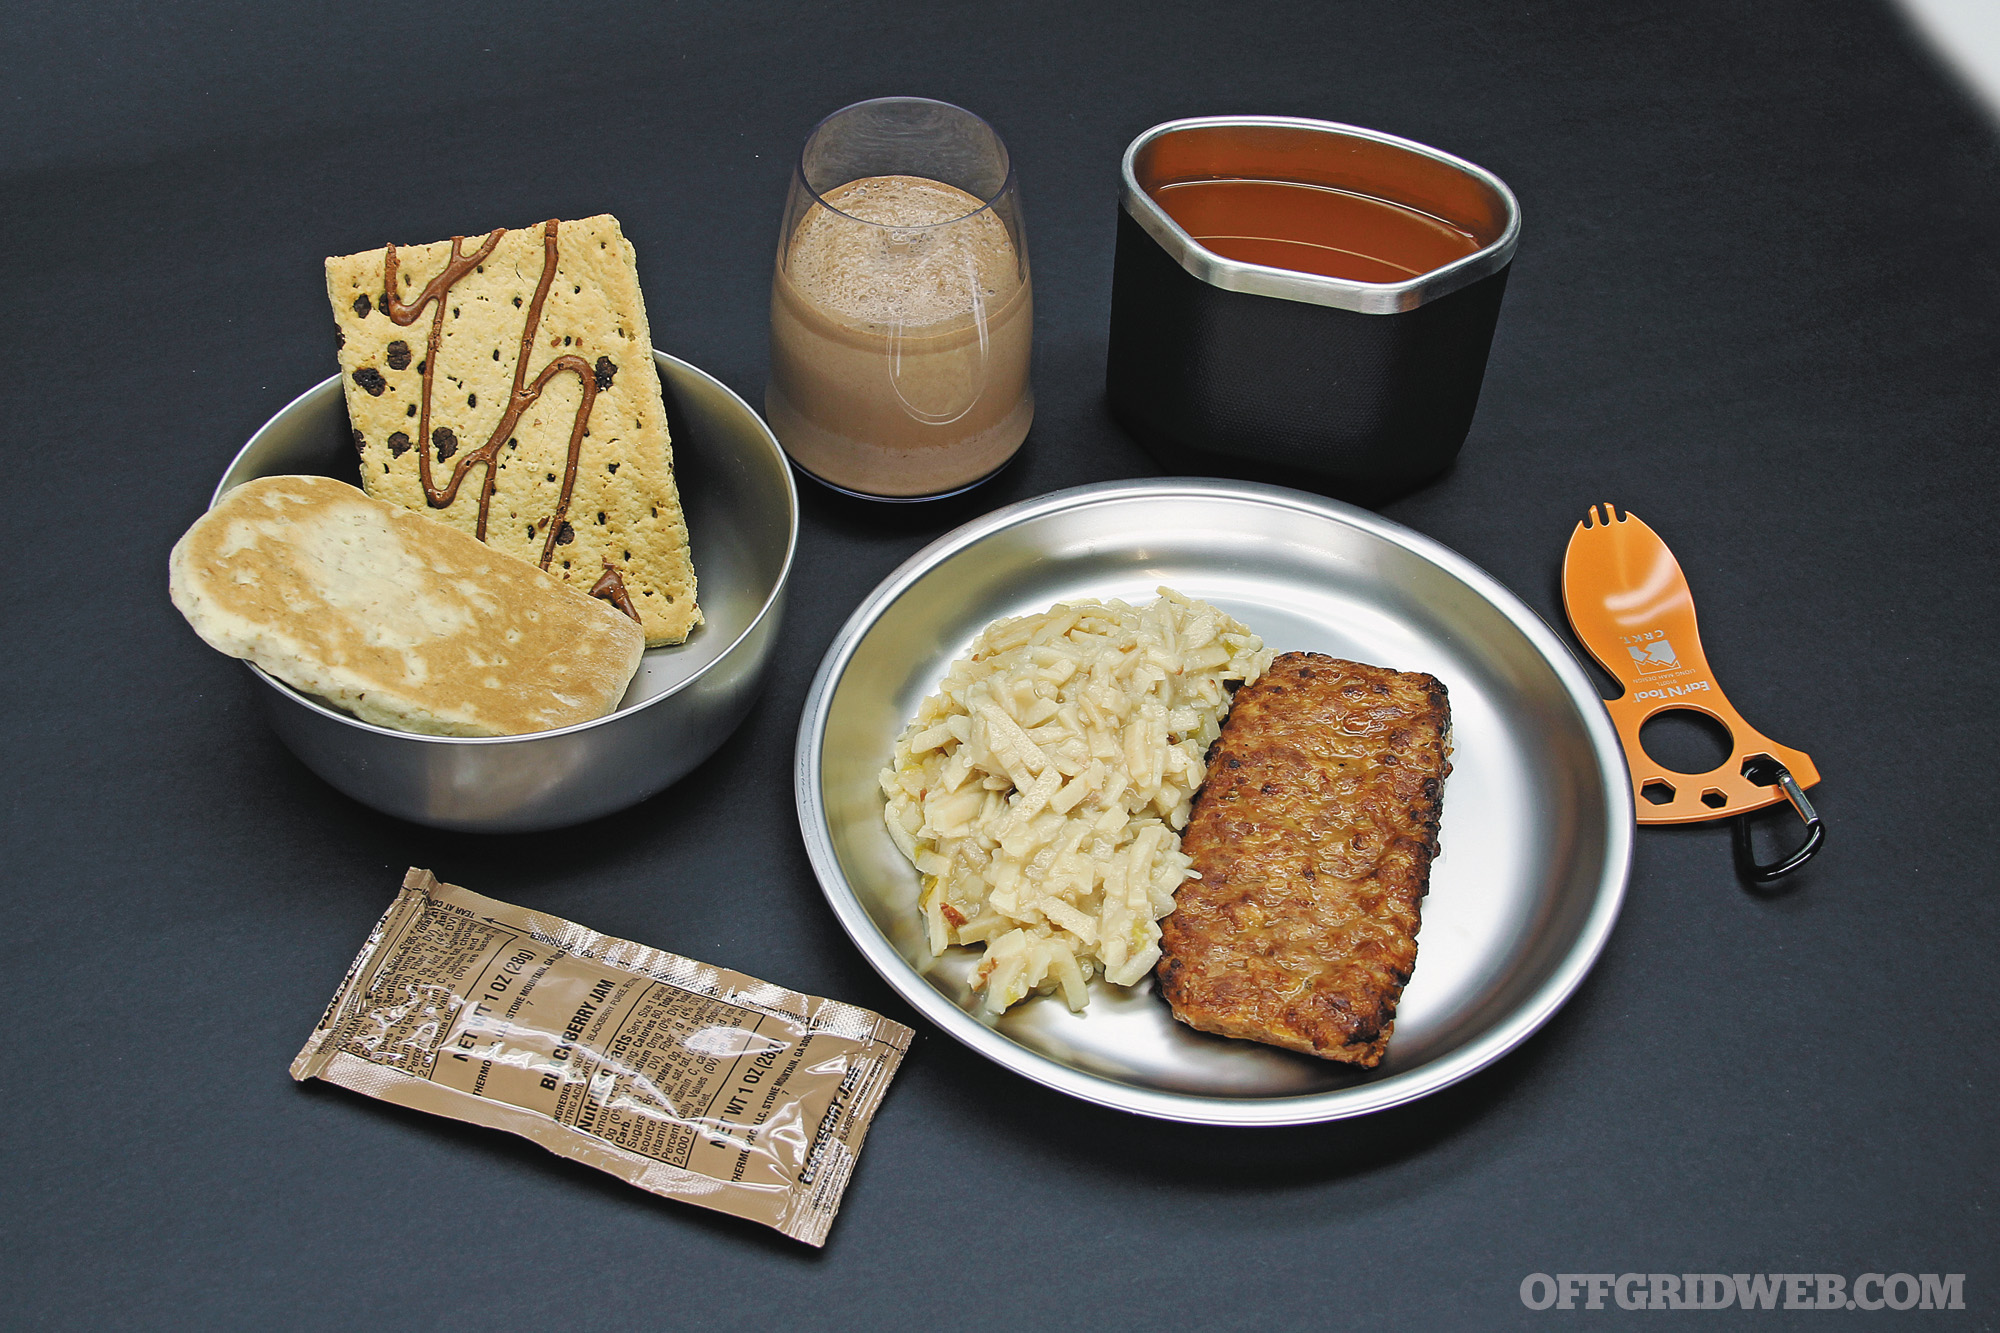
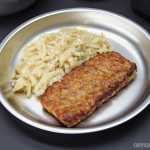
Pork Sausage Patty Meal
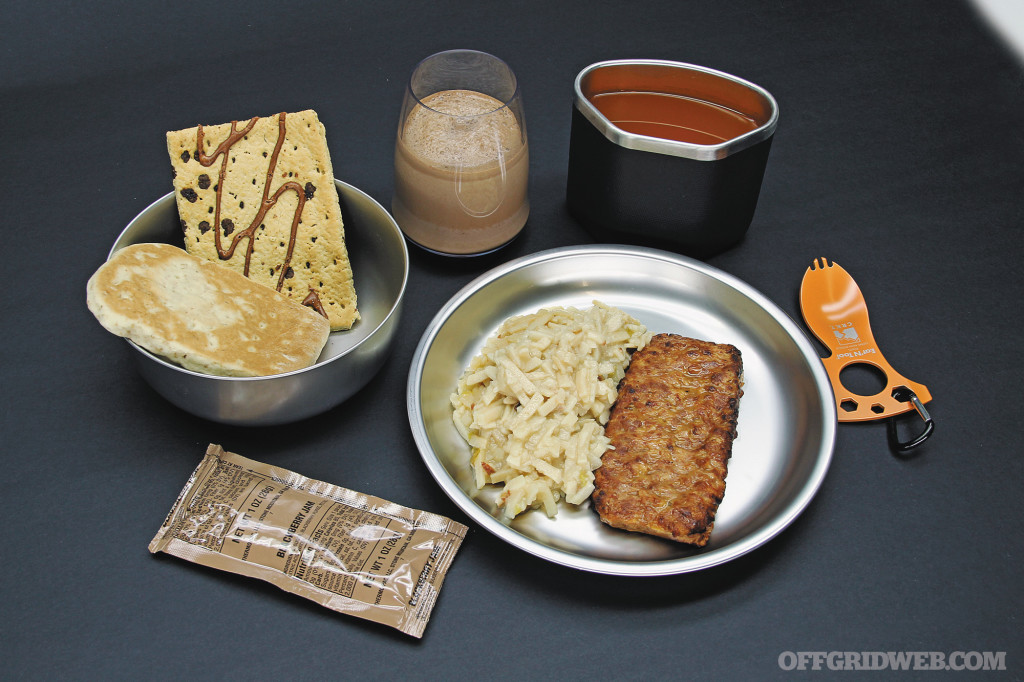
Pork sausage patty, hash browns with bacon, toaster pastry, wheat snack bread, grape jelly (in some), orange drink, cocoa drink, instant coffee, sugar, and creamer.
Tester 1: Tastes like mom’s leftover meatloaf, the kind you don’t want to eat, but don’t have the heart to trash. Even bacon couldn’t save the hash browns. The toaster pastry tasted like it was from Kellogg’s.
Tester 2: The patty was swimming in delicious maple-flavored grease; the best part of the MRE. The hash browns looked like maggots in KY jelly.
Tester 3: The wheat snack…imagine a thick, fluffy piece of cardboard, then compress it in an effort to remove any semblance of taste or flavor. Any sort of topping is a must.
Tester 4: The sausage patty was tolerable. The FRH barely made the maple “sauce” viscous enough to pour. The toaster pastry is the best part, even though it looked like it’d been sat on. It’s hard to screw up a Pop-Tart.
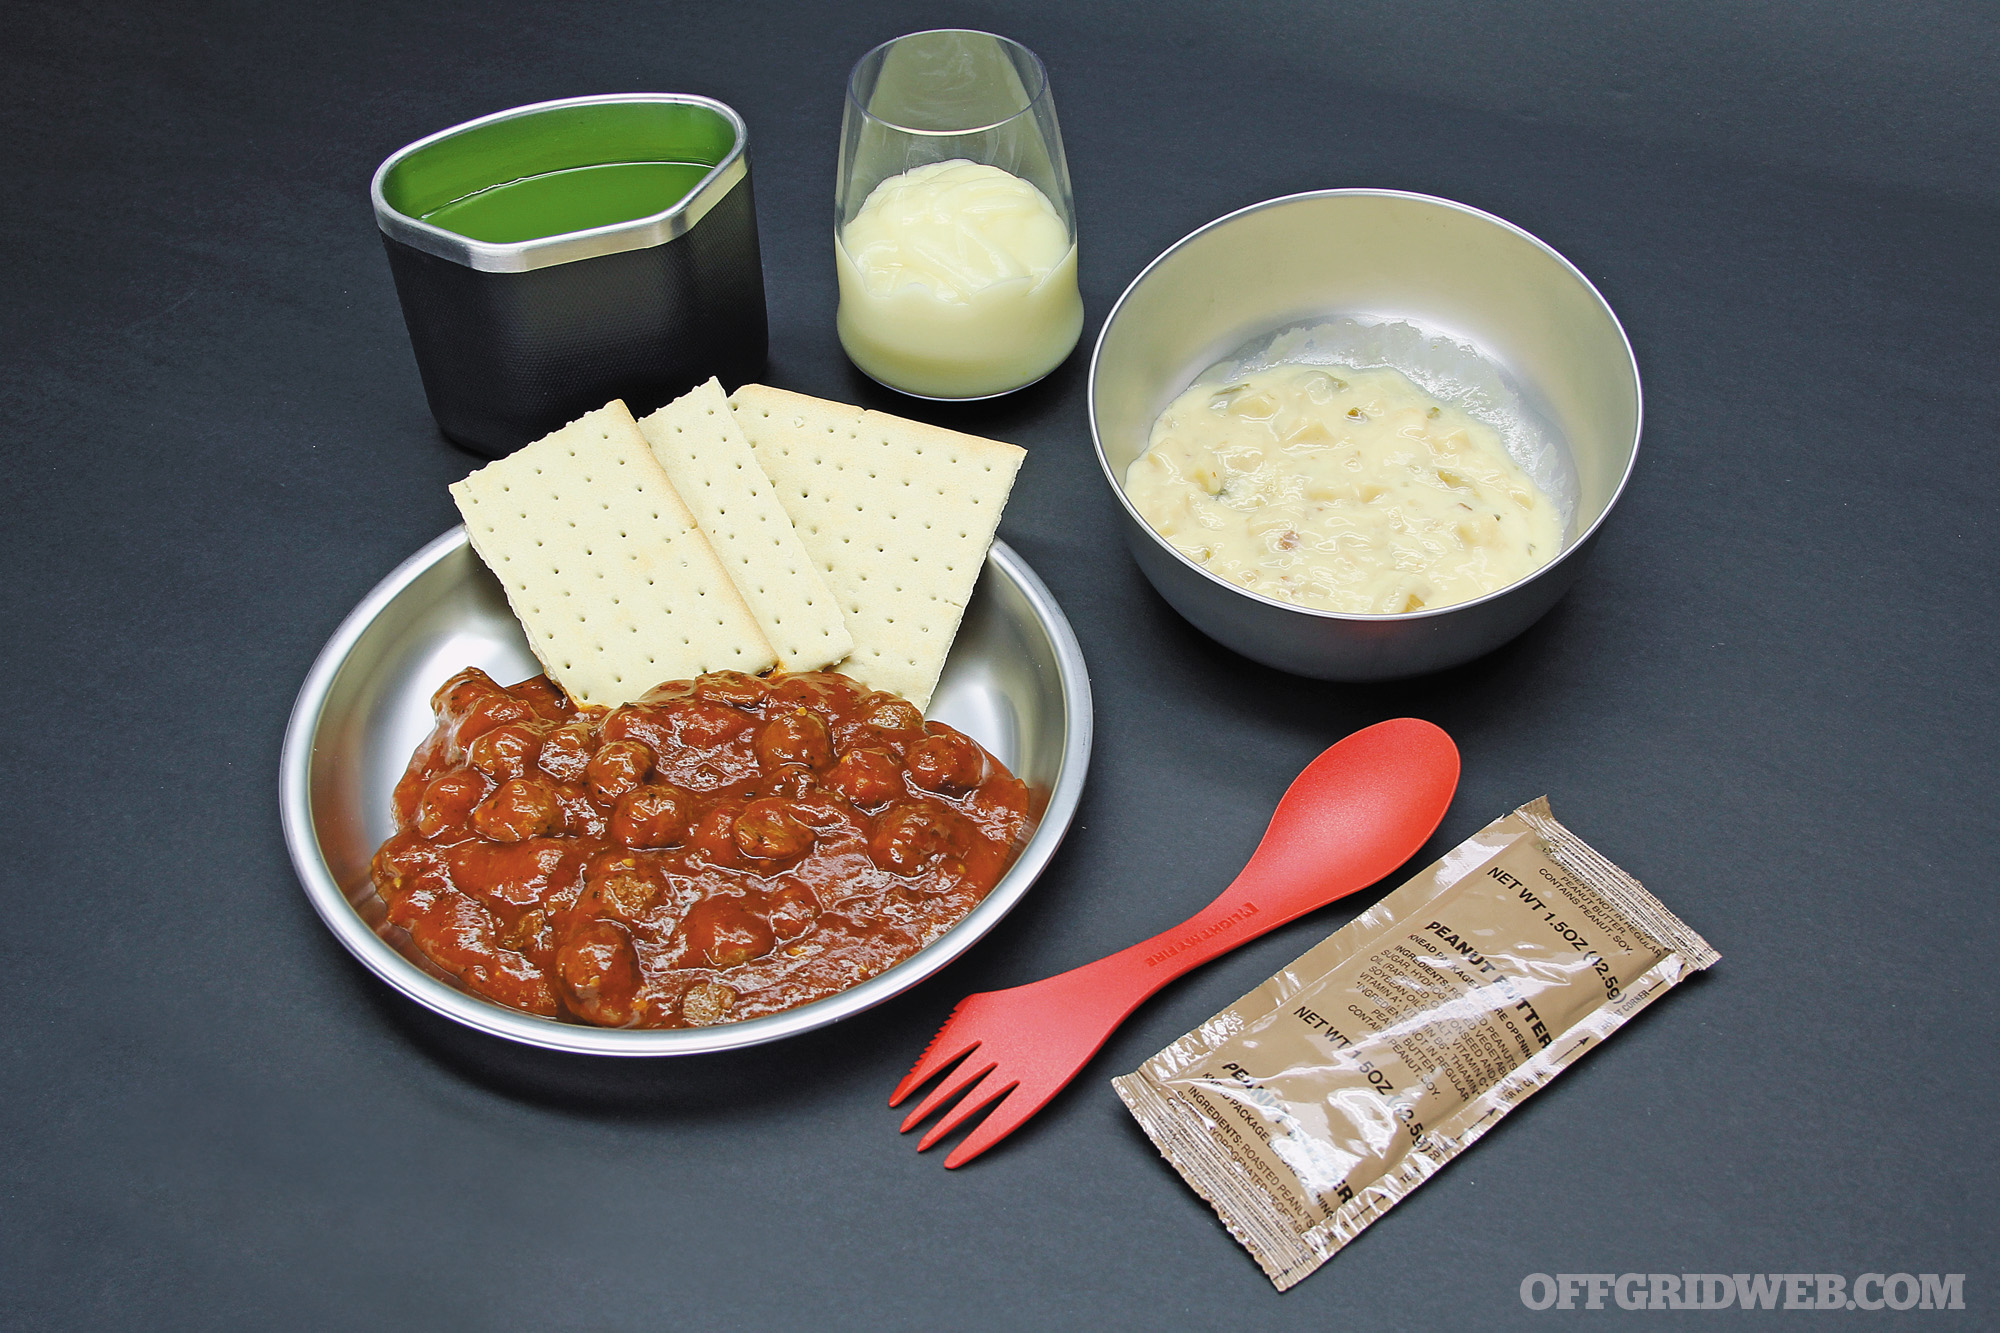
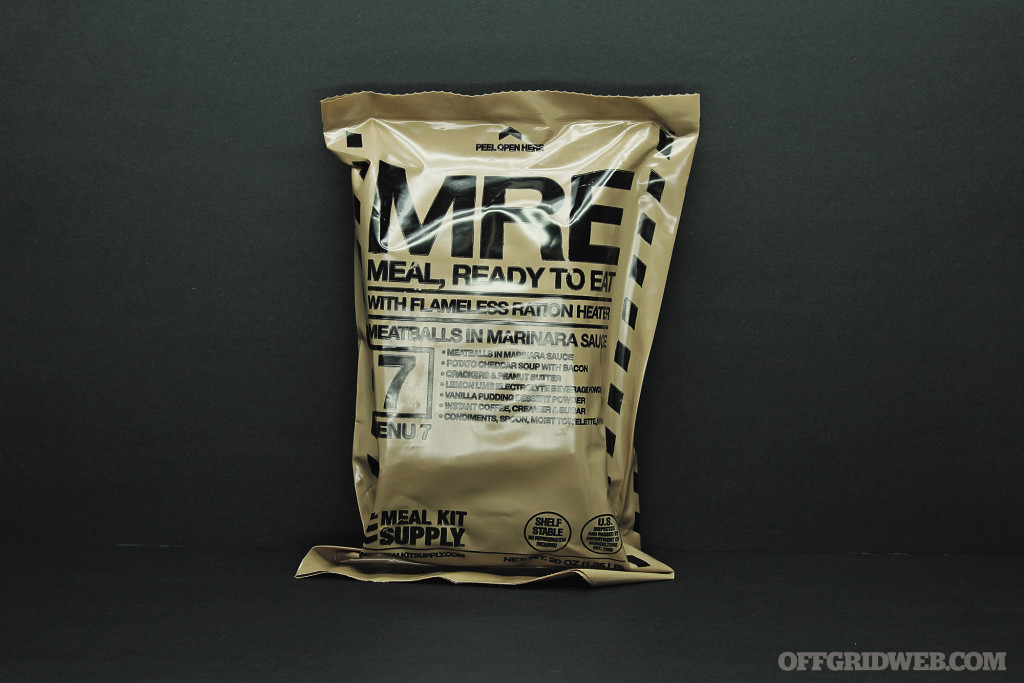
Meatballs in Marinara Sauce
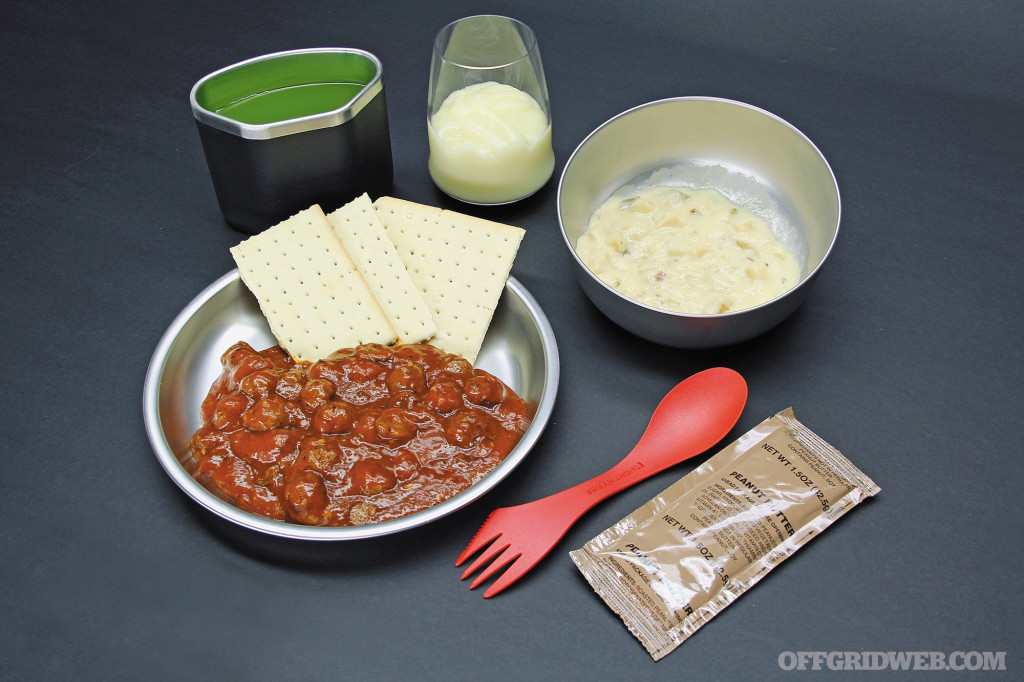
Meatballs in marinara sauce, potato cheddar soup with bacon, crackers, peanut butter, lemon-lime drink, vanilla pudding dessert powder, instant coffee, non-dairy creamer, sugar, condiments, spoon, and moist towelette.
Tester 1: Holy salty balls, Pepperman!!! The meatballs alone have 1,030 mg of sodium or 43 percent of the RDA. Another drawback, the MRE is low on carbs. While fad dieters might think that’s great, a lack of carbs in a long-term SHTF scenario could be a hindrance.
Tester 2: At 1,250 calories, it was the highest of all we tested, if you eat it all. Having lots of calories, it’s a good thing if you’re working hard. The total meal also has extremely high sodium content, which is also good if you’re sweating like Jessica Simpson taking the SATs. Cooked on the stove, it’s decent for processed food. You’re not going to win over the woman of your dreams serving her this, but she might stick around for dessert. This is the only one of the four I’d consider stocking up on.
Tester 3: The meatballs were plentiful and a reasonable facsimile to what you’d find in the canned goods aisle at your local grocery store. As for the soup, this very lactose-intolerant reviewer took one for the team. While I strongly dislike the taste of cheese, the soup was otherwise good, and I was rewarded with morsels of bacon goodness. The usual post-dairy gastric distress wasn’t as immediate as I expected, but punishment eventually came, as sure as death and taxes.
Tester 4: This was my favorite of the bunch—of course, I eat Chef Boyardee straight from the can and sometimes I even wait until I get home from the market. While the meatballs didn’t remind me of Grandma Mione’s, I enjoyed them all the same. The only thing stopping me from making this a regular menu item is the fear of stroking out because of all that sodium elevating my blood pressure. The vanilla “pudding” dessert was a pleasant surprise. You can skip the crackers, which are, as my buddy Craig Shoemaker would say, “harder than Chinese algebra.”
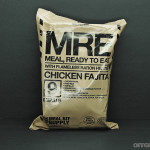
Chicken Fajita
Chicken fajitas, rice, tortilla, pepper sauce, sliced pound cake, powdered orange drink, cocoa powder, instant coffee, creamer, sugar, condiments, spoon, moist towelette, napkin, and hot sauce.
Tester 1: The chicken is high in protein, but the tradeoff is that it’s also high in sodium. After following directions and only getting it lukewarm, it looked like a delicious meal. Looked good, but taste good it did not. It was as if the salty chicken and the bland rice were duking it out to see which would gross me out first.
Tester 2: Throw the included hot sauce in there, and it’s not bad. I’ve had worse from a Mexican restaurant. The rice was undercooked and crunchy. On a cold day, when the rain is running down the crack of your ass, the pound cake would be a good morale booster.
Tester 3: The fajitas themselves were tasty. It comes with a lot of flavorful sauce, which I enjoyed over the rice and tortillas. Speaking of which, “rice” and “tortillas” were generous appellations for those would-be staples. “Rice-Replica” and “Tortilla-Replica” are more accurate.
Tester 4: This is a reasonable attempt at a Tex-Mex favorite of mine. The flavors were all there, but somehow they didn’t come together the way I would have wanted. Ultimately, with some hot sauce (needed more than provided), it could give Taco Bell a run for its money, but still come up a little short. The tortillas were too chewy and provided enough lift to play a hole or two of disc golf. The pound cake was the best dessert of the lot, which is a dubious achievement.
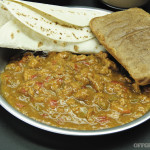
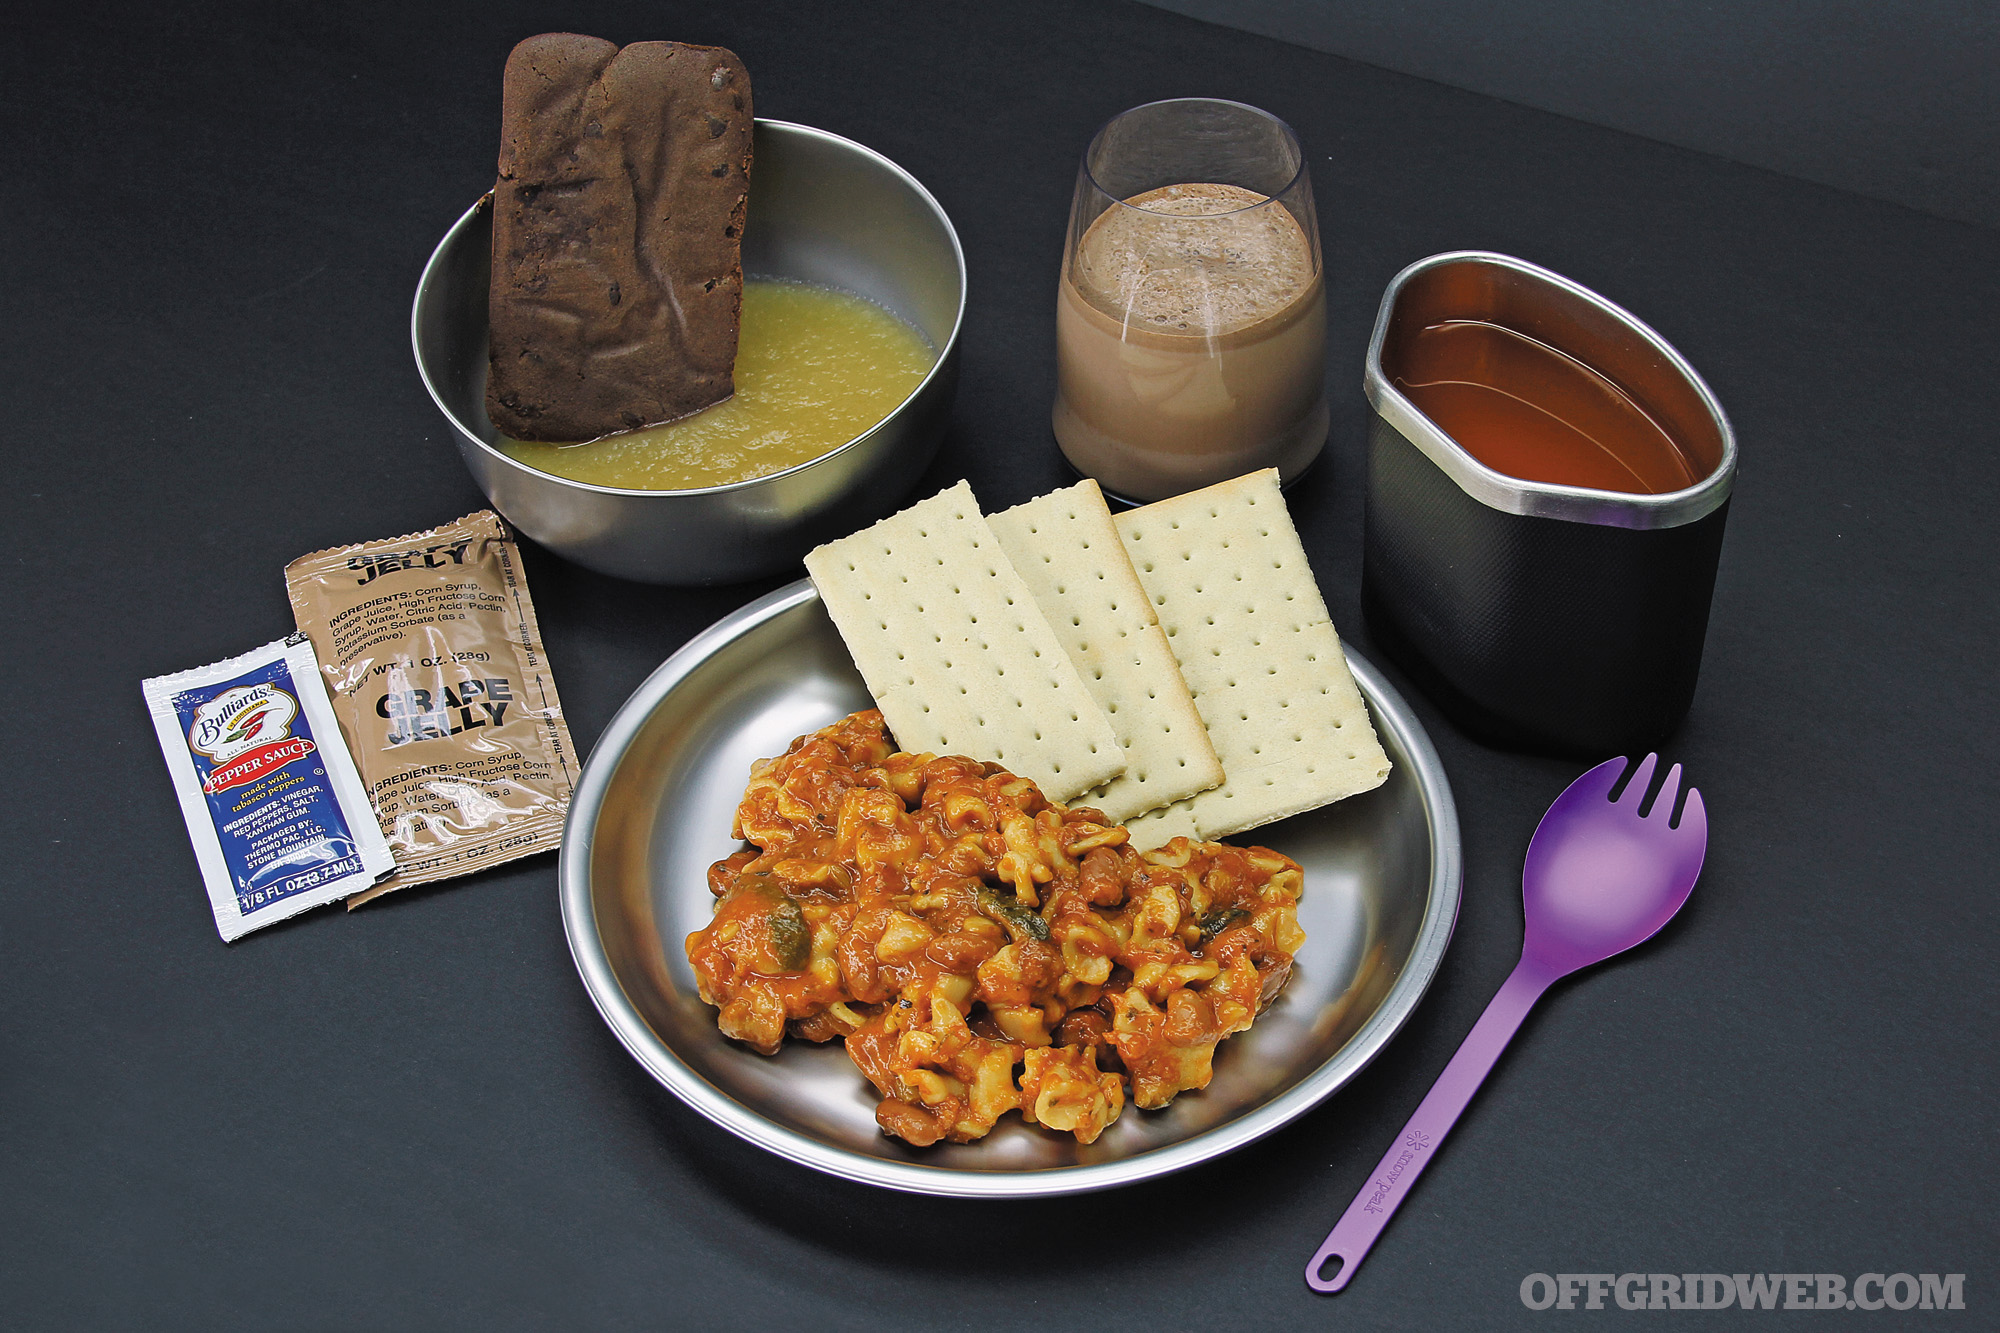
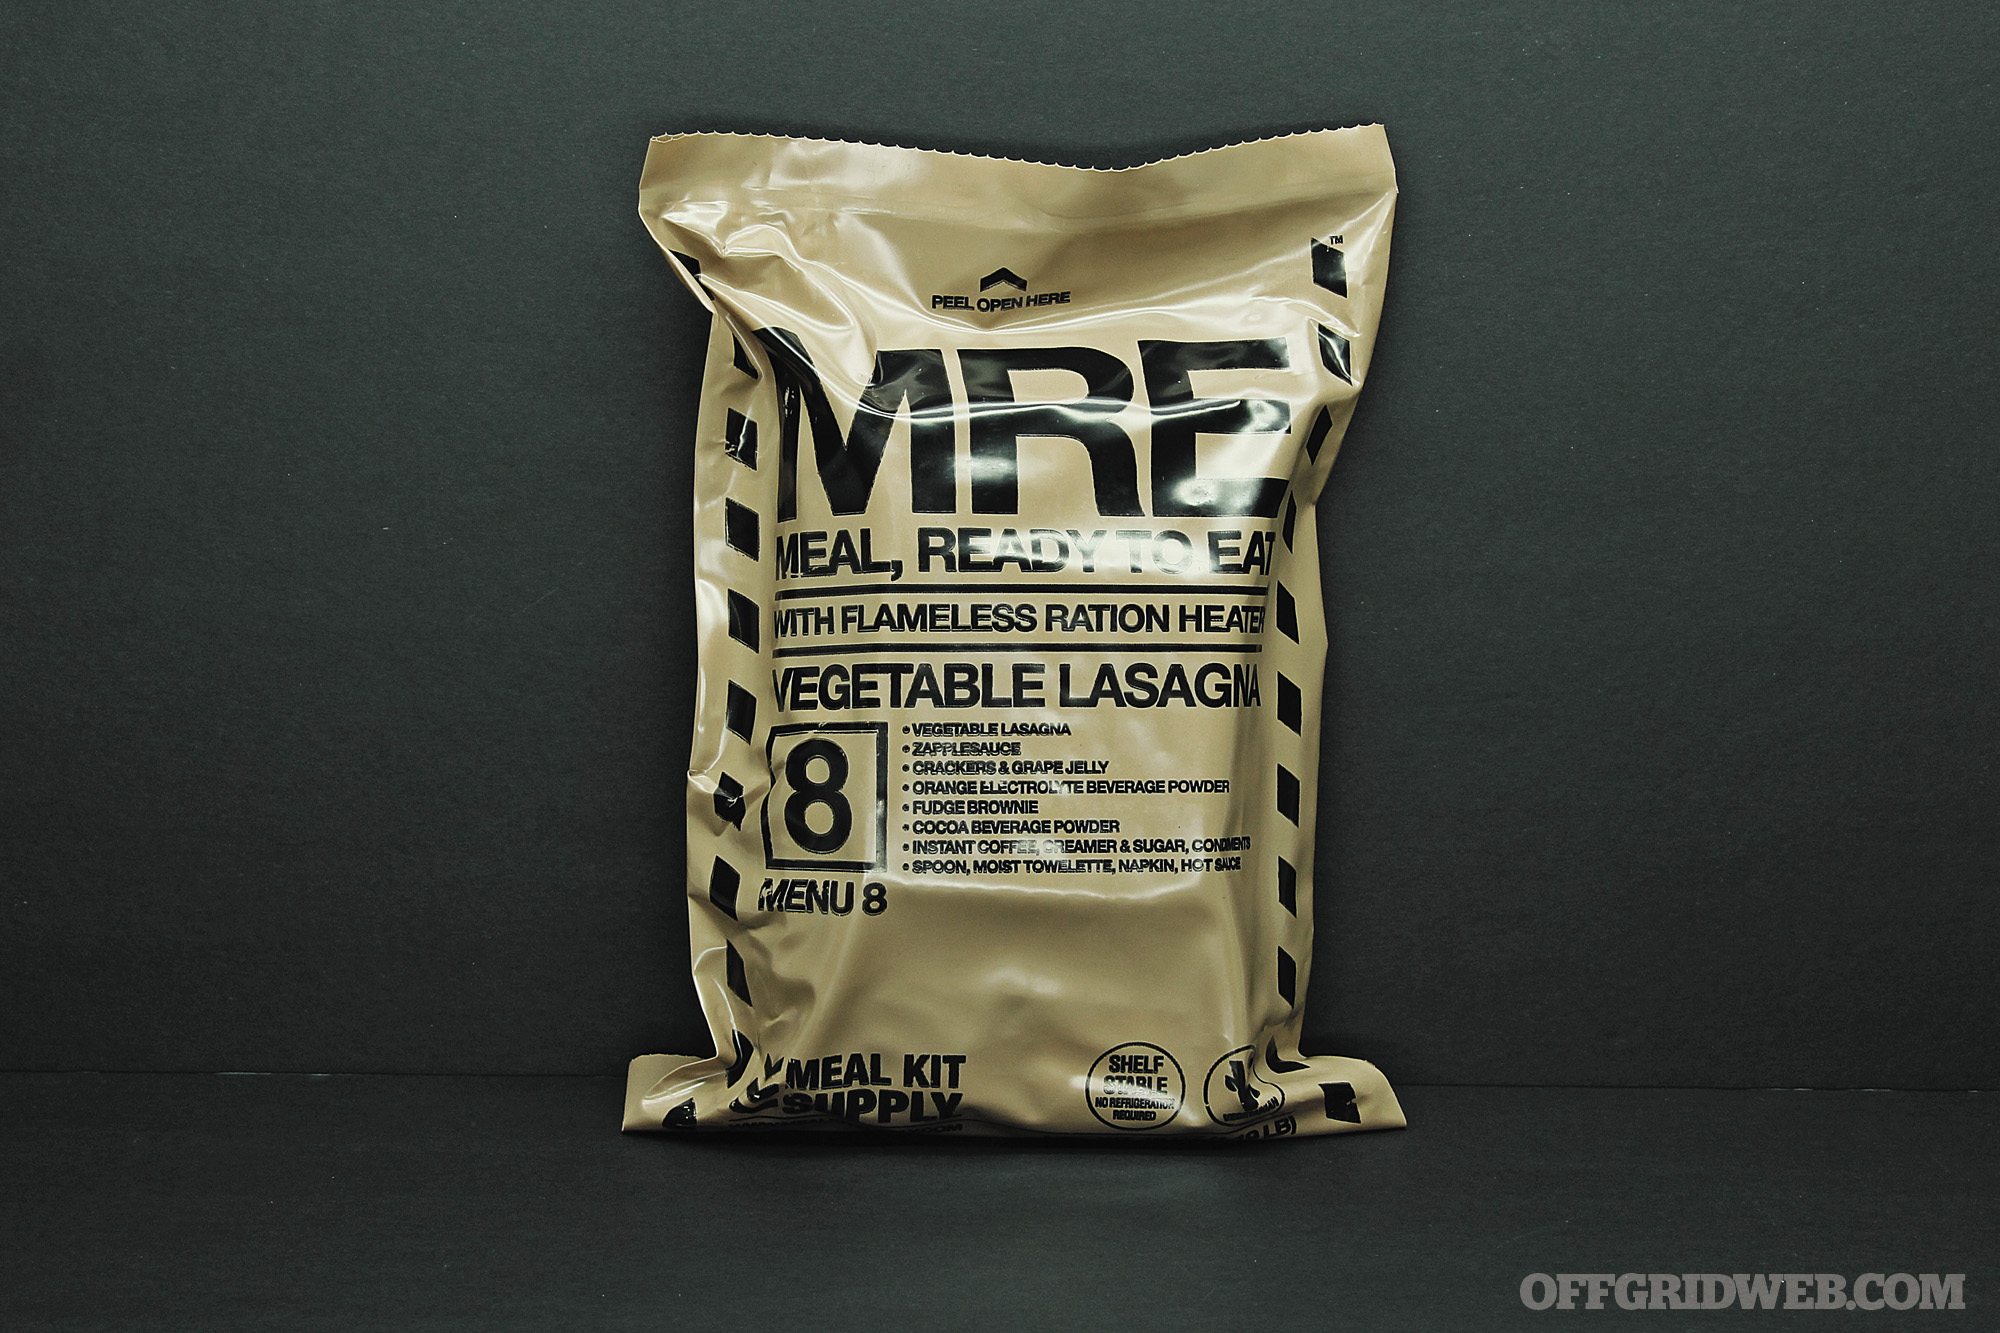
Vegetable Lasagna

Vegetable lasagna, ZAPPLEsauce, crackers, grape jelly, fudge brownie, orange drink, cocoa, instant coffee, creamer, sugar, condiments, spoon, moist towelette, napkin, and hot sauce.
Tester 1: Once again, the FRH was barely effective. Considering this came from a bag and contained no delicious meat or meat-ish products, the vegetable lasagna was actually kind of tasty — for an MRE, anyway. The crackers tasted like real crackers, while the brownie and “Zapplesauce” were above average.
Tester 2: In addition to the meal looking remarkably like a gut wound this MRE is also high in sodium. To get enough calories, you have to eat the whole MRE and not be picky. The brownie has the highest calorie count, but it’s all simple carbs, so expect to crash hard if you’re expending a lot of energy.

Tester 3: Recovering from the potato and cheese soup, so I literally sat this one out.
Tester 4: Another attempt at an Italian favorite. My biggest peeve was calling it lasagna; it was noodles suspended in sauce and what I guess were the vegetables. It just didn’t look right. I image The Walking Dead using this as a prop when zombies are eating brains. All that aside, it did taste pretty good when it was heated to a decent temperature. The fudge brownie was surprisingly good, no worse than the pre-packaged brownies you get at a gas station. Make sure, however, you have plenty of water to wash it down, because it’s a little on the dry side.
Featured Utensils & Dinnerware
The following items can be found in the MRE images above:
Freeze-Dried Eats: The Alternative to MREs

If the specter of filling up on sodium-saturated military-grade dried foodstuffs doesn’t sound palatable to you or you have health concerns that bar you from partaking in them, you’re in luck. Those who camp, climb, hike, or do any other outdoorsy kind of activity may already be aware of the many freeze-dried meals that are on the market. Made for outdoor adventurers, they are like MREs in that they last for years after their manufacture date, but unlike MREs, which are complete meals in a pouch, offer only single courses. This doesn’t mean that you can’t select a few offerings to form your own complete meal, however.
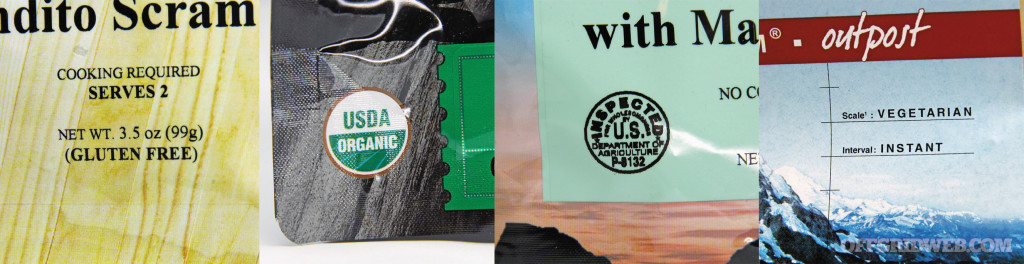
Generally speaking, these non-military-grade meals are USDA inspected for quality, get high marks for taste, and are, for the most part, nutritious. If you have health concerns with your food, there are meals prepared for just about every need. There are vegetarian, organic, gluten-free, MSG-free, and preservative-free varieties. Between the different manufacturers, you end up with a large selection of tastes from the basics like scrambled eggs and beef stew all the way to curry and yakisoba noodles.
The advantage of MREs is that they come ready to eat whether you heat them up or not. They even come with their own water-activated chemical heater bag. Freeze-dried foods on the other hand, require about one to two cups of boiling water per pouch. This means that you’ll need to use your supply of clean drinking water and a means to heat it to a boil to get your meal cooked. If you feel like you have a bulletproof water plan for an impending doomsday scenario and enjoy a more-than-MRE gourmet meal, these freeze-dried alternatives just might be the ticket. We like to have our bases covered, so we went with storing both types just in case.
Natural High Chicken Pot Pie with Mashed Potatoes
- Serves: 2
- Dry Weight: 6 oz
- Single Cooked Serving Size: N/A
- MSRP: $6.50
- URL: www.knafoods.com
Alpine Foods Bandito Scramble
- Serves: 2
- Dry Weight: 3.5 oz
- Single Cooked Serving Size: N/A
- MSRP: $5.23
- URL: www.knafoods.com
Backpacker’s Pantry Organic Yakisoba Noodles
MaryJanesFarm Organic Curry in a Hurry
Mountain House Chili Mac with Beef
Bulk Foods
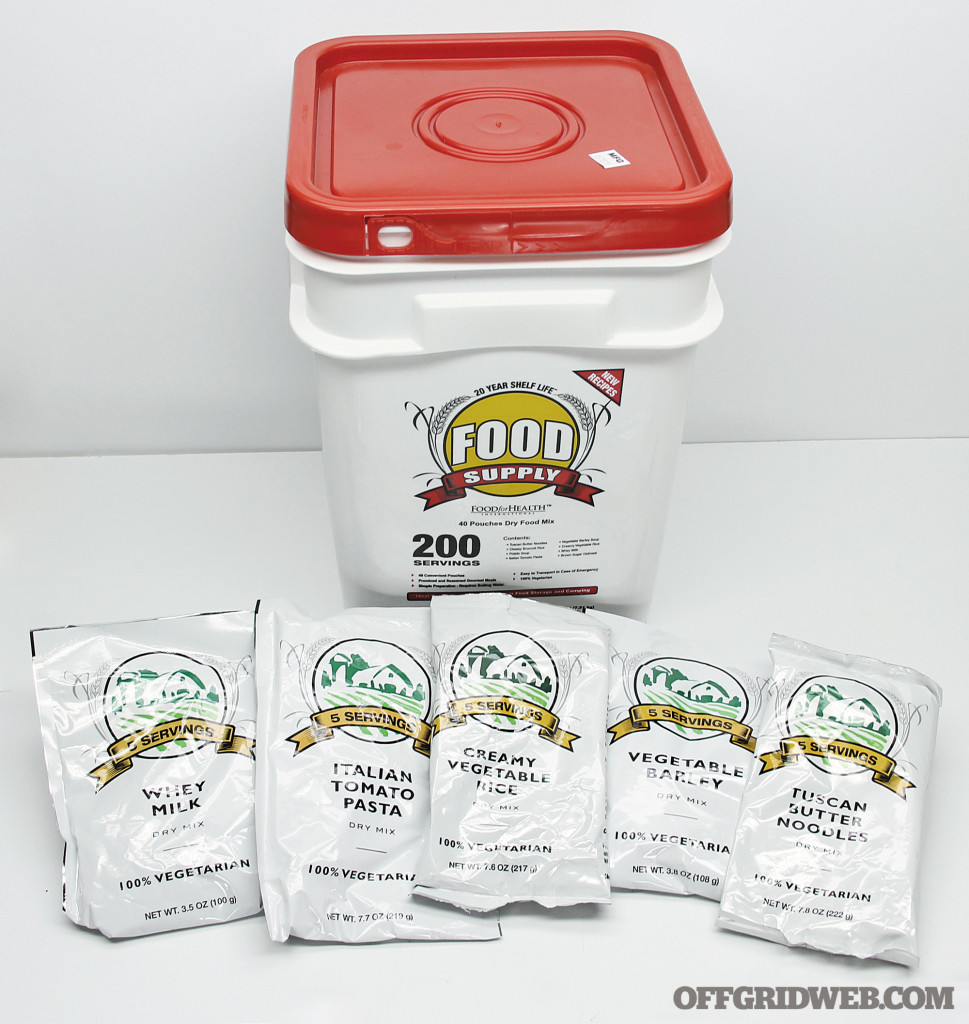
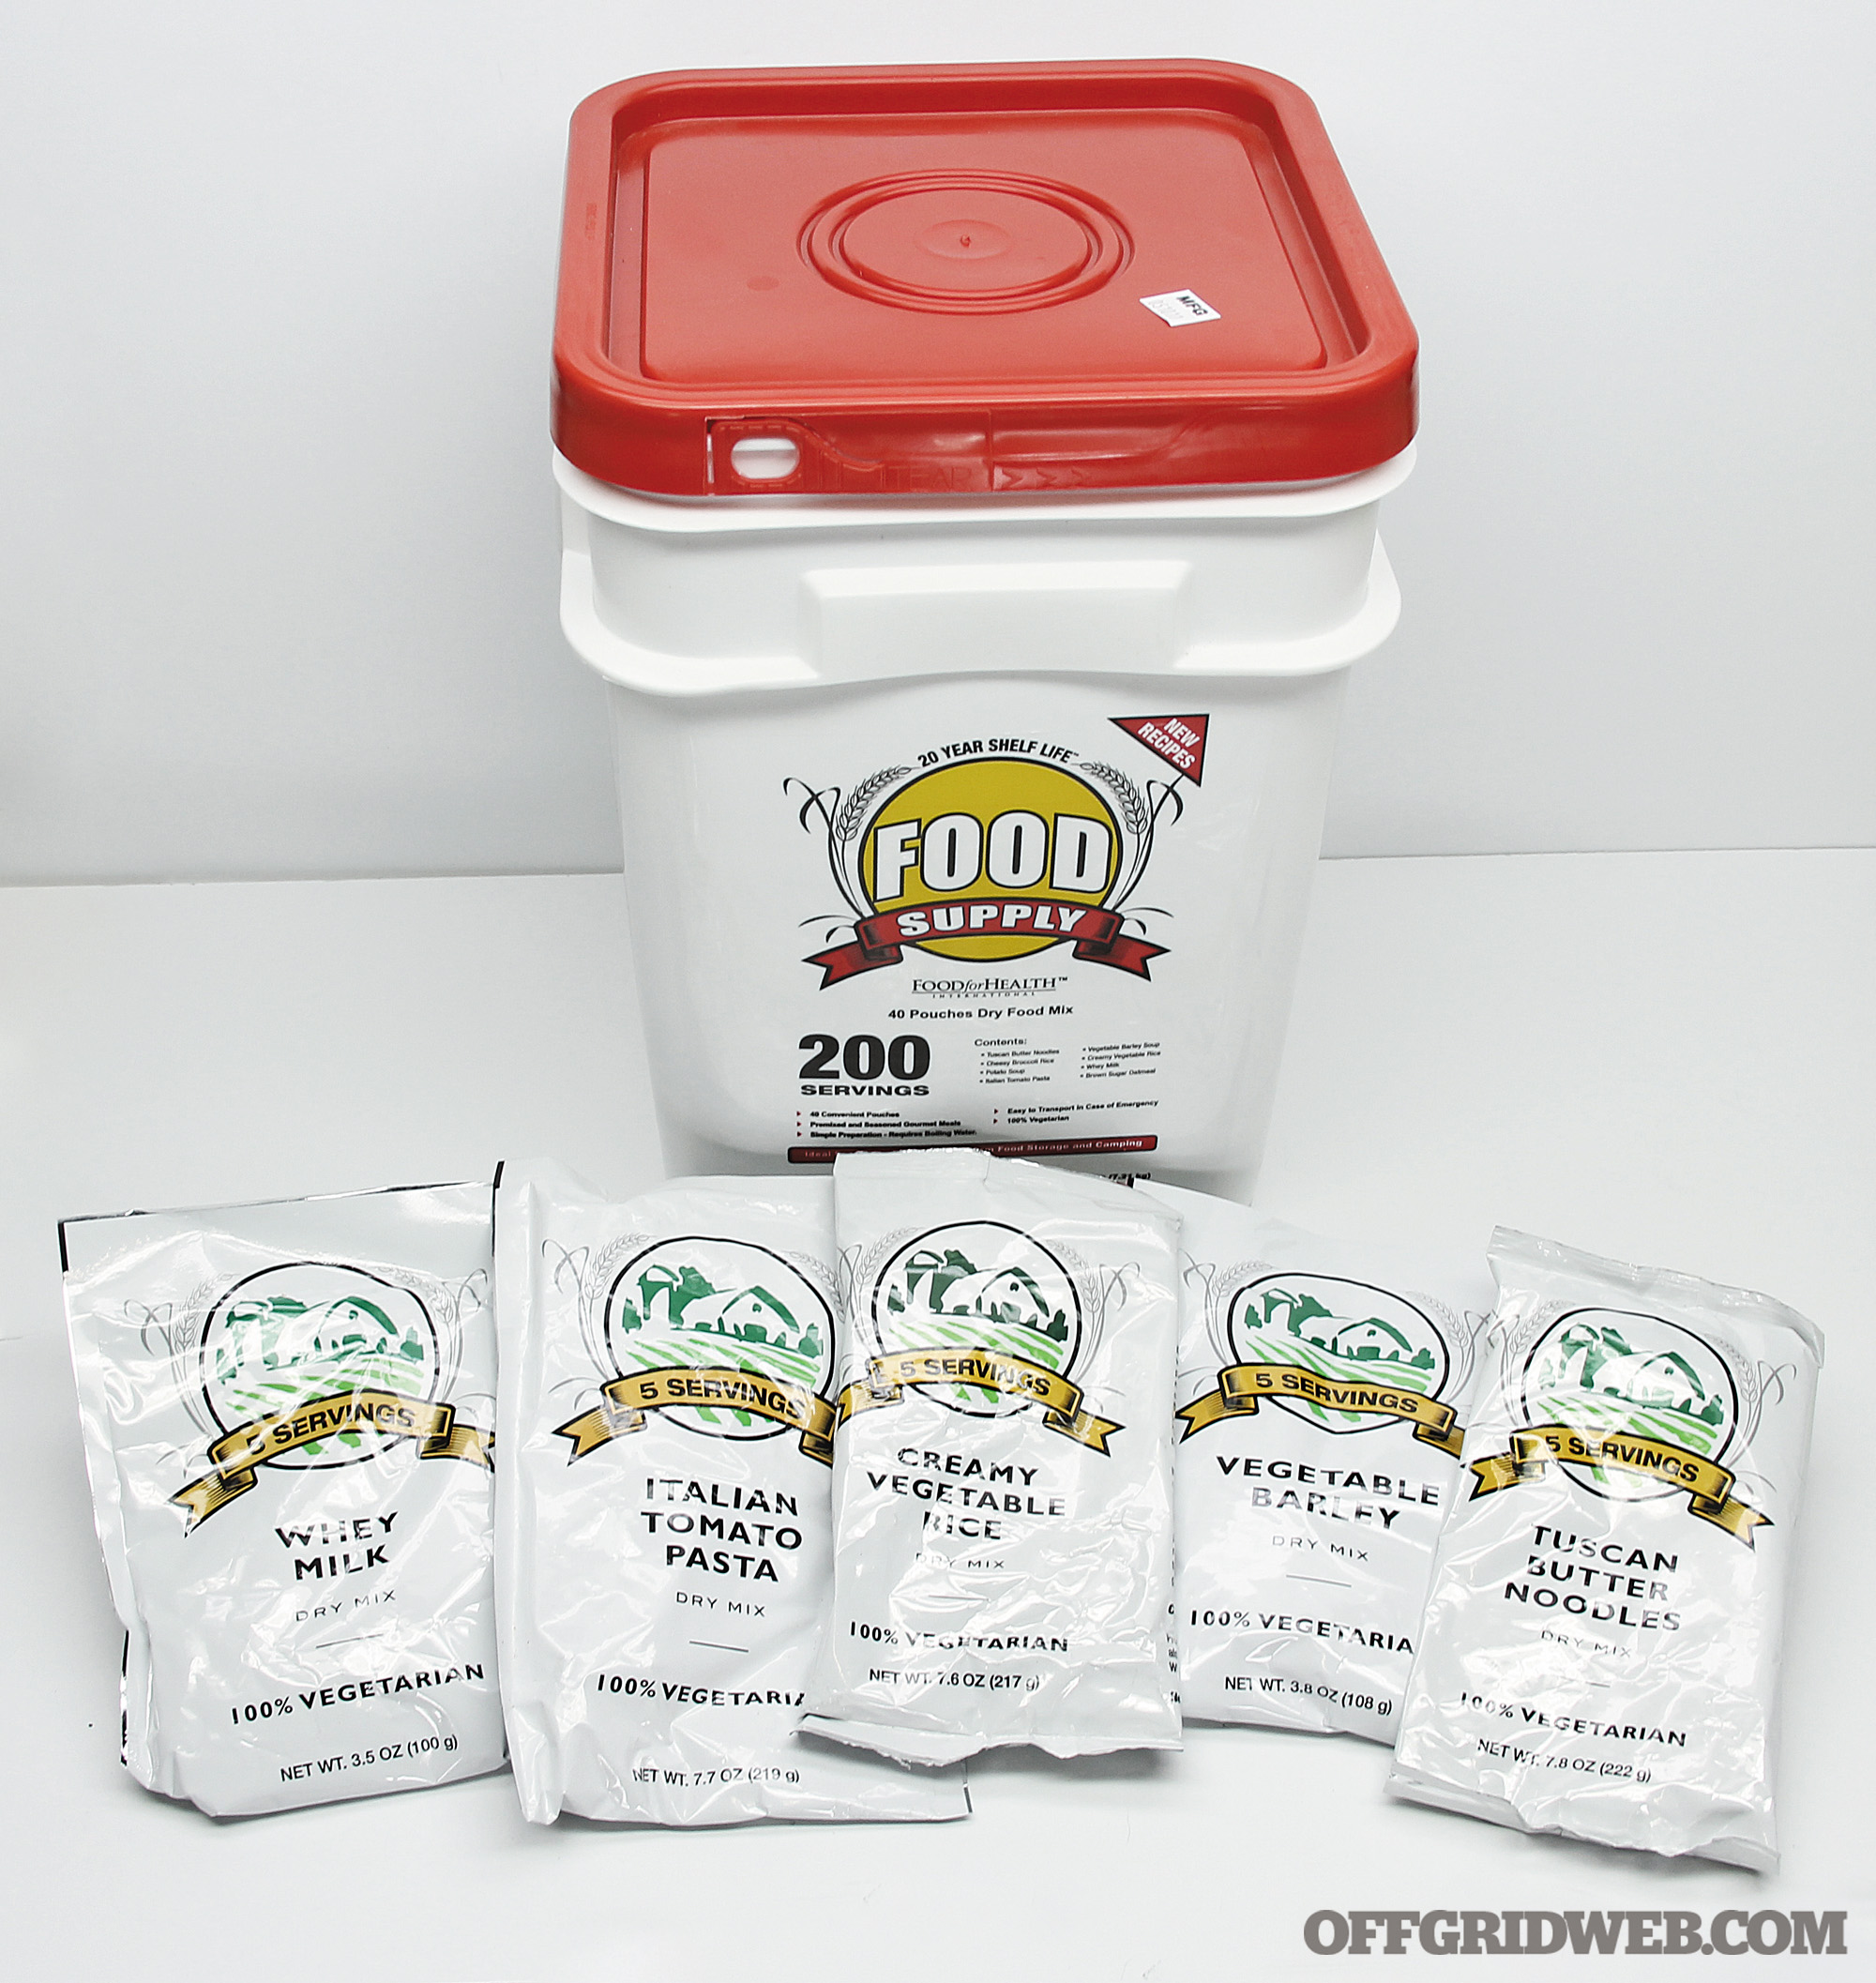
If you’re thinking you’d like to prepare for a long-term meal plan or have a lot of mouths to feed, look into dried food that is sold by the bucket. Many manufacturers make them; most of them contain hundreds of servings with a variety of flavors stuffed into each bucket. Your best bet is to study what your taste and nutritional needs are and look for the corresponding bucket.
This 5-gallon bucket we got was a little over $100, includes 200 servings of food, divided into a pouch of five servings each. Like the freeze-dried foods we outlined before, they do require boiled water for preparation. If stored properly, this food can be stored for an amazing 20 years.
Food for Health International Food Supply 200 Servings
Features:
- Tuscan Butter Noodles, 20 servings
- Cheesy Broccoli Rice, 20 servings
- Vegetable Barley, 20 servings
- Creamy Vegetable Rice, 25 servings
- Creamy Potato Soup, 25 servings
- Italian Tomato Pasta, 20 servings
- Brown Sugar Oatmeal, 35 servings
- Whey Milk, 35 servings
MSRP: $114.95
URL: store.foodforhealthinternational.com
Conclusion
If you’re hoping to get five-star cuisine from a plastic bag, then you need to dial back your expectations a whole lot. If you figured a complete meal from a plastic bag that can sit for years at a time and not go bad isn’t going to win any food awards, you’re well ahead of the game. While these meals weren’t the best we’ve ever eaten, we’ve had, heck, cooked, worse. But, in any SHTF scenario, your primary goal is to survive and thrive, and MREs should be an important part of your plan. The nutrition and fuel they provide you is more than enough to survive on. On top of that, you may even be surprised at how palatable some of them are.
Resources
- Wornick: www.wornick.com
- Longlife Food Depot: www.longlifefood.com
- Sopakco: www.sopakco.com
- MREstar: www.mre-meals.net/index.php
- Meal Kit Supply: www.mealkitsupply.com/catalog/
- Ameriqual: www.ameriqual.com