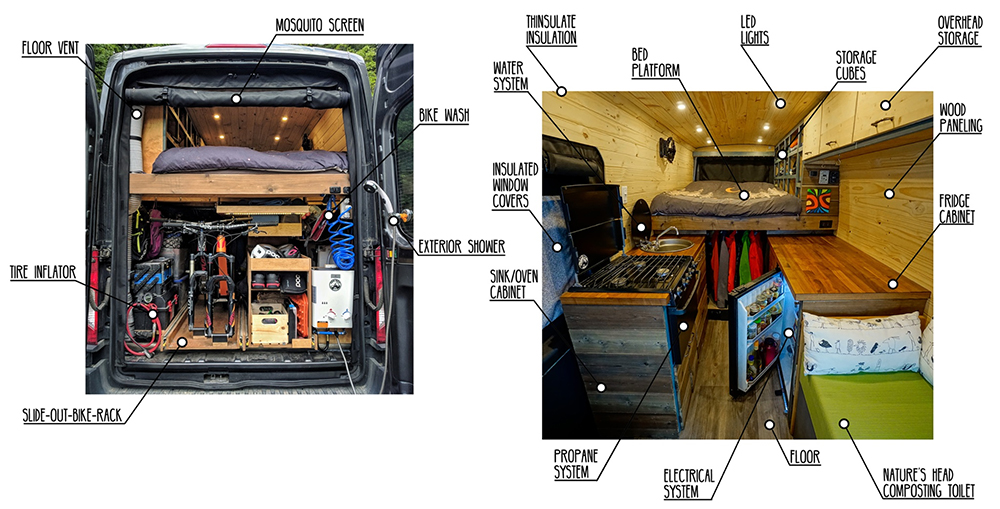
Whether you love adventure on the open road, you’re looking to become better prepared for a bug-out situation, you want to downsize your life, or all of the above, building a vehicle into a home on wheels is an appealing idea. We’ve written about many such builds in the past — they range from minimalistic to extravagant, and from 15-passenger vans to converted box trucks. Above all, these vehicles are designed to provide a comfortable place to sleep, secure storage for gear and supplies, and a rugged means of transportation that can traverse countless miles of highways and trails.
Photo via FarOutRide
If you’ve considered diving in to a camper van build project of your own, it’s valuable to study other successful builds and learn from the builders. Total cost and time expended are especially important variables, and few builders share these details publicly. Fortunately, we recently came across FarOutRide.com, a web site dedicated to sharing every detail of a Ford Transit van project.
Photo via FarOutRide
The creators of FarOutRide, Isabelle and Antoine, quit lucrative engineering jobs and sold their house before moving into their self-built van in 2017. Since then, they’ve been continually updating their web site to document the project and encourage others to do the same.
Specifically, the FarOutRide is a high-roof, extended-length 2016 Ford Transit with a 3.7L gas V6. Isabelle and Antoine purchased the van for $45,000 CAD (roughly $35,000 USD). The couple have tracked and itemized their subsequent build expenses, which currently total just over $18,000 USD, bringing total cost to $53,000.
Photo via FarOutRide
However, time is money, and it’s undeniable that an immense amount of labor has gone into the build. Conservatively, they estimate 640 hours spent on the van, but also admit the reality is probably closer to 1,000 hours including all the small tasks that weren’t strictly tracked. Isabelle and Antoine did the work themselves, saving what could have easily been tens of thousands of dollars in labor if it was done by a third party.
Photo via FarOutRide
If you’re interested in building a camper van, bug-out vehicle, or overland rig, we’d encourage you to check out FarOutRide.com. It’s full of a wealth of info that can help you decide if you’re ready for van life, and budget accordingly.
Most of us know the carabiner as a form of mountaineering equipment — these days, you’ll generally find them in the climbing section of sporting goods and outdoor gear stores. However, the origin of this name hints at its original use. Carabiner is derived from karabinerhaken, German for carbine hook. The earliest carabiners were used by German riflemen in the 1930s to attach gear to belts. But you don’t have to be a mountain-climber or a soldier to see the value of this ubiquitous tool.
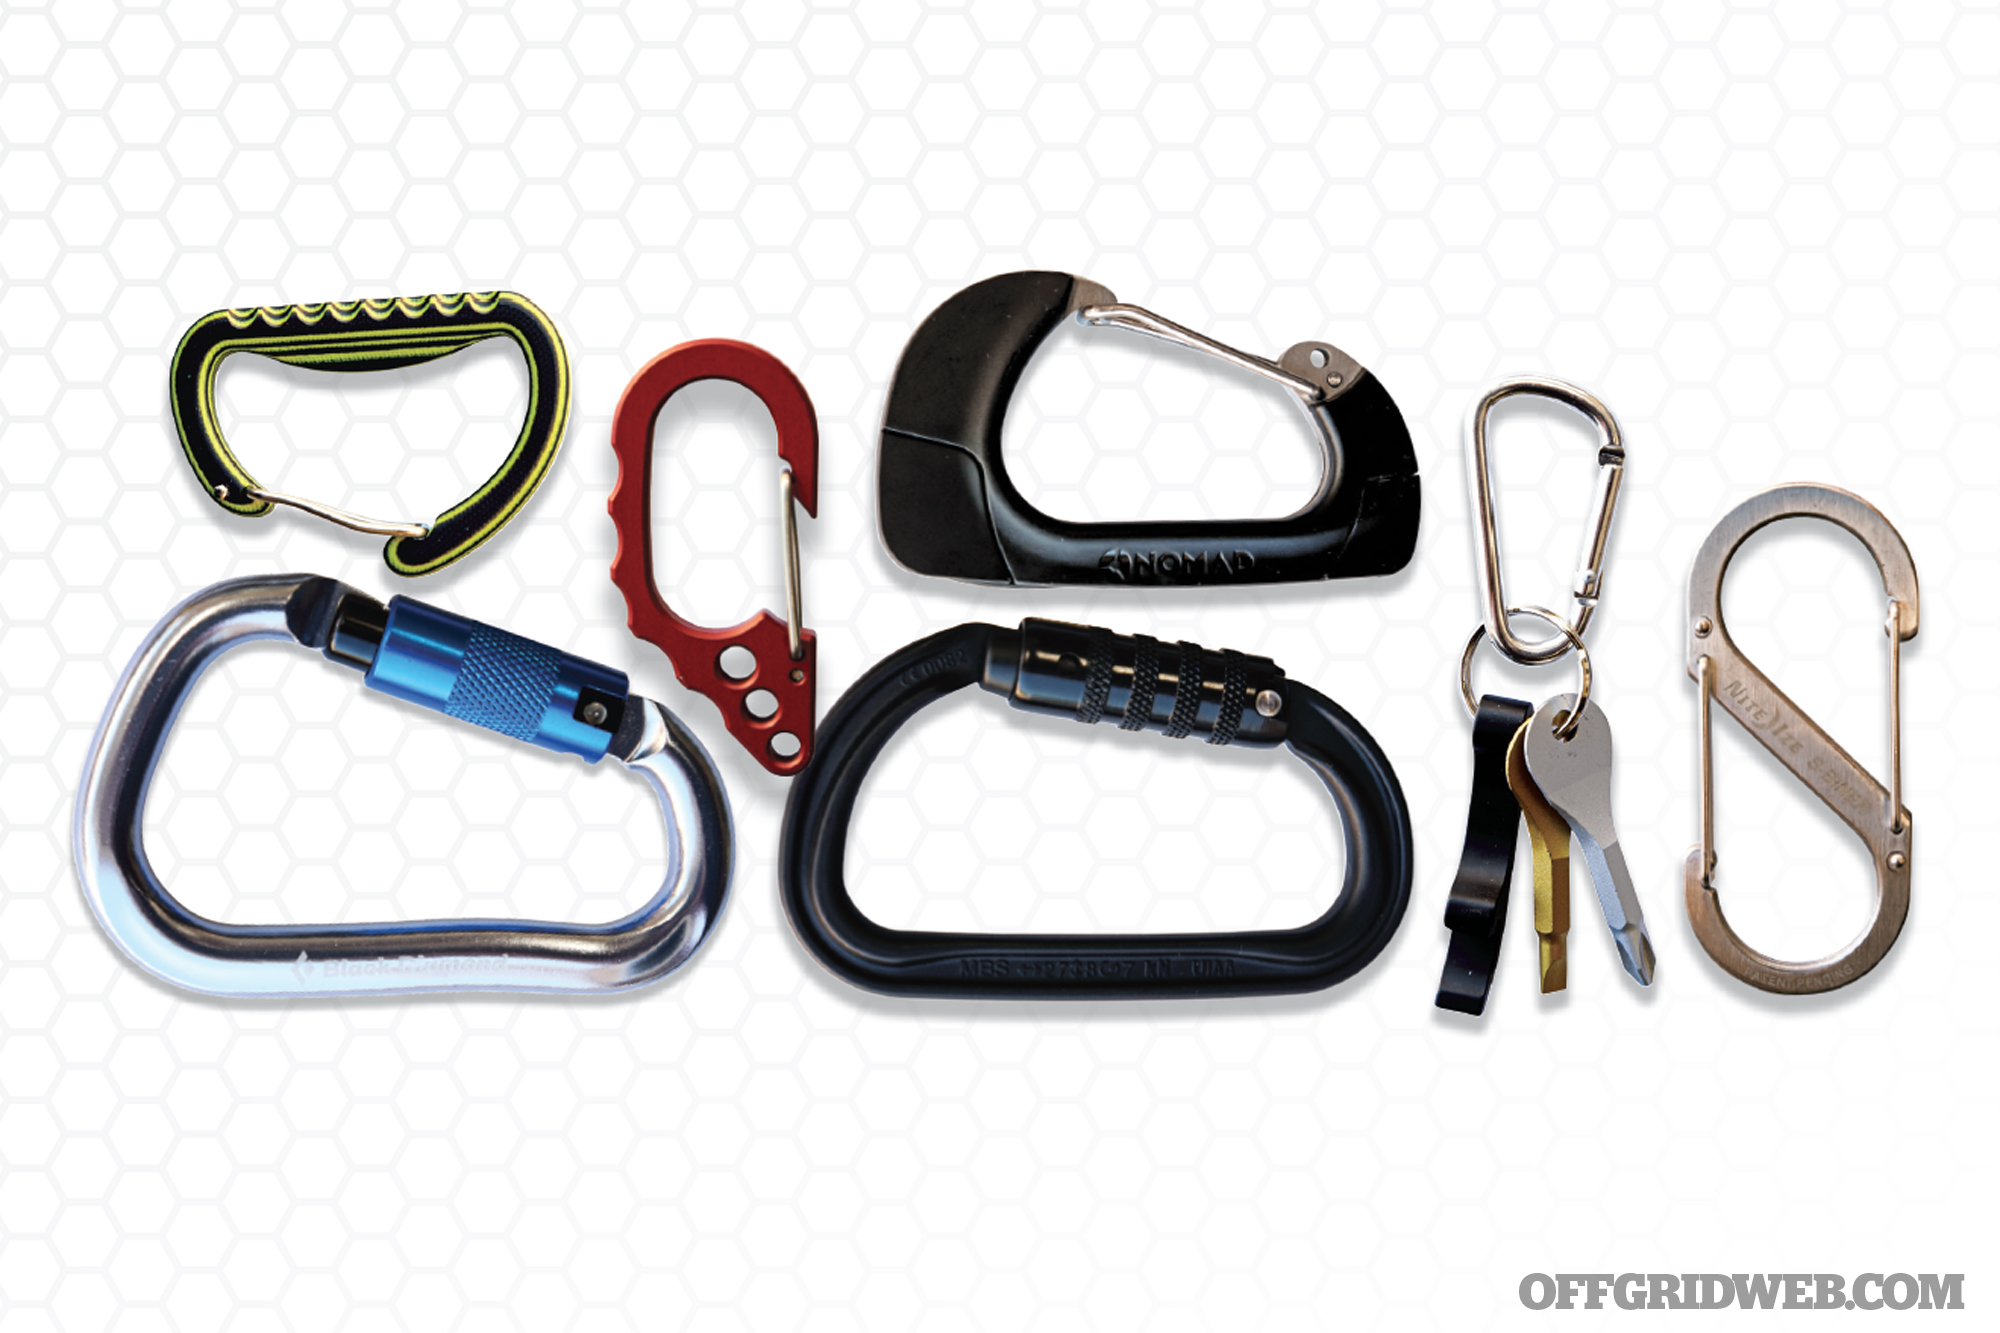
Carabiners serve a myriad of purposes for hiking, backpacking, camping, and emergency preparedness. The most obvious of these is — just like the original karabinerhaken — to retain gear on a belt, strap, rope, or ridgeline. A carabiner can snap a loose accessory onto PALS webbing on a plate carrier, hook a handbag to a piece of luggage, suspend a hammock, connect a water bottle to a backpack strap, or stow your keys on a belt loop. We’ve used them to hang gravity water purifiers, bear bags, and lanterns in the backcountry. A large carabiner also works well as a carry handle for multiple heavy shopping bags, and you could even use one as an improvised weapon in a pinch.
As a result of these uses, we make a point to have a carabiner (or a few) close at hand. Some of these are heavy-duty climbing tools that could be used for rappelling, while others are of the multipurpose every-day-carry variety. Some of the latter category incorporate other functions, such as a bottle opener, prybar, bit driver, or even an integrated USB power bank.
The Heroclip
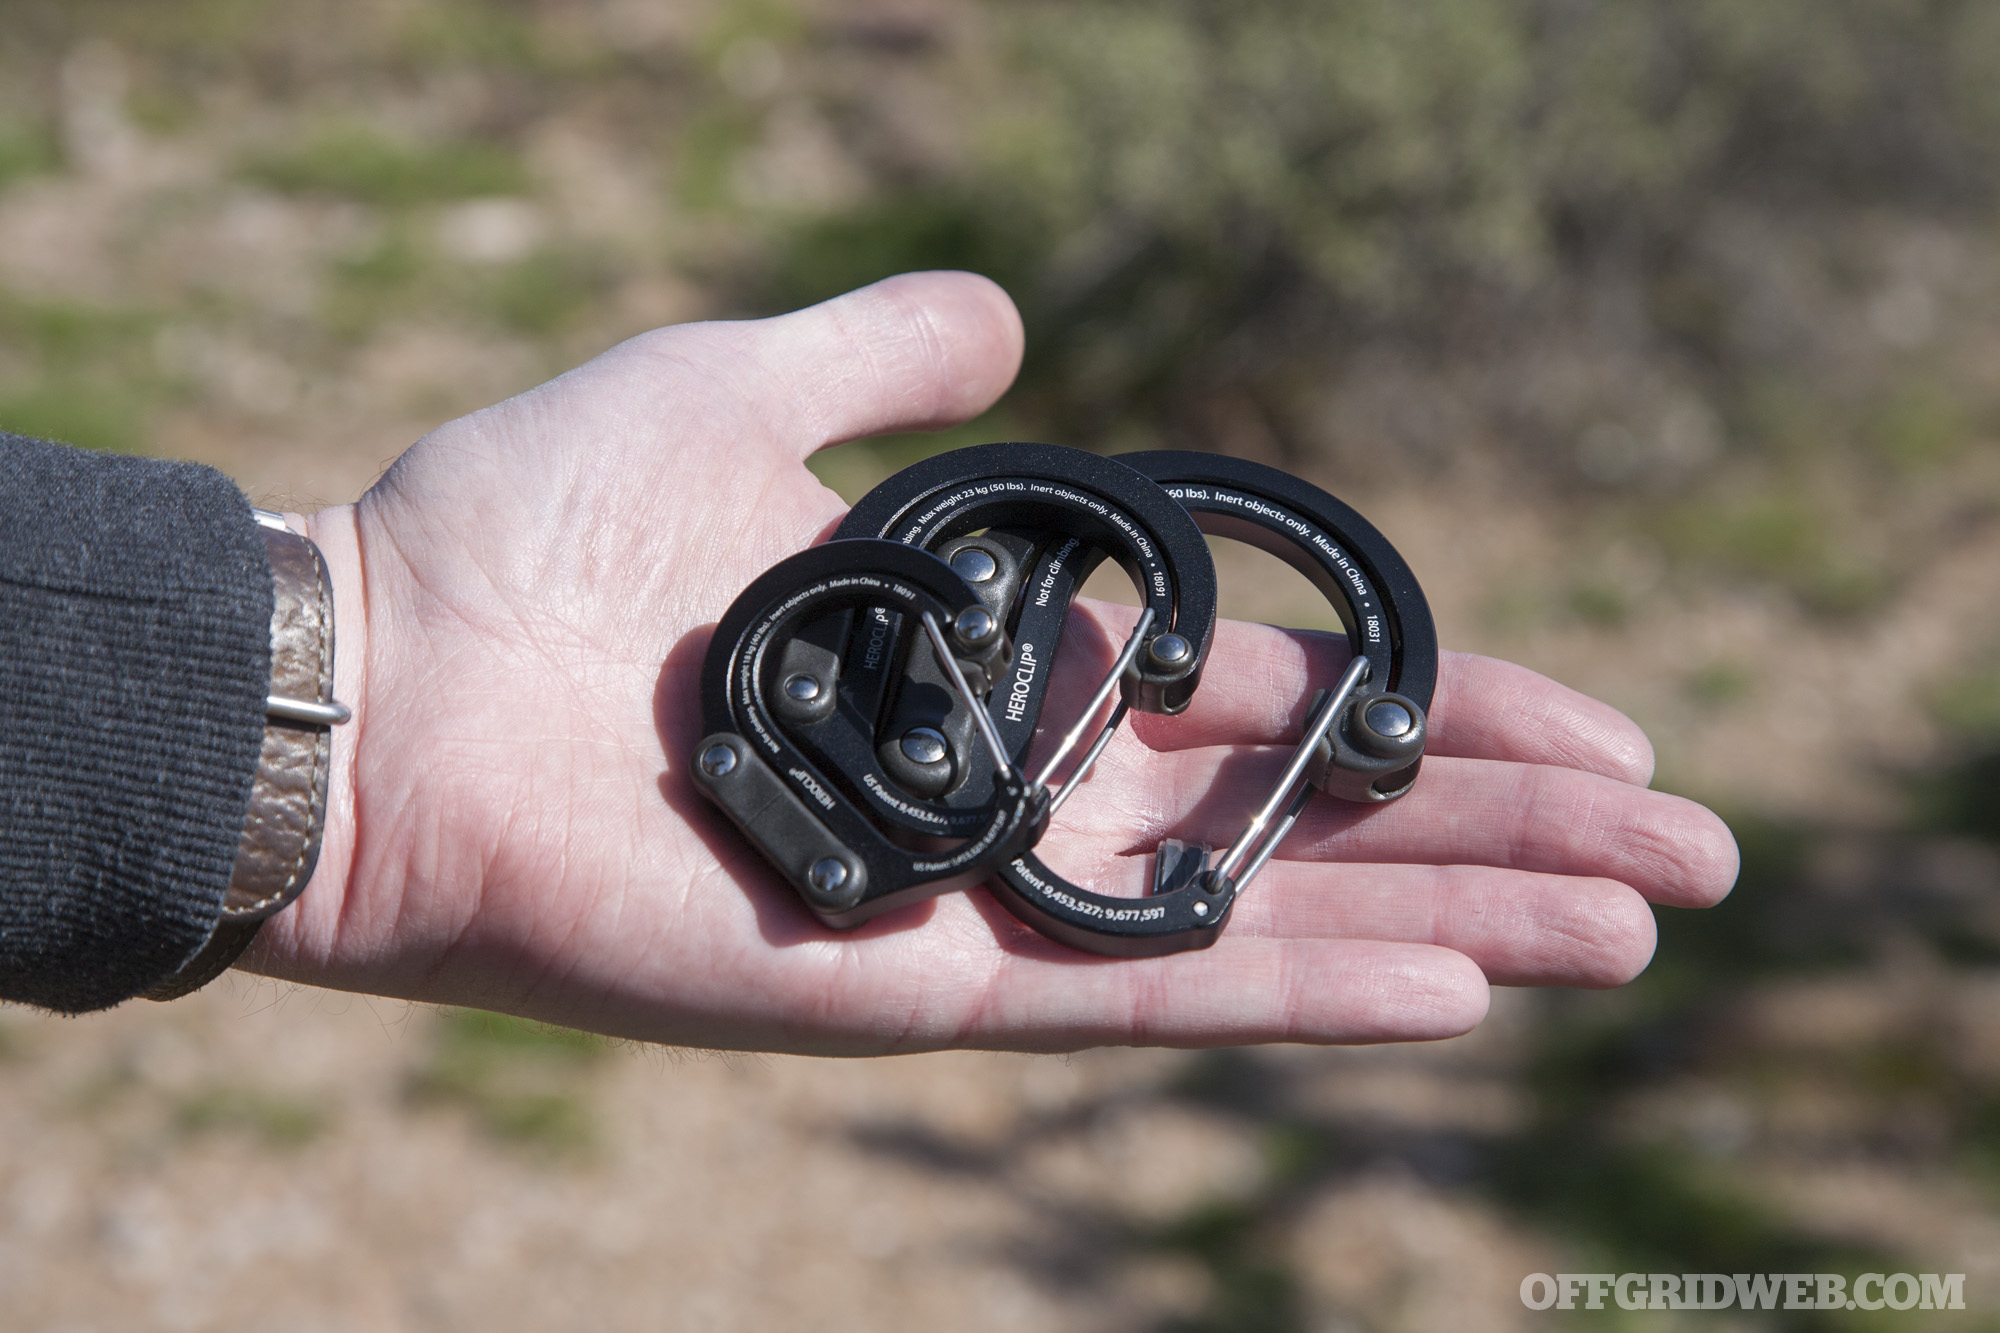
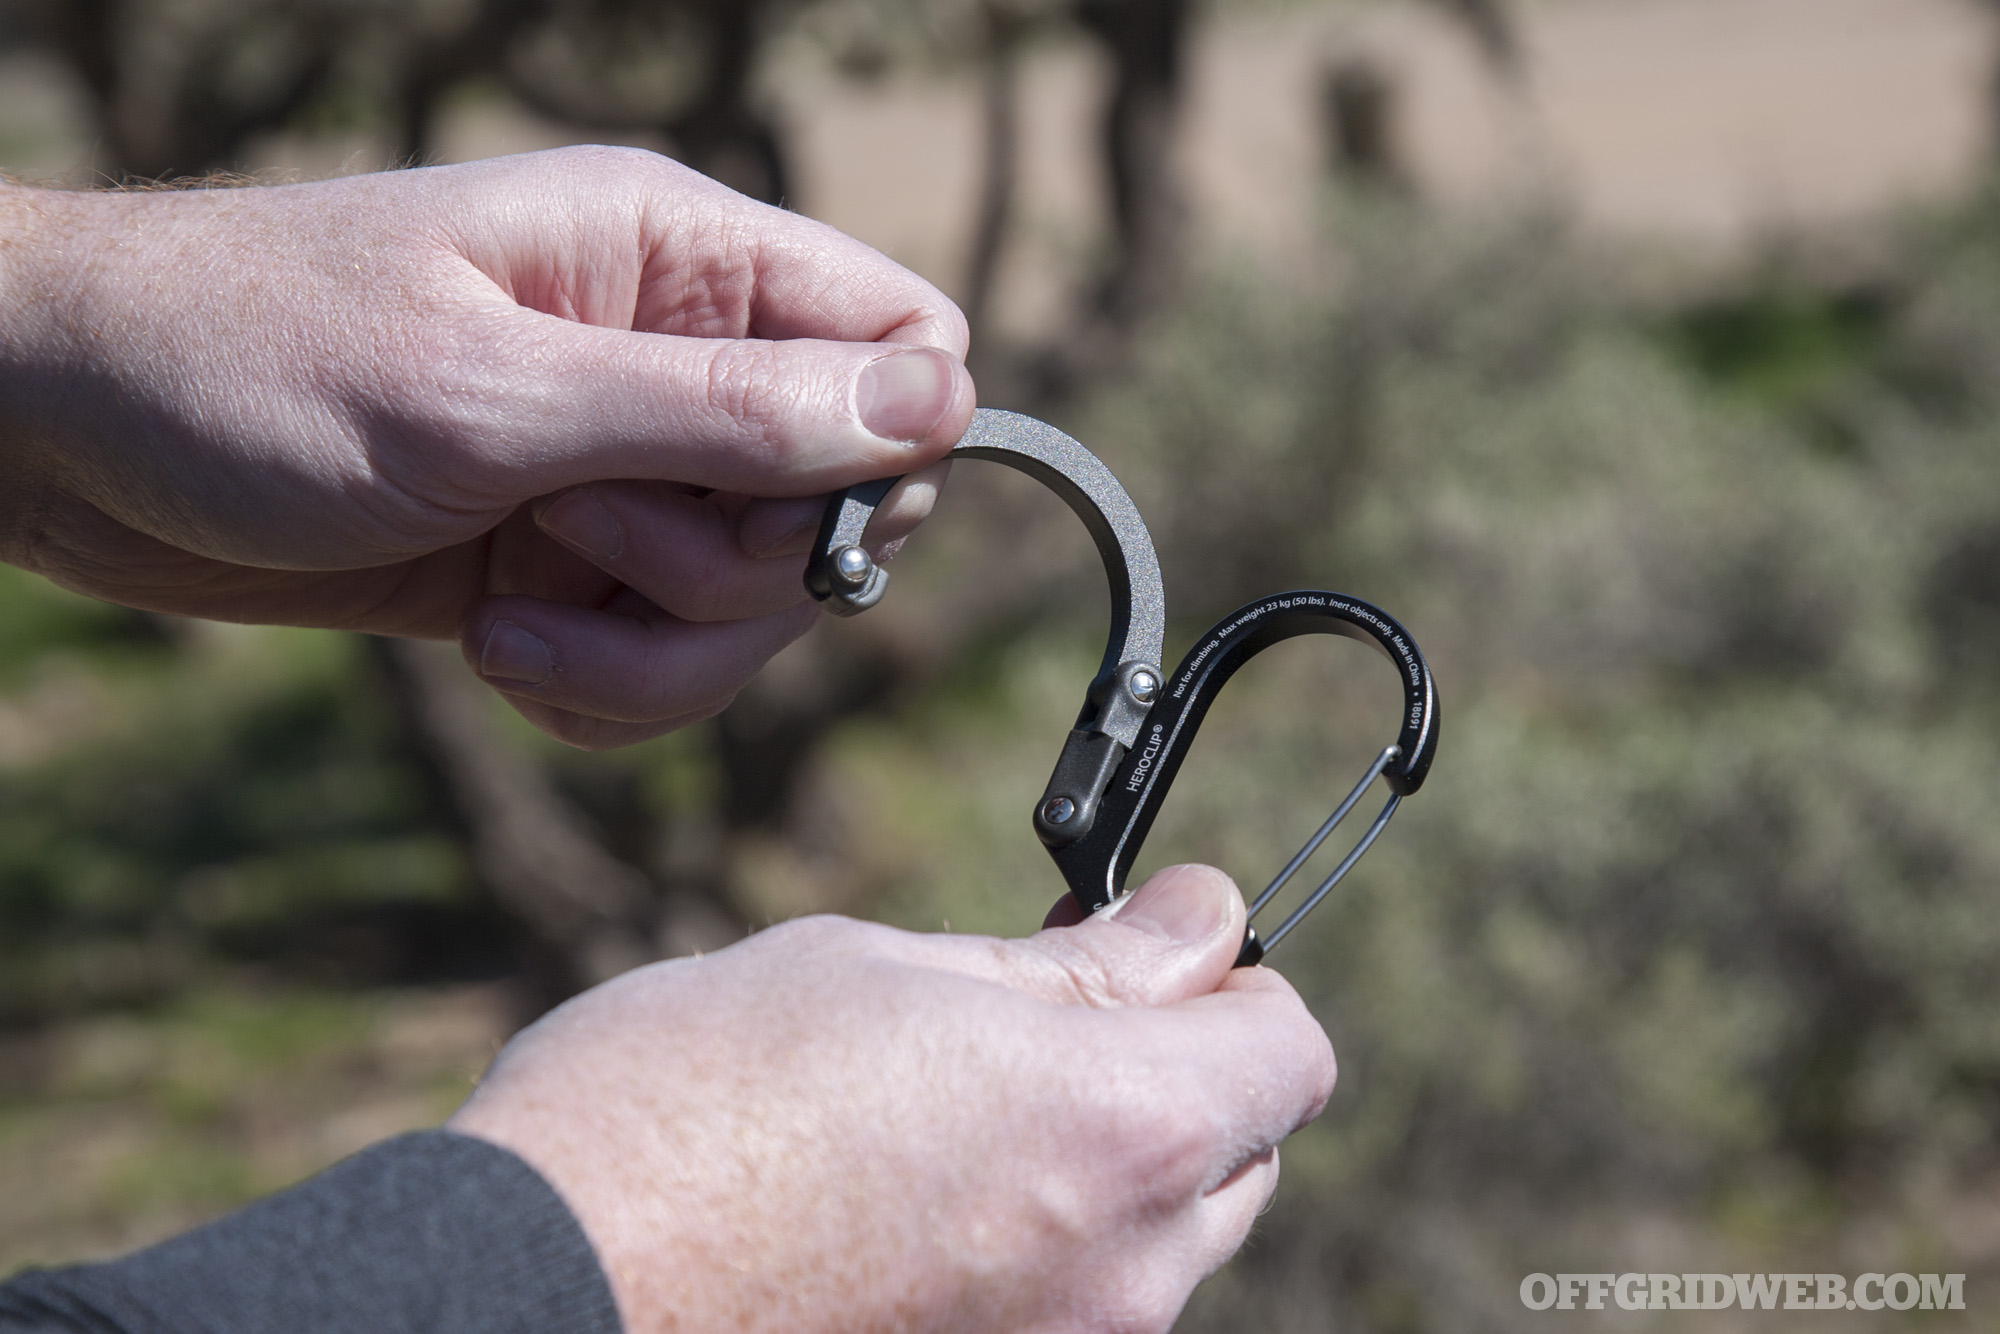
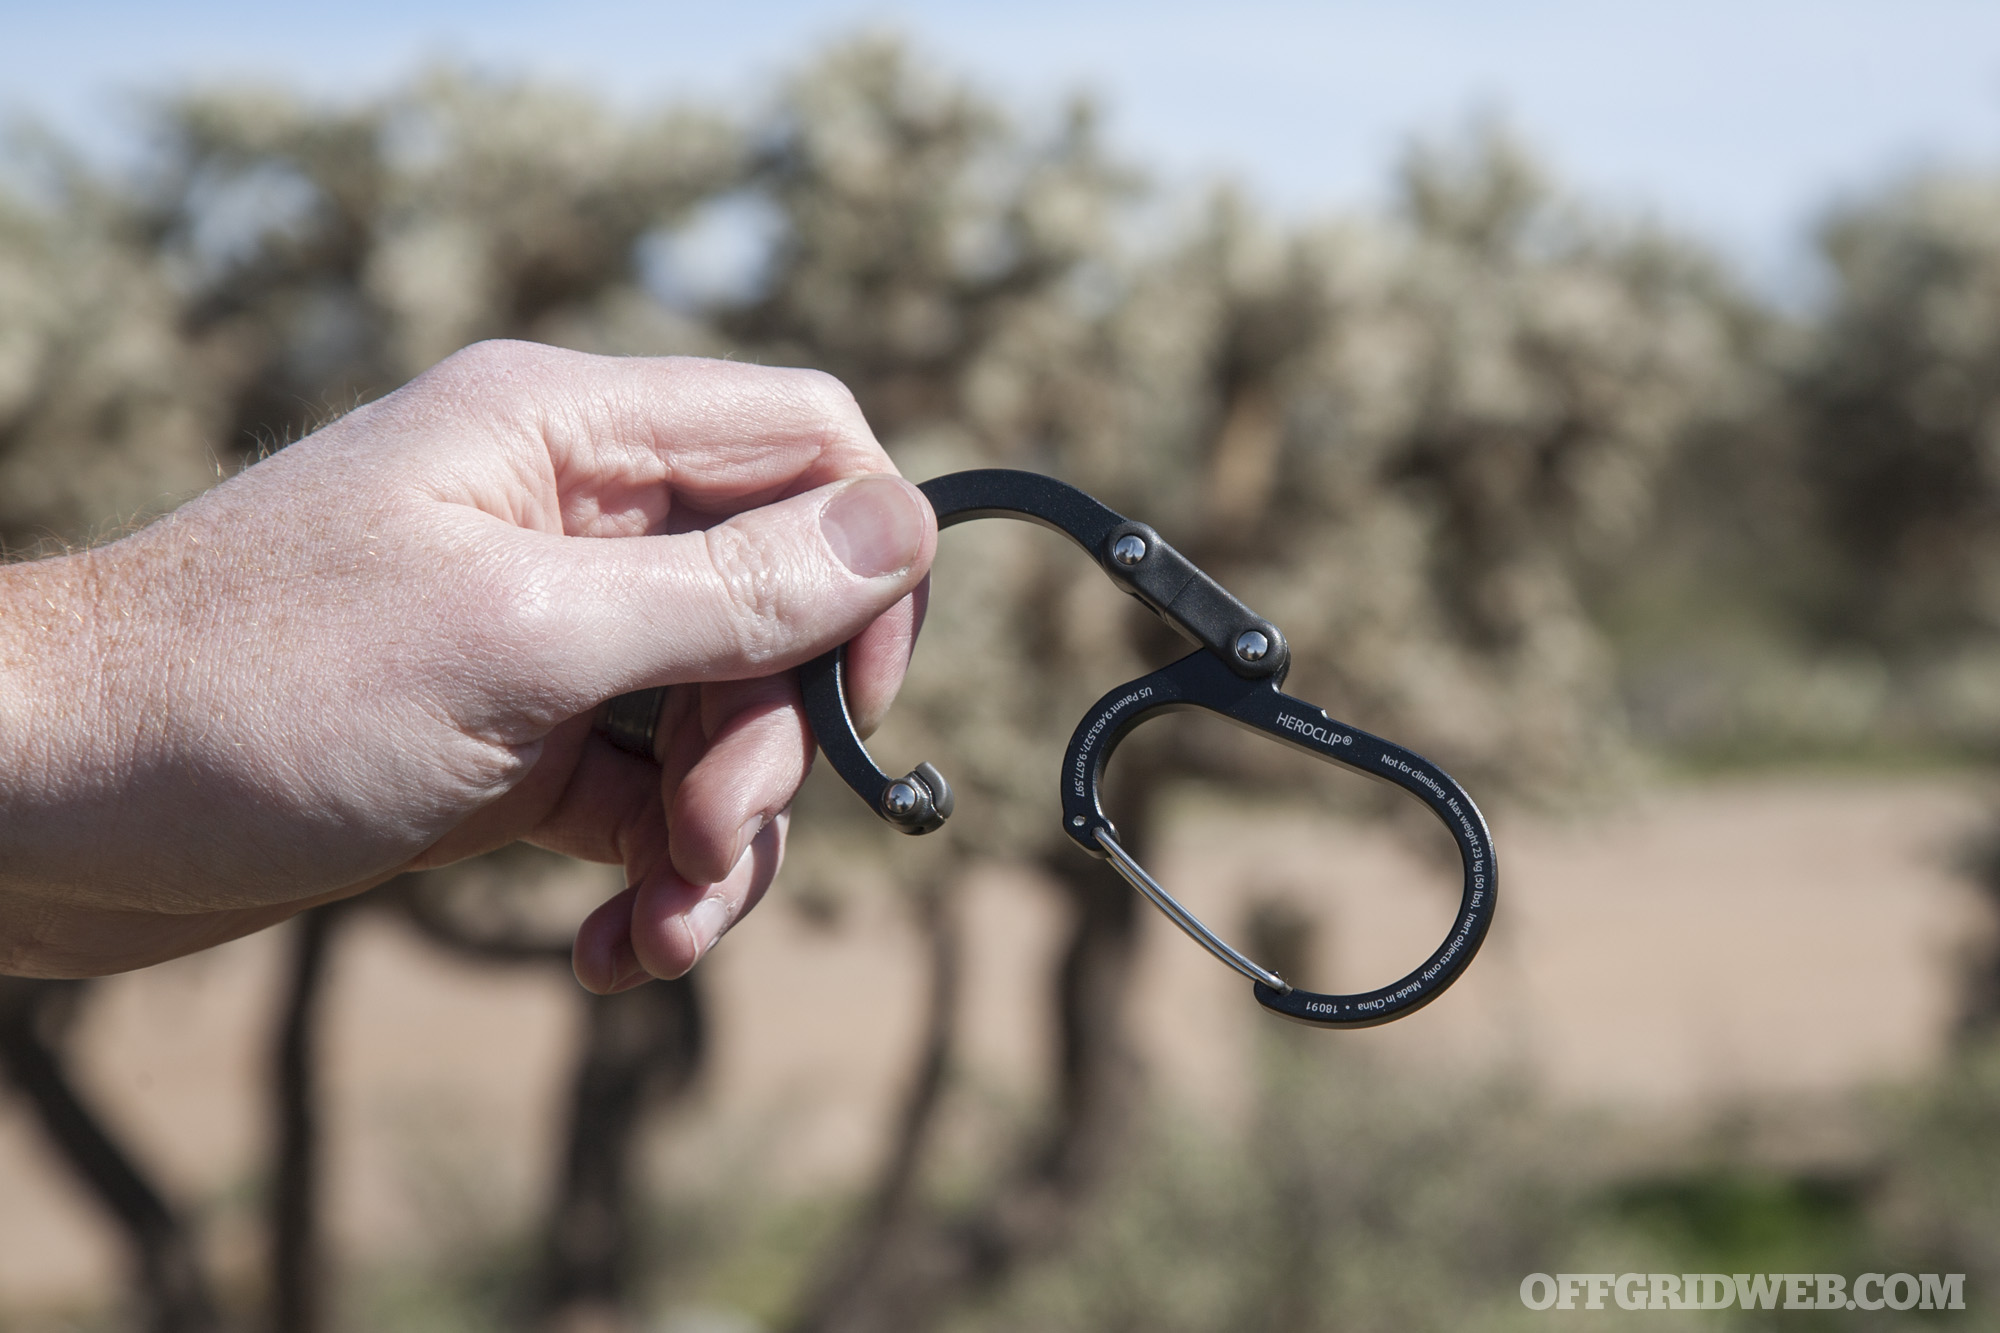
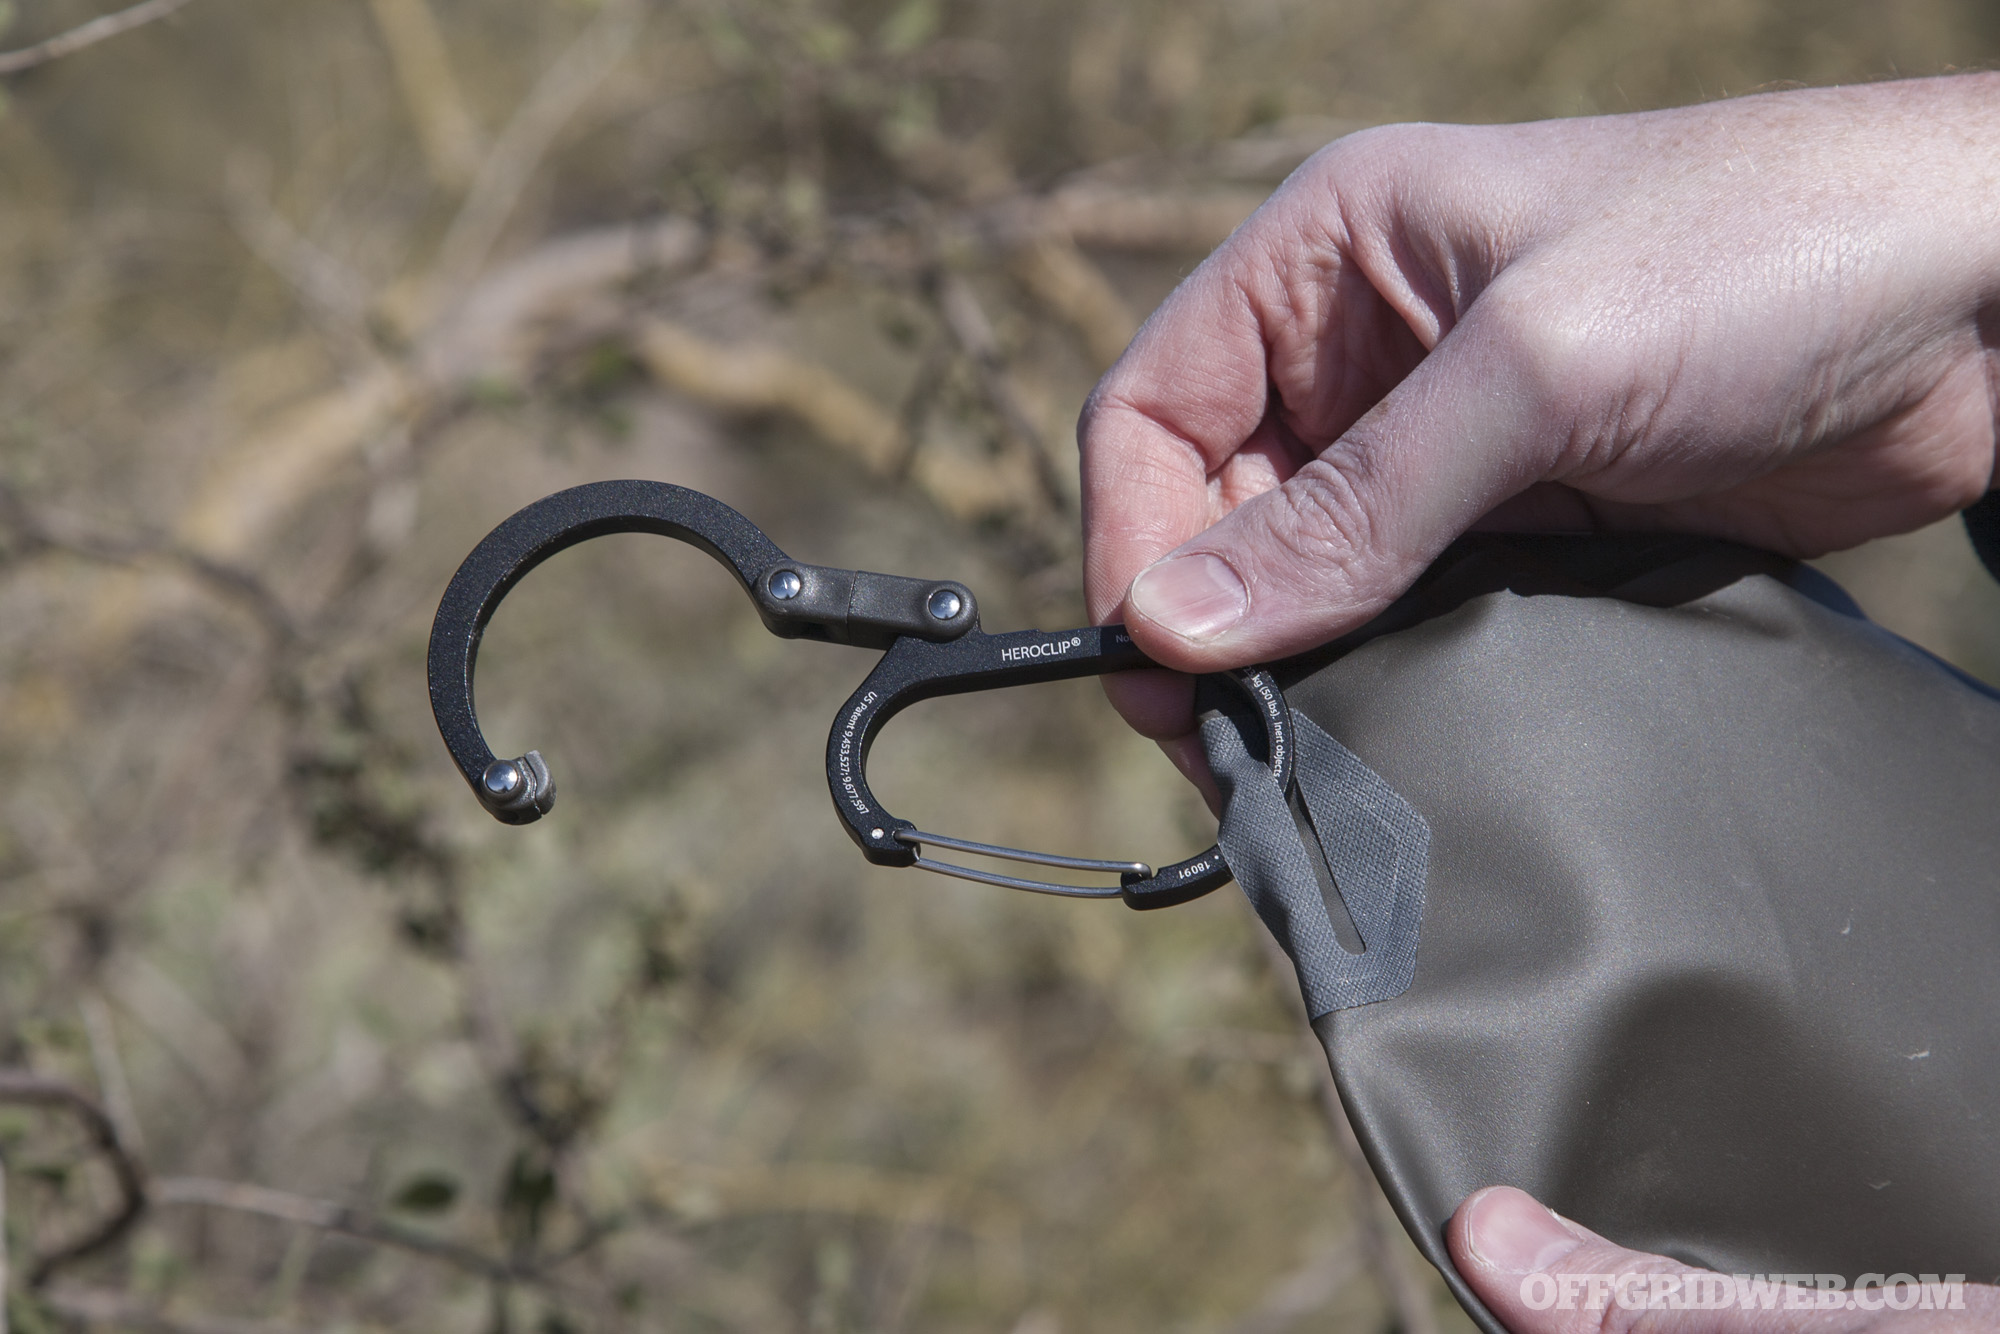
Much like a traditional carabiner, the Heroclip is constructed of solid billet aluminum and available numerous anodized colors. It features a spring-loaded wire gate, and an asymmetrical body that’s larger on one side. Where it differs from tradition is its patented dual-jointed hook and swivel.
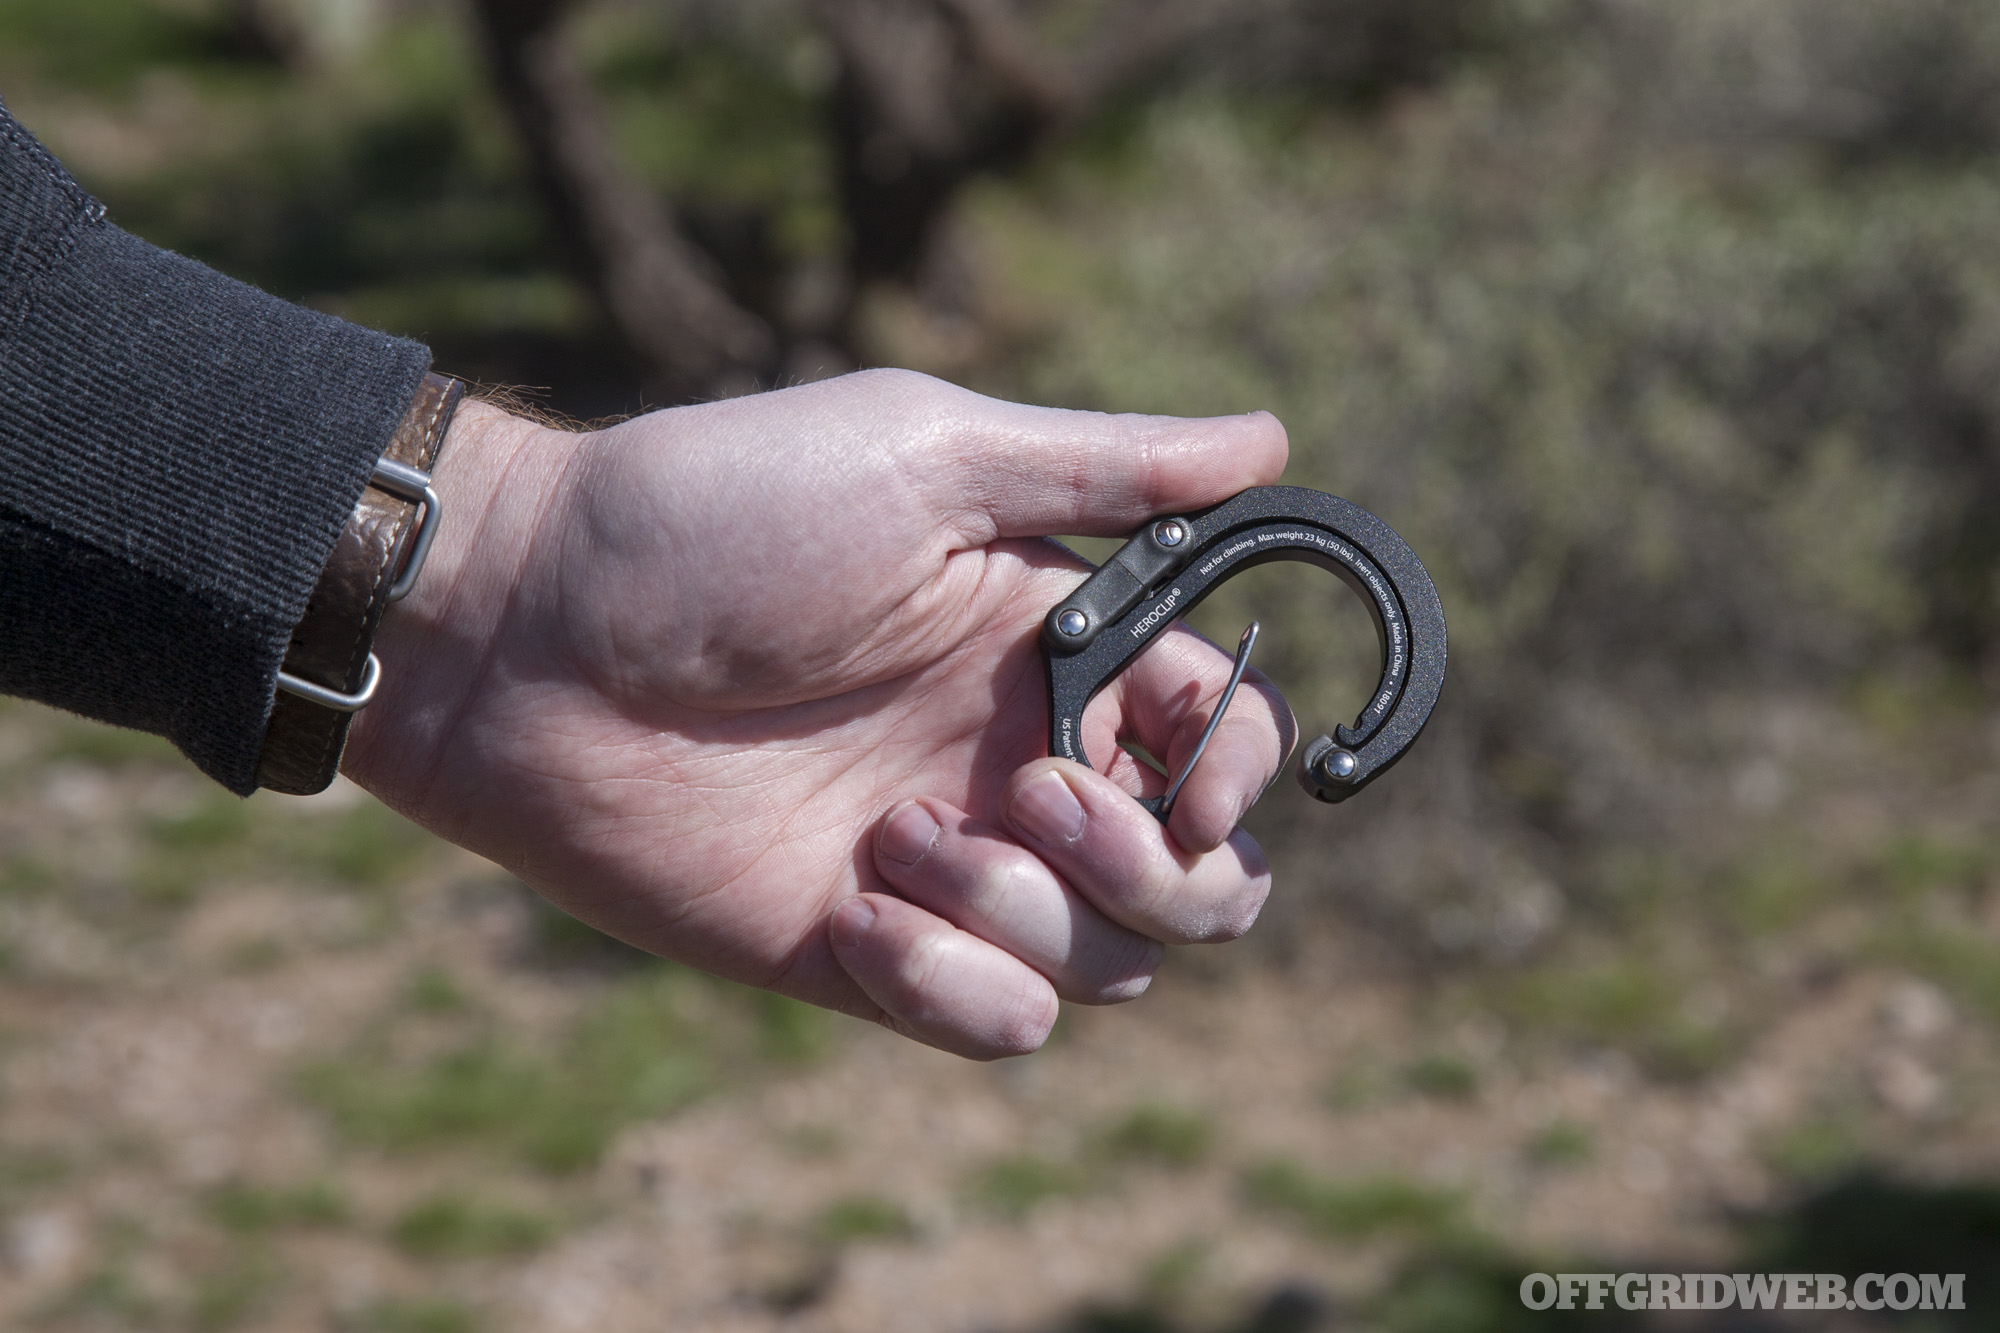
When not in use, the Heroclip’s hook encircles the top half of the carabiner, remaining relatively compact and unable to be dislodged in transit. To open the hook, the user must press on the gate and rotate the hook to the side. It swivels a full 360 degrees, and also pivots 180 degrees to reach the opposite end of the carabiner.
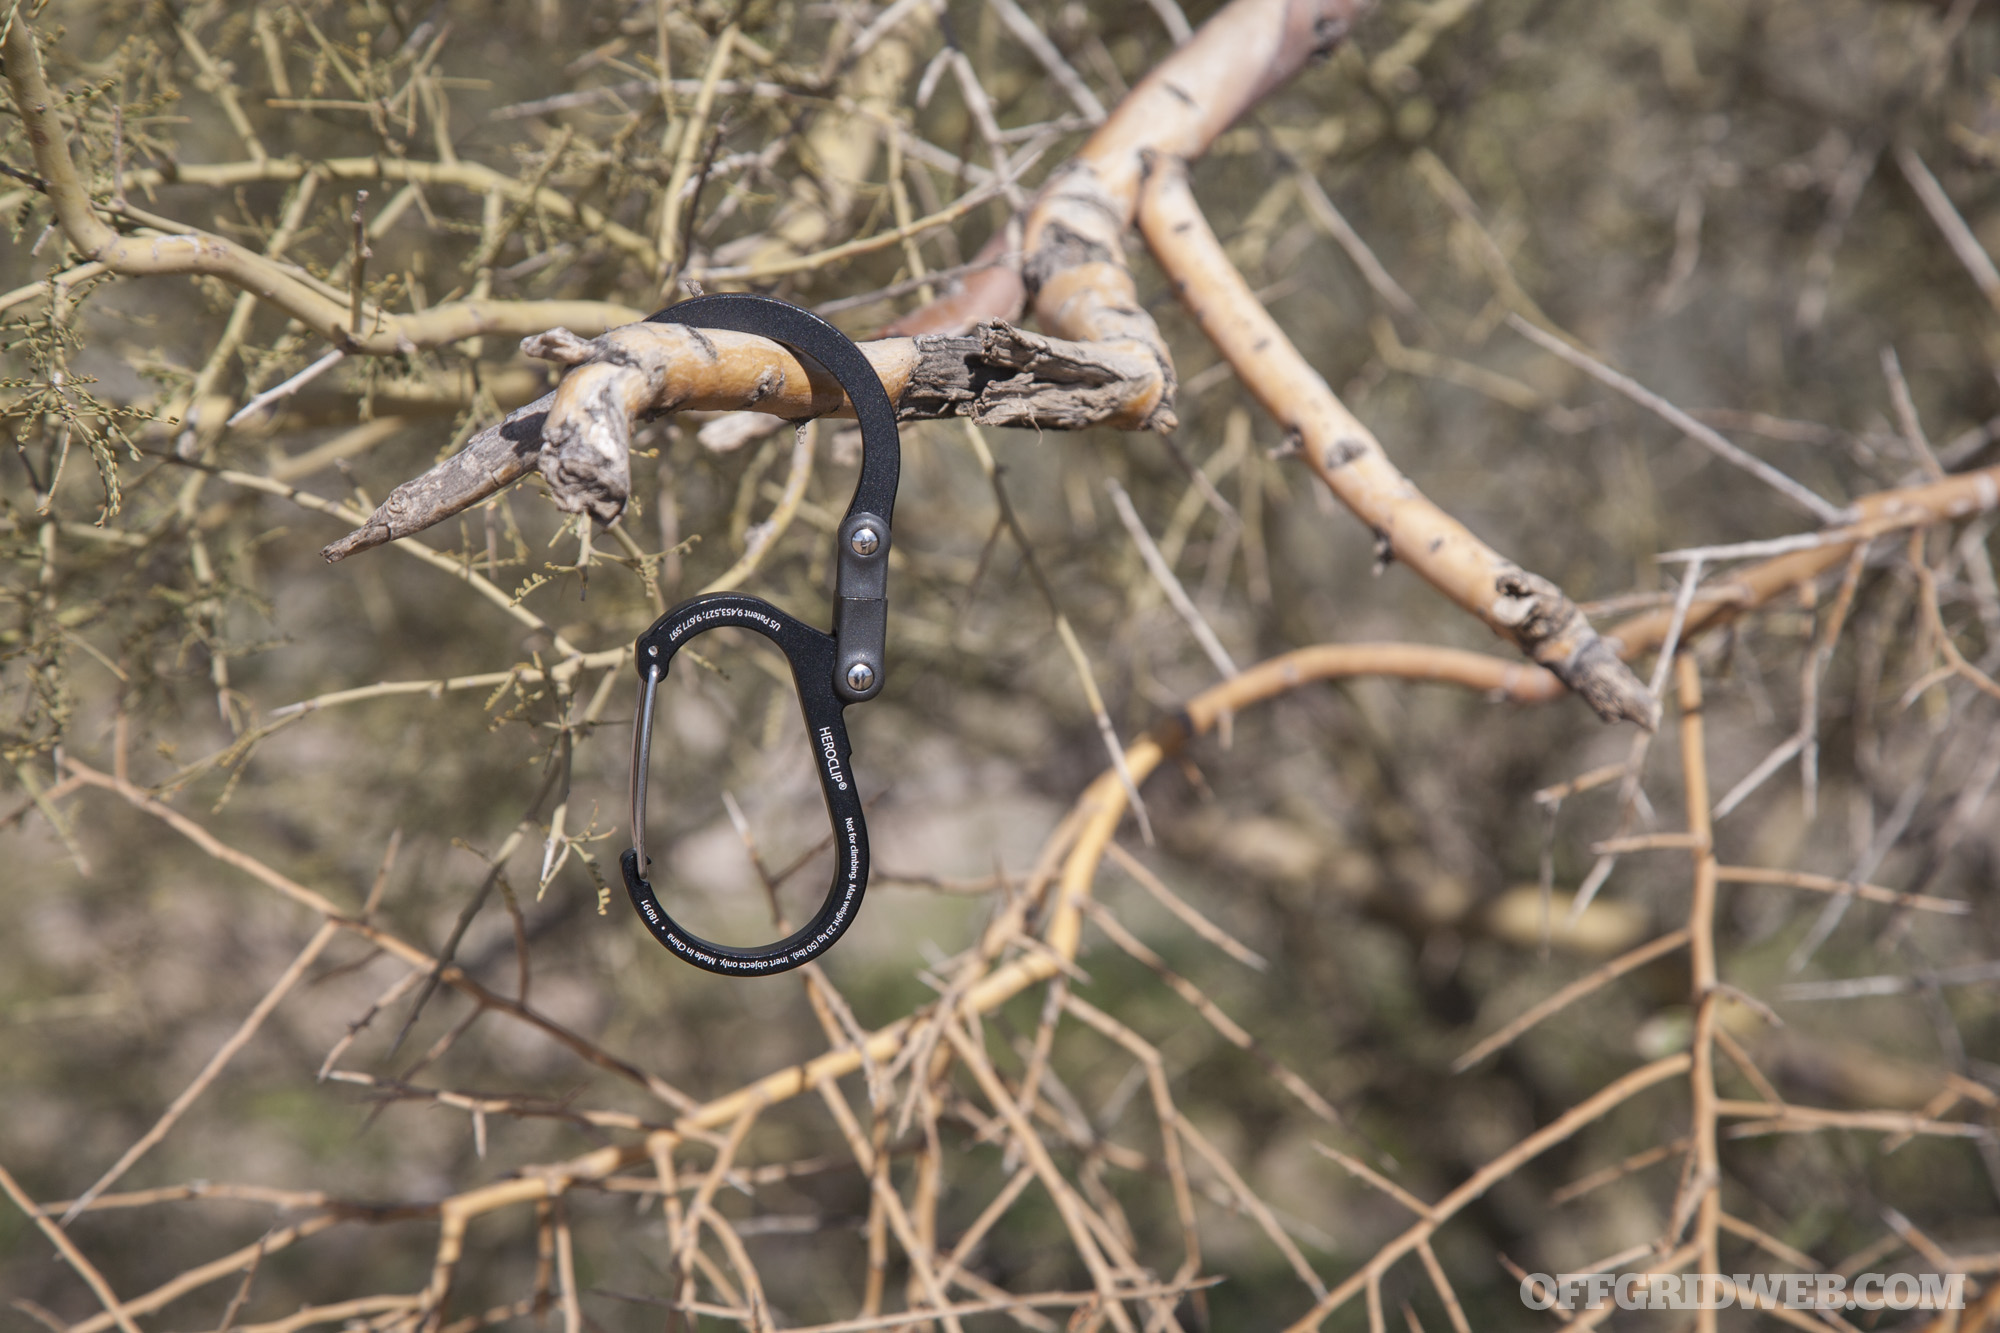
The hook can now be looped around objects that the carabiner wouldn’t otherwise fit onto, such as large railings or tree branches. Additionally, the Heroclip hook has a “beak” tip that’s designed to grab flat surfaces — ledges, walls, tabletops, and so on. The beak has a rubberized insert that provides additional grip and reduces slippage.
The Heroclip is available in three sizes, with the following specs:
Medium – holds up to 60 pounds – $20 MSRP
Small – holds up to 50 pounds – $18 MSRP
Mini – holds up to 40 pounds – $15 MSRP
The polymer-encased swivel may not look strong, but it feels quite sturdy and had no problem carrying the maximum rated weight during our testing.
Color choices include various two-tone schemes ranging from silver on gray to bright teal on orange, as well as the monochrome Stealth Black seen in our photos. In case these options aren’t sufficiently high-vis for you, the company offers patterns that include blue digital camo and rainbow.
Our Impressions of the Heroclip
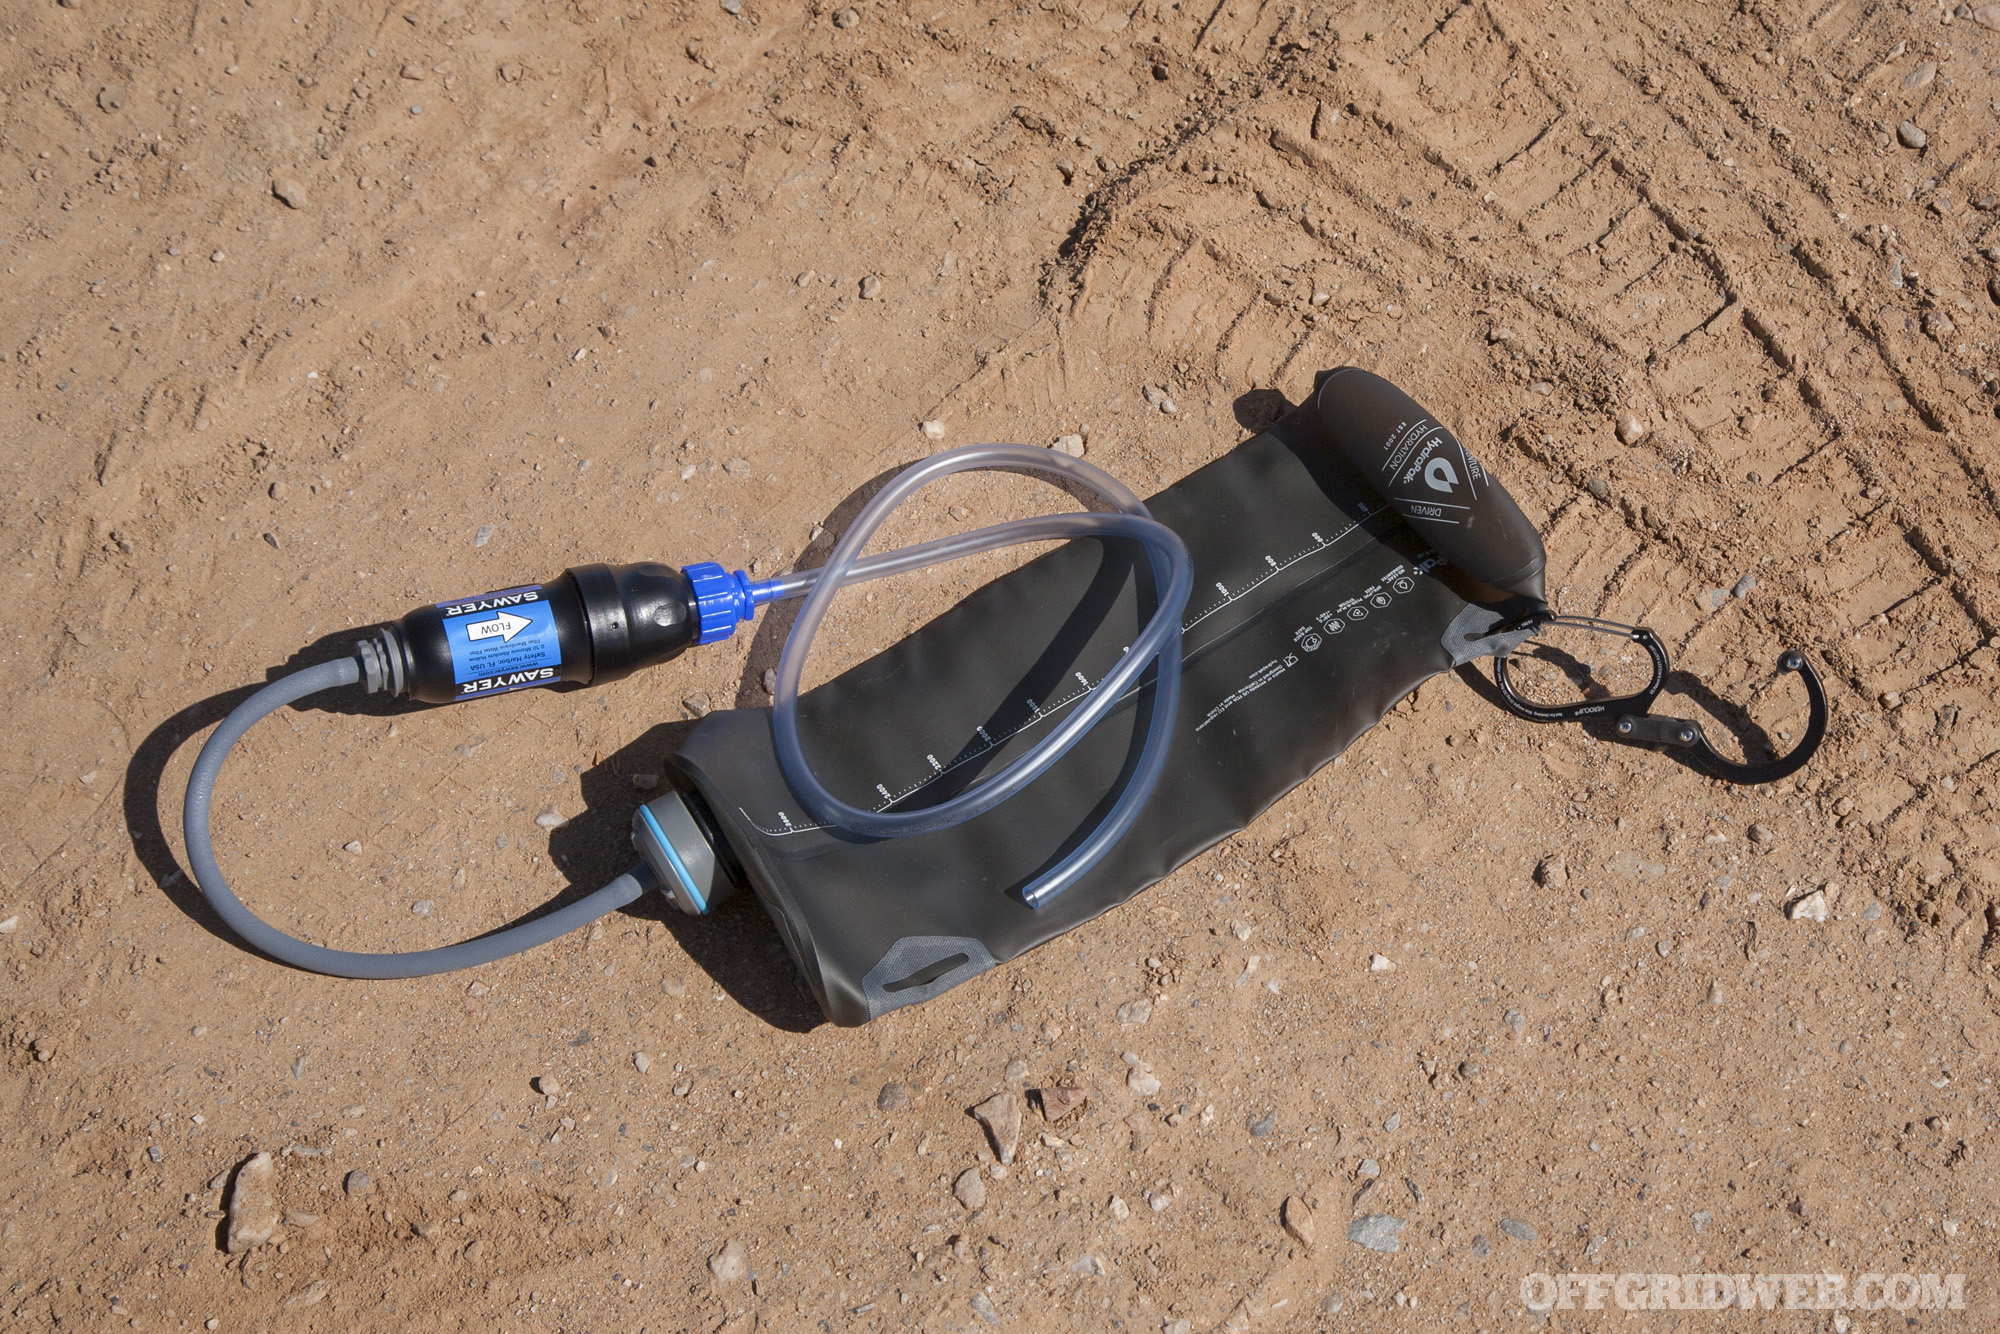
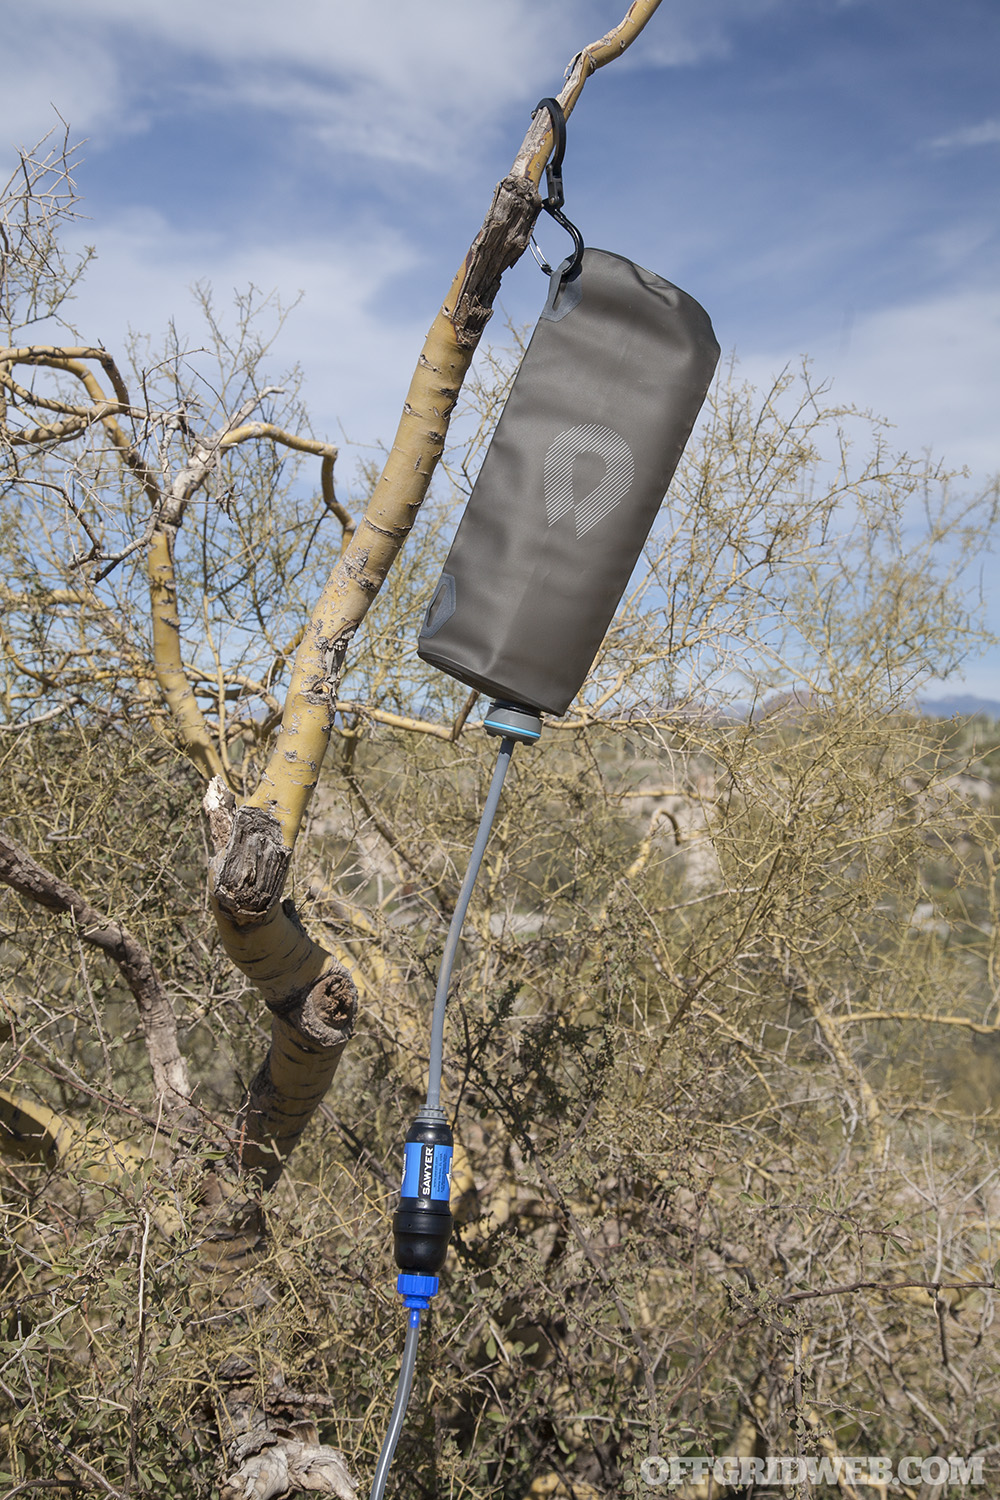
We tried out a trio of Heroclips in various sizes to determine if this design adds value for practical use in the outdoors. As we mentioned earlier, one place we commonly use a carabiner is on a gravity water filtration setup, so we set out to see how the Heroclip fared for this purpose.
A quick aside about the setup seen here — it’s based around a Hydrapak Seeker reservoir with a quick-disconnect cap and hose. This reservoir holds 3 liters of dirty water, and is suspended from a tree or other elevated surface. Gravity feeds the water down through a Sawyer Squeeze filter using the included inline adapter caps. The clean hose can be inserted into any other reservoir, usually a Klean Kanteen bottle or another hydration system. Total cost for the hydration gear was less than $50, weight is minimal at roughly 6 ounces, and it packs down easily.
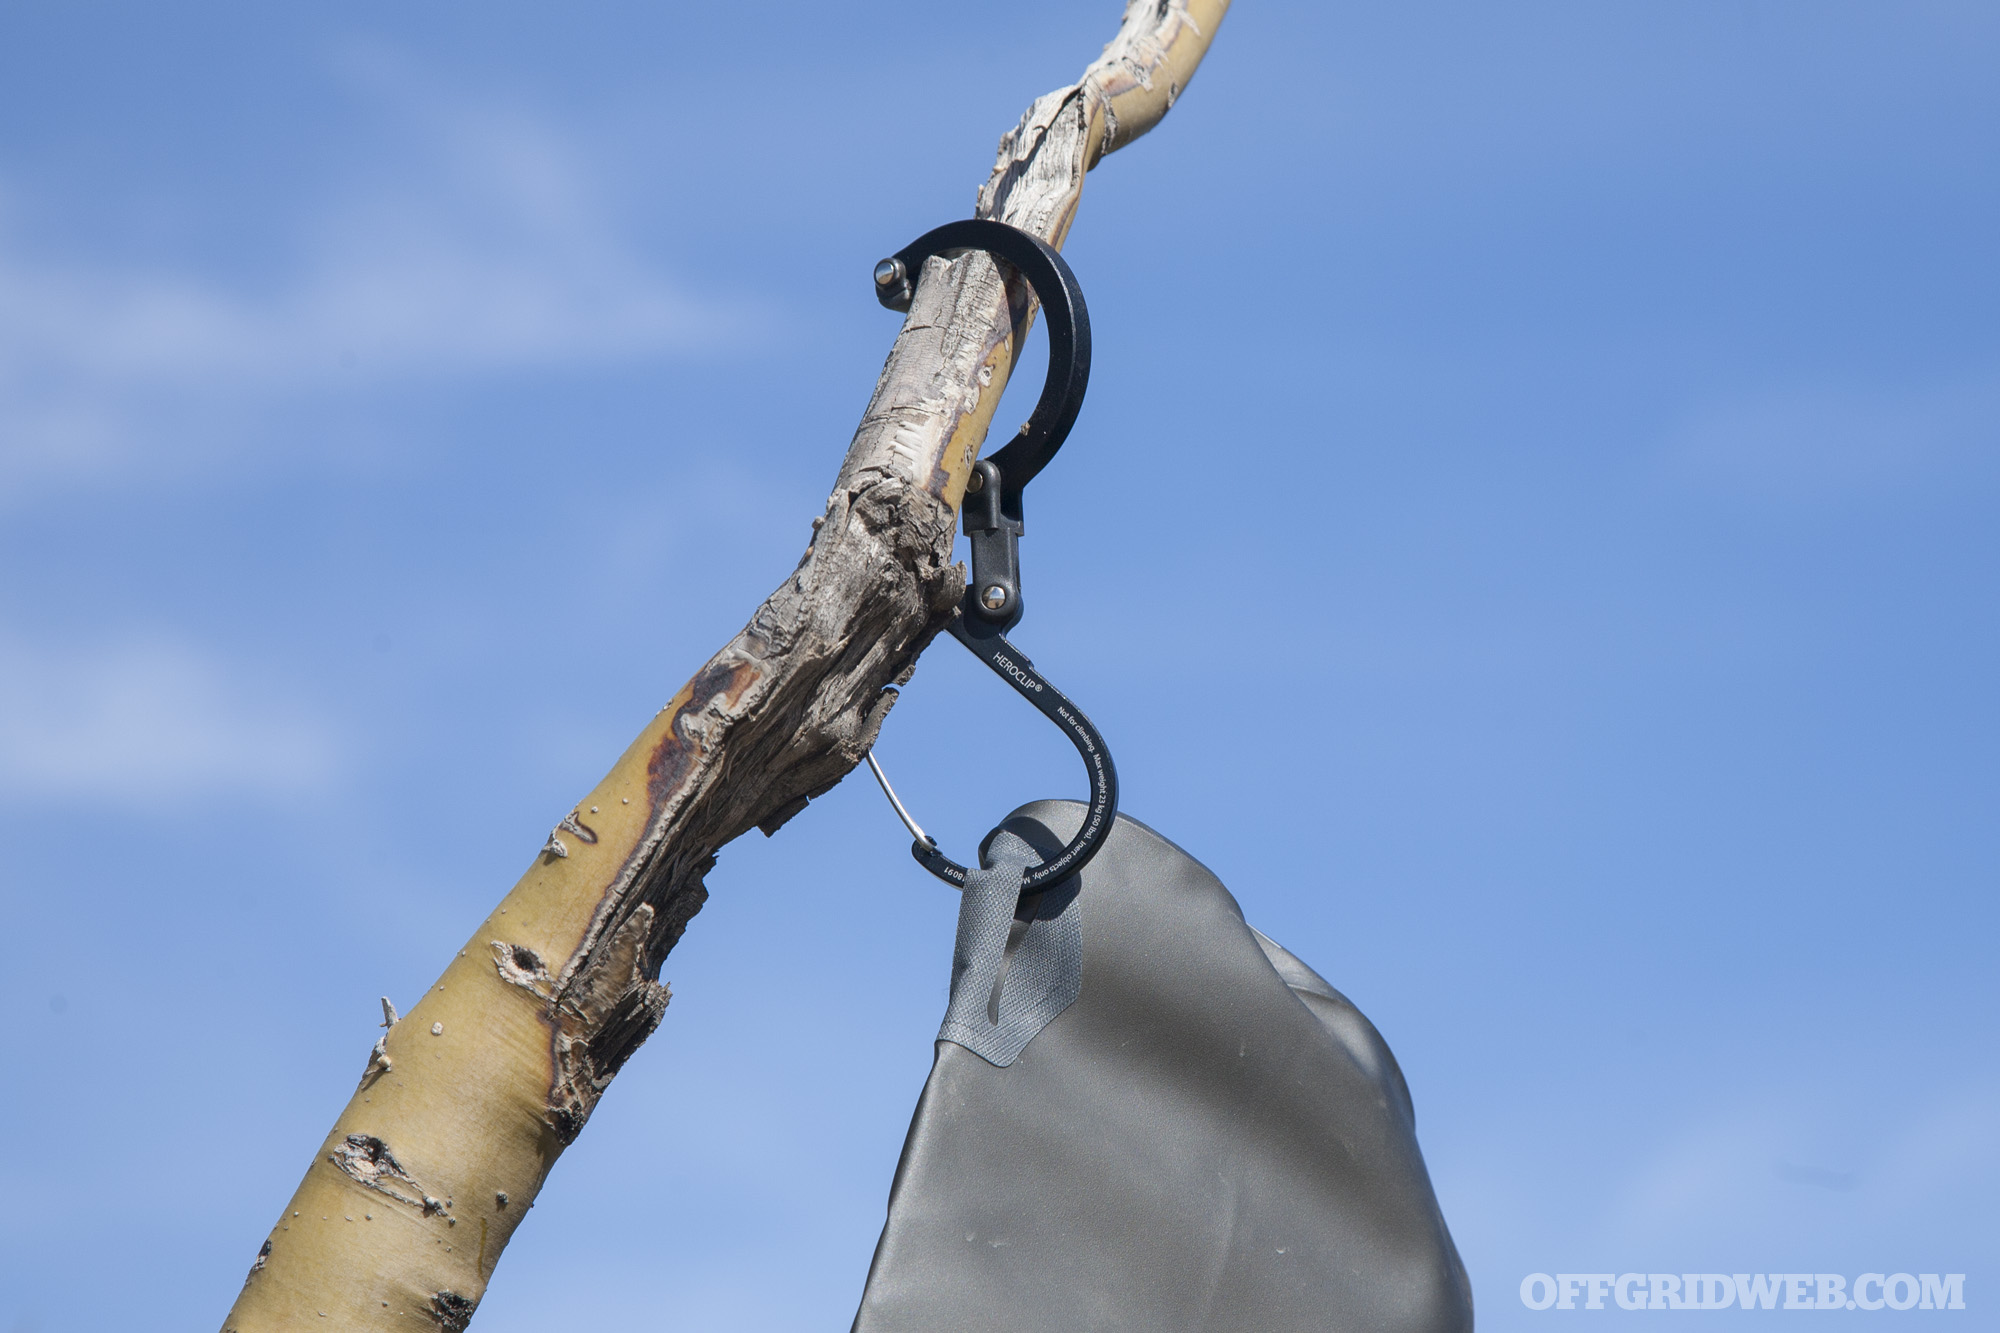
We like the Hydrapak Seeker for this purpose because it has several built-in attachment points. Normally, we’d use a plain-jane carabiner hooked around a small forked tree branch. However, we’ve run into cases where most nearby branches are too big for a carabiner to fit around, or too small to hold enough weight. In some environments, you may have a tough time finding anything to clip the carabiner to. Rather than rigging a paracord ridgeline or MacGyvering something temporary out of zip ties and duct tape, it’s helpful to have a more versatile solution.
The Heroclip excels at this task — it actually seems made for it. The water weight will never exceed its carrying capacity, and the rotating hook makes it simple to attach our gravity filtration kit to virtually any nearby object. This includes flat surfaces, like the edge of a wall or rock outcrop. This is a case where the Heroclip is clearly easier to use than a regular carabiner.
So what about other carabiner-y uses?
Obviously, the Heroclip is not intended for climbing, and using it for this purpose would be dangerous. It’s also not suitable for use on a hammock or in other high-stress settings. On the other end of the spectrum, it wouldn’t be our first choice for retaining keys or other small accessories. It’s a bit bulkier than an EDC-specific carabiner like a Nite Ize S-biner or a Keybiner, and we don’t foresee needing to suspend our car keys from a ledge any time soon.
That said, when you find a situation where you need to attach Thing A to Thing B and your carabiner won’t fit around both, the Heroclip helps tremendously. For example, you might want to hang your 35-pound backpack off the ground and away from critters, but said backpack is heavy enough that it’ll snap any of the small branches that would fit inside your carabiner. The Heroclip hook lets you suspend it from a much larger branch — even if the hook doesn’t clear the whole branch, its “beak” will hold on to most surfaces.
Speaking of that beak, we found that it tends to slip on smoother surfaces. Its hard rubber construction is more like a hockey puck than a pencil eraser, and it lacks texture. This is one area we feel could be improved, although it’s not an issue you’ll notice in most cases.
Conclusions
At the end of the day, the Heroclip isn’t a replacement for your existing carabiners — at least not most of them. It is, however, a great alternative for the situations when you need to suspend gear from uneven or unusual surfaces. And when you’re not using the hook, it works as a decent (albeit rather bulky) carabiner. We’ll certainly be using one in our gravity water filter kit from now on.
Pros:
Extremely versatile
Good range of sizes — we prefer the Small
Hook stows neatly when not in use
Reasonably-priced
Cons:
Relatively low weight ratings
Bulkier than most non-climbing-rated carabiners
Rubberized hook “beak” isn’t as grippy as we’d like
Disclaimer: The concepts shown here are for illustrative purposes only. Be sure to check local laws before setting any traps.
You can’t grill it until you kill it. This expression sends anti-hunter types into full-triggered mode. To some, there’s a preconceived notion that living in the woods will only require eating nuts and berries. The reality of the scenario involves a much larger buffet line of small game and rodents that pack nutritious calories in little fur-bundled packages. Running around trying to hunt them expends more calories than will be returned — so the logical answer to the survival question is developing a series of traps that’ll work for you when you rest or attend to other survival needs.
Check out the most popular survival books in your local bookstore or library, and you’ll find any number of elaborate trap illustrations. Creating these traps may seem like a daunting task, but with enough practice, a rough working example can be made in short order. We’ve seen these books, and we’ve also seen what’s often left out of written instruction. We’ll break down some of the most common traps and focus on the trigger mechanisms to make them both more sensitive and more effective in putting meat over your fire. Check your local regulations as well before setting any traps.
Crushing Traps
Figure 4
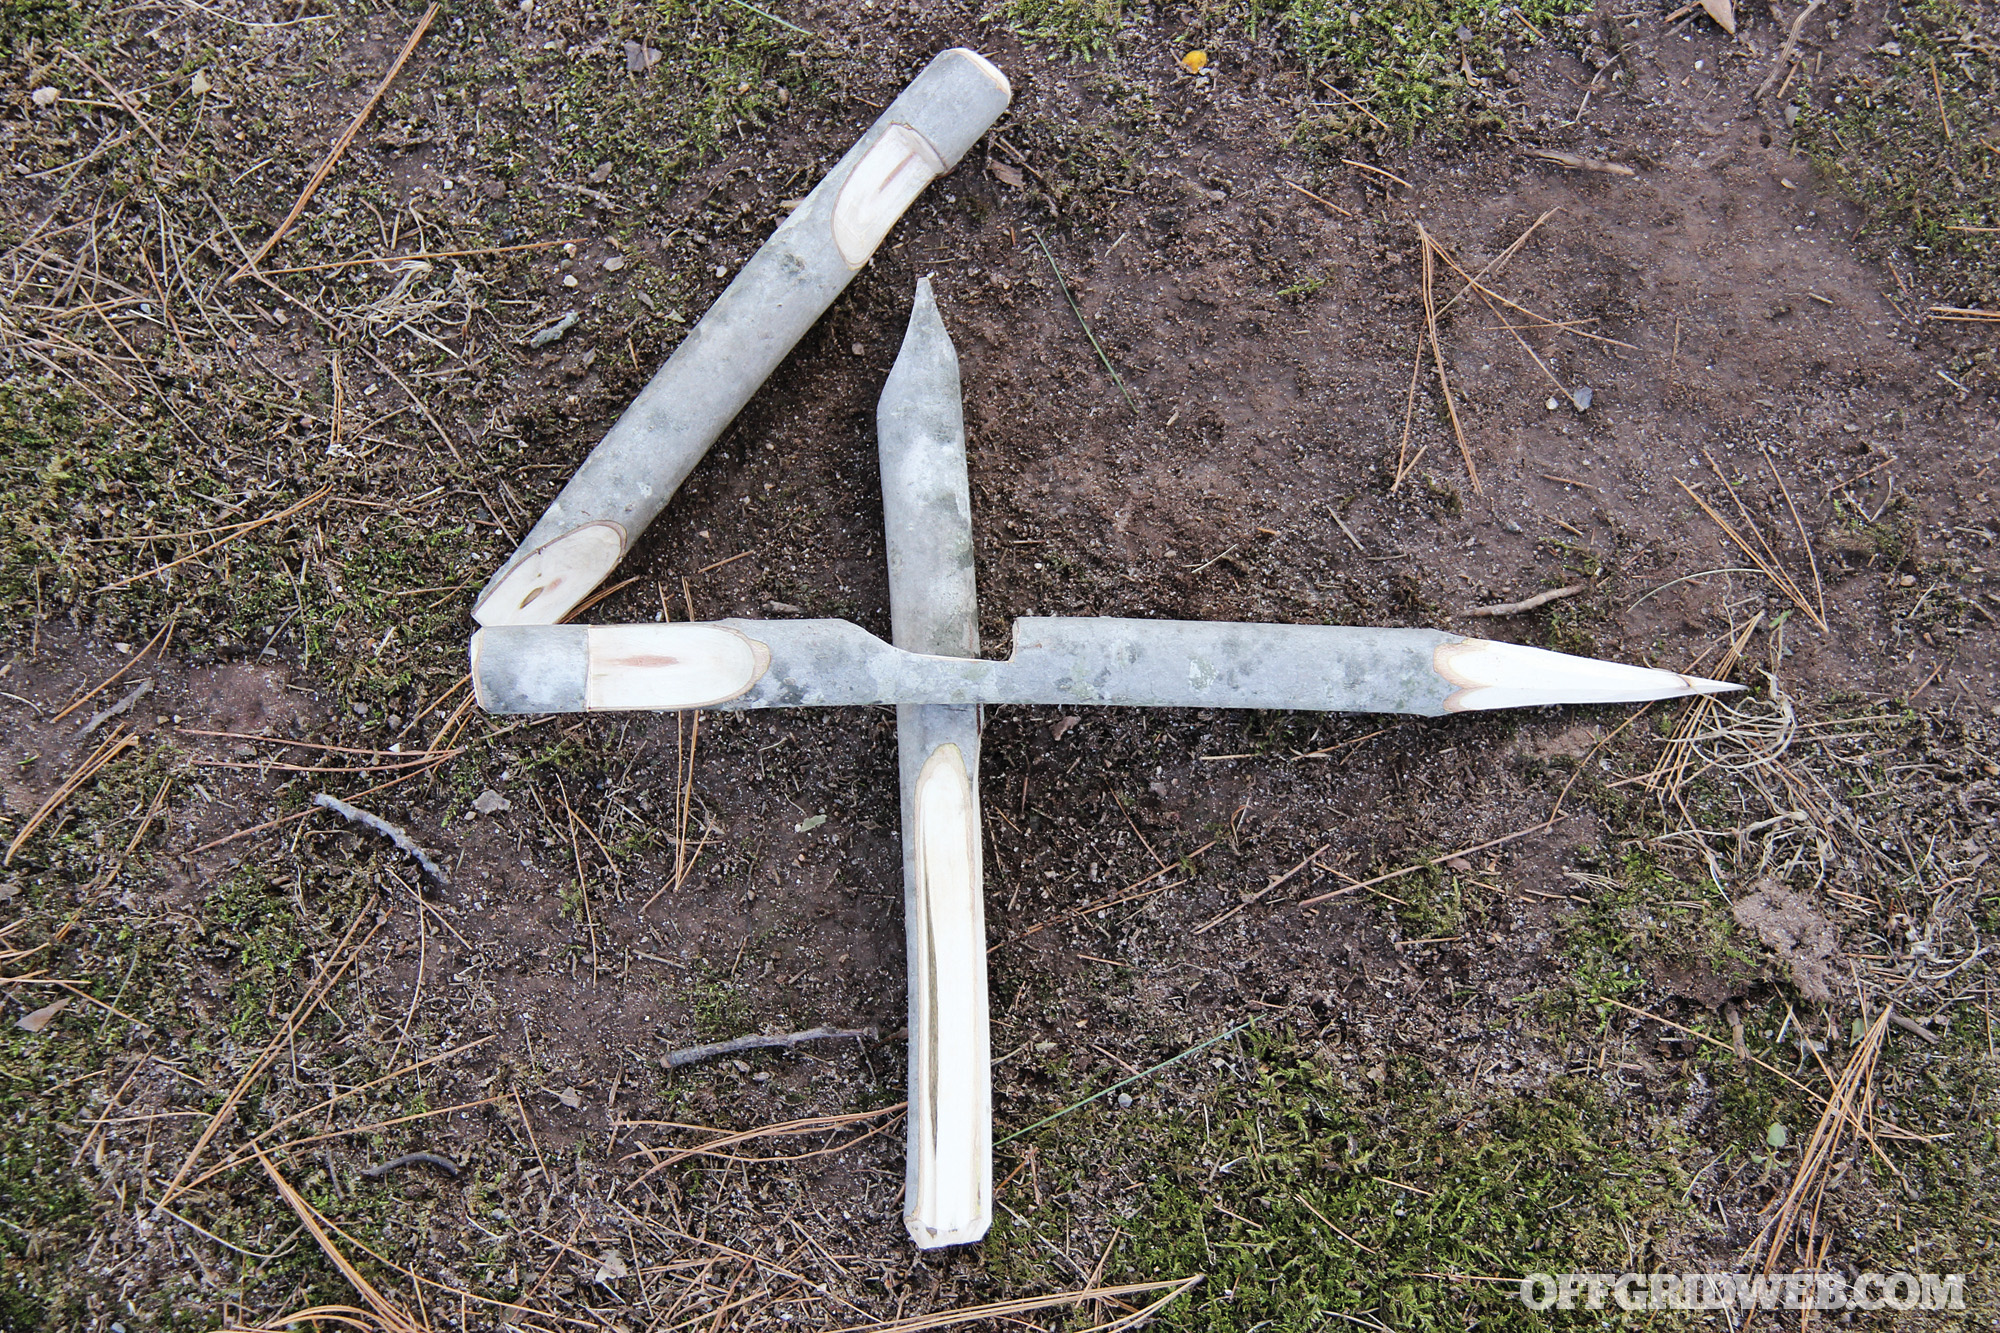
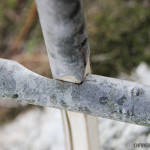
The Figure 4 trap trigger is easily carved with nothing more than a blade and some hardwood. This trigger is most frequently used with a crushing weight, such as a rock or large round of wood, but pest control can be handled in urban areas with wood planks, pallets, and cinder blocks. Use dried seasoned branches free of rot, if you can. Green branches will contract as they dry and may split along the grain. If possible, select wood free of knots and about the thickness of a Sharpie marker to start. You can always scale your trap part components up or down. The three components — the upright, diagonal, and horizontal (these terms will make sense shortly) — can all be carved from a single stick. The thickest part of the stick is used for the diagonal stick, the thinnest for the horizontal, and medium thickness for the upright.
The key to carving the Figure 4 is to make precise cuts with the correct angles and orientation to one another. The vertical stick requires a chisel tip as well as a 90-degree angle. The diagonal stick requires a ramped notch on one end and a chisel on the other. The horizontal requires two ramped notches configured 90 degrees offset from each other. The three pieces of this trap trigger are held in place with opposing pressure. The angle of the diagonal stick and the length will vary the speed at which it triggers.
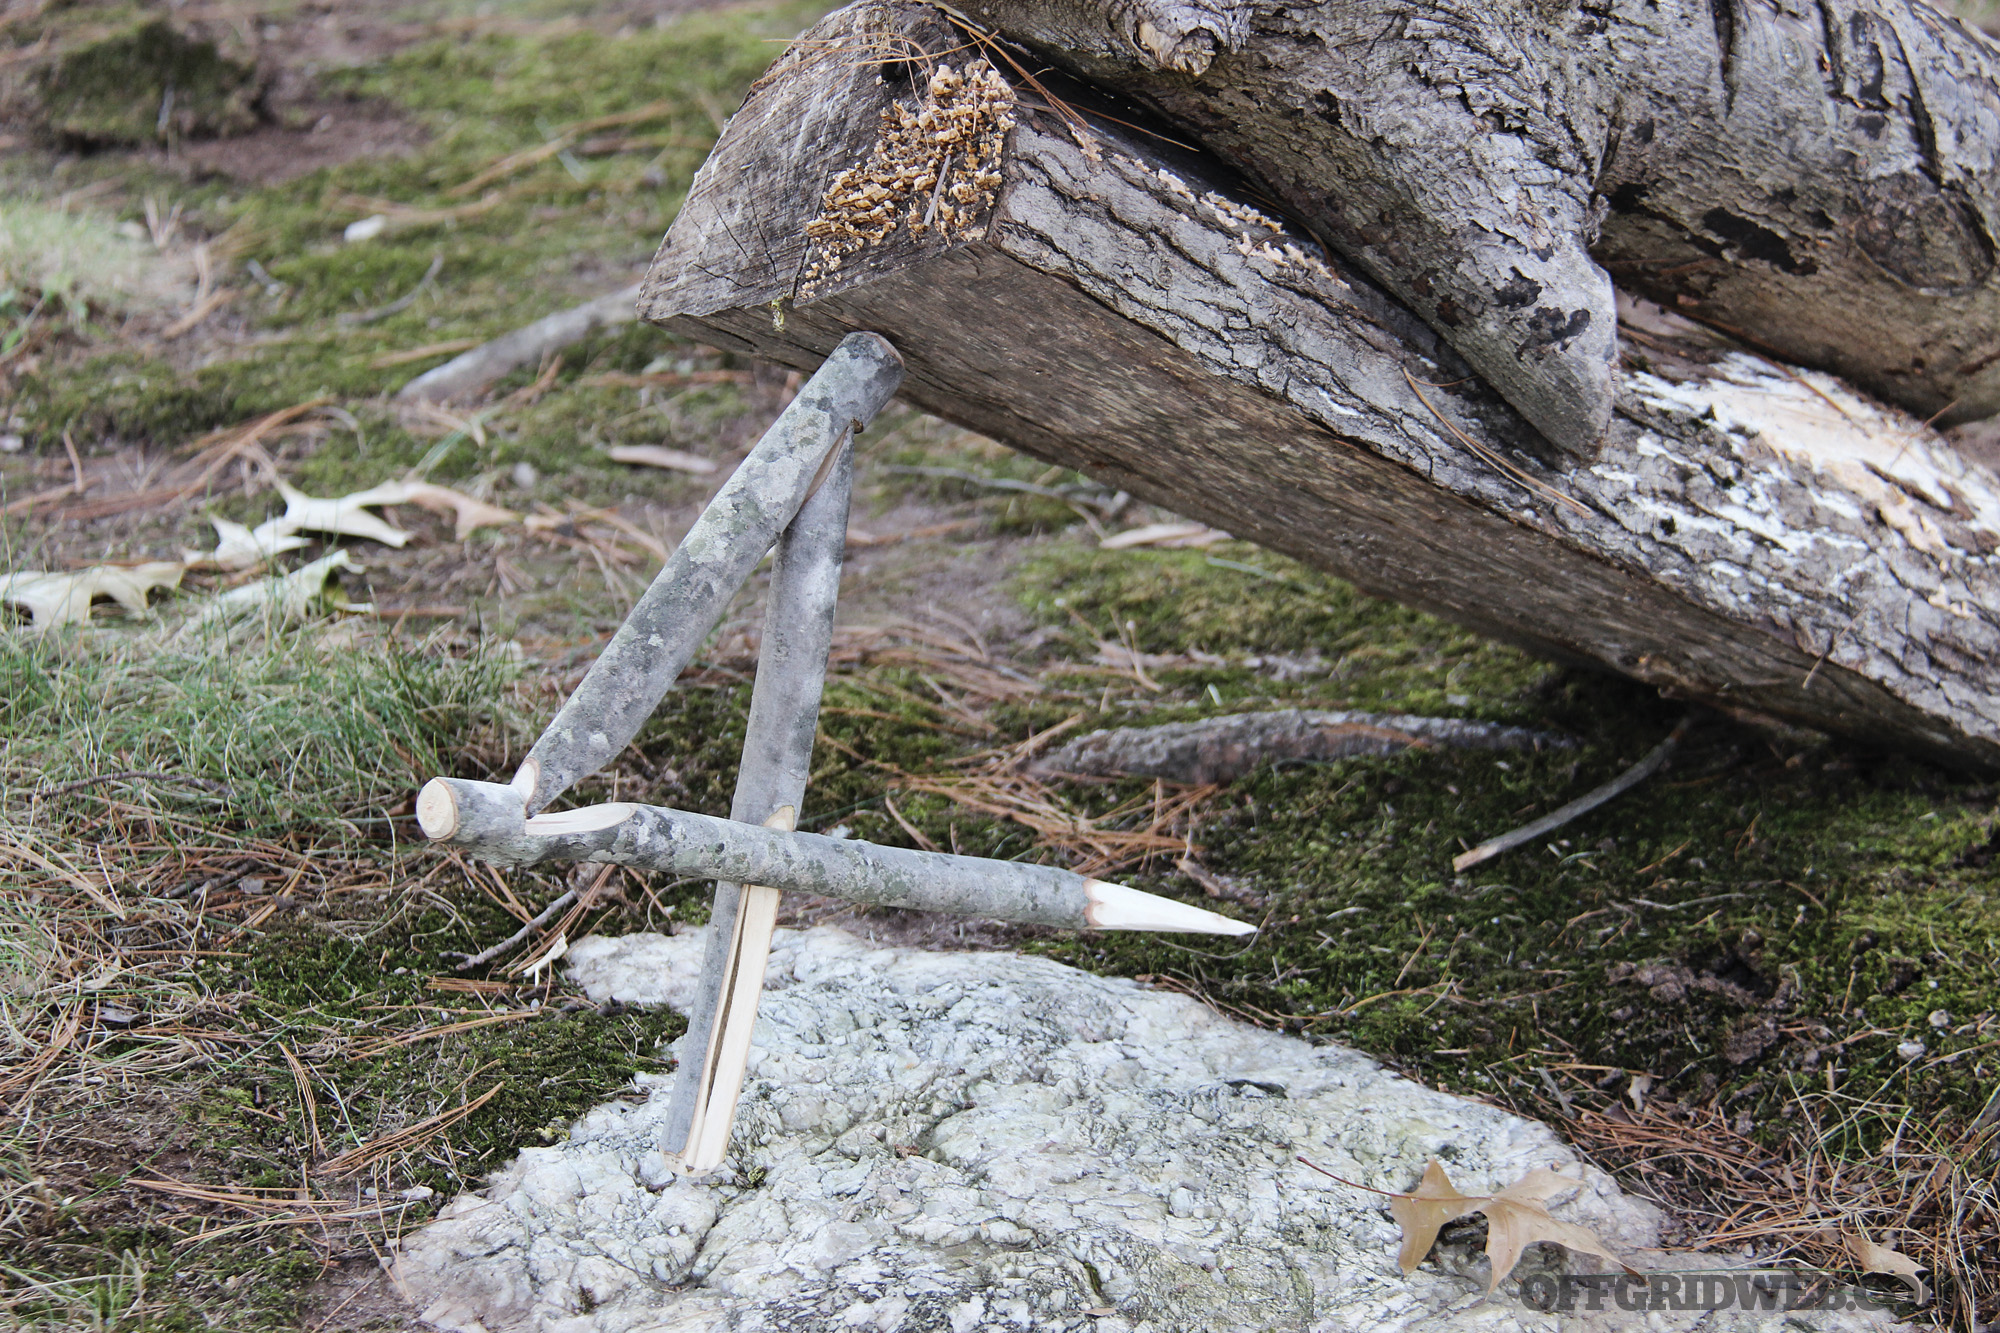
Above: The Figure 4 trap trigger is adaptable to many variations of crushing traps. This trap has an additional weight added to the primary crushing log to increase lethality and effectiveness.
When carved correctly, the Figure 4 will be thrown out of the way when the trap is triggered. To make it more sensitive, keep the points of contact smooth without bevels or scratches. Don’t drive the vertical stick into the ground, but rather rest it on a hard surface instead. The size of the weight will depend on the animal you intend to catch; for example, a 10-pound rock falling on a 2-pound animal will be sufficient to crush it. Placing a flat rock or setting the trap on a hard surface will increase the crushing force of your trap.
Pros: Simple knife-and-knowledge skill (just add sticks). Works well with “cage-like” traps, too.
Cons: Requires a deadfall weight
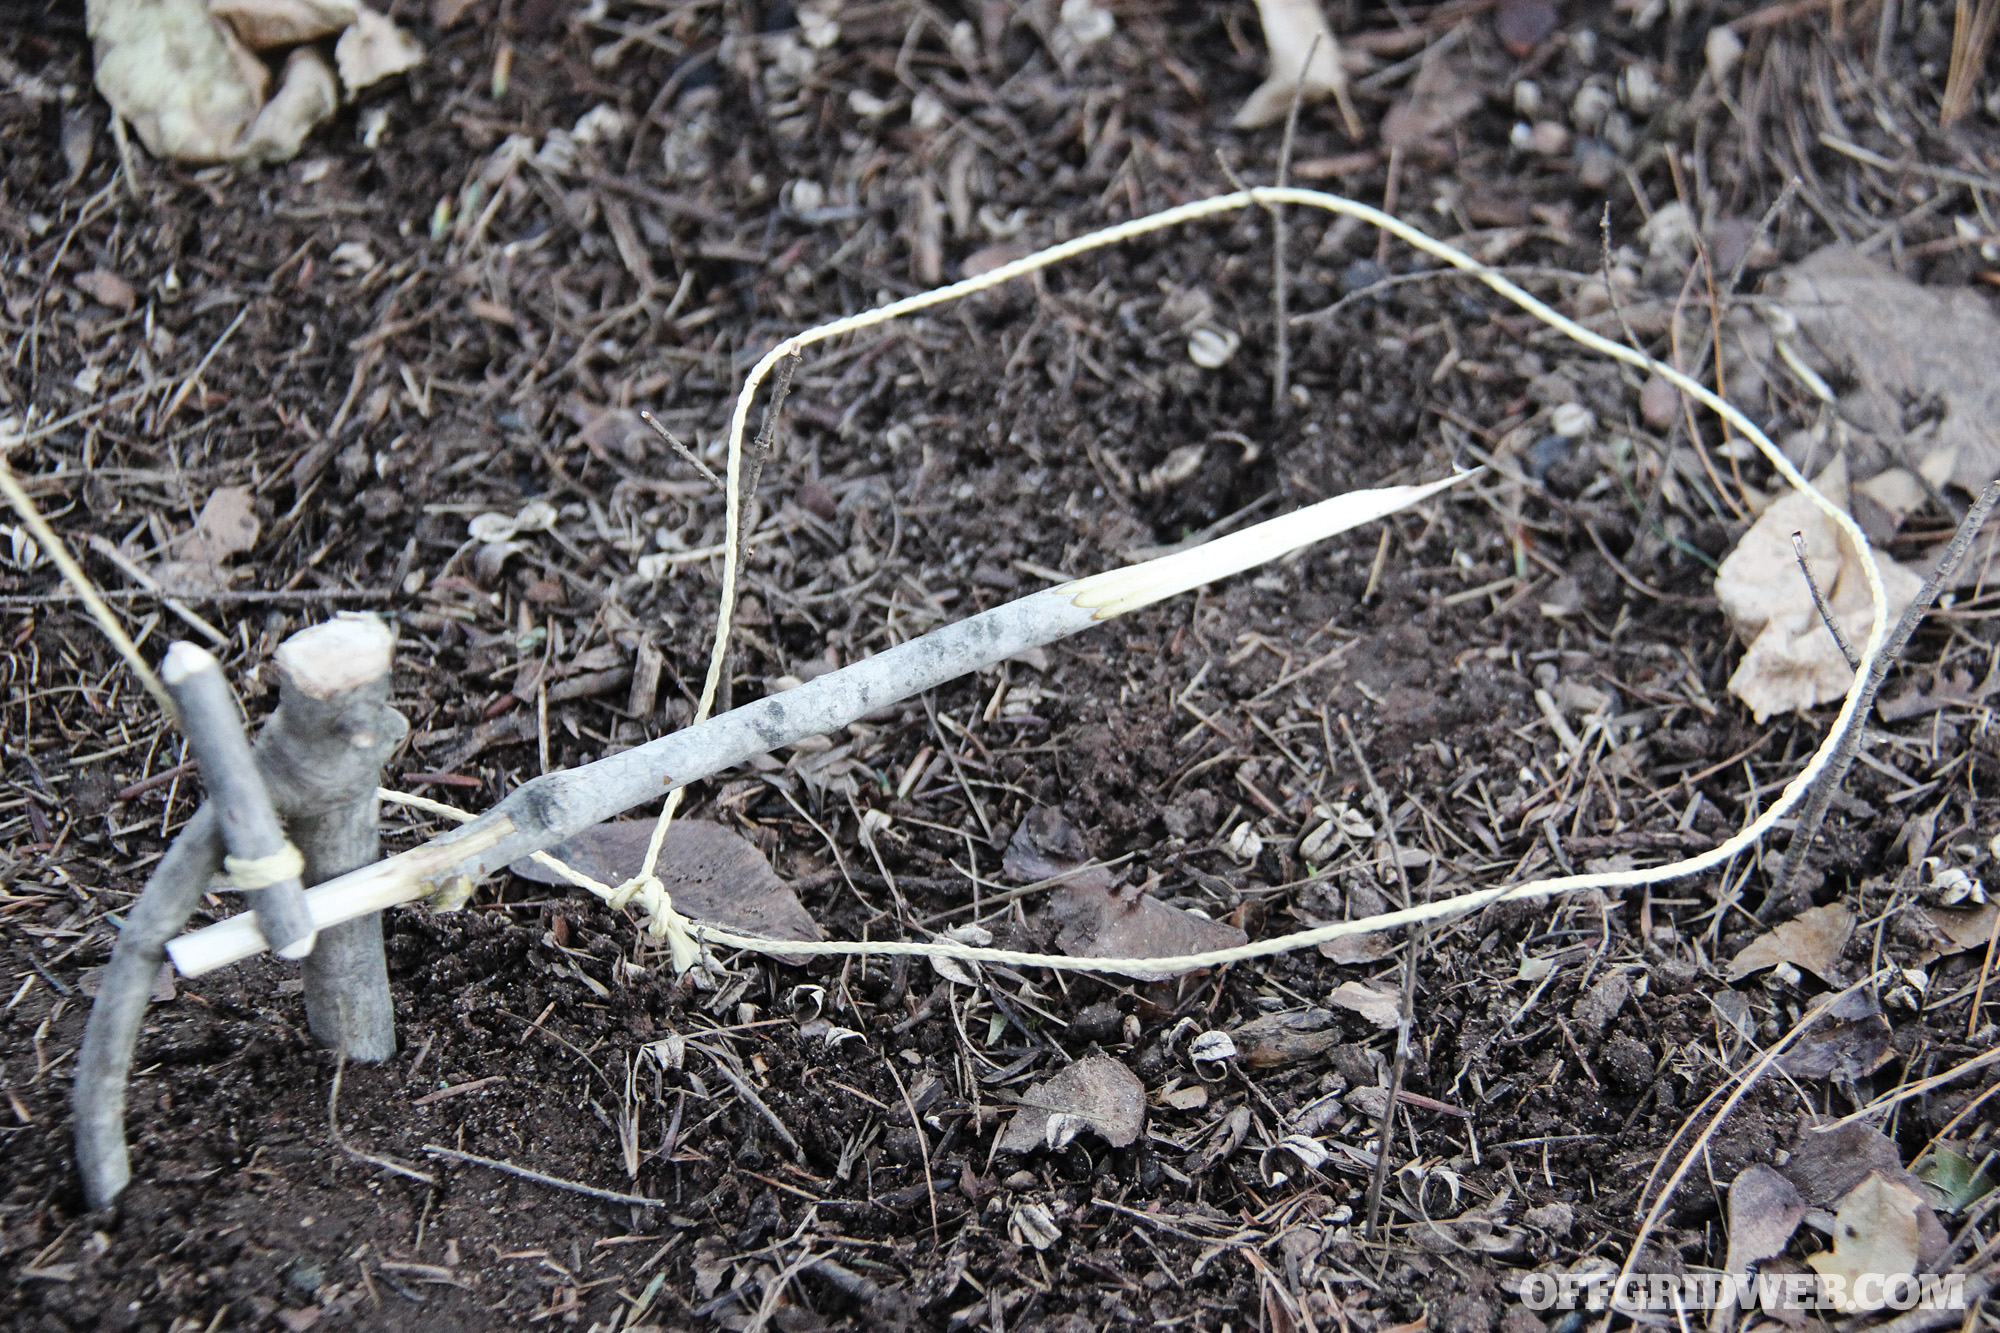
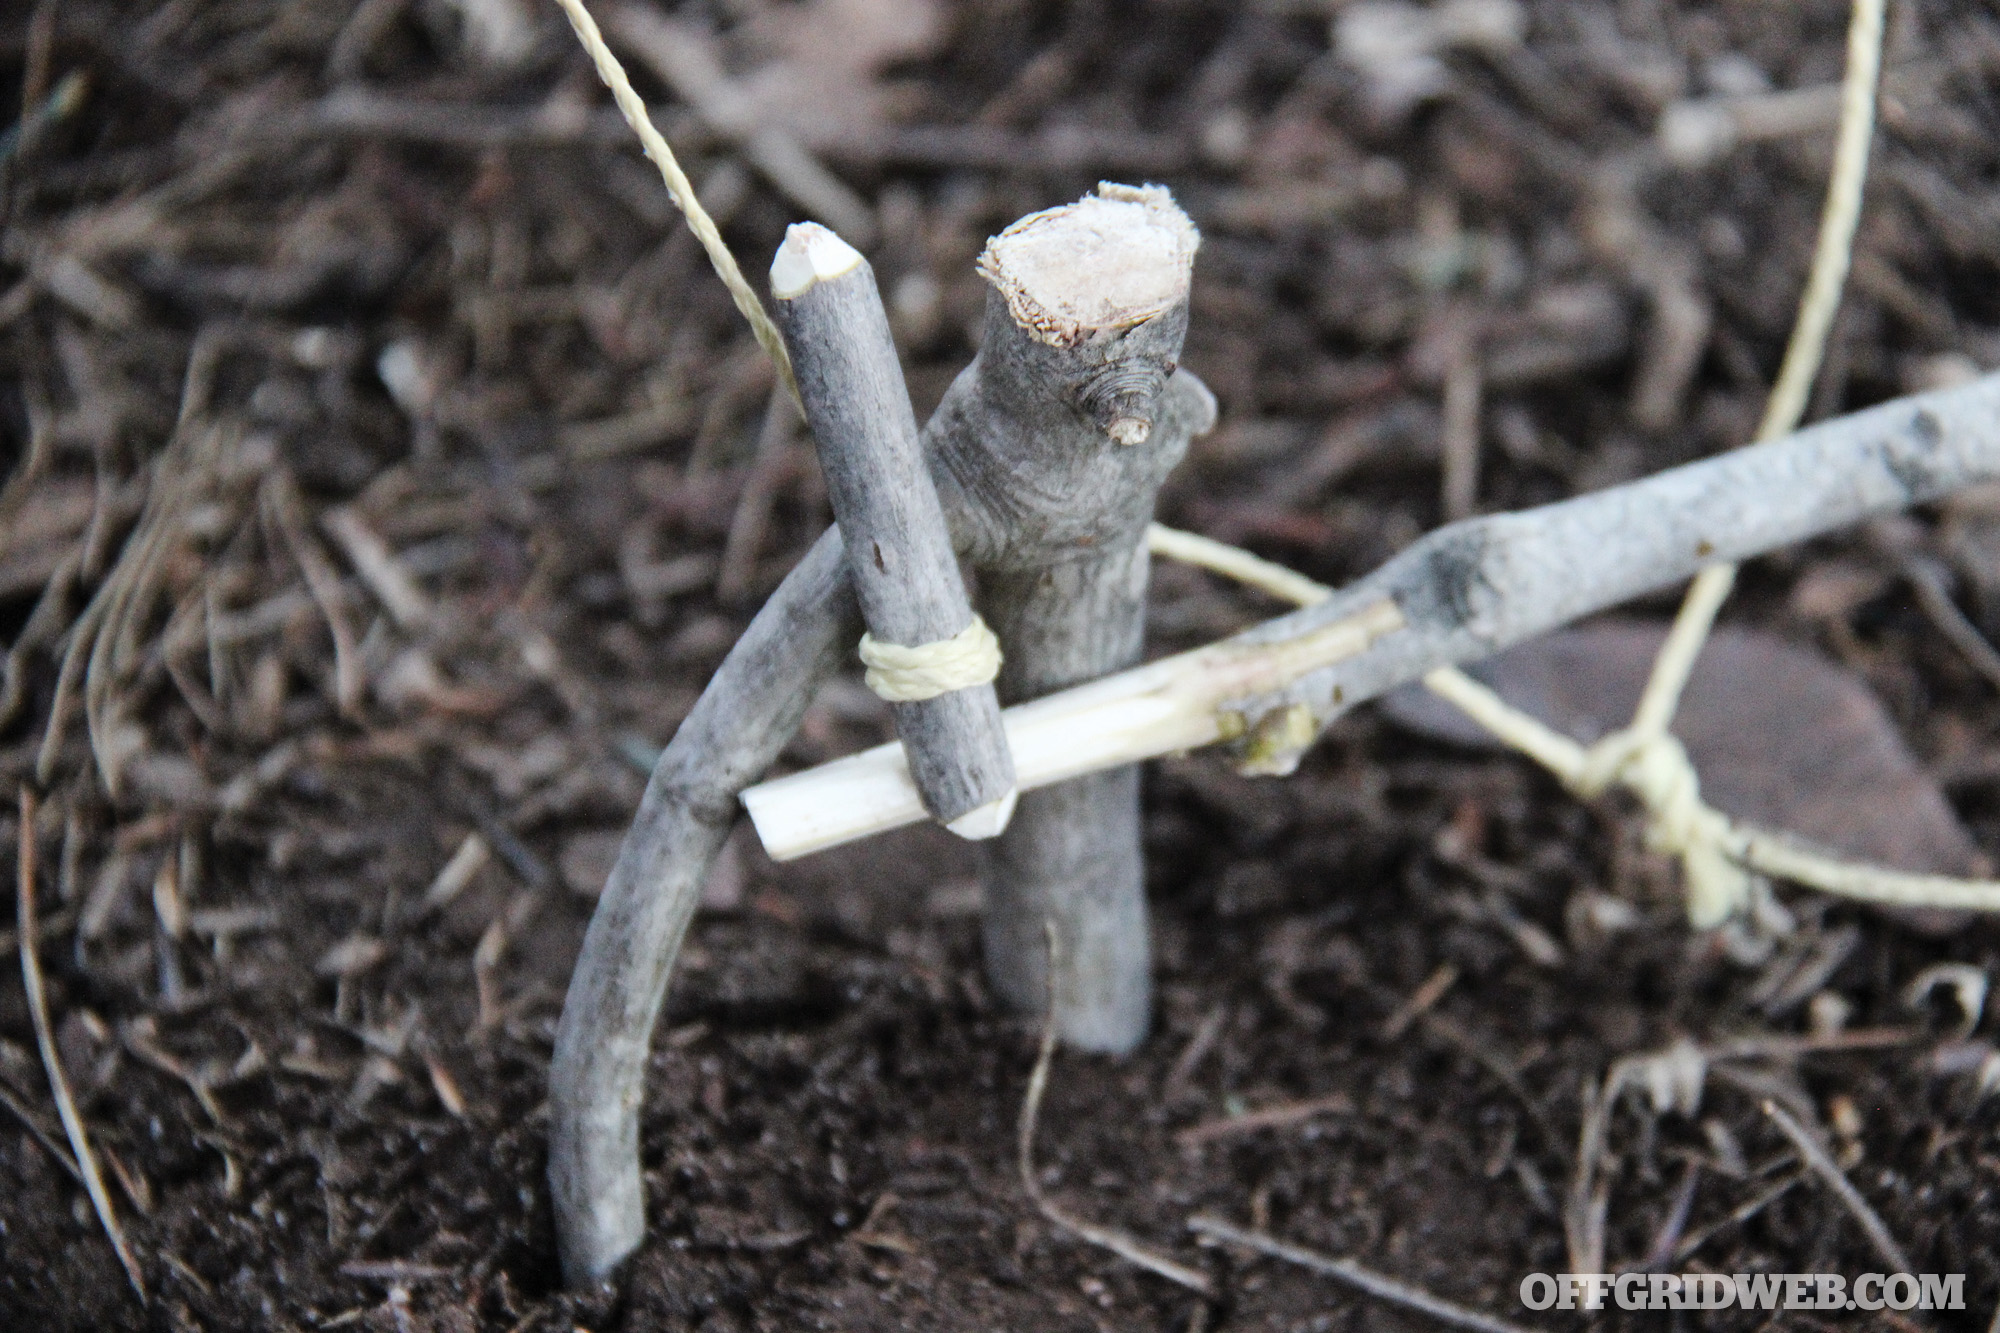
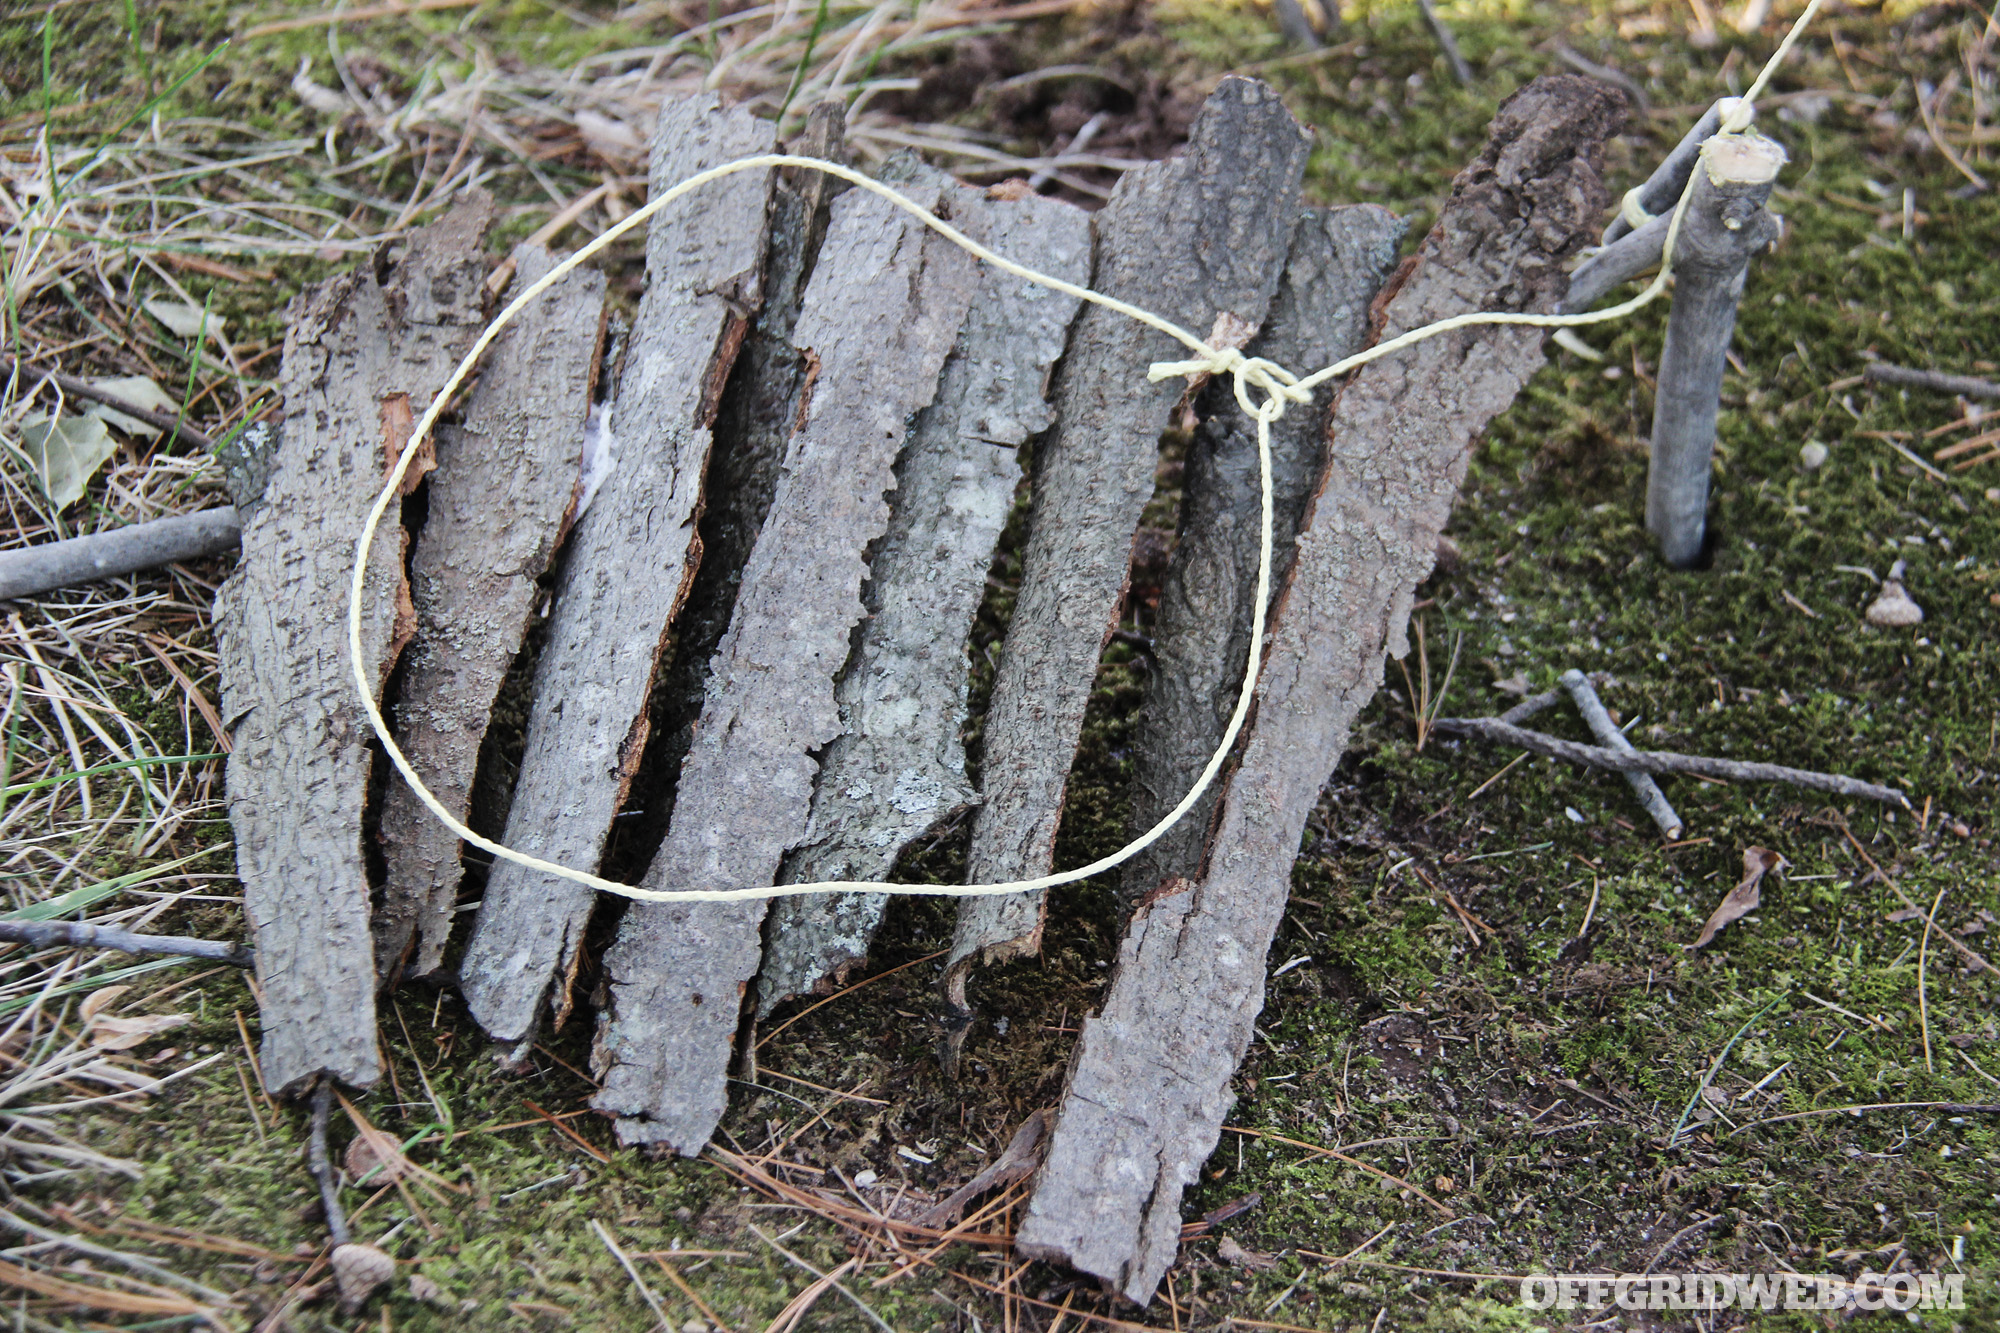
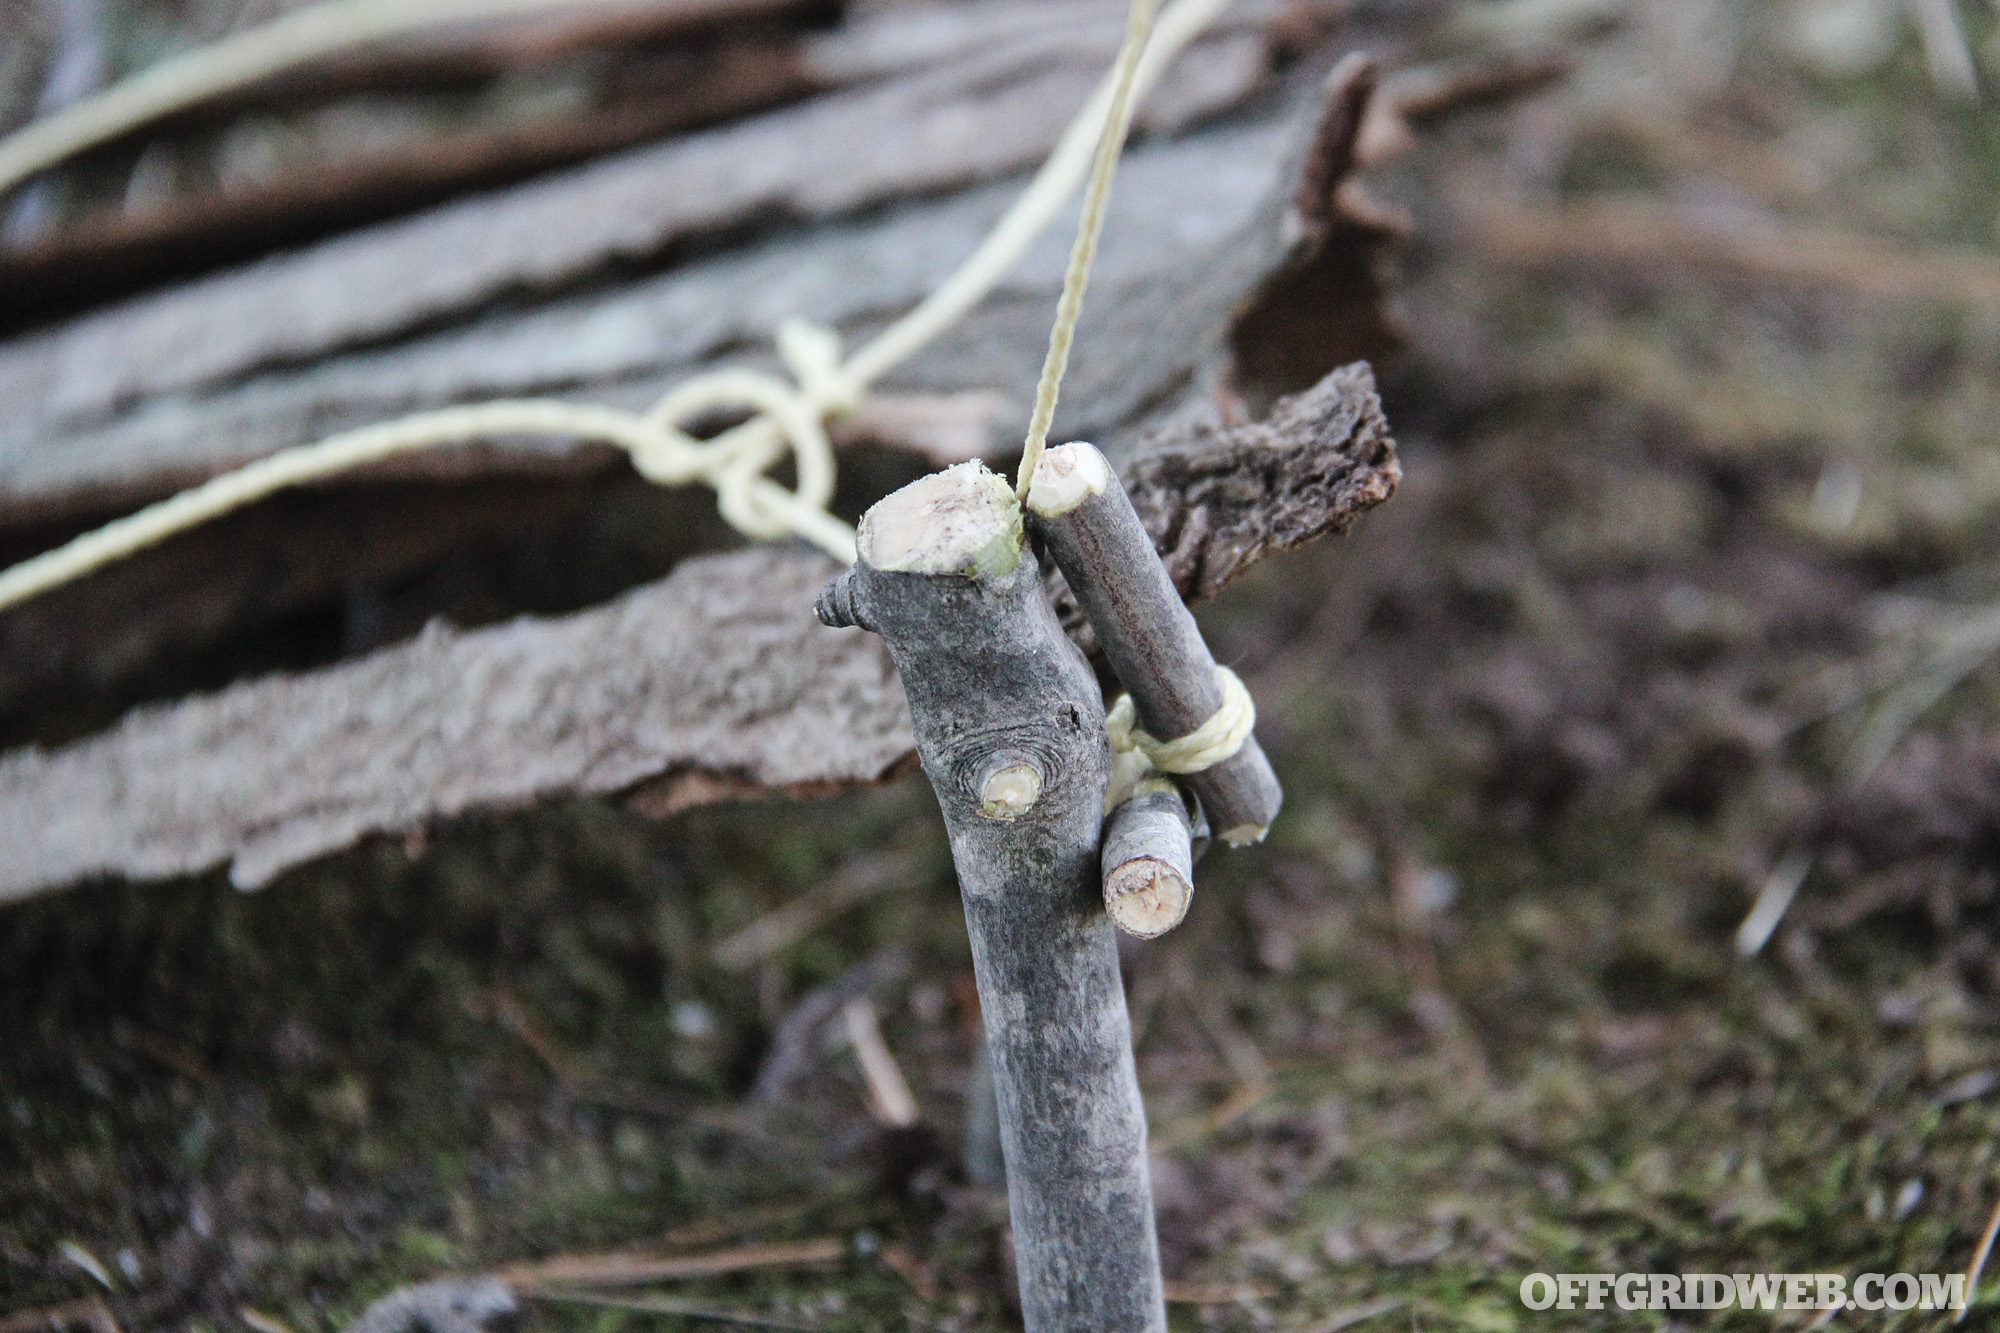
Paiute Figure 4
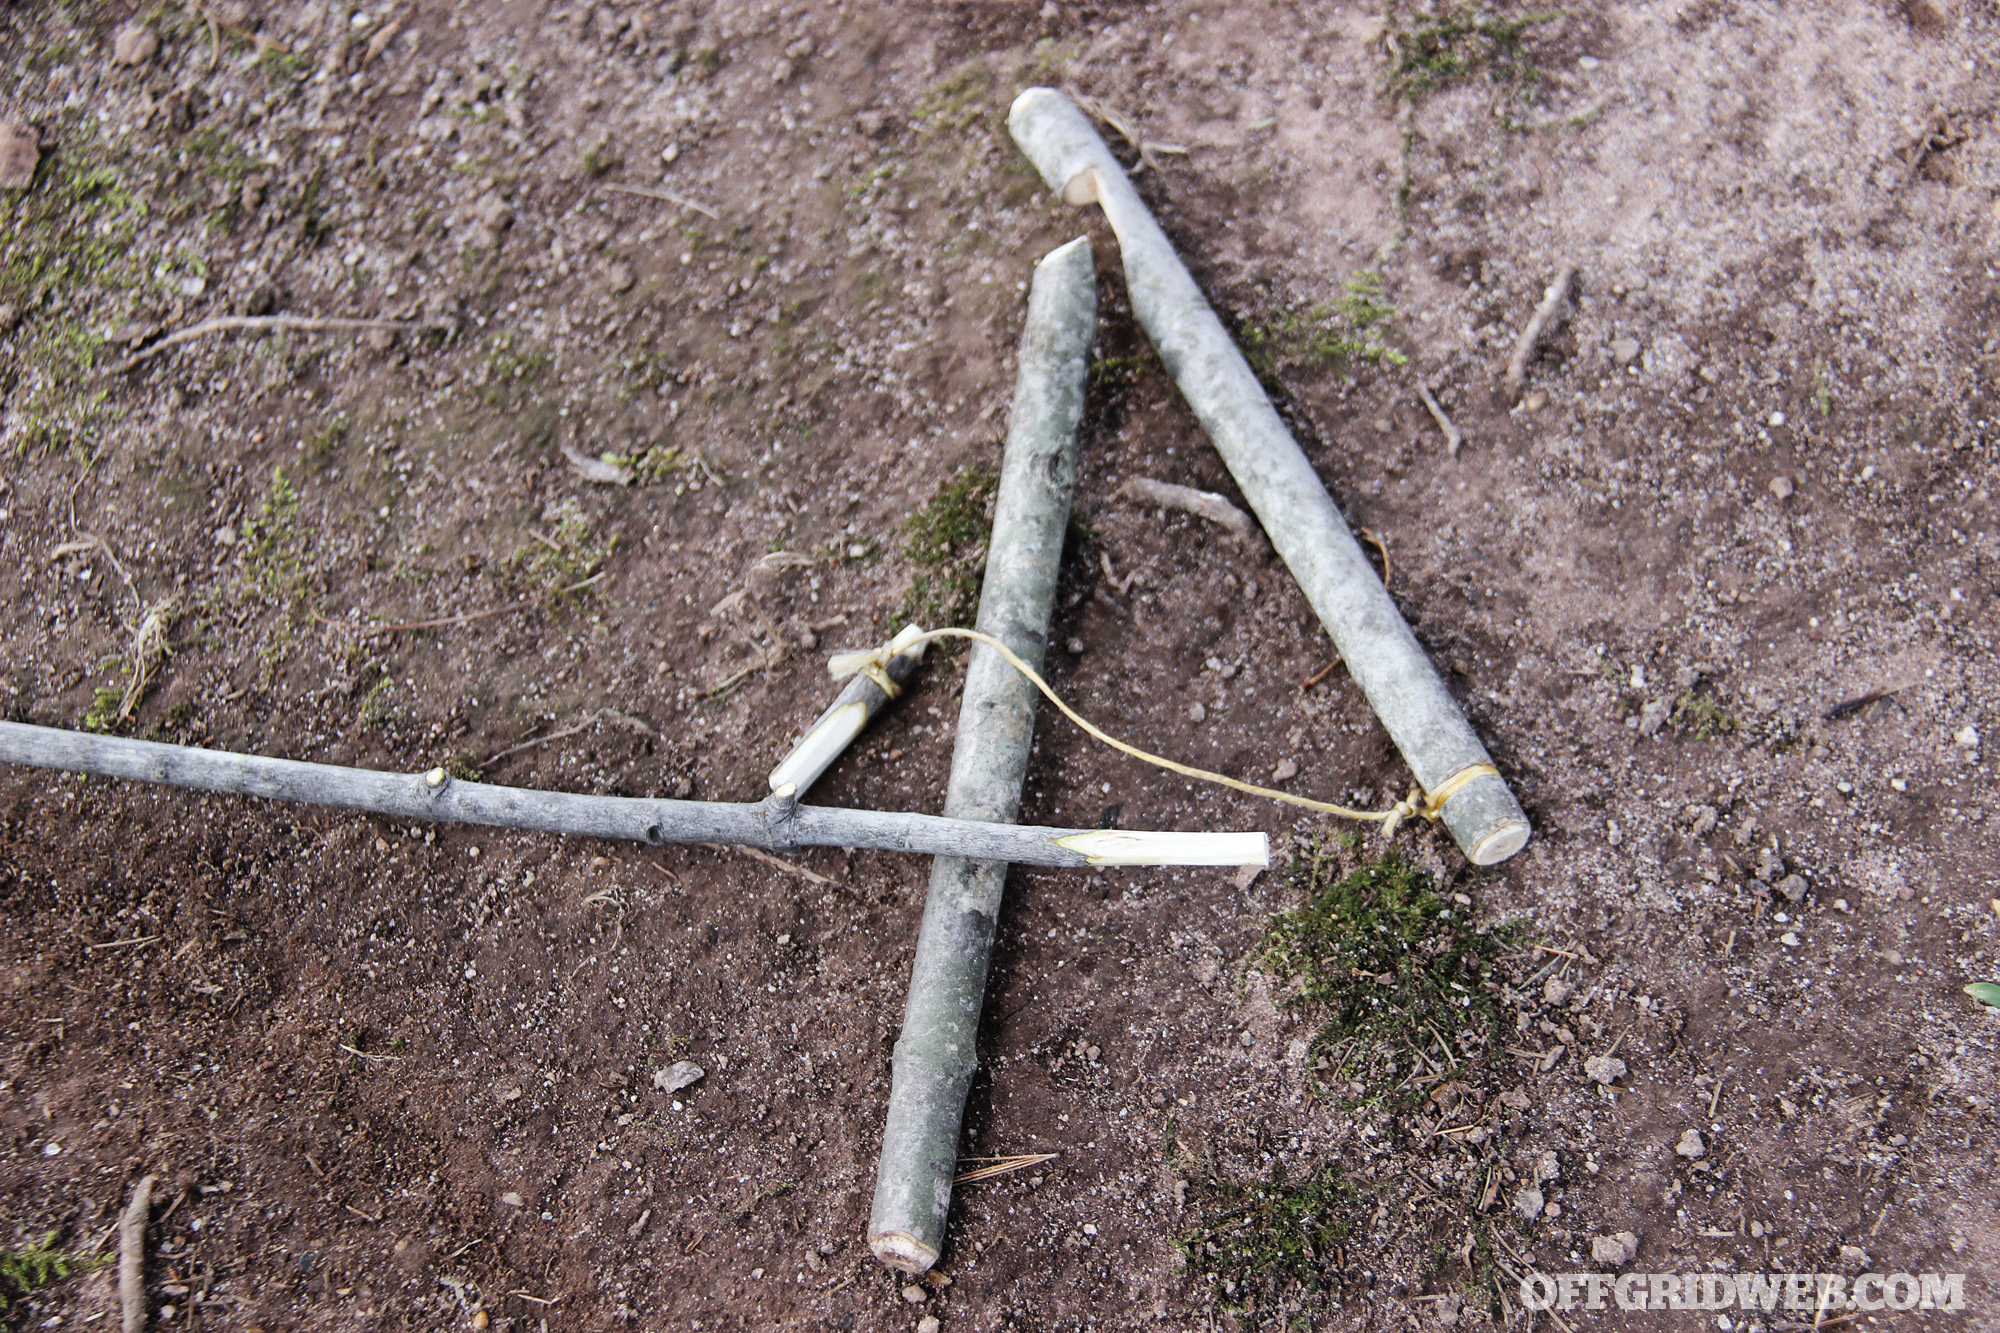
Above: The Paiute Figure 4 trap trigger requires less carving with the trade-off of adding cordage to the setup. The Paiute Figure 4 is an incredibly responsive and fast trap trigger; it works well with crushing traps and makeshift cage traps. A cage trap can be created to catch animals live, but must be weighted to prevent an animal from escaping.
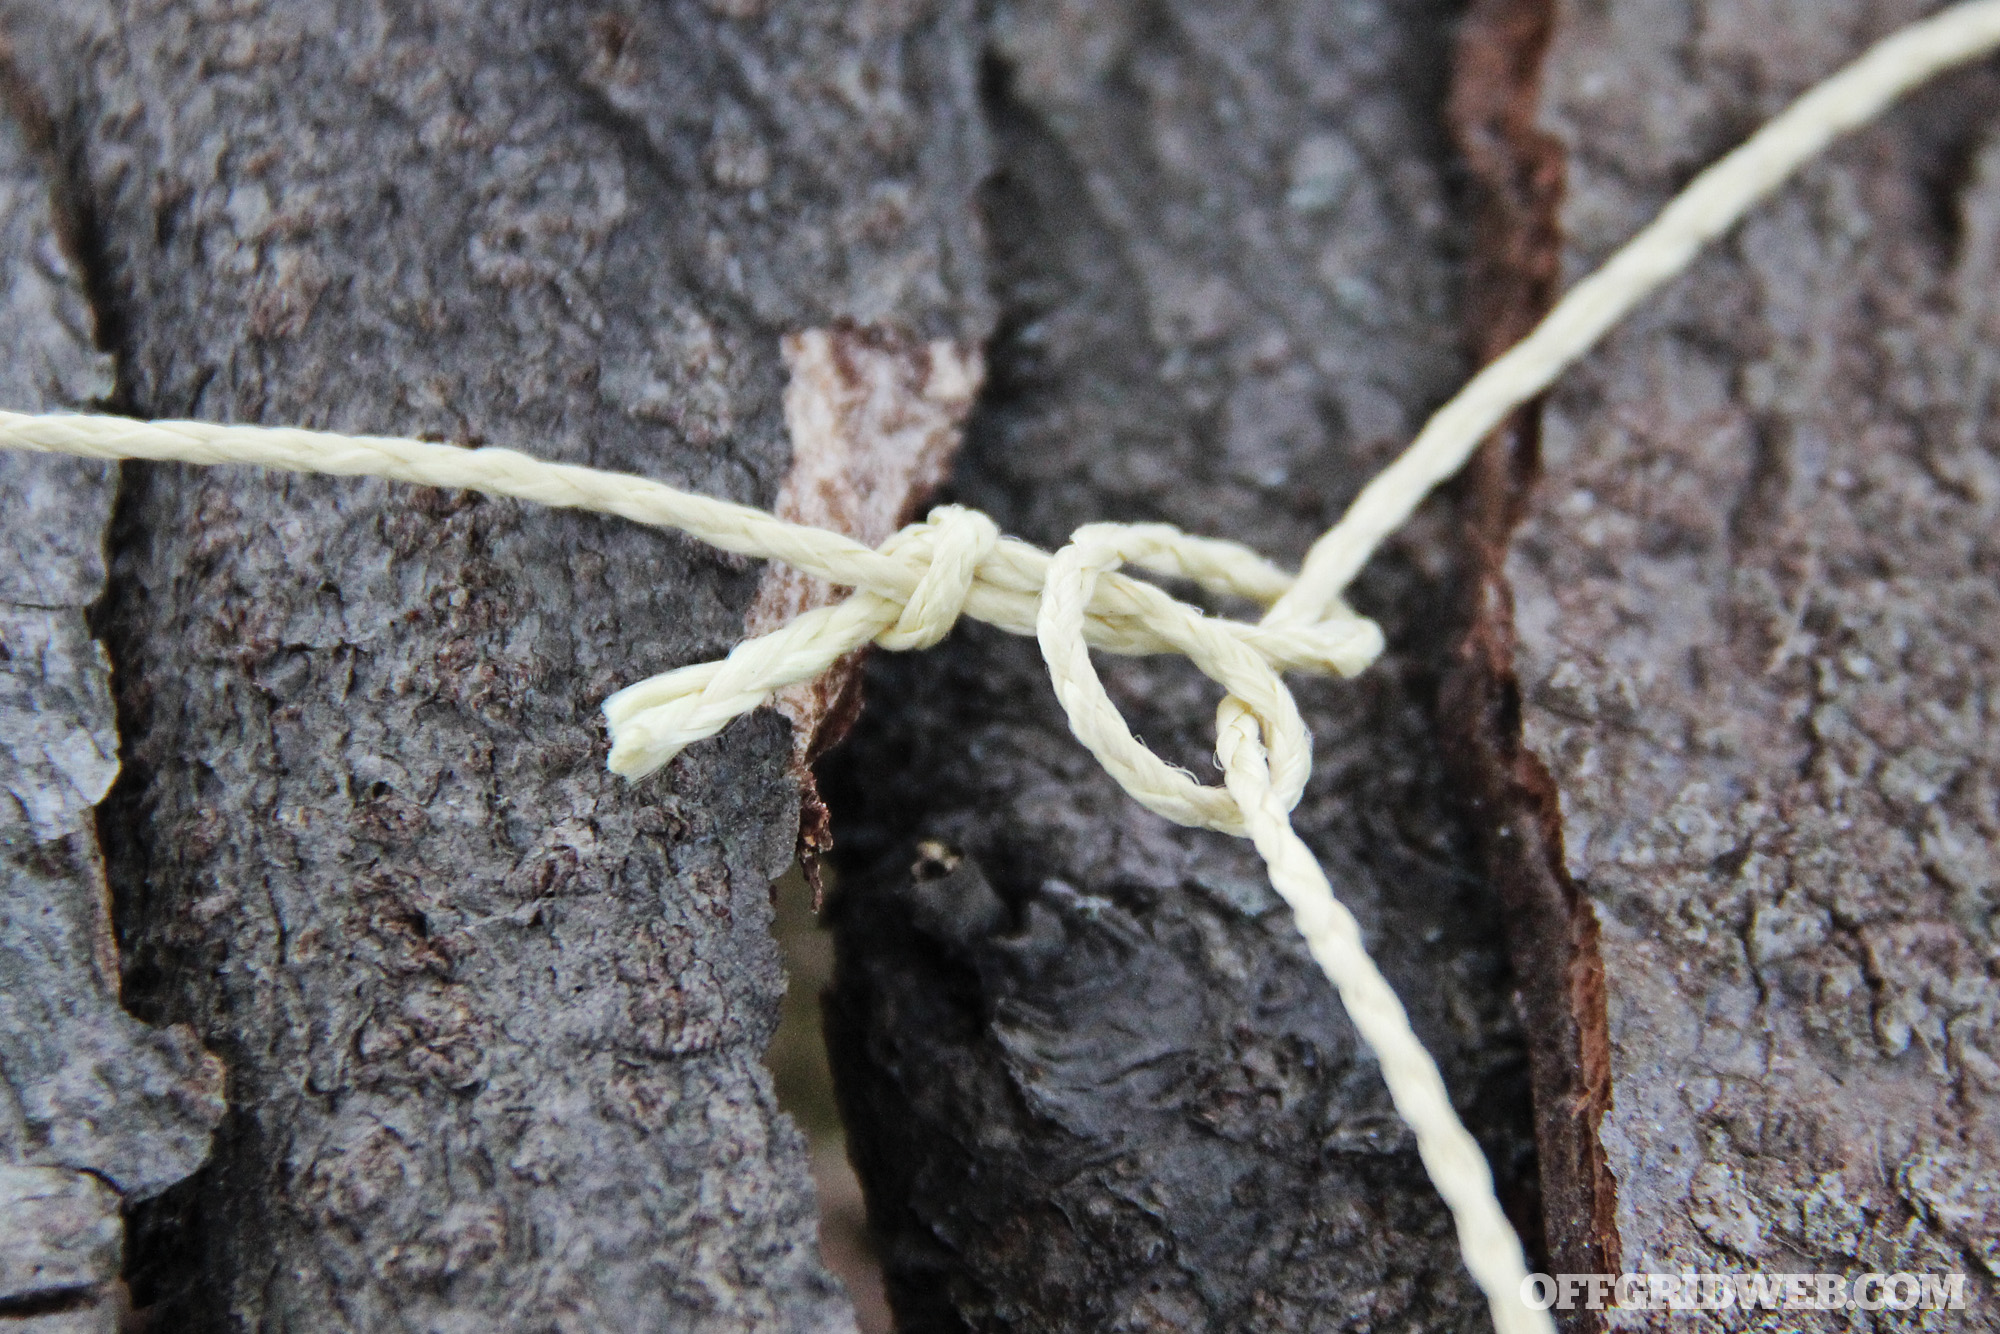
A variation of a Figure 4 with increased sensitivity is the Paiute Figure 4. This trap needs less carving, but requires cordage. In the Southwest states where the Paiute lived, Yucca fibers were easily processed into cordage with sufficient strength for trap triggers. In the modern era, paracord innards and jute twine can be substituted if your natural cordage making skills aren’t up to snuff. Make sure your cordage has little to no stretch to prevent delayed action.
The Paiute requires a single chisel tip and ramped notch along with a single groove around the horizontal stick. If you’re using reverse-wrapped cordage, the initial loop created can be looped around the toggle that wraps around the vertical stick. Where many survival manuals get it wrong is showing the Paiute trigger stick and toggle stick carved to perfect flats that maximize contact with one another at the expense of increased friction. To increase the sensitivity of the trigger and toggle, round the ends and smooth them out as best as possible.
Pros: Less carving than Figure 4, very fast trigger.
Cons: Requires cordage and a deadfall weight
The Simple Snare
A simple snare loop can be made from wire. Ideally, the wire should be the braided variety as it has greater resistance to breaking and the braid has a tendency to catch animal fur, adding a level of retention. Aside from the wire, the only other material necessary is a small twig or a stick that serves as a dowel. The process is easy.
Step 1: Cut a small length of snare wire (approximately 18 inches). About 4 inches down from one end, place a dowel horizontally across the wire and loop the wire around three times.
Step 2: With one hand pinching the dowel and the other the ends of the wire, twist it tightly a half dozen times.
Step 3: Break the dowel in half and pull it from the loop. Don’t let the loop close, but pinch it flat.
Step 4: Bend the tail end of the working end of the wire to create an acute hook.
Step 5: Thread the running end of the wire through the twisted loop and position the hook on the other end of the wire in line with the opening. The hook may increase the chances of hooking on the prey’s fur and help close the loop.
Step 6: Measure the size of the loop appropriately for the prey you intend to catch. The size of the loop should be approximately two to three fingers wide for a chipmunk or squirrel and four fingers for a rabbit.
Step 7: Attach the running end of the snare wire to a good anchor. Make sure the anchor is affixed to the ground or a branch the animal cannot break free. If you have them, use a fishing swivel to prevent the wire from twisting and weakening.
Snaring Traps
Goal Post
Above: The Goal Post setup is a bidirectional trap trigger. Regardless of which way an animal runs through the Goal Post, it’ll trigger. Whenever a lightweight snare is used, small forked twigs can be used to prop it open and hold it at the right height above the ground. A simple girth hitch can be used to create the snare loop with a simple stopper knot.
The goal post trap trigger is simple to construct with only three sticks and some form of lifting mechanism (bent sapling, counterweight, tensioned cord, etc). Cut two upright posts and carve ramped notches into them at the same height. Cut the upright sticks into digging chisels or a point. Using a blade, cut serrations in the space between the chisel tip and the notched ramps on each upright to grip the earth and prevent them from being easily extracted. The horizontal stick is the trigger pin; cut it to create two 90-degree angles opposite from each other on the two ends.
The goal post is set by pounding the upright sticks in the ground along a game trail. The width between the goal post will vary, but in general it should be slightly wider than the animal’s body. Make sure the upright sticks are positioned with the ramped notches facing opposite directions inline with the game trail. This allows the trigger pin to fire from either direction. Placing the notches on the uprights facing the same way will only allow the trap to work in one direction. A single or a double snare can be suspended from the horizontal post. When the animal runs through the goal post and is caught through the snare, the trigger pin will be displaced and the tension from the lifting mechanism lifts the animal. Contrary to popular belief, the animal need not be lifted entirely off the ground. All that’s needed is to lift the front legs. Lifting an animal completely off the ground and out of the reach of predators does have its place when they could also be in the area.
Pros: Very strong bidirectional trigger
Cons: Requires additional cordage for lifting mechanism
Toggle (aka the “L7” Trigger)
Above: The “L7” trap trigger utilizes two forked sticks that hook onto one another. It’s very responsive and can be used for many setups, including fishing traps that set the hook when triggered. Forked “Y” twigs are used for holding snares at the appropriate height.
The toggle trigger is shaped and configured just like the letter “L” and number 7. This trigger works on the concept of opposing pressure to keep it from firing. This trigger mechanism can be carved from a single branch. Carve the ramped notches with minimal space from the 90-degree angle and the end of the stick. Bevel the ends of the “L” and “7” pieces to fit together better. Groove the opposite ends with an awl or carved knife tip to create a hole for cordage.
The toggle trigger is capable of holding an incredible amount of weight. It works well in various configurations, from a floating trigger pin to a staked version in the ground. Where the books have gotten it wrong in the past is showing an incredible amount of weight or force suspended with a toggle trigger on a set designed for an animal that can’t trigger it. The friction between the two notched ramps can be alleviated by either working the beveled notches to points or by using a round twig as a “roller bearing.”
The toggle trigger can be used for either snaring traps or for crushing traps. One easily constructed trap set is built with a rock suspended over the head of an animal, funneled into an area where one end of the toggle is attached to an attractant or bait an animal will tug on. When the toggle is released, the rock suspended above falls on top of the animal’s head.
Pros: Easy concept to grasp
Cons: Can stick without “roller bearing”
Twitch Up
Above: The classic twitch up works with a baited stick. When the prey disturbs the trigger stick, the toggle releases and the snare catches around the animal’s neck, neck and front leg(s), body, or leg(s) alone. Note the “Y” twigs propping the snare loop open.
A classic snare trap trigger is the twitch up. This type of trap trigger can exploit natural forks in root systems, or carved forks can be pounded into the ground along game trails. The twitch up is very sensitive and can be scaled to any size to catch a chipmunk or an alien predator with dreadlocks by the leg. In case you’re wondering, this is the one you’d use to lift a person upside down by the ankle like they do in the movies.
Pound a forked stick into the ground, with the same type of serrations described for the goal post. This forked stick needs to be secure enough to hold the force of the counterweight, and there needs to be enough room between the crotch of the fork and the ground for the trigger pin to clear. The trigger pin can be fashioned from a smooth piece of hardwood, bone, or antler. You can taper it like a cone, debark it, and round it so it slips with the greatest ease. Attach the trigger pin to the counterweight with strong cordage, and attach the snare to the trigger pin as well. Pull the trigger pin through the forked stick and align the broad end with the end of the fork facing upward.
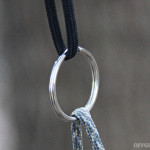
Above: Key chain split rings work well to redirect the pull from a counterweight with minimal drag. Logs work well as lifting weights in the woods and cinder blocks do the same in urban environments. With enough weight, a lifting trap can be scaled up for man-sized prey.
There’ll be tension against the fork, and the trigger pin will want to pull through the fork. To prevent this, place a horizontal stick between the two tines of the fork and the tapered end of the trigger pin. The horizontal stick can be tweaked to have a minimum amount of surface area touching it. This will increase the sensitivity. Place the loop of the snare under the baited horizontal bar and prop it up with small forked twigs. When the prey disturbs the baited horizontal bar, the trigger pin will release and the counterweight or bent sapling will pull the snare tight around one of the legs and lift the animal upward.
Pros: Extremely sensitive trap, adaptable to any size prey
Cons: May not react if parts are incorrectly sized and mismatched
Platform Twitch Up
Above: The platform twitch up snare setup requires no bait and fires when the prey steps foot on the platform. The twitch up pulls taut around the prey’s leg and holds under the tension from the counterweight.
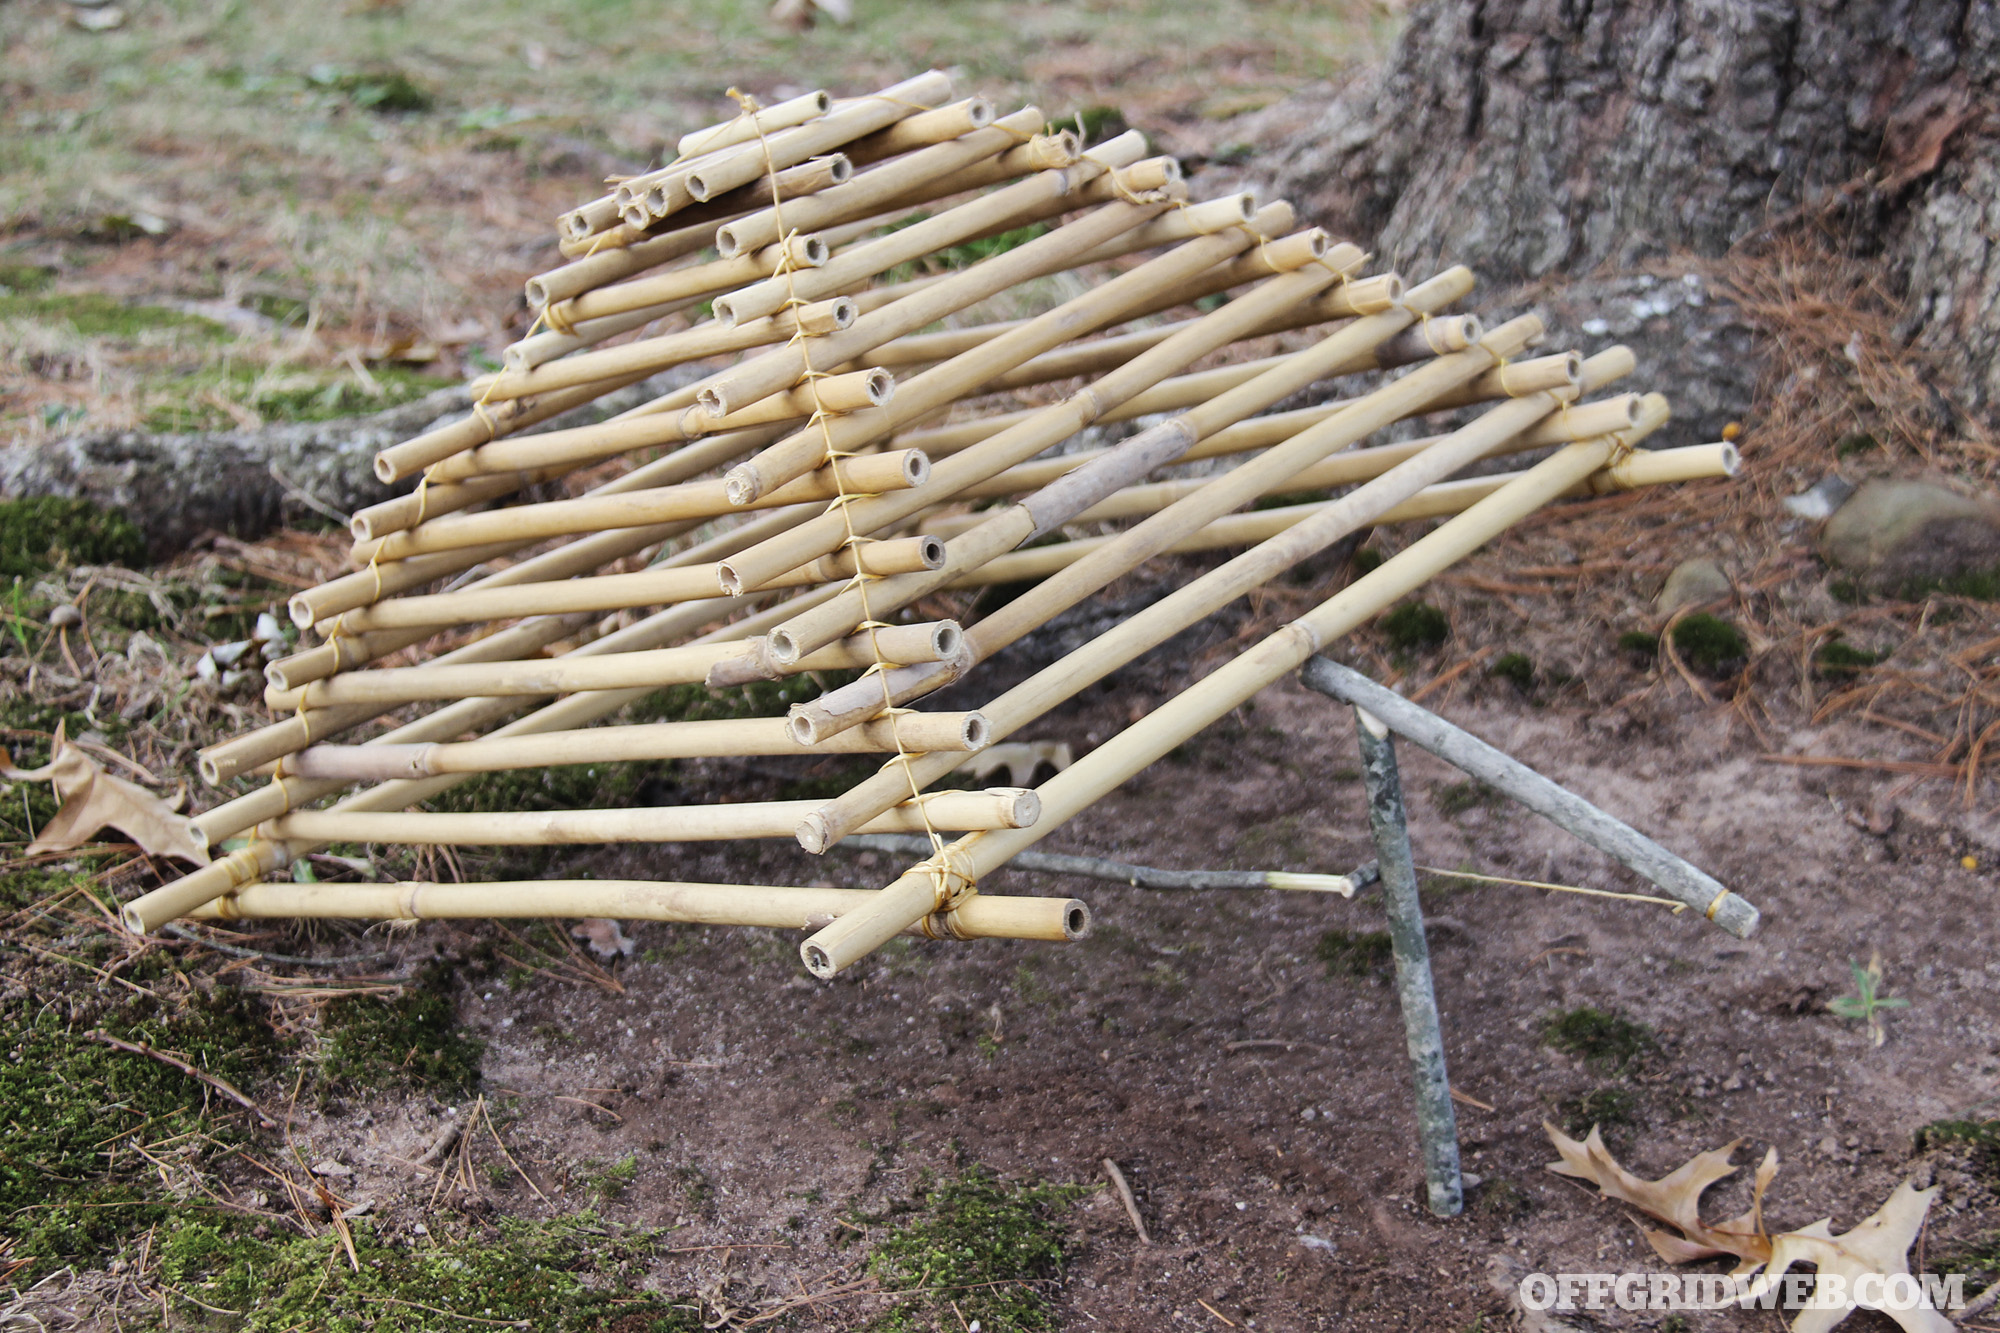
While the traditional twitch up is an effective and easy-to-make trigger mechanism, it relies on the prey eating from a baited stick. To increase the odds of success for this trap, a platform can be constructed over it. In this configuration, when an animal steps on the platform, the snare closes around the leg. This can be accomplished as easily as placing perpendicular sticks or a solid flat object like a piece of bark, wooden plank, or hard-ribbed leaves across the horizontal stick.
With more surface area, there’s a greater chance to set off the trap. Unfortunately, this platform is more easily detected as it has a larger profile than the single horizontal stick used in a basic twitch up. A good trade-off is to make multiple snare loops for a prey to step in. Also, instead of creating a flat platform, alternating branches can be placed over the horizontal stick to resemble a “rooftop” platform.
Pros: Greater surface area for greater triggering effect
Cons: Larger footprint means easier recognition by prey
Universal Trapping/Snaring Best Practices
1. Funneling: Using branches, rocks, and logs, create a funnel that forces your prey into your trap. If you can’t bait your trap, funneling draws an animal into a setup they otherwise would attempt to avoid.
2. Multiple Traps: Trapping works best on the principle of the more, the better. A single snare covering a rabbit hole may pay off, but multiple overlapping snares will increase your odds. The same concept goes for crushing traps — a minimum of six should be set with the expectation that just one will be effective.
3. Watch Your Eyes and Fingers: Whenever you’re setting a trap, there’s a possibility you’ll accidently trigger it. Eye injuries or crushed fingers can happen. Respect your traps and what they can do.
4. Check Frequently: Traps can be triggered inadvertently, and a trap that isn’t set won’t catch anything. Traps can be blown over by the wind, or they might just wound an animal, allowing it to possibly escape before you return. Traps should be checked every four to eight hours.
5. Dispatch Safely: Ideally, snares will wrap a loop around an animal’s neck and either snap the spine or strangle it. Ideal is rarely the case, and snares can sometimes catch an animal around the head and shoulder, around the trunk, or around one or both of the rear legs. If you catch an animal that’s still squirming in a trap, you need a way to dispatch it humanely. A good forked stick will help pin it down or against a tree. A baton strike or .22 to the head will do the rest.
6. Reset Traps: Animals are creatures of habit, and the instincts that drew the first animal to the trap you set may lead others there too. If your trap isn’t mangled from the first kill, reset it and check it later.
7. Baiting Traps: Baiting traps will improve your odds. Scavenged mushrooms, berries, nuts, and animal guts can be harvested in the wild depending on the usual diet is the animal you’re trying to trap. You can also sacrifice some trail mix or a small bit of an energy bar to bait your traps.
Conclusion
All of these trap triggers have their quirks and nuances to make them more sensitive and effective. Our photos show the basic traps without the clutter of “fencing” that funnels the animal in. This will increase the effectiveness of the trap. Of course, you could have the best trap in the world, but if it isn’t in the right spot, it won’t matter and you’ll end up hungry. Don’t try to half-ass your approach to game getting. If you’re willing to learn how to make the traps to catch game, learn where your dinner lives, its habits, and the knowledge from seasoned trappers, you’ll be able to bring dinner to you rather than you tracking it down.
About the Author
Kevin Estela has been a professional survival instructor since 2007 first at the Wilderness Learning Center as lead instructor and then with his own company, Estela Wilderness Education. Kevin is a ranked associate level instructor in Sayoc Kali, a purple belt in Brazilian Jiu-Jitsu under Sifu Chris Smith, and an avid firearms marksman and shooter. When not teaching outdoor skills, he’s a full-time high school history teacher and founder of the Estela Wilderness Education Fund. Follow him on Instagram/twitter @Estelawilded or www.facebook.com/estelawildernesseducation
Hygiene is an important part of any survival scenario, especially the long-term situations. Without the ability to clean your hands and body, skin infections and the transmission of bacteria and pathogens are increased. As a survival-minded individual, you’ll probably have a knee-jerk reaction to the realization that cleanliness is a survival priority; and that reaction is probably to go buy a case of soap. There’s nothing wrong with that.
Soap can last for decades, if you store it out of the reach of rodents (yes, mice and rats love to eat it). But there’s more to self-reliance than just storing the goods that someone else made. The truly independent will learn how to make things for themselves as well. In the event that you don’t have access to off-the-shelf soap, you can take a page out of the pioneer playbook and make your own.
Let’s start with a little history and a bit of chemistry. We get the word “soap” from the Latin word “sapo,” though the invention of this slippery substance predates the Roman Empire. The oldest known soap formula was scribed on a clay tablet in Babylon over 4,000 years ago, and it was a simple mixture of water, alkali, and cassia oil. Over the centuries, cultures around the globe discovered that most oils and fats make an effective soap base, and that many different alkaline substances can turn that fat into soap. We’re still performing this minor alchemy today, when we mix up our own soap.
During the process of saponification, the fat is raised to the right temperature (for that type of oil), and mixed with the right amount of alkaline fluid. As it’s stirred, the soap will thicken and hydrolyze into “salts of fatty acids,” with a few other things present. Once it cools, hardens, and ages a bit, your soap is ready to perform its job, namely mixing with water to remove dirt and oils from our bodies and possessions.
It must’ve seemed like some kind of magic to our ancestors. Fat doesn’t mix with water, but soap does, and soap is made from fat. Soap also has an almost magnetic pull on dirt and oil. There are many different kinds of soaps you can make. By using olive oil, you can make Castile soap, renowned for its mildness. You could make an abrasive soap by mixing a little sand or powdered pumice with your batch. Or you can make granny’s lard and lye soap — a slightly stinky soap with mighty cleansing powers. Here’s what you’ll need to make your own homemade soap from animal fat and lye.
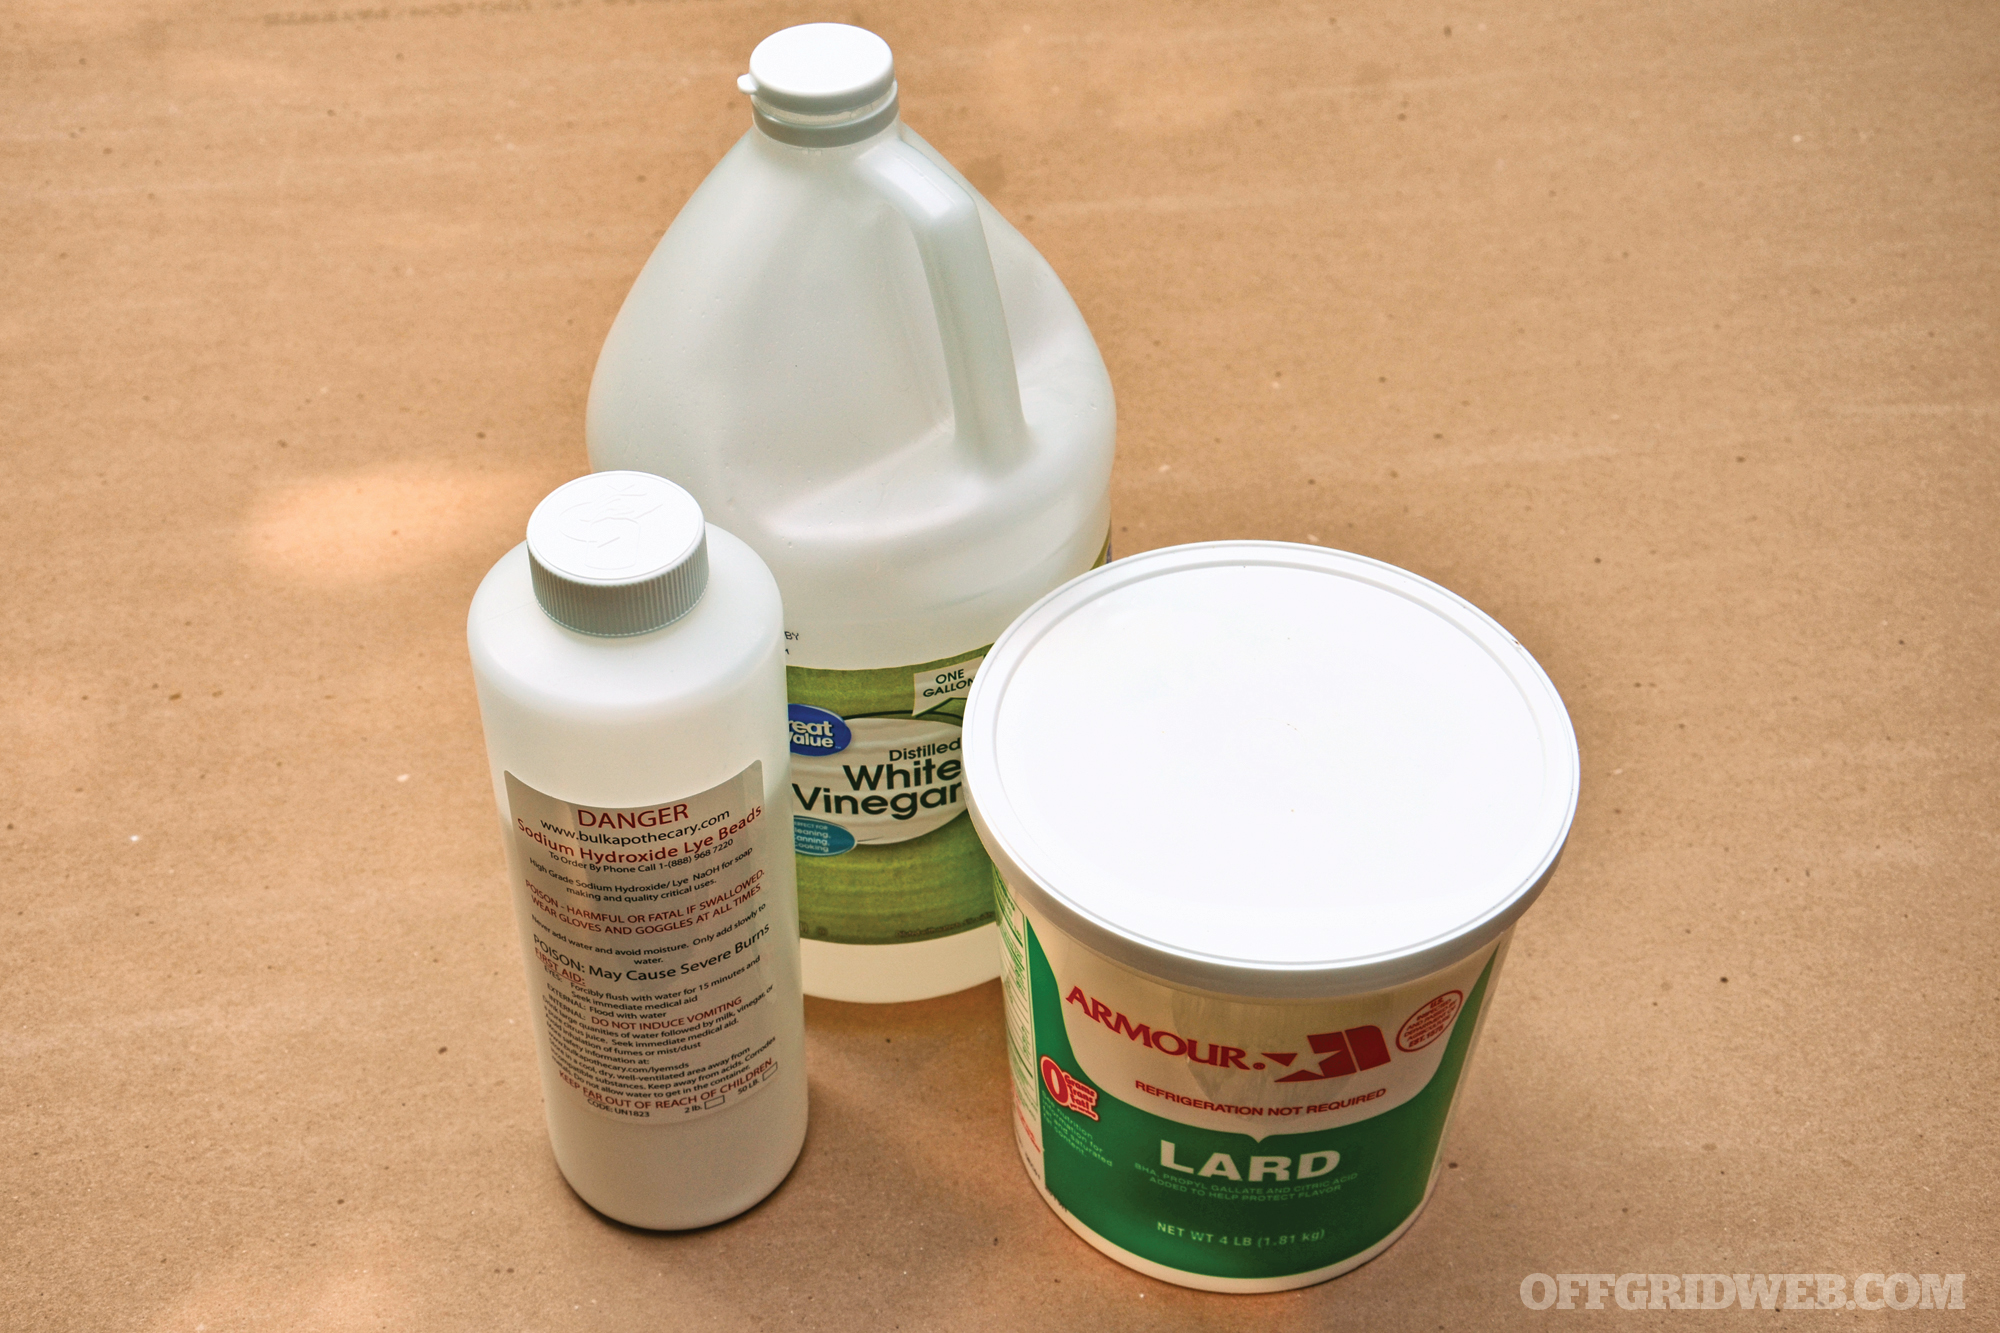
Above: Be sure you keep soap making supplies separate from any items used for cooking. They should not be used interchangeably.
Safety First!
Go back and watch Fight Club again. Not for fun, but for educational purposes this time. Pay close attention to the scene where lye is eating away at the protagonist’s hand. Commit that to memory, as well as these handy safety tips!
Wear disposable gloves and safety goggles while working with your soap, particularly when working with lye crystals and lye water.
Keep an open bottle of vinegar close at hand in case of lye spills. This acidic liquid will help to neutralize the alkaline lye.
Keep children and pets out of your soap-making area (they should never be underfoot, especially when the lye water is sitting there cooling).
Never mix hot water with your lye crystals. It may splatter lye on you!
Only mix your lye water in a glass container that can handle heat (a Pyrex measuring cup is best, as it can handle high heat and has a pour spout).
Don’t mix lye water in metal containers, especially aluminum.
If you refused to wear your safety goggles and got lye water or soap slurry in your eyes, flush them with copious amounts of water and call 911. Don’t rinse the eyes with vinegar.
Make sure that everything you use in making lye soap is labeled and never used for food purposes again.
Since you’ll be working with caustic materials, eye protection and gloves are a must.
Assemble Your Supplies
Safety should always be your top concern in the quest for soap, so never forget that you are working with some very caustic materials and residue. If you’re even thinking about soap making, you’ll want to get some gear that serves no other purpose. Don’t use your good measuring cups or the family soup pot for soap. Get some gear exclusively for soap making, label it, and store it together (not scattered through your kitchen).
The Hardware: You’ll need a stainless steel cooking pot (stainless doesn’t react with lye), a large spoon, a Pyrex measuring cup (because it can handle high heat), gloves, goggles, a scale that can register down to 1/10th of an ounce, a thermometer (a meat thermometer works well), plus something to pour your soap into that’ll act as a mold to shape the soap. This could be a non-stick baking sheet, if you want to cut the soap into flat bars. Or it could be round plastic cups, for disk-shaped bars. You could also buy soap molds, in virtually any shape you can imagine.
The Ingredients: For the recipe enclosed here, you’ll need rendered animal fat (this is lard; never use chunks of raw fat right off the animal). You’ll also need a container of pure lye crystals (sodium hydroxide). This is found at hardware stores and some craft suppliers (such as www.bulkapothecary.com). Finally, you’ll need some clean water and some vinegar. The vinegar will not be used in the recipe. It’s simply kept nearby with the lid open as a counteragent to the caustic lye (it’s like a fire extinguisher for alkaline burns); it can be any kind of vinegar (distilled, apple cider, etc.).
Get To Work!
Since the Industrial Revolution, soap went from a rough and ugly homemade cleanser made of wood ashes and leftover grease to a sweet-scented store-bought grocery item — and why wouldn’t it? Buying affordably priced soap from a merchant saved our great-great-great-grandparents a lot of time. Soap making stopped in many families, and soon this homespun knowhow was lost. But thanks to a resurgence of interest in homemade products, the modern DIY movement has resurrected this arcane process and brought it back from oblivion.
Set Up For Safety: Soap is made by mixing together an emulsion of lye water and fat, creating the chemical reaction known as saponification. It’s important to note that strong lye is very caustic and capable of burning the skin and blinding you (think acid burns, but on the other end of the pH spectrum. Ever seen Fight Club?). Before you start making soap, the first thing you should get out is a jug of vinegar and take the lid off. Keep this on standby to pour over your skin, in the event that you spill any lye water on yourself or anyone else. You’ll also want to organize all of your containers and materials, then put on your gloves and goggles.
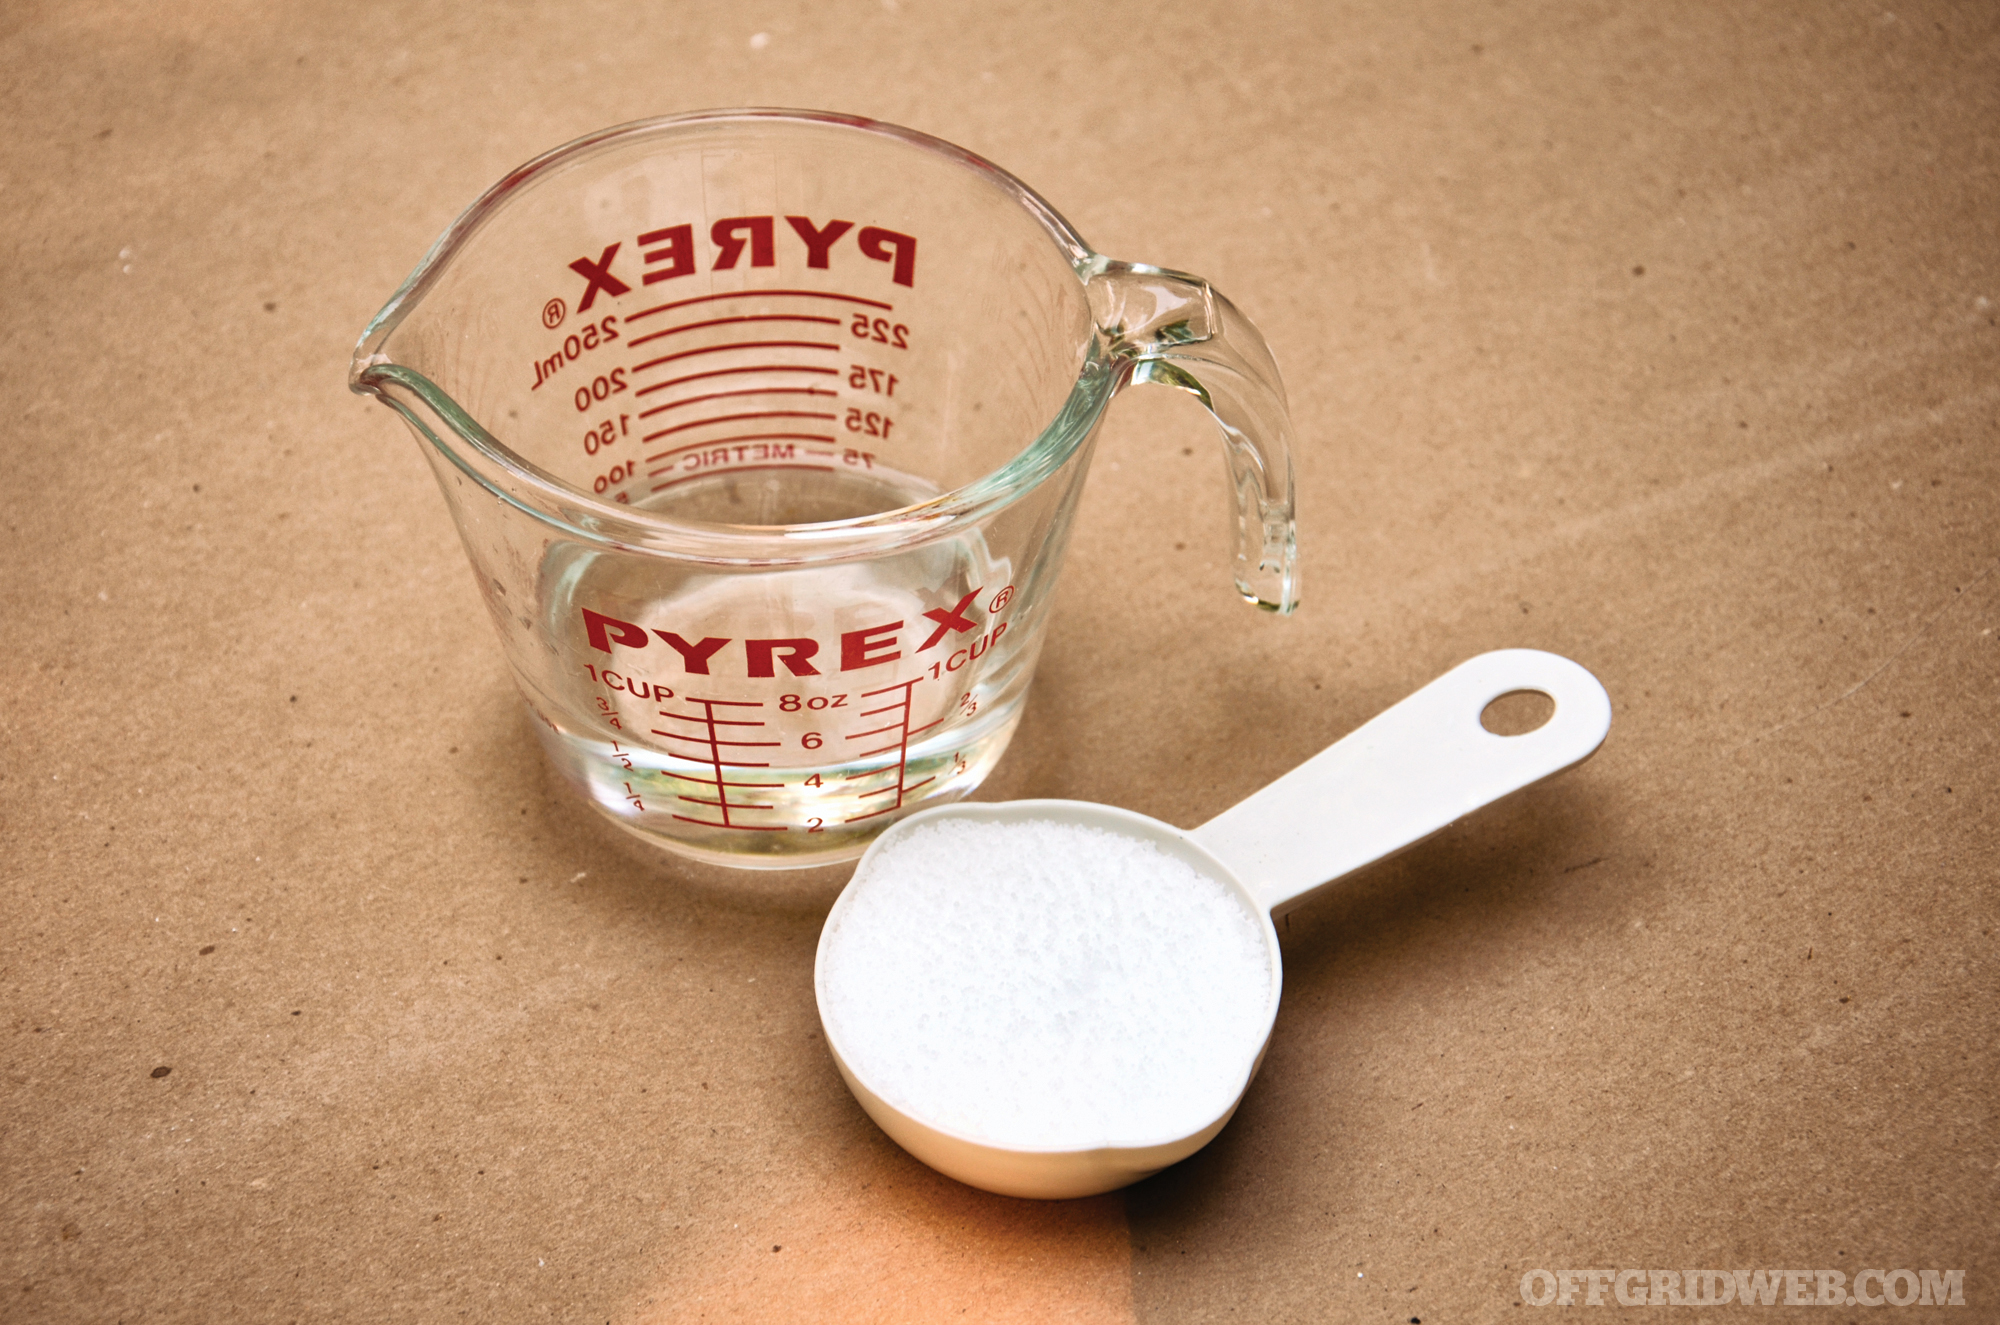
Measure Precisely: In the days of yore, people would pour rainwater through wood ashes to leach out the lye that naturally occurs in ash. This can still be done, of course, but how will you know how strong the lye will be? You won’t. So for more controlled results in soap making, visit your local hardware or craft store and purchase some lye crystals to add to your preparedness stockpile. It’s a good drain cleaner, and an even better soap maker. You’ll need exactly 2.2 ounces of commercial lye for our recipe.
With gloves and goggles donned, dissolve the lye crystals into 3.5 ounces of cold water in your heat-resistant Pyrex measuring cup. Set the cup on a surface that’s not harmed by heat. As the lye mixes with water, it’ll have a strong exothermic reaction (releasing heat). You should mix these in a well-ventilated space and let the lye water cool on its own. The lye and water mixture will become cloudy and make the container very hot to the touch. While the lye is heating up and then cooling down, you’ll also want to measure out exactly 1 pound of rendered lard (from the creature of your choice).
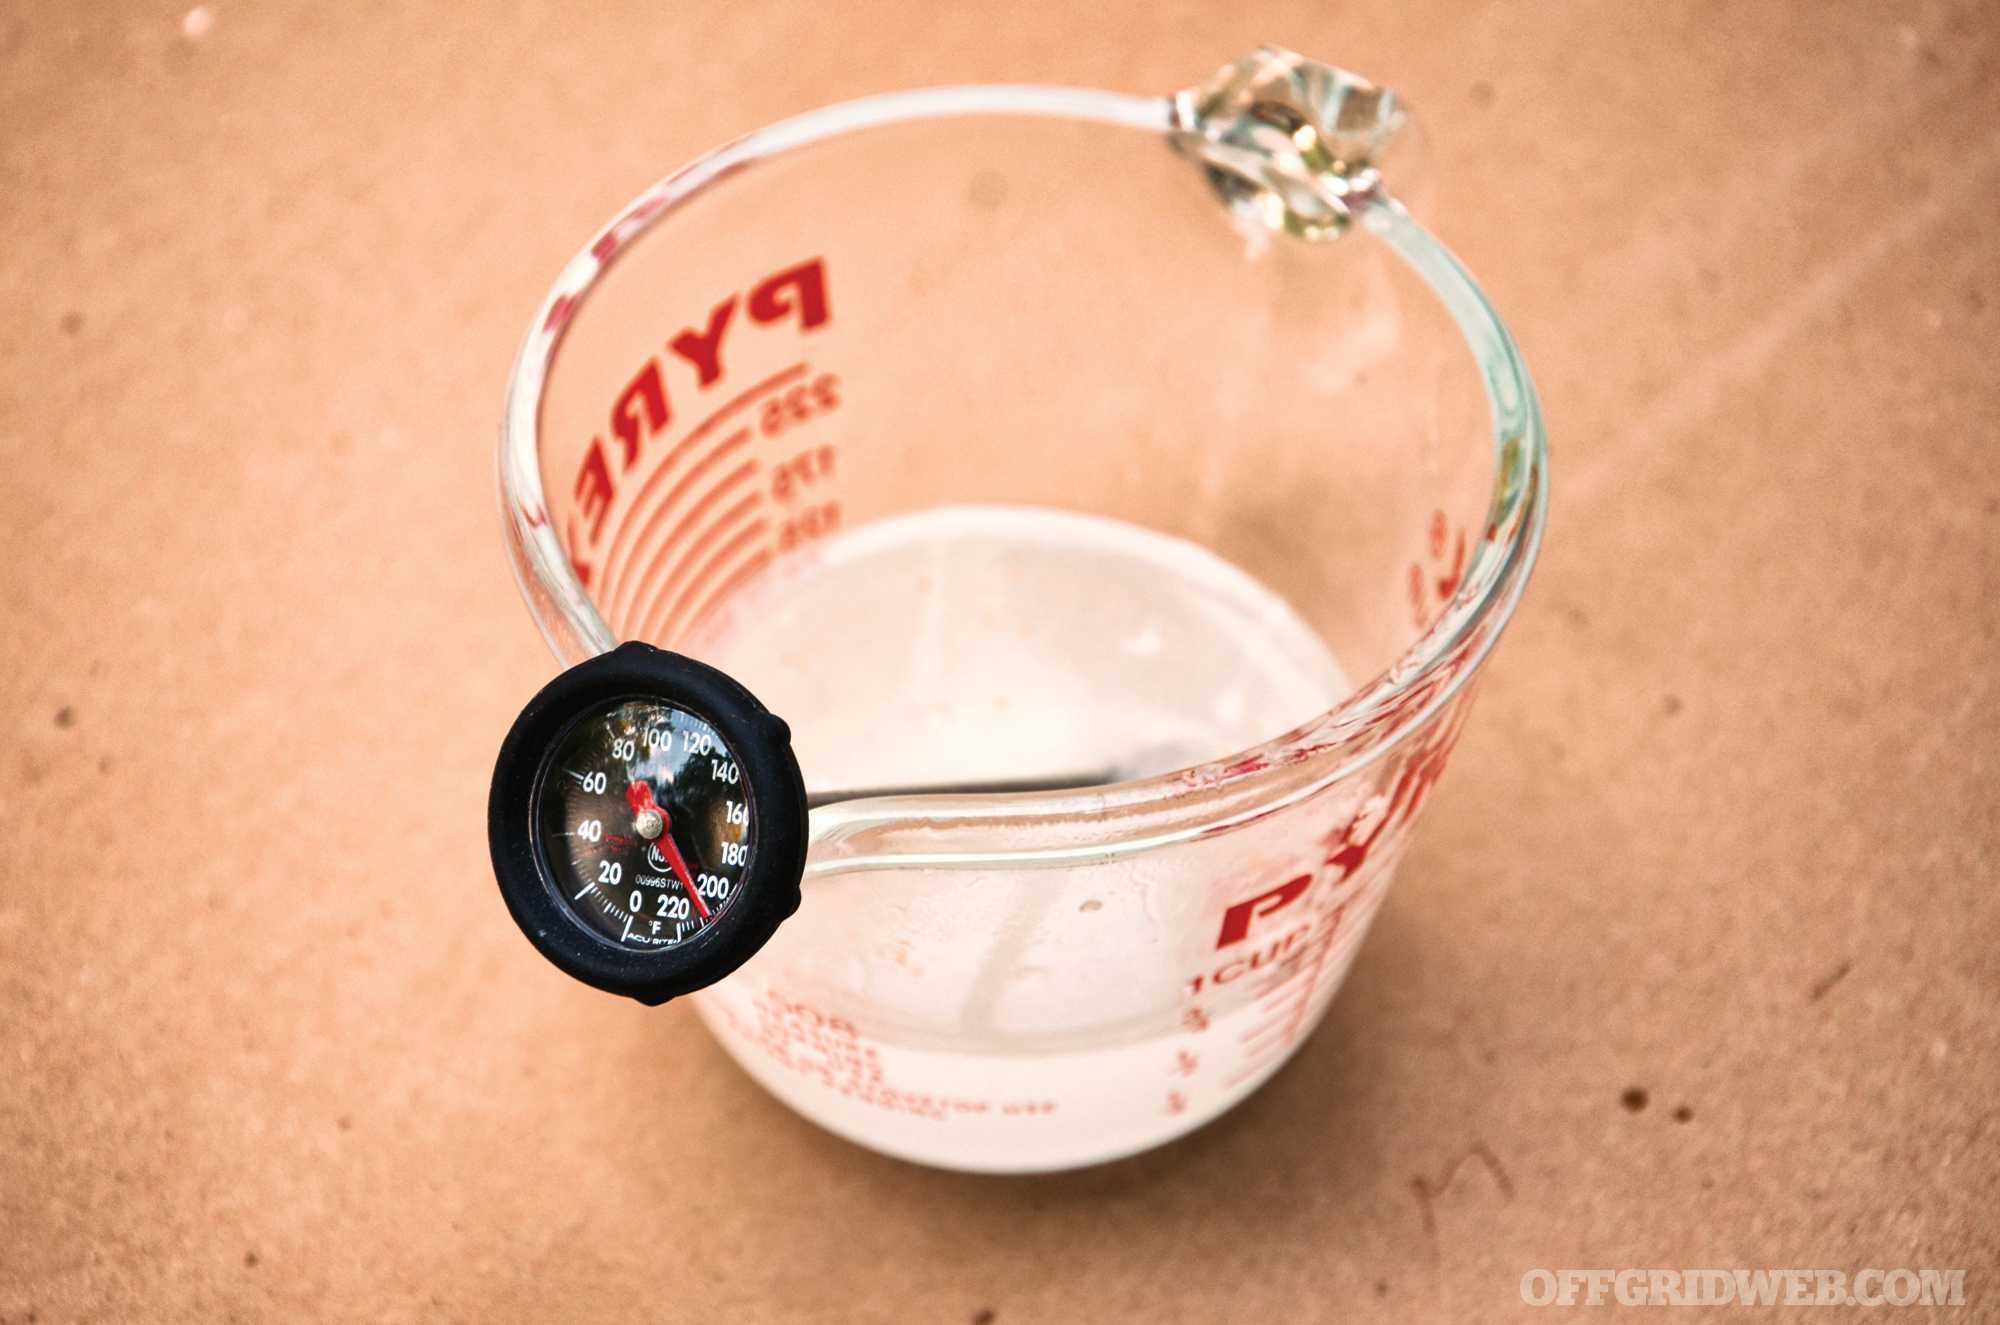
Start Cooking: About 45 minutes after mixing the lye crystals and water, place your lard in the pot and begin to melt it over a low heat. Most fats work well enough when heated to 120 degrees F (see our list for specific fats). Allow the lye water to cool down to about 85 degrees F before proceeding (this will be about an hour after mixing).
Mix Things Up: Once the lard has reached 120 degrees F and the lye water has cooled to 85 degrees F, slowly stir the lye water into the warm melted lard using a large plastic or wooden spoon. Keep stirring (in the same direction) until you have a thick, milkshake-looking slurry. This change of texture can happen in minutes or it can take longer, depending on the fats, lards, and oils used. Whatever happens, keep stirring until your fat has had a texture change. This motion is need for saponification. When you’re satisfied that it’s well mixed and has transformed into a new substance, pour the soap slurry into molds or onto a pan to cool. For optimal results, insulate the soap slurry so that it cools very slowly. For example, you could wrap a dry towel around your molds.
Above: Anything from ice trays to muffin tins can be used as soap molds. It’s up to you what size and shape you’d like to create.
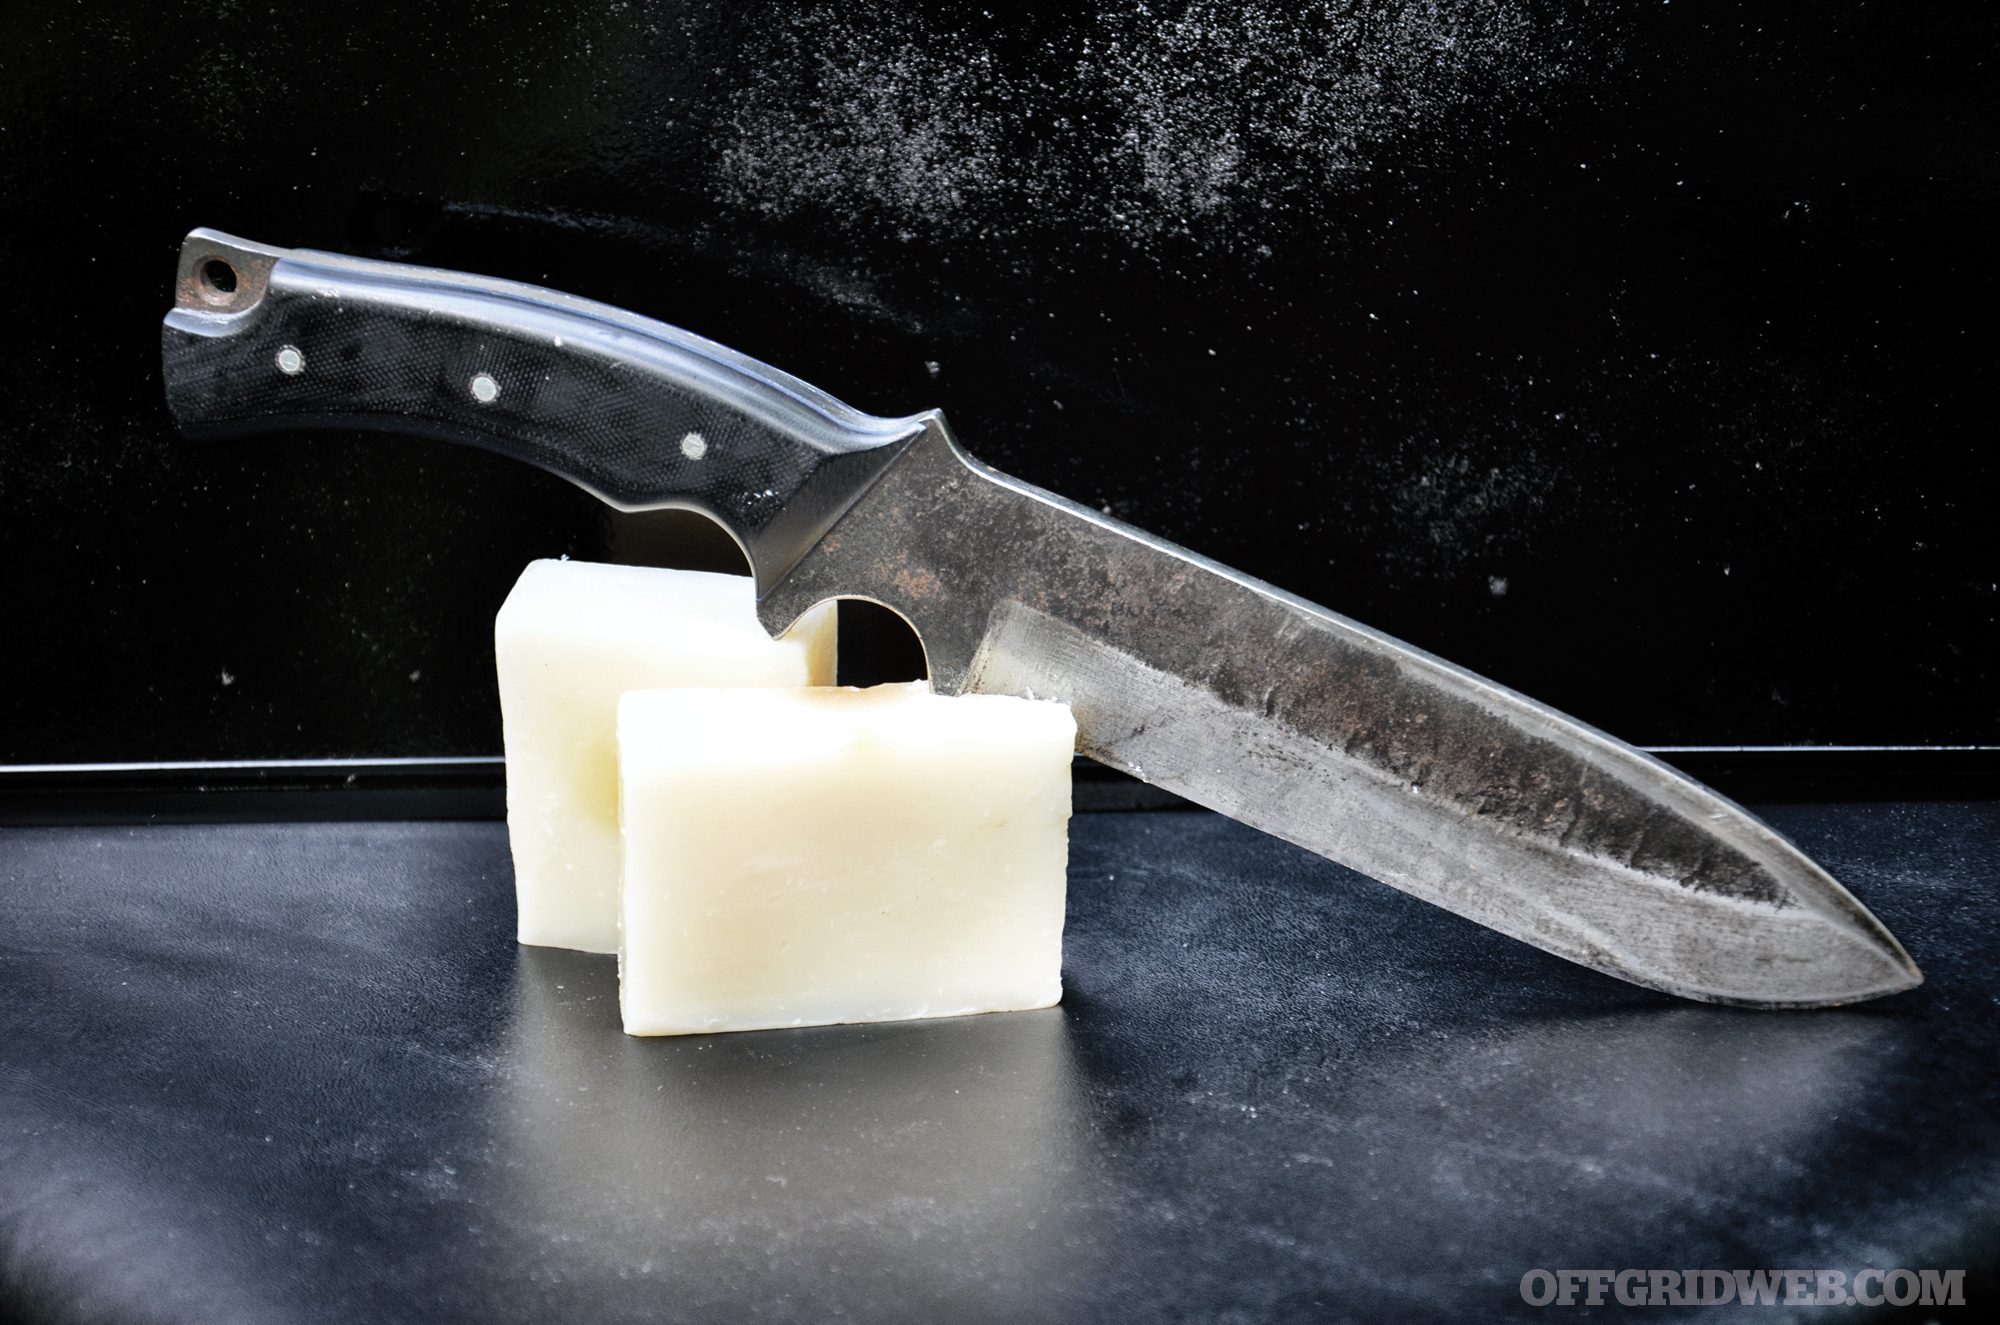
Add Some Age: The soap will harden as it cools (unless you really messed it up), but it’s not ready to use right away. After a few days of hardening and drying, it should still be soft enough to cut a “loaf” or pan of soap into flat bars (don’t wait weeks to cut it; the soap will become very hard). There’s one final step in this type of soap making. You still have to age the soap. Let it sit in a cool dry place for a few weeks to cure. Try washing your hands with a bar after one month. If your skin feels slimy or tingly, rinse your skin with vinegar to neutralize the soap, and age the soap a few more weeks. Then enjoy it!
Saponification Temperatures
Soap is made by blending the right amount of alkali solution into a compatible quantity and type of fat. When there’s too much fat in the mix, the soap is greasy and ineffective. And when there’s too much alkali solution, the soap is too harsh. Getting the correct ratio of these two substances is critical, and so is the temperature at which they are blended. You’ll need to heat your oils so that they are clear, not cloudy (but don’t overheat them, either). Instead of using our general temperature guideline of 120 degrees F for all types of lard and oil, bring these particular fats to these specific temperatures for the best results.
Olive oil: 100º F
Vegetable oil: 110º F
Goose fat: 115º F
Bear fat: 115º F
Pork lard: 120º F
Sheep fat: 125º F
Beef lard: 130º F
Deer fat: 130º F
Conclusion
If you go back into history, many families were self-reliant out of necessity, rather than choice. And in that time, they combined spare fat (when you had enough fat to spare) and lye made from rainwater that had run through wood ashes. The elders who had been making soap for a lifetime could tell the strength the lye by the speed at which the ashy liquid ate away at a feather or how high a potato would float in the solution.
They could also tell the heat of the fat by sticking a finger in it, and whether the slurry had changed to soap by tasting it! (Don’t try those last two.) These folks knew how to stretch their supplies and make what they needed — a powerful role model for preppers. Today, making soap can be a fun home hobby, and it can even be a gateway into prepping for people who aren’t sure about stockpiling beans and bullets. With what you know now, a little fat, some lye, and a bit of elbow grease, you’ll never run out of soap again.
About the Author
Tim MacWelch has been a survival instructor for more than 20 years, training people from all walks of life, including members from all branches of U.S. Armed Forces, the State Department, DOD and DOJ personnel. He’s a frequent public speaker for preparedness groups and events. He’s also the author of three New York Times-bestselling survival books, and the new Ultimate Bushcraft Survival Manual. When he’s not teaching survival or writing about it, MacWelch lives a self-reliant lifestyle with his family in Virginia. Check out his wide range of hands-on training courses open to the public.
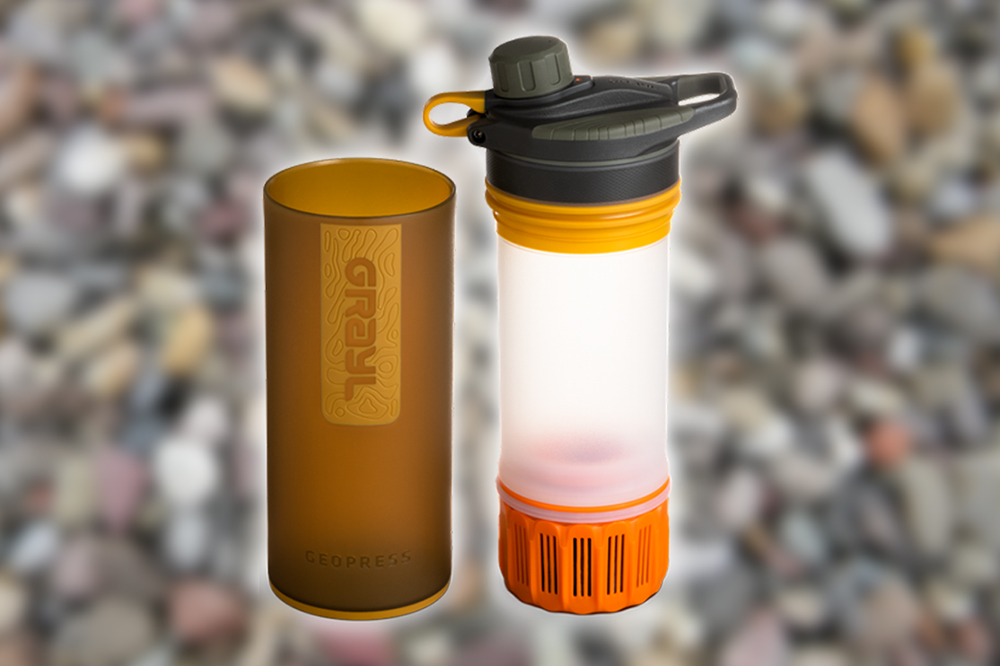
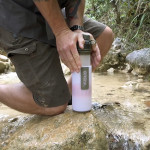
Those of you who read our water purifier buyer’s guide may recall the name GRAYL. We gave the company’s Ultralight water purifier bottle our Top Pick award as a result of its excellent performance and easy one-press operation. However, the Ultralight bottle’s relatively small 16oz capacity and simple screw-on cap were some areas we felt could be improved upon. GRAYL has now released a new water purifier that maintains many of the benefits of the Ultralight while also increasing capacity and adding a drink cap with a spout.
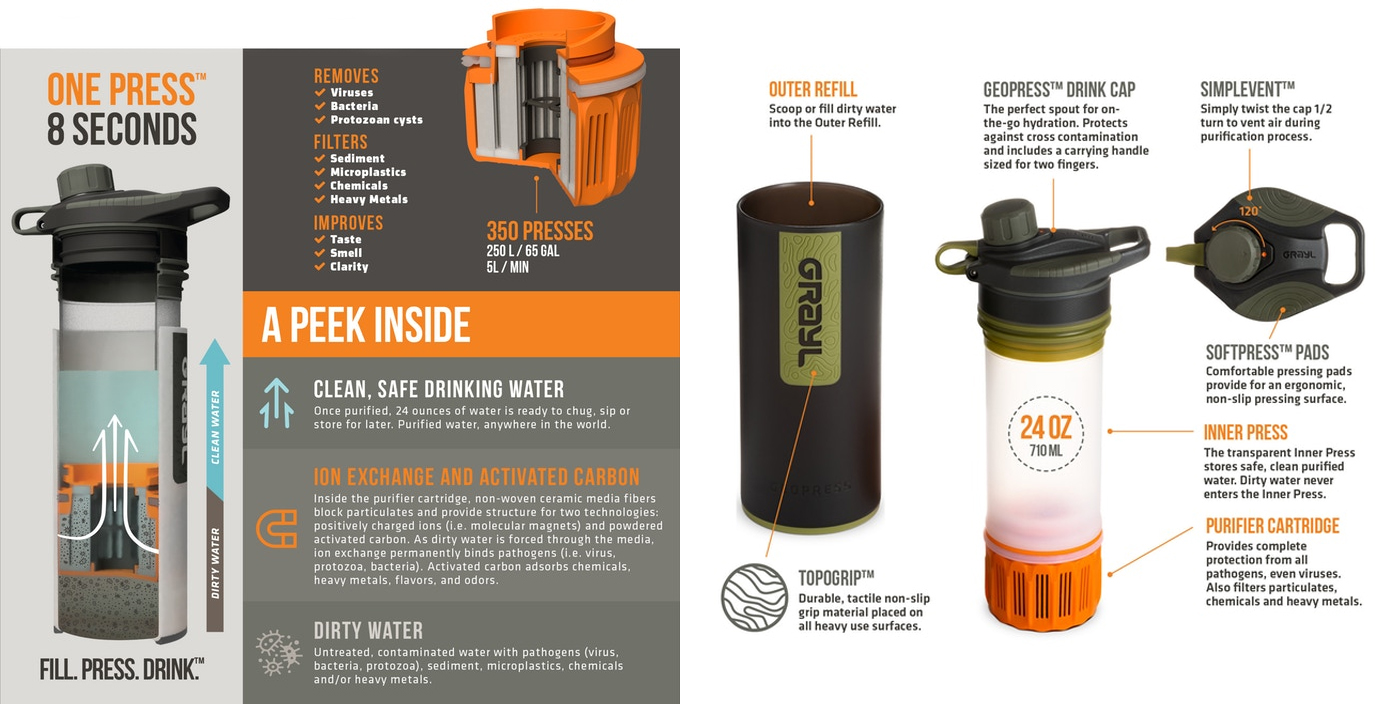
The GRAYL Geopress uses the same “fill, press, drink” operation — just scoop up some dirty water with the outer sleeve, place the inner press portion into the sleeve, and push down with your body weight to force water up through the purifier cartridge. Capacity is 24oz (710ml), making it 33% larger than the old Ultralight.
The Geopress purifier is said to take 8 seconds to purify a full 24oz of water, or 5L per minute. The American-made purifier cartridge lasts for 65 gallons (250L) before it must be removed and replaced. As with the Ultralight, this purification media removes viruses, bacteria, protozoa, heavy metals, chemicals, and particulates. More importantly, GRAYL says it meets the stringent purification standards set by NSF/ANSI, and has been proven to remove 99.99% of viruses, 99.9999% of bacteria, and 99.9% of protozoan cysts.
Ergonomic improvements to the Geopress include Topogrip non-slip surfaces, a Simplevent air release valve, and the new cap design that includes a pour spout and carry handle.
The GRAYL Geopress bottle is currently available for pre-order on Indiegogo at a discounted rate of $77 for a bottle, or $100 for a bottle plus one extra cartridge. After the pre-order phase, MSRP will be $90 and $120 respectively. The first Geopress bottles are expected to ship in April 2019. For more info, go to TheGrayl.com or check out the Indiegogo campaign page.
The market for purpose-built survival gear is substantial and, it seems, growing by the day. From bracelets to backpacks, the “prep” or “survival” gear industry has taken on a life of its own. More often than not, we lean toward the right-tool-for-the-job philosophy: Buy a piece of kit that’s designed from the ground up to do what you need it to. If you need a vest or chest rig or assault pack to hold your bug-out gear, the natural choice would be to purchase from a company that specializes in that kind of equipment. But that’s not to say there isn’t good and effective crossover between end users.
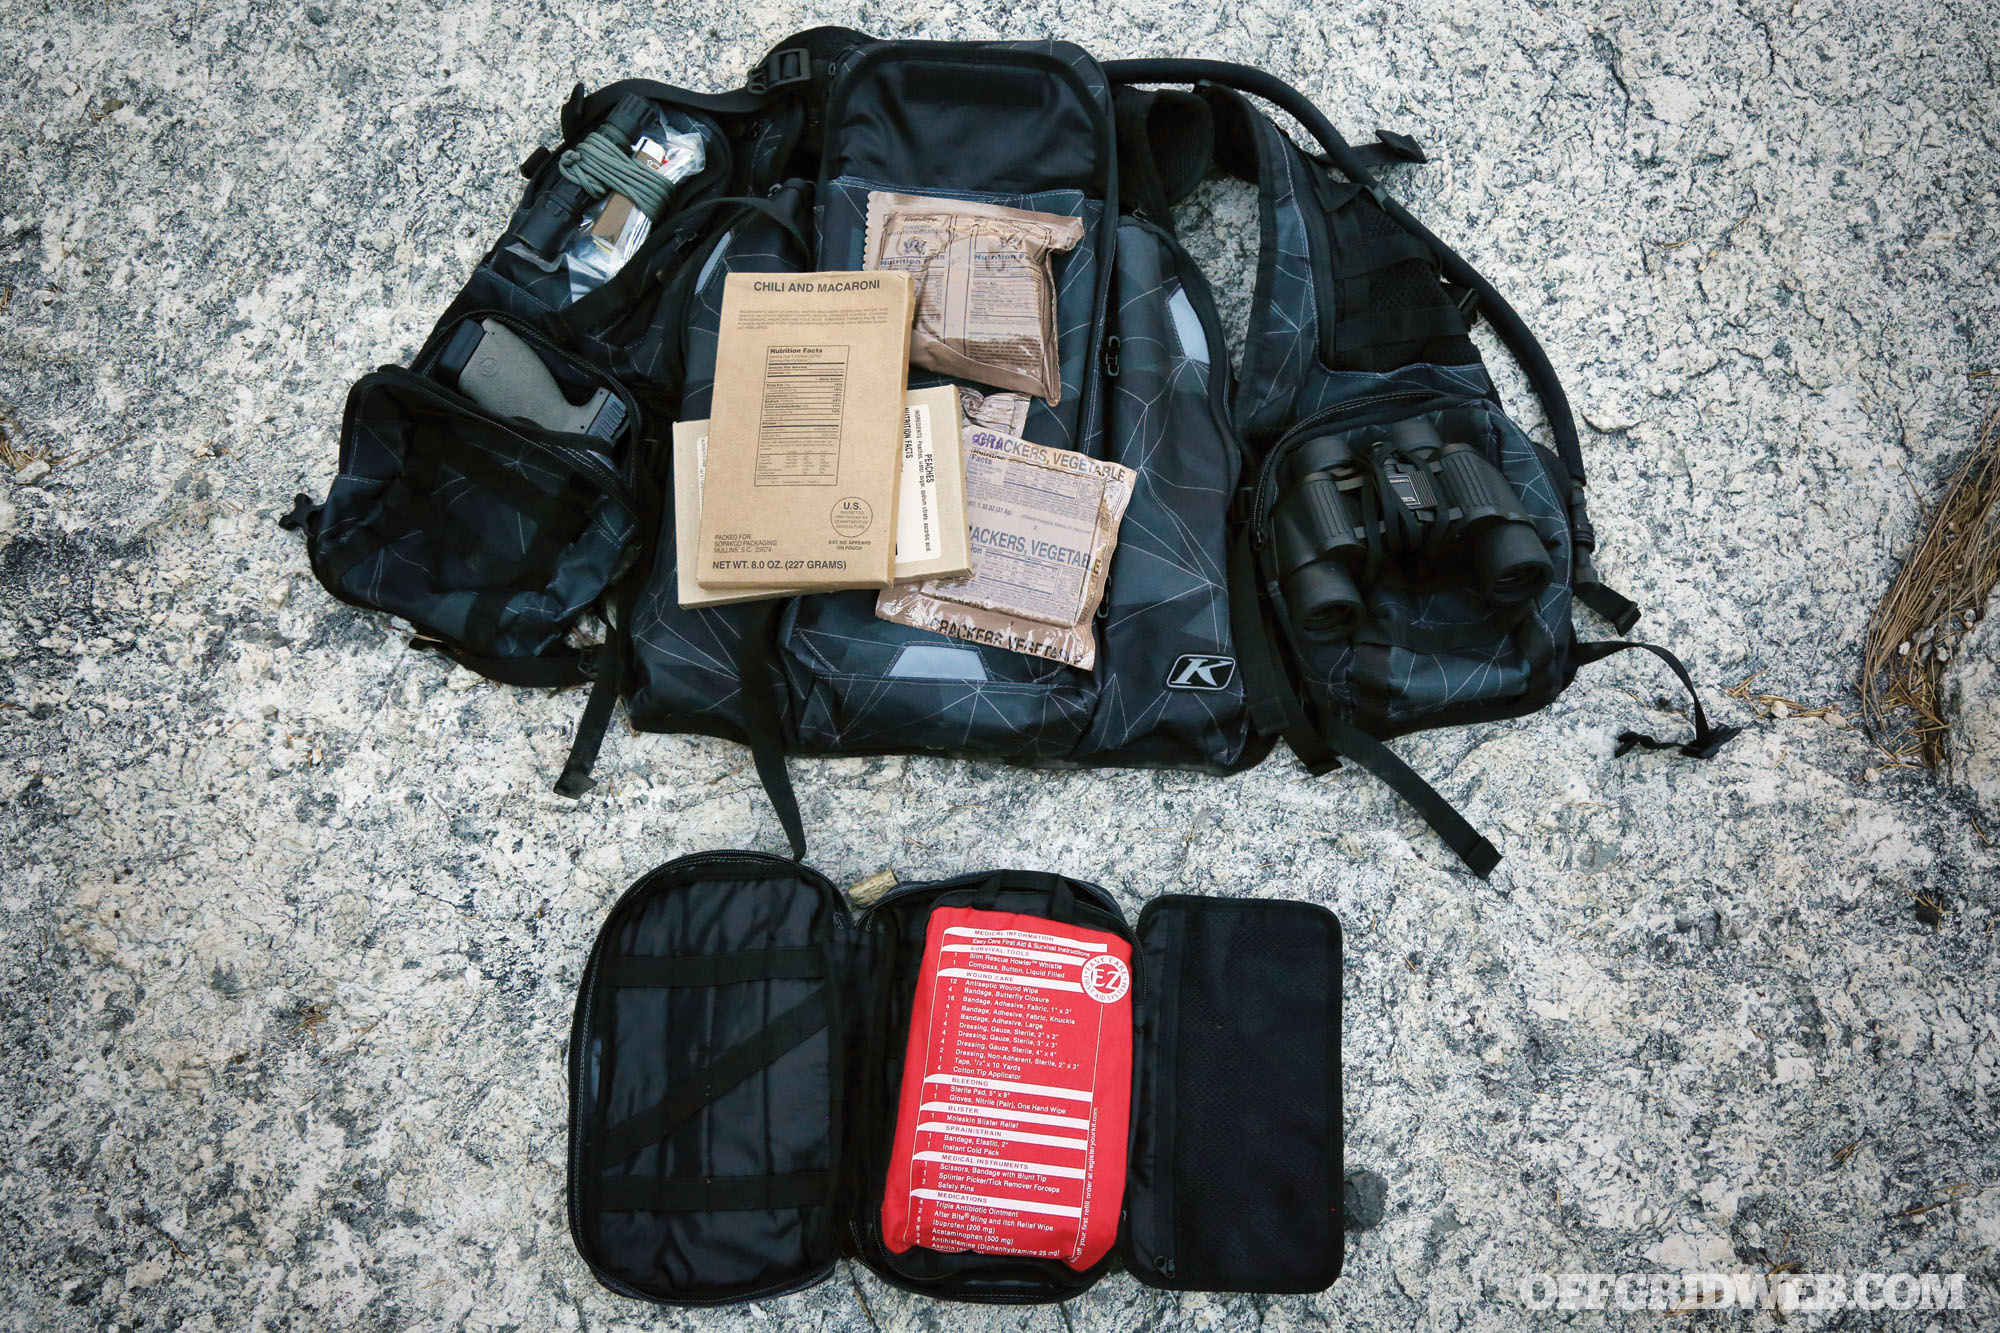
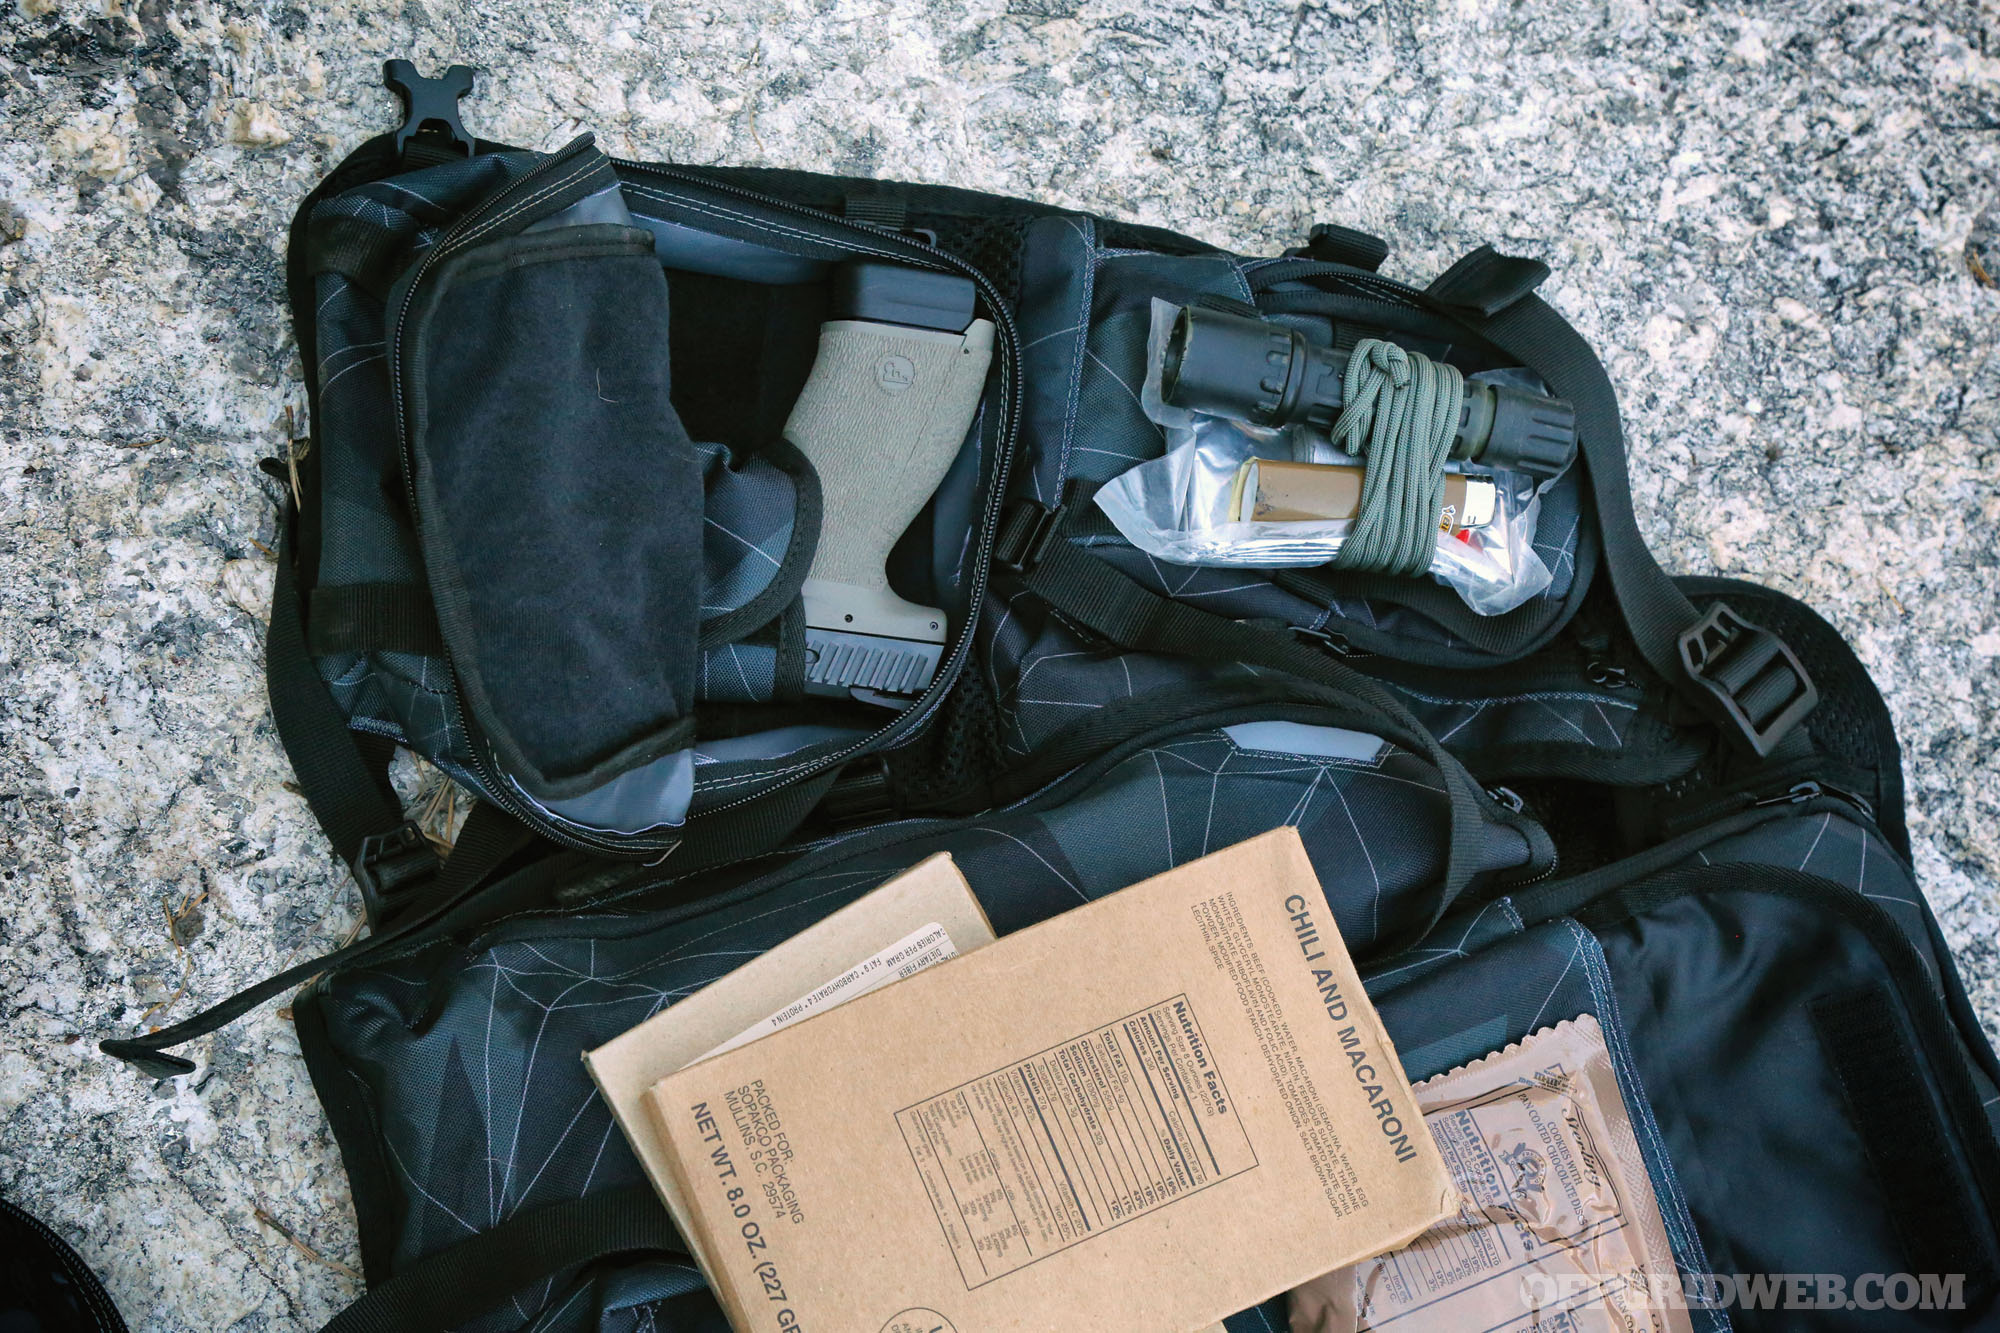
Above: The hydration pocket also accommodates stripped-down MREs or other trail food, and the tool pouch fit our first-aid kit perfectly.
That brings us to the topic of this story — the Klim Arsenal vest. Klim doesn’t produce anything specifically for the tactical, EDC, prepper or survival markets. In fact, their bread-and-butter lies in the high-performance motorsports user group. Snowmobilers, motorcyclists, and off-roaders are likely familiar with their line of technical apparel. But how well do these hobbies reflect the needs of us looking to stay ready in a turbulent world? The answer, in our experience with the Arsenal, is “better than we expected.” The Arsenal vest was specifically designed for endurance motorcycle racers. When compared against the average citizen looking to stay prepared, both groups look for a couple of the same key factors when they shop for gear: high-quality construction, the ability to stand up to long-term use in varied conditions, ample storage space in an efficient and compact configuration, versatility in load carriage and employment, comfort, and ease of use.
What’s it Do?
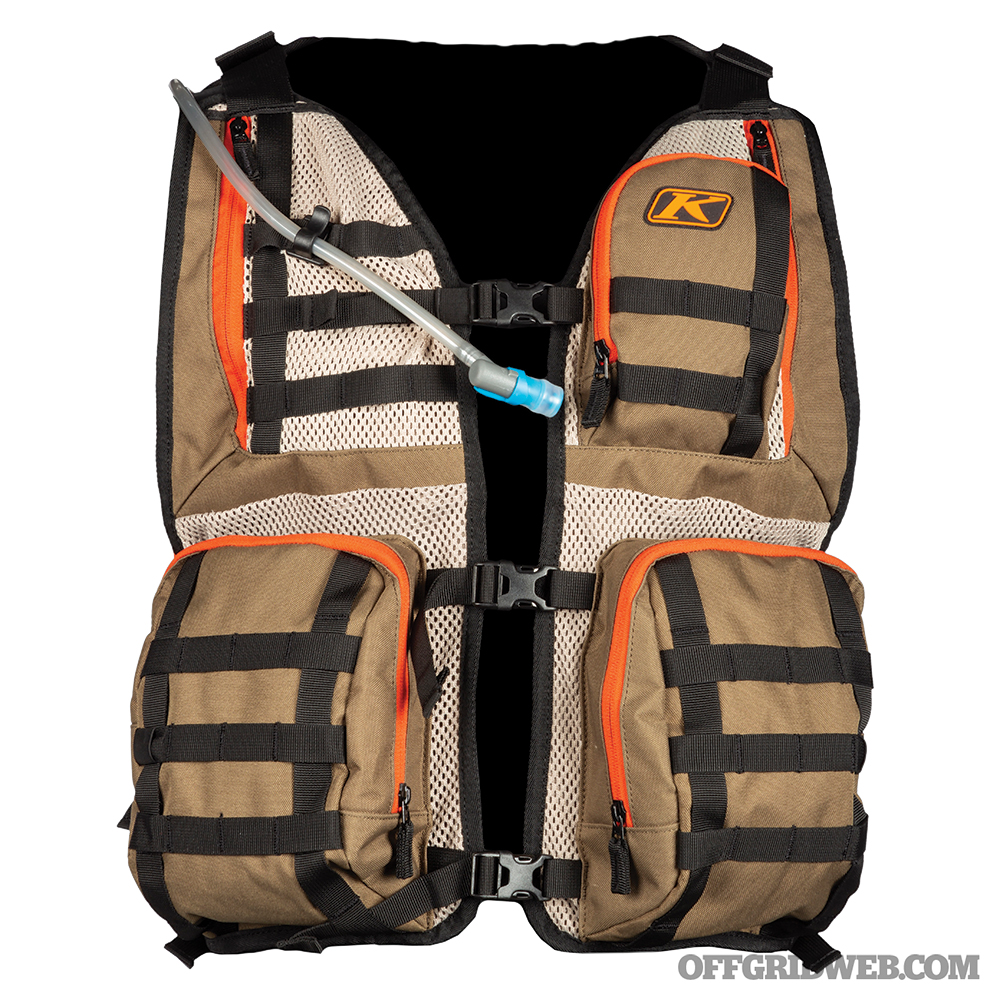
The Arsenal vest was designed for motorcyclists who spend long hours in the saddle as an alternate option to backpacks and on-bike storage for essentials like water, fuel, and tools. To the author, the layout is similar to an ALICE system LBV (Load Bearing Vest) from way back when, before the military put everything in modular pouches. The Arsenal features three large pouches on the front, with three more on the back, plus a small detachable kit that’s meant to be used specifically for wrenches and tools. It comes with its own hydration bladder and tube topped with a bite-valve. The areas of the vest not covered by pouches are nylon mesh, which provides good ventilation and trims a little bit of weight. The front closes with fastex-style buckles, and the each side has three adjustment straps, so sizing is just about universal, with fit being completely customizable to what your situation requires.
Above: The front pouches of the Arsenal are sized for any number of survival sundries.
Those of you crossing rugged terrain in hot climates may want it cinched tight to the body while anybody packing the Arsenal into blizzard conditions can loosen the vest to fit over multiple layers of cold-weather clothing. The front pouches have nylon webbing in a large grid pattern over them. It’s definitely not MOLLE spec in terms of spacing. But if you have a need to add pouches to the Arsenal, it’s possible. You can also use this webbing to weave fishing line or 550-cord through. The Arsenal is available in two color schemes: a geometric mash-up of dark gray shades that definitely doesn’t qualify as camouflage and, new for 2019, a pseudo-khaki with orange accents and white mesh. This may be a good or bad thing. Both of these options are very un-tactical. In fact, our test sample was literally gray — which may fit right into your low-visibility look. But if the rest of your equipment is coyote brown or MultiCam, perhaps the khaki version makes more fashion sense.
Above: The Arsenal vest includes a hydration bladder standard.
How Well Does it Do?
We ran the Arsenal in a two-day Weaponize The Senses class with Greenside Training, as well as on several weekend hiking adventures. Weaponize The Senses is a curriculum that focuses on tracking animals and humans alike over rough terrain. We moved nearly 10 miles on foot over the course of two days, wearing the Arsenal vest for most of that movement. Moving through brush and cactus across Arizona border country in August was probably the best test we could come up with for the Arsenal’s mesh ventilation. The vest performed well and kept us as cool as possible, given the conditions. The other thing we noticed was how evenly the weight was distributed while moving. Typically, in a class like this we’d use a patrol or assault-style pack. While we’re used to long walks with heavy packs, the Arsenal saved us a ton of shoulder and back pain after our Greenside class.
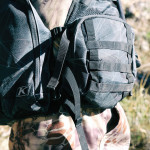
Above: We found the Arsenal to be comfortable in a variety of climate conditions.
Repurposing the motorcycle racing pockets turned out to be fairly easy. The hydration pocket in the back also fit two stripped-down MREs. That pocket is flanked by two long, narrow zipper pouches that were originally intended for spare fuel bottles. We figured out that we could carry two additional 1-liter bottles of water. In a long-term survival/camping situation, small bottles of fuel for lanterns or camp stoves also fit perfectly. Rolled up flags or signal panels, blankets, balled-up socks or underwear and toiletries could also be stowed in these pockets. The detachable tool kit also straps to the back of the vest. If you have generators, dirt bikes, or ATVs incorporated into your bug-out plan, having some tools on hand would be a wise decision. If you don’t need hand tools, you can convert the detachable tool pouch into a standalone kit for anything from medical supplies to signaling to fire-starting.
Both of the bottom front pockets include generic pocket-style holsters for small-to-medium frame handguns.
The side straps offer large amounts of adjustment for body type and outerwear considerations.
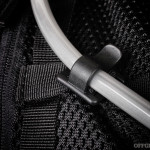
Small additions like a retention clip for the hydration tube prove a well-thought-out design.
On the front of the vest, there are three large square pockets for storage — two low and one high. The two low ones each have a built-in holster for small- to medium-sized handguns. It’s a semi-universal pocket-style holster that you have to Velcro your handgun into. But it’s there in case it’s an option you want to use for a backup gun or survival pistol. Wearing a full vest may inhibit your ability to wear a proper belt holster, so the built-in holsters could be a less-than-optimal alternate to that. Aside from a pistol, the front pockets are general purpose, and can be stuffed with anything you desire. Food, boo boo-fixing supplies, small GPS units, sat phones, knives, multitools, and trapping/fishing supplies all fit. Smaller binoculars, thermals, night vision, or other optics can be made to fit as well. The bottom line is that the Arsenal vest is your blank slate to load out in whatever fashion fits your environment and preparedness plan. It’s lightweight, comfortable, and offers a significant amount of cargo space.
Does it Stack Up?
Since Klim isn’t a tactical or survival equipment company, there aren’t really any direct competitors in the prepping space, but there are a few similar options that stand pretty close. The Arsenal’s MSRP is $190. The aforementioned military LBV can be found for about 10 percent of that price, however, those vests are usually old, tattered, and the pockets are sized specifically for AR-style rifle magazines, with no storage on the back — severely limiting your load capacity. When you expand your horizons to include new-design load bearing vests from reputable manufacturers, the Arsenal quickly becomes one of the most economical options. Many of the purpose-built “tactical” load-bearing vests can run well past $300 and, by our research, don’t offer anything significantly different from the Arsenal. While it may not have been built as a survival product, it absolutely stands up to the rigors of that duty. If you’re looking for a reasonably priced, well-constructed, and comfortable piece of kit for load-bearing purposes, the Arsenal is worth your time and possibly even your money.
Caution: Hunting regulations and ordinances apply to the manner in which all game animals are taken. It’s up to the reader to research hunting regulations that apply in your particular situation. Among other things, the use of silencers, the type and caliber of ammunition, and the magazine capacity of your firearm may be regulated by federal, state, or local laws.
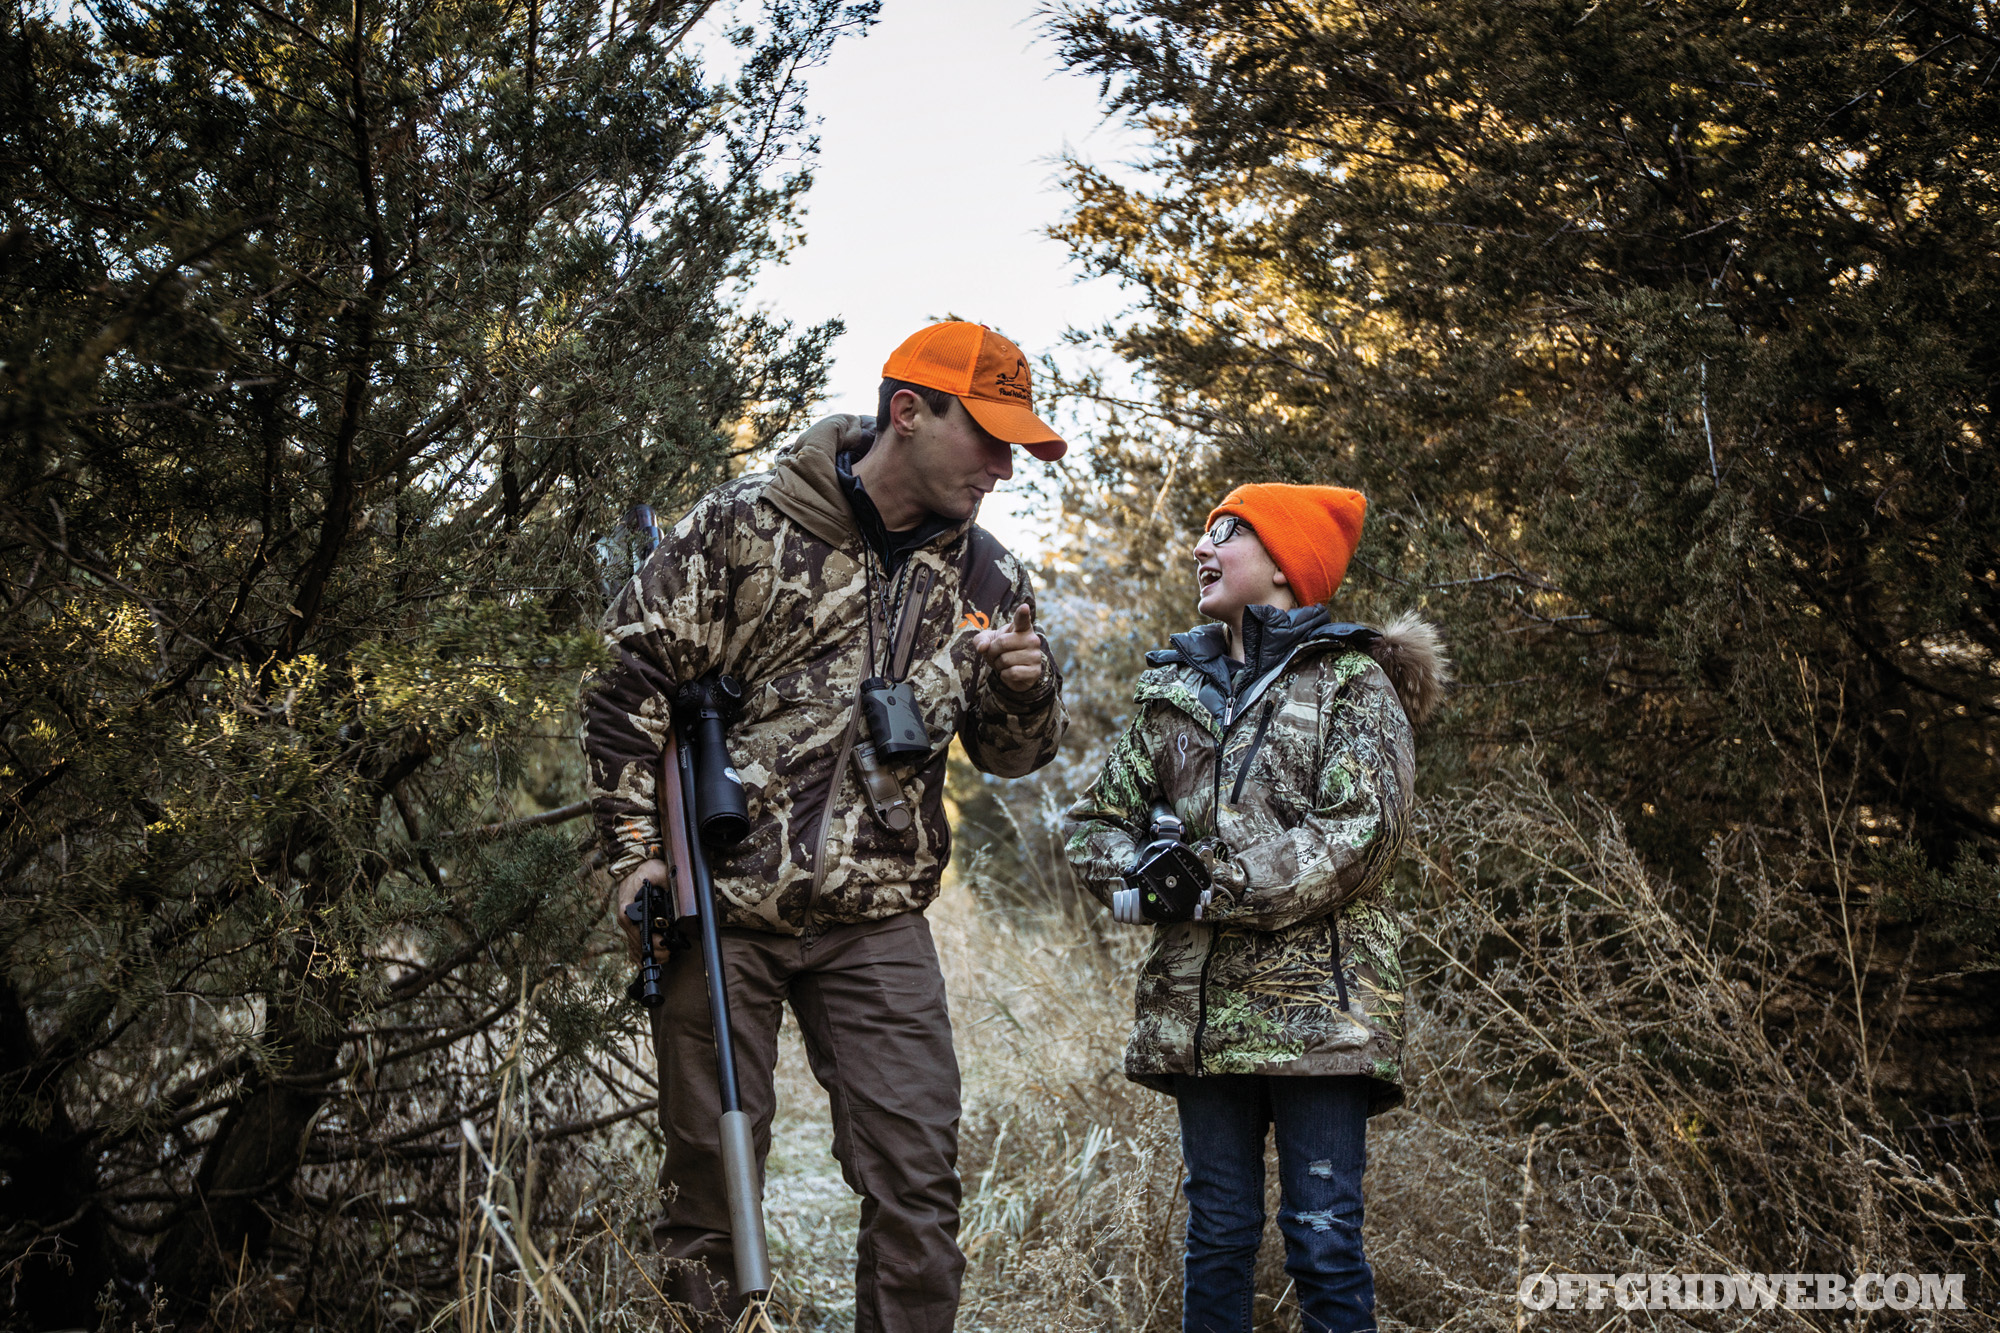
We each have our own reasons for wanting to hunt instead of buying meat at the grocery store. For many of us, those reasons are values that we take pride in passing down to the next generation. But teaching a kid a new task, especially one as serious as taking an animal’s life, can be as stressful as it is rewarding for all involved.
We’re going to break down how to prepare your child for their first hunt. And much of that same preparation can be used for any first-time hunter. The anticipation of a first hunt can be nerve-racking, but with proper planning, your child will be confident to pull the trigger. These lessons come from my experiences with my daughter; all kids are different, so don’t take our specific example as a be-all and end-all.
Always Safety First
You can half-ass a lot in parenting, but you can’t half-ass firearms safety. Be truthful about firearms; they’re meant to kill and can be dangerous. If you already hunt, your child has probably already seen a firearm in person, in your home. Either way, start an education session without the gun in the room. Ask questions to see what your child already knows about firearms. Having an open conversation with your child about guns removes the mystery and is empowering to the child.
Next, teach the four main rules of firearms safety:
Always treat every firearm as if it were loaded.
Keep the muzzle pointed in a safe direction.
Keep your finger off the trigger until you’re ready to shoot.
Positively identify your target and know what’s in front of and behind it.
After the initial information session, bring out the unloaded firearm you plan to use for your child’s hunt. Show your child the gun is unloaded; have him or her visually inspect the chamber after you. Now explain the parts of the gun and how each piece works. With the unloaded gun, while observing all the safety rules, have your child handle the rifle to understand how to use it. The goal is for your child to be able to tell you how that gun works and the safety rules before you’ve even gone to the range or brought ammunition near the gun.
Above: Hunter Education may not be mandatory in your state, but it will educate your child about firearms safety and how to be a better hunter. If you watch over your kid’s shoulder, you’ll likely learn something from the courses, too.
Being your child’s first teacher about firearms safety is imperative so they know they can always ask you questions. But in preparation for hunting, your child should take a hunter education course. There are several courses offered online, tailored to your specific state; for example, we’ve used HunterCourse.com and Hunter-Ed.com. These state-approved online courses make it possible for your child to get a hunting license. The courses are thorough and teach everything from types of hunting weapons to laws and regulations. At the end of the course, your child will need to pass an exam in order to receive their hunter education card. Even though hunter education isn’t required in some instances for minors, we still recommend completing the course — it’s great information and your child won’t have to complete it as an adult when they want to hunt. As an adult, most states require proof of hunter education certification in order to get a hunting license.
Mental Preparation
Learning that your young animal-loving child has decided they want to shoot a deer is surprising. Some children want to mimic their parents and don’t fully understand what hunting is. Be honest and tell your child every detail, even the gross stuff, that comes along with hunting. Make sure they comprehend what they’re asking to do.
Explain why you hunt, such as knowing where your food comes from, the joy of being in the woods, or to bond with family. There are countless reasons why we hunt — talk about them with your child so he or she can have a greater appreciation and understand the hunt isn’t only about the kill.
Above: We cover a lot of topics in this article to help your child become a successful hunter, but it’s your duty to make sure you and your child are compliant with state and federal laws. For example, some states have minimum caliber restrictions for big game, ban the use of suppressors, and limit how many rounds can be in the rifle. Be sure to thoroughly read the laws for the area you’re hunting.
If you’re hunting whitetail deer, show your child pictures of whitetail deer. Using animal anatomy diagrams, explain what a kill shot is and where to aim. From there, have them look at deer presenting in multiple ways; in other words, show them pictures of deer facing different directions, and have them point to where the aiming point would be in relation to the animal’s orientation.
Sometimes animals don’t die immediately from one shot. In those situations, you may need to track the animal and shoot it again. Explain this to your child. The fear of making a bad shot is stressful for many hunters. Explain that it’s the hunter’s job to take the most ethical shot possible and to end the animal’s life as quickly and painlessly as possible. Be honest that the deer may not be dead when you walk up to it; it may be making heart-wrenching sounds. But assure your child that you’ll handle this if this happens. Your child could take a poor shot, and you’ll need to step up to finish the job because your child will likely be overwhelmed with emotion. Explaining all of this is for your child’s mental preparation. In a perfect case, a heart or double-lung shot will be made, and the animal won’t suffer.
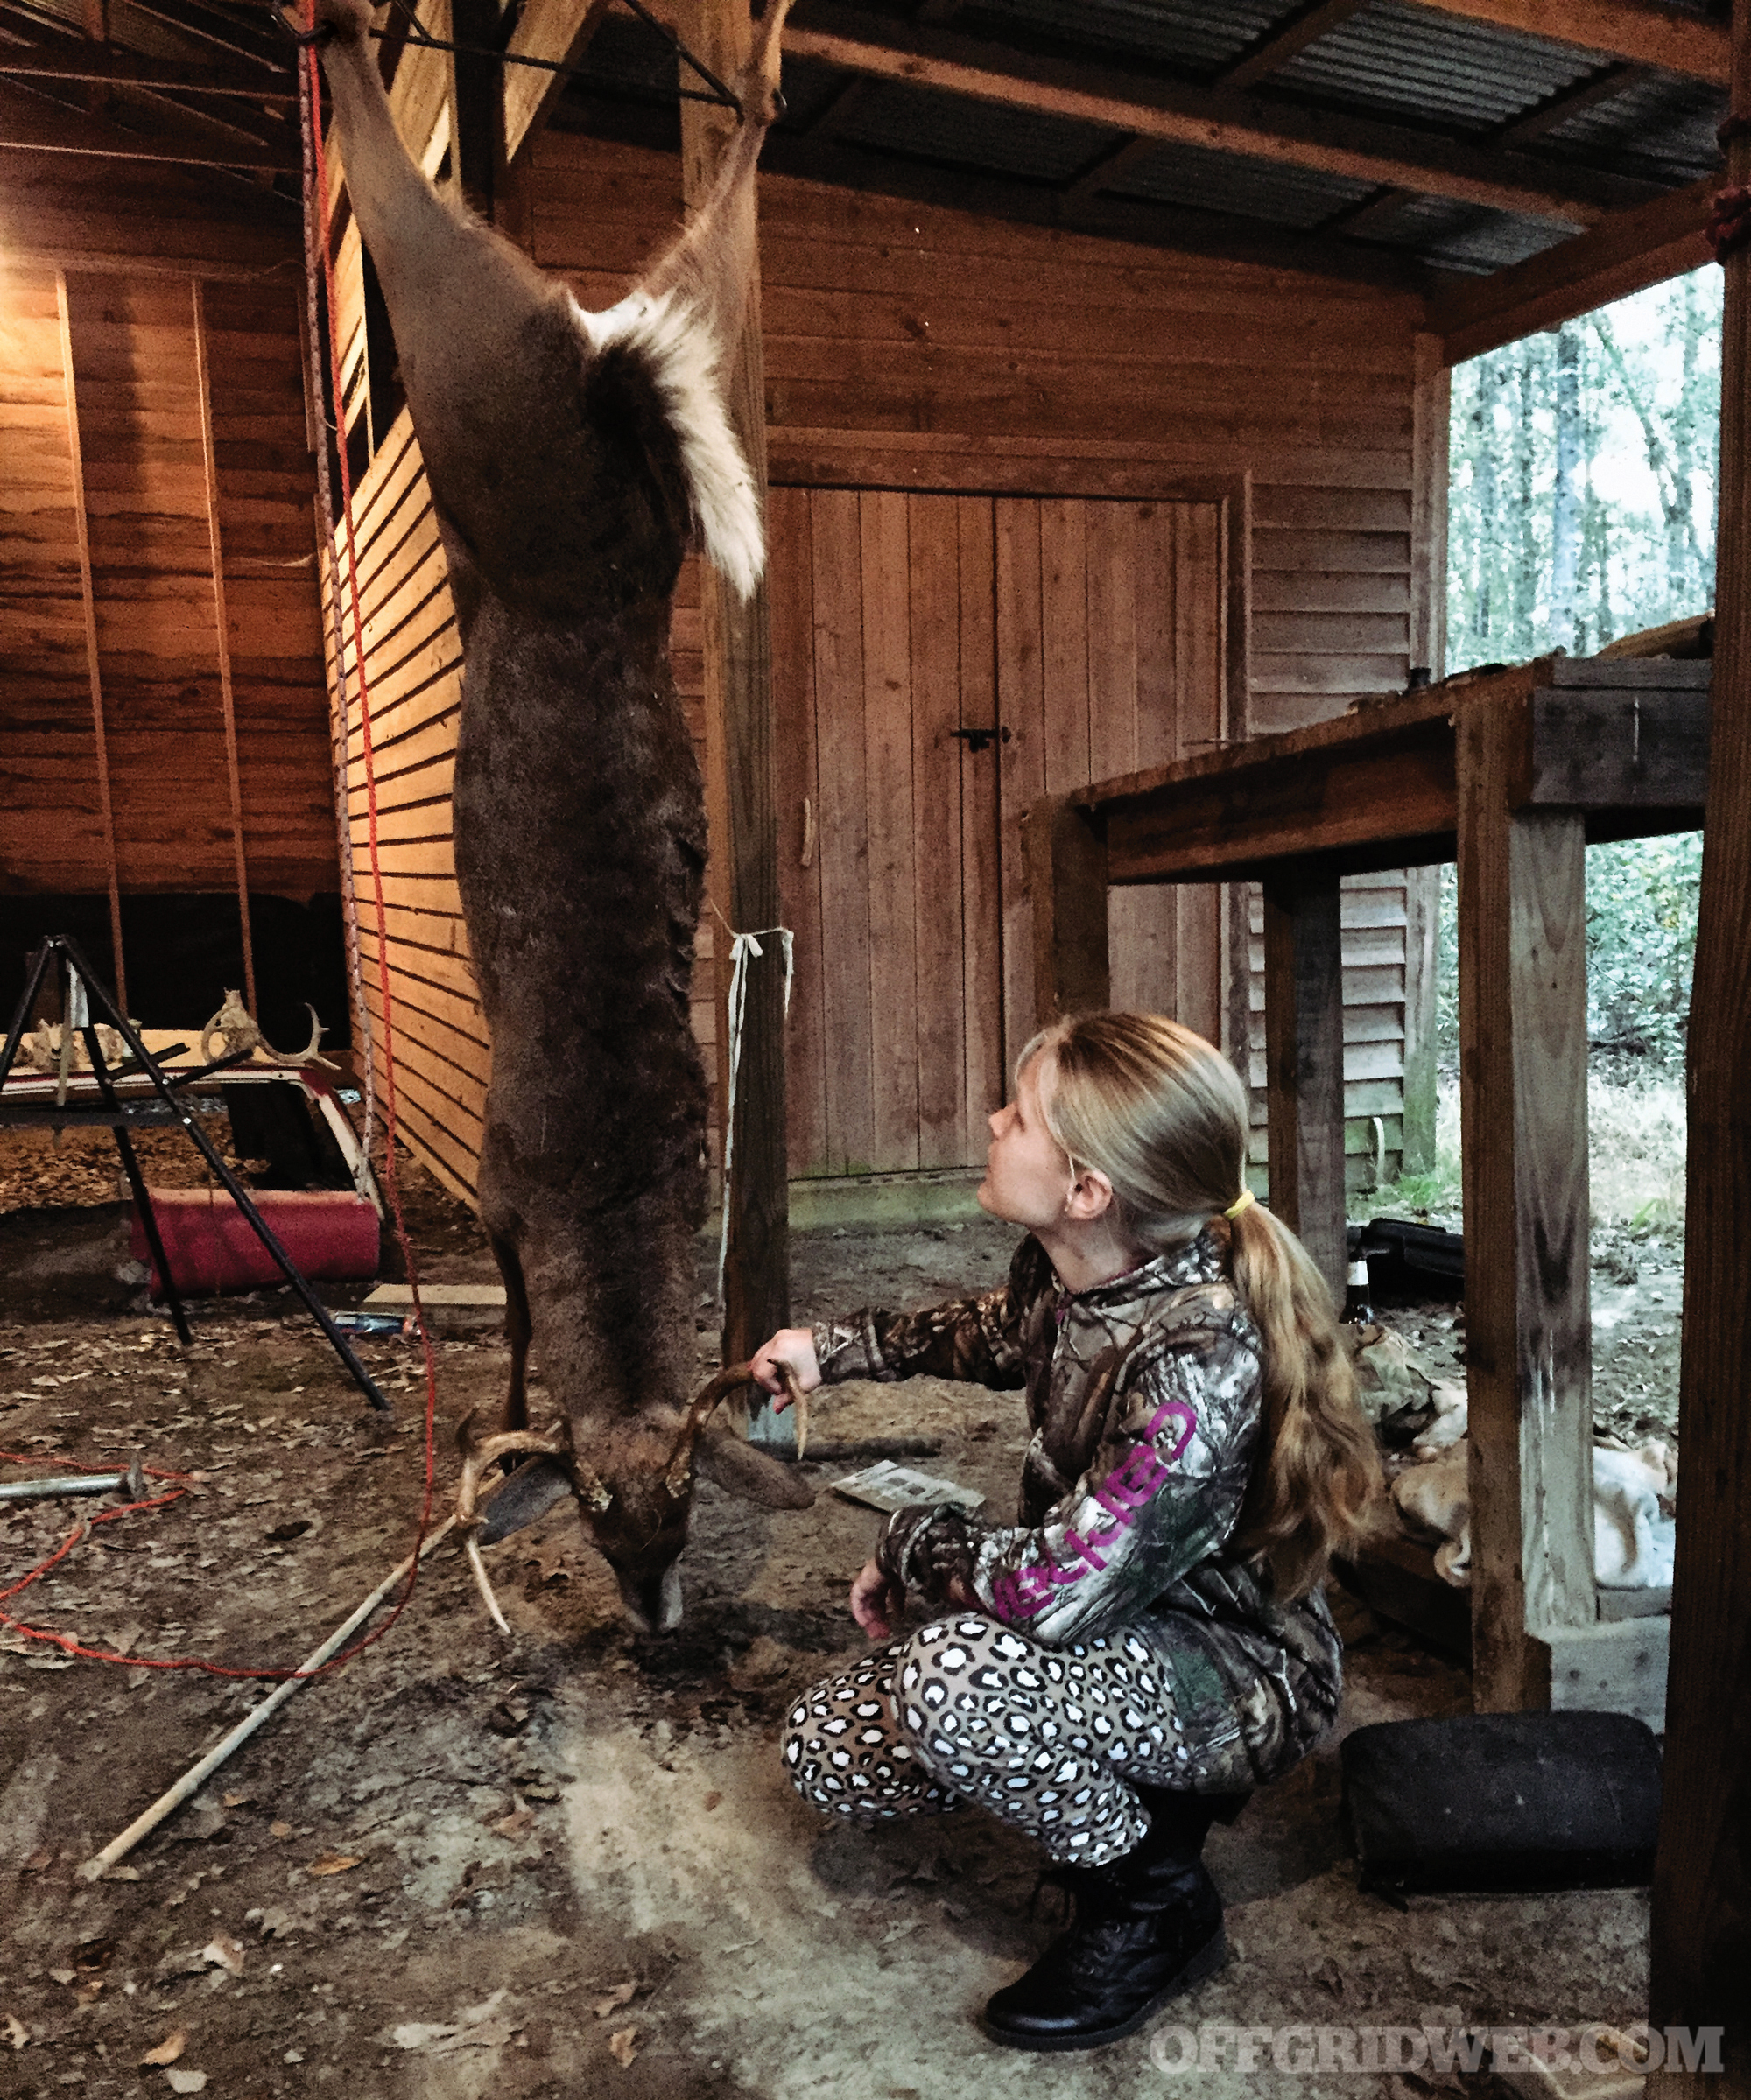
The hunt doesn’t end after pulling the trigger. If your child wants to hunt, tell him he’ll have to help with cleaning the animal, as well. This is where we opted to show our daughter pictures of dead deer and videos on how to clean a deer. We told her she wouldn’t be expected to know how to do it, but she at least had to be there to help and gain knowledge of how to clean a deer. Soon after our daughter’s first hunt, we used that deer meat for a meal and told the family she had provided meat for supper; it was a proud moment for everyone.
Practice
Now it’s time to hit the range. Make sure your child has the needed equipment, including eye pro, ear pro, hunting clothes, etc. Most rifles aren’t child-sized, but can be accommodated to fit. When your child gets behind the gun, and you explain eye relief and body positioning, if he or she can’t see through the scope, understand that you may need to fit the gun to him or her.
Above: The hunt is more fun than the kill. Even when a hunt doesn’t result in meat on the table, it still makes for priceless memories with your child.
If the rifle doesn’t fit your child, look for ways to adjust the length of pull, eye relief, and cheek weld. Many modern hunting rifles have pieces that can be removed from the buttstock to adjust the length of pull. For eye relief, you can move the scope back in the rings or move the whole scope mount if possible. A consistent cheek weld is important because it’ll ensure your child looks through the scope the same way each time. If you don’t have a rifle with an adjustable cheek piece, there are aftermarket cheek pieces that you can attach to it. Or you can just go old school and tape foam on the buttstock. All of these possible adjustments are another reason why AR platform rifles can be a great first rifle for a child to use for hunting. AR platform rifles allow for endless adjustment options that are quick and easy — so much so that you could use the same rifle by just extending the collapsible buttstock.
Resist the urge to gun up for your child’s hunt. You don’t need a large caliber to take down an animal. You need good shot placement and quality hunting ammunition. A rifle with a lot of recoil isn’t fun for anyone to shoot and will likely discourage your child from wanting to hunt. In most cases, your child can have a successful whitetail hunt using a .223 Remington or .243 Winchester and hunting ammunition.
Once you’ve confirmed zero and had your child confirm zero, it’s time to practice shooting from different distances and different positions. Shooting from different distances will help your child understand bullet drop compensation and will help you assess their capabilities. For example, start at 50 yards, shooting at an 8-inch piece of steel or paper target. After you see your child can consistently hit the 8-inch plate at 50 yards, go back another 50 yards and repeat the process. This practice session should be fun and should give your child a lot of trigger time to understand what a good sight picture looks like and how to reduce the wobble zone. When we did this with our daughter, we went all the way back to 200 yards. Realistically, we didn’t expect our 9-year-old would shoot a deer at 200 yards, but she was having fun shooting and doing it well, so the practice session continued. If she couldn’t have consistently hit the 8-inch plate at 100 yards, we would’ve known her capability was 50 yards and not allowed her to take a farther shot.
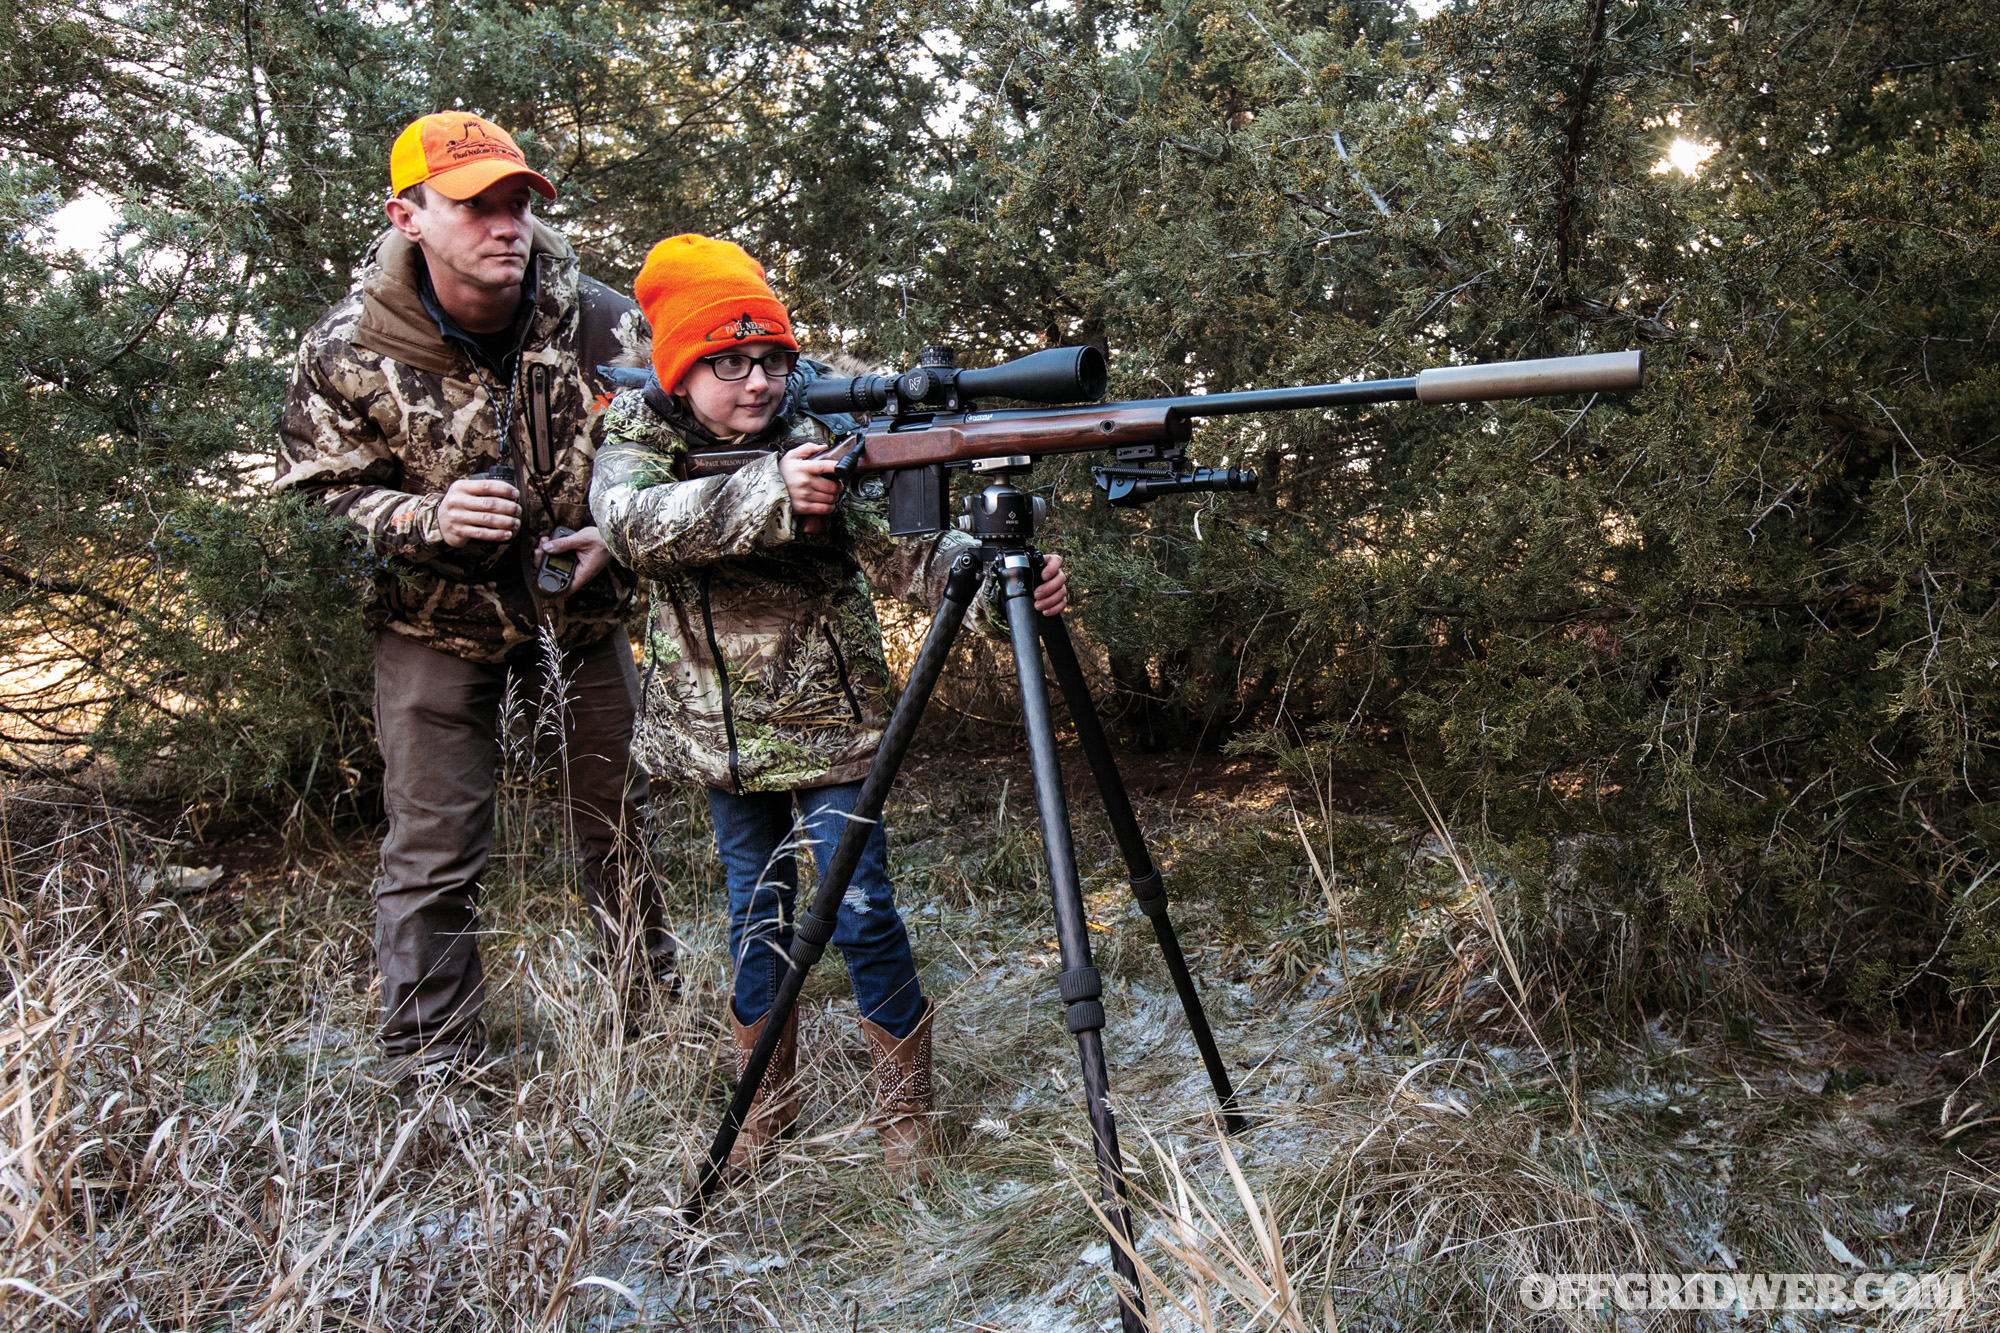
Above: Hunting with a suppressor has many benefits:
Negates the need for hearing protection when you’re trying to be sneaky in the woods; you can hear everything, including each other.
Decreases the chances of anticipating the shot and jerking the trigger due to the loud noise from the rifle.
Reduces recoil of the rifle.
How and where you’re hunting dictates the position you’ll be shooting from. Shooting from the prone position, laid-out flat on your belly, is stable and excellent for learning marksmanship fundamentals, but terrain and obstacles dictate that prone shooting is rarely used when hunting. So, practice positions you’re likely to encounter. For example, if you’ll be seated, in a blind, and using a tripod, practice that. If you’ll be walking through the woods and plan to set up, practice setting up with tripod or bags quickly with your child. These are dry runs for the main event.
Determine each of your roles for the hunt. Both of you should be scanning for deer; the easy way to do this is to give your child half of the area to scan while you scan the other half. Explain that your child’s main job is to listen to you and pull the trigger when they believe they have a good shot. You should range the animal with a rangefinder, tell your child what the holdover (if any) should be, and adjust the elevation turret for her. The only thing on her mind should be to get the crosshairs in the kill zone and make a clean shot.
Above: Assisting in the whole process helps your child fully understand where meat comes from.
Day of the Hunt
Kids might have unrealistic expectations and think a big buck will walk out immediately. Help them understand that some hunts end without even seeing a deer all day. Because kids need a little more than adults, as far as entertainment and food, starting in a blind is ideal. Hunting from a blind allows your child to move around without startling wildlife. Definitely bring extra snacks and water for the day — the extra roominess of a blind helps. Make sure both you and your child have comfortable chairs to sit in. When you get into the blind, set the gun up and have your child practice shooting positions before it’s time to take the critical shot.
When one of you spots a deer, both of your heart rates will skyrocket. Just breathe and go through the motions just like you both had practiced. Range the deer and determine if it’s at a distance your child could take an ethical shot. From there, have him quietly and quickly get set up behind the rifle. Tell them to wait until it’s a good shot, with minimal wobble, and to go ahead and pull the trigger when ready. These seconds may feel like an eternity while he’s looking through the scope and you’re looking through binos. When they take the shot, you should try to spot where the deer was or wasn’t hit. Your next steps will be determined on the shot.
For the sake of this article, we’ll assume all of that practice and preparation resulted in a clean shot and the animal fell close to where it was shot. You and your child will be emotional and excited — let it happen and savor the memory. Tell them you’re going to wait a few minutes before going out to get the deer; this is so it has time to die. Large animals can take a few minutes to bleed out, and even the nerves firing can be alarming to the child. So enjoy 20 more minutes in the blind, take pictures of his or her shooting position, praise them for their hard work, and make this moment special.
When you walk up to the deer, you should have the rifle in-hand, loaded, and on safe. If for any reason the deer isn’t dead, you’ll need to act quickly to dispatch it. When you find the deer is dead, unload the rifle and start your steps for either field dressing or hauling it back to where you plan to process it.
Life Lessons
Teaching a child to hunt is rewarding for you and your child. It’s a lesson they’ll keep with them forever. Hopefully, you’ve helped spawn the next generation of hunters. But if not, you’ve at least provided him or her with the knowledge to hunt for their own meal if survival becomes a necessity.
In this era of GPS satellites and smartphone apps, it’s easy to forget about the navigational technology that preceded these modern conveniences. Thousands of years ago, our ancestors didn’t have the luxury of Google Maps. Early magnetic compasses first saw use in the 11th century, but these were only temporarily magnetized using a lodestone and were far too large to be considered portable. The pocket-sized, liquid-filled, mass-produced compasses we know today have been around for less than 100 years.
So, how did our forefathers figure out where they were going in the days before GPS and reliable magnetic compasses? They used celestial navigation — techniques for determining position based on the location of the sun, moon, planets, and stars.
You may think that these techniques are obsolete today, but every prepared individual knows that it’s wise to develop knowledge of alternative navigation methods in case Plan A (or B, or C) isn’t an option. Even the U.S. Navy has reintroduced celestial navigation to its training programs after briefly phasing it out. In a SHTF scenario, it can be a very effective means of getting your bearings.
Solar Navigation
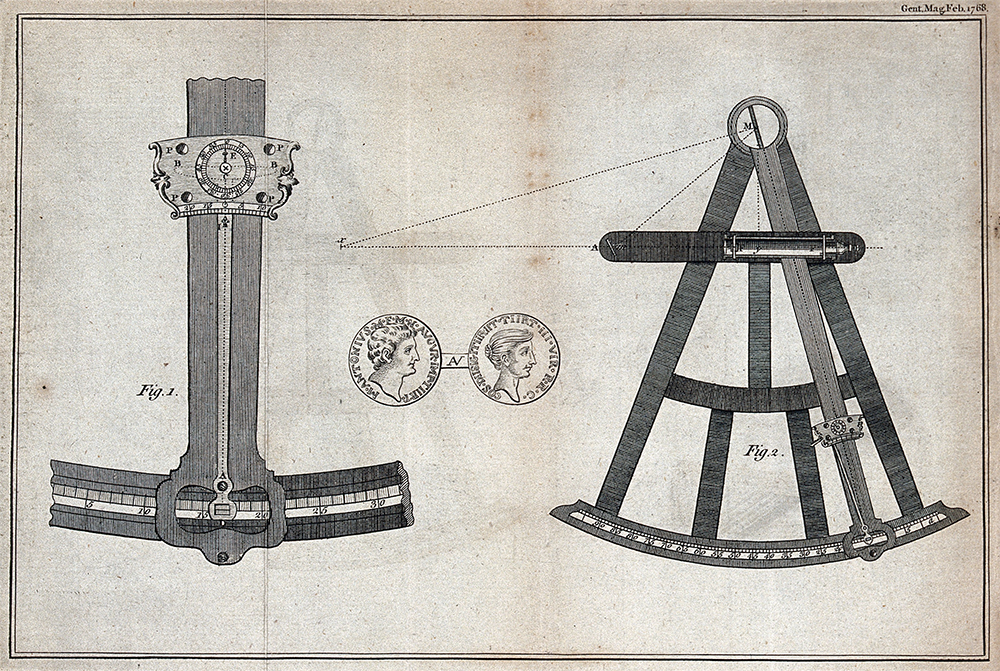
One of the most straightforward forms of celestial navigation relies on the sun. You’ve probably heard of rudimentary solar navigation techniques such as the shadow stick method or the analog watch method, but depending on your geographic location and the season, these improvised techniques have the potential to be inaccurate or entirely ineffective. This is why our seafaring ancestors developed more precise mechanical instruments such as the kamal, astrolabe, octant, and sextant — but we’d be willing to bet you don’t have any of those stashed in your bug-out bag.
An engraving of a sextant, circa 1768. (Via Wikipedia / Wellcome Images, CC 4.0)
Fortunately, it’s still possible to learn solar navigation without expensive and fragile tools or in-depth knowledge of spherical trigonometry.
African Sun Compass
The African Sun Compass was developed as a durable, lightweight, pocket-sized tool for solar navigation. Its creator, Timm Irvine-Smith, is a South African who loves traveling the world with his wife Melina. Based on his knowledge of the imprecise shadow stick method and other ancient devices, such as the Ottomani Compass and the Viking Sun Stone, Irvine-Smith set out to make a simplified device that could provide orientation, latitude, and longitude. His first prototype was a simple piece of wood with lines drawn on it:
He wrote, “Eventually while traversing Switzerland I managed to determine my position (Latitude & Longitude) to within 27 km with the version on this page. I then knew that I was onto something.”
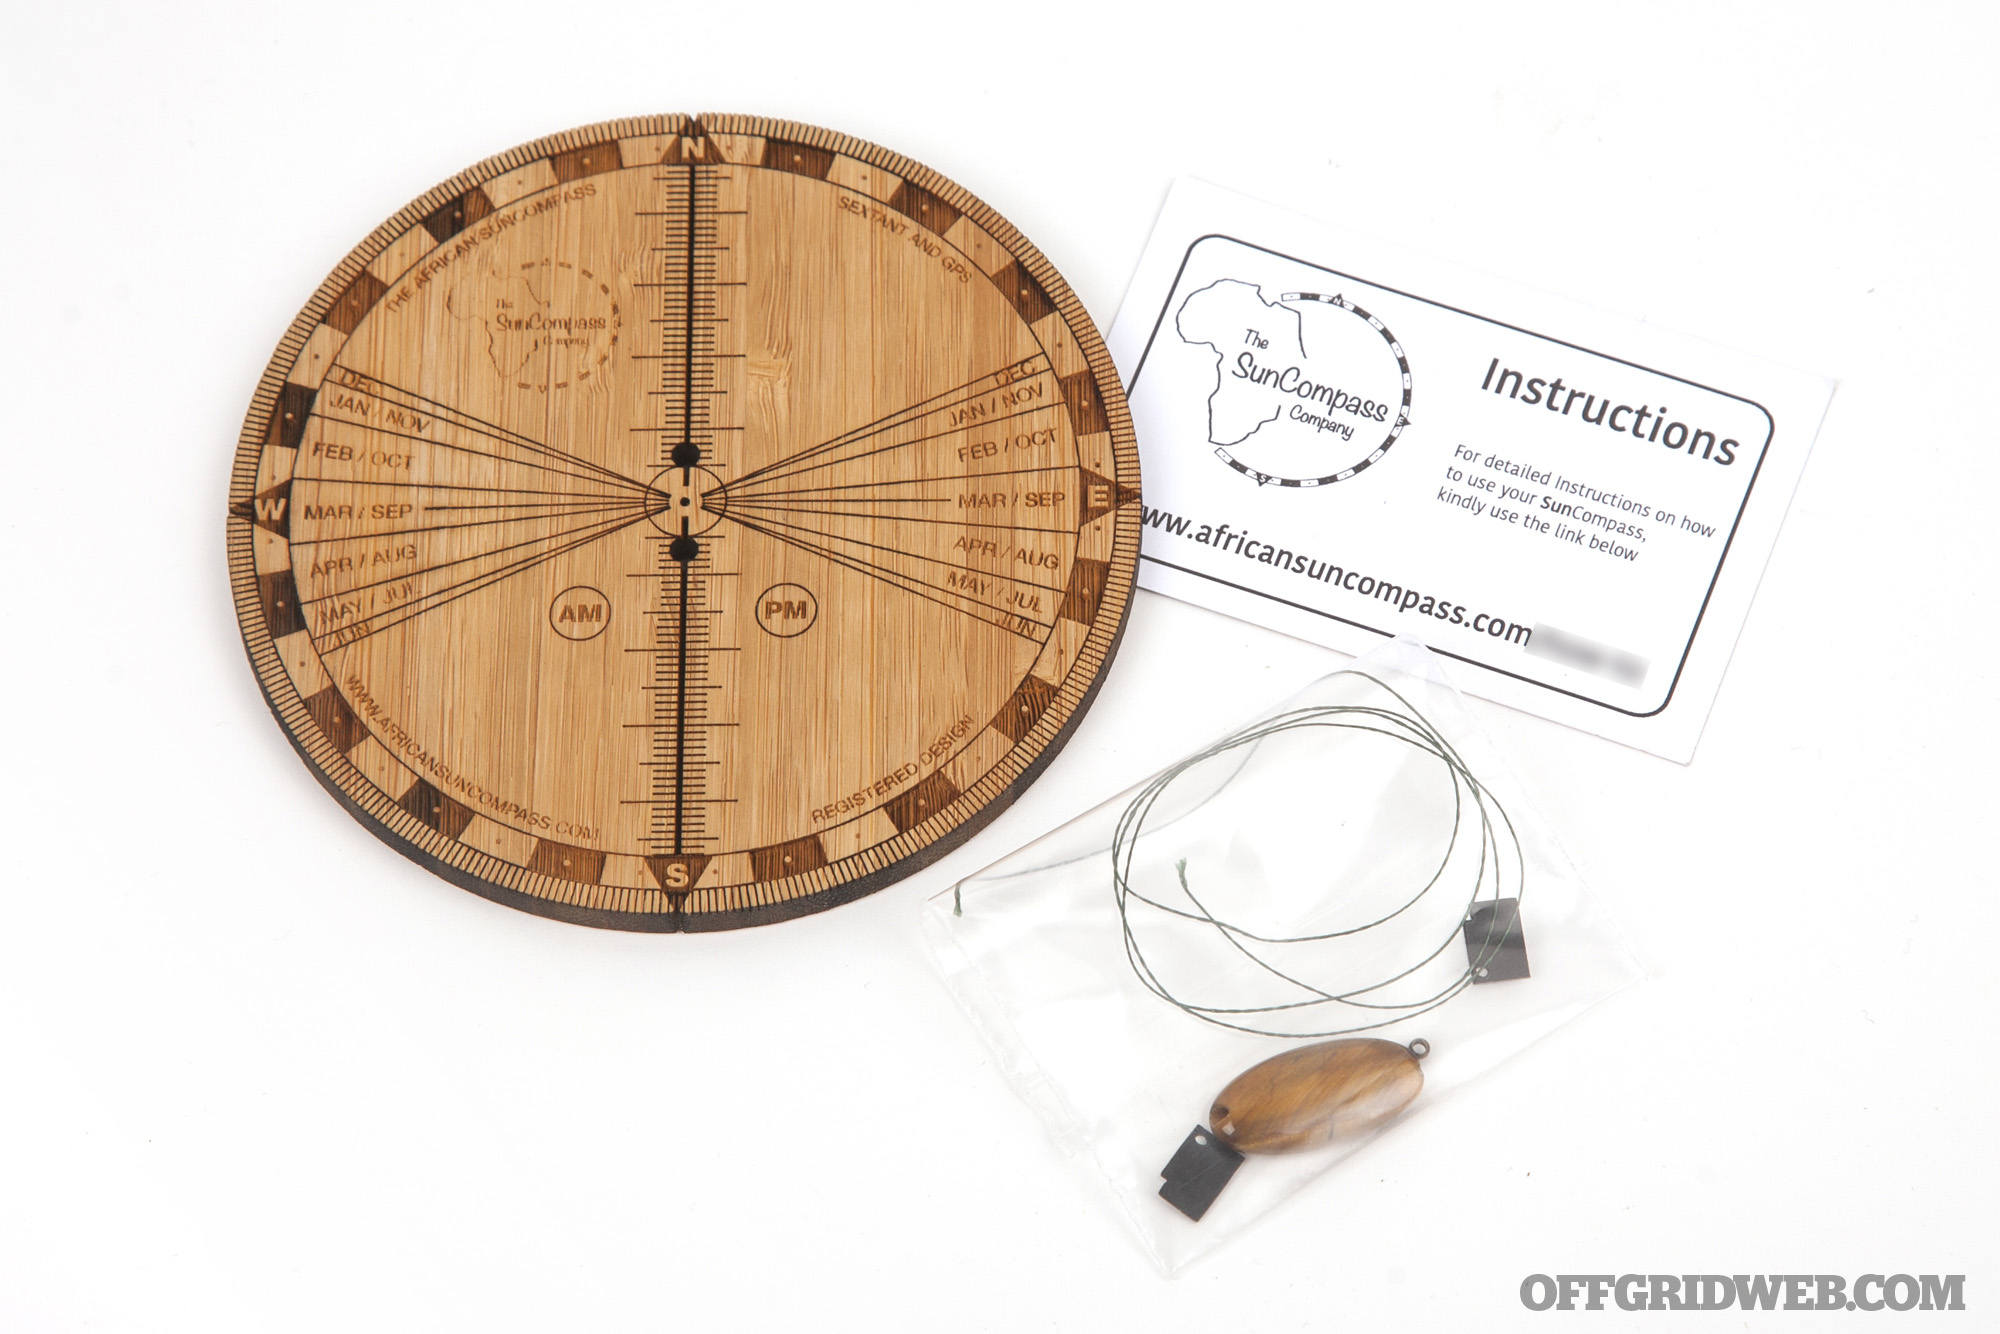
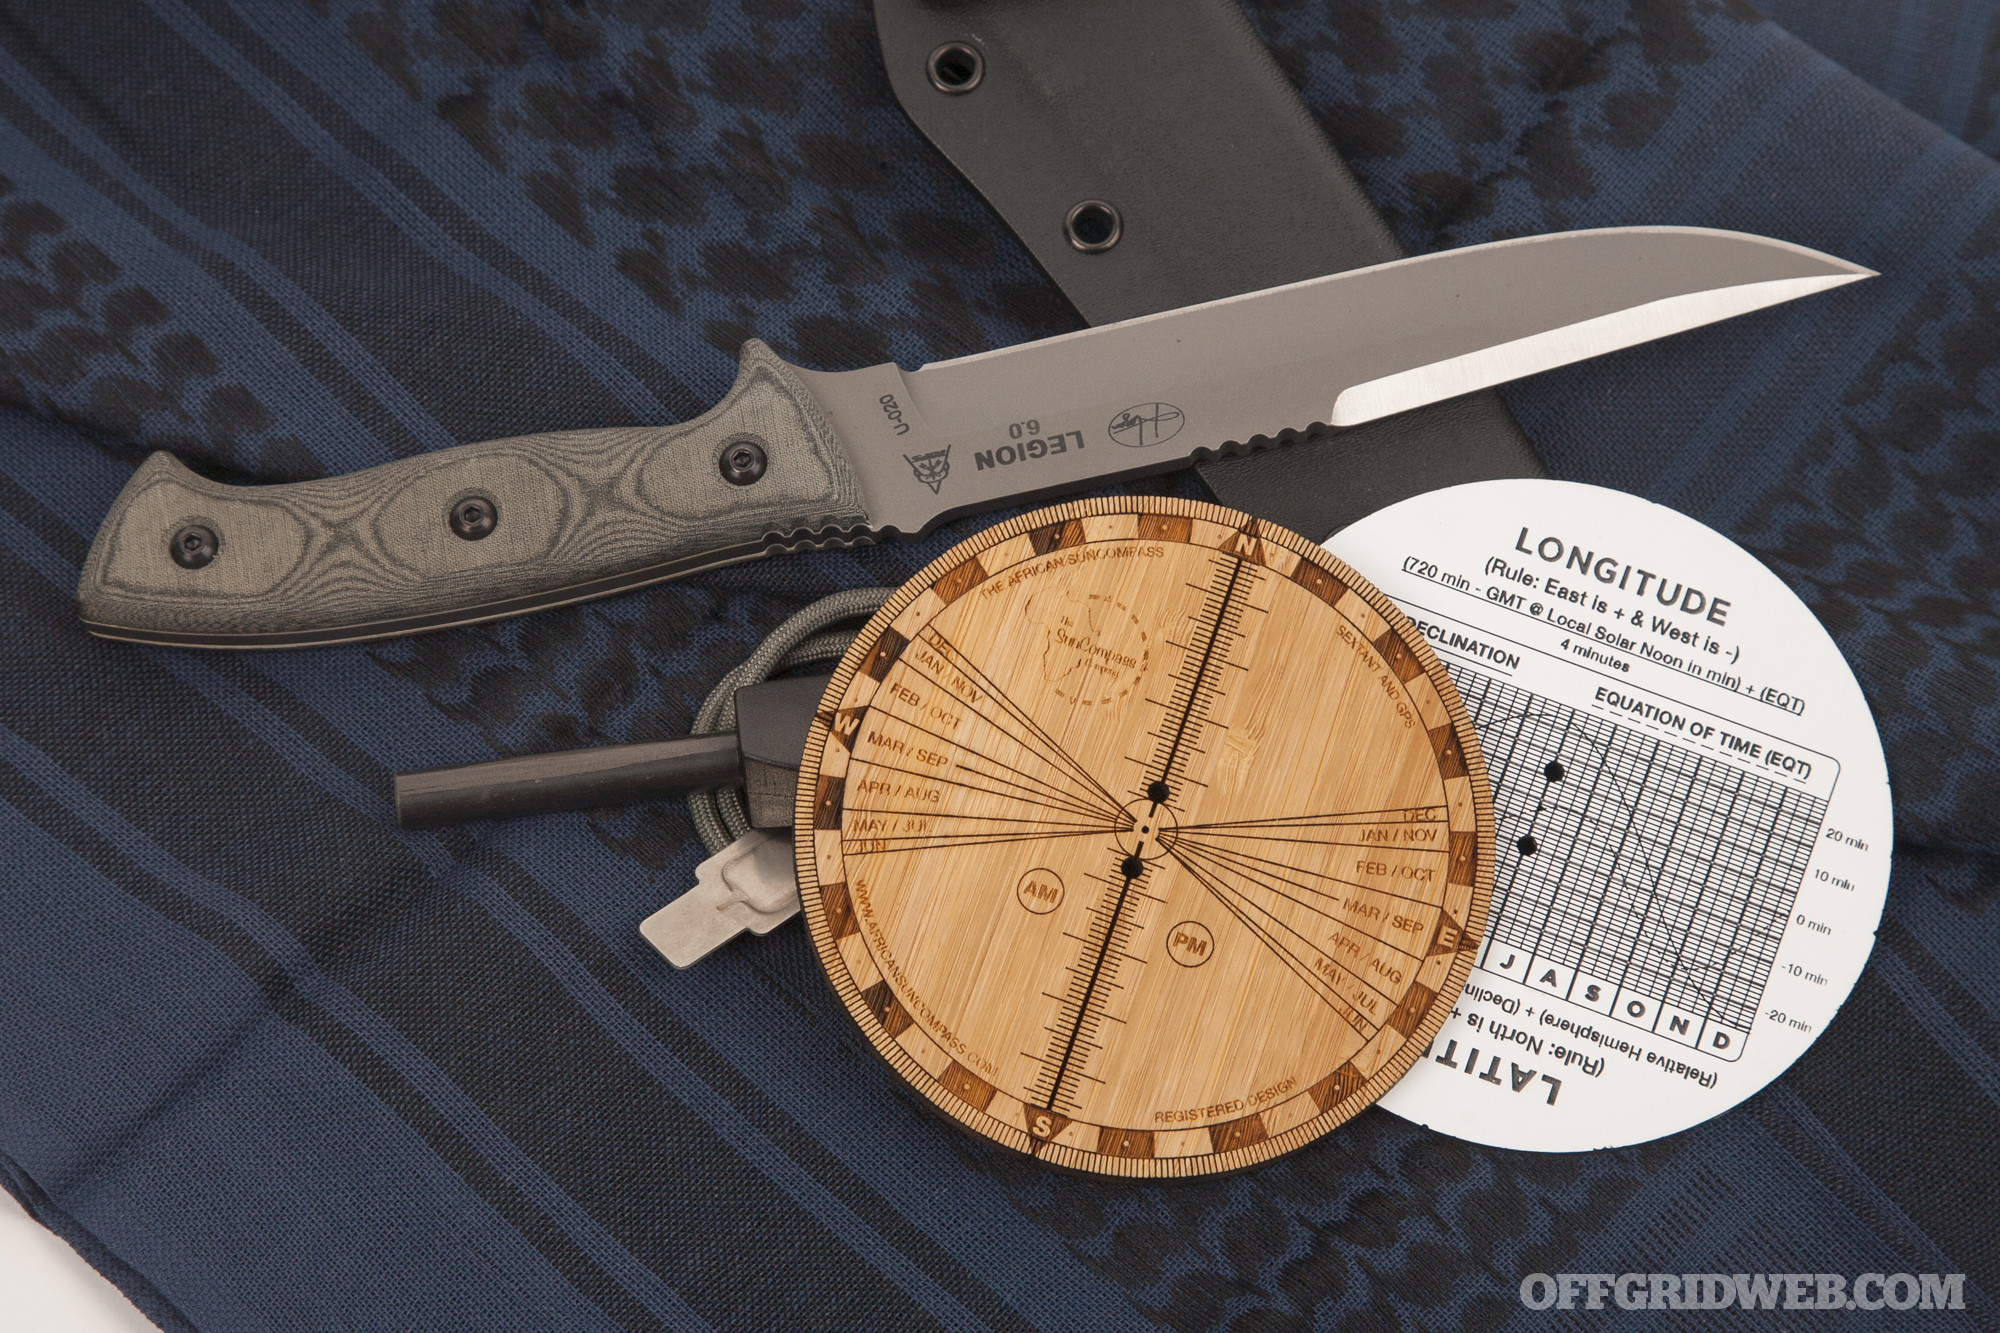
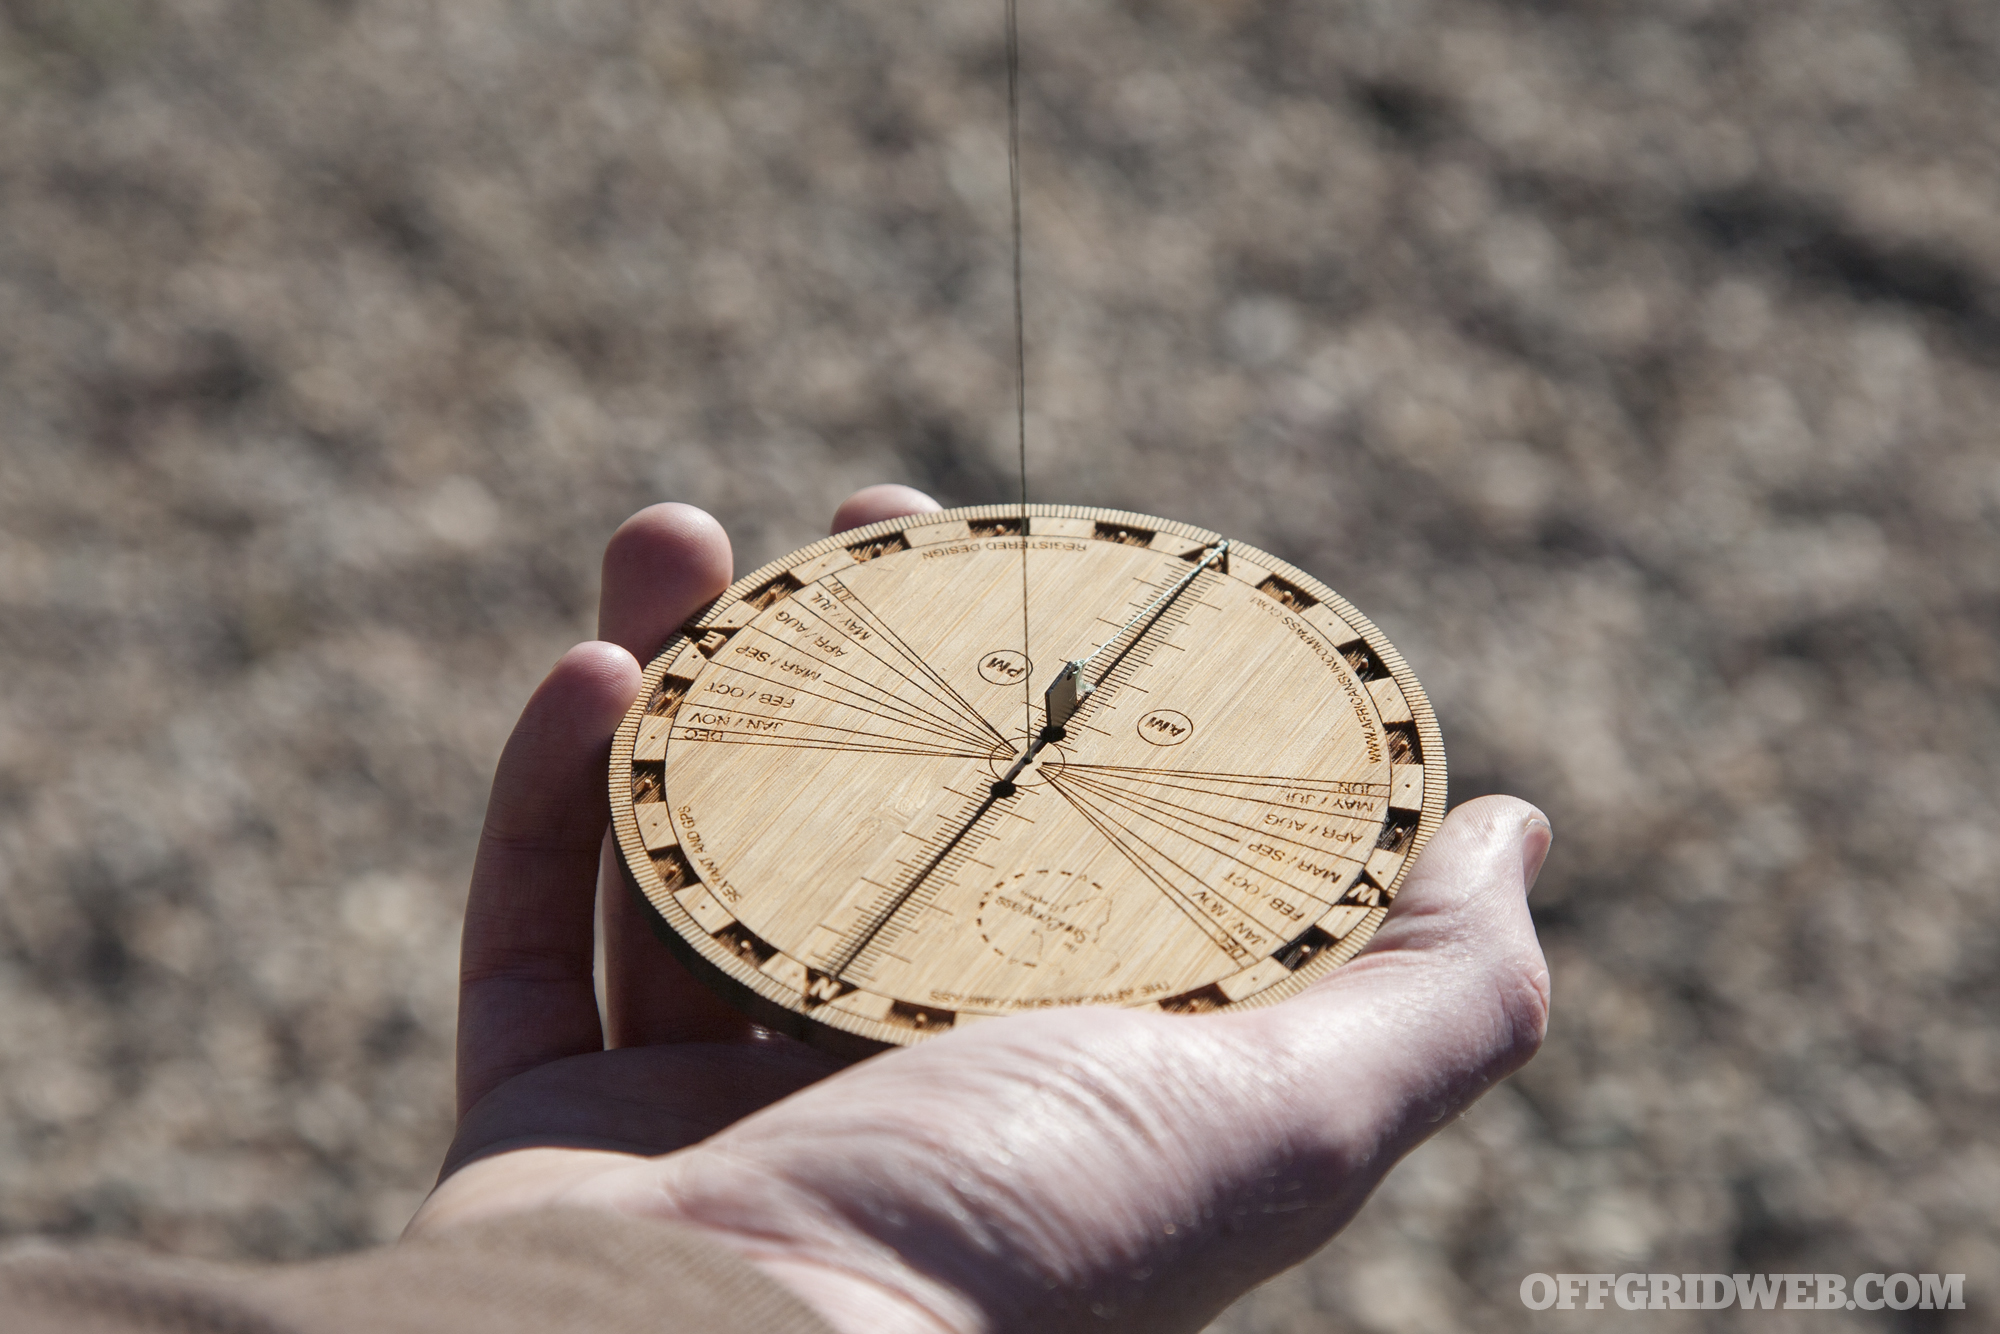
This evolved into the African Sun Compass, which is available in either white TroPly polymer or natural bamboo. The markings are deeply laser-etched on each side of the 0.2-inch-thick disc. Each Sun Compass includes the following parts:
Compass disc
Plumb line
Gnomon
Pendant weight
Copper retention ring
Card with web link for detailed instructions
Assembly and Calibration
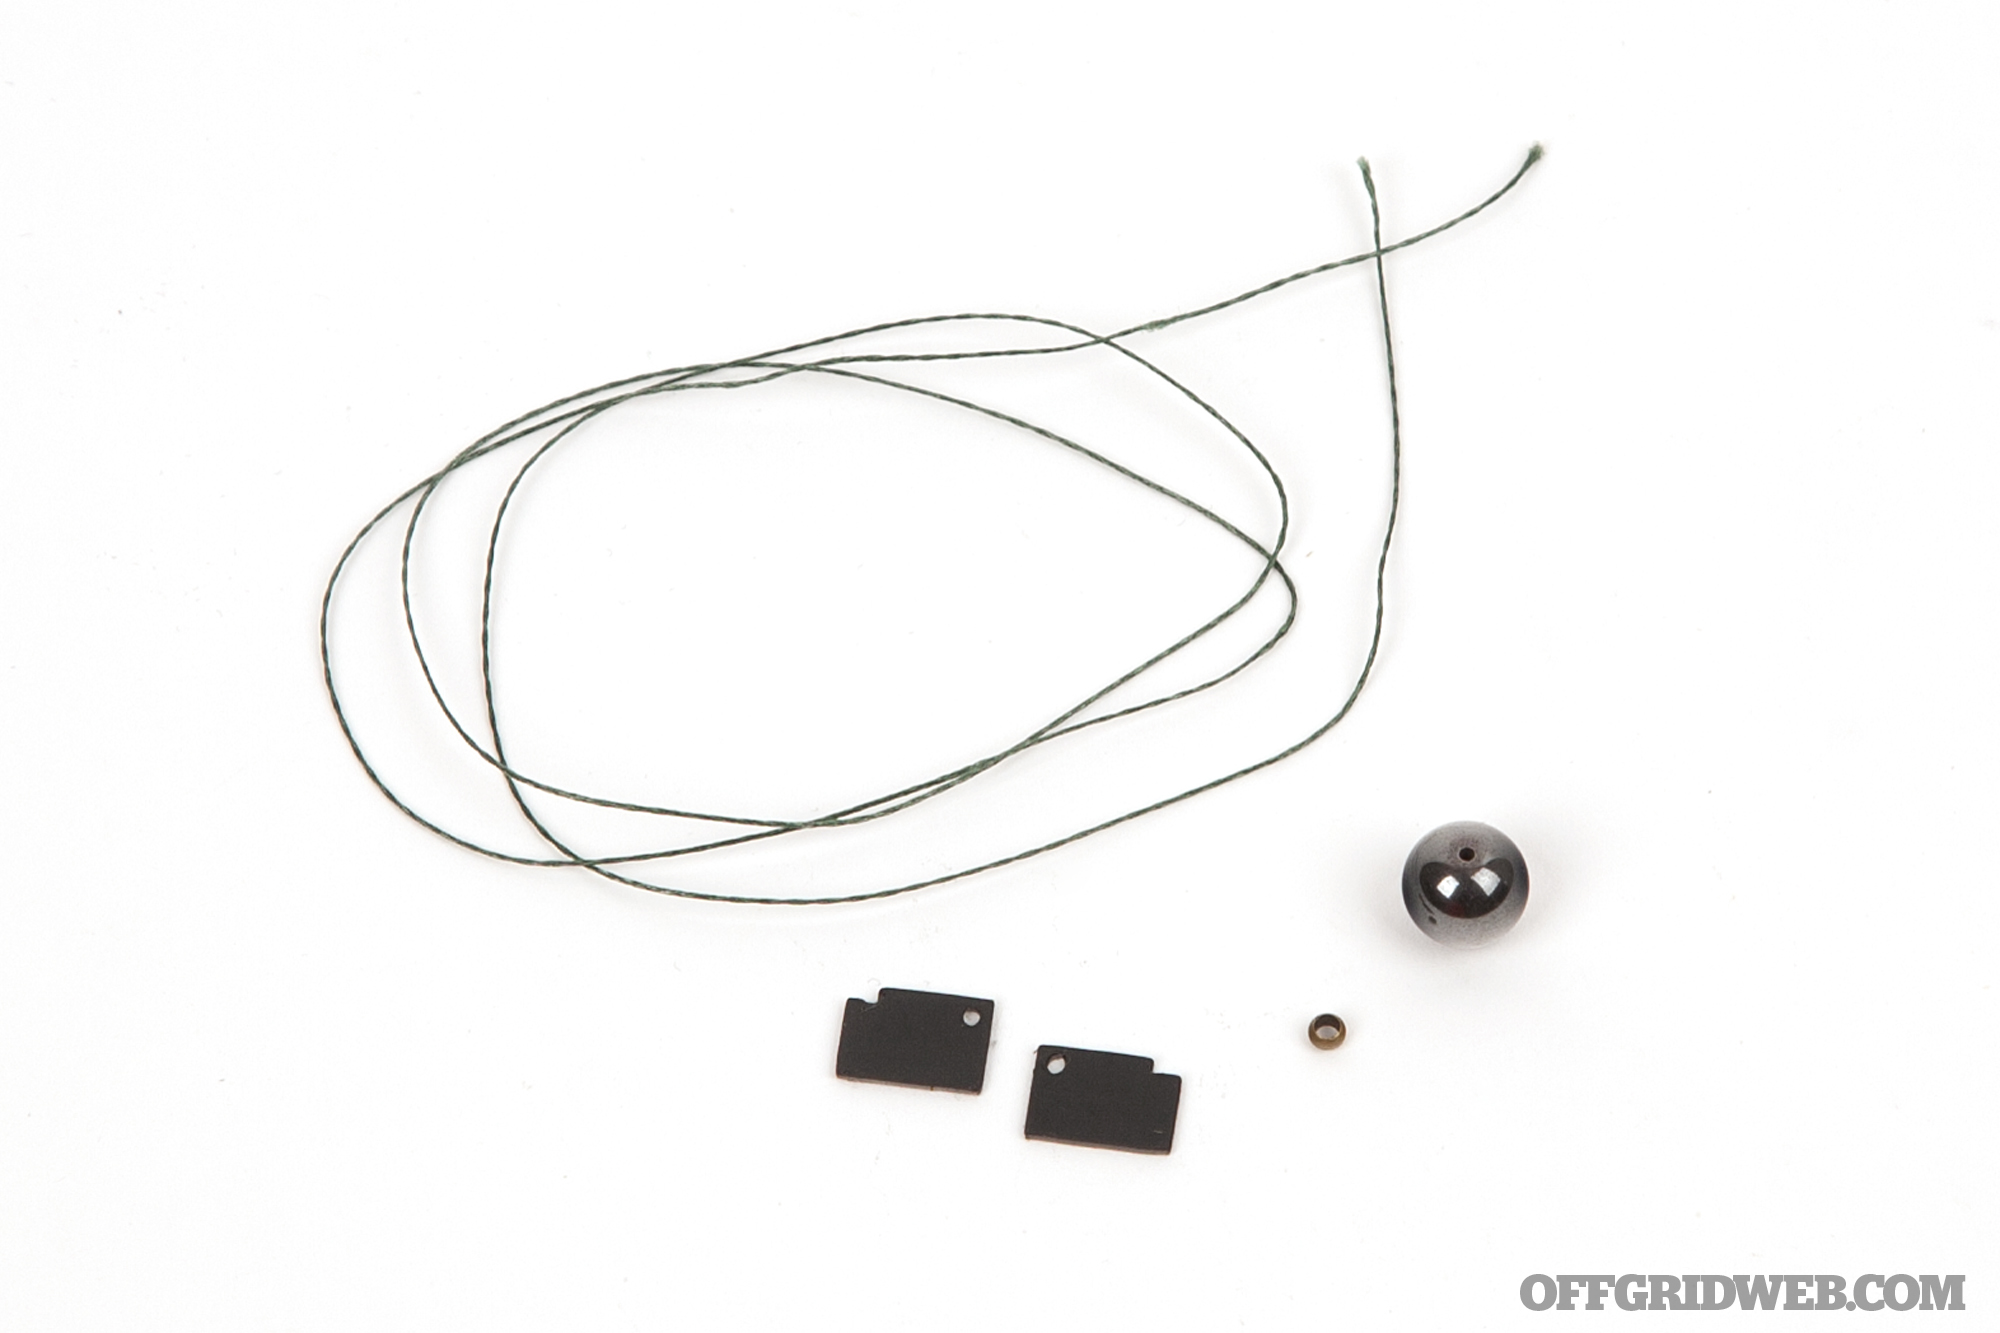
Clockwise from top: plumb line, pendant weight, copper ring, and gnomon (with spare).
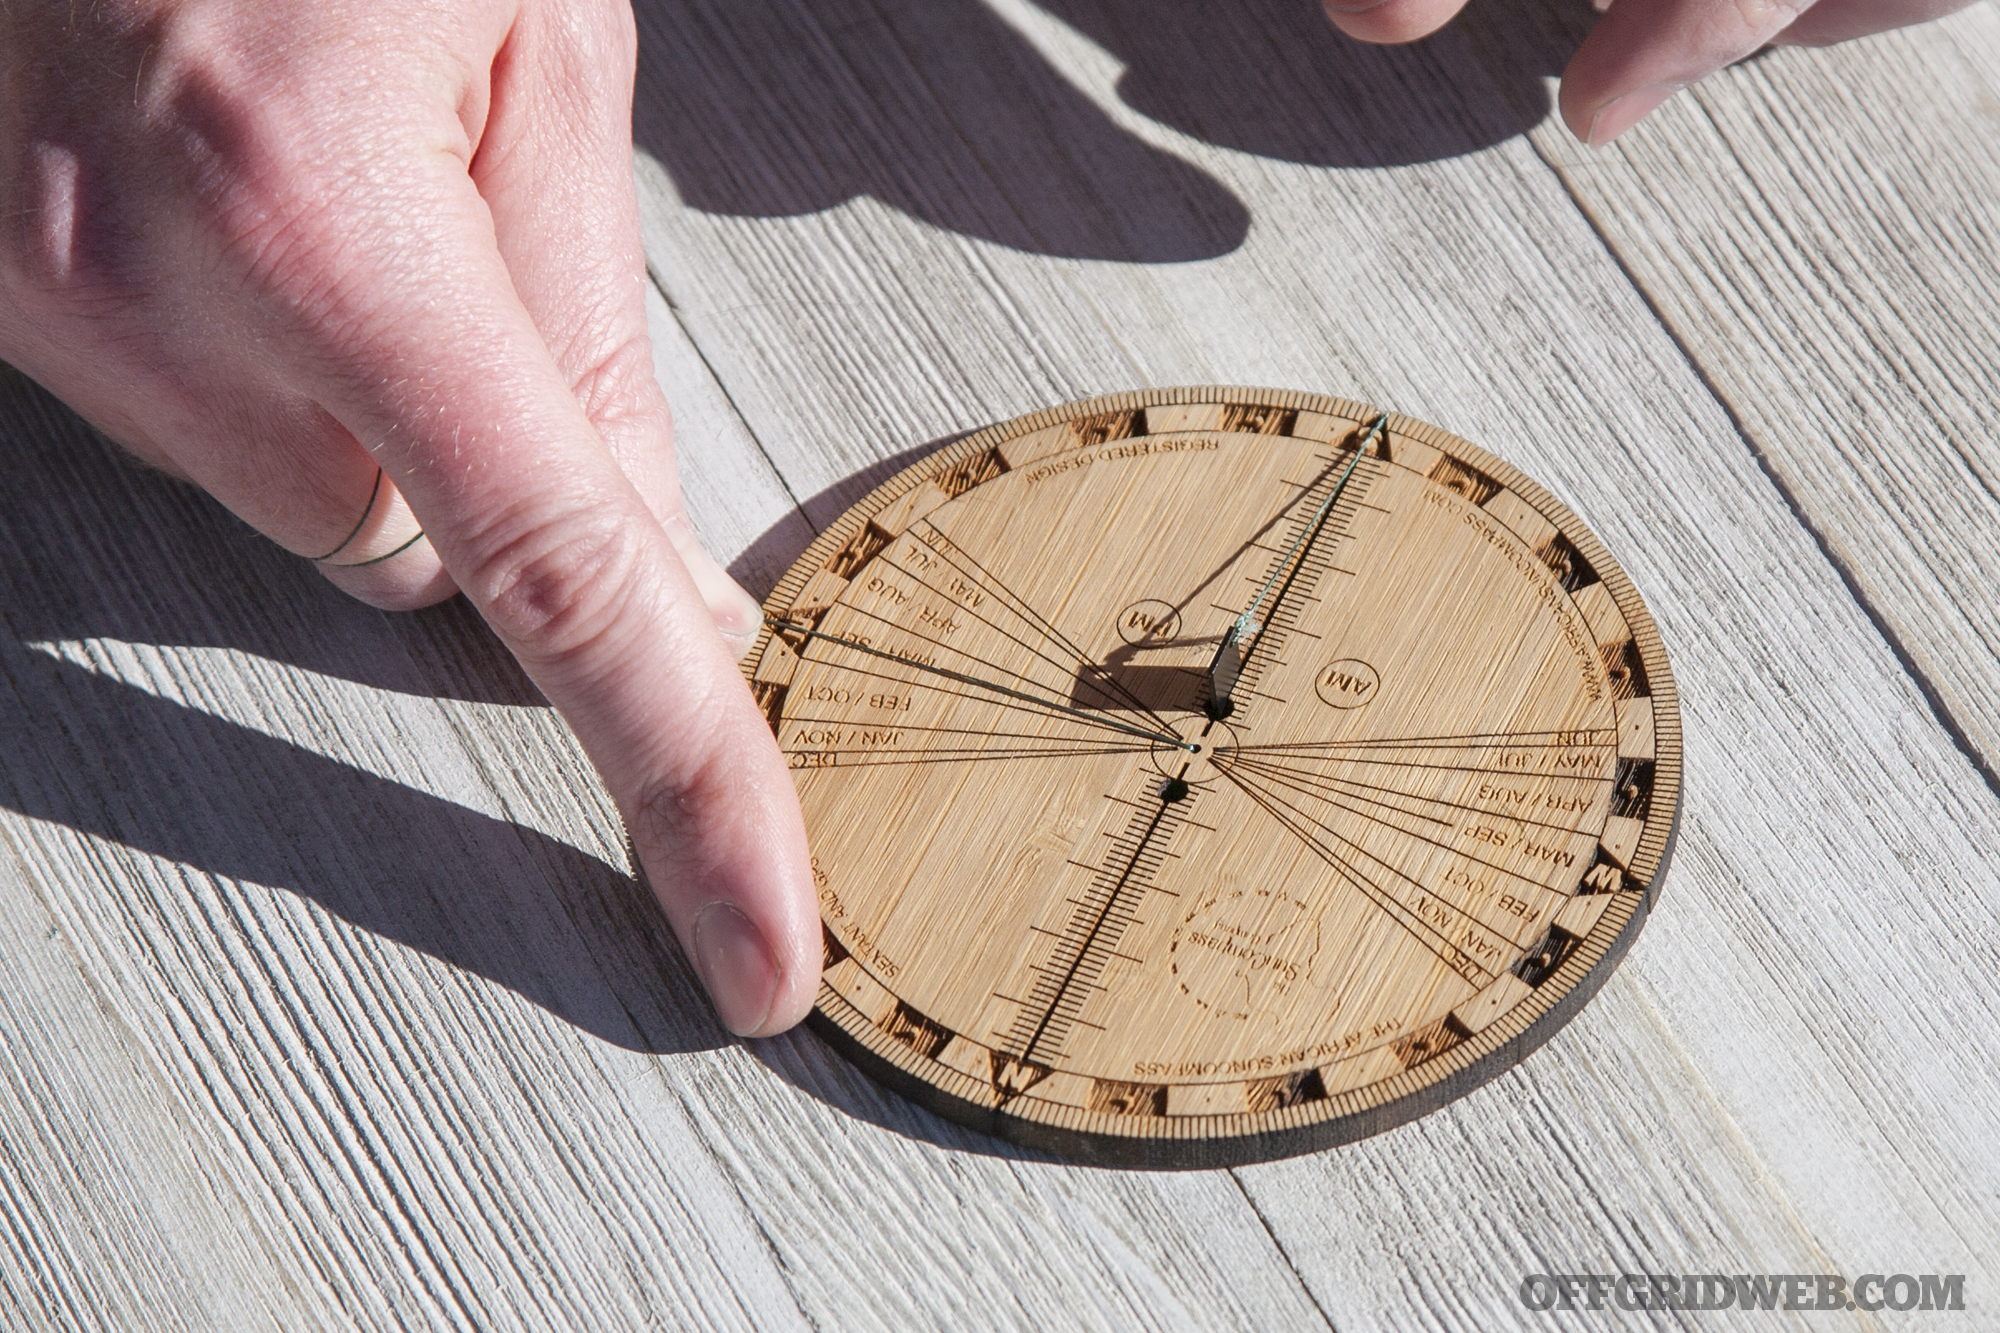
Before using the Sun Compass, you’ll need to do some quick assembly. Run the plumb line through the hole in the center of the disc. On the side with the cardinal directions, pass this string through the pendant weight (a metal ball for TroPly models, or a stone for bamboo models), and tie it tightly around the tiny copper ring to retain the weight. On the other end, tie the string to the hole in the gnomon. This small metal chip will be inserted into the groove that runs between North and South.
To calibrate your Sun Compass so it reads True North, you’ll need to follow the steps shown in the instructions.
Note: If you’re using the sun compass in the afternoon, you’ll need to start with the stick shadow cast from West to the center hole (as pictured in steps 1-8 above). If you’re using it in the morning, you’ll need to start with the shadow cast from East to the center hole. The “AM” and “PM” markings on the face refer to the side the plumb line must be placed on, not the side the shadow starts on — the instructions aren’t entirely clear about this at first glance.
Above: Pointing the stick shadow at the center hole, tracking the shadow’s new position after 5 minutes, and aligning the gnomon shadow with the plumb line at the East marker.
Once your Sun Compass is calibrated, make a note of the exact gnomon position using the hash marks along the groove. You’ll need to go through these steps to re-calibrate it once a week to retain maximum accuracy.
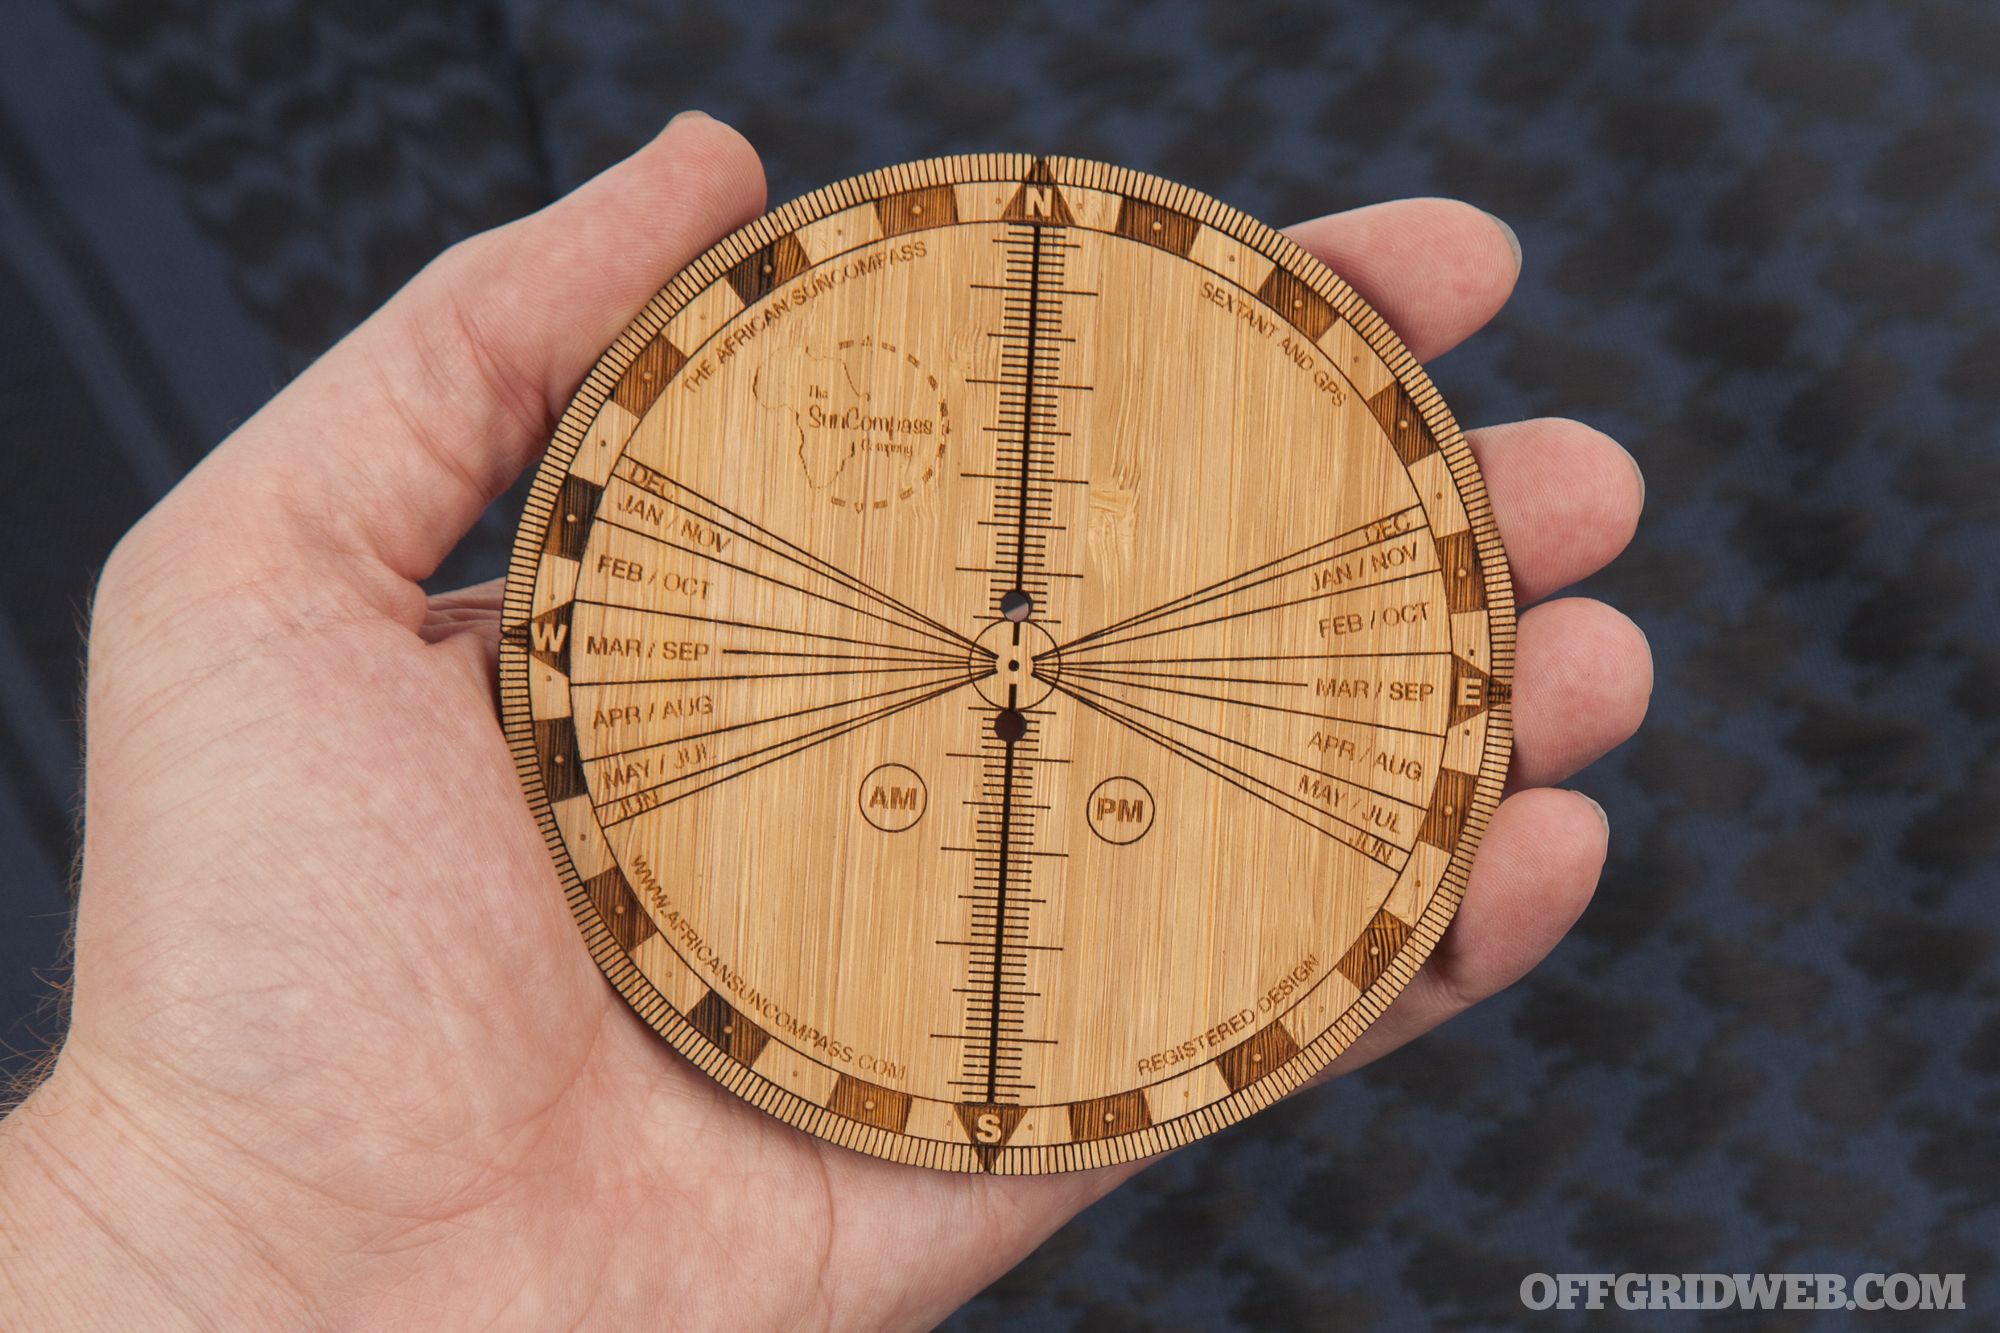
Finding North
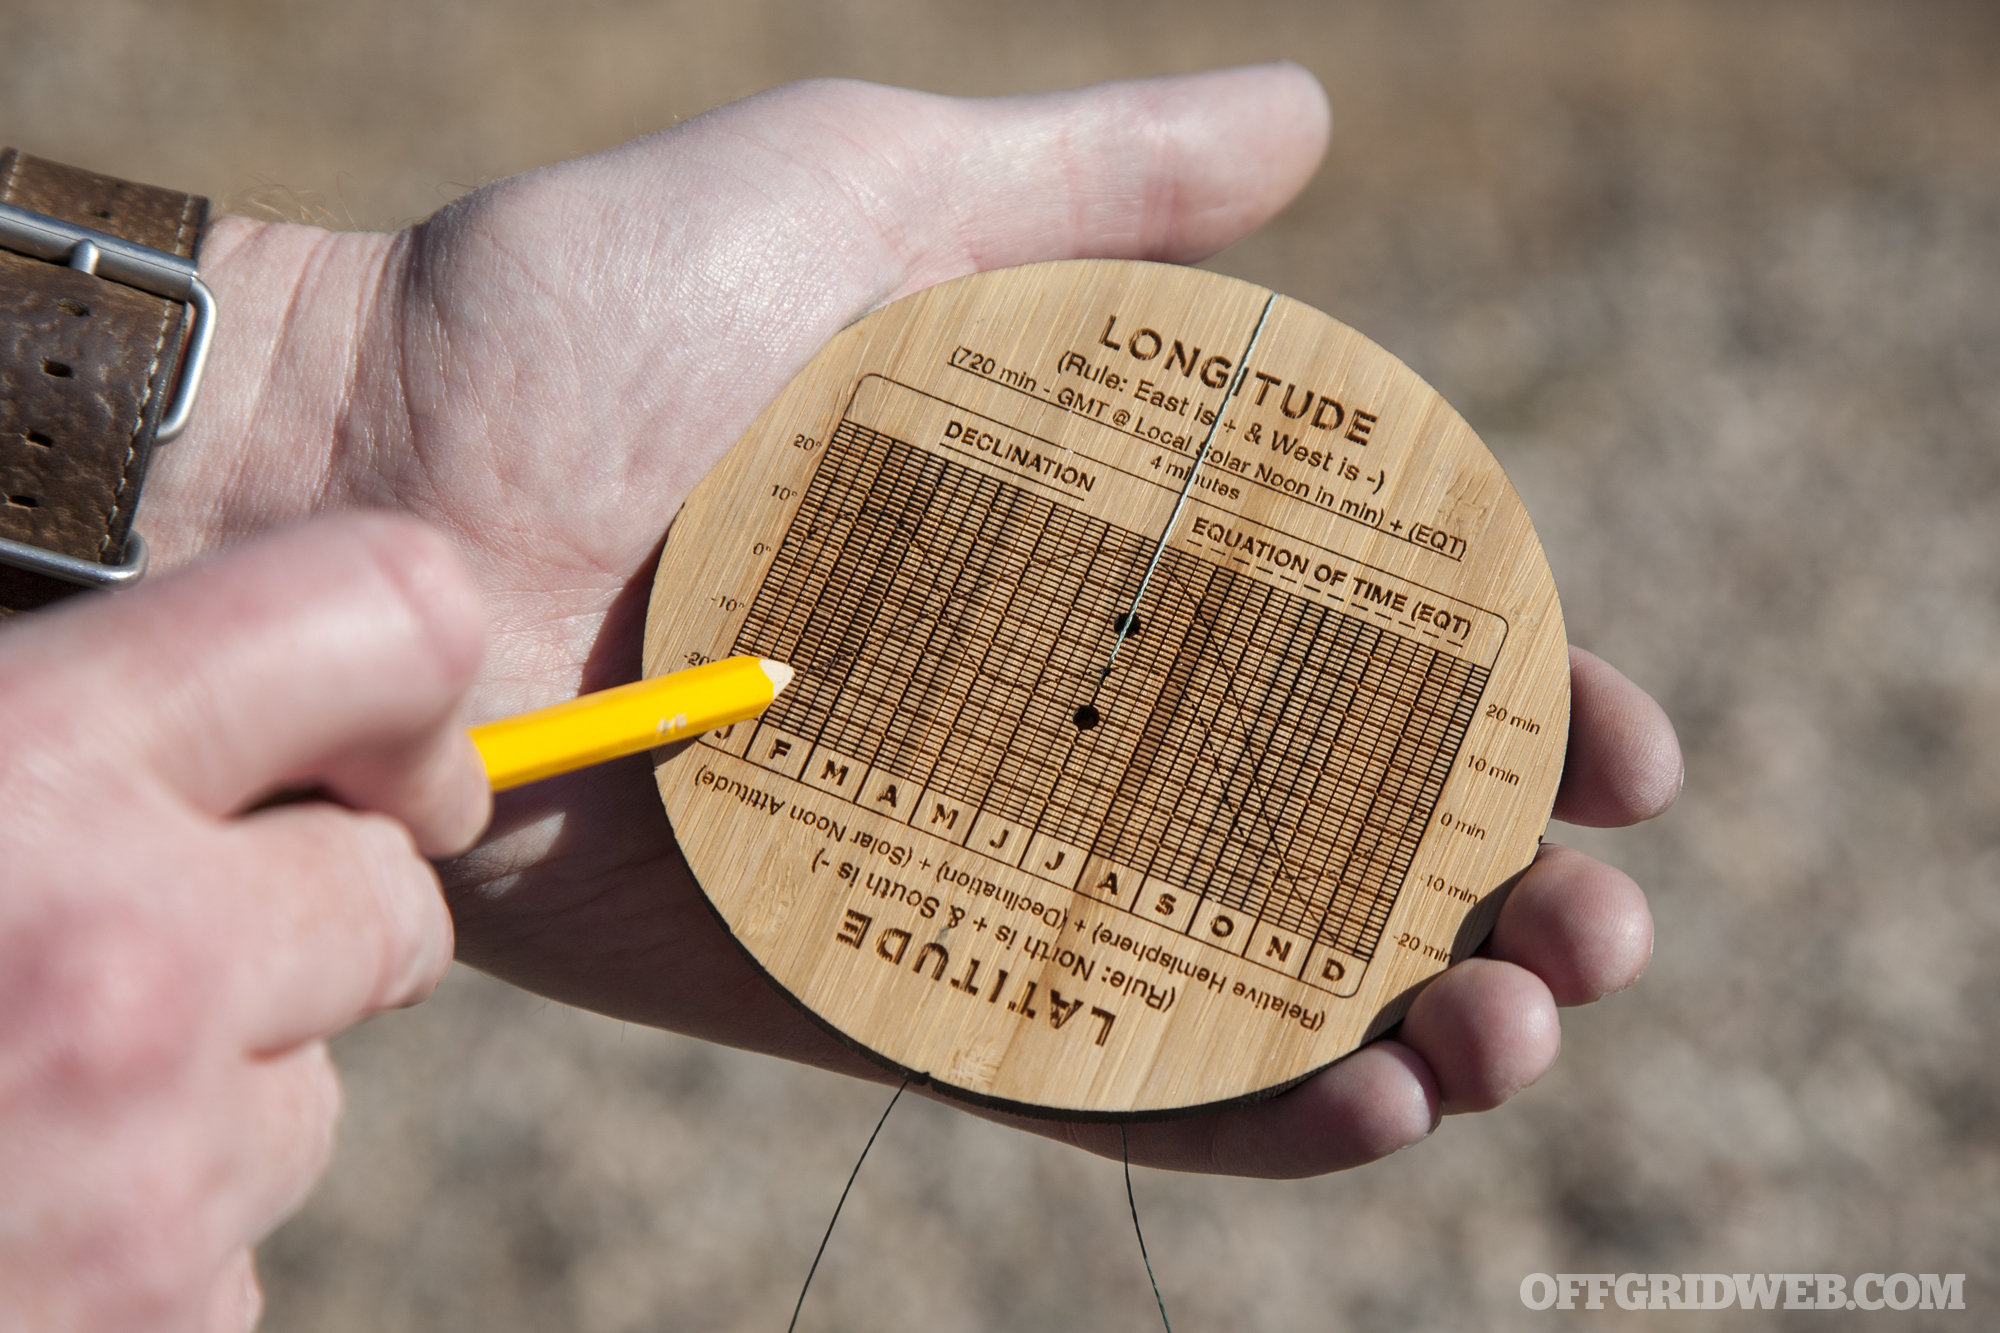
To orient the compass to True North, you’ll need to start by checking the declination figure on the back side of the Sun Compass. We tested the compass on February 7th, which gives a declination of -16. We were using the compass in the afternoon, so we started at East and moved 16 degrees towards “Feb/Oct” on the compass face.
Checking solar declination for February 7th.
With the gnomon calibrated and the corner of its shadow touching the plumb line, you’ll find True North.
Navigation & GPS Coordinates
The Sun Compass is capable of doing far more than simply pointing out the cardinal directions. It can also help you triangulate your position on a map, chart a course to a landmark, or even calculate your latitude and longitude once a day at noon.
Triangulation
To triangulate your current position on a map, you’ll need to find North, then follow the steps pictured in the instructions to find your location in relation to three visible landmarks (mountain peaks, islands, etc.). It’s worth mentioning that the instructions don’t have a step 7 — this numbering error is present in the original documentation on the Sun Compass web site.
A similar process can be used to chart a course to a landmark and walk a bearing in that direction. Instructions are also provided for this purpose.
Daily GPS Fix
With the Sun Compass, you can calculate your latitude and longitude once per day at Local Solar Noon. This is a complex process, and is explained in detail in the instruction PDF file on the African Sun Compass web site. For the sake of brevity, we’ll summarize the process below:
Point the compass North and wait for Local Solar Noon, when the gnomon shadow aligns exactly with the N/S line.
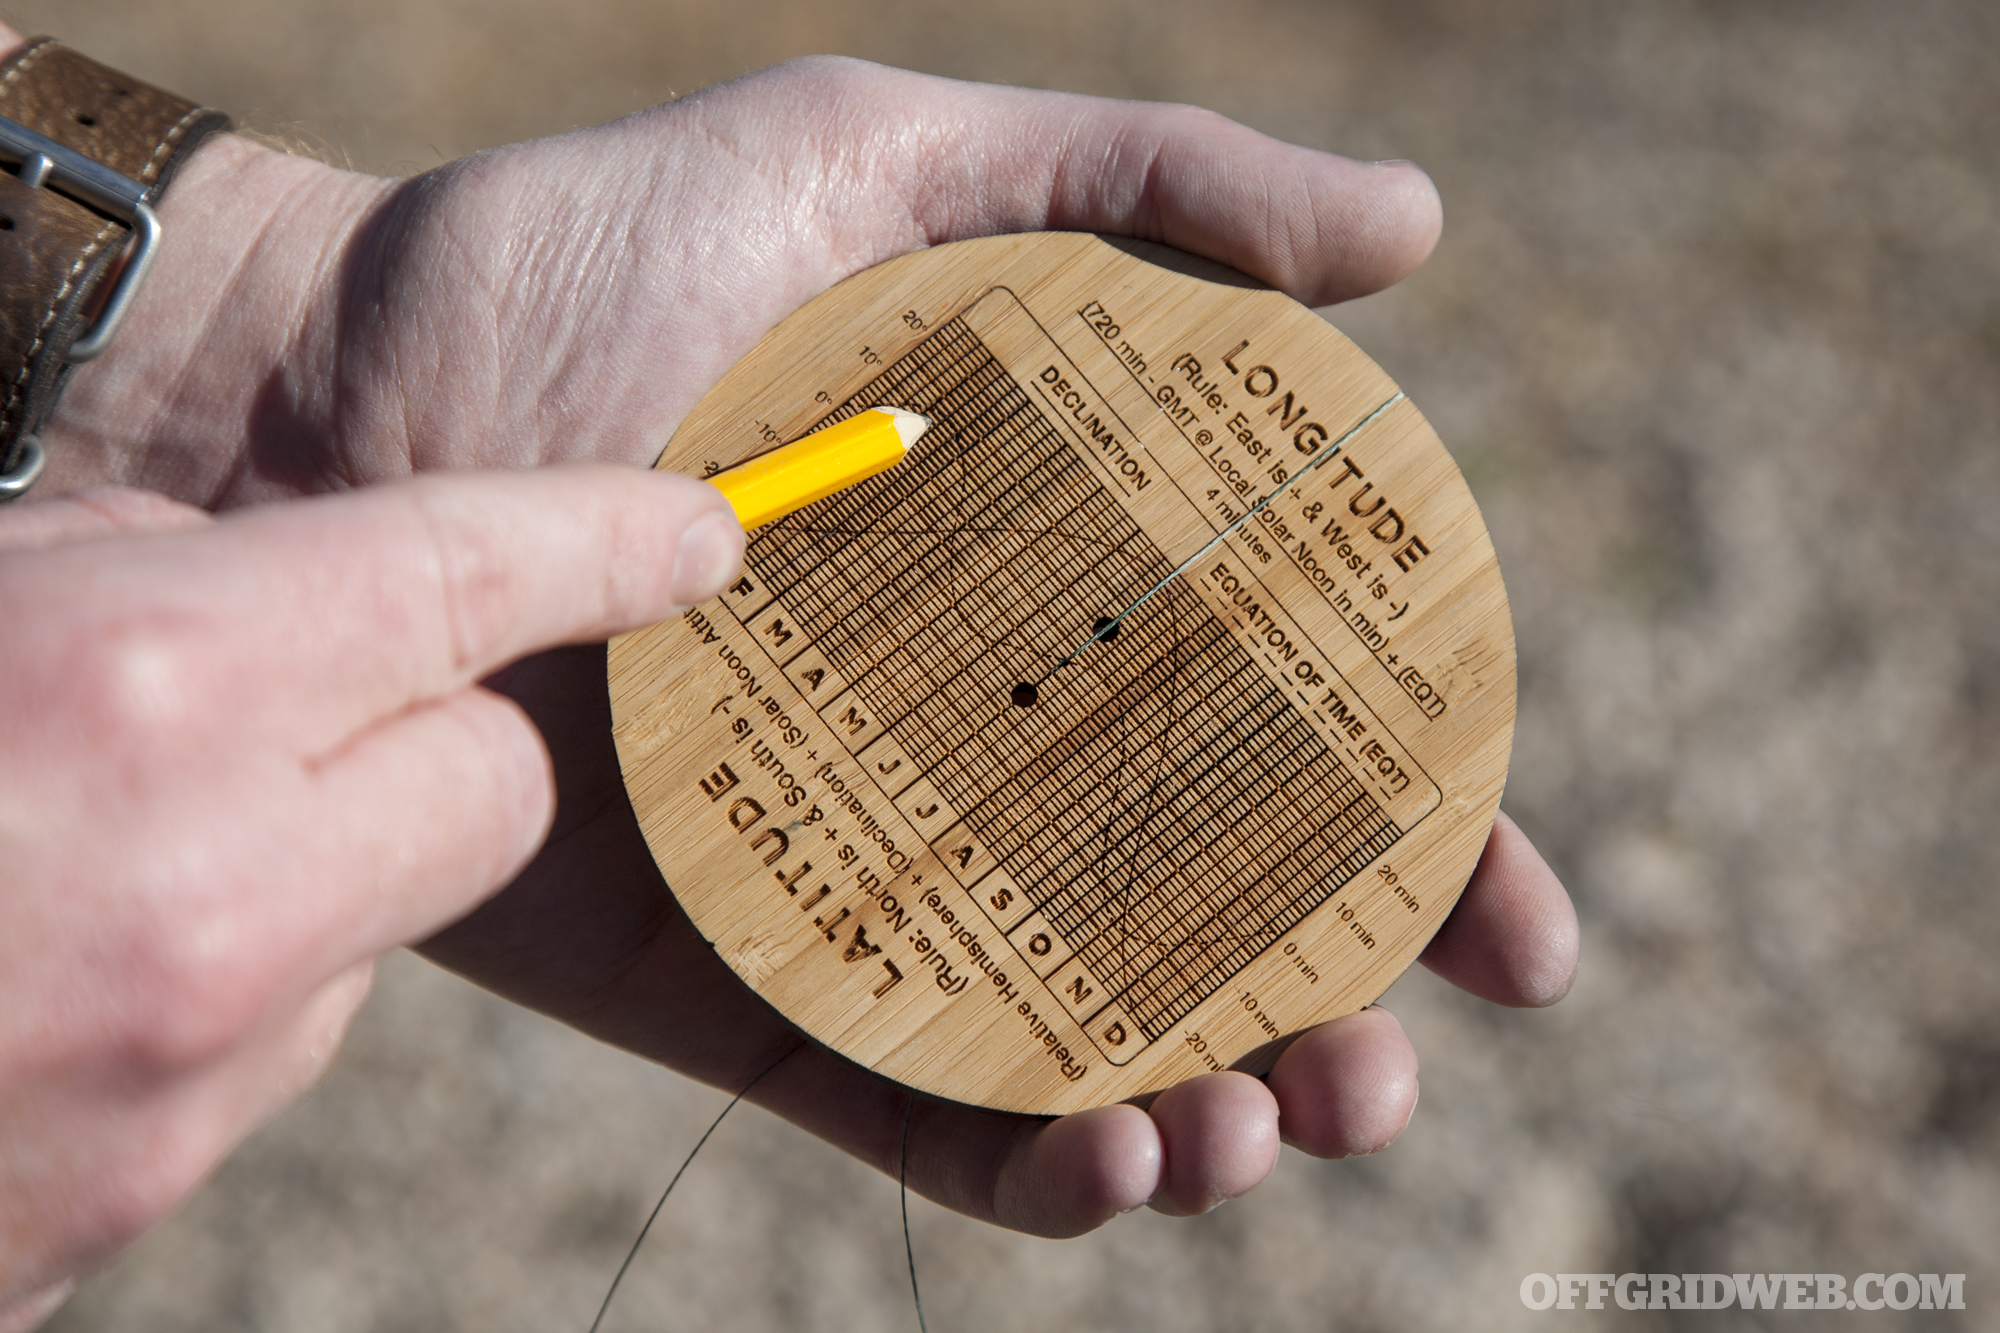
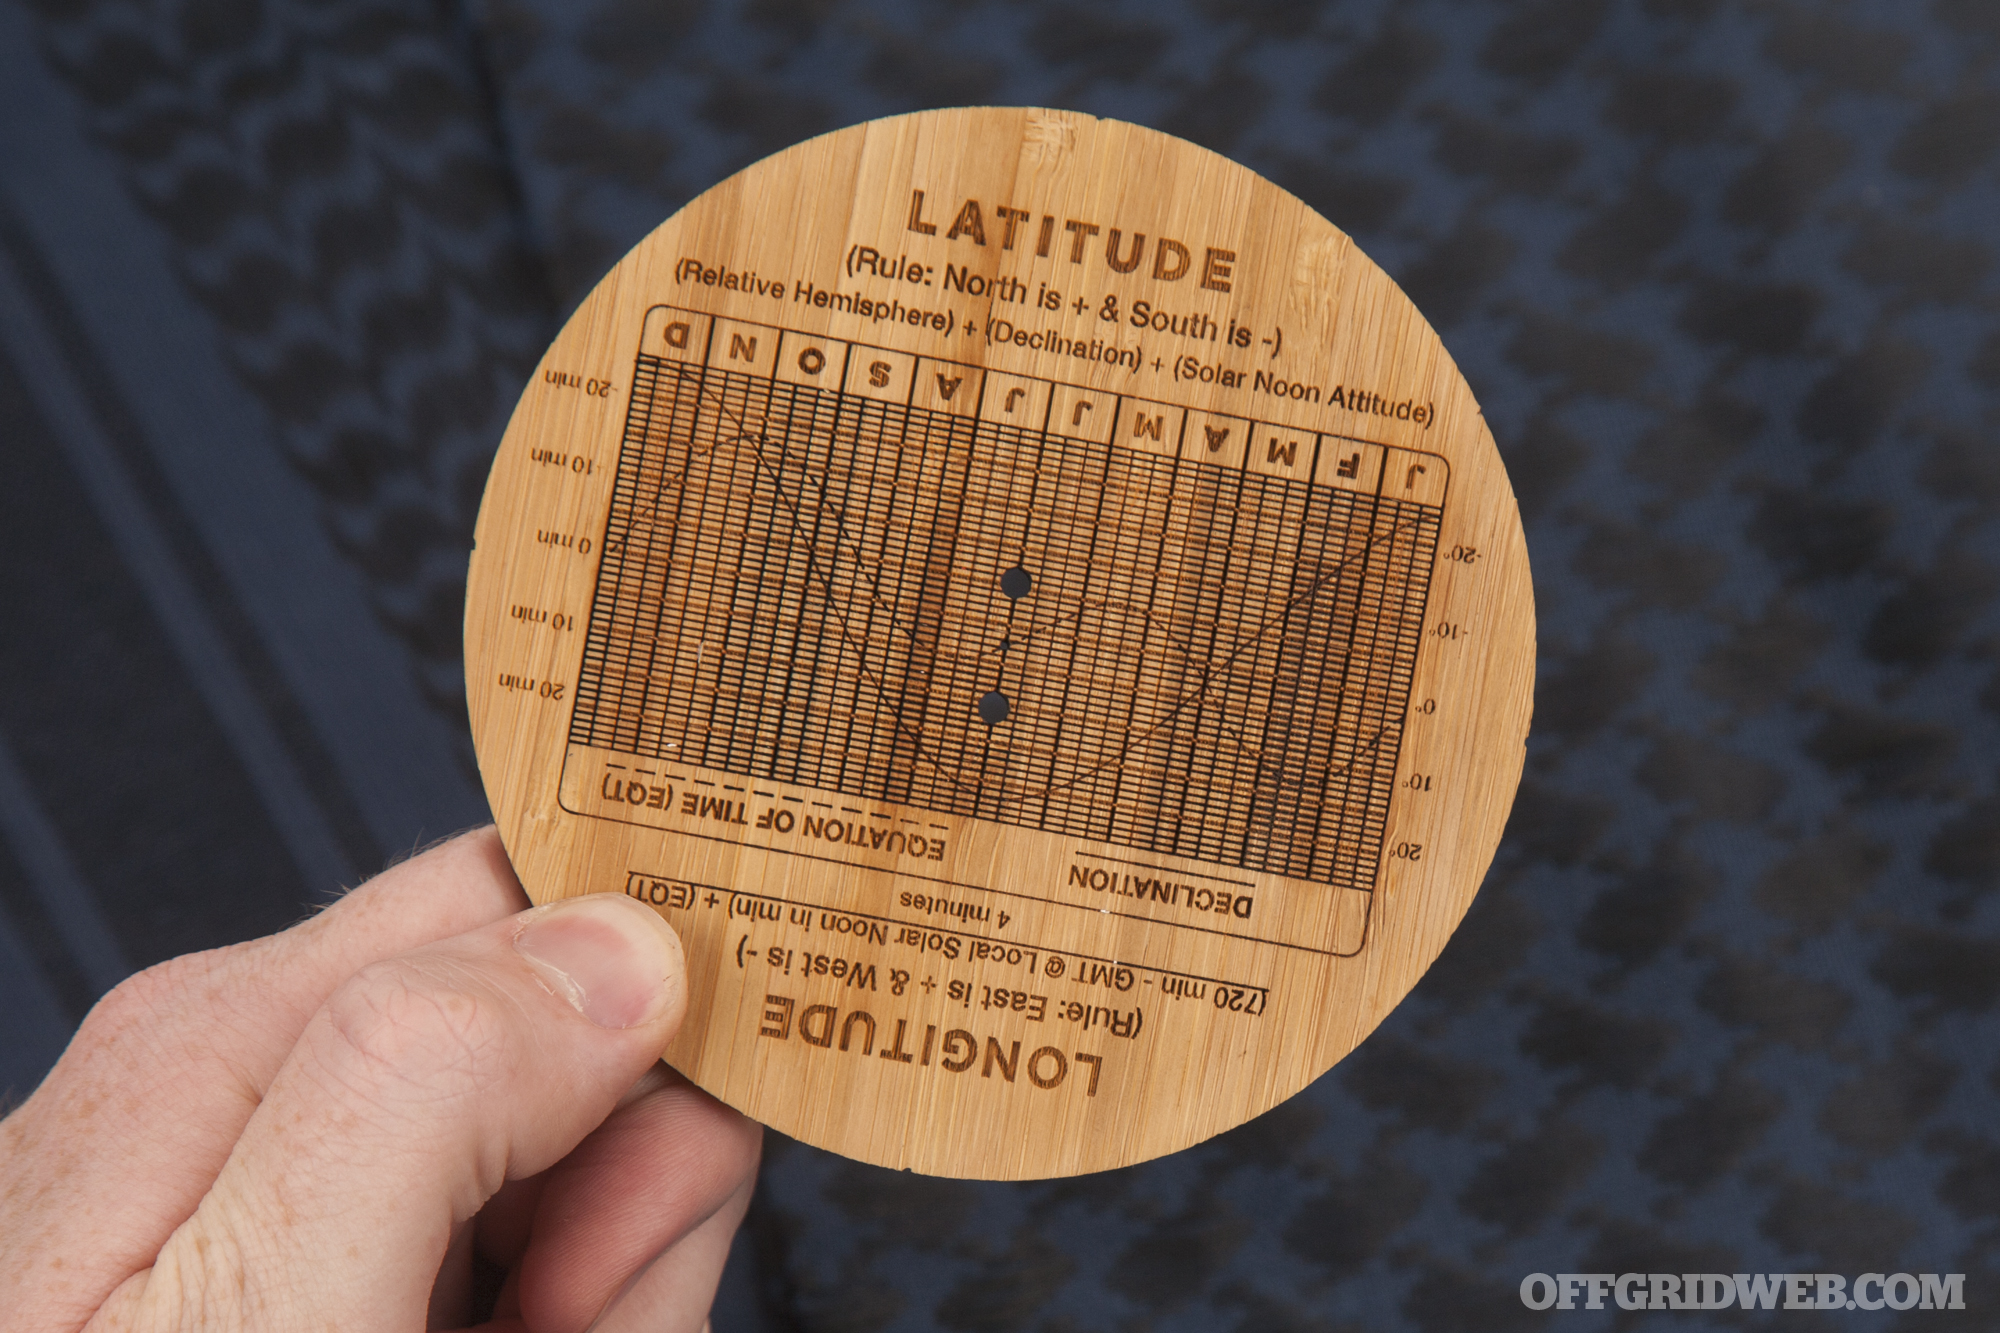
Determine Greenwich Mean Time (GMT) and how much you’re ahead or behind of it.
Use the dashed “Equation of Time” line on the back of the Sun Compass to establish the date-based deviation figure.
Calculate longitude: (720 minutes – GMT @Local Solar Noon in minutes) + (Equation of Time) / 4 minutes
Measure sun angle by hanging the pendant weight vertically as a pendulum.
* Either -90 or +90 depending on whether the gnomon is placed in the North or South side of the center groove. ** Obtained from cross-referencing the date with the solid line on the back of the Sun Compass.
Our Experience with the Sun Compass
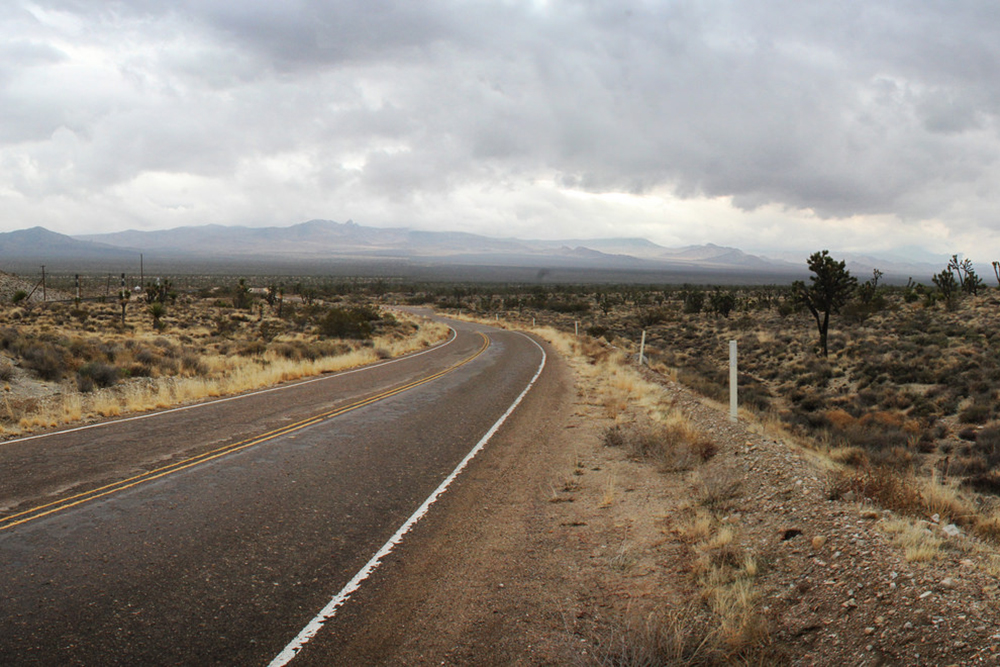
We did some hands-on testing with the Sun Compass on a clear and sunny February day in Arizona. Setting up the Sun Compass for the first time was easy enough, and the tightly-knotted string keeps the gnomon and pendant weight from getting lost in transit. If you do lose or damage the gnomon, a spare is included.
Calibration was fairly straightforward, although we got started on the wrong side due to confusion about the previously-mentioned AM/PM issue. After flipping the dial 180 degrees, it took about 3 minutes to calibrate the compass once the stick’s shadow moved sufficiently. After calibration, we looked up our declination (16 degrees) and rotated the disc until the gnomon shadow told us we reached True North. Again, this step is dependent on whether it’s morning or afternoon, so be sure your plumb line is on the correct side.
Triangulation and setting a bearing was more complex. Aiming with the plumb line is much like shooting an azimuth with the sight wire of a lensatic compass. However, keeping the Sun Compass perfectly level and the plumb line at 90 degrees throughout the steps isn’t easy, and deviations can lead to less accurate readings. On the upside, you don’t need to worry about memorizing or looking up magnetic declination like you would with a typical compass.
Looking up the Equation of Time value for February 7th before calculating longitude.
We attempted the daily GPS fix process, but to say it’s daunting for a first-timer would be an understatement. We found ourselves repeatedly re-reading the instructions and scratching our heads about converting Local Solar Noon to GMT to minutes. Since we didn’t have Arizona’s GMT differential memorized we had to Google it — it’s GMT-7, meaning we needed to add 7 hours to local time to reach GMT. If your area observes daylight savings time, you’ll also need to factor that in.
Local Solar Noon occurred at 12:41, which is 7:41 GMT, which is 461 minutes. The chart on the back of the compass indicated our Equation of Time value of +13 minutes. Plugging it into the formula, we got the following result:
Evidently we did something wrong, since the actual longitude at our location was 111.606 degrees West. Going back over the numbers, we realized our error: the calculation must be done with time in the 24-hour format. This seems obvious in retrospect, but isn’t mentioned in the instructions or the provided example, so we overlooked it in our first calculation. The correct longitude formula would be:
Recalling the “East is + and West is -” reminder on the compass, we get a longitude of 112 degrees West. This seems pretty close to 111.606, but more on that later.
To determine latitude with the sun compass, you have to measure the angle of the sun, another substantial task that requires more instructions and pendulum-dangling. Then you need to check declination on the chart and calculate the result of a second formula. Here’s what ours worked out to:
This positive value indicates 33 degrees North. After plugging our actual location into an online GPS distance calculator, the difference between our actual GPS coordinates (pulled from a GPS app with 7 decimal places) and the Sun Compass’s result worked out to an error of roughly 26.1 miles. That’s within the device’s claimed accuracy range of 50 kilometers (31 miles).
Conclusions
The African Sun Compass is a surprisingly capable device. It’s a disc of bamboo with a string through it — no electronics, GPS chip, or even a measly magnet — yet it still manages to act as a self-contained navigational system that works almost anywhere the sun is visible. We were able to determine True North, chart courses to landmarks, and even calculate our latitude and longitude with reasonable accuracy. That’s a seriously impressive feat.
However, we approach all survival tools from a practical standpoint, and this is where the African Sun Compass begins to show its flaws. Would we rely on it in a life-and-death situation? Yes, but only if no modern navigational tools were available. We say this for the following reasons:
Complexity. The Sun Compass is far from idiot-proof. While the instructions are helpful and detailed, you’d certainly struggle to use this tool without reading (and re-reading, and re-re-reading) those instructions. Also, the instructions are only offered in digital form. You’ll need to read them on a computer/smartphone, or print the PDF files yourself. A portable pocket-sized instruction booklet would’ve been a godsend.
As we learned firsthand, there are many points at which values can be misread or miscalculated, potentially throwing off your orientation or position. We did our best to remain patient while using the compass, but it definitely tried that patience at times — we can only imagine how frustrating it would be in a true survival situation, suffering from hypothermia, dehydration, or physical injury.
Reliability. Unlike a magnetic compass or GPS, the Sun Compass can only be used outdoors during the day and in reasonably clear weather. If fog, clouds, or a dense forest canopy obscures the sun, you lose your ability to navigate.
Taking readings requires you to stop moving, pull the line taut, measure a shadow, and in some cases do some mental algebra. The compass’s use changes from morning to afternoon, and it also requires re-calibration at least once a week to maintain accuracy.
Geographic position is also an important variable. If you live in an area that ever gets less than 7 hours of sun per day, such as Alaska, northern Canada, or Scandinavia, the Sun Compass will be rendered ineffective during winter months. And if you’re in the tropics — such as Central America, Southeast Asia, or (ironically) most of Africa — your relative solar hemisphere may change throughout the year, changing how the compass must be used.
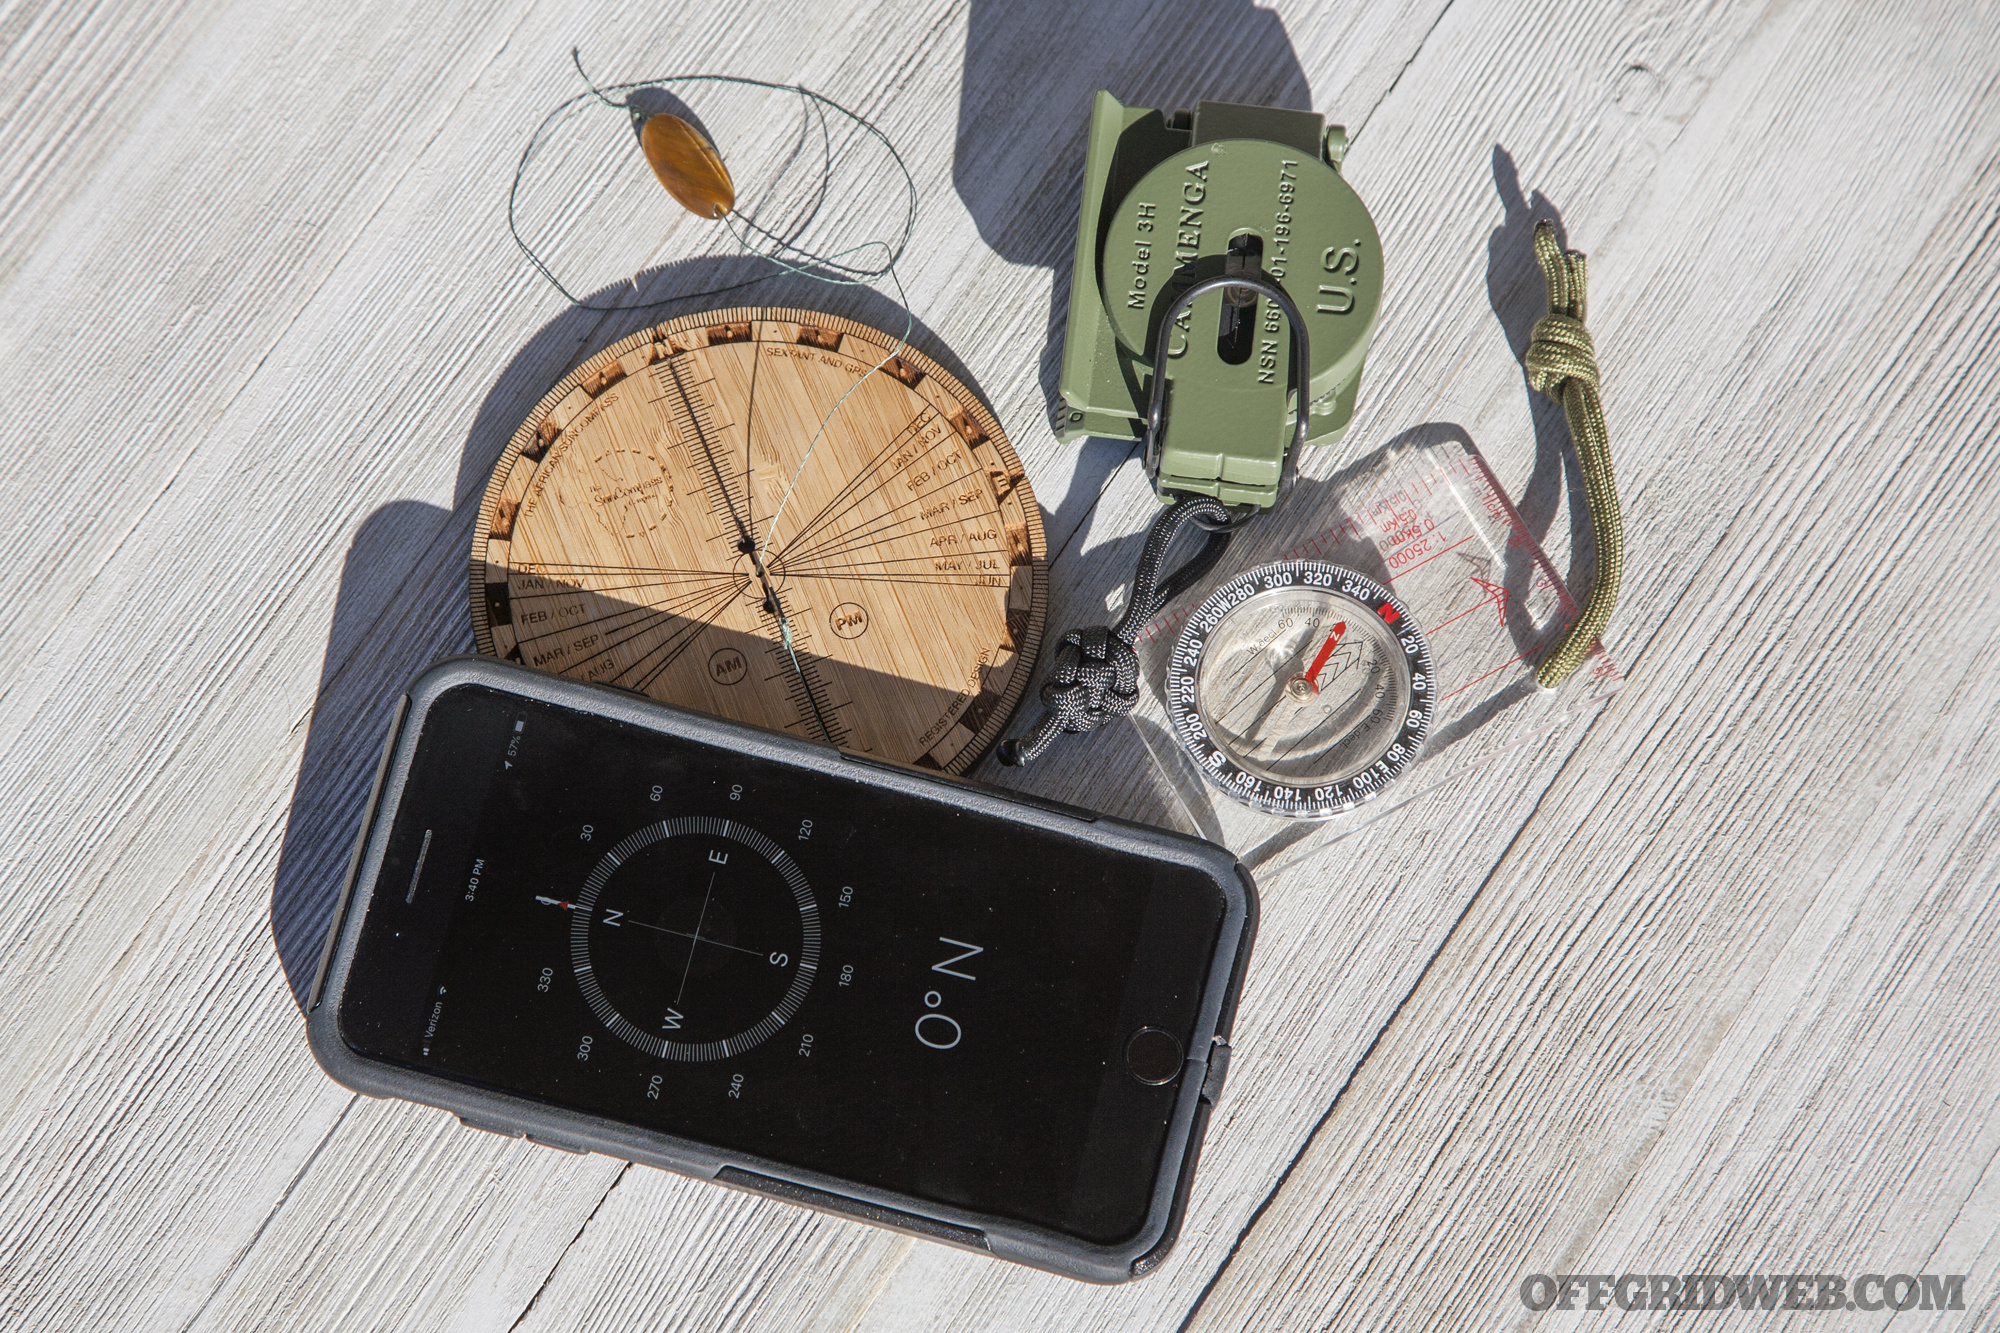
Cost. The Sun Compass is currently available for 899 South African Rand, which currently equates to about $66 USD. You can get a very respectable Silva or Suunto magnetic compass for that kind of money — or several cheaper compasses, if you want backup options.
That said, the African Sun Compass is a great tool to have in your toolbox, and a fun challenge to undertake. It teaches you to truly delve into precise solar navigation, rather than shoving a stick in the ground and using it to guesstimate where North is. If you invest the time it takes to master this tool, you’ll become a more knowledgeable and prepared person — even if you still rely on your GPS device or magnetic compass in 99.9% of situations.
For more information on the African Sun Compass, go to AfricanSunCompass.com.
UPDATE 2/18/19: After reading our article, Timm reached out to thank us for the feedback, and let us know he’s been making revisions to the Sun Compass to address some of our concerns. Specifically, he has made the following changes:
24 hour time format is now mentioned in the instructions
The AM / PM issue is solved in the front face design
The numbering on the navigation instructions has been fixed to have the seventh step and not jump to eight
We’re glad to hear that the Sun Compass is improving, and we commend Timm for being so open to user feedback.
Disclaimer: Check local codes on composting before attempting to create your own to ensure you’re not inadvertently violating any laws.
Whether you’d like to grow your own veggies for fun at your off-grid homestead or you’re preparing for a long drawn-out crisis that’d require the ability to harvest fresh produce for several seasons, you’ll have many problems to surmount. One of the most glaring issues is how to fertilize those crops when the Miracle-Gro runs out. Our forebears grew their own food without the help of any synthetic products from a garden center and in an ecologically friendly way.
You too can sustainably create much of the nourishment that your survival garden will need. Feed the plants that feed you, with the simple process of composting.
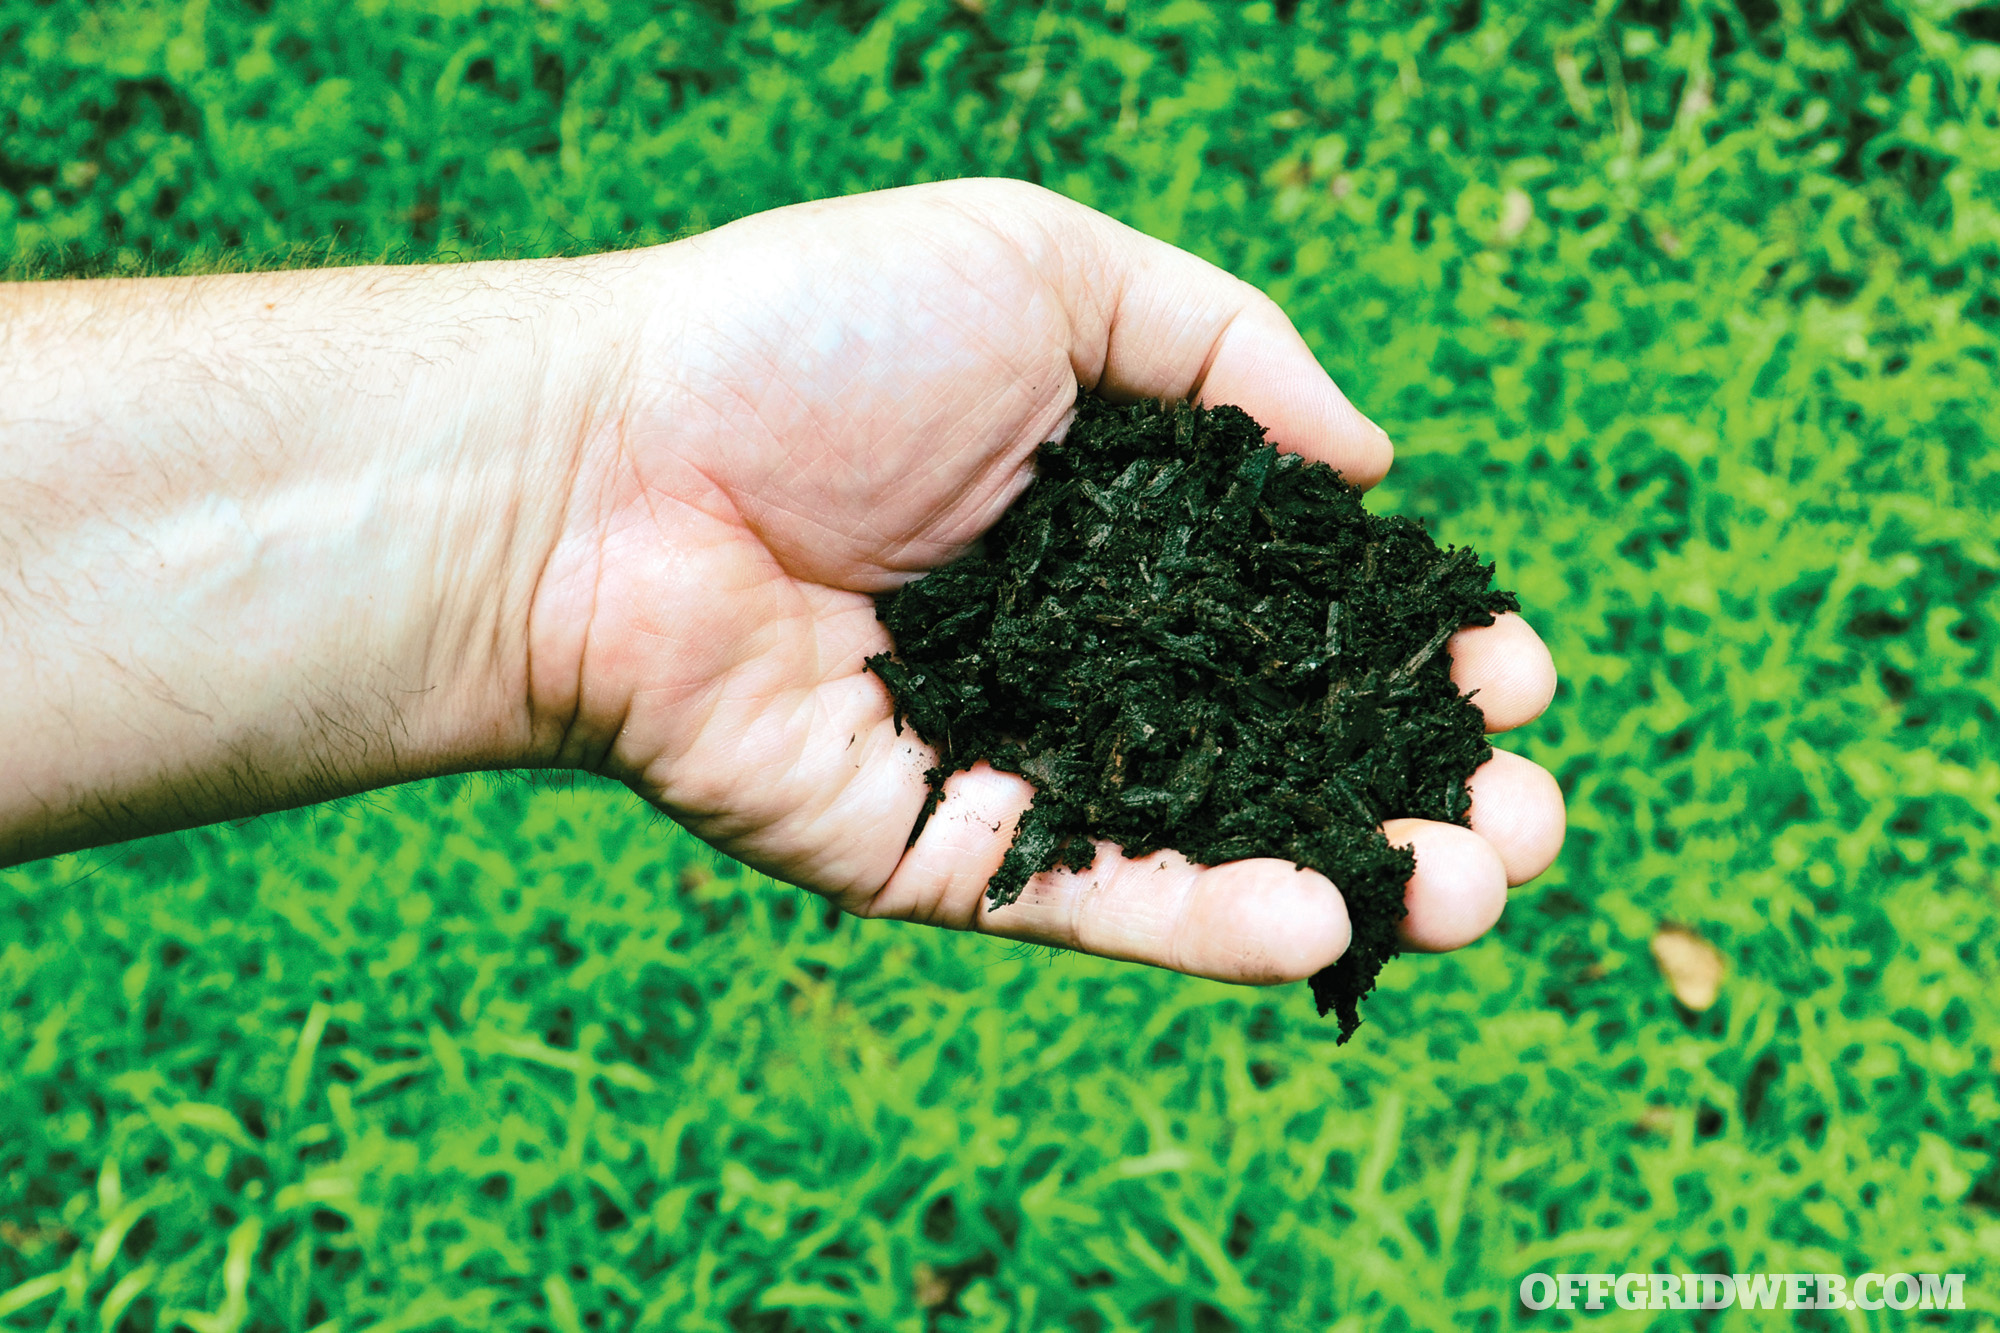
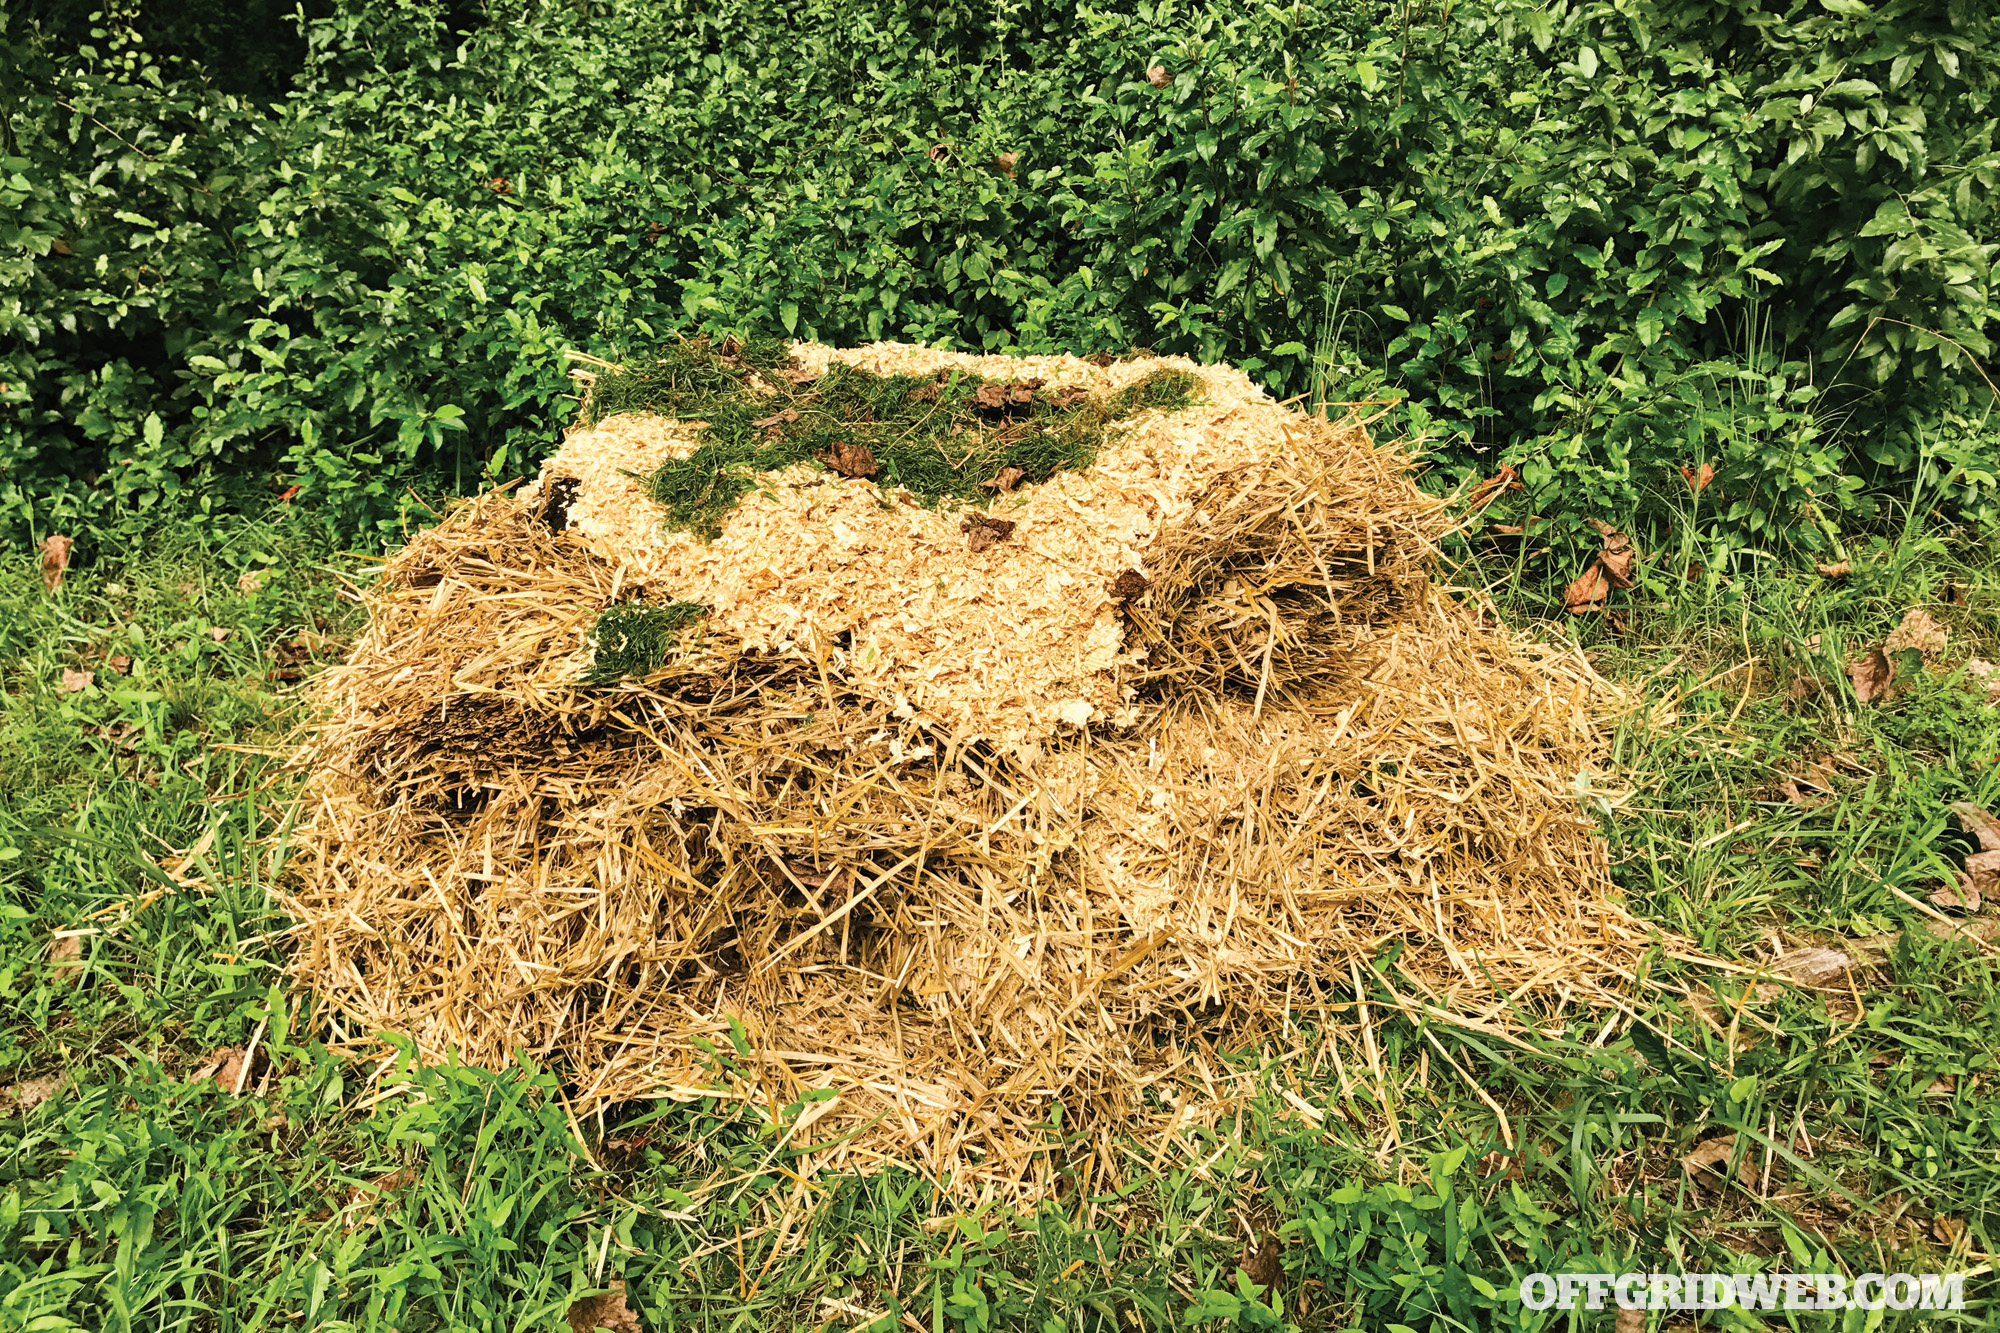
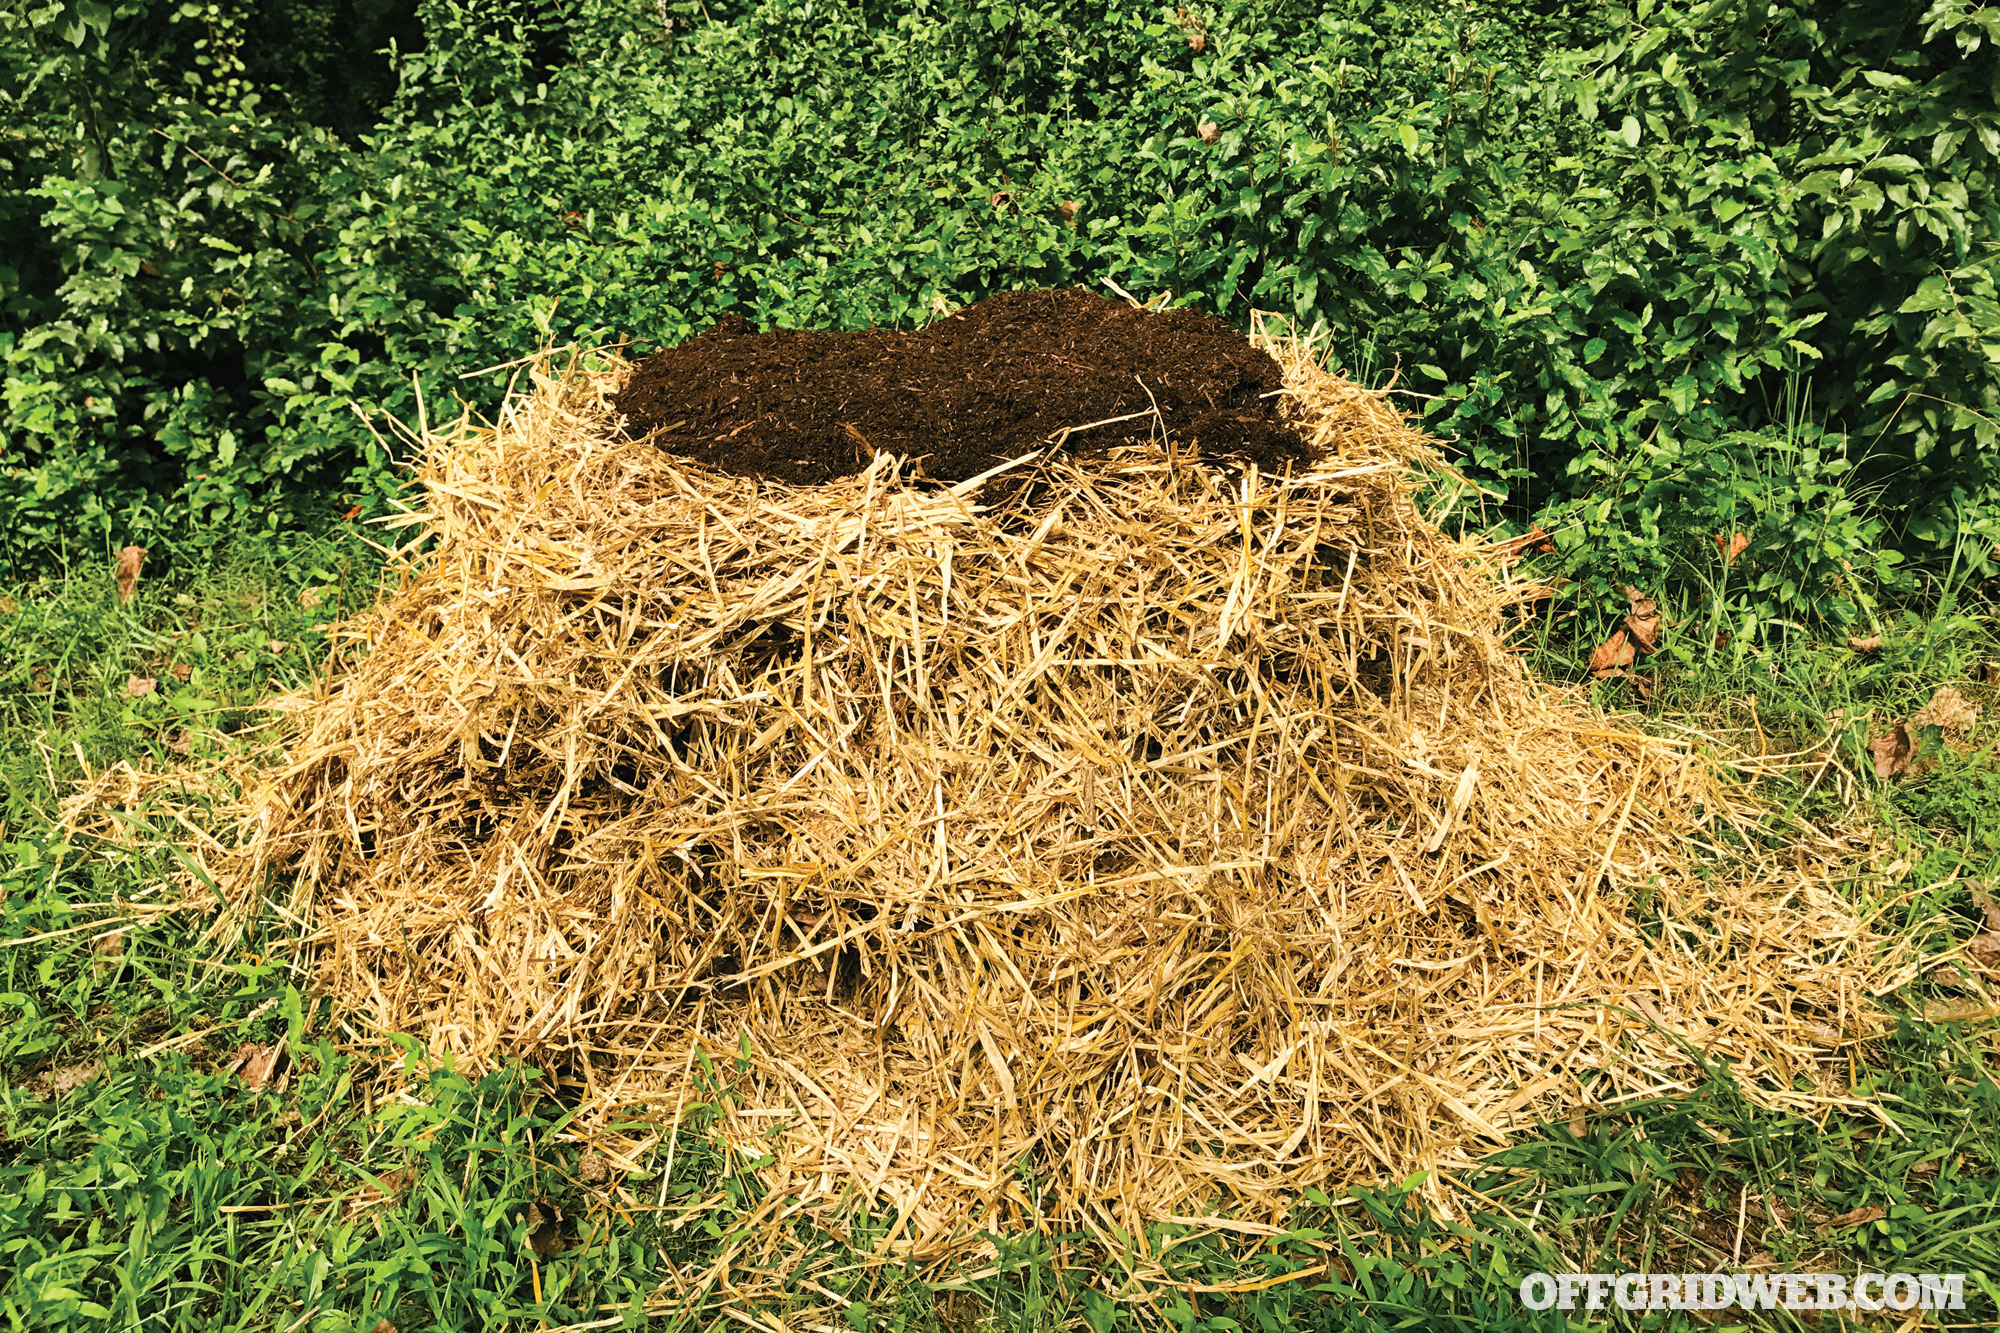
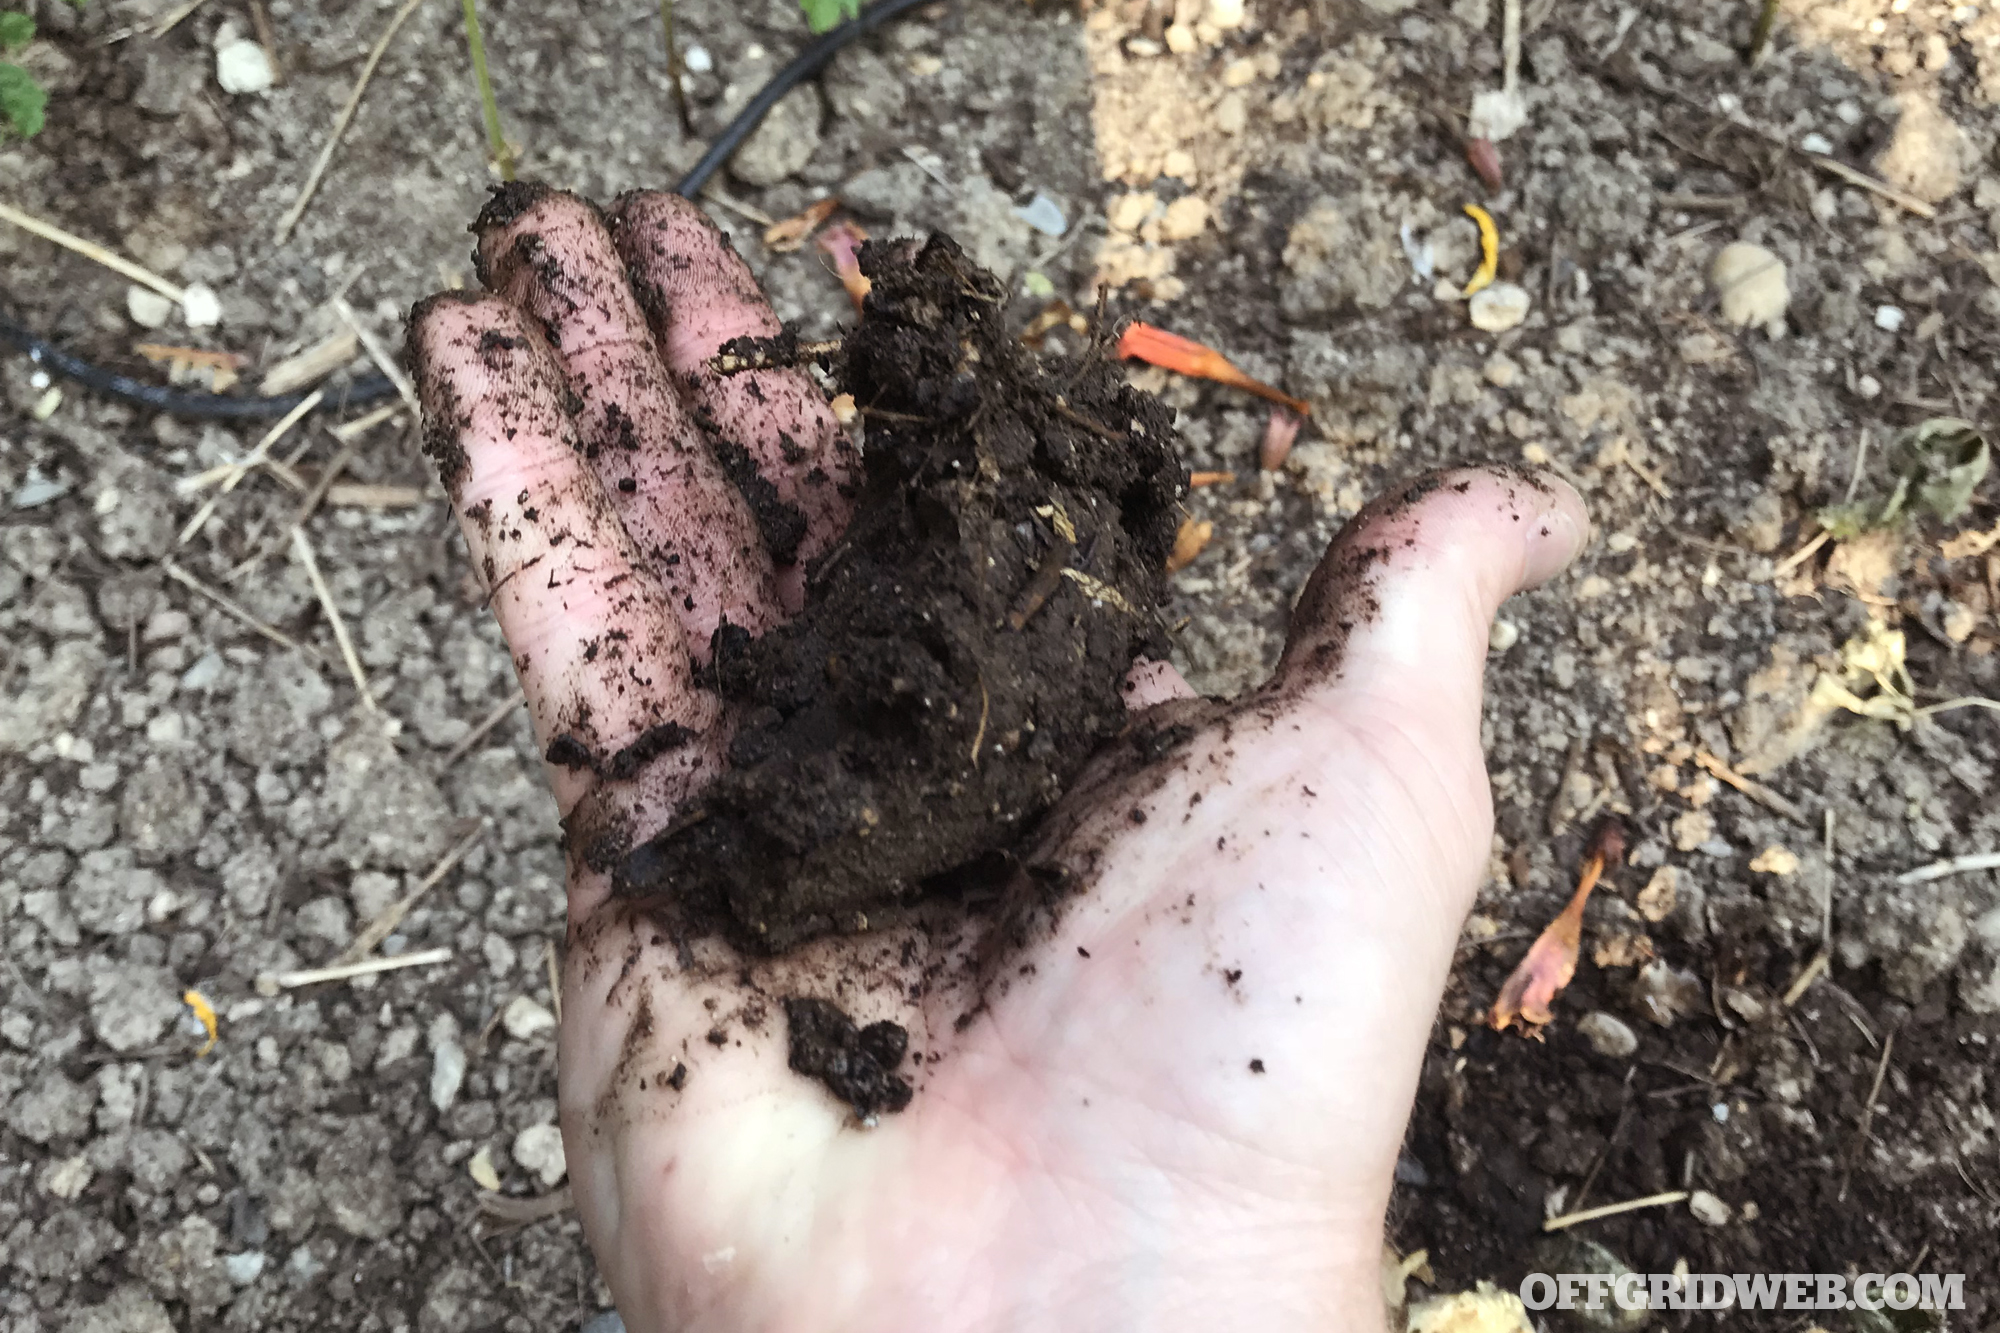
You can think of composting as “managed rot.” This is the procedure of collecting plant material (and possibly some animal materials) and assisting the decay of this organic matter so that it can be used as a fertilizer and soil conditioner. The act of composting creates rich plant food, while simultaneously addressing some waste disposal issues.
The finished compost provides nitrogen (for healthy growth of stems and leaves) and phosphorus (which is needed for flowers and fruit) to your plants. In addition to fertilization, compost allows sandy soils to hold moisture longer, breaking up dense clay soil for better drainage and easier root growth. Plants slowly make natural compost (humus) as they die and return to the soil, but when we jump in to help, we can make it happen a lot faster.
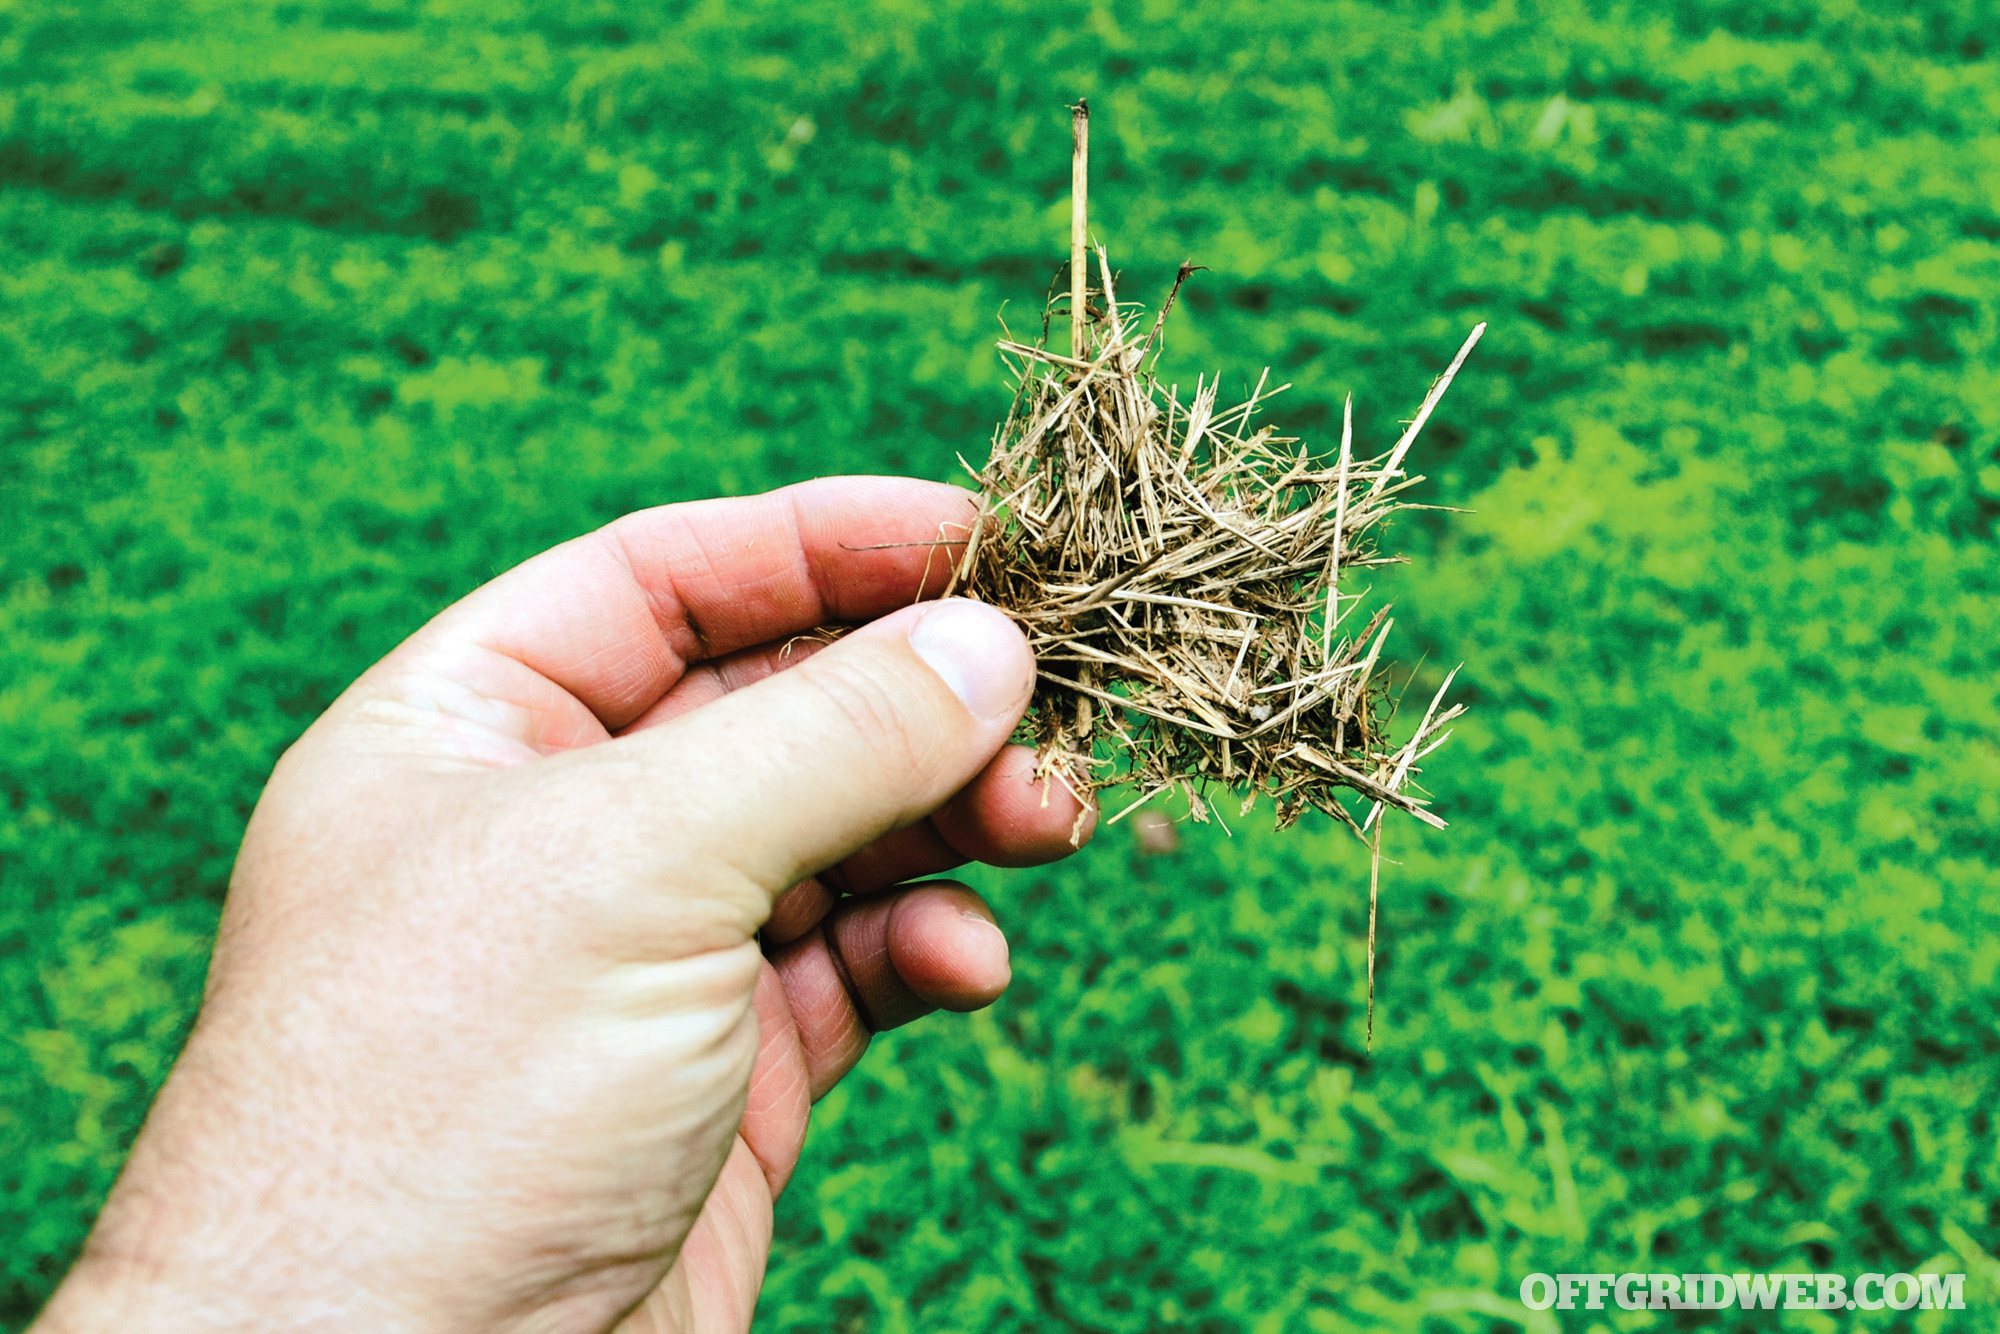
Learn the Basics
Composting can be practiced in different ways, but the most basic system is a quick-and-dirty compost pile on the ground. The pile can be any size, though tiny ones don’t break down very quickly and may not heat up enough to kill weed seeds. Huge piles can also be a challenge, as they’re hard to mix and aerate by hand. A pile that’s about 3 or 4 feet tall (and just as wide) is a good size for most gardens. Once your waste items are placed in a pile, watered, and blended, the pile begins to heat up, and the organic materials are broken down by fungus, worms, bacteria, and many other soil-borne organisms.
Sure, decomposition will happen even without our involvement — but by keeping the pile as damp as a “wrung out sponge” and by turning the materials to add oxygen, we can drastically speed up the process. The change from lawn waste and food scraps into rich humus (a building block for productive soil) can happen in several months, rather than several years.
Gather Your Materials
So what can be used for composting? The bulk of your pile should be carbon-rich plant material. From your outdoor surroundings, you can use straw, wood sawdust, spoiled hay, leaves, dried grass clippings (not the fresh green ones, wait until they dry and change color to throw those in), wood shavings, shredded tree bark and twigs, corn cobs, seaweed, pine needles, and similar materials. From home, you can add coffee grounds, crushed eggshells, rotten vegetables, fruit and veggie peelings, spent tea bags, shredded brown cardboard, and other plant-based non-toxic waste. A simple bucket with a lid is all you need to collect your compost scraps, prior to adding it to the pile.
You could add human, cat, and dog feces, if you had no other place to deposit this nasty stuff, but be warned. This waste can transmit various diseases to humans, and your finished compost that contains these wastes should be aged for at least one year before use so that disease-causing organisms can die off. Yes, you heard that right. A compost that contains feces, bones, blood, etc., should be one year old before use, especially on crops that would be eaten raw (like lettuce). You don’t, however, need to age the stuff, then add it to compost, then age the compost as well.
To really kick-start your pile, add some nutrient-dense items to the mix. Bone meal and blood meal are vile yet energetic compost boosters. Both are common products available for purchase in well-stocked garden centers, heat treated for safety. To make your own, you could crush fresh or dried bones with a hammer, or dry out fresh blood on a plastic tarp to make blood flakes. Wear disposable gloves and a mask for safety while handling. These DIY fertilizers shouldn’t be stored for long, and ideally, the bone chips and blood flakes should be added to compost when finished.
Dried herbivore dung is great too. Cow, horse, buffalo, and llama manure can be easily collected once it has dried, and blended into the pile for great benefit. Finally, add some loose topsoil to the pile. This loads up your compost with beneficial organisms. Much like human and other fecal matter, drying the scat is no guarantee of safety. Bacteria like E. coli and other pathogens can live for some time in dried dung. Omnivore, carnivore, and human manure are the most likely to harbor pathogens and continue harboring them for months.
You may want a large bucket to hold some of the organic material until you’ve collected enough.
Skip These Scraps
All plant and animal material eventually returns to the dirt, but that doesn’t mean you should indiscriminately toss the following things into your compost.
Thick Stuff: Chunks of wood, branches, and other large materials will take a long time to break down. Chop or shred them into small bits (less than ¼-inch thick) to hasten the composting process. For those with a wood chipper, woody materials can be chopped to a perfect size with little effort. If you lack this mechanical marvel, using a machete with a stump as a chopping block is a non-mechanized way of breaking down pieces.
Sick and Buggy Plants: Your compost may get very hot, but it may not get hot enough to kill the eggs of insect pests or the organisms that can sicken your vegetables (like fungal plant diseases). When your vegetables or other plants die from pests or illness, burn them instead of composting them.
Meat and Grease: A few bare bones or empty oyster shells in the pile are fine; they add calcium, phosphorus, and many other vital minerals. Just crush them with a hammer before adding them. Skip the nastier stuff, though. Rotting meat, eggs, and cheese can draw scavengers and propagate dangerous bacteria. And find some other use for spent cooking oils and rancid animal fat. They’re very slow to decompose. Use the fat for grease lamps to provide lighting. Burning rancid grease doesn’t smell great, but it does offer a good bit of light. That’s a topic for another article.
Weeds and Seeds: If you don’t want it growing in your garden, don’t plant it in your compost! Even a hot compost pile may not kill the hardiest weed seeds on the edge of the mound.
Weird Paper: Ordinary pulp paper can certainly be composted, though other papery products aren’t desirable. Glossy magazine paper won’t add anything nourishing to your compost. And waxed paper and cardboard (like milk cartons) will take an unduly long time to break down.
Grab Some Tools
A simple polyleaf rake and shovel are two of the only tools you’ll need for composting.
There aren’t many tools needed to accomplish the process of composting. You’ll need a rake to gather bulk materials and some way to move the material to your pile. This could be a wheelbarrow, a “lawn and leaf” trash bag, or a tarp to drag it across the ground. A shovel is a handy way to turn and aerate the pile. You’ll need a water hose or buckets of water to dampen the pile. You may also need a chopping block and machete if you’re planning to compost a lot of sticks, cornstalks, or other coarse material. That’s about it!
Follow The Steps
Now that you have a rough idea of the process and right materials, follow these simple steps to composting success!
STEP 1: Plan it all out. Determine where you’ll put your compost pile, what you’ll be composting, and how you’ll water the pile.
STEP 2: Gather your tools and materials. Chop up any coarse materials like twigs and branches on a stump with a machete.
STEP 3: Put down 6 to 12 inches of compostable material, mix in a little rich dark topsoil dirt, and water it. Top it with high-nutrient material like dried herbivore manure, bone meal, eggshells, and similar things. Add another 6 to 12 inches of material with a little dirt, water it, and spike it with more compost additives. Repeat until your pile is at least 3 feet tall and just as wide.
STEP 4: Wait a few days and check the pile for heat and moisture. A good pile will start to throw off heat after a few days. Weed seeds are killed when the pile reaches 130 to 150 degrees F, though a frequently turned pile can get even hotter than that! Water the pile if it feels dry. It should be damp, for best results. To test compost pile temperature, large thermometers are available from garden supply companies, or you can pull open the pile to feel the heat. Be careful, it could be as hot as scalding tap water!
STEP 5: Use a shovel to “turn” the pile over, stirring it up to add more oxygen. Do this at least once a week, but twice a week is even better (especially in the beginning). Water the pile as needed.
STEP 6: Keep turning your pile until it resembles dark-colored dirt. This is usually a few months in warmer weather, or a few seasons in cooler weather. Use the compost when it’s finished or save it for later. It’ll keep, so there’s no rush.
Don’t get overzealous with your compost size when first trying out the process. Start with a manageable size as outlined in this article for best results.
Know the Health Risks
Even without incorporating human and animal excrement into your compost pile, it can still harbor some harmful organisms.
Tetanus is a common disease that attacks the human nervous system. The culprit is a simple bacterium that can be found in dirt and compost. It typically enters the body through open wounds (like cuts, scrapes, scratches, and yes, via rusty metal). Prevent problems by keeping up-to-date with your tetanus immunizations and keep any wounds thoroughly covered when working with your garden or compost.
Aspergillosis is a lung infection caused by a fungus that thrives in decaying plant material. A healthy immune system is usually enough to protect us from this organism, though the disease did kill a British gardener after he inhaled a large amount of compost dust. Prevent this ailment by wearing a dust mask around your compost and spraying the compost with water if it’s particularly moldy and dusty.
Legionnaire’s Disease can present as a respiratory infection caused by a bacterium known as legionella. Usually associated with tainted water, Legionnaire’s Disease can also be contracted by breathing in compost dust. Wear a mask to prevent inhalation.
Paronychia is a localized skin infection that occurs around fingernails and toenails after prolonged exposure to soil and compost. Symptoms include tenderness of the infected area, pain, and throbbing. Wear clean, dry gloves, and footwear to protect yourself and wash up after playing in the garden.
Compost Troubleshooting
When you’re trying any new skill, it’s common to have questions and feel uncertain if things are going correctly. Here are two typical problems and their solutions.
It really stinks! The natural odors of decomposing plants aren’t usually that offensive, but when your compost pile smells like a fetid bog, you’ve got a problem. A compost pile that reeks like a septic tank may be the result of being too wet. For example, if your pile has been soaked by weeks of rain, cover the pile to keep it drier. And if the stench is specifically reminiscent of rotten eggs, your compost has likely gone anaerobic. This means that anaerobic organisms (critters that don’t need oxygen) have become the majority, and their byproduct is egg-scented hydrogen sulfide. Turn the pile more often to incorporate more oxygen and restore the balance of organisms.
Nothing is happening: Compost can take its own sweet time, particularly when it’s too dry or your composition is off. For those making compost in an arid climate or those who are rationing water, try to come up with more moisture to add to your pile. Remember, it should be as wet as a “wrung out” sponge. If your pile has “stalled out,” add more material and start it again. Make sure to add more high-nitrogen material this time around. Products like blood meal, cottonseed meal, and corn gluten meal can kick-start the pile (as can dry dog food). It’s also possible that you don’t have enough micro-organisms. If the pile is turned often, wet enough, and you have the proper ratios of materials, try adding micro-organisms in the form of an inoculant, fresh finished compost, or rich top soil.
5 False Assumptions
While there are many foolproof aspects to composting, there are a few misconceptions that people have about composting.
You Have to Buy Some Kind of Container or Tumbler: Nope. These products are handy for small backyards and communities with HOAs that are “anti-compost pile.” But making compost on the ground is the cheapest and easiest way to do it.
Composting is Complicated: Hardly. Letting plant material rot is as easy as falling off a log. Even if you do every step wrong, you can’t stop your dead plant material from decomposing.
Don’t Let it Touch the Ground: This is dead wrong. Your pile should be on the ground so that the natural composting organisms can spread up into it from the soil. Never set up your compost on plastic sheeting, on top of wood pallets or in other ways that isolate your piles from the ground.
You Can’t Compost In Winter: That’s not quite true. Well-built piles make their own heat, and as long as the weather isn’t too severe, they’ll keep cooking through the winter.
Composting Draws Nuisance Animals: Yes, it’s possible, but unlikely if you do it right. Focus on vegetable scraps, leaves, grass, and yard waste. Skip the meat and dairy products in your pile. These elements can draw rodents, raccoons, stray cats, and plenty of other marauders.
Add Some Worms
By keeping your pile in contact with the ground, the local native worm population will be able to climb up into your compost, eat some of the materials and enrich the compost with their droppings (usually referred to as “castings”). There’s even a name for this practice. It’s called vermicomposting. You can also purchase a species of worms that can aggressively eat your plant waste. Nicknamed “red wigglers,” red worms, and manure worms, the species is scientifically known as Eisenia foetida. These crimson crawlers thrive between 60 and 70 degrees F, and when healthy, can digest about ¾ of their body weight in plant material each day.
These special worms can be purchased from garden supply companies and added directly to cooler compost piles in mild climates. You can also create your own “worm farm” indoors by building or buying a specialized habitat container. Once settled into a new worm bin, your wigglers will feed, breed, lay eggs, and multiply. After the food scraps and bedding material have turned into rich dark dirt, you can use it to top-dress indoor plants or outdoor veggies. It’s also a great additive to potting soil and compost tea. You could even cook and eat the worms themselves, if your situation got really bad.
Conclusion
It’s been said that good things come to those who wait, and this is definitely the case when we patiently wait for our compost payday. After a host of microscopic miners dig through a heap of plant refuse and convert it into rich humus, the nutrients will be unlocked and your vegetables can receive the full benefit of that dark organic matter. This should be the most important crop you produce — not vegetables, but better dirt!
Tools frequently separate those who can’t from those who can. Those who fancy themselves as self-reliant and prepared truly aren’t unless they have an assortment of basic tools to work with and the knowledge to use them. Whereas many take the low-cost disposable option, those of us bent on preparedness should choose durable, reliable, and repairable gear — this applies to items in your home, your vehicle, and your bug-out bag. Everything we do for preparedness is predicated on the belief that one day we may not be able to easily replace many of the items that are often taken for granted or have them serviced by an outside technician.
While an assortment of basic tools is critical, some jobs require tools that are more specialized. Many times, a specialty tool can save hours of needless work, such as removal of other parts to get at a fastener in an inaccessible area. Sometimes a bolt is just plain stuck or was installed with so much torque it may be difficult or impossible to remove it with hand tools. And sometimes power tools or air tools that we’d normally rely on won’t be feasible due to lack of power. Certain specialty tools can help overcome the lack of power in an emergency. Here we list and discuss a few you may not know about. There are many brands and types, but we’ll focus on a handful of our favorites.
1. Torque Multiplier
X-4 Tool (Various)
Common Use Removal of extremely tight fasteners without the aid of power tools
A torque multiplier, as the name implies, is a hand tool that when utilized with a normal ratchet can substantially increase the amount of force applied to a fastener. The amount depends on the gear ratio of the torque multiplier. The example shown is a 4X multiplier. What does this mean in real-world terms? If an individual can apply 250 foot-pounds of torque with a normal ratchet, the same person could apply 1,000 foot-pounds of torque with the aid of the torque multiplier.
The torque multiplier can make quick and easy work of lug nuts on large trucks or military vehicles and can loosen or tighten stubborn fasteners. This could likely only be otherwise accomplished through the use of power tools or an unwieldy large breaker bar.
2. Low-Profile Sockets and Ratchets
Snap-on 10 pc 3/8” Drive 6-Point Metric Flank Drive Low-Profile Ratchet/Socket Set (8, 10, 12–18 mm)
Frequently, a fastener is in a spot with limited access — especially in automotive applications. Standard sets of sockets and ratchets are often too long to fit into a location you may really need to get to. If your tool can’t reach the work, you may need to remove additional parts just to free up space, which only increases the amount of time you have to spend on the job.
Low-profile sockets and ratchets are made to get to those limited-access fasteners, potentially helping you avoid a lot of extra work. These tools are about half the height of standard sets, allowing you to get into those hard-to-reach areas.
3. Hose and General-Use Picks
Snap-on Set, Radiator Hose Pick, Soft Grip, 6 pc
Common Use Removal of stuck hoses for repair or replacement
After years of use, hoses (such as those on a car’s radiator) can often be stuck firmly in place. These picks are used to separate the hose from its connector without damaging either. Without hose picks, people often try to loosen the hose with channel lock pliers, which can lead to damaging not only the hose, but potentially other hard-to-replace parts, such as a radiator end tank.
The picks are used by loosening the hose clamps and sliding the tip between the hose and the connector/hose barb. It can then be worked around the circumference of the hose to lift it from the barb. The pick can also be used to help pry it off the barb. Like many tools, picks can be multi-use; examples include scraping, retrieving lost tools or parts, and removing old gaskets.
General-use picks can be utilized in applications where E-clips, split rings, O-rings, and cleaning or debris removal are required. They come in a variety of sizes and shapes, and are invaluable once you have them. They’re also super handy for cleaning guns or installing small parts.
4. Service or Thin Wrenches
Snap-on 5 pc SAE 15° Offset Low Torque Slimline Open End Wrench Set (7/16–1”)
Common Use Low access / small wrench flat fasteners
Service wrenches are thin in profile compared to standard wrenches, allowing them to work with very small wrench flats, such as those found on bicycles and muzzle devices on firearms. They’re sometimes referred to as “bicycle” wrenches. They’re also very handy when working in limited-access areas — for example, close to a vehicle firewall.
One application we’ve found them very useful for is holding a studded fastener with a ground wire attached to a nut, such as frequently encountered on intake manifolds. Using the service wrench prevents the wire from getting broken or mangled. We also use them frequently on muzzle devices with very small wrench flats and minimal clearance next to a barrel.
Universal sockets and extensions are named for their “universal” joint. The U-joint on these tools allows them to be used at an angle, for locations where a straight approach simply isn’t possible. These are also often referred to as “wobbly” sockets. Universal sockets are available in all the usual drive sizes, in six- and 12-point configurations, deep and shallow versions, and versions for use with impact guns. You might find one or two of these in a standard hardware store ratchet set, but they’re so valuable and versatile that it’s always worth expanding your collection.
6. Slide Hammer
Snap-on 8-Way and 10-Way Slide Hammer Puller Sets
Common Use Pulling seals, bearings, axles, and hubs
A slide hammer allows its user to apply hammer force more effectively to pull an item rather than push it. An example would be to remove a wheel bearing or its race without damage. It’s extremely useful where prying on an object to remove it isn’t possible. Anytime you need to apply force to remove something you have no rear access to, a slide hammer is a great option.
We use them for removing grease seals without damage to axles and hubs. There are even slide hammers to break tire beads off of wheel rims in a pinch. It’s a very useful tool that has little to no substitute when you absolutely need one.
7. Cordless Impact Gun
Milwaukee Tool ½-inch Cordless Impact Wrench
Common Use Loosening or quickly tightening fasteners
Modern high-torque, lithium-powered, rechargeable, electric impact guns are becoming more common, but unless you frequently work on cars, you might not own one yet. They’re an incredible tool and can replace an air compressor, hoses, and pneumatic impact guns. Better yet, they frequently meet or exceed the torque ratings of air-powered versions, making tire changes and dealing with fasteners with high-torque specs easy. But they’re not limited to the garage. This particular tool features 1,400 foot-pounds of removal force and 1,000 foot-pounds of torque for tightening.
It’s often used for fast lug nut removal and installation, but any work where there are many high-torque fasteners will benefit from it. The 3/4-inch air-powered impacts can be used for large military vehicle lug nuts, but this 1/2-inch drive cordless version has enough power to make quick work of those, too. It’s a very worthy addition to a preparedness toolkit, along with provisions to keep it charged. We haven’t yet met a fastener that this tool couldn’t handle in the normal course of operations.
Six- and twelve-point sockets are the norm. But what about four-point fasteners, such as those found on many drain plugs? Eight-point sockets are primarily used on these type of fasteners. A stuck drain plug can be difficult to remove with conventional open-end wrenches or adjustable wrenches without rounding off the fastener. An eight-point socket is made for this purpose.
Although rare, there are eight-point fasteners as well. Should you encounter one, good luck removing it without one of these sockets. If you have to scavenge gear lube from abandoned vehicles for heat or fuel, an eight-point socket may be a better way than ventilating the oil pan with a .45 ACP. They’re very common on differentials and transfer cases.
In a grid-down situation, batteries take on a whole new importance. There are specific tools to help install, remove, and maintain wet-cell lead acid DC batteries that can make those tasks much easier. Batteries can be the difference between life and death, so having tools to work on them just makes sense. The basics are angle-nose pliers, side battery terminal cleaner, cable clamp pliers, a cable clamp puller, and a battery terminal cleaner.
Angle-nose pliers hold the square bolt head so you can loosen or tighten the nut on the terminal clamp. Side terminal cleaner cleans the terminal connection on side post batteries, which are flat and frequently hard to get to. Cable clamp pliers spread terminal leads for installation without deforming or damaging them. Cable clamp pullers remove stuck terminal leads without damaging them or the terminal posts. Terminal posts are easy to break if you aren’t careful. Battery terminal cleaners clean terminal posts and ensure a good connection, which is probably the most common problem with batteries in general. They also reshape terminals and make a better seal against corrosion.
Also pictured are a load tester and a specific gravity tester. Diagnostic tools such as these are important because they can tell you if you have a viable battery. The load tester is used by attaching the clamps to the appropriate terminal of a fully charged battery, then the tester will apply a load and tell you whether the battery will hold a load or not on its meter. If it reads bad on the load tester, it’s time for a new battery. The specific gravity tester can also be used to determine if a battery is viable by opening the battery and drawing the electrolyte/acid into the tester itself. The tester has a float and, based on where the float line is, will tell you individual cell state of charge — a good way to tell if your battery is on its way out.
Brake, air, transmission, power steering, and air-conditioning line fasteners can be difficult to deal with using conventional wrenches. Line wrenches and sockets are slightly open to allow them to pass onto the line being worked on and prevent damage to both line and fastener. They also allow more torque to be used to remove stubborn fasteners. Crows feet and cut-away sockets are designed to help you in limited access areas, which are frequently encountered when dealing with air, water, coolant, and oil lines.
It’s very common to damage line fittings using conventional open-end wrenches or crescent wrenches. Frequently, there might not be a ready replacement or a good way to repair a damaged line in these circumstances. Using the proper tool such as line wrench sockets can prevent additional damage that you’ll need to address. It’s much more difficult to damage these soft fasteners when using the proper tool.
The Swench is a manual impact wrench. It works like a ratchet or torque wrench. When it cams over, a spring-loaded striker is released and impacts the fastener, similar to what happens with an impact gun. This tool helps loosen very large or high-torque fasteners without electric or air power. If you need to change the track on a tank or propellers on an aircraft this is the tool for you. Unfortunately, this power comes with a stratospheric price tag.
12. Clamp Tool
Mayhew Pro Tools 28650 Spring Loaded Hose Clamp Pliers
Common Use Removal or installation of spring type hose clamps
This clamp tool is used to reach into hard-to-access areas and remove or install spring-type hose clamps. It features a long, flexible cable with a hose-plier end that’s actuated by a trigger — when pulled it locks open and releases the clamp. When used to install clamps, the opposite is true.
Spring-type hose clamps have become very common in automotive applications and can be very difficult to address with conventional pliers. This tool allows you to reach and easily remove hose clamps to deal with the underlying issues. It’s an invaluable tool for working on newer automobiles.
This is a really cool socket that addresses the issue of removing threaded studs with minimal to no thread damage. Without this tool, the method commonly used is to tighten two nuts on the stud against one another. When being used, one simply slides the socket over the stud. The tool has a segmented sprag, and when rotational force is applied the sprag grips the stud and removes it or installs it.
Having used both methods, this tool is far more efficient and is just plain cool to use. These types of studs are frequently encountered in almost all automotive applications and are used in places such as timing covers, oil pans, water pumps, and so forth.