Video: Cooking & Eating Yucca

The yucca plant can be found throughout much of the United States, but it's most plentiful in the southwest. If you live in the region, you've almost certainly seen it. Its pointed green leaves, tall stalks, and towering clusters of white flowers are easy to recognize, even for casual hikers and backpackers.

Eating yucca plant wild edible food desert survival 3

As we've mentioned in the past, yucca provides a wide array of survival resources, including cordage, tinder, soap, and even an extract that can be used to stun fish. Despite how its name might sound, yucca is also a source of several tasty wild edibles. During the spring, the blossoms and stalks are ripe and ready to eat.

Although yucca blossoms can be eaten raw, they can also be cooked to soften the texture and improve flavor. The plant's young green stalks should be cooked before eating, but this is as simple as roasting them directly on hot coals. Always a good source of info on survival in the southwest, YouTuber Bob Hansler recently posted a video that shows how to harvest and prepare yucca stalks and blossoms:

Hansler describes the flavor of the cooked petals to be relatively mild like cabbage or spinach, picking up the taste of the butter they were cooked in. As for the stalk, he says it's surprisingly sweet, much like sweet potato or butternut squash. Whether you're in a true survival situation or simply looking to supplement the food you already have in the backcountry, yucca is a great resource.


Review: Hazard 4 Pillbox Backpack

Living the prepared lifestyle doesn’t always mean leaving your tech behind and living off the land. It’s about being prepared to handle (or prevent) disaster in all aspects of life, including your everyday routine. Whether you’re a nature photographer on the trail or a sniper/observer gathering critical intel for your unit, protecting your equipment is a vital aspect of your mission. The impact from a fall could result in a broken camera lens or optic, leaving you facing a hefty repair bill at best or unable to complete your mission at worst.

Hazard 4 Pillbox backpack camera tech ccw handgun EDC daypack 16

When hauling around high-dollar camera kit or expensive tech gear, we’re typically limited to two options: a heavy, foam-lined hard case, or a soft, padded nylon pack. When stuck with the hard-case option, we usually find ourselves confined to a vehicle, having to leave most of our gear behind when heading out on foot. Opting for the lightweight pack allows us to carry more essential gear, but often leaves us praying that the internal padding is sufficient to keep our equipment in operational condition. Fortunately, Hazard 4 has just expanded our options with their newly released Pillbox Thermocap Photo-CCW Daypack.

About Hazard 4

As a manufacturer of outdoor adventure and extreme sport travel gear, Civilian Lab has spent many years developing and manufacturing hard-use gear. Over the years, a growing number of users have brought their Civilian Lab gear into professional field use. The high demand for tactical versions of that gear led Civilian Lab to introduce the Hazard 4 line of “Progressive Tactical Gear.”

Hazard 4 Pillbox backpack camera tech ccw handgun EDC daypack 5

The Hazard 4 name was inspired by a standard threat-classification index that ranks hazards from Low (1) to High (4). The goal of Hazard 4 is to design gear that will be the “last line of defense” for the user facing extreme adversity, whether it be through environmental, industrial, or man-made factors. To this end, they have taken a progressive approach to their designs.

With a base of operations located in southern California where there is year-round access to mountain snow, dense forest, desert heat, urban congestion, and of course the Pacific Ocean, the Hazard 4 team is able to field-test their products in the most rigorous conditions and adjust as needed to ensure their products are suitable for any environment. The added input of professional end users helps ensure that the most desirable features are incorporated into every Hazard 4 product.

The Pillbox

The Hazard 4 Pillbox is a new tactical pack design consisting of a lightweight, thermoformed, padded hard-shell integrated into a Cordura nylon skin. Although Hazard 4 has previously integrated this hard-shell into components of some of their other packs, this is the first pack built completely around the technology. We had a chance to field-test the Pillbox after SHOT Show, and this experience left us impressed with the overall construction and design concept.

Overall Construction

The Pillbox is divided into three main sections, each lined with silent pull-tab YKK zippers. The outer sidewall is covered with bar-tacked connection points that are both ALICE- and MOLLE-compatible. A padded back panel with air channels provides comfort and airflow when wearing the pack.

The padded shoulder straps are equipped with quick-release buckles and lined with multiple attachment points. The attachment points hold the adjustable sternum strap, giving the wearer full control over height placement. Each shoulder strap also has hook-and-loop retention for channeling a hydration tube, a feature often overlooked even on dedicated bladder carriers.

The removable waist support belt is fully adjustable and comes with Hazard 4’s original locking side release buckle. This unique buckle has a locking lever resembling an AR-15 safety-selector located in the center of the buckle. Placing it in the locked position will prevent any unintentional buckle release.

It might be overkill for the average user, but to those who operate in hazardous conditions and know all too well the crazy things can happen under stress, this locking lever will likely be a welcomed addition.

Camera/Tech Compartment

Hazard 4 Pillbox backpack camera tech ccw handgun EDC daypack 15

The camera compartment features a customizable, internal photo-bag divider system for organizing and protecting camera gear or other fragile items. Those familiar with traditional camera bags with recognize the concept, but notice a significant difference in the quality of the Hazard 4 design. Although we could have used a few more small dividers for improved organization of loose items, the pack configured nicely around our camera, lenses, flash, and accessories.

Laptop/Accessory Compartment

Hazard 4 Pillbox backpack camera tech ccw handgun EDC daypack 6

The laptop compartment, located in front of the camera compartment and directly behind the thermoformed shell, contains an internal padded pouch for housing a laptop or tablet. It’s also appropriately-sized to carry a soft armor panel, like the 11”x14” Spartan Armor Systems Level IIIA panel we threw inside to add some ballistic protection.

Hazard 4 Pillbox backpack camera tech ccw handgun EDC daypack 7

The front padded section of the laptop compartment features an assortment of accessory pockets to hold pens, memory cards, cables, and other small items, as well as a MOLLE-compatible panel covered with back-fill loop-fasteners for accepting a variety of add-ons. An accordion-style divider lies between the hard shell and laptop compartment. This area is perfect for carrying books, files, or large accessories like solar panels or light reflectors. The divider can be disconnected on the inside to allow for full opening of the accessory compartment.

CCW/Hydration Compartment

The rear section of the pack is lined internally to accept hook-fastener-backed attachments. Hazard 4 offers a number of concealed carry attachments (such as the Stick-Up Modular Universal Holster) that can be used to customize the CCW compartment to your liking. Of course, any aftermarket hook-fastener-backed attachment will work with the system, so your options are endless. We used a generic adjustable loop holster to hold a Glock 19.

Hazard 4 Pillbox backpack camera tech ccw handgun EDC daypack 17

The one downfall with the Pillbox’s CCW compartment is the lack of any type of rapid access system. If your only concern is having a convenient place to pack a handgun, then this isn’t an issue. But if your intent is to have a readily accessible, off-body carry option, then this probably isn’t the best choice. You would be better off carrying a hydration system using the built-in hydration hanger. The nice part about the CCW/Hydration compartment is that it is perfectly suitable for housing additional electronics thanks to the generous padding lining the compartment.

External Modularity

The hard shell of the Pillbox has six recessed double grommets for mounting Hazard 4 HardPoint items. HardPoint is a unique series of accessories that bolt into the double grommets to add loops, valves, wire passages, etc.

Hazard 4 Pillbox backpack camera tech ccw handgun EDC daypack 20

For example, the Stop Gap-1 (pictured in the diagram above) can be paired with shock cord or nylon webbing to strap additional gear to the outside of the pack.

Hazard 4 Pillbox backpack camera tech ccw handgun EDC daypack 19

Other accessory designs are in the works, such as the soon-to-be-released HardPoint external LED light. When not housing a HardPoint accessory, the double grommets can be sealed from the inside using the hook-backed covers included with the pack.

Specifications

External Dimensions: 19.7″ L x 12.2″ W x 7.5″ D
Main Compartment: 19.7″ L x 12.2″ W x 3.7″ D
Laptop Compartment: 19.3″ L x 12.” W x 0.6″ D

Hazard 4 Pillbox backpack camera tech ccw handgun EDC daypack 9

Total Capacity: 1800 cu in
Weight: 5 lbs 2.5 oz
Main Materials: Invista 1000D Cordura, PU x2 Water Repellent Coated
MSRP: $200
Website: www.hazard4.com

Final Thoughts

Hazard 4 Pillbox backpack camera tech ccw handgun EDC daypack 2v2

The Hazard 4 Pillbox is one of the best packs we’ve used for the purpose of packing and protecting valuable optics and electronics. Whether you’re on a high-stakes reconnaissance mission or just photographing the local wildlife, the Pillbox provides the ideal blend of protection, function, durability, and comfort to guarantee you won’t break your gear or your back.

About the Author

Microtech SOCOM Alpha knife review Summit in the Sand RECOIL 6

Chad McBroom is the owner of Comprehensive Fighting Systems, a company that offers practical training in armed and unarmed combatives. He has over 30 years of martial arts experience and specializes in edged weapons. He also does a bit of knifemaking himself, a hobby he took up to gain a greater understanding and appreciation of blade craft. Follow him on Instagram @cfs_combat.


Heat on Tap: Cauldryn Fyre Water Bottle Review

Hot water is life — whether on a mundane level, as piping hot coffee keeps people sane and civilized during their everyday routines, or in a survival situation where the ability to sterilize water can keep you alive.

In RECOIL OFFGRID Issue 5, we reviewed a selection of insulated and non-insulated stainless steel water bottles. The best of the insulated bottles did a great job of keeping hot liquids hot and cold liquids cold. But all they can do is maintain temperature as long as possible. The Cauldryn Fyre water bottle takes that a step further by incorporating a heating element at the bottom of its stainless steel, vacuum insulated bottle. You can attach a large rechargeable battery to heat on the go, or dock the bottle on an AC- or DC-powered base and plug it into a wall outlet or cigarette lighter socket in your car or boat.

The One Bottle To Rule Them All?

OFGP-180600-HANDSON-CAULDRYN-7D2_8606.JPG

With a name that Saruman would be proud of, the Cauldryn Fyre aims to do it all. The 16-ounce bottle is vacuum-insulated to maintain temperatures on its own. It’s topped with a screw-on lid with two openings — a small one that flips open to sip from and a larger spout with a threaded cap to pour from. The pour spout also sports a pressure release valve for boil mode. There’s a plastic clip strap that keeps the lid attached to the bottle and also includes a retention loop.

The heating element has two primary modes accessed via two buttons on the bottle: maintain and boil. The former maintains a specified temperature; you can cycle through four temperature ranges — 124-134 degrees, 135-145 degrees, 160-170 degrees, and 194-204 degrees. Initiate the boil mode and the element will stay on until the contents reach the boiling point (212 degrees). The four LEDs on the side of the bottle light up as the temperature reaches 104, 140, 176, and 212 degrees.

Keeping Hot Stuff Kinda Warm and Cold Stuff Kinda Cool

Unfortunately, as an insulated water bottle, the Cauldryn didn’t stack up well against the bottles we tested previously in Issue 5. To test the Cauldryn’s ability to keep its contents hot, we filled it to capacity with 200-degree water. After 12 hours at an ambient temperature in the high 60s, the water had cooled down to 80 degrees, a 120-degree difference. As a point of comparison, in our previous testing, the best-performing bottle from Zojirushi went from 195 degrees to 151 degrees after 12 hours, a loss of just 44 degrees, while the least effective of the products tested fell to 92 degrees, shedding 103 degrees.

For our cold water test, we filled the Cauldryn with 39-degree water. After just 15 hours, the water had warmed to and remained at ambient temperature, which was 65 degrees. In comparison, in our previous testing, the Zojirushi bottle again topped the charts, going from 36 degrees to 50 degrees after 24 hours, in an ambient temperature of 78 degrees. None of the previously tested bottles reached ambient temperature in the 24-hour testing period; the worst bottle crept up to 74 degrees after 24 hours.

Plan Ahead

So, the Cauldryn’s not a particularly good insulated bottle, having performed noticeably worse than the least effective product in our prior roundup. But it has something none of those other bottles have — a heating element. Using that element to maintain temperature turned out to be our favorite application for the Cauldryn, keeping coffee and tea at our preferred temperature all day without any fuss. We appreciated being able to choose between the different temperature options, even enjoying hot soup. The trade-off is that, due to its large battery, the Cauldryn has much lower capacity and weighs much more (a pound or more) than traditional insulated bottles. With the battery attached, it’s awkwardly tall, at over 12 inches.

We also tested the Cauldryn’s boil feature. Untethered, we were able to get two boils out of a fully charged battery. Starting with 16 ounces of 61-degree water, the Cauldryn delivered boiling water as promised, taking 18 minutes to reach 212 degrees with the lid closed. Without the lid, it took 20 minutes and reached 211 degrees before automatically shutting off. We thought this was a rather leisurely pace — until we conducted the next test.

The Cauldryn comes bundled with a handy AC-powered base on which you can dock the bottle. Perhaps our base unit was faulty, but it didn’t work well. Boiling 61-degree water with the Cauldryn plugged into a power outlet took a long time. The tree outside our office window seemed to be growing faster than the water temperature in the bottle. Perhaps taking mercy on us, the Cauldryn finally threw in the towel and shut itself off early at 199 degrees, after 51 torturously long minutes. CIA operatives take note: Waterboarding may no longer be an approved enhanced interrogation technique, but being forced to watch the Cauldryn boil water on its AC-powered base might be a close substitute.

Other Considerations

OFGP-180600-HANDSON-CAULDRYN-OPENER-7D2_8657.JPG

Boiling water takes a lot of energy, so the battery module is quite heavy (1.3 pounds) and boasts a robust 75.5 watt-hour rating. It’s also designed to recharge via a hefty 19-volt, 2-amp power supply. This is no big deal when you have access to AC power or use Cauldryn’s optional DC adapter. However, if you’re out in the field with the bottle and its battery, common portable charging options such as USB power banks or solar chargers won’t charge the battery, even with an (uncommon) USB cable that fits the battery’s thirsty circular plug.

Four LEDs on the battery display its status, and you can also charge other items with the Cauldryn’s battery via two USB ports. Both output 5 volts, with one rated at 1 amp and the other at 2.1 amps. While charging an iPad that regularly pulls up to 1.8 amps from a wall charger, we measured output up to 1.5 amps from the Cauldryn battery.

Some of the Cauldryn’s controls weren’t as user friendly as they could be. The maintain and boil buttons are unlabeled, so you need to remember which is which. The temperature LEDs are also unlabeled, but they’re color coded so it’s easy to get the drift. The 1A and 2A USB charging ports aren’t labeled either. You also need to mind the battery’s power button; we unintentionally actuated it several times. The retention loop arrived broken, but that’s OK because we didn’t like it anyway, as it’s made of plastic and protrudes inconveniently.

OFGP-180600-HANDSON-CAULDRYN-7D2_8632.JPG

With exposed leads on the bottom of the bottle, you need to exercise some care in cleaning the bottle after use. You can’t just dunk it in the sink or throw it in the dishwasher.

There are many superior insulated bottles on the market that are also lighter, smaller, less expensive, and higher-capacity, so we’d suggest you only consider the Cauldryn if you plan to use its heating element frequently. We felt the sweet spot for the Cauldryn was in keeping liquids warm at your exact desired temperature — handy for everyday use or on short outings. However, if you don’t mind losing a little bit of temperature over time, a highly rated insulated bottle would be a cheaper, lighter, and more convenient option. The boiling function consumes so much battery power that we’d reserve it for emergency use when in the field — but it’s a nice capability to have and useful if you have ongoing access to an AC or DC power source. As a survival tool, though, the Cauldryn’s practicality comes up short.

Hot Water Test
Start200°F
2 Hours146°F
4 Hours121°F
8 Hours93°F
12 Hours80°F


Cold Water Test
Start39°F
 4 hours54°F
 8 hours60°F
 12 hours63°F
 15 hours65°F (ambient)

Make & Model
Cauldryn Fyre Mobile

Dimensions
8.25 x 37⁄16 (bottle)
4.25 x 3 3⁄16 (battery)
12 1⁄8 x 3 7⁄16 (attached)

Weight
1 lb. (bottle)
1.3 lb. (battery)
2.3 lb. (total)

MSRP
$130

URL
www.cauldryn.com

More From Issue 25

Don’t miss essential survival insights—sign up for Recoil Offgrid's free newsletter today!

Read articles from the next issue of Recoil Offgrid: Issue 26

Read articles from the previous issue of Recoil Offgrid: Issue 24

Check out our other publications on the web: Recoil | Gun Digest | Blade | RecoilTV | RECOILtv (YouTube)

Editor's Note: This article has been modified from its original version for the web.


The Armored Group Unveils New Terrier LT-79

If you find yourself in a SHTF situation and you decide it's time to bug out, a truck can help you get out of town quickly with all your gear. However, it also makes you a rolling target for anyone who's less prepared than you are. And if the bad guys have guns, you may be in for serious trouble. This is where an armored vehicle with run-flat tires provides a huge advantage.

The Armored Group (TAG) has been designing and manufacturing armored vehicles for military agencies, law enforcement, private businesses, and individual citizens for more than 25 years. Each model produced by the company undergoes testing and certification for ballistic and blast protection, including being subjected to the explosion of more than 40 pounds of TNT.

The Armored Group TAG Terrier LT-79 truck vehicle offroad bugout 2

TAG's latest vehicle is known as the Terrier LT-79. As implied by its name, this platform is designed to be compact, agile, and mobile across rough terrain. The Terrier is based on a reinforced and militarized Toyota VDJ79 chassis, derived from the famously-tough civilian Land Cruiser 70 Series. It features a 4.5L V8 turbo diesel engine and 5-speed manual transmission with an upgraded clutch, stronger axles, heavy duty suspension components, and large 4-piston disc brakes.

The Armored Group TAG Terrier LT-79 truck vehicle offroad bugout 3

The TAG Terrier LT-79 rides on steel wheels and 37-inch Hankook offroad tires fitted with standard run-flat inserts. Ground clearance is 11.4 inches at the lowest point under the differentials; approach angle is 41° and departure angle is 33°. It has a fuel range of just under 500 miles, and thanks to its front and rear HVAC systems, can be operated effectively in temperatures ranging from below zero to a sweltering 130°F.

The standard 3-door body will hold up to eight people, while optional bench seating can bring capacity to 10 people. A roof turret and 5-door body configuration are also available. Payload capacity is 2,200 pounds of passengers and gear.

The Armored Group TAG Terrier LT-79 truck vehicle offroad bugout 1

As for the armor, the Terrier LT-79 can be built to B6 or NIJ Level III in order to withstand 7.62x51mm NATO rifle rounds. Crew compartment protection against Kinetic Energy weapons conforms to STANAG 4569 Level I, meaning it can also withstand blasts from hand grenades and small IEDs. This can be upgraded to Level 2 to withstand land mine explosions. Of course, there's also a huge list of optional extras, including blast-attenuating seats, acoustic deterrent system, smoke grenade launchers, thermal cameras, a remote-controlled weapon station, and overpressure air filtration to protect against chemical weapons.

TAG says the Terrier LT-79 was primarily designed for SWAT teams, law enforcement, and military personnel, but it looks like it'd make a seriously capable bug-out truck for anyone else who manages to get their hands on one. No price is listed on the TAG web site, but the company calls it “economical and budget friendly”. For more info, go to ArmoredCars.com.


Edible Plants & Their Dangerous Doppelgangers

Warning! This article is meant to be an overview and not a detailed guide on identifying and consuming edible plants. Seek guidance from a trained botanist before attempting to eat any plants. Any attempt to consume plants shall solely be at the reader’s risk.

Most of our readers already know that our preference is for fresh meat in the wild during a bug-out or backcountry hiking scenario. And as Green Beret Mykel Hawke noted in Issue 23 of RECOIL OFFGRID, it’s much easier to get life-saving nutrients and energy from animals than it is from plants.

That being said, animals aren’t always available to us. And in a true survival situation we may need to end up foraging for plants in order to scrape by. The problem is that foraging for edible plants, although easier because they can’t run away from you, is complicated by the fact that some plants can harm you and others can kill you. The second issue is that some plants that resemble edible options and look familiar to us can actually be quite harmful if ingested. If you’ve ever seen the movie Into the Wild, this situation was depicted to reflect one of the theories about how Christopher McCandless died.

Wild garlic, also known as Ramson, presents clusters of white flowers.

To help us sort things out, we tracked down professional backpacking and climbing guide Lee Vartanian. These days, besides guiding in his “spare time,” he works as the founder and head of Modern Icon, which handcrafts K9 leashes and harnesses for high-end law enforcement and military applications. He also helps train U.S. Department of Defense (DOD) agencies in “the art of vertical access in nonpermissive environments.” In other words, using ropes and climbing skills to gain passage to areas that bad guys don’t want you to access.

Lee earned his bachelor’s degree in outdoor education, with a minor in environmental science, and has been guiding professionally for 18 years. As a kid, he practiced by foraging for food in his neighborhood and constructing homemade snares. Besides reading every book on edible plants he could find, he also hoarded magazine clippings from survivalists, including wild food proponent Euell Gibbons, author of Stalking the Wild Asparagus, who some readers may recognize from circa-1970s Grape Nuts commercials.

“Everyone thinks about clubbing a wild rabbit and cooking it over a fire when they think of survival experiences,” Lee told us. “But they forget the importance of being able to eat on the move. Killing and prepping wild game with primitive tools is a challenge even on a good day. Doing that while you’re malnourished, cold, and sleep deprived can be close to impossible and potentially hazardous to your physical safety.”

If unexpectedly stranded in the backcountry, Lee’s recommendation for most people, most of the time, is to shelter in place and wait for rescue. Hiking out, however, may sometimes be necessary. “In either scenario,” Lee said, “you may have to rely on both hunting and gathering depending on how long you are lost. So don’t miss out on the benefits of gathering plants that are plentiful and won’t run away when you’re on the move.”

Testing Edible Plants

First of all, don’t just randomly chow down on the first thing that looks like a tomato or a berry. Follow a series of protocols to help make eating in the wild less hazardous (note that we never used the word “safe.”)

One of these plants is edible, but the other could kill you.

One of these plants is edible; the other could kill you.

Crush the plant’s leaves and take a whiff. If it smells unpleasant, or like almonds, discard it.

Rub the juice of the crushed leaf on the inside of your arm, and wait for 15 minutes. If no irritation develops, place a small piece on your lips, then in the corner of your mouth, then the tip of your tongue, and finally under your tongue, holding each for three minutes before moving.

If the plant irritates your skin or mouth, treat it as you would an acid. Pour water over your skin to remove toxins, and use alcohol or dish soap to clean off the residue. Contaminated clothing must be washed or thoroughly discarded.

If no negative side effects are observed, swallow a small amount and wait for five hours, consuming nothing else in the meantime. Assuming nothing bad happens, the plant can be considered less hazardous to eat.

“The part a lot of people miss,” Lee said, “is ensuring that whatever they’re testing is plentiful. Don’t let your curiosity override your logic, and always consider boiling the plant to make it more easily digestible.”

Accidental Ingestion

If the sample you ate starts to give you a bad ride, or if you or someone else inadvertently ate something that’s turning out to be toxic, there aren’t a lot of great options. An unpleasant reaction can turn deadly in a short amount of time. The best thing to do is to make a note (or take a sample) of the plant or plants ingested, then evacuate immediately to a hospital. However, if you’re in such a bad situation that you’re forced to eat plants in the first place, it’s likely that immediate evacuation isn’t feasible.

If you can’t get your victim to a hospital, place them into the recovery position (¾ prone) and prepare to wait it out. Rest will give their body the best chance at fighting the toxins in the event you’ve exhausted all other options.

Many people assume that the easy solution at this point is to induce vomiting, but that’s really not the answer. First, a toxic plant may cause vomiting on its own, so if it’s going to happen, it’s probably already happening. Second, induced vomiting can cause caustic substances to create more damage on the way up, especially if the vomiting is projectile and goes through the nose. Last, there’s also a chance to inadvertently inhale the vomit accidentally, further complicating an already bad situation.

Because your self-treatment options are so limited, it’s critical to avoid eating anything that you can’t 100-percent positively identify in the first place. The mess you don’t make is the mess you don’t need to clean up.

So now that you know how to test items, and just how dangerous it can be to accidentally eat the wrong thing, watch out for the following deadly doppelgängers — though keep in mind that this is just a small sampling of harmful plants. Our hope is that this listing will help you more safely stalk your own wild asparagus and get more nutrition with less nausea. Good luck out there, and happy “hunting!”

Wild Grapes (Vitis riparia) vs. Poisonous Virginia Creeper (Parthenocissus quinquefolia)

Wild grapes

Wild Grapes. Photos: Wasrts / Wasrts / Bill Summers, hosted by the USDA-NRCS PLANTS Database

“This is my favorite deadly doppelgänger comparison because everyone seems to want to eat anything that resembles a grape or berry,” Lee said. “When in season, wild grapes provide a tremendous amount of nutrition with their fruit, leaves, and even new shoots being edible, but keep in mind that the roots are poisonous. Wild grapes also provide a great source of potable water through cutting their vines. Cut high first, then low, to maximize the amount of water yielded per vine.”

Virginia Creeper

Virginia Creeper. Photos: James H. Miller, hosted by the USDA-NRCS PLANTS Database / Kateryna Pavliuk

Tell Them Apart: Wild grape tendrils are more conspicuous and grow in branches, as opposed to Virginia Creeper, which adhere using terminal pads. Also, Virginia Creeper leaves are compound leaves, meaning that they consist of several leaflets joined to a single stem. Wild grape leaves just have one leaf attached to each stem.

Wild Grapes Range: Eastern Half of Canada and throughout the United States, excluding the far Southwest and Southeast U.S.

Virginia Creeper Range: Eastern half of United States and Canada

Black Nightshade (Solanum americanum) vs. Deadly Nightshade (Atropa belladonna)

Black Nightshade. Photo: Richard A. Howard, hosted by the USDA-NRCS PLANTS Database

Black Nightshade. Photo: Richard A. Howard, hosted by the USDA-NRCS PLANTS Database

American Black Nightshade berries and leaves are traditionally eaten by Native Americans as well as modern cultures in Central American communities. Black Nightshade also has more protein, calories, fiber, calcium, iron, B vitamins, and vitamin C than spinach.

Deadly Nightshade, on the other hand, can cause delirium, hallucinations, and death when eaten in large quantities. “This is the most likely deadly doppelgänger to get you into trouble,” Lee said. “Avoiding both varieties, if you’re unsure, would be your best bet.”

Deadly Nightshade. Larry Allain, hosted by theUSDA-NRCS PLANTS Database

Deadly Nightshade. Larry Allain, hosted by the USDA-NRCS PLANTS Database

Tell Them Apart: “The most obvious way to differentiate between them is that the edible Black Nightshade berries grow in bunches, as opposed to Deadly Nightshade berries which grow individually. Remember that only the ripe berries can be eaten safely, and the leaves still need to be boiled before consumption.”

Black Nightshade Range: Southern and Western United States, British Columbia

Deadly Nightshade Range: Central United States, Saskatchewan

Virginia Ground Cherry (Physalis virginiana) vs. Horse Nettles (Solanum carolinense)

Virginia Ground Cherry. Photo: Katy Chayka

Virginia Ground Cherry. Photo: Katy Chayka

The Virginia Ground Cherry is an edible plant when ripe, resembling a small tomato. However, more often than not, any “wild tomatoes” stumbled upon in the wild should be regarded with suspicion due to their similarity to Horse Nettles.

Though they look quite similar to cherry tomatoes, all parts of the horse nettle are poisonous and can cause abdominal pain, nausea, vomiting, and death.

Horse Nettles. Photos: Ted Bodner / Jennifer Anderson, hosted by the USDA-NRCS PLANTS Database

Horse Nettles. Photos: Ted Bodner / Jennifer Anderson, hosted by the USDA-NRCS PLANTS Database

Tell Them Apart: Horse Nettle has large spiky prickles on its stems, while the Ground Cherry only has thick, stiff hairs. Additionally, the fruits of the Ground Cherry are enclosed in a papery husk while those of the Horse Nettle are bare.

Virginia Ground Cherry Range: Central and Eastern United States, Eastern half of Canada

Horse Nettles Range: Throughout the United States, Parts of Eastern Canada

Wild Garlic (Allium canadense) vs. Death Camas (Toxicoscordion venenosum and others)

Wild Garlic. Photo: Thomas G. Barnes, hosted by the USDA-NRCS PLANTS Database

Wild Garlic. Photo: Thomas G. Barnes, hosted by the USDA-NRCS PLANTS Database

Wild garlic should smell strongly of onions or garlic, and is generally edible without issues. Use the chopped green leaves as chives to make any food more palatable and eat the onion-like bulb. Be aware, though, that Death Camas also looks a lot like an onion. It can cause loss of voluntary muscle movement, diarrhea, vomiting, among other unpleasantries.

Death Camas. Photo: Al Schneider, hosted by the USDA-NRCS PLANTS Database

Death Camas. Photo: Al Schneider, hosted by the USDA-NRCS PLANTS Database

Tell Them Apart: Take a whiff. Although the Death Camas bulb looks like an onion, it won’t have the smell of garlic or onion like its edible cousin.

Wild Garlic Range: Eastern half of United States and Canada

Death Camas Range: Throughout the United States and Canada

Wild Carrot. Photo: Joaquim Alves Gaspar

Wild Carrot. Photo: Joaquim Alves Gaspar

Wild Carrot aka Queen Anne’s Lace (Daucus carota) vs. Poisonous Hemlock (Conium maculatum)

The roots of young carrots are very edible, although as they age they become more woody and inedible.

Poisonous Hemlock. Photos: Doug Goldman, hosted by the USDA-NRCS PLANTS Database / Gary A. Monroe

Poisonous Hemlock. Photos: Doug Goldman, hosted by the USDA-NRCS PLANTS Database / Gary A. Monroe

Tell Them Apart: Look for purple blotches or spots on the smooth (hairless) stems of Poison Hemlock. Wild carrot stems are usually covered in hairs, while hemlock is bare.

Wild Carrot Range: Throughout the United States and Canada

Poisonous Hemlock Range: Throughout the United States and Canada

Lee’s Recommendations for Where to Learn More

Books by Tom Brown Jr. and Courses at his Tracker School in New Jersey

“Tom Brown is one of my literary mentors,” Lee says. “Anything written by Tom is a sure bet, and any survival courses at his school come highly recommended, even though people think he is a little ‘out there’ with the spiritual side of things.” www.trackerschool.com

Courses at the Nantahala Outdoor Center in Western North Carolina

Look for courses titled Wilderness Survival 1 and Wilderness Survival 2. The first course teaches you how to survive the first 72 hours in the wild, when most rescues typically happen. In the second course, you learn what to do after the first three days have passed, addressing the need to survive on the move while self-rescuing. www.noc.com

Survival Courses from 88 Tactical at their Tekamah Training Facility in Nebraska

With introductory to advanced courses ranging from 8 hours to 48 hours, 88 Tactical offers skillset training you can benefit from regardless of skill level. www.88tactical.com

Additional Sources

More From Issue 25

Don’t miss essential survival insights—sign up for Recoil Offgrid's free newsletter today!

Read articles from the next issue of Recoil Offgrid: Issue 26

Read articles from the previous issue of Recoil Offgrid: Issue 24

Check out our other publications on the web: Recoil | Gun Digest | Blade | RecoilTV | RECOILtv (YouTube)

Editor's Note: This article has been modified from its original version for the web.

Stormproof Backpack Buyer’s Guide

Any prepper worth their weight in MREs will have SHTF packs set up in several locations for any number of potential disasters. A bug-out bag at home, a get-home pack at the office, and an emergency kit in the vehicle.

But what if the bags themselves don’t hold up? What if they fall apart under a heavy load or get ruined in a torrential downpour paired with gale-force winds? Now your precious three-day cache is soaked, useless, or strewn across the muddy forest floor.

With spring showers approaching, we’re taking a closer look at durable bags available today that will both increase your daily carry capacity and endure punishing weather.

For the sake of argument, we’re calling them “stormproof” backpacks. Note: This is not a buyer’s guide exclusively on waterproof bags, also known as dry bags. Because they tend to have just one large compartment and look like sacks made out of inflatable swimming pools, dry bags aren’t as versatile for preppers and may stick out in urban settings. Though there are two dry bags among the six models we’ve tested here, we also got hands on with a duffel, a lumbar pack, a campus-style knapsack, and a true trail pack.

Each one fits a particular niche, but are adaptable enough for use in other situations — all with an eye toward keeping your vital supplies safe and dry. But how do you go about choosing?

What to Look For

For recommendations that hold water, we went to two subject-matter experts (SMEs) with almost a half century of combined experience making gear for outdoor adventurers: Patrick York Ma, the CEO and chief designer of Prometheus Design Werx and Mel Terkla, an independent designer who’s worked for a variety of companies, including Kifaru. Here are some things they suggest you watch out for in a weatherproof pack.

Photo courtesy of Patrick York Ma

Photo courtesy of Patrick York Ma

Rain Cover: This is essentially a bag for your bag, and can turn any backpack (even your favorite Jansport) into a stormproof sack. “Rain covers are ‘seamless’ covers with ample interior coatings — typically polyurethane (P.U.) — that are sized to wrap and cover your entire pack, except for the suspension,” Ma says.

Durable Fabric: “If I were looking for a stormproof pack, my first priority would be durability,” Terkla says. After all, what good is a stormproof pack if it’s just gonna rip and let moisture in?
Interior Coating: “Cordura can be had with a waterproof coating on the inside layer of the fabric,” Terkla says. “Even without sealed seams or waterproof zippers, this makes the pack extremely water resistant.”

Exterior Coating: Ma recommends getting a pack with a good durable water repellent (DWR) coating on the outside, too. DWR causes H2O to pool into beads on the fabric’s surface, making it easier to shed the droplets.

Seams: Try to look for bags with welded or taped seams. “This type of pack construction will be the best at blocking water penetration,” Ma says, adding that packs with these types of seams usually come with coated interiors.

Zippers: Both SMEs recommend looking for zippers covered with an external flap.

Top-Load Design: Top-load backpacks feature a main compartment that opens at, well, the top — think Santa’s toy sack, but with an large flap that covers the opening. Meanwhile, front-load backpacks feature a main compartment that unzips in the shape of an “n” and unfolds like a briefcase. While the latter design is easier to pack and compartmentalizes your gear, the former is the way to go if you want to keep your survival supplies dry, Ma says: “Top loaders with single or double quick-release buckles generally block rain better than full-zip front-panel loaders.”

What to Avoid

On the flipside, our SMEs warned us to steer clear of these attributes when shopping for a stormproof sack:
Lightweight Fabrics: Terkla says the priority of any stormproof pack should always be durable materials. Even with DWR, thin fabrics can fray against rocks or snag on tree branches, allowing moisture to seep in. Likewise, Ma says to skip “any hipster cotton canvas,” waxed or not.

P.U.-Coated Reverse-Coil Zippers: Not all zippers are created equal. Both SMEs agree that the recent trend of “waterproof” P.U.-coated reverse-coil zippers should be avoided, ironically enough. A regular zipper has its teeth, slider, and puller visible on the exterior. These new reverse-coil zippers have its teeth on the interior (hence the name) so that the backside of the teeth (on the exterior) can be laminated with water-resistant P.U. The problem is that P.U. gradually wears out, and even more so with hard use. “These just become more points of entry for rain as they wear out over time,” Ma says. “A DWR-treated reverse-coil zipper is actually better at repelling rain … but it’s not common, though.”

PALS Webbing: A MOLLE-style pack with PALS webbing stitched on it is full of needle holes, Ma says, all of which are tiny doorways for moisture to get in.

Also, survival expert and longtime RECOIL OFFGRID contributor Tim MacWelch advocates avoiding go-bags covered with PALS webbing in general, as they will attract a lot more unwanted attention from the desperate and the unprepared once SHTF.

Holes: It’s common sense not to select any stormproof bags with drain holes or unprotected openings for wired earphones or hydration bladders. “Any drain holes on the bottom of a pack will let water in if you set it down on saturated ground or a puddle,” Ma says.

Weathering the Test

With these tips in mind, we put the backpacks in this buyer’s guide to the test. But since we’re not Halle Berry in an X-Men movie, we couldn’t conjure up a storm with our mutant powers.

To simulate a downpour and assess each bag’s ability to shut out H2O, we stuffed each pack full of newsprint paper as a substitute for our survival gear. Why? Newsprint turns to mush when wet, so we’d know right away if water got inside a pack. Next, we stuck each bag under a running showerhead for 10 minutes. Then we wiped down the exteriors before unzipping each model, noting whether (and where) any of the paper got soaked.

However, repelling water isn’t the only measure of a great bug-out bag (BOB). We also looked at each pack’s cargo capacity, internal storage organization, and comfort level during use.

Whether you expect hail and showers in the coming weeks, you live in a region prone to tornadoes in the spring season, or you’re gonna hit the lake or river once the snow melts, there’s no doubt a backpack option that can help you weather the storm. Read on to see if one of the following six bags is right for you.

Arc’teryx Carrier Duffle 55

Canadian company Arc’teryx has an international reputation for making top-notch climbing, skiing, and hiking gear. So, it shouldn’t surprise anyone that its Carrier Duffle 55 is one tough, technical SOB. The P.U.-coated nylon fabric combined with sealed seams and Arc’teryx’s trademarked WaterTight Zipper shrug off rain, snow, and hail like nobody’s business. In fact, in our testing, not a single drop of water got to the interior.

But how does it perform as a go-bag? This duffel is definitely durable. Designed for a variety of uses (commuting, traveling, winter sports, etc.), the Carrier Duffle 55 can withstand rigorous daily use in assorted environments. From the materials and hardware to the straps and stitching, everything spells sturdy. The quick-release shoulder straps are both removable and adjustable, so you can carry the bag as if it’s a backpack, sling pack, or briefcase (thanks in part to four grab handles, which also work as lash points). The interior is white, allowing greater visibility inside.

On the flipside, most duffels have only one compartment, and this Arc’teryx model is no exception. So, if you’re bugging out, the contents might slosh around inside. Oh, and minor complaint: When packed full, it looks like a big shiny black pillow on our backs. Not exactly indiscreet nor aesthetically pleasing.

Overall, a hard-core pack that’s highly weather resistant and versatile enough for various duties … but its lack of interior divisions might give preppers pause.

Body Fabric
Polyurethane-coated NC400r-AC2 nylon

Capacity
55 liters (3,356 cubic inches)

Dimensions
31 by 17 by 18 inches

Weight
1.3 pounds

Colors
Black (shown), Cardinal, Pilot

MSRP
$199

URL
www.arcteryx.com

Pros:

  • Impressive weatherproofing construction
  • Storm flap helps keep rain and wind out
  • Can be carried like a backpack, sling pack, or briefcase
  • When not in use, it can be stowed compactly in the included mesh bag. When in use, the mesh bag can double as a travel organizer and be thrown inside the duffel.

Cons:

  • Just one large compartment; no dividers or pockets to keep your gear organized.
  • It’s not the coolest looking nor the most discreet duffel on the market.

Aquapac Wet & Dry Backpack 35L

Aquapac set sail in 1983 when three British friends had the idea of making a case for a Sony Walkman (which was like, you know, an old-school MP3 player) so they could listen to music while windsurfing. Now the company produces waterproof protection for everything from tablets and cameras to maps and insulin pumps.

Aquapac’s Wet & Dry Backpack is a stormproof bag with the standards rating to prove it. It has an IPX6 rating, meaning it can withstand rain, splashing, and rough sea conditions. It’s no surprise, then, that the Wet & Dry Backpack had no problems passing our shower test.

Unlike most dry bags, the Wet & Dry Backpack has more than one compartment. It lives up to its name with a sizeable internal waterproof bag for separating clean clothes from dirty ones. Furthermore, this yellow bag has a clear pocket attached to it so you can quickly find your keys, smartphone, and other small objects without having to dig around.

On the outside, the padded back support can be removed to dry out, be substituted with a hydration bladder, or act as an improvised seat cushion on rocky terrain. Mesh pockets can hold water bottles or other items. And there are multiple lash points so you can clip on carabiners, lights, or other equipment.

At 35 liters, the Wet & Dry Backpack isn’t large, but it can serve as a stellar daypack in turbulent conditions.

Body Fabric
Polyurethane-coated 210-denier Taslan, 500-denier Oxford polyester

Capacity
35 liters (2,135 cubic inches)

Dimensions
23.6 by 15.7 by 8.7 inches

Weight
1 pound, 14 ounces

Colors
Black

MSRP
$110

URL
www.aquapacusa.com

Pros:

  • Truly stormproof thanks to its coated nylon, taped seams, and roll-top closure
  • Ability to separate clean and dirty gear
  • Waist strap, breathable mesh shoulder straps, and a sternum strap that slides
  • Interior bag is bright yellow for greater visibility.

Cons:

  • This medium-sized pack won’t fit a lot of gear and supplies, so pack judiciously.

Granite Gear Talus

The Talus is a part of Granite Gear’s Barrier lineup, which has proprietary technology (including water-resistant zippers, Tarpaulite material, and Repelweave fabric) that aims to provide protection from the elements.

Prior to our shower test, we expected the Talus to fail because it has no external zipper flaps. We were surprised to find that the zippers and the Repelweave fabric stayed true, deterring water for seeping through its teeth and weave, respectively. Unfortunately, the seams betrayed Granite Gear’s Barrier technology. While newsprint at the top and middle of the pack were bone dry, we found that our newsprint was damp where moisture had gotten through the bottom corner seams.

As a campus-style knapsack, this bag has a padded, Tricot-lined sleeve that fits most 17-inch laptops, as well as a Tri-cot lined pocket for valuables like eyewear, smartphone, or wallet — all of which stayed dry during our tests.

However, you gotta take the pros with the cons. The Talus’ tall-and-slim design is meant to keep the weight of your load as close to your back as possible, easing the strain on your spine and maintaining a better center of gravity. This means stacking your items on top of each other in the main compartment; not inherently a bad thing in and of itself. But the odd thing is that the zipper on this front-loading pack doesn’t go past halfway, meaning you can’t access stuff at the bottom of the pack unless you remove the items at the top first.

Body Fabric
Repelweave

Capacity
33 liters (2,015 cubic inches)

Dimensions
20 by 12.75 by 9.25 inches

Weight
2 pounds, 8 ounces

Colors
Black (shown), Ember Orange, Enamel Blue, Flint, Midnight Blue, Rodin, Verbena

MSRP
$45

URL
www.granitegear.com

Pros:

  • Divided sections, laptop sleeve, and mesh pockets help keep contents organized
  • Sliding sternum strap, adjustable shoulder straps, and “hideable” waist strap
  • Tri-cot lined pocket for valuables
  • Affordable price tag

Cons:

  • Zipper on main compartment doesn’t extend down far enough, making it awkward to get items from the bottom of the pack.
  • Water seeped through the seams at the bottom corners.

Kelty Revol 65

Asher “Dick” Kelty is considered by many to be the inventor of the aluminum-framed backpack, among many other innovations. The Revol 65 carries on Kelty’s legacy, offering an ergonomic pack that lets you lug around a poopload of life-sustaining cargo.

The aluminum and HDPE plastic frame combined with Kelty’s brilliant PerfectFIT adjustable suspension system keep the cargo weight on your hips and shoulders instead of your lower back. Plus, the lumbar support is adjustable and the Kinesis hip belt actually moves with your every step to increase stability. If that weren’t enough, there’s also a trap-door compartment at the bottom where you can access a sleeping bag (or other gear) without unloading the entire pack.

All this comes at a cost: weight. It’s more than 4 pounds, the heaviest pack in this buyer’s guide. If you load up the Revol to its 65-liter capacity, your three days’ worth of supplies can easily weigh north of 50 pounds. On paper, adding 4 pounds doesn’t seem like much, but after a few hours they’ll feel like an extra 40.

The Revol 65 is a top-loader with two quick-release buckles, meaning the main section is virtually shielded from any drizzle or snow. However, in our shower testing, we were shocked to find that the bottom of the pack got damp. It appeared some moisture slipped into the trapdoor compartment through the stitching. Still, it’s a technical trail pack that’s crazy comfortable and highly functional.

Body Fabric
210-denier Robic nylon ripstop

Capacity
65 liters (3,950 cubic inches)

Dimensions
30 by 12 by 10 inches

Weight
4 pounds, 3 ounces

Colors
Forest Green (shown), Raven

MSRP
$220

URL
www.kelty.com

Pros:

  • Padded back panels, adjustable suspension system, and Kinesis hip belt
  • Trap-door compartment
  • Three-day pack that doesn’t scream “bug-out bag!”
  • It’s packed (pun intended) with subtle smart features, including an external hydration sleeve, zippered pockets in the hip belt, dual grab handles, loops for trekking poles or ice axes, and a top stash pocket to keep phone and sunglasses from getting crushed.

Cons:

  • At more than 4 pounds, it’s about a pound heavier than we’d like.
  • While the main section stayed dry, the trapdoor compartment got damp during our shower test.

Mountainsmith Tanack 10L Lumbar Pack

Founded almost four decades ago by mountaineering guide Patrick Smith, Mountainsmith has been a staple among trailblazers because of its many ground-breaking patents. In recent years, the company has teamed up with photographer Chris Burkard to create a series of photography-focused packs. One of the latest collaborations is the Tanack 10 — the most hard-core fanny pack you’ll ever see.

The Tanack 10’s Cordura fabric is ridiculously tough, the zippers are guarded by external flaps, and there’s a removable rain cover hidden in the base panel pocket. When encased in said rain cover, this lumbar pack is virtually waterproof. So naturally, we took the rain cover off to see how the lumbar pack would do naked. The results? Not ideal. Water managed to slip through, turning newsprint at the top and bottom damp.

Still, the Tanack 10 has numerous features to keep it as comfortable and convenient as possible: removable padded shoulder strap, two side pockets for water bottles or other items, detachable interior bag for accessories that can be attached to the exterior, and a quick-release padded waist belt (which is compatible with the Moutainsmith Tanack 40 backpack).

Despite its name, the Tanack 10 actually has a 15-liter capacity — not a whole lot. However, it can be used as an improvised go-bag if feces suddenly meets fan or as a daypack on a hiking adventure. Of course, if you’re into photography, it works best for those who want to stay mobile in challenging environments yet need quick access to their camera. (Though you’ll need to pony up an extra $60 if you want padded dividers for your equipment.)

Body Fabric
610-denier Cordura HP, 210-denier nylon liner

Capacity
15 liters (900 cubic inches)

Dimensions
11.75 by 12.25 by 5.5 inches

Weight
1 pound 13 ounces

Colors
Barley (shown), Black

MSRP
$100

URL
www.mountainsmith.com

Pros:

  • Durable materials combined with quality craftsmanship
  • Included rain cover provides maximum protection from inclement weather
  • Interior accessories pouch can transform into additional external storage
  • Delta Compression System helps you adjust for different loads, cinching up as needed.

Cons:

  • Too small to hold a substantial amount of survival supplies, yet weighs almost 2 pounds.
  • Without the rain cover, the interior got wet while the exterior stayed damp the longest of all the packs tested.

Scrubba Stealth Pack

Certainly the most unique entry in this buyer’s guide, the Scrubba Stealth Pack is a four-in-one solution: a weatherproof backpack, a compression dry bag, a camp shower, and a portable washing machine. Yes, you read those last two functions correctly.

This invention came about when Scrubba founder Ash Newland of Australia and a friend were planning to climb Tanzania’s Mount Kilimanjaro in 2010. They realized their cold-weather apparel and camping gear would take up most of the cargo space, leaving them room for just a few changes of casual clothes. Soon enough the first Scrubba bag was born.

The Stealth Pack version combines a waterproof roll-top bag, a flexible integrated washboard, and a multifunctional valve in one durable package. To use it as a washer, place your dirty clothes with some water and detergent inside the bag, close the roll-top closure, then scrub the garments for up to 3 minutes.

If you’re in need of a shower after mucking around in the backcountry, just fill this dry bag with water, hang it from a tree, and let its black nylon soak up some sunrays. Then turn the valve and get a warm rinse in. If you’re traveling, this Scrubba can act as compression bag. Fill it with clothes, squeeze out all the air, and tighten the valve. It’ll stay compact, saving you luggage space.

As a dry bag, the Stealth Pack effortlessly passed our shower test with flying colors.

For serious survivalists, the Stealth Pack won’t suffice as a primary BOB, but would shine as a valuable add-on thanks to its multipurpose design.

Body Fabric
Waterproof 40-denier nylon fabric, 210-denier nylon back panel

Capacity
21 liters (1,281 cubic inches)

Dimensions
21 by 13 by 7 inches

Weight
1 pound

Colors
Black

MSRP
$100

URL
www.thescrubba.com

Pros:

  • Can quadruple as a dry bag, compression bag, portable washer, and camp shower
  • Weatherproof design and construction
  • Outside-the-box design
  • Excellent as a supplemental pack

Cons:

  • Limited 21-liter capacity
  • Like most dry bags, there’s just one compartment; no internal or external pockets or pouches.

Is Budget Waterproofing Feasible?

Testing all the bags for our stormproof backpack buyer’s guide got us thinking: Is it feasible and possible to make a weather-resistant knapsack on the cheap? After all, not everyone has a hundred bucks lying around to spend on a brand-new dry bag. But a bottle of waterproofing wax runs for only $10.

To craft our own DIY stormproof backpack, we looked for a backpack that wasn’t just affordable but also common (to approximate what one might find in an average household). Anyone who’s ever attended high school in the past 50 years has owned or seen a JanSport bag, so we selected the Trans by JanSport SuperMax. It features a 15-inch padded laptop sleeve, four zippered compartments, and a lifetime guarantee. Price tag? Anywhere between $25 to $35 online.

Next came selecting the waterproof coating. There are all sorts or protectants available today, from silicone aerosols to durable water repellents (DWR) made of fluoropolymers. We chose a $9 bottle of Nikwax Tent & Gear SolarProof. Aside from being a water-based formula that’s non-aerosol, non-flammable, and non-hazardous, it provides both H2O repellency and shielding against UV damage.

Following the directions, we sprayed an even coat of Nikwax on the SuperMax, waited two minutes, and wiped excess liquid with a damp cloth. We let the pack dry overnight. The next day we performed our in-house rain simulation: stuffed it full of newsprint paper, closed all the zippers, and put it under a running showerhead for 10 minutes. Then we wiped off the droplets on the pack’s exterior.

So how did our DIY stormproof pack do? Like a drunk celebrity at a police checkpoint, it failed miserably. While the Nikwax did indeed help water bead up and stay on the surface of the polyester fabric, the coating couldn’t stop H2O from flowing through the seams or zippers, where our newsprint paper was most mush-like.

The lesson? You can paint a dinghy to look like a submarine, but that won’t stop it from taking on water when you hit rough seas. If you’re looking for a truly weatherproof pack for your next bug-out bag, make sure it was manufactured with weather-resistant properties in the first place, because a waterproof coating can only do so much.

H2O Hack

As is the case with most survival gear, the higher the standards of quality and functionality we demand of our stormproof packs, the higher the price tags. So how can you keep your supplies dry if you can’t afford an expensive dry bag?

If you’re prepping on a budget, backpack designer Mel Terkla recommends two economical strategies.

“A built-in waterproof pack rain cover or a standalone one is the easiest way to keep the rain at bay,” says Terkla, an independent designer who’s worked for a variety of companies including Kifaru. “The other option is to separate all your gear into waterproof bags” before placing them in your backpack.

By “waterproof bags,” he’s referring to airtight plastic pouches made by companies such as Loksak. They look like zippered sandwich bags but are 100-percent waterproof, far more durable, and come in a variety of sizes. For example, Loksak’s OPSAK can be as small as 7 by 7 inches or as large as 28 by 20 inches and start at $9.49 for a two-pack. If you’re really pinching pennies, Terkla says, then use that money to get a box of Ziploc freezer bags and separate your survival gear accordingly.

As for rain covers, if your backpack doesn’t come with one, you can find generic models for as little as $5 or quality brand covers starting at about $15, depending on size and compatibility.
“These two simple solutions will make your bag absolutely stormproof without any loss of durability,” Terkla says.

More From Issue 25

Don’t miss essential survival insights—sign up for Recoil Offgrid's free newsletter today!

Read articles from the next issue of Recoil Offgrid: Issue 26

Read articles from the previous issue of Recoil Offgrid: Issue 24

Check out our other publications on the web: Recoil | Gun Digest | Blade | RecoilTV | RECOILtv (YouTube)

Editor's Note: This article has been modified from its original version for the web.

Nuclear Weapon Destruction Simulator

Have you ever wondered what might happen if a nuclear bomb hit the nearest major city to your home? What about a major population center, such as New York City or Los Angeles, or an island like Hawaii? There are many variables involved in these hypothetical scenarios, such as the yield of the bomb, detonation altitude, and the various effects of the blast, including heat, pressure, and lingering radiation. Regardless of these conditions, it's clear that a nuclear attack would cause serious devastation — but how much?
Nuclear weapon destruction estimate radiation bomb terrorist threat 2

An interactive tool from Outrider.org estimates and visually depicts the effects, fatalities, and injuries that might occur in a nuclear weapon explosion. It allows the user to enter any country, city, or specific address as the target of the simulated attack. The tool also lets the user select from four bomb types:

  • Little Boy – First Bomb Used in Warfare – 15 kilotons
  • Hwasong-14 – North Korean ICBM – 150 kilotons
  • W87 – United States ICBM – 300 kilotons
  • Tsar Bomba – The Most Powerful Explosive Device Ever Detonated – 50,000 kilotons

Nuclear weapon destruction estimate radiation bomb terrorist threat 3

These bombs can also be simulated as a surface or air burst attack. The former causes more extreme destruction at the center of its target, while the latter would spread the destruction across a wider geographic area. The calculations are based on NUKEMAP, a tool created by nuclear weapon historian Alex Wellerstein. You can read more about the simulation models involved here.

Nuclear weapon destruction estimate radiation bomb terrorist threat 1

Based on statements on its “What You Can Do” page, the goal of this tool is to advocate for worldwide nuclear disarmament. No matter your stance on that issue, it's still interesting to learn what could happen if a nuke was dropped on your doorstep — and how far you'd have to bug out to avoid its effects.

You can experiment with the simulator at Outrider.org/nuclear-weapons/interactive/bomb-blast/


Alone in the Sahara: The Survival Story of Mauro Prosperi

What would you consider the most challenging survival environment on Earth? There are many potential candidates, ranging from the windswept Antarctic to the vast Amazon rainforest. No matter how you rank these regions, the Sahara desert is sure to be near the top of your list.

This 3.6-million square mile desert is nearly as large as the entire United States (including Alaska), and is known for its intense heat. The surface temperature of the Sahara's dunes has been measured at more than 180°F. Rainfall and vegetation growth is minimal, and the odds of encountering another person are extremely low. It's about as close as you can get to a barren wasteland without traveling to the polar ice caps or the Moon.

Flickr.com/habibkaki

The rolling dunes of the Sahara in Algeria. Photo: Flickr.com/habibkaki

However, humans love a challenge, and we're no strangers to overcoming nature. Adventurers have climbed the highest peaks and dove to the pitch-black depths of the ocean. For these bold individuals, the Sahara is just another obstacle to conquer.

The Marathon des Sables

Also known as the Marathon of the Sands or the Sahara Marathon, the Marathon des Sables has been called the toughest foot race on Earth. This six-day annual ultramarathon covers 156 miles — roughly the same as six regular marathons. It takes place in the Sahara desert, specifically southern Morocco. The marathon's website describes it as follows:

“MdS is a truly grueling multi-stage adventure through a mythical landscape in one of the world’s most inhospitable environments – the Sahara desert. You have to be self-sufficient and carry all your own food and equipment for the week on your back. Communal goat’s-hair Berber tents are pitched every night but, apart from that you have to take it with you. Water is rationed and if you exceed the ration, you get a time penalty.”

The following promotional video shows the sights of the 33rd annual Marathon des Sables, which will commence this month.

Mauro Prosperi

In 1994, Italian police officer and former Olympic pentathlete Mauro Prosperi was looking to push his physical limits. At the time, he was 39 years old and married with three young children.

Mauro Prosperi survival story desert marathon water heat sand sun shelter 5

Prosperi recalled his reaction to learning about the infamously-difficult ultramarathon:

“I love a challenge so I started training immediately, running 40km (25 miles) a day, reducing the amount of water I was drinking to get used to dehydration. I was never home. My wife, Cinzia, thought I was insane – the race is so risky that you have to sign a form to say where you want your body to be sent in case you die.”

After intense preparation, he flew to Morocco to begin the race. Although it now draws roughly 1,300 participants each year, providing a heightened sense of safety in numbers, the 1994 event reportedly had only 134 competitors. As a result, Prosperi says he was on his own for most of the six-day journey.

Recent MdS events have higher attendance, making it easier for competitors to stick together. Photo: Flickr.com/61680535@N07

The present-day MdS has far higher attendance than it did in '94. Photo: Flickr.com/61680535@N07

Where it Went Wrong

The fourth day of the Marathon des Sables constitutes its longest single stage, with a 57-mile trek through the desert between campsites. On April 14th, 1994, blistering sun elevated temperatures to 115°F as Prosperi passed the third checkpoint, 20 miles into the day's journey. Per regulations, he picked up his allotted 2 liter ration of water and continued running.

Shortly after 1:00, high winds brought on an unexpected sandstorm that caused organizers to pause the race for the day. Other competitors waited out the storm and eventually made it to the fourth checkpoint by nightfall, but Mauro Prosperi had disappeared. The following morning, ground and air search parties were sent out to look for him. The Moroccan military and Bedouin trackers aided in the search. However, they found no trace of Prosperi.

Mauro Prosperi survival story desert marathon water heat sand sun shelter 7

Alone in the Desert

In a 1998 interview with Men's Journal, Prosperi recounted what happened that day:

“When the sandstorm started to blow, I lost sight of everybody else. I kept running, though, because I thought I could see the trail. I was in seventh place and didn’t want to lose my standing. It was nearly dark before the winds relented. I started running again, but after a few minutes it occurred to me that I had lost the trail.”

Prosperi says he backtracked for hours, but it soon became too dark to continue searching for the trail markers. He made camp and resumed the search at dawn, only to find his surroundings completely unfamiliar. He had little food and almost no water left.

Mauro Prosperi survival story desert marathon water heat sand sun shelter 8

Prosperi with fellow Italian runner Mario Malerba in the 1994 marathon.

Following race guidelines to remain stationary and wait for rescue, Prosperi sat on the sand dune all day. In the afternoon, he says a rescue helicopter flew almost directly above his position, but failed to notice him. The next day, he decided to begin walking again. He later told the BBC, “I had a compass and a map so I thought I could navigate perfectly well, but without points of reference it's a lot more complicated.”

Finding Shelter

In the distance, Prosperi noticed what appeared to be a solitary structure. As he approached, he recognized it as a marabout shrine — an abandoned tomb for a Muslim religious leader. Although there was no rescue to be found here, the shrine provided shade and other resources.

The marabout shrine Prosperi used as shelter is still standing in the Moroccan desert.

The marabout shrine Prosperi used as shelter is still standing in the Moroccan desert.

In an attempt to stay hydrated, Prosperi sucked on wet wipes from his pack, licked morning dew off rocks, and drank his own urine while it remained relatively clear. He also used urine to rehydrate and cook the freeze-dried food in his pack, since no other water was available. (Editor's Note: Although Prosperi did what he thought was best at the time, it is not advisable to drink urine, since it may lead to further dehydration and/or organ failure.)

When his food stockpiles ran out, Prosperi says he ate bird eggs and beetles; he also says he killed and consumed raw bats and lizards he found near the shrine, hoping to absorb any moisture that might be removed by cooking the flesh. Anti-diarrhea medicine in his pack helped him avoid losing more water despite this extreme diet.

Yet again, an airplane passed near Prosperi's location. He says he tried to signal by lighting a small fire and writing “SOS” in the sand, but the plane continued towards the horizon. Distraught and suicidal, Prosperi took his pocket knife and cut his wrist — in a cruel twist of fate, his dehydrated blood coagulated and prevented his death.

On the Move Again

Mauro Prosperi survival story desert marathon water heat sand sun shelter 9

Continuing through the desert, Prosperi headed for distant mountains. Photo: Mauro Prosperi / Facebook

In a final attempt to reach safety, Prosperi set out from the shrine and began walking towards mountains in the distance, traveling in the early morning and late evening to avoid the heat of the day. He left pieces of his gear behind to form a trail of breadcrumbs. Although he believed the mountains to be in the direction of the marathon's trail, this route would actually take him even further into the Sahara.

As he passed dry riverbeds, he squeezed liquid from plant roots. Then, after eight days in the desert, Prosperi found a desert oasis. He told the BBC, “Really it was only a large puddle, a mirror of water in a wadi. I threw myself upon it and gulped with abandon, but I could hardly swallow. I managed to force a mouthful of it down, and almost immediately I vomited. I couldn’t hold anything. I found I had to take tiny sips, one every 10 minutes.”

Mauro Prosperi survival story desert marathon water heat sand sun shelter 13

Signs of livestock led Prosperi to civilization. Photo: Flickr.com/jmenj

With his thirst finally quenched, Prosperi filled his water container and kept walking. Eventually, he found some dried-up goat droppings, and continued searching for more. The droppings led him to human footprints. He recalls, “I crested a hill and beheld an incredible sight. There was a nomad girl, maybe 8 years old, tending a flock in the sparse greenery of a wash. I ran toward her and begged for help.”

Finally Rescued

Tuareg tribesmen helped Prosperi return to the nearest town. Photo: Flickr.com/acquimat

Tuareg tribesmen helped Prosperi return to a nearby town. Photo: Flickr.com/acquimat

The girl was part of a caravan of nomadic Tuareg, who immediately gave Prosperi goat's milk, then took him via camel to the nearest village. Despite starting in Morocco, Prosperi had traveled 180 miles from where he disappeared, unknowingly wandering into Algeria. Local military police initially confronted him due to tensions between the two countries, but after finding out who he was, they took him to a hospital.

Mauro Prosperi survival story desert marathon water heat sand sun shelter 4

Prosperi reportedly lost 35 pounds, weighing in at just 99 pounds when he was rescued. Doctors said his liver had almost completely failed, and hospital staff gave him 16 liters of intravenous fluids. He was reunited with his family and received a warm welcome back to Italy, although he was unable to eat solid food for several months after the ordeal, and he says that he didn't recover for almost two years.

In the following short film, Prosperi discusses the experience:

Skepticism and Evidence

A few adventurers and journalists have doubted the accuracy of Prosperi's story, considering the near-superhuman feats it entailed. Some claimed he staged or exaggerated the ordeal for money and fame. Marathon des Sables founder Patrick Bauer told Men's Journal that the story is “a fabrication” and “physiologically impossible” — these statements caused Prosperi to consider a lawsuit against Bauer, but he eventually dropped it, stating that the dispute was personal rather than legal.

Mauro Prosperi survival story desert marathon water heat sand sun shelter 1

Prosperi re-entered and completed the Marathon des Sables in 2012. Photo: Mauro Prosperi / Facebook

However, the well-documented physical damage Prosperi endured would have been excruciating, and it left lasting effects on his body. The Men's Journal interviewer said he had a visible scar on his wrist, allegedly from his suicide attempt in the desert. Documentary teams have also revisited the marabout shrine, identifying bat skeletons and discarded personal belongings that corroborated his account.

Prosperi recently returned to the shrine where he nearly died in 1994.

Prosperi has returned to the shrine where he nearly died in 1994.

The survival story of Mauro Prosperi may be hard for some to believe; even by his own account, he made choices that would have reduced his chances of survival. But after nine days in one of the harshest environments on Earth, Prosperi narrowly made it to safety, and that is undeniably an impressive feat. In the book Surviving the Extremes, author Kenneth Kamler, M.D., writes:

“Mauro Prosperi was a world-class endurance runner, acclimated to the heat, inured to physical hardships through years of training and discipline. Mauro didn't lie… [his] body provides compelling testimony to the kind of damage the desert can inflict and, at the same time, evidence of what the body can sustain when pushed to its extremes. He competed against the desert as a decided underdog, but he won, turning in the performance of his life.”

Despite his lasting injuries, Prosperi remains athletic and active.

Despite his lasting injuries, Prosperi remains athletic and active to this day.


New: NightStick DICATA Low-Profile Headlamp

Just about any flashlight on the market can provide illumination in ideal conditions. However, it takes a completely different category of light to reliably continue providing illumination despite exposure to heat, water, dust, pressure, impact, chemical spills, and flammable gases. In these extreme conditions, you'll need a seriously robust light source, and that's exactly what NightStick set out to create with the new DICATA headlamp.

NightStick DICATA headlamp light safety fire rescue helmet 6

The NightStick DICATA is an intrinsically-safe headlamp, meaning that it can be used in areas with dangerous concentrations of flammable gas and dust particles without acting as an ignition source for these substances. This is especially relevant to firefighters, rescue personnel, and other professionals who work in these environments. On top of this, the DICATA is based on an impact- and chemical-resistant glass-filled nylon polymer body, and features an IP-67 dustproof and waterproof sealed design.

NightStick DICATA headlamp light safety fire rescue helmet 5

To get more technical, this light has been certified under cULus, ATEX, and IECEx safety ratings. It also meets the requirements of NFPA 1907-8.6 (2013). For those who aren't familiar with these ratings, they mean that this headlamp has been tested extensively for safe use in the extreme environments we previously described.

NightStick DICATA headlamp light safety fire rescue helmet 4

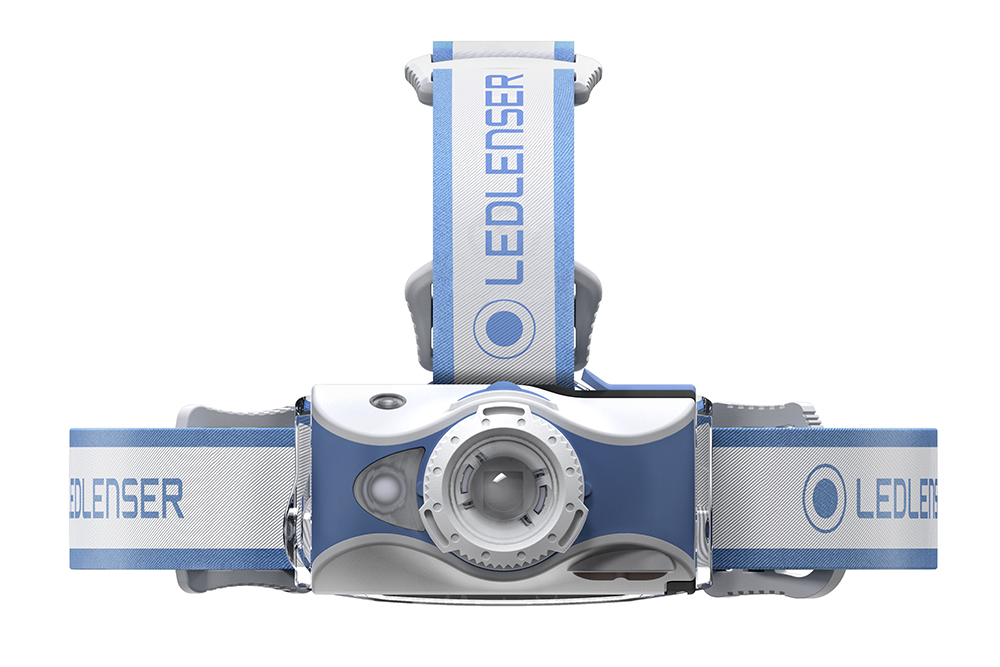
Beyond this durable design, the NightStick DICATA headlamp features dual light sources: a 275-lumen spotlight and a 250-lumen floodlight. Both can be activated simultaneously for a combined output of 310 lumens. There's also an independently-controlled rear-facing amber light to make others aware of your position from behind.

NightStick DICATA headlamp light safety fire rescue helmet 1

The DICATA's low-profile housing and tough rubber head strap are intended for use on a helmet or hard hat without obstructing face shield movement, and its controls are enlarged for easy access while wearing gloves. It runs on 3 easy-to-find AA batteries, and is available with either a red or green high-visibility housing. For more info on these headlamps, go to NightStick.com.


Improvised Evacuation Methods

Learning how to evacuate an injured person from a hazardous or remote location, such as an active-shooter event or a backcountry hike gone wrong, is like paying down your credit card bill rather than buying new stuff every month — in your heart you know you should do it, but it’s just not as fun or as sexy as other options.

We believe in a holistic approach to preparedness and recognize that it’s just as important to know how to save the lives of others as it is to protect your own. To find out more, we spoke with Eric Soderlund, who has worked as a detective for a large Florida county law enforcement agency for the last 13 years. Prior to that, he served as U.S. Army military policeman (95B, now 31B) for eight years. He's on the board of advisers for the Committee on Tactical Emergency Combat Care (CTECC) and serves on the training cadre for the Florida SWAT association’s tactical EMS course.

“It’s great to have a gun on you,” Eric says, “But it’s about more than just being armed. Like we saw in Las Vegas, all of those 3,000 people in the crowd could have had a gun on them, and it wouldn’t have done any good. So we need to be a student of the game. And these days the game includes medical training and knowing how to move injured people.”

Disclaimer: This article is meant to be an overview and not a detailed guide on evacuating injured individuals to safety during an emergency. Seek professional medical training before attempting any of these techniques.

Use Your Surroundings

In the event that casualty evacuation becomes necessary, Eric encourages trainees to first take a good look around them. This doesn’t mean to go all MacGyver and build an ultralight hang-glider to escape out a window. Instead, keep it simple and just think about what makes sense. “Look at the environment and see what’s ready to use,” Eric says. “If you have a minute to look around, see if there’s something that can make your life a little easier.”

Look at your environment and ask yourself what you have at your disposal that could serve as an improvised gurney or wheelchair to evacuate someone from danger quickly.

Look at your environment and ask yourself what you have at your disposal that could serve as an improvised gurney or...

If you’re in an office environment and a casualty can’t walk, consider grabbing one of those ever-present rolling desk chairs, placing them in the chair, and wheeling them out. You may have to hold them from behind to keep them upright, but it’ll still be easier than simply trying to drag them out with your bare hands. “You don’t necessarily have to be Captain Caveman, and lift and carry everything,” Eric adds. “Work smarter, not harder.”

Otherwise, if you’re not immediately faced with a direct threat and you have at least one other person to help you, you could improvise a litter (like a flexible stretcher) out carpeting on the floor. With the casualty laying down, cut an outline around them using your knife. Then cut slits for handholds on the sides and another at the head, and roll your patient inside the carpet Corleone-style just like you’ve seen in all those mafia movies. This will allow you to grab the carpet much more easily and slide the casualty along the floor with much less friction than otherwise. And if you decide that you do want to add a dash of MacGyver, threading a pole or mop handles through the cutout slits provide an even easier handhold and improve the rigidity of the litter as well.

Find Alternate Paths

For those who work in the same place every day, it makes sense to occasionally look around and think about what you could use, and how you might be able to get out. “Think about your situation ahead of time,” Eric says. “If you’re in a high-rise building where a fire on top and bottom is a real possibility, would you consider base jumping off the roof? That’s an extreme example, but the idea is to look at your environment and consider the possibilities. Think outside the box of leaving the building using the stairs or an elevator.”

Many wooden doors can be broken down with a mule kick. However, metal doors, as we’d find in a commercial or office environment, aren’t quite so easy. But if we think outside the box we might find that the walls either side of that door are made from drywall and metal studs. In that case, there’s a good chance you can bust through the drywall to access the other side.

A commercially available Breach Pen cutting tool can be used to burn your way through padlocks or chained doors, and is much more portable than a bolt cutter. This lightweight and packable tool, about the size of a small flare, allows you to burn your way through any number of barriers. Additionally, also consider keeping a fire-suppression tool on hand, like a compact aerosol spray can fire extinguisher, such as those from Blaze Defense Systems, which can quickly cool red hot metal to hand-holdable temperatures.

Breach Pen is a small, portable tool to quickly cut through locks and other metal materials that may be impassable otherwise. Like any heat-conducting device, proper training is important.

Breach Pen is a small, portable tool to quickly cut through locks and other metal materials that may be impassable...

Additionally, many office buildings have drop ceiling tiles. If you can climb into the dropped ceiling space, you may well be able to bypass locked doors and access other areas.

Last, consider breaking through windows to get out. Ten to 15 years ago it’d never be an issue to break glass. But depending on your location, the glass might be impact or hurricane-rated, so you can’t necessarily just throw a chair through it. To mitigate this, you could consider using a glass-breaking tool offered on some fire-rescue–style knives such as the TOPS/BUCK CSAR-T. If necessary, you might also think about shooting through the glass, after taking a look to see what’s outside first.

“Just remember,” Eric says, “you own every single round that comes out of that barrel, regardless of what kind of crazy situation is going on. So maybe consider shooting out a lower corner of the window so you’re aiming at the ground, reducing the likelihood of collateral damage.”

Consider Aftermarket Solutions

In an ideal situation, you’ll have a full-size EMS stretcher next to you, like the ones you see EMTs load into rescues (ambulances). It’s 100-percent rigid, so all of the force you use to push (or pull) the stretcher translates directly into moving the stretcher. Realistically, of course, that’ll never happen. So we trade rigidity for improved portability, and we use packable soft litters instead of stretchers.

As litters get lighter and more portable, they also get more flexible, which isn’t necessarily a good thing. With a more flexible litter, the force that would’ve moved your patient is more likely to just bend your patient. It’s analogous to pushing a sturdy wooden crate versus trying to push a canvas sack, or worse, a thin plastic bag filled with oranges.

Can't find anything nearby to move someone who is injured? Why not carry something with you? The Foxtrot Litter by Tactical Medical Solutions is a portable, lightweight platform that can be used to move someone to safety when seconds count.

Can't find anything nearby to move someone who is injured? Why not carry something with you? The Foxtrot Litter...

Eric recommends training with commercial products where available, because having trained with good products will help show you how to improvise a solution when the time comes. “The more you use the commercial devices and formalized training,” Eric says, “the better you’ll be at building improvised solutions because you’ll better understand the concepts behind it.”

“Consider a commercial tourniquet, for example. If you’ve used one you’ll know that you need a strap, a windlass, and something to clip the tensioned windlass to. So don’t eschew the commercial options just thinking you can ‘wing it’ when you have to. Training with the real gear will help you wing it.”

When it comes to commercially available products, Eric has used several from Tactical Medical Solutions (TacMed Solutions) that he favors. First is the Foxtrot Litter. “The Foxtrot is the Cadillac of litters, and it’s relatively inexpensive,” Eric says. “It’s semi-rigid, striking a compromise between usefulness and portability. For its size you can use a two- or four-person carry, or just drag it on the ground as you would in a wilderness situation. A Skedco Sked (sled) is also cool, but usually that’s not available unless you’re traveling in a large vehicle or into overlanding with 4×4 Jeeps.”

For the photos seen in this article, we used a Rescue Task Force (RTF) version of the Foxtrot Litter, which uses somewhat beefed-up materials but is a similar concept. We also used the Evacuation and Rigging Strap (ER-S) from TacMed Solutions, which is inexpensive, small enough to be packed inside any bag, and lets you perform a drag, a backpack carry, or a modified half-litter carry on a casualty with a few simple loops of the strap around them.

It can be used to carry a casualty in a low

It can be used to carry a casualty in a low “bear-crawl” position, minimizing exposure by maintaining a low...

“Another soft litter is the Phantom from TacMed Solutions,” Eric says. “It can be thrown into a backpack or bag easily. The trade-off is that you can’t drag it very far or you’ll rip the sh*t out of it. It’s also super flexible, which actually makes it harder to carry when you consider the patient naturally flexing their knees and bending their hips.”

Decision to Move

When it comes to deciding whether or not you should attempt to move casualties during an active shooter event, the recommendations are fairly simple. If the casualty is dead, then there’s no need to move them. And if you’re in a “hot zone” where the shooter is a direct threat to you, you should worry about protecting yourself with your own firearm if possible or evading instead. Otherwise, if you’re in a “warm zone” where the threat is still out there, but not directly in front of you, then you should attempt to move the injured casualty to safety.

Regardless of whether or not you suspect neck or spinal injuries, unless you have advanced tactical medical training, don’t spend time trying to stabilize the patient's neck or spine prior to evacuation. Chances are that you’ll just do it wrong anyway, compounding the issue and wasting invaluable time. Instead, focus simply on getting the casualty to professional care as soon as possible.

One way to use the ER-S strap from TacMed Solutions is to lay the casualty on their back and use the ER-S as a convenient drag strap, looped around the casualty's arms and chest.

One way to use the ER-S strap from TacMed Solutions is to lay the casualty on their back and use the ER-S as a...

In a backcountry hiking or wilderness situation, it can be difficult, if not impossible, to evacuate an injured party to safety by yourself. In most situations it'll be safer for both you and the casualty if you leave him or her to shelter in place, and speed off by yourself to go find help. Otherwise, you run the risk of running out of supplies or dying of exposure on your way out because of the slowed pace when transporting casualties. The delay in medical care alone may doom the casualty. The better option is to quickly alert the local authorities, who can deploy a wilderness search-and-rescue team.

Litter Use Tips

When you strap the patient into an aftermarket litters, consider strapping them so that they’re laying on their side as opposed to on their back, like you see in all the movies. This makes it easier for them to bend their bodies (or you to bend their body for them) in order to navigate tight corners or stairwells.

Think about it this way — if you’re laying on your back it’s quite difficult to arch your body into any configuration besides straight up and down. But if placed on your side, it’s easy to bend into an S-shape or maneuver to help you fit where you need to. This also has the added benefit of the patient being in the “recovery” position already, reducing the chances of choking on vomit or blood, and making it easier for them to breathe. You can also utilize a backpack, jackets, towels, etc., to prop them up into the recovery position, or use these items to place in “hot spots,” bony areas of the body that can take a beating if dragged in a litter over rough terrain.

To summarize our tips: Try to use your environment to help you, consider other ways besides doors to get out, and consider purchasing aftermarket litters to train with and carry with you. This way you’ll be helping not just yourself and your family, but possibly the larger community as well.

Applied in a different configuration, the ER-S can also be used to hoist a casualty and attach them to you like a backpack, which is more appropriate for certain conditions.

Applied in a different configuration, the ER-S can also be used to hoist a casualty and attach them to you like a...

“Part of being prepared is being able to enable the laypersons around you — showing them how to help others while you do it yourself,” Eric says. “So get your family involved, and your kids and community. Get them involved and thinking, it'll suck to have to carry some random casualty or your wife by yourself down three flights of stairs in order to escape a threat.”

Get Formal Training to Learn Improvisation

It’s not easy to tell someone how to improvise ahead of time, for the same reason that it’s hard to predict the future. But formal training will give you a good foundation of skills to build on and make it easier to recognize improvisational opportunities when you find them. Here are some companies Eric recommends that teach patient/casualty movement as part of their courses.

Lone Star Medics

  • Medicine X Course: This two-day “ambush medicine” course focuses on providing casualty care while being fired upon and includes coverage of rescue rigging and rapid trauma assessments. lonestarmedics.com

Special Operations Aid & Rescue (SOAR)

  • Tactical Emergency Casualty Care (TECC) Course: Based on national TECC committee guidelines and endorsed by the National Association of Emergency Medical Technicians (NAEMT), this two-day course teaches students how to treat casualties in wounded environments, but also includes treatment of pediatric patients and techniques for dragging and carrying victims to safety. www.soarescue.com

Improvised Evacuation Methods safety rescue casualty injury medical first aid 2

Talon Defense

  • Combatant Casualty Care: An advanced four-day course that includes coverage of patient drags using both improvised and commercial litters and rigging, it also teaches more advanced medical treatment techniques which can be incorporated to treat casualties in place prior to evacuation. talondefense.us.com

If you can’t make it to one of these in-person classes, check out these two online resources that provide expert-approved guidance for civilians in active shooter situations.

  • www.ready.gov/until-help-arrives – This reference guide, produced with input from the Committee on Tactical Emergency Combat Care (CTECC), includes a helpful interactive video to teach kids in addition to more advanced discussion for adult civilians.
  • www.avoiddenydefend.org – Developed by Texas State University, this 12-minute video eschews the common “hiding” advice regarding active shooters. It also expands beyond the common office or school shooting environments to include reasonable (and possibly life-saving) response techniques for open retail store environments, churches, movie theaters, and more.

About the Author

Andrew Schrader recently served as an Advisor/Reviewer for the San Bernardino (California) City Fire Department’s After Action Report (AAR) of the Active Shooter Incident Response which took place in December 2015. His company, Recon Response Engineering LLC, educates firefighters and search and rescue teams on the subject of urban search-and-rescue and building collapse. Most recently, he was deployed in Florida to support rescue operations following Hurricane Irma. www.reconresponse.com

More From Issue 25

Don’t miss essential survival insights—sign up for Recoil Offgrid's free newsletter today!

Read articles from the next issue of Recoil Offgrid: Issue 26

Read articles from the previous issue of Recoil Offgrid: Issue 24

Check out our other publications on the web: Recoil | Gun Digest | Blade | RecoilTV | RECOILtv (YouTube)

Editor's Note: This article has been modified from its original version for the web.