The human body relies heavily on sleep. Getting a good night’s rest helps us feel rejuvenated, improves attitude, reduces our risk of illness, and restores critical thinking abilities and reaction time that might be impeded by tiredness. On the other hand, continual sleep deprivation can have a disastrous effect on our lives — anyone who has pulled one too many all-nighters due to work, family, or school commitments can attest to this.
The U.S. Centers for Disease Control and Prevention (CDC) recommends adults get 7 or more hours of sleep each night. Many of us end up getting less than that, so the CDC has studied and analyzed the rates of low sleep in cities across the United States. The study also includes data on average bedtimes, which generally are between 11:00 and midnight.
Taking a quick look at the list, you may notice that many of the top cities have rates of poverty, unemployment, and violent crime that are far above the national average. It’s difficult to say whether the sleeplessness is a byproduct of these factors or whether it exacerbates them — both may be true. Studies have linked sleep deprivation with increased aggression and reduced impulse control, so it’s a factor worth considering if you visit the cities on this list.
Although the word “offgrid” is part of the name of our magazine, and we cover and discuss many products and techniques that can help you survive without access to electricity, there’s no denying that juice powers some wonderful devices.
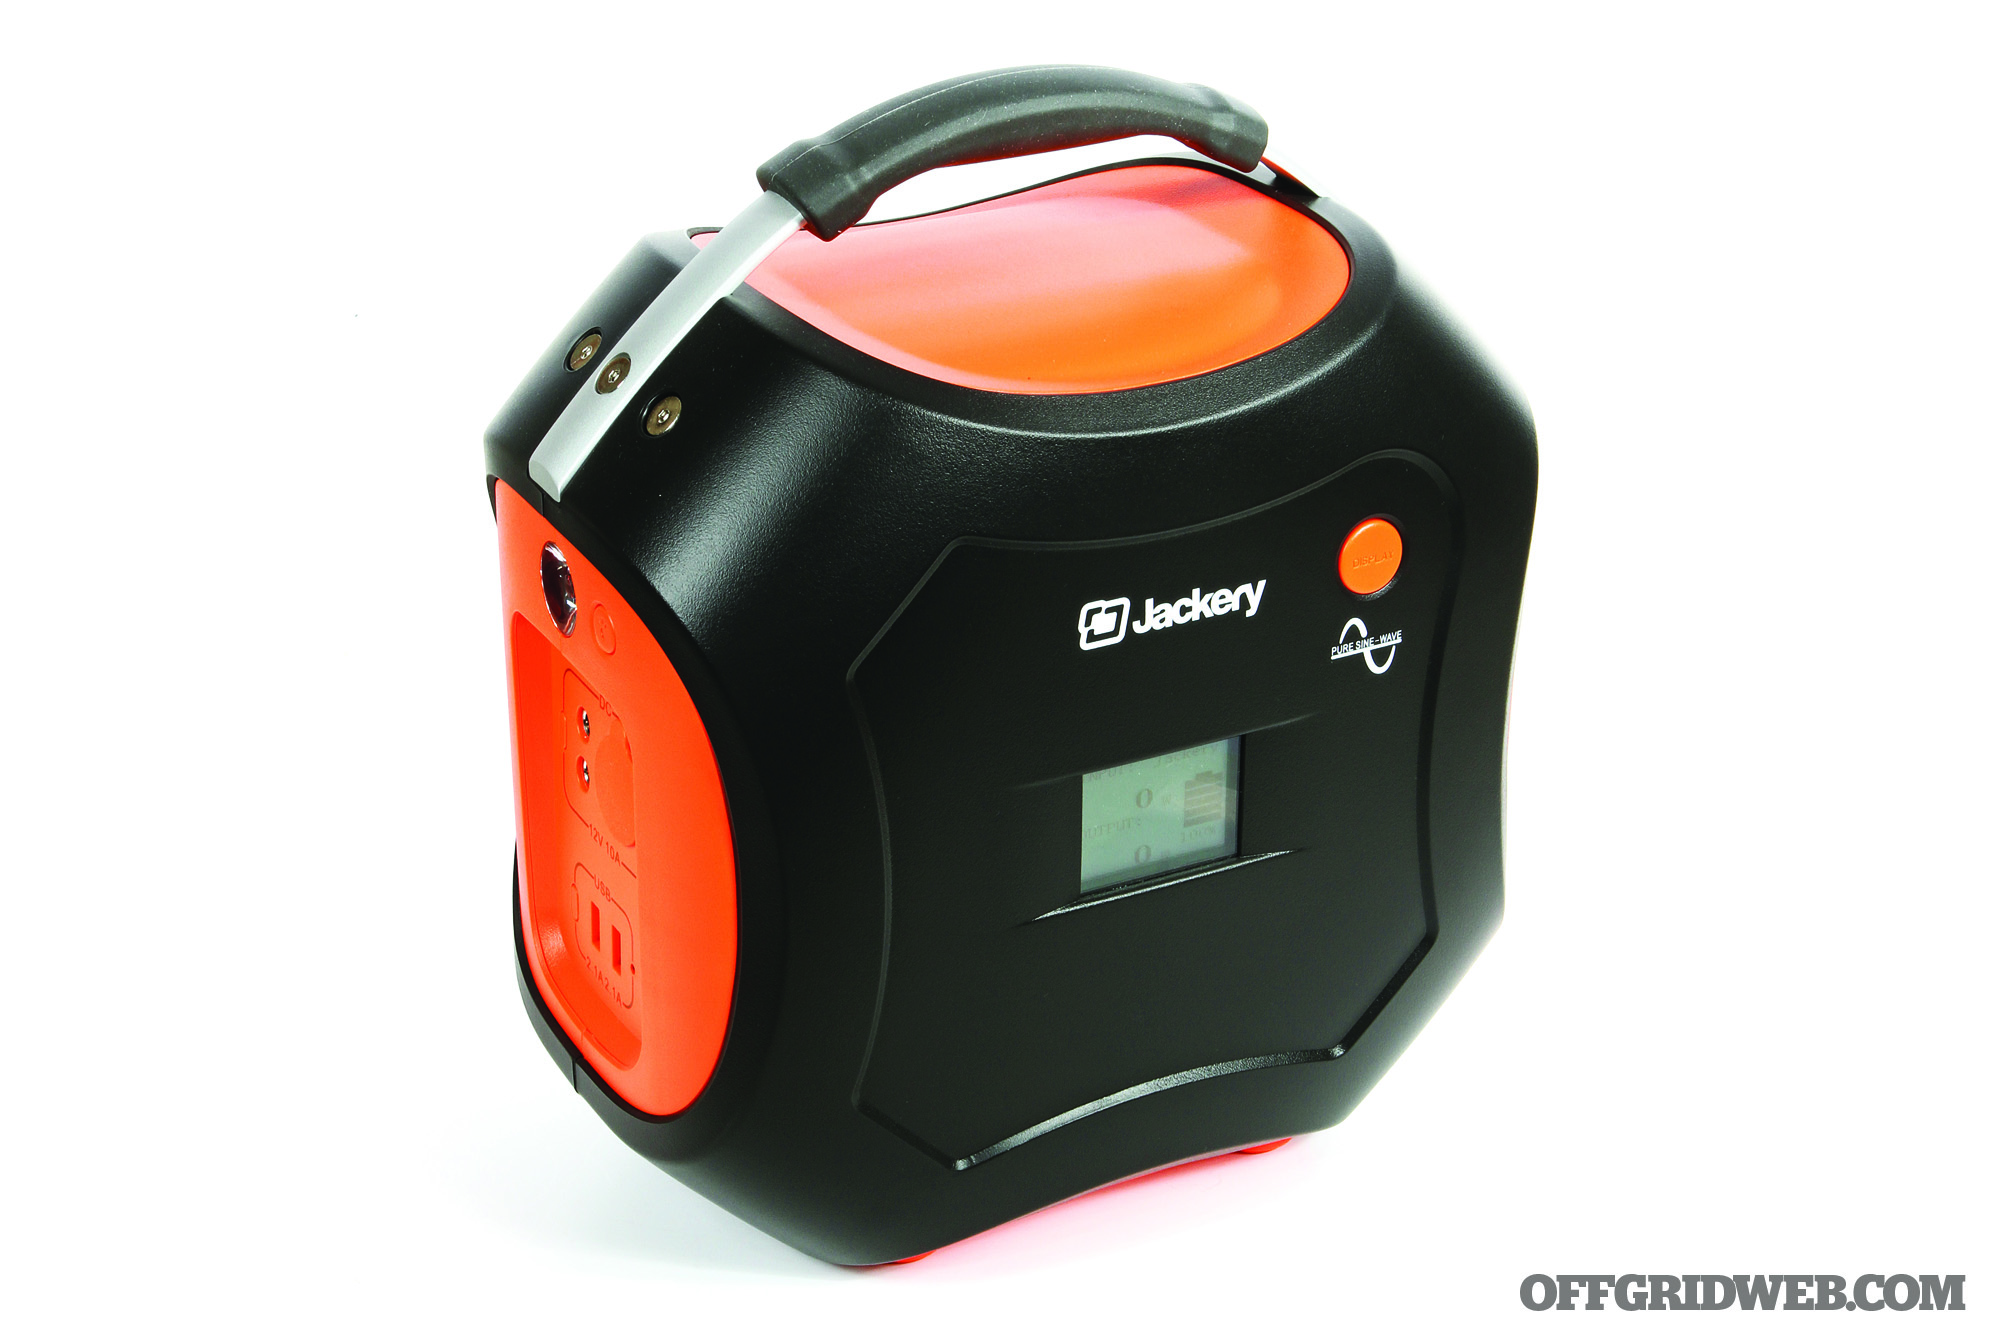
So what can you do when you expect to be far from outlets, but still need power on tap? More specifically, what if you need a lot of power and AC capability? Jackery has a solution: the Explorer 500. They call it a portable solar generator, and while you can charge it with a solar panel, it’s basically a giant battery. Not one of those old-fashioned, boat anchor, lead-acid batteries that you might find in cars and some other high-capacity generators, either. It features lighter, more compact, and more resilient lithium-ion cells, just like smartphones, laptops, and Tesla cars.
Fun Facts About Electricity
Electricity is essentially the flow of electric charge, which we utilize to power our homes, offices, and portable devices. Voltage, measured in volts, refers to the potential energy or difference in charge between two points. Current, measured in amperes, refers to the rate at which charge is flowing. Multiplying the two together results in an expression of power, measured in watts (V x A = W).
Your house is powered from your local electrical grid with AC (alternating current), whereby the electric current repeatedly reverses direction, alternating back and forth at a certain frequency. On the other hand, DC (direct current) flows in only one direction, as used to power electronic systems and as found in batteries.
Many items are designed to be plugged into an AC outlet. So if you wish to power them with a portable battery unit, it must be able to convert the DC output from its battery to AC for the appliance or device to use, via a component called an inverter.
Power requirements for various devices span a wide range. A 100-watt light bulb, not surprisingly, draws about 100 watts. A desktop computer might draw several hundred watts. A microwave could wolf down over 1,000 watts. This is no problem at home — a typical 15- or 20-amp 120-volt power circuit in your house can deliver about 1,400 to 1,900 watts of continuous power (e.g. 15A x 120V x 80 percent for a continuous load as a rule of thumb).
However, while hairy-chested gas-powered generators can replicate this level of power delivery, batteries like the Jackery generally can’t put out that much power. The Explorer 500 is rated to deliver peak AC output of 500 watts and continuous output of 300 watts (110 volts at 2.6 amps). So don’t expect to use power-hungry appliances and tools with it.
Performance
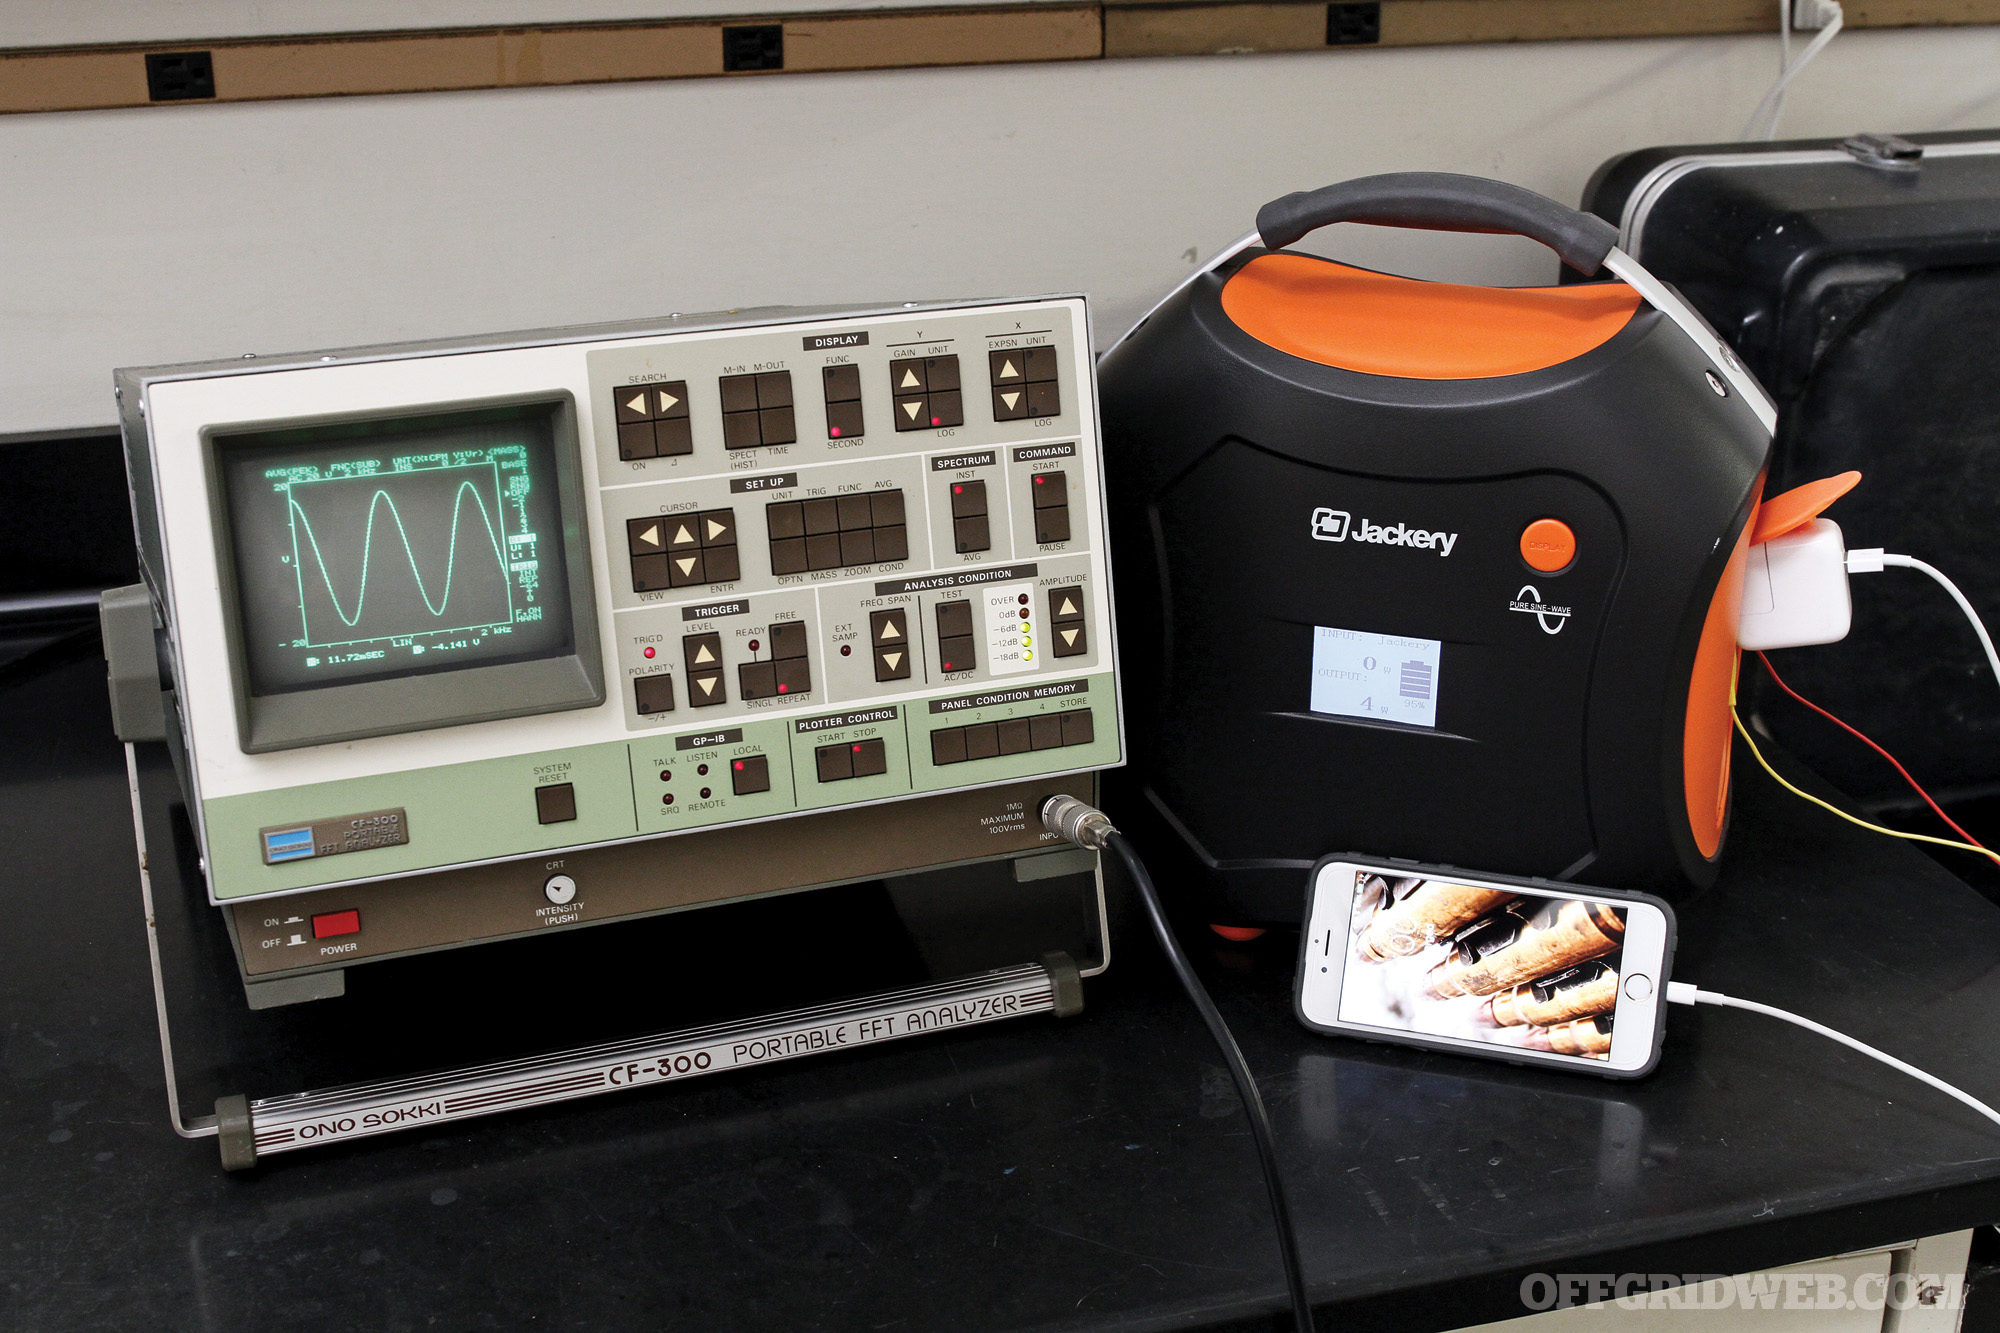
Above: Our trusty old Ono Sokki FFT (Fast Fourier Transform) analyzer plots amplitude versus time, showing a nice sine wave from the Jackery. Voltage values look low, because we used an attenuated oscilloscope probe.
Jackery says the capacity of this beast is 500 watt-hours, so theoretically you could power a 50-watt device for 10 hours or a 500-watt item for one hour. For an extended continuous test, we used the Explorer to run a retina MacBook Pro 15 for an entire work day, consisting of watching work-related videos, work-related surfing of the web and social media, writing articles, editing photos and videos, rendering video projects, playing a few work-related games, and watching more work-related videos. From a full charge, the Jackery lasted 10.5 hours (roughly 10 percent of capacity per hour) and its built-in LCD monitor reported power output typically ranging from 20 to 60 watts. This was pretty consistent with Jackery’s stated specifications, assuming some efficiency loss.
To test more peaky power needs, we used the Explorer to run studio strobe flashes that bumped up against its peak AC output. We powered two strobes on a photo shoot with a power strip plugged into the Jackery’s single AC outlet. There seemed to be a dip in power after each time the strobes fired, but the big battery kept on trucking throughout the shoot. With the heavy demands on the battery, the Jackery’s cooling fan also kicked in.
Note also that the unit doesn’t actually connect to the third grounding prong on plugs; there’s just an empty plastic recess to accommodate the prong. This seems unlikely to present any issues, especially given the Explorer’s overall power output limitations, but devices that sense and require a proper ground may not work.
Jackery says that the Explorer’s AC output is a pure sine wave, as you’d expect from your home’s outlet and high-end backup power systems for computers and other sensitive electronic equipment. However, an online publication’s review of the similar Jackery Power Pro last fall found that it wasn’t producing a clean sine wave when connected to an ocilloscope. We wanted to check if Jackery had improved the quality of the AC power output along with the product’s name. So, we spent some time on the lab bench with an Ono Sokki FFT (Fast Fourier Transform) analyzer. We’re pleased to report that the Explorer’s AC signal was a clean sine wave, confirmed with the FFT analyzer’s plots of voltage amplitude versus time and frequency.
For more pedestrian DC power needs, the Explorer also has two USB ports, a 12-volt car socket, and two 6mm 12-volt DC sockets. Recharging small items like an iPhone were child’s play with the massive battery, like refueling a motor scooter with a KC-135 Stratotanker.
Charging
With such a large battery, charging the Explorer is a non-trivial consideration. The specification for its charging port is 25.5 volts, so it requires a hefty power source to replenish its lithium-ion cells. The included AC power adapter weighs 1 pound and pushes 25.5 volts at 3.5 amps; the math lines up perfectly with the Explorer’s display, which indicated an input of 89 or 90 watts when plugged in. Jackery says a full charge should take six to seven hours; in our testing, it took almost exactly six hours each time.
Alternately, for when power outlets aren’t available, Jackery offers optional solar panels. We tested their large 102-watt panel, which folds in fourths from a sail-like 40 by 31.5 inches to 20 by 16 inches and is secured by magnets and a zippered sheath when folded. It has two USB outlets, USB-A and USB-C, as well as a connector that takes an extension cable to plug into the Explorer. There were two cable lengths included with our press loaner; the short 12-inch one was faulty but the long 10-foot cable worked fine. On sunny California days in springtime, the Explorer showed that it was receiving 45 to 57 watts from the solar panel. At best, we’d recharge about 10 percent per hour in midday, averaging closer to 5 percent as the sun crept on. Jackery notes that total charge times of seven hours or less are possible, but we weren’t able to achieve sufficiently high-input wattage to charge that fast. Note that Jackery has updated its solar panels, now offering a 100W variant which offers similar performance to the older model that we tested. It also replaces the fabric outer shell with hard plastic.
While lithium-ion cells are great, they don’t last forever and lose effectiveness over time — just ask Apple about its Batterygate controversy. Jackery estimates that the Explorer’s battery will last approximately 500 full recharging cycles.
In the Field
In the field, the Explorer worked as promised, without any fuss. The illuminated display shows power output, input, and battery status in percentage. This was very handy to keep an eye on power consumption (or charging) and to have a handle on how much longer the battery might last. However, like a cheese-eating surrender monkey, it gives up the ghost silently; we’d have liked an audible indicator when the battery runs out. There’s an LED light built into the unit as well, convenient when you’re trying to deal with a tangle of cords and devices at night.
The single AC outlet was an inconvenience; we successfully used a power strip, but that’s one more item to worry about and misplace when you most need it. In any case, you should remain cognizant of the total load you put on the system.
We thought the car socket would be handy to use a cigarette lighter as a firestarter. Unfortunately, none of the lighters we had on hand (from an old Ford truck and an old Honda) worked — it appears the contacts on the lighters were recessed too far for the Explorer’s socket. But various other 12-volt car accessories worked well, including a portable refrigerator that’s been a family favorite on long trips over the years.
While somewhat heavy and bulky, the solar panel worked dependably. You can drape it over a tent, prop it up, or use the metal grommets to latch it to something, like a roof rack.
The Explorer isn’t weather-proof, with its exposed fan and sockets, but held up fine in regular use. It got banged around in the back of vehicles, along dirt trails, and at camp sites, collecting scratches, but continuing to serve up juice. Additionally, its stated operating temperature to supply power ranges from 14 to 113 degrees F, and from 32 to 104 degrees F for charging, so be mindful of this if you experience temperature extremes in your area.
At over 12 pounds for the battery and over 9 pounds for the solar panels — not to mention their bulk — the system wasn’t particularly practical for traveling on foot. It has a nice rubber carrying handle, but isn’t otherwise conducive to being humped. However, it did function nicely as an improvised kettlebell for exercising in the field.
So the Explorer 500 seems best suited for relatively static or vehicle-based applications — emergency or backup power during outages, supplemental power source, car-camping trips, events at venues without power outlets, and so forth. We read online reviews from folks who also use it for medical equipment and astronomy. For long-term survival use, though, we’d pick a more powerful gas generator over a solar-powered battery pack like the Explorer to service electrical needs. But as a dead simple, clean, quiet power source for items that aren’t overly power hungry, the Jackery Explorer 500 is a very handy tool. And its ability to be recharged via solar panels can help to lower your reliance on consumable fuel sources — an important consideration if a disaster leads to chaos at local gas stations.
Specifications
Jackery Explorer 500 and 102W (tested) Solar Panel
Dimensions 10.6 by 6.7 by 12.5 inches (battery pack) 20 by 16 by 1 inches (solar panel, folded)
Personal experience is often the greatest teacher. When we make it through difficult situations, especially those which could have easily become life-threatening, it leads us to contemplate how we can prepare ourselves to better cope with those situations in the future. And more importantly, it helps us consider what we’d do if things took a turn for the worse. This is why we’ve created our Survival Scenarios article series — to help you think through problems before they arise.
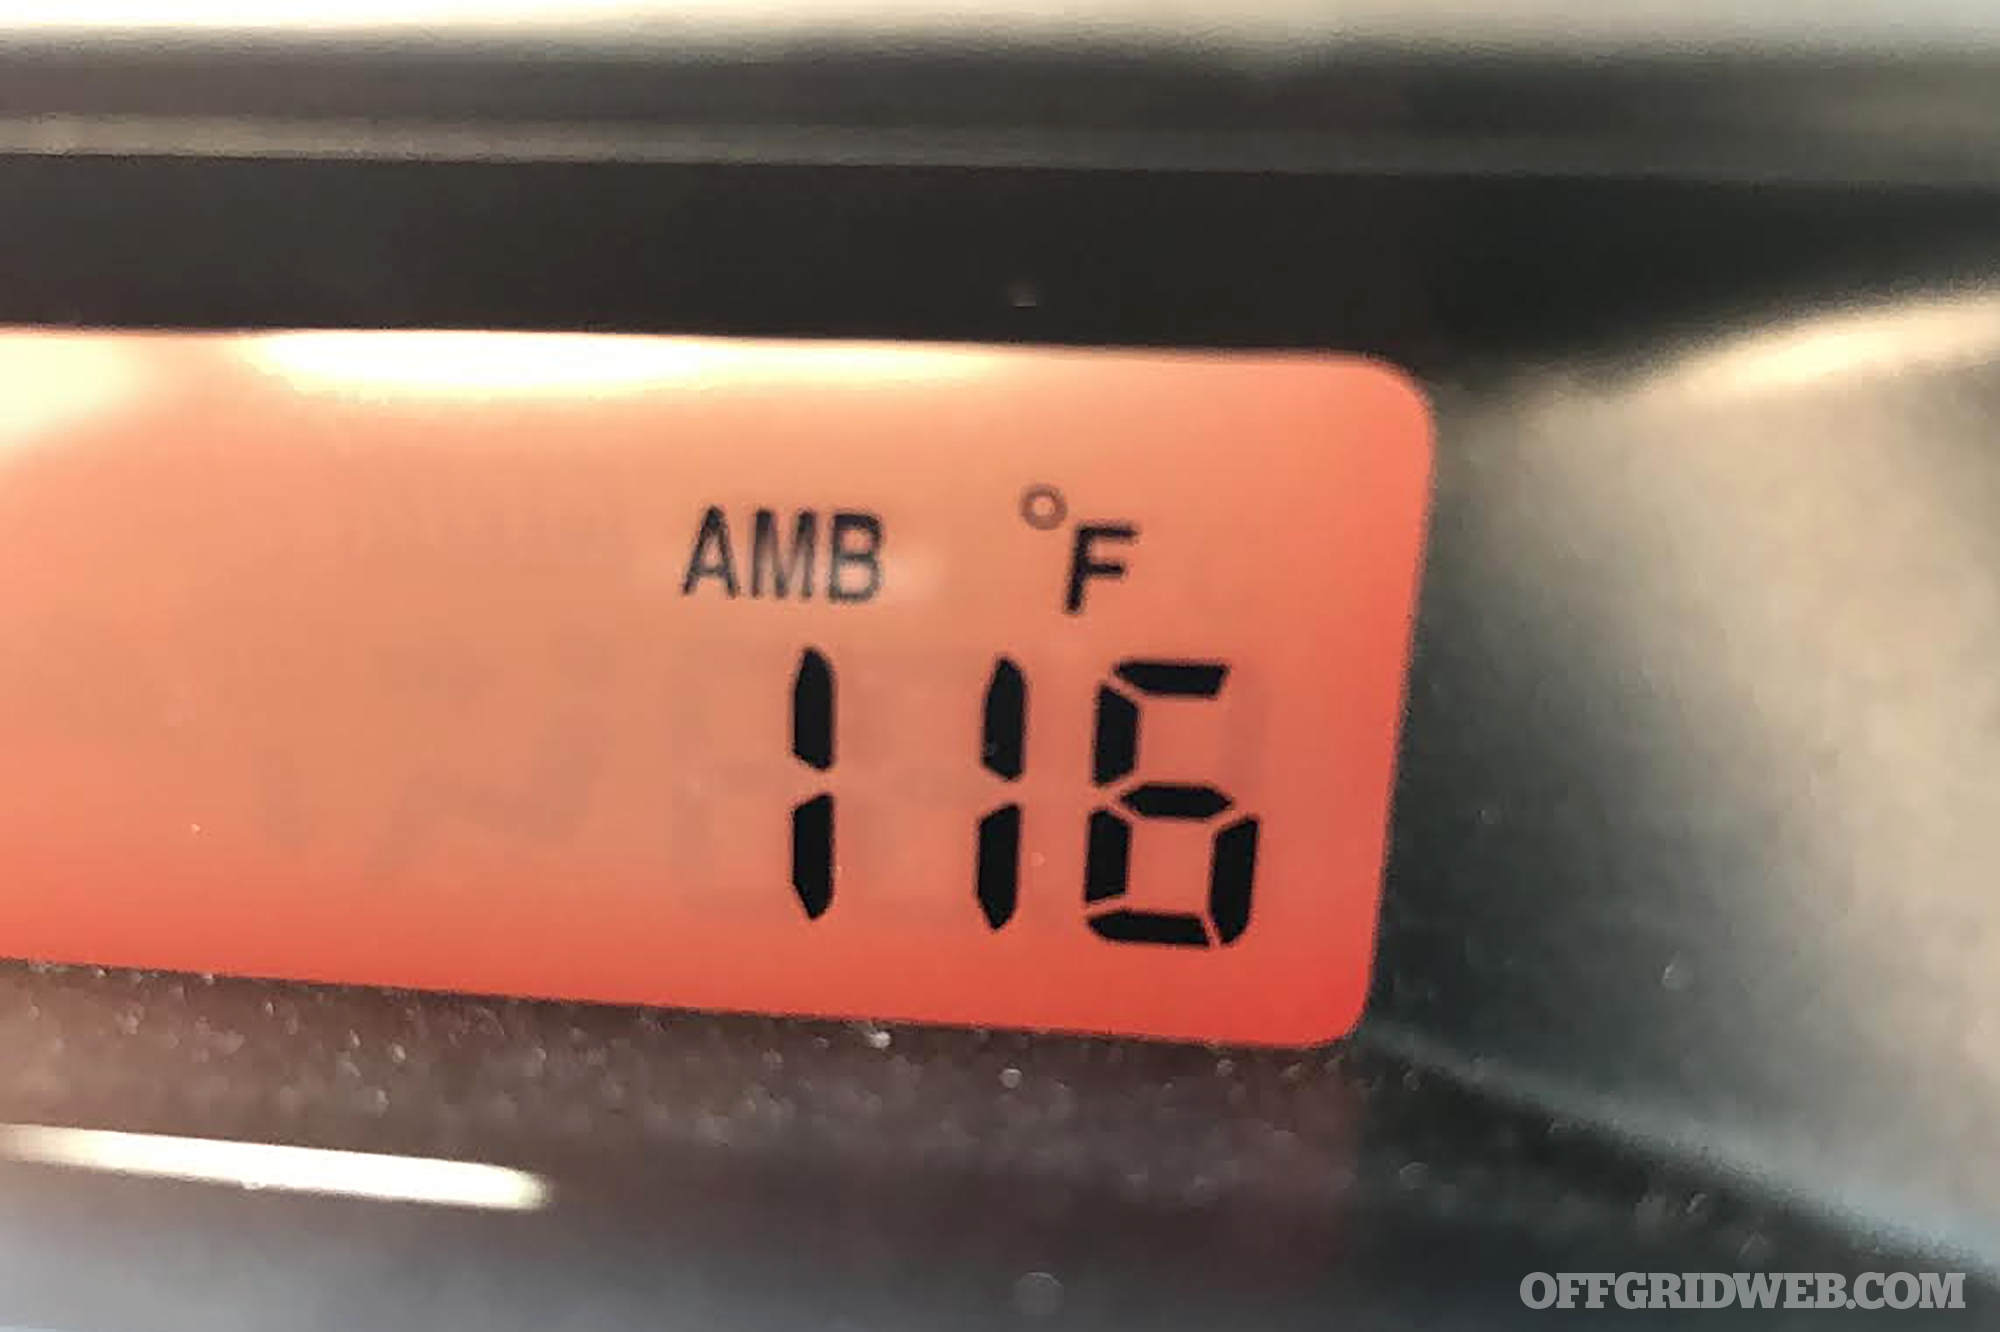
The following scenario is based on my own experience during a recent 8-hour road trip between California and Arizona. After pulling off the road for a bathroom break, I returned to my car only to find the battery had died unexpectedly and the engine wouldn’t turn over. Ambient temperature had been hovering around 116°F (47°C) for most of the afternoon.
This wasn’t a problem with the air conditioning at full blast, but without a running engine, A/C was no longer an option. My wife and dog were in the car with me, and it was getting hotter by the minute. Anyone who has experienced this extreme desert heat knows it’s more than just uncomfortable. Prolonged exposure can be dangerous if you’re unprepared.
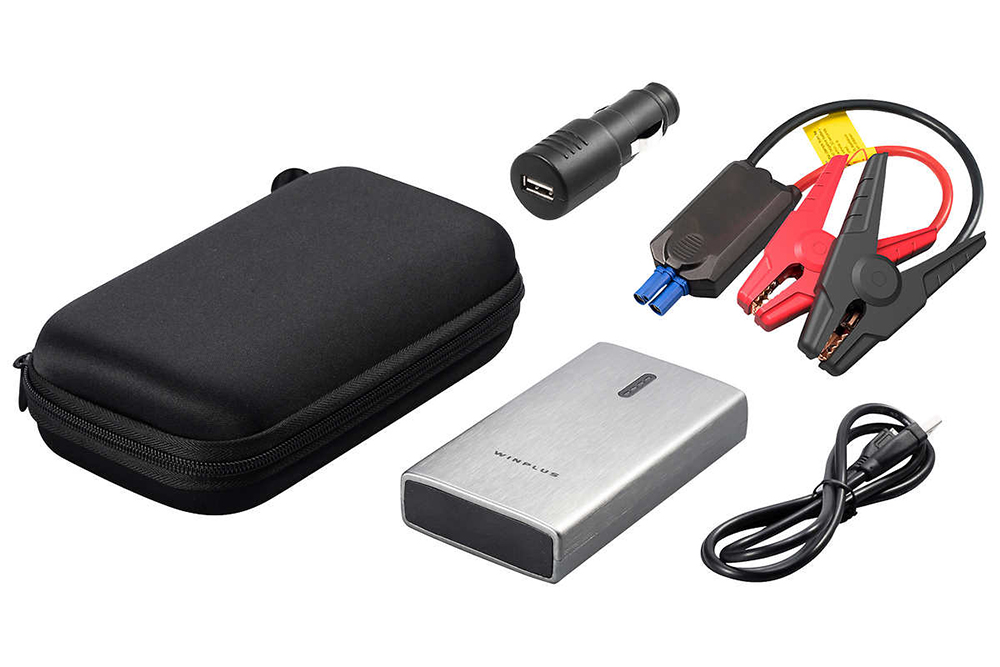
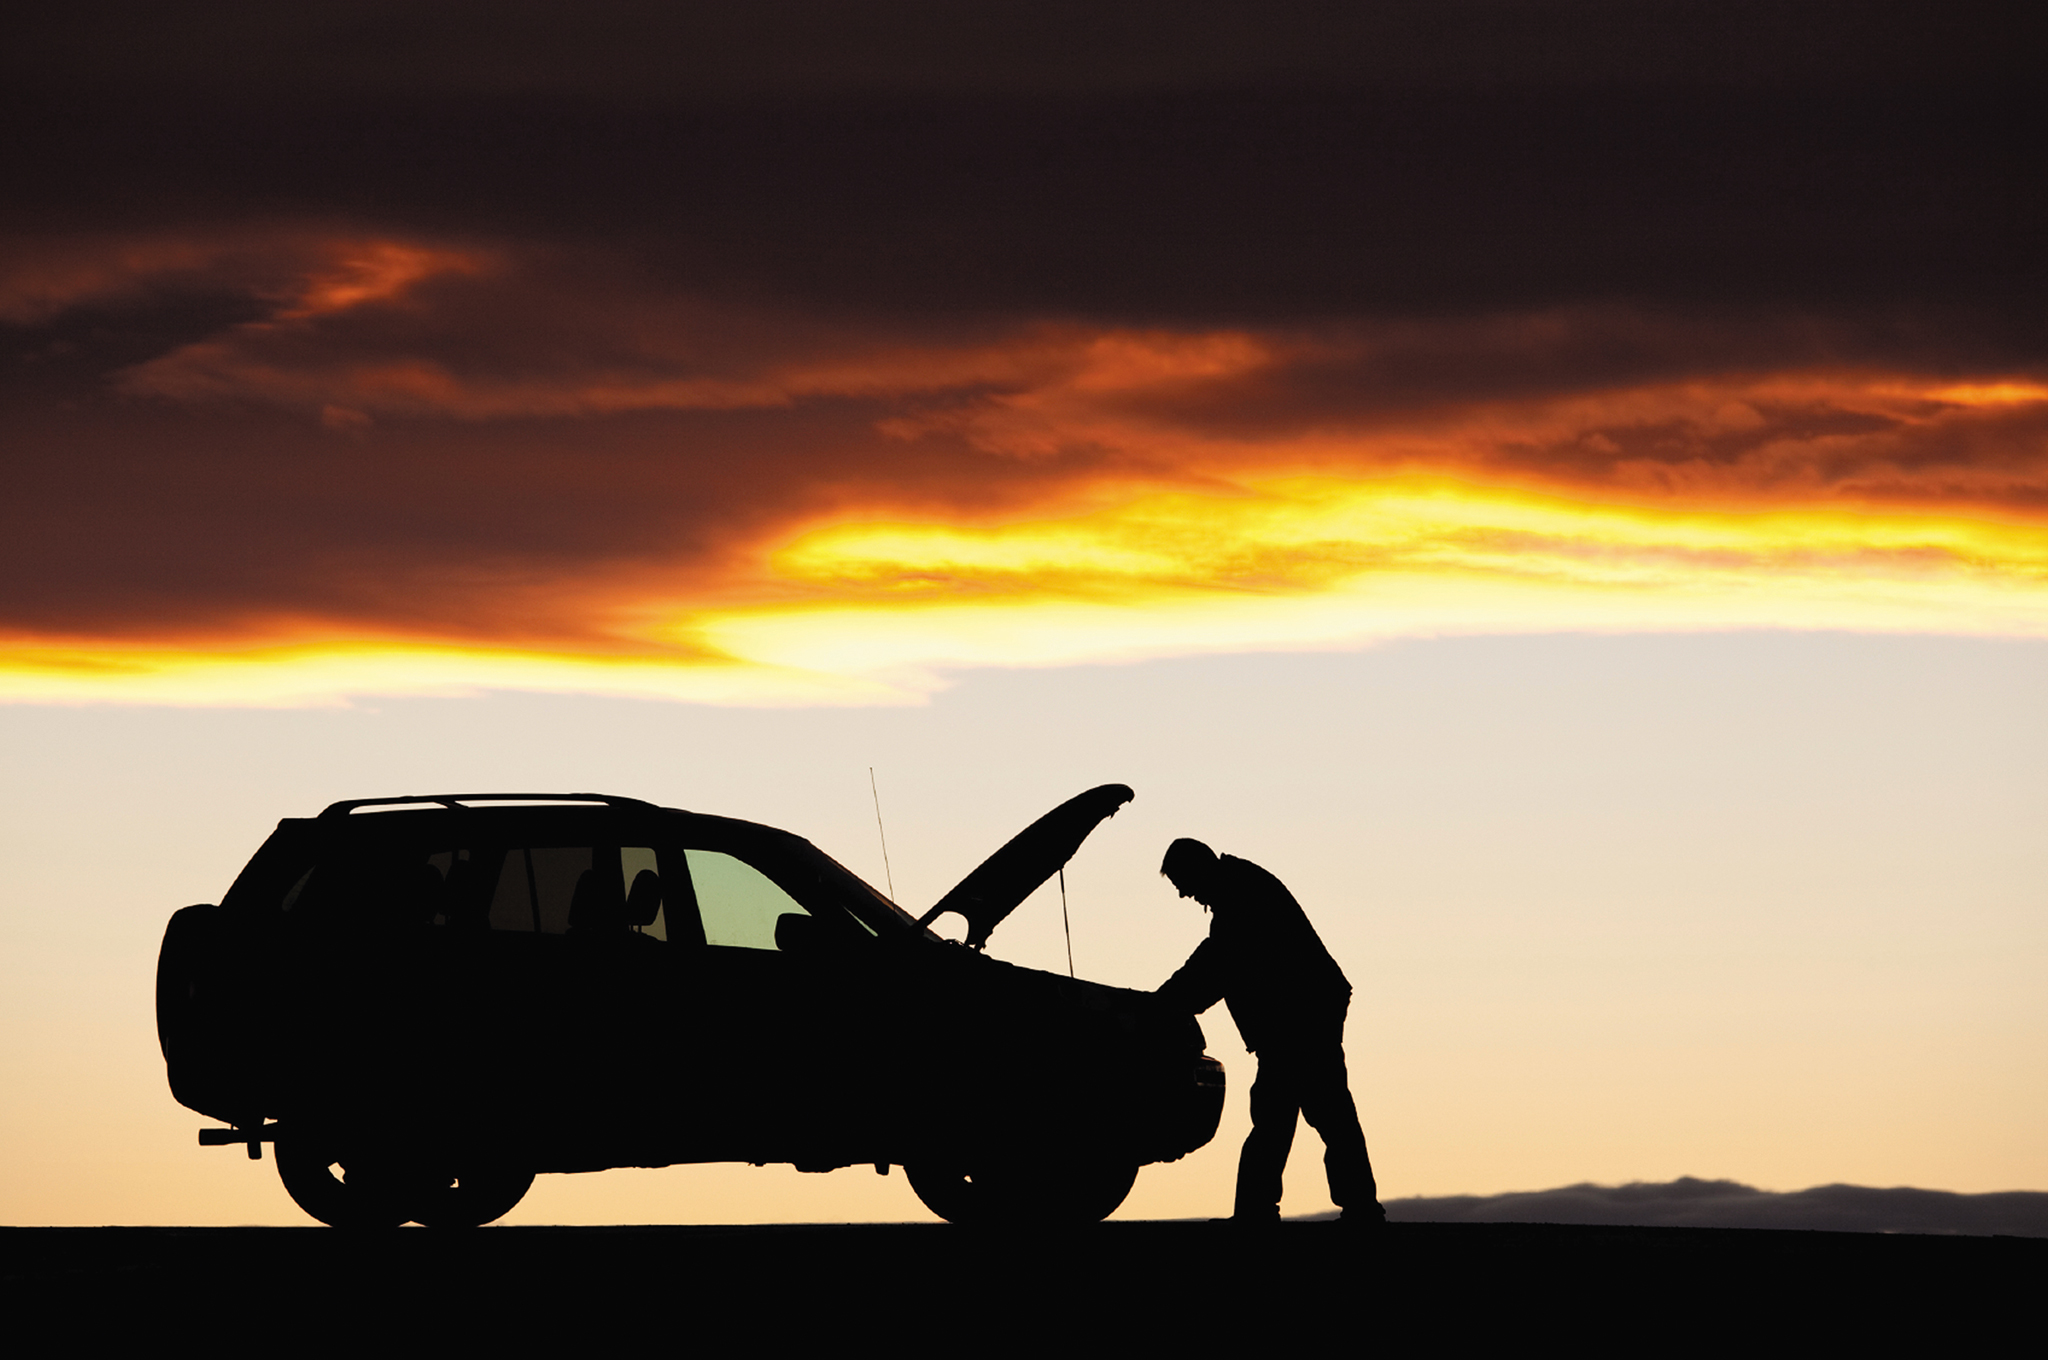
Fortunately, I had a portable lithium-ion jump-starter in the glovebox and was able to get the car running again in less than a minute. Without this item, I would’ve been forced to pull out my jumper cables and rely on the kindness of a stranger. And if I found myself in this situation in a more remote area without these tools, I could end up in serious danger.
A handheld jumpstart unit like this one can get your car started without the aid of another vehicle.
This leads us to an interesting question: if you found yourself in a broken-down vehicle on a remote desert road, what would you do? Stay with the vehicle and take shelter, hoping for a passerby to spot you? Or set out on foot to reach a more heavily-trafficked road, attempting to wave down another motorist?
This is the question we’ll address in today’s Survival Scenarios article. As usual, we will ask you how you’d handle a difficult choice in a hypothetical survival situation, given the background information below. The article will end with a poll where you can make your choice and see how others felt.
Background Info
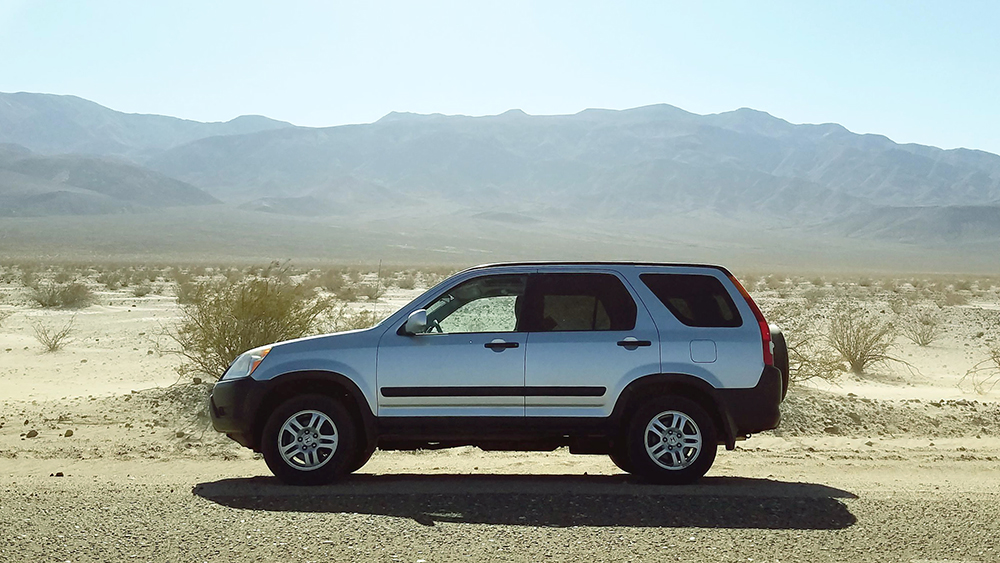
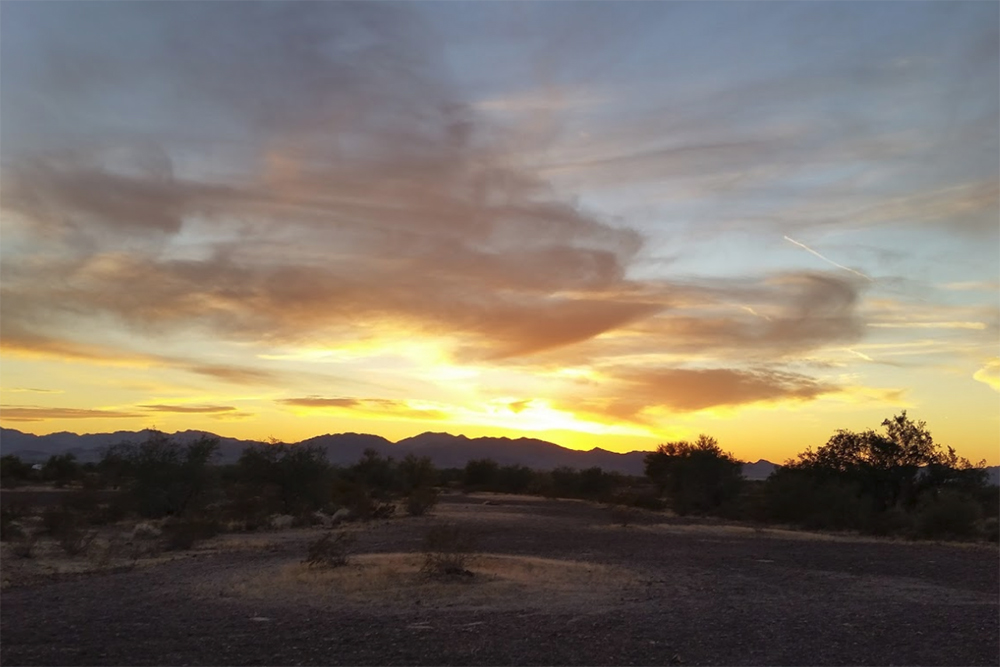
In this scenario, you’re traveling north on Route 95 from Yuma, Arizona towards Lake Havasu. You’re in your compact SUV, headed out on a Thursday afternoon to meet some friends for a weekend at the lake. A few hours into the journey, you spot a sign for a campground and hiking area, so you decide to check it out and stretch your legs. But as you pull to a stop in the empty dirt parking lot, your vehicle’s engine sputters and stalls. Turning the key produces nothing but a faint click — it won’t start.
It’s late summer and stepping out of your air-conditioned vehicle feels like walking into an oven. According to the temperature reading on your dash, it’s close to 120°F outside, and extremely dry without a hint of breeze. You know that the onset of heat exhaustion and heat stroke can be sudden in this weather.
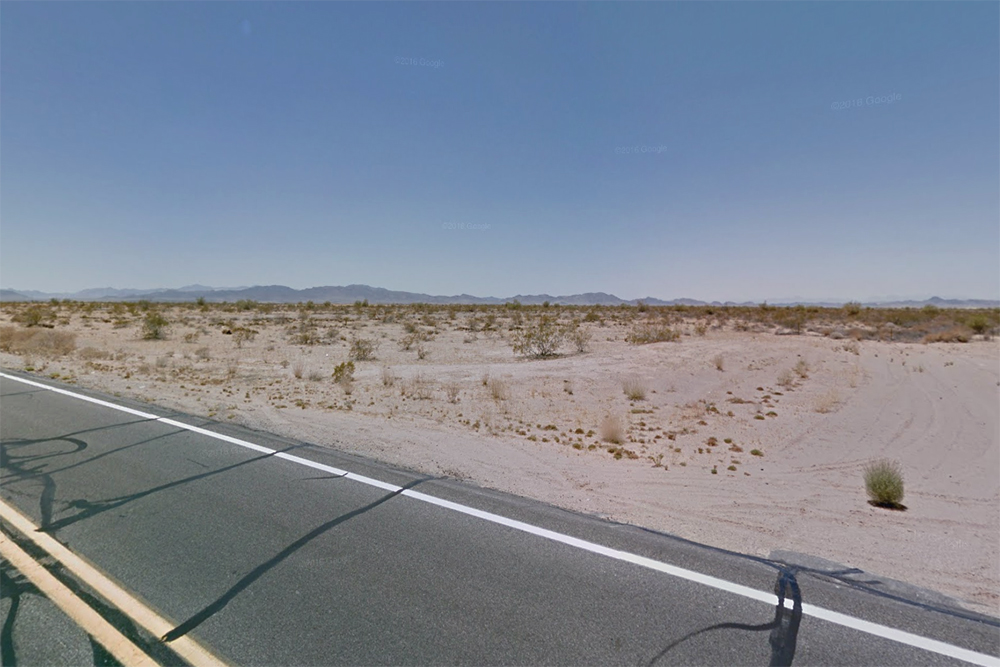
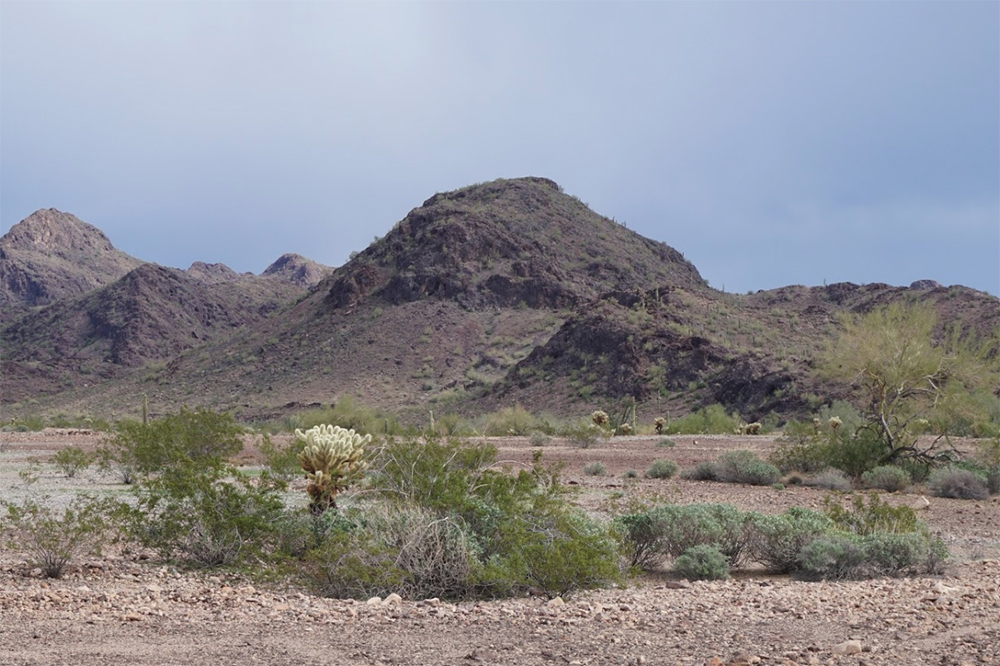
The surrounding terrain is mostly barren, with low-lying bushes and cactus as the only vegetation. You estimate you’re about two miles from Route 95, but passing traffic is sparse at this time on a weekday.
In your vehicle, you have the following items:
Cell phone with a full battery, but it currently reads “No Signal”
A cooler containing most of a 24-pack of water bottles (roughly 2.5 gallons worth) and two six-packs of light beer, but no ice
Vehicle emergency kit with a jack, jumper cables, tow rope, two road flares, a small tarp, a pair of gloves, and a multi-tool
One thing’s for sure: sitting in your enclosed vehicle isn’t an option. The intense sun and greenhouse effect is making it unbearably hot inside. You can either take shelter in the shade and wait for rescue, or set out on foot to reach a main road or a location that has enough cell signal to call for help.
Staying Put
If you choose to stay with your vehicle, priority number one is finding shelter from the sun. There are no large trees or manmade structures nearby, but you can use the tarp from your emergency kit to rig up a shelter alongside your car. If that doesn’t work, you can crawl underneath the car itself, although the undercarriage is probably still warm from your trip.
The good news is you’ve got quite a bit of lukewarm water (and beer) to stay hydrated. The water can also be splashed on spare clothing and wrapped around your body for evaporative cooling. Food is limited, but exposure will threaten your health long before lack of calories becomes a problem, so it’s not a top priority.
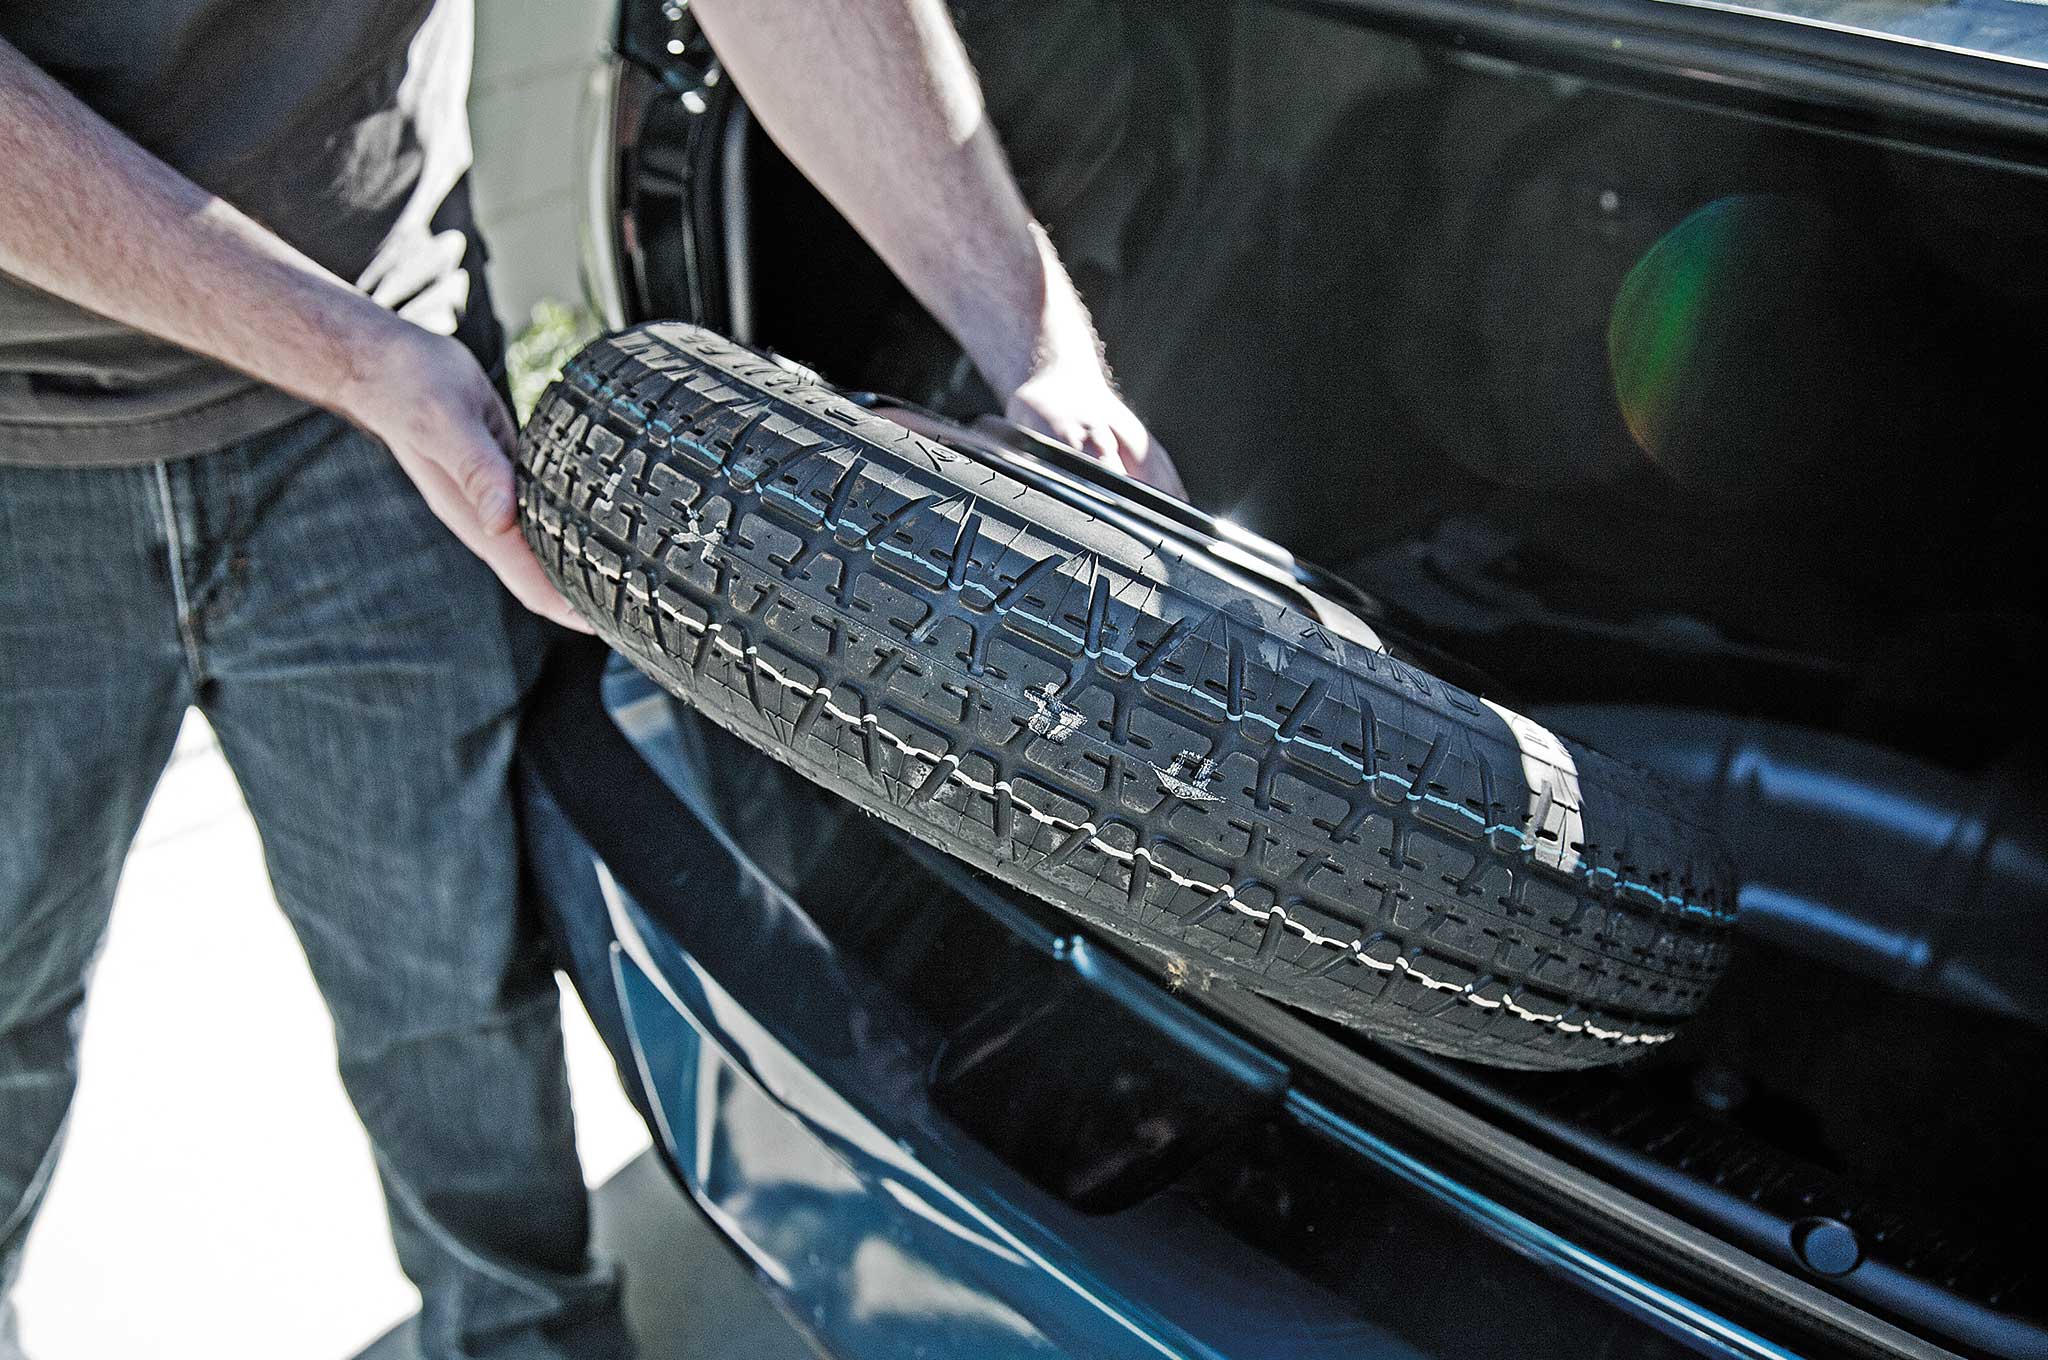
By staying with the vehicle, you can use the road flares and some collected brush to start a signal fire. Burning the spare tire will create thick black smoke that will hopefully serve as a distress signal. However, this relies on someone spotting your signal and calling the authorities.
Your friends expect you to arrive in Havasu by dinnertime, so they’ll probably know something is wrong within a few hours if you don’t show up. They can report your vehicle type and approximate route to rescue personnel, but they’ll have no way of knowing where in the 150 miles of desert you ended up — or how far you are from the main highway. Rescue might take 24 hours or more to arrive, and that’s a long time in this extreme heat. Even after the sun sets, you can expect temperatures close to 100°F.
Walking to Find Help
If you set out on foot from your vehicle, it’ll be wise to leave signals indicating your distress. You can prop the hood open to indicate a breakdown, and in case a plane flies overhead, use the international ground-to-air signaling code to leave a marker on the ground. This could be built from brightly-colored items from the car, or dark stones that contrast with the sandy ground.
Before leaving, you’ll want to leave a written note in the car indicating details rescuers might need — your name, the circumstances of your breakdown, emergency contact info for friends/family, the time you left the vehicle, your physical appearance, and the direction you headed.
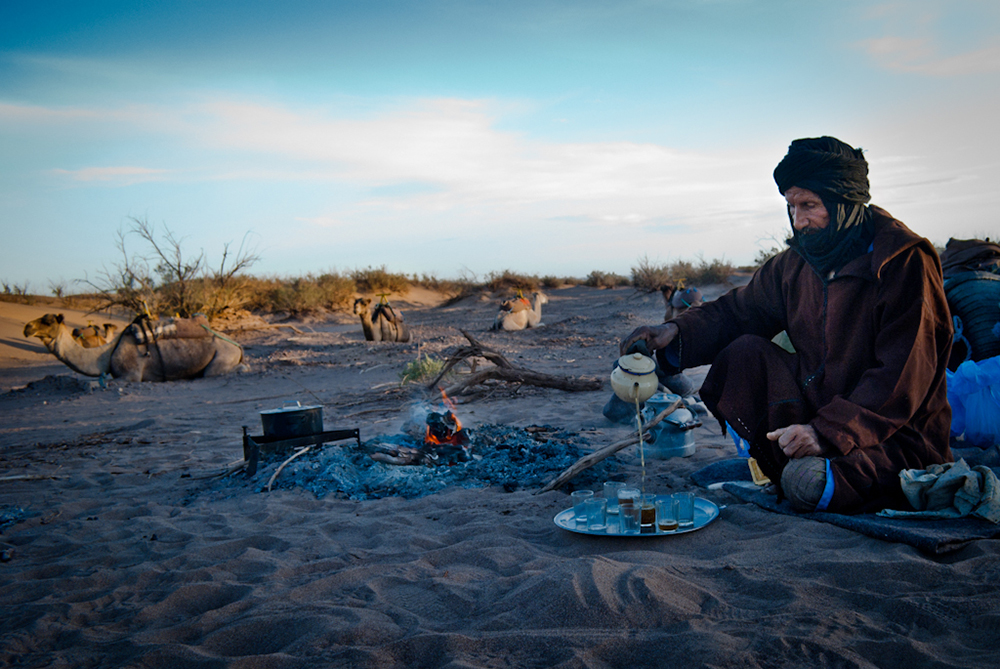
Covering your skin in fabric will help you avoid the direct sunlight. Photo: Flickr.com/acquimat
You can load up the duffel bag to take some items with you, most importantly plenty of water. It’ll also be wise to loosely wrap your exposed skin in lightweight garments to escape the harsh sun, as Bedouins and other desert-dwelling people have done for centuries. The road flares can help with signaling once you reach a main road.
Setting out on foot increases your odds of a quick rescue, since you might walk a short distance and reach cell signal, or you might reach the highway and flag down a motorist. However, it also poses a huge risk. Leaving your vehicle will make it harder for rescuers to find you, and could cause you to become lost or injured in the desert with even less supplies.
The Decision
Given the circumstances above and the pros/cons of each choice, it’s time to decide which course of action you’d take. Would you prefer to leave your vehicle, knowing the high risk and high potential for reward? Or would you take the safer route, staying with your vehicle to conserve energy and remain in the shade?
Enter your decision into the poll below, and feel free to justify that choice in the comments section.
WARNING: This article is meant to be a quick overview and not a detailed guide on how to deal with dental care in an emergency situation. Professional medical treatment should always be sought first before attempting any of these methods.
Do you remember the movie Cast Away? In this film, protagonist Chuck Noland (played by Tom Hanks) survives four years on a deserted island after his plane goes down in the ocean. At one point in the movie, Mr. Noland develops a bad tooth. Since a professional dentist isn’t available to extract the tooth, he’s forced to improvise and gruesomely knocks the tooth out with an ice skate blade and a rock. Isn’t there a better way? Could he have prevented the situation from getting that bad?
While this may have been played up for dramatic effect, think about that scenario for a second. If you develop severe dental problems, such as an infected or cracked tooth, lacerated gums, an oral fungal infection, or one of many other nasty issues in that opening you’re using to eat food and drink water, what can you do? If no medical help is available, you may be in a world of hurt.
Anyone who has experienced even a mild toothache or onset of a cavity knows that it’s a level of discomfort you wish to rid yourself of as quickly as possible, lest it become unbearably painful. Without proper treatment, an abscess or infected tooth could even be life-threatening. First, let’s talk preventive measures. Don’t assume that if you’re without floss or a toothbrush you’ll just have to hope for the best. There are items out there you can either fashion yourself or that can be found in nature. An ounce of prevention is worth a pound of cure.
Answers to those questions can be found in Murray Dickson’s book, Where There Is No Dentist. First released in November 1983, it’s an excellent, easy-to-understand resource to manage various dental issues in remote third-world countries or a long-term survival situation. Like Mr. Dickson, we value preparedness.
“Where There Is No Dentist” by Murray Dickson
Mother Nature’s Mouthwash
As part of a preventive strategy, you can rinse your mouth with a mixture of ½ teaspoon of table salt dissolved in a cup of warm water every day to keep harmful bacteria to a minimum. This works by gently altering the pH balance in your mouth to create an alkaline environment that impedes the growth of specific tooth-decay-causing bacteria. Fortunately, the saltwater solution won’t irritate the mucous membranes that line your mouth and help maintain its equilibrium.
In a survival situation, you can boil ocean water down to procure sea salt crystals, but rinsing with untreated seawater should always be avoided (more on that shortly). If you aren’t near an ocean, you can boil hickory roots until the water evaporates. The crystals left in the pan are salt. You might even be lucky enough to find a salt block in a farmer’s field.
It’s important to note that while pure saltwater rinses can be beneficial for oral health, the use of saltwater — especially raw seawater — on open wounds elsewhere on the body poses some concerns. See our “Debunked” column elsewhere in this issue for more details on saltwater wound care.
Improvised Toothbrush
If you don’t have a toothbrush, you can create one by using a small, soft tree branch (ash, willow, poplar, pine). Choose a small branch that’s about the thickness of a pencil. It should be sturdy enough that it won’t break when you brush your teeth. Chew the end of it to soften it, and use that end to brush with. Toothpaste is helpful, but not essential, as brushing with water alone is better than not brushing at all. As for floss, you can use the smaller cordage from paracord, palm leaves, fibers from a yucca plant, or similar nontoxic fibrous items.
In the second part of the book, Dickson discusses treatment of various dental problems. With poor dental and gum care, infection becomes a real possibility. The gums often get infected due to poor hygiene and a diet high in sugar. These can cause the gums to loosen around the teeth and allow bacteria to grow in this space. The gums can swell, get red, bleed, and be painful as some of the earliest signs of infection.
Infections
If the infection gets deeper near the root of the tooth, there’s a possibility it can spread to the adjacent bone. If the infection gets into the bloodstream, it can infect the heart valve (called endocarditis), and is a potentially life-threatening situation. This type of infection requires intravenous antibiotics, which would not be readily available in a survival setting. Thus, recognition of early signs of infection is your best bet to minimize more serious infections from occurring.
Starting oral antibiotics early is important, so hopefully you have stored some for these types of emergencies. Antibiotics that’d be useful are Penicillin, Amoxicillin/Clavulanate, or Clindamycin. You could also try herbal remedies like chamomile, Echinacea, garlic, onions, etc., to boost the immune system if nothing else is available, but these may not help if the infection is too far advanced.
If an abscess is present, you may need to drain it to relieve the pain and pressure. This would require a large sterile needle or sharp sterile knife to incise the area and allow the pus to drain. Remember that good hygiene is an important part of keeping your teeth and gums in good shape so you won’t have to attempt oral surgery on yourself or someone else. Those are dangerously desperate measures that may only exacerbate the problem if you have no experience in this area — they’re a last resort.
Echinacea
What happens when the tooth gets infected? One simple sign of infection is that the tooth can be sore with chewing. If the pain is fairly constant and severe, it may suggest a deeper infection, or abscess, in the tooth. Bacteria find safe harbor in a dental cavity, a lost filling or a loose crown. Cleaning the tooth and filling the breach is essential to prevent any further damage to the tooth. Dickson devotes specific chapters to cleaning, filling, and pulling a tooth.
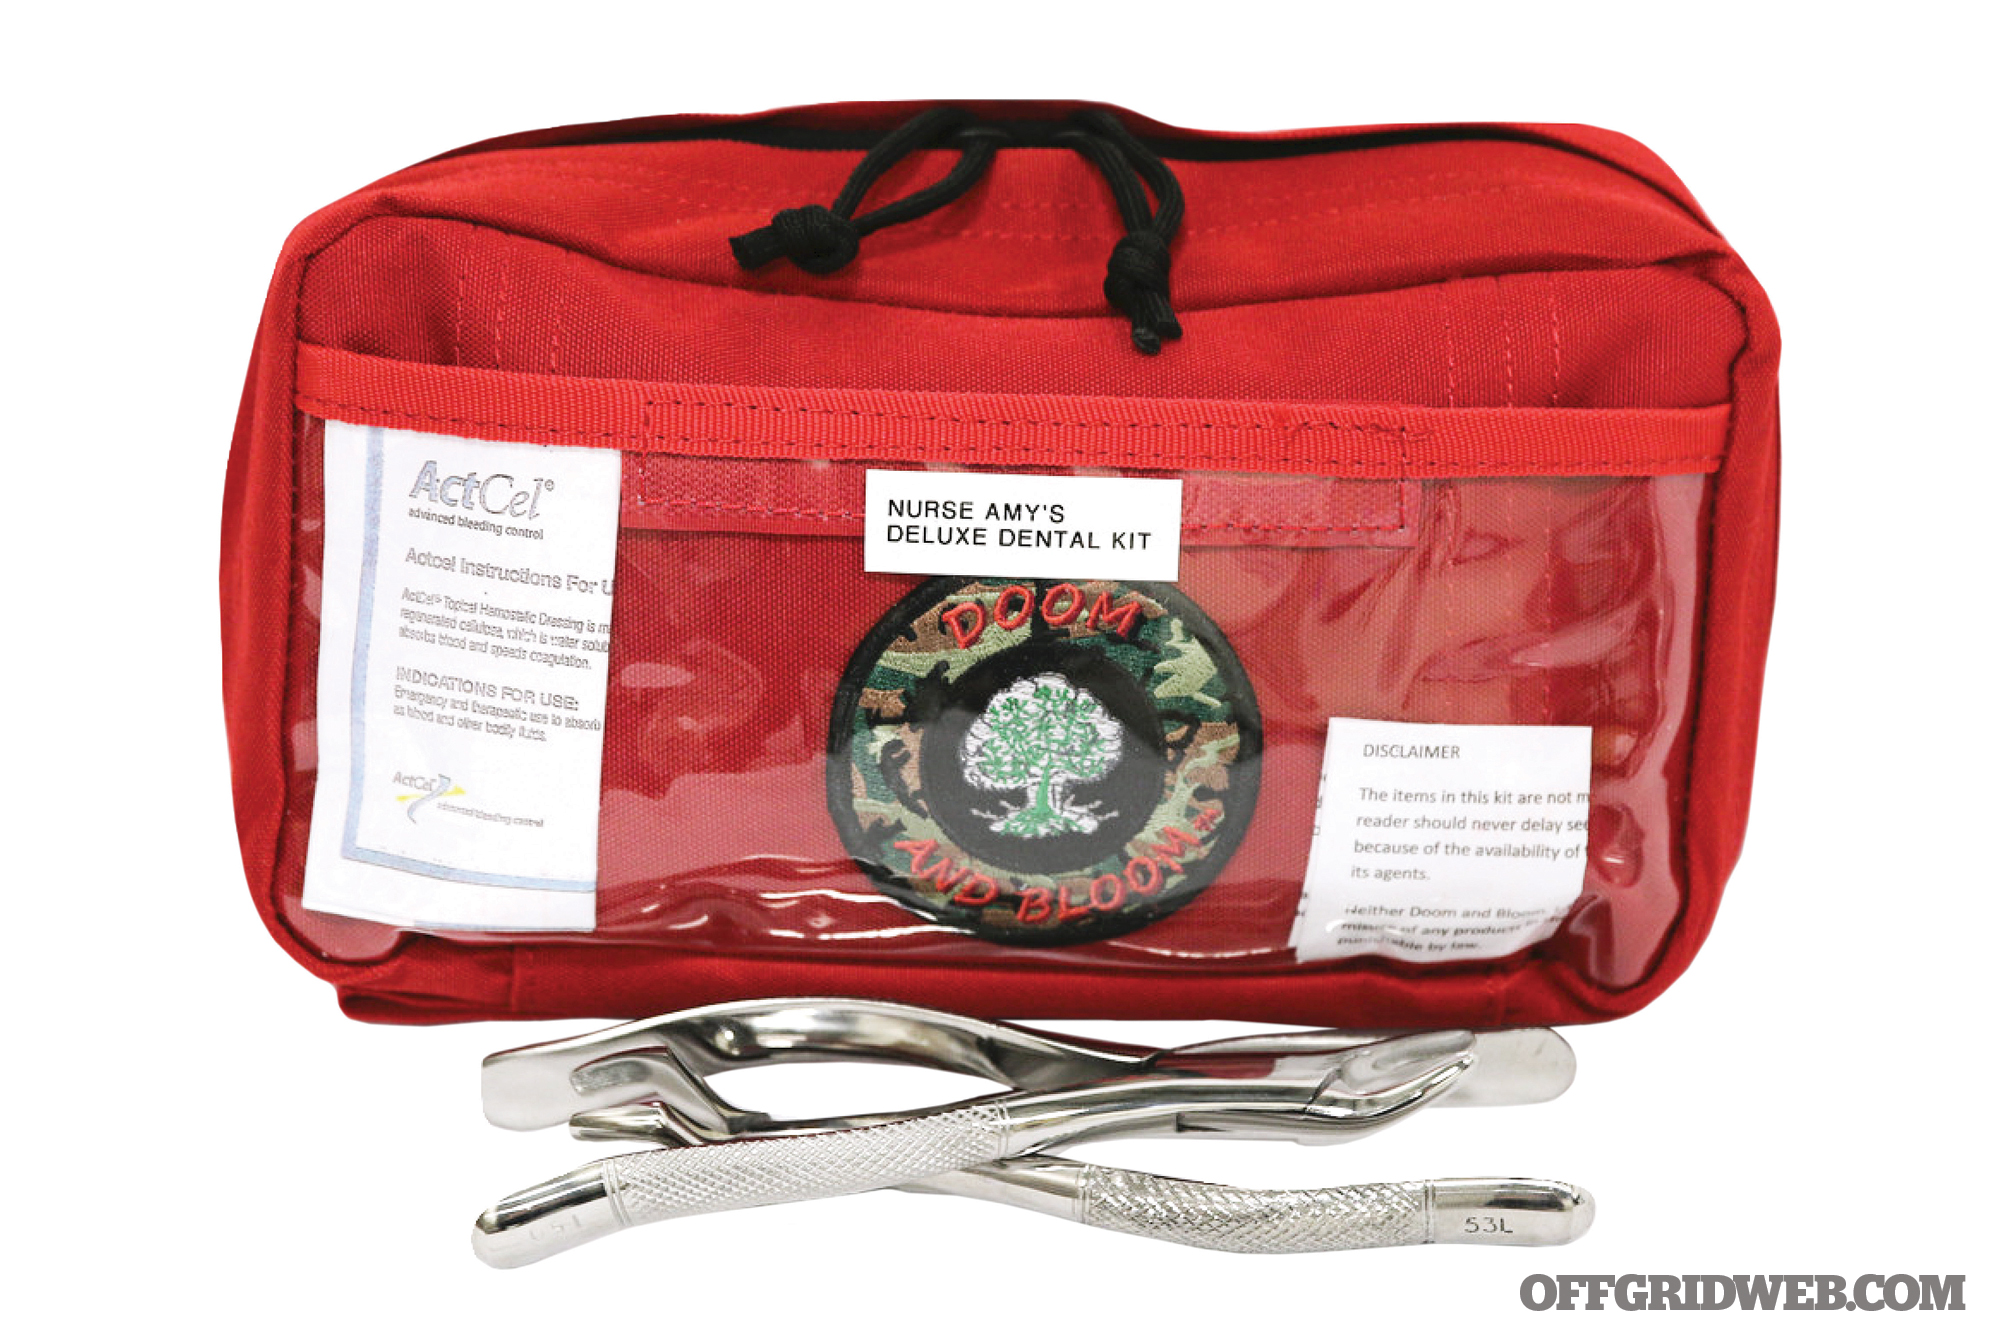
Survival Kits
Although there are dental kits that have everything you need to place a temporary filling in a cavity (including instructions), you may need to make your own tools. You can, however, purchase a small collection of dental tools for about $10 and still not take up much room in your bug-out bag.
These tools should include a probe, scaler, spoon, and a filling tool, at the very least. If you don’t have access to these tools, you’ll have to scavenge for items to make them. Coat hangers and heavy-gauge wire are easy to fashion into anything you may need to clean or remove a tooth. Keep in mind that when placing the filling, be sure there’s no infection deeper in the tooth. This may cause increased pain and an infection that spreads to the bone and bloodstream.
For sterilization purposes, boiling the improvised dental instruments in clean water would be the way to go.
Tooth Damage
What happens if you break a tooth or even knock it out completely? You’ll need to decide whether to fix the problem or pull the tooth. If the tooth has changed to a dark color or has broken off deep at the root, or if the nerve is exposed, then you should remove the tooth. If you carry lidocaine and a syringe, I’d suggest injecting into the gums at the root above the tooth (for the upper teeth).
For the lower teeth, you’ll need to inject inside the mouth above the angle of the jaw. This is where the main nerve enters the jawbone. If the tooth gets completely knocked out in one piece due to trauma, you have about 12 hours to replace it. Ideally, replace the tooth as soon as possible. Make sure to clean it first with saline or purified water. Hold the tooth in place for about five minutes. Try to protect it by covering it and the adjacent teeth with a roll of beeswax. Of course, if you find yourself with nothing but an ice skate and a rock, you’ll have to do the best you can.
As far as improvised gauze found in nature, you could use alfalfa leaves, cayenne, or calendula to stop bleeding and the inner part of the brown cattail fruit, cotton, or hemp flour as an absorbent. In lieu of those items, a piece of clothing or tampon could also serve as temporary absorbents.
Conclusion
Dickson’s book provides an excellent resource for prevention and treatment of different dental ailments when there’s no dentist and you find yourself suffering from oral health problems. Educating yourself prior to a dire situation will be paramount to returning home with all of your pearly whites. Speak to your dentist as well about tools and medical supplies you should carry with you that could come in handy during an emergency. Although you may not have thought to add something as simple as floss, toothbrush, and bottles of mouthwash to your bug-out bag, they’re an essential and often-overlooked part of your survival needs.
About the Author
David Miller, DO, FACOI, is an internist in private practice. Diagnosed with Type 1 diabetes in 1990, he has a unique perspective on patient care and disease management. Experiences away from the office have included being a fight doctor for regional MMA bouts and a team physician for a Division I university in west central Illinois. Dr. Miller is an instructor for the Civilian Crisis Response Team (medical section) based out of Indianapolis.
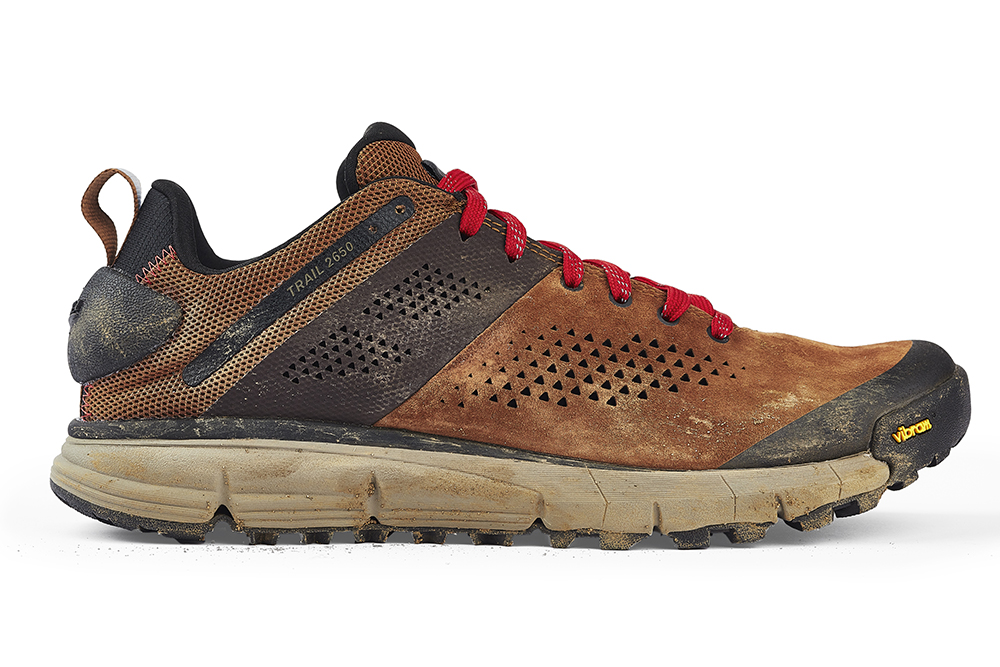
The Pacific Crest Trail, or PCT, is a legendary hiking route that extends from southern California to British Columbia, Canada. It reaches from just above sea level to a staggering 13,000 feet, travels across numerous mountain ranges and national forests, and covers 2,659 miles of wilderness. Although there’s no single route that can fully sum up the terrain of North America, the PCT certainly comes close.
Oregon-based footwear company Danner has paid homage to the Pacific Crest Trail with its latest hiking shoe release. It’s dubbed the Trail 2650, referring to the number of miles spanned by the trail, and is designed to be ultra-lightweight and flexible. As a spring- and summer-oriented shoe, breathability was also a top priority.
The Danner Trail 2650 is based on a lightweight EVA midsole, durable Trailguard TPU shank, and rugged Vibram 460 outsole. The company says this tread pattern “provides superior traction across slippery and challenging terrain”. This shoe also features Danner’s EXO heel system, which locks the wearer’s heel in place in an effort to avoid slippage that can lead to blisters.
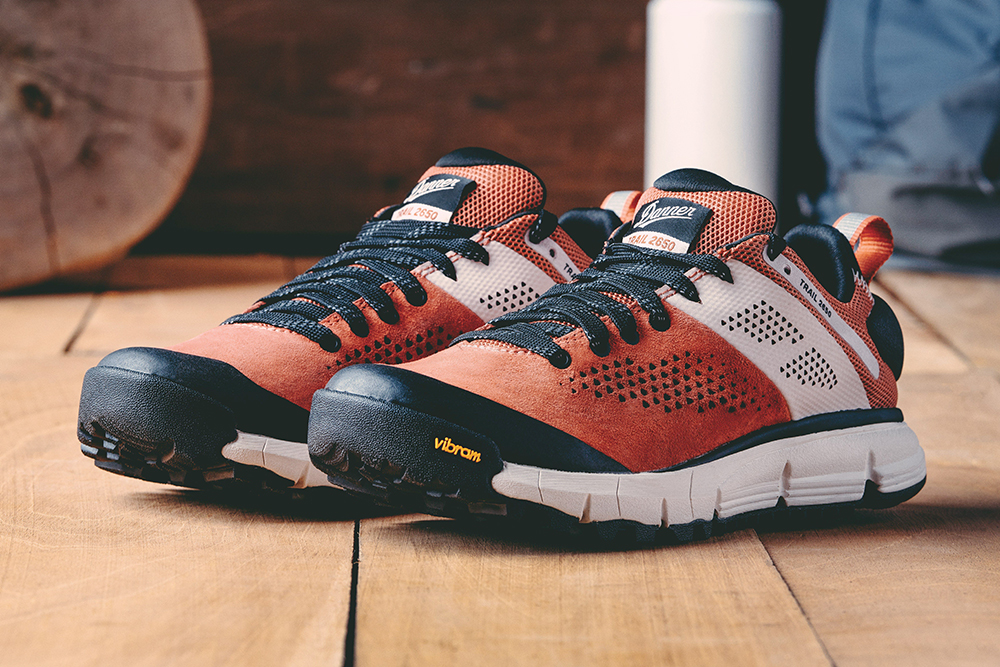
Alternate colorways for the Men’s Trail 2650
The Trail 2650’s upper is constructed from leather and textile with a breathable mesh lining. It also comes with red laces, which have become an easy-to-spot Danner styling cue. Overall weight of the shoe is just under 12 ounces.
Women’s Trail 2650
This new footwear will be available in Spring 2019 for both men and women, with an MSRP of $150. For more info, go to Danner.com/trail-2650.
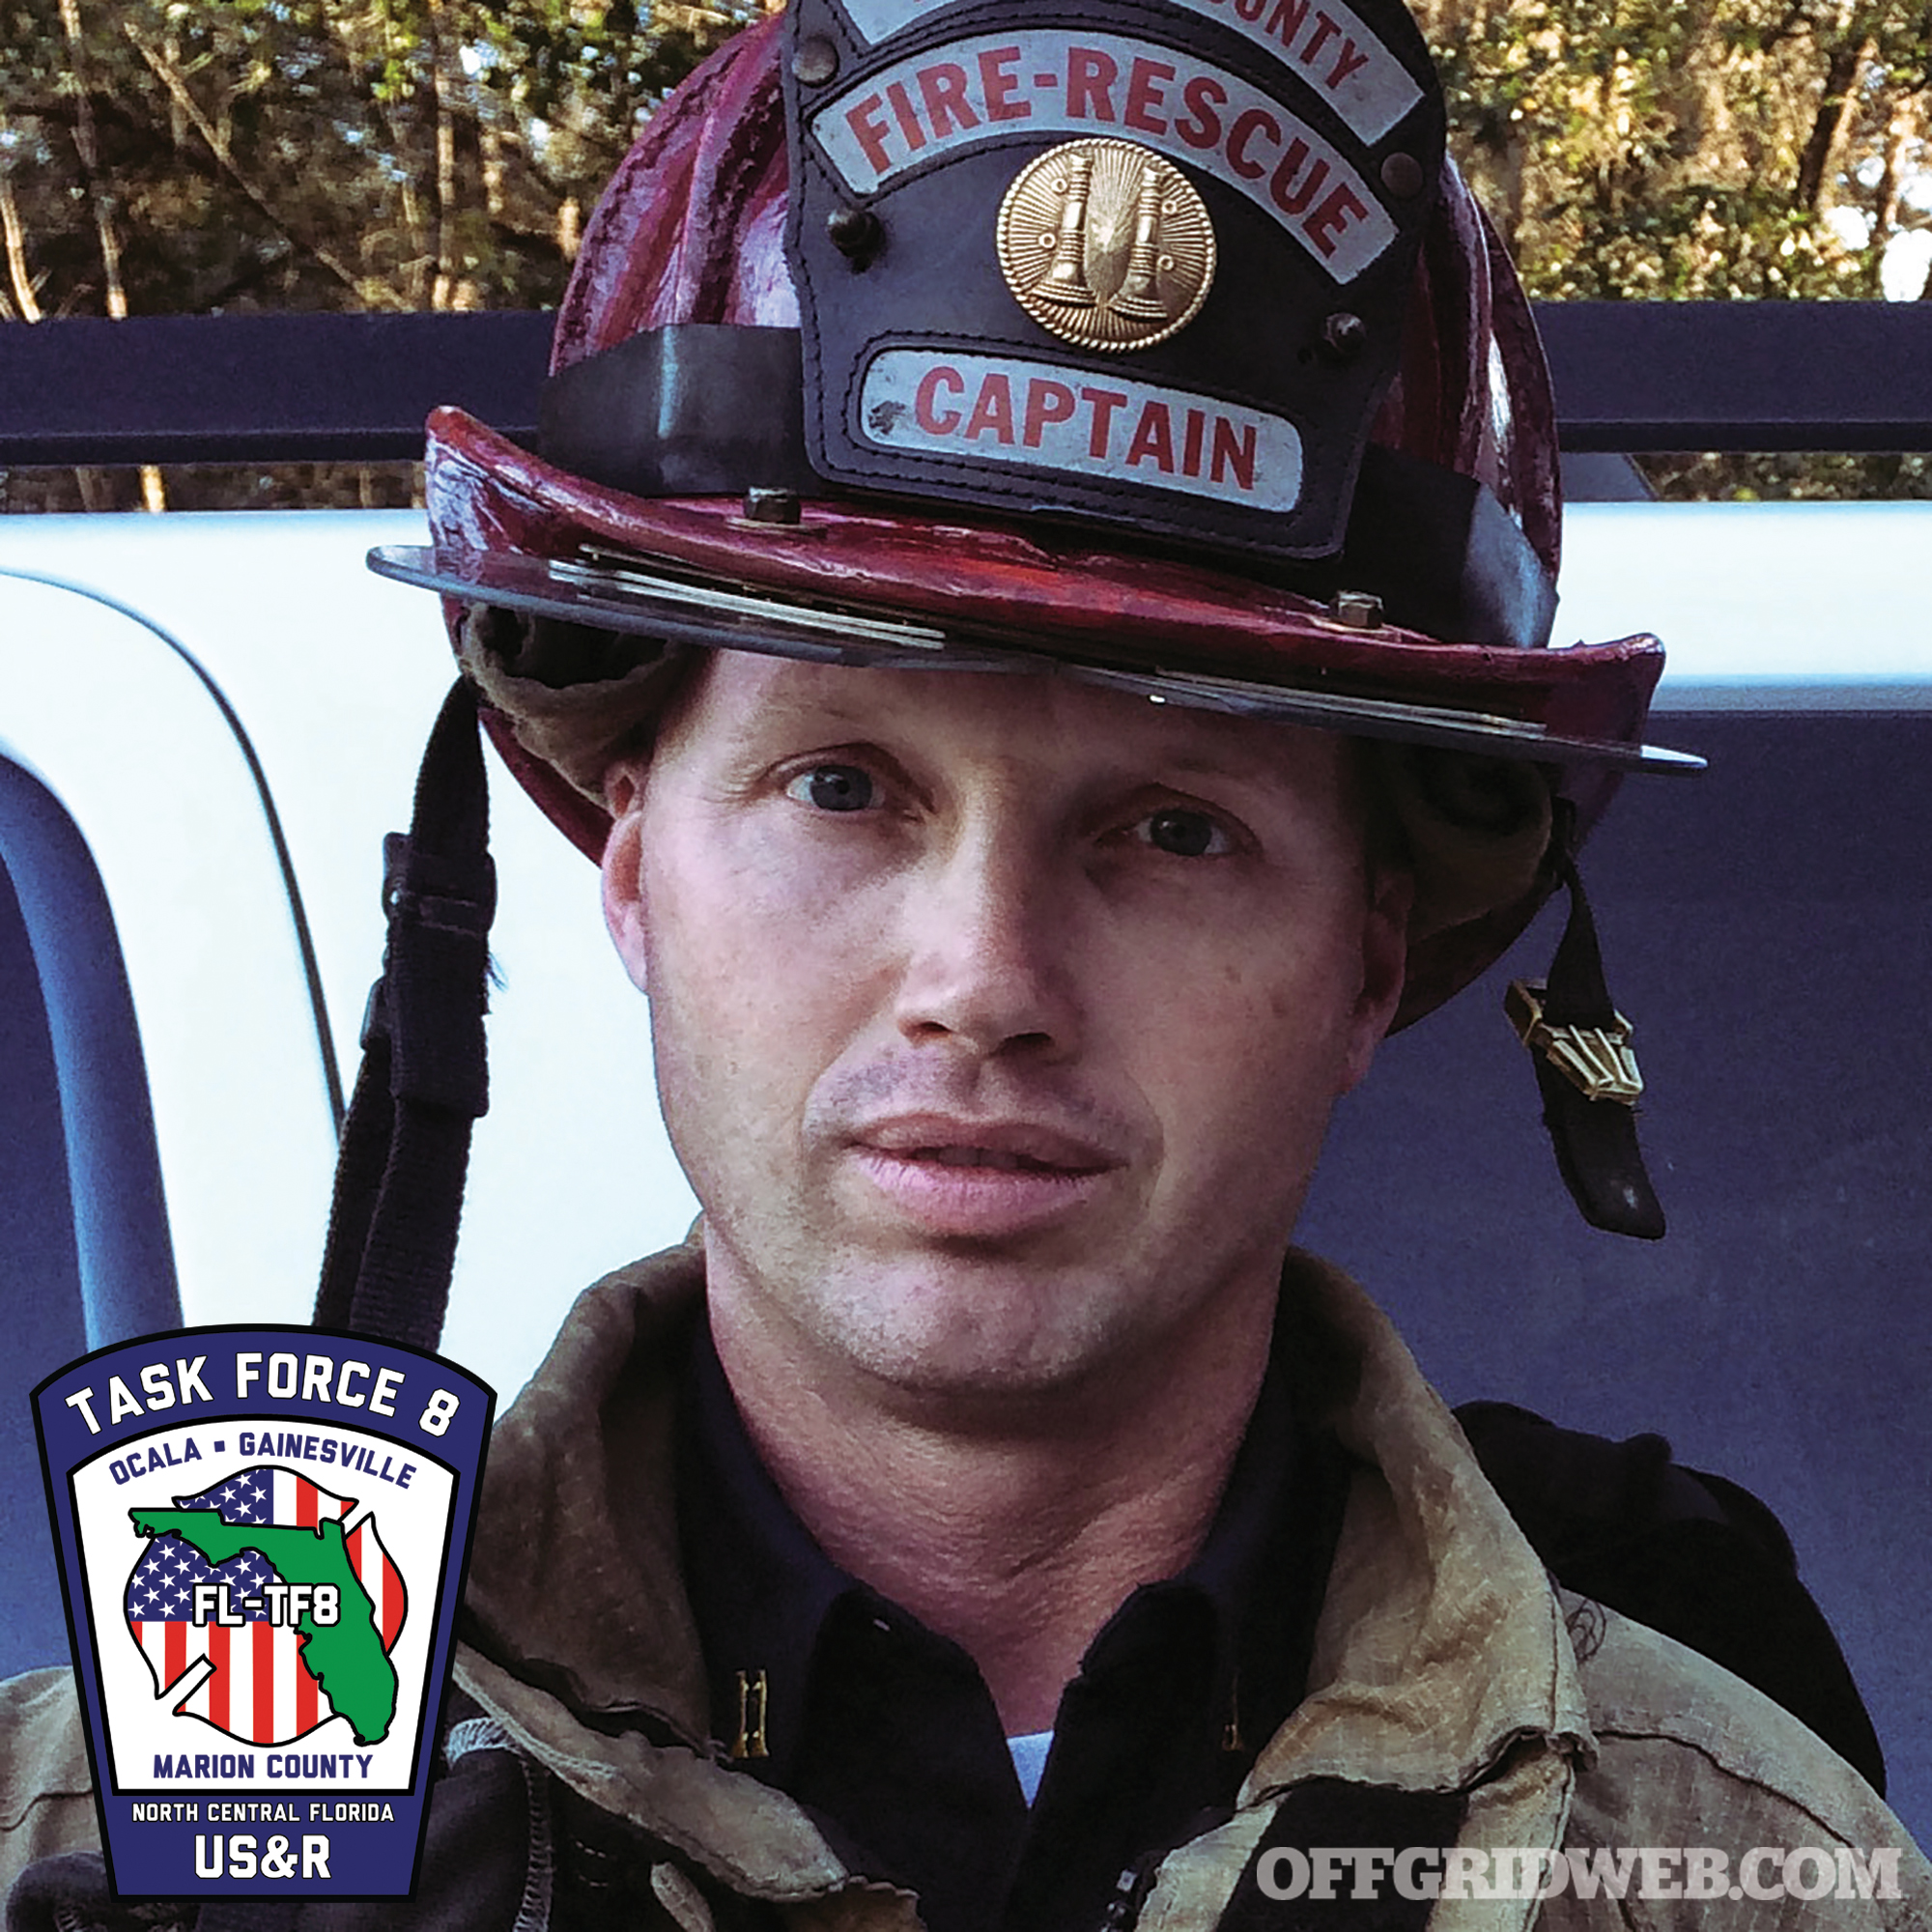
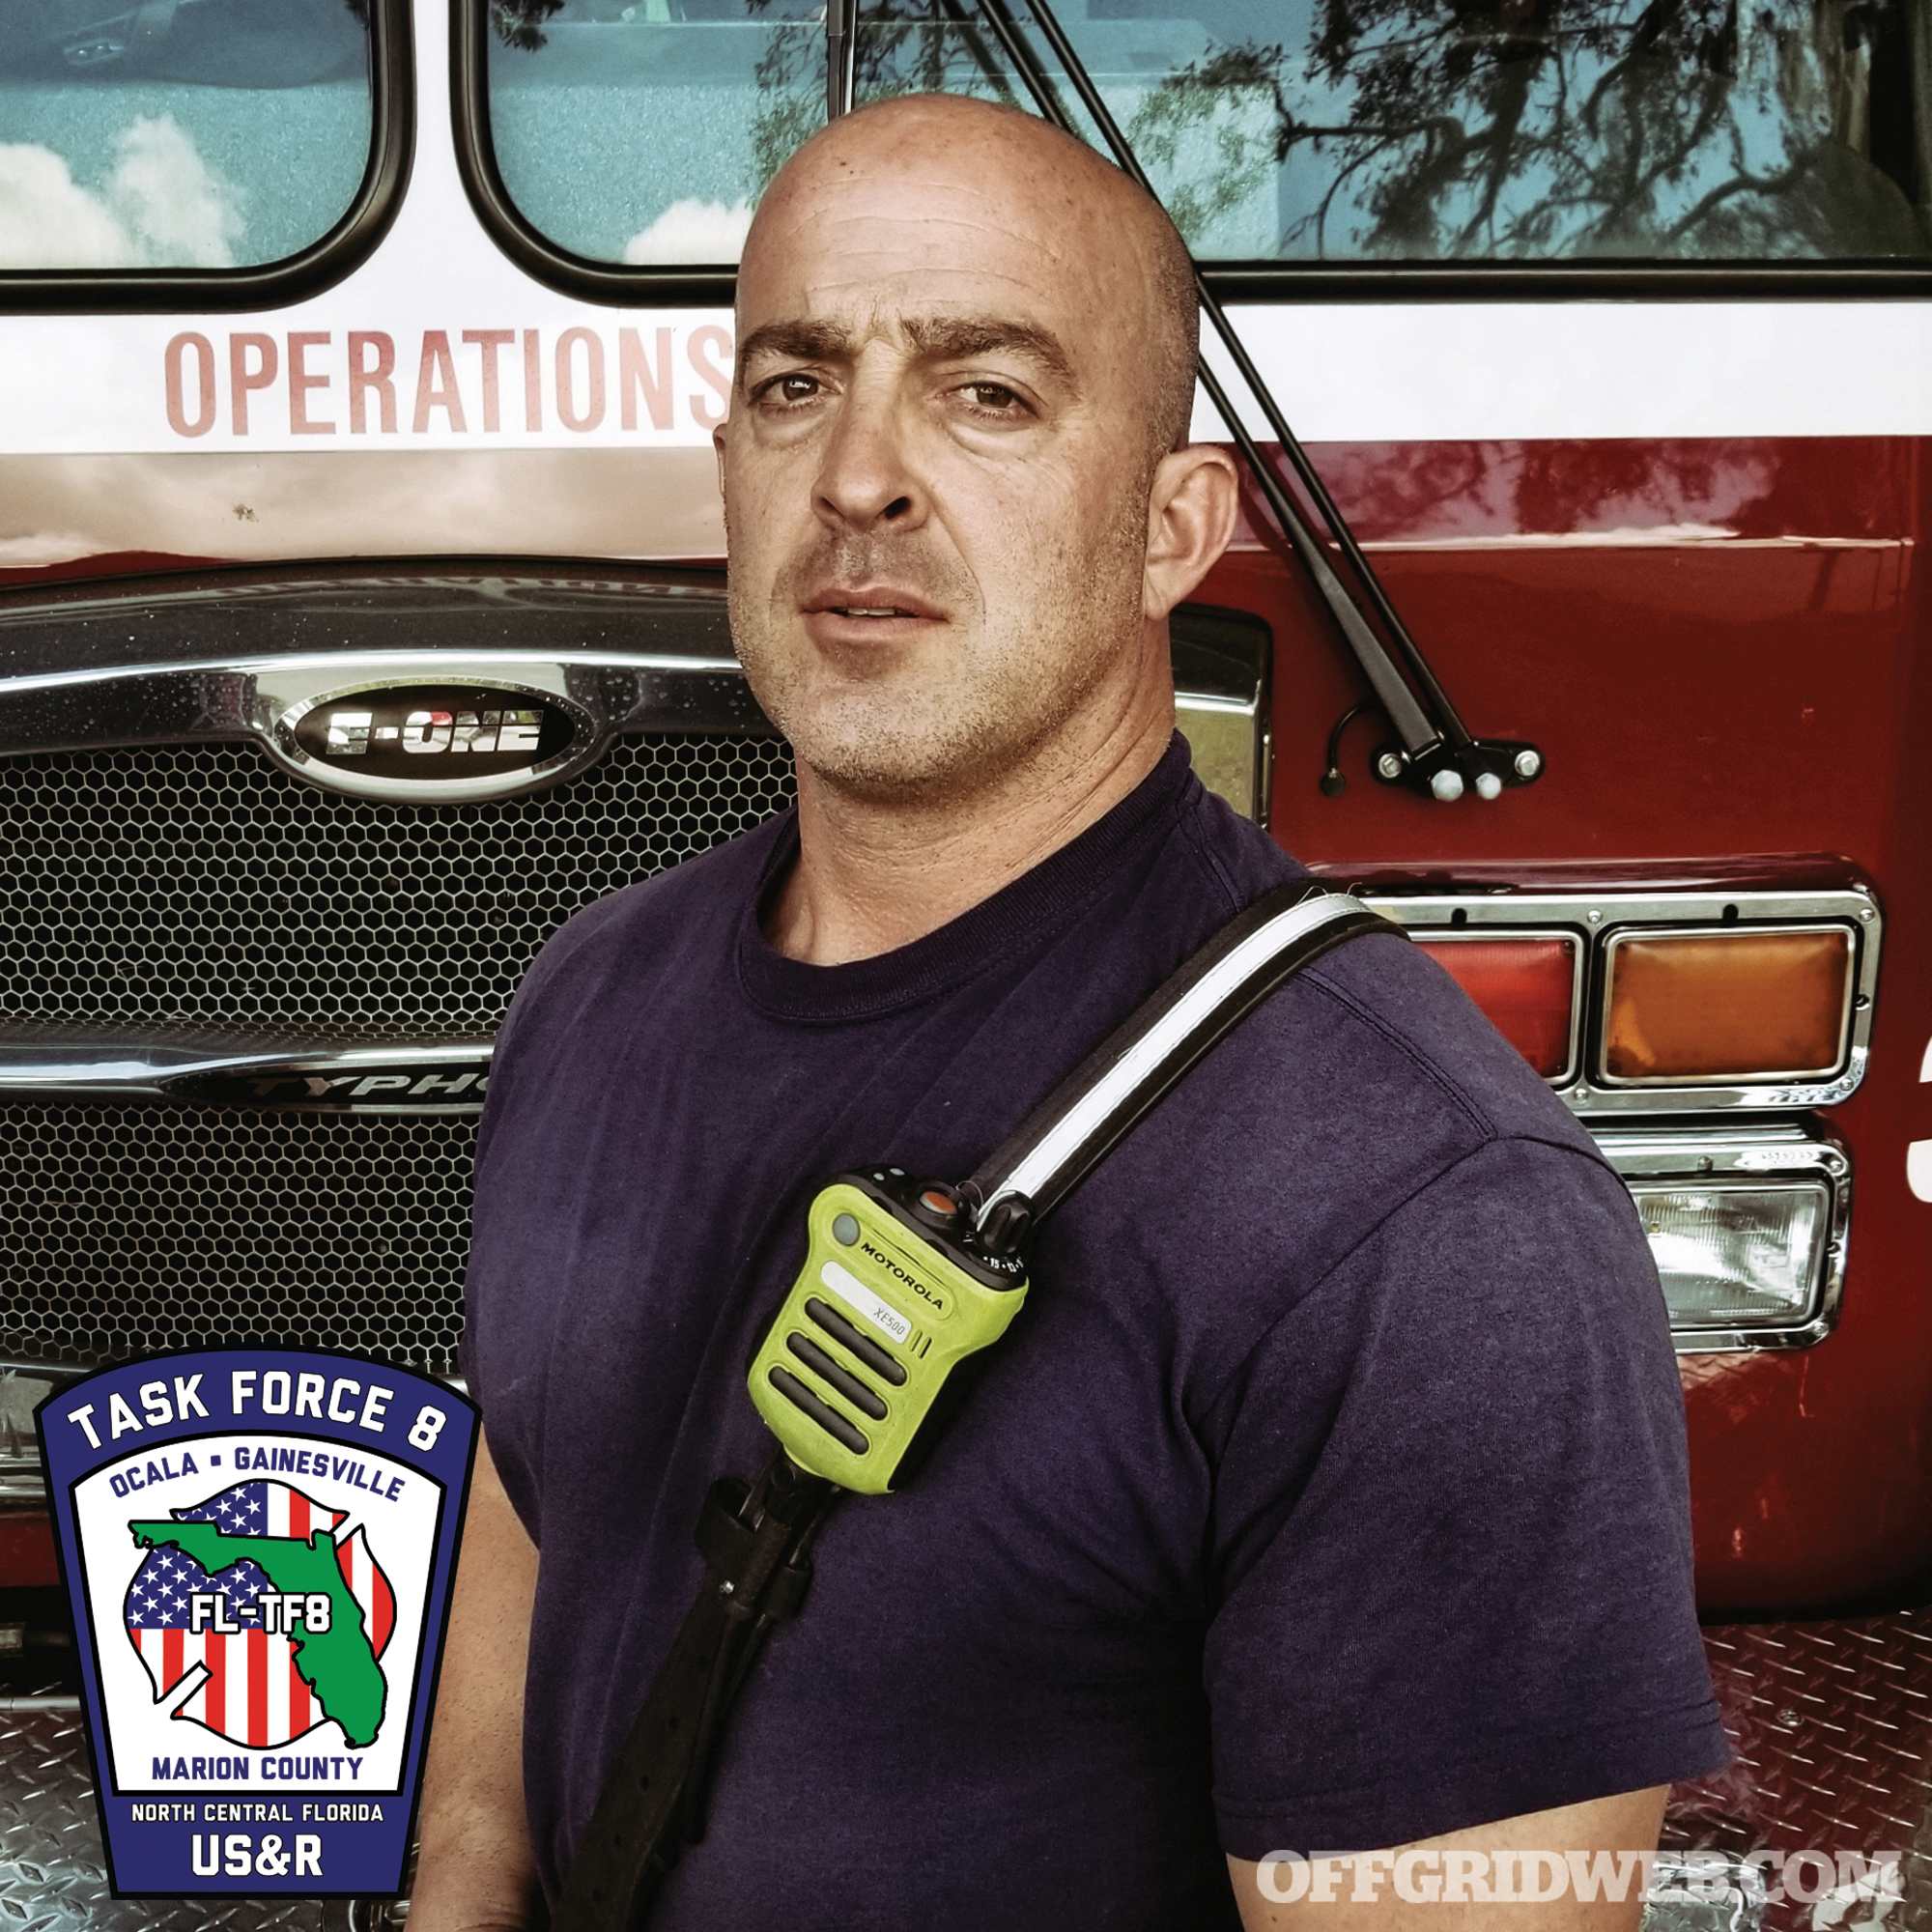
Waiting on standby for hours with his crew of nine handpicked men next to the runway at NAS Jacksonville, Capt. Robert Graff of Florida Urban Search and Rescue Task Force 8 (FL USAR TF-8) finally got the phone call he’d been waiting for. Hurricane Irma had just made landfall in the Florida Keys as a Category 4 with wind gusts up to 130 mph. Communications with the area were almost non-existent, and rumors were everywhere that Key West was destroyed and bodies were floating in the streets.
Speculation aside, Graff knew at least three things to be true. First, that the large, federal FEMA rescue teams were still gearing up and re-staging since the projected landfall location had changed so many times. If help were to arrive immediately, it wouldn’t come from that direction. Second, the bridges between the islands had been damaged, so travel by road wasn’t an option. Last, because of the storm’s current path running up the center of Florida, all of the other state search-and-rescue resources were on standby to see if they would need to rescue their own hometowns.
After days of hearing maybe, possibly, and probably from the Tallahassee Emergency Operations Center, the endless circles of comms had finally boiled down to one phone call and one question. A Coast Guard C-130 was being diverted in Graff’s direction. Was his team ready to be dropped off into unknown conditions, without knowing exactly when or how they would be resupplied, and spearhead the state’s response by being the first USAR team to make contact? “We’re good to go,” Graff responded.
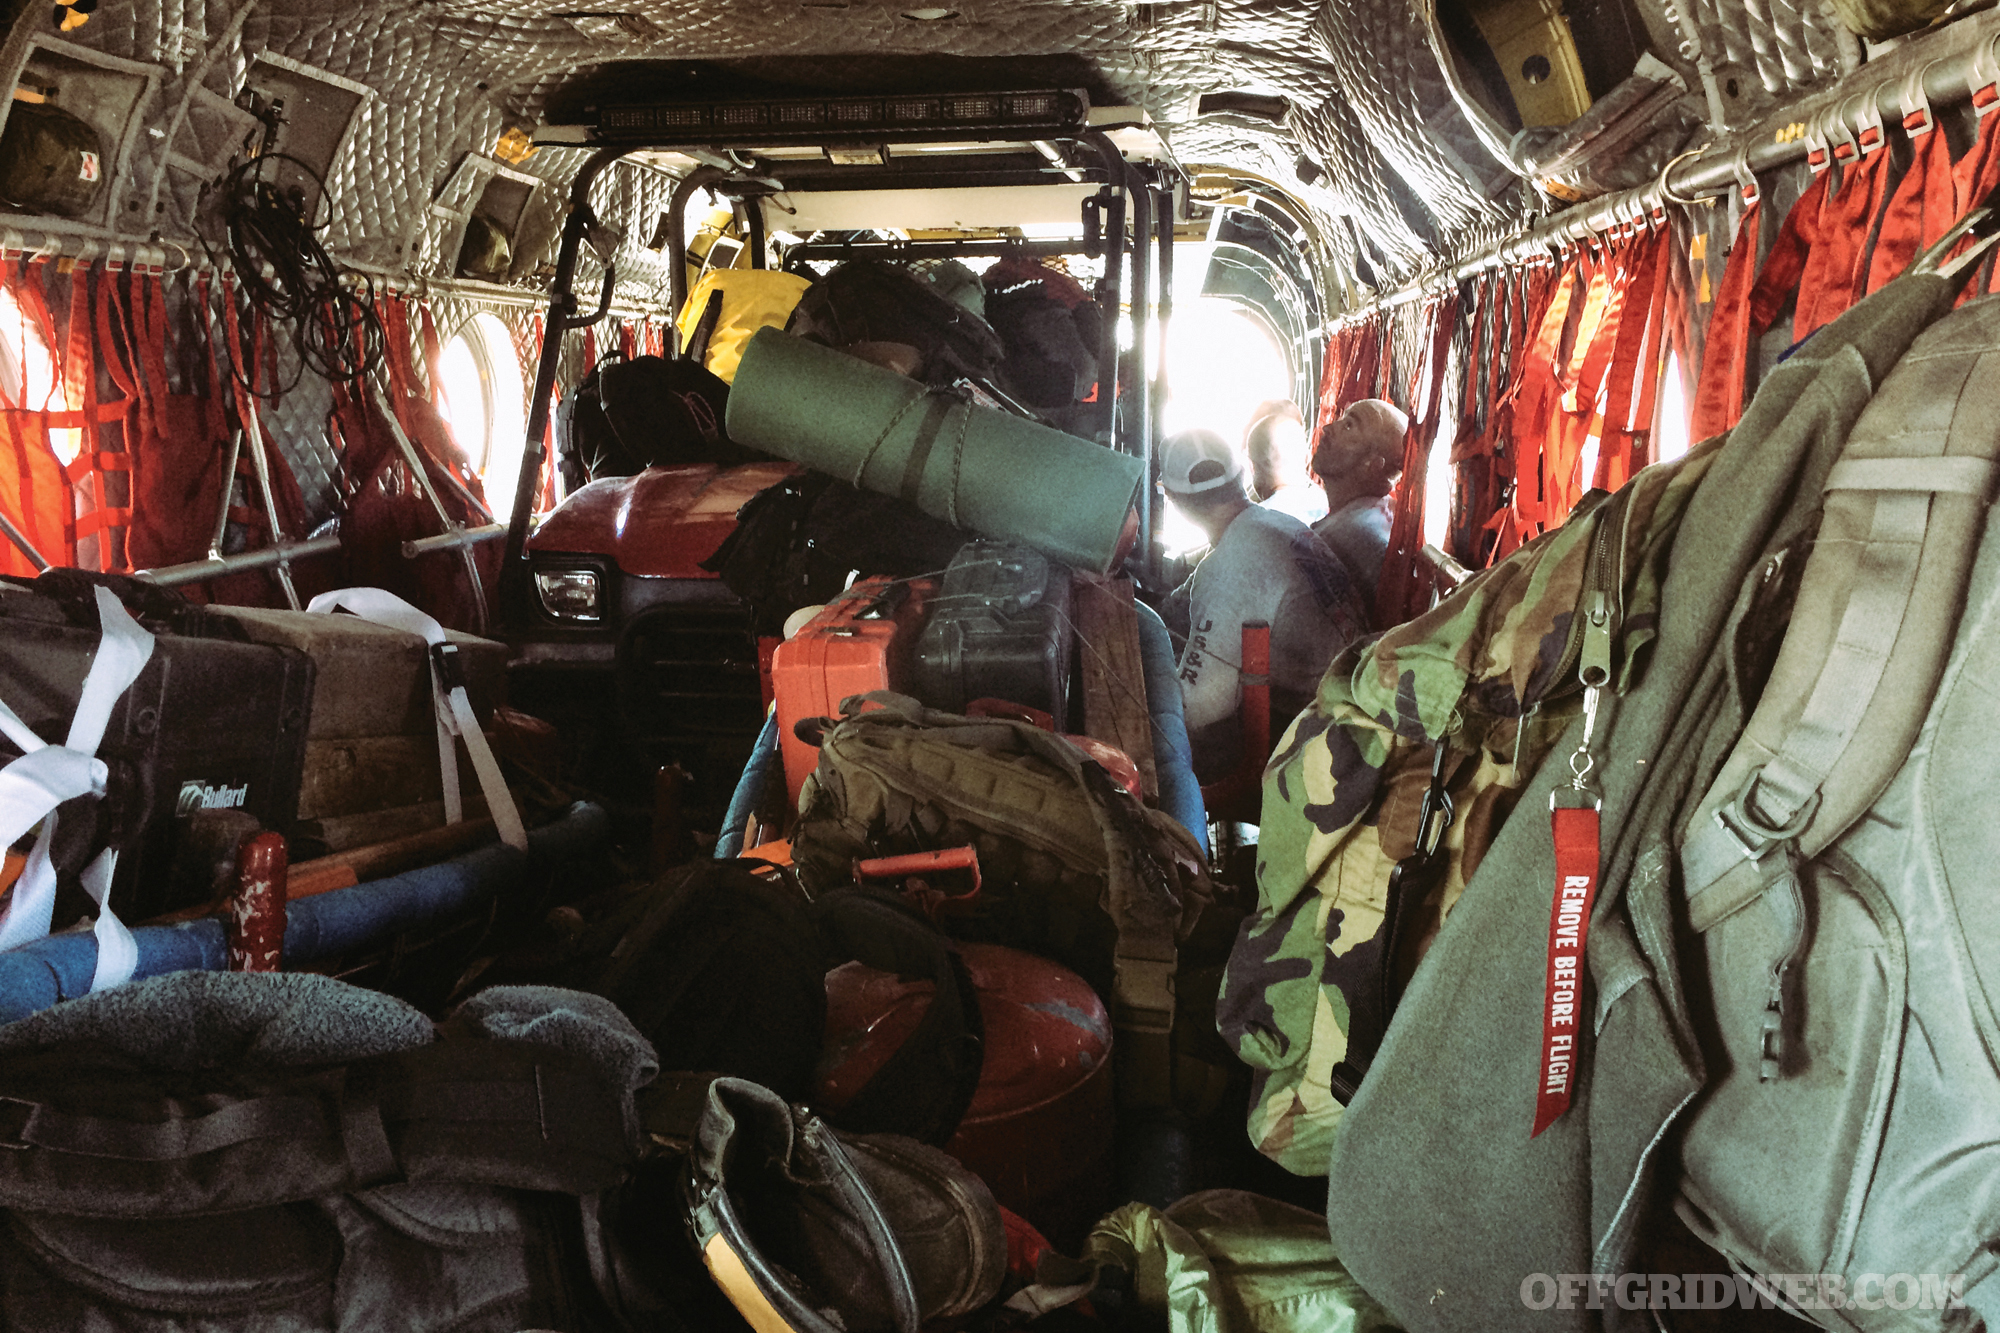
Mission completed in the Keys, the crew prepares to load their gear into U.S. Army CH-47 Chinook helicopters for transport from Marathon Key back to Central Florida.
As the leader of the 72-person team made up of three different Florida fire departments from the City of Ocala, City of Gainesville, and Marion County, Graff’s small squad was uniquely positioned to head up the response as the advance team. Each of them were experts and instructors on subjects — building collapse, confined-space rescue, and overland navigation — besides also working as firefighters, paramedics, and EMTs.
They focused on fast-moving response with minimal gear, carrying enough shelter, supply and rescue tools on their backs to self-sustain for at least 72 hours. With the majority of the team on standby back in central Florida, Graff and his nine men stepped onboard the Hercules and into an Air Deployable Search and Rescue (ADSAR) mission they knew would be one for the history books.
Five months after they returned from that deployment, we sat down with Graff as well as Search Specialist Todd Muder, also part of the team that responded. With hurricane season beginning June 1, we wanted to understand what they had learned from their experience that we could apply to our own lives and preparedness planning. We talked local supply chains, sat phones, and why a $400 cooler may be one of the best purchases you can make. It’s our hope that you enjoy reading this half as much as we did talking to them.
RECOIL OFFGRID: What were your first impressions as you landed in Key West?
Search Specialist Todd Muder: The first thing I noticed is that practically the whole airport had been shut down and was being run by the military. When we landed they had paratroopers who had dropped into the airport before we got there, to clear the runway and set up a makeshift Air Traffic Control (ATC) on the ground. They were running the whole airport by hand radios and driving around on little 80cc dirt bikes.
There was little damage in Key West itself, and the local authorities had already performed initial recon there before we arrived. Of course, we hadn’t known any of that because the only working comms at that point were satellite phones, and they were spotty, so very little intel was getting out of the Keys. But the local law enforcement told us that areas had been heavily damaged to the north, and no one had searched there yet, so they gave us a lift to the next island up, and we began to search on foot.
Were these areas also lightly damaged, like Key West had been?
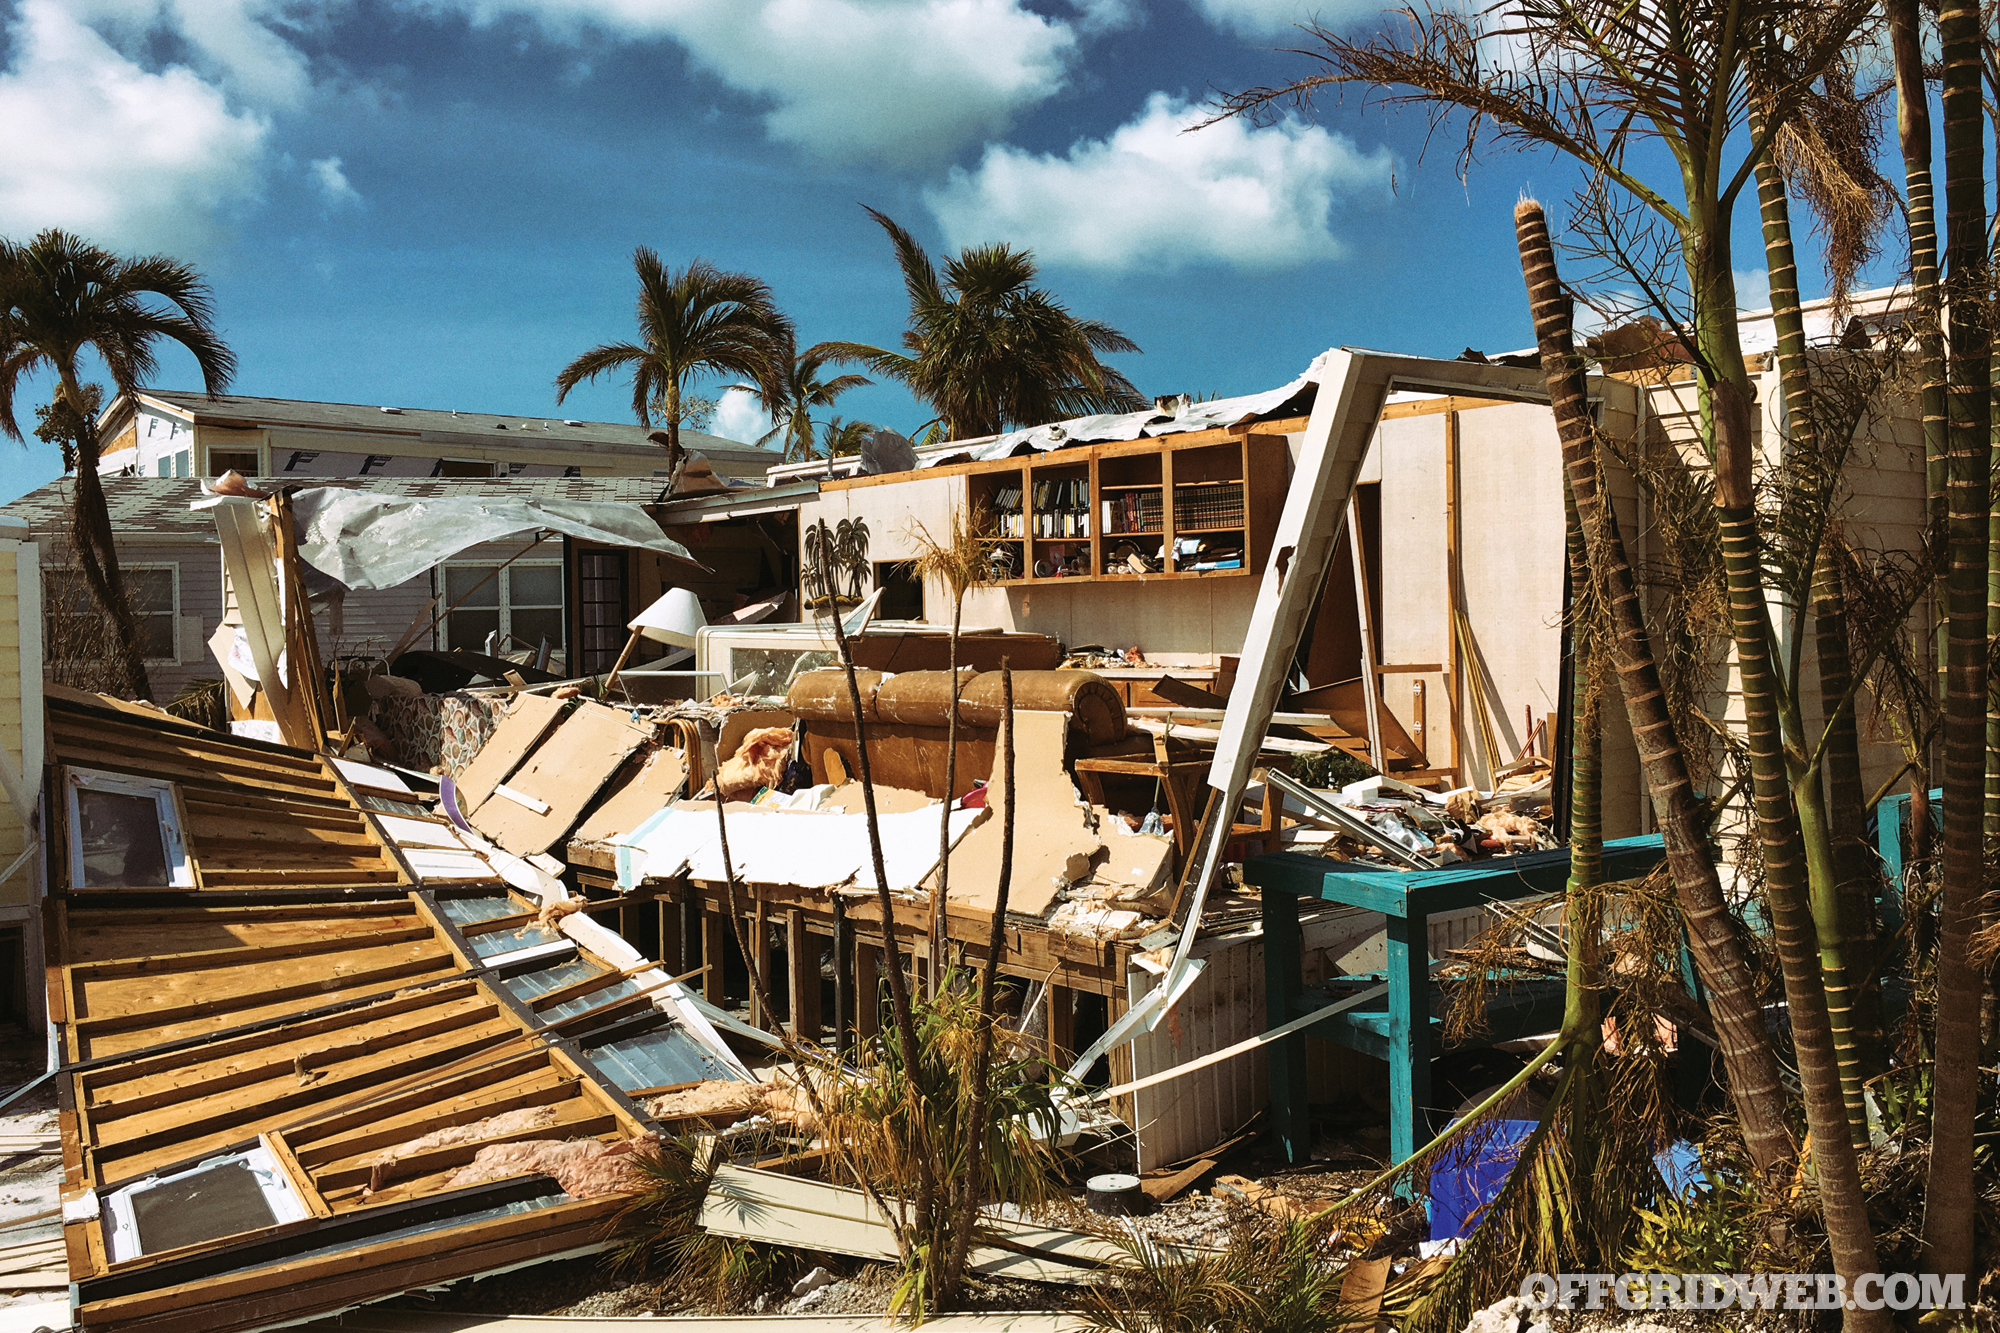
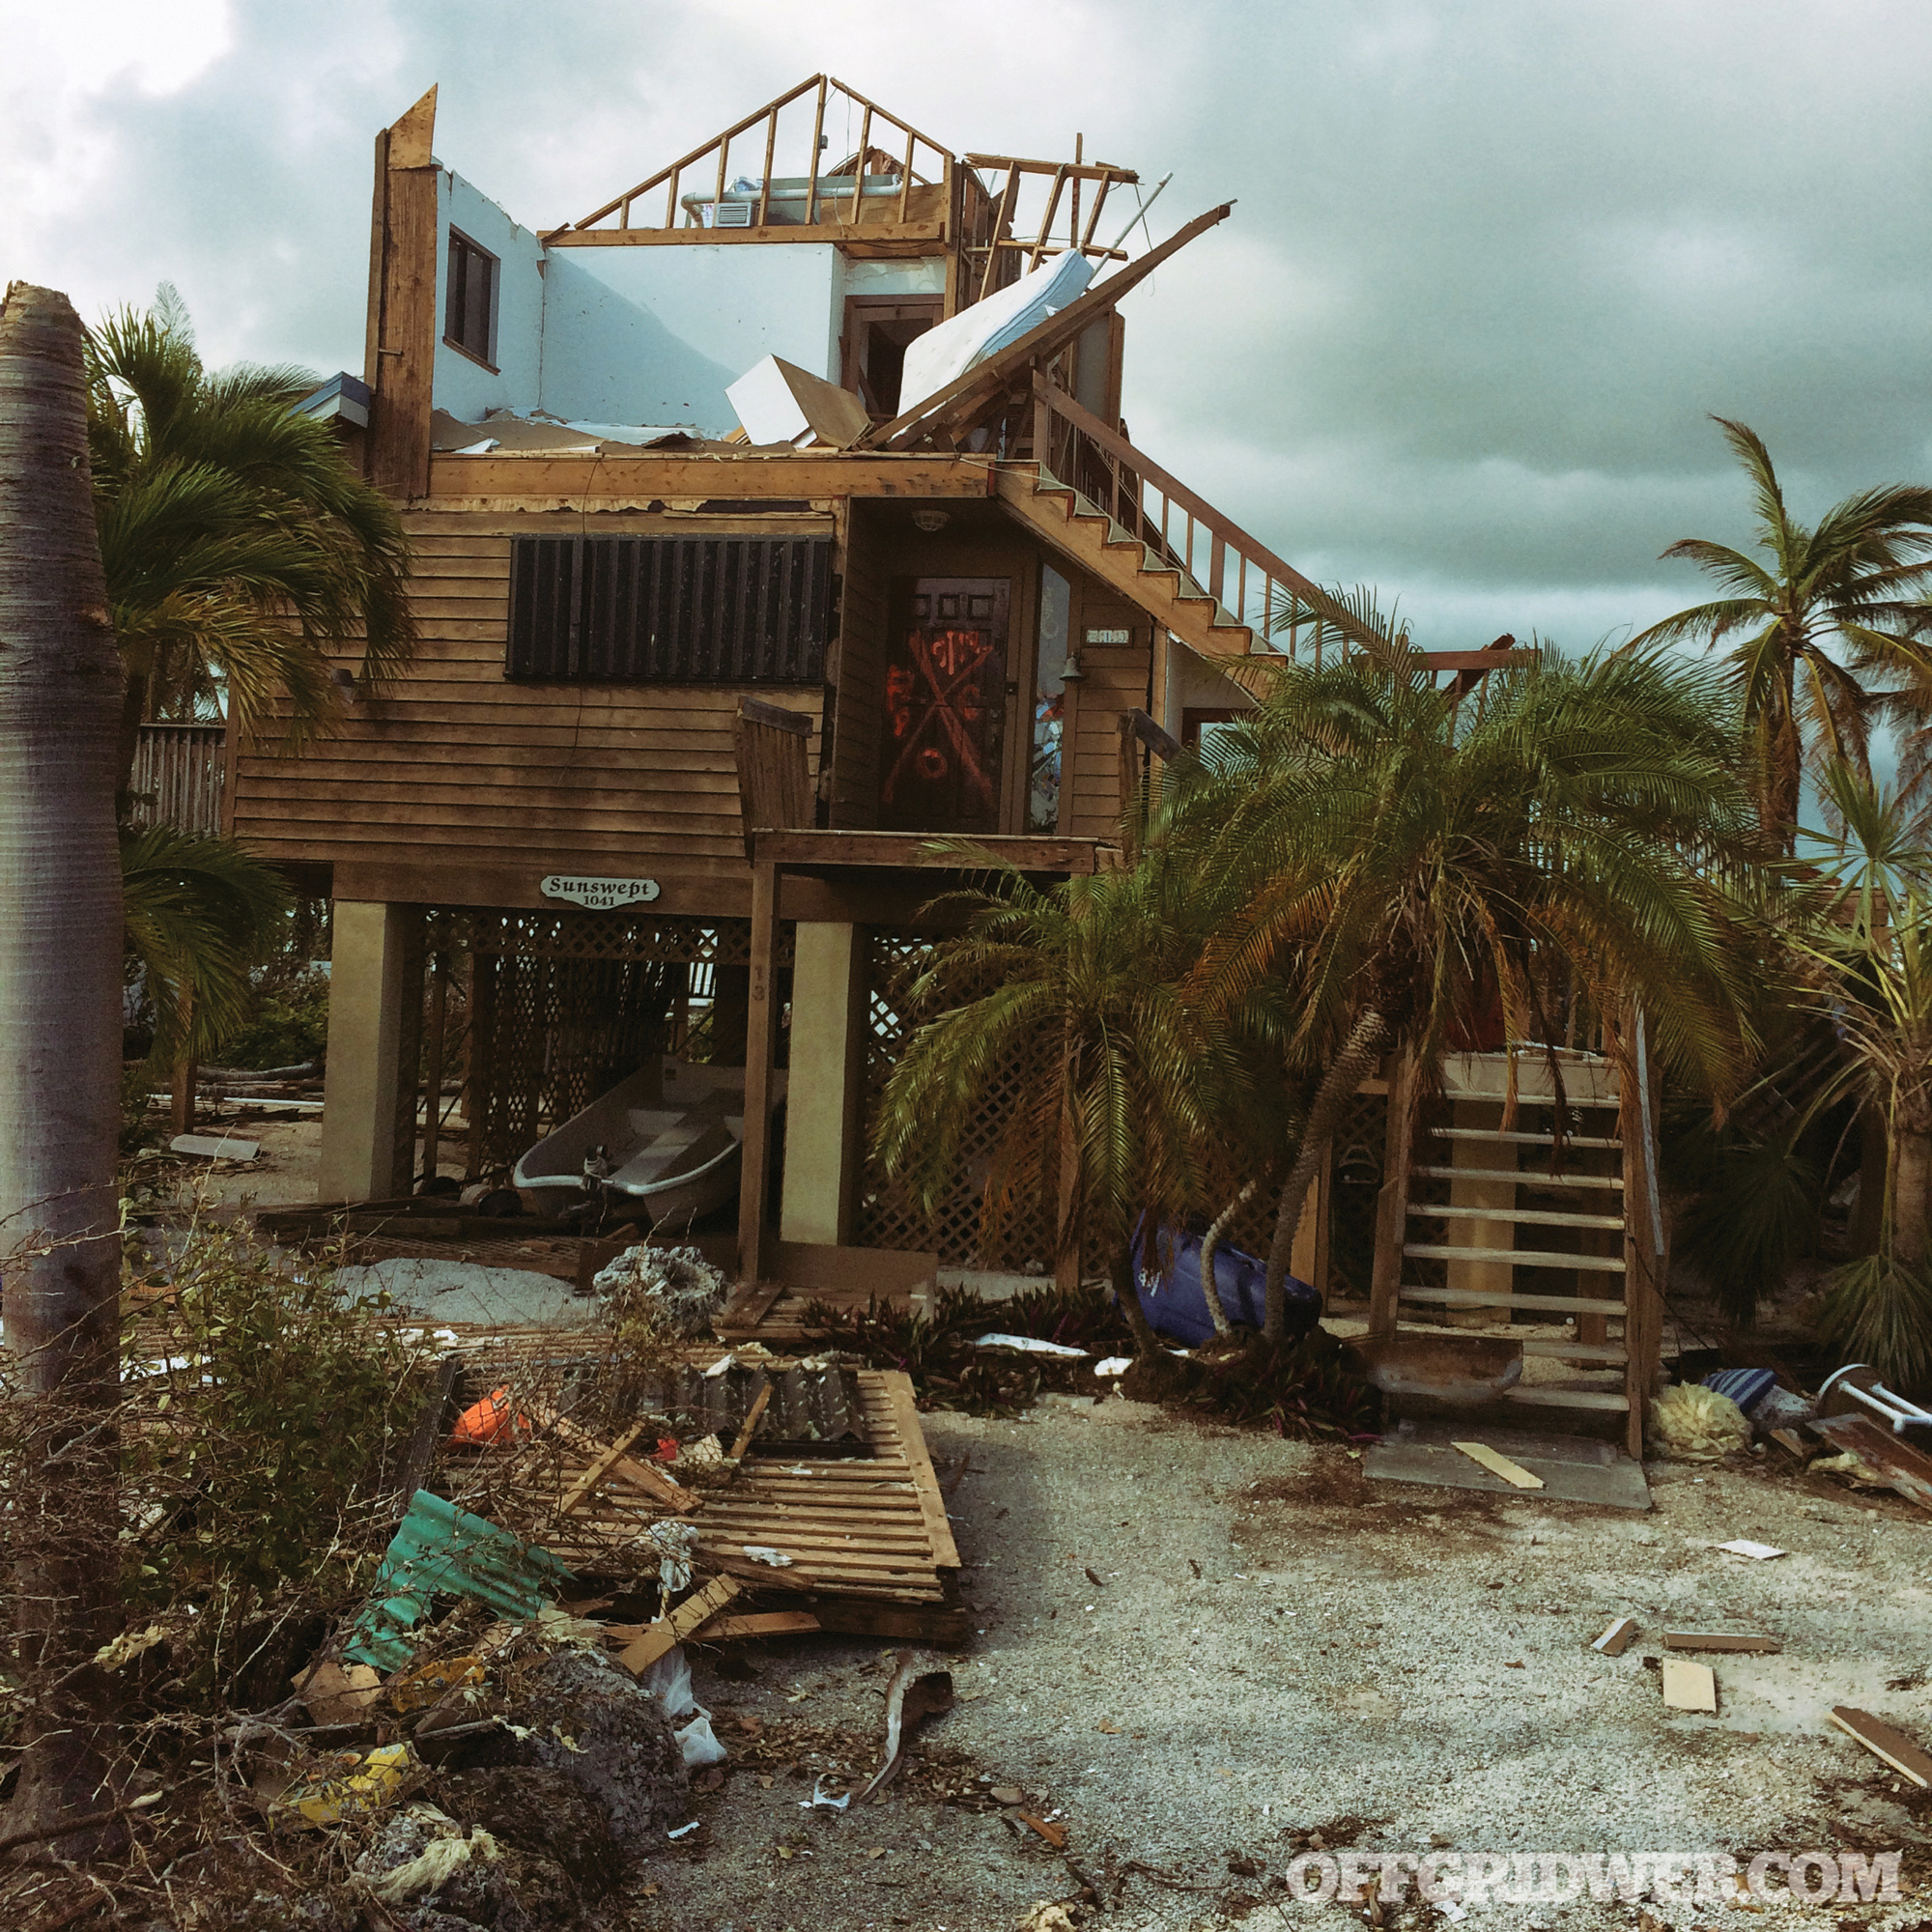
TM: No, it was total devastation. Most of these neighborhoods were modular homes or mobile homes, and I’d say that a solid 70 to 75 percent of them were totally destroyed. They hadn’t been searched yet, so it was a big task for the 10 of us. But we’re all trained to perform thorough recon at a fast pace, so the process moved very quickly.
When we arrived, people were looking for help and trying to pick up whatever was left of their lives and their homes. The time when we got there was when people were running out of water and food, and they were getting desperate for it.
On the first island we got to, there was a bunch of mobile home siding stacked in the middle of this big roadway. We realized it was spelling out something, but couldn’t see what it was saying because it was so large until we got on top of one of the homes to look down at it. Then, we could see that it spelled out “Food / Water / Gasoline.” So the residents were just hoping that air support would fly over and read this sign that said they required assistance.
One of the many homes where the team searched for survivors in the Keys.
This seems pretty quick for people to already be at the end of their line. What went wrong with their plans?
Capt. Rob Graff: Some of them were elderly folks who maybe just took it for granted that everything would be OK. Some of them sounded like they’d been well prepared, but had lost their supplies during the storm. I think some of them thought, “Oh I can just wait it out for a couple of days, and the power will kick back on.” But the power grid was completely destroyed. A couple of days in, it wasn’t such a big deal. But even a lot of people who had enough food and water for 72 hours or 96 hours didn’t anticipate that at the end of that point, the supply chain to replenish the Keys still wouldn’t be restored. The bridges had been damaged, which was the reason we couldn’t get into the Key by ground, and supply trucks can’t get in either until all those bridges have been evaluated or repair. All that takes time.
So there’s nowhere for these people to refuel or resupply. All the sewers are backed up, and everything’s covered in floodwater that’s mixed with sewer water and bacteria. On top of that there’s no running water, so they can’t wash up or wash themselves, so very quickly you start running into these health crises, this humanitarian aid-type stuff.
Did you find anyone, then, who had fared well even in the damaged areas?
RG: There were several people who had been well prepared, who were just riding around on their beach cruiser bikes. They told us they were fine — they had water; they just needed some ice. Most everybody just wanted ice.
The ice became really important because people in their prepping stocked perishable food like milk and meat into coolers, and figured they could just keep it iced even without power or electricity. But it’s hot in the Keys, and after about 24 hours the ice is melted, the meats are going to spoil, and there’s just nowhere to keep it.
TM: Some of the civilians that we ran into had prepped well, but they hadn’t prepped to be self-sustainable for an extended period of time. One of the big things was fuel. A lot of generators were silent there, and people were just begging for gasoline because that generator’s going to power their refrigerator, their icemakers, and their cell phones too. Most of their cell phones were either dead or out of service, so they were all asking us to make calls for them.
It just seemed like many of them hadn’t really thought through how much gasoline their generators used per hour, or per day, or how much gas they would need to use for an extended period of time. Besides the gas, a lot of folks had no idea about their water usage per person, per day, and how much they’d need for an extended period — not just three or four days without water.
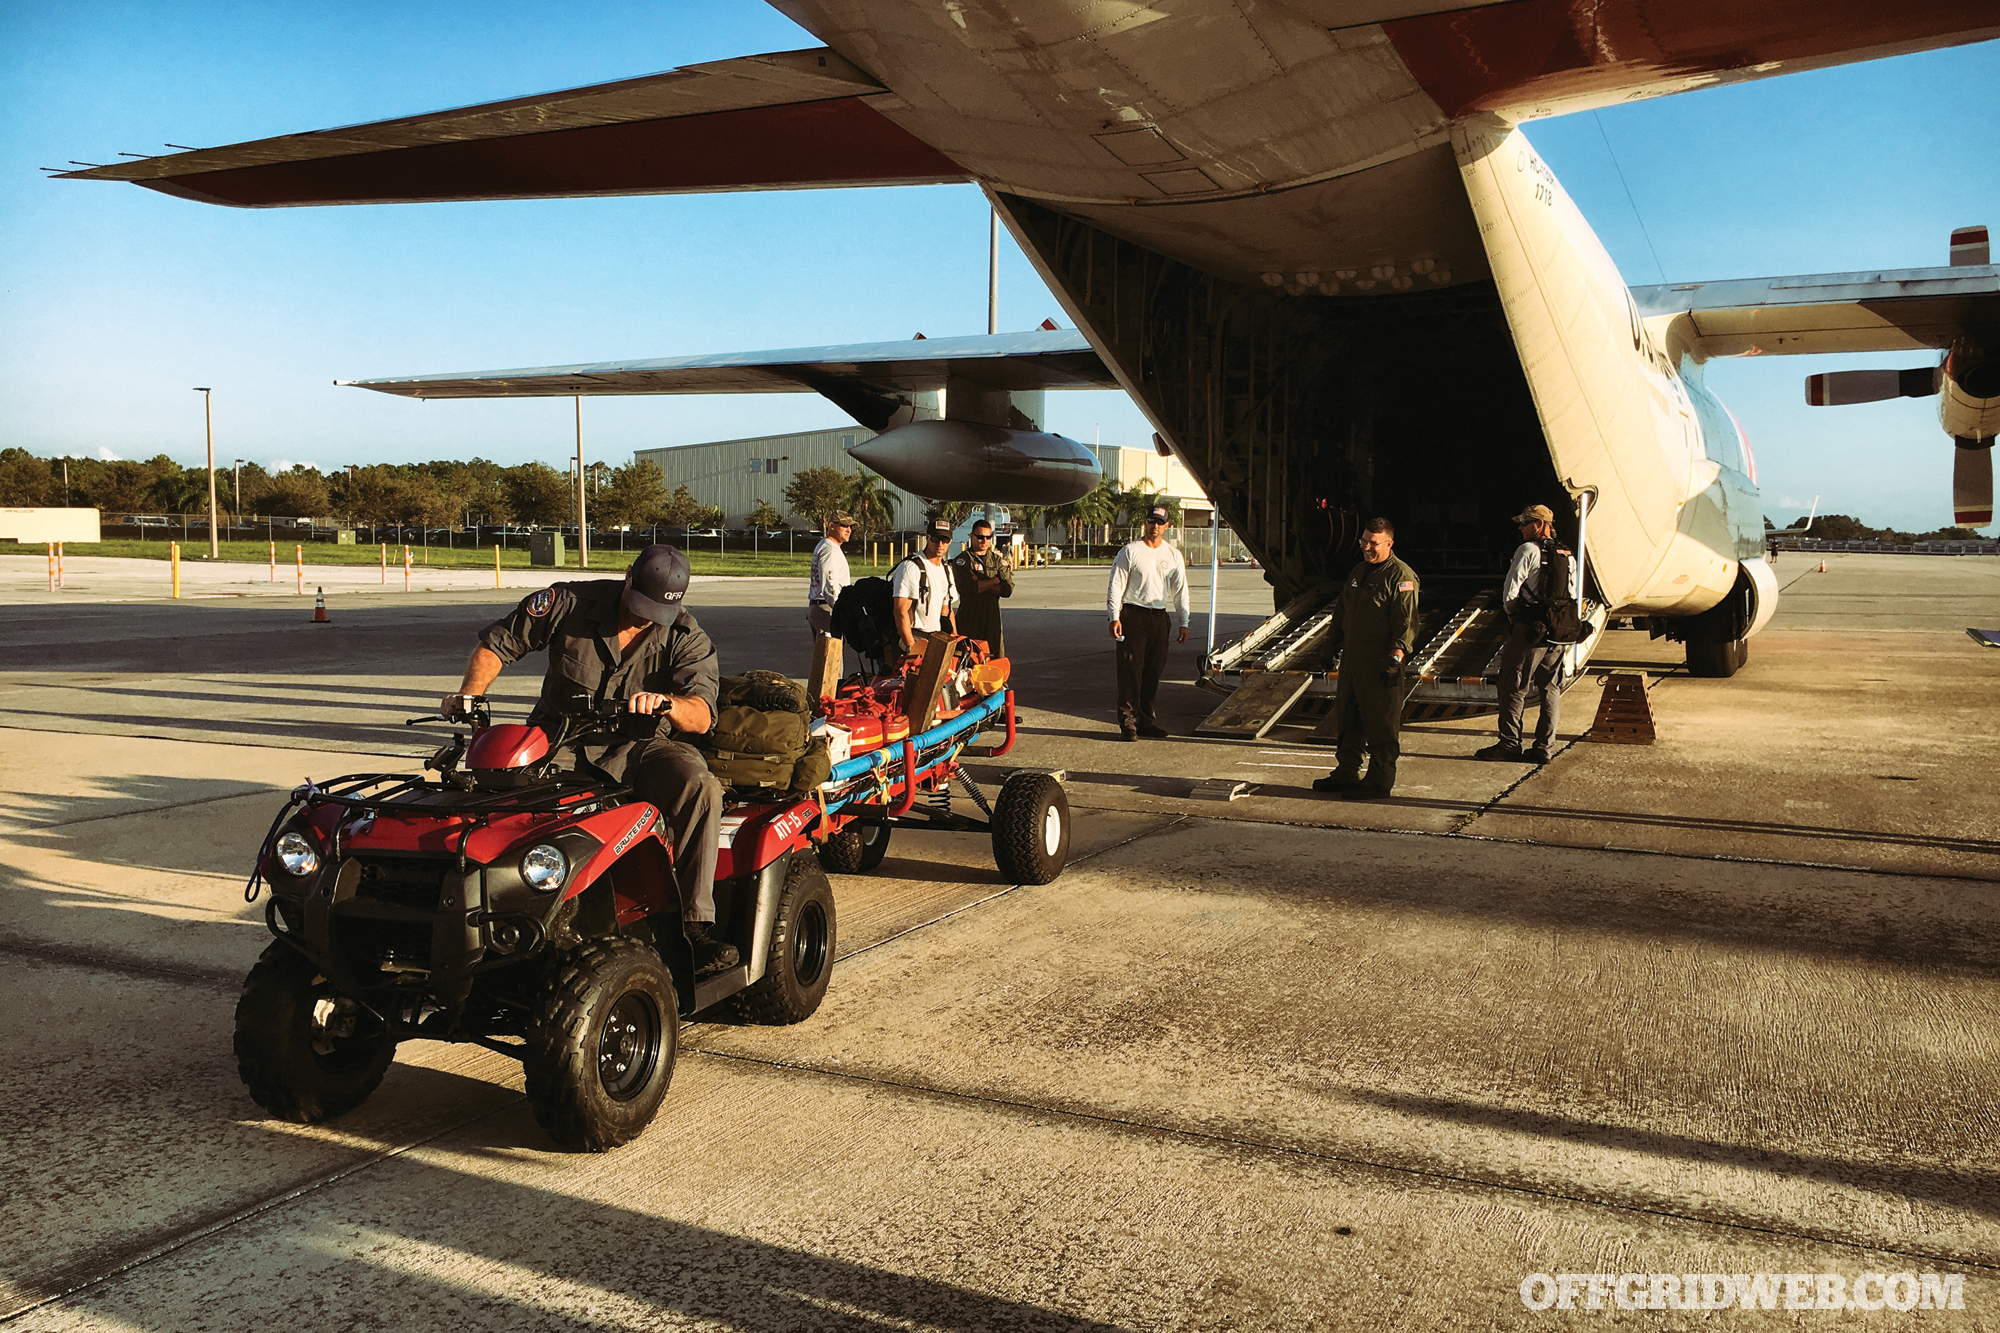
Here the team is loading their gear and vehicles onto a C-130 Hercules at Naval Air Station (NAS) Jacksonville, in preparation for flying into Key West to begin their mission.
Tell us more about the assumptions people make that end up getting them into trouble.
RG: Most people just grab a supply of things and don’t actually sit down and figure out how long it’s going to last. They think, “Well, I’ve got a case of water.”
But when you start looking at how many gallons of water someone is going to drink in one day, or per hour, especially when you’re exerting yourself cleaning up the mess, or if you had to walk for any period of time, that water goes fast. They just figure too, “I’ll fill up my vehicle with fuel, and I’ll just drive out.”
Well, there wasn’t any communications so they’d drive out somewhere, wouldn’t be able to find supplies in the next town, so they’d drive back in and the next day they’d do the same thing. After three days, now they’re out of fuel and there’s nowhere to refuel, and they still don’t know when the supplies are coming in. It was common for people to ask us, “Do you know when the supplies are coming? I don’t have enough fuel left to go look and see. I’ve only got enough fuel left to make one more trip.”
And that was it, so they’re pretty much stuck, and on that third day following the hurricane you start to see people who are just at the mercy of if somebody’s going to bring them resupply.
After three full days of searching destroyed homes and slowly working their way north from Key West, the 10 men from Florida Urban Search and Rescue Task Force 8 (FL USAR TF-8) arrived on Cudjoe Key and linked up with the larger FEMA search-and-rescue teams that were at last able to drive their 18-wheelers filled with supplies over the inter-island bridges. They shook hands with FL TF-2 from Miami and CA TF-1 from Los Angeles, and took a quick breather before jumping in and helping the federal teams continue the mission late that afternoon.
TM: That first night we were there, we’d been searching on foot and hadn’t showered for three days or more, which is not a problem whatsoever. But they brought us in, and I wouldn’t say that we were royalty, but they accepted us as they would one of their highest team members. We got showers, we got a nice bunk for the night with cool fans blowing, and all of that good stuff.
When it finally came to dinnertime, dinner had slowed down to a snail’s pace. A hundred guys from their team were just standing there, with hot food steaming ready to eat. Nothing was really happening, and we couldn’t figure out why. So one of their team leaders came up to us and said, “Hey guys, these guys respect you. You’re guests of ours. They will not eat until you all eat first.” We tried to put them off, and said no way, it’s your men, it’s your food, we’ll eat last. Their leader responded, “Like I said, I’m telling you right now. They will not eat until you guys eat.”
So they brought us up there, had us eat first, and everybody fell in line after that. So that was awesome, seeing such a well-established team bringing us in like that. They didn’t even know us, we’re a smaller team than them, but they brought us in as one of their own. Dinner was good with those guys; they were real, conversation was good, and food was awesome — it’d been trucked in straight from Miami.
After dinner, people had heard about who we were, the team leader introduced us and told them what our mission was. That basically we were just this small cluster of guys being dropped so far south where no one had made it down to yet. So he wanted his team to recognize us because when they travel, they go with 70 to 80 guys at a time and semi-trucks stocked with gear, whereas we’re just one small portion of a task force, and the only tools we have are what we could carry on our backs. It was an incredible experience, to have them accept us in like that and treat us like one of their own.
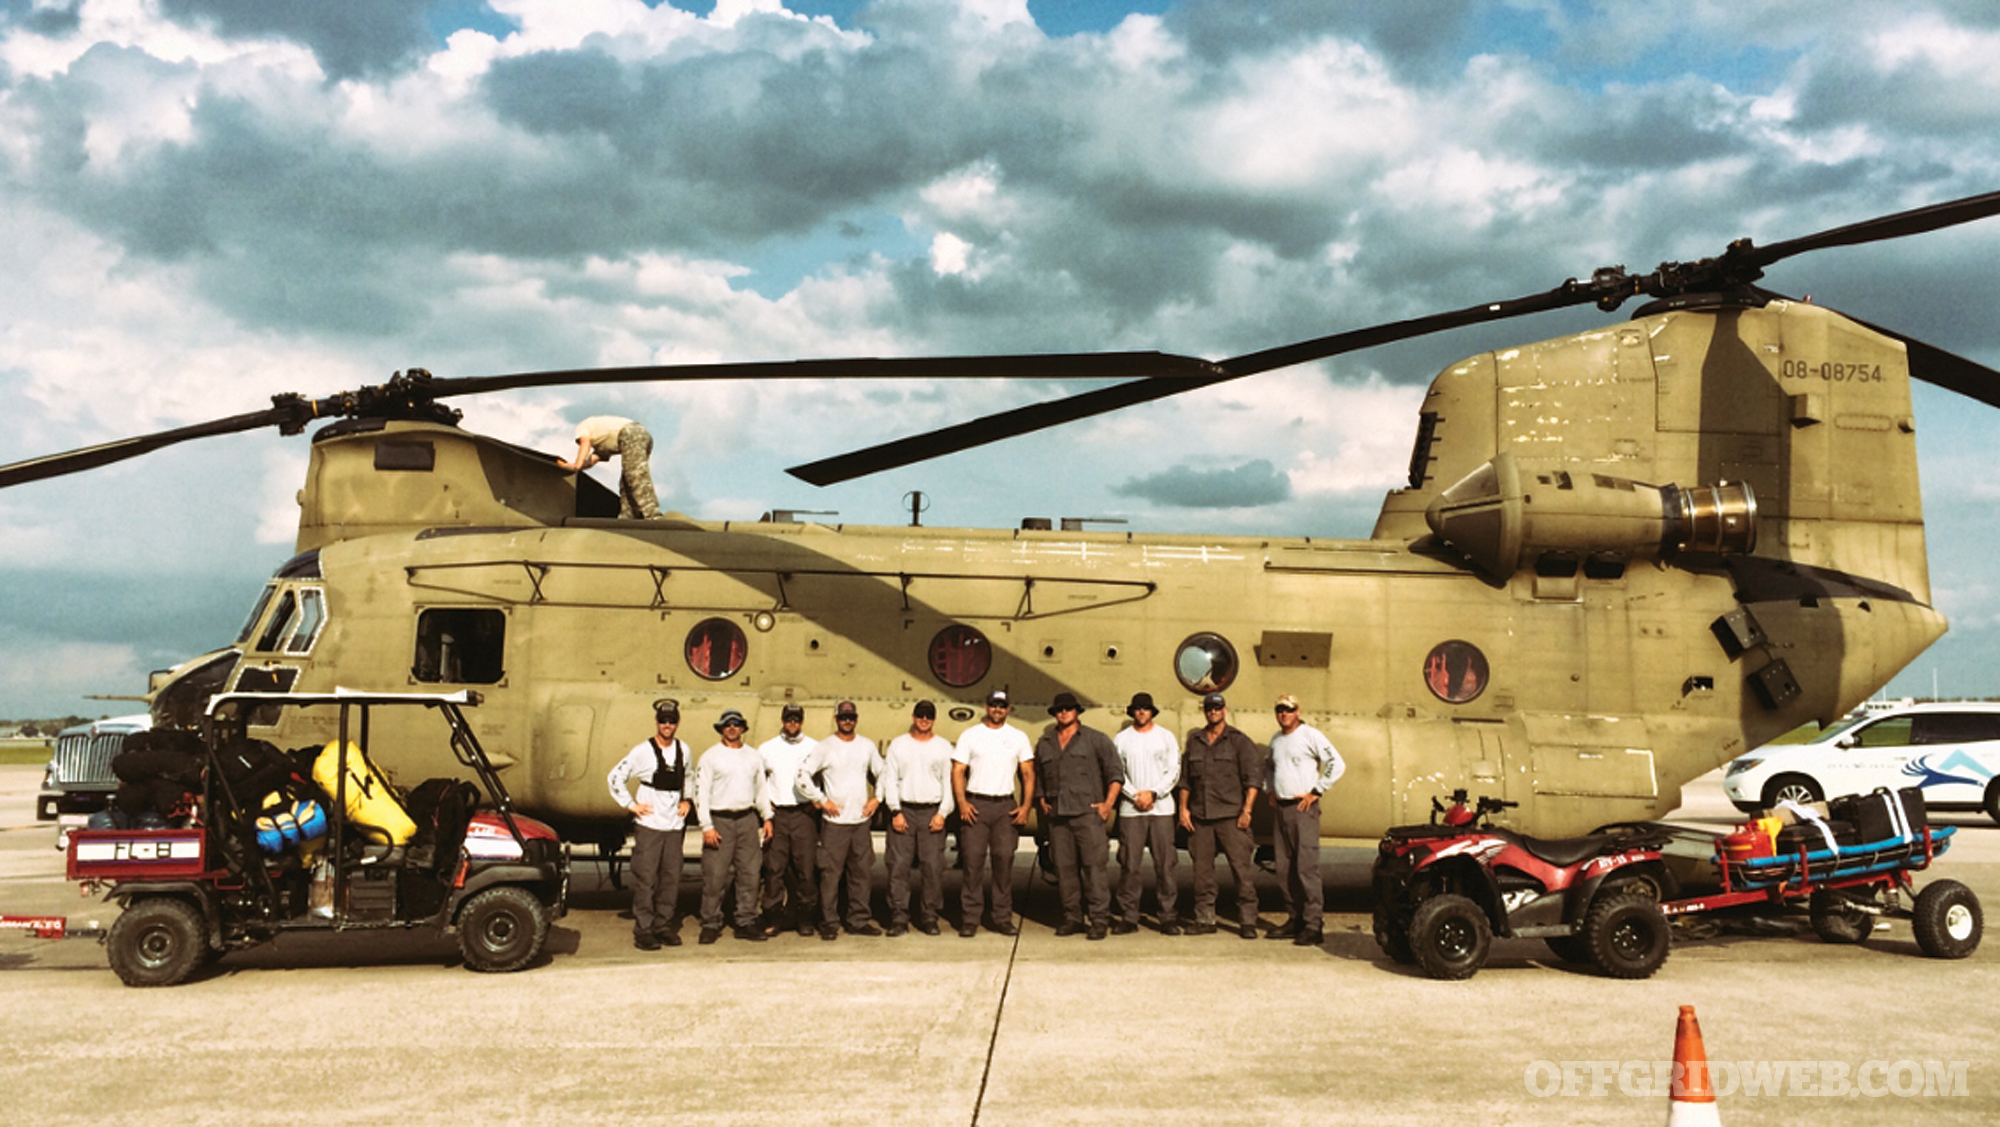
The next day, a National Guard CH-47 Chinook picked the men of TF-8 up at Marathon Key airport and flew them to Orlando, where they made their way back to Ocala and Marion County in the center of the state. Their assignment, to function as the first Urban Search and Rescue Team to aid those areas of the Florida Keys which were unreachable by road, had been successfully completed.
When Hurricane Prep Hits Home
We also asked Capt. Graff and Search Specialist Muder to give us five takeaway lessons from their deployment that they were able to apply to their own lives.
CALCULATE YOUR FUEL USE
Capt. Rob Graff: I think harder now about making sure that I have enough fuel for my generators and figuring out exactly how long they’re going to run based on the fuel on-hand. This was an issue while I was deployed with my own house. I had fuel, and two different methods — propane and gasoline. And what I found out was that the propane was gone quick. It burns cleaner, but doesn’t last as long as regular gasoline.
It also comes down to knowing what you can and can’t run with the generator. In my house now, everything’s color-coded. Red dots can’t be run with the generator, for example. So even when I’m not there my wife can operate it. All she has to do is follow the color code, turn on this one, turn off that one, and so on, so that my family can have some sense of normalcy in their lives since I’m usually deployed after a disaster.
Down in the Keys I saw guys who had their generators and fuel all laid out, but their fuel had gotten contaminated by seawater because they’d left it on the ground instead of putting it up high. So I learned from that as well.
THINK BEYOND THE GRID
Search Specialist Todd Muder: We implemented several ideas that I took away. One is using alternative power sources other than generators or the conventional power off the power grid. We’ve acquired portable battery-powered charging blocks that can run computers or your cell phone, and I also purchased a solar-powered charger to charge my phone and the power block backup even when off the grid.
BRING YOUR BOOTS
TM: If you plan on sheltering in place, you need solid footwear. Everything we saw was houses broken into pieces. There’s nails, glass, and screws sticking out everywhere. If we hadn’t had sturdy boots we probably would have been put out of service.
BUY A GPS (NOT YOUR PHONE)
TM: You may need to consider alternate means of navigation after a hurricane. Road signs will be gone, and the roads you may be used to could be washed out. If all the visual landmarks that you’re used to are gone, being able to navigate locally — even in areas that you’re normally familiar with — can be hard to do. Especially if you’re on an evacuation route, you might get off course and then nothing is familiar to you at that point.
Everybody thinks they can just use their phone, but the phone may or may not be working at that point. So have a good-quality GPS, separate from your phone, and know how to use it to get from point A to point B.
USE THY NEIGHBORS
TM: In the Keys, I saw communities that would have benefitted from better resource pooling. For example, one fellow we ran into was trying to use his front-end loader to clear the roads. But he was out of diesel. The next guy we ran into had diesel, but his generator was broke. So if they’d had a better system to communicate, or just better general knowledge of the available resources within their area, that would have helped.
So now, I and my neighbors have talked about it, and it’s amazing the resources that they have. For example, my neighbor has a high-powered generator. I’ve got a generator too, but I’m also the only one on my block that has a swimming pool, so everyone knows that they can use that water for flushing toilets and use for general cleaning. So just having the knowledge of what people in my community have that we can share, trade, barter, or whatever is critical.
Our Panel
Capt. Robert Graff started as a firefighter/paramedic in 1996 and has spent more than 20 years serving the citizens of Marion County, Florida. He currently serves as Division Chief of Special Operations, serves as an instructor at the Florida State Fire College, and regularly consults as a Subject Matter Expert for topics in technical rescue and hazardous materials. He’s a Florida State Smoke Diver and has deployed on search-and-rescue missions for six other hurricanes besides Irma, including Hurricanes Hermine and Matthew in 2016 and Hurricane Katrina in 2005.
Todd Muder has worked as a firefighter for 24 years and has been a member of FL USAR TF-8 since 2004. He is a state-certified paramedic and works as a Driver-Engineer for Marion County (FL) Fire Rescue. He’s certified by the National Association for Search and Rescue (NASAR) SAR Tech I and works for the team as a Technical Search Specialist. Besides his deployment for Hurricane Irma, he also deployed for Hurricanes Matthew and Hermine in 2016, Hurricane Ivan in 2004, and multiple missing-person searches throughout his career.
Author’s Gear Recommendations
Based on his experiences gained while Hurricane Irma was passing over his home in St. Petersburg, Florida, and afterward when he deployed in support of search-and-rescue operations, author Andrew Schrader either had (or wishes he’d had) some of this gear.
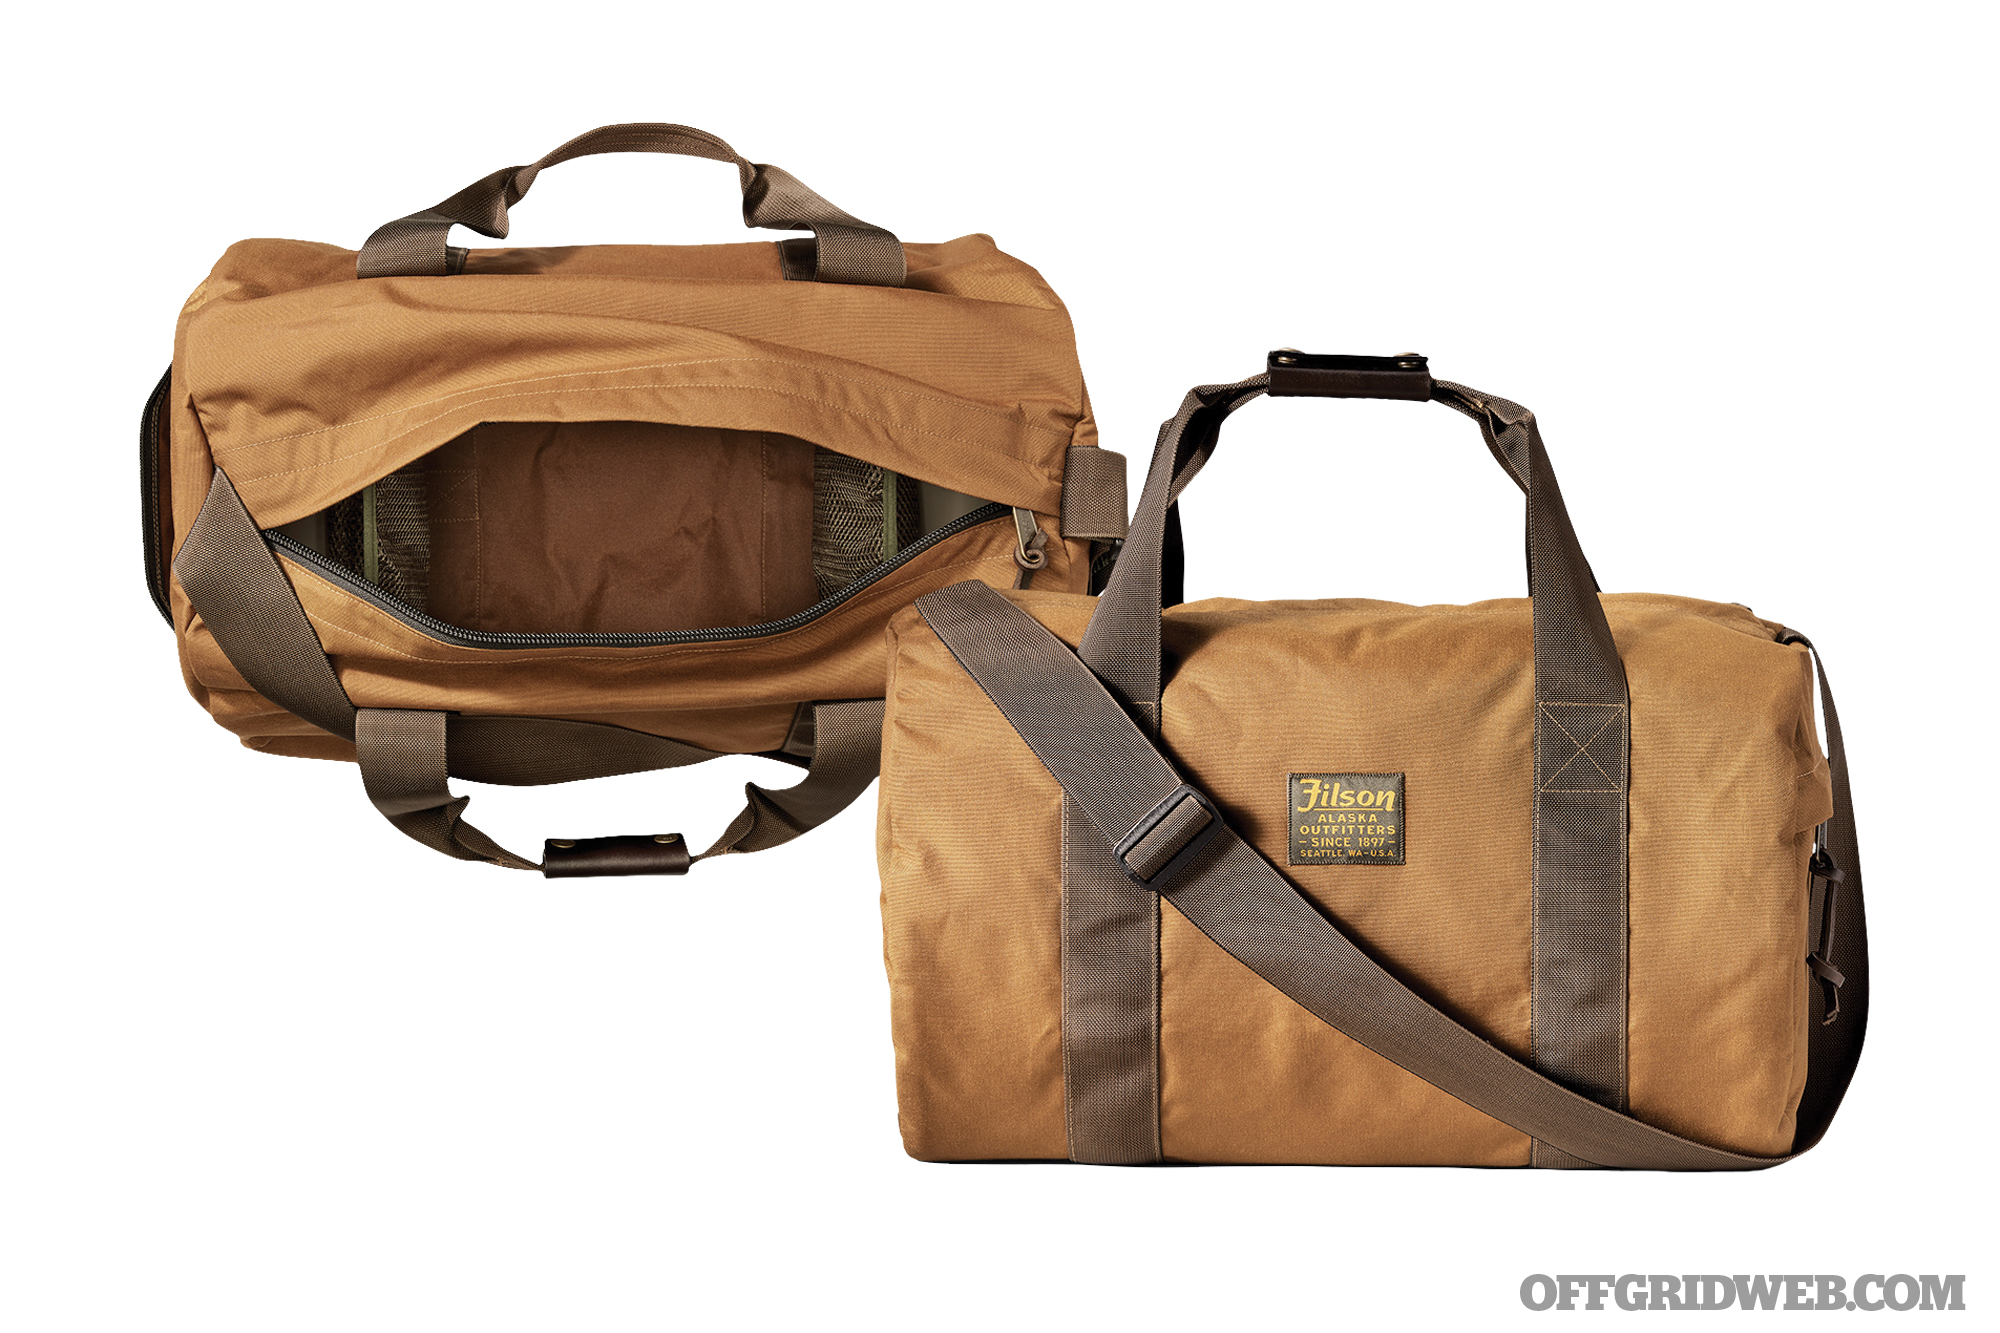
Filson Ballistic Nylon Barrel Pack
I found it extremely helpful to have all of my “really important sh*t” ready in a single duffle bag, and I kept it on my kitchen counter the entire time while the hurricane was inbound and passing over during the night. This wasn’t so much a “go bag” as it was just filled with the stuff that I kept using over and over or really wanted to keep easy tabs on, once the power went out. This included things like multiple light sources, portable power chargers, a pistol, etc.
Some people recommend spreading things out throughout the house in these situations, but in my experience that just makes it easier to lose things when the lights go out. I like having one large bag that’s easy to locate and carry.
Gerber Center-Drive Multitool
I’d love to list a big, sexy knife here, but the fact is that in actual sh*tty situations you’re a lot more likely to need a multitool than a huge combat knife. Having full-size pliers that can lock down on something is a big help. Now that I’ve used the Center-Drive, as nostalgic as I might be for my old Leatherman Wave, I’ll never go back.
Yeti Tundra 65 Cooler
My power was out for seven days following Hurricane Irma. Only because I had invested in two heavy, insulated wall coolers, my wife still had ice and cold drinks after those seven days while I was deployed following the hurricane. (I like to have one cooler stocked only with ice, which gets opened only to refill the drinks/perishable cooler as required. This helps the ice last longer.)
My wife may not have had air-conditioning in 92-degree weather, but she had cold drinks, and that made a huge impact on her mental and physical well-being. I’ll never waste money on some grocery-store Igloo cooler again.
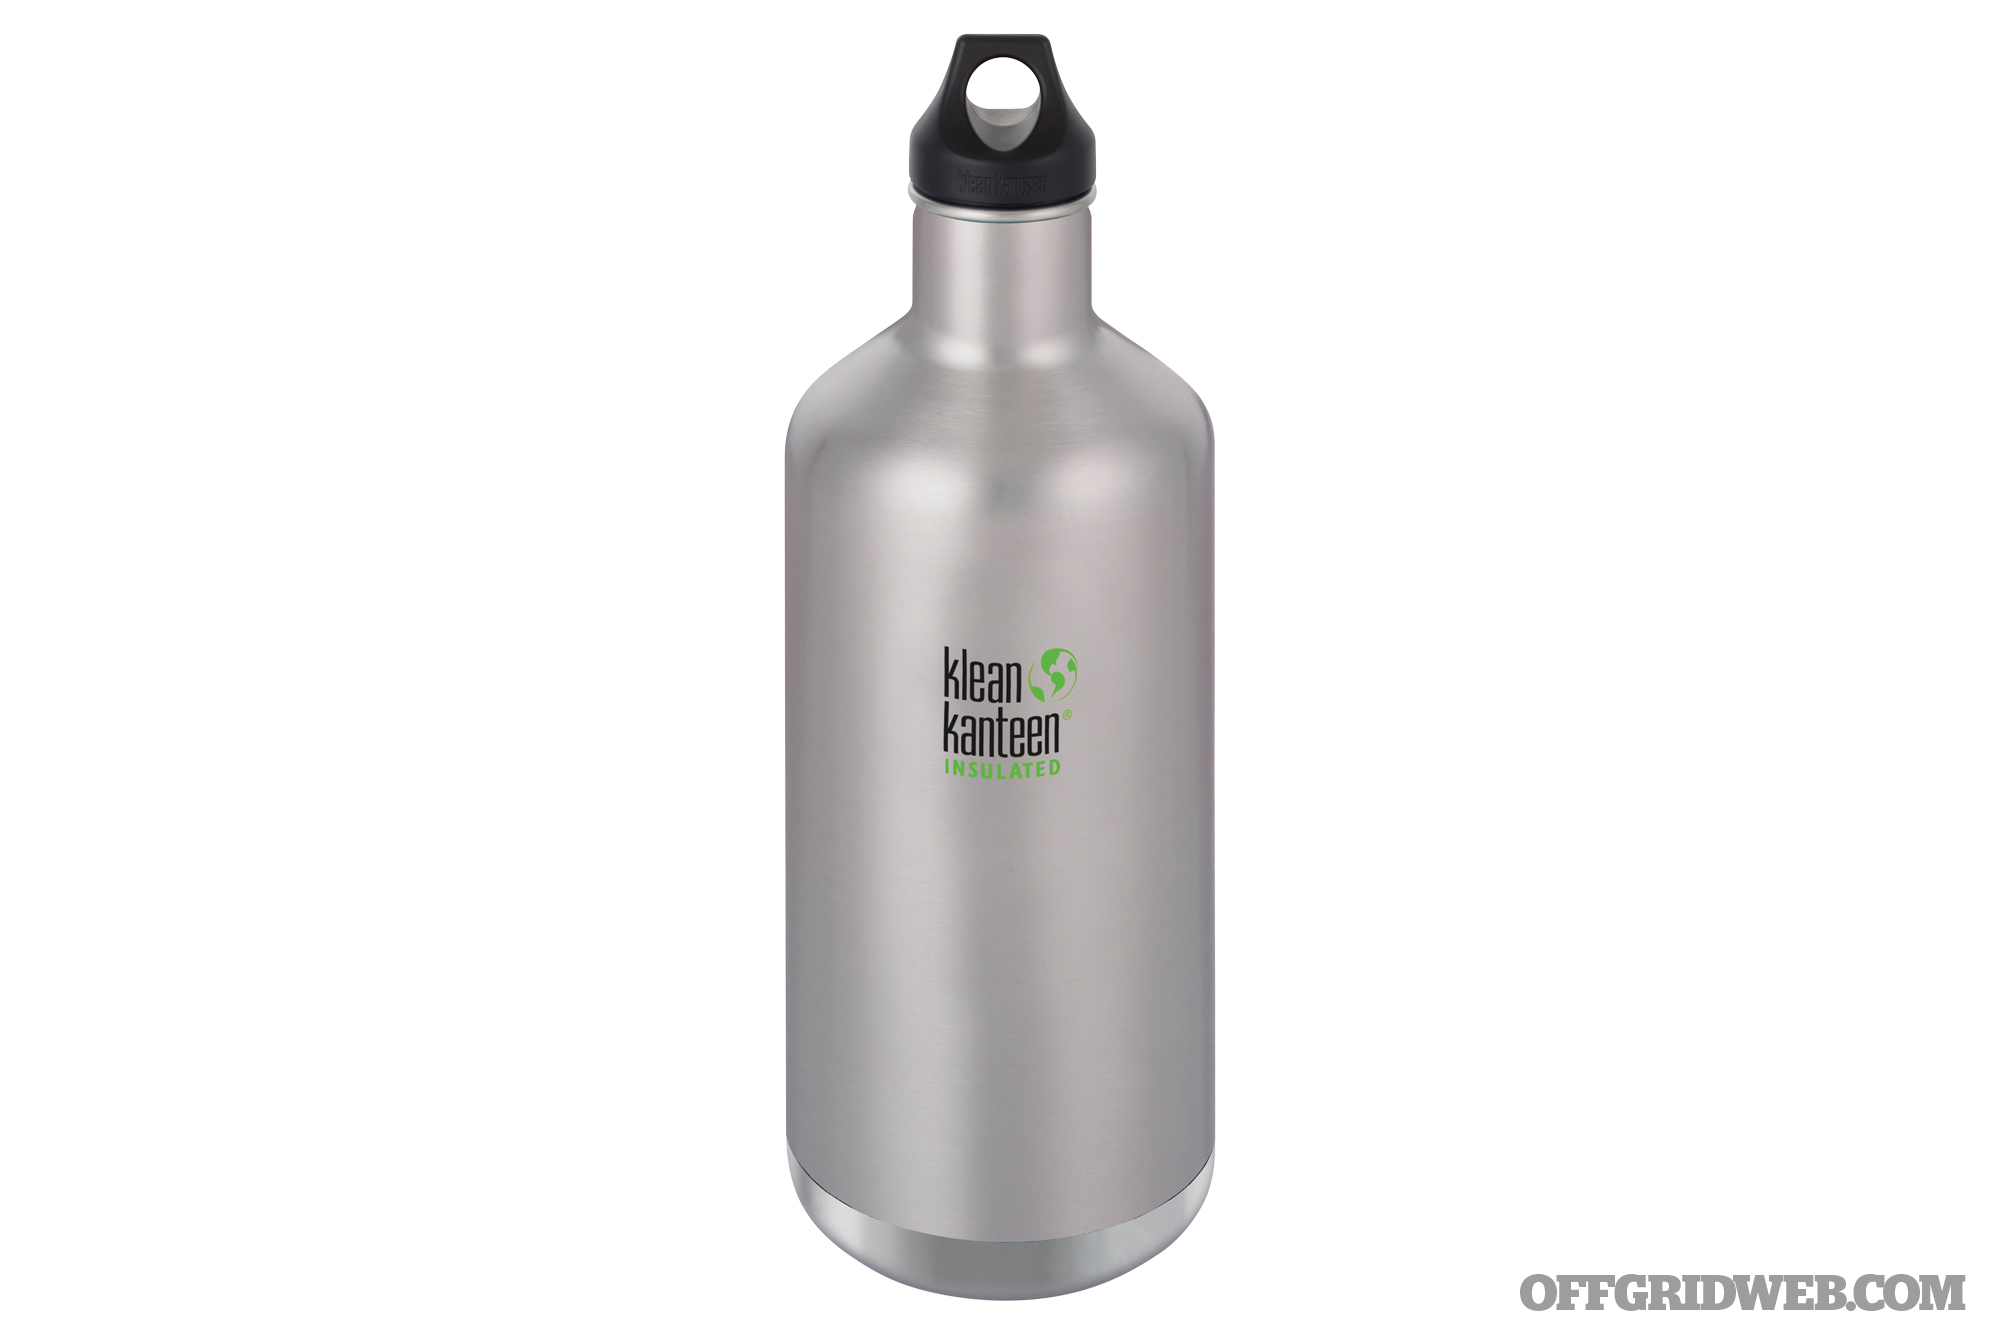
Klean Kanteen 64oz Insulated Bottle
This is perfect for making sure that you always have cool, clean water on hand during hard times. Like with the Yeti cooler, if you’re lucky enough to find or scrounge ice then you really want to try your hardest to keep it cold as long as possible. It might sound silly — like is having cold water really a survival factor? Yes it is. Access to cold water during stupid-hot conditions helps keep your core temperature down, leading to better decision-making ability and fewer lapses in judgment. If you’ve been there, then you know.
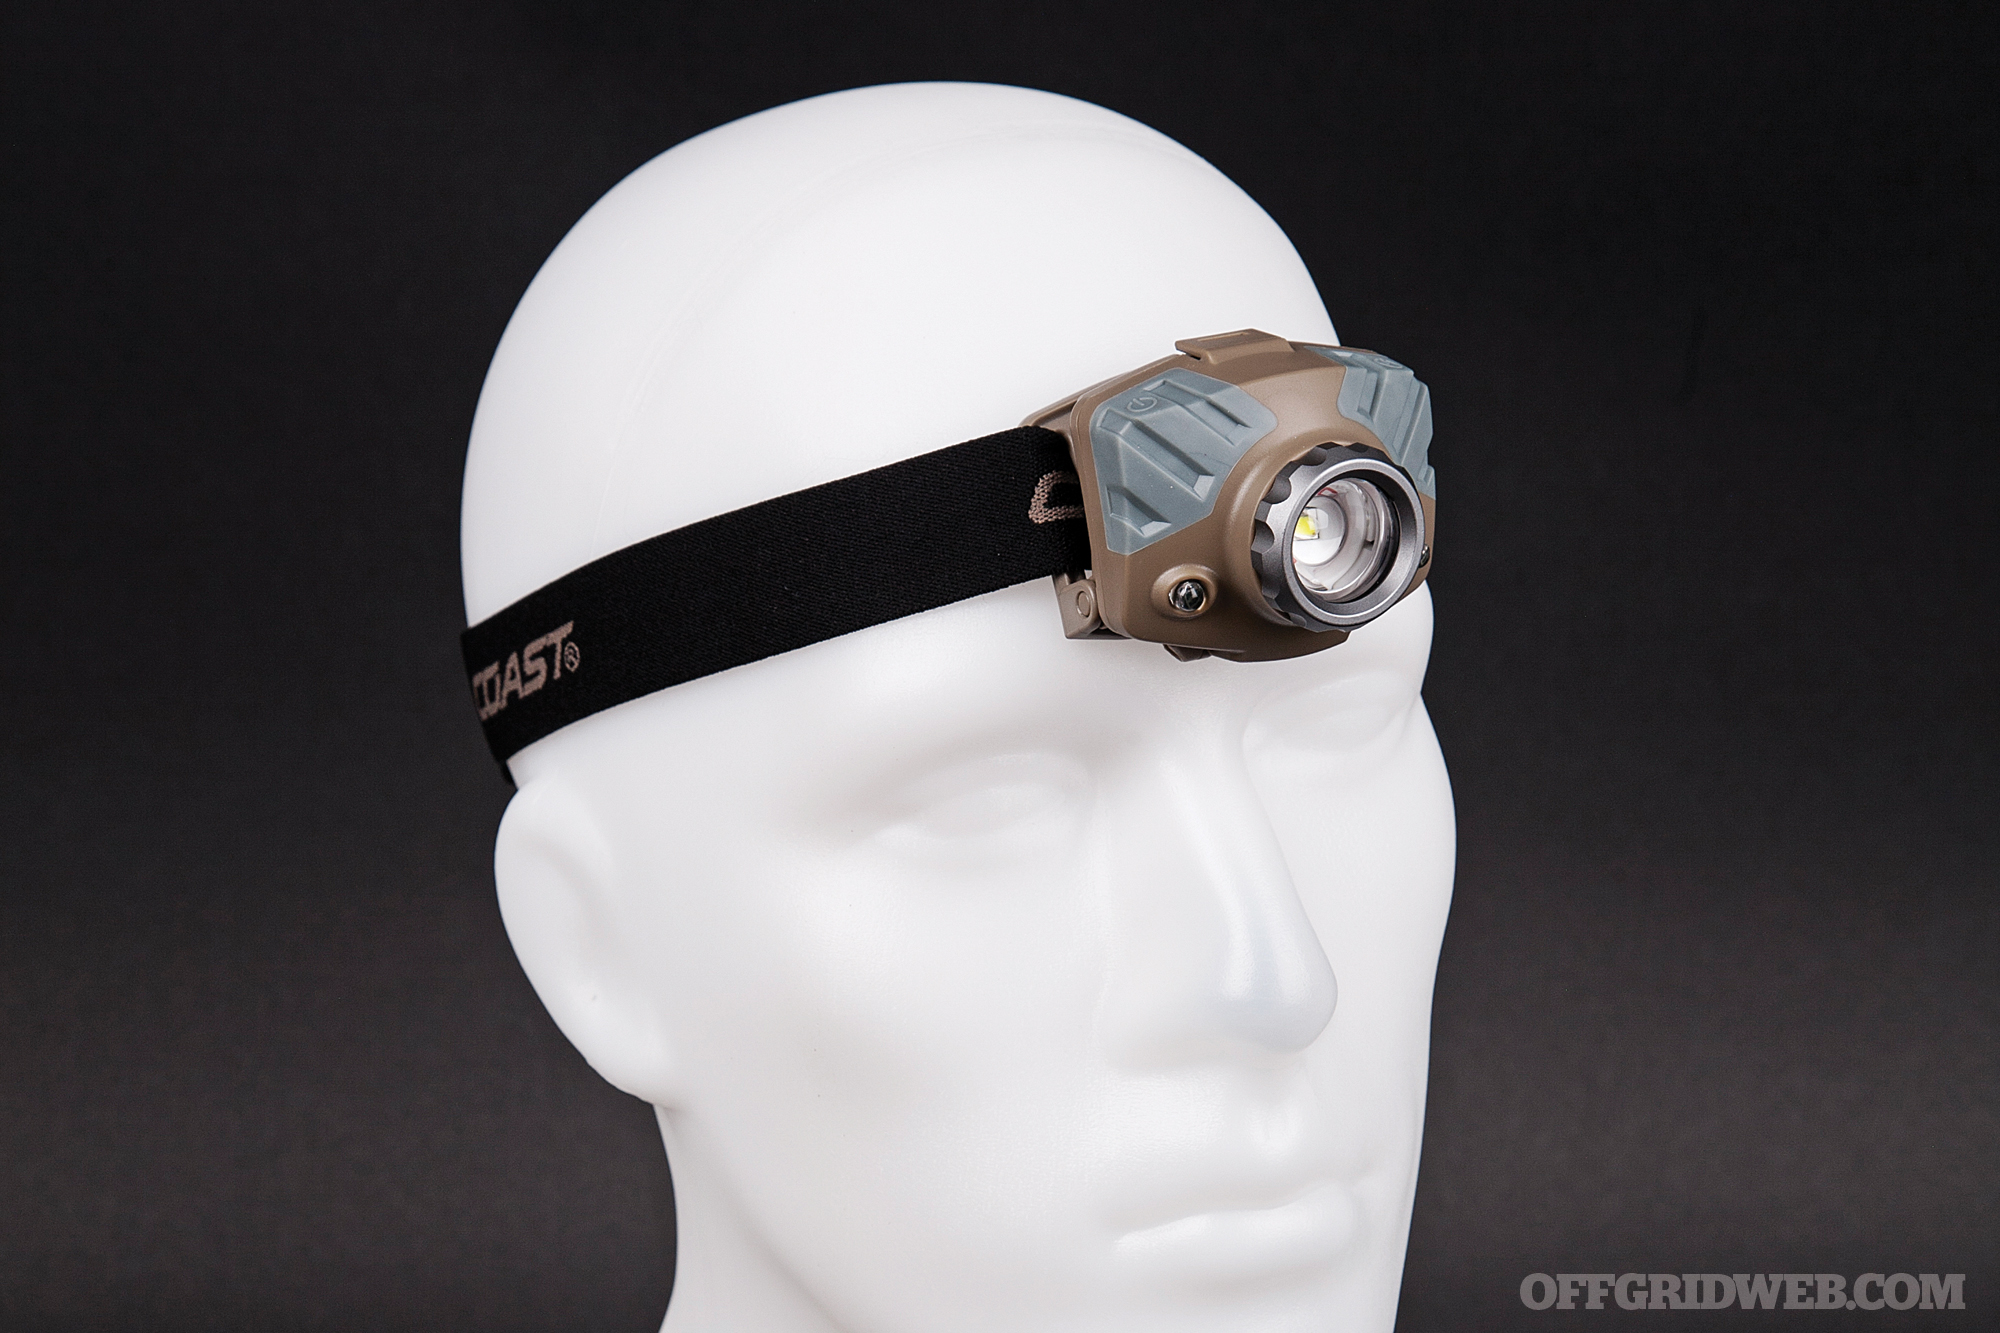
Coast Polysteel 600R Flashlight
The reasons for a good flashlight are obvious, but I just can’t emphasize enough the need to have multiple light sources on hand. You never realize just how little you can get done in the dark until you don’t have a light, and trying to change batteries in the dark will be, at a minimum, a significant inconvenience. I think I had seven flashlights and rechargeable lanterns on hand, after the power had gone out when Irma was passing over in the night.
I’ve used the old non-rechargeable version of the Polysteel 600, and can verify that the design is a beast. Now it’s made even better because of the dual power sources, taking standard alkaline batteries or the rechargeable lithium-ion battery pack. Both the alkaline battery core and the rechargeable core are two separate “drop-in” barrels, making it simple and fast to swap one for the other without having to handle each little battery individually. It uses easy-to-find AA batteries, and the external charging port with a USB insert can power other devices like my cell phone.
About the Author
Andrew Schrader is a licensed professional engineer and is certified by the U.S. Army Corps of Engineers as an Urban Search and Rescue (USAR) Structures Specialist. His company, Recon Response Engineering LLC, educates firefighters and search and rescue teams on the subject of urban search and rescue and building collapse. As a fellow member of FL USAR TF-8, he was also deployed during Hurricane Irma to North-Central FL, in Putnam County. www.reconresponse.com
Fear of the dark is a natural human condition, but it’s not a lack of light that we fear — it’s a lack of awareness of our surroundings. In total darkness, our minds tend to wander to the myriad of unseen dangers that could be lurking in the shadows, leading to feelings of dread and powerlessness. As children, we worried about imaginary monsters and ghouls; as adults we’re unsettled by an awareness of the real threats in our vicinity, even if they’re as simple as a hidden tree root that could lead to a sprained ankle.
Carrying a flashlight is one way to regain your vision after dark, but it occupies your hand and must be manually aimed. A headlamp bypasses these issues, naturally following your view and freeing up your hands for other important tasks. Just try setting up a tent, cooking a meal, or reloading a weapon with a flashlight in hand and you’ll see the value of an alternative light source. This is why our bug-out bags are never without some form of headlamp — in normal circumstances, waving around a flashlight is inconvenient, but in a SHTF situation it could leave you fighting for your life one-handed.
Headlamps provide various types of light, and what you need will depend heavily on your nighttime activities. Surface-mounted LEDs cast a wide flood beam that’s perfect for detail-oriented jobs at the campsite or workshop; a recessed LED with a deep lens or reflector will project a long-distance spotlight for lighting trails or locating far-off landmarks. Some headlamps offer both beam types, as well as a red light that can be used to preserve your night vision.
In order to help you select a headlamp that meets your needs and your budget, we collected and evaluated a dozen of these hands-free lights. Read on for our thoughts on each.
Black Diamond ReVolt
Claimed Max Brightness 300 lumens
Claimed Max Runtime 175 hours
Weight with Batteries 3.6 ounces
Battery Type AAA rechargeable (three, included), lithium, or alkaline
Output Modes Spot and flood beams with adjustable dimmer; red constant-on or flashing
This headlamp offers a tightly focused white spotlight, diffuse white floodlight, and directly accessible red setting. Each can be activated individually, or both spotlight and flood can be used simultaneously. Controls are simple, and each light source can be precisely dimmed by holding down the power button. The ReVolt can run on common AAA disposables or the NiMH batteries it comes with — the latter set is rechargeable via a hidden micro-USB port, but offers substantially lower output (175 lumens) and runtime (75 hours). But at a sub-$50 street price, overall value is quite good.
Pros:
Three individually dimmable LEDs let you quickly access the exact type of light you need
Lockout mode removes the risk of accidental activation in storage
IPX8 waterproof to 1.1-meter immersion
Cons:
Max output is dramatically reduced when using the included rechargeable batteries
Battery door closure relies on a long plastic tab, and we can see the potential for breakage
COAST FL75R
Claimed Max Brightness 530 lumens
Claimed Max Runtime 23 hours
Weight with Batteries 3.2 ounces
Battery Type Rechargeable lithium-ion (one, included) or AAA (three, included)
Output Modes Adjustable focus with high, medium, or low output; red
The Pure Beam Focusing Optic on this headlamp casts a large and even circle of soft white light, which we found to be very useful in a dark campsite. Twisting the bezel focuses the center of the light into a spot beam for longer throw, but retains the peripheral flood for situational awareness. The FL75R’s removable li-ion battery is rechargeable via a micro-USB port, and available in various bright colorways as well as this subdued FDE option.
Pros:
Twist-focus optic produces an extremely wide flood beam with or without a central spot
Includes AAA batteries and a rechargeable pack, plus a cable and wall charger
Cons:
Red LEDs cast a tight spot beam; flood would’ve been more useful
We normally don’t care about packaging, but this arrived in a comically huge 9-by-15-inch plastic clamshell. The box was mostly empty space.
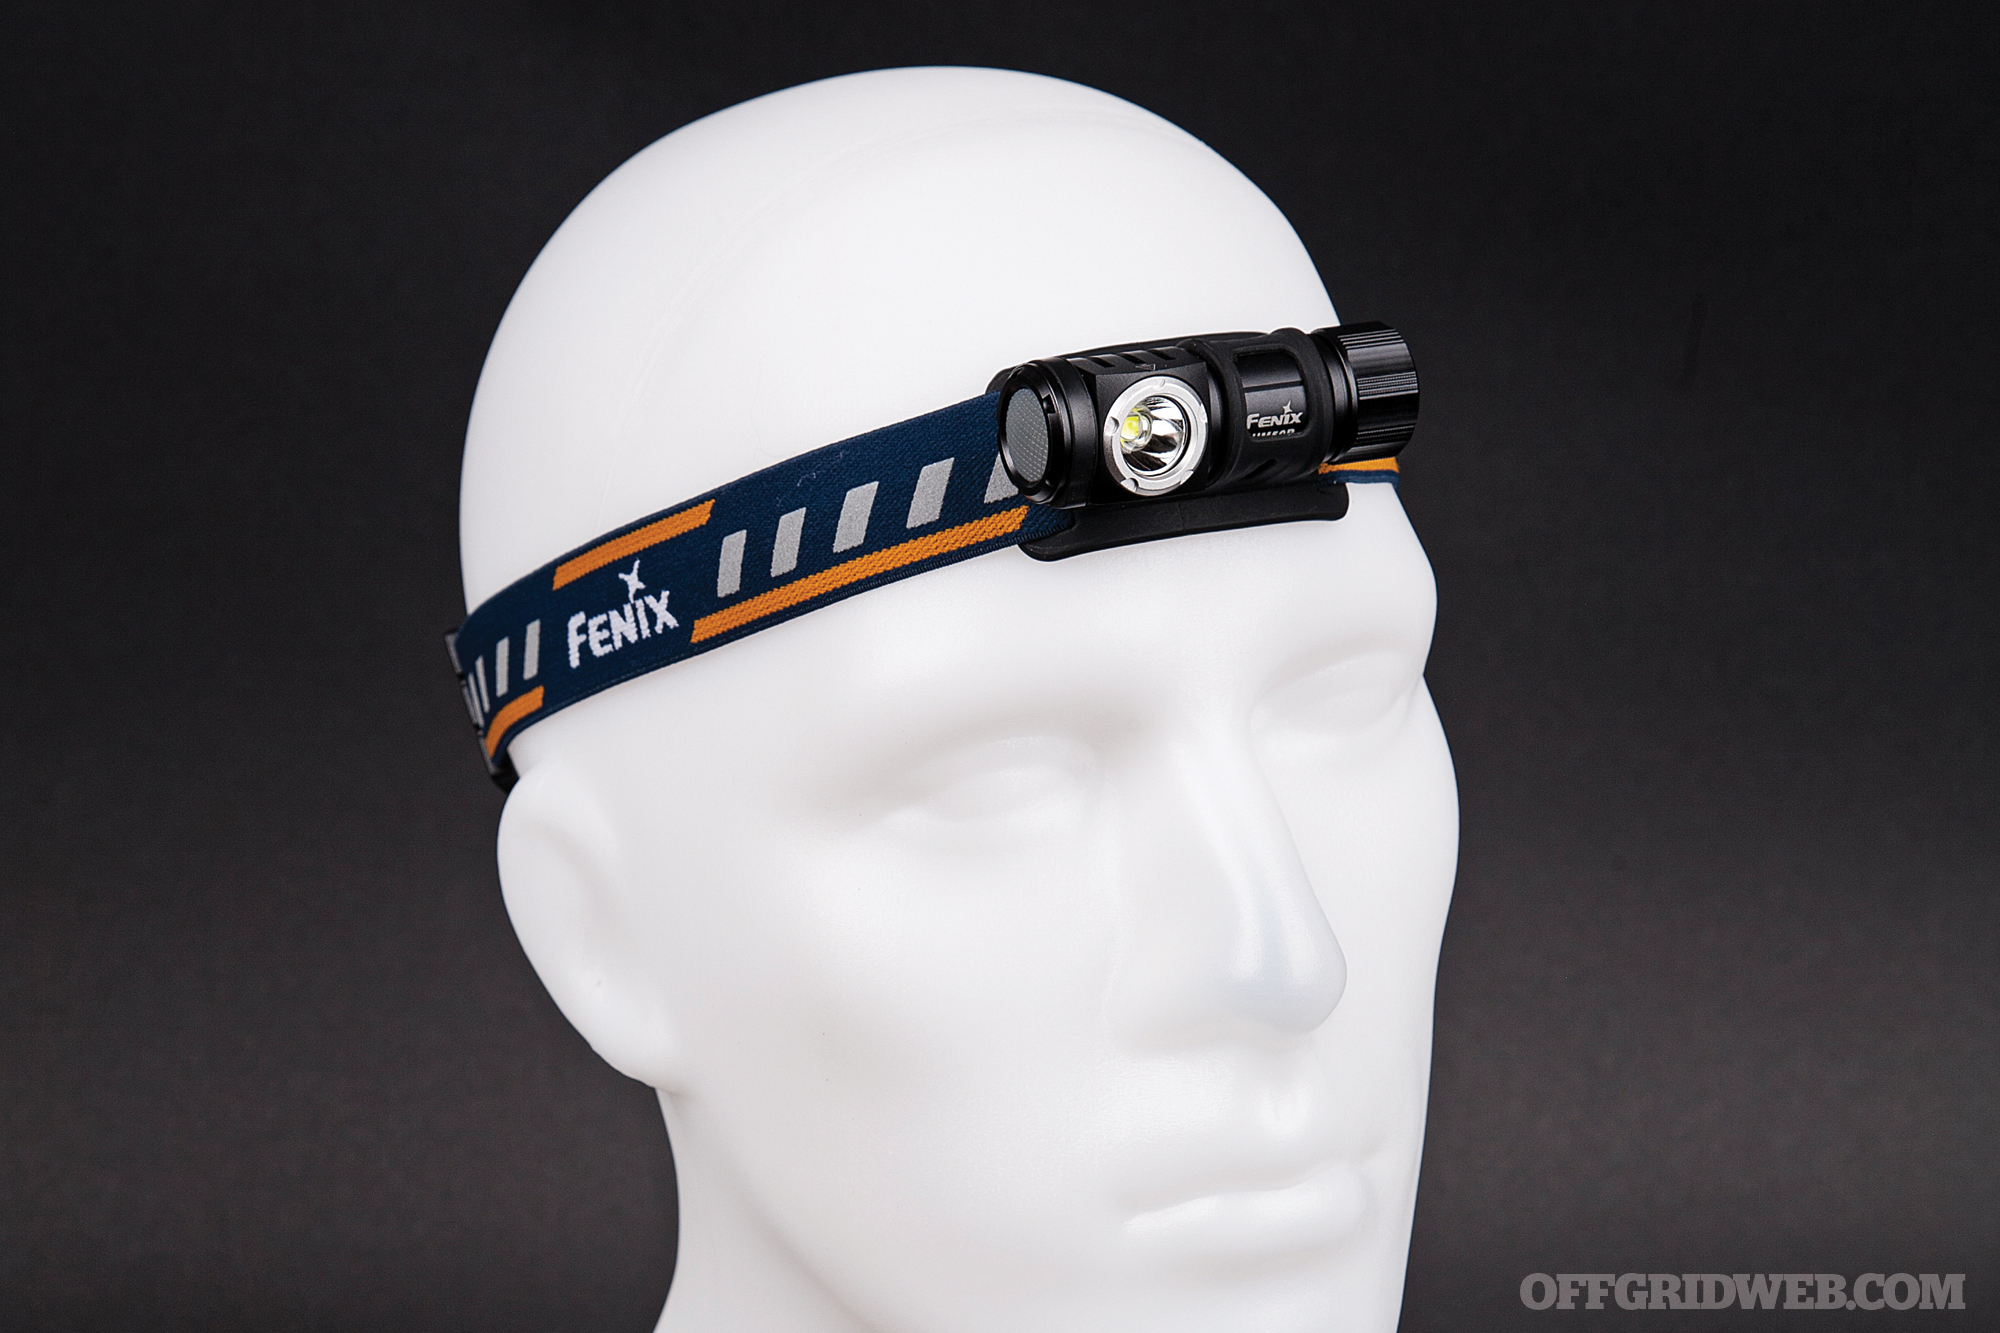
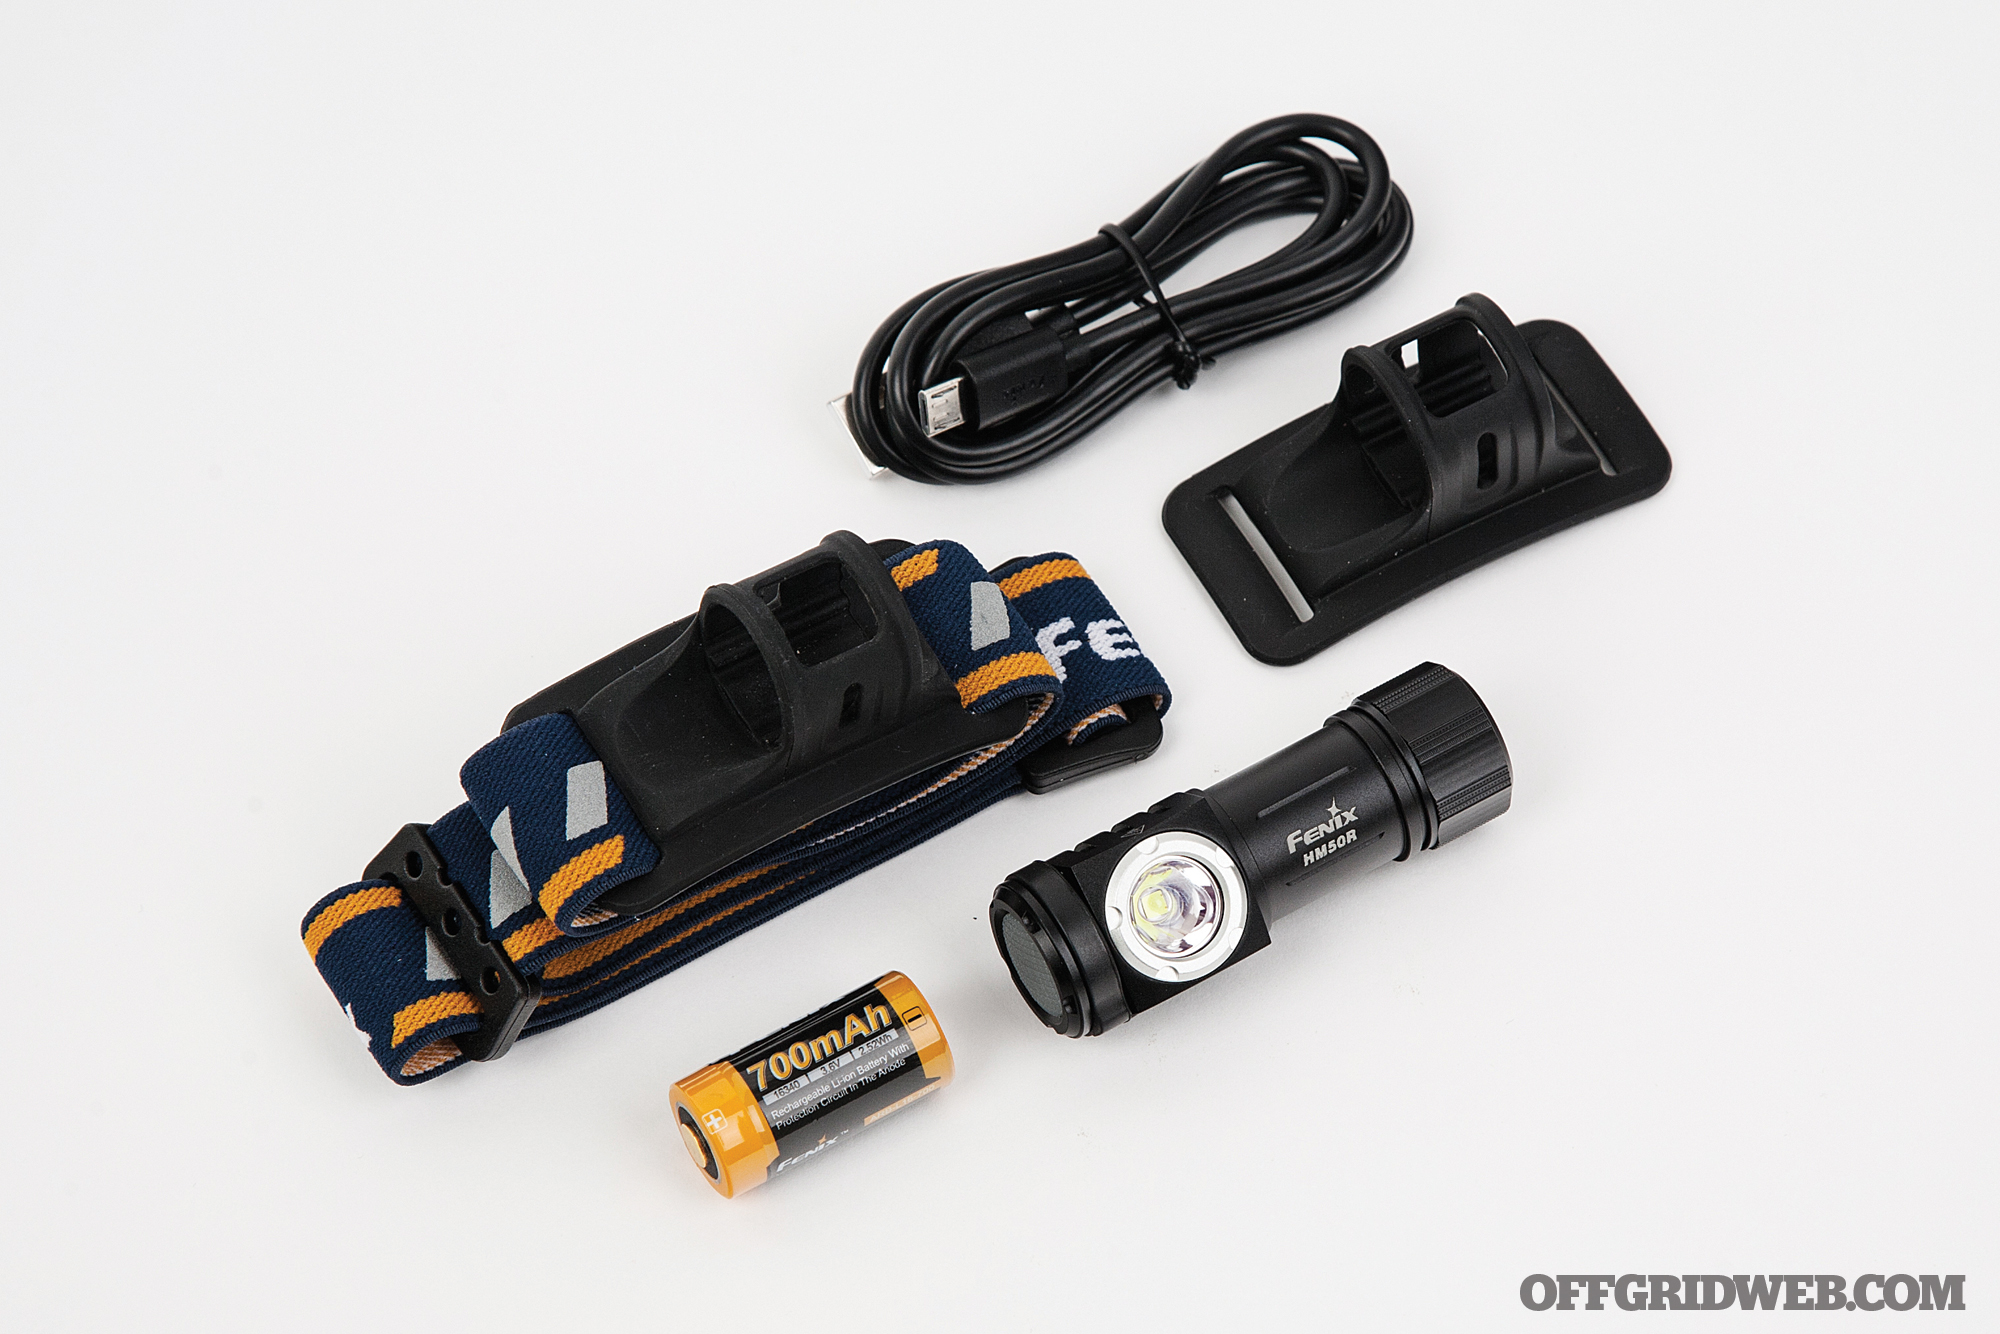
Fenix HM50R
Claimed Max Brightness 500 lumens
Claimed Max Runtime 128 hours
Weight with Batteries 2.8 ounces
Battery Type Rechargeable 16430 (one, included) or CR123A (one, not included)
This dual-purpose design can be carried as a flashlight or worn as a headlamp. The headband mount is a stretchy rubber ring that slides around the light’s body; a spare is included in case the original gets damaged. The elastic band includes rubberized strips on its inside surface, which prevent the light from sliding down the wearer’s forehead. To avoid accidental activation, the power switch has a 1-second lockout delay. A rubber flap on the side conceals a micro-USB charging port for the battery.
Pros:
Can easily be removed from the headband and used as a flashlight
IP68 water- and dustproof, impact-resistant to 1 meter drops
Cons:
The absence of a clip or lanyard hole makes this light easy to lose if carried in a pocket.
Lacks a red LED, but the 4-lumen low mode almost makes up for it
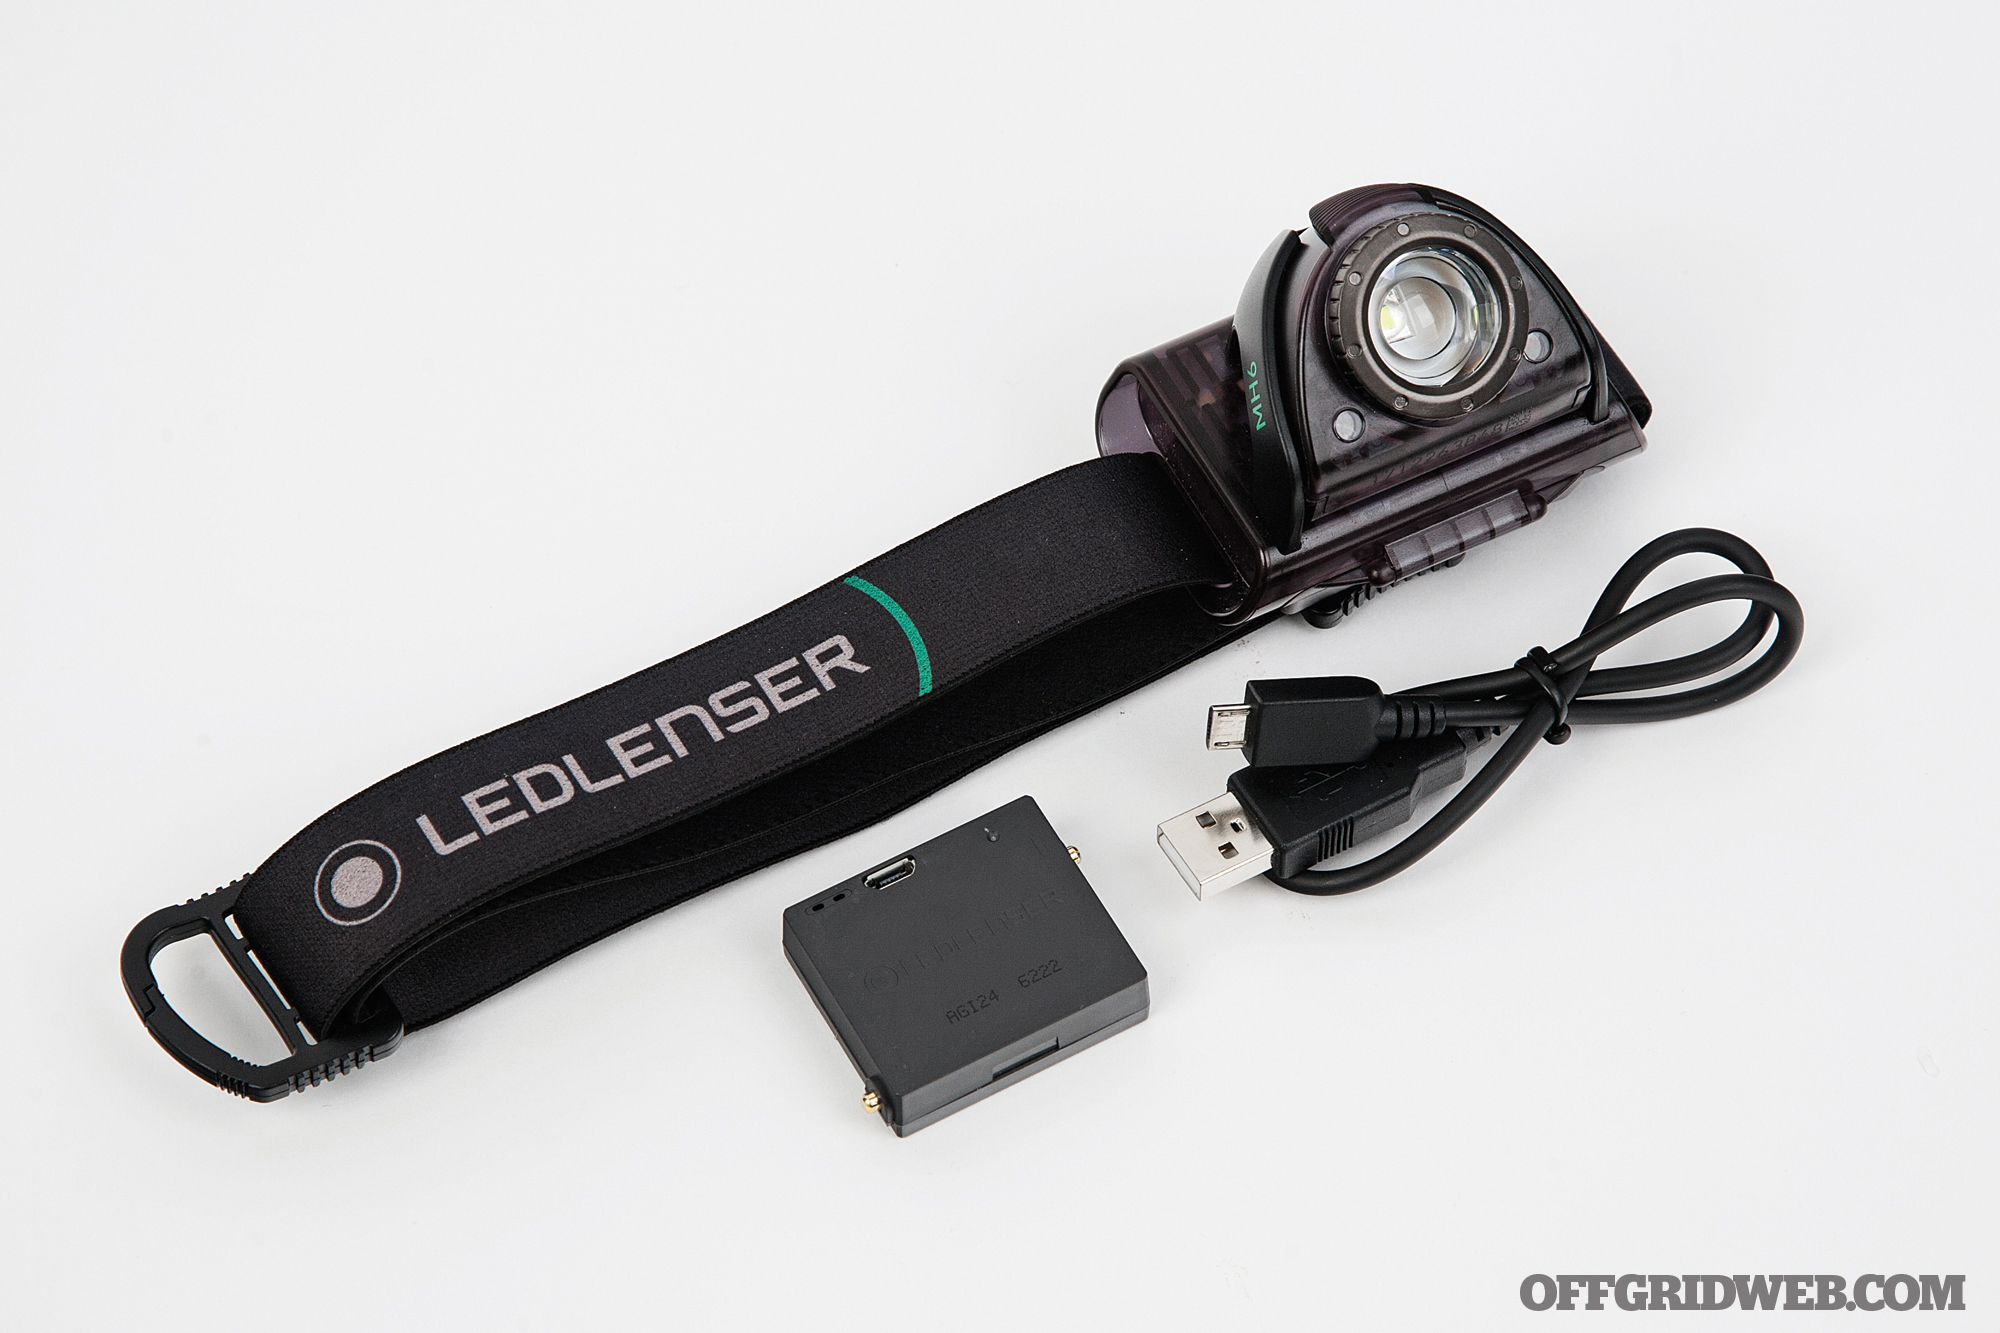
Ledlenser MH6
Claimed Max Brightness 200 lumens
Claimed Max Runtime 20 hours
Weight with Batteries 3.3 ounces
Battery Type Rechargeable lithium-ion (one, included) or AAA (three, not included)
Output Modes Adjustable focus with adjustable dimmer, high, low, and flashing modes; red, flashing red
The MH6 is one of three new models from Ledlenser, placed between the 100-lumen MH2 and the 600-lumen MH10. It features the company’s bezel-twist Advanced Focus System, which adjusts from a moderately wide and even flood beam to a very tight spot beam. Pressing the power button cycles through high, low, and a slow-flashing beacon mode; a dimmer function is available, but it only affects the secondary low mode’s output, so it’s more of a set-it-and-forget-it option. A single auxiliary LED provides a dense spot of red light.
Pros:
Concentrated spot beam yields great 120-meter throw; flood beam is respectable, but not as wide as other lights we tested
Lockout mode prevents accidental activation
Cons:
Dimmer function is difficult to access and seems redundant alongside high and low presets
The housing is clearly designed to accommodate two red LEDs, but only one is present. This feels like a cost-cutting measure.
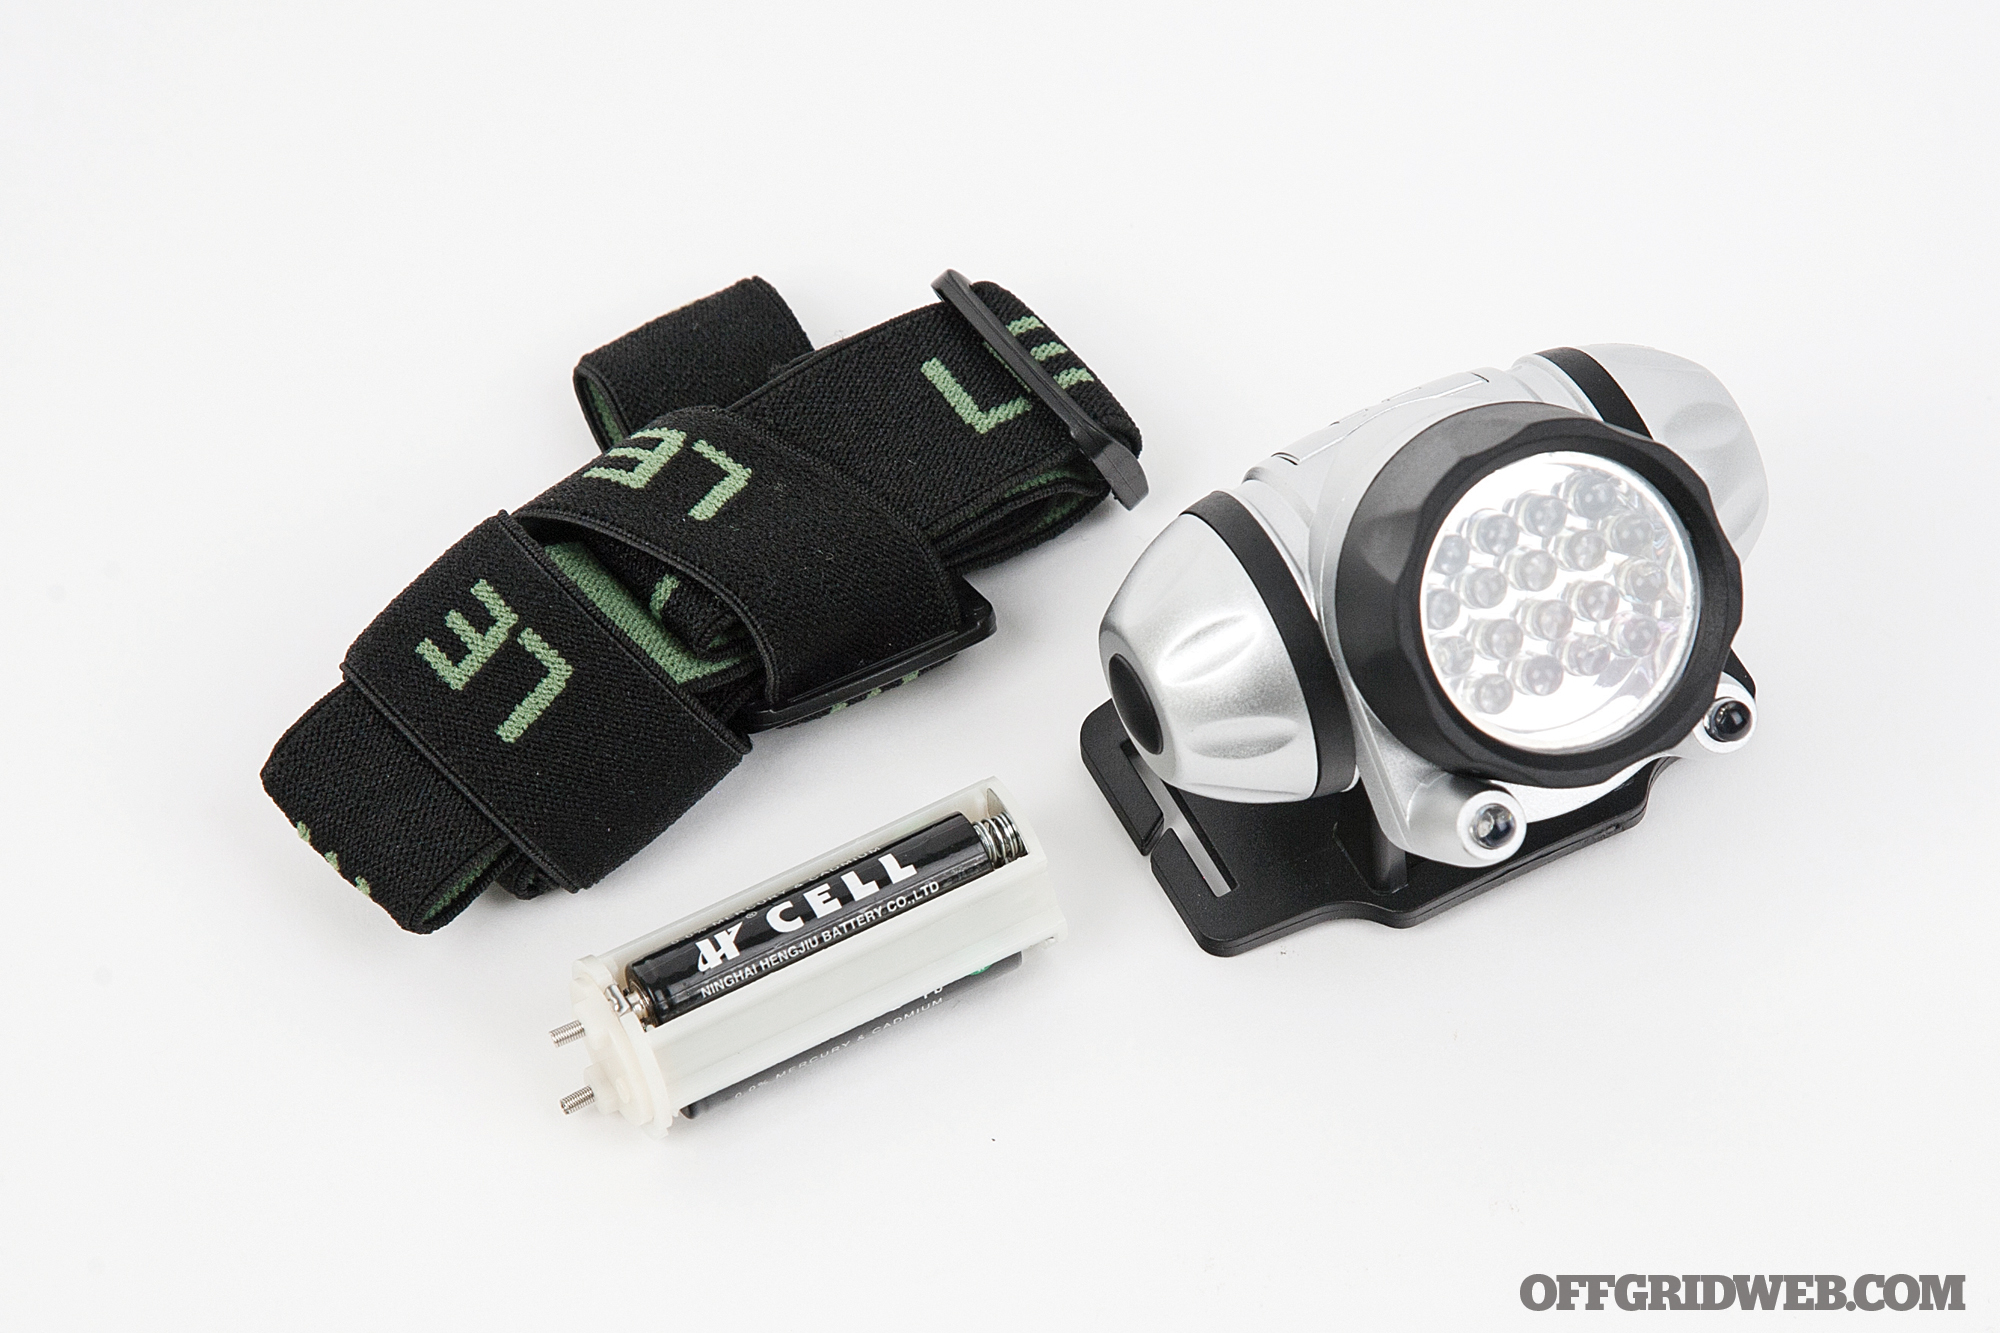
In search of an extra-affordable headlamp, we searched online with a price threshold of $10 — this is what we found. Despite a total of 20 LEDs, it only manages to produce a beam that’s acceptably bright at close range. For hiking or other mobile activities, output is lacking. The flashing red LEDs are useful only as a signal beacon. This is a clear case of getting exactly what you paid for, and we’d only recommend it if the other alternative is stumbling around in total darkness.
Pros:
Inexpensive
The box proudly says it has a starting time of less than 500 milliseconds — a strong selling point for the extra-impatient headlamp buyer.
Cons:
White light output is dismal, and the red light can’t be set to constant on
Bulky plastic housing looks and feels cheap
Mount can point in only four directions: straight ahead, 45 degrees, your feet, or the top of your nose
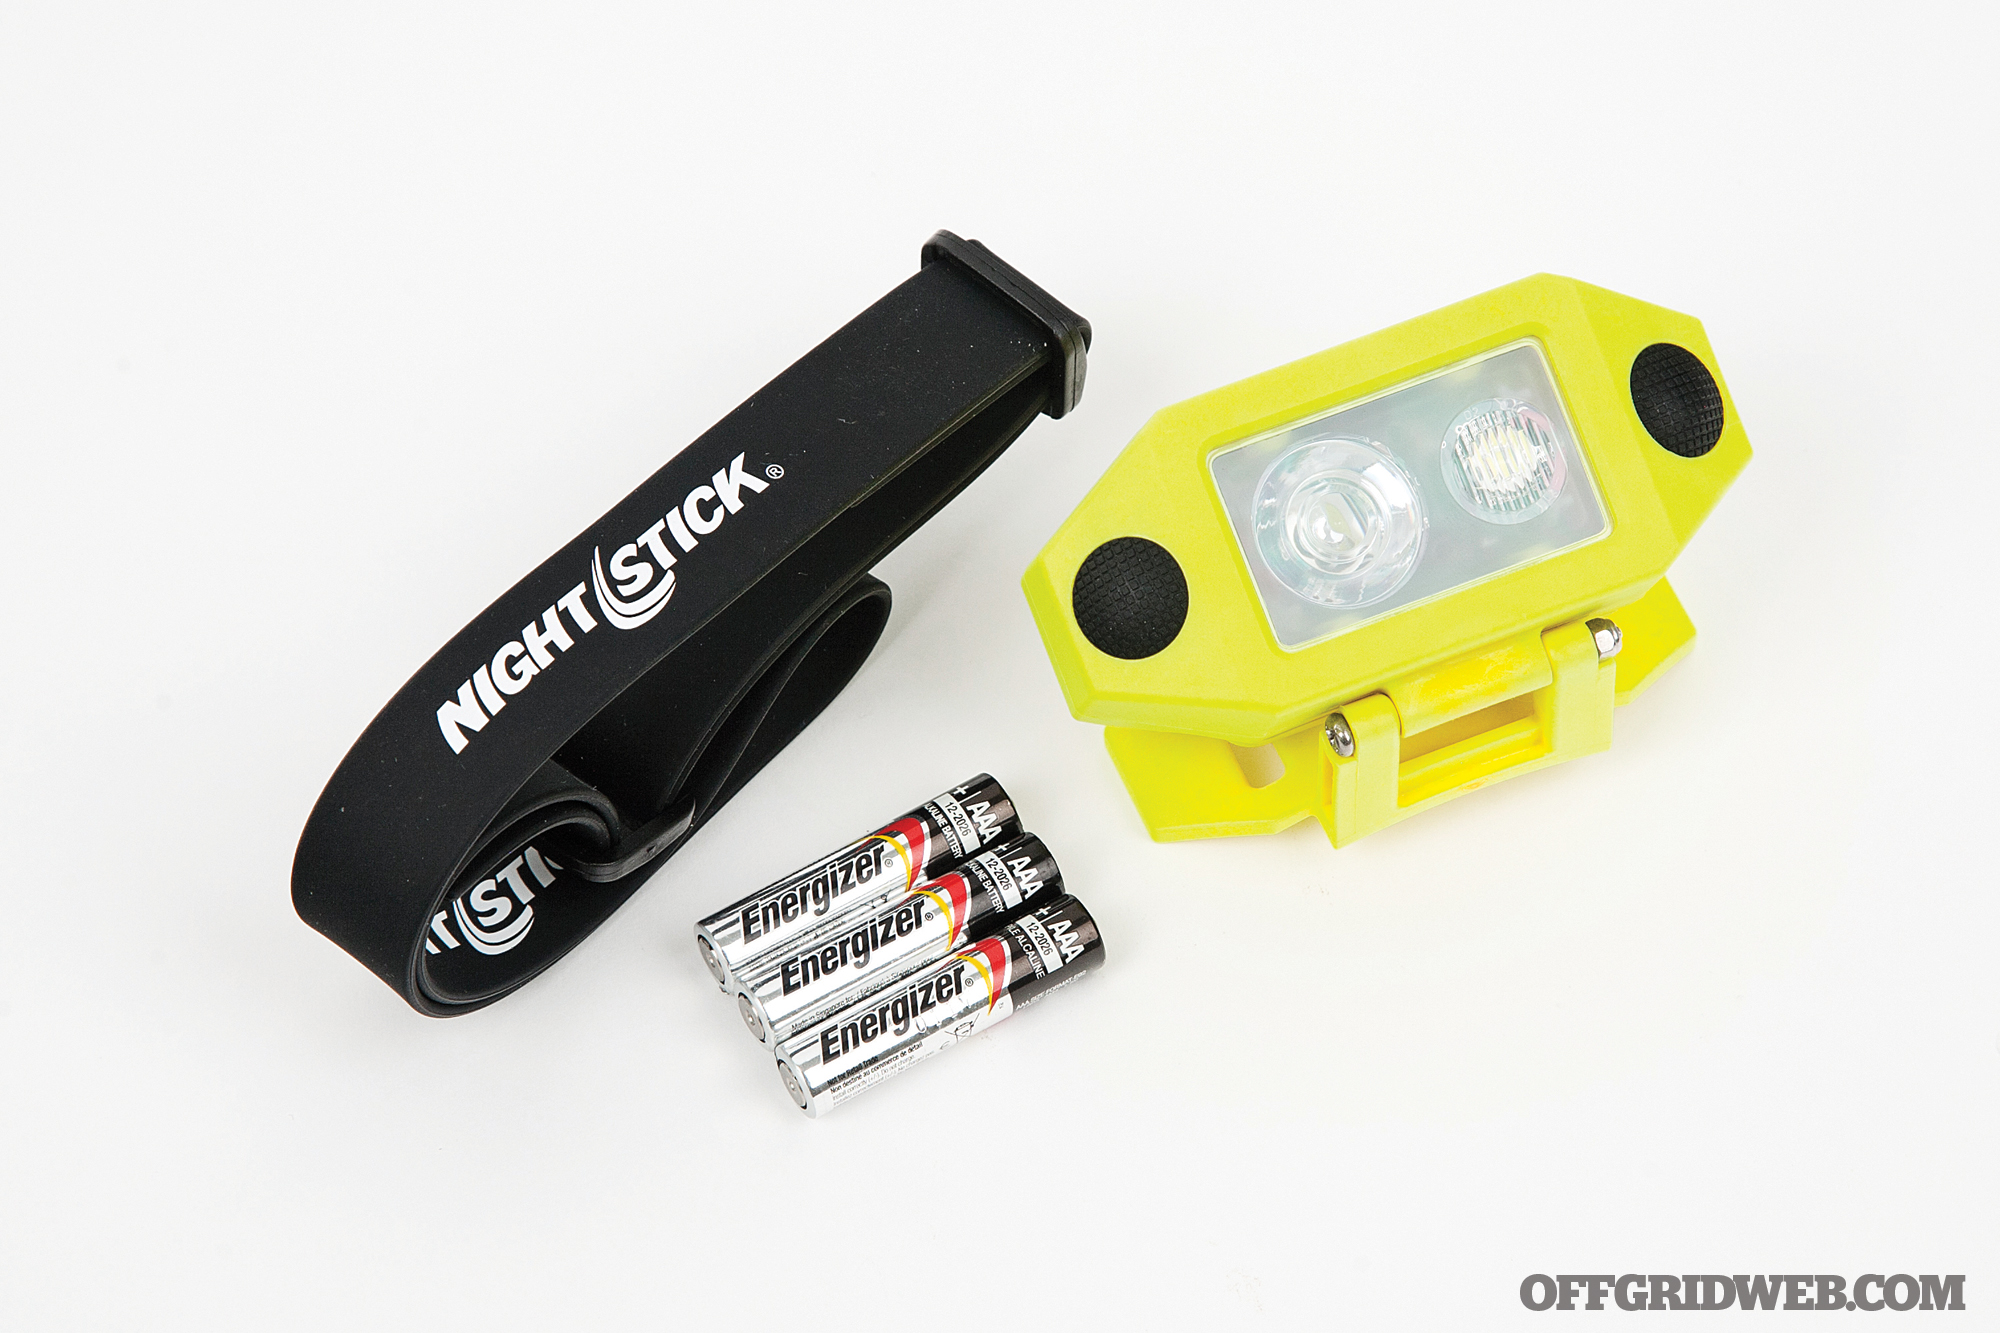
NightStick XPP-5460GX
Claimed Max Brightness 200 lumens
Claimed Max Runtime 10 hours
Weight with Batteries 5.4 ounces
Battery Type AAA (three, included)
Output Modes Spot high or low; flood high or low; dual spot-flood
Designed for use on helmets and hard hats with flip-up face shields, this low-profile headlamp offers a long list of industrial certifications. Most notably, it’s intrinsically safe, meaning it can be used in areas with potentially explosive concentrations of flammable vapor. Both spot and flood beams are bright and easy to access, even with gloved hands. The strong rubber head strap feels exceptionally durable, though it’s not as comfortable on bare skin as a fabric band.
Pros:
Ready to handle almost any environment — it’s IP67 water and dustproof, impact-resistant, chemical-resistant, and intrinsically safe.
Simple two-button controls
Cons:
In low mode, the light makes an audible buzzing noise
It lacks a red LED, its lowest setting is 100 lumens, and it always turns on in high mode first. Say goodbye to your night vision when you hit the power button.
A Phillips screwdriver is required to open the battery compartment
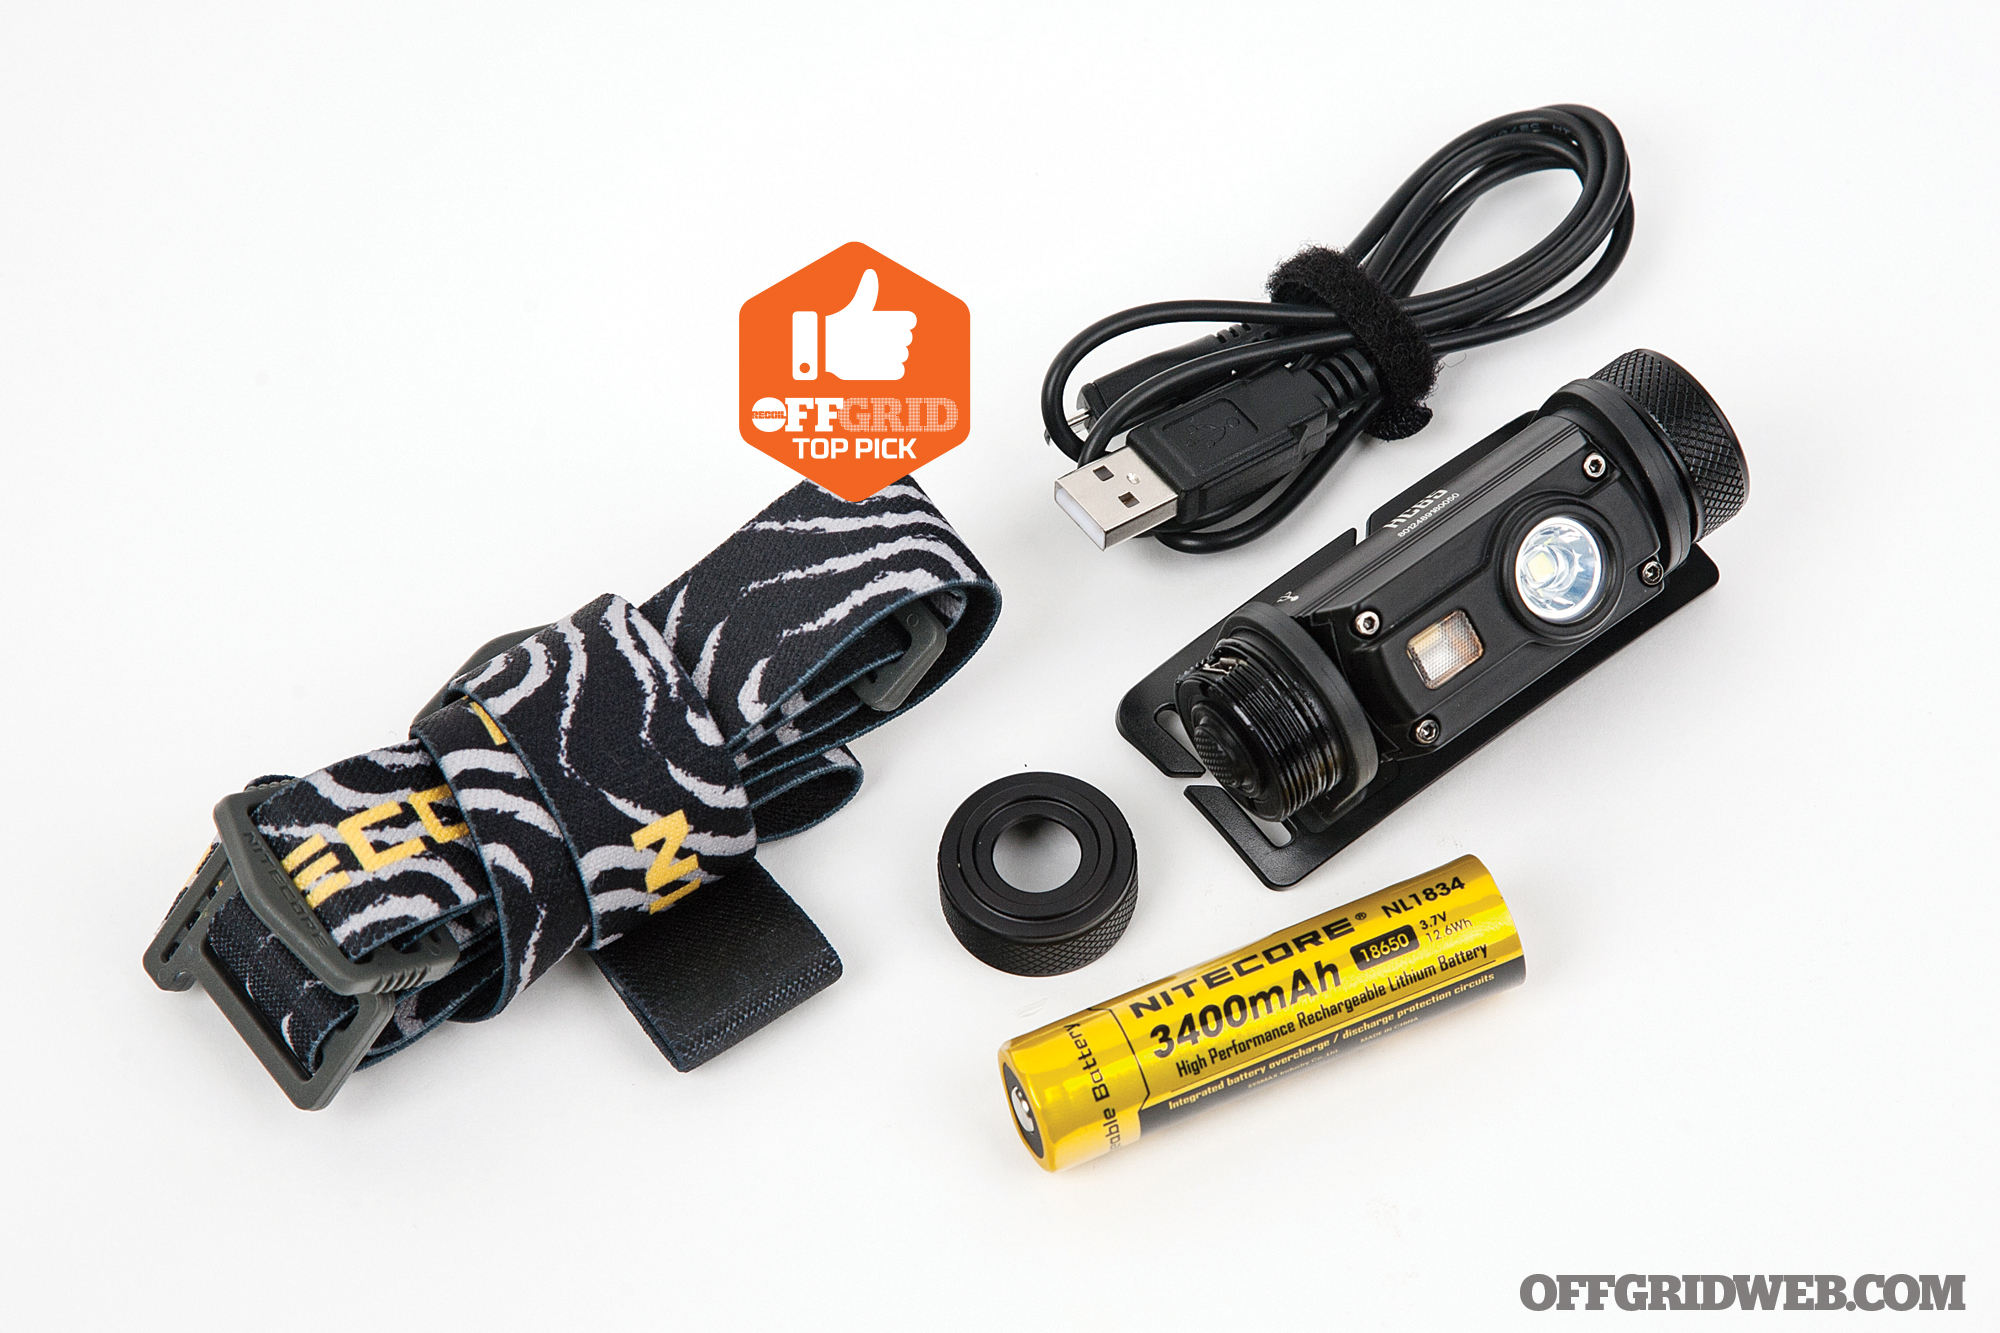
Nitecore HC65
Claimed Max Brightness 1,000 lumens
Claimed Max Runtime 800 hours
Weight with Batteries 5.7 ounces
Battery Type Rechargeable 18650 (one, included) or CR123A (two, not included)
Output Modes Spot turbo, high, medium, low, ultralow, strobe, SOS, or flashing; white flood light; red constant-on or flashing
Built from impact-resistant and waterproof aluminum with a flexible polymer strap mount, the HC65 feels reassuringly tough. The 1,000-lumen turbo mode cuts through darkness, but a variety of low-output modes make this headlamp just as effective for close-up tasks. Unscrewing the switch end of the body reveals a built-in micro-USB port for easy recharging; a blue LED blinks to indicate battery level or charging status.
Pros:
We’re seriously impressed by the level of features and build quality at this price.
IPX8 waterproof to 2-meter immersion, impact-resistant to 1 meter
Cons:
Heaviest of the 12 headlamps
Full-presses of the switch produce a reassuring click, but half-presses require just a light touch. We question the long-term durability of this control scheme.
Cap must be removed to access USB port, and could easily be misplaced
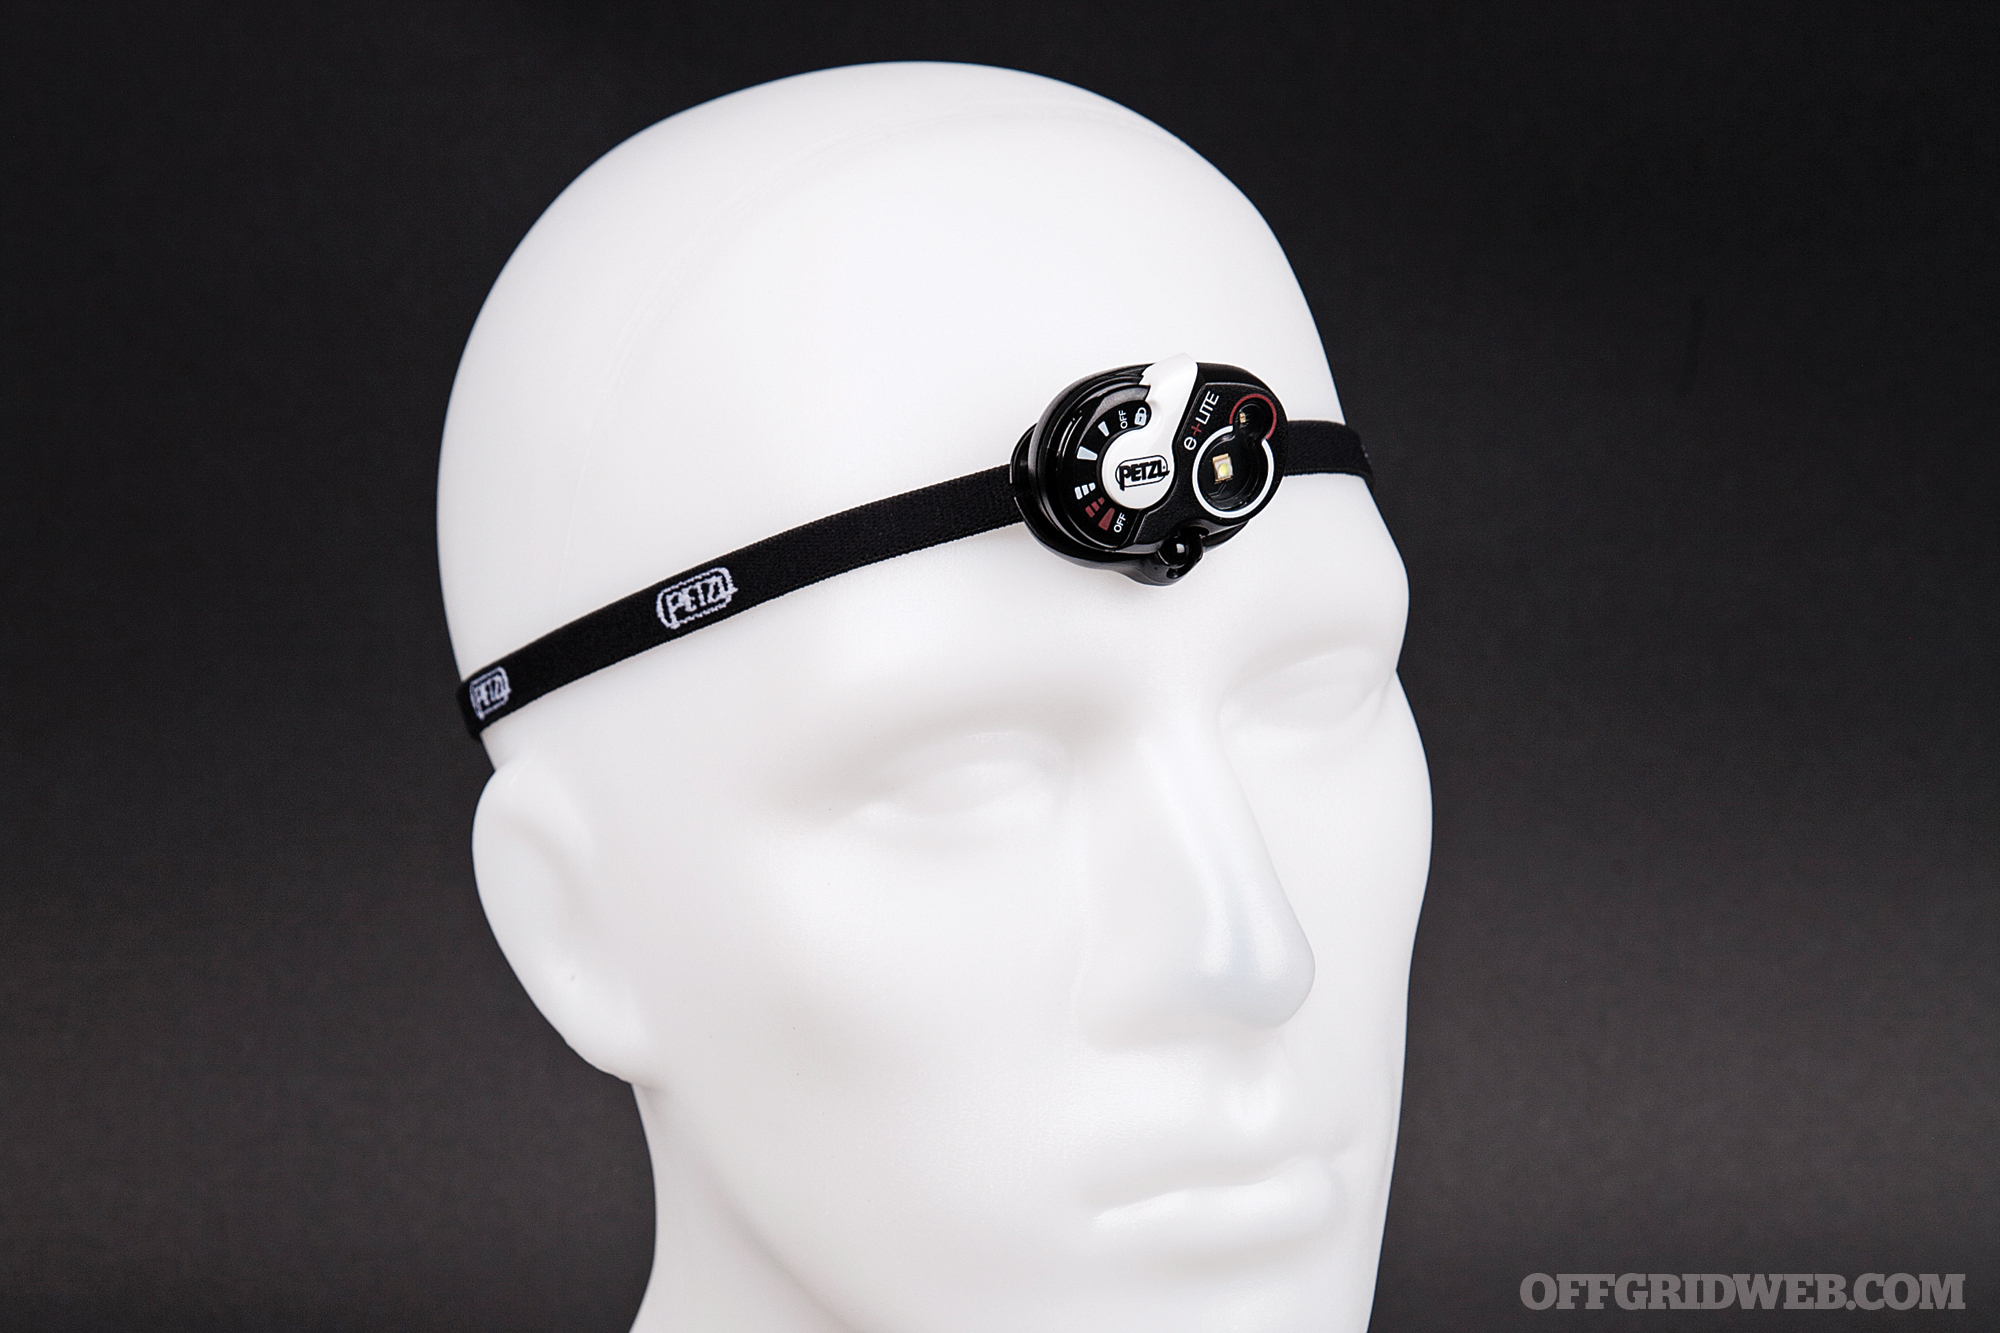
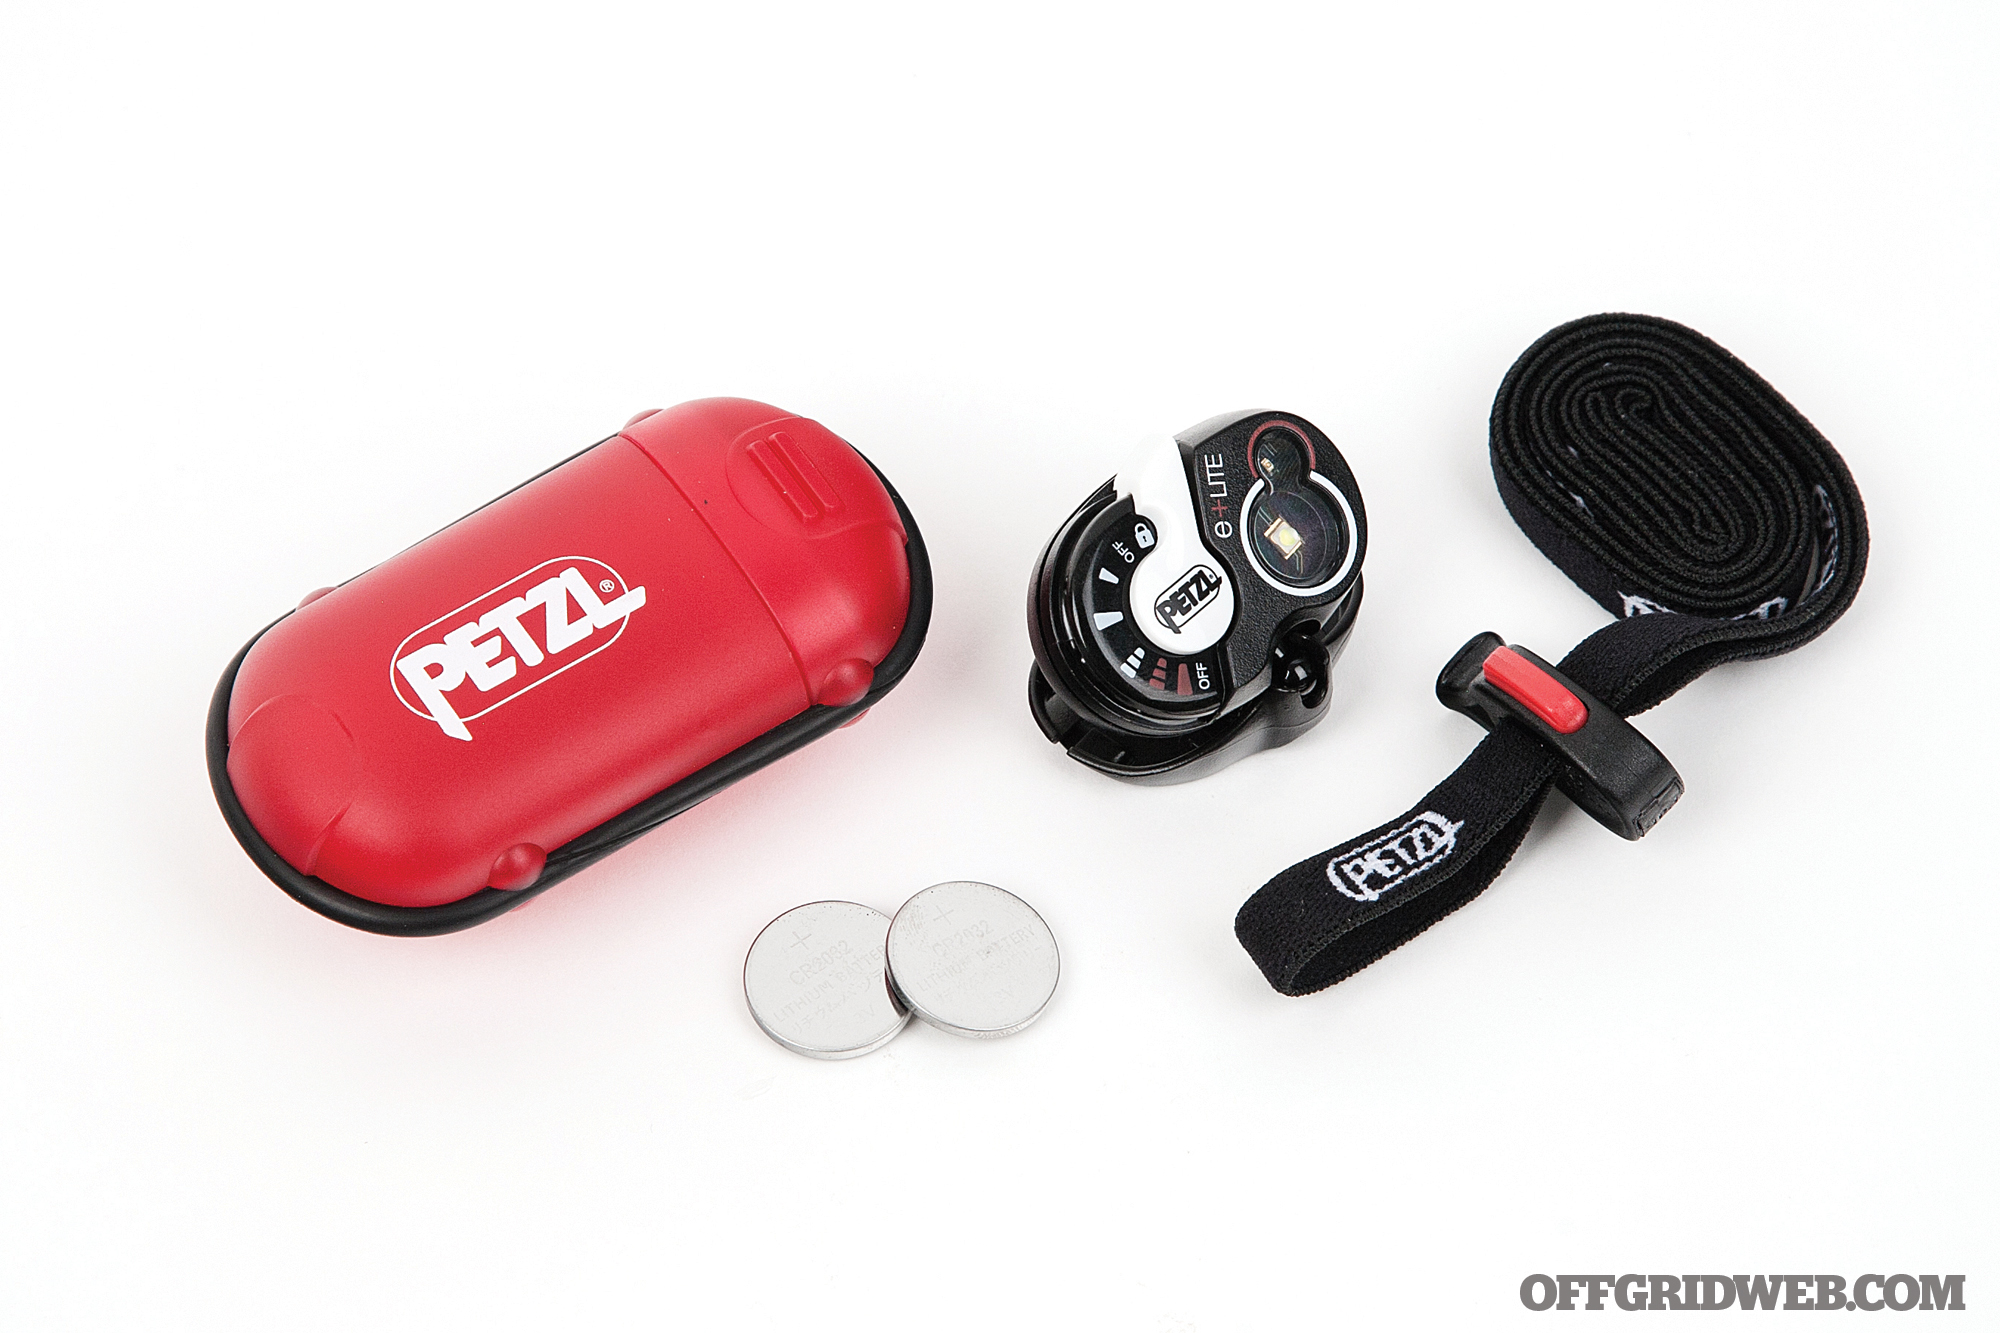
Petzl e+LITE
Claimed Max Brightness 50 lumens
Claimed Max Runtime 95 hours
Weight with Batteries 1 ounce (1.6 ounces with case)
Battery Type CR2032 (two, included)
Output Modes White low, high, or strobe; red constant-on or strobe
Unlike other lights in this guide, the e+LITE wasn’t intended to be your primary light source — instead, it works a backup to any other headlamp or flashlight. The tiny size, long shelf life, and waterproof storage capsule make it ideal for stashing in any emergency kit. The rotary switch allows access to five modes; thankfully, Petzl included “OFF” positions on both ends, making the red light accessible on its own. The unique ball-and-socket mount allows the light to be pointed in any direction, including side-to-side.
Pros:
Lightweight, compact, and easily stowed design makes it a great backup headlamp
Amazingly durable — waterproof, temperature-resistant from -22 to 140 degrees F, and shelf-stable for 10 years
Strap cinch includes a whistle for emergency signaling
Cons:
Low-output flood beam makes this most useful as a close-range light
Replacement coin-cell lithium batteries might be tough to find in an emergency
This versatile light is part of Princeton Tec’s Modular Personal Lighting System (MPLS), and is compatible with many tactical mount applications — ARC, MICH, or Picatinny rails, above-the-rail mount, and MOLLE/PALS webbing. It also includes a nylon strap for use as a standalone headlamp, worn above the right ear. The pressure switch allows toggling between white light and a secondary LED cluster. We chose three red LEDs, but Princeton Tec offers the Charge with other color combinations, including ultraviolet and infrared. A flexi-neck allows the wide beam to be aimed independently of the user’s head.
Pros:
Secondary LEDs are available in various useful colors — red, green, blue, UV, and IR
Works great mounted on a backpack shoulder strap or other webbing
Made in the USA
Cons:
The sag-prone head strap is the least effective of this light’s many mounting options.
Rather expensive, considering its modest list of features
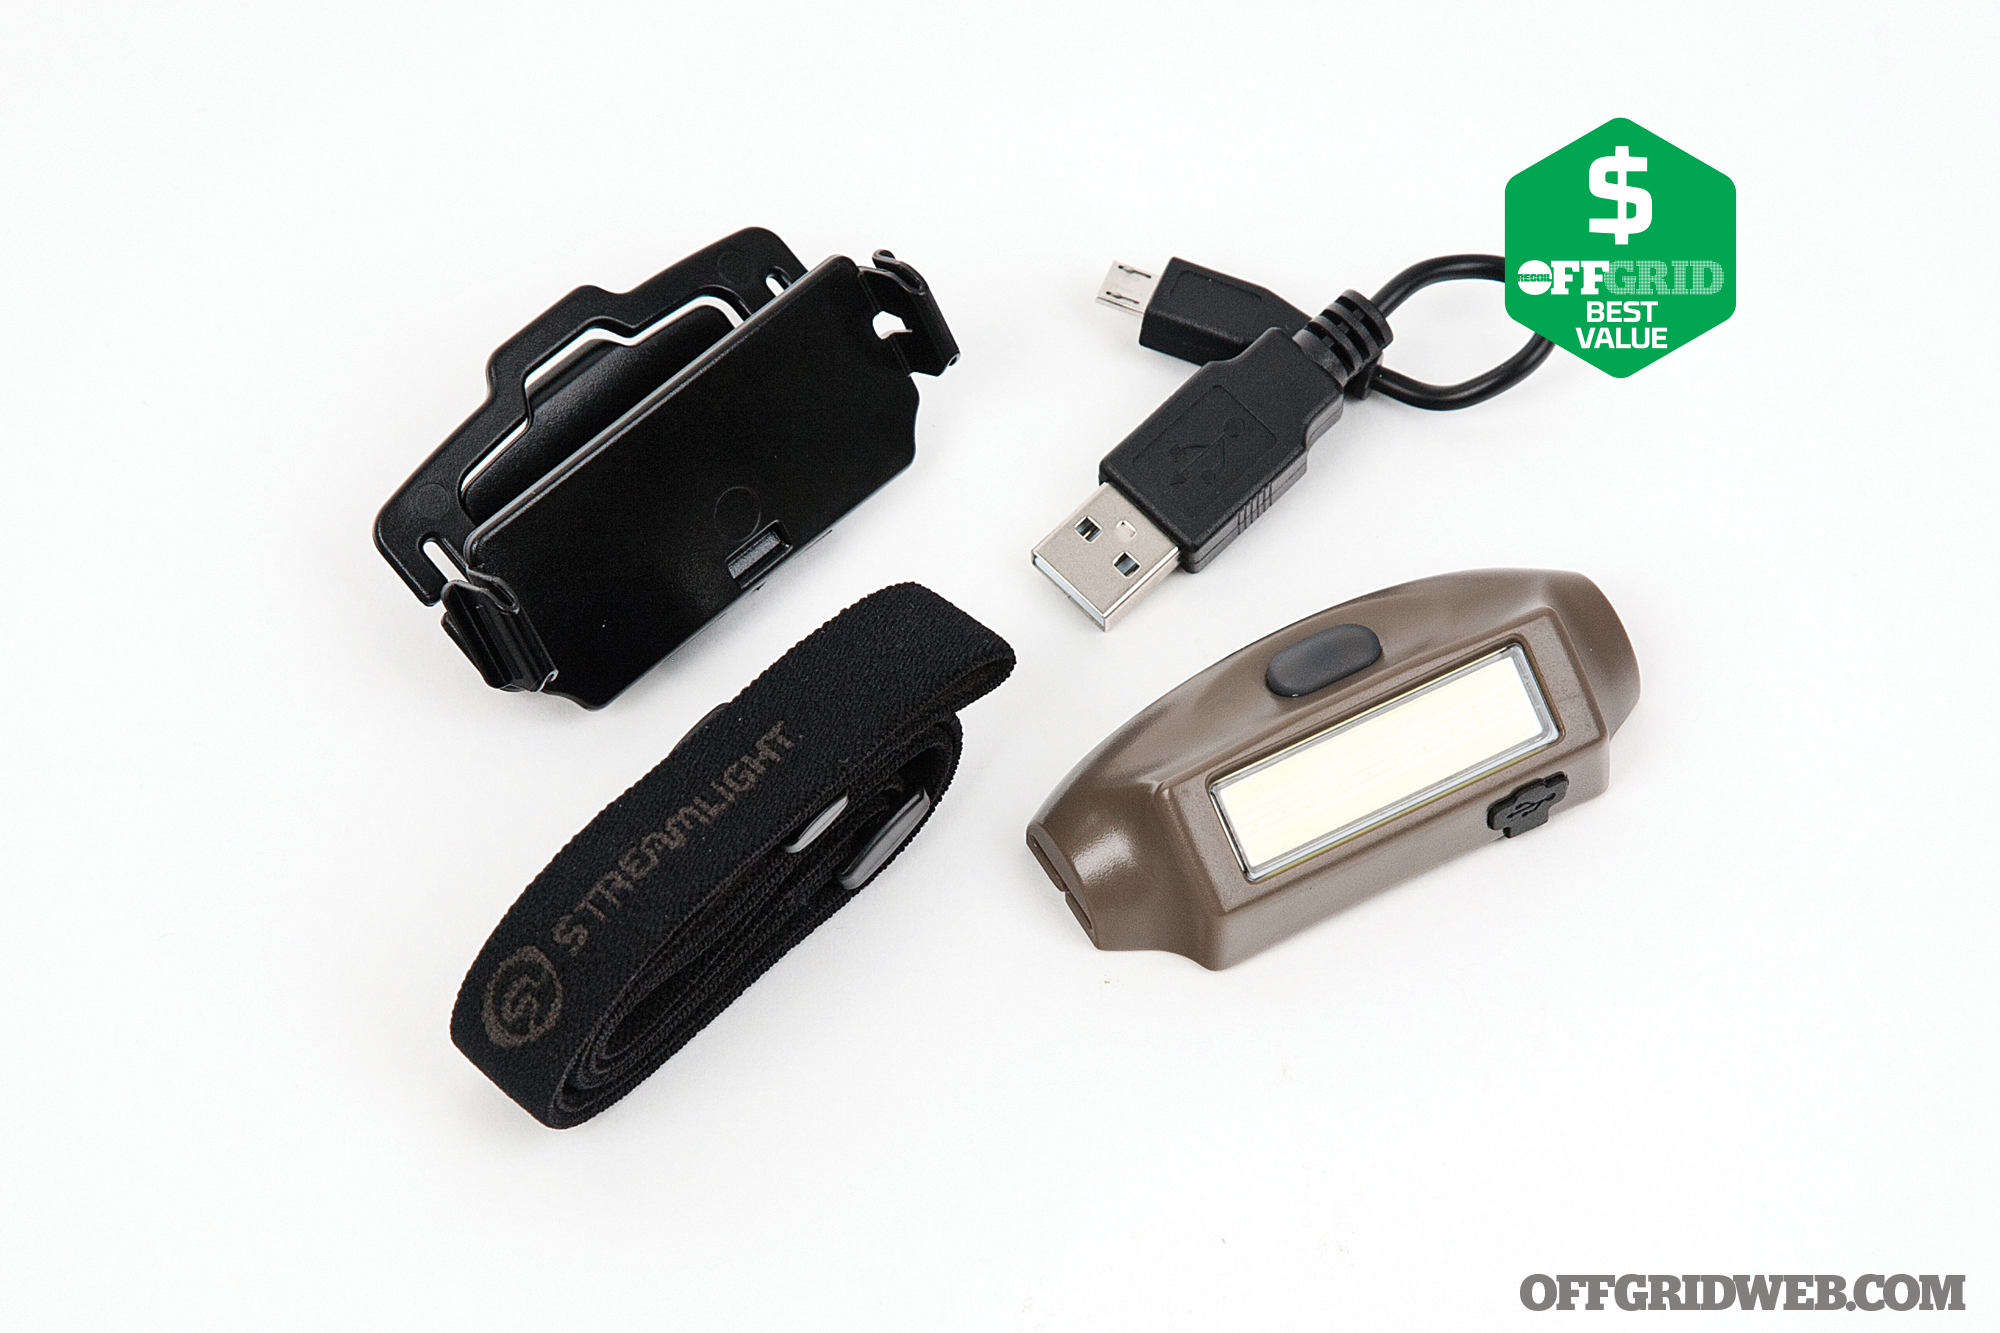
Streamlight Bandit
Claimed Max Brightness 180 lumens
Claimed Max Runtime 10 hours
Weight with Batteries 1.7 ounces (including pivot mount)
When we first saw the Bandit at SHOT Show last year, we gave it high praise for its everything-you-need-and-nothing-you-don’t simplicity. Admittedly, this flood light isn’t what you need for alpine mountaineering or spotting far-off targets, but it does well for most other after-dark tasks. The light includes a slim head strap and a pivot mount that can clip to the brim of a ball cap. It’s also USB-rechargeable and can be stashed easily when not in use. Black- and yellow-bodied Bandit models only feature white output; coyote models feature either white/red or white/green. Considering that this light can be bought online for around $20, it offers outstanding value.
Pros:
Small size and light weight make this a good candidate for a backup headlamp, but it’s also bright enough to be used as a primary.
Super-wide beam is ideal for cooking, map-reading, and other detailed tasks
Cons:
Compact design means short runtime — only two hours at full output
Raised rubber switch can be activated inadvertently during storage.
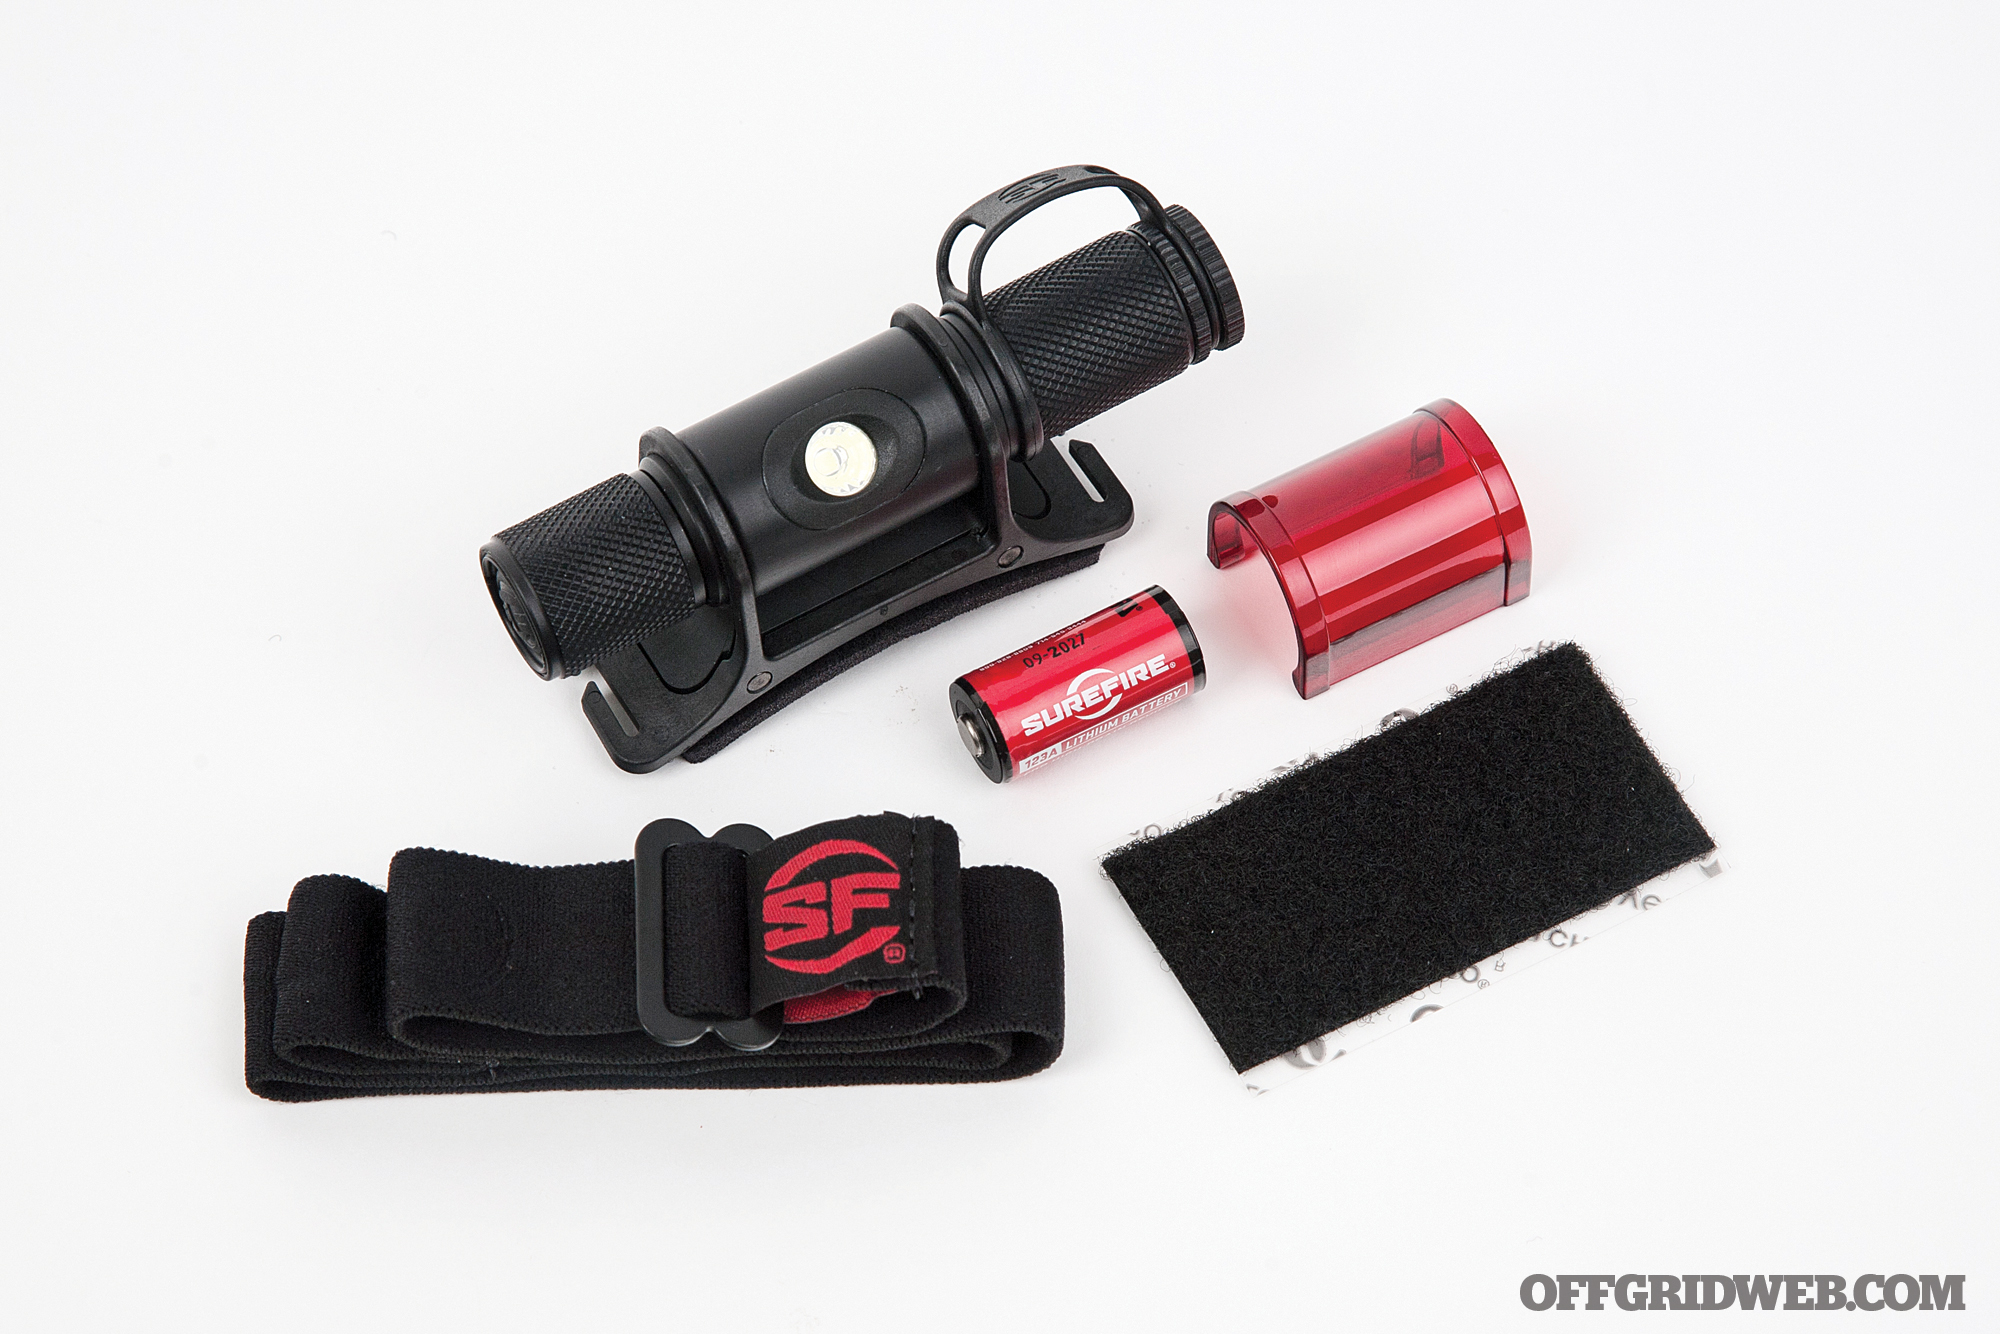
SureFire Minimus
Claimed Max Brightness 300 lumens
Claimed Max Runtime 75 hours
Weight with Batteries 4.7 ounces
Battery Type CR123A (one, included)
Output Modes MaxVision beam with adjustable dimmer and SOS mode
We reviewed the Minimus way back in Issue 2, but that was the old 100-lumen version — SureFire released this redesigned model in 2016. In addition to triple the output, it features a soft MaxVision beam that’s superb for short- and medium-range use (up to 66 meters). A button on one end activates the light, and its brightness can be adjusted all the way down to 5 lumens by twisting the dial. The tough aluminum body contains a single CR123A battery; a retention strap prevents loss of the battery cap.
Pros:
The warm white MaxVision beam is nicely balanced between a diffuse flood and focused spot, and proved effective for most tasks.
Breathe-O-Prene forehead pad makes this light extra comfy to wear
Made in the USA
Cons:
Detachable red filter feels like an afterthought, and can be lost easily
While the beam pattern is very versatile, long-range throw isn’t its forte.
UCO Vapor+
Claimed Max Brightness 300 lumens
Claimed Max Runtime 120 hours
Weight with Batteries 3.2 ounces
Battery Type Rechargeable lithium-ion (one, included) or AAA (three, not included)
Output Modes White LEDs with adjustable dimmer, red
With several stylish colorways and a wood inlay on its slim housing, the Vapor+ has a unique look. Controlling the light is as easy as twisting the Infinity Dial bezel to activate either all three white LEDs or a single red LED. The beam pattern is a nice middle ground between spot and flood. A rear-mounted pleather battery pouch distributes some weight to the rear and can house either a rechargeable pack or standard AAAs.
Pros:
Simple and intuitive controls — twist one way to adjust white light, twist the other to access red
Available in five colorways, from plain black to funky ’70s-style “Vintage Parks”
Cons:
Hard plastic bezel dial feels cheap, and its engagement clicks are gritty
Strange triple-LED configuration doesn’t provide a substantial benefit over a single light source, since there’s no way to activate each individually. We suspect this was chosen for visual appeal.
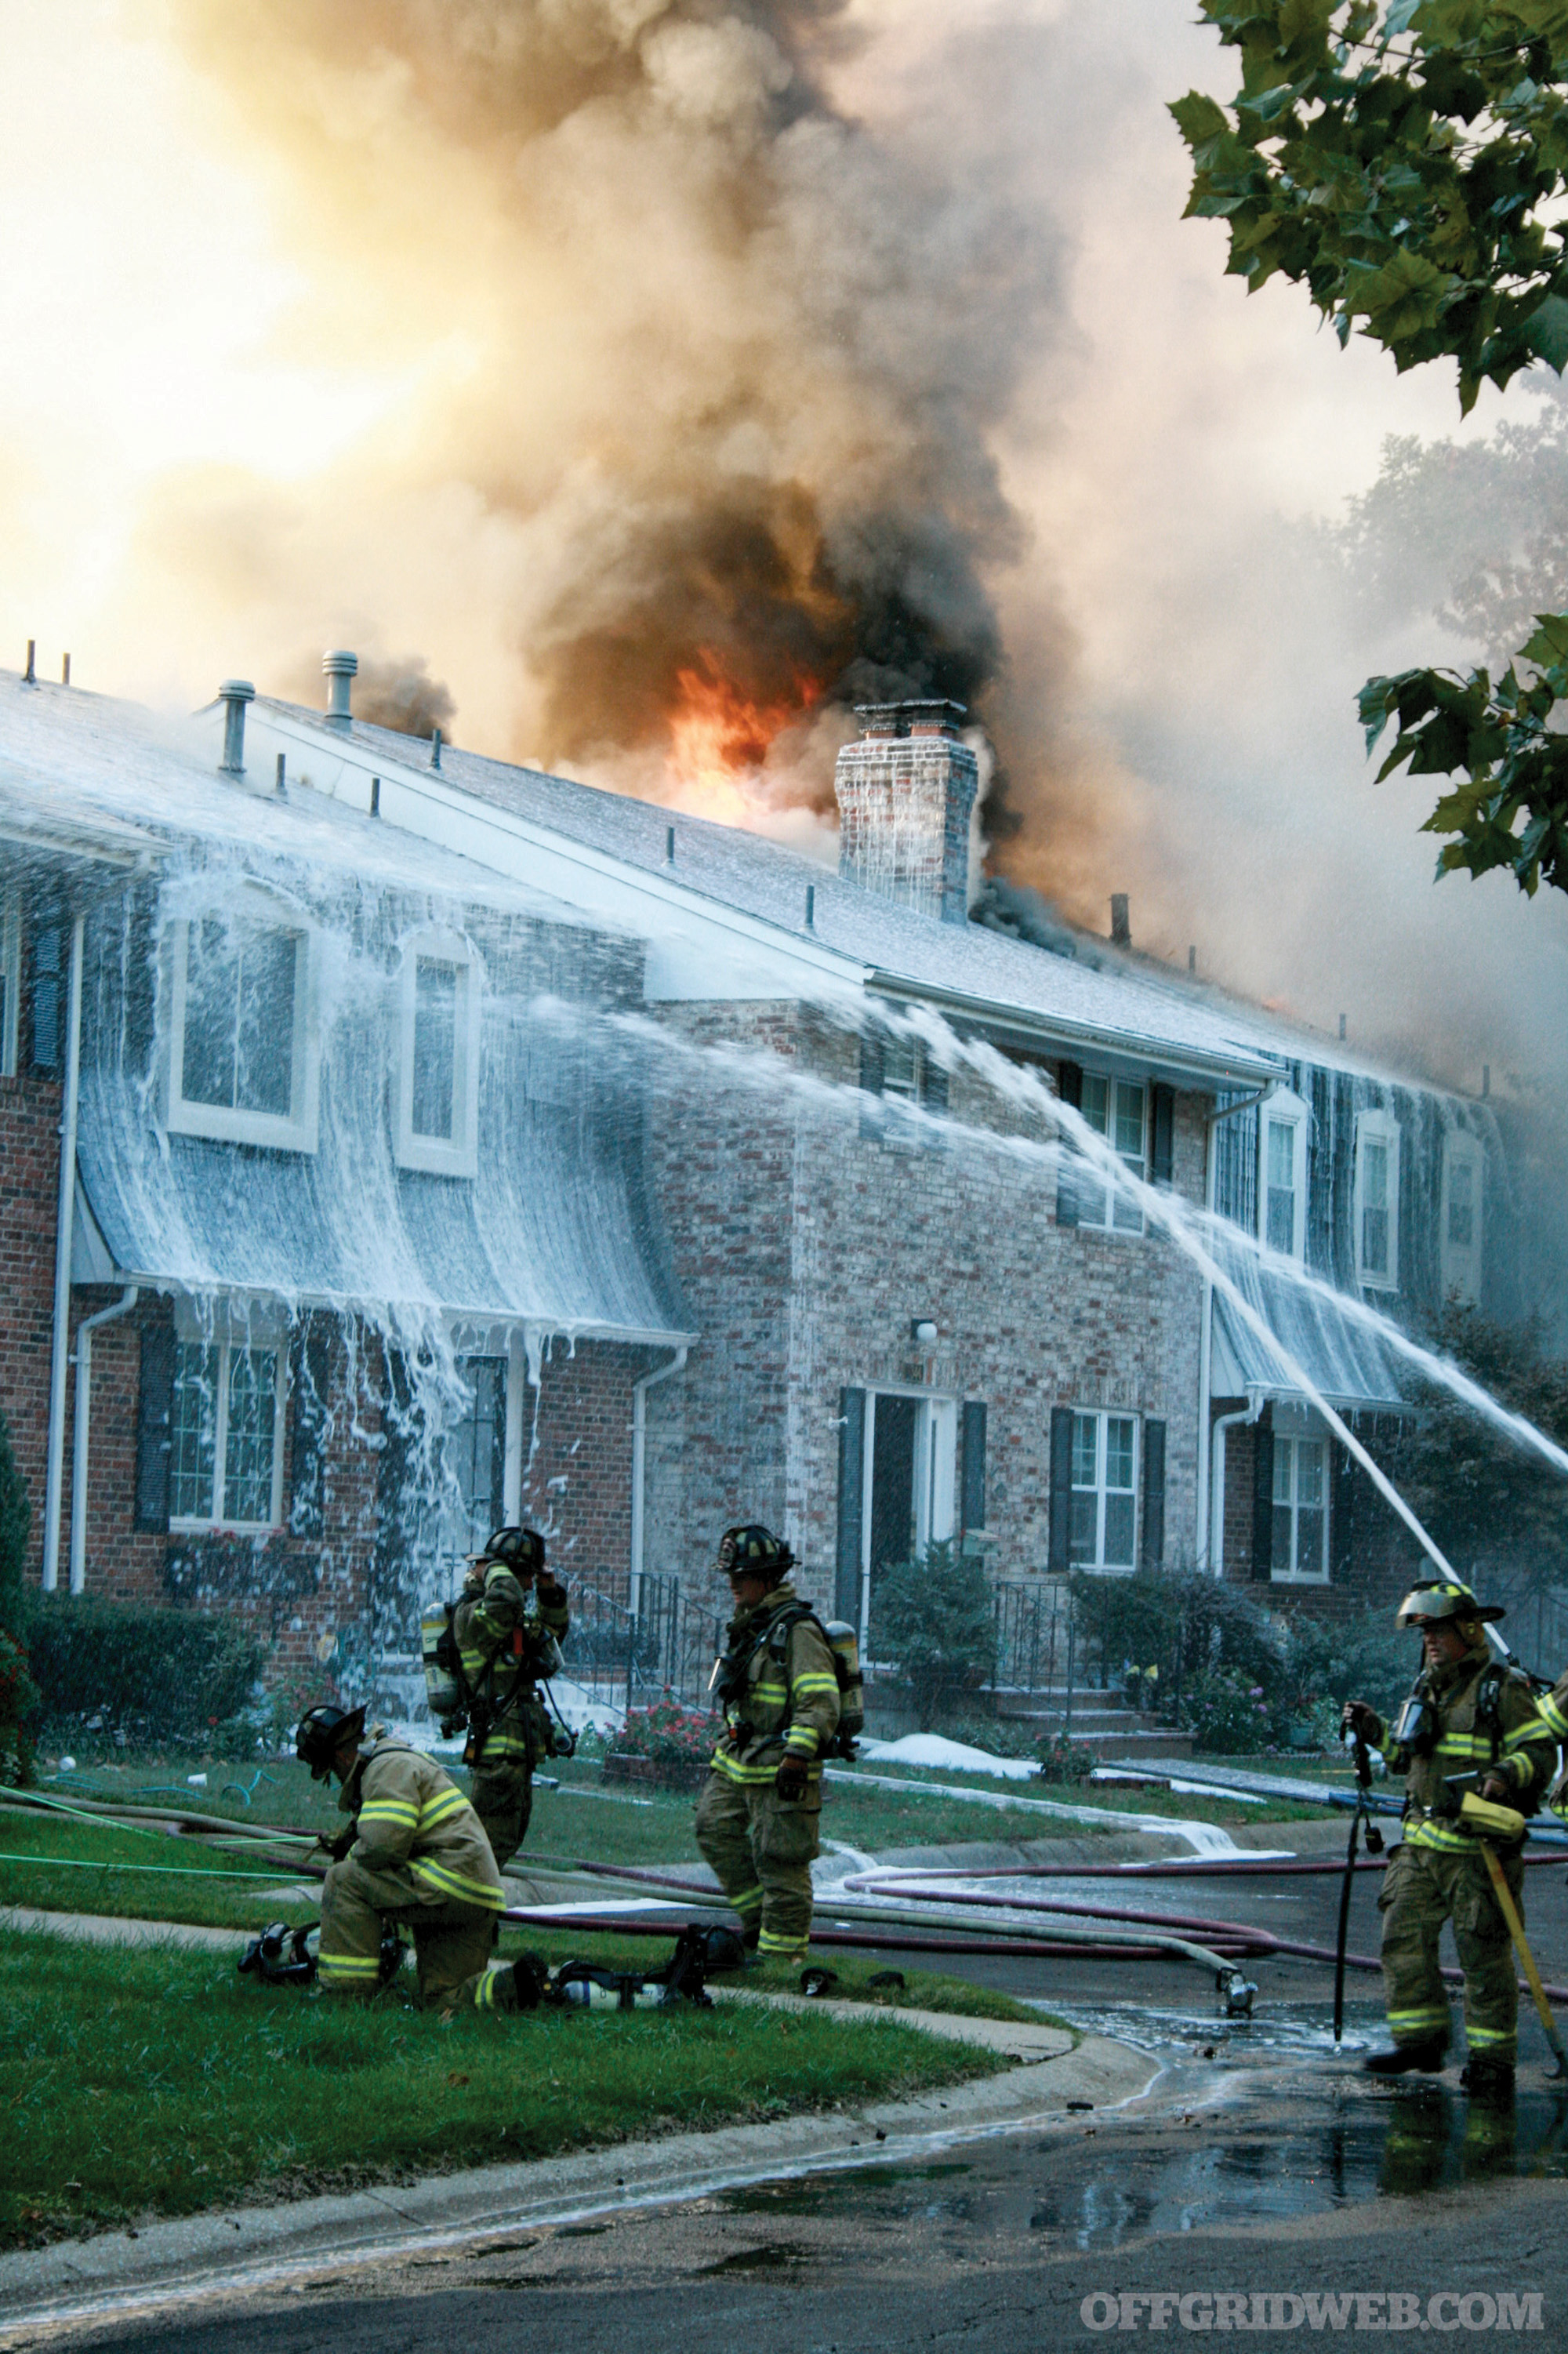
The number of residential fires in the United States has steadily decreased over the past six decades thanks to advancements in detection and suppression. Still, the National Fire Protection Agency (NFPA) reports that hundreds of thousands of house fires are reported every year leading to thousands of fire-related deaths and injuries. Protecting your family and your home from fires is an often overlooked, but critical need.
Home fire protection most commonly includes the purchase and use of smoke alarms and fire extinguishers. These offer you the capability to extinguish a small fire, if you catch it in time, or to be warned of a bigger fire if you don’t. Those are crucial safety devices for the times a fire occurs inside your home. But what if the threat comes from outside your home?
In 2017, the United States was bombarded by wildfires. It was a remarkable season in many ways and all of them tragic. According to the National Oceanic and Atmospheric Administration (NOAA) almost 10-million acres burned in 66,131 separate wildfires. In California alone, 9,000 wildfires ravaged 1.2-million acres of land, destroying over 10,000 structures.
The West Coast was devastated by wildfires, but if you live in or near a wooded area, you’re at risk as well. Even those in residential areas aren’t immune. Just last year, there are several examples of conflagration. These include the Kansas City suburb of Overland Park, Kansas, where, due to a large apartment building fire and high springtime winds, a single fire reached out and damaged over 30 residences in a nearby neighborhood.
Protecting your home, loved ones, and belongings takes on a whole new meaning when infernos, burning at nearly 1,500 degrees F, rage all around. Fire literally falls from the sky or can approach like a tidal wave, rising above your rooftop. In most cases this is a battle you can’t win. Fire is a formidable enemy under typical residential circumstances, but when you factor in the sheer volume of a wildfire, the thought of defending your home seems hopeless.
There are situations, though, where steps can be taken to intervene when your home is threatened by a wildfire. One way is with the installation of a residential sprinkler system. Unless it was installed in the construction phase, though, this can be very costly. There are some DIY methods that can save money, but these don’t often meet the aesthetic standards of most families.
One could argue the cost versus benefit of this, but for the sake of conversation, let’s take a home sprinkler system off the table and focus on protecting your home from the outside. So what options does that leave you with? According to experts, there are a few primary ways that you can, at the very least, hinder the process of an imminent wildfire.
Create a Defensible Space
Above: No one looks forward to cleaning rain gutters, but dry leaves and debris are fuel that could easily ignite if they are allowed to build up. Clean your rain gutters regularly.
One of the least expensive and best ways to protect your home from a wildfire is by creating a defensible space. Simply put, a defensible space is the area around your home between the structure itself and vegetation and combustibles. Vegetation is the fuel for a wildfire, and by creating a space between your home and the fuel, you have a natural fire break that’ll slow the progression of the fire. The goal is to create enough space around your home as practically possible. Some states suggest defensible space zone models at 30- and 100-foot radiuses around your home. Most suggest that a minimum of 30 feet between structures and vegetation is considered “industry standard.”
The first thing to identify is the slope of your property. Fire likes to burn uphill, mostly due to the preheating of the ground fuel and the up-slope draft. The greater the slope away from your house, the greater defensible space you’ll want in that direction. If the grade is over 30 percent, you’ll want at least 100 feet of defensible space.
The next step is to inspect nearby shrubbery and trees. Experts aren’t saying that you can’t have decorative landscaping around your house — just choose carefully what you put there. All plants will burn given the right conditions. Choose plants that shed a minimal amount of leaves or other waste. Trees should be low in resin and sap with no rough bark. If you’re uncomfortable identifying the right plants and trees, check with a local landscaping professional.
It’s also a good idea to conduct regular maintenance by clearing the area around your home of yard waste. Some property owners utilize lawn sprinklers to saturate the ground surrounding their house prior to evacuation. They turn them on as far in advance of the fire as they can, and then leave them running and safely evacuate.
Trees can create what are known as “ladder fuels,” upwardly growing vegetation that allows fire to climb vertically. To reduce your risk of nearby trees becoming ladder fuels, trim branches to where the lowest branches are at least 6 feet off the ground. Tree limbs should be pruned away from your house, particularly the rooftop and chimney. Obviously the closer the tree branches are to your home, the greater the chance for a fire to reach out or jump to your house.
Above: Attic vents are often the flashpoint for ignition as embers make their way through openings. Make sure to install fireproof mesh screens to reduce the chances of a surrounding fire being able to work its way into your home.
Protect your attic by minding vent openings and eaves. These provide the perfect gaps for embers to enter the void spaces in your home where small fires start and become big fires before you even know it. Ensuring they’re properly screened could be the safeguard you need to keep embers from clandestinely reaching your home’s interior. While you’re on the roof checking the screens on your chimney, vents, and eaves, be sure to clean out your gutters. An accumulation of dead leaves around the roof perimeter is asking for trouble.
Install outdoor non-combustible shutters. Heat can break windows and quickly ignite the curtains hanging just inside of the glass. Even before the glass breaks, enough heat can be transferred to ignite fabric inside the home. Installing non-combustible shutters that can be closed during an emergency provides a specified fire rating (depending on manufacturer) that can hinder fire spread inside your home.
Creating a defensible space is a relatively easy way to keep fires away from your home as well as providing firefighters the space they need to get to all sides of your house and quickly extinguish a fire. A little bit of knowhow combined with a healthy dose of common sense will provide you the peace of mind of knowing that you have taken proactive steps to put a potentially life-saving barrier between you and a fire.
Within a Defensible Space
Keep trees trimmed at least 10 feet away from structures.
Keep shrubs less than 18 inches tall.
Within the first 3 feet of the home, use nonflammable landscaping such as rock or pavers.
Keep propane tanks a safe distance away from the house with any easily accessible shutoff valve.
Keep gasoline in an approved safety container away from occupied buildings.
When burning yard waste, always use an approved burn container with a spark arrestor.
Commercially Available Foams/Gels
The use of foam in firefighting applications has been evolving since the early 1900s. It really wasn’t until the mid 1980s that foam became readily used in wildland firefighting, and then was brought inside for interior suppression operations. Foam provides several advantages for fighting fires. It cools the area and produces a blanket that deprives oxygen, which extinguishes the fire. Foam also reduces the surface tension of water that, simply put, makes water wetter allowing it to penetrate further into the fuel, improving saturation.
Above: Commercially available foams have a long shelf life, and there are many applicators available that can be used to mitigate the onset of a fire.
Foam can also be used for fire prevention. In recent years, commercially available foams have been utilized by homeowners as a preemptive action against wildfires. There are now a variety of brands that offer residential foams that can be applied to the exterior of structures to blanket them, keeping them cool and reducing the chance for ignition.
Foam can be purchased in a variety of quantities from large 275-gallon totes to small 5-gallon buckets and can be applied in an assortment of ways. There are simple approaches that use a standard garden hose. More complex methods are also available that involve a gas-powered pump, an eductor (which is a device that uses the venturi effect to draw foam up into a hose stream), a hose (often a 1.5-inch fire hose), and a nozzle.
For portability reasons, some people have opted to purchase a hand pump backpack-style unit due to its mobility and rapid application benefits. This method makes it difficult, if not impossible, to cover a large area quickly, but is more cost effective than some of the other, more involved methods. If your goal is to cover and protect a structure, this may not be the best option for you, but is a good tool for putting out spot fires or protecting a small area that may be difficult to reach.
Once applied, foams absorbs into the material and can remain active between eight and 16 hours. The benefit of using foam is that most commercially available foam is approved by the EPA and is biodegradable. As a general rule, foam doesn’t stain, damage, or kill vegetation. There’s little or no clean up after use.
There are a variety of fire-retardant gels also available and, while they’re safe to use in the same fire suppression and prevention methods as foam, gel can be messy and expensive to cleanup. The shelf life alone often deters many homeowners. Gel shelf life is typically three to five years. By comparison, foam shelf life is often over 20 years. The effectiveness of gels can be less than foam and, therefore, aren’t often favored.
Fire-Retardant Paint
Fire-retardant additives can be purchased for exterior paint. Interior flame-retardant paint, albeit costly, can also be purchased and is used in some government buildings, such as the Pentagon and some U.S. embassies.
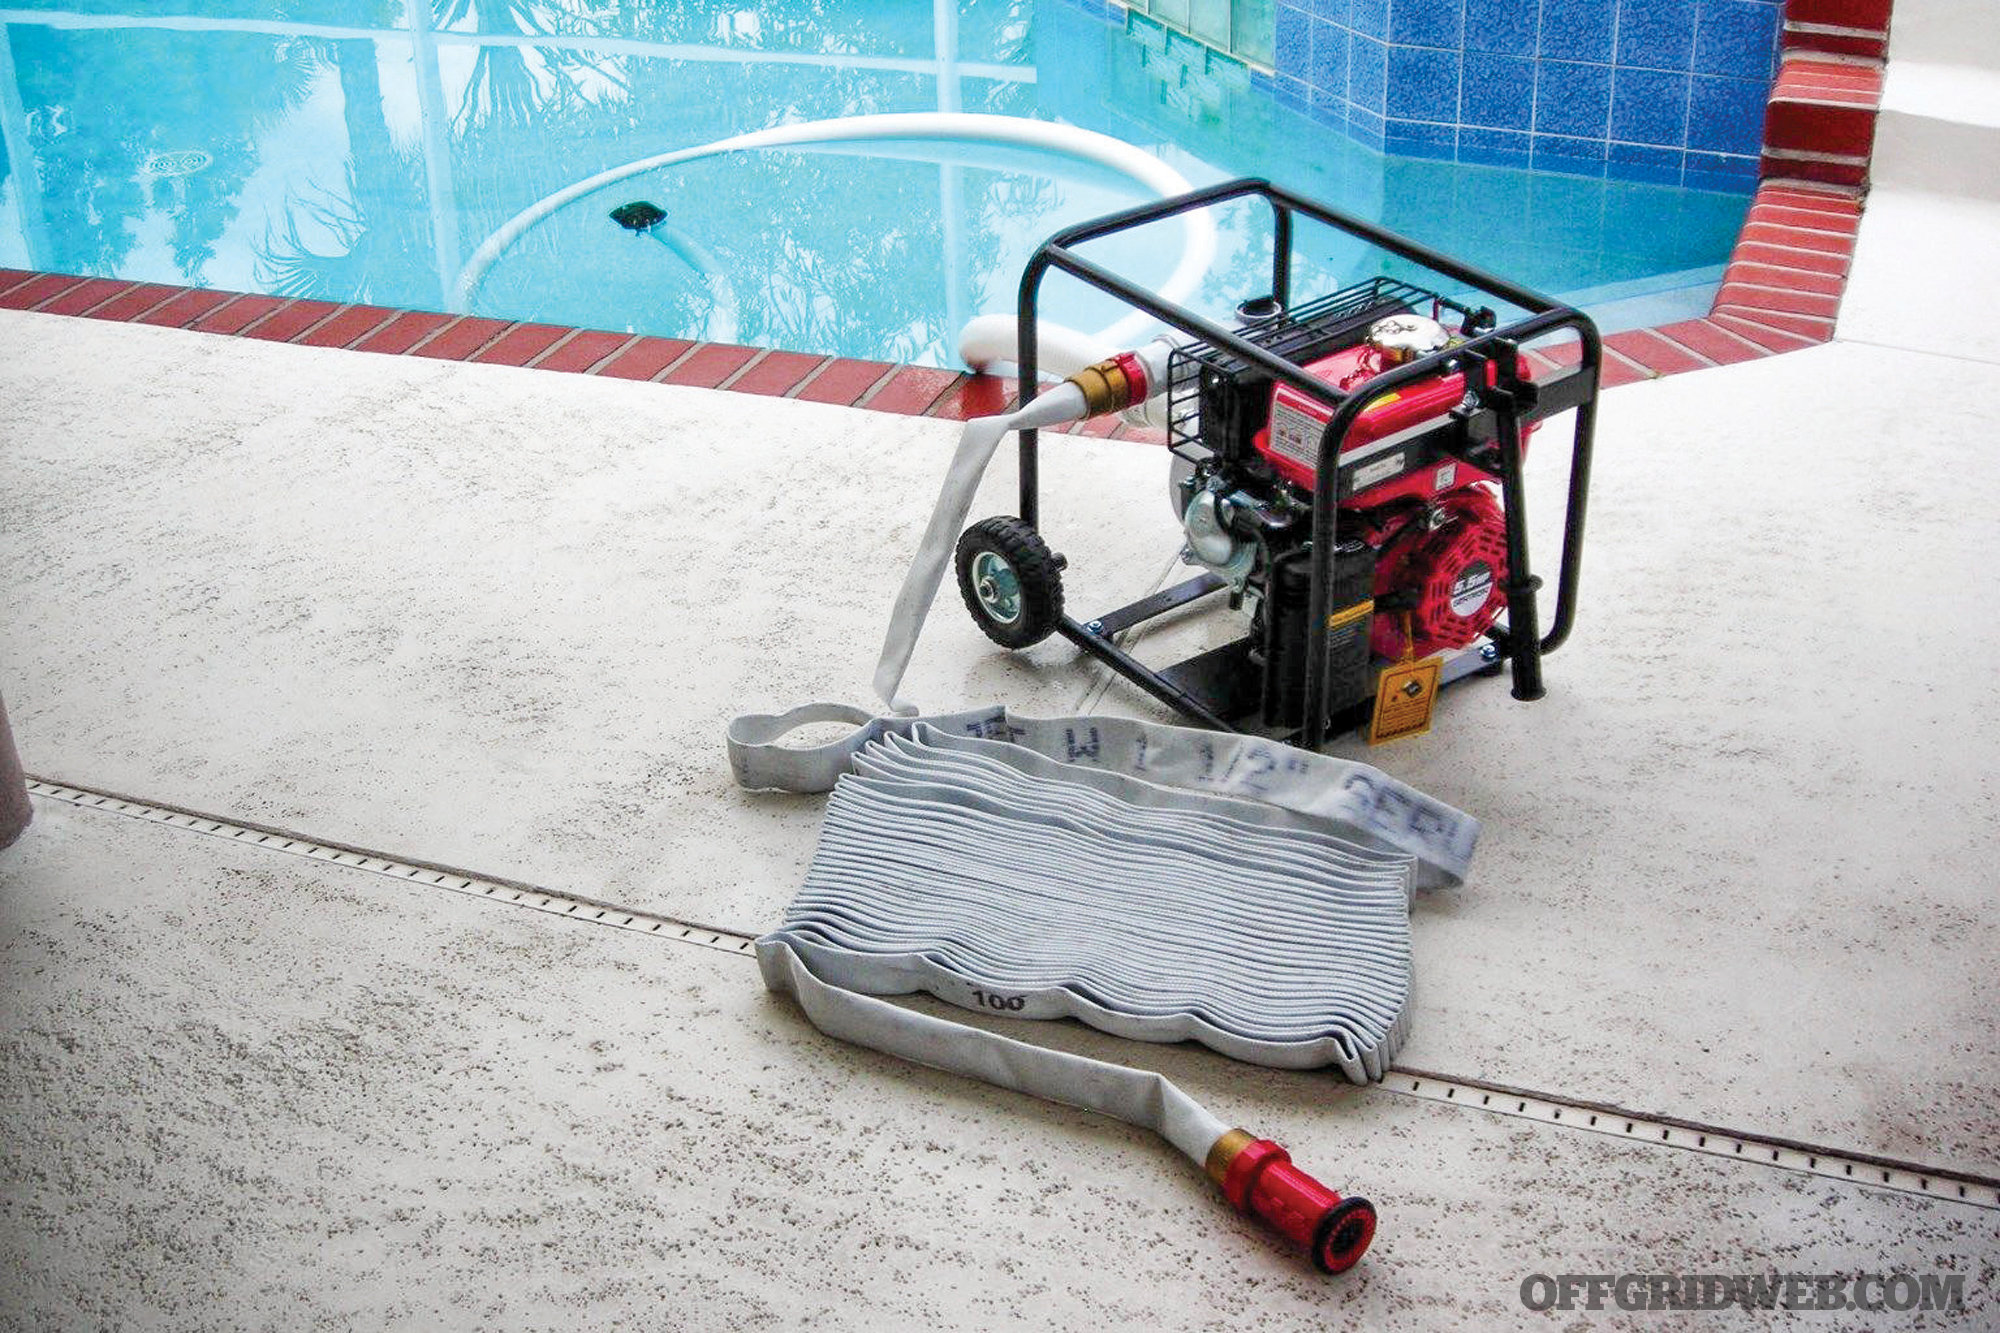
Pool Pumps
Above: If you have a pool, spa, or nearby pond, a pump, such as this model from JJS Fire Supply, can be used to saturate your home and stave off a fire until help arrives.
Another way to saturate the exterior of your home as a fire-prevention tactic or to put out exterior fires is the use of swimming pool water. Some companies offer an attachment that comes directly off of your swimming pool pump that mirrors the setup of a fire truck: a water supply, a pump, and a fire hose. You can DIY a system or, for around $600, you can purchase a kit that includes the parts needed for attachment to the pool pump, 100 feet of fire of fire hose, nozzle, and a hose reel to store it. Keep in mind that many pumps are reliant on electricity being available to run, but until the electricity is no longer available, it’s an effective and safe tactic. Gas-powered pumps are also available.
If you have a swimming pool, pond, or Jacuzzi, another system that can be used is a floating gas-powered pump system. They work just as any water pump would and come with the same fire hose and nozzle, but offer the advantage of floating on the surface of water. These pumps can typically flow up to 265 gallons per minute, which is a very sufficient flow rate for wetting down your house and property.
There are also companies that make plastic and steel water tanks that can be installed if your property will support something of that size. Capacity typically ranges from 2,000 to 5,500 gallons. Free-standing, portable water tanks can also be set up as a water source with enough notice. They operate much like a kiddie pool and can be inflated and filled with water to combat an approaching blaze.
Conclusion
Protecting your home from fire, particularly if you live in a high-risk area, should go beyond the standard smoke alarms and fire extinguishers. Anyone who has been affected by a wildfire will tell you that they’re swift, voracious, and devastating. Clear the area around your home creating a defensible space and then utilize your available budget and creativity to ensure you can take the needed steps to protect your home, property, and most importantly, your loved ones.
Scott Finazzo has over 20 years of experience as a firefighter. He’s a member of his department’s technical rescue team and has served as an instructor since 2000. Scott has written five books, including the national bestselling The Prepper’s Workbook and The Neighborhood Emergency Response Handbook, as well as his narrative of a kayak journey through the Virgin Islands called Why Do All the Locals Think We’re Crazy? Follow Scott at www.scottfinazzo.com.
You hear the expression “came from the school of hard knocks” a lot when people discuss why potentially good folks lost their way. Many times that promulgation is meant to suggest that an individual’s path in life is determined more by nurture than nature. No matter where you fall on that argument, Thomas Coyne is one of those rare outliers who had many opportunities to acquiesce to the violence he saw, but instead chose to help the little guy.
Coyne didn’t have much in the way of good role models, and saw how many others let the negative atmosphere they were exposed to become a part of their programming. Even though many might think the odds of Thomas overcoming the adversity surrounding him were low, he didn’t subscribe to any credo other than “your life is what you make it.”
If you went by his résumé alone, you’d be astonished to think he’d ever been subjected to anything but heroics during his childhood. From firefighting, helicopter rescue, search and rescue, and disaster management training, to founding Coyne Survival Schools (formerly Survival Training School of California), Thomas has put himself in harm’s way and shown how much you can do to change your surroundings for the better — if you want it badly enough. If we had one takeaway from our interview, it’s that Thomas isn’t about to rest on his laurels. He’s still looking to make a difference and teach others to turn struggle into success.
Our Interview with Thomas Coyne
RECOIL OFFGRID: Where did you grow up?
Thomas Coyne: I actually kind of grew up on the road. Believe it or not, I went to 18 schools growing up. I had four or five different high schools, so I grew up bicoastal, you could say, between Philadelphia and Los Angeles.
So how did that affect you with having to move around all the time?
TC: I became my own person. Usually when a person is introduced to their social environment as a kid, you adapt to fit in at school with whatever crowd, but if you’re going to all these different schools in different cities with different people, you have to build up a personality independent of what others think about you. So I would say it gave me a personality that wasn’t based on social norms or what people think you should or shouldn’t do. It was based on my own judgment calls.
Thomas with his Ethiopian military escort, desert survival event, Danakil Depression.
Once you got out of high school, what did you do?
TC: I got a job with the state working at parks and doing natural resource rehab at the redwood parks up by Oregon. And then I went into wildland firefighting from there.
What made you want to become a firefighter?
TC: As a kid I wanted to do big things. I watched a lot of action movies, and growing up in some of the neighborhoods I did, I saw the need for heroes in the world and people who’d look out for each other. I always wanted to do something to make a difference, and when I was working with parks, I learned to love nature, even though I grew up pretty urban. Getting out there in the parks gave me that.
When you work with the state in California and you’re in anything like parks or any kind of field operating with natural resources, once fire season comes you have an opportunity to go work in the fire camps, depending on what your capabilities are. So I ended up working in a fire camp, getting overtime, seeing the firemen, and I was like, why am I sitting here in the camp and these guys are out fighting fires?
I was going to junior college and trying to get all my general education done so I could transfer to a four-year college. Some colleges with fire science certification programs have an on-call crew, and I got picked up there. Then, the ball started rolling, I got into fire line leadership, and for the first time I found something I really, really loved.
Teaching Palm Springs Mounted Police wilderness first aid.
What did you enjoy about it?
TC: Having that bell go off and you have to run out to the helicopter, people counting on you to be there — and not just for you to be there, but for the best version of you to be there. The in-shape you, the clear-headed you, the well-hydrated, good-decision-making you to show up and take care of them. I was always trying to better myself. Being a young guy as well, the thrill of almost dying, taking near misses, and getting injured while getting out of helicopters. To be able to lead people into situations like that — I just kind of naturally gravitated toward that role.
It’s not like I asked for it but was always thrust into a leadership position in every crew I was on. They saw my dedication, the way I worked, my attention to detail, and they always wanted me to be in charge of the most critical things. Like I’d be the crew EMT because we’d have to be self-sufficient for 24 hours if you’re a Type 1 resource like Hot Shots or Helitack, so I’d be responsible for all the medical gear and medical treatment on the crew. I’ve been squad leader a couple times where I was in charge of my squad and all the crew equipment — the crew vehicle, the firefighting gear; I was responsible for maintaining it and handing it out.
Tell us about the complications of being a fireman.
TC: A lot of firefighting had issues in my day, and it was kind of coming out of a good ol’ boy past. It can’t just be a bunch of good ol’ boys cutting fire lines once in a while. The fire seasons are horrendous. You had firefighters with high-level capabilities, but you still had a lot of the good ol’ boys holding us back.
I was having things occur where I had to scream at my crew. I remember I went to a fire where we flew in with the superintendent, the second in command, the third in command, the lead firefighter, and me. They tried to abandon the fire because they heard there were people coming eventually to relieve us, but they weren’t there yet and they wouldn’t be there for hours. They came and told me that if we didn’t leave the fire then, we wouldn’t be able to go get a hotel room and we’d have to sleep on the ground near the fire. I enjoyed that kind of thing, and I was there to get some. When I heard that, I flipped out and started screaming at all of them, and I made them get back to work. I made them cut line until we got relief. When they told me the relief was there, we got in the helicopter and flew off, and when I looked there was no relief on the ground and the fire grew by 20 acres in between us leaving and the next guys getting there.
On another assignment on a fire where a whole engine crew had just been wiped out in Esperanza [the Esperanza fire was in California in 2006 and burned over 40,000 acres], we had a state-of-the-art prototype four-wheel-drive fire engine — there were only a few in existence. They put us down these sandy roads in an area around houses, because they knew ours was the only vehicle that could get there and if a spot fire got out of control it’d burn more neighborhoods. We got the call for the spot fire; we got up to the fire, and my engine crew refused to engage. So I left them and cut fire by hand until it was suppressed and coordinated with the helicopters that were dropping on it.
Actually on that one, a local chief overheard our radio traffic and was in the area in a four-wheel drive truck, because he was scouting that area for spot fires. He came barreling down the road, came up to my engine, and asked me where he wanted me to have him cut line. He called my engine and asked if they were coming over, and they came over. So my engine was on a fire where a whole engine crew had just died and thousands of homes were burned, and we got an assignment to make sure more homes didn’t burn.
When the fire came, they were too scared to engage, so I engaged alone without a vehicle, without water, just a hand tool. But when the chief came and asked if they were coming over, they didn’t want to get in trouble, so they came over. They didn’t care if I burned to death, but they didn’t want to get in trouble from the chief — that was more important. And the thing is, my acting captain that day told the crew they couldn’t go over and that I was already dead. My crew later apologized to me and told me what he’d said.
Enough sh*t like that happened, where I was like, I’m gonna be my own leader. On the way to the fire in Big Sur about 10 years ago that almost overran Carmel, our helicopter was supposed to be the first on scene for what’s called the initial attack. You call 911, 911 calls our helicopter. They forgot to refuel the helicopter that morning, and our helicopter ran out of gas on the way there. They had to set down on the side of the freeway. God knows if that fire strike could’ve been stopped because of that or not. I’m not there for that sh*t — helicopters running out of gas and guys wanting to stay at hotel rooms.
Teaching an Air Force EOD unit on a seven-day private survival course.
You talked earlier about growing up and recognizing the need for heroes. What were some of the experiences that made you feel that way?
TC: I grew up with extreme poverty and violence. A lot of my brothers and sisters were involved in organized crime. I lived in really bad neighborhoods and had a family who engaged regularly in that violence. You see people not getting a chance. You see your neighborhoods are heavily patrolled by police, and you get talked to like sh*t. If you do something wrong in your neighborhood, you get the book thrown at you. It seemed like there was no one looking out for the little guy in a lot of these places.
If you called 911 in some of these neighborhoods, it could be hours before someone came. You see people getting beat down, shot, stabbed, and survival of the fittest. It was where the toughest guys make the rules and no one even wants to try anymore. You grow up in these neighborhoods, and you might see some older person with a tumor on them or with some horrible condition. And they just sit there and rot because they can’t get medical care and no one gives a damn.
I always had compassion for my fellow man. I never understood my family’s choices or the people around me when it came to that kind of activity. Don’t get me wrong, I was a little badass too sometimes and did some dirt, but I never understood the choice of that as a lifestyle — to one-up people like that. Maybe it was a bit reflective too. When I was seeing women or kids getting beaten and you’re too small to do anything, you think, OK, when I’m a man I’m going to do something.
So many people repeat that same pattern after they grow up that way. What do you think it takes to go the other direction?
TC: I was a 100-percent latchkey kid. I had four sisters and three older brothers at least 10 years older than me. I had a million aunts, uncles, and cousins I couldn’t even name. My parents were never married. Dad died when I was young and was never around anyway, so I had all this family who never took an interest in me or gave me any guidance. If I signed up for sports, I had to sign myself up. I’d walk myself to games. Any interest I got into I had to find a way to do it without any support. My parents would always push back and be like, “Why are you doing that? You’re a loser.” Or “It costs too much money.” Or whatever, so I never really felt like I was a part of my environment.
With my family doing their own thing, not really caring about where Thomas was, I never felt like part of the family. I didn’t want to be like the people I was surrounded by. I wasn’t embraced and guided, so it wasn’t like I was sucked into that lifestyle either. I was very impressionable as a young man. When you’re a young man with a single mom, you want love, you want family and all that, but if I had people who took care of me in a bad way, I probably would’ve gone that way too. Since I was left to my own devices, I didn’t like the people or my environment. I guess I wanted to dance to the beat of a different drum.
Teaching at the Marine Mountain Warfare Training Center survival and sniper instructors at a ten-day event.
What was your vision for what you wanted to teach when you started your business?
TC: First off, excellence was everything. We wanted to be the best at it and wanted to offer it in a way that it hadn’t been offered before. So a big thing with us was having the best field training. We wanted to be the guys who could take you anywhere, in any conditions, with the least amount of gear, and teach you how to exploit the landscape. The most hard-core field school was really the vision.
This was the only thing that I was capable of starting a business in that I had a skill set and knowledge for. I get calls from military commanders, special operations teams, and now various law enforcement departments. Training LAPD’s EMT instructor cadre and other groups like that. It’s weird, man. It’s taken on a life of its own.
What do your courses primarily focus on?
TC: Our training focuses on providing the general public with the skills needed to survive an outdoor emergency when rescue is far or not coming.
What event or situation do you think the general public is the most underprepared for?
TC: Anything where there’s a loss of communication and they can’t get calls out or media updates. People are really unprepared for anything. Maybe some guys have a little bit of storable food or some sh*tty survival kit they bought from some scammer on the Internet, or they went down the camping aisle at Walmart and put as many $3 things they could into a $5 backpack.
The industry of preparedness is really diseased, so you have a lot of people who know nothing about preparedness, have never been involved in any kind of emergency response, and they open a little Internet store, get some advertisements, and sell a bunch of cheap junk. I’d say 90-percent of your survival kits are junk and will leave you hanging.
It’s not like swift-water rescue or EMT, where there’s a certification process and a national cadre of instructors and people who have experience doing those things. So with survival, anyone can put on an Indiana Jones hat, say, “I’m a survival expert,” and start selling stuff. One of the most popular survival experts right now … what’s his name? Dick Dingleberry?
[Laughs!] Dave Canterbury?
TC: Yeah, he went around he’s telling everyone he was an Army Ranger, and he was never an Army Ranger. He said he’s a hand-to-hand combat instructor and SWAT team guy … never any of those. He pissed in a bag, and held it up at sundown, and claimed he made a fire using it as a magnifying glass. And people eat that sh*t up. And the trolls like that who portray that magical thinking, he’s the visual representation of that, and guys like Dingleberry are the most popular ones out there. And they don’t care if you’re using the last bit of life you have if they find you dead with a bag of piss.
So you have stuff like that out there. There aren’t a lot of guys like me out there who’ve responded to natural disasters. I’ve literally felt someone’s last f*cking breath on my cheek. When I’m trying to save them with CPR, they’re half ejected out of a vehicle, I’m trying to breathe for them, and I feel their last breath and last heartbeat, I’ll be damned if that last heartbeat is because I gave them bad advice. I don’t care what anyone says, you can’t make fire with a bag of water or piss, but that’s the industry right now and I have to deal with it.
People are like, “How can you say the opposite of every survival manual, the opposite of every YouTube video, and all this stuff I’ve heard is all bullsh*t?” So you see guys go out in the woods with stupid, fake survival kits that don’t work, trying to be like the guy on TV, and they die. I’m trying to give the public an option for real-world outdoor emergency training, not LARPing [live-action roleplaying]. They can go to any other survival school in America and do live-action-survival-role-playing, and it’ll be just as effective as Dungeons & Dragons would be in a real battle. So that’s what we’re working against. We’re working to change the industry.
Wild plant identification course.
So what do you think people tend to mischaracterize the most about survival and prepping?
TC: I think a lot of people believe that if they have a big sack of gear they’ll be ready. I’ve had a lot of people come to my school, and when we start training they pull a piece of gear out they’ve had in their kit for over a year. And then they thought it’d be easy to use, and then they don’t know how to use it. So you have a lot of people who have all this food and gear they have and think they’re ready, but they’ve never practiced with that gear or trained in a situation that recreates the stresses of an emergency while using that gear. If you’re trying to use something for the first time in a huge emergency where the world’s on fire, that’s a huge no-no. That’s how they find you dead with gear that could’ve saved your life, wondering what happened.
What aspects of survival do you think people should teach their kids?
TC: Emergency medical care and fire/water/shelter/signal. So the thing about being in the outdoors is you don’t have your microclimate to help you. You don’t have your house, your heater — you have whatever clothes are on your back, which may not be enough. The No. 1 killer in the outdoors is exposure, so the only way to stop that is fire/water/shelter.
And I don’t see schools push signaling enough. That’s so important. If a kid gets lost, they have a minimal skill set and may not have muscle or mental development that we do — but if they build a signal right away, that’s a huge deal. When you get lost in America, we have all these search-and-rescue teams, helicopters flying around, guys on quads out there looking for you, the locals will go out, so if you can do anything to build a signal, you’ll probably only be out there one night. If you teach that kid to build a signal as soon as they get lost, then you don’t have to worry about where the hell your kid is out in the woods.
If you could change the K through 12 curriculum, what areas of survival do you think everyone should learn chapter and verse?
TC: Every kid should have their wilderness first-aid card, and everyone should have a version of our critical skills program. I’m not saying everyone should take ours, but they should take one just like it. A human being shouldn’t be so out of tune with their environment. The modern first-world human is the only animal on Earth that will die from being put in its natural environment. It’s not right for kids to not know how to be alive on Earth without a big air-conditioned, electrical-grid-attached building. That’s ridiculous. That’s not how we evolved or were created. We shouldn’t die just because we’re not in a climate-controlled, reinforced building. That’s what that critical skills course is about — getting basic weatherproof shelter, basic water location and treatment, basic all-weather fire making, build a signal, and get out. Every human being should know how to do that.
What do you think the most likely survival situation is that people will encounter in their lifetimes?
TC: Natural disasters. Once the grid turns off you might as well be in the wilderness. The wilderness medical care will be more useful than the urban care, because you have to improvise gear and deal with people for extended periods of time. That’s what wilderness medical care is based on. Whether you got caught in a natural disaster that destroyed the neighborhood or you got lost outside, you now need shelter, clean water, and there’s a good chance that you need improvised medical care. You’ll be using the same principles and mindset to obtain and make it work — to purify water, to build shelter, to perform improvised medical care.
Teaching students how to make primitive flotation devices using local plants.
What do you think the most overrated survival tool is?
TC: The fire steel or ferro rod. It’s one of the worst things to use to make fire during an emergency, yet every survival expert out there is going to tell you to carry a fire steel.
What do you think the most underrated tool is?
TC: Stormproof match. Fire is the king of survival skills. If you have a bad cut, you can just grab your shirt and tie it on there real tight. With shelters, once I show you how to build it, it’s so easy. Anyone can build a survival shelter. In the wilderness, water is either there or it’s not.
Making fire from what’s out there, depending on if you’re hurt or whether it’s wet or not, it might be impossible. If you’re just rubbing sticks or using a fire steel, here’s the thing … fire is the most difficult thing to make when you need it the most. When it’s cold, wet, when you might be injured or hypothermic — it’s the most difficult to make.
You want a signal? Fire is a great signal. You need shelter? Shelter is going to be a lot warmer with fire. You need something to boil water to make it safe to drink? Fire will do that for you. You need that emotional security and morale boost and reassurance that you’re going to make it? Successfully making a fire and sitting by that overnight is going to give you that. It was a big deal when man tamed fire. We have myths and sacred stories about how man was getting fire in ancient times. That’s because it is hard. Hard to do in nature with just nature, so you’ve got to be ready.
Interesting that a guy who once put out fires is now teaching people to make them.
TC: [Laughs] Well, you could say I’ve seen how it’s done.
As prepared and responsible individuals we know that self-reliance comes in many forms. Bushcraft refers to the skills needed to survive and thrive in the bush. Over time the term has come to represent someone who can go into the wild and apply skills that help them survive longer and with relative comfort. Often bushcraft is directly related to primitive or wilderness skills, such as friction fires, trapping, and woodcraft. This artistry in survival from humans of yesteryear holds a place with modern survivalists who can see a future where the common life luxuries are no longer available.
Bushcraft is not necessarily difficult to pick up. At the core, most skills revolve around making fire and cutting things. A quality knife and ferrocerium rod are enough to get an interested party initiated. As with any new venture, doing your homework first can alleviate headaches and keep bad habits at bay. Bushcraft skills can lead an individual down several paths of preparedness. Your interests and environment may steer you toward wood crafting, plant identification and uses, or primitive hunting and trapping, to name a few.
Most of these books can be found used on eBay or similar sites if you’re looking to save money, but even new, they’re not overly expensive. The information they hold can be priceless, however. Whether your locale is the Rocky Mountains or the Florida swamps, the following four books can help you be more prepared for your next adventure — voluntary or otherwise.
Woodcraft and Camping: The Great American Classic of Camping by “Nessmuk”
Nessmuk, the pen name of George Washington Sears, was a legendary bushcrafter and outdoorsman. His book, originally published in 1884, is both a technical manual and a personal story of his equipment and adventures in the wilderness. The first chapter covers why the “modern” person feels the need to be in the wild and the connectiveness of humans to the natural world. Nessmuk’s words still reverberate to this day almost 100 years later for anyone that spends time outdoors.
What we like: Timeless core principles are established for success in the wild.
What we didn’t like: Considering the fact that this book is almost 100 years old, we cut him some slack for the lack of diagrams and illustrations.
Indian Fishing and Camping by Robert “Gray-Wolf” Hofsinde
This book, originally published in 1963, was written by a Dane who immigrated to the states and saved a Chippewa boy with a broken leg while trapping in Minnesota. As a result of this compassionate act, he was inducted into the tribe as a full blood brother and so began his interest in Native American technology. This is one of the books Hofsinde has written on the way American Indians of that time period lived and thrived. The primary focus is primitive fishing techniques that include net making, hook making, bait, and spears/harpoons.
What we liked: Hofsinde was a school-trained artist from the Royal Art Academy of Copenhagen, so we were pleased to find that his illustrations in this book are easy to follow and give just enough detail to be very useful.
What we didn’t like: Some of the specifics for tool making aren’t immediately clear and the author almost makes them seem too easy.
Advanced Bushcraft by Dave Canterbury
This is the newest book on our list and it has been included because of its emphasis on more advanced bushcraft topics. Canterbury is no stranger to the primitive skills community and has been successful with his forms of communication to the masses on all things Bushcraft. This book is well-organized and does serve as a companion to his Bushcraft 101 book. Even if you haven’t already read the 101 book, Advanced Bushcraft is informative and well organized.
What we liked: Chapter 2 covers natural resources and gives excellent insight into common wood types and their many uses.
Ellsworth Jaeger is a highly-regarded author and was the authority on American Indian lore and camping. This book, written by Jaeger in 1945, contains over 400 illustrations covering practically every aspect of life in the late 19th and early 20th centuries. The opening line of Jaeger’s book hits hard — “the myriad of jingle-jangle gadgets of some of our modern outdoorsmen would make our ancestral buckskin men turn in their graves”. This is insight into his view of the “modern gadgets” of 1945. We can hardly imagine what he would think of our present-day society’s reliance on technology.
What we liked: This book has a little bit of everything, making it an excellent reference for how to accomplish practically any task in the outdoors.
What we didn’t like: Nothing sticks out as overly negative about this book.
Conclusion
These four bushcraft books cover an immense amount of outdoor information, making them helpful additions to for your SHTF library. Even if you aren’t one to venture into the remote wilderness on a regular basis, many of these skills can be practiced in your own backyard and can set the stage for exceptional baseline knowledge. As they say, knowing is half the battle.
If you’re interested in learning about another bushcraft book, keep an eye out for our upcoming review of the classic Bushcraft: Outdoor Skills and Wilderness Survival by Mors Kochanski. It will be published in our “The Last Page” column in an upcoming issue of the RECOIL OFFGRID print magazine.
About the Author
Alexander Crown served as an Infantryman with the Scout/Sniper Platoon of the 3rd Battalion, 509th Parachute Infantry Regiment in Ft. Richardson, Alaska, where he specialized in radio communications and reconnaissance. Since separating, Alexander spends his time as an avid outdoorsman and hunter with an appreciation for self-sufficiency in the form of gardening. He also enjoys woodworking, firearms, and reloading. You can follow him on Instagram @acrown509.