Wes Massey had the sharpest eyes of anyone I’d ever known, and as we walked down a busy Seattle street something caught his attention. His pace slowed a bit, and I slowed my stride to match him. Without raising a hand to point, he simply nodded his head to direct my attention toward a homeless-looking fellow who was sitting up against a building. In a quiet voice, meant only for me to hear, Wes said “Hey, check out that guy.” We both slowed our walk to the point where people were bumping into us, and tried not to openly stare at the man.
The scruffy and unwashed old man was coughing up blood. Red rivulets of spit and blood were running out of the corners of his mouth, down onto his dirty shirt. Our stride quickened again and we hurried past him, instinctively trying to avoid the ill man. For propriety’s sake, we didn’t speak until we were out of earshot of the poor fellow. But as soon as were clear, we voiced our alarm. “Dude, what the hell was that?!” I queried. “That was a whole lot of nasty, that’s what that was,” Wes replied.
He went on to say that he thought that symptom seemed familiar, like something he had seen on TV. But he admitted it was not something from the gross medical mystery shows he relished watching during dinner. I could see the wheels turning in his mind as he said “No, I haven’t seen that kind of condition on a medical show — I think I saw it on the History Channel!”
Hope you’re holding your copy of OG with medical gloves, because this edition of What If? is about to get contagious. This time, we’ve been posed the question, “What if an outbreak of weaponized pneumonic plague threatens the entire Pacific Northwest?” To explore our different approaches in the face of a modern outbreak of one of the most contagious and fatal diseases known to man, OG asked three different survival writers to wade through this infected tale about surviving an epidemic.
For this installment, we have Jim Cobb, author of numerous prepper books and respected disaster-preparedness consultant. We also have Rudy Reyes, an actor, martial arts instructor, and former special-operations member of the U.S. Marine Corp’s 1st Reconnaissance Battalion. Rounding out the trio, there’s me. I’ve been a professional survival instructor for 20 years, with three New York Times-bestselling survival books under my belt — and a horrible case of hypochondria.
Unlike past What If? features in which we wrote different perspectives based on the same persona, here we’re writing from our own personal perspectives. Here are our fictional but realistic stories of pestilence and woe.
The Scenario
SITUATION TYPE
Outbreak
YOUR CREW
You and your assistant/co-worker
LOCATION
Seattle, Washington
SEASON
Late winter (February)
WEATHER
Rainy with highs around 50 degrees F and lows near 37 degrees F
The Setup: You’re on a working vacation in the Pacific Northwest, staying at a posh hotel in Bellevue where you’ve been doing consulting work for a big tech firm. After two days of work, you and your assistant will spend the next two days seeing the sights in Downtown Seattle via public transportation.
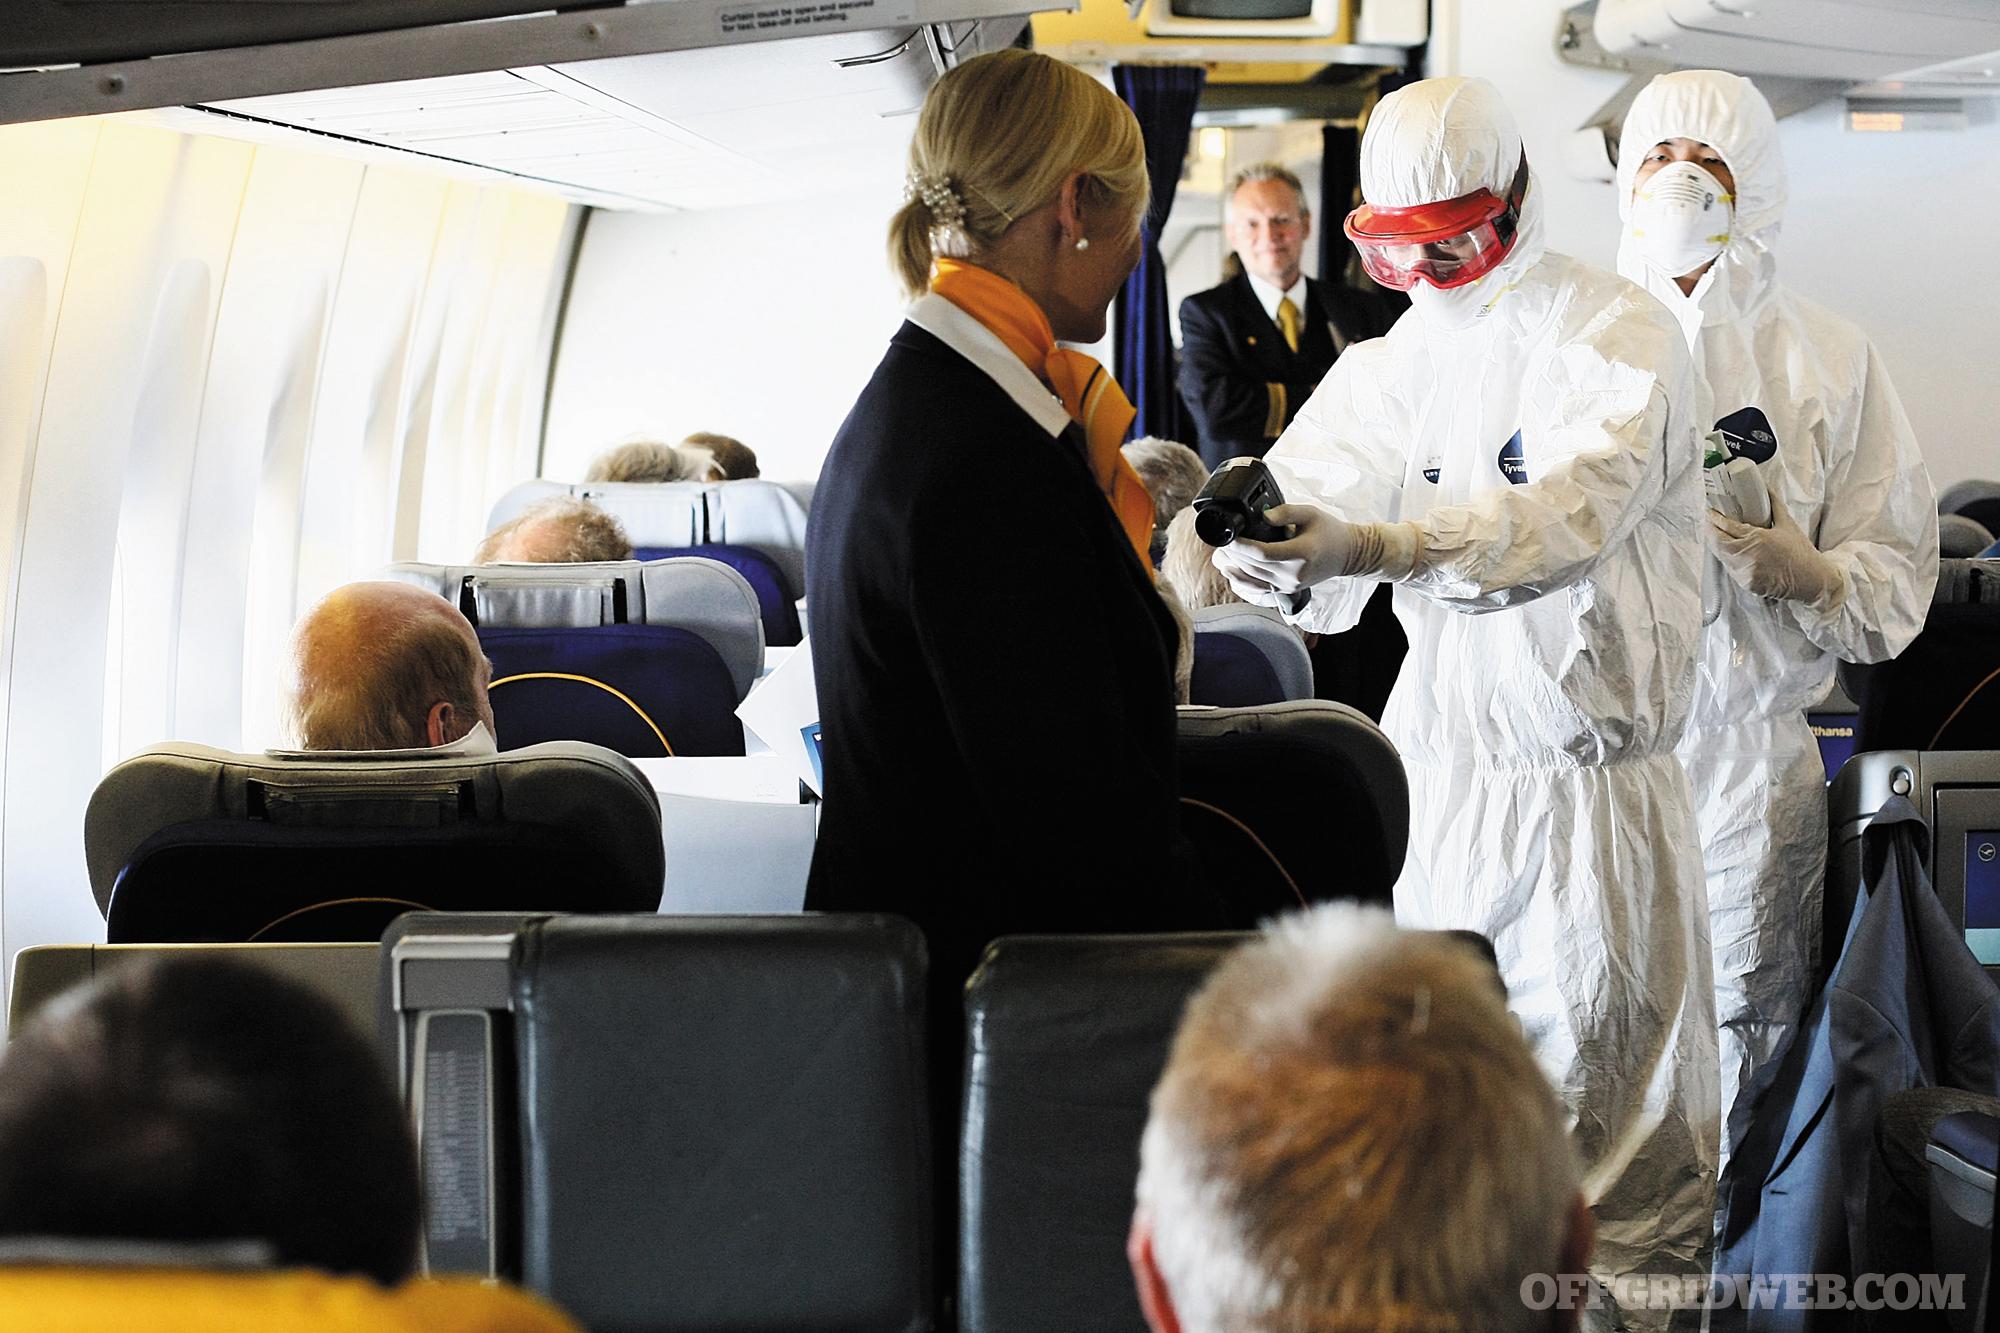
The Complication: Since arriving by plane two days ago, you’ve noticed a lot more people than usual coughing and sneezing — but it is flu season after all. While in a nice downtown restaurant, the multiple TVs show the same breaking news report: multiple bioterrorist attacks have allegedly hit Seattle. Authorities would not reveal where the attacks were perpetrated and by whom, but said the contagion is most likely pneumonic plague. The reporter then describes the symptoms, treatment centers, and recommended precautions. You don’t believe you’re infected, but it’s not known how the biological attacks were launched so you can’t be certain. Plus, you’re potentially surrounded by infected people in a crowded downtown area. The one-to-six-day incubation period also means you could be infected and not know it.
The New Plan: Just as you and your assistant start formulating a plan of action, firefighting trucks zoom by. Then ambulances. A few moments go by and just as you leave the restaurant, you see large vans with signs that read, “Washington State Department of Health,” escorted by police cruisers. You know SHTF nearby, and you’re not going to wait to find out what kind it is.

DISASTER-PREP EXPERT: Jim Cobb’s Approach
It was the Department of Health vans that finally made it seem real. Up until that point, we’d felt like it was more of a hypothetical scenario rather than reality. But, seeing those squad cars leading the Department of Health vans up the street was our personal call to action. At that moment, we had two primary goals. First, we needed to get back to the hotel as quickly as possible, while hopefully avoiding any infected people. Second, we needed information. The talking heads on the network news programs likely didn’t know much more than we did at that point.
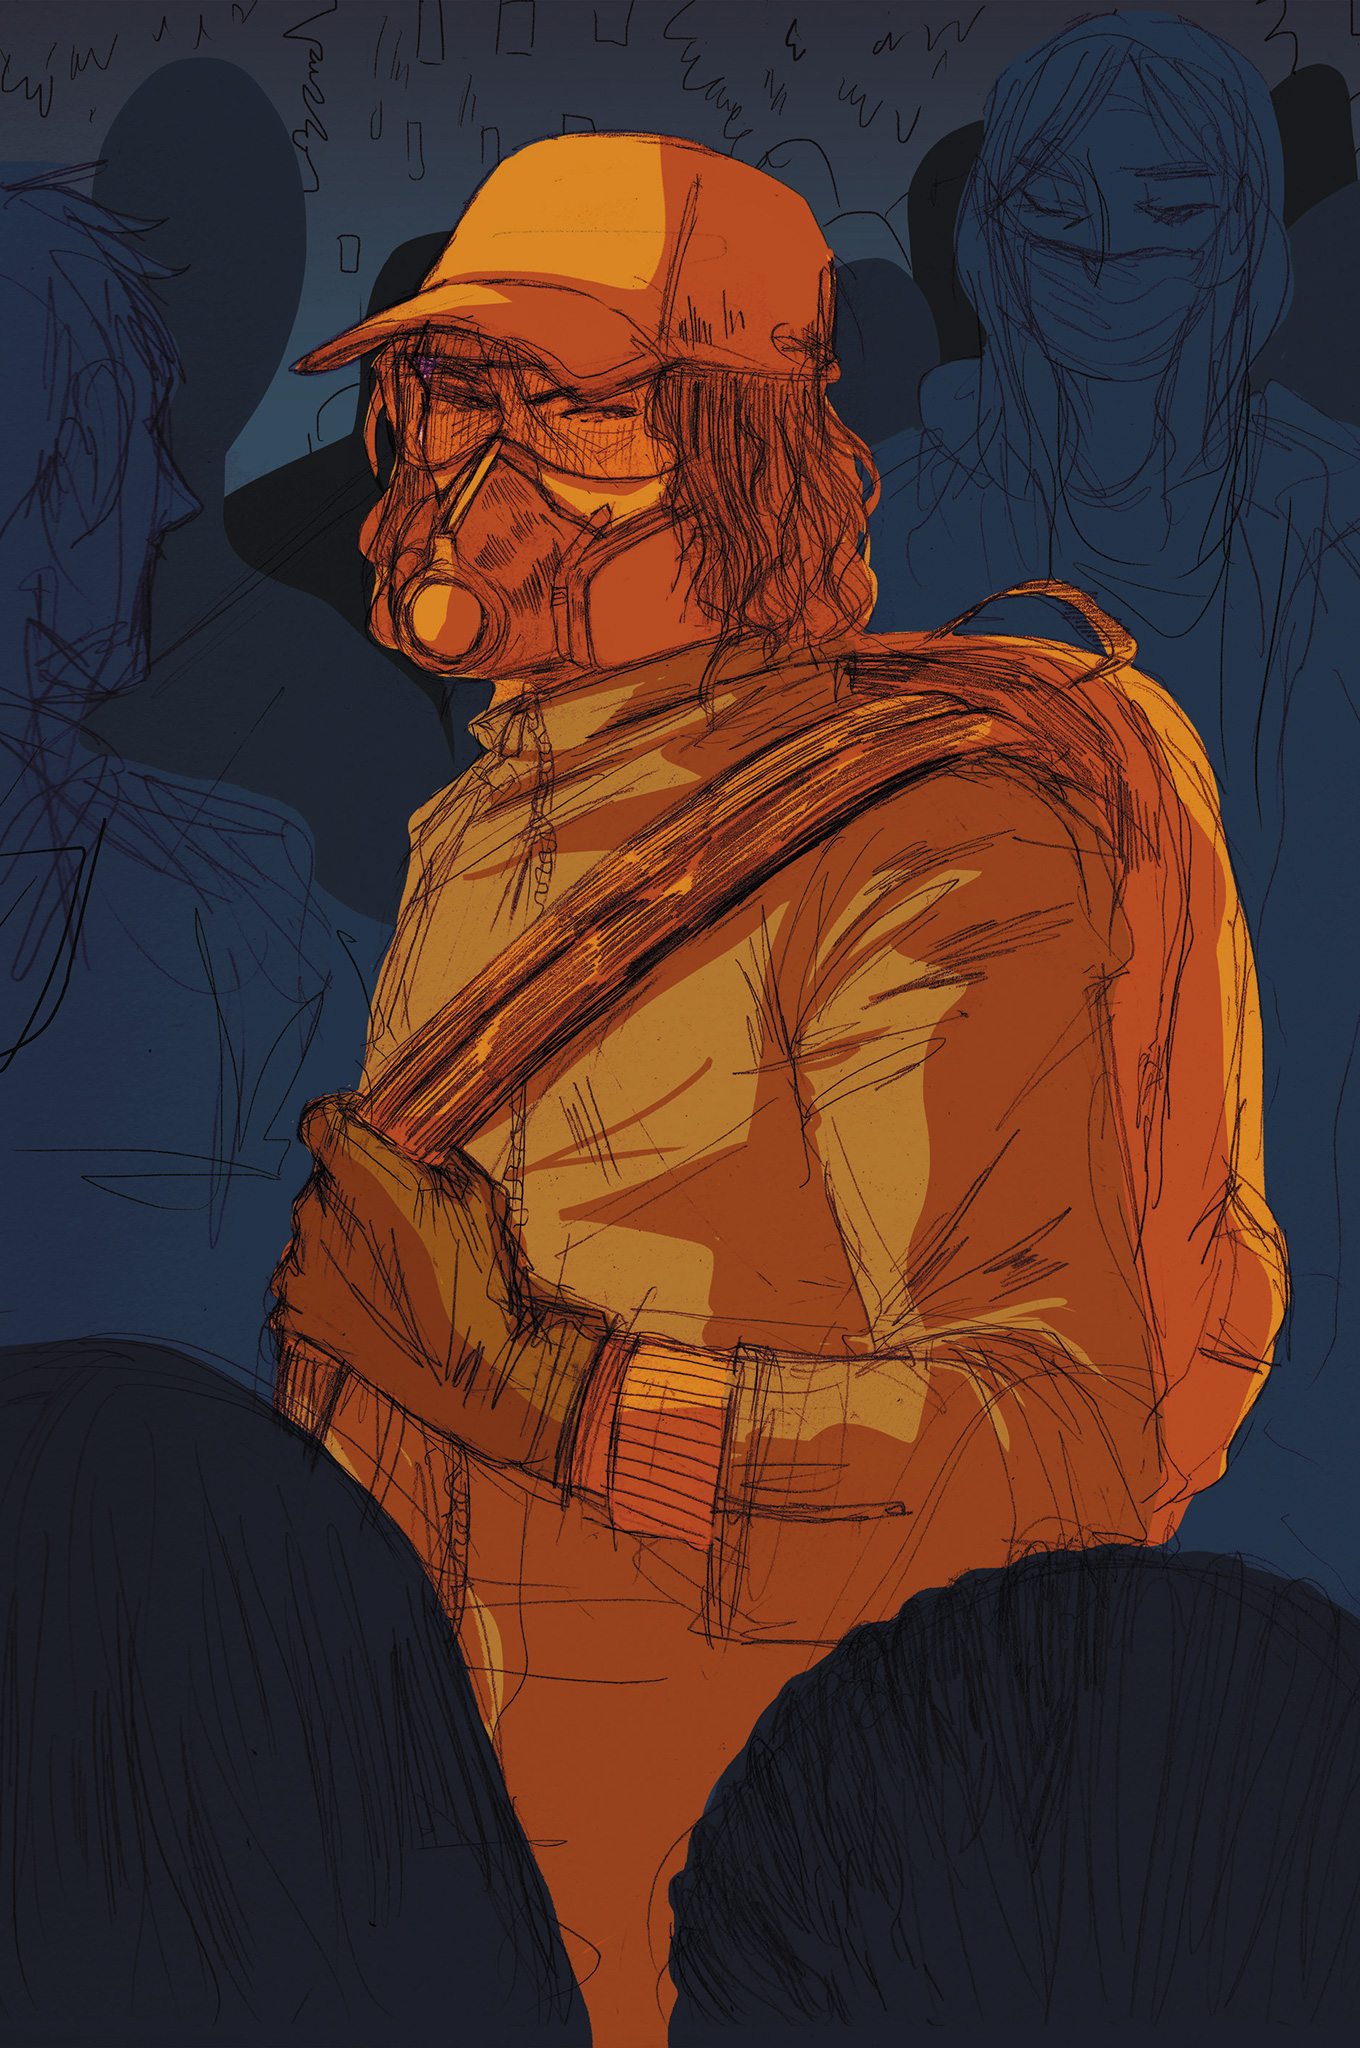
Thankfully, the restaurant we were in was only a few blocks from the hotel. I told Kevin to grab the cloth napkins from the table as we got up to leave. He did so, stuffing them into his jacket pocket, while I tossed down enough cash to cover the bill and a generous tip.
We went outside, and I led us around the corner to a small alley alongside the building. Firing up Google Maps on my phone, I plotted a route back to the hotel using side streets and alleys, keeping us away from the bulk of the crowds. We tied the cloth napkins around our mouths and noses. While they certainly were a poor substitute for N95 masks … well, any port in a storm. As we made our way back to the hotel, we kept a careful eye out for other people, especially those who appeared sick. At that point, we had no idea of the infectious range a sick person might have. This wasn’t very difficult as everyone else seemed to have the same idea.
When we hit the lobby of the hotel, I immediately went to the ATM. I pulled out the maximum cash advance I could from three different credit cards in my wallet, giving me almost a grand in cash. Kevin did the same. Cash is almost always king and I wanted plenty on hand in case we got to a point where credit cards weren’t being accepted.
We’d flown into Seattle, but I wasn’t keen on getting on a plane to get back home, or being trapped in a sealed tin can with a bunch of people who may or may not be infected. I knew driving would take far longer, but we’d be in a better position to avoid other people in doing so. When we got to our room, I jumped online via my laptop and found a local car rental agency. I wanted something that gave us a little roo, but wouldn’t kill us on gas mileage.
At that point, we took the time to call home and speak with our respective spouses. Neither had seen the news reports yet, so we filled them in as best we could. I told my wife to give our boys a hug from me and that I’d hopefully be seeing them all very soon. Promising to keep in touch along the way, we said our goodbyes.
For years, Kevin and I had been in the habit of mailing packages to hotels where we were going to stay any time we had to fly. The TSA wouldn’t allow us to fly with pocket knives and such, so this was the best option to have some gear with us no matter where we traveled. We included return postage inside the box so, at the end of each trip, we just boxed everything back up, slapped on the mailing label and postage, then left it at the front counter to go out with the day’s mail. While neither of us had any sort of full-on bug-out bag, we each had a Maxpedition Beefy Pocket Organizer with the basics, such as a knife, fire starters, and first-aid supplies.
Our tech company client had given us all sorts of logoed products when we’d arrived a couple days ago. One of those items was a canvas shopping bag, which I took with me down the hall to the vending machines. ATM machines only spit out $20 bills, of course, but between the two of us we had enough singles and change to purchase several bottles of water, which went into the bag.
We gathered our belongings, which wasn’t much since we always packed light. One rolling suitcase each, one daypack each, and the canvas tote with bottled water. Our survival kits were stuffed into our Vertx EDC Gamut daypacks. We also cleaned out the room of all soap, shampoo, coffee packets, plastic cups, and all of those other goodies hotels like to include. I figured that even if we ended up not needing them, someone else might.
At the front desk, I just had to swipe my credit card and provide a signature, then we were out the door. While I’d been doing that, Kevin had pulled up a walking route to the car rental agency. We’d have to hoof it for about a mile, but there was no way I was going to risk taking a cab. We pulled our suitcases behind us and managed to stay out of most of the foot traffic. Many of the people around us had tied scarfs or bandanas around their lower faces, just as we’d done with the napkins. We arrived at the car rental desk without incident, and since I’d reserved the vehicle online, all I needed to do was sign a couple of forms and we were handed a set of keys. While we still hadn’t gathered a lot of intel on the situation, we knew we needed to stay well away from any densely populated areas.
I drove while Kevin worked the map on his phone. The GPS installed in the car would only give us the most direct routes between Point A and Point B, which of course would involve driving straight through major cities. Using his smartphone, Kevin plotted a less populated route for the several hundred miles it would take us to get home. We planned to drive straight through, stopping only for gas and bathroom breaks.
We were about 300 miles outside of Seattle when Kevin began complaining of a headache. He looked rough, haggard, and flushed with fever. We both knew right away that this wasn’t good. We’d been listening to various talk radio stations and had heard several times that early treatment was the key to survival. Antibiotics worked, but only if they were administered in the first stages of the disease. I hated to do it, but there wasn’t another viable option: I changed direction a bit and headed to Pullman Regional Hospital.
We’d beaten the rush, so to speak, as the emergency room wasn’t overflowing yet. Within an hour, Kevin had been tested and diagnosed with the pneumonic plague. They checked him into a semi-private room and hooked him up to an intravenous antibiotic. I’d called Susan, Kevin’s wife, and let her know what was going on. She was beside herself with panic, but I reassured her, telling her that we’d caught it really early and he should be fine.
My wife was worried too, of course. I managed to swallow my coughs enough that she didn’t hear. I told her I loved her and that I’d be home as soon as I could. I hung up and then collapsed on the bed next to Kevin.
FORMER U.S. FORCE RECON MARINE: Rudy Reyes’ Approach
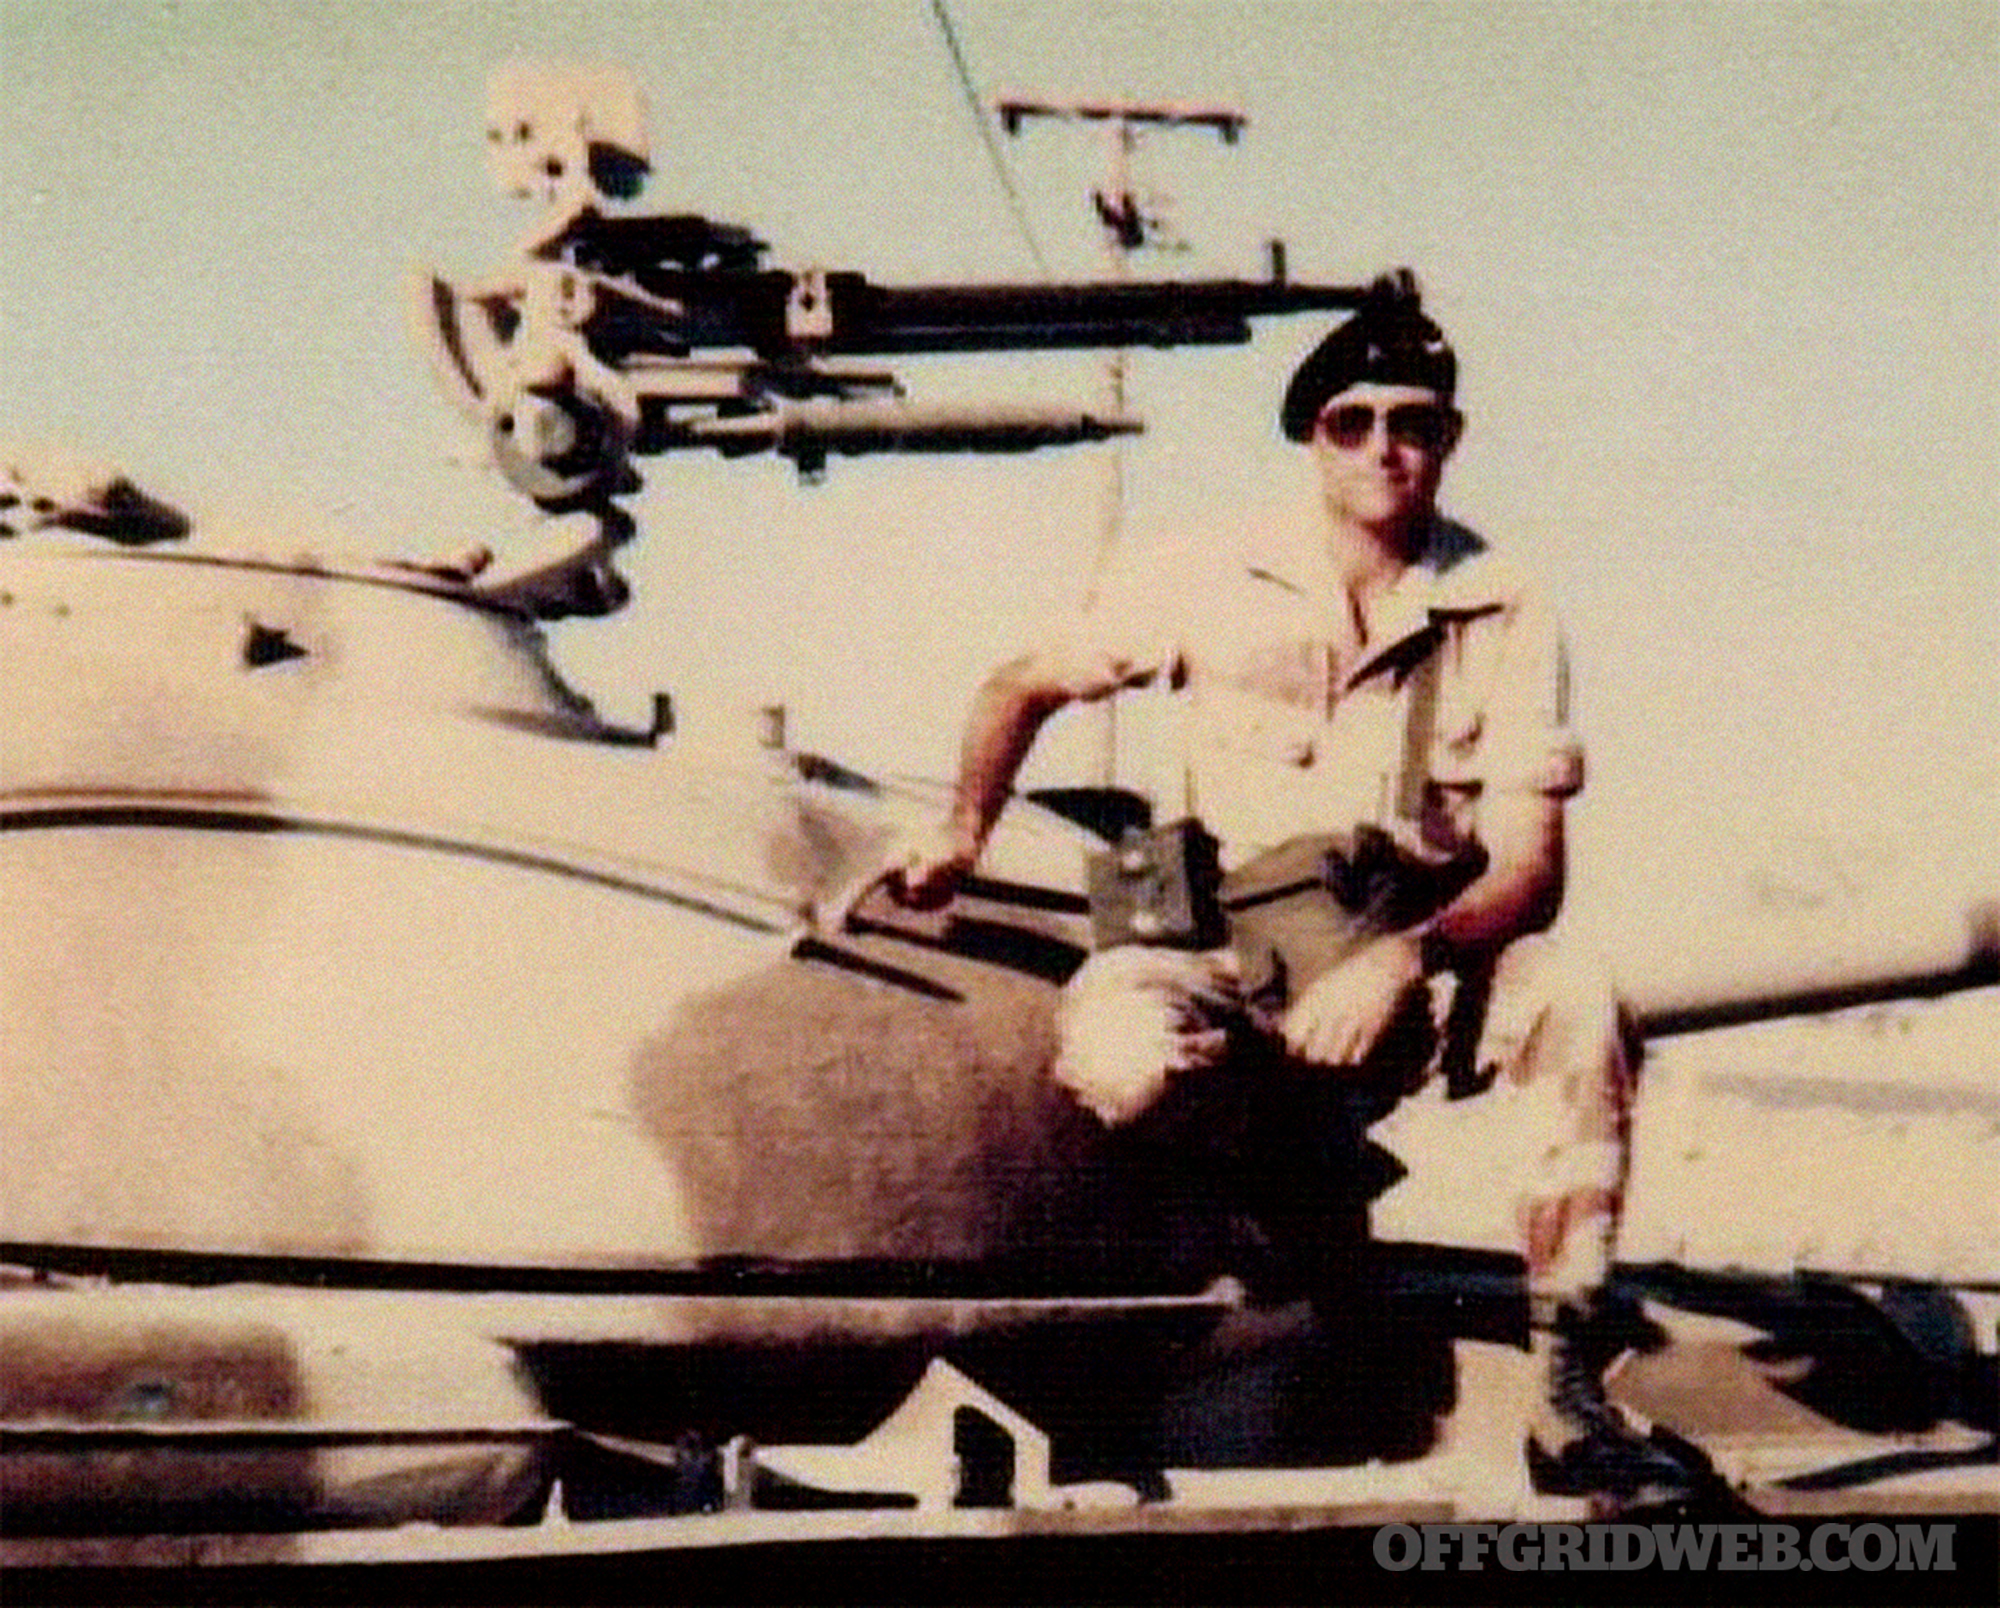
After two 18-hour days doing a security job for a Seattle technology company, we got two days of R&R to explore the city. My new associate, Juan Carlos (aka JC), was a former Green Beret medic who just transitioned out of 15 years of service. Until recently, he was a local and crashed with me at the fancy Bellevue hotel. What a difference a year makes — earning a living consulting for billion-dollar tech companies, and staying at swanky hotels was so far from my former Recon Marine life and so many years in the dirt of the ‘Stan and Iraq.
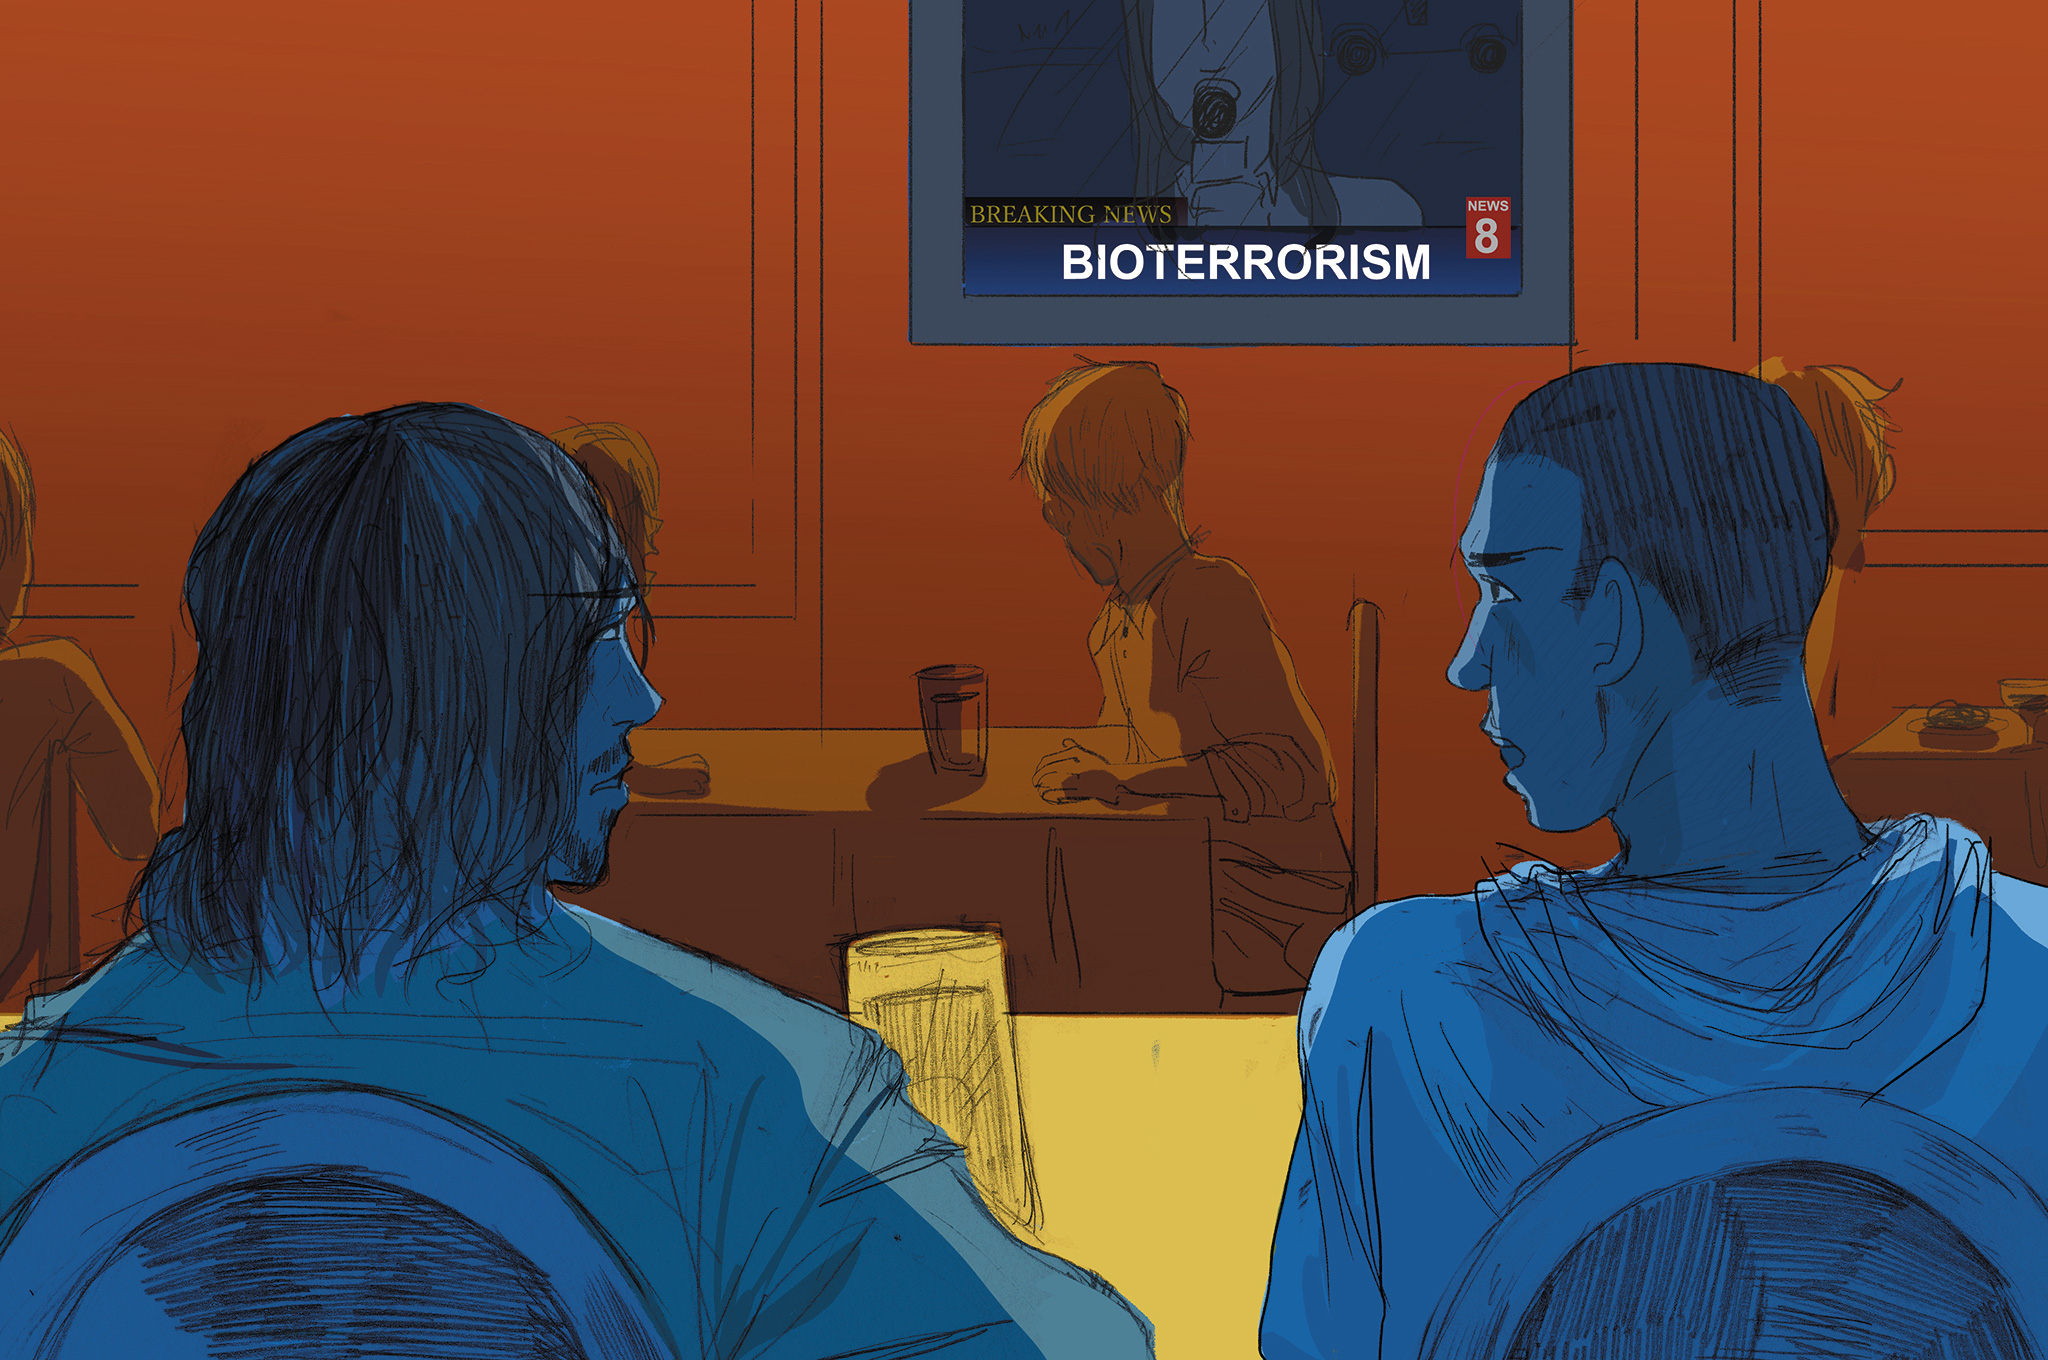
Walking from our hotel, we settled on a cozy little mom-and-pop coffee shop to start our day. While in line, we immediately noticed several of the patrons looking ill. It wasn’t just that folks were coughing and sneezing; their faces were pale, body language weak, and brows soaked with sweat even though it was a cool winter day. Just then, chatter from all the shop’s TVs changed and prompted everyone to look up. A news broadcast reported that multiple bioterrorist attacks had hit Seattle. Authorities wouldn’t reveal specifics, but urged people to stay home or seek out local treatment centers.
“JC, forget your caramel macchiato,” I said. “Let’s push.” We blew through the doors and bolted straight for the hotel. As we ran, the sound of sirens filled the streets. Police cars, ambulances, and state health department trucks were on the move. I yelled to JC, “Bro, we need to get the f*ck out of Dodge!” JC replied, “No way I’m dying in a FEMA camp!”
When we got to the hotel, I ran up the stairs to our room to grab our gear bags while JC went to the garage to get the rental car. In a matter of moments, we were reunited in the hotel’s rear entrance. It was clear from all the sirens and mobile units that Seattle was indeed hit with something. The idea of being caught in a lockdown didn’t seem like just a movie premise anymore.
“Bro, it’s time to get real with SERE,” I said, referring to the military concept of survive, evade, resist, and escape. But JC reminded me that we needed some medicine and supplies. “Let’s find a drugstore, quick, and one on a side street,” I replied. Moments later, we pulled up to a chain drug store. It looked like others were thinking the same thing — by the rush of people heading in and out, you’d think it was a Black Friday sale. An electronics store across the street was already being looted.
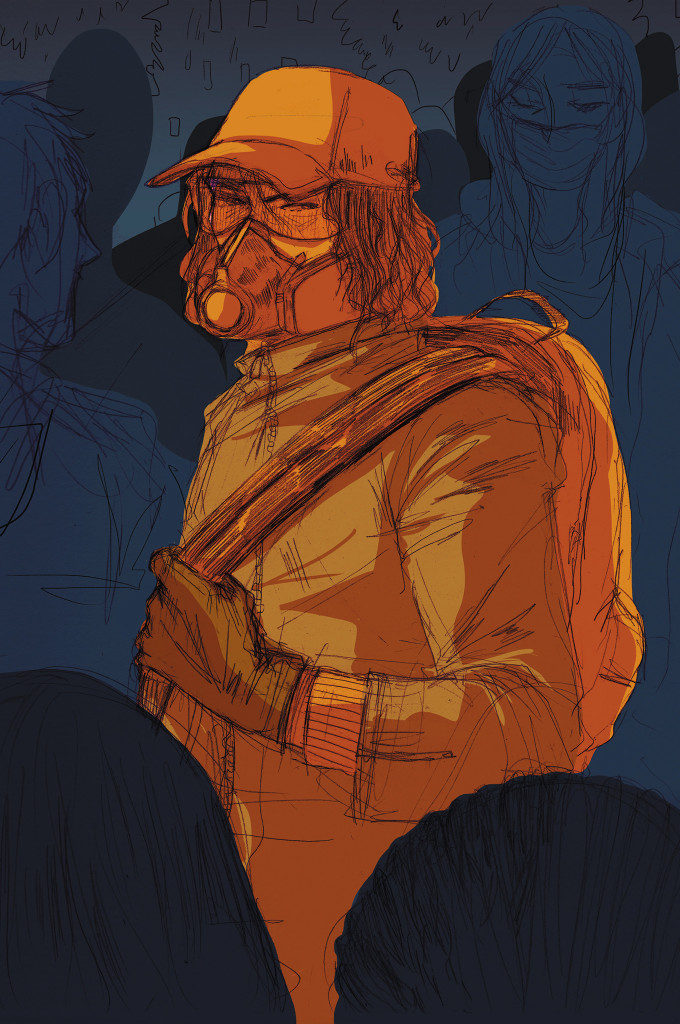
As security experts and combat veterans, we had a small arsenal of pistols and carbines in the trunk. We got out and opened the trunk, each grabbing a .45-caliber sidearm and stuffed it into our pants. JC passed me an extra magazine, and I picked up an Armalite AR-10 and filled the left pocket on my trousers with extra mags.
JC had a brand new custom AR-15 short-barreled rifle. We each grabbed empty backpacks that were swag gifts from our tech company client. Locked and loaded, we entered the store. Chaos was well underway. We moved quickly to the pharmacy counter and came face to face with a junkie who had just killed the pharmacist for a bottle of Oxycontin. As he fumbled for his knife, I smashed his head with my buttstock, knocking him out. “Not worth the bullet,” I said. We split up, grabbing antibiotics, cough serums, and other medicines. I also grabbed jerky, power bars, hand sanitizer, and some Quaker Oats.
“On your six bro,” I heard JC call out about 30 seconds later. “We’re good to go.” I nodded, then felt his tap on my shoulder, signaling he was ready. “Oscar Mike on me,” I said.
We moved as one through the crowd, who immediately cleared a path for us after just one look. We exited the store, dumped the supplies in the backseat, and were off in seconds. “So, where are we going?” I asked. “The mountains,” JC replied, as he steered. “I’m cool with that,” as I thought out loud. With plenty of supplies and the best medic in the world (who happened to be local) by my side, I felt confident.
We had the radio on, but it was the emergency broadcast system (EBS) on a loop. We tried to reach our families, but in typically lockdown fashion, mobile phone communications were down. I thought maybe we would have better luck in the mountains. We were pretty well off in terms of supplies. We had CamelBaks, portable power banks, and a Goal Zero solar panel system. We also had a supply of iodine for water, fixed blades, paracord, and some extra cordage from the laces in my Palladiums boots, along with a good old-fashioned mylar space blanket for shelter or signaling, and several magnesium fire tools.
We pulled off the road, unloaded the gear, and hit the trails. JC knew a great spot about 10 mikes in. We figured we would hold out there for a few days and wait to see if we were infected. If not, then we could make it home for Valentine’s Day. My family was in Kansas City, and JC just moved his wife and kids to Colorado last week. The thought of giving the bug to them or anyone else on the way was just immoral and not the way we live.
We arrived a few hours later at the spot JC hunted as a kid, deep in the Olympic forest. Now we could make camp, hunker down, and keep an ever-vigilant eye on each other. The survival shelter went up quickly. We tried comms again, but no signal. The portable crank radio was up and running, but the same EBS loop was running.
In the Pacific Northwest, water wasn’t an issue, but hypothermia was. Even in this wet terrain, our fire-craft skills had a roaring flame going in a few minutes. That was essential to keeping us warm and dry in the Washington rainforest. We chowed on some jerky and protein bars, and knew we had enough basics to easily survive — without hunting — for a week or two in the woods if needed. It was time for sleep. The second day was uneventful and still no new news on the radio. I was angry at myself for not bringing my sat phone on the trip.
On the third day, I awoke to the sounds of JC coughing and shivering. “Brother, I’m just fine,” he said. I knew he wasn’t. I pumped him full of antibiotics and gave him a swig of the powerful codeine cough serum. By early evening, his fever was spiking, probably close to 103 or 104.
I took his shemagh, put some cold water on it, and applied it to his forehead. I said, “Let’s hit you up with some more meds and put you on the rest plan.” That was JC’s code for, “Sorry, my brother, you’re gonna die.”
I started my own treatment plan and loaded JC up on more antibiotics, but it was too late and the meds we grabbed at the pharmacy didn’t seem to be working. By morning JC had passed, and my cough had begun. I buried my brother on the mountain and dug my grave besides his. It had such a beautiful view. I took some solace that it would be here and not in some desert, yet it infuriated me that the bastards I fought against for so long and so hard pulled off this attack off. I prayed that our families would be OK. I pulled my journal from my bag and wrote letters to our families. I knew that some day, someone would find us.
That night, in my fever-fueled dreams, I was with my brothers and my family — it was so peaceful. It was Valhalla.
SURVIVAL EXPERT: Tim MacWelch’s Approach
Wes and I had both stopped eating as we sat in the restaurant watching the news report, trying desperately to hear what was being said, overtop the restaurant noise and panicked conversations of other patrons. “Plague,” Wes said flatly. “That’s what the old guy had. Coughing up blood, he must have had it for days.” The severity of our situation began to hit home. We were in a densely populated city, attacked by bioterrorists.
“Let’s get back to the room and see what we can find out,” I said. I pulled the bandana out of my jacket pocket, the one that I always carry for 1,001 odd purposes. I also flicked open my tactical folding knife, another EDC staple. I cut the cloth in half and handed one piece to Wes. After seeing me cover my nose and mouth with the cloth in my hand, he followed suit. We threw down enough money to cover the meal and tip, then headed for the door.
We were out the door and walking quickly down the street. Clearly some people hadn’t heard the news yet. Plenty of pedestrians were walking from point A to B as if nothing was wrong, but a few here and there seemed to be losing it. Half a block up a speeding car crashed into two others on the street. A few people were running and pushing their way through the sidewalk traffic. One teenager we passed was just standing there crying. We didn’t say a word to each other as Wes and I hurried toward our hotel. We didn’t have to speak. We knew what was on the other’s mind. How do we get the hell away from all these people?
We made it back to the hotel room, and started to hash out what we needed to do. “We’ve got to get out of these street clothes. They’re probably contaminated from the coughing guy, if not everybody else.” I agreed and threw our clothes into the plastic laundry bag we found in the hotel room. We took turns showering and donned the “outdoor” clothes we had worn during the training. We had each packed lightly and didn’t have many other options. We also agreed that staying off the street was the right call, but to bug-in at the hotel — we needed supplies. On the little hotel notepad, Wes started a list.
Food, water/drinks, meds, disinfectant, protective gear.
As he wrote, I noticed that he was sweating. I asked him how he felt, and he shot me look of alarm. “I don’t know,” he said. “My stomach is feeling weird.” I told him to add some Pepto to the list, and then I started trying to make calls. The mobile phone system was already jammed, no doubt from other worried people trying to call their worried friends and loved ones.
I tried to call my family over and over, then I finally used the hotel room phone and had success. My wife had heard about the “outbreak” as they were now calling it, and had been trying to reach my cellphone for hours, but the call hadn’t gone through. It made me wonder if the city hadn’t shut down the cell towers on purpose, but that line of thinking wasn’t helping. I assured my wife and girls that I was fine and I’d be home as soon as I could…but those words were beginning to taste like a lie.
This situation was very bad. While I was using the hotel room phone, I tried another call. This one was to my client at the big tech firm that had hired us. I was surprised that I caught her at her desk, and I asked her what she had heard. Obviously rattled, she said that her company was still asking people to report in for business as usual, though many people had called in sick or gone home sick. She also said that the state health department and CDC was supposed to be setting up emergency medical clinics throughout the city to test and treat people.
I gave her the hotel phone number and our room number, and asked her to call if she discovered anything new. As I was getting ready to leave the room, I decided not to touch the notepad or pen that Wes had been holding. We agreed that leaving the hotel was a bad idea, so the only place to buy food and drink was in the gift shop. Wes said he would catch up to me at the shop, but first he had to go to the bathroom. I went out to see what I could find within the hotel.
As I walked down the hotel hallway, I struggled to recall everything I had learned in school about the Black Death, plagues in general, and medieval history. Hadn’t the majority of the population of Europe died from this stuff in the Middle Ages? I couldn’t quite recall, but I knew that our situation was getting worse by the minute. We needed to do two things: We needed to stay away from people, and we needed to get medicine if Wes or I had this sickness.
Lost in thought, I went down the elevator and into the hotel shop. One other fellow seemed to have had the same idea about stocking up. He had a mountain of snacks and some sodas at the register. I looked over at the cooler and saw about a dozen water bottles. I guessed the shopper expected that the water would keep flowing no matter what. I didn’t have the same expectation. I took two hand baskets and filled them both with all of the water, all of the juice, and several sodas and teas. Then I filled another two baskets with nuts, chips, jerky, and other high-calorie snacks — cleaning out most of the meager stock that the store held.
The clerk was surprised by my purchase and mentioned that there was a small grocery store around the corner if I needed food. I thanked him, and explained that a crowded market was the last place I wanted to be right now. He gave me a puzzled look, then shrugged his shoulders as if to say “whatever.” Once the provisions were bagged up, I asked him to call the front desk to have a cart sent over. I loaded my supplies on the luggage cart and made my way back toward the room.
I had gotten the food and water, even some Pepto Bismol for Wes, but we needed more. As I pushed my luggage cart past an unoccupied housekeeping cart, I grabbed a stack of clean towels, a few rolls of toilet paper, and a large spray bottle with the handwritten word “bathroom” on it. A quick squirt in the air told me it had bleach as an ingredient. I threw it on my cart and hurried back to my room.
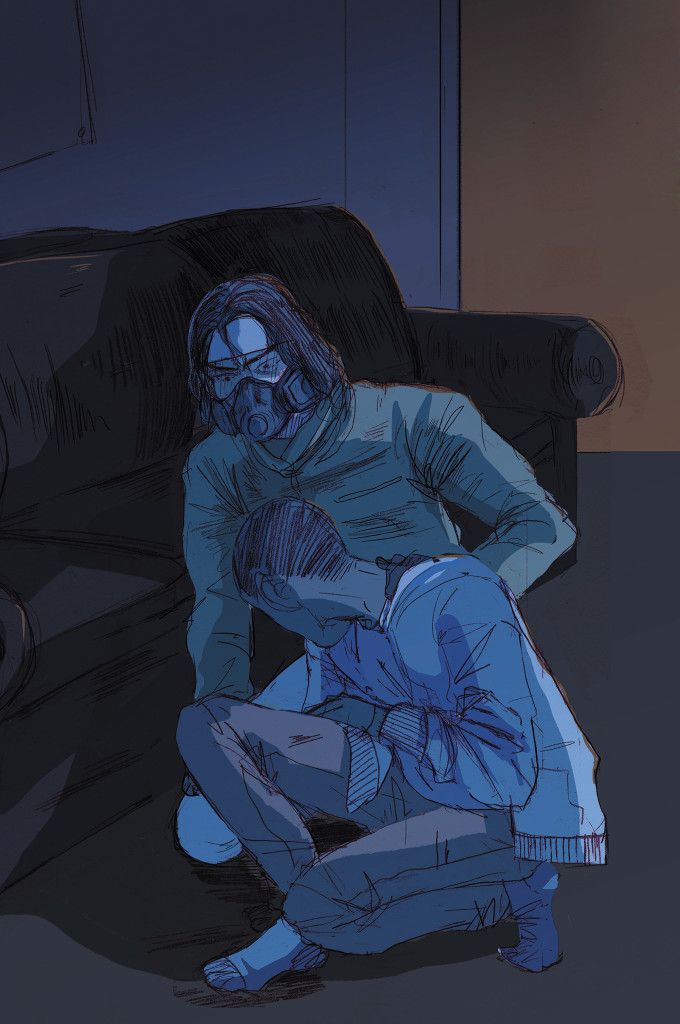
Once inside, I saw the bathroom door was still closed. I called through it, “Hey man, you alright in there?” Wes replied, “I’m sorry dude, I threw up in the bathtub.” I told him that it was OK, I had some food and drinks, and some stomach medicine. I bagged up the supplies in two sets, adding the stomach medicine to Wes’ bags. I opened the bathroom door, slid the bags inside, and closed it again. The stench was almost too much for me. I headed to the far side of the room, then proceeded to use the bathroom cleaner to spray down my hands, every food bag and bottle, every doorknob, and everything I thought Wes had touched. Flipping on the TV, the news said that health department emergency sites would be up by the evening and handing out antibiotics. That came as a great relief. I knew that Wes had the plague — his symptoms matched. And as tough as he was, he wouldn’t make it without the right antibiotic for this strain of the disease.
Before dusk, I headed down to stand in line for hours at the CDC tent in a nearby park. After the long wait, I finally received one blister pack of pills. In tiny lettering, it said “Streptomycin — one every 12 hours.” They wouldn’t give me two packs. One pack per person was the rule. And I wasn’t about to cause a scene with the armed guards in hazmat suits standing ready. Despite the cold and drizzling Seattle night air, I felt hot as I walked back to the hotel. Once inside the room, I slid the pills under the bathroom door and told Wes to take a pill and set the alarm on his watch for 12 hours, to take another.
With a slight sweat on my brow and an unusual weariness, I laid down to sleep. My last thought before slumber came was, I’ll go back and get some pills for myself in the morning.
I vaguely remember waking up to my name being called, and the room being too bright. I also wasn’t sure if the phone had been ringing or not. I remembered throwing up in the bed, and then sliding back into darkness.
Five agonizing days had passed since I had slipped those pills under the door. Wes emerged from the bathroom. He was weak and moving slowing, leaning on the wall for support as he walked. He had lost a lot of body weight, and his clothing was stained with every type of filth that could possibly be emitted from a human body. He looked at the bed that was nearest to the door, and he saw a man lying there, surrounded by dried vomit. Wes pulled the blanket up over the man’s face — to cover those open eyes, waxy and dried out. I had been dead for days.
Conclusion
The pneumonic plague is one of the more serious diseases that can be used as a contemporary bioweapon. The bacterium that causes this form of the plague (Yersinia pestis) is aggressive, able to kill a person within a few days without strong antibiotics and modern medical care. Though this bacterium is naturally occurring, found worldwide in rodents and their fleas, it can also be grown as a living weapon.
Pneumonic plague is far more contagious than the more commonly known bubonic plague, and pneumonic plague doesn’t present the large dark lymph swellings associated with bubonic plague. In fact, pneumonic plague can easily be misdiagnosed as the flu. This makes it an even more sinister weapon, as it could kill a large number of people before the authorities understand what was really happening.
Should this disease become a naturally occurring outbreak or be used as a bio-weapon to attack your area, your best bet for survival is to isolate yourself from anyone and everyone. Zero contact is the safest policy. Of course, this won’t be an option if you’re caring for loved ones who have contracted it, if you have to travel during the event, or if you have to go out to find the right medicine. Let’s face it, a bioweapon scenario like this is one of the scariest we’ve ever presented as a What If? feature, and it’s also one of the more plausible scenarios we’ve ever presented. You’ve been warned.
For more on the pneumonic plague, see: http://emergency.cdc.gov/agent/plague/faq.asp
How would you react to the same scenario as played out by our panel? Share your plan with us on our Facebook page: www.facebook.com/OFFGRIDmag.
[meetourpanel]
More From Issue 12
Don’t miss essential survival insights—sign up for Recoil Offgrid’s free newsletter today.
Read articles from the next issue of Recoil Offgrid: Issue 13
Read articles from the previous issue of Recoil Offgrid: Issue 11
Editor’s Note: This article has been modified from its original print version for the web.


