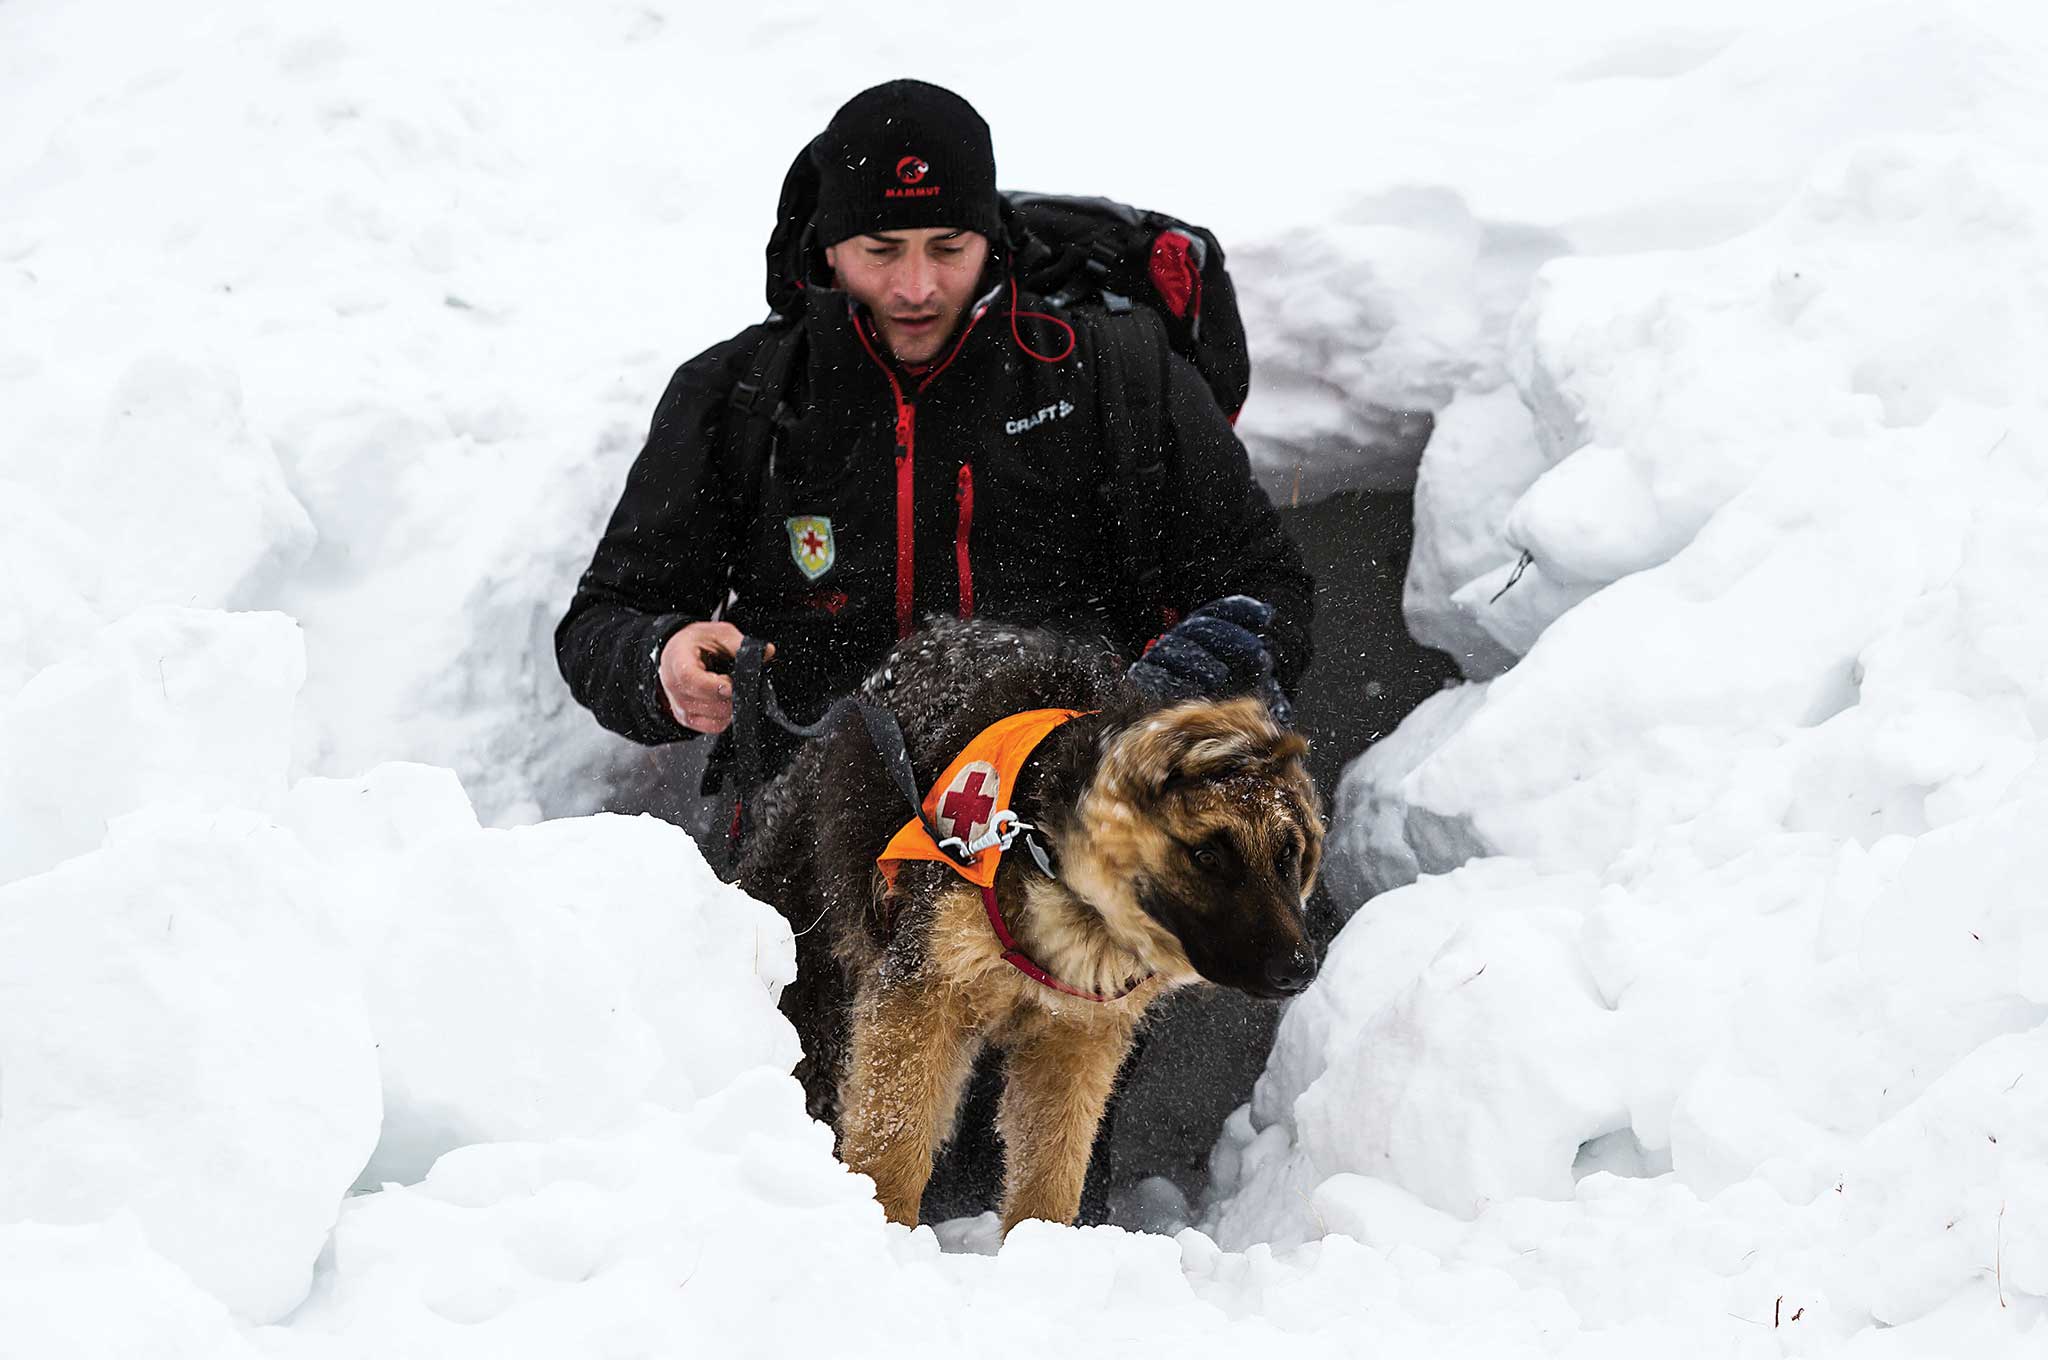
At SHOT Show 2018, we were pleased to see a variety of new “grayman” gear in development and on display. As opposed to the traditional MOLLE-webbing-covered tactical equipment that has become commonplace these days, gray man apparel is designed to blend into urban and suburban environments while retaining capabilities that exceed its subtle appearance. It enables the wearer to be prepared for adverse conditions without screaming “I just spent my whole paycheck at the military surplus store”.
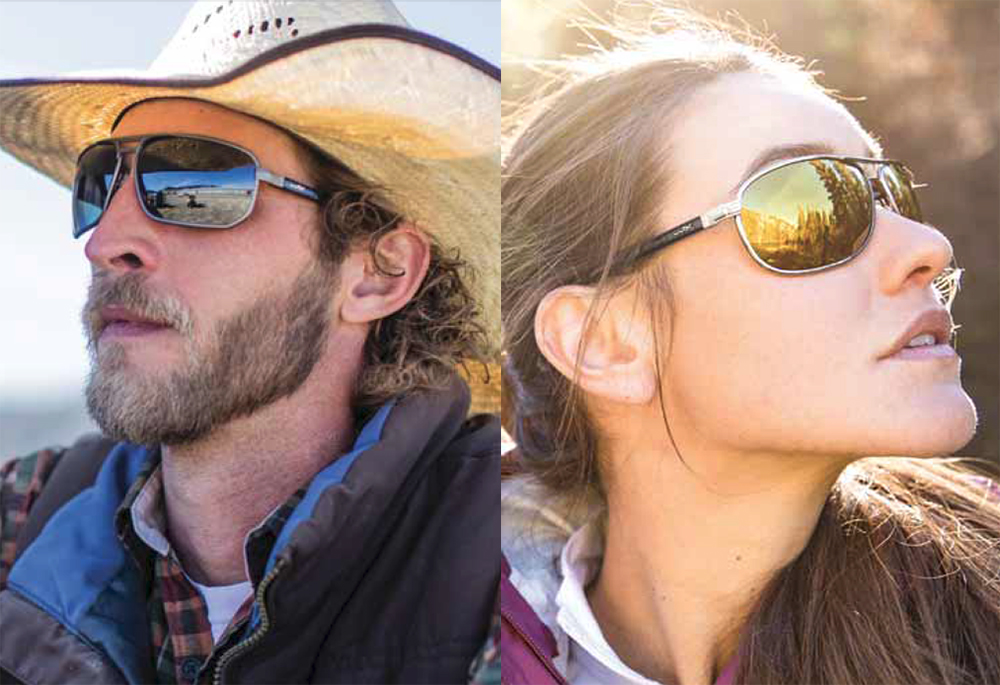
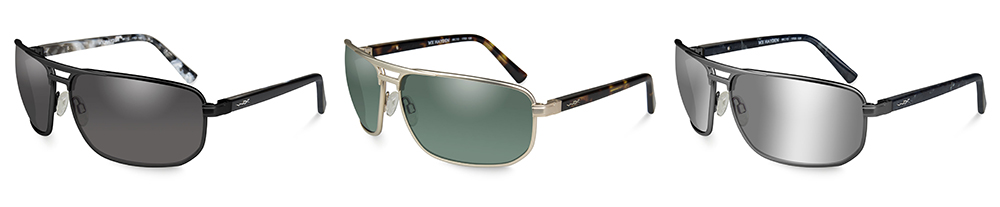
Wiley X has become well-known for its polymer-frame glasses, many of which are popular among military and law enforcement personnel. At SHOT Show, the company unveiled a line of new-for-2018 aviator sunglasses in two styles: Hayden and Klein.
The new aviators feature slender metal frames in a variety of finishes, and polarized and non-polarized lenses in several colors. More importantly, these shades aren’t just for show. Their polycarbonate lenses meet ANSI-Z87.1 High Velocity and High Mass Impact Safety standards, as well as OSHA 1910.133(b)(1)(1) standards. This means that they’ll be capable of protecting your eyes from serious damage, whether you’re hiking, biking, shooting, or watching splinters fly through the air as you chop firewood.
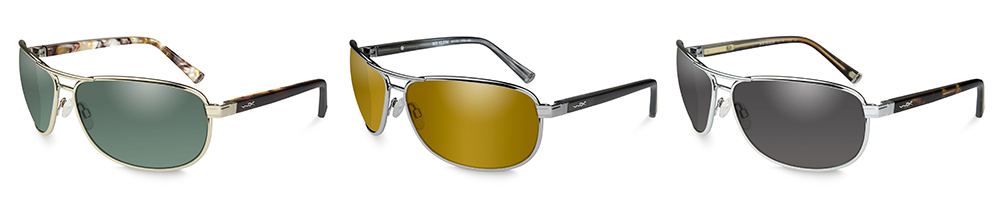
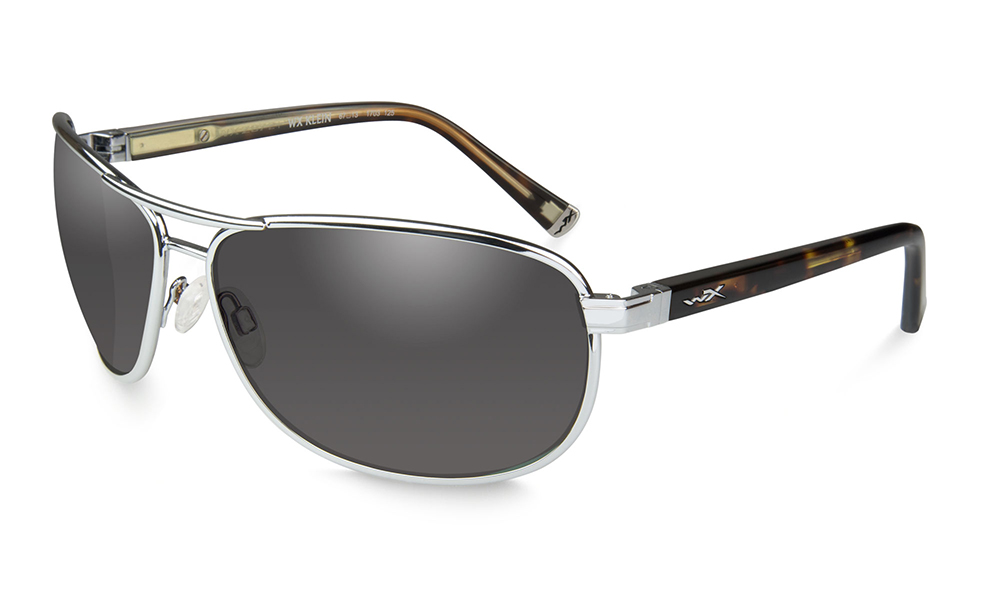
The Wiley X Klein (above) is a more-traditional aviator design, with rounded corners and a smooth oval shape. It’s available in three styles: silver frame with grey lenses (pictured), gunmetal frame with polarized mirrored gold lenses, and gold frame with polarized smoke green lenses.
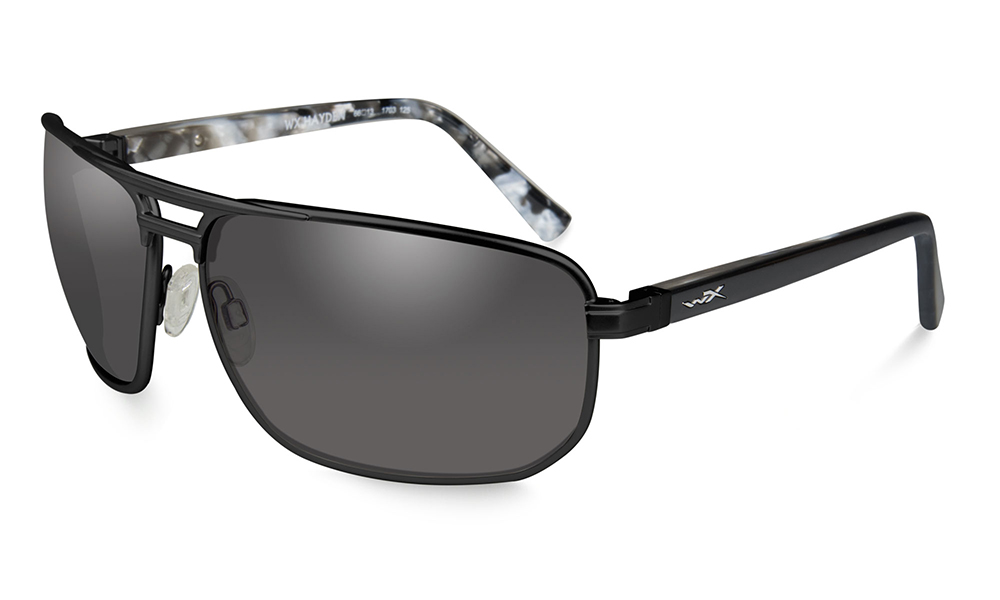
The Wiley X Hayden is a modernized take on the aviator, with a slightly squared-off lens shape. It’s also available in three styles: matte black frame with grey lenses (pictured above, not yet listed online), satin gold frame with polarized green lenses, and matte dark gunmetal frame with polarized silver lenses.
MSRP is $150 for non-polarized models and $190 for polarized. For more information on the Wiley X Hayden and Klein aviator glasses, go to WileyX.com.
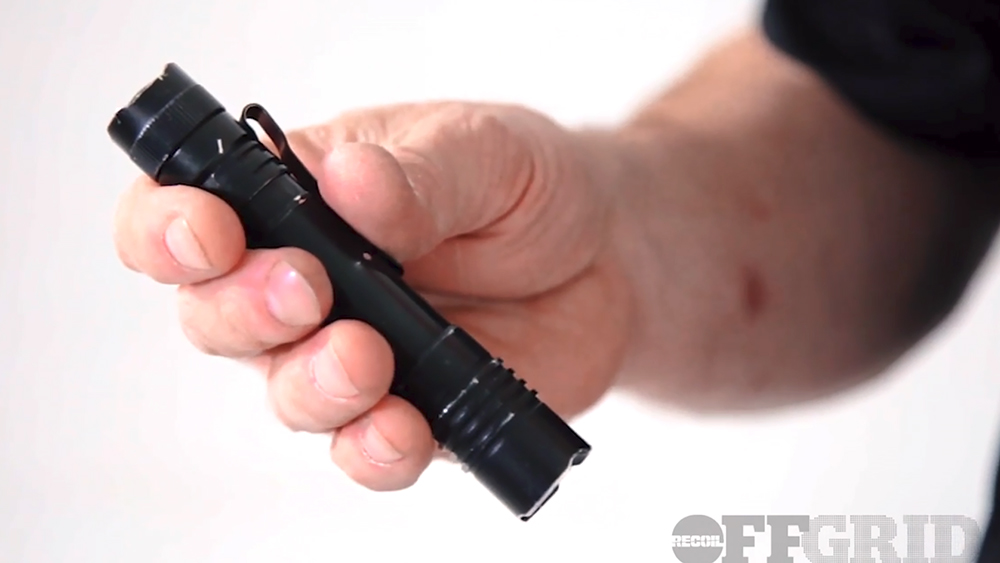
When it comes to EDC gear, there’s always a compromise between size and functionality. While it might be advantageous to have an 18-inch machete in the jungle or a hefty woodsman’s ax in the forest, these large tools would certainly be cumbersome in urban environments. That’s why most of us carry small folding knives — they provide enough of an edge for daily tasks, without excessive weight and bulk in your pocket.
The same philosophy applies to EDC flashlights — you probably don’t need a 1,000-lumen light for most daily tasks. Something small and light with just enough output is often a more practical option.
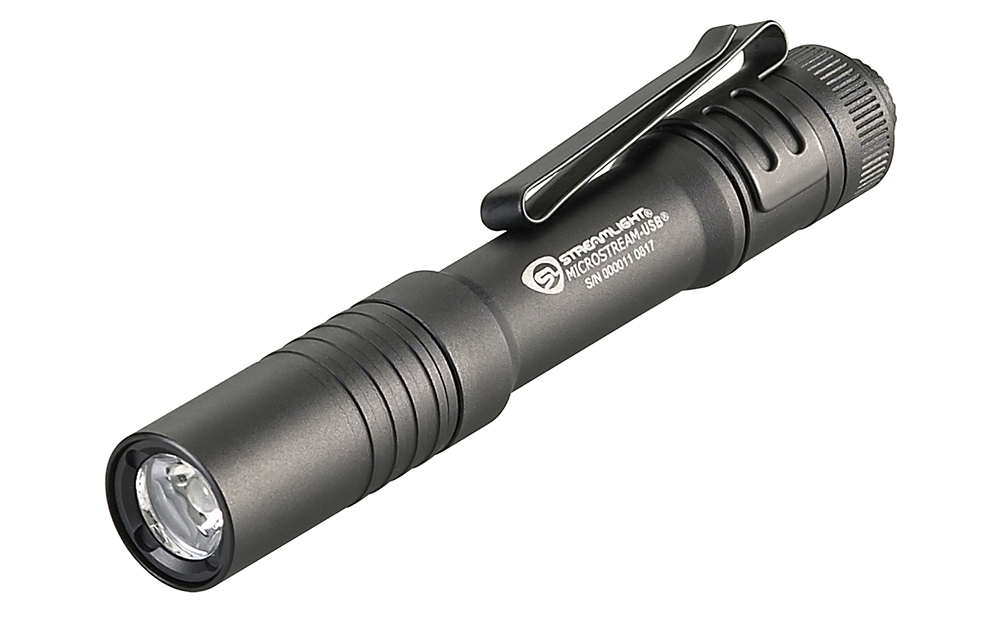
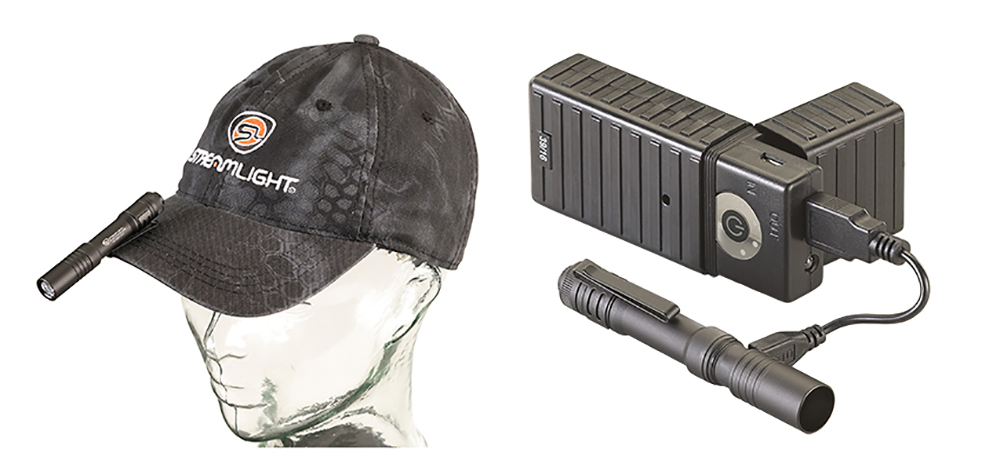
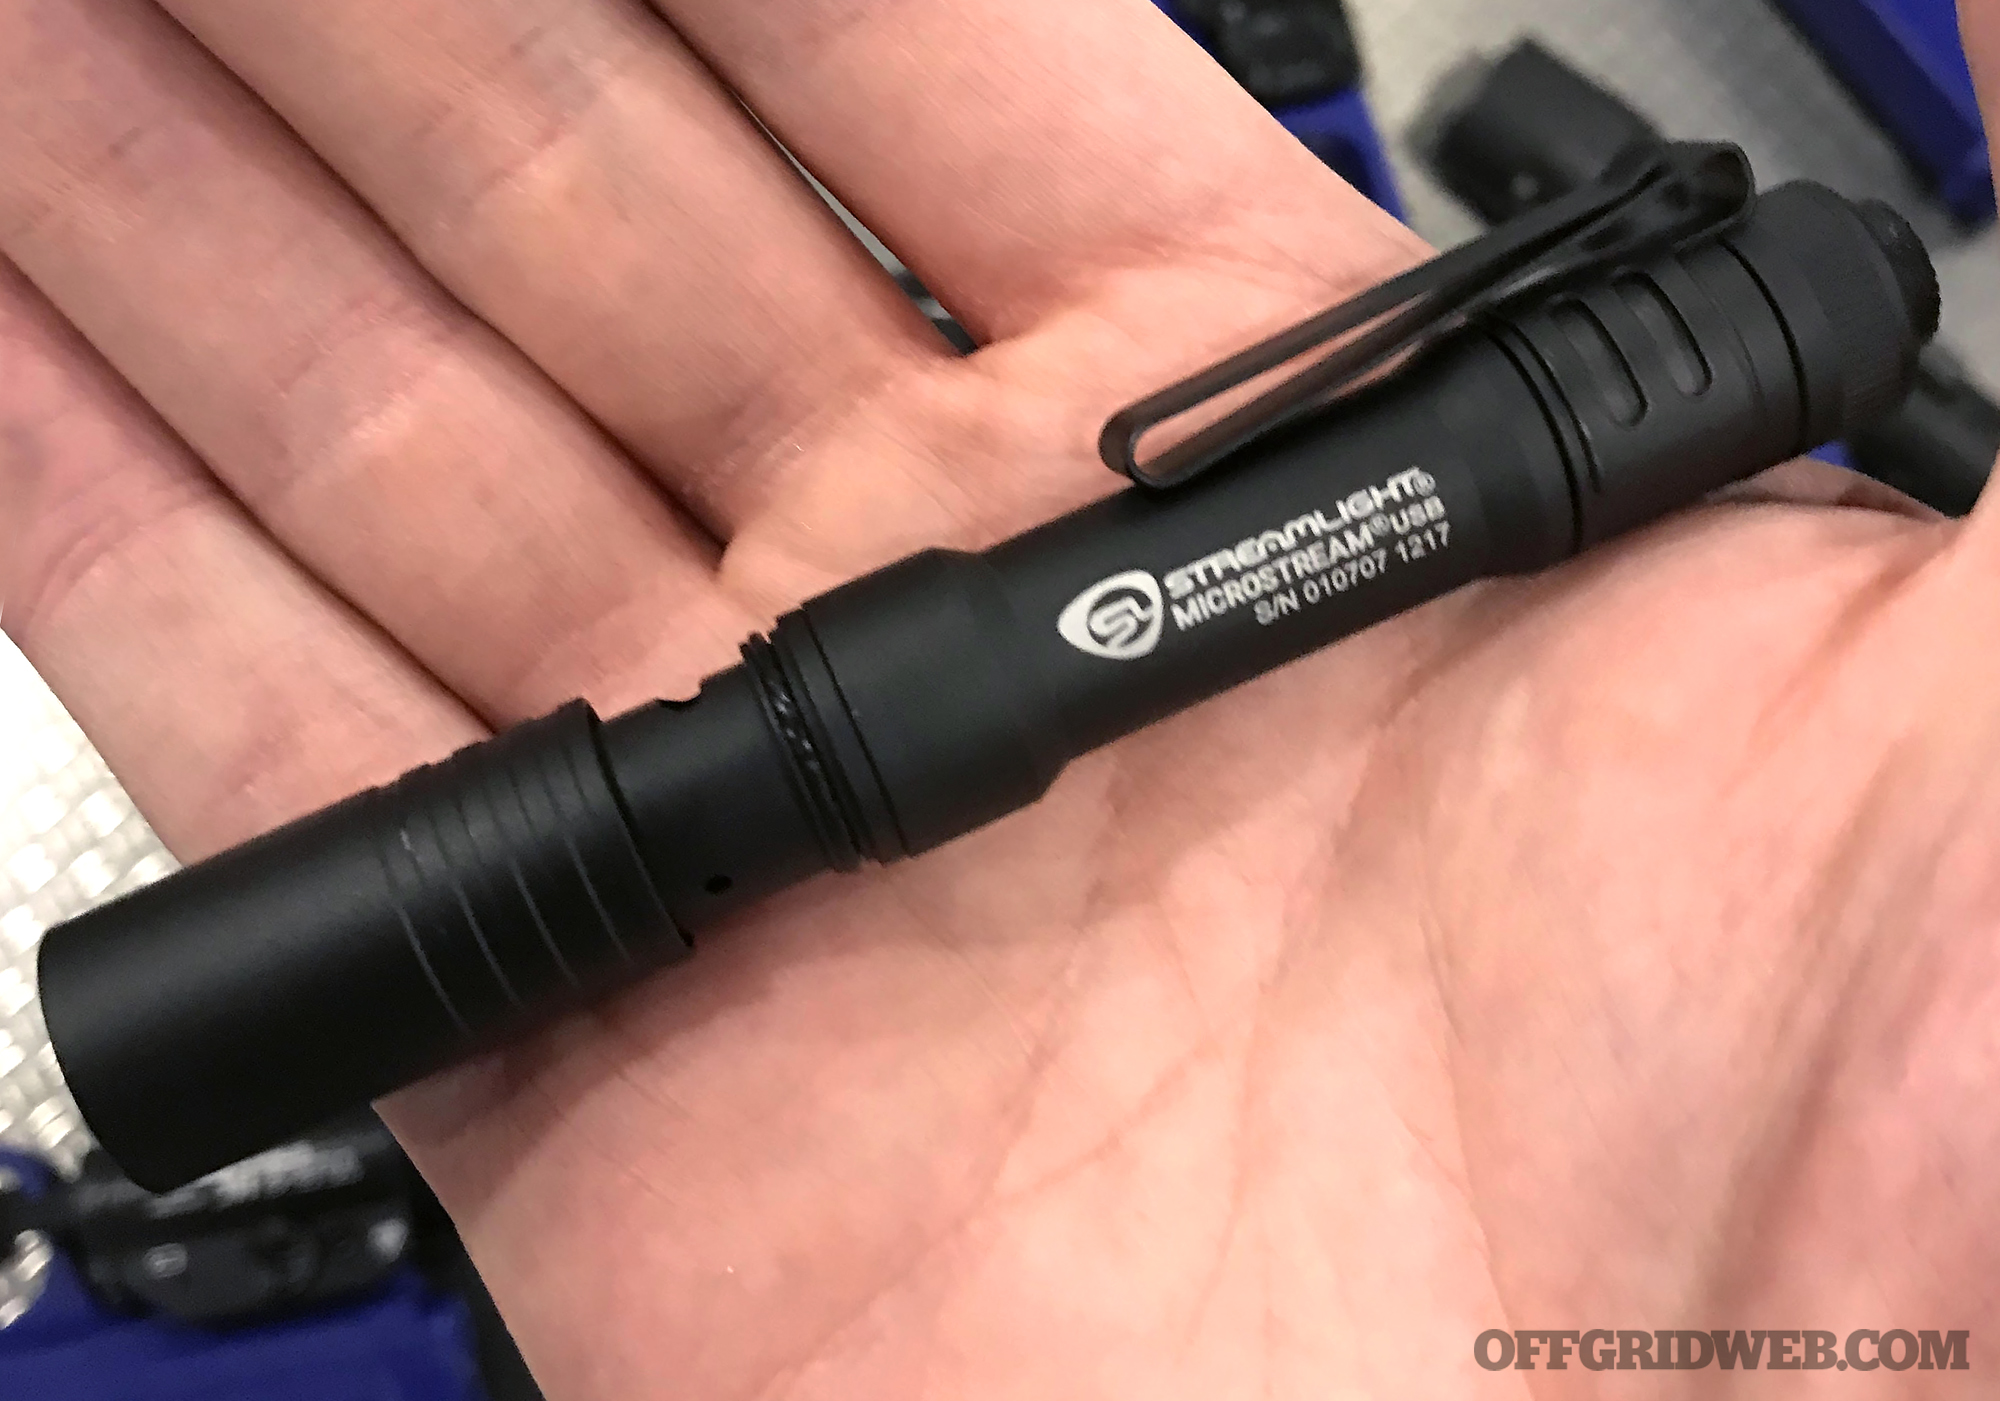
Streamlight’s original MicroStream is a slim and compact flashlight that fits into the palm of the hand. It also has a removable pocket clip that can attach to the brim of a hat for hands-free use. However, the standard MicroStream offers only a single brightness mode (45 lumens) and runs on traditional AAA alkaline batteries. For 2018, Streamlight has released an updated version of this popular design, called the MicroStream USB.
As you should be able to guess by its name, the MicroStream USB is rechargeable via a micro-USB port that’s hidden under a sliding metal bezel. The bezel is sealed by O-rings, making the light IPX4 water-resistant. A 350 mAh lithium-ion battery can be fully charged in 4 hours from a wall outlet or portable power bank, and can be recharged up to 300 times. The tail cap switch includes charging indicator LEDs — red for charging, green for fully-charged.
The MicroStream USB’s output has been substantially increased to 250 lumens. This light also now offers a low-output 50-lumen mode — ironically, that’s still brighter than the original MicroStream. The light’s runtime is 1.5 hours on high and 3.5 hours on low. Aside from these changes, the light looks and feels about the same as the old MicroStream. It weighs just 1.2 ounces and measures 3.87 inches long.
We got our hands on the MicroStream USB at SHOT Show, and felt that its size would lend itself well to most urban EDC loadouts. We appreciate the USB-rechargeable design, since topping off your light at work or in the car is much more convenient than stashing supplies of consumable batteries in all your packs. MSRP for the MicroStream USB is $50, which means you’ll probably see street prices of about $35. For more information, go to Streamlight.com.
In today’s world of 24-hour news cycles, constant connectivity, and digital addiction, the idea of getting lost in nature can seem comforting. But, for anybody who’s ever experienced it, the reality can be downright terrifying. None of us enjoy the feeling of being vulnerable, alone, or in physical danger. But these risks are inherent with any activity that takes us into the wilderness.
If we can figure out how and why people get lost, we can plan to be ahead of the curve and simply enjoy the outdoors. To this end, we’ve assembled a guest panel of search-and-rescue (SAR) experts. All are seasoned professionals with decades of experience, and each hails from a different corner of the country with unique concerns about weather, terrain, and availability of resources.
They were incredibly generous sharing both time and knowledge so that you can be better prepared for your next adventure.
RECOIL OFFGRID: What are the two most common mistakes people make that contribute to them getting lost?
Hank Janssen: There are several recurring themes we see again and again with people getting lost. The biggest one is people going off trail, either because they think they know where they are or try to take a shortcut. Following the wrong trail is also particularly common. Sometimes people go off trail to see a landmark or stream or some such thing and then get completely turned around. The second most common mistake is underestimating the environment they’re in — the impact that things like weather and terrain have on their ability to function and follow trail.
In both these cases we see people make poor decisions that get them into trouble. We have seen people wander over 15-plus miles from the location where they initially realized they were lost. That makes it incredibly difficult for a SAR team to find them.
Joey Nickischer: The most common mistakes made are going off trail and not being prepared for the hike. If you stay on the trail, your rescue is almost guaranteed — it’s the most obvious place SAR personnel will look. For every foot you venture off trail, the odds of you getting found in a timely manner drop precipitously. Hike preparation varies widely, but the 10 essentials [see sidebar] are a good place to start. Along with that goes the knowledge of how to use those 10 essentials! They’re useless without knowledge.
I’ve always preached travel light and have equipment that can be used for more than one purpose. A compass might also come with a mirror that can be used for signaling and a magnifying lens that might help to start a fire. Bandages can be used as kindling, a magnesium fire-starter can be used as a bright flashing light, a tarp can be used to catch rainwater, etc.
It’s also helpful to have an emergency plan in place with a trusted friend or relative. When I go hiking, I chat with a reliable friend to let them know that I’m going hiking and verify that they’re available to be my point of contact should something go wrong. Then I text/email them my itinerary including what trail(s) I will be on, who I’m with, what my destination is, and what time I expect to return. And most importantly, I stick to the itinerary, unless I’m able to verify my friend has gotten word of a change in plans. They’re also informed to notify the authorities if I’m more than an hour overdue.
Gary Presson: 1) Not having a plan. Preplan your route before you even arrive at the trailhead. Enter your important checkpoints into your GPS if you use one or have your route marked on your map. Give a copy of your route, either map or a list of waypoints, to someone who can notify the authorities if you don’t return by an established time and date.
2) Taking a shortcut off the established trail. I’m just as guilty of this as anyone. However, I’ll take a few minutes to study the map and analyze the terrain before I attempt a shortcut. In the Northwest, the trails are there for a reason. Most of the time they’re the quickest and most efficient way to travel even though they can be significantly longer.
Once you realize you’re lost, what’s the most advisable “movement plan?”
HJ: What we recommend is for people to stay where they are, which is hard because people get very anxious and convince themselves that the trail/parking lot is “just up ahead,” frequently getting themselves into more trouble. Having said that, there are a few simple things that’ll help you and the SAR teams — if possible, stay close to water or an open clearing. Water will help you stay alive and a clearing gives us a better view from the air. But do not go out of your way to look for either.
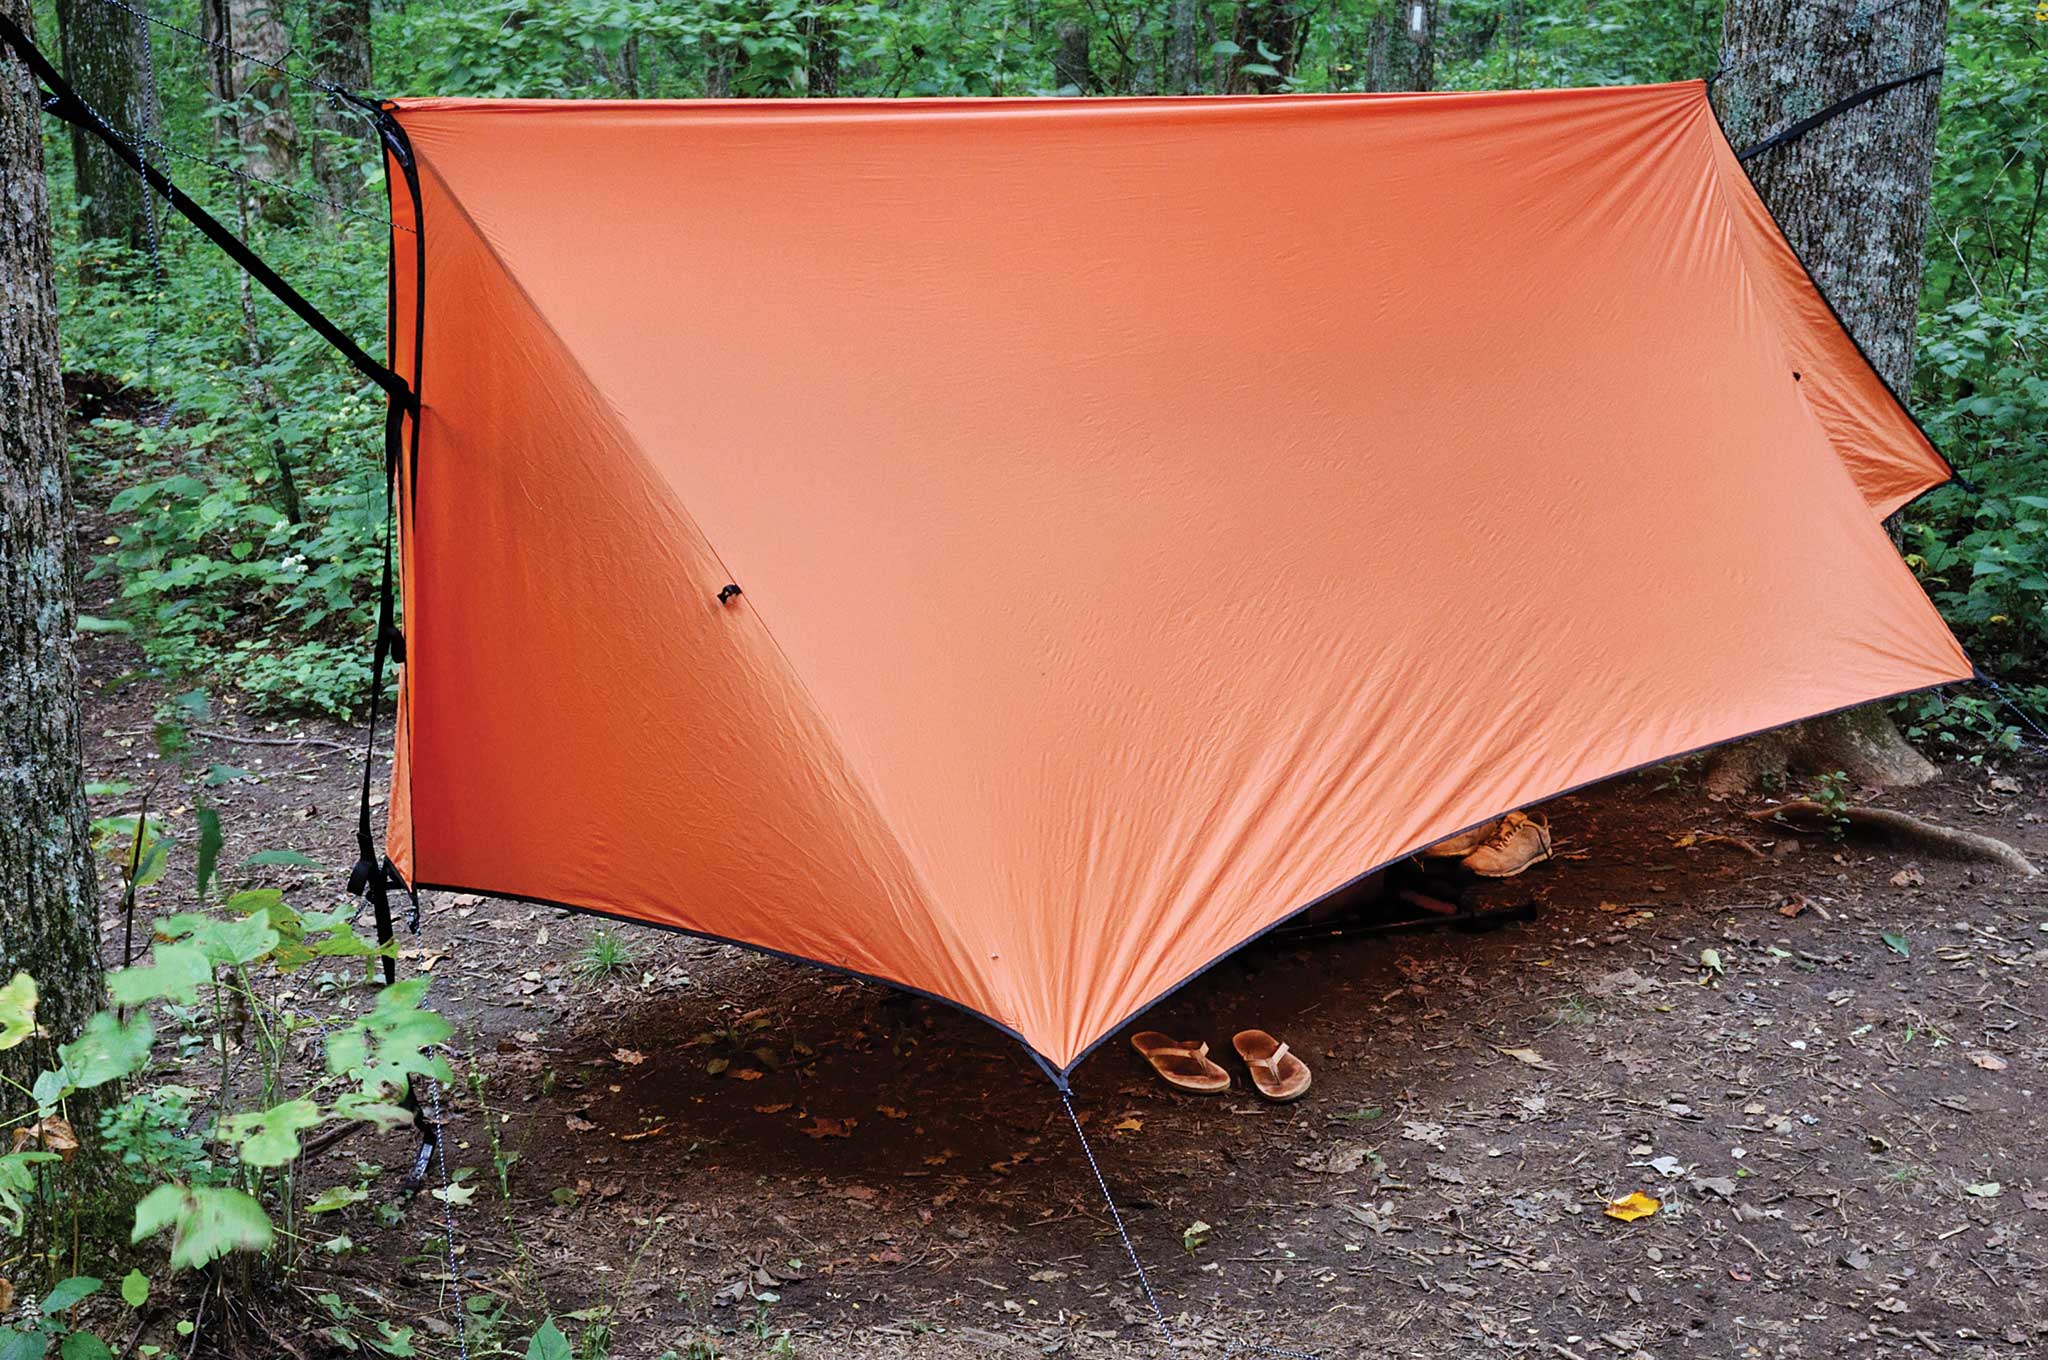
JN: While most experts say to stay put, there isn’t a straight answer for this one. In general, backtrack a little if you’re certain of your track. If that doesn’t solve your problem, stay put, stay as visible as possible, and call for help. You want to make yourself a big, easy target for searchers. That bright blue tarp strung up at eye level can be seen from a long distance, as can a small, smoky fire.
GP: If you are confident that you can backtrack your route, it is probably your best course of action. If you’re totally lost or injured, then stay put.
Regardless of the season, the ability to build a fire is critical for lifesaving warmth and possibly signaling rescuers. Bring more than one way to start a fire with you.
If you had to pick a “most important” skill to get a lost person through until a SAR team can get to them, what would it be?
HJ: The area we do SAR in is the Pacific Northwest; the backcountry is wild, and the weather changes on you very fast. I’ve been on searches where the helicopter dropped me and my dog on top of a mountain at 80 degrees F, and they were unable to pick me up at the end of the day because it was snowing or fogged in. That being said, for survival the most important abilities to have are to create a shelter from the weather and make a fire. But both require some practice.
JN: The most important “skill” is probably patience. Patience that help is coming and to not keep moving from location to location. Patience in building that fire with limited resources. Patience to sit and think about your predicament and how to safely improve it.
Other “most important” skills are going to vary based on your terrain and climate. The rule of three states you cannot live more than three minutes without air, three days without water, and three weeks without food. Work with that knowledge to improve your situation. In a desert environment, water and shelter from the sun are going to be vital. In most other places, your biggest threat is going to be exposure. Touching anything, including the ground, that’s less than body temperature is going to start sucking heat out of you, not to mention the ambient temperature and wind. Insulate yourself against the cold.
GP: In the Northwest, I’d say that shelter building is a very important skill to have. Summer snows in the high country aren’t that unusual, and exposure can set in quickly. Staying in the elements can quickly result in hypothermia, and everything will go downhill from there. You don’t have to look very far for some downed trees to quickly throw up a tarp and get out of the elements. Also, know how to build a snow cave if you decide to trek out in the winter months.
Would you know how to build a snow shelter if your life depended on it. See RECOIL Issue 11 for our article on how to build one.
If you knew before you hit the trail that you were going to get lost, what three items/pieces of gear would you make sure you packed?
HJ: A survival tarp. I prefer those to the lightweight Mylar survival blankets, which are really a single-use item. A survival tarp is usually bright red on one side and has reflective material on the other side and they’re pretty heavy duty. With a survival tarp you can make a shelter, a bivvy bag, an emergency blanket, a rainwater collector, etc. I have been doing SAR for 20-plus years, and I just now replaced the one I got 20 years ago. In SAR training I use this thing all the time. They’re light, cheap, la st forever, and pack down to nothing.
I recently added to my essential survival gear a Garmin InReach Explorer plus. The thing is amazing and I have found few places here where the bidirectional satellite communications didn’t work. It has a map built-in, and you can send text messages via satellite. And I found the battery to last 80 hours or so in the field. But they’re not cheap and require a subscription. I do five-plus-day off-trail backpacking trips, and the thing has changed the way I communicate in the field. But it’s a piece of electronics, so don’t solely rely on it. Our teams always have a GPS unit and paper map of the area as backup. At a minimum, try to have a map and compass and know how to use them.
Fire-starting material. Do not rely on one way to light a fire. Have two or more different ways to start a fire. I carry a cheap BIC lighter, a traditional ferrocerium rod and metal striker (they take practice to use effectively), and waterproof matches in a waterproof case. Additionally, I have dry fire-starting material — usually burlap string or fire-starter blocks.
I know I’m exceeding three items, but also something to filter or purify water with.
JN: Water, map, and compass. Almost everything else can be improvised.
GP: 1) A tarp. Get out of the elements as quickly as possible. 2) Fire-starting gear. Once you get out of the elements, stay warm. 3) A good multipurpose knife. There are hundreds of different models to choose from. Some even have compartments for fire-starting gear and other survival equipment. Is there any last advice or words of wisdom that you’d give to someone awaiting rescue?
HJ: Getting lost is surprisingly easy. We get on average 50-plus SAR requests a year, and we’re a small volunteer group. Pack a few essentials if you go out like water, food, and the items I list above, even if you only go out for an hour or so. Always let people know where you’re going, call or text a family member of friend telling them where you are and when you have gotten back. Backcountry SAR starts from the last known location, and we work out from that. It’s hard to do that if the only thing we know is that you didn’t come home, but never told anybody where you went.
This one is easier said than done: Do not panic when you get lost. Take a deep breath, assess the situation and try to stay where you are. Your first priority is to keep yourself and whomever you’re with safe.
It’s amazing what shelter, fire, and food/water will do to raise your spirit and significantly increase your chances of survival. You can live without food for a while, but water is essential.
Do not feel discouraged if you’re not found within 24 hours, here in the PNW the cavalry is usually mobilized to come find you, and we don’t give up after 24 hours.
Even a small tarp can be an improvised shelter or rainwater collector. They’re light, don’t take up much room, and can save your life.
JN: The No. 1 most important thing is to be educated. Be educated about how to use your equipment, be proficient with a map and compass, and with survival in your locale. Even Les Stroud, TV’s Survivorman, educates himself with local survival skills before each adventure. Seek out local experts or join local outdoor clubs to learn some hands-on basic skills. If you can’t do that, read as much as you can. A myriad of books and articles have been written on the subject of survival, hiking, and camping. Read them and then practice using those skills in a safe place, before you need to use them in a potentially life-threatening scenario.
GP: Stay calm and prioritize which tasks need to be accomplished first. Always let someone know where you’re going and when you expect to return. If you’re a hunter and not sure of your route, then at least let someone know which areas or creek drainages you expect to be in. A small first-aid kit with a couple of ACE wraps and SAM splints isn’t that heavy and doesn’t take up a lot of space. These items can make the difference between being able to make it back to the trail head/camp, or spending an unplanned night in the woods.
10 Essentials to Hiking
The 10 essentials varies a bit from person to person and locale to locale. What you would carry in the forests of Maine is somewhat different than the tundra of the arctic or the deserts of the Southwest. Here is certified SAR tech Joey Nickischer’s 10 essentials list.
1. Water: Sufficient for environment, but 2 liters is a good reference point 2. Map: Paper topographic trail map preferred but others might suffice 3. Compass: Orienteering type, with sight (such as the Silva Ranger) 4. Flashlight: Something better than a $0.99 special 5. Knife: I’m a big fan of the older USAF survival knife, but even a small Swiss Army style or multitool is good. 6. Fire-starter: Magnesium fire-starter has been my choice for decades. 7. First-aid kit: Basic stuff including Band-Aids, gauze roll, tape, ACE bandage, and moleskin 8. Whistle: This is for signaling if you need assistance. 9. Extra clothing: Type depends on climate and weather conditions, but a change of socks, a hat, etc. 10. Shelter: Even a simple tarp can help keep you dry and warm, plus the typical royal blue stands out better than blaze orange in most environments.
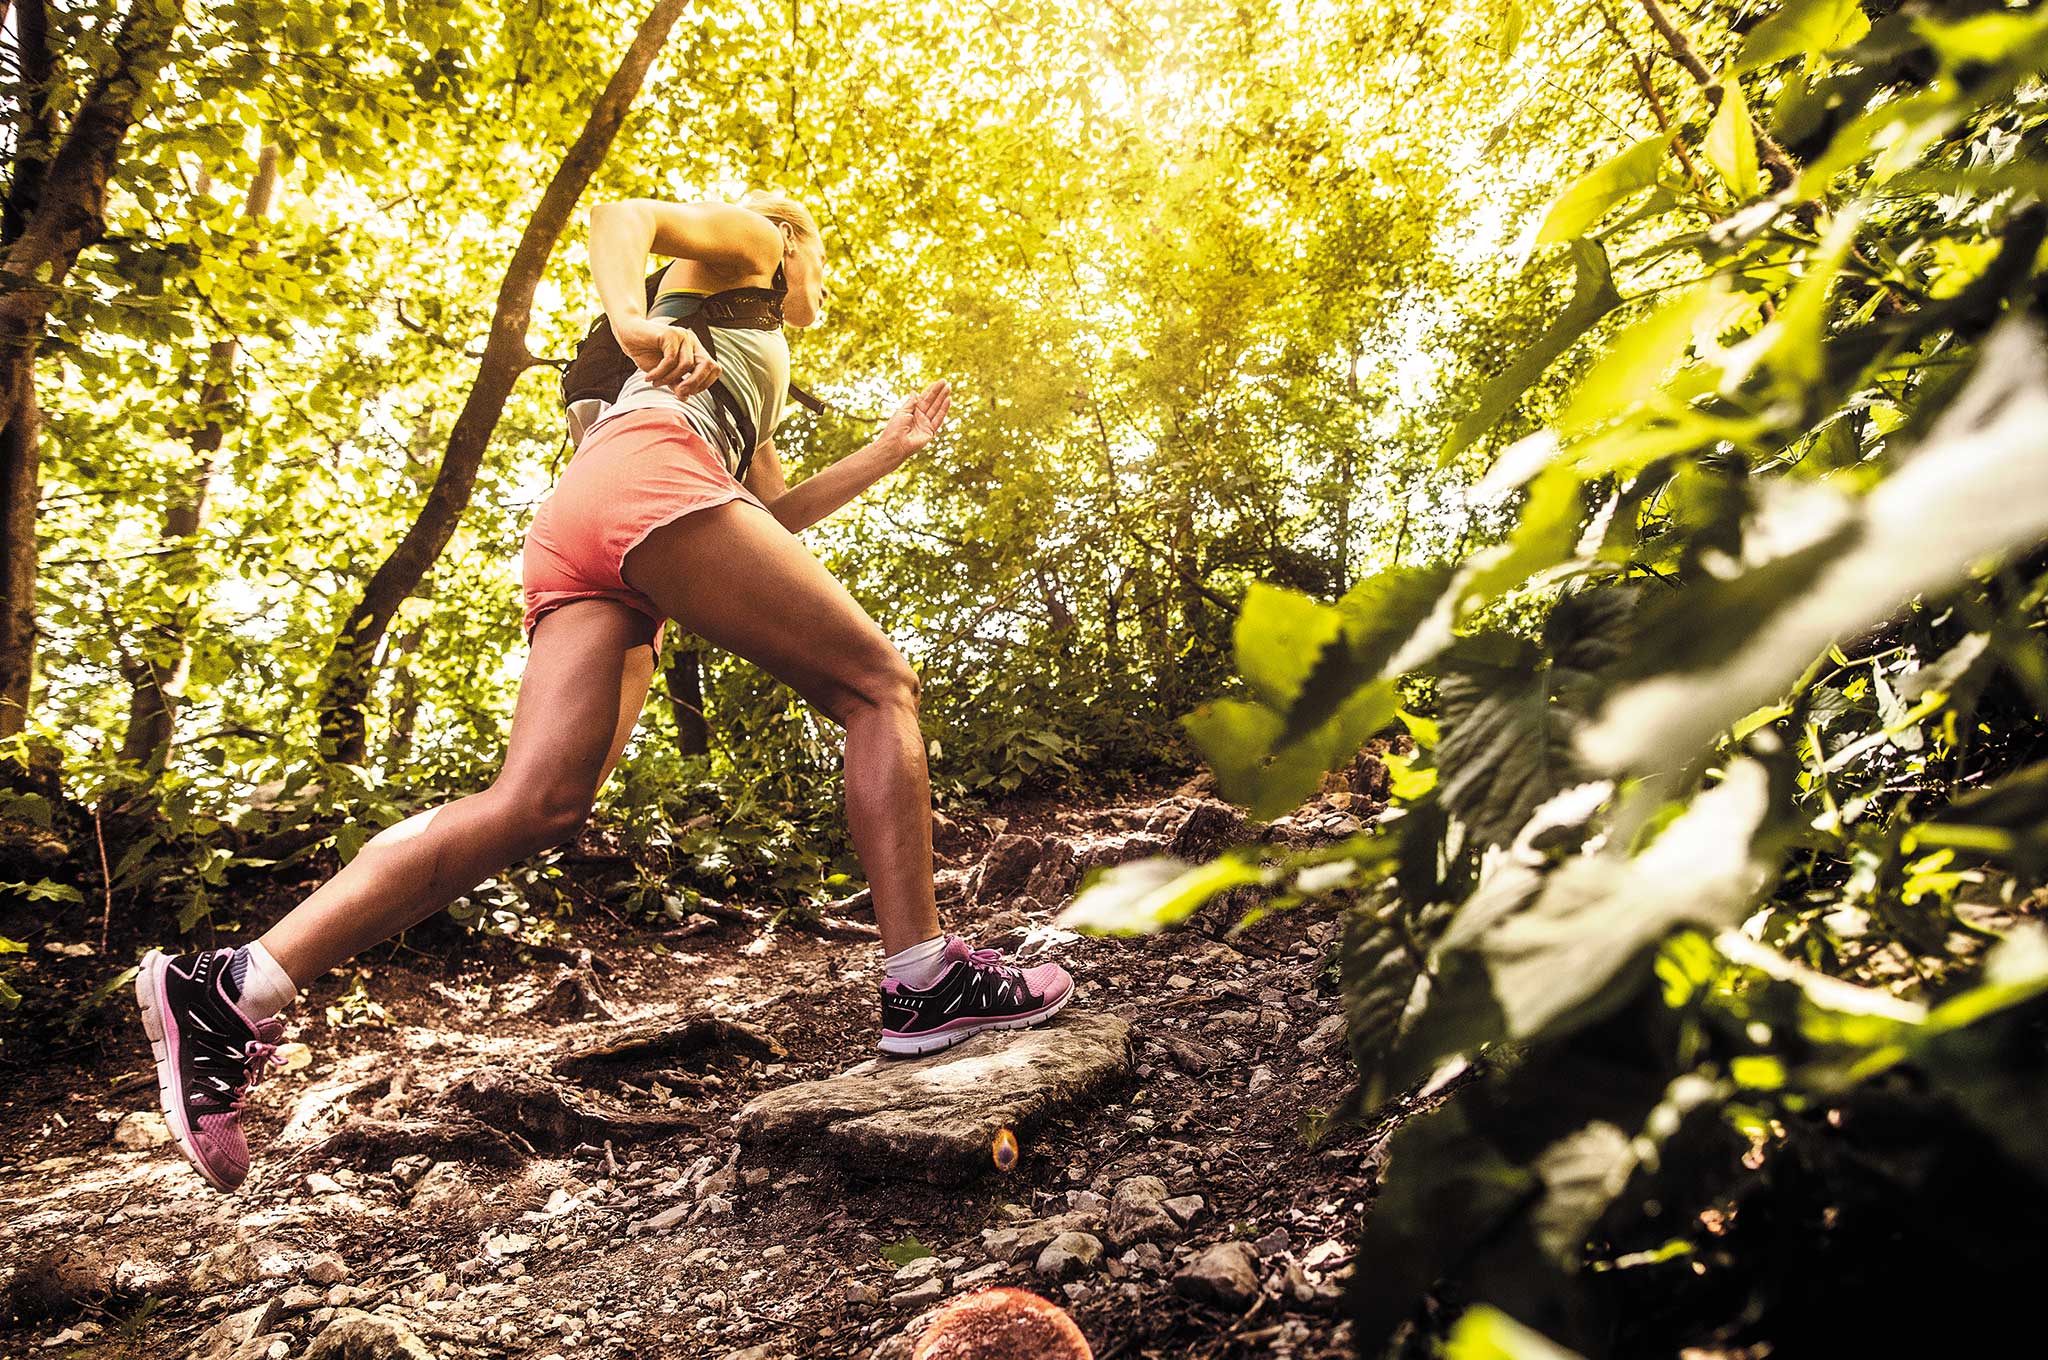
As we often reiterate, preparedness involves more than just gear, skills, and knowledge. There’s a physical element to preparedness that must not be overlooked. In an emergency situation, you may need to hike miles uphill with a fully-loaded pack, sprint several city blocks at a moment’s notice, swim ashore from a boat, or lift a heavy log off an injured friend. All of these require a certain level of strength and endurance.
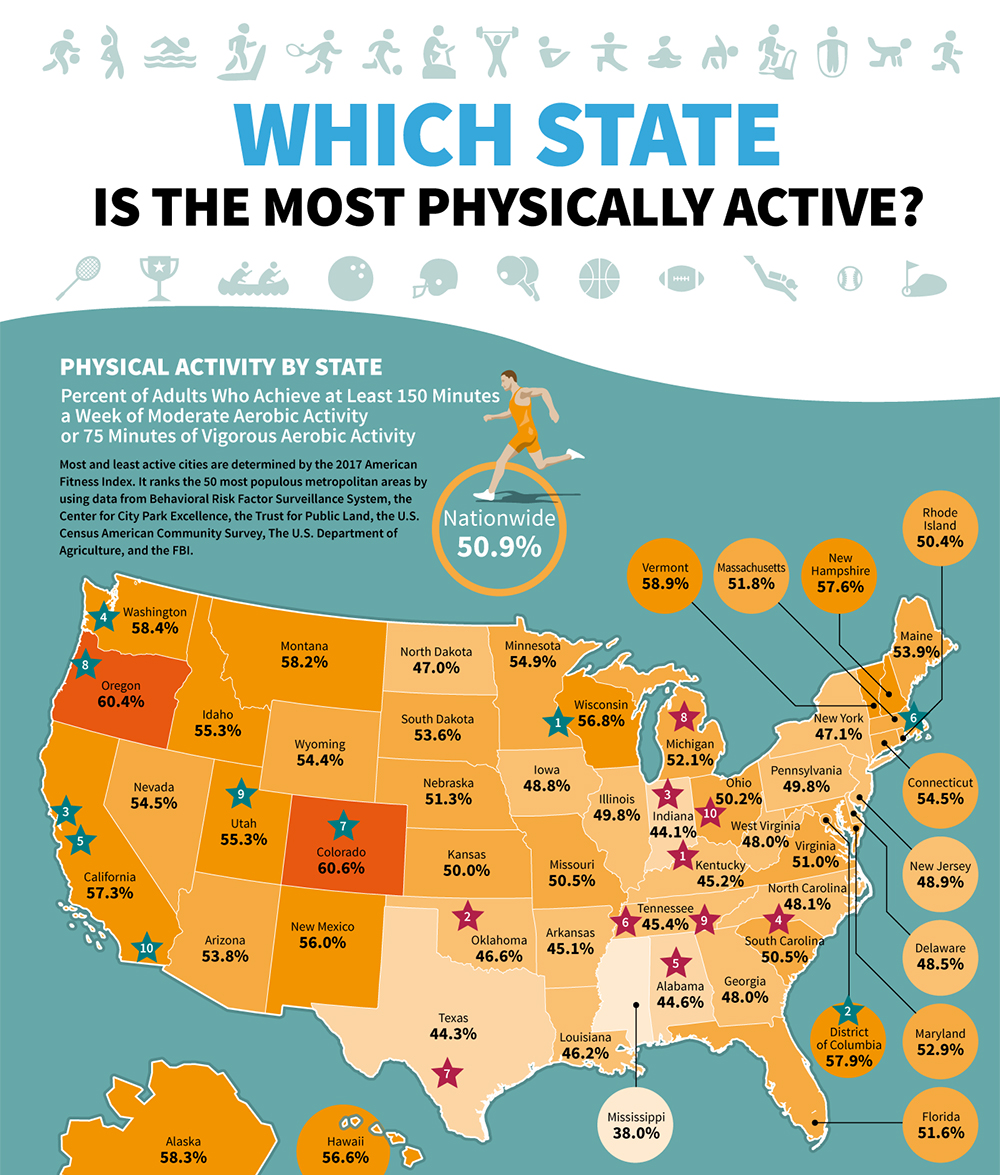
Now, we’re not saying you need to be a greased-up bodybuilder with a hyper-specific diet and workout routine, but you should at least have a reasonable level of physical fitness. Statistics tell us that some parts of the United States tend to have a higher distribution of physically-fit individuals than others, and this data has been compiled into an infographic by AAA State of Play. This information provides an indication of how likely it is for people in your state to be in shape — that could mean you, your friends and family, or the criminal who’s trying to run after you.
The graphic shows the percentage of adults in each state who participate in aerobic activity (i.e. cardio) each week, and the percentage of adults who participate in “muscle-strengthening” activities at least twice per week. Click here to download a full-size version of this graphic.
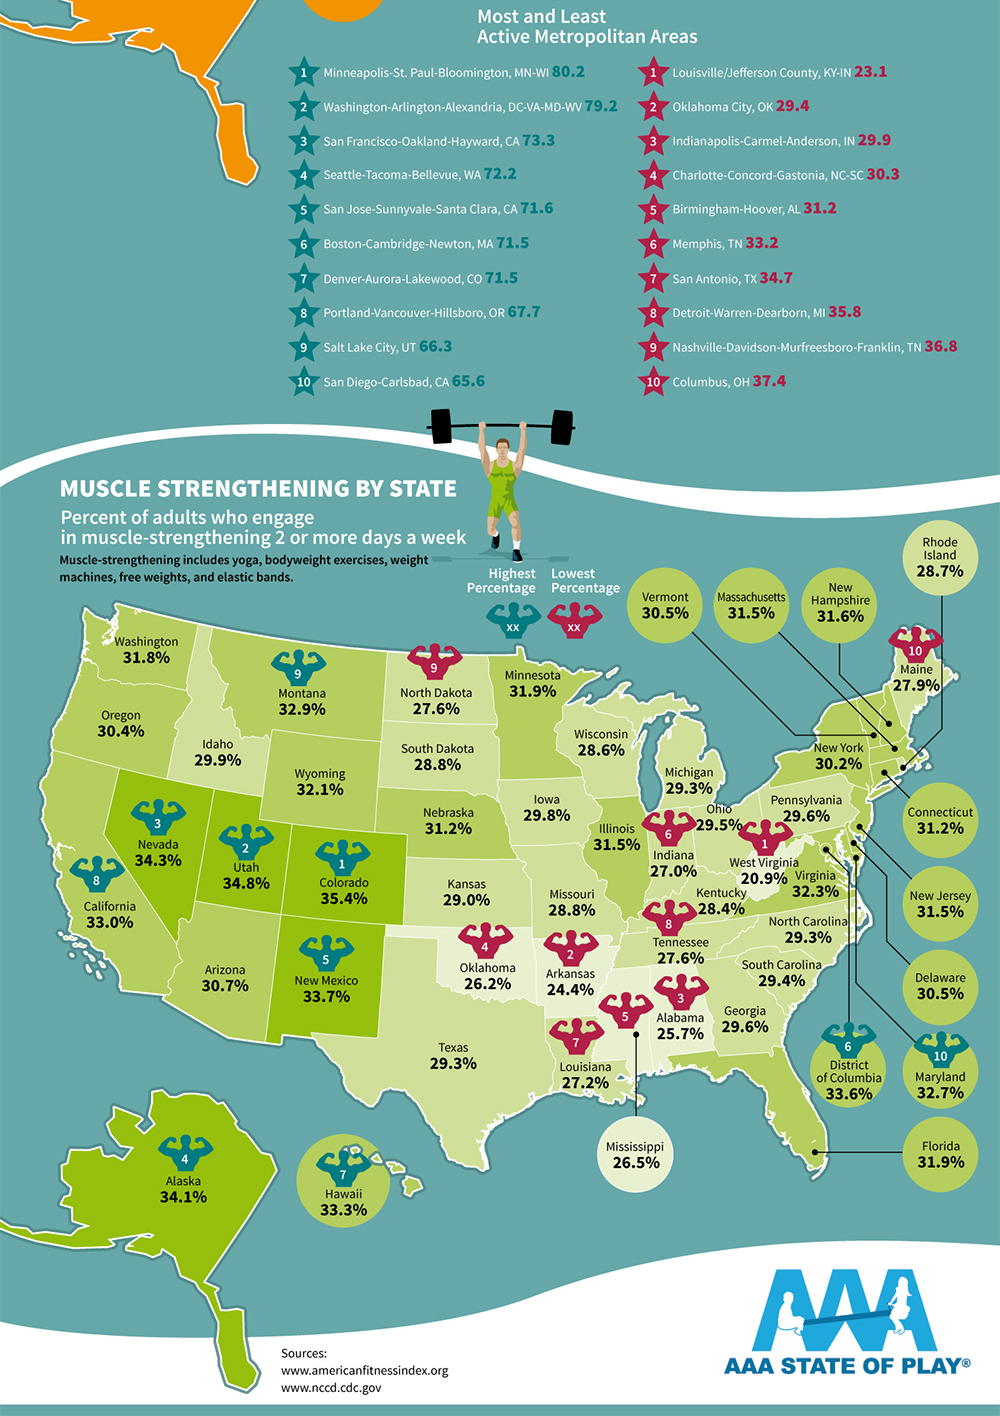
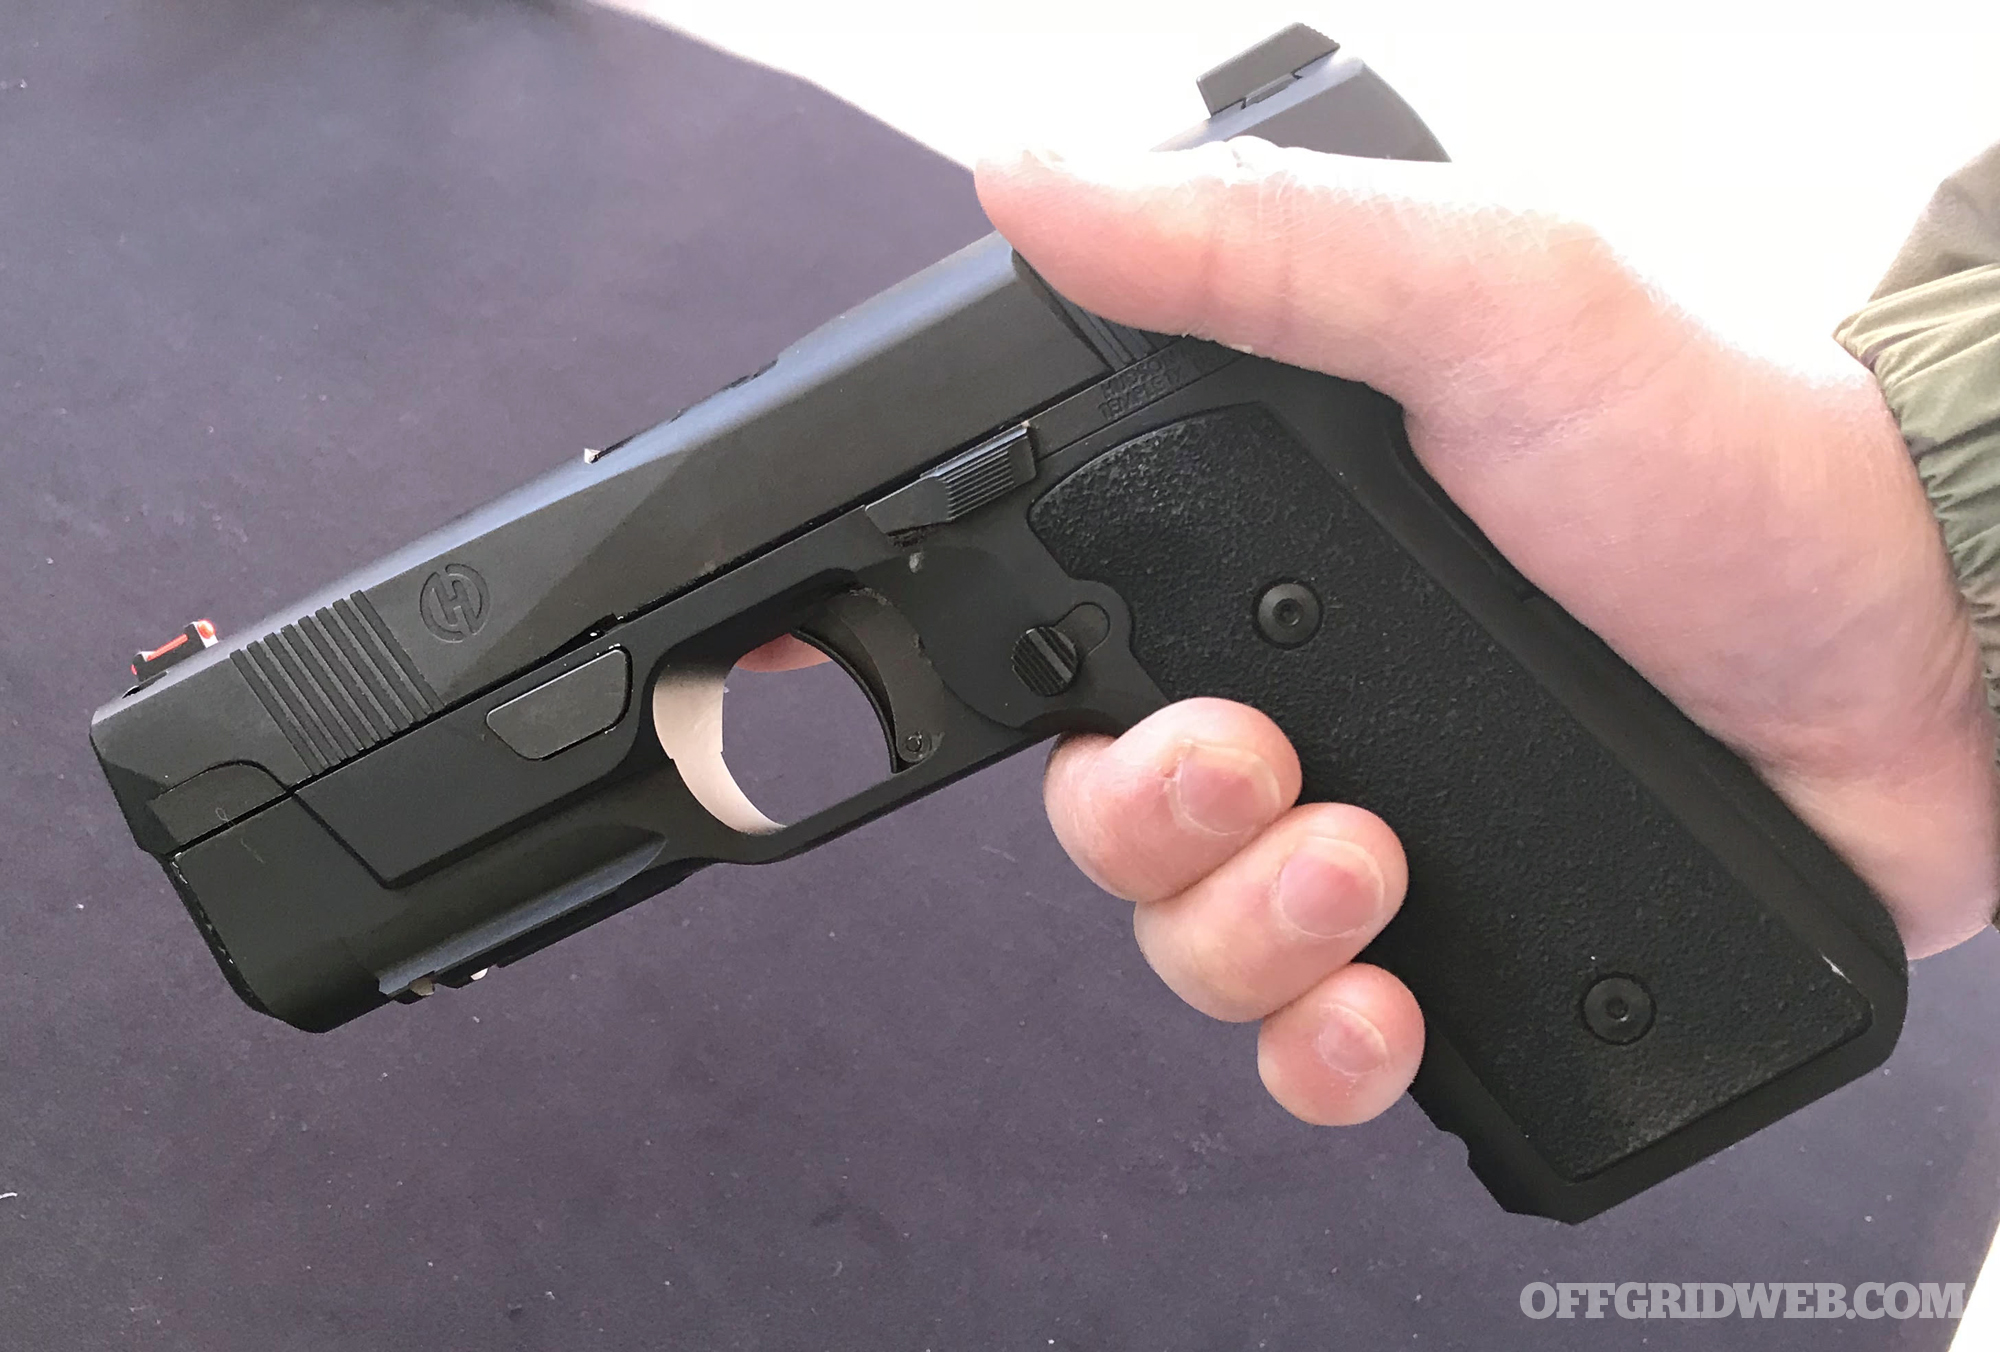
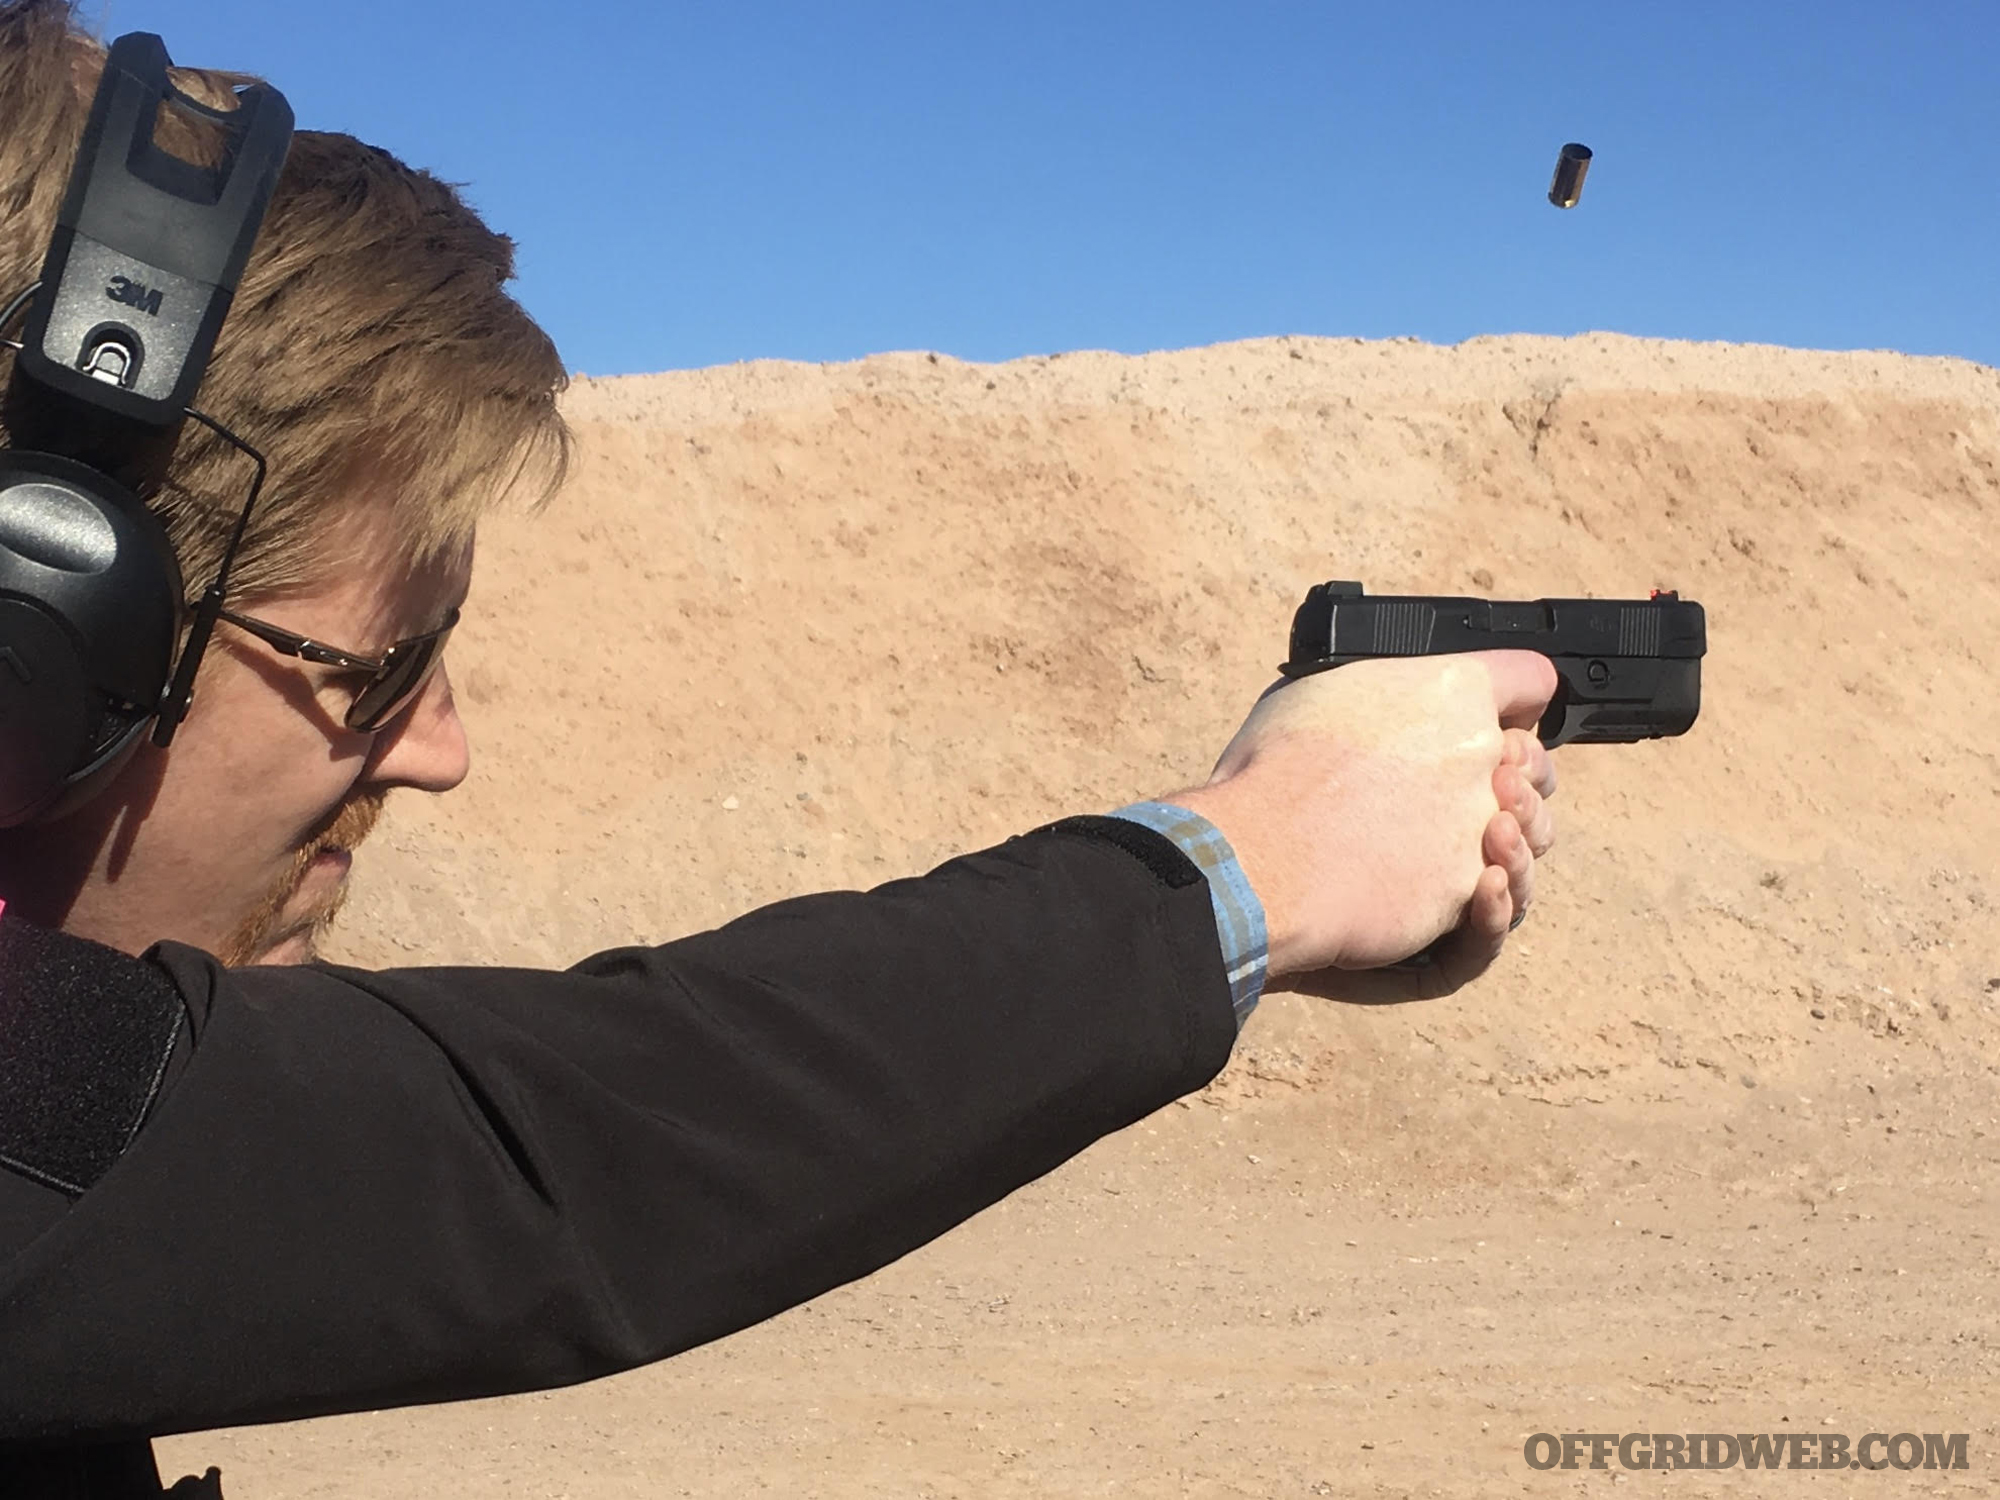
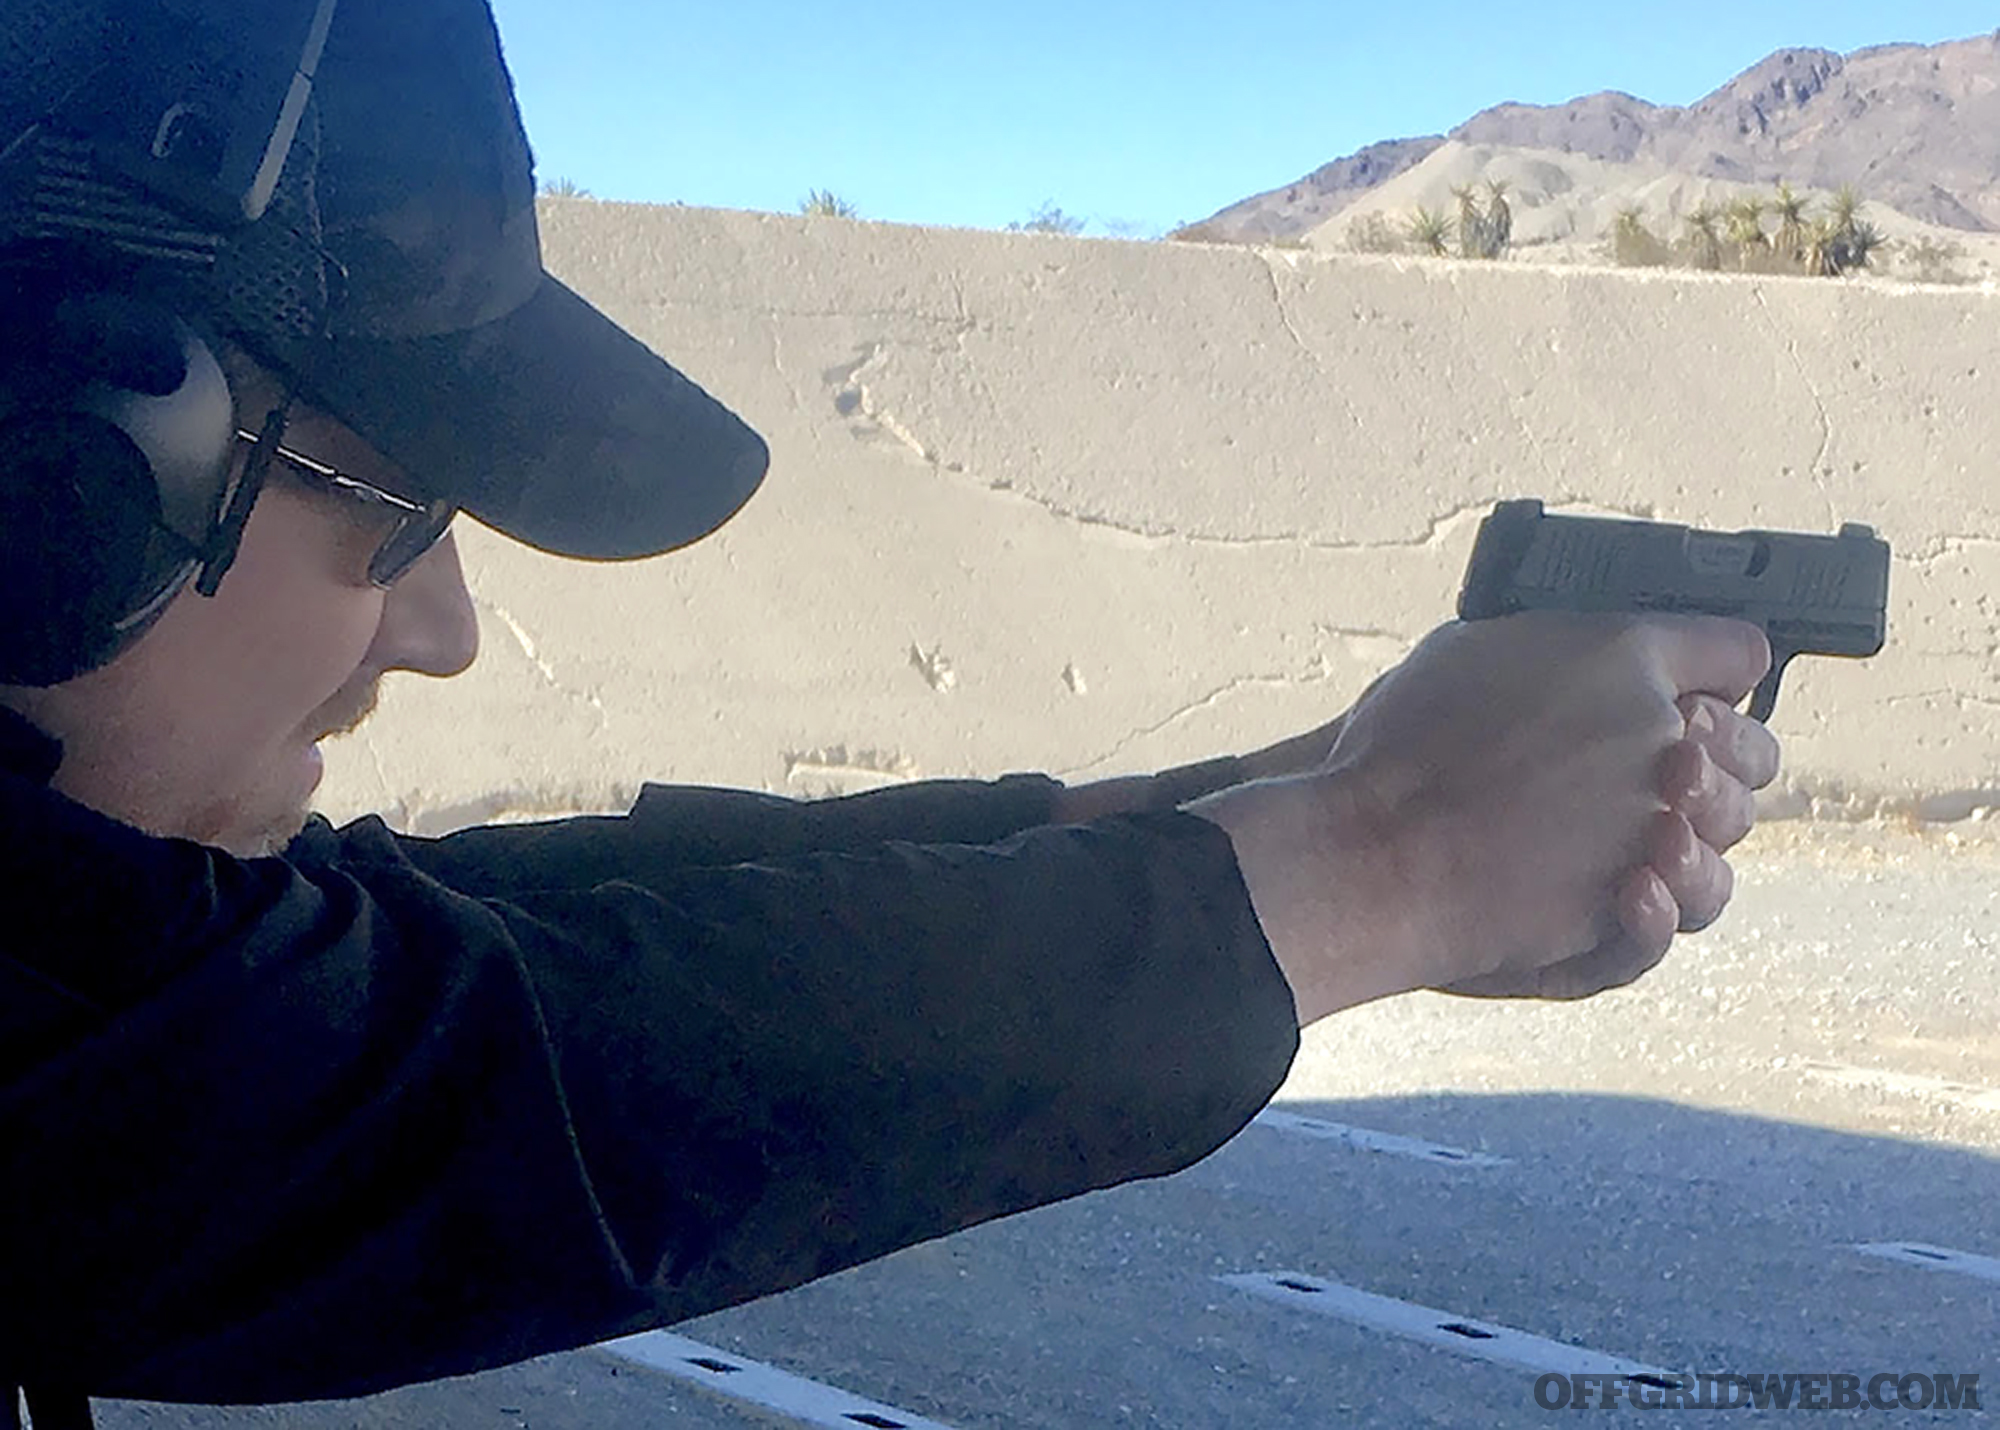
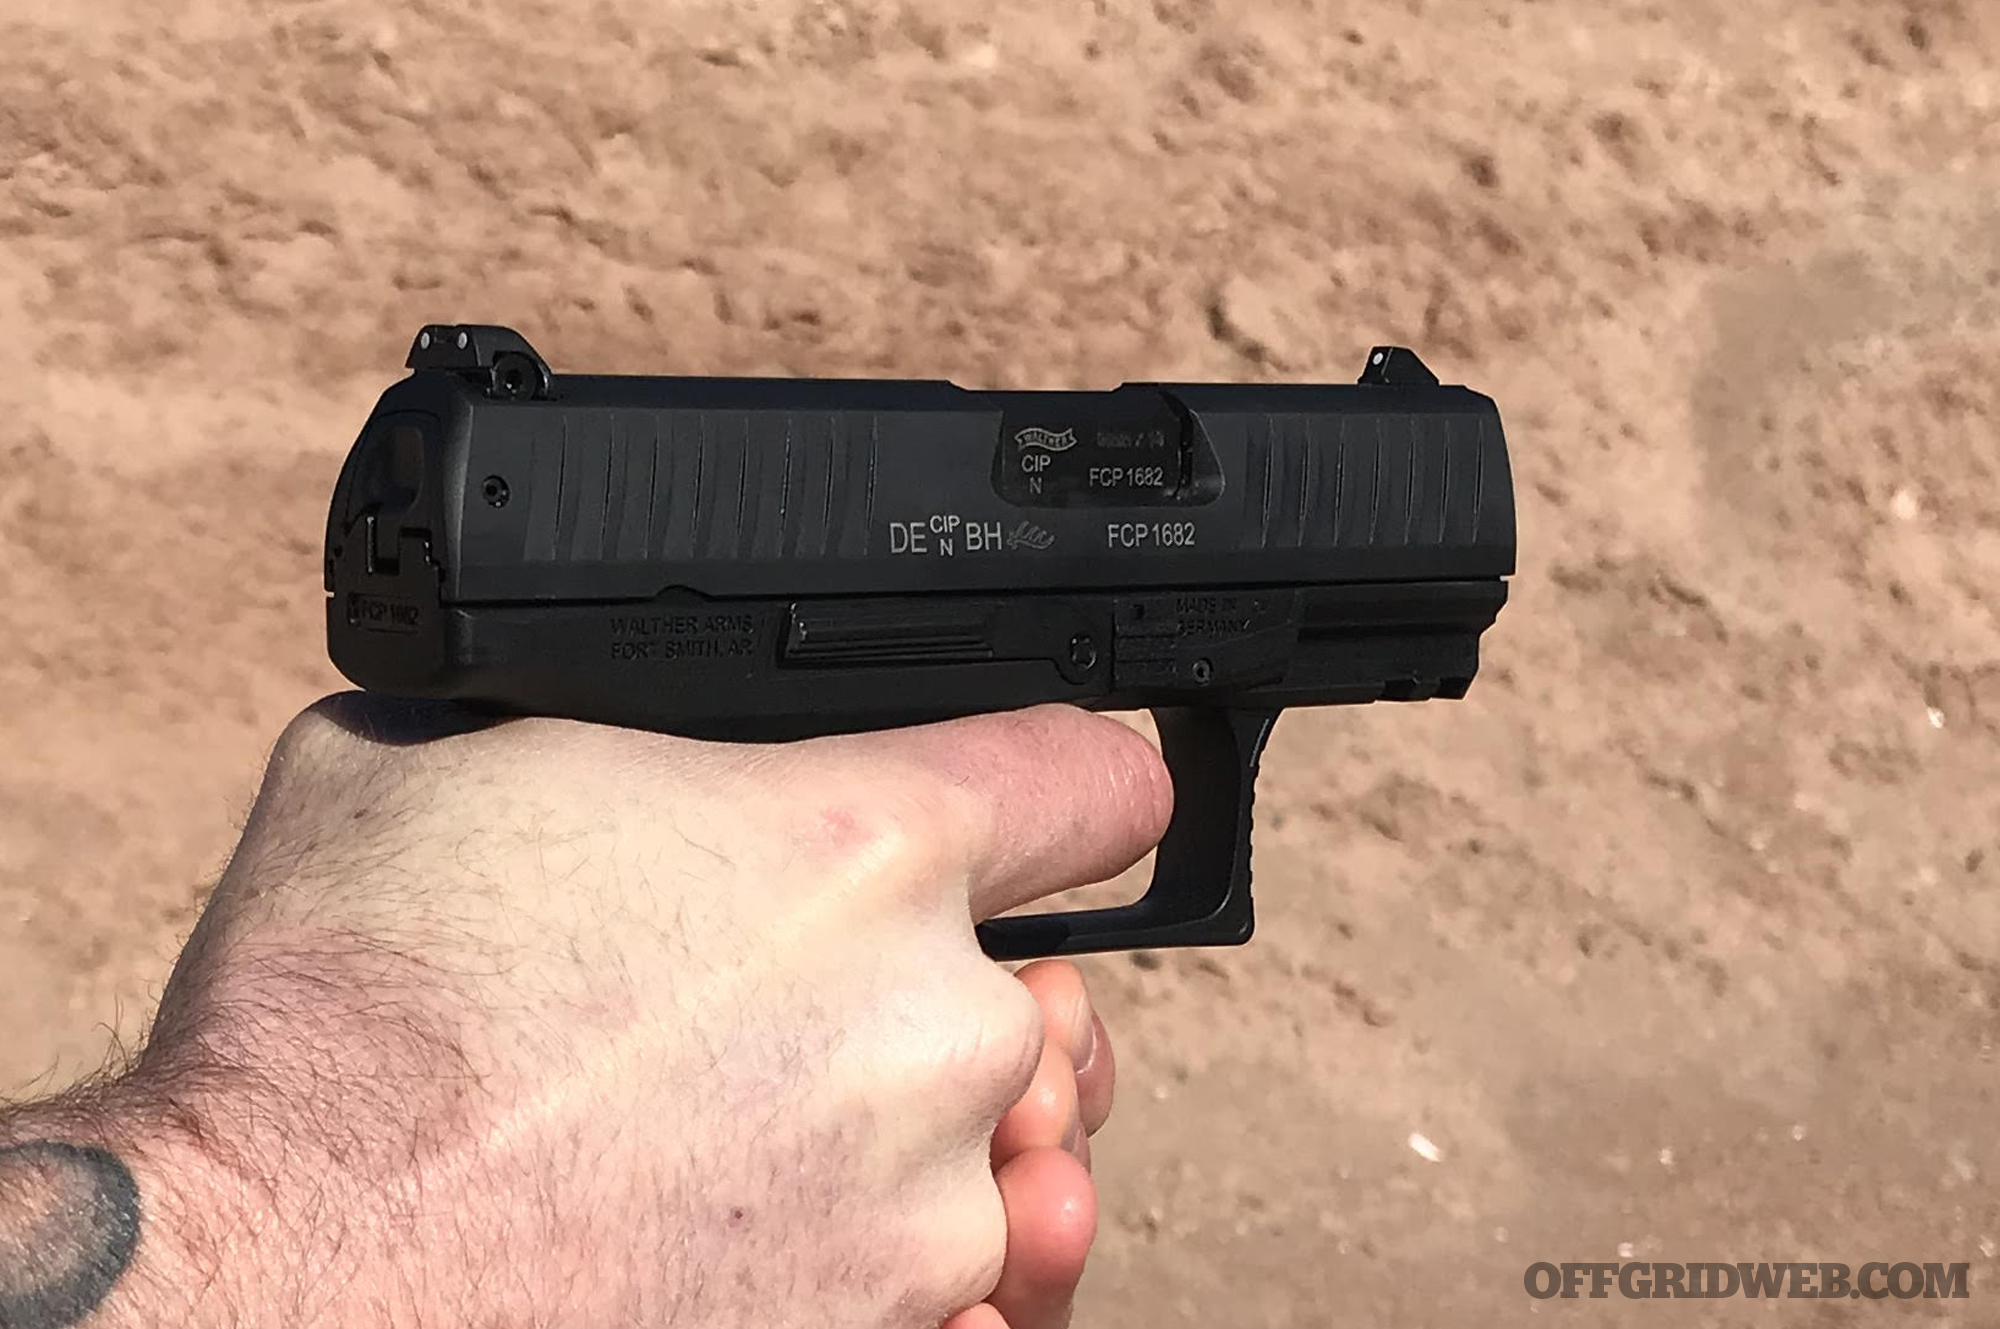
Last week at SHOT Show 2018 in Las Vegas, we had the opportunity to get our hands on four new 9mm handguns and put some rounds down range with each. These included the Archon Type B, the Hudson H9A, the SIG Sauer P365, and the Walther PPQ SC. Below, we’ll share a quick recap of each pistol:
Archon Type B
The Archon Firearms Type B, formerly known as the Arsenal Stryk B, is a new polymer handgun with a 15+1 capacity. Its low bore axis and square-edged “grip mapping” texture made it easy to control. We did experience a stovepipe failure to eject near the end of our first magazine, but the guns had been run continuously for several hours by that point of the Industry Day at the Range, so it may have simply been in need of cleaning.
Hudson H9A
This is the new aluminum version of the “Best of SHOT Show 2017”-award-winning Hudson H9. The new model is roughly half a pound lighter than its predecessor, but shares 85% of its components. Shooting the H9 and H9A side-by-side, the aluminum gun has a little more perceived recoil, but that’s a small price to pay for a gun that should be easier to carry and manipulate. We still enjoyed shooting the H9A just as much as the original model.
SIG showed us its new “high-capacity micro-compact” P365 handgun, which measures just 1 inch wide and 4.3 inches tall. The standard magazine fits flush with the short grip, but holds 10 rounds of 9mm, and the longer extended mag holds 12 rounds. That’s an impressive capacity for a gun this size.
Walther PPQ SC
Walther brought its new sub-compact 9mm handgun to SHOT Show 2018. The PPQ SC is comparable in size to the P365, measuring 1.3 inches wide and 4.4 inches tall. Capacity is 10 rounds with the standard magazine, or 15 with the extended mag shown above. The smooth trigger and ergonomics will be familiar to anyone who has used a full-size Walther PPQ M2, but the PPQ Sub-Compact offers a much smaller carry-friendly size.
So, which of these four new handguns from SHOT Show 2018 seems most appealing to you? Let us know in the poll below.
Contrary to a bug out bag, the contents of Snyder's long-term survival nomad pack have enough supplies and gear to get him through dire situations that last more than 72 hours.
In Issue 24, we interviewed survivalist EJ Snyder — click here to read the complete interview. During our time with EJ, we also had a chance to discuss the gear he carries into the wilderness. For this OFFGRIDweb exclusive tie-in to our print article, we’ll share the complete list of survival items inside EJ’s long-term “nomad pack”, pictured below:
Contrary to a bug out bag, the contents of Snyder’s long-term survival nomad pack have enough supplies and gear to get him through dire situations that last more than 72 hours.
Water Camelbak hydration bladder, Klean Kanteen stainless steel bottle with cup and cooking setup, Puritii water filtration bottle (75 gallon lifespan), Coleman camp coffee pot (doubles as a cooking vessel)
Shelter 20×10 heavy duty lightweight tarp (one side silver) with bungee cords, 200 feet of 550 paracord, homemade grappling hook (made out of 3 bike storage hooks secured with plumbers clamps and Gorilla Tape with 100 feet 550 paracord), 3 snap link carabiners, SXB Skull Crusher Extreme Blade by TOPS Knives, Leatherman multitool, folding hand saw, T.M. Hunt M18 Woodsman knife, Outlast Adventure Supply 12-in-1 Recon Survival Tool, military-style machete, ENO hammock system, insect netting, military-issue poncho liner, 5.11 Tactical work gloves, extra bright orange carry bag (food storage hang bag), dry bag
With Jeff Sausch, during Dual Survival, Episode 4, Gator Bait, 2016.
Nav, Comms, & Signaling Military-issue lensatic compass, headlamp, tactical flashlight, Eddie Bauer Mini Camp Lantern, black Sharpie marker wrapped with 30 feet of silver duct tape, signal mirror, lightweight orange signal flag, Eton Scorpion 2 Weather Radio with built-in solar charger and hand crank, extra batteries
Medical Small Ziploc bag of various meds, antibiotics, bandages, etc., emergency blanket, heavy duty casualty blanket, 12-in-1 camp scissor tool, cotton bandanna
Extra Clothes Waterproof windbreaker with hood, extra Tru-Spec 24/7 Xpedition Pants and long sleeve shirt, silk long johns, Goretex boot liners, 4 pairs of Smartwool socks, neck buff, shemagh scarf
EDC Items (Carried Outside the Pack) Glock 22 with three magazines, Spyderco Tatanka folding knife, sunglasses, Wazoo Survival Cache Belt (includes handcuff keys, lockpicks, a wire saw, a razorblade, duct tape), matches, 550 cord, small tools and a handful of cash
Winterized Add-Ons (Not Pictured) Lightweight Recon sleeping bag (10-degree), lightweight field jacket liner, winter gloves, winter skull cap, additional ammo and food
Finding shelter is one of the top priorities in any survival situation. Sudden rain, high winds, or even a cold breeze can cause your core temperature to plummet if you’re not adequately prepared, and that can lead to hypothermia. The easiest option is typically to look for an existing structure to take refuge in, such as a barn or natural rock outcropping. When natural shelters are unavailable, you’ll need to know how to build your own.
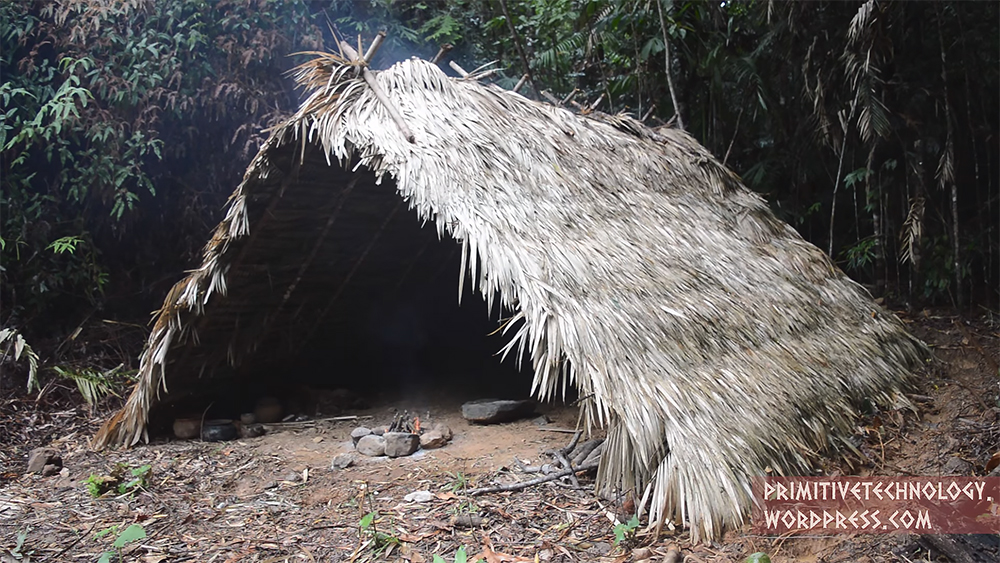
The A-frame shelter is one of the easiest and most recognizable survival shelter designs. It uses crossed pairs of diagonal posts to form the sides, and a long ridgepole beam at the peak of the shelter. This structure is much more spacious than a conical tipi, providing lots of room for gear, firewood, and tools. With adequate reinforcements and a thatched roof, the A-frame shelter can provide strong resistance against wind and rain.
In the following video, the host of Primitive Technology builds an A-frame shelter in the Australian jungle from straight tree trunks and palm fronds. However, since he uses no modern tools, he begins by crafting a stone ax head through the process of flint-knapping. This ax head is used to fell a tree and cut its trunk into an ax handle, which is then used to fell more trees for the shelter.
The side supports are bound together with bark strips, and a ridge pole is placed on top, completing the A-frame shelter’s structure. To keep out the rain, palm fronds are split and layered in an overlapping pattern on the sides, and wood supports called “jockeys” are added up top to prevent the peak of the shelter from blowing away in high winds. The host then tops off the shelter with a clay wall reinforced by woven vines, plus tool storage on the wall and a bed platform.
The Survival TV trend only skims the surface of what goes into making a true survivalist. Some may view preppers as crazy people waiting for unimaginable events. But, this attitude overlooks the benefits that a survival-focused mindset can bring to one’s everyday life.
E.J. Snyder is a prime example of how life rarely goes as planned. Snyder found his purpose in life through a unique combination of hardship and opportunity; each pulling him a little further down the path of the survivalist. Snyder sees his experiences as individual scenes which, joined together, form a rich tapestry he uses to motivate and educate others. From getting bullied as a kid to learning his role as a leader in the military to his naked butt gracing the TVs of millions, Snyder gleans valuable lessons from every experience.
When Snyder was approached for Discovery Channel’s Naked and Afraid, the show’s name was a working title. The producers whittled away elements of the show until the premise was based on surviving the toughest environments with no food or clothes for 21 days. Each episode runs a similar course; participants get eaten alive by the local bugs and nearly starve to death, and one person often quits before the last day. Snyder has been on two of the 21-day versions of Naked and Afraid, as well as the extended 40-day Naked and Afraid XL. Most people recognize Snyder as the naked guy who will go to any lengths to survive. But, behind the titles and accomplishments is a man who wants to help the masses.
We caught up with Snyder in North Carolina to see what he has learned along the way and listen to some of the advice he gives his students to build their self-confidence.
RECOIL OFFGRID: How do you define survival?
E.J. SNYDER: If you do something and don’t die- that’s called survival. No survival technique or skill was ever in a survival book until somebody tried it. And it’s trial and error until you succeed and then it becomes a viable technique in a book.
What started you on your path as a survivalist?
EJS: My mom worked three jobs to take care of me and my brother, but we didn’t have the nicest things. I got bullied a lot because I didn’t have the nicest clothes. My mother’s work ethic rubbed off on me and I picked up a paper route so I could buy school clothes for me and my kid brother. She taught me hard work and discipline and to not rely on others. The other side of that was my love for the outdoors began when my dad would pick us up on the weekends. He’d take us camping, fishing, canoeing, hunting, and trapping. When the weekend was over, I still wanted to be outside.
Bullying is a topic you feel strongly about, how did you handle bullies as a kid?
EJS: Back then, I wasn’t the Skullcrusher, I was more of a stick snapper. I was very tall, lanky, skinny, and very emotional over my folks divorcing. And, when there’s blood in the water, animals smell it- bullies are no different. So, I got targeted by a pack of bullies. But, I never fought back because I always thought I would get in trouble and get kicked out of school. My mom told me if those kids hit me, I had the right to defend myself. By this point, my stepdad was in my life and he taught me how to box and lift weights. I was learning wrestling in school and enjoyed the thrill of competition. I picked up more fighting techniques from friends who were taking karate. Learning to protect myself helped build my confidence. Finally I had enough and after being shoved by one of the biggest bullies, I defended myself. That was in sixth grade.
How did that shape your view of the world?
EJS: Bullies were one of the building blocks in my life. They helped me realize that if someone put up a challenge, or a wall so to speak, if I can’t get around, over, or under it, I’m going to go right through it with passion, vigor, and as much energy as possible.
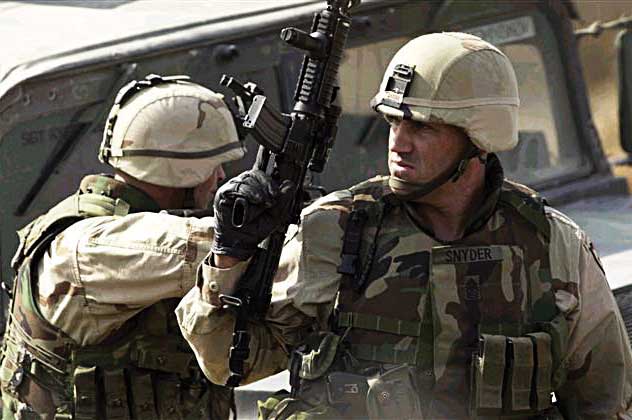
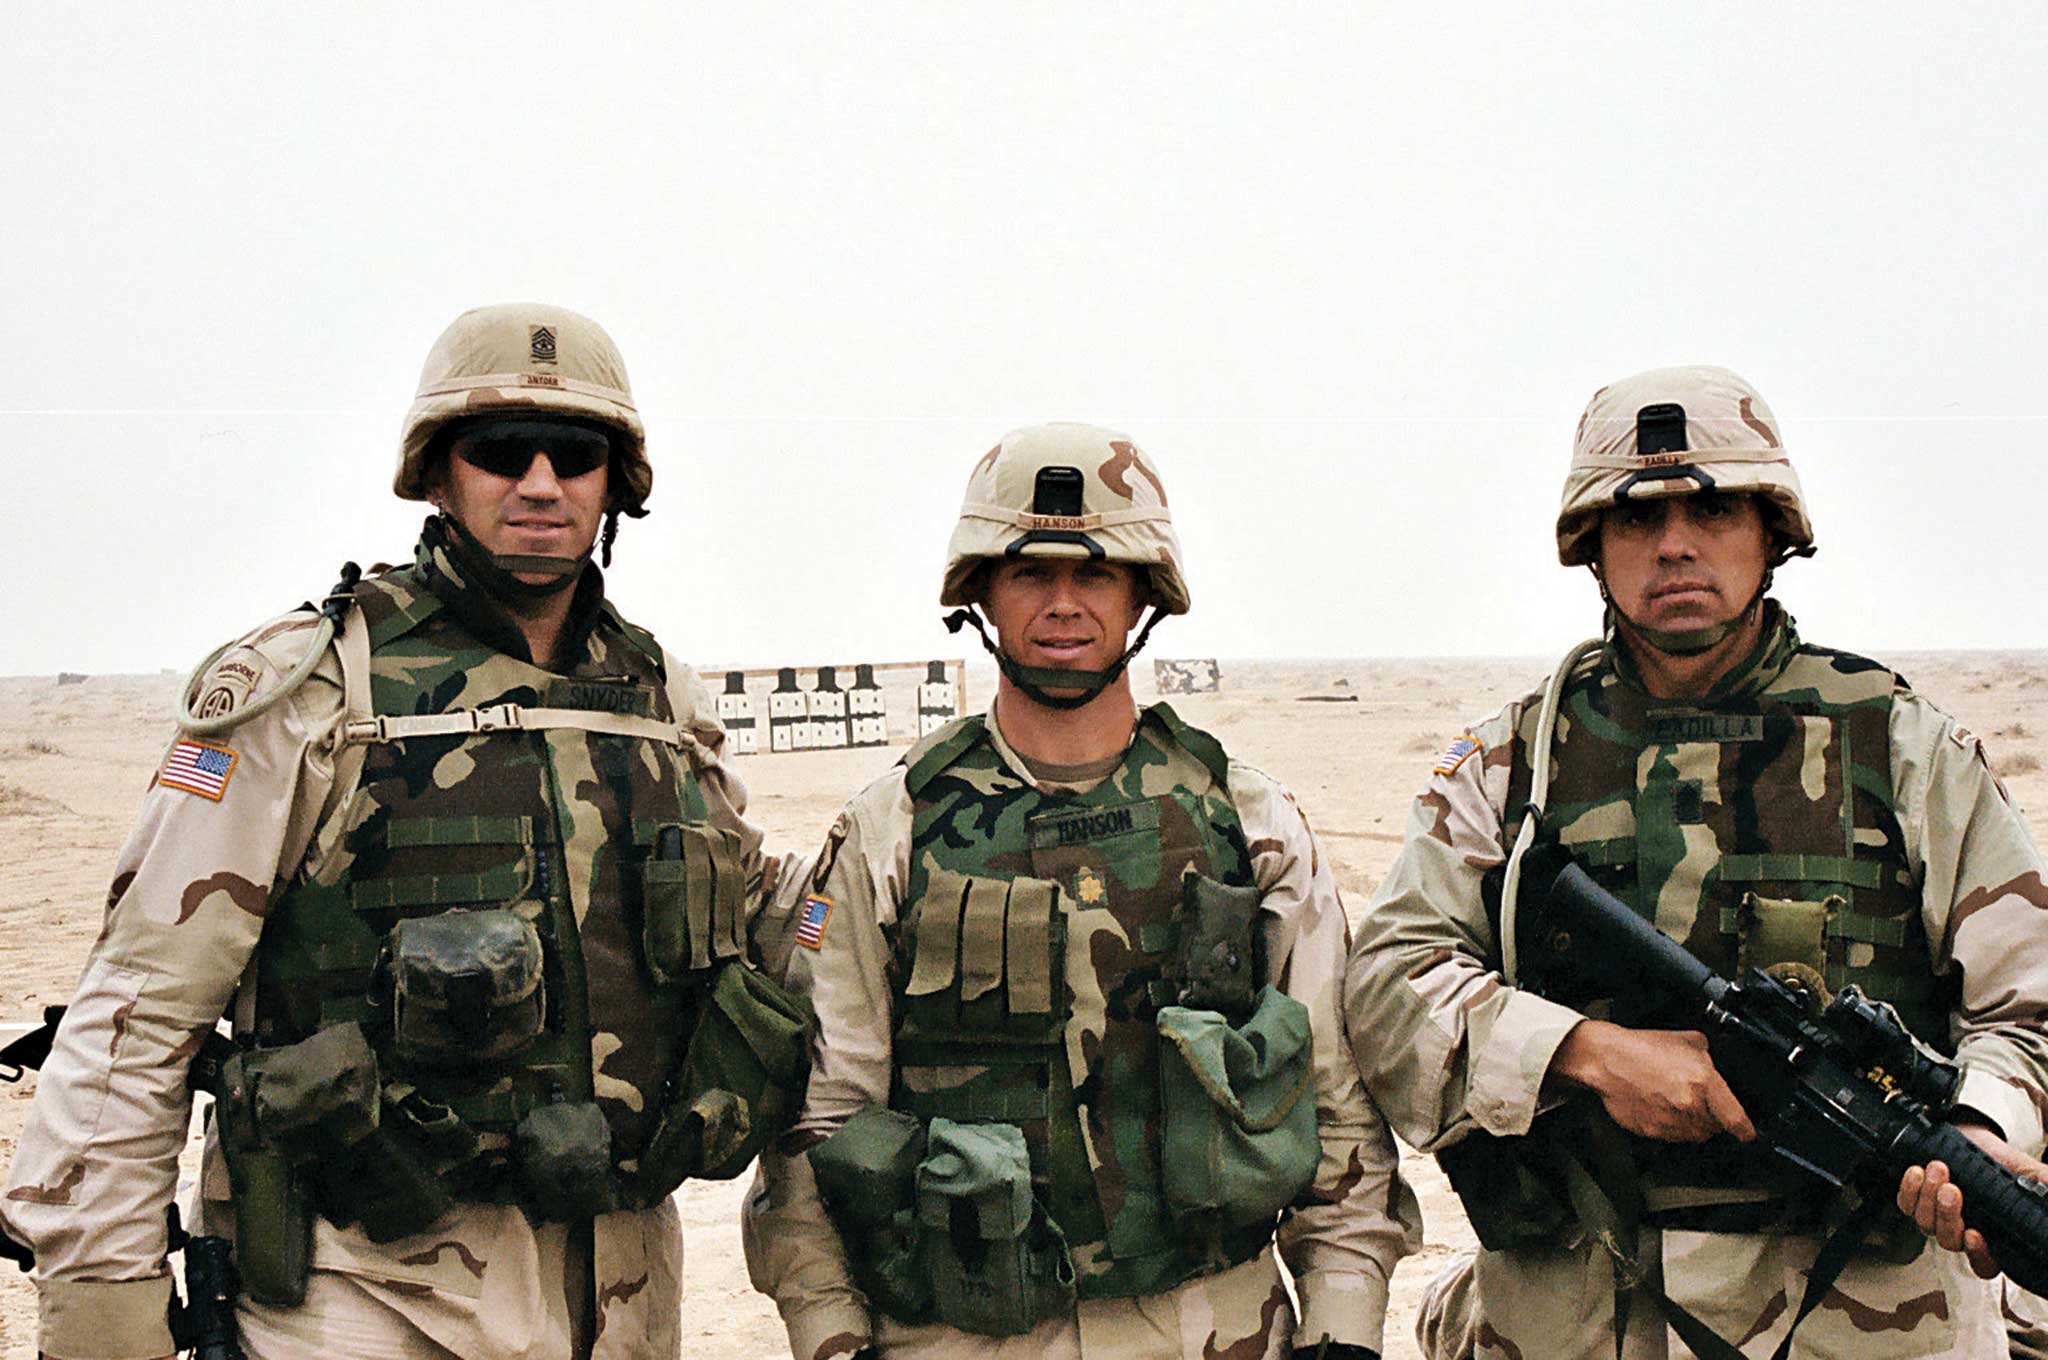
Pulling security in Iraq, 2004.
Why did you decide to go into the Army?
EJS: My mom asked me what I wanted to do with my life. I told her I wanted to be a stuntman and an actor. She said, ‘That’s stupid, you’ll never make it- that’s the worst idea you could ever think of. You’ll starve.’ So, I decided to pursue my other dream, which was to join the military and live a life of adventure.
You held several leadership roles while in the Army, what kind of leader were you?
EJS: I was a lead-from-the-front, lead-by-example kind of guy. I would get in your face when you needed it, but I’d be there to put my arm around you when you needed it most. Everyone knew I was a passionate leader, and they would to follow me through the gates of hell, even though I was hard on them. I have that philosophy that more sweat in training means less blood in battle. The train as you fight mentality is something I adapted and put realism into training so that when people needed those skills most they’d have them. And if you fast-forward slightly, I used that same analogy —and the same philosophy— for the survival students I trained.
Snyder (left) in Kirkuk, Iraq with Major James Hansen and Command Seargent Major Arthur Padilla in 2004, providing cross-weapons training with Iraqi Special Forces.
When did the crossover from a military mentality to a more survivalist mindset happen?
EJS: After my time as a Drill Sergeant, I went on to be a Ranger instructor and while I was there, I was assigned as a primary survival and tracking instructor. Learning and teaching survival skills in the Army advanced some of what I had learned in my youth. The Army gave me more opportunities to be in the wilderness and outdoors. But, the biggest thrill was going through SERE level-C and then revamping the survival training program. That is when survival became my passion and my whole drive.
At what point in your life did you realize you had to be prepared for unexpected events?
EJS: When everyone started talking about Y2K and what could happen, I wanted to be prepared to take care of my family. I always had outdoor skills, but with Y2K, new skills became my hobby and my passion. While people were out doing other things, I was prepping for something that could affect my family- that was a pivotal point for me.
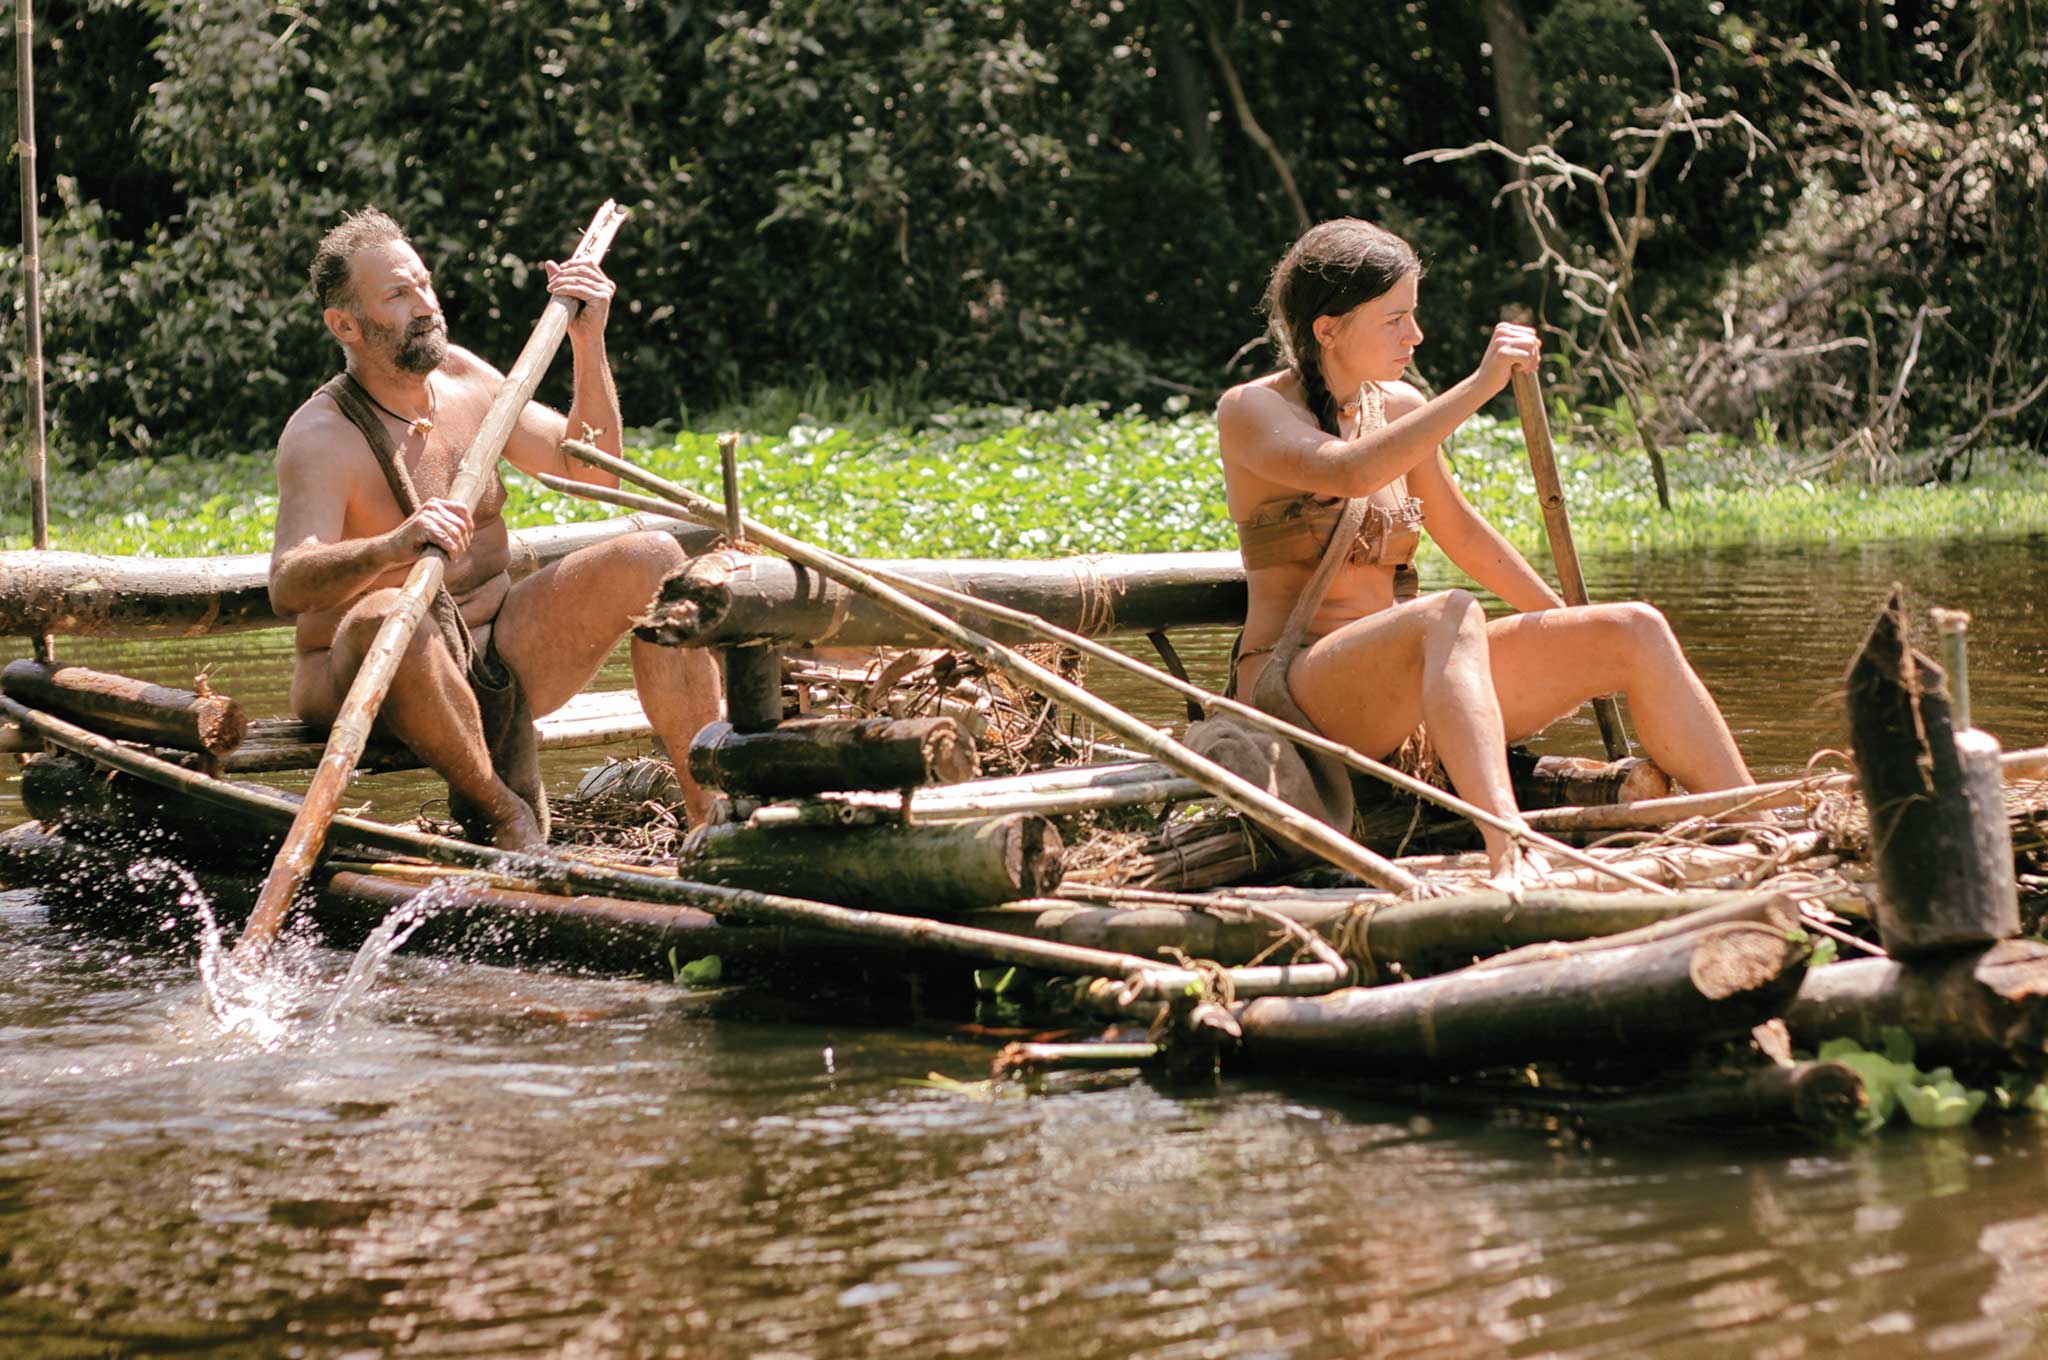
Paddling up the Amazon River with Laura Zerra during Naked and Afraid, Season 2.
What initially motivated you to go on Naked and Afraid?
EJS: After retiring, I was in a kind of a low point in my life… just not happy with my career and not sure what I wanted in my life. When I’m out in the wild, I hear God’s voice, loud. I thought I was going out there to do something really cool… do the survival thing, be a badass. And, I got so much more out of it. I was really humbled by that experience, in Tanzania. I was a changed man when I left. I evolved as a survivalist, became a changed man, and was closer to God after that point and really appreciated those things in my life that I was maybe taking for granted.
Naked and Afraid seems tough to prepare for.
EJS: I practice and I train that way all the time. So, when I was put into those situations, I didn’t really do much to prepare, unless I knew I was going to a certain zone. If I know where I’m going, I may brush up a little bit on that particular area and the indigenous people that lived there. But for the most part I believe I can go anywhere on this planet with just my knife.
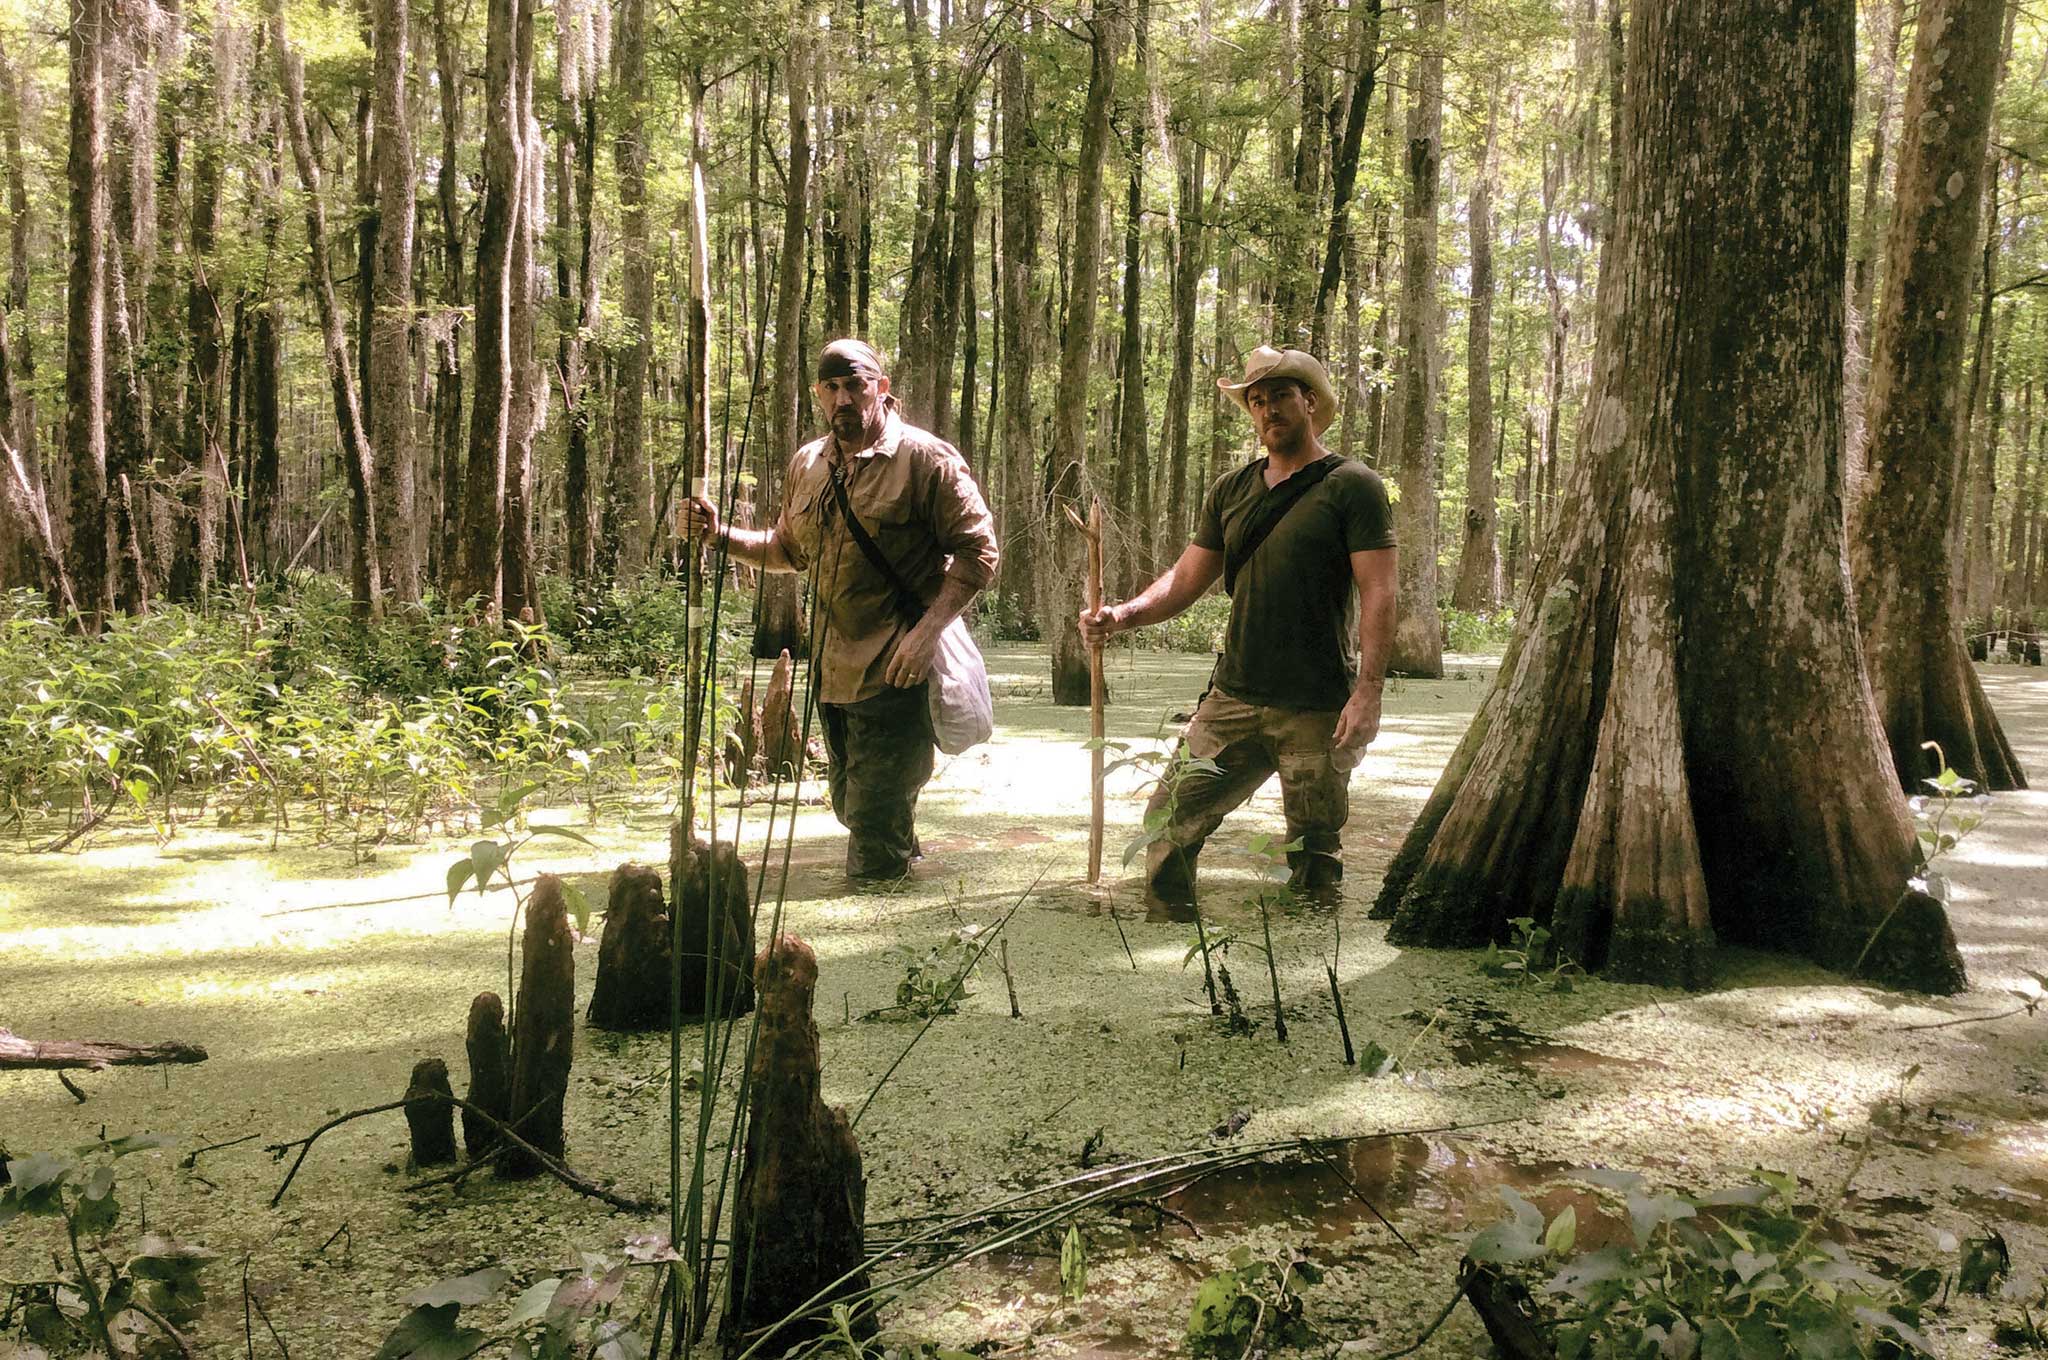
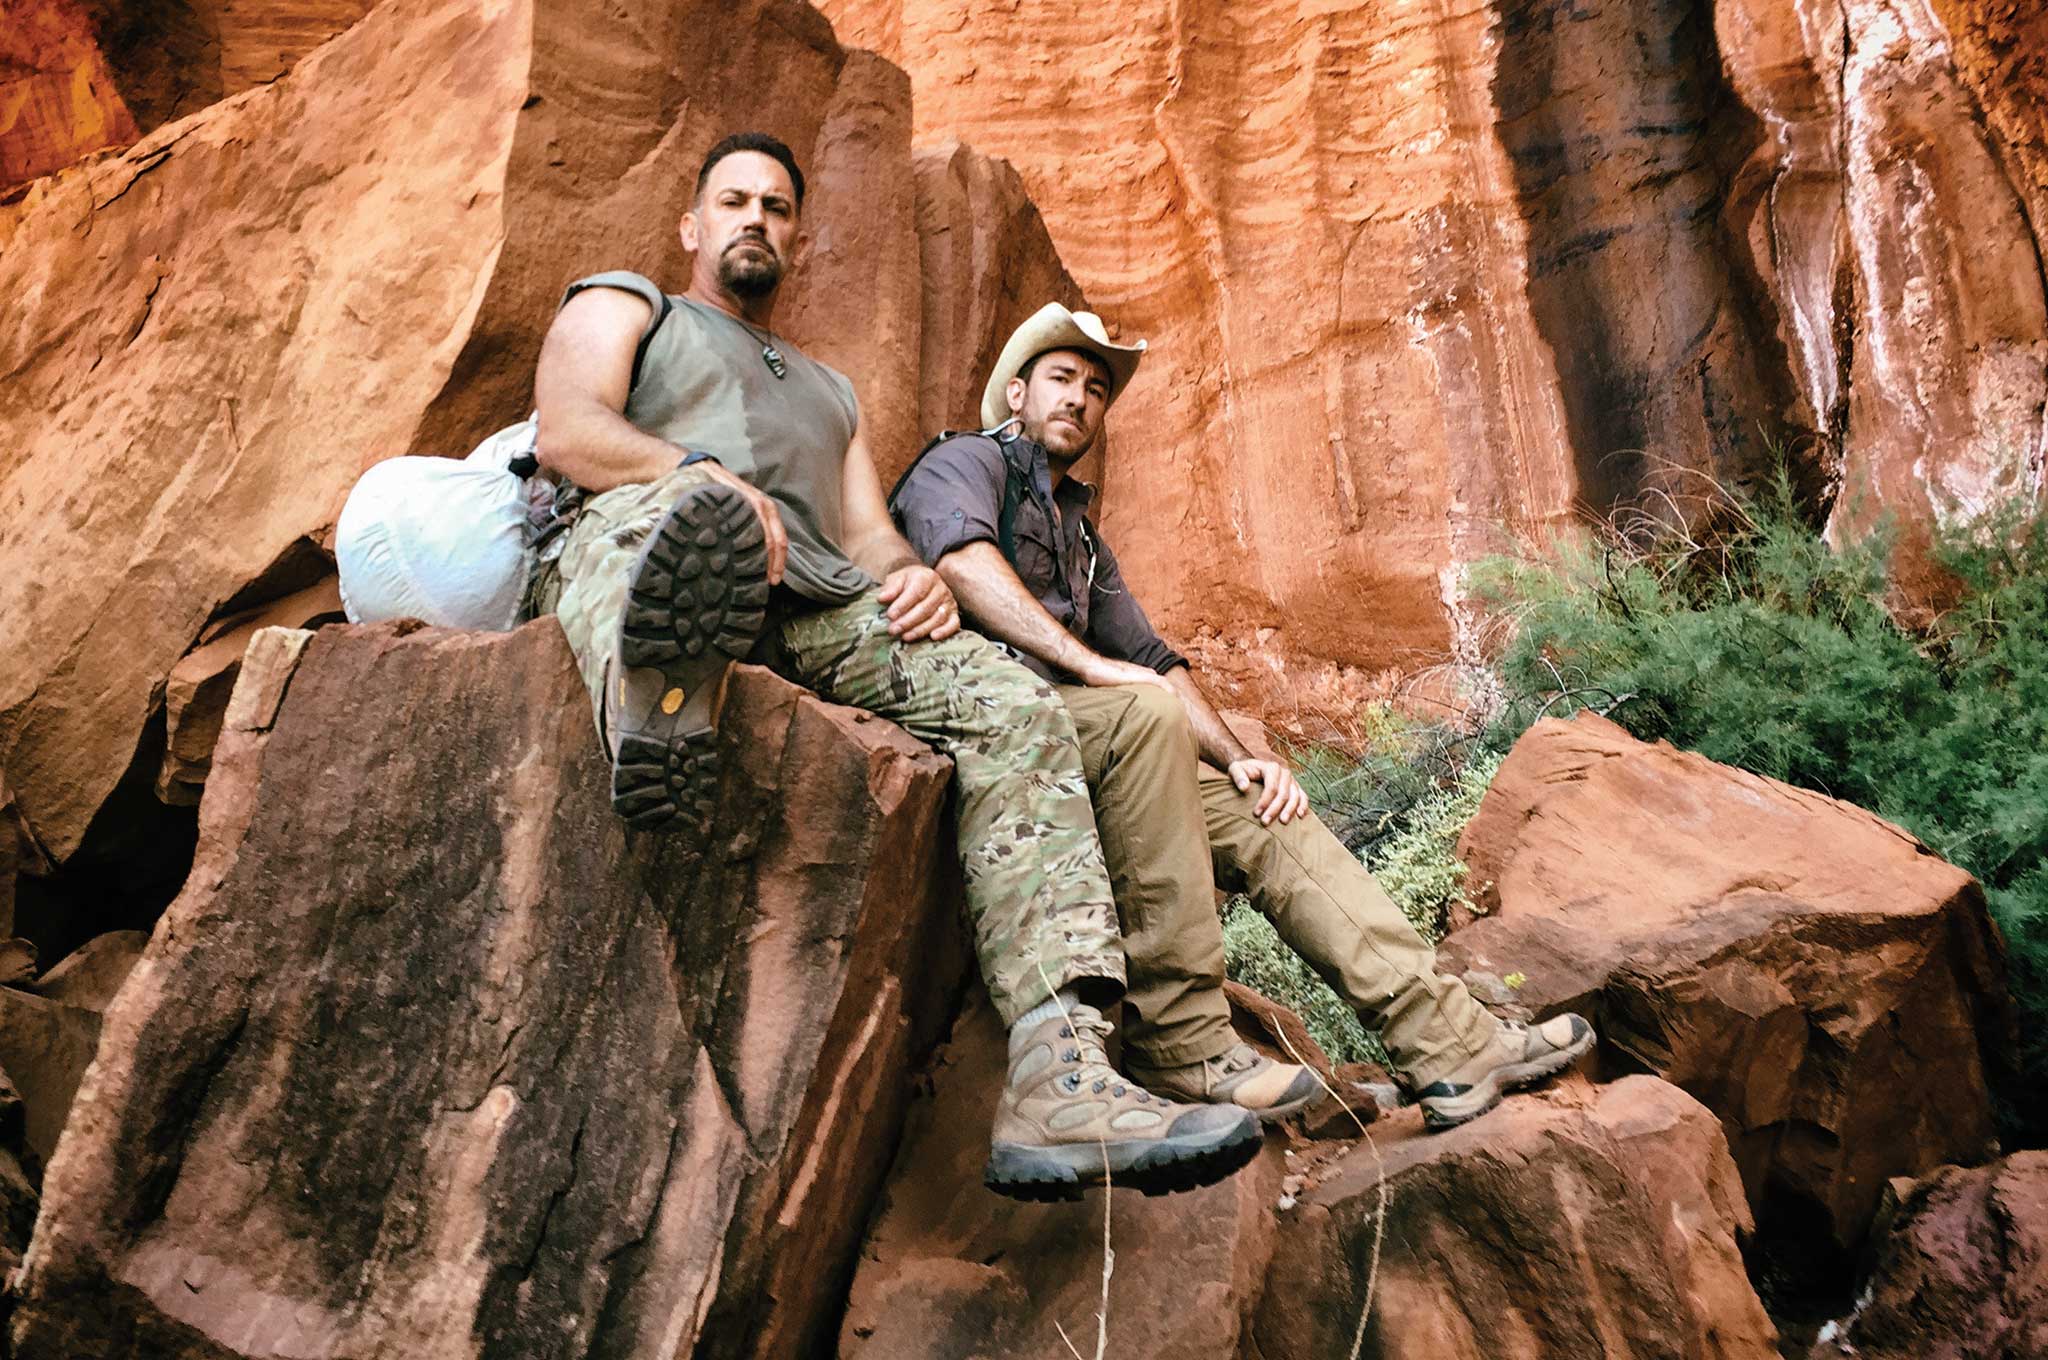
Snyder and Jeff Zausch during a water break during filming of Dual Survival in 2016.
Did the Naked and Afraid experience impact other parts of your life?
EJS: It really refocused me on my path. It wasn’t until I almost lost my life out there that I realized what I needed to do. I was meant to be a leader, to teach survival and help those that can’t help themselves. When bad days come, I want to help people get through that. And so, I sit here before you.
What did you learn from being on the show?
EJS: From my first partner, I learned that it’s okay to ask for help. The second time I went on the show, I tapped into my Native-American spirit and let the wild teach me some things. Getting back to my Native-American roots opened up something very primal. After being humbled by the first Naked and Afraid, I started shoring up my weaknesses. Instead of a military modern-day survivalist, I became more of a hybrid by tapping into primitive bushcraft while pairing it with my modern day survival techniques. Those experiences made me want to become more self-reliant- more off grid. I eventually want to get off the grid and have my own homestead.
With Jeff Sausch, during Dual Survival, Episode 4, Gator Bait, 2016.
Which situation has tested your mental fortitude the most?
EJS: It was a time when I felt the most helpless I’ve ever felt. While trying to get to the extraction point in the Amazon, in the middle of the night, while paddling in the river, a biblical storm hit. I knew lightning hit the water because the static electricity was raising the hair on the back of my neck and arms. I knew that was a dangerous situation; we had to get off of water or were going to be done. It was pitch black, we had no illumination, no moonlight. We pulled over to the side, with no idea of what we were walking into, knowing that black caiman [crocodiles] could be everywhere. We hunkered down against a tree, but got pummeled by the storm for five hours. I’ve never been close to hypothermia my life. We got to a point where we were both speaking in tongues, that I knew we had to get up and get moving or we weren’t going to make it. So, we got back to paddling towards the extraction point. I have never felt so helpless knowing that because of the lightning, I just had to take it. So, in regard to mental fortitude, I got pretty close to my breaking point in that situation. I don’t get there often.
How do you plan to go off grid?
EJS: I look at survival as a five-tier kind of thing. Those tiers include:
Bushcraft and primitive skills
Modern and military survival skills
Self-reliance skills
Defense and security skills (i.e. combatives, weapons, and defendable structures)
Offgrid living and homesteading skills (i.e. studying alternative fuels and livestock care)
What kind of feedback have you gotten from being on survival shows?
EJS: People reached out to let me know how I inspired them. Some people said when they see me go through these tough challenges and get through it make it, that it causes them to make an adjustment in their lives for the better. Whether it’s getting up off the couch or finally getting to the gym, getting out of a really bad relationship, getting bullied in school, or even overcoming addictions. If me being on TV drinking elephant dung, running around bare-naked with my butt hanging out helps just one person, then, for me, it’s worth it.
Contrary to a bug out bag, the contents of Snyder’s long-term survival nomad pack have enough supplies and gear to get him through dire situations that last more than 72 hours.
What’s your EDC?
EJS: Well I am a firm believer that you don’t advertise what you’re bringing to the table. So, I always walk around with a small bag. It’s not a man purse or anything like that, it’s just a small bag. I have enough stuff in the bag that would at least get me back to my vehicle, or if I have to walk home, I can get home. On my body it’s a pretty extensive kind of situation. But, in terms of defense, I carry a Glock 22 with three magazines. I also carry a Spyderco Tatanka. One reason I usually wear eye pro is if I’m walking down the street nobody’s can tell what I’m observing, and that gives me the ability to look and watch others while they don’t realize I’m watching them. My belt is a Wazoo Cache Belt. On the belt is a D-ring attachment that will hold my weight if I was caught in a pinch and needed to be able to rappel down from something. It carries a couple handcuff keys, lockpicks, a wire saw, a razorblade, duct tape in there. Also some matches, 550 cord, small tools and a handful of cash, as well.
That’s quite a bit of gear to carry every day.
EJS: It goes back to that philosophy. I don’t know when that bad situation could happen, but I want to be a positive factor when it does. When I can carry more, I carry a basic survival kit, a fire starter, a water bottle with a built-in filter system, extra 550 cord, compass, a headlamp, flashlight, and SAPI [bulletproof armor] plate in case of an active shooter situation. Some people might say I’m a little off. But, I’ve walked to a different drum-beat my whole life.
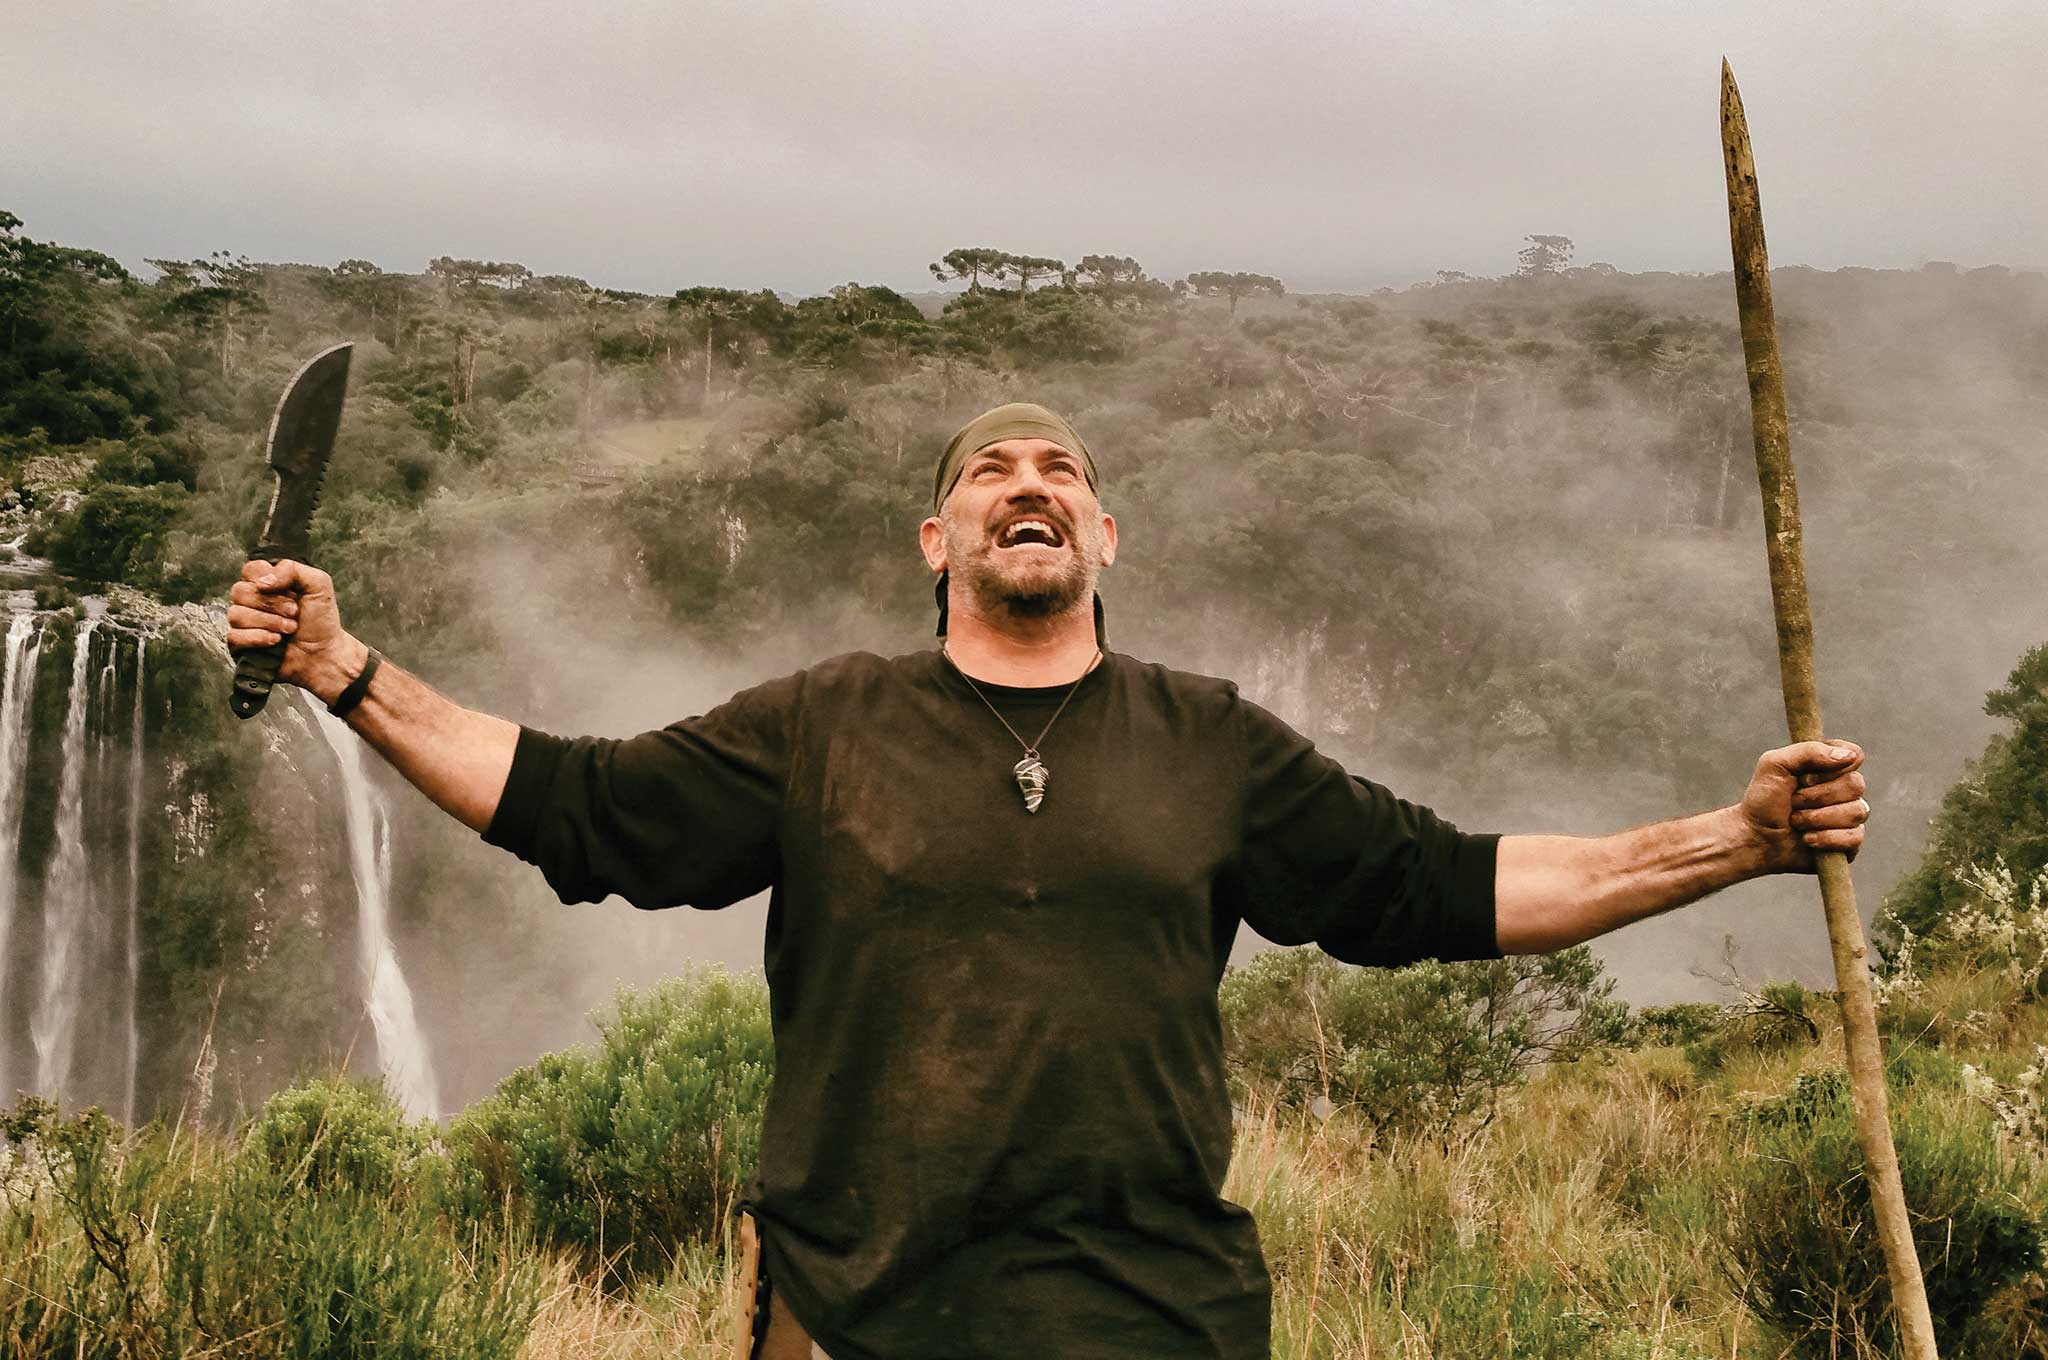
Giving a war cry during Dual Survival in 2016 while in Southern Brazil.
If you were restricted to carrying only five items, what’d they be?
EJS: Number one item, my fixed-blade knife. My knife broke in Africa and because of that I created and designed my own survival fighting knife. It’s a one-tool option, the SXB Skull Crusher Extreme Blade, by TOPS Knives. Number two, a magnesium fire starter because primitive fire making is actually very difficult, and it sucks. So why do it if you don’t have to. Number three, a pot to boil water. I personally like using a Coleman camp coffee pot because it has a lid, a percolator which helps boil water twice as fast, and it’s a huge asset that you can just pull all the guts out of it and use it as a regular cooking pot. The fourth changes from time to time based on the environment. I would say a tarp, because it’s a ready shelter and it’s good for a lot of other uses, like water collection, and you can make other items with it. The last item would be about 100 feet of 550 cord because of its many uses.
What charities are you involved in?
EJS: Being a veteran, I am passionate about helping other veterans. Any project that involves veteran suicide awareness or that can help a vet, I want to be involved in. Outside of veteran charities, I’m part of Reality Rally. If you go to the Reality Star Line Up, you’ll see my name and an option to donate. Funds raised go to the Breast Cancer Resource Center. The Breast Cancer Resource Center is called Michelle’s Place. Michelle’s Place has done a lot of amazing and wonderful things for people. My family has been affected by breast cancer. Cancer is a bully, and I don’t like bullies.
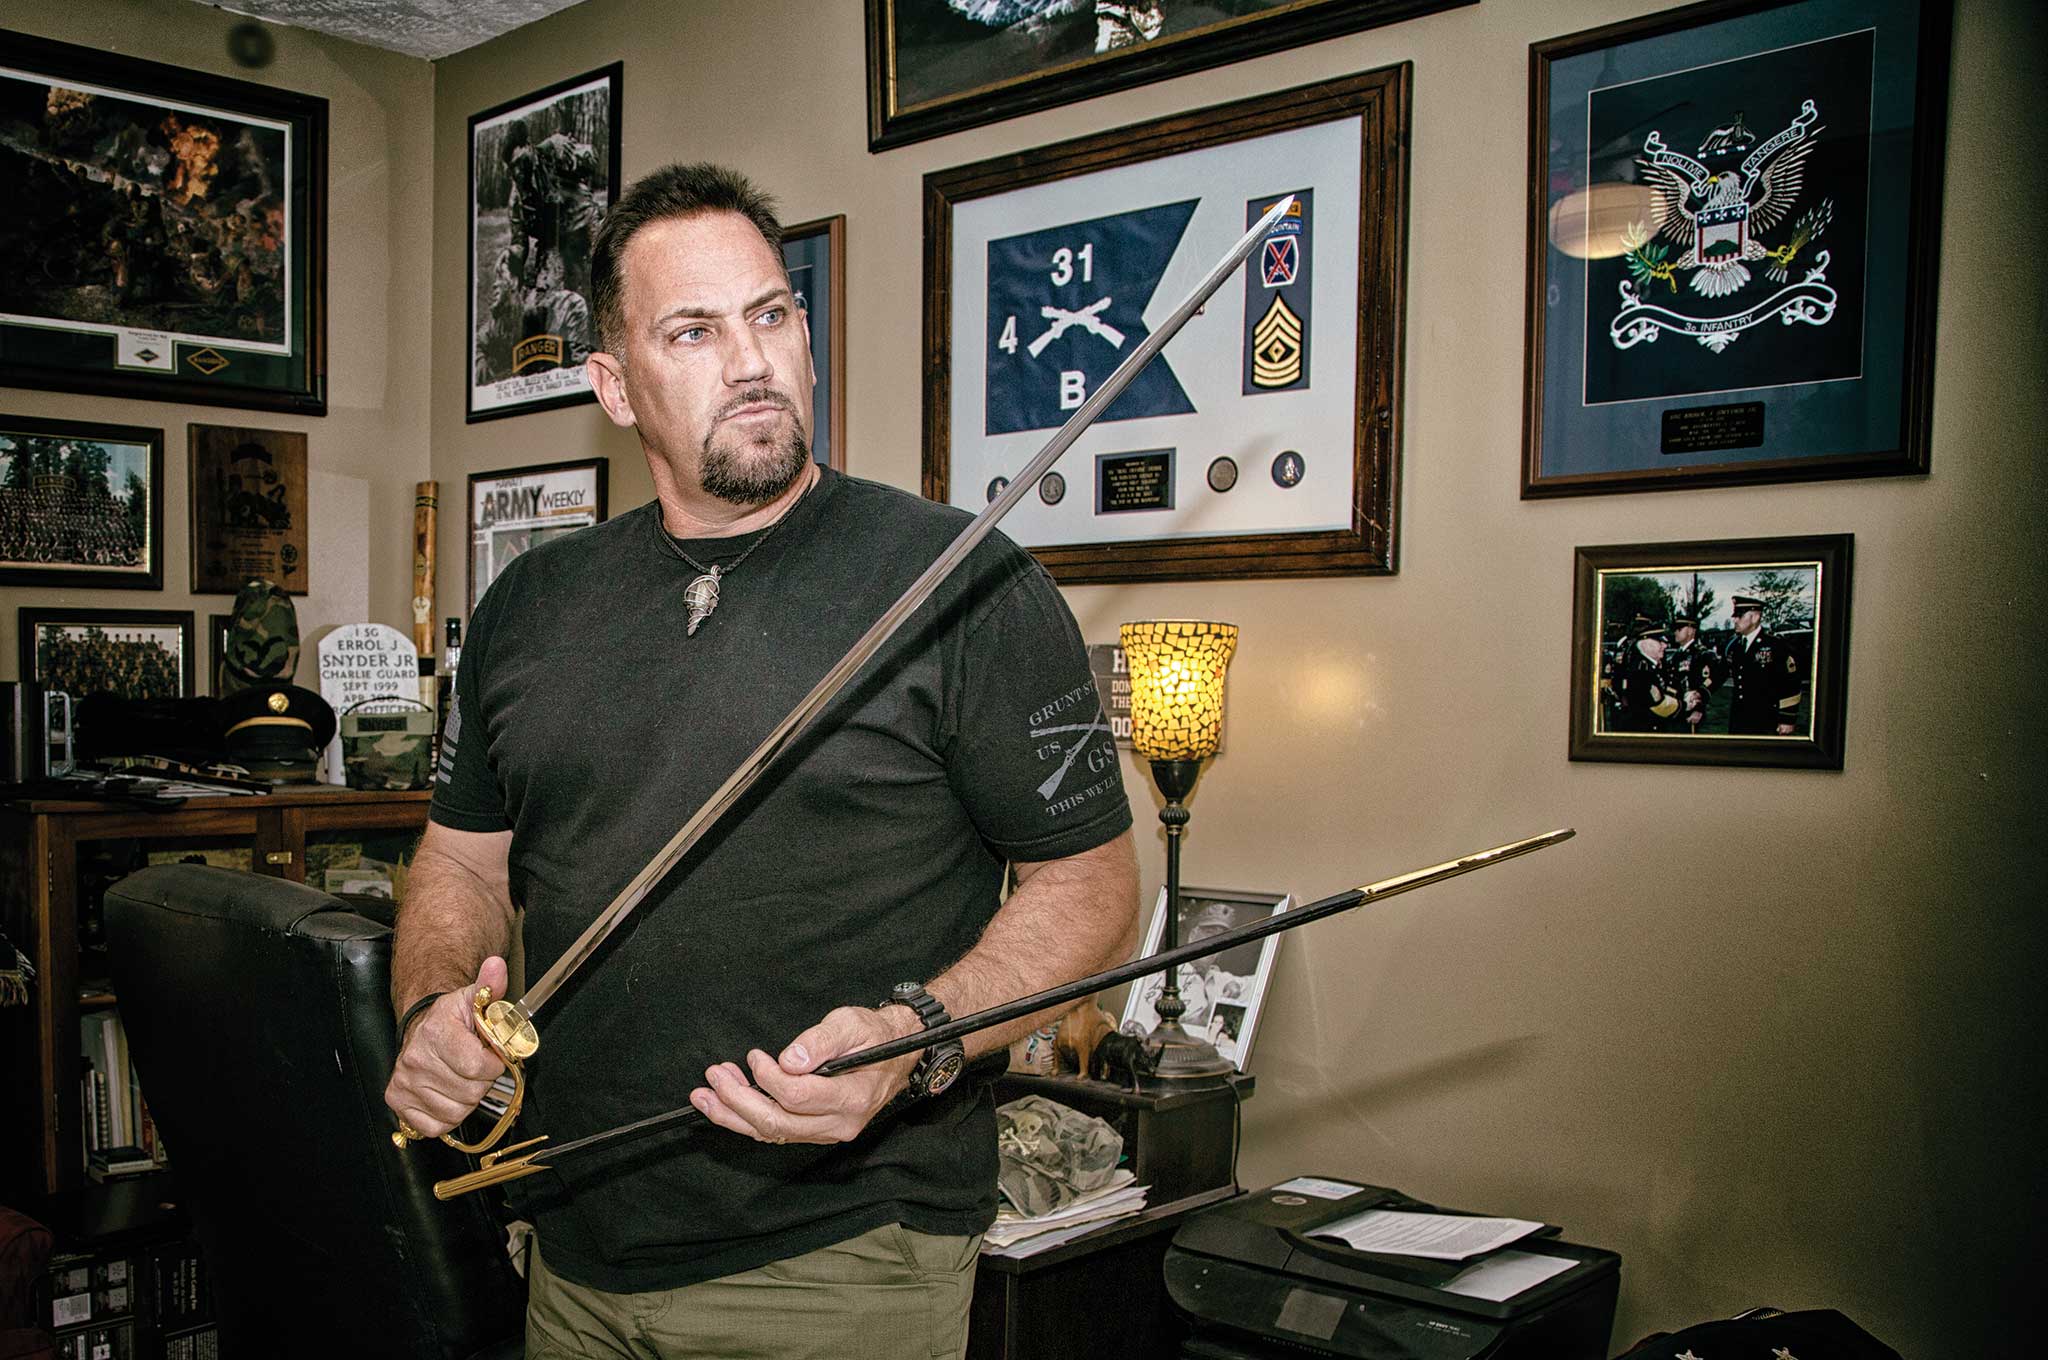
Snyder with a ceremonial sword from his time as the First Sergeant of the 3rd US Infantry Regiment, Charlie Guard, from 1999-2001.
The other cause I work with is Give Kids The World Village. It’s a part of the Make A Wish Foundation in Orlando, Florida. We raised money for these little kids who are fighting life threatening challenges. From time-to-time people approach me to help them with their other causes and I don’t believe I’ve ever turned anyone away, at this point, because I have a problem with the word ‘no’.
In light of recent events, what advice would you give people worried about going to public places where mass shootings could occur?
EJS: I know it’s a scary world right now, but the best way to eliminate that fear is to build your own confidence. The way you build your confidence is to first fix your mindset. The greatest tool to survival is your mindset. If your mindset’s right; having situational awareness, having goals, having focus, there’s nothing you can’t do. Always be positive about what you’re seeing in life. When you go to these places like that, have situational-awareness, watch what’s going on around you.
Fear emits pheromones that will cause the other animals to pick up on it. And that type of pheromone can cause an animal to get into a frenzy. If you stay calm and positive, you will have a positive effect on other people around you.
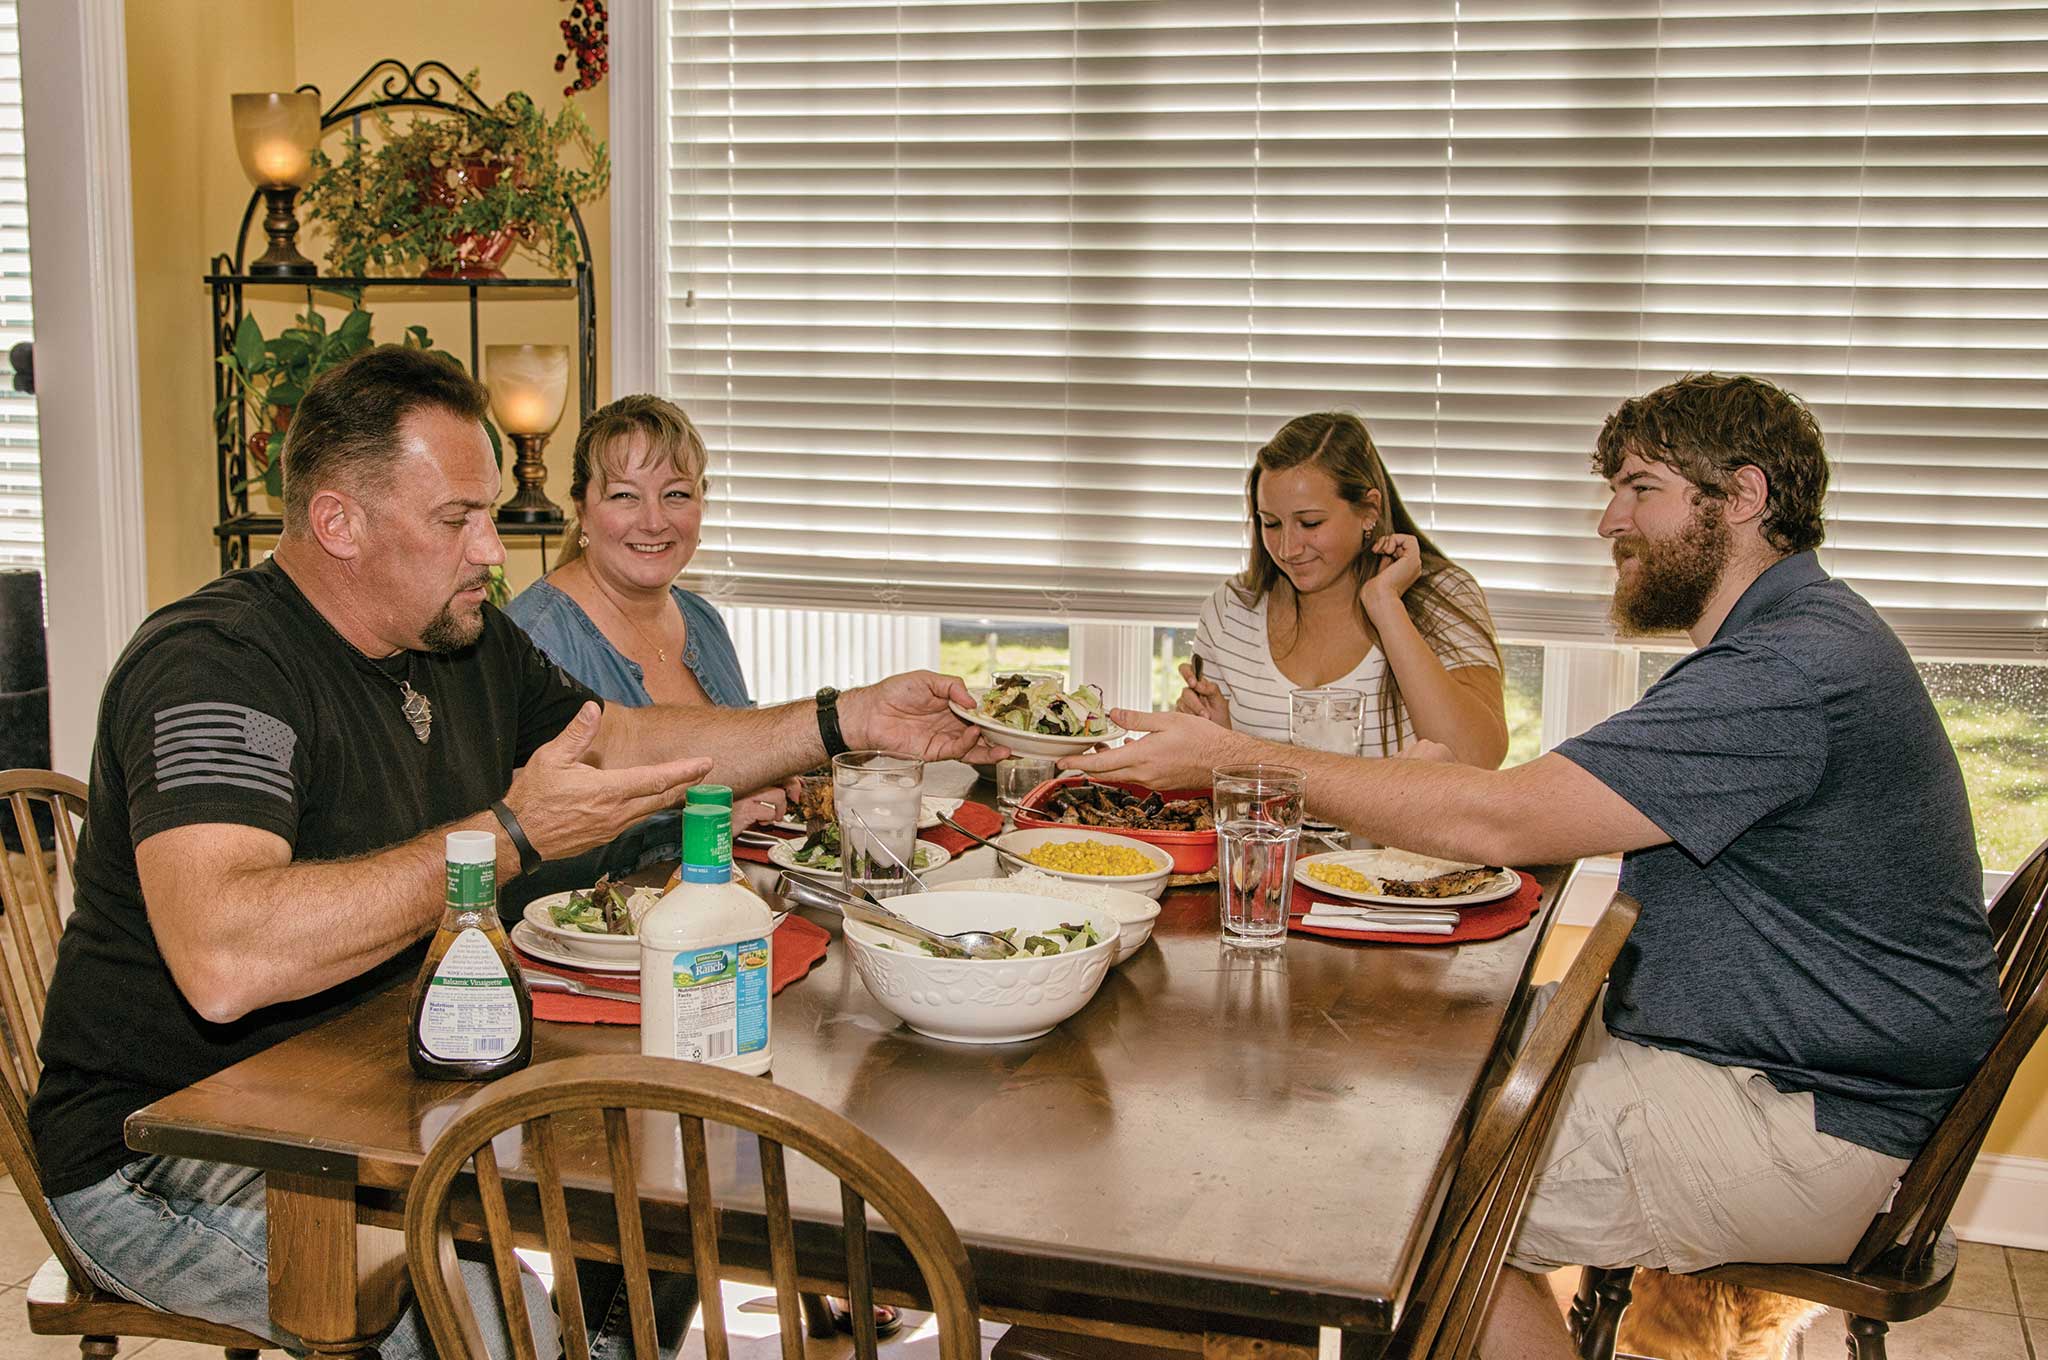
What makes Snyder happy is being able to spend quality time with his family and dog.
You find yourself stuck in a high-rise elevator, all alone. The power cut out suddenly and faint emergency lights are the only thing separating you from complete darkness. What do you do now?
It’s been nearly an hour and you haven’t heard a peep from the outside. The emergency phone is of no use to you — no one has responded to numerous calls for help. You begin to consider what may have caused the elevator to get jammed up, and why no one has come to aid you. Did the grid go down? Was it a routine power outage? An act of terror? No matter what the circumstance, you know that you must get in contact with emergency services, or find a way out. All by yourself.
In scenarios like the one above, escaping danger alone may seem like a daunting task, but a majority of adults have spouses and/or children. If you’re a part of this populace, you won’t have the luxury of dealing with an emergency without first considering your family. Keeping yourself and your family members safe brings a substantially higher level of complexity to the table — just imagine how being trapped in that elevator with a concerned spouse, panicked teenage daughter, and crying toddler would amp up the stress level. Or maybe they’re trapped in the building’s lobby without you. Either way, your own well-being is no longer the only concern.
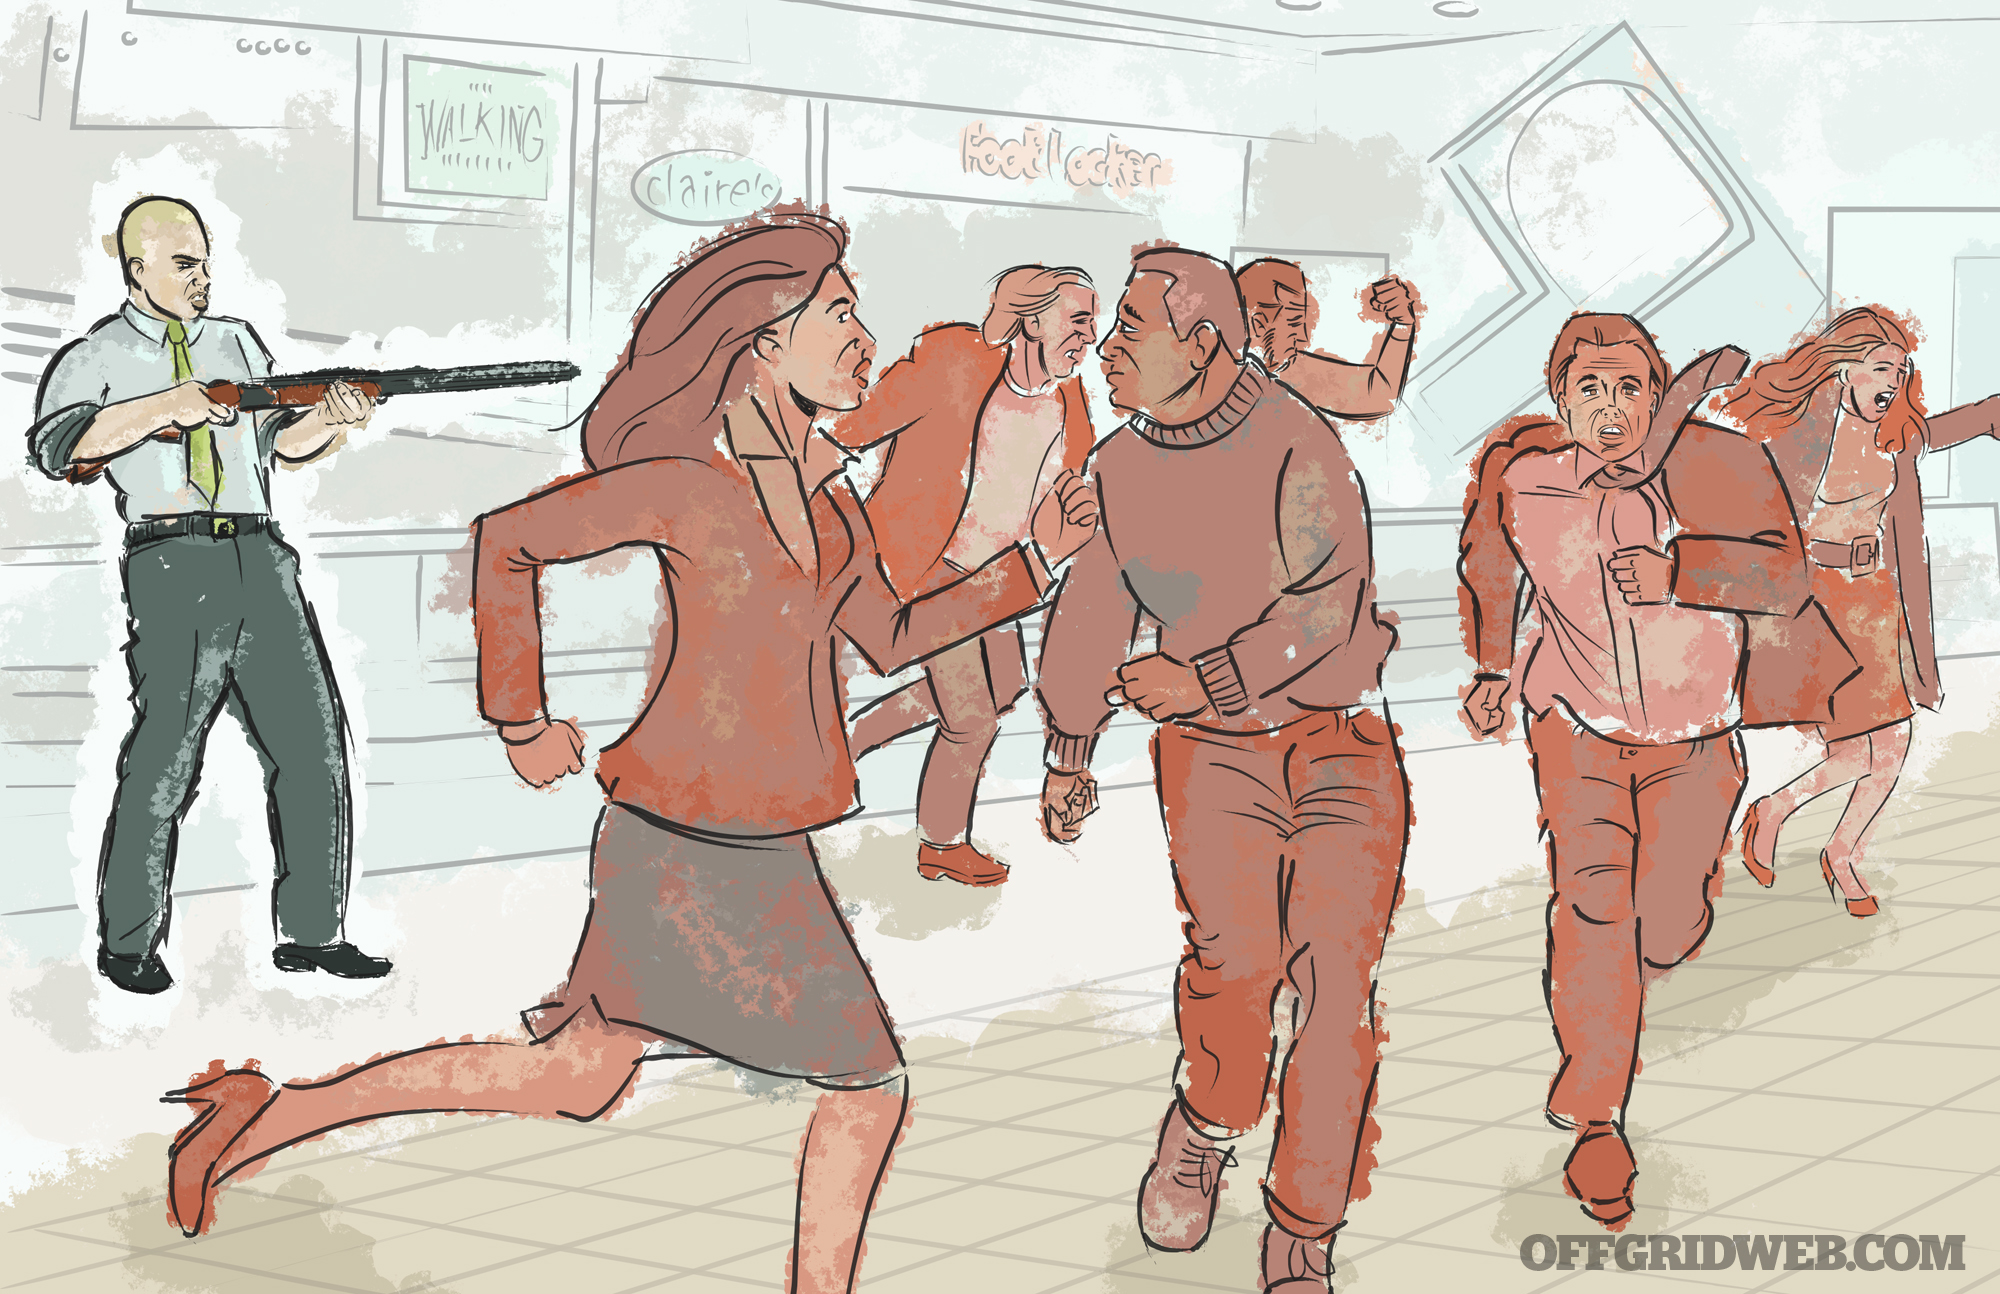
During short-term situations like active-shooter scenarios or riots at crowded venues, rapid thinking and quick reactions will be necessary to reach safety unscathed along with your loved ones. However, that doesn’t mean avoiding the fray in these scenarios is easy. Compare this with a long-term situation resulting from a large-scale terror attack or natural disaster, and you’ve got yourself a scenario packed with difficulties.
Below, we’ve proposed a few hypothetical cases that may help you reconsider the viability of your family’s emergency plans. Read on for some family survival tips to consider for a handful of disaster scenarios.
Active Shooter
Keys to Survival
Since active shooter situations typically have little or no warning, and occur in a variety of locations, it’s hard to craft and plan the perfect response. Every incident is different, but there are a few common factors to consider.
Upon hearing the first shots, distance yourself from the active scene as quickly as possible while staying low and maintaining quiet communication with your family to avoid any unwanted attention. Stay together if at all possible, and avoid the path of panicked crowds. If you can escape chaos and any confrontation with the shooter within seconds of the first gunshot, that is the goal.
Ideally, you’ll already have discussed an escape plan, established an emergency meeting location where you’ll reunite with family members, and scoped out nearby barriers where you can take cover in an emergency. Refer to our previous article on vehicular terrorist attacks for more tips. If nothing else, just remember “run, hide, fight” — in that order.
Challenges
Safety in numbers isn’t always an applicable statement. In the line of fire, a target-rich environment ramps up the number of hits an active shooter can achieve on innocent bystanders. Make sure one of your very first decisions is identifying proper cover for your family members to duck behind, or under, while moving out of harm’s way. Freezing up in the middle of an active scene is one of the worst things you can do, as it makes you a vulnerable static target — avoid that at all costs. Even if bulletproof cover isn’t available, conceal yourself from the shooter’s line of sight.
If you are in the shooter’s immediate vicinity, attempt to get your party to scatter and run for safety at the first possible opening (e.g. when the shooter’s back is turned). If you have nowhere to go, fight back as a last resort. Whenever possible, try to carry a concealed weapon where the law permits, and encourage capable family members to do the same. Bringing a gun to a gun fight gives you a lot better odds than bringing a knife or bare hands.
Terrorist Bombing
Keys to Survival
Identifying the precursors of an attack is the first step in keeping your family safe from danger. Keep your eyes peeled when traveling in unfamiliar areas, or when you’re near large groups of people at venues such as sporting events and concerts. Animals use a pack mentality to alert each other of predators outside the group — you can do the same with your family members to remain aware of danger and identify potential threats.
Keep your family in sight to get a feel for their body language. They may feel that something is out of place, but fail to alert you if you’re too far away. Aside from being proactive and teaching your family a mindset of constant situational awareness, having basic knowledge of medical trauma treatment is never wasted brain space. Knowing how to treat a traumatic injury or shrapnel wound is very valuable knowledge nowadays. Consider taking a day to receive professional first aid training with your family, through a program such as National Stop the Bleed Day.
Challenges
If you have the rare misfortune to be caught in the midst of a bombing, the most critical piece of initial information is to identify where your family members are immediately after the blast. Staying close together as the crowd frantically mills around is important, and could mean the difference between life and death — assuming the blast wasn’t right on top of you.
Nevertheless, identifying and treating major injuries in your party using a tourniquet and hemostatic clotting agent is priority number one. Secondly, take stock of the situation and scope out any chance of a secondary blast or follow-up attack after the initial bomb. Assessing and addressing injury, and knowing when to get out are two key items that will help you in this type of emergency.
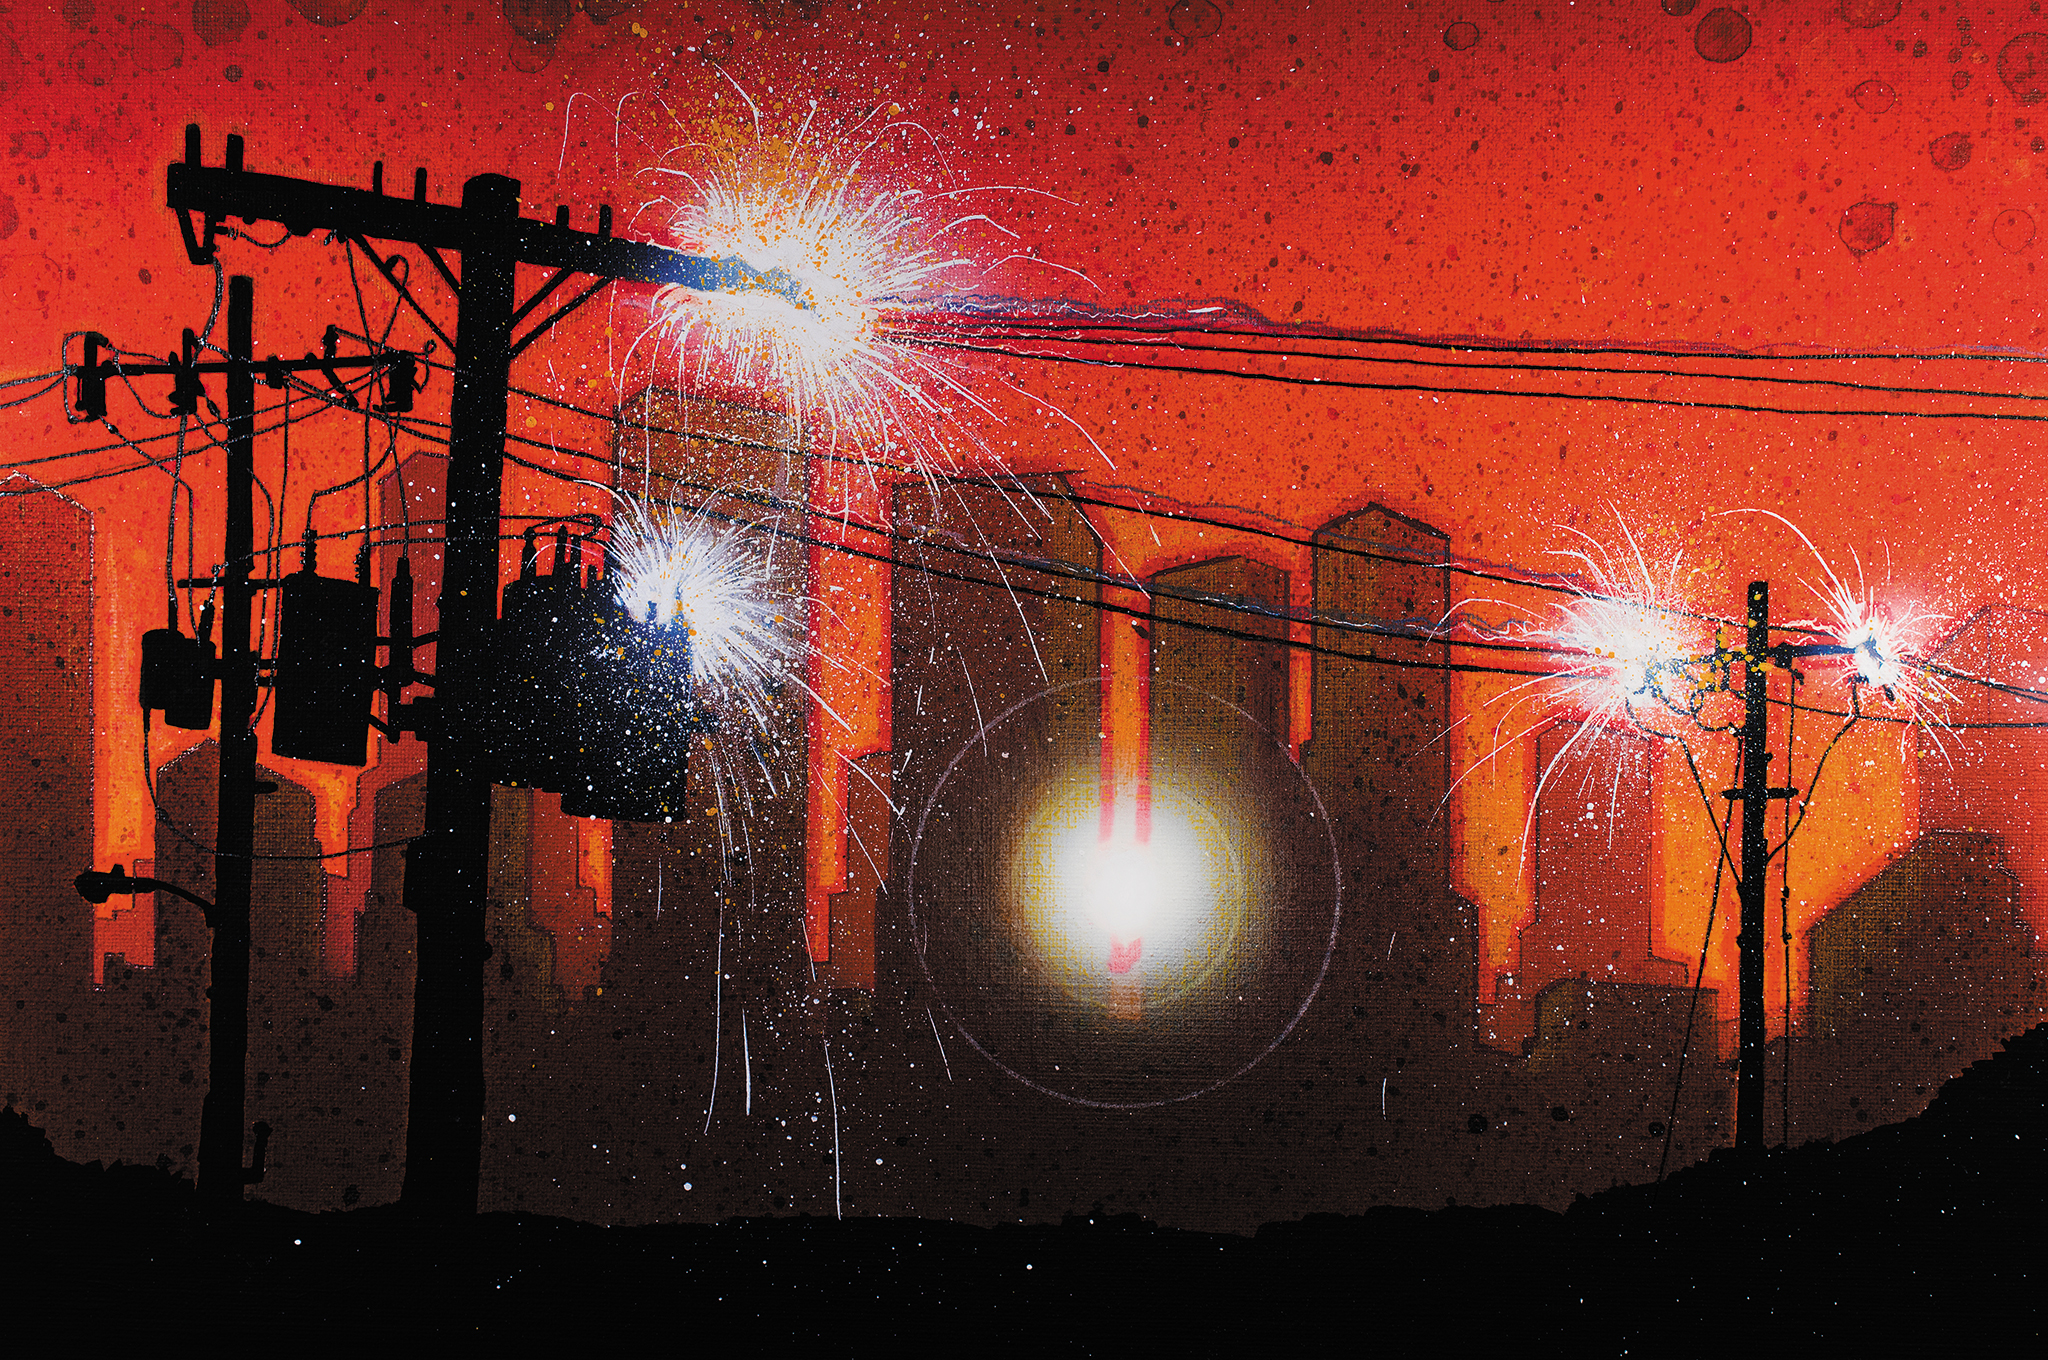
Grid Down
Keys to Survival
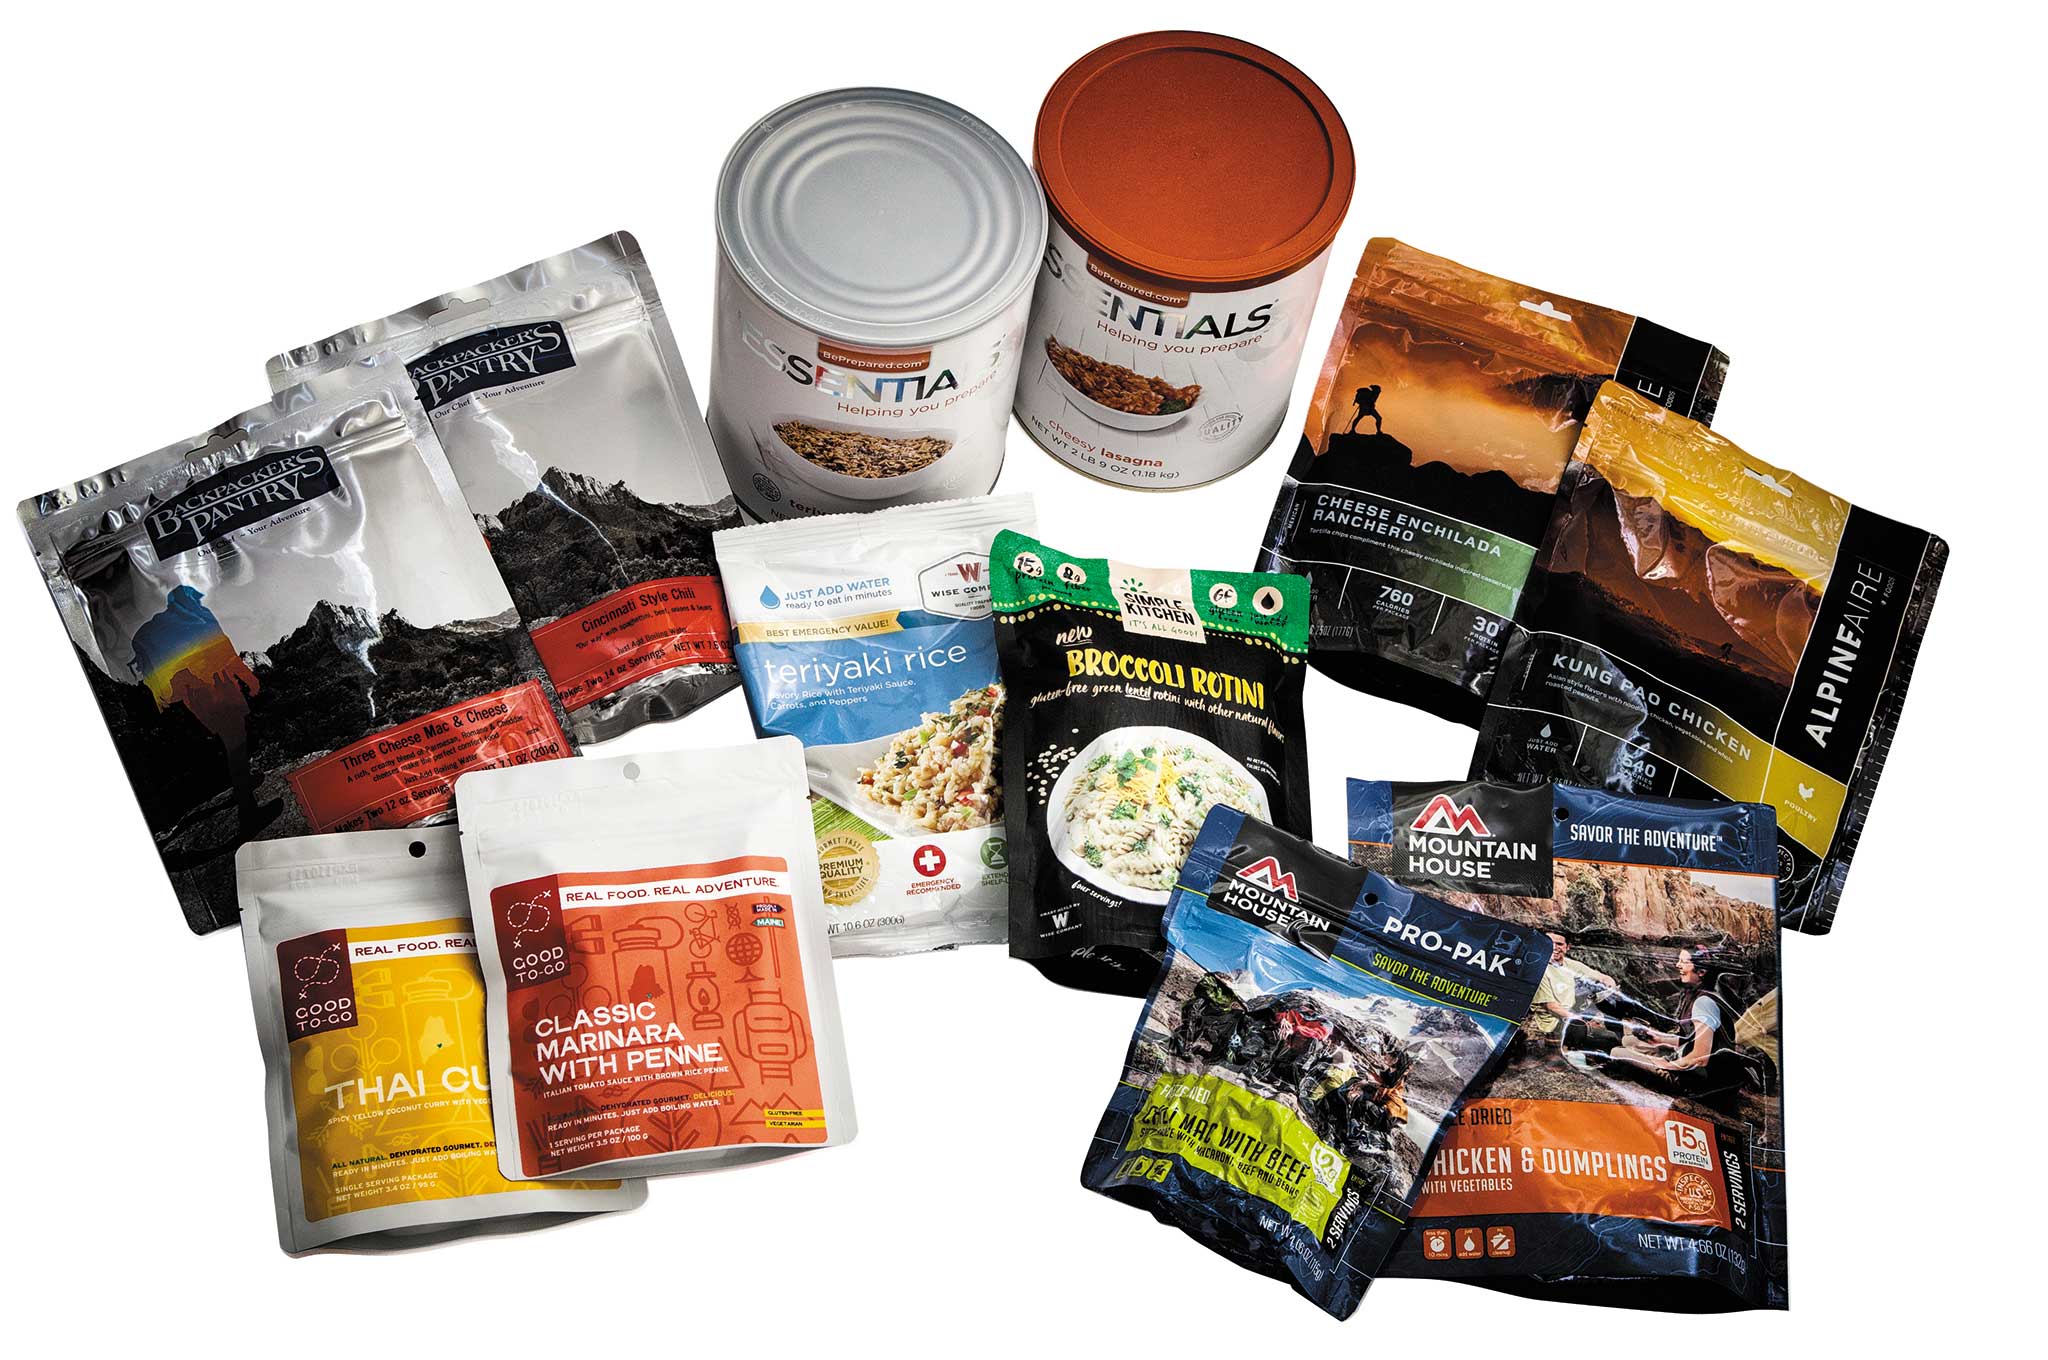
Whether it’s the result of an EMP (electromagnetic pulse) or some form of massive technological failure, a grid-down situation could last hours, days, weeks, or even longer. Regardless of duration, it’s important to know how to work as a family unit to survive. If you have a simple stockpile of food and basic supplies, you can make it work with careful portion control and rationing. Options such as starting a garden or rainwater harvesting can also be a lot easier with your family, as opposed to attempting these tasks on your own.
Homestead maintenance, cooking, and auto repair can also be delegated and executed at the same time to use time more efficiently. Practice working together before disaster strikes, and optimize tasks to make the most of the natural strengths of each family member.
Challenges
Having no electricity can really wear on people who are used to being connected to technology every day. This is true for a lot of Americans, but especially the younger generations. Preparing a generator with plenty of gas can be a great solution to have some power for lighting, attempts at communication, and charging devices (assuming there’s still a network for your devices).
You alone may not care about a long-term power outage, but as far as morale goes for your family, access to a few electronic conveniences will make a huge difference. A small generator can also power handy devices such as water pumps, appliances, or heaters. These solutions are great to keep around just in case the lights go out!
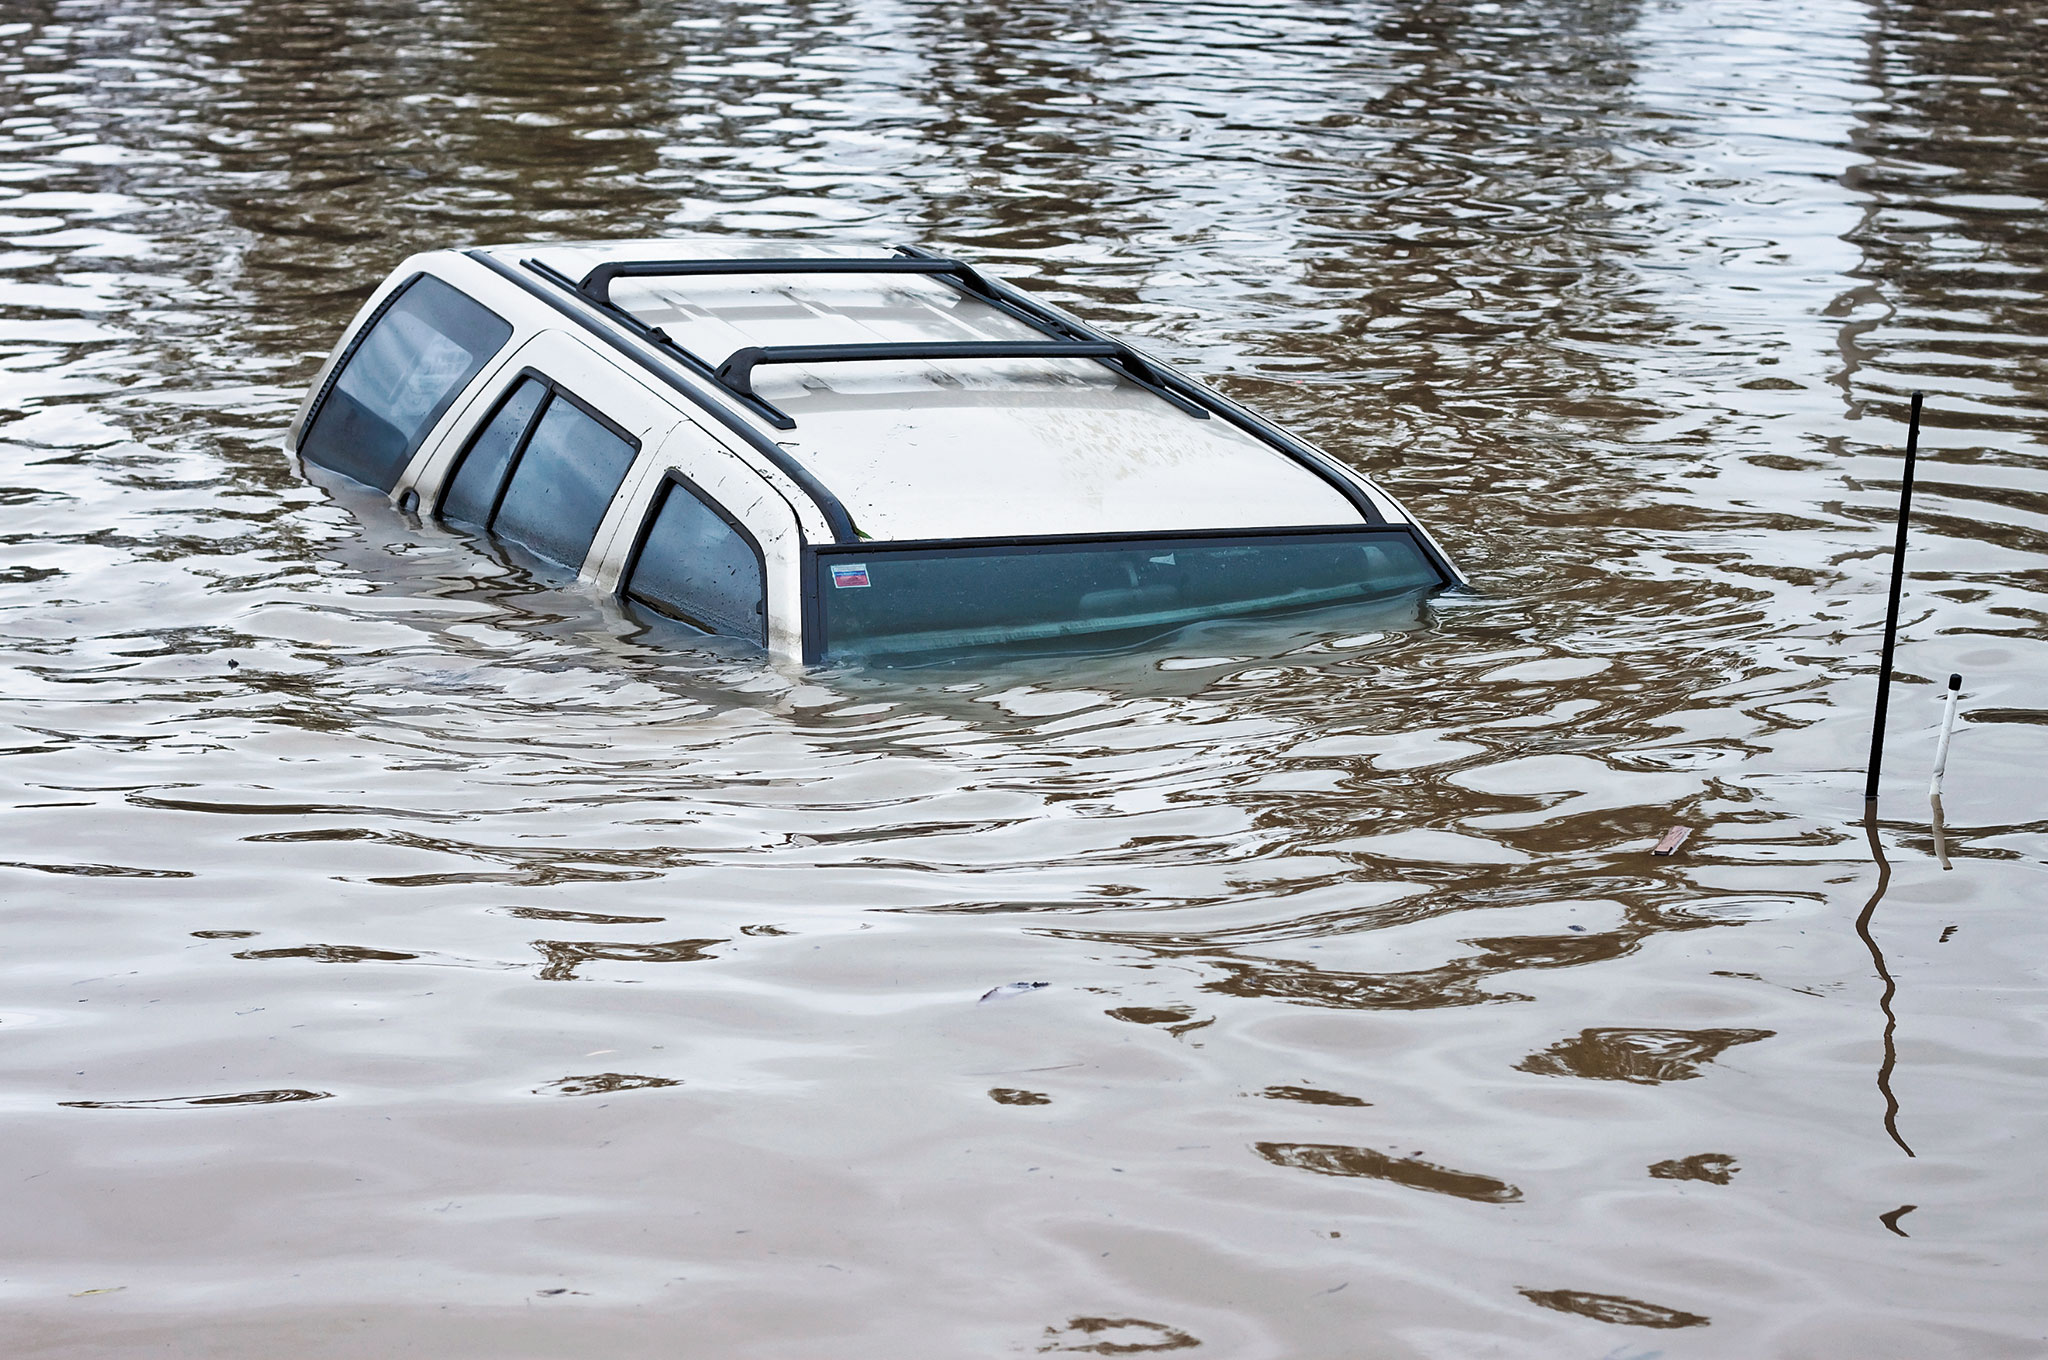
Natural Disaster
Keys to Survival
Natural disasters can range from severe wildfires all the way to major flooding and blizzards, depending on your geographical location. Regardless of the situation, general preparedness and keeping a stockpile of food and medicine can determine you and your family’s fate. Before disaster hits, work together during shopping trips to gradually build up supplies based on what your entire family needs. Depending on the type of disaster, shelter, food preparation, and general hygiene will become keys to keeping the family morale high.
Work together to make your shelter situation the best it can be, even if that means replacing your torn apart roof with a robust tarp, boarding up windows, or creating a makeshift fireplace to stay warm when all means of heat have been knocked out in a chilling blizzard. Utilize your strength in numbers to troubleshoot hangups that would otherwise be arduous to take on alone. Try making tasks fun for kids by turning them into competitions, and offering morale-boosting prizes for completing these tasks.
Challenges
Just recently during Hurricanes Irma and Harvey, the world sat and watched as major flooding and storm damage destroyed shopping centers, homes, and entire cities. With this came a sudden depletion of food for those bracing for the storms. As a family, beef up your food storage and protect it to best suit the type of disaster most likely to strike your area.
Stockpiling enough shelf-stable food and water for your family creates an essential safety net.
The largest challenges during a natural disaster are access to food, clean water, and first aid, so hitting the clearance medicine section at the store and bolstering your pantry will save you much heartache during an emergency situation. Be sure you have enough of these resources to sustain every one of your family members, plus an extra safety margin. Consider keeping logs of normal resource usage on a daily, weekly, or monthly basis to better estimate how much you’ll need to stockpile.
Civil Unrest
Keys to Survival
Unless you live under a rock, you would have noticed that there’s been a sharp increase in riots and protests in the United States recently due to a myriad of social and political issues. Unfortunately, during these events there are often innocent civilians caught in the middle, and these bystanders may be affected in some unfortunate ways.
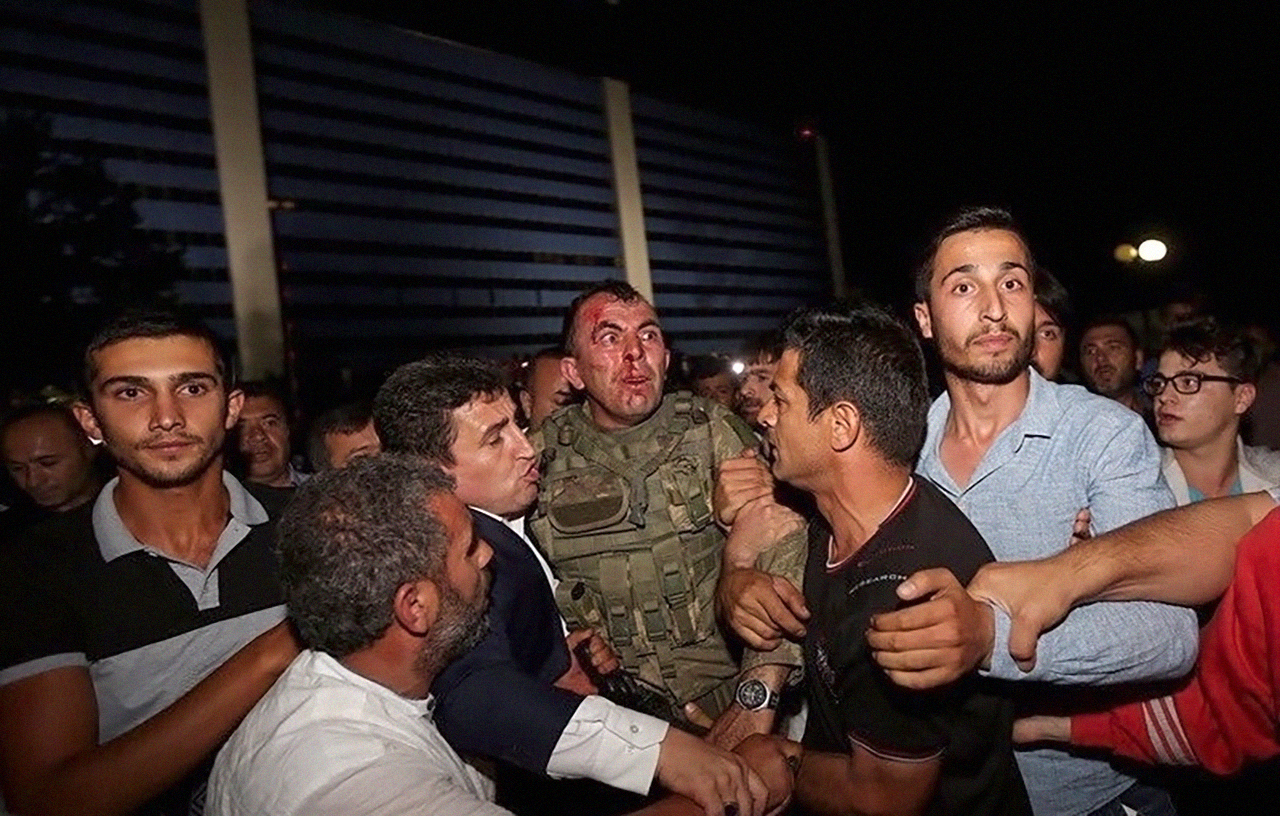
An attempted military coup in Turkey quickly led to mass violence in the streets.
Looting and destruction of property is common during these types of events, and keeping your property locked down tight is important. Having more people to assist in fortifying your dwelling is a huge benefit, and can lead to a much easier time during a crisis event. Also, taking watch shifts as a family to prevent any intrusion is a benefit that a lone survivor may not have. Keeping alert and working together to stay safe until authorities regain control can be the difference between peace and pure chaos.
Challenges
Depending on your location, arming yourself with weapons may be difficult. Even if you already have access to a wide range of firearms, not all members of your family may be fully comfortable using them, which can pose quite the risk if you need to hand them a firearm for protection. Take some time as a family and hit the range to practice your shooting skills and safety discipline. It’s a fun and educational way to better prepare for the worst, and also gives a great opportunity to teach your loved ones something new.
With proper training, even a simple flashlight can double as a helpful impact weapon.
Aside from firearms, it’s also important that your family has an idea of what weapons can be improvised during any type of neighborhood invasion. Baseball bats, chairs, and garden equipment make effective improvised weapons in a pinch. Also, small pepper spray canisters nearing their expiration can usually be found in clearance aisles of big box stores. Don’t be fooled, most of the time the expiration dates are more of a guide than gospel.
Conclusions
No matter what the situation, the safety of your loved ones always comes first. It’s definitely true during a catastrophe that a more people equals more exposure to risk. But a larger group also yields more resources, manpower, and intelligence on the situation. Managed correctly, this can lead to a better chance of survival.
However, knowing what to do is only half the battle. Training and hands-on preparation are essential to making any plan work in the real world. Employing tactics or plans can be much harder in the heat of the moment, so don’t forget that NOW is the time to get your family involved.
Taking your loved ones along with you to shop for your stockpile, or even going over simple drills at home could save you in a life or death scenario. In an emergency, you’ll need your family to work together like a well-oiled machine, rather than panic and squabble due to inadequate preparation.
About the Author
Jim Henry is a physical security and surveillance expert who has spent all of his adult life working to keep people out of places they shouldn’t be, and locating individuals who need to be found. Prior to his current employment in the private sector, where he works as a government contractor, Henry was a Surveillance Investigator for The Rivers Casino in Pittsburgh, PA. He also worked in Erie, PA in a similar role. Before that, Henry was busy building a diverse portfolio of education, studying countersurveillance, critical infrastructure protection, and threat detection. Even though most of his current work remains secret, Henry is very vocal about his love for firearms, writing, EDC gear, hiking with his dog, and spending time with his family.
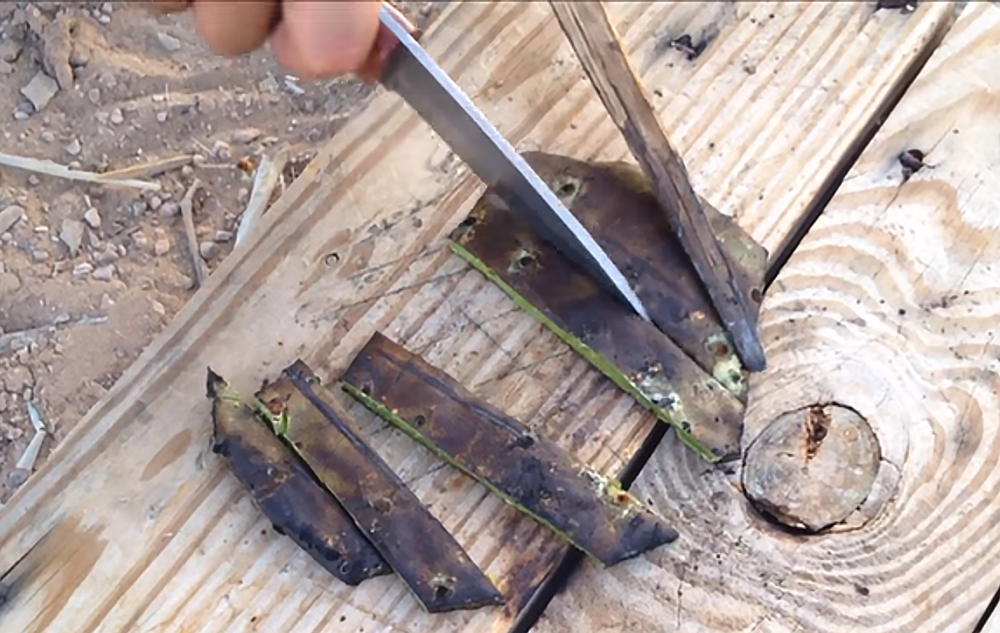
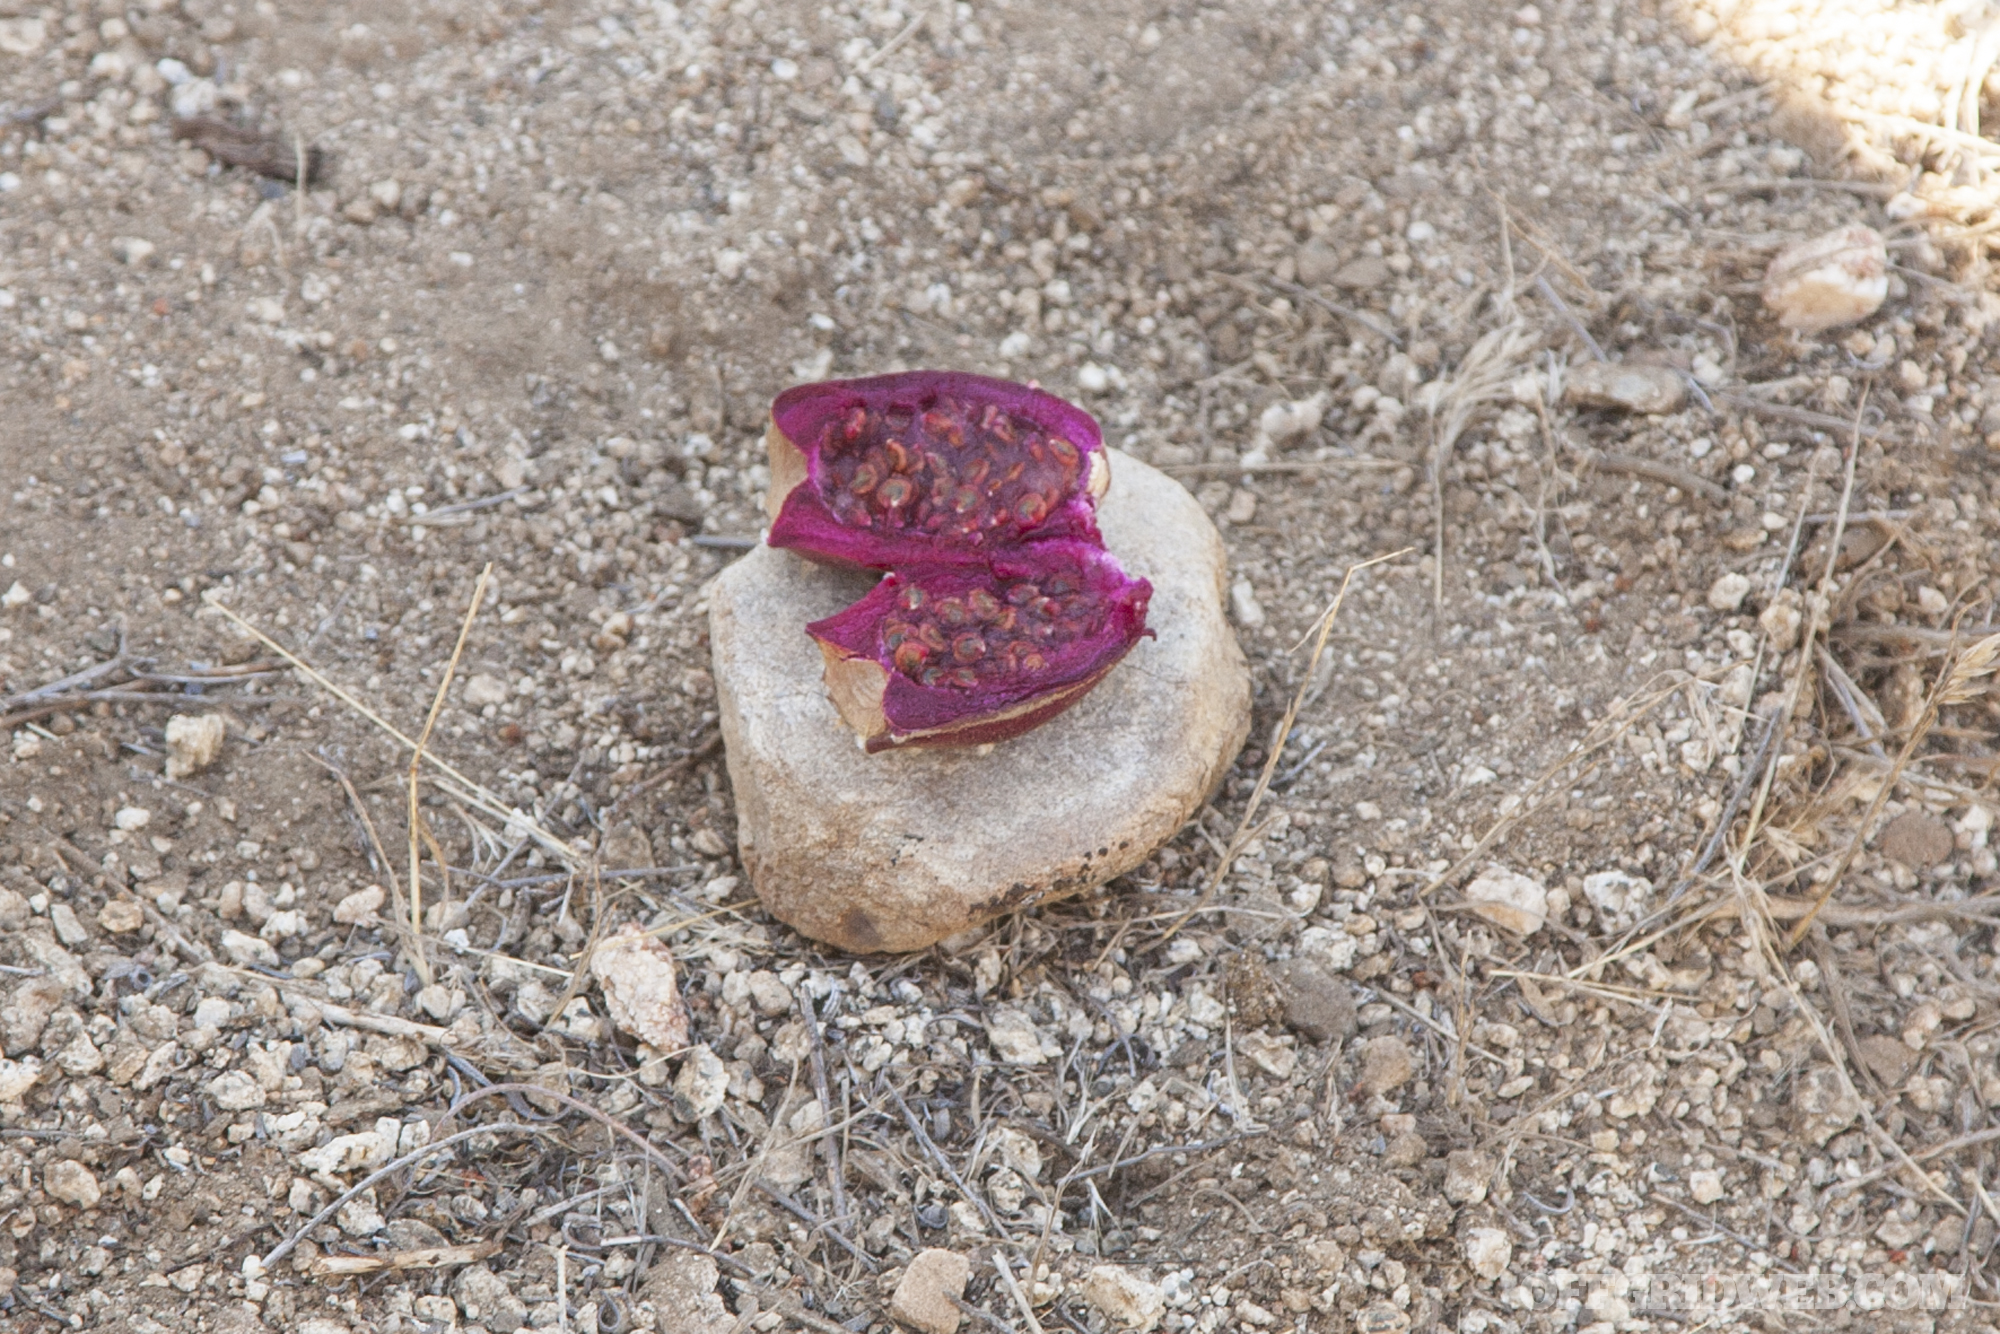
There’s an old desert survival myth that you may have seen perpetuated by classic western movies — supposedly it’s possible to cut open a barrel cactus and find a convenient reservoir of clear drinkable water inside. Unfortunately this isn’t true, and even if you’re able to painstakingly squeeze liquid out of a cactus, gulping down large quantities of cactus water is likely to make you sick. However, cacti can provide another important survival resource: food.
The prickly pear cactus is found throughout the United States, Mexico, Central and South America, the Caribbean, and even the Mediterranean. Most varieties of prickly pear cactus have flat, branching pads and oblong red fruits which appear during warmer parts of the season. As we mentioned in our 3MR wild edibles class recap, the fruits are easy to eat and quite delicious — just carefully cut them off the cactus, scrape off all the spines and hairlike fibers with a knife, roast them over an open flame if desired, and eat the sweet red flesh inside the fruit (also called a tuna).
We mentioned in that wild edibles article that the green cactus pads are edible, but didn’t have the opportunity to go into more detail. If you’re curious how to eat this part of the cactus, the following video from Junkyard Fox provides a thorough explanation on how to harvest, clean, cook, and eat prickly pear pads (also called nopales).
The key is to carefully scrape all large spines and tiny hairlike glochids off the surface of the cactus before handling or eating it. Otherwise you’re going to have a VERY unpleasant dining experience.
While nopales still contains traces of the cactus juice we mentioned at the beginning of this article, the smaller and younger outer parts of the cactus contain less of the stomach-upsetting oxalic acid. Cooking the cactus pads also helps to break down the acid, further reducing the risk of indigestion. This plentiful plant may not be a cure for thirst in the desert, but it can certainly help cure your hunger.