Tasting Canned Protein – Vegetarians Need Not Apply

It's been a month since the nation's power grids went down and with them almost all modern conveniences. Grocery stores are either sold out or were gutted by looters weeks ago. Fast-food joints are all shut down. Hoping to nuke your favorite Hungry-Man meal? Forget about it. Freezers and microwaves have stopped working. Most urban-dwellers are living off of prepackaged foods or what they can scrounge from their backyard gardens.

Naturally, you're better prepared and equipped than most. Though your fresh provisions have been exhausted, your inventory of nonperishable food is well stocked. (After all, it's been suggested that one needs to store two years' worth of food.) As grateful as you are to not be starving, you don't want to be eating crackers and pinto beans for God knows how long.

Luckily, you had the foresight to invest in the wonderful commodity of tasty, tasty meat. And all sorts of it. Whether the animal once roamed the earth by land, sea, or air, there's a good chance you'll find it turned into portable cuisine-in-a-can to be enjoyed for years to come. In a long-term survival situation, canned meat can not only provide much needed calories and protein, but also offer a huge boost in morale when times look desperate. But have you actually tasted the canned food you're storing?

Your intrepid editors at OFFGRID are putting our palates — and our digestive tracts — on the line to bring you a blow-by-blow report of which meats are treats and which ones are gastro horrors. To present the most objective review possible — or just to share in this author's misery of having to eat canned meats every night for a week straight — he enlisted OFFGRID's editor, Patrick Vuong, and managing editor, John Schwartze, to help judge in the taste tests. Read on to find out which can contained the most amount of whoop-ass once opened and which one sent us reaching for the garbage bin.

Boiled Oysterspampa-boiled-oysters

Make & Model
Pampa Boiled Oysters
Notable ingredients:
Whole oysters, water, salt
Size
8 oz.

Tester #1:
Patrick Vuong

At First Bite: Chewing one right out of the can was like taking a bite out of the ocean. Mark this one under “poor life choices.”

Overall: Don't get me wrong, I love oysters. When shucked and served with lemon, vinegar, a dash of cocktail sauce, horseradish, and some Tapatio, fresh oysters are one of the most delectable foods on the planet — this briny, boiled version was not. In fact, it was a complete and utter mistake. Even after I breaded and deep-fried it, the canned oysters still tasted like the Pacific Ocean took a dump in my mouth. If I ever were holed up in my compound with the world crumbling around me, I would never eat this again. Instead, I'd try to use it as bait…though I'm not sure I'd catch anything but cockroaches with it.

Tester #2:
John Schwartze

At First Bite: Ewww, nasty!

Overall: I haven't felt this grossed out since I watched Hostel. Oysters are something I've always hated. Freshly shucked with all the fixings is still something I avoid. This was a gagger alright. Could barely get the first one down and couldn't bring myself to finish the rest for fear of a “reversal.” About the only way I could down these is either with a strong chaser, dipped in batter and deep fried, or used in some kind of stew to mask the flavor. I'm sure others would happily and easily down a can of these with no problem, but I'm not one of those people with the necessary acquired taste. Perhaps they'd be better used as bait, chum, or punishment for a misbehaving child since castor oil is out of vogue now.pampa-boiled-oysters

Tester #3:
Martin Anders

At First Bite: Cracking the can open was a pretty horrifying experience. Why does this even exist?

Overall: If you enjoy eating what looks like the spawn of the Alien queen, then this is the canned meat for you. Add to that the sensation of an ocean-soaked sponge unleashing its salty brine in your mouth and you get an inkling of what it's like to have this slide down your throat. That's all I have to say about that.

Chickenhormel-premium-chicken-breast

Make & Model
Hormel Premium Chicken Breast
Notable ingredients:
(Not a complete list) Chicken breast meat with rib meat, water, sea salt, sodium phosphates
Size
5 oz.

Tester #1:
Patrick Vuong

At First Bite: Tasted like chicken — if by chicken I meant dried meat packed into small chunks and rehydrated by bathing it in salt water. But, yeah, it tastes like the real deal.

Overall: I'm a huge fan of fried chicken, chicken wings, breaded chicken, chicken breast, popcorn chicken, and pretty much anything derivative of this type of poultry, so my opinion was a little skewed — I was really hoping it would be better. I know, I know, it's from a can. Don't get me wrong, it tastes fine. And, you can eat this cold from the can, heated up, with a sandwich, or mixed in with other dishes, so it's quite versatile. In a disaster scenario, I'd be a happy little survivalist if this were the only ration left in the pantry.hormel-premium-chicken-breast

Tester #2:
John Schwartze

At First Bite: It reminded me of eating Thanksgiving leftovers. Tasty!

Overall: This is my pick of the litter. The meat was moist and flavorful. There are a million different things you can do to jazz it up, but eating this by itself out of the can was definitely good. There are plenty of nutrients, but my only complaint is that there's really only about one serving worth of meat inside. It's chunky and not shredded, so it doesn't really fill up the can. You'd have to get a lot of these if you wanted something good that would last for a while. I may start buying this as a viable alternative to cold cuts for sandwiches.

Tester #3:
Martin Anders

At First Bite: Let's just call this Tuna of the Land.

Overall: At first bite, I thought for a split second that this chicken was tuna. Maybe it's because it comes in a can, swimming in salted water. That said, I have to say that it's exactly as advertised. Unlike most of the other meats in this taste test (and the nuggets I ate for lunch today), the meat here is clearly made of real chunks of chicken breast. It's a bit dry, but still makes for some good eats.

Nitrates vs. Nitrites

While good nutrition is certainly important to one's survival, the choice between starving and not starving is clear. Eating a preservative and sodium packed can of meat might not be your first choice when you've just enrolled yourself in a Pilates class, but when times get tough, the choice to eat potted meat is a clear one to make.

The arguments for and against nitrites and other additives are a bit controversial. Some say they're terrible for your health and some say those claims are greatly exaggerated. Many canned meats are preserved with additives such as nitrates and nitrites that keep them from spoiling.

For those against them, they point out that although nitrates are a normal part of our diets, excessive levels have been linked to diseases like leukemia, non-Hodgkin lymphoma, and many cancers. Sodium nitrate and potassium nitrite, which appear in our tested meats, are added to cured meat to preserve color, prevent fats from going rancid, and inhibit bacteria from growing. But it is said that if nitrites are exposed to high heat, such as during cooking, they will have the potential of becoming carcinogenic. To eat or not to eat, the choice is yours.

Crab Meatcrown-prince-crab-meat

Make & Model
Crown Prince Crab Meat
Notable ingredients:
(Not a complete list) Crab meat, water, salt, sodium acid pyrophosphate, calcium disodium EDTA, sodium metabisulphite
Size
12 oz.

Tester #1:
Patrick Vuong

At First Bite: Would you like some cold crab with your salt? All sodium jokes aside, this canned shellfish wasn't that radically different from the ridiculously expensive stuff you buy at a swanky restaurant.

Overall: I didn't think it was possible, but you actually can (pun intended) satiate your appetite for exquisite seafood dining in a SHTF scenario. The meat was shredded to tiny bits and salty, but otherwise authentic — especially when heated up to supplement other foods. I tried it with good ol' mac and cheese, but eating it with crackers would also be flavorful and more plausible in a survival situation.crown-prince-crab-meat

Tester #2:
John Schwartze

At First Bite: Was pleasantly surprised. The meat was tender and not too salty. There were tiny bits of shell, but that's to be expected.

Overall: People pay beaucoup bucks to crack through shells to get to this stuff. Heated up it was pretty tasty. With some drawn butter it really wouldn't have been too far off from what you get in a restaurant, and you're paying a lot less. If I had to eat this to survive it'd certainly be far from agonizing. I think eating it day after day would get a bit old in a hurry, but I certainly wouldn't pass it up if I were desperate for food. If I were to also end up with some nice crackers to put this on, who knows, I may be holding TEOTWAWKI social mixers with these as hors d'oeuvres.

Tester #3:
Martin Anders

At First Bite: Direct from the can, the crab meat is soaked in a salty brine and is flaky in texture.

Overall: The crab is clearly canned from the leftover parts from bigger, more desirable pieces. The flavor has a slight chemical taste that is reminiscent of the smell of a brand new pair of Nikes, oddly enough. If you think that sounds strange, try a taste of this crab! Overlooking the chemical taste, I'd say that it's something that I could live off of. Given repeated servings, I could get used to it.

Corned Beef Hashhormel-mary-kitchen-corned-beef-hash

Make & Model
Hormel Mary Kitchen Corned Beef Hash
Notable ingredients:
(Not a complete list) Beef, rehydrated potatoes, water, salt, sugar, sodium nitrite
Size
25 oz.

Tester #1:
Patrick Vuong

At First Bite: Straight from the can, it surprisingly tasted like decent pâté with some potatoes.

Overall: I can certainly eat this cold straight out of the container, but it tasted even better after I fired it up on the skillet and ate it with scrambled eggs. Considering this is old potatoes mixed with low-grade cow parts preserved with sodium nitrite, the corned beef hash was rather pleasant and almost tasted like it didn't come from a can at all. It gets a thumbs-up.

Tester #2:
John Schwartze

At First Bite: Good. A little greasy and salty, but the potatoes were nice and firm.

Overall: I guess the true question you should be asking is, “Would I eat any of these by choice.” For this, a big yes. I don't think I've ever had canned corned beef hash so was anxious to try this. Served cold it was quite good, and warmed up, even better. You could mix this with all kinds of things to improve it as well: cheese, eggs, sauce, sandwich filling, etc. This would be a great food source during tough times that's appetizing and nutritious. I'd imagine kids would become receptive to this one as well. Next to the chicken I'd have to say this was my second favorite and would eat it on a regular basis.hormel-mary-kitchen-corned-beef-hash

Tester #3:
Martin Anders

At First Bite: Everything you need in one can.

Overall: Clearly better if it were heated up on a skillet, the corned beef hash is a bit of a cheat in this test since it contains both beef and potatoes. It's got everything a hungry survivalist needs to be satisfied. Eaten cold, it is chunky, but still very palatable. Some Tabasco would put this selection over the top.

Deviled Hamunderwood-deviled-ham-spread

Make & Model
Underwood Deviled Ham Spread
Notable ingredients:
(Not a complete list) Ham (cured with water, salt, brown sugar, sodium nitrite)
Size
4.25 oz.

Tester #1:
Patrick Vuong

At First Bite: Hello, high blood pressure. Meet deviled ham spread.

Overall: This was essentially a really salty pâté — but a good one nonetheless. Out of the can, it tasted like a decent meat paste. However, there's really not a whole lot in each tiny can, so you'd have to either buy a ton to have enough sustenance or use it as a flavor enhancer for other foods. You could spread it on crackers or bread…or cake it all over the canned boiled oysters to mask the mollusks' disgusting flavor.

Tester #2:
John Schwartze

At First Bite: A little salty, but pretty decent.

Overall: It's definitely no Easter ham in terms of flavor, so don't expect it to be sweet or smoky. Out of the can it's not a bad way to go, and the meat was moist. Even though the contents take up the entire can, the can itself is so small it's only worth about one serving of food for an adult male. I definitely wouldn't pass this up though. It's pretty tasty and versatile. I finished the can with no complaints. Warmed up it's even better.underwood-deviled-ham-spread

Tester #3:
Martin Anders

At First Bite: It's salty meat spread.

Overall: The flavor isn't bad, but it's very salty. I wouldn't attempt eating this straight unless it's all I had. I do think it's perfect to spread onto crackers or accompany flavorless foods such as rice. Heating it up might increase its appeal. The can has a pull-tab cap and is smaller than a hockey puck, which makes it easy to stow.

How Long Can I Store It For?

Canned foods low in acid, such as corn or peas, can last for about five years. Canned foods high in acid like tomatoes can keep 18 months or more. It's all about how the cans are stored. You want to keep them away from heat and humidity. Storage in dry and dark places that range in temperature from 50 to 70 degrees Fahrenheit is optimal for long-term storage. For more on expiration date management, see “For a Limited Time Only” in OFFGRID's Spring 2014 issue.

Know Can Do

Canned meat isn't just good for sustenance. It also offers a useful byproduct: the aluminum can itself. In desperate times, know that the can…well, can be repurposed for all sorts of uses. Below are just a few examples:

  • Cup
  • Candle holder
  • Rain water catch
  • Pot for cooking or boiling
  • Berry and nut basket (if you have to gather food)
  • Security alarm when combined with rocks and some string (see “Early Warning System” in OFFGRID's Fall 2014 issue)

Spamhormel-spam-teriyaki

Make & Model
Hormel Spam Teriyaki
Notable ingredients:
(Not a complete list) Pork with ham, salt, water, modified potato starch, sodium nitrite
Size
12 oz.

Tester #1:
Patrick Vuong

At First Bite: It's Spam with a hint of East Asia…and slathered in a saline sauce.

Overall: Who doesn't love this mystery meat? I enjoy it on occasion as a component of fried rice, as a complement to eggs, or as the main ingredient in Spam musubi. So I figured the teriyaki version would be just as good. To my surprise, it was really salty — and that's saying a lot for Spam. While it would be most agreeable with a generous amount of white rice, I'll probably stock my provisions with regular Spam and save this version for when I want to feel extra Asian.

Tester #2:
John Schwartze

At First Bite: Flavorful, but please don't pass the salt.

Overall: Spam is something else I can't remember the last time I ate outside of some Hawaiian cuisine that uses it. Mine was teriyaki so had a bit more flavor than expected, but was really salty. Comparatively speaking it was pretty good — the texture was firm, and could be used as a nice grilled steak, as filling in a sandwich, or chopped up and served with other things. This would be another I'd happily resort to if times got lean. Its versatility, flavor, and texture make it a worthwhile resource, and I may actually start using this more often to find new and exciting ways to make it taste good when mixed with other ingredients. Plus, I can sing the Monty Python Spam song while I'm cooking it as an added bonus!hormel-spam-teriyaki

Tester #3:
Martin Anders

At First Bite: It's a brick of meat; what's not to like?

Overall: Stocking up on Spam in case SHTF is a no-brainer decision. Loading up on this teriyaki version on the other hand is questionable. It's surprisingly sweet, clearly a result from its very strong teriyaki flavor, but it also has an unusual aftertaste that the original flavor doesn't have. I can't say that I'm digging this version, but if you already have a five-year supply of original Spam, it probably wouldn't hurt to throw in a few cans of alternative flavors like this teriyaki version just to mix it up a bit.

Tunachicken-of-the-sea-chunk-light-tuna-in-water

Make & Model
Chicken of the Sea Chunk Light Tuna In Water
Notable ingredients:
Chunk light tuna, water, vegetable broth (contains soy), salt
Size
5 oz.

Tester #1:
Patrick Vuong

At First Bite: For those who've never tried canned tuna, it had a salty yet slightly sour texture, followed by a “seafoody” aftertaste.

Overall: If you're a low-carb nut or a fitness freak, you're probably well acquainted with this style of seafood. Some guys I know eat this straight from the tin for lunch — and nothing else. (Tuna is a storehouse of protein, which not only helps build muscle, but also keeps you feeling full longer — which is highly useful when rations are low.) I suggest eating it with veggies, rice, or crackers. I've long gotten used to canned tuna, so this portion of the taste test was fairly ho-hum. I'd rather have a plate of fresh tuna sashimi, but, hey, preppers can't be choosers. I'd venture to guess that in dire circumstances, this tuna would be palatable enough for most people.

Tester #2:
John Schwartze

At First Bite: Tolerable, but definitely not my first choice.

Overall: For some reason I've hated canned tuna since childhood. I enjoy sushi or a nice grilled tuna steak, but can never get into tuna of this kind so my evaluation is a bit biased. This is a good source of protein and nutrients, but my preference would direct me to other sources of canned nourishment if I had the choice. There's a lot you can do to jazz this up with mayo, onions, etc., but in a forced situation with nothing else to use I would likely be using this as a bartering chip more than I would a source of sustenance. My cat was happy to finish the majority that I couldn't, which also makes it a reasonable alternative pet food to keep your four-legged buddies going if there's nothing else to use.chicken-of-the-sea-chunk-light-tuna-in-water

Tester #3:
Martin Anders

At First Bite: Very dry with a sour, tangy flavor.

Overall: Sure, I like myself a good tuna melt once in a while. When I took a mouthful of tuna straight from the can, I was a bit disappointed. This isn't what my tuna melt is made up of is it? Its consistency is similar to overly cooked chicken, soaked in salt water. Can I eat it in a survival situation? Absolutely. Do I wish I had some mayo and other seasonings to add to it? Absolutely.

Vienna Sausagesarmor-vienna-sausages

Make & Model
Armour Vienna Sausage Original
Notable ingredients:
(Not a complete list) Mechanically separated chicken, water, salt, corn syrup, sodium nitrite
Size
4.75 oz.

Tester #1:
Patrick Vuong

At First Bite: This ain't my first time at the Vienna sausage rodeo — easily my favorite dead animal product of this taste test!

Overall: Truth be told, I've been eating these little bad boys since I was a kid (though a lot less after I realized what goes into making them), so I had zero inhibitions when cracking open the lid. These are basically mini hotdogs that you can eat straight up, throw into soup or stew, or douse in ketchup and mustard with some bread. Stock up on Vienna sausages without reservation, folks.

Tester #2:
John Schwartze

At First Bite: Mushier than I expected, but had a nice flavor.

Overall: I don't remember the last time I had one of these that wasn't slathered in barbecue sauce and served hot as some sort of Christmas party appetizer, so my palette was pretty objective. These were quite nice and something I'd definitely stock up on if food became scarce. They weren't too salty and had a nice flavor. I expected a firmer texture, but it wasn't so soft that it was gross. There are a variety of things you could eat these with (sauces, mixed with other items, as a side dish) that would make them a nice part of a complete meal. If you like hot dogs, you'd like this.

Tester #3:
Martin Anders

At First Bite: Seven little piggies all snug in a can.

Overall: A childhood favorite of mine, the Vienna sausage is the younger cousin of the hot dog. By no means is this a gourmet food, but it is enjoyable to eat — especially when you're hungry. I do like the fact that it comes in a small pull-top can. They're painless to carry in a bug-out bag or cargo pant pocket and easy to open when it's time to eat.armor-vienna-sausages


New DVX Safety Sunglasses

A good pair of sunglasses is extremely important for any survival kit, not only because they cut glare and improve your vision in bright daylight, but because they protect one of your most vulnerable organs: your eyes. Without proper eye protection, you run the risk of things like dust, sand, wood chips, metal fragments, chemicals, or even bloodborne pathogens incapacitating you at a moment's notice. Even if you already wear a pair of sunglasses every day, having a backup pair in your bug-out bag is wise.

DVX Eyewear has released two inexpensive new models that would be well-suited as EDC sunglasses or as backups to your existing gear. The lenses on both these DVX safety sunglasses are rated to meet ANSI Z87 High Velocity and High Mass Impact standards, and the frames are constructed of durable and flexible Triloid Nylon. This results in OSHA-grade protection for your eyes, at a very affordable price point.

DVX sunglasses Axon

The DVX Axon, a new frame and lens combo for 2015.

The first new pair is called the DVX Axon, and it comes with gunmetal frames and Silver Flash lenses. The Axon also features a rubberized nose bridge and temple tips for added comfort and a secure fit, even if you work up a sweat. The Axon retails for $48.

DVX sunglasses Mojave

The matte black DVX Mojave, another new model for 2015.

The second pair is known as the DVX Mojave, and it features stealthy matte black frames with Polarized Grey lenses. The 8-layer polarization on the lenses dramatically cuts glare from water, roadways, snow, or other reflective surfaces. This yields excellent visual clarity in even the brightest conditions. The Mojave retails for $78.

All DVX eyewear products can be found conveniently at Walmart Vision Centers throughout the United States, and they carry a 1-year warranty against defects on frames and lenses. To learn more about DVX safety sunglasses, visit dvxeyewear.com.


Infographic: Essential Knots

We'd be willing to bet you've got some paracord somewhere in your survival kit, go bag, or EDC gear. Maybe it's a keychain, bracelet, knife handle wrap, zipper pull, or just a loose bundle—but whatever form it's in, it's important to have cordage available. You've probably heard this message many times by now.

However, cordage is basically useless if you can't tie knots. Even one or two essential knots (such as the bowline) will get you a long way, but there are literally hundreds of different knot types out there. You probably won't be able to remember all of them, so having instructional pictographs is a huge help. Fix.com created this great infographic that not only shows how to tie important knots, but what they're used for.

Essential Knots Infographic

So, go grab some paracord and practice these knots. Once you've tied them 10-15 times, you should have them committed to memory, which is what will really matter once you don't have this graphic to refer to. Good luck, and be sure to let us know which of these essential knots is most useful to you.


Paperclip Lock Picks

If you've been following the site, you may have seen our feature last week on cracking a padlock without tools. That technique is very simple and effective, but it also makes quite a bit of noise as you tap the lock with a hard object. Additionally, it won't work on recessed door locks—if you're being illegally detained in a building, that's more likely to be what you're dealing with. Fortunately, there's another easy method that anyone can try using a common household item: paperclips.

DISCLAIMER: We’re certainly not advocating you do anything against the law, so only practice this technique on locks you own. Please don’t do anything stupid and/or illegal with this knowledge, and if you do, we are not responsible.

You may have thought picking a lock with a paperclip was too good to be true, since it's often featured in otherwise unrealistic TV shows and spy movies. It may seem far-fetched, but it's actually quite doable. YouTube channel BlackScoutSurvival shows how it's done:

You'll notice the host makes picks using a set of pliers. While a pair of pliers makes the process easier, it's not necessarily a must-have tool. Both the tension wrench and the rake can be made manually, as shown in this video (most relevant from 2:22 to 5:02):

Admittedly, these videos still make it look easier than it might be for a true beginner. However, even with minimal practice, paperclip lock picks can be an effective method of escaping captivity. Looks like MacGyver wasn't so far off after all.


Portable Lanterns Buyer’s Guide

So you've finally made it to safety. Whether you're taking shelter from a passing tornado or hunkering down in a basement until the bad guys leave, at some point you'll need to be able to see in the dark. It's obvious that having a source of constant light is invaluable.

While we always preach that everyone should have a flashlight, keeping a portable lantern at the ready can illuminate your workspace while freeing up your hands. Like most lighting equipment, portable lanterns come in many shapes and sizes with differing features. In this guide, we take a look at models that can be easily stowed. These lanterns are made to be packable and can be stuffed into a car trunk, glovebox, camping pack, or bug-out bag. Depending on what your end use is, there's a lantern here that'll fit your needs.

Portable Lanterns Buyer's Guide

  • Black Diamond Apollo

    Colorway - Colorway Matte Black, Ultra White (shown)
    Lumen Output - High 80 / Low 10
    Runtime - High 15 hr. / Low 60 hr.
    Overall Width - 3 in. / Open: 5.5 in.
    Overall Height - Closed: 5.125 in. / Open: 9.625 in.
    Weight With Battery - 11.4 oz.
    Battery Type - AA (four, not included) or NRG Rechargeable Battery Kit (sold separately)
    Controls - Constant-on/variable-adjust push button
    MSRP - $50
    URL - http://www.blackdiamondequipment.com

    Looking like it just landed on the surface of the moon, the aptly named Apollo spews out 80 lumens of bright ambient light on its highest setting and is adjustable down to 10 lumens on its lowest setting.

  • Coast EAL20

    Colorway - Black and yellow
    Lumen Output - High 375 / Variable
    Runtime - Low 100 hr.
    Overall Width - 5.5 in.
    Overall Height - 8.25 in.
    Weight With Battery - 2 lbs 4.5 oz.
    Battery Type - D (four, not included)
    Controls - Constant-on push button, variable output selection dial
    MSRP - $54
    URL - http://www.coastportland.com

    The Coast EAL20 LED Lantern is equipped with nine LEDs (one white and eight red) which provide approximately 375 lumens of bright light on its highest setting or 80 hours of runtime on its lowest power saving setting with four D batteries.

  • Coleman CPX 6 Triago Lantern

    Colorway - Black and red
    Lumen Output - High 450 (lantern) / High 150 (panel)
    Runtime - Low 300 hr. (lantern) / Low 7 hr. (panel)
    Overall Width - 6 in.
    Overall Height - 10.75 in.
    Weight With Battery - 4 lbs 5.2 oz.
    Battery Type - D (four, not included), rechargeable cartridge (sold separately)
    Controls - Constant push-button switch on lantern base and on each panel
    MSRP - $120
    URL - http://www.coleman.com

    The Triago illuminates a wide swath of area at 450 lumens on its high setting for up to 13 hours.

  • Goal Zero Lighthouse 250 Lantern

    Colorway - Black
    Lumen Output - High 250 / Variable
    Runtime - High 2.5 hr. / Low 48 hr.
    Overall Width - 4.5 in.
    Overall Height - 6.25 in.
    Weight With Battery - 1 lbs 3.5 oz.
    Battery Type - Rechargeable Li-NMC (included)
    Controls - Rotary dial switch, emergency signal push button
    MSRP - $80
    URL - http://www.goalzero.com

    Packed full of features, the Lighthouse 250 Lantern can be charged via a wall outlet, a built-in hand crank, or even with an optional Goal Zero solar panel.

  • Kelty Flashback Mini

    Colorway - Ano Black (shown), Ano Green, Ano Orange
    Lumen Output - Lantern Mode: High 50 / Low 20; Flashlight Mode High 70 / Low 20
    Runtime - High 13 hr. / Low 38 hr.
    Overall Width - Closed: 2.25 in. / Open: 2.25 in.
    Overall Height - Closed: 3.75 in. / Open: 5.25 in.
    Weight With Battery - 8.8 oz.
    Battery Type - AAA (four, not included)
    Controls - Constant-on push-button switch
    MSRP - $40
    URL - http://www.kelty.com

    In its compact form, the Flashback Mini acts as a flashlight. When fully deployed from its telescoping aluminum body, it's a lantern capable of lighting up an area about 15 feet in any direction.

  • Streamlight The Siege

    Colorway - Coyote
    Lumen Output - High 340 / Mid 175 / Low 33 / Red 10 / S.O.S. 10
    Runtime - High 30 hr. / Mid 70 hr. / Low 295 hr. / Red 235 hr. / S.O.S. 430 hr.
    Overall Width - 3.75 in.
    Overall Height - 7.25 in.
    Weight With Battery - 1 lbs 14.8 oz.
    Battery Type - D (three, not included)
    Controls - Constant-on push-button switch
    MSRP - $61
    URL - http://www.streamlight.com

    The Siege is hardcore. It's rated IPX7, meaning that it's waterproof to 1 meter and is impact resistant up to 2 meters. It also floats in water and has a rubber molded cap, body, and base for enhanced grip.


Martial Arts Myth: Knife Attack Self-Defense

We've all seen knife fights in movies and TV shows. The dastardly villain pulls a glistening stiletto, makes some quip about how it has been knife to know our hero, then makes an overhand stabbing motion you'd see coming a mile away. The hero expertly deflects the stab with his forearm, roundhouse kicks the villain into a nearby fruit stand, and rides off into the sunset. Roll credits.
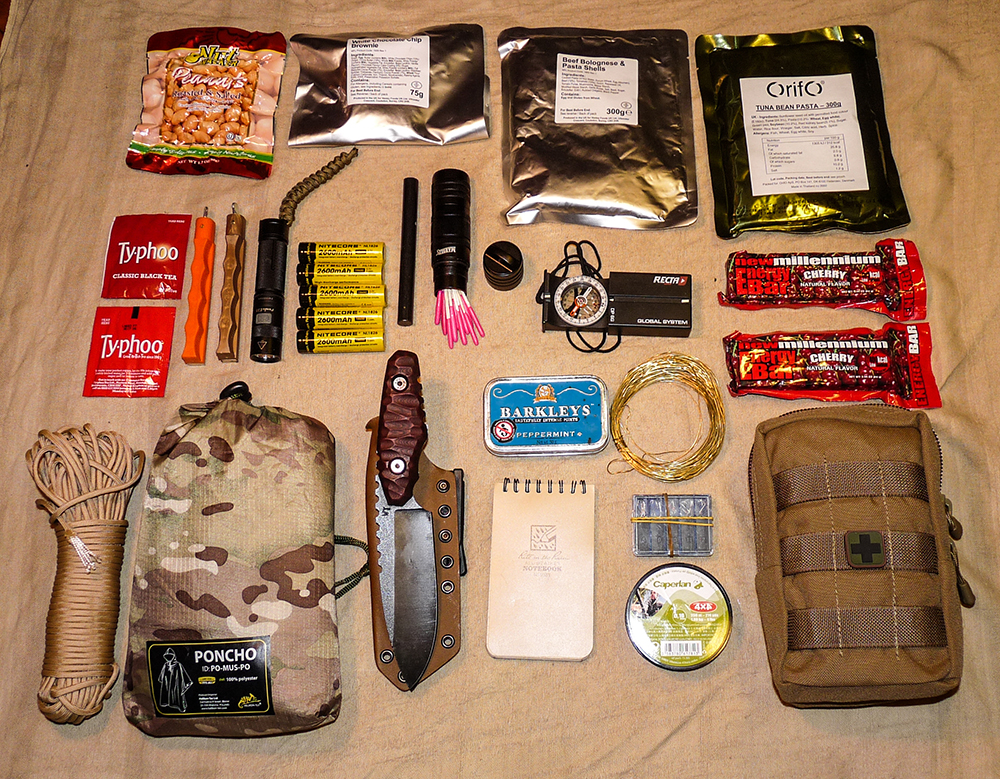
Unsurprisingly, the reality of a knife fight is nothing like this—think less like “The Mask of Zorro” and more like a prison shanking. It's fast, vicious, and often the victim doesn't even realize they've been stabbed until they notice the blood. Knife attacks are so sudden and unpredictable, you probably won't be able to block them effectively, even with considerable training.

Don't just take our word for it, watch this video for a good explanation from martial arts instructor Richard Dmitri (NSFW language):

As you can see, you do not want to go up against an attacker with a knife, especially in close quarters. If your opponent pulls a knife and you're unarmed, your first option should always be to escape. That may sound cowardly to some, but the odds would be stacked against your survival, and running may be the only way to remain unharmed.

If you're sure there's no escape, use kicks or improvised weapons from your surroundings to keep your distance. Attempt to distract or disorient your attacker, then make a run for it when you can. Here's another video that sums up the options effectively:

Despite the myth that most people can effectively block a knife attack with limited training, it's not as easy as some martial arts trainers make it seem. Do yourself a favor: run and live to fight another day.


Techniques to Break Free From a Kidnapper’s Restraints

Kidnappings are an all-too-real situation both at home and abroad. Whether you're an overseas contractor, a deckhand on a freighter in unfriendly waters, or a tourist in a foreign country who wandered into the wrong part of town, the unfortunate reality is that the fate of unlawful abductions and incarcerations can often be the worst kind. What's even more discouraging is that the availability of training for the average person to deal with these kinds of situations is limited at best.

Assume neither Liam Neeson nor anyone else is going to find and free you. You're on your own. So in the event you are taken by unknown assailants and restrained, what can you do to escape?

The variables that can occur in these situations are only limited by your imagination. You may be blindfolded, gagged, partially or fully undressed, in the same room with your captors or alone, and bound in various different ways with various different materials. Since we can't cover every possibility, we've spoken to a few experts on what to do to free yourself from common restraints (handcuffs, duct tape, rope, and zip ties) and staged a few situations to demonstrate ways to possibly break out of these restraints. Take a look at these methods and arm yourself with the self-reliance that could very well save your life.

Preparation

Kevin Reeve — whose company, onPoint Tactical LLC, offers courses in tracking, survival, escape, and evasion skills — says kidnappings are typically motivated by three factors: profit, political reasons, and ideological reasons (such as religion). You may not realize it, but you may fit one of these criteria just by traveling in an unsafe area. Take the time to familiarize yourself with where you are going. Know where the closest military bases, embassies, and consulates are located. After you escape, you will need to find a safe haven that'll offer asylum and enable you to contact help. If you are captured within the United States, finding a fire station or police station would also suffice; however, these facilities may provide little protection in foreign countries.

Landmarks can help you navigate. For example, if you are going to Paris, finding the Eiffel Tower on the horizon and knowing where it is in relation to safe locations is recommended. See the article “No Compass, No GPS, No Problem” in the Winter 2014 issue of OFFGRID. The U.S. Department of State also offers travel advisories and warnings on its website (www.state.gov). Familiarize yourself with these before traveling abroad. Knowing danger zones and avoiding a potentially life-threatening situation to begin with is the most effective tool you can have.

Reeve also suggests carrying small and discreet tools that can help facilitate an escape, as well as having them in several tiers if some are confiscated. “I have a lock pick set in my pocket, one in the back of a search-and-rescue belt, and then I have other picks sewn into pads on my clothing. If they take my shoes and belt, I'll still have three tiers: pocket, belt, and inside the clothes. There are three or four restraint escape devices that I also carry. Usually a handcuff key, a V cutter on a string, and a diamond rod, which is a diamond-coated wire about a 1⁄32 of an inch thick and 3 inches long,” Reeve says. This may seem excessive, but in survival situations it's all about having as many advantages as possible. We'll discuss resources that sell these tools in a bit.

Time is of the essence. “As time progresses, the quality of your incarceration increases,” says Reeve. The sooner you can escape, the better your odds of survival. The more time passes, the more difficult escape becomes.

Passive Resistance

When you are forced to surrender to your captors, Reeve suggests “passive resistance” techniques to help stack the odds in your favor without your captors knowing it. Do not act threatening to your kidnappers or look them in the eyes. “Generally the more compliant you are at this stage, the better it is for you,” says Reeve. You can also try to persuade your captors to bind your hands where you can see your restraints and therefore have an easier time breaking out of them. “Present your hands in front of you hoping your captors will accept that arrangement,” says Craig Sawyer, a former Navy SEAL with experience in running high-threat mobile security operations.

Orient yourself. Are you alone? If so, what is in the room that you can reach and use to escape? What are you bound with? If you can't see it, feel it to get a better idea. Does anything around you have hard or sharp edges, such as a closet track, door, wall corner, or table? Is there anything on the floor such as paper clips or pens? You have to use everything at your disposal that may help free you.

Handcuffs

Handcuffs tend to be a bit generic. One key may work on a variety of different handcuff types. “Smith & Wesson Model 100 handcuffs account for about 60 percent of the market. The reason is because people have to transfer prisoners and they don't want a special key for each one,” says Reeve. First, if your cuffs are not in front of you, try to bring them out in front of you. “This is far better for numerous reasons: increased mobility, the fact that you can easily see and manipulate your restraints, your reach is increased, you can fire weapons if the opportunity arises, etc.,” says Sawyer.

Arm and torso length varies from person to person, and it may not be possible for you to bring the cuffs in front of you. If your hands are stuck behind your back, you'll need to figure out the orientation of the locking mechanism. Is the keyhole facing your hands or your elbow? Is the cuff double or single locked? Once you establish this, you'll have a better understanding of how to manipulate the lock.

A bobby pin or small, thin piece of metal can be fashioned into a lock pick by bending one end of it into a shape that resembles a hand crank.

A bobby pin or small, thin piece of metal can be fashioned into a lock pick by bending one end of it into a shape that...

The next step is finding or making a tool. Assuming you don't have a cuff key available, a bobby pin or small, thin piece of metal can be fashioned into a lock pick by bending one end of it into a shape that resembles a hand crank. You can use the keyhole to help bend it into the appropriate shape. A thin piece of metal called a shim can also be used. The metal clip of a pen cap can be broken off and used as a shim. If you're double locked, you'll have to use a bobby pin or something like it to open the cuffs. If you're single locked, you can shim or bobby pin the lock open.

Another method is try to slide your hands forward toward your captor as your cuffs are applied with the intention of them being fastened around your forearms. This way the cuffs will be closed loosely, and you may have enough room to pull your hands through the opening. Enlarging your wrists may also cause the cuffs to be closed loosely. “The technique is to align your wrists and flex them in a manner that causes the restraints to be loose once you relax and change the angle. Basically, put your wrists next to each other and make fists. Once the restraints are applied, relax, realign, and attempt to slip out,” says Sawyer.

Slide your hands forward toward your captor as your cuffs are applied with the intention of them being fastened around your forearms. This way the cuffs will be closed loosely, and you may have enough room to pull your hands through the opening.

Slide your hands forward toward your captor as your cuffs are applied with the intention of them being fastened around...

To escape using some sort of lock-picking device takes some practice. By using a diamond rod, you may also be able to saw through the cuff chains by working it back and forth. With enough practice, you can use any of these techniques to escape in a reasonable amount of time. Having a diagram of the internal workings of cuffs or cutaway cuffs that have a piece of plastic where the top piece of metal goes is also a great teaching aid to practice with. We must also reiterate that escaping from lawful custody is illegal, and these techniques are for unlawful abductions and incarcerations only.

Single Lock: Insert the bobby pin into the narrow part of the keyhole, bend the pin down toward the side where the cuffs will open, and this will release the ratchet to open the cuffs.picking-single-lock-hand-cuffs-with-bobby-pin

Double Lock: If the cuffs have been double locked, put the bobby pin in the keyhole facing the other side, opposite of where the cuffs will open and move it to release the double lock. Then turn the pin around and repeat what you'd do in a single lock situation by turning it to release the ratchet.

Using a Shim: Push a shim between the teeth and the ratchet, leave the shim in place, then turn your wrist to push the toothed end of the cuff open.picking-hand-cuffs-with-a-shim

Zip Ties/FlexiCuffs

Zip ties and FlexiCuffs, which are generally made of nylon or plastic, can be broken or loosened with enough force and are also susceptible to friction. With a fair amount of upper body strength and a wide enough body, if your hands are bound in front of you by zip ties or nylon cuffs, bring your hands above your head and jerk them down in a quick motion with your elbows off to your sides. With enough force you can break them. “Once the zip ties are on, wait for a period when you're left alone and twist your wrists against the bands of the zip ties to break them. Turn, relax, and wiggle your hands to try to slip out of the zip ties, attempt to push the internal metal locking blade of the zip ties down to unlock and remove them,” Sawyer says.

Bring your hands above your head and jerk them down in a quick motion with your elbows off to your sides. With enough force you can break the zip ties.

Bring your hands above your head and jerk them down in a quick motion with your elbows off to your sides. With enough...

By using something hard that creates enough friction, such as the corner of a door, wall, or table, you may also be able to work the binds back and forth over the edge until you've broken through them. Shoelaces made of paracord or Kevlar string are heat resistant enough to be used as a saw to break out of nylon or plastic binds. Sorry, regular cotton shoelaces won't do the trick. If you still have and can reach your shoes, you can unlace them, tie the strings together, tie a loop on both ends to slip your toes into, and in a bicycle motion move the string or cord back and forth to burn through the material.

Shoelaces made of paracord or Kevlar string are heat resistant enough to be used as a saw to break out of nylon or plastic binds.

Shoelaces made of paracord or Kevlar string are heat resistant enough to be used as a saw to break out of nylon or...

Rope

A passive resistance technique Reeve recommends is presenting your hands in such a way that you cross your wrists in front of you and then rotate the lower wrist about 45 degrees to create a space when you put your wrists back parallel. Another option is to put your knuckles and wrists together and then pull your hands toward your chest and push your elbows out. “From the captor's perspective it looks like I'm being very cooperative, and my wrists and hands are close together, but I'm creating a big gap between my wrists by having my elbows out,” Reeve says. “When you bring your elbows back in together, you've created a huge amount of looseness.” Try and create as much space in the rope as you can.

Put your knuckles and wrists together and then pull your hands towards your chest and push your elbows out, creating a big gap between your wrists. When you bring your elbows back in together you've created a huge amount of looseness.

Put your knuckles and wrists together and then pull your hands towards your chest and push your elbows out, creating a...

When you bring your wrists together, rotate your wrists back and forth to stretch the rope and then start pulling on one strand with your teeth to loosen it. Take up as much slack as you can, then do the same thing and work your wrists again until you have stretched it. Pull that loop repeatedly until you can wiggle your hands out.

If your hands are bound at your sides and you have rope wrapped around you, you can wiggle until the rope moves from the wider part of your body to the narrowest part. You can also ball your hands into fists and keep your fists against your thighs as you're being tied so you create space between your forearm and your body. As with cuffs and zip ties, try and resist in a way your captors can't detect that will enable you some degree of looseness.man-tied-up-in-rope

Rope can also be cut through using paracord, Kevlar string, or a diamond rod if you have it hidden on you. Also, as with zip ties, finding a hard surface to work the rope back and forth against until you've burned through or loosened it will help you escape. Phone and electrical cords are also commonly used in home invasions because they're readily available, but can also be cut through using the friction method.

Duct Tape

Believe it or not, duct tape can be fairly easy to tear and escape from. If you can take control of the situation passively enough to have your hands bound in front of you, put your forearms together. As opposed to rope where you bring your hands in and elbows out to create slack, you want duct tape to be tightly bound so that you can have the most leverage later — so extend your arms and put your hands out to get them close together. Like with zip ties, if you have enough upper body strength, bring your hands up over your head and slam your elbows over your ribcage. It will begin to tear the tape. Once you start the tear, you can keep it going. If that doesn't work, find a corner to rub the tape up and down against until it begins to tear.

If you're bound to an object, such as a chair, put pressure on the tape by twisting instead of lifting. If your arms are parallel with the arms of a chair you're bound to, turn your arms 90 degrees to tear the tape. If your legs are bound together, bend over and put your hands together like you're praying, then put your hands between your knees and shove. You'll put enough tension on your legs to tear the tape. If that doesn't work, you can start a tear using the friction method.

Find a corner to rub the tape up and down against until it begins to tear.

Find a corner to rub the tape up and down against until it begins to tear.

Escaping

Escape and evasion techniques are very specific to your situation and too detailed to address here. However, here are a few guidelines to know if you are able to flee your captors. “The first priority is to get as far away as you can. But running can bring attention to yourself,” says Reeve. Try to blend in with the locals. “Second priority is to attend to yourself medically. Third priority is to arm yourself, which may be picking up a piece of rebar or finding a rock and putting it in a sock to use as a weapon in close quarters. Fourth is to attend to physical needs of warmth and water. If you're in Alaska, you'll want to find warm clothing and get into a warm location. Fifth priority is to try to communicate.” Find a payphone, borrow a phone, make a collect call, and do whatever you can to establish comms. “The next priority is to make plans to get home by finding transportation,.” Reeve says.

man-escaping

“You obviously need to know the city, back streets, which neighborhoods are permissive/non-permissive, how all methods of public transportation work there, alternate means of communication, any friendly allies there and how to contact them, plans on where to go, and how to establish contact with friendlies once on the run, etc.,” says Sawyer.

Tools of the Trade

Previously we'd mentioned companies that provide restraint escape and lock-picking devices that will help you escape from unlawful custody. Purchasing non-metallic tools may also give you an advantage if you are searched with a metal detector. You can create your own escape and evasion belt with a hidden compartment containing the tools mentioned previously. Here are companies that provide these types of tools:

www.serepick.com
www.lockpicktools.com

Taking a course in escape and evasion is highly recommended. Practice these techniques at home. Doing so may shave precious minutes off the amount of time you may be kidnapped and held unlawfully. “Just as is the case in Navy SEAL operations,” Sawyer says, “‘Proper prior planning prevents piss poor performance.'”

Danger Zones

According to data provided by Control Risks, an independent, specialist risk consultancy with offices on five continents, here are the top 20 countries leading the world in kidnappings for ransom as of September 2013.

1. Mexico
2. India
3. Nigeria
4. Pakistan
5. Venezuela
6. Lebanon
7. Philippines
8. Afghanistan
9. Colombia
10. Iraq
11. Syria
12. Guatemala
13. Yemen
14. Libya
15. Egypt
16. Brazil (tied)
16. Kenya (tied)
18. Nepal
19. Malaysia (tied)
19. South Africa (tied)

Disclaimer

The techniques described in this article are for the purposes of gaining freedom from kidnappings and unlawful incarcerations only. Escaping from lawful custody is illegal.

Sources

Kevin Reeve > www.onpointtactical.com
Craig Sawyer > www.tacticalinsider.com


USMC Winter Shelters

This winter, it's important for those of us who live in colder climates to prepare for outdoor survival. If you end up stuck outside in the elements, you'll need to think fast and prepare a shelter before the icy wind saps your precious body heat. Fortunately, the U.S. Marine Corps has provided two useful documents that show us how to construct improvised shelters: the Survival, Evasion, and Recovery Handbook and the Winter Survival Course Handbook.

Winter shelter plains

A valley like this is a dangerous place to be exposed, as wind chill can rapidly drop your core temperature.

We looked through these two handbooks, and found 5 different winter shelters that have been tested and proven by the USMC to protect you from the cold. See below for the methods, but first, here are some general tips:

  • Cold climates require enclosed, insulated shelter.
  • Snow is the most abundant insulating material in these climates. Although it is cold to the touch, it's also very effective at containing heat in an enclosed space. So, incorporate it into your shelter.
  • Insulate your body from the snow and the cold ground by putting down a layer of pine boughs or other foliage. This slows the loss of body heat.
  • An air vent is required to prevent carbon monoxide (CO) poisoning from using an open flame inside an enclosed space. CO poisoning can kill you before you even realize there's a problem, so don't forget this step. (Read the Mayo Clinic's guide on symptoms of CO poisoning for more information.)
  • As a general rule, unless you can see your breath, your snow shelter is too warm, and should be cooled down to prevent the snow from melting and dripping.

Snow Wall

Winter Snow Shelters 5

This is what the USMC calls an “immediate shelter”. It's about as basic as it gets, but piling up a snow wall to act as a wind break for your camp is a lot better than sitting totally exposed. Wind chill can drop the perceived ambient temperature by 20 to 30 degrees (or more), so by simply blocking this wind, you'll feel much warmer.

If you're located in a flat plain or valley like the photo above, there are no trees to work with, and the snow is too shallow to dig into, a snow wall may be your best option. File this under last-ditch plan, but don't rule it out completely.

Tree Pit

Winter Snow Shelters 4

The tree pit shelter is another form of immediate shelter. If you can find a sizeable tree buried in a few feet of snow, dig down to the base of the trunk, and cover the ground with boughs from the tree itself.

Winter shelter tree

A pine tree deeply buried in a hillside snow drift is perfect for this type of shelter.

Then, stack more boughs against the trunk above you to serve as a roof. Aside from an ingress/egress hole, try to keep the space as enclosed as possible to retain heat. Simple but effective.

Thermal A-Frame

Winter Snow Shelters 1

You've probably heard of an A-frame shelter before, and this is a winter variant. Build a framework as shown from tree branches or sticks, then cover with a parachute, tarp, or thermal blanket (if you have one). Cover the floor with tree boughs or other soft plant material, which will insulate your body from the cold ground.

Winter shelter pine needles

Evergreen boughs make for excellent bedding material. They're cushy, insulate heat, and even smell nice.

Top off the structure with more tree boughs, preferably stacked in layers from the bottom up (with the branch up and leaves down), in a similar manner to roofing shingles. This layered pattern will help strengthen the structure, and prevent pinhole leaks from forming in the next layer.

The shingle method is useful for many types of shelters, as it strengthens the roof and seals out moisture.

The shingle method is useful in warm or cold climates, as layers strengthen the roof and seal out moisture.

Speaking of the next layer, the previous step is where you would have stopped if you were building an ordinary A-frame shelter—now for the “winter” part. Cover the tree boughs with packed snow, watching for holes and gaps. Finish it off with a door plug to seal out the wind, and don't forget to add an air vent if you plan to build a fire inside.

Snow Trench

Winter Snow Shelters 2

This shelter is exactly what it sounds like. First, you'll dig a ditch or trench into the snow, making it deep enough to lie down in comfortably. Then create a support structure of sticks across the top, and cover with foliage (such as tree boughs or moss) and snow. Plug the doorway, and voila—it's not roomy, but it'll keep you warm.

The Snow Trench method can also be combined with the Tree Pit design, by digging your trench under the snow-covered branches of a nearby tree. The branches act as a pre-made roof, saving you time and effort.

Snow Cave

Winter Snow Shelters 3

This is the most complex and time-consuming shelter to build, but it also provides lots of space, excellent insulation, and even a way to conceal your location. Dig your shelter into a snowy hillside, ensuring there's plenty of snow above your head to prevent a collapse.

You'll also want to create three stepped floor levels. The purpose behind these levels has to do with the fact that cold air naturally sinks, while hot air rises. By building the floor of the chamber below where you're sleeping and working, you'll avoid sitting in a “pool” of cold air that has fallen to the lowest point in the chamber. This makes efficient use of the heat you generate inside the shelter.

Winter shelter mountains

Don't venture outdoors this winter without knowing how to build a simple shelter. It could save your life.

The lowest level is the cold air sump, which is even with the entrance to the shelter. This is where the cold air will collect. Next, you have a working platform, where you can cook and build your fire. Finally, on the top level, you have your sleeping platform, elevated for maximum heat retention while you're asleep.

As with the other shelters, remember to block off the entrance with a solid object (like a backpack or some snow), so the wind doesn't get in. Also, don't forget to poke a small air vent hole at the top, to prevent carbon monoxide from collecting in the shelter and silently poisoning you. It would be a real shame to go to the effort of making this shelter, only to have it become your tomb because you forgot the air vent.

Be safe out there this winter, and if you try building one of these shelters, we want to see it. Tag us on Instagram @recoiloffgridmagazine or post it on our Facebook page.


DIY Emergency Power from a Phone Line

Remember our article on the advantages of landline phones in a disaster scenario? If so, you probably also remember that landline phones receive power through the phone line, and can often stay operational for weeks—even if the rest of the power grid is down. That's because the phone company supplies the power necessary to operate the phone, and will continue to supply power via generators for as long as possible during a disaster.

DIY emergency power phone line

See the red and green wires? Those supply DC power to keep your landline phone operational.

Knowing this, we wondered if it's possible to use this power for anything else, such as keeping a cell phone (or other small USB electronic device) charged. The answer is yes, but it takes a little preparation, tinkering, and wire splicing to make it work.

Emergency phone line power 1

Disclaimer: Be aware that this DIY emergency power source should ONLY be used in legitimate emergencies, as it is highly illegal (as in a felony) to use phone line power for anything but powering a landline phone. This is also potentially dangerous, since you run the risk of shocking yourself or frying your electronic device if something goes wrong. Don't do anything stupid or illegal with this information, and if you do, we are not responsible.

If you'd like to read through the steps in more detail, check out the article on Instructables here. It has some complex-looking wiring diagrams, but the concept is simple: phone cord spliced to a LM7805 voltage regulator, spliced to a USB cable. You can also add a diode to protect your charger if you think anyone might call the phone line.


6 Survival Uses for Tampons

Some of the most ordinary items found at home can be used alternatively for all sorts of life-saving needs. Repurposing everything from cooking oil, snack chips, and even used tea bags can help you get through a tough spot — if you know what to do with them. (See “Household Survival” in OFFGRID's Spring 2014 issue.)

As you can tell by the title of this article, we're about to delve into a household item that some people might be too shy to speak about, let alone buy, stock, and experiment with. Yes, people, we're talking about one particular feminine hygiene product here: the tampon.

In this case, tampons are no laughing matter. Knowing what you can do with them can mean living to fight another day, so listen up. Tampons are made out of blends of cotton and rayon. Cotton and rayon are both absorbent and flammable materials, making them useful for a wide range of survival uses. Tampons come in many variations; most any of them will work for our suggested uses in this story. But for best results, we recommend non-scented ones that come wrapped in plastic.

Rudimentary Filter

tampon-water-bottle-water-filter

Whether you need to filter water for drinking or fuel for your vehicle, the cotton-and-rayon wadding of a tampon makes for a basic yet effective filter. By no means does this method filter biological, chemical, or heavy-metal impurities out of water. Further purification steps will need to be taken to make your water safe to drink. It does, however, filter out a good portion of the larger particles found in water sources so that your other purifying methods — whether by distillation, boiling, tablets, or through another filter — can be more efficient.

If things get really dire out there and you find yourself in a Mad Max situation scouring questionable sources for fuel for your vehicle or electrical generator, make sure your fuel system stays clear of contaminants by filtering your found fuel through a tampon filter first. Contaminants such as sand can put your vehicle or generator out of action, requiring repairs and spare parts. That's trouble you just don't need in a SHTF scenario.

Slow Blood Flow

tampon-and-paracord-improvised-bandage

The most obvious use for tampons is to absorb blood. “Well, duh!” you might say. But you don't need to limit this product to only its original application — it can serve as a temporary wound dressing until proper medical attention can be applied. Unravel it and it can be applied as a pressure bandage with the help of some tape or even paracord. Other improvised applications include stopping nosebleeds and using it as dental gauze. Tampons can also be used in lieu of cleaning pads to help cleanse a dirty wound before dressing it.

Note that tampons are generally clean, but should not be considered fully sterile from a medical standpoint. As soon as purpose-built medical supplies are available, the tampon should be discarded and replaced.

Fire Kindling

tampon-used-as-fire-kindling

Fire is life. So, survival often depends on how quickly and efficiently you can get a fire started. Cotton is probably the most flammable fabric commonly found in household use and rayon is a close second. That's perfect for you since tampons are made of just that mix. As a bonus, if you purchase tampons that come in a plastic wrapper, your kindling will stay dry even if you are drenched.

Take the tampon out of the wrapper and applicator and rip it into a few pieces. Fluff up a piece and use it as your fire's kindling. It will light up quickly, but if you have some hand sanitizer, petroleum jelly, lip balm, or even animal fat, rub a little bit in for even better fire-starting results. Keep the leftover pieces of tampon to help start more fires in the future.

Blister Control

tampon-and-duct-tape-foot-bandage-for-blisters

Blisters form on your feet because of friction between your skin, socks, sweat, and shoes. Oftentimes, ill-fitting shoes or footwear that hasn't been properly broken in will cause blisters to form. When you're humping your bug-out bag to safety, you don't need the added pain and irritation that a blister can bring. A painful blister can cause you to move slower, thereby slowing down your whole party. And there's the added danger of infection if it gets worse.

If you feel one coming on or feel that there's the potential of one forming and you don't have access to proper blister care, cover the sensitive area tightly with a piece of tampon and a Band-Aid or some tape. Keeping yourself mobile is imperative, so shielding your feet from blisters is a must.

Bore Cleaner

tampon-used-as-shot-gun-bore-cleaner

Having a clean, properly functioning firearm for defense is a good idea, especially if it ever hits the fan. Should you find yourself out of cleaning patches, an alternative way of cleaning your firearm is by way of tampon. Most tampons are perfectly sized for 12-gauge shotgun barrels, but smaller wads ripped from the tampon would work for other calibers. Use the tampon as you would a cleaning patch running it through the barrel several times with cleaning and lubricating solution if it is available. Use another piece of tampon to clean out the breech and chamber.

Candlewick

tampon-string-used-as-candlewick

The string attached to tampons makes excellent candlewicks. Perfect for blackout situations, you can fashion a makeshift candle by using anything such as cooking oil, shortening, crayons, and older used-up candles. Make sure to coat the string in your chosen candle fuel to allow the candle to burn more efficiently. Fill a non-flammable, open-top container with the fuel and place the wick into it. Light it and enjoy the slow burn.