Many of us have considered stockpiling shelf-stable food for emergencies — items that won’t go bad for years, even if there’s no electricity to power a refrigerator or freezer. However, what about everyday life? Unless you’re living in an extremely remote area without a reliable power grid, or you just time-traveled here from the 1930s, you probably store your everyday food items in a fridge. So, it’s important to make the most of the food you use on a daily basis, including perishable items like dairy and fresh produce, rather than only considering emergency food storage.
Optimizing your home’s food storage — whether it’s the fridge, freezer, counter, or pantry — will have a dramatic effect on your life. Here are a few key benefits of rethinking your food storage system:
Quick access – Stop digging through disorganized leftovers to find the items you need.
Longer lifespan – Properly stored items won’t spoil as quickly, and you won’t end up with moldy science experiments in the back of your fridge.
Better taste – Fresh food tastes better and retains more nutrients.
Save on groceries – Less spoiled items means less wasted money and fewer trips to the store.
Help the planet – Tossing less food in the trash means less ends up in landfills, and more food is available for those who might otherwise go hungry.
Self Storage Finders created the following infographic that helps visualize food storage and pantry organization. It addresses several important topics, like how to organize your food, which items don’t belong in the fridge, and tips for how to extend the lifespan or regrow vegetables. Check it out below, or click here for a full-size version.
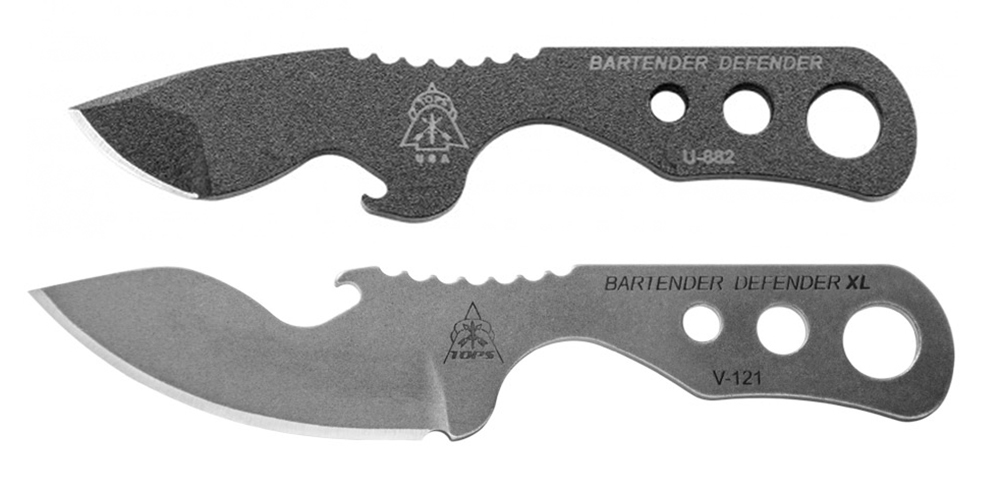
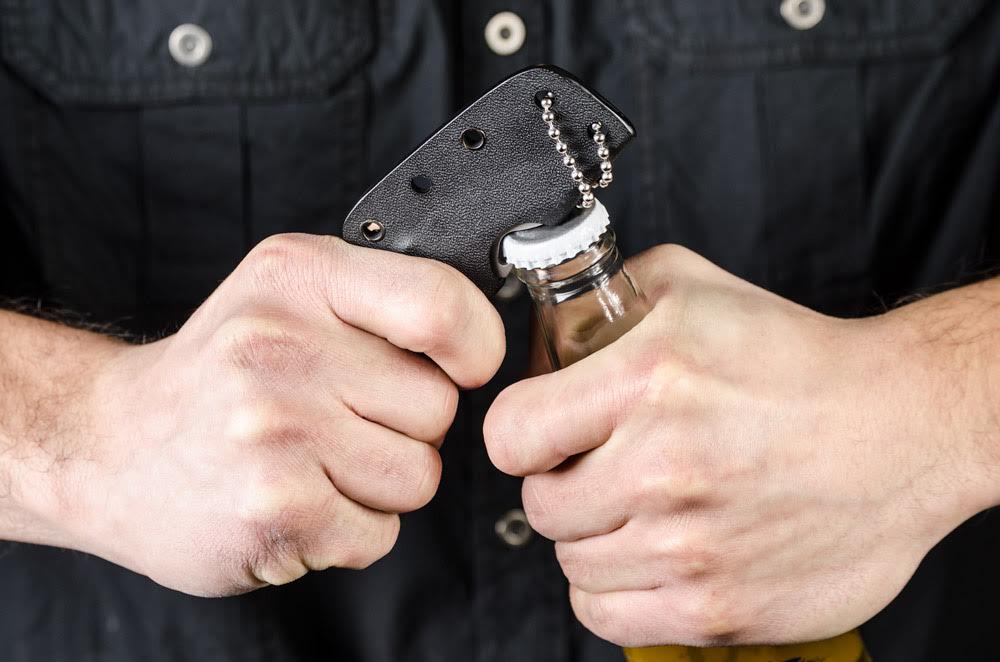
Every industry has its tools of the trade — a logger needs an ax, an electrician needs a multi-meter, a surgeon needs a scalpel. For those who make a living through bar-tending, few tools are more important than a good bottle-opener. Even if you don’t spend much time behind the bar, it’s a useful item to have, and always manages to come in handy at get-togethers. TOPS Knives realized this, and built a tool that combines a compact blade and a convenient bottle-opener. It’s called the Bartender Defender, also known as the de-cap-itator.
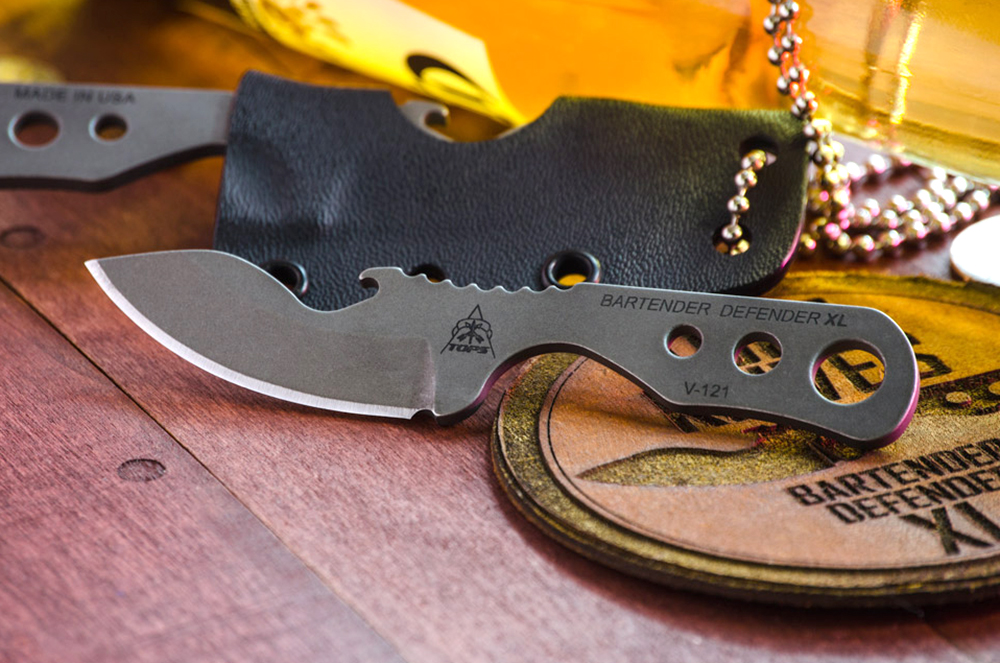
Top: the original Bartender Defender. Bottom: the revised Bartender Defender XL.
TOPS released the original Bartender Defender several years ago, and it has been a popular choice for those who needed a bottle opener and small blade. But, over the years the company also received some feedback from customers who wanted a longer blade to work with. So, the Bartender Defender was redesigned, and a new XL version was created.
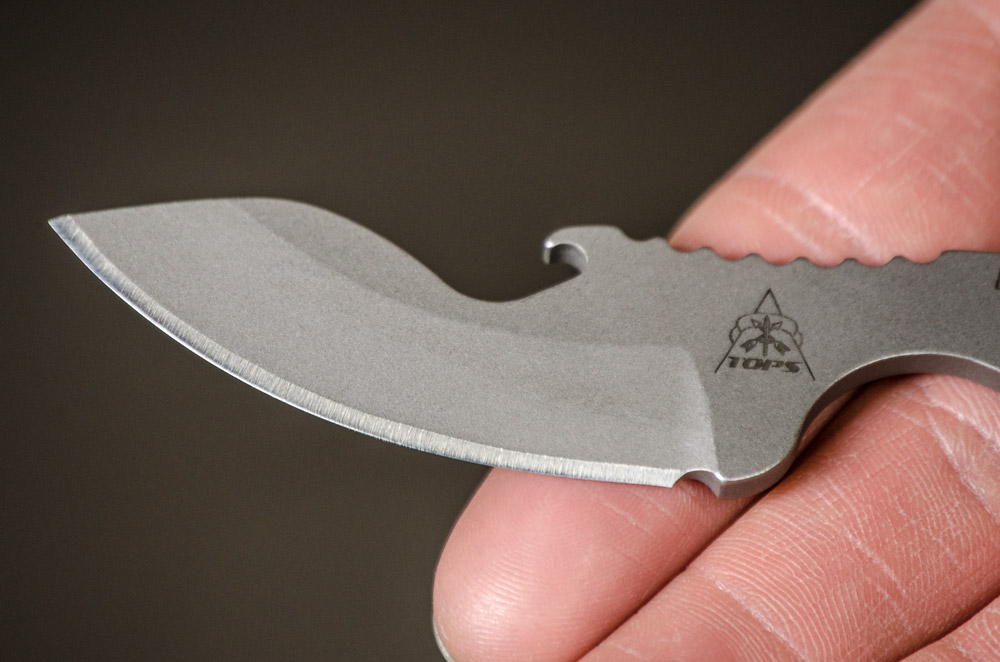
The Bartender Defender XL may be larger than the original, but not by much. It’s still only 4.63 inches long, or about 8% longer than the standard model. However, the business end was significantly revamped, producing a 2.13-inch upswept blade edge. That’s over 80% more usable edge than the original 0.38-inch blade design.
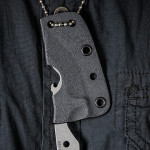
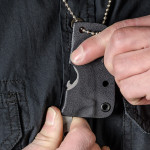
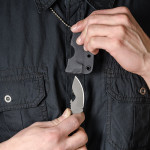
The bottle opener is still an integral part of the Bartender Defender XL, but has been moved to the spine of the blade. The Kydex neck knife sheath was also redesigned, and now features a cutout for the bottle opener. When you need to open a beverage, you won’t even have to draw the blade, and we’d call that both a safety improvement and ergonomic upgrade.
As opposed to the black wrinkle finish on the original model, the 1095 steel Bartender Defender XL has a smooth tumble finish, with a clear Cerakote to protect against rust. Here are the rest of the key specs for this blade:
The dawn of each new year brings celebration, and few places are more famous for New Year’s Eve festivities than Times Square in New York City. It’s an American tradition to watch the ball drop in the Big Apple, and listen to the streets erupt with cries of “Happy New Year!” as confetti rains from the sky. However, given the recent state of world politics and the growing trend of terrorist acts against large crowds of people, a celebration of this magnitude presents some clear security concerns.
As preparedness-minded individuals, we should consider how to react if we found ourselves trapped in a crowd during an emergency. A single individual yelling about a gunshot could create a domino effect through the crowd, resulting in mass panic and a crushing stampede in the streets. Worse yet, that warning could eventually prove to be indicative of a legitimate threat — in those tense first seconds, it might be hard to know whether to trust the claims and run for your life, or to stay put and seek shelter.
Each year, Times Square in New York is packed with crowds celebrating the new year. Photo: Anthony Quintano / Flickr
Therefore, our first Survival Scenarios question of 2017 addresses this decision. What would you do if you found yourself trapped in a crowd of revelers at Times Square, and claims of an overheard gunshot led to mass panic? Would you try to navigate the chaotic crowd and immediately leave the area, or avoid the crushing onslaught and find shelter nearby?
In case you’ve missed our previous installments of Survival Scenarios, here’s how it works. We ask you how you’d handle a difficult choice in a hypothetical survival situation. Previously, we asked if you’d rather bug-in or bug-out during a violent post-election protest, or whether you’d prefer to be snowed-in or snowed-on in a fierce blizzard. As always, today’s post ends with a poll where you can make your choice, and see how others felt about the scenario.
Background Info
Even on a normal day, the hustle and bustle of NYC is substantial. Photo: Kenny Louie / Flickr
Before you decide whether you’d choose to make a run for it or seek shelter in the vicinity, we’ll provide some background info. As we said previously, you find yourself in the middle of Times Square on New Year’s Eve. It’s approximately 11:30pm, and the streets are packed to the bursting point with hundreds of thousands of people, all shoulder-to-shoulder. You’ve been standing in the same spot for over seven hours, awaiting the big moment.
Despite having misgivings about the extremely crowded event, you didn’t want to disappoint your family by missing the opportunity to see the festivities firsthand. You’re currently on vacation in New York with your wife, Amanda, and 12-year-old daughter, Chloe. Steve, your friend from college, lives in upstate New York, and convinced you to spend New Year’s in the city with him and his wife Erin. The five of you are clustered together in the street.
The crowd is frantic with energy as it approaches midnight, and you can barely have a conversation without shouting over all the background noise. At this point, your feet hurt, your back is sore from standing, and you honestly just want it to be over so you can return to the hotel. But everyone is having a good time, and you can see the gleam of excitement in Chloe’s eyes, so you persevere.
The streets are loud and tightly-packed as midnight approaches. Photo: Chensiyuan / Wikipedia
Suddenly, you hear a series of distant cracks from the street behind you. The sound seems faint, but still oddly clear as it reverberates off the building. You pause and turn in its direction. As you try to determine the origin of the sound, you feel the energy of the crowd change.
The calm chatter turns into a fearful roar, and you make out the phrase “They’re saying someone has a gun!“ from a man as he shoves his way past. A woman standing to your left heard it, too. She shrieks, “Oh my god. Let’s get out of here!” The once static crowd begins moving, jostling and pressing in against you, eliminating any remaining gaps of personal space. Screams echo off the concrete and glass. A police officer down the street is on his radio, looking concerned. Amanda grips Chloe’s hand, and turns to you with thinly veiled fear in her eyes — “What should we do?”
Gear and Resources
Remember that there are five members of your group: you, your wife Amanda, your daughter Chloe, and your friends Steve and Erin. Steve and Erin can make it on their own if you choose to split, but Steve has some experience training in MMA, which might be useful if a physical confrontation arises. You’re certainly not going to willingly separate from your wife and daughter in this chaos, so they’re sticking with you wherever you go.
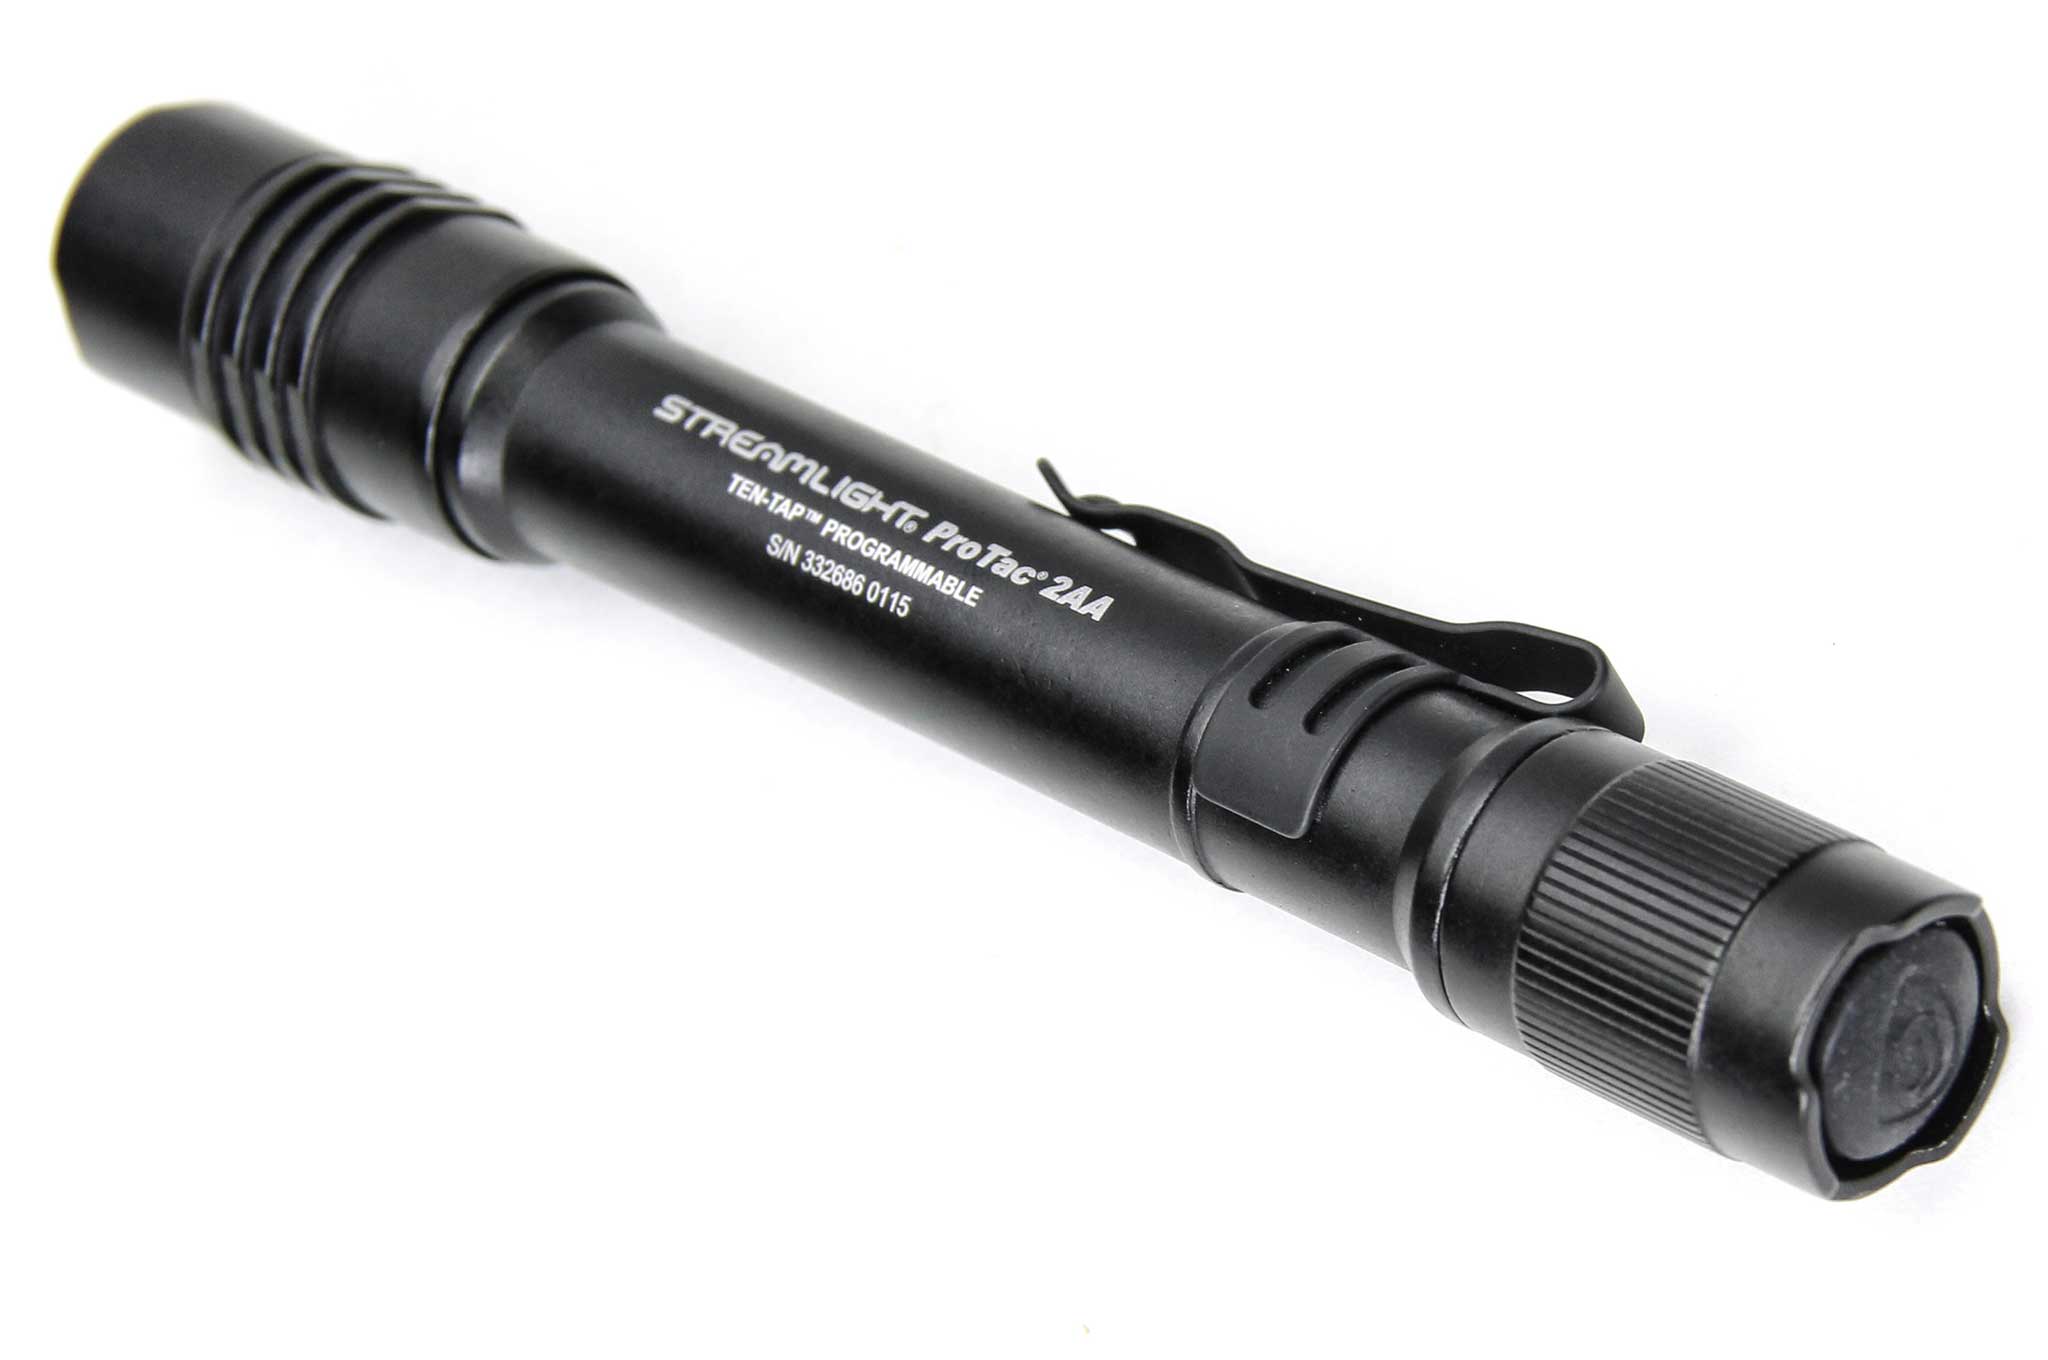
As for gear, you’ve got virtually zero. Restrictive weapon laws in New York City prevent you from carrying a firearm, and disallow most folding knives — and that’s on a normal day. The added security of the New Year’s Eve event screened attendees for additional weapons, even innocuous things like tactical pens. You do have a small flashlight and your smartphone in your pocket, but no purpose-built self-defense weapon.
The flashlight in your pocket could be used as a self-defense impact weapon in a pinch.
Given this information, will you and your family join the frenzied crowd and try to leave the area, hoping not to get trampled or separated? Or will you find some shelter nearby, and hope that the rumors of a shooter are untrue?
Bug Out to Safety
If you choose to make a run for it, there are risks you need to consider. The power of the crowd is tremendous, and the panic is spreading like wildfire. You can try to force your way through, but that may result in trouble — pushing and shoving might lead to punches and kicks as the masses lose control.
Also, the biggest concern is becoming separated from your family during the escape. You already wisely established an emergency meeting point a few blocks away, so you could theoretically regroup there if worst comes to worst. But you shudder to think of what could happen if your 12-year-old daughter ends up alone among the thousands of people running for their lives.
One upside to bugging out is that it could potentially shorten the duration of the danger. You might get down the block and find that the crowd is less frenzied, or manage to find a relatively-unobstructed escape route. The other upside is related to the origin of this situation — if the supposed gunshot sound ended up being an actual gunshot, you want to be as far away from it as possible.
Stay Put and Find Cover
If you choose to stay put, you’ll need to find some shelter ASAP. The crowd is pushing and shoving in all directions, and you should find a solid structure that can deflect that energy. Then again, if you hug a wall and the crowd pushes too hard in that direction, you could end up being crushed or trampled.
Crowd control barricades are everywhere. They may serve to funnel the horde into a tighter space, or they may be overrun completely. Police are abundant in the area, but they’re clearly struggling to regain control of an out-of-control mob scene. You’ll have to look out for yourself if you want to stay safe.
The major advantage of staying put is that it ensures you can stay together with your family, and with Steve and Erin. Steve’s strength and martial arts experience could be helpful if violence erupts. You’re without weapons, but at least you won’t be swimming upstream through a sea of terrified pedestrians.
The chances of the possible gunshot from earlier being a real threat seem slim in this heavily-monitored setting, but if the claims were true, you may be in big trouble. The mass panic you’re caught in the middle of could end up being a mass shooting.
The Decision
Knowing you have seconds to decide on a course of action, what would you do: bug-out immediately, or stay put and find cover? Enter your decision into the poll below, and feel free to justify that choice in the comments section.
Survival Scenarios is a recurring feature on OFFGRIDweb.com, and will ask you to make a difficult choice between two or more hypothetical situations.
We don’t just want you to read our posts silently—we want to hear what you have to say. Share your thoughts or suggestions in the comments below, or head over to our Facebook page.
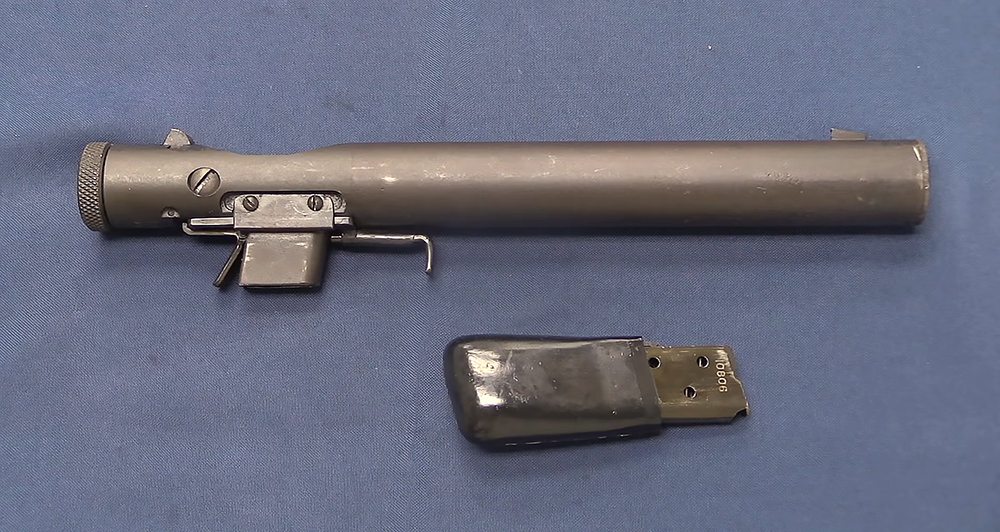
If you spotted a Welrod for the first time, you might not realize what it is. In disassembled form, it resembles a piece of industrial equipment, the sort of thing you might find in an obscure corner of the hardware store next to caulk dispensers or hot glue guns. In fact, it was nicknamed the “bicycle pump” by those who used it. It also has no easily-identifiable markings or symbols on its plain metal body.
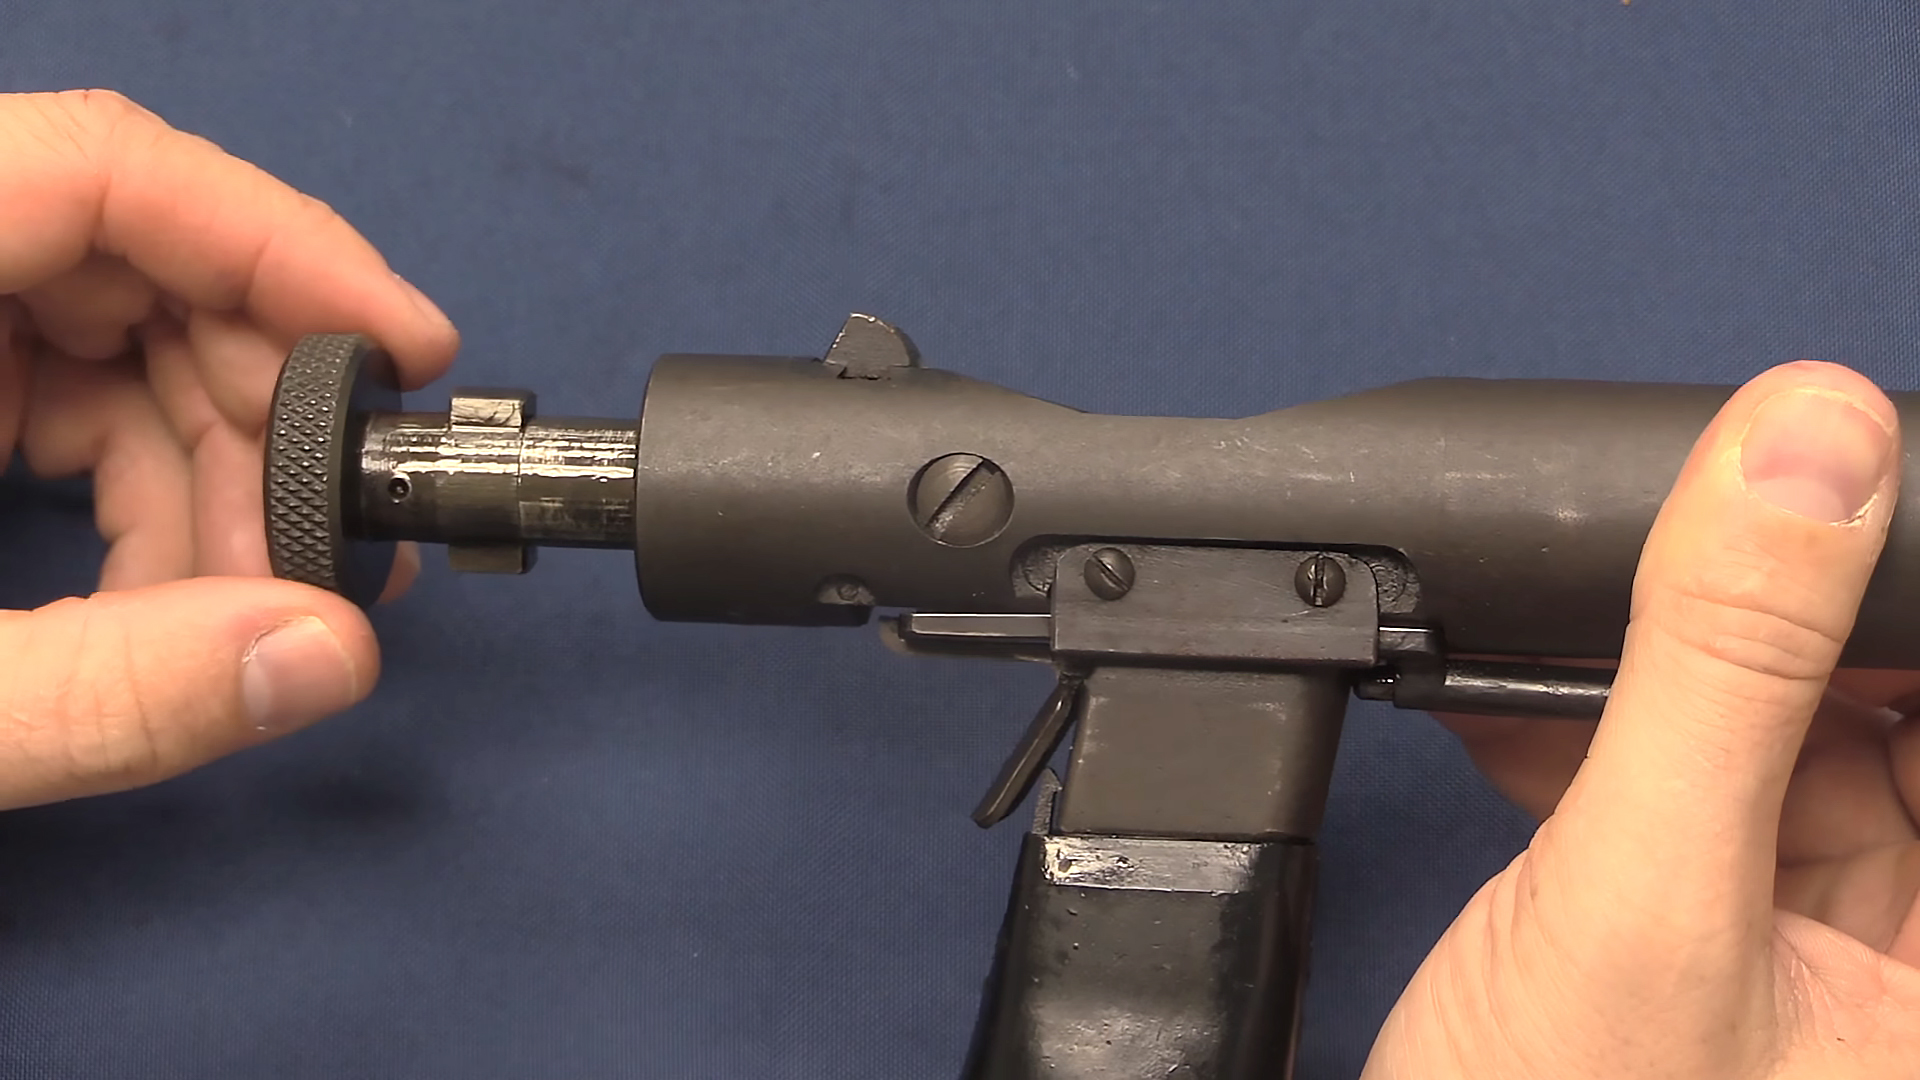
Howewer, when its 8-round magazine is inserted to form a pistol grip, the Welrod’s purpose becomes more apparent. This historically-significant weapon has a very specific purpose: silent use behind enemy lines. Forgotten Weapons recently posted a video analysis of the Welrod Mk IIA, including hands-on disassembly of a surviving example, and and in-depth description of its functionality:
The Welrod was developed in the early 1940s by Special Operations Executive (SOE), a British military organization which coordinated espionage, sabotage, and reconnaissance missions in occupied Europe during World War II. British SOE (along with American OSS and European resistance forces) needed a weapon which could be distributed, concealed, and fired without drawing attention. The pistol’s strange appearance accomplished the first two goals, but silent operation was essential to meet the third requirement.
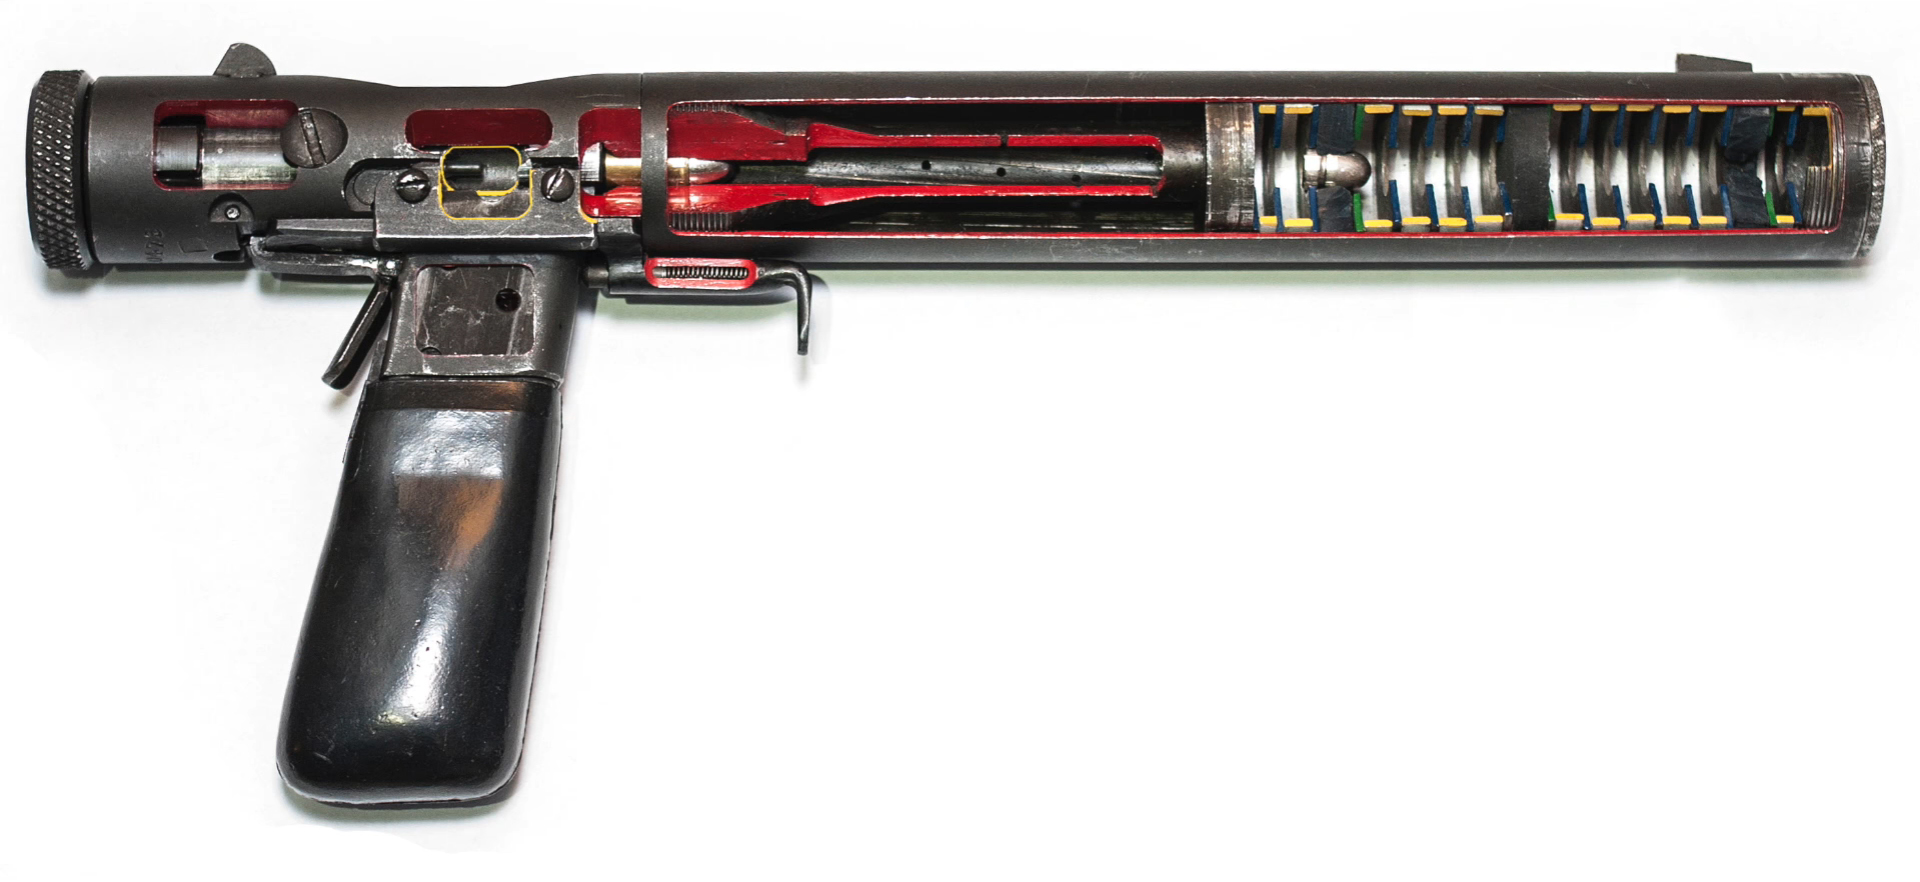
A 12-inch by 1.25-inch cylinder forms the body of the gun, and houses a ventilated barrel and an integrated suppressor. The Welrod fires a sub-sonic .32 ACP cartridge, and is operated with a manual bolt action, further reducing the gun’s sound signature.
All of these features bring the sound of a shot to approximately 73 decibels. That’s about as loud as the normal background noise of traffic on a city street. While it’s not technically silent, it’s extremely quiet even by modern suppressed gun standards, and was revolutionary for its time. The rubber wipes inside the suppressor only lasted for about a dozen shots, after which they lost effectiveness, so the shooter needed to make every shot count.
Although the secretive nature of this gun makes tracking its use difficult, reports indicate it was used in the Korean War, the Vietnam War, the 1982 Falklands War, and the Troubles in Northern Ireland, among other modern conflicts. Some say it was even fielded by SAS members during Operation Desert Storm, and that an updated version may be in use to this day.
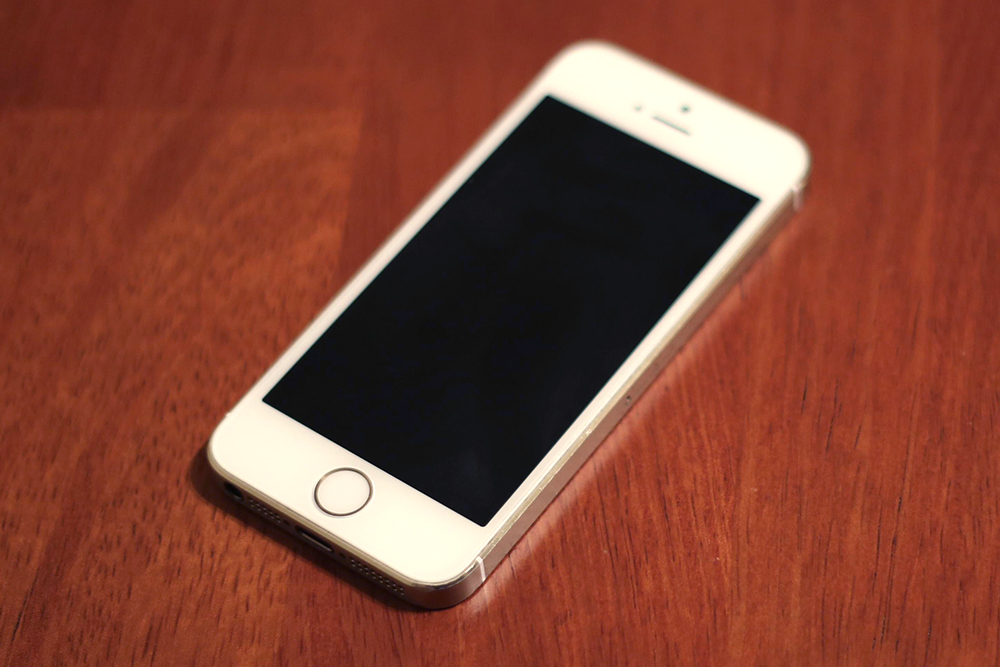
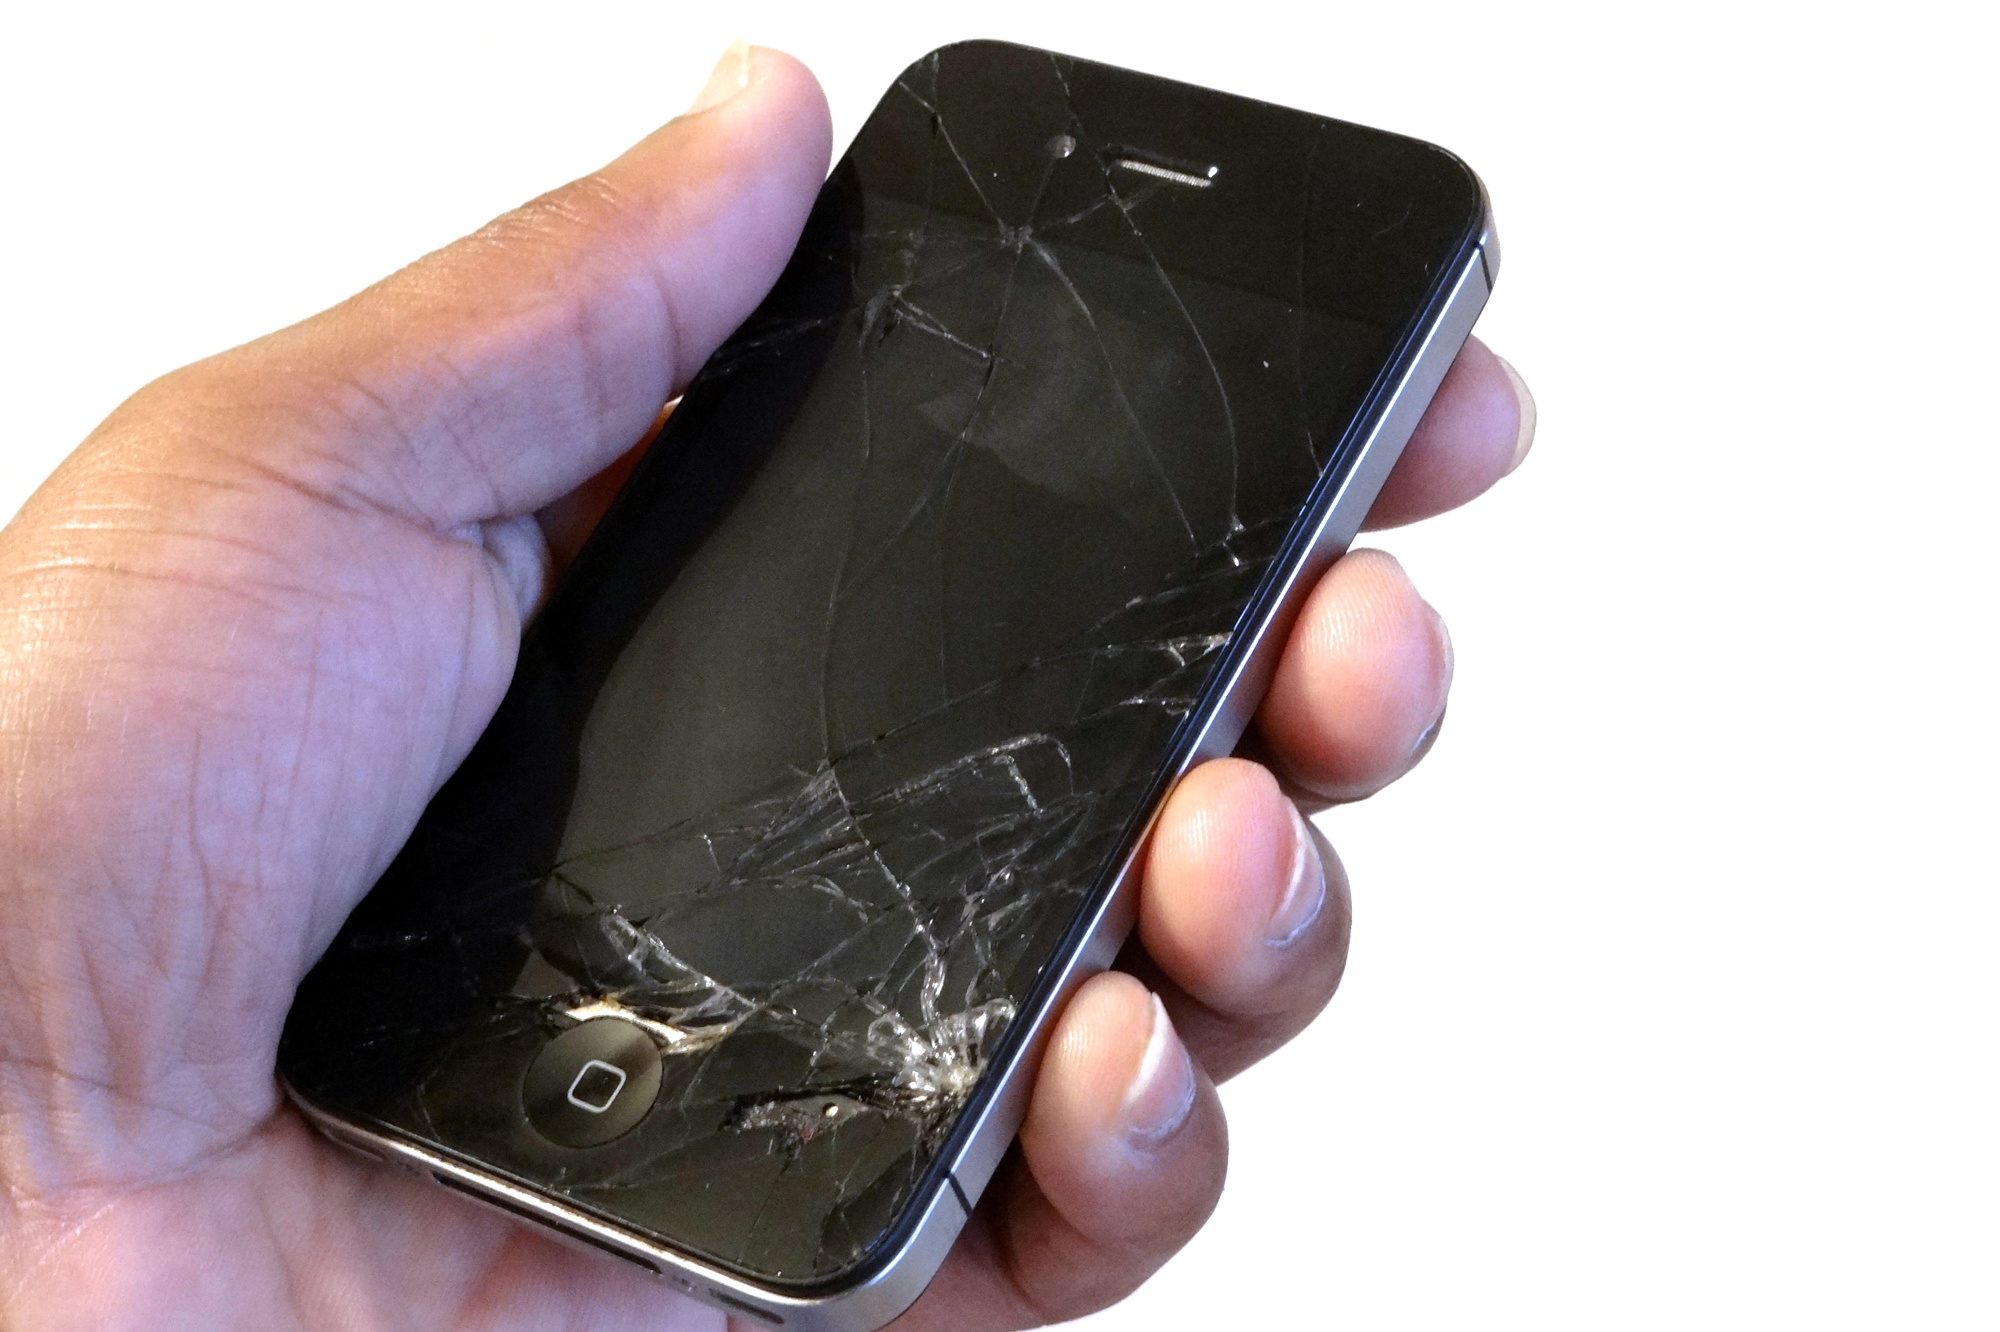
What objects do you touch the most each day? If you’re anything like most Americans, a smartphone is probably near the top of your list. In fact, there’s a high likelihood you’re holding it in your hand as you read this. The smartphone is a great tool, and can make our lives much easier, but this constant connection with a single device can be very revealing about us.
Obviously, the data stored on and transmitted by our phones can pose a security risk, and fingerprints on the screen could be searched in a law enforcement database. But that’s not all — under forensic scrutiny, the smudges, dust, and grime on a phone can be used create a detailed profile of its owner’s lifestyle.
Researchers at the University of California San Diego School of Medicine and Skaggs School of Pharmacy and Pharmaceutical Sciences recently conducted a study on this topic. Thirty-nine healthy adult volunteers handed over their cell phones to the researchers, who swabbed each phone in four locations.
These swab samples were then analyzed using a mass spectrometer device to detect specific molecules. The molecules were compared against a massive database of known substances, in order to identify substances found on the phones. Here’s where it gets really interesting: the substances were used to learn about the phone owner’s lifestyle. Here’s a list of a few of the substances found on swabs:
Anti-inflammatory skin cream
Hair-loss treatment
Anti-depressant medication
Eye drops
Sunscreen
DEET insect repellent
Citrus
Caffeine
Herbs and spices
Amina Bouslimani, PhD, was one of the scientists involved in the research. She writes:
“By analyzing the molecules they’ve left behind on their phones, we could tell if a person is likely female, uses high-end cosmetics, dyes her hair, drinks coffee, prefers beer over wine, likes spicy food, is being treated for depression, wears sunscreen and bug spray — and therefore likely spends a lot of time outdoors — all kinds of things. This is the kind of information that could help an investigator narrow down the search for an object’s owner.”
Even a broken cell phone left behind by a criminal could be used to provide forensic data.
Senior author of the study, Pieter Dorrestein, PhD, hopes to broaden the molecular ID database to include more common items. These might include “the most common foods people eat, clothing materials, carpets, wall paints and anything else people come into contact with.” This line of forensic research is in its early stages, but could eventually be used to profile and track missing individuals or wanted criminals.
Every season presents its own dangers, but the thought of falling through ice in winter is especially frightening. In an already cold winter environment, you’d be faced with plummeting core temperature, shocked respiratory system, and soaked clothing weighing you down. On top of this, escaping the icy water may take several attempts, and you’re working against the clock before your body shuts down. Tragically, falls through ice continue to take lives each year.
As is true in any survival scenario, preparation can leave you better equipped to deal with a fall through ice. If you know how to react, and understand what’s happening, your odds of survival will increase dramatically.
In order to demonstrate the process of escaping a fall through thin ice, the YouTube channel Pike Pole Fishing created a 6-minute instructional video. The video’s host, Adam, volunteers to fall through the ice three times under the close supervision of medical and rescue professionals. His pain is your gain, as he shows how to kick your legs and carefully lift yourself from the water. Never attempt this on your own.
If you need help remembering this technique, just think about Arnold Schwarzenegger’s groan-worthy pun in his role as Mr. Freeze — kick some ice. For an infographic that illustrates some more tips for escaping a fall through thin ice, check out our previous article on the topic.
While some may think that survival cuisine entails gnawing on hunks of gristly meat, or eating bowl after bowl of cold gruel, it doesn’t have to be that way. There are plenty of tasty and nutritious foods that can be stored for years in the right conditions. These foods can be supplemented by any wild fish and game you’re able to catch, as well as naturally-occurring vegetables. So, even if the excrement has hit the proverbial fan, you don’t need to sacrifice your taste buds to stay alive.
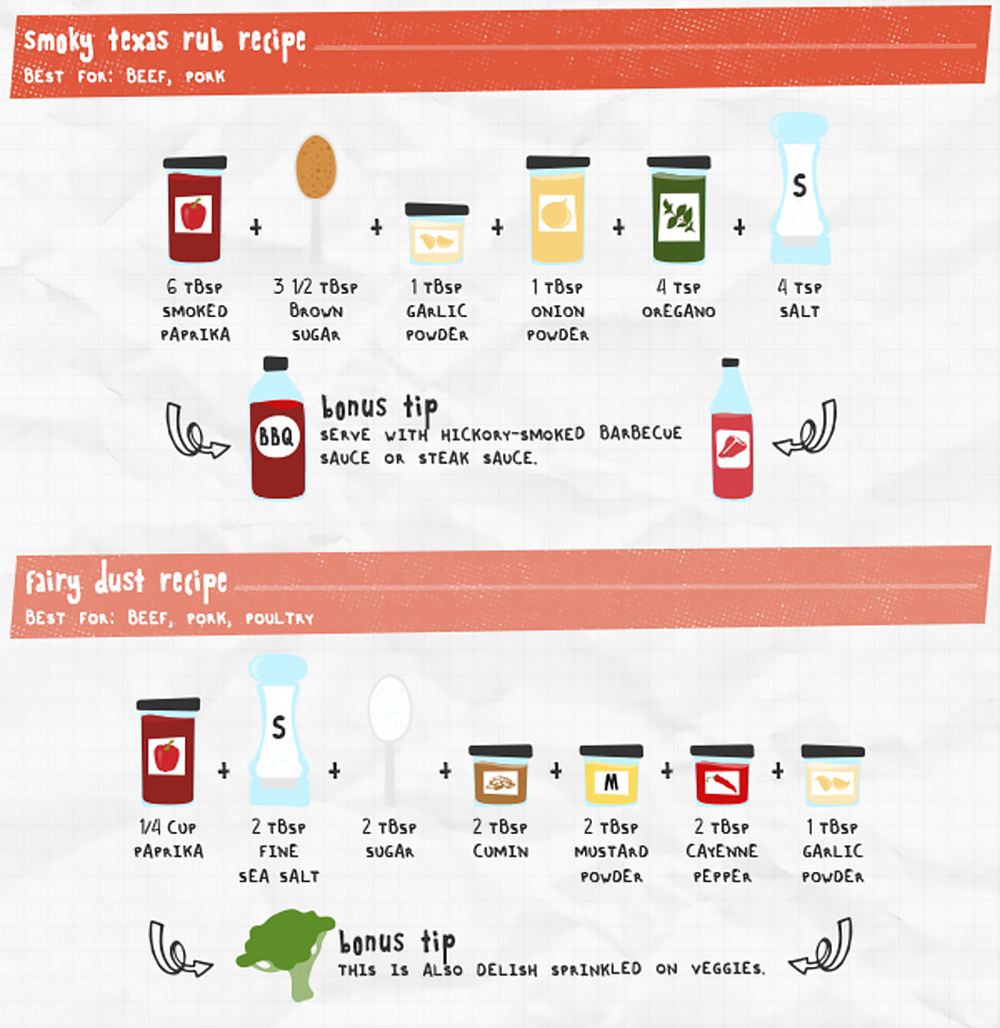
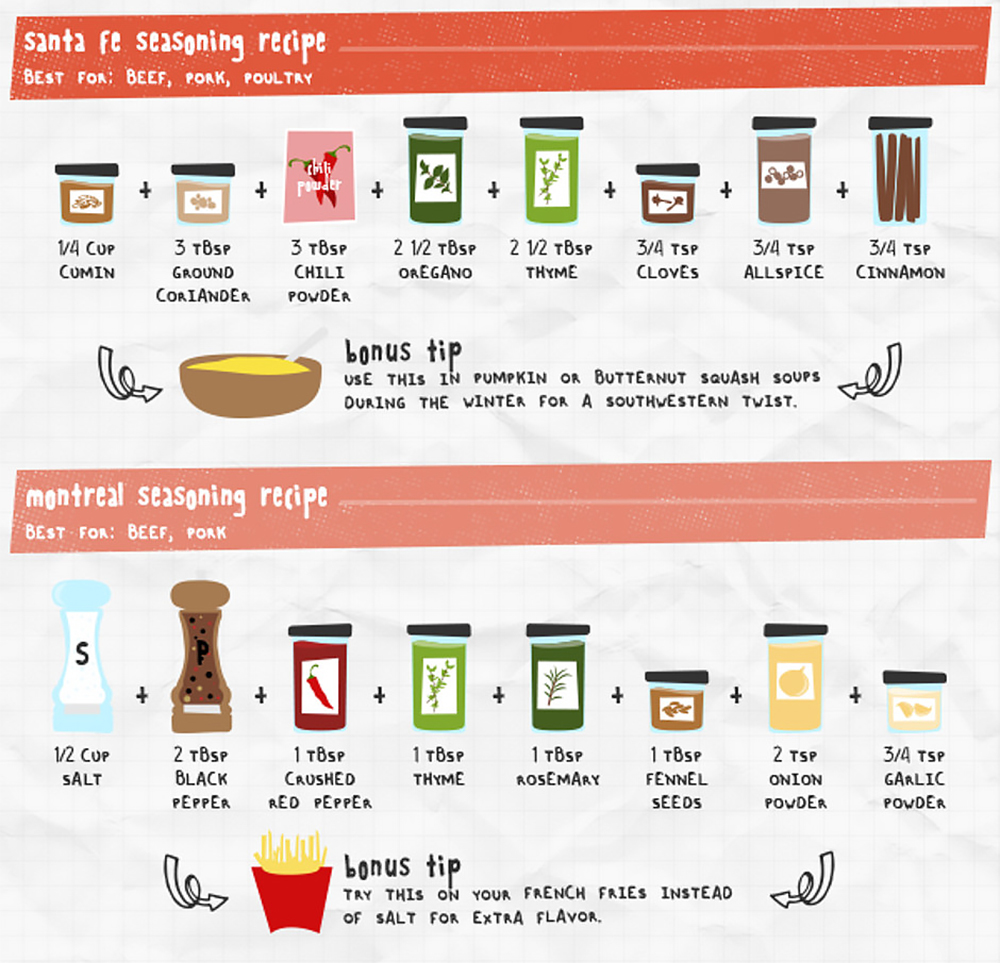
Beyond the raw ingredients you’re using, any chef can tell you that the next most important element of taste is seasoning. Actually, some might argue that seasoning is even more important than the underlying ingredients — after all, perfect seasoning can make something otherwise unappealing taste delicious. So, you’d be wise to include a variety of seasonings, herbs, and spices in your emergency pantry. Fortunately, these items generally have a very long shelf life, and some can be stored indefinitely without spoilage (though they may lose some potency).
However, all the spices in the world are worthless if you don’t know how to use them properly. The following infographic from SheKnows.com shows ten DIY dry rub recipes that can add zest to barbecued beef, roasted pork, grilled poultry, sauteed seafood, steamed veggies, or even french fries. These recipes use dry ingredients that can be stored for much longer than bottled or canned sauces. For a full-size version of this infographic, click here.
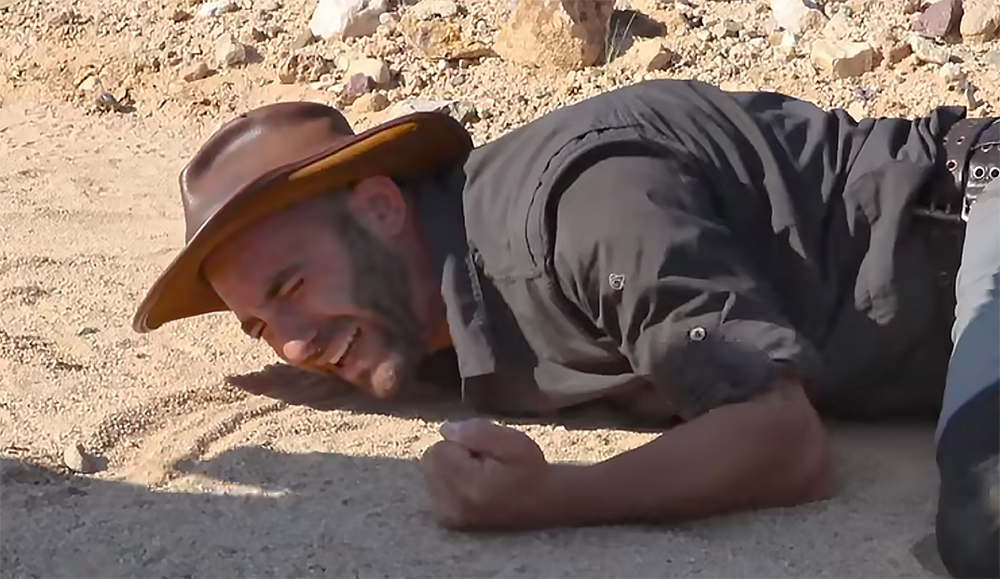
For survivalists, YouTube can be a great resource. It provides a truly immense amount of video demonstrations of useful survival techniques from guys like Primitive Technology and AlfieAesthetics. However, on the other hand, YouTube also provides even more content that leaves us shaking our heads and wondering, “why would anyone do that?!” The following video from self-proclaimed “adventurer” and “animal expert” Coyote Peterson definitely falls into this second category.
Here’s Peterson after being stung by a tarantula hawk in a previous video. He keeps coming back for more.
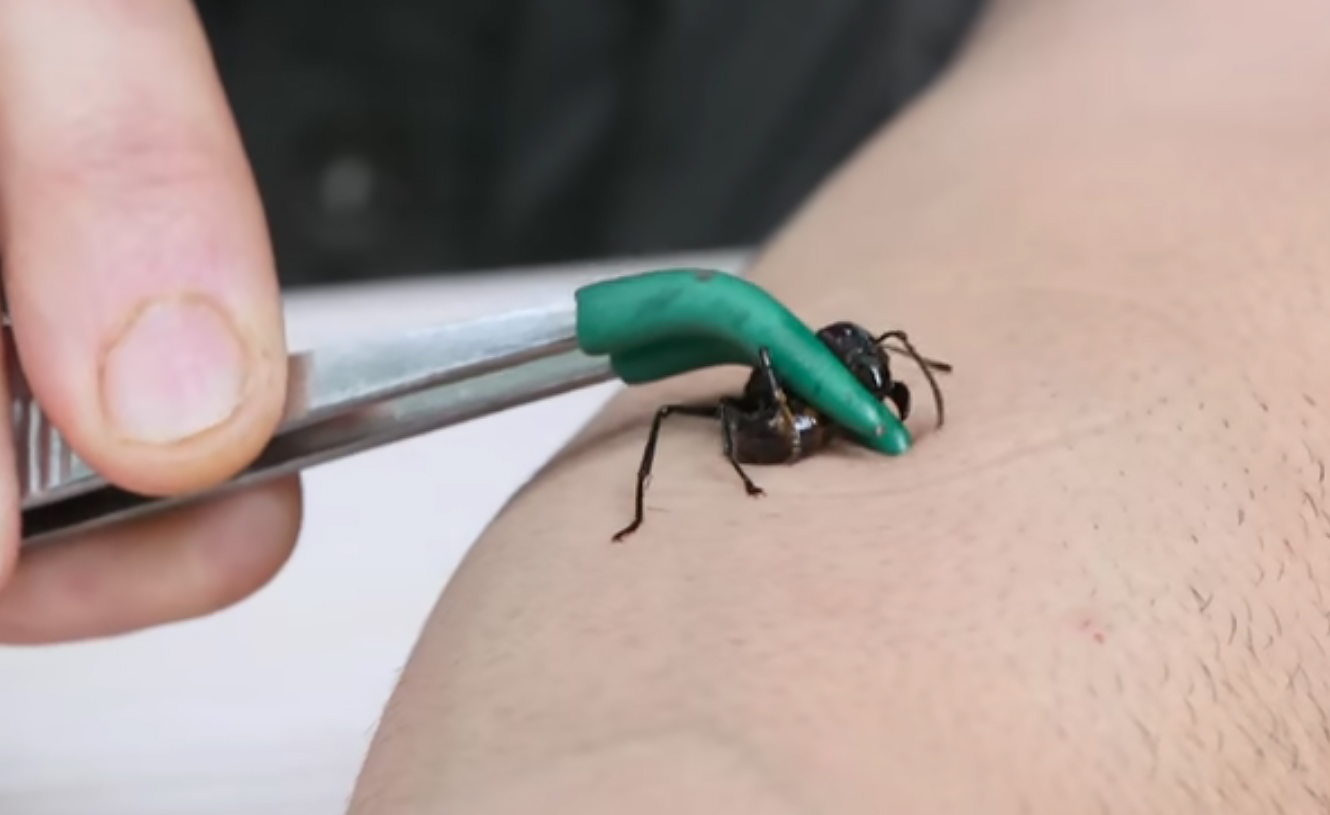
In the video, Peterson travels to Costa Rica with a singular purpose: to force a bullet ant to sting him on video. For those not familiar, the bullet ant is renowned for its excruciatingly painful sting, one which tops the list of most painful insect stings and is supposedly akin to being shot by an actual bullet.
While this is very obviously a bad idea, we must admit we find the schadenfreude factor a bit entertaining. It seems others have as well — the video already has over 11 million views. File this under “never, ever try this at home”.
So, despite the entertaining nature of watching Mr. Peterson squirm in pain, here are a few practical takeaways from this video:
This video shows that, like most dangerous animals, the bullet ant isn’t out to get you. In fact, it just wants to get away from you and stay alive. Peterson literally had to coerce the ant to sting him by holding it against his skin with forceps. If anything, that makes us less concerned about these critters.
If this is what it takes to get stung by a bullet ant, we don’t have anything to worry about.
Also, if you ever managed to get stung by a bullet ant in a real survival scenario, it certainly wouldn’t be pleasant, but it’s unlikely that it would do any actual lasting harm.
We’ll leave you with a palate-cleanser video from the BBC, for a bit of contrast. Here are some thoughts from a professional naturalist and wildlife presenter on the bullet ant:
If you’re an American or Canadian who travels to the UK, you might get some funny looks if you ask for a flashlight. Due to linguistic differences, most English-speakers outside North America refer to these handheld lights as torches. From a purely logical standpoint, neither term seems entirely ideal. Flashlights don’t necessarily flash (unless there’s a strobe mode), and electric torches don’t involve flames.
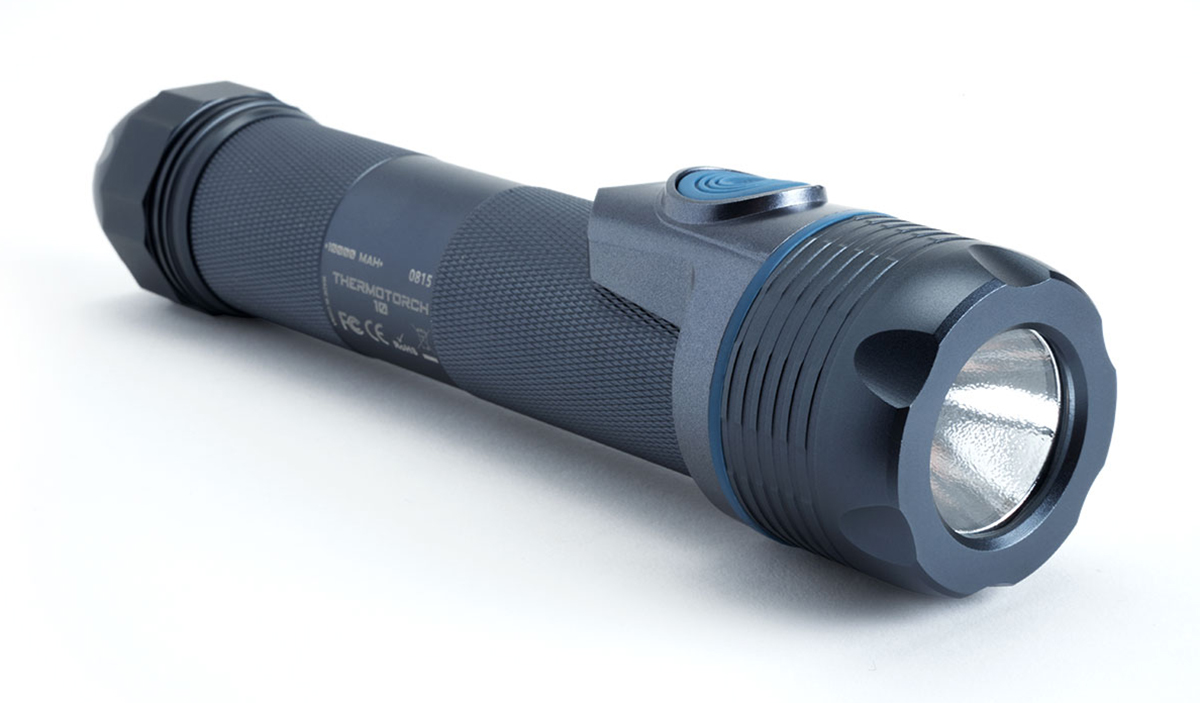
However, there’s a new product on the market that takes the term “torch” a little more literally. It’s called the Celestron ThermoTorch, and while it doesn’t have an open flame, it is designed to provide both light and heat. This flashlight is also an electric hand warmer, in an effort to make the cold winter months a little more bearable.
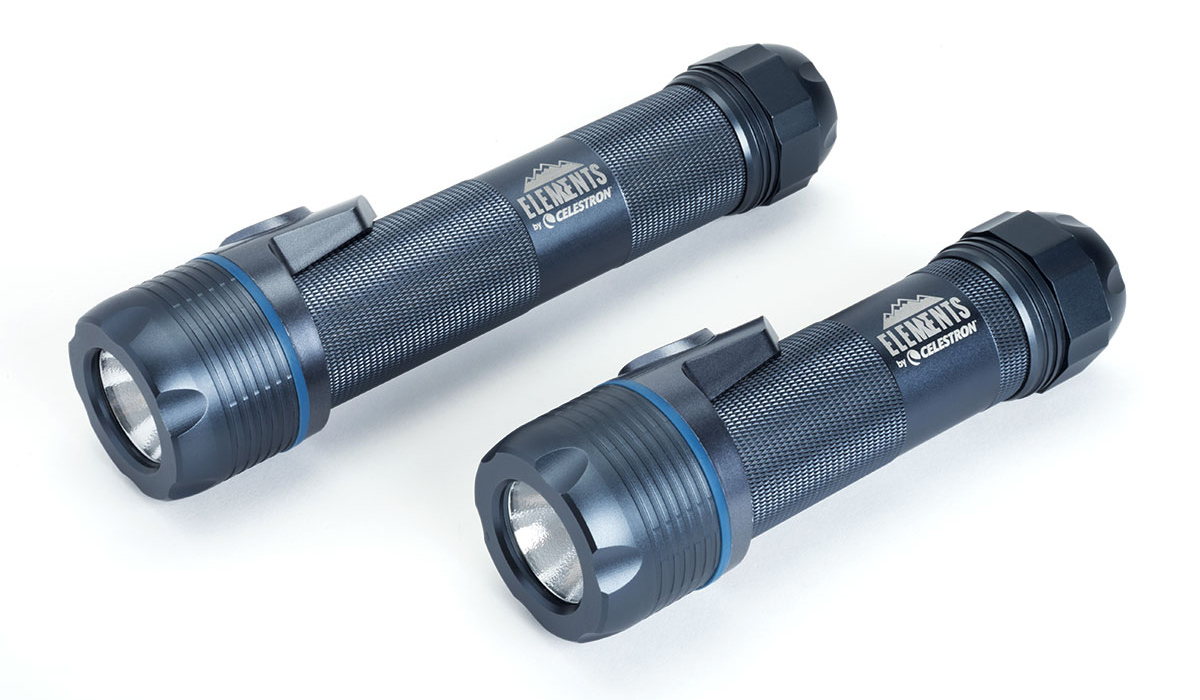
Left: the full-size ThermoTorch 10. Right: the smaller ThermoTorch 5.
The ThermoTorch is designed around a 10,000 mAh rechargeable lithium-ion battery, contained in a CNC-machined metal housing. The housing is IP65 water- and dust-resistant, as well as shock-tested against drops and impacts. On one end of the body is a 3-mode CREE LED, which produces 300 lumens, and is operated by a large rubberized button with integrated power indicator.
Removing the threaded cap on the other end of the ThermoTorch reveals another feature: dual USB output ports. This allows the ThermoTorch to be used as a portable power bank to charge other electronic devices, such as smartphones, cameras, or GPS units. The ThermoTorch can also be recharged via a mini-USB input port.
The “thermo” in ThermoTorch comes from a built-in hand warmer that can provide a full 10 hours of heat, and produce temperatures up to 114°F. You can keep the device in your pocket to warm your hands, and click on the light when you need increased visibility.
Celestron offers the device in two sizes:
ThermoTorch 10 – 10,000mAh battery, 8.25″ length, and dual USB output ports
ThermoTorch 5 – 5,000mAh battery, 6.5″ length, and a single USB output port
The ThermoTorch 10 is available at various retailers for $90, while the smaller ThermoTorch 5 is available for $70. For more information on this product, visit Celestron.com.
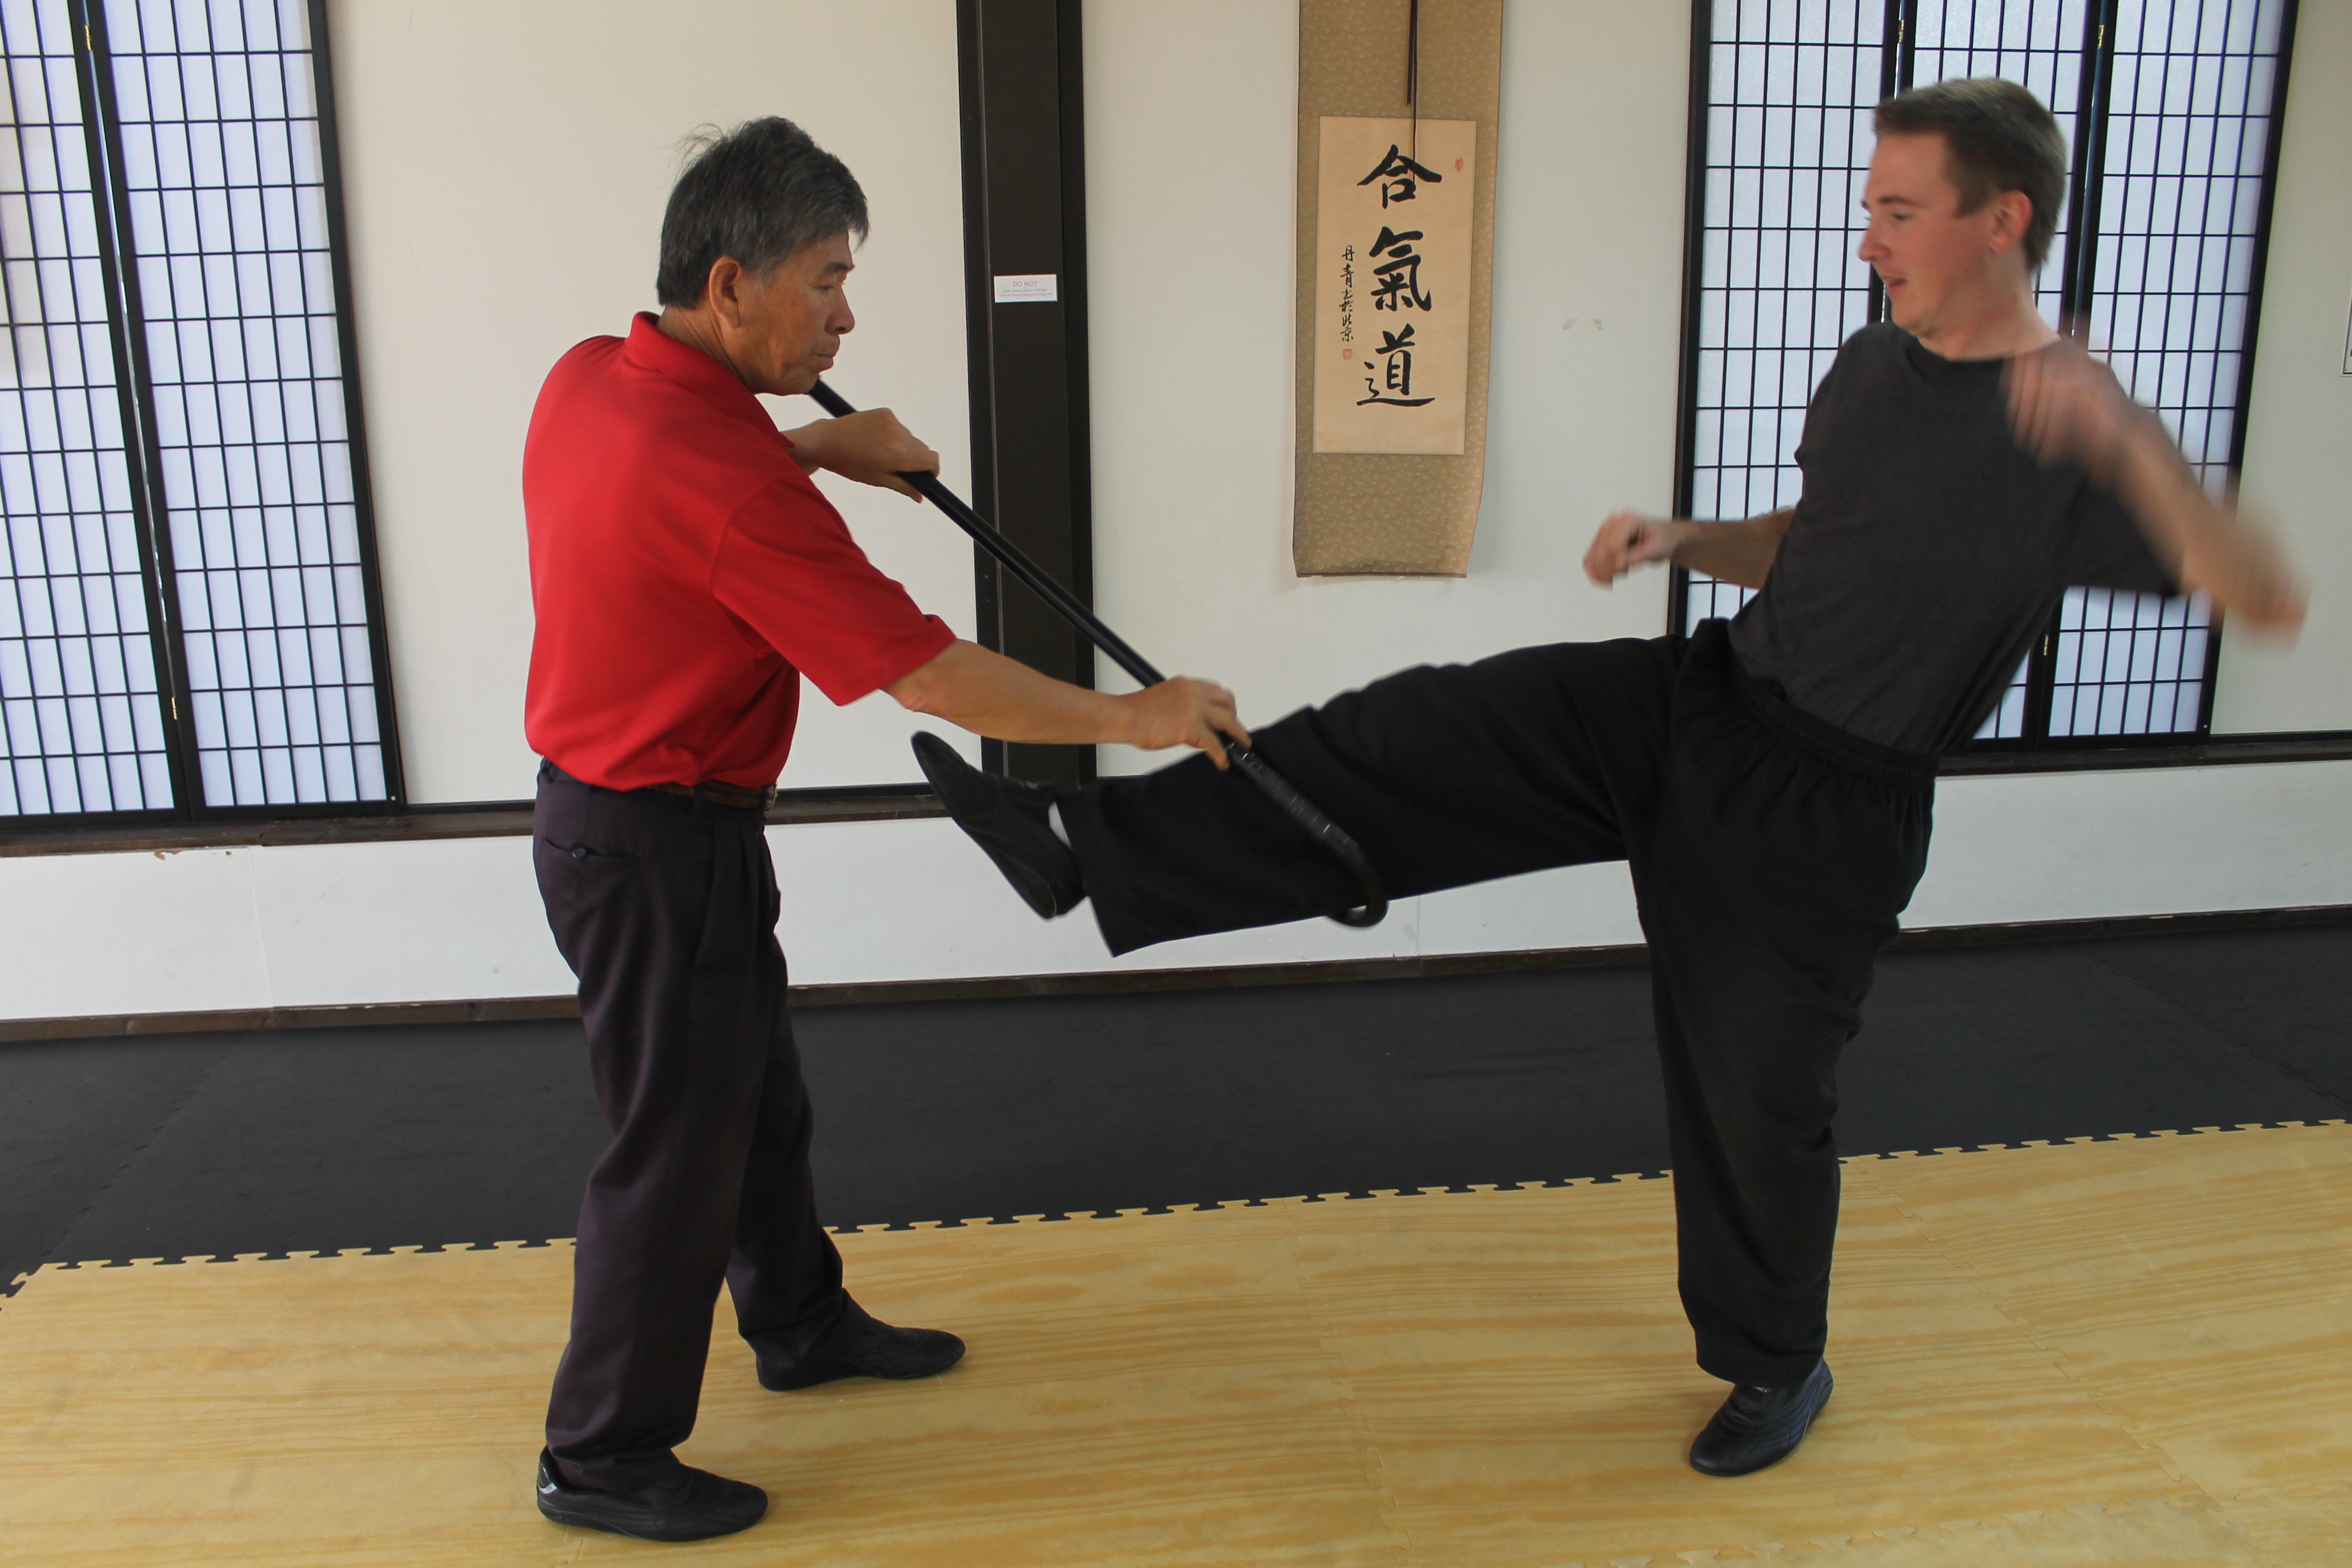
In Part I of our Self-Defense Cane series of web-exclusive articles, we discussed why a cane can serve as an excellent self-defense tool — even if you don’t need one to walk. This simple hooked stick can be hidden in plain sight due to its discreet appearance, and can be carried in non-permissive environments where more conventional weapons are banned.
Today, we’ll address some common mistakes and misconceptions that might make carrying a self-defense cane less effective. For illustration purposes, we’ll be referring to the KA-BAR TDI cane we introduced in Part I of our series.
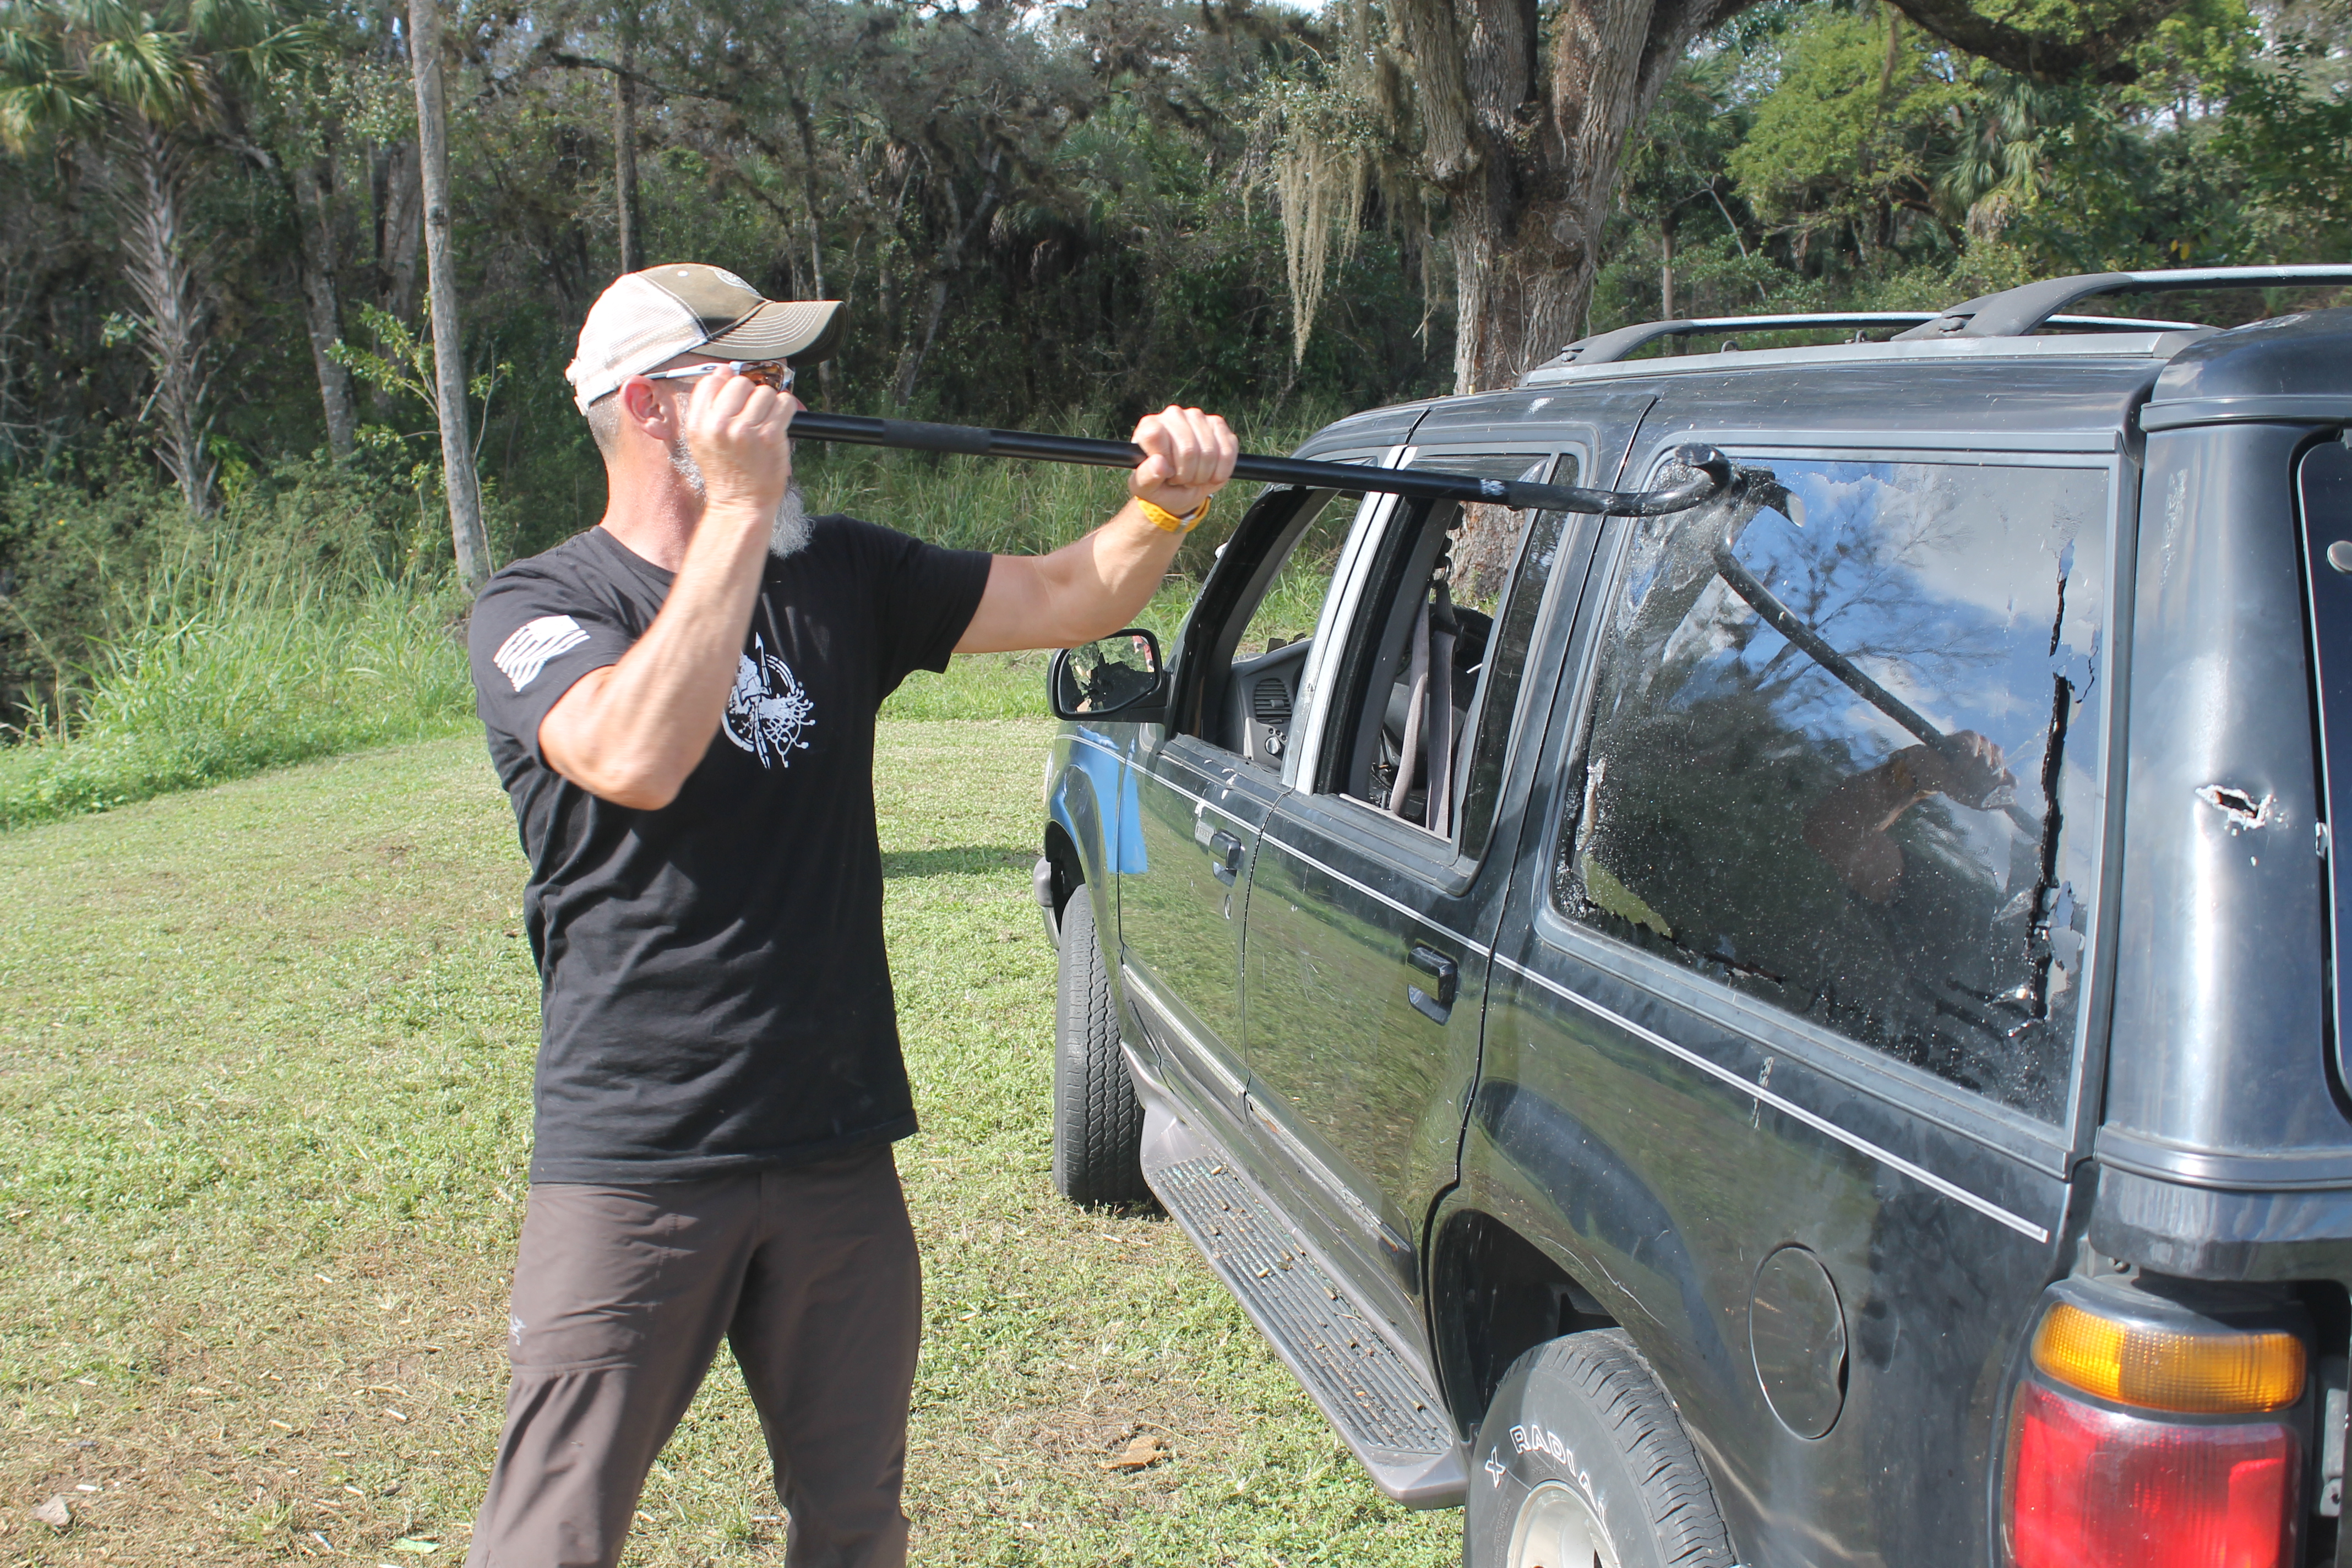
Above: Chris Costa of Costa Ludus smashes SUV glass to clear the way for his pistol and carbine vehicular shooting class in Everglades City, Florida. The KA-BAR TDI aluminum cane crook easily took out the windows and allowed Costa to rake out large pieces of glass, clearing the way for his shooters and keeping his hands free from cuts. The cane had minor scratches. (Photo courtesy of Costa Ludus.)
Without further ado, here are the top 10 rookie mistakes to avoid while carrying a cane for self-defense:
Mistake 1: Assuming One Size Fits All
When fitting the KA-BAR TDI-Self Defense Cane, shorten the shaft gradually. One advantage of the hollow shaft is that the cane’s rubber tip or foot can easily be removed, the cane shaft shortened with pipe cutter or hack saw and the rubber foot replaced. The rubber foot is slightly over-sized for secure surface grip, and a metal washer insert within the tip prevents the tubular cane from cutting through the tip.
Take care to use the cane before you decide to cut it, removing a small ¼-inch amount at one time, while wearing street shoes and practicing with the cane in between cuts. Although the full-length cane can easily be carried by a 6-foot-2 or taller person, actual cane length comes down to personal preference.
Cut too much, and you will stoop while walking with the cane, resulting in poor posture and potential spinal problems. Start by standing straight upright with a slight bend in the elbow while lightly grasping the cane. Avoid cutting the cane based on someone’s hard and fast rules, like having the cane’s highest point at the point of your hip, or the wrist bone. When in doubt, or while training, always err on the side of leaving the cane cut slightly long, to allow for different footwear, declines, inclines, and actual cane usage for walking when injured during your urban bug out.
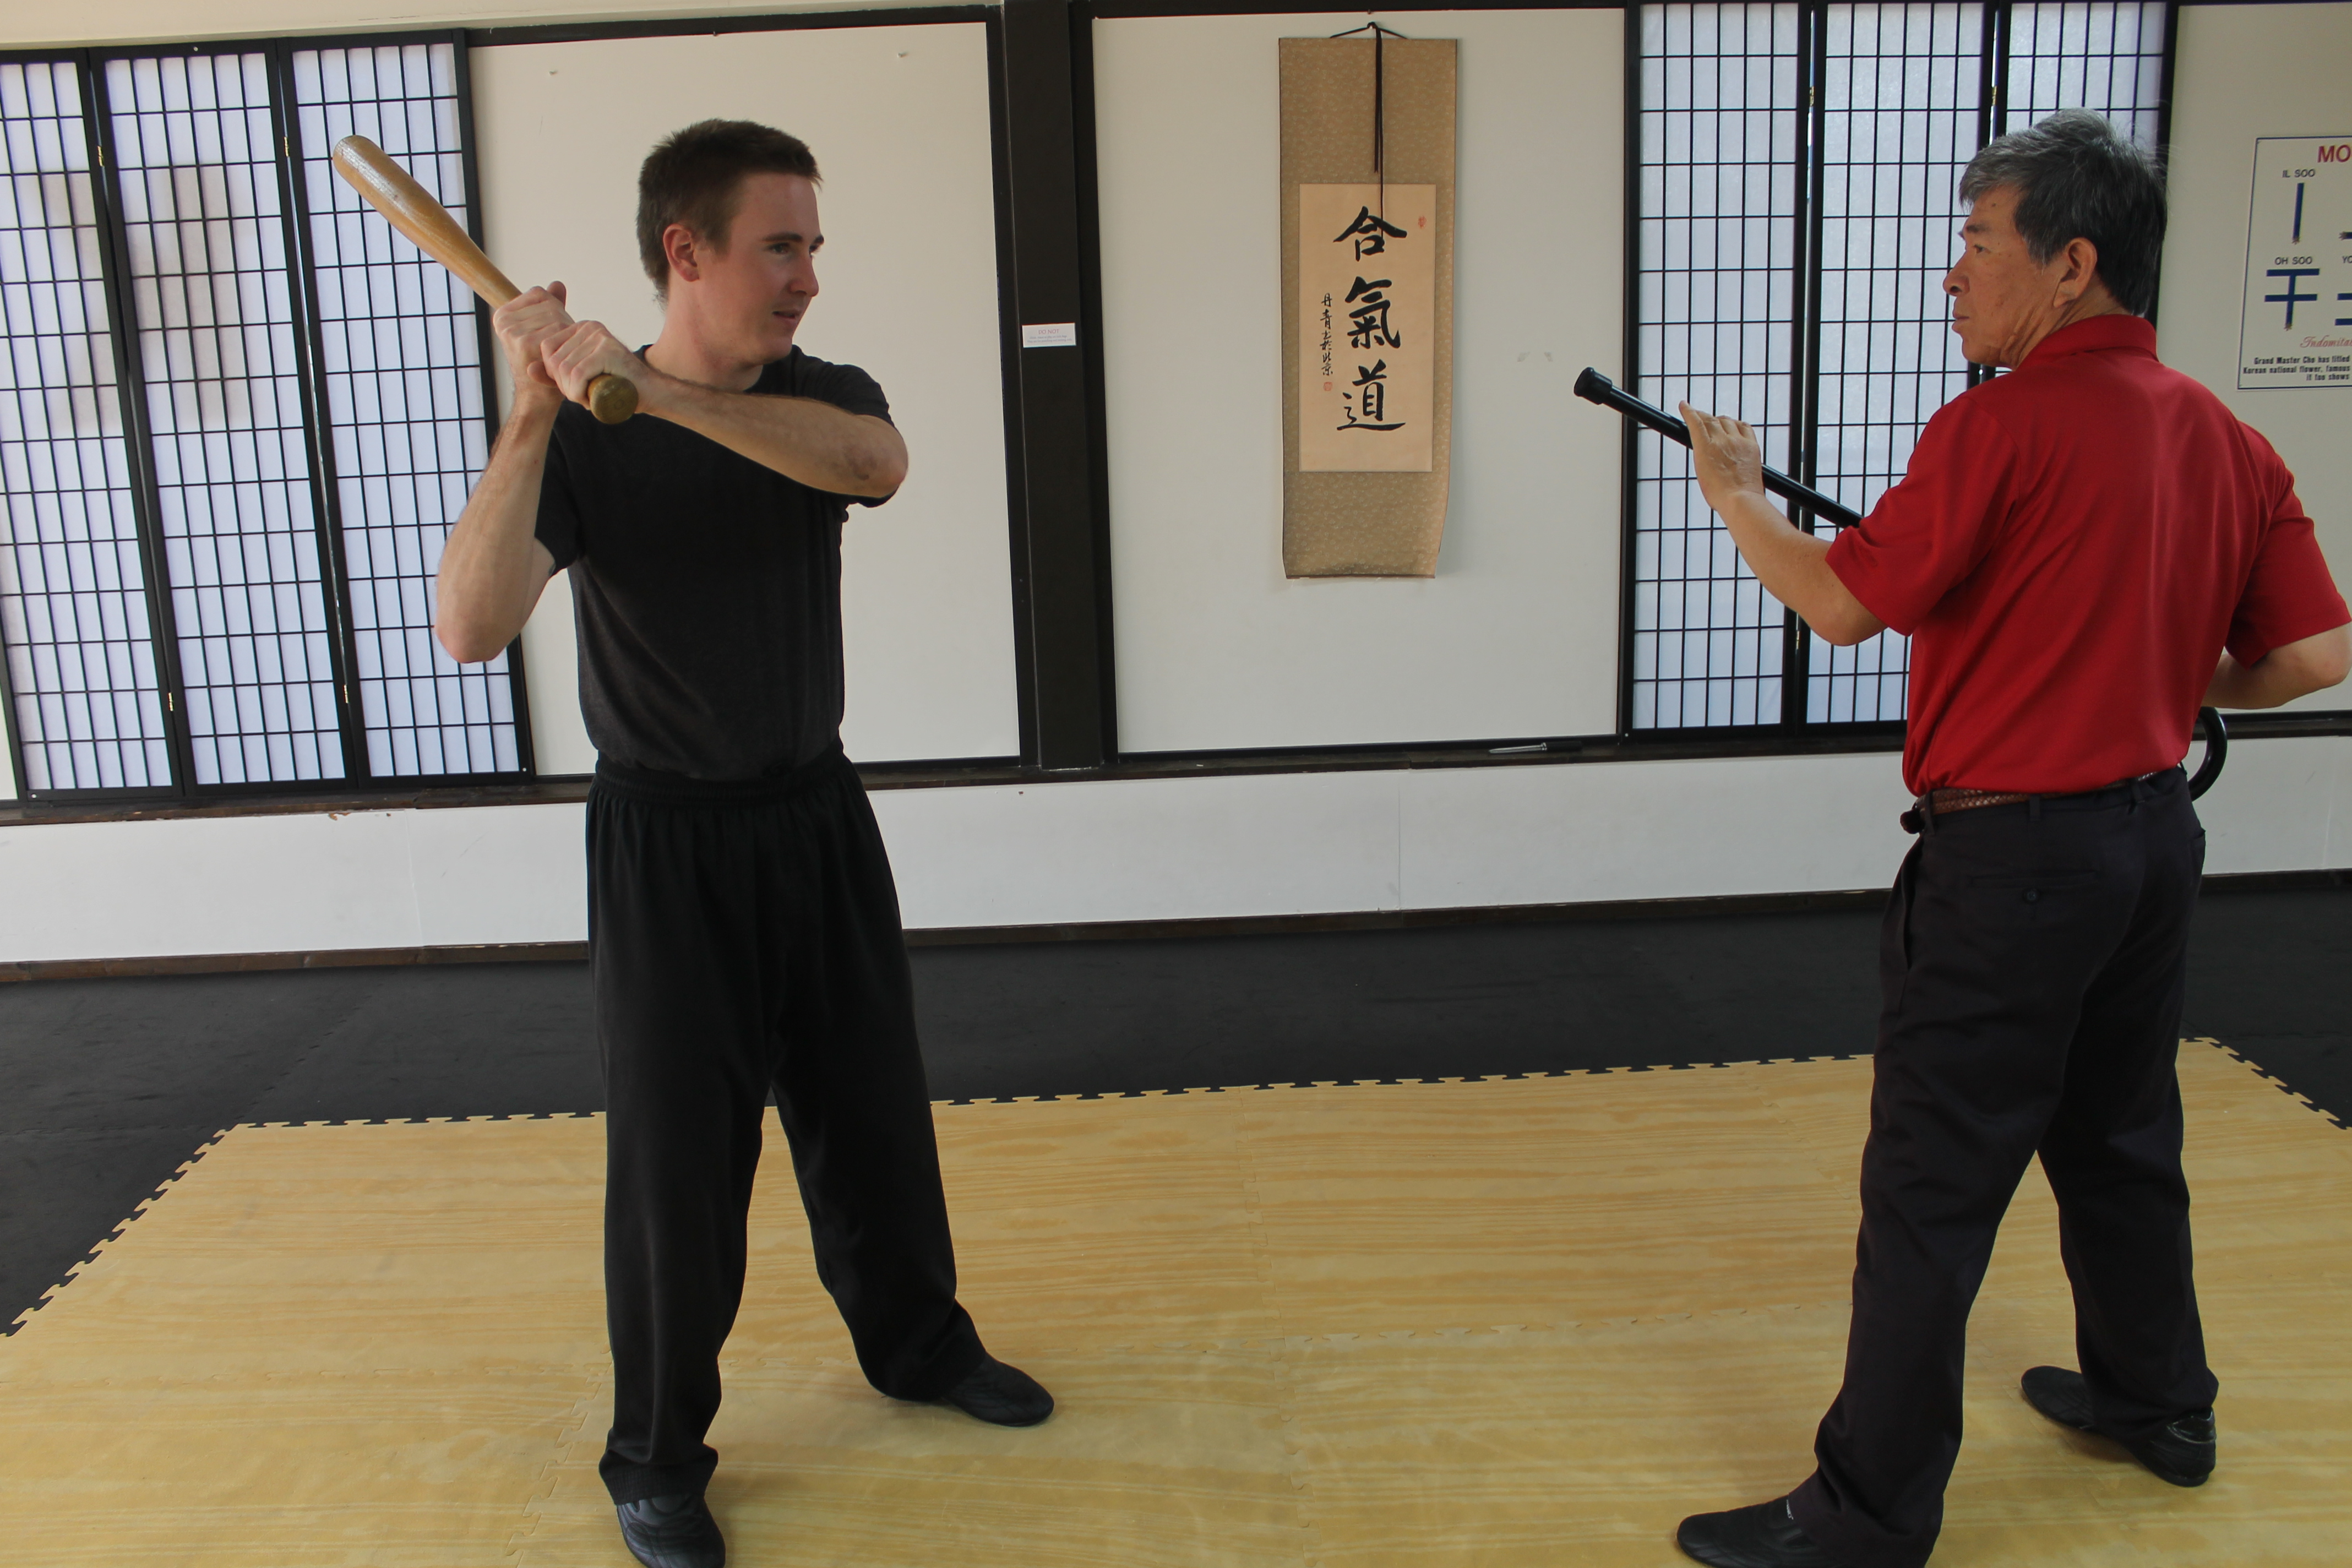
Mistake 2: Cocking Your Weapon
This phrase is taught to U.S. Marines during the Corp’s Martial Arts Program in Quantico, and refers to the need to avoid telegraphing your moves by drawing the cane rearward before thrusting the cane forward, usually in a two-handed thrust or bayonet style lunge to strike or to parry. There are no shortcuts in training, but even a limited martial arts specialty cane course can prevent the cane carrier from excess motion, and instruct in the art of generating powerful blocks, strikes, counters, and thrusts from a calm and relaxed position through foot movement and rotation of the hips and torso through to the arms. This holds true in tight quarters.
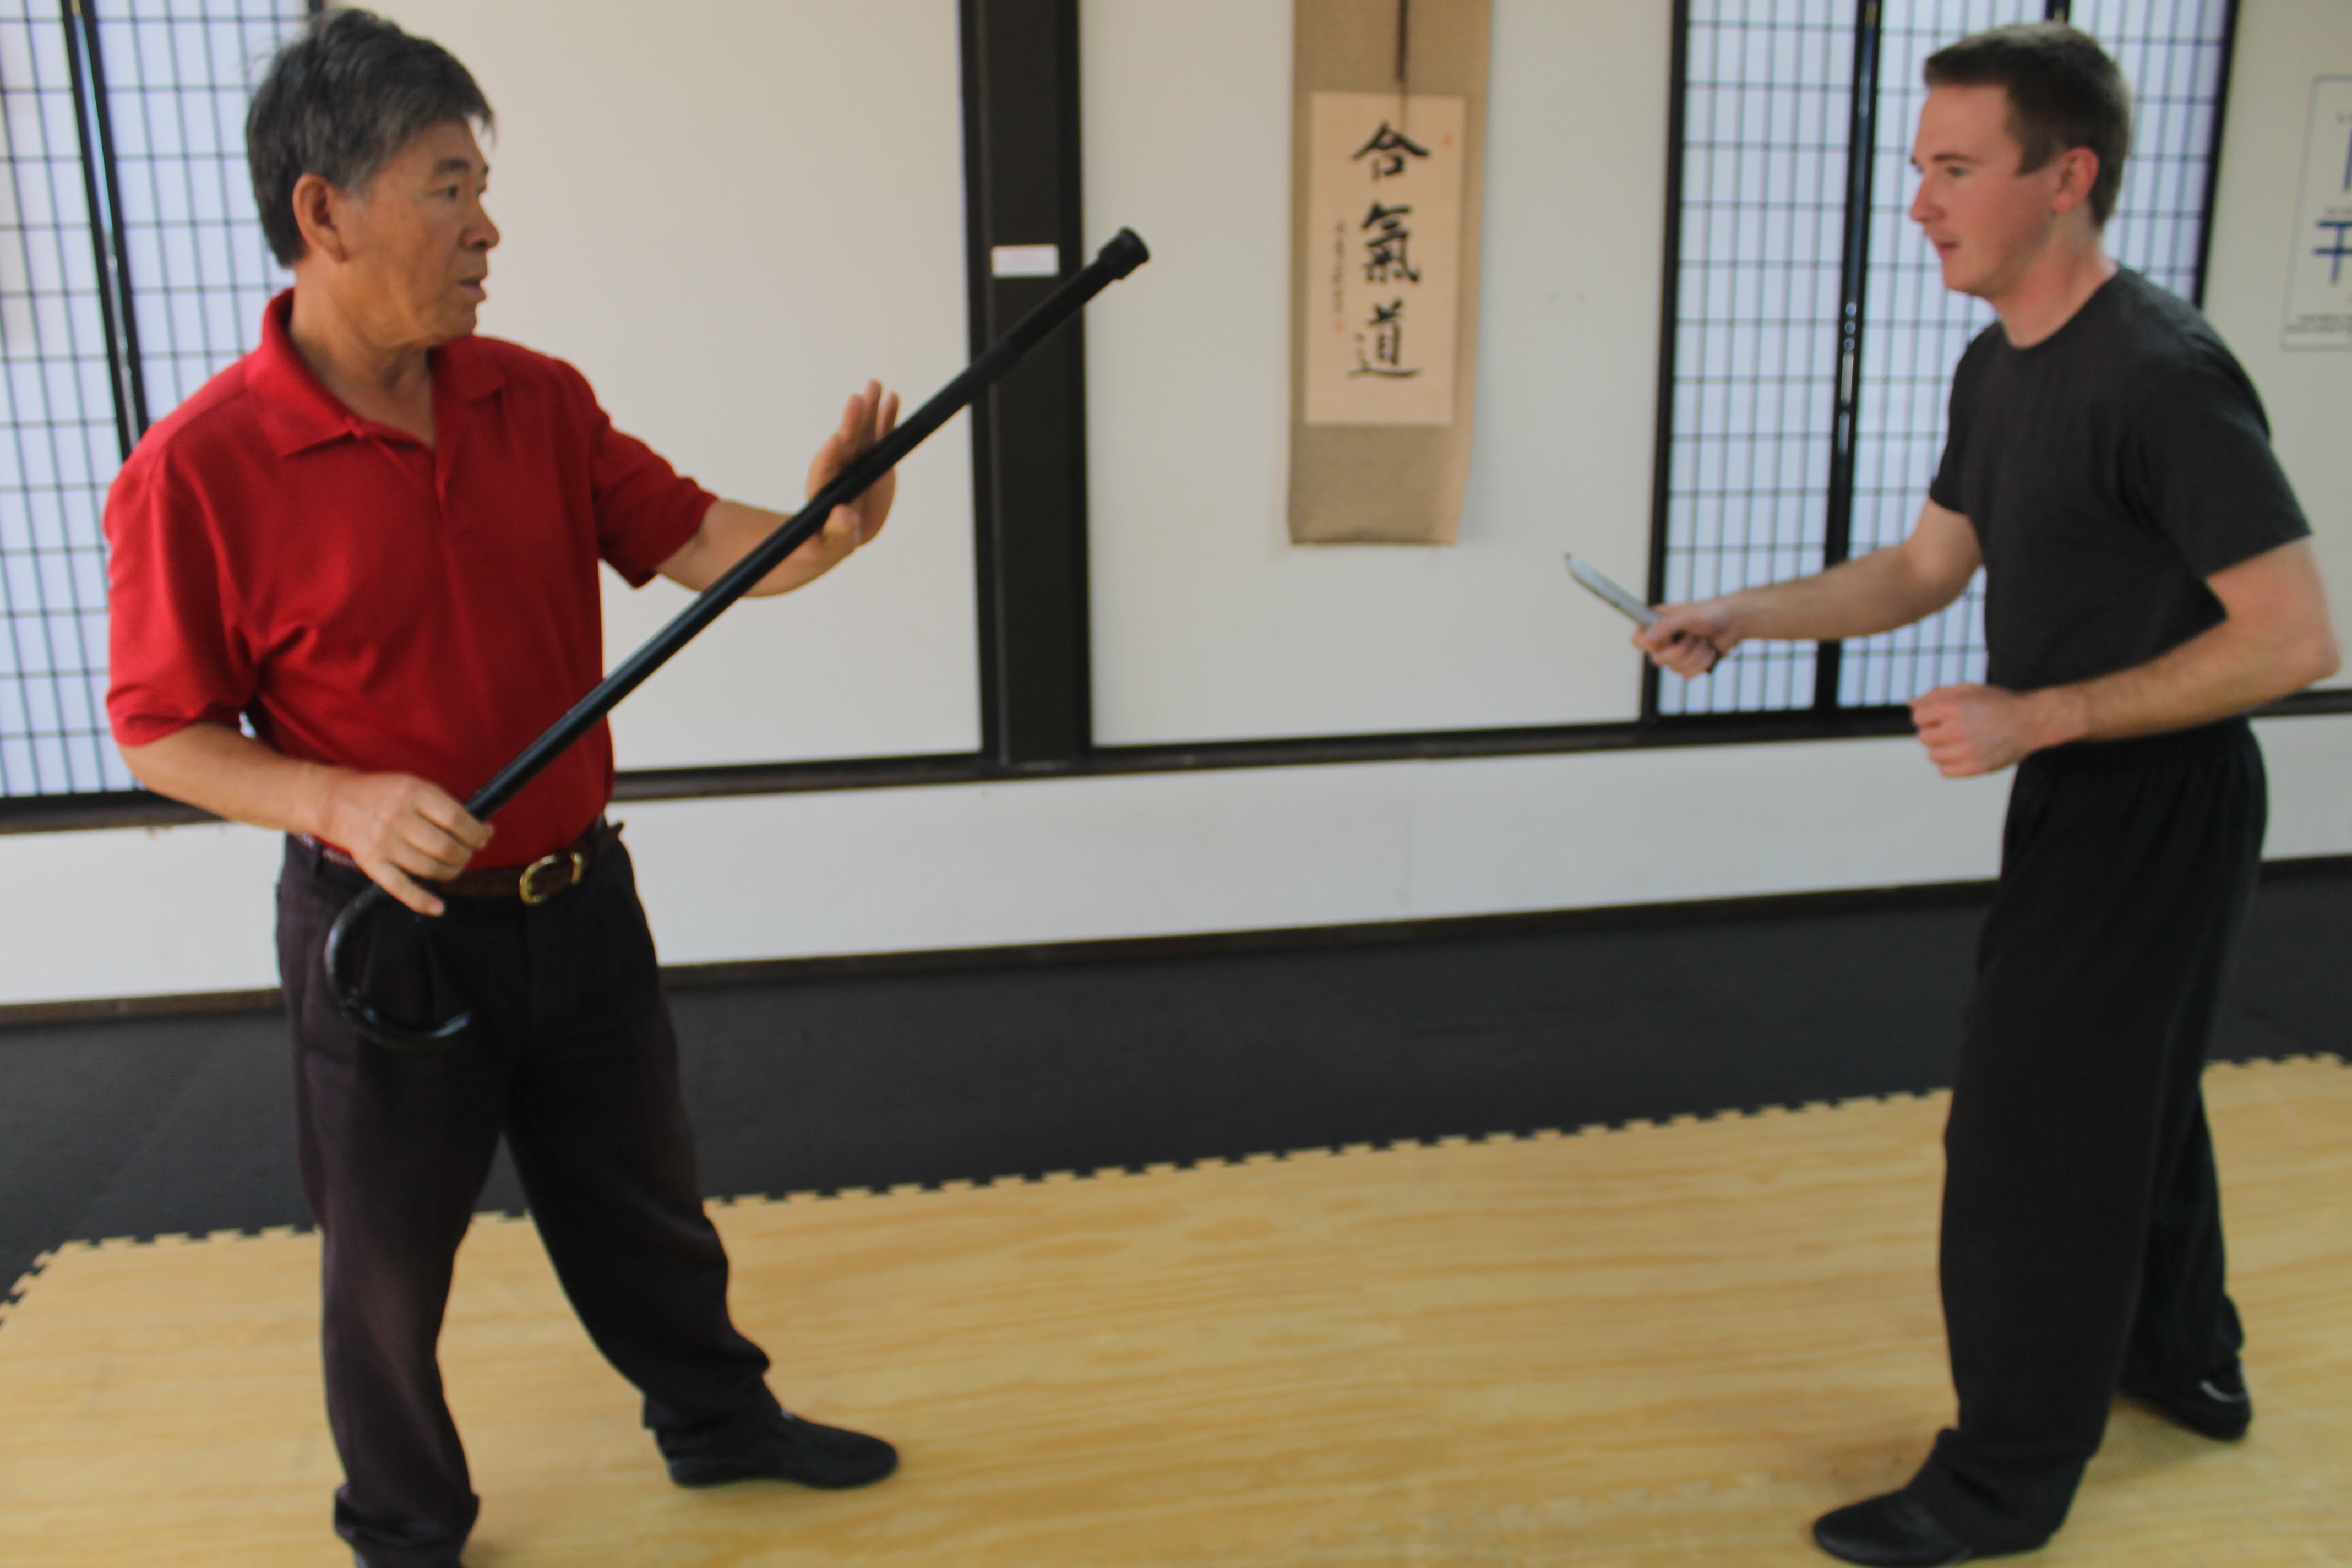
Mistake 3: Overextending
For anyone using the cane to steady their posture during a medical recovery or unsure footing, care must be taken not to overextend on a thrust by leaning too far forward. You can become off-centered by a swing and a miss, opening one to a counter-strike, a cane takeaway, or a trip.
Mistake 4: Freezing
Don’t stand still with the cane cross-chest and allow an assailant to close in and grab it with both hands. If that happens, you may be able to rotate the entire cane down while twisting against the attacker’s grips, using a foot stomp, snap kick, or knee to dominate. As soon as the grip is broken, look for an opportunity to counter or put some distance between you by circling.
Mistake 5: Advertising Your Third Leg
When waiting or standing still at a public bus stop, for example, the cane’s creator, Benner, teaches to keep the cane out of sight to passersby. This is accomplished by closely aligning the cane with his right or left side, or positioning it slightly behind him. If needed, the cane may be brought up, around, or overhead with surprising speed, spinning the cane in a one-handed grip in the crook or hook to fend off an attacker.
Mistake 6: Forgetting Driver Defense Drills
When driving in stop-and-go or bug-out city traffic, keep the cane within reach while driving but first practice defensive moves to prevent entanglement with seatbelts, steering wheels, and passenger side riders. Lean inward, rather than outward of the window and prepare to repel boarders with a straight stab to the throat or face.
Mistake 7: Using the Foot
In case of emergency, break glass. This saying is familiar, and the cane can smash out an entire SUV rear window. The best power stroke comes from landing our blow with the heavier curved end. After smashing the glass use the hook to break out the class. This prevents you from pushing through windshield glass with the straight cane end and risk losing the rubber foot when the cane is withdrawn through the safety glass spider web. The overall cane length will enable you to smash and escape through a commercial plate glass window in the event of an active shooter or fire scenario. In that event the hook can even serve as a climbing aid. Your collapsible umbrella won’t cut it.
Mistake 8: Neglecting to Train
Benner believes in simplified “non-horsesh!t” techniques that end or prevent fights. The danger with training all the time with extremely light bamboo or foam canes, he said, is that people believe they can perform lightning speed, rapier-like moves, crossing behind the back in two-hand shifts. Then when they switch to the full weight metal cane, the speed and balance are unfamiliar, requiring additional grip strength to execute. Benner once had dinner with the late Col. Rex Applegate, author of the manual on knife fighting. In his advanced age, Applegate is reported to have used a cane to put down two street toughs, one with a groin strike and one with a blow to the head.
Mistake 9: Believing the Weapon-Free Zone Myth
Law-abiding citizens have a blind spot. When traveling through non-permissive environments, don’t let your guard down. Just because you comply with the law by leaving behind your $200 blade doesn’t mean the guy asking directions is not concealing a throw-down box cutter. Watch the hands and don’t be lulled into a false sense of security by a sign with a red circle and line around and through a handgun.
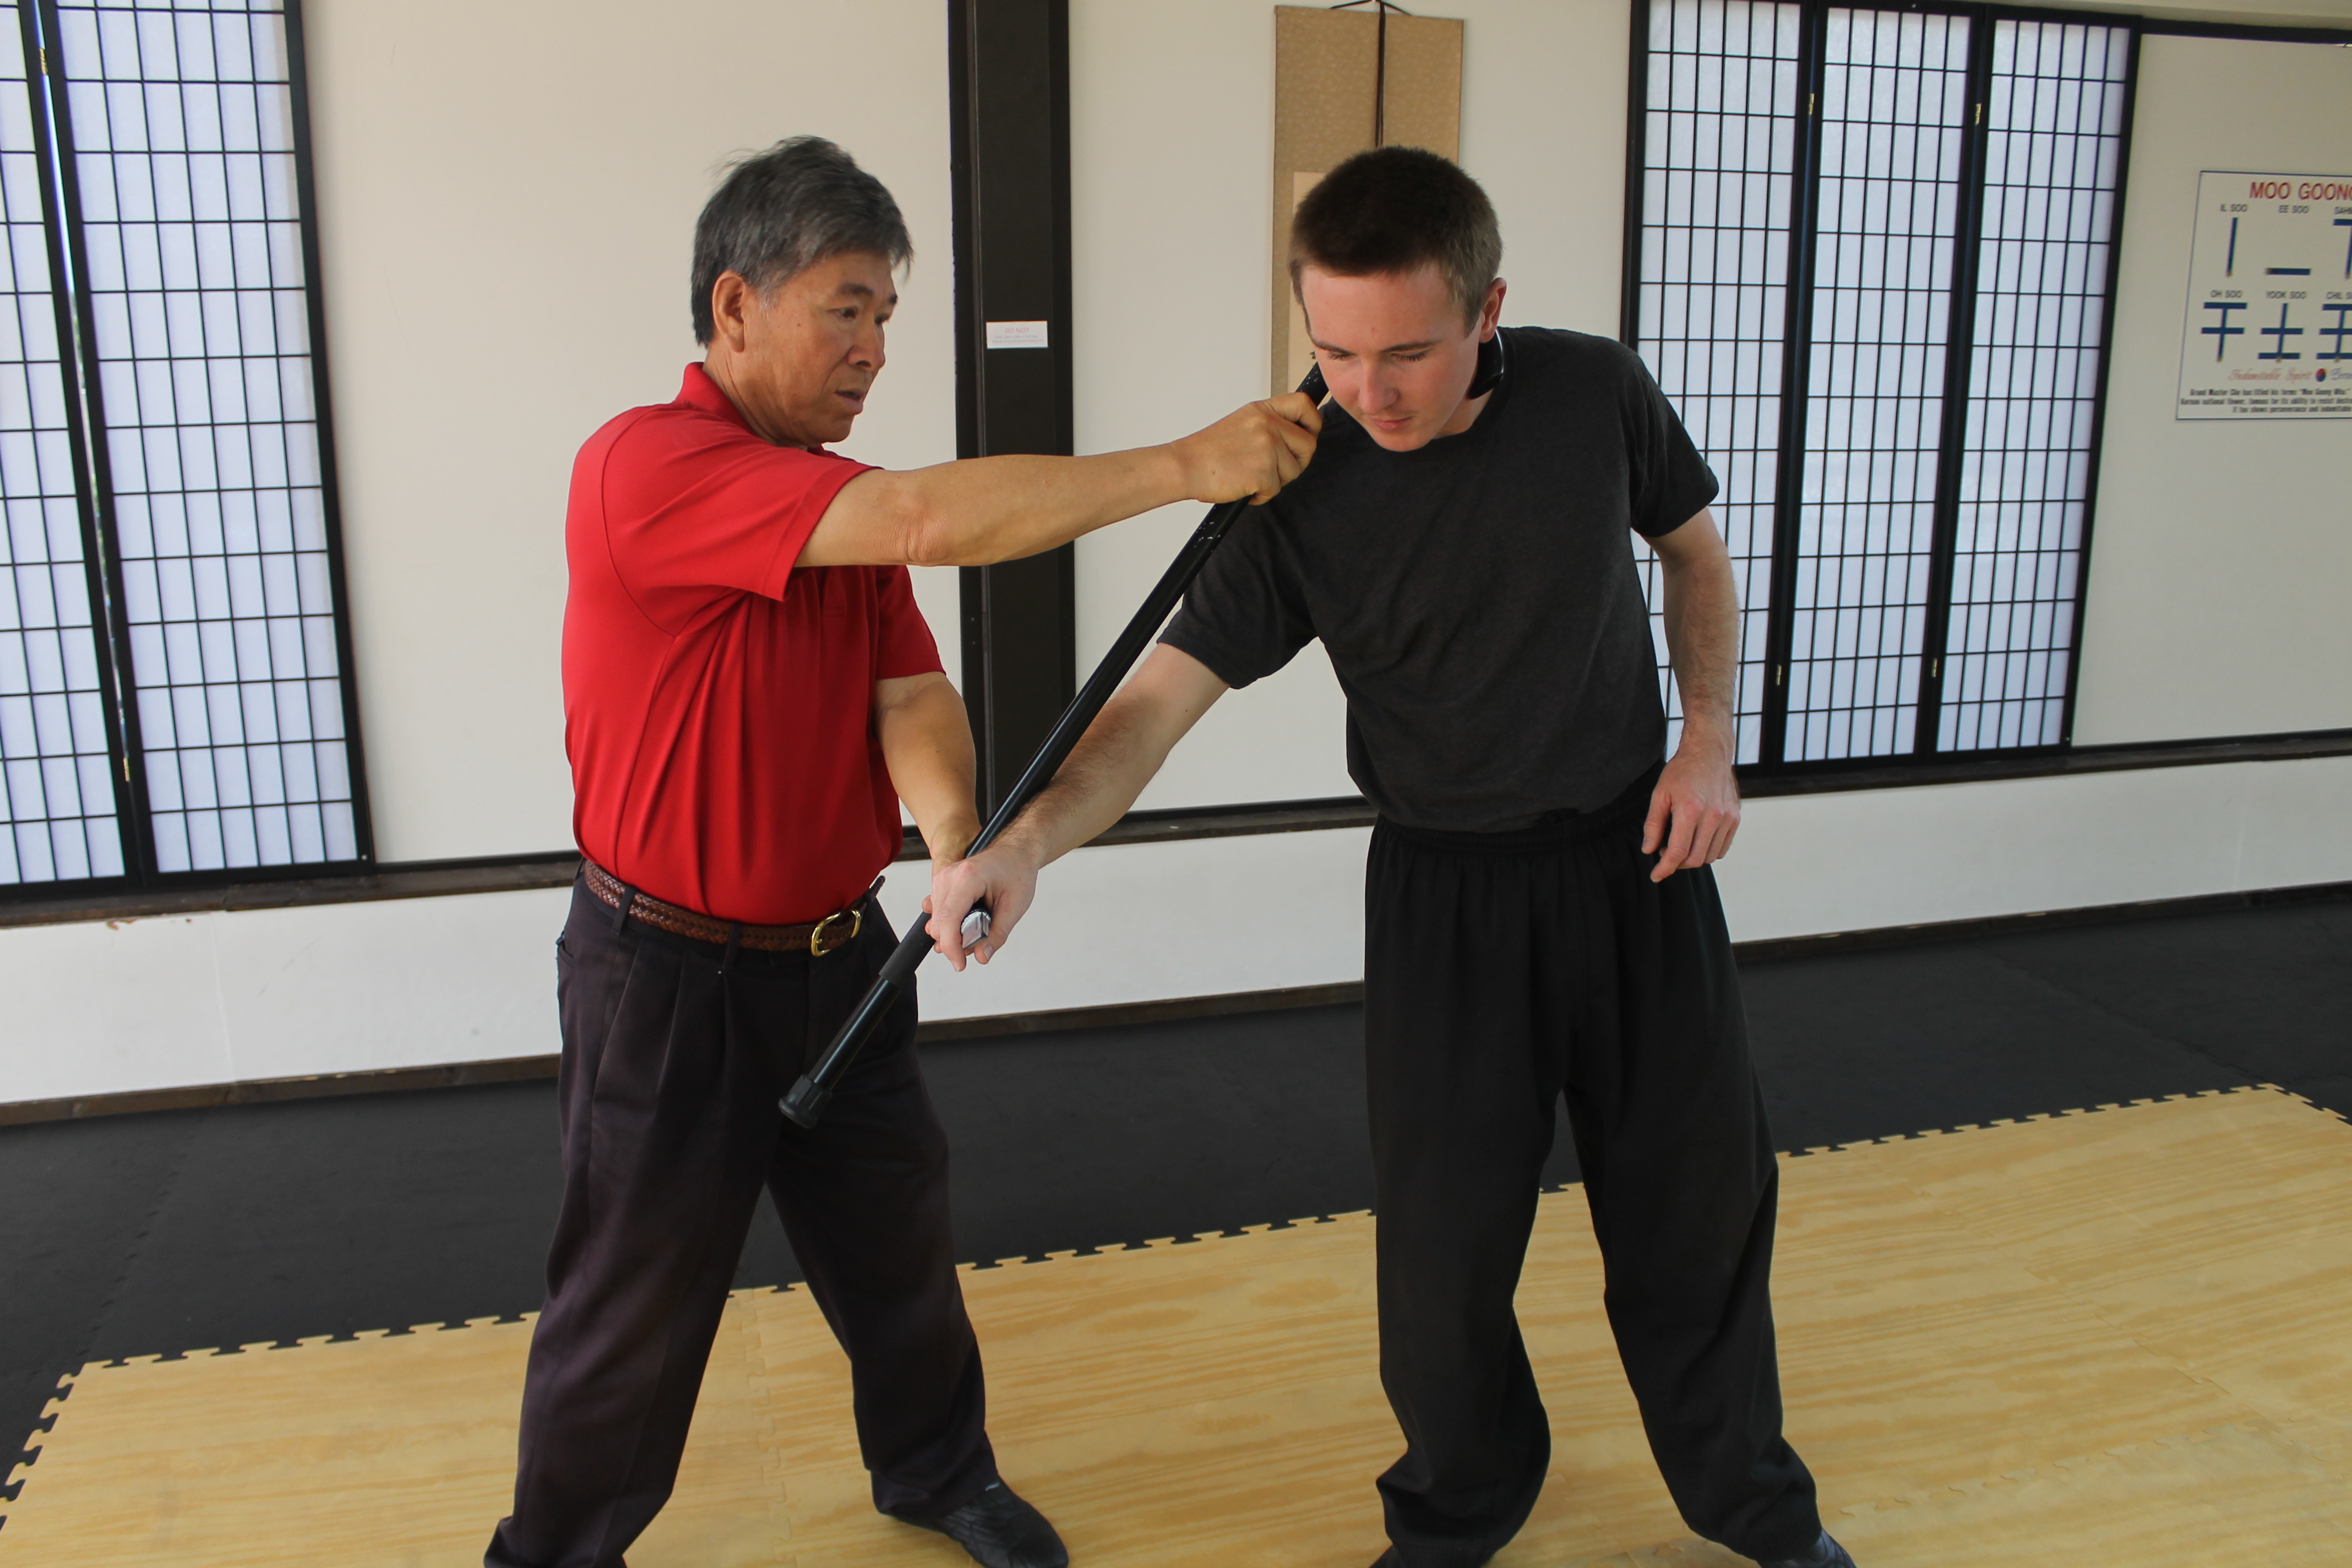
Mistake 10: Countering Without Purpose
Don’t swing at the entire person. Visualize an attack, be it a front kick to your groin, a sucker punch from behind your head, a grab for your messenger bag. Imagine openings — sensitive areas. Focus your defensive counter (thrust, block, strike) on the opening created by the attacker. If he groin kicks with his right leg can you move to the outside side and deliver a strike to his supporting left knee, avoiding his punch? If he grabs your bag can you drive down the beveled tip of your cane crook handgrip into his arm or neck?