How to Suture: DIY Guide to Wound Closure Methods

Traumatic injuries occur in the tens of millions every year in the United States. According to the Centers for Disease Control and Prevention (CDC), close to 2-million victims of trauma require hospitalization annually. In normal times, trauma victims have the benefit of an infrastructure that allows rapid stabilization and transport to a modern medical facility. The off-grid medic, however, has no such access, but is even more likely to be confronted by traumatic injuries. 

In survival scenarios, mishaps related to activities of daily survival are bound to occur. Those unaccustomed to, say, chopping wood for fuel could easily end up requiring intervention by someone with medical skills in the event of an accident. 

couple hiking hurt knee


Disclaimer:

This article is for informational purposes only and applies specifically to long-term off-grid scenarios. Improper wound closure can cause more problems than it solves. Seek care by certified professionals wherever a functioning medical system exists.


One of those skills is wound closure. The well-rounded medic should be familiar with the various methods and materials used in closing a laceration. More important still is the proper judgement as to when an open wound should be closed and when it should not. Having the necessary knowledge, training, and equipment is imperative to be an effective caregiver.

The Open Wound

An open wound is any injury that breaches the skin. Skin is your natural armor. It prevents the invasion of microbes into the body that could otherwise be life-threatening. Typical open wounds include:

skinned knee

Above: Skinned knees are a common form of abrasion. Typically, no closure is necessary; clean and dress the wound to reduce the risk of infection.

Abrasions: An abrasion occurs when your skin rubs or scrapes against a rough or hard surface. A motorcyclist’s “road rash” is one example, but most people have “skinned” their knee as children. Bleeding is minimal, but the wound needs to be scrubbed and cleaned to avoid infection. No closure is necessary.

Punctures: A puncture wound is a hole created by a projectile, nail, needle, or certain animal bites. Some punctures may not visibly bleed, but can be deep enough to damage internal organs and increase the risk of infection if closed. 

wrist laceration

Above: An example of a typical laceration.

Lacerations: For the purposes of this article, we’ll define a laceration as a cut that goes through both the upper layer (epidermis) and the lower layer (dermis) of the skin. Skin lacerations expose the structures underneath to the risk of contamination. Accidents with knives, tools, and machinery may cause lacerations that slice through major blood vessels or even cut deeply into internal organs, like the liver. Bleeding can be extensive. Most lacerations these days are closed by a medical professional.

Avulsions: An avulsion is a tearing away of skin and the soft tissue beneath. Avulsions usually occur during violent accidents, such as crush injuries or shrapnel wounds. Degloving is another gruesome form of avulsion (don’t Google that unless you have a strong stomach). In many cases, these wounds bleed heavily and rapidly. After assuring that bleeding has stopped, closure may be attempted at some point dependent on the amount of tissue lost.

crashing a bike

Above: Mountain biking is one activity that can lead to “road rash” abrasions in the backcountry.

Decisions: Primary, Secondary, or Tertiary Intention

When faced with an open wound, you can choose to:

  •  Close it right away (“primary intention”)
  •  Keep it open and let heal on its own (“secondary intention”)
  •  Keep it open for a time and then close (“tertiary intention”)

Your choice will depend on the situation. Most wounds that you close (primary) heal just fine as long as the wound is flushed with clean drinkable water or a diluted antiseptic solution. This is known as “irrigation” and serves to clear out debris and germs. 

suture guide

Primary Intention: Closure by primary intention usually leads to edges that fit together neatly and, if done properly, drops the risk of infection significantly. It’s important to know that, although skin heals very rapidly, deeper tissues like muscle and tendon take longer to heal and recover full strength.

For wounds that are jagged in nature, a portion of skin may require trimming, also known as “debridement.” This makes the wound more symmetrical and assures the removal of dead tissue that would impede the healing process.

Secondary Intention: Healing by secondary intention leaves the wound open. It’s preferred when wound edges cannot be brought together easily. An example might be a shrapnel wound, where large areas of tissue may be torn off. This may also be used for wounds with a significant amount of dead tissue (like bedsores), which requires debridement.

The process of a wound closing on its own is called “granulation” due to the granular look of newly forming tissue. The larger the wound, the longer it’ll take to fill in. Other factors like the age and general health of the victim play a part in the speed of healing, as does the presence of infection. 

These wounds are usually packed with moist (not soaked) sterile dressings, which should be changed at least daily and irrigated with clean water or a diluted antiseptic solution. 

Tertiary Intention: Healing by tertiary intention is also known as a “delayed wound closure.” In this strategy, the wound isn’t closed immediately because of suspected contamination. It’s treated like healing by secondary intention for a period of time so that the tissue can be closely observed for signs of infection. If no signs of infection are present after two or three days, the wound may be closed at that time. 

Waiting to close is the more prudent approach in many cases where infection is a common complication, like bite wounds. Leaving the wound open for a time allows pus and inflammatory fluid to drain and not accumulate below the skin. 

A partial closure is sometimes performed with the placement of a drain. Drains consist of thin lengths of latex, nitrile, or even gauze placed into the wound to allow drainage. “Penrose” drains are a reasonably priced item that are still used in some operating rooms. Don’t be surprised if a drain leaks fluid; be sure to cover any exposed areas.

Many open wounds should be treated with antibiotics to prevent infection whether you close them or not. Natural substances with antibiotic properties, such as raw, unprocessed honey may be useful in survival scenarios.

To Close or Not to Close?

That is the question, as Hamlet would say. It seems like common sense that we would want to close a laceration to speed healing and prevent infection. The decision to close a wound, however, involves developing sound judgment, something that takes some training and experience. 

circular wound healing

Progress of suture closure over time.

What are you trying to accomplish by closing a wound? Your goals are simple. You close wounds to repair the defect in the body’s armor, to eliminate “dead space” (pockets of air/fluid under the skin which could lead to infection), and to promote healing. Although more an issue in normal times, a neatly closed wound is more cosmetically pleasing.

Closure options include sutures, staples, tapes, or medical glues such as Dermabond. Even industrial superglue has been used (they’re both in the cyanoacrylate family), although the prescription product tolerates getting wet better.

Always use the least invasive method possible to close a wound. Steri-Strips and glues don’t put additional holes in a person, but sutures and staples do. In certain areas, however, it may be necessary to use them. Joints like the knee and elbow are so frequently flexed and extended that tapes and glue are unlikely to hold a laceration together. These wounds should be closed if possible. For that, sutures or staples are required.

You’d think that all wounds should be closed. Unfortunately, closing a contaminated wound can do a lot more harm than good, and could possibly put your patient’s life at risk. Take the case of a young woman injured some years ago in a fall from a zipline — she was taken to the local emergency room, where 22 staples were needed to close a large laceration in her leg. Unfortunately, the wound had dangerous flesh-eating bacteria in it, causing a serious infection which spread throughout her body. She eventually required multiple amputations (including her hands).

how to suture

Above: Steri-Strips can be placed between sutures or staples to conserve materials.

Despite this tragic case, some wounds are good candidates for closure after a good cleaning. Lacerations that are less than eight hours old are an example. Beyond that, it’s likely that bacteria have already colonized the injury. Even the air has bacteria that can cause infections.

Another case that might call for wound closure is if a laceration is long and deep, cutting through layers of subcutaneous fat, muscle, or other internal structures. A muscle that has been ruptured or torn may not regain its function unless cut edges are approximated. You may also decide to close a wound that gapes open loosely enough to suggest that it can be closed without undue pressure on the skin. The exception might be a puncture wound from an animal bite. These bites are loaded with bacteria and are often kept open.

Is the wound a simple laceration (straight thin cut on the skin) or an avulsion (areas of skin torn out or hanging flaps)? If the edges of the skin are so far apart that they can’t be stitched together without creating undue pressure, the wound should be left open. 

Wound Infections

Most wounds you’ll encounter in an off-grid setting will be dirty. If you close a dirty wound, such as a gunshot, you have sequestered bacteria, bits of clothing, and dirt into your patient’s body. Within a short period of time, the wound may show signs of infection. 

dog bite

Above: Animal bites have a higher risk of infection.

An infected wound closure appears red, swollen, and is warm to the touch. In extreme cases, an accumulation of pus called an “abscess” may form. In these cases, stitches would have to be removed and the inflammatory fluid drained. If not recognized quickly, infection may spread to the bloodstream (a condition known as “septicemia”) and become life-threatening.

The Suture Kit

Commercially produced suture kits, also known as “laceration trays” should contain the following items:

  •  Needle holder
  •  Toothed forceps
  •  Hemostat
  •  Small scissors
  •  Gauze pads
  •  Drapes
  •  Antiseptic (such as Povidone-Iodine solution or Chlorhexidine; usually separate)
  •  Sutures, absorbable and nonabsorbable

The above materials in the tray itself are usually labeled as sterile. Veterinary sutures are acceptable in a pinch as long as they’re also sterile. If uncertain, the needle point may be exposed to heat until red hot, then allowed to cool. An alternative approved for nylon sutures by the National Institute of Health calls for 10 minutes of complete immersion in povidone iodine 10-percent solution. Rinse in sterile water or saline afterward.

suture kit

Above: Suture kit supplies should include antiseptics and gloves.

One item missing from the list is local anesthetic. Agents like lidocaine with or without epinephrine are prescription drugs. Besides their anesthetic effect on soft tissue, they’re also used for certain cardiac issues. An accidental injection of lidocaine into a blood vessel by an inexperienced medic can lead to life-threatening arrhythmias. Off the grid, anesthetic options may be limited to ice packs or topical ointments. Your experience with this may vary.

As for suture type, it’s best to practice using an inexpensive non-absorbable suture like silk, which is, in my opinion, easier to practice with than some other materials. 

Choosing A Closure Method

Let’s say you’ve chosen to close the wound. When choosing a closure method, you should always use the least invasive method possible to close a wound. Surgical tapes and glues approximate wound edges well, but have little tensile strength. Sutures and staples are more invasive. 

It’s important to realize that you’ll only have a limited supply of staples and sutures. If you’re down to your last couple of sutures or the last stapler, feel free to mix different closure methods like alternating sutures and surgical tapes, or even adding duct tape improvised into butterfly closures when you’ve run out of medical supplies. You’d be surprised to see what qualifies as medical supplies when the chips are down.

There are several reasons why surgical tapes (Steri-Strips) and glues are used:

  •  They’re less painful for the patient. 
  •  Unlike sutures or staples, they don’t require additional punctures of the skin. As such, there’s less risk for infection. 
  •  Materials are less expensive and more easily stockpiled.
  •  In a grid-down disaster setting, advanced closure materials like sutures and staples may no longer be manufactured or distributed. Conservation of these limited supplies is imperative.

Surgical Sutures: In certain areas, such as knee and elbow joints, it may be necessary to use sutures or staples. Sutures are needles and thread used to a sew a wound closed. Unlike staples, they can be used just about anywhere in the body. Some are absorbable; that is, they’re meant to dissolve over time. For the off-grid medic, nonabsorbable sutures like nylon or silk will mostly be utilized for skin lacerations. There are, however, a wide variety of suture types available for just about
any purpose. 

Surgical Staples: Much like the staples used to hold paper together, they’re almost as easy to place on the skin with a little training. Staple closures are strong enough to hold a wound closed over joints. A special removing tool is used for removal.

Sutures vs. Staples: Here are some considerations to help you choose between sutures and staples:

Sutures

  •  Can be used on skin or deep layers
  •  Best for jagged lacerations
  •  More skill required to perform well
  •  Can be performed alone
  •  Many materials from which to choose
  •  More time-consuming
  •  Any scissors can be used to remove, or no removal at all if absorbable sutures are used.

Staples

  •  Standard versions should be used for skin closure only
  •  Best for straight-line cuts
  •  Less skill required to perform well
  •  Best performed with an assistant 
  •  Fewer choices (essentially, standard or large)
  •  Can be accomplished very quickly
  •  Requires special instruments to place and remove properly

Surgical Glue: Medical glues are cyanoacrylates meant for use in lacerations that don’t need a tremendous amount of tensile strength. A good example would be a small laceration on the forearm. Prescription medical glues like Dermabond hold up better to getting wet and are less irritating than regular superglue (which is also a cyanoacrylate). If you must use the industrial version, gels are easier to handle.

To use topical skin adhesive glue:

  •  Approximate the wound edges carefully (best done with an assistant). If glue gets in the wound, it won’t close.
  •  Gently brush the glue over the laceration, taking care not to push any below the level of the skin.
  •  Apply about three layers of the adhesive over the wound, preferably widening the area of glue each time after drying to increase strength of closure. 

Although you’d use antibiotic ointment on most wound closures, avoid it in closures with skin glues; it breaks down the compound. The glue itself, however, helps protect the wound from infection.

Surgical Tapes: Surgical tapes are strips of sterile adhesive material used for simple laceration closure. A popular brand is called “Steri-Strips.” Like medical glues, they work best on small lacerations upon which there is little stress. Placed with a sticky liquid called “tincture of benzoin,” they adhere to both sides of the wound and pull it closed. Steri-Strips last for a few days and often fall off on their own. They can be used in between stitches or staples to provide more support or on top of glue closures.

sutured knee

How to Suture Skin

The process of learning how to suture should be hands-on. We teach it and found that there are few substitutes for having a physician show you how to stitch in person. Certification is rarely available, however, for those who aren’t nurse practitioners, physician’s assistants, or other medical professionals.

It’s also important to realize that, off the grid, it’ll be nearly impossible to duplicate the sterile conditions of an operating room. The best you can hope for is a clean environment that eliminates the majority of microbes.

You’ll need something on which to practice. The best material I have found for teaching is a pig’s foot. The skin of a pig’s foot is probably the closest thing you’ll find to human skin. 

Wash your hands and put on sterile gloves. Place the pig’s foot on a level surface and make a “laceration” by cutting straight through the skin with a knife or scalpel. You’ll then perform a “skin prep.” Paint the area to be sutured with a pad dipped in Betadine, Hibiclens, or other antiseptic. Alcohol may be used if nothing else is available. Start at the laceration edges and paint around them in an ever-widening oval. If you have enough materials, repeat three times.

Next, you’ll isolate the “prepped” area by placing sterile drapes. The drape will usually be “fenestrated,” which means it has an opening in the middle to expose the area to be sutured. If not, cut a hole big enough to see the entire wound. Taken together, we refer to this as the “sterile field.” Local anesthesia would be given at this point if available.

Open your laceration tray and the suture packet cover. If you have sterile gloves, put them on now. Take the tip of your needle holder and grasp the curved needle in either the center of the arc (for skin) or one-third of the way from the string end to the needle point for deeper structures. Remove the needle and the attached string from the packet. Adjust the curved needle on the needle holder so that it’s perpendicular (to skin) or slightly outward to the line of the instrument. 

The needle holder is held in the dominant hand. If you’re holding the needle holder in your right hand, the sharp end of the needle should point to your left and vice versa. For most purposes, the needle tip should point to the ceiling.

Now take your toothed forceps in your non-dominant hand and grasp the edge of the laceration where you wish to place the first stitch. Right-handers start on the right, left-handers on the left. Insert the suture needle at a 90-degree angle to the skin and drive it through that side of the laceration with a smooth twist of the wrist that follows the needle’s curve. It should enter the skin no closer than a quarter inch from the edge of the laceration.

how to suture 1

1. The needle enters the skin at a 90-degree angle.

Release the needle but continue to hold the skin next to it with your forceps so that it stays in place. Re-clamp it, and pull through. Reload the needle on the holder and, going from the inside of the wound, drive the needle with a twist of the wrist through the skin on the other side of the laceration. If the edges are close together, this may be performed in one motion instead of two. If they’re that close together, however, maybe you should have considered surgical tapes instead of sutures?

how to suture

2. Holding with the forceps, pass the needle through one side.

Pull the string through, leaving a small length on one side. This should leave you with a long side (the side with the needle) and a short side. 

diy suture guide

3. The needle goes through the other side.

diy suture guide

4. Leave the end without the needle very short.

There are various ways to tie your suture, each with its own advantages and disadvantages. In our opinion, the ideal method for the survival medic: 

  •  Has stitches that are independent of each other so that one faulty stitch by an amateur doesn’t unravel the whole closure
  •  Conserves precious suture material 
  •  Is easy to learn for the non-medically trained

This method is known as the “interrupted instrument tie.” 

Holding the needle holder loosely in the center over the wound, wrap the long end of the string twice over and around the end of the instrument. Then, open the needle holder end slightly and grab the very end of the short end of the suture. Pull it through the loop tightly to the other side. You’ll form a square knot, also called a “Surgeon’s Knot.” Repeat the instrument loop several more times. Only one loop around the needle holder is required for every knot after the first. Four or five knots on top of each other should do.

how to suture

5. Loop the long end twice around the needle holder head.

how to suture

6. Surgeon’s knot in place

Finally, grasp the two ends of the string and cut the remaining suture material ¼ inch from the topmost knot with your suture scissors. If you have a good supply of suture material, place each subsequent suture about ½-inch apart from the previous one, especially if over a joint (see below). In situations where suture availability is limited, you may choose to fill in areas between sutures with surgical tapes if the laceration isn’t over a joint.

how to suture

7. Each successive knot uses only one loop.

It’s important to tighten your knots only enough to close the wound. Approximate, don’t strangulate. Excessive pressure from a knot that’s too tight will prevent healing in the area of the suture. You can easily identify sutures that are too tight — they cause an indentation in the skin where the string is. To complete your suture procedure, apply some antibiotic cream or raw, unprocessed honey. Then cover with a light dressing.

suture guide

8. Perform several knots per stitch. Grasp both ends and cut at about ¼ inch from the knots.

Once the closure is done, keep the wound dry and covered for 48 hours, checking it several times a day. Sutures or staples on the skin should typically be removed in seven days; if on the face, remove after five days; if over a joint, remove after no less than 14 days. 


Suture After Care

Most wounds closed with sutures should be covered with an antibiotic ointment and a nonadhesive dressing for the first 48 hours or so. Antibiotic ointments like Bacitracin or Triple Antibiotic reduce the rate of infection from 18 to 5-6 percent. These products, however, degrade surgical glue closures and shouldn’t be used in those instances.


How to Staple Skin

After thoroughly cleaning a wound and applying antiseptic to “prep” the surgical field, you’re ready to use your skin stapler. Your assistant will need two Adson’s forceps to hold the skin for you. Position yourselves on either side of the patient. Both you and the assistant should wear sterile gloves.

stapler

Above: The middle of the stapler is clearly delineated.

Most staplers are held in the dominant hand the same way you would hold, say, a garden hose nozzle. Stand in a position so that you have an overhead view of the laceration to be closed.

Your assistant then grabs the edges of the skin with the two forceps. They’ll then evert the edges (turn them inside out) slightly and gently press them together.

stapling a wound

Above: Adson’s forceps are used to approximate the skin; the staple is then placed.

Hold your stapler at a 60-degree angle to the approximated edges and press firmly downward on the raised edges of the skin. The line of the laceration should be right in the middle of the line of the stapler. 

Press the “trigger” of your stapler to embed the staple; then, release and retract. Check the staple placement and remove any that aren’t appropriately executed. The skin should appear slightly “tented up” if the staple was placed correctly. Place subsequent staples ½-inch apart, especially in areas over a joint. If not over a joint, they can be spaced more widely apart, with surgical tapes placed between in-between.

stapled wound

Above: Staple intervals are dependent on the location.

To remove staples, you’ll need an instrument that’s (unsurprisingly) known as a staple remover. This instrument is similar to office staple removers of bygone days. Place the “mandible” of the staple remover between the healed skin and the staple. Some brands contain two prongs on the lower blade and one on the upper. When the two prongs are under the staple, press the handles together; the top prong will press on the staple in such a fashion that the staple is easily lifted and removed. Repeat until all staples are removed.

removing staples

Above: A staple remover is needed to easily take out staples.


When to Remove Sutures or Staples

The longer sutures are in place, the higher the chance they may become embedded in the skin and cause scarring. On fine skin on the face, five days is often enough. On regular skin, like your forearm, a week to 10 days should do. Consider two weeks or more if the closure involves a joint, like the knee. If you’re not sure about the strength of healing, take one or two alternating stitches out in the middle and observe for skin edge separation.


sutured knee

Common Suturing Mistakes

Too Tight: Over-tightening causes skin to invert and prevents laceration edges from touching (and thus healing). It may also delay formation of new blood vessels in the area of the suture closure.

Too Loose: Skin edges should be touching and not gape open.

Not eliminating “dead space:” Dead spaces are pockets of air or fluid that accumulate under a skin closure. If you can’t approximate the entire wound with one series of sutures, consider placing deeper layers of (absorbable) suture first.

Misaligned sutures: Sutures not directly across on each side leave leftover skin at the end. Be certain to align perpendicular to the wound edge. Avoid making sutures that appear diagonal to the wound.

Uneven thicknesses: Taking a deep “bite” on one side and then going superficial on the other leaves one skin edge higher than the other. Make sure to take bites on each side that are as identical as possible.

Not beginning with a Surgeon’s Knot: Double looping on the first instrument tie will prevent slippage that causes excessive loosening.

Not using fine-enough sutures: Delicate areas like the face should be sutured with as small a suture as you can competently handle. Scars from needle holes are more noticeable with bigger needles and thicker string.

Using too fine a suture: Over joints, too thin or small a suture may not be able to handle the stress of movement. 

Leaving sutures in place in obvious infections: Follow the wound healing process closely. If pus is noted, remove all sutures and consider allowing to heal by secondary intention.

Sutures placed too close to the wound edge: Take enough skin on each side to give strength to the closure. One-fourth of an inch is about right for most closures. It’s better to have a suture a little too wide than too narrow.


Conclusion

It’s important to realize that every surgeon may have their preferred way of closing a wound that differs from the above. Ask five surgeons, get five answers. Medicine is as much an art as it is a science. 

There’s a lot more that goes into proper education and training in wound closure than is found here, but with some commitment and determination, the off-grid medic can learn this important aspect of medical care. 


More Emergency and First Aid


Red Rock 360 Tactical: Training in the Dark

According to the National Archive of Criminal Justice Data, 9 p.m. is the peak hour for violent crime. Despite this fact, many of us train almost exclusively during the day. Does that make sense to you? No? Good. If you wish to be truly prepared, your training must be realistic, and this means you need to learn how to defend yourself effectively around the clock.

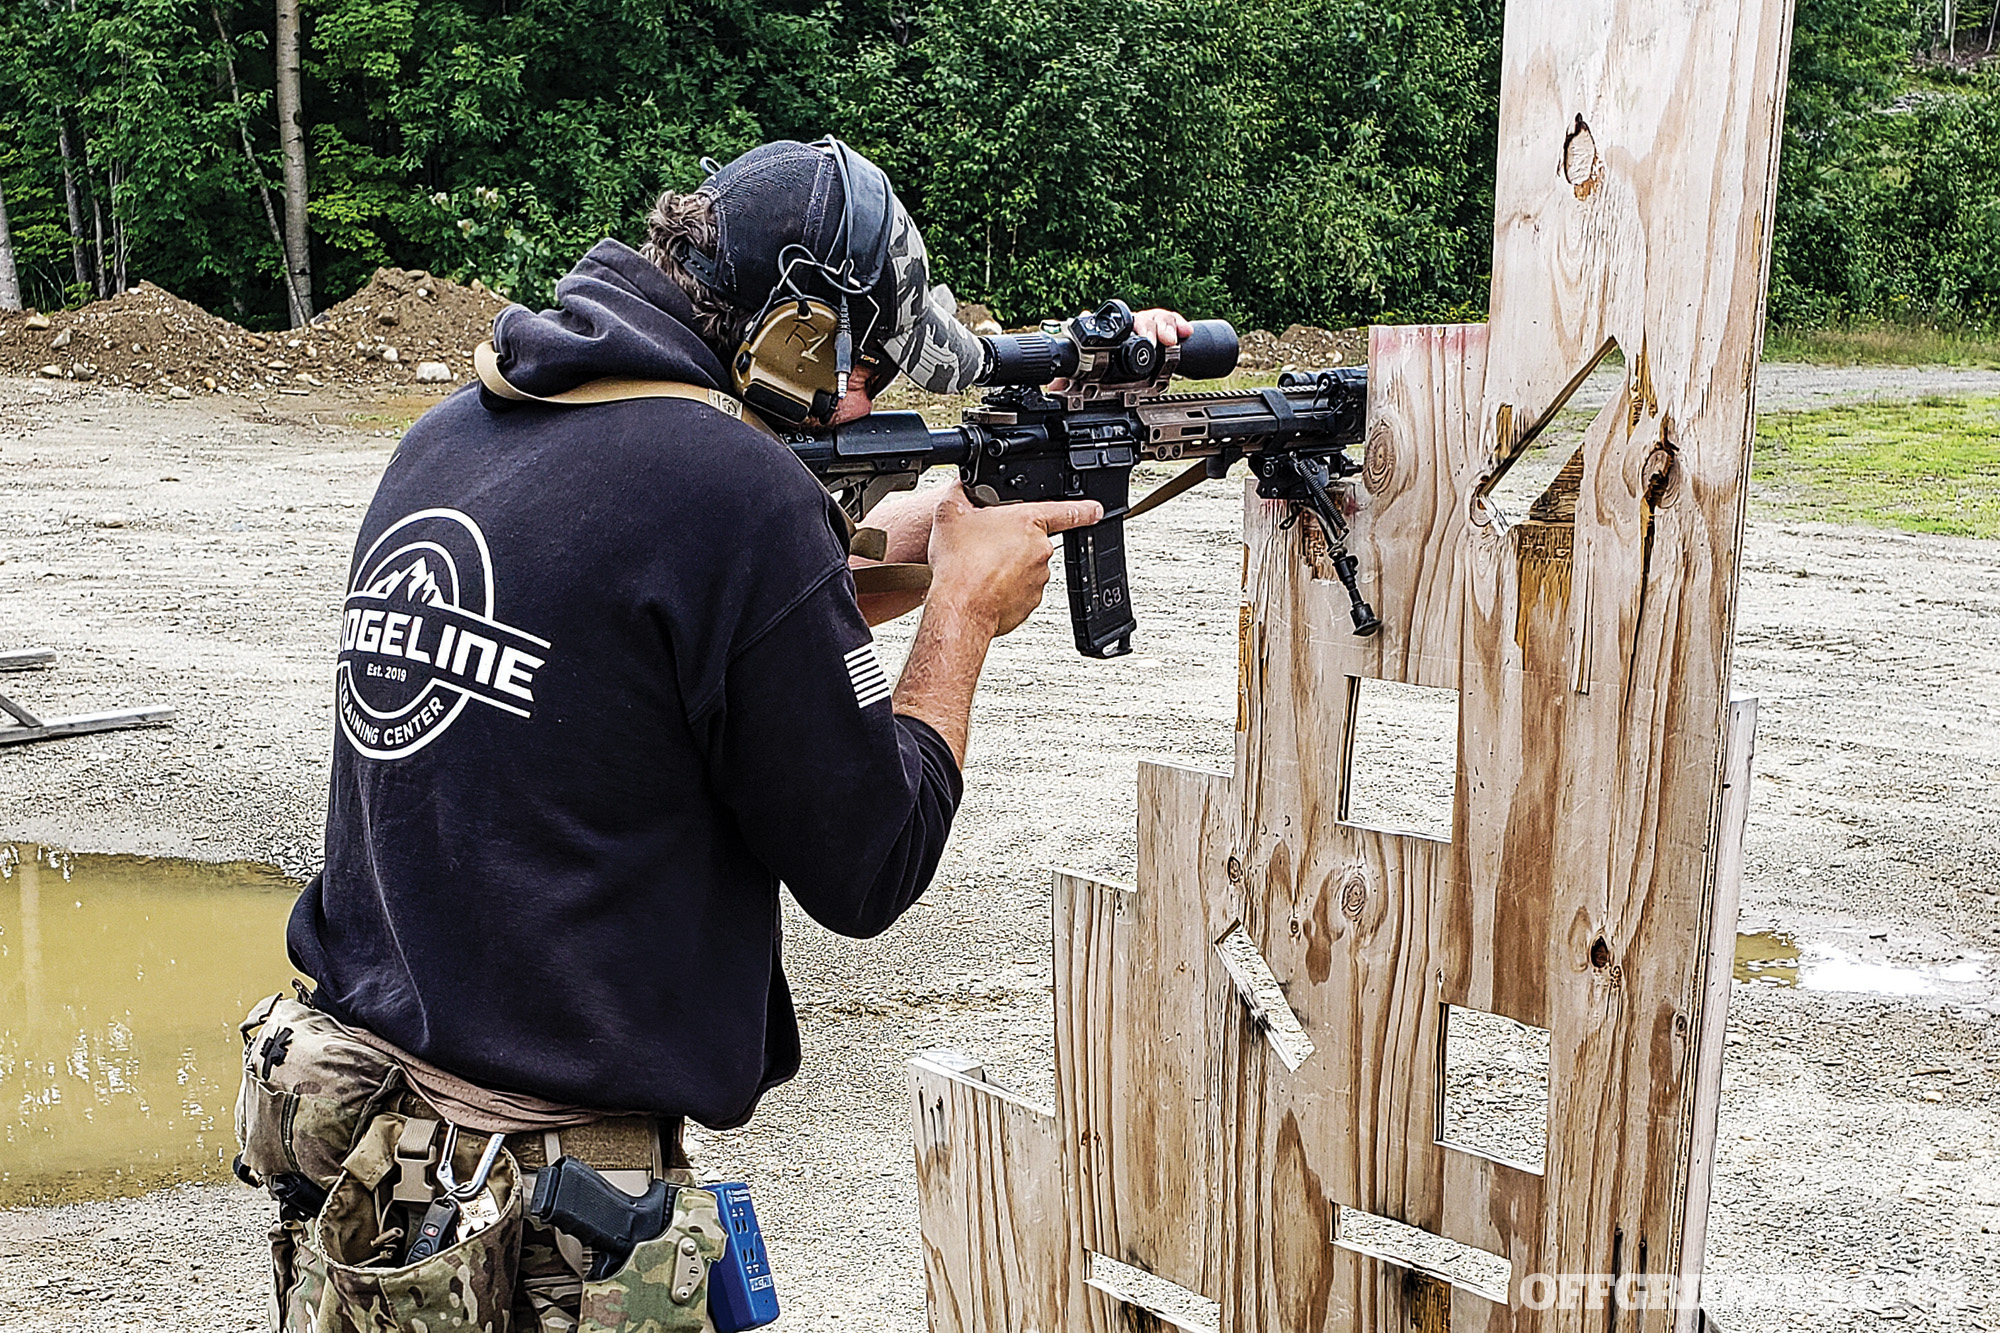
With this in mind, I recently took a day-and-night carbine class from Red Rock 360 Tactical in Marana, Arizona. The class is typically split into five-hour sessions on two days, but our class was condensed into a single day. Head instructor Frank Munoz, a USMC scout sniper (retired) and active paramedic, began the afternoon portion of the class by checking students’ fundamentals, including our ability to compensate for optical offset and maintain accuracy from 5 to 100 yards. We also practiced the classic Mozambique drill — two rounds to the chest and one to the head — as well as target transitions and reloads. None of this felt especially difficult, but it’d get more challenging as the daylight faded and flashlights became the only light source.

Red Rock 360

The final daylight drill and the first nighttime drill involved the same obstacle: a VTAC barricade. For those not familiar, it looks like an oversized plywood Tetris block covered in holes and slots. We were tasked with hitting a target through each opening as quickly as possible — this meant standing, kneeling, going prone, and contorting into some uncomfortable stances. It also meant acquiring a sight picture at awkward angles, and being aware of muzzle placements to avoid shooting new holes in the plywood. During the day, we stayed back from the barrier to maximize its cover. After nightfall, we pressed muzzles through each opening before activating our flashlights, since turning them on too soon produced blinding backsplash. Muzzle flash and dust clouds also obscured visibility, but those of us with suppressors had less trouble.

Working around the barricade became exponentially more difficult as we now had to get the muzzle, sight picture, and flashlight beam through each opening. This emphasizes the value of a compact light mounted close to the barrel. More importantly, several students noticed that their lights weren’t as reliable or effective as they had assumed. A few were too weak or diffuse to clearly illuminate targets beyond 50 yards, and others needed new batteries almost immediately. My own began to flicker under recoil; twisting and stretching the tail cap spring corrected the problem. Illuminated reticles had to be adjusted to avoid washout under dynamic lighting conditions. Without testing our carbines on a dark range, none of these issues would’ve been revealed.

Red Rock 360 cover

The remainder of the nighttime session focused on movement. We practiced entering rooms silently, pressing doors to check if they were open. We used our lights to scan in short bursts, moving constantly and taking care not to telegraph our paths with the beam. Shooting with a flashlight is simple enough, but the real challenges come from the tasks between light activations — moving to cover, reloading, and clearing malfunctions. This Red Rock 360 class provided valuable lessons about the differences in day and night shooting, and gave me an appetite to train more after the sun sets.

For more information on future classes, follow @redrock360 on Instagram or email redrock3sixty@gmail.com. 


MORE FROM OFFGRID ON TRAINING AND PREPAREDNESS


Battle Belt Setup: Weight Off Our Shoulders

Nicholas Nassim Taleb in his book Antifragile commented that some of the greatest inventions are creations so simple and ubiquitous, that they nearly go unnoticed, such as the spoon or chair. The belt itself likely fits into this category, and within the confines of load-bearing equipment centered on warfighting and modern combat, the bearer is under unique restrictions to their environment. When looking at a modern battle belt, the influences are circular. When considering an ideal battle belt setup, like a plate carrier setup, there are rules, and there are guidelines.

When addressing these rules, we must keep in mind two deciding questions: What environment will the belt be used and what other equipment will it be used with? The first question might influence decisions like color and material used. The second will have much more to say about what goes on the belt.

battle belt setup ronin senshi

Battle Belt Setup Rules

The first rule only applies to specific people. If you are part of an organization that has Battle Belt SOPs (Standard Operating Procedures) such as having a medical kit on your left hip, then that is a hard and fast rule to follow.

The second rule applies to where the belt should be worn. Assuming the wearer is of sufficient physical condition to perform the activities from which a battle belt is derived (i.e. combat, war, battle), when properly worn it will rest on top of the pelvis, not on the femur. While this may differ from where most people wear their pants, high-waisted jeans aside, a battle belt should sit higher, partly for mobility, and partly because wearing the belt lower reduces blood flow to the legs, fatiguing them faster in long movements.

This second rule will impact where specific caddies, carriers, and pouches are placed and stands firm so that a battle belt setup too tall to be worn with a plate carrier will not cheat by sagging onto the ball joint of the femur.

The belt fights right in with high end gear like S&S Precision's PlateFrame-Modular.

The final rule applies to material construction. At no point is it advantageous for a battle belt to fall apart or fail to bear the weight. It must be able to hold up over extended periods of time, and should not sag on the X-axis. A battle belt that bounces and flops around when the wearer is sprinting fails this rule. Buy quality.

Principles

These generalities govern the direction a battle belt setup will take. Having a common-sense air to them, they remain to be stated as a reminder. They themselves are not rules that will completely compromise a battle belt setup, but if ignored, they compound to eventually make the belt more of a detriment than an advantage.

The first principle: all other things being equal, choose the lighter option. A battle belt helps reduce the weight worn on a plate carrier, and it must have a net benefit beyond that option. At the same time, drawing a magazine from a belt is typically easier than from a plate carrier. It would be better to mount a “fast mag” pouch directly to the pants belt than to burden the bearer with a heavy, bulky battle belt.

The second principle: prioritize a color scheme for your operating environment. Mixing and matching colors works for Instagram, and thus has its place. Be honest with yourself when putting together a battle belt setup, we all appreciate it, even if it's just to look cool.

The third principle: a battle belt should be able to function as a stand-alone piece of kit, and integrate into multiple scenarios. Depending on body shape, it can be difficult to mount pouches, like medical gear which is typically worn closer to the small of the back, without making it uncomfortable to drive a vehicle. Pay attention to pouch shape and location, and if you get to choose your own gear, keep in mind how it will fit when doing more than shooting on the flat range.

The fourth principle is derived from CQB scenarios. Whenever possible, keep the size of a fully-loaded battle belt inside of shoulder-width. This goes doubly for those operating under the cover of darkness, as sound is just as likely to give away one's position. By limiting the circumference to one's stride, and identifying key points where gear could scrape against a door frame or catch a sling and impede the use of a carbine, this process continues ad infinitum.

The fifth and final principle: a properly outfitted battle belt should be comfortable enough to wear all day even when fully loaded.

Battle Belt Types

As we've discussed before, there are differences between EDC, Range, and Battle/War Belt Setups. Over the years battle belts have changed, and fall into a few categories.

The most basic format of battle belt is one that has no other features except that it can be worn in addition to normal clothing and has the possibility of bearing magazines, medical pouches, a holster, and other pieces of equipment. The term “batman belt” summarizes this concept in a utility belt that carries a smorgasbord of useful gear.

viking tactics brokos belt

Above: The Viking Tactics Battle Belt has stood the test of time, and continues to serve as an effective mounting host for all types of gear. 

About a decade ago, the classic utility belt was supplanted by larger, molle/pals padded belts that resembled what a barbarian would wear in the video game Diablo, and had their added value of distributing weight across a larger footprint. Reminiscent as well of the wraps worn by french fur trade voyageurs, these helped provide physical support when bearing a heavy load, much like a weightlifting belt, and still remain relevant in such circumstances.

GBRS Group Assaulter Belt

Above: The GBRS Assaulter Belt represents one of the most advanced versions of a multi-layered belt.

The third type of battle belt appears to be derived from competition shooting, where an inner belt is worn to meet the requirements of a rulebook, while also resulting in a surprisingly advantageous, near minimalist, lightweight platform for carrying tactical and survival gear, able to be donned quickly without compromising structure thanks to thermoplastics and semi-rigid materials.

What Goes Onto A Battle Belt?

A battle belt serves two (and for a select few, three) purposes: to spread the weight of gear carried across one's body, to provide easier access to certain things like magazines, medical equipment, and tools. For those performing rotary-wing operations, it can also serve as a place to attach one's lanyard, or if repelling, many battle belts can integrate directly into a harness. Put all together, an ideal battle belt setup brings all of this together, in one package that can be quickly donned and doffed.

Ammunition Pouches

An advantage to placing at least one rifle magazine pouch on the belt is that it will typically be faster to reload from the belt than from a plate carrier. Doing so will also help slim down the plate carrier, or open up real estate for other equipment. Magazines contribute to a majority of a battle belt's weight, and should be balanced with other pouches, holsters, and other gear carried.

GBRS Group Assaulter Belt Full Kit

If a pistol is worn on the belt, an ideal battle belt setup will carry additional magazines for a complete package. Generally, pistol magazines are carried on the front hip, opposite the holster. Rifle Magazine fit just behind them, often landing on or just behind the hip joint.

Medical Gear

In addition to a stocked IFAK, or med pouch, a battle belt is an excellent place to carry additional tourniquets. Differing unit SOP's aside, the free space at the front of the belt is perfect for an additional tourniquet, shears, or knife. Anything that inhabits this space cannot interrupt drawing the pistol, decoupling the belt, or drawing a lanyard if pertinent, and be aware that gear carried in this space should be considered tertiary at best, as it will be the first to be lost when low-crawling through a rough field.

Above: North American Rescue IFAK with C-A-T, hemostatic gauze, and other trauma care supplies.

An advantage of stowing one's medical gear on a battle belt is that in the event that it must be used, the belt can often be removed, and the medical equipment accessed with greater ease. This should not be considered the only option, as there are circumstances such as a damaged spinal column where being rolled over to remove the belt could cause additional harm. Instead, having the ability to remove the belt to access medical equipment, while not being required to do so should be considered an advantage.

Holsters

The idea of a drop leg holster was intended to aid in drawing a pistol when wearing a plate carrier. What it turned into was a bastardization of “thigh holsters” that ended up residing somewhere near the kneecap. In our more modern, more civilized era, the drop leg holster has returned to its rightful location: about even with the ball joint of the femur. This is accomplished by following the second rule: wearing the belt above the pelvis, and provides enough flexibility to draw the pistol when seated in a vehicle.

range belt edc belt war belt

Depending on body shape, a holster such as the mid-ride Safariland series fits this bill. Veil Solutions, G-Code, T.Rex Arms, Guerilla Tactical, and more options ride on the belts of professionals around the world, and despite one's choice, it must not sag too low, and be able to be drawn even when wearing body armor above it. Ideally, a battle belt can function on its own but serves best to support a higher level of gear. A holster is not an item to cut corners or pinch pennies on.

Supporting Gear

Small items, like a multitool or a knife are perfect additions to a belt. In contrast, even as the belt provides more space to attach mission-specific gear, one is bound by the second rule (not restricting blood flow) and respects the third, fourth, and fifth principles.

Dump Pouch

Closest to dogma, a Dump Pouch is a piece of gear that has great utility, with minimal weight cost. A battle belt is a perfect place to attach a dump pouch. When wearing a plate carrier, battle belt, or rucksack with a cummerbund, suddenly the wearer will discover that their pockets are harder to reach. Lower hanging cargo pockets are a temporary solution, albeit a detriment in long-term survival situations. After miles of travel, a combination of sweat and weight turn items carried in cargo pockets into sandpaper grinding into that soft spot just above the knee. That rubbing creates an opportunity for infection.

A dump pouch solves this problem, simultaneously isolating snacks, spare water, and loose magazines from the pockets which themselves create an opportunity for infection, and also a place to collect spent magazines.

Sharps

There is clearly an advantage of a belt knife, and the bearer must recognize that what is stored on the belt must be able to be lost in the most extreme of situations.

Closing Battle Belt Setups

Whether to take weight off of a plate carrier or to be a second line layer of emergency gear, a battle belt setup will evolve over time. The rules and principles have come from decades of use by professionals all around the word, and center on being equipped for a prolonged survival event, or a firefight.

Just as with other tactical or survival gear, one must remain true to their purpose, as excessive bulk is just as dangerous in the long run. Good ideas require testing, and this is no exception. It is better for one to find out that their belt causes chafing during long movements, or their magazines fall out when sprinting  before they manifest under the duress of life-or-death.

A Battle Belt fulfills many needs, for some it is that added layer of security in a bug out bag, for others, it is mission essential gear. From M203 shells to militools, follow these rules and principles to refine your setup. v


MORE ON CHEST RIGS, BODY ARMOR, AND TACTICAL GEAR


Binoculars Buyer’s Guide: A Closer Look at 10×42 Binoculars

Take a look at the animal kingdom and pay careful attention to the physiology of successful predators. You’ll notice a few common threads, such as sharp claws and teeth, quick reflexes, strong muscles, and precise senses. Although some hunters rely primarily on enhanced smell, touch, and hearing, many of the most dominant species have fine-tuned vision. Eagles, for example, have eyes that are disproportionately large for their heads, with deep central foveas and extremely high rod and cone cell density. According to Live Science, an average eagle has vision four to five times more precise than a human’s, in addition to vastly improved low-light acuity and color perception — they can see parts of the color spectrum we can’t, including ultraviolet light. So, it’s no surprise that these birds can ambush prey from high above with pinpoint accuracy.

recon of target area

Although we use the term “eagle-eyed” to describe humans with outstanding vision, our eyes can’t possibly compete with those of a real eagle. Thankfully, we have something other animals don’t: The ability to improve our senses through tools and technology. For thousands of years, we’ve been using glass lenses to create optical magnification devices that let us see faraway objects — ships on the horizon, enemy troops on the battlefield, and prey to hunt. Many of the early devices were single-tube monoculars, but we quickly learned that dual-tube binoculars gave us a wider and clearer view.

In this article, we rounded up six pairs of binoculars from a wide range of price points. To level the playing field, each was selected in a common and versatile 10×42 binoculars size. But before we proceed, we should clarify some important terms you’ll see throughout this article.

Optical Terminology

Like rifle scopes, binoculars are described in terms of magnification and objective lens diameter — in this case, all our binos feature 10x magnification and 42mm objective lenses. Larger objective lenses increase the size and weight of your binoculars, but they offer much better light-gathering capabilities, meaning that the image you see will appear bright and vibrant. The quality of that glass will determine image sharpness, as well as the degree of chromatic aberration — much like looking at an old anaglyph 3D image without wearing red and blue glasses, chromatic aberration makes colors look slightly misaligned. 10×42 Binoculars offer plenty of magnification for a variety of tasks, including target shooting, hunting, and surveillance. The 42mm size is reasonably portable, but still performs well in twilight or overcast conditions.

reconnaissance cover

Here’s an overview of some of the other key terms, and why they matter:

Diopter

Binoculars feature diopter adjustment to compensate for slight differences between your two eyes. After calibrating the diopter, each side of the binocular should appear equally clear, and you’ll be able to use the main focus knob to bring a target into perfect focus.

Field of View (FOV)

The width of the area you can see through the lenses, denoted in either angular (e.g. 6.2 degrees) or linear (e.g. 326 feet at 1,000 yards) format. Wider FOV means you’ll have better peripheral vision around your target. For the sake of comparison, we provided all FOV ratings in imperial units (feet at 1,000 yards) as opposed to metric (meters at one kilometer) or degrees.

Eye Relief

The distance your eye must be from the eyepiece to see the complete image, without a dark vignette effect around the edges. A higher number means your eyes can be further away without distortion; this is especially important if you wear glasses, since you may be unable to hold the binoculars close to your eyes. Adjustable eyepieces allow you to dial in the appropriate eye relief without holding the binoculars further away from your face. 

Exit Pupil

A number calculated by dividing objective lens size by magnification power. Since all binoculars in this article are 10x42mm, all pairs have an exit pupil measurement of 4.2mm. Lower magnification and higher lens size (e.g. 7x50mm) produce larger exit pupil values, which allows more light to pass through the binoculars. In bright settings, your pupils will already be smaller than this exit pupil size, so this value matters most in low-light settings.

Interpupillary Distance (IPD)

This is a measurement of the distance between the pupils of your eyes, which can be obtained from your optometrist. You can also get a ballpark measurement at home by holding a metric ruler against your forehead in front of a mirror. In order to see a full image through your binoculars, you’ll need them to articulate enough to match your IPD. For most adults, that’s between 50mm and 75mm; women tend to be lower in this range, and children can be 40mm or less. Most binocular makers don’t advertise their exact IPD adjustment range; those that do typically go from mid-to-high 50s to mid 70s. You may need to try a few pairs firsthand if you have a very narrow or wide face, or if you plan to let your kids use them.

Miscellaneous Terms

Lastly, we’ll note that all binoculars in this guide are “fully multi-coated,” which means that each glass surface has been treated with multiple coating layers to diminish glare and enhance clarity. Less expensive binoculars may use single-layer coatings, or may not coat every piece of glass. All binoculars in this article are also waterproof sealed to block dust and moisture from entering the housing; three of the pairs are nitrogen-purged to further reduce the risk of fogging in extreme conditions. All pairs are also tripod-compatible. 


Bushnell Nitro 10×42

Dimensions: 6 by 4.2 by 2.5 inches
Weight: 1.7 pounds
FOV: 340 feet at 1,000 yards
Eye Relief: 17 millimeters
MSRP: $350
URL: bushnell.com

Bushnell Nitro 10x42

Aesthetically, these Nitro binoculars immediately caught our eye. Their gunmetal gray housing is thoroughly textured, and features silver accents and a red anodized trim ring. The lens and eyepiece caps fit well and feel secure. A nice, molded foam case is also included, along with a padded neck strap and clip-on Spudz cleaning cloth (a handy range bag accessory). Beneath the surface, these binos are said to use “Bushnell’s highest-quality glass,” but the sharpness and color fidelity of the ED Prime glass didn’t blow us away. That said, it’s good for this price range. The glass is coated with an EXO Barrier to reject water, oil, dust, and scratches, and the prisms are coated in PC-3 Phase Coating to boost contrast. Given the name, we thought these might be nitrogen-purged — a feature usually seen only on high-end models — but that doesn’t appear to be the case.

Bushnell Nitro 10x42

Pros

  • Wide FOV and relatively long eye relief are great for glasses-wearers.
  • Best diopter adjustment design of the bunch, with a raised indicator tab and locking mechanism
  • The housing and accessories look and feel high-quality, despite the affordable price.

Bushnell Nitro 10x42 case

Cons

  • Clarity isn’t perfect, with mild chromatic aberration on highlights and blur near the edges.
  • “Nitro” name may lead to confusion about nitrogen-filled optics


Leupold BX-4 Pro Guide HD 10×42

Dimensions: 6 by 4.7 by 2.5 inches
Weight: 1.7 pounds
FOV: 326 feet at 1,000 yards
Eye Relief: 16 millimeters
MSRP: $500
URL: leupold.com

Leupold BX-4 Pro Guide HD 10x42

Leupold calls these binoculars a “Jack of all trades,” with sufficient power and FOV for a variety of uses. The open-bridge housing has two points of contact for added strength, and features a grippy Armor coating with textured areas for each palm. Under the hood, Extra Low Dispersion glass objective lenses have been used to reduce chromatic aberration. This glass is coated in Guard-Ion for water- and dust-resistant properties, as well as Diamondcoat 2, which enhances abrasion-resistance and light-transmission. The prisms are phase coated for edge-to-edge sharpness. The focal ring is nice and smooth, but the tight diopter adjustment is difficult to dial in while looking through the lenses. Also, the eyepieces feature twist-adjustment, but don’t like to stay put. Leupold’s cushy neck strap and compact carrying case were our favorites in this roundup, but we noticed the loose front covers tend to slip off as the binos are removed from the case.

Leupold BX-4 Pro Guide HD 10x42

Pros

  • Crisp image with minimal chromatic aberration
  • High-quality case with MOLLE-compatible snaps and comfy neck strap

Leupold BX-4 Pro Guide HD 10x42

Cons

  • Slim rubber front covers are easily dislodged and misplaced
  • Diopter adjustment is very tight, but eye cup adjustment is too loose.
  • 58mm minimum IPD setting may be too wide for some users


Meopta MeoPro Optika LR 10×42

Dimensions: 6 by 4.5 by 3.2 inches
Weight: 2.3 pounds
FOV: 325 feet at 1,000 yards
Eye Relief: 17 millimeters
MSRP: $1,500
URL: meopta.com

Meopta MeoPro Optika LR 10x42

One of Europe’s most prolific optic manufacturers, Meopta was founded in 1933 in what is now the Czech Republic. Over the decades, the company has produced everything from aerospace equipment and movie projectors to riflescopes and binoculars. New for 2021, the Optika LR combines premium glass with an integrated laser rangefinder. Just press a button on the housing, and an OLED target ring appears; press again to show a digital readout of the distance to your target (yards or meters). A second readout shows your choice of incline angle, height difference, or horizontal difference readings. Tech aside, the image quality is gorgeous, thanks to the HD Fluoride glass and proprietary MeoLux coating that provides 85-percent light transmission. All lenses are also coated in MeoDrop hydrophobic coating, and the magnesium housings are purged with dry nitrogen to block even the slightest trace of condensation.

Meopta MeoPro Optika LR 10x42 case

Pros

  • Impressive clarity and brightness throughout the entire field of view
  • Laser rangefinder is a great tool for target practice, zeroing optics, hunting, competition, and professional applications 

Meopta MeoPro Optika LR 10x42

Cons

  • Although the rangefinder and high-quality glass don’t have much effect on size and weight, they certainly drive up the price.


Riton X5 Primal 10×42 HD

Dimensions: 5.7 by 4.5 by 2.7 inches
Weight: 1.7 pounds
FOV: 315 feet at 1,000 yards
Eye Relief: 15 millimeters
MSRP: $600
URL: ritonoptics.com
Riton X5 Primal 10x42 HD

With a magnesium alloy frame, dry nitrogen purged optics, and Riton’s HD glass, the X5 Primal binoculars deliver a wonderfully clear and bright image. The glass is coated with low-light-enhancement, full wide-band, anti-scratch, antireflective, and hydrophobic coatings. The optics are waterproof, fog-proof, and shockproof up to 1,200-G impacts. It’s clear that every dollar was spent on achieving the best image possible at this price point, but that didn’t leave much room for everything else. The housing has textured areas, but its finish is somewhat slippery, rather than soft and rubberized. The neck strap and lens caps are decent, but the carrying case is thin and flimsy with a cheap hook-and-loop closure — basically a throwaway item. It’s possible to overlook these peripheral issues given the great image quality, but you should know what you’re getting when you choose these binoculars.

Riton X5 Primal 10x42 HD case

Pros

  • The glass itself is very good and provides better image quality than the price would suggest.
  • Nitrogen purging is a feature we’d only expect in higher-end binoculars.

Riton X5 Primal 10x42 HD

Cons

  • Flimsy case feels like it should’ve come with a pair of sub-$100 binocular
  • 15mm eye relief isn’t ideal for those who wear glasses.


Steiner T1042r

Dimensions: 6.8 by 4.6 by 2.6 inches
Weight: 1.8 pounds
FOV: 317 feet at 1,000 yards
Eye Relief: 16 millimeters
MSRP: $782
URL: steiner-optics.com

Steiner T1042r

Steiner has brought its riflescope expertise into its Tactical binocular line. The “r” in this model’s name indicates that it has the optional SUMR milliradian targeting reticle integrated into its right tube. If you’re serving as a spotter for a shooter who’s using a 10x rifle scope with mil reticle, this makes it easy to call hits and recommend adjustments. For those who haven’t used binoculars with a reticle before, it’s worth noting that it’ll appear tilted unless your IPD is about halfway through the adjustment range — this is unavoidable, and you may have to tilt your head to accommodate it. Steiner’s fully multi-coated HD glass produces a crisp image from edge to edge, and the optics are filled with 14-psi-pressurized dry nitrogen to repel moisture in extreme conditions. The rubberized housing is comfortable, and we appreciate the ClicLoc quick-detach clips for the neck strap and front covers.

Steiner T1042r case

Pros

  • Clear image and very good low-light performance
  • Comfortable, rubberized eyecups and peripheral shields make these a great choice for LEOs and hunters who spend many hours behind binoculars

Steiner T1042r

Cons

  • Unless you frequently need the reticle for spotting, it may be distracting, and it comes at a substantial price increase from the standard T1042 ($545).
  • Those who aren’t blessed with IPD close to 64mm will always see a tilted reticle


Vortex Diamondback HD 10×42

Dimensions: 6.8 by 4.6 by 2.6 inches
Weight: 1.8 pounds
FOV: 330 feet at 1,000 yards
Eye Relief: 15 millimeters
MSRP: $280
URL: vortexoptics.com

Vortex Diamondback HD 10x42

Vortex says the Diamondback HD “optically punches high above its class.” Clarity and color fidelity are good for the money — mostly comparable to the $70 more expensive Bushnell — but they didn’t dramatically exceed expectations. Then again, we noticed that these binos retail for around $230, at which point they offer a lot of bang for the buck. Focus and diopter adjustment are smooth, although the former dial makes a faint but disconcerting crunching noise as it turns. The dark green rubberized housing isn’t especially grippy, but does have textured areas for each palm. Our favorite feature is the GlassPak carrying case, which comes with an X-harness to secure it on your chest. This eliminates the annoyance of binoculars bouncing off your sternum as you walk. The case also includes two side pockets for small items like sunglasses, and a zippered rear pocket for a map or cleaning cloth.

Vortex Diamondback HD 10x42 case

Pros

  • The GlassPak carrying case is great, with a helpful chest harness and room for accessories.
  • Can be found for about $50 below MSRP at various retailers, making it a good value

Vortex Diamondback HD 10x42

Cons

  • Imperfect clarity and noticeable chromatic aberration at the edges
  • Housing could use more texture to maintain grip in wet conditions
  • 15mm eye relief isn’t ideal for those who wear glasses.


More on OFFGRID


Book Review: Left of Bang by Patrick Van Horne and Jason A. Riley

The Premise: Best stated by Steven Pressfield, author of The Warrior Ethos and Gates of Fire.Left of Bang is not for combat warriors only. It’s for you on the subway, you in a bad part of town, you with the sharks in the corporate boardroom. It’s for your wife when she’s home alone, or entering a dark parking structure, or walking with the kids on vacation overseas.”

Left of Bang is the civilian version of the Marine Corps’ Combat Hunter Program developed at the direction of former Marine Corps Gen. James Mattis. The goal of this program is to teach Marines to use and interpret their senses or gut feelings as potential warning signals, transforming potential prey into predators. Left of Bang is based on the Three Pillars of Survival: increased situational awareness, early threat recognition, and developing a system for acting on those threats.

The 411: Left of Bang presents a comprehensive system to develop your abilities to read situations and human behavior through what the authors label as the six domains.

  • Kinesics: conscious and subconscious body language
  • Biometric Cues: biological autonomic responses within stressful situations
  • Proxemics: interpersonal spatial interactions
  • Geographics: learning to read the relationship between people and their environment
  • Iconography: understanding the symbols people use to communicate their beliefs and affiliations
  • Atmospherics: focusing on collective attitudes, moods, and behaviors in a given situation

Left of Bang provides a template for identifying what’s out of place by “establishing a baseline and determining anomalies.” Under the Marines’ Combat Hunter doctrine, three identified anomalies initiate a decision, so the danger cannot be ignored or denied out of fear or uncertainty. Unlike the military or law enforcement, who have specific mandates for action beyond self-defense, the private citizen’s decision may be limited to fight or flight.

Although Left of Bang’s instruction is drawn from the authors’ military experience, the range of responses and actions are broadly applicable to civilian life. “Action may simply be contacting the person to ask some questions and observing them up close,” they write, adding that, “a civilian in the same location might consider report, alert (i.e. sound an alarm), or run.” In other words, while we can learn much from the book’s instruction on being alert and observant, the applications taught can easily be converted to our daily lives. As the authors emphasize, “Regardless of what situation you find yourself in, or what role you are playing at the moment, you must have a set of pre-established decisions to make based on what you observe. Otherwise, you’ll freeze, take too long, or make a decision that is not in your best interest.”

Realistically, confident decision-making benefits all aspects of our lives, and Left of Bang presents a system for the execution of quick and accurate decision-making to avoid victimization. At the conclusion of Left of Bang, the authors comment, “Those who prepare and train themselves for the possibility of violence will react differently than those who do not. Those who are not prepared will likely panic and will ultimately become helpless (Condition Black). Those who are prepared will still experience anxiety but will be more likely to maintain awareness and act effectively in a stressful situation (possibly going as far as Condition Red).”

left of bang

The Verdict: These lessons from Left of Bang will teach you how to read your environment and respond faster than those around you. By learning how to profile baseline body language, and immediately detect anomalies, you can learn to stay “Left of Bang.” 

The authors succinctly state, “The goal for this development is for you to increase not only the success rate for your predictions, but also the confidence you have in your ability to profile. However, we also want to ensure that you are realistic in your abilities, understand your limitations, and don’t become overconfident in your skills.”

Bottom line: This book is about eliminating a reactive/survivor mentality and developing a proactive mindset.  


Book & Author

Left of Bang: How the Marine Corps Combat Hunter Program Can Save Your Life by Patrick Van Horn and Jason A. Riley
Publisher: Black Irish Entertainment LLC
MSRP: $20 (paperback)
URL: blackirishbooks.com
Pages: 228

Rating:
Thrive
Survive
Die


OFFGRID LIBRARY OF RECOMMENDED READING


Urban Messenger Bag: Incognito EDC

The concept of Every Day Carry is to allow perpetual access to tools to increase resilience in times of need. Simply put, it’s valuable to have gear readily accessible in a messenger bag to deal with most situations I may come across in the course of my day. Aside from simply meeting my own immediate needs, it also allows me to help others.

Depending on the environment, context, and level of preparedness you’re trying to achieve, you can tailor your EDC loadouts accordingly. For my purposes, I prefer a messenger bag while moving around an urban environment on foot, in a car, or on public transit.

Realistically, you can’t be ready for everything all the time, especially when it’s all carried in a smaller bag. So, I balance a mix of capability, cost, weight, and what’s appropriate against what I’m preparing for. It’s also important to note that you’ll need adequate training to go with the tools you carry.

messenger bag

Above: When the main compartment is open, there’s no visible gear that would pique the interest of a bystander.

The J. Crew Harwick briefcase is the host for the majority of my urban EDC gear. It doesn’t have an over-flap like some messenger bags, but it performs in the same way with direct access to the pockets. In this configuration, I can carry my EDC loadout and laptop without being too heavy or bulky. The only downside I have found is that, if overloaded and carried for a long period of time, the shoulder strap can dig into your neck or slide off your shoulder — an issue not as common with backpacks.

My main EDC goals are to have the following capabilities:

  •   Access to a multi-tool for common fixes (pliers, blade, scissors, screwdriver, pry tool, etc.)
  •   Deal with minor injuries, pain, and stop bleeding
  •   Have light and fire on command in the dark
  •   Access escape routes or life-saving items in exigent circumstances
  •   Render aid to self or others
  •   Facilitate travel during an emergency (to get home or to another relatively safe location)   

As I live and work in Canada, any firearms are unfortunately a no-go to carry. Our laws differ greatly from those in the USA and the options available to us are far fewer, so I pack accordingly.

Messenger Bag

Above: Compartmentalizing gear into pockets and pouches makes every item easy to locate quickly.

To meet the parameters I set for myself, I carry the following in my messenger bag, in addition to what I have on my person as first-line EDC:

  •   BIC lighter
  •   Leatherman Wingman multi-tool
  •   Nitecore E4K small flashlight
  •   Lock pick/bypass tools and escape tools (check your local laws)
  •   Personal Protective Equipment (PPE — mask, gloves, wipes, and sanitizer)
  •   First-aid basics (Band-Aids, Tylenol, dressings, Quik-Clot, tourniquet)
  •   Notepad, measuring tape, and pens
  •   Backup battery for phone or other devices, with various cables and adapters
  •   Duct tape, garbage bag, and paracord
  •   Some cash for transport or emergency purchases
  •   Business promo materials (cards, stickers, patches, etc.)

You may also consider adding a ballistic panel as a backer in your bag. They’re usually very thin, light, and flexible, so they shouldn’t affect your overall bag bulk. A panel can add protection against projectiles and shrapnel without being too obvious inside this type of discreet bag. Be sure to check your local laws in respect to this.

In the outside double pockets, I carry business promo materials and quick-access items (tourniquet and hand sanitizer). On the other outer-pocket, I carry a book. Inside, one pocket has two removable pouches — one holds some first-aid gear, a garbage bag, and PPE; the other pouch contains a battery, cables and adapters, lock pick tools, and duct tape. A final pocket houses a multi-tool, paracord, flashlight, notebook, pens, and wipes.

messenger bag worn

With the gear carried in this way, I keep everything organized, easily accessible, and streamlined. It also leaves the two sections of the main bag empty to carry my laptop and any other stuff I may need.  

I really like the messenger bag/commuter briefcase setup. Regardless of what your loadout consists of, you’re going to have to carry it in a convenient manner. All those pieces tend to add weight in your pockets and can impede movement. Nowadays, the messenger bag has gained a level of acceptance among the urban masses, and tends to stand out far less than backpacks. These bags can traverse a wider range of urban environments while still keeping your hands free and maintaining a lower-profile. Far more places will zero-in on backpacks as threats, while overlooking messenger bags as innocuous business accessories. 


Make and Model

J Crew Harwick Briefcase
MSRP: $120 (discontinued)
URL: jcrew.com


About the Author

Boris Milinkovich, CD, CBCP, is a Canadian with a varied background of more than 20 years in military, law enforcement, and personal protection skillsets. He’s the owner and training director at True North Tradecraft in Toronto, offering training and equipment to civilians and approved agencies in counter-custody, covert-entry, personal protection, and disaster preparedness. He can be reached through www.truenorthtradecraft.ca, @truenorthtradecraft (IG/FB/LinkedIn), and @ttradecraft on Twitter.


MORE BAG DROPS FROM OFFGRID


How To Fell a Tree: Summon Your Inner Lumberjack

Modern humans often take for granted the sheer amount of resources we acquire from a forest. If you’re living in a constructed home, chances are it was built out of products acquired from trees. When you use the restroom, chances are you're drying your hands or cleaning your tuchus with materials made from trees. Everything from the books we read to the holiday cards we send are gleaned from forest products. Go back only as far as half a century, and the ability to procure and process wood was even more crucial to the survival of humanity. Timber was used almost exclusively to build nearly every structure, ignited to cook food, boil water, and to keep smithing forges hot.

Is Paul Bunyan Passé?

We find ourselves in a unique time in the human epoch — we’ve become less reliant on raw gifts from nature, instead leaning heavily on electronic technologies. But if you think that we can turn our backs on forest products completely, you’d be wrong. To illustrate this point, in February of 2021, a massive shift in atmospheric temperatures caused catastrophic power failures throughout much of the southern continental United States, leaving tens of millions without modern amenities to keep them warm and comfortable. Sadly, there were many people who asphyxiated on the toxic gases emitted from backup generators and vehicle engines as they attempted to stave off the relentless cold.

notching a tree

Above: Axes with sharpened double-bit heads make quick work of notching a tree. The direction of the notch will strongly influence the direction a tree will fall.

Clearly, a large swath of humanity has forgotten how to find and use simple resources that can make the lives of everyone better. Wooded areas growing next to houses, on the edges of town, or in large forests in rural areas are a source of limitless products. Dry leaves and soft boughs are mattresses for sleeping, sticks and branches are kindling for fire, and green needles are ingredients for tea. Large branches and logs are structural elements for shelters, cabins, and a plethora of tools. Trees provide fruit, nuts, and fuel — the list goes on.

Larger trees provide greater utility, but chopping or cutting one down can seem daunting, if not impossible. This is especially true if it’s your first attempt at such a task, and rightfully so. Caution is encouraged when it comes to tree felling, because there’s a lot that can go wrong. Trees are deceptively heavy, and their weight isn’t perfectly balanced. When you go to the lumberyard to buy a 2×4 for a home improvement project, you’re handling wood that has been dried over time. Live trees, on the other hand, hold thousands of liters of water and are many times heavier than their commercially processed byproducts. However, if survival is the name of the game, the rewards outweigh the risks.

Consider “What If?”

The following hypothetical situation will help envision the steps that should be taken if felling a tree becomes necessary for survival. Imagine that frozen weather has knocked the power grid out and the electric company has issued a statement warning citizens it may be a few days before they can get it back online. As the hours tick away, family members begin donning increasing amounts of layers, and the pipes in the walls make alarming creaking sounds as they begin to freeze. The home has a functional fireplace, but since you live in the suburbs, it has been mostly for aesthetics … until now. Several trees in the yard next to the house have been damaged by ice and wind, and instead of freezing for days, the family decides to open the chimney flue, cut down a damaged tree for wood, and get a hot fire crackling on the hearth.

how to fell a tree

Dissecting this scenario will help elucidate some important things that should be considered before swinging an ax at a tree. First is determining which tree to cut. Thinking of trees as a limited resource will help in the selection process. A good rule of thumb is to preserve the trees that are the healthiest, or at least leave them for last. It takes a long time for a tree to grow, so pick the ones that are damaged or appear unhealthy. Another thing to think about is the tree’s proximity to something that might be a source of unintended collateral damage. Having a 50-foot tree crashing through a roof or falling on infrastructure may cause more harm than good. Make sure there’s adequate room for the mass of the tree to land safely, even if it doesn’t fall exactly as intended.

The current season is another important aspect to consider. Early spring to mid-summer, especially in regions that experience regular freezing temperatures in the winter, is a time when trees are taking up massive amounts of water from the ground. Felling during this time, depending on the species, may seem like breaking into a water main when the sap gushes freely from a fresh cut. Late summer through the winter months is an ideal time for bringing down a tree because liquids aren’t being actively moved beneath the bark. Better yet, cut when there’s snow on the ground, because the impact of the fall causes less damage if there’s a blanket of powder protecting the surroundings.

bow saw cut tree

Above: Once the notch is complete, use a bow saw for the back cut to weaken the wood fibers and cause the tree to fall in the direction of the cut. 

Most leafy trees lose their leaves once a year, but in the case of evergreens such as Christmas trees, they stay on year-round. Something that every aspiring survivalist woodsman needs to know is that evergreen trees often contain a high amount of resin, the stuff that feels sticky when you try to hold on to its branches. So, even if there isn’t enough time to dry the wood for a fire, the resin of an evergreen tree may help the fire catch and burn more efficiently than the wood from a leafy alternative. Doing your due diligence and becoming familiar with the trees in your surrounding area will be a lifesaving step. Some species can be used for more than just fire, like the Vitamin C that can be acquired by making tea from the needles of an Eastern White Pine, or the cordage that can be made from the bark of a Basswood.

Gearing Up

Getting serious about taking down a partially or fully grown tree means having the right equipment for the job. For speed and efficiency, nothing beats a gas-powered chainsaw with a bar large enough for the task at hand. They do require fuel, oil, regular maintenance, and some familiarity with their capabilities before taking chain to wood. Depending on the size and brand, a chainsaw may be expensive and heavy to varying degrees, but they’re fast and less labor-intensive. You might also consider an electric chainsaw, but if it is a grid-down scenario, electric saws will most likely be entirely useless.

how to fell a tree

Above: It's wise to cut incrementally, a little at a time, and observe how the tree is about to come down.

Watching cartoons may lead some to believe that an ax alone can bring down a tree, and although it's possible, an ax’s utility is greatly increased if accompanied by a bow saw or crosscut saw. These tools are far less expensive, but much more labor-intensive. This means that physical strength and endurance are important factors when using the hand-felling method. Researching which ax styles are best for actual felling versus splitting wood is also crucial to success.

Safety should be at the forefront of every tree-felling endeavor. When mechanical methods are involved, wearing steel-toe boots and chainsaw chaps may seem cumbersome. Try not to feel like wearing safety gear is a lame thing to do. Just look up some photos of chainsaw injuries, and I promise, safety will be the foremost thought when handling a motorized saw. One single tooth of a fully spinning chainsaw can pass the same point more than 300 times per second and can cut through flesh and bone like a hot knife through butter. Because of this, taking a chainsaw safety course from an experienced instructor is highly recommended. 

fallen tree

At a minimum, gloves will help maintain a firm grip on swinging axes and revving chainsaws, hard hats will prevent head injuries from unexpected falling debris, and safety glasses will protect those peepers from flying chunks of wood and sawdust. Saw sharpening and cleaning are also mandatory skills to acquire. First-aid training and awareness of your own limitations could be invaluable as well.

Many factors can play a role in the failure or success of felling a tree. Trees close to powerlines may create an electrocution risk. Trees growing close to one another could create a situation where the branches become entangled, making the actual felling dangerous and unpredictable. Wind direction and speed can push the falling tree in an unexpected direction. Critters calling the tree their home may go on the offensive to protect it. The bottom line is to take your time to analyze the situation and think before you cut.

Steel to Wood

After considering as many of the previous concerns as possible, the felling process is relatively simple. The first step is to make sure the tree has a safe place to land, and that you have prepared an egress route away from the falling tree. What I mean by this is, if you were to look down on the tree with a bird’s-eye view, moving away from the tree behind the direction of the fall at a 45-degree angle is statistically the safest path to get away. It’s important to take some time to make sure your egress route is free of restrictions that may cause you to trip and fall, and even practice moving away from the tree in a deliberate and smooth manner.

lumberjack safety gear

Above: The importance of wearing proper gear when using a chainsaw cannot be overemphasized. A quick internet search for “chainsaw injuries” should be enough to convince anyone to take this endeavor seriously.

Next, you’ll want to make something called a face or notch cut. This involves cutting a wedge out of the side of the tree in the desired direction of fall. In a perfect world, this should be on the side where the branching is the thickest or the side the tree is naturally leaning toward. You can check this by standing at the base of the tree and looking up. You may notice that there are more branches growing on the side that’s exposed to the most sunlight. This is also the cut you'd use an ax to make. It doesn’t have to go all the way through the tree, but cutting to a depth of a third of the diameter of the tree is ideal.

To seal the deal and bring it down, line up the back cut or felling cut perpendicular to the interior angle of your notch cut. This cut would be made with a bow or cross-cut saw if you’re doing it by hand. Don’t try to cut all the way through — leaving about half an inch of wood between your back cut and your notch cut will create a “hinge” that the tree’s weight will rest on as it falls. Don’t be surprised if the tree doesn’t fall over immediately. If cut properly, it should lean over slowly at first. This provides ample time to walk casually away along the predetermined egress route, much like an action movie hero walking smoothly away from an explosion. Having a partner to stand back and call out when the tree starts to lean over may give you more time to safely get away from the falling tree. There are several cutting techniques that’ll accomplish the same result, and guides can be found online; however, nothing beats hands-on instruction from an experienced pro.

how to fell a tree

Above: Ryan Warmboe, northwoods timber savant and Forester for VanOss Forestry Services LLC, demonstrates how to fell a tree with efficient finesse.

Once the tree is on the ground, the real work begins. Limbs should be removed from the main stem and can be stacked into a pile for later use. The process of cutting fireplace-sized logs to be split into firewood is called “bucking,” and is accomplished quickly with a chainsaw. If necessity dictates, it can be done with a bow or crosscut saw and a lot of elbow grease (there’s a reason some fitness trainers use a smaller crosscut saw to cut through thick chunks of wood as a form of exercise).

The most important thing is to take your time and be mindful of every action you’re taking. There are a lot of moving parts involved when felling a tree, and most of them are potentially fatal. This isn’t something that should be done with small kids or pets running around, or if sensitive infrastructure is being jeopardized. It may be best to stick with smaller trees until you can build up the experience, and confidence, to take on something larger.

Final Thoughts

Tree felling is an invaluable skill for anyone serious about ramping up their survival skills. The ability to utilize forest resources can open a world of opportunities, including logs for cabins, slabs for shingles, bark for canoes, wood coal for heat and cooking, resin for glues, and a nearly endless list of other uses. Utility aside, there may be a need to remove a tree blocking a road to town in the aftermath of a storm. Having lived through the destruction of several monstrous hurricanes while stationed in Louisiana and cutting away the fallen trees trapping people in their homes, I’ll never undervalue the skill of being able to safely cut wood. 

fallen tree

Many people have powerful emotions regarding their favorite trees, especially those that have been standing for decades or centuries. This means that cutting trees indiscriminately should be avoided, and consulting anyone who has a stake in the tree’s fate before the first stroke of an ax should be mandatory. No matter what the situation may dictate, getting in touch with a skill that was so vitally important for most of mankind’s existence will only result in benefits for you and the ones you care about. 


More on OFFGRID


Growing a Survival Garden

For those lucky enough to acquire a property with a thriving orchard, the benefits are obvious in the first year. What’s not immediately clear is all the decision-making and patience that were necessary in the beginning. There’s an old proverb: “The best time to plant a tree is 20 years ago. The second-best time is today.” That certainly applies to fruits. Once established, though, one can expect years of production. Blueberries, for instance, can produce for up to 50 years. Standard apples and pears can be productive for 35 to 45 years. Consider fruits a multigenerational investment. 

In addition to being long-lived, fruits are versatile, both in terms of usage and storage capacity. Fruits can be eaten fresh or rendered into jams, jellies, juices, fruit leathers, cider, and wine. They can be frozen, canned, or dehydrated. Some late-season apple varieties like Arkansas Black, Stayman, Pink Lady, and Fuji can keep up to five months if stored in a cool and humid environment.

The Planning Phase

Regardless of which fruits make sense for your situation, some basic homework beforehand will ensure successful establishment. Site selection is important. Vegetable gardens are challenging on sloped terrain, but fruits and slopes are a great fit. Placing fruits on a high point of the landscape allows heavy, cold air to flow past the plants rather than settling right on top of them. Be mindful that south-facing slopes warm up quicker in the winter, which sounds like a positive, but it can also encourage earlier blooming and subsequent damage by late frosts. 

Soil testing is always a good idea. Contact your local Cooperative Extension Service about their procedures and fees. Normally, soil testing costs will range from free to $10. The results will give you an indication not only of nutrient needs, but also the natural pH of your soil. A soil pH between 6 and 6.5 will be perfect for tree fruits, strawberries, grapes, and brambles, such as raspberries and blackberries. Blueberries need more acidity, so a pH of 4.5 to 5.2 should be the target. If your score is too low, it can be raised with limestone. If too high, adjustment with sulfur may be in order.

PawPaw Fruit

Above: Pawpaw is a native fruit reminiscent in flavor to a banana, but the mushy texture is a turnoff to some.

The number of fruit cultivars is overwhelming, but a good starting point would be to speak with neighbors. What fruits have done well for them? Universities in your state with an agricultural program will periodically publish variety trials for common fruits, and while the list isn’t exhaustive, it can at least provide insight into a handful of varieties that do well. As an example, search online for “Growing blueberries in [your state] .edu.” A lot of first-time fruit growers make the mistake of planting supermarket varieties they’ve enjoyed — think Honeycrisp apples or Bing cherries — even if those aren’t adapted to their region.

Propagation

A seed will contain genetic material from both parents, and as a result, the fruit produced by the offspring may be unrecognizable. Therefore, asexual propagation (cloning) is best. Grafting is a cheap and easy way to clone an apple or pear tree, and brambles can be easily propagated from cuttings or “tip-layering,” where the tips of trailing canes are covered with soil or mulch, resulting in new roots that can be cut from the mother plant. Strawberries produce “runners,” which can be transplanted to a new location.

If obtaining cuttings or other plant materials from friends and neighbors, be mindful of carrying plant diseases home. Did the person giving you these cuttings monitor and manage for disease problems? An argument can be made for only getting plants from reputable nurseries to avoid diseases, but neighbors have been sharing plants since the dawn of time. At least visually inspect those runners or cuttings to ensure they look healthy.

survival garden bees polinating

Above: Native bees can pollinate fruit crops more efficiently than honeybees can, in a lot of situations.

Pollination

We’ve learned a lot over the last decade about the value of native bees to the pollination of fruit crops. Studies in the Northeast have concluded that, even in the absence of honeybees, native species such as bumblebees, orchard mason bees and leafcutter bees can adequately pollinate commercial orchards. So, don’t let anybody tell you that you have to have honeybees for fruit production. Nonetheless, a colony or two of honeybees on your property provide insurance for those years when native bee populations dip. Another option is to build simple nesting structures for native bees, such as blocks of wood with predrilled holes for orchard mason bees. 

Some fruits are self-pollinating. On the other hand, plums, apples, sweet cherries, pears, and blueberries need to have another variety nearby for cross-pollination. The two varieties should be compatible in terms of their bloom windows. Nursery catalogs will often list varieties that cross-pollinate, or you can find charts online with compatible cultivars.

Survival Garden Pruning Fruit Trees

Above: Pruning of fruit trees is something you should commit to every year.

Pruning

Yearly pruning of fruit trees, brambles, grapes, and blueberries will be necessary. To put it another way, it'll be much easier to commit to pruning every year than to try to fix neglected plants a decade from now. 

Pruning is a science and an art, and a lot of practice is needed to become proficient. It helps, though, to remember why you’re pruning. Pruning should focus first on removing diseased or damaged limbs or canes or unproductive wood. Then, the goal should be to open up the plants’ canopies enough for good airflow and sunlight penetration, which will mean drier foliage and therefore less opportunity for fungal invasions.

A final but important motivation for pruning is to shape the tree to support a maximum fruit load, favoring wide-angled connections between the limbs and trunk.

Pests

Most of the diseases that’ll impact fruits are fungal and include a long list of inflictions such as cedar-apple rust, black knot, black rot, brown rot, gray mold, anthracnose, and powdery mildew. The bacterial disease fireblight is a major problem with pears and apples. In addition, each region of the country is facing its own armies of both native and invasive insect pests, from plum curculio to spotted wing drosophila fly to cicada to spotted lanternfly.


Survival Garden pests

Above: Aesthetically perfect tree fruit doesn’t just happen, and management of insect and disease pressures will need to be factored into your growing plan.

Approved products, insect presence, disease occurrence, and treatment windows will vary from region to region, so it’s wise to consult a spray schedule created specifically for your part of the world. Your local Extension office can provide that. These often include organic options for those leery of conventional chemical products.

Many diseases are carried from one season to the next in mummified fruit, so make it a habit to gather old fruit from your vines and trees in the fall and destroy it. Raking and removing leaves from beneath your plants is a good practice as well. When pruning, disinfect your tools with alcohol between plants.

Wildlife Damage

Bears, deer, beavers, rabbits, and other mammals can wreak havoc on fruit trees and bushes. Birds, too, can devour berries or peck holes in tree fruit. If wildlife populations are heavy near your property, electric fencing would be a good idea, especially when the plants are young and tender. 

Voles are small rodents that’ll feed on the roots and bark of young trees. Hawks, owls, and snakes will eliminate some of your vole problems, but beyond that, habitat modification and traps can be useful.

Bird netting stretched over the plants before fruits ripen will ensure that your family — and not the birds — gets most of the harvest.

Apples and Pears

An orchard is a symbol of success for a ruralite, but even a couple of apple or pear trees can result in bushels of fruit. 

Graftage is the best and most economical way to build an orchard with proven varieties. Two things are needed: rootstock and scionwood. Contact your local Cooperative Extension Service to see if they sell rootstock in the winter or order online from a nursery. The rootstock can impart certain characteristics to your trees, including disease resistance, anchorage, and/or a dwarfing or semi-dwarfing growth habit. Rootstock is often sold at $1 to $2, each.

Scionwood is collected from the desired trees during the dormant season. The best scionwood is from year-old
watersprouts that are roughly the diameter of your pinky. Don’t collect watersprouts at the base of the tree, as this is likely off the rootstock. 

The grafting process is an easy skill to acquire. Farm- or horticulture-based organizations in your community may offer yearly grafting workshops, but if not, it’s a skill that can be picked up from online videos or a knowledgeable neighbor. The only tools you’ll need besides the scion and rootstock are a sharp knife and masking tape.

Standard-sized apple trees should be spaced 30 feet apart. The spacing should be 18 feet for semidwarf and 8 feet for dwarf trees. For pears, spacing for standard and dwarf varieties should be 25 feet or 12 feet, respectively.

cedar-apple rust

Above: Cedar-apple rust is a fungus that produces galls in juniper species in the spring before moving into apple trees later in the season.

Commercial production (i.e., visually appealing fruits) of apples and pears requires considerable inputs, including a dozen or more sprays — organic or conventional — during the season. But if you’re not easily offended by ugly apples, you can skip some of those. Fly speck and sooty blotch, for instance, are two fungal diseases that look unattractive but don’t significantly impact the fruit’s usefulness.

Stone Fruit

Apricots, sweet cherries, and Japanese plums need warmer climates to thrive, whereas European plums, hybrid plums, and sour cherries are more winter hardy. Peaches prefer hot summers but also winter temperatures that fall below 45 degrees F. Again, it’ll be a matter of consulting neighbors as to what has worked for them and what hasn’t. Learn what USDA hardiness zone you live in, and use that as a preliminary guide when perusing nursery catalogs.

Unless you’re situated in that perfect range, your harvest may not happen every year. In the southern Appalachian Mountains, for example, peach trees have a heavy load two years out of five, but those who grow them consider it worth the wait.

While grafting can be done with stone fruits as with apples and pears, the more common propagation method is budding, done in late spring or early summer. With this method, a bud from the desired tree is inserted into the trunk bark of another.

Brambles

If low inputs and organic production are your goals, then raspberries, blackberries, blueberries, and strawberries are the way to go. They face disease and insect pressures as well, but they tend to require fewer chemical preventatives than do tree fruits and grapes.

If raspberries or blackberries are content with a site, they’ll quickly grow into a dense patch unless you take steps to prune and trellis them.

Blueberries

High-bush, low-bush, and rabbiteye are distinct types of blueberries grown in the U.S., and within each of those types are varieties that are distinguished by size, sweetness, fruiting window, and other factors. Again, your location’s climate will determine which type to choose, and there are likely cultivars that have been proven producers in your region. 

When planting blueberries, first ensure that you’re planting into a soil with the proper acidity of 4.5 to 5.2 pH. Amend each planting hole with a gallon of peat moss and mulch with pine needles or wood chips after planting. 

Strawberries

Strawberries are classified as June-bearing, ever-bearing, or day-neutral. The first produces a heavier, more flavorful crop between May and July. The other types have a fruiting period that’s stretched out over a longer season, normally culminating in late summer or fall.

Strawberry blossoms should be pinched off the first year, so as to channel each plant’s energy toward root development. Growers should also plan to renovate their strawberries periodically, as unmanaged patches will tend to produce smaller and smaller berries over time.

strawberries

Above: A well-planned and tended strawberry patch can provide you with gallons of sweet fruit well before summer arrives.

One approach to strawberry management is to have four planting areas. Once the first area is planted, the runners can be cut and transplanted into Plot 2. The runners from Plot 2 can be planted into Plot 3 the following year, and so on. In the fourth year, Plot 1 can be completely cleared and replanted.

Because weed management can be an ongoing challenge in strawberry production, many commercial producers treat their plants as annuals, planting into black plastic or other types of mulch in fall, harvesting the following spring and then starting all over again.

Grapes

As with apples and pears, grapes are prone to a long list of diseases and insect pressures and will need significant management to maximize the harvest. An age-old practice involves planting a few roses in the vineyard to serve as sentinels. They’ll often show symptoms of various fungal diseases or insect pressures in advance of the grapes.

survival garden grapesAbove: The more humid your climate, the earlier you’ll need to manage for fungal diseases in grapes.

A major input with grapes will be some type of trellis or arbor system, which can range from simple cattle panels bent into a hoop to more elaborate systems. 

Black rot is especially trying for aspiring vineyard owners, and one way it’s carried from one season to the next is in mummified fruits. Just like with other fruit diseases, it’s a good practice to remove old fruit from the vines as early as possible and destroy those.

While this all sounds daunting, the shotgun approach works for many. Plant whatever trees and bushes are on sale at your local garden center, give them a minimal amount of attention, and hope for the best. It’s not ideal, and you certainly won’t maximize production that way, but there have been many apples eaten from neglected trees and lots of cobblers made from haphazardly planted berries.

Other Possibilities

Lesser-known and under-appreciated fruits are worth considering. Gooseberries and currants, for instance, are options that can handle a bit more shade than other berries, and deer don’t mess with these much.

Fig is another one unpopular with deer, and there are varieties on the market hardy to Zone 6.

Then, there are native fruits perfectly adapted to your climate, from pawpaws to persimmons to prickly pear.

Fruits are a long-term investment for a property, but establishing berries or tree fruits will eventually pay off. No fruits are a plant-it-and-walk-away prospect, but if you’re willing to invest in learning and management today, the rewards will someday be sweet. 


More on Survival Food and Preparation


What If Critical Supply Lines are Indefinitely Interrupted?

It’s impossible to predict the flashpoint that could reduce a city to chaos in a matter of hours. One thing is for sure: There will always be some among us who are looking for an excuse to see the world burn. We’ve watched certain U.S. cities silently condone violent civil unrest in 2020, blithely lumping it into the same category as peaceful protests. What will that flagrant disregard for safety and stability culminate in this year? Rather than throw caution to the wind and assume “everything will be alright,” we decided to look into a situation that could potentially have a devastating impact on commerce. What if your hometown was so consumed with rioting that the services and supplies you take for granted suddenly became unavailable? 

The Scenario:

The Setup: You live in a major city that has been under siege with nonstop civil unrest. The weeks of ongoing riots have not only forced many city centers and local businesses to close but have also interrupted commerce for the average citizen. Everything from supermarkets to hardware stores have stopped receiving deliveries. Roadblocks, because of protests as well as trucks being looted, have not only made it difficult to conduct business, but some companies are flat-out refusing to send their drivers into areas where their lives are in danger. Curfews and limited public movement have only exacerbated your inability to replenish supplies you used to take for granted. Store shelves are empty, fighting over what’s available is a regular occurrence, and you have no clue when things will subside enough for life to resume as normal.


Situation Type: Long Term Supply Shortage

Your Crew: You, your Spouse, and your Children

Location: Calumet Heights, IL

Season: Summer

Weather: Hot: High 90 degrees F, Low 70 degrees F. 


The Complication: Since you’re not able to just pick up and leave your home that easily, and the suburbs have experienced a run on their supplies, you’re forced to improvise with what you have and stretch supplies as far as you can to make them last. Of course, traveling through areas that are fraught with unrest comes with its own risks, not to mention the fact that there are long lines at gas stations due to a diminishing fuel supply. It’s summertime, and the heat only makes a bad situation worse — the scarcity and chaos are weighing heavily on the mental state of an already agitated local population. 

Although mail has continued to be delivered, you fear that the USPS may be the next link in the chain to break. Services like UPS, DHL, and FedEx have stopped delivering goods in order to protect their staff, making it somewhat difficult to purchase supplies via e-commerce. For this “What If,” we’ve asked survival instructor Kevin Estela and agriculture and natural resources educator Phillip Meeks how they’d adapt their lifestyle to these conditions. Each writer was asked to consider things like food storage/cultivation, making or improvising needed household items, finding alternatives for medication and first-aid supplies, and self-defense resources like ammo without consistent availability of commercial goods and services.

The daily morning news has given me no hope of this current civil unrest stopping. The government has failed the people and has let the lunatics run the asylum. My normal supermarket has been trashed, my favorite local family owned deli and convenience store was burned for allegedly aligning with the politics of the mob’s apparent oppressor, and desperation around the city is at an all-time high. Cellular service is still consistent and access to the internet has given me a chance to collect valuable intelligence from my environment. I’m going to let the looters fight over scraps as I direct my attention elsewhere.

For most people, running out of food is a death sentence. Many of my neighbors have left town for the suburbs, but I’m holding ground. I’ve heard reports of those who left late being met by ad-hoc militia-type groups with skewed politics and maniacal leaders. I’ve seen photos of the evacuees’ trashed cars, but haven’t seen any of the evacuees themselves. We can only speculate. Those who remained have told me they are in the same boat as I am, and we’ve talked about our homes as our castles that we’d be willing to defend. We are trying to stay low-profile, and we’ve even adopted the clothing color scheme of the “protestors” to blend in. If only they could see how much I loathe their reckless actions behind this stupid disguise I’m choosing to wear.

Most of the leftover families have backgrounds in self-reliance much like my own, and many are weekend sportsmen with a modest home armory of at least a .22 rifle, 12-gauge shotgun, and .30-06 bolt gun. In many large cities like this one, politicians have limited our ability to own most pistols and modern sporting rifles. My sister and my nieces have come to my house, so this fight for survival isn’t mine alone. If I only had to worry about myself, I’d suck it up and sacrifice comfort voluntarily. With kids around, this isn’t going to be easy. We have a stocked cupboard, but that food won’t last long. Canned food doesn’t require reconstitution, but the trade-off is weight and space. We’re part Asian, so we were fortunate to have a healthy supply of rice on hand already. I need to think of ways to extend those meals. I need to find fillers out there to get us through this winter.

We stocked up a modest medicine cabinet with more vitamins, dietary supplements, and bandages for boo-boos. Since we don’t plan on moving about much, we’ve moved the bug-out kits from our vehicles to our house. Car windows are just fragile doors that haven’t been smashed open yet, so we don’t want to leave anything of value out on the street. 

Appearances vs. Reality

Knowing we’d need to get across town from time to time, I secured the rattiest-looking shopping carts I could find. The “protestors” loot and steal from stores, shops, and wealthy individuals. It’s a gamble, but I doubt being seen as a bum would attract too much attention, especially at hours of the day when most are preprogrammed to sleep and definitely when the cold of winter keeps most “protestors” indoors on their computers and phones. 

We all know the actions of this mob don’t constitute lawful protest. I watched it play out time and time again and was quick to stock up on freeze-dried foods at the local Walmart. I also grabbed plenty of canned goods at the supermarket as soon as I suspected something like this was happening in my backyard. I let the idiots fight over toilet paper while I grabbed another large sack of rice, plenty of cooking oil, and tuna packets. 

The way I look at it, with just these three ingredients, I have carbs, fat, and protein. I grabbed some spices and seasoning packets before I left, knowing I could provide some variety to my unexpected guests who experience food boredom easily. One last thing I picked up on my way out of the store were oversized clothes for my nieces and sister. I want them to look like they have been without food and unable to fill out their normal clothes. Perhaps that’ll help to keep prying eyes from looking too closely at us in our well-prepared state.

Coordination

It pays to have friends. Thankfully, the bonds built around campfires and in hunting camps are hard to break. Outdoor pursuits like these tend to attract similar mindsets. Before all this nonsense popped off, my hunting buddies and I discussed using our phones as a primary means of communication along with two-way radios as an alternate means of communication. Some of us don’t have our license to transmit over civilian amateur bands, but we’re pretty sure law enforcement has bigger fish to fry than some guys chatting on open lines the mob likely isn’t monitoring. Using past cases of civil unrest, we’re fairly confident phone and internet service won’t be interrupted, as people were tweeting and calling from inside occupied zones in the Pacific Northwest. 

Should the local government services or utility providers shut down, they’ll only temper the resolve of the mob to stay on mission. My hunting buddies and I decided to use a simple code along with GPS hunting software (OnX Hunt) on our cell phones to keep track of mob positions that we could share with one another. We could also pool our resources if times really got tough. We decided to pop common critters found in most cities as survival food, and save them with the tools found in most of our kitchens like Kitchen-Aid meat grinders, vacuum packers, and food dehydrators. 

As a community, we feel the strongest resource we have is one another. Even though we don’t have a medical doctor in our immediate group, we’ve identified who will be our “doc” with the highest medical training. We’ve used text message chains to inventory our medicine cabinets by sharing the photos of what we have. Who knows, maybe someone has a leftover prescription or remedy someone else may need. Without a regular doctor to visit, this will have to do. The rest of us will work in support roles, and we’ll fall back on print resources like the book Where There Is No Doctor. We know this isn’t perfect, but we can work with what we have and address what we face. 

What if Supply Lines

Redefining “Food”

If I’ve learned one thing about eating in the wilderness, it’s that hunger is great sauce. I know what it’s like to fast, but how do you convince kids to eat conservatively? My sister is a good mother, and like most moms, she’ll sacrifice her comfort for her kids. Some of the kids’ picky eating habits will make this scenario more difficult. I’ll have to field dress and butcher out in the field, and return with cuts of meat that resemble what could’ve been bought in the grocery store. Doing this in the field will make me more vulnerable, but the trade-off is having to carry less weight over distance. 

Drop cakes and fry bread are easy to make with just basic ingredients. Additional nutritional ingredients can be added and snuck into the girls’ food like a dog mama sticking a pill in some peanut butter for her pooch. We’ve got a meat grinder attachment. I know I can mix random scraps of meat, fat, cheese, and spices to make what should remind the girls of meat snacks. 

Discreet Food and Water Collection

Even though I live in a city, I know there’s a major body of water directly east of me, Lake Michigan on the outskirts of Calumet Heights. Should I run out of food or if the water gets shut off, I’ll take my shopping cart, don a disguise — most likely a utility worker outfit with a hard hat, vest, and clipboard — and head there. I won’t chip through the ice with my hatchet until long after dark. The good thing about ice fishing is that I can set multiple homemade tip-ups and bail multiple hooks on a single line. It’s a form of passive fishing that’ll let me seek out resources while the baited hooks do the work. If I resort to active fishing, I’ll be a sitting duck and an easy target.

My friends and I decided we wouldn’t take from other families in the same scenario we’re in. If we ran out of food, we would fall back on taking food from government buildings and, in particular, schools. Schools serve hundreds if not thousands of meals each day. The supplies found in the cafeteria, the athletic trainer’s office, school nurse’s office, and various family and consumer science classrooms would give us plenty to sort through. We know the looters and protestors are more interested in high-value real estate like department stores and political buildings. 

We can work efficiently and without disruption by going where the agitators won’t be. The frustrating lack of action by the federal government to harden schools, despite numerous calls for basic physical security measures to protect against school shootings, means easy access for us. We asked officials to block off ground-floor windows and create security corridors to prevent unauthorized access, but since they took no action, we know there’ll be multiple easy entry points. 

The Enemy of My Enemy is My Friend

I’ve already mentioned how most residents of Illinois don’t have the firearm resources of less restrictive states. Standing toe-to-toe with the rioters is foolish and strategically irresponsible. While I know my hunting partners are capable marksmen and the value of a single well-placed round can’t be measured, there are better options that draw on strategy than force. From watching the news, we know there are multiple domestic terrorist groups “protesting,” but without any real direction. We know mob mentality is often reactive and driven by emotion, which is how we’ll divide the mob and direct their attention at one another instead of the populace. All it takes to incite a mob is a perceived threat. A few bricks with gang colors or inflammatory notes thrown through some rival windows will send a strong manufactured message. Enough bricks can build a house or break down the perceived structure of an organization when equally disorganized groups turn on one another. 

We know this civil unrest can’t last forever. In all the cases in our recent history, the government has eventually stepped in. This isn’t a matter of surviving indefinitely; it’s simply a matter of holding out. While some of society has crumbled around us, the backbone of this nation is still holding strong and working together through a secret network. Compared to a mob looking for attention and likes on their social media hashtags, we value community and cooperation. We’re going to outlast and see this through. 

Both peaceful demonstrations and riots increased significantly around the globe from 2011 to 2018, according to data published by the Cross-National Time Series. Last year alone saw some of the most costly civil unrest in U.S. history, with one set of protests extending to 140 U.S. cities and leading to personal and corporate insurance losses in excess of $1 billion, says the Insurance Information Institute.

It seems that unrest capable of impacting local businesses and grinding day-to-day life to a halt is a greater possibility than it’s ever been, especially in cities. And these events won’t necessarily come and go within a few days. 

Indoor Preparations

When I was a kid, I learned a lot about preparedness from a space my parents referred to simply as their “utility room.” They’d converted their carport into a new kitchen, leaving the old refrigerator and cabinets behind. Over time, my folks filled this space with razors, shampoo, toothpaste, adhesive bandages, Ibuprofen, salt, and practically any other worthwhile item they caught on sale. In the same way, the old refrigerator got packed with condiments, ground beef, soft drinks, and frozen pizzas. This continuous and long-term larder-loading is what I’ve tried to adapt as an adult. It can be an affordable way to build enough supplies to carry a family through a long-term event … but only if you start now.  

You may use a lot of disposable items in your normal, day-to-day life — things like paper plates, paper cups, paper towels, and wet wipes. It’s good to have a few weeks’ worth of these things in stock, but for the long-term, there’ll come a point where it’ll be more sustainable to switch to real dinnerware and towels to be laundered. For an emergency that stretches on for months, plenty of laundry detergent and dish soap are good investments. Some ultralight backpackers forego the need for a lot of toilet paper by using a squeeze bottle as a makeshift bidet. The thought makes some squeamish, but the fact is it’s an acceptable way to keep oneself clean when paper products run out. 

Another angle regarding the replacement of disposable with reusable items is this: if trash disposal is disrupted for weeks or months, what will the accumulation of garbage in your home mean to your family’s health and morale?

Buy drinking water in reusable 5-gallon containers to cut down on waste. Hygiene and household cleaning can be accomplished with pool water or a rain barrel. It’s possible the rainwater can be made potable in a pinch, too, depending on the surfaces it touches.

Plan to cook during an extended crisis, and give the entire family a role in the process. (A selection of easy-to-prepare instant meals will be fine for when time and energy run low.) Canned meats, vegetables, and fruits have a long shelf-life, as do pastas, flour, and cornmeal. Powdered milk is great to have on your shelf, but liquid milk can be frozen for several months, too. Have family members select recipes now that use a minimal number of ingredients, and concentrate on putting those items in your pantry. 

If you haven’t stockpiled first-aid supplies and medications such as over-the-counter painkillers and allergy relief for both children and adults, begin doing so immediately, always being mindful of expiration dates. Keep appropriate amounts of ammo for hunting or defense stashed away. In fact, double what you think is a reasonable amount. Dry pet food will store for a long time, so be sure to have some extra, as well as common pet medications.

Pick a room in the house such as the master bedroom, and equip it with solid locks and extra shelves. Store communications equipment, first-aid supplies, extra food, and defensive tools in there. This can be where you lock up your supplies should you have to leave for a few hours, or it can serve double duty as the spot to which your family retreats in an emergency.

Have some cash in small denominations set aside, as well as items that can be used for bartering with your neighbors: hard candy, instant coffee, sample bottles of whisky, cigarettes and cigars, travel-sized toiletries, and so on.

Outdoor Preparations

Most vegetable seeds will keep for years in the freezer, so stock up when those go on clearance. Snap peas and beets are versatile in that their leaves can be eaten, too. Radishes are ready for harvest in under a month. Vegetables with many fruits per plant do well in containers on a balcony, and a nice crop of potatoes can be harvested from buckets, mulch piles, or even cardboard boxes. To work edible components into the landscape, blackberries, raspberries, currants, serviceberries, and strawberries can all be used in attractive ways.

Embrace the concept of “succession planting.” Once you harvest onions, for example, fill that spot with snow peas or kale. Understand which vegetables are best direct-seeded into the soil and which need to be grown first as transplants, and invest in a few trays and a bag of starter mix for cabbage, broccoli, and tomato transplants. Cool-season crops that you’d normally grow in early spring can typically be planted again in late summer for a fall harvest.

A roll of “floating row cover” will extend the fall growing season by at least a couple of weeks, providing fresh produce until Thanksgiving or beyond.

What if Supply Lines

On Site

Family and friends outside the area may still be able to access supplies normally. Take advantage of that silver lining as long as USPS delivery is still happening to fill in gaps with medications, toiletries, or other supplies.

Parks and greenways can prove to be a source of wild edibles, especially in the summer, and the fact that maintenance of public green spaces may cease will mean a proliferation of blackberries, greenbrier, wild carrot, pokeweed, and other food-worthy plants. Be wary of collecting edibles from previously well-maintained lawns and golf courses, though, as these could still cling to some pesticide residues. Don’t overlook the many species of weedy mints that could be used for teas. Most home lawns (once maintenance subsides) will host good yields of dandelion, chickweed, oxalis, violets, and other edibles.

While fish and crayfish can be easily harvested from nearby water bodies, water quality is likely a concern in the city, and the harvest of squirrels or groundhogs from a city park may draw undue attention. However, those protein sources are there if desperately needed, as are winged options such as starlings and pigeons. 

Entomophagy (the practice of eating bugs) is ranked as a last resort by most, but with a little cooking and lots of barbecue sauce, it’s possible to convert grasshoppers and cicadas that emerge in the summer into novelty dishes to stretch the food supply.

Fuel, herbicide, fertilizer, and pharmaceutical runoff can all make urban streams and ponds questionable, so be cautious when seeking an emergency water source. Focus instead on rainwater catchment, if possible, and treat drinking water by boiling or using a backcountry filter system. 

Crisis

An individual or household can easily navigate through many short-term disasters, but the longer the emergency, the more you need community. That can be your physical neighbors, members of a faith-based organization to which you belong, or a group of buddies who all live within walking distance of each other. Studies have looked at the value of community in disaster resilience, and the bottom line is that those neighborhoods and broader communities able to invest in their own recovery from the bottom up — as opposed to waiting for authorities to fix everything — stand a much better chance of emerging from a serious disaster. There are two ways to view your neighbors: as competitors for limited supplies or as potential allies whose knowledge and skills can complement your own.

A coordinated neighborhood gardening effort can minimize idle hands and involve men, women, and children in preparing for their own nutritional needs. A few folks with shovels, mattocks, and wheelbarrows can easily convert turf to garden in a few hours. Within days, every yard and vacant lot on a given street can be prepped for vegetable production.

Children can be given the task of overseeing small plantings at their own homes, monitoring the patio tomatoes for hornworms, for instance, or picking slugs off the cabbages. 

Another community effort directly related to gardening — and an important one given that urban soil is often less than ideal for growing — is the development and maintenance of compost. A team can be responsible for collecting all compostable materials from the neighbors (newspapers, coffee grounds, fruit and vegetable scraps, grass clippings) and keeping it aerated. The more a compost pile is turned, the quicker it becomes something useful. 

Beyond gardening, a coalition among just a few neighbors could help address other needs, such as those that relate to clothing, repairs, or medical emergencies. “Maria has some new sheets she’ll donate if we agree to replace them after all this is over, and Stan is handy with a sewing machine.” 

It can be surprising what tools and skills you may uncover on the block. Mark has a tractor with a bucket and a rototiller attachment; Lisa spent two semesters studying veterinary medicine; Richard is a retired tailor. A neighborhood swap meet can be a good way to exchange any surplus you may have for items the family next door can part with: shoes, tools, disinfectants, seasonings. The social aspect of these kinds of activities can help keep everybody sane at the same time. 

A good, progressive approach to preparedness that’s been presented to me is to first think about a 72-hour event. After that, make it a goal to have all you need for two weeks, and so on. It’s good to maximize all available storage space over time with your family’s nutrition, hygiene, health, and safety in mind. In thinking of disasters that could potentially go on for months, it’s also wise to consider what neighbors might bring to the table.

Conclusion

Lots of situations can interrupt the flow of commerce. COVID, snowstorms, the Suez Canal blockage, and the Colonial Pipeline cyberattack all recently contributed to an interruption in goods reaching their destination. Civil unrest is just another piece in the puzzle that can also indefinitely affect our ability to procure the goods or services we take for granted. Many in the ammunition industry believe that the demand has exceeded the supply so dramatically that it may take at least two years to catch up. Ask yourself what would happen if that type of demand impacted food, medical supplies, and other items you absolutely need to live. 

Do your part to not only use these techniques to maximize your self-sustainability during an emergency, but also consider forming neighborhood groups with like-minded individuals who share your concern. Determine what everyone’s willingness to participate is, what their strengths and weaknesses are, and what role they can fulfill when everyone needs to pool their resources to survive a supply shortage. A little extra planning now will pay dividends when another unforeseen event threatens to force the average citizen to do without the conveniences they’ve grown accustomed to.   


About the Authors

Kevin Estela is the Director of Training for Fieldcraft Survival and best-selling author of 101 Skills You Need To Survive In The Woods. He’s an Associate Level Sayoc Kali Instructor, Purple Belt in Brazilian jiujitsu, and graduate of numerous firearm schools. He’s a lifelong outdoorsman who is an avid hunter, fisherman, and backpacker. When not teaching or writing about survival skills, he resides near the Wasatch Mountains in Utah. 

Kevin Estela

Phillip Meeks is an agriculture and natural resources educator with a B.S. in Forestry and an M.S. in Community & Leadership Development. He, his wife, and three children live in the mountains of Southwest Virginia. Phillip and his family garden, keep bees, make maple syrup, and hunt mushrooms whenever they can.

Philip Meeks


MORE SCENARIOS TO CONSIDER:


GBRS Group Assaulter Belt: Carrying the Weight Without Adding Weight

On the one hand, a best practice for reviewing duty/combat/survival gear is to compare and contrast it with other options available at the time. On the other hand, a belt of this type should also be independently considered for its objective features, and how they measure up under pressure. Earlier this year GBRS Group appeared in OFFGRID #43, bringing Tier 1 Tactical Training and the experience to back it. In addition to on-demand performance and instruction, they have recently dropped a belt built by LBT for special operations: the GBRS Group Assaulter Belt. From out of the bag, to on the range, to out in the field, it takes time for the belt to settle in, but once it does: it's time to take notes.

Beginning with the context, if you were to look at assaulter/war/battle belts over the last 13 years, you might be concerned that we've simply gone full circle, back to where we started. The floppy, slim, sleeve-like “belts” of 2008, which nearly required suspenders were replaced by the thicker, taller, and more rigid “battle belt” design. The mutli-belt variation eventually crept from the 3-Gun and USPSA world into more tactical lines of gear, and while the GBRS Group Assaulter belt may look like this style at first glance, it has vastly different properties than the distinctly rigid comp gear.

GBRS Group Assaulter Belt

Top: Protective Shroud. Mid: Inner Belt. Bottom: Rigged Up Outer Belt.

Construction

Out of the packaging, the GBRS Group Assaulter Belt system includes a thin inner belt, the main load-bearing belt, and a third cover-belt of sorts that is to protect the hook interface when the outer belt isn't being worn. Instead of following the tradition of competition gear, which put the hard side, or hook side of the velcro/hook and loop tape on the inside of the outer belt, GBRS chose to put the soft side facing one's body. Thus, the third cover belt is there to protect the hard side/hook side when wearing it in an EDC fashion.

The outer belt gets its structure from a thin and lightweight, semi-rigid thermo-polymer, allowing it to bear pistol and rifle magazines, med kits, holsters, hatchets, knives, and more. In comparison to other belts of its type, the GBRS Group Assaulter Belt feels remarkably light, and although it will flex more horizontally (on the z axis), the vertical (y axis) play is still minimal, just the way a belt like this needs to flex. One layer in from the thermo-plastic core, Type 13, 1-23/32” belt webbing provides the tensile strength, to a measure of 7000 pounds. 

GBRS Group Assaulter Belt

Where some use rigid material such as scuba webbing to give a belt its form, with the Molle or similar interface attached to that, the GBRS Group Assaulter Belt has laser-cut holes in the thermo-polymer that act as the mounting spot for pouches. Effectively gaining two properties with one layer: modularity and form. A cobra buckle seals the deal, with a D-ring for either a safety lanyard or rappelling device, although the belt is in the process of testing and certification. Until then, keep it on the range.

Getting Attached

The bad news of the belt is that it's quite difficult to mount gear onto it. The payoff, however, is that once mounted, the equipment fits securely and tightly to the body. The Molle/PALS like interface of the thermo-polymer tightly engages with whatever pouches are mounted and favors some methods over others such as Malice Clips. Gone are the days of pouches twisting and jostling about, but genuine work must be put in to get them there. A Tek-Lok will fit over the whole outer belt without problems, and although they can be used, the Esstac belt mounts must be removed from the mag caddie first, then re-connected mid-belt. One end of the belt is permanently affixed to the D-ring side of the Cobra Buckle, the other has a flaring of the thermo-polymer for holster support, or branding. Either way, the user will have to do a little tinkering to get everything to fit, but once it does, it's secure.

GBRS Group Branding Block

The Branding Block effectively prevents EssTac Kywi's from being slid directly onto the belt.

The pile/loop/soft side that runs on the inside of the outer belt allows the user to throw it on in an emergency, something uniquely pressing to those on the fighting edge of the military, and gives some credence to the design. In the event that there's no time to set the outer belt onto the inner belt, it can be thrown on without having to plan a trip to the med shed after the hard work is done. The inner belt, however, is so thin and light that it adds very little by means of support when attached. Instead, it adds one more restraint to keeping everything in place when sprinting, jumping, vaulting, or taking an aggressive knee under night vision goggles.

Life Under Weight

As if taking inspiration from Thomas Kuhn in The Structure of Scientific Revolutions, the changes in gear trends rarely follow a clean trajectory. That is to say, if someone were to try to draw a path through the development of load bearing tactical gear, they would not be able to keep it straight, but rather cyclical, as new threats, technological advancements, environments, and relationships between manufacturers and end-users develop and change the landscape of equipment. The GBRS Group Assaulter Belt, in the last ten years, has arrived in its time.

S&S Precision PF-M

The belt fits right in with high end equipment. Gear shown on Plate Carrier: (Front) S&S Precision...

With the soldier, SEAL, or Ranger in mind, the ability to reduce weight while actually maintaining if not improving load-bearing capability is one thing. For those on the competition field, a little more weight on the hips will rarely make a difference. But for those doing 3-5 km infils on a target area, where and how the weight rests on your hips will impact long-term endurance. Many a Ranger Private has been warned not to put too much weight on his hips, lest he restrict the blood to his legs, tiring him out quicker.

Toor Knives tomahawk

The GBRS Group Assaulter Belt system integrates, if not improves the current commonality amongst upper-echelon warfighters to move some of the equipment from their plate carrier or chest rig to their belt, if not for weight, then for speed. After going through the work of installing AR-15 magazine carriers like Esstac Kywi's or G-Code Scorpions, they feel like part of one's body, agile in CQB situations, and secure in aggressive sprints. A Safariland Holster can either be shifted slightly forward on the hip for a clean fit, or kept closer to the 3 o'clock and used in tandem with a leg strap.

Base Layer Scrutiny

After ten years of the everyday wear of the Ares Gear Ranger, built heavily with scuba webbing, the lighter weight buckle-less design of the GBRS inner belt and shroud support a full-size pistol carried appendix without a problem when worn with the protective shroud. Wedging the belt clip of a holster between the layers only adds confidence to a draw-stroke as the holster remains secure. Despite its near weightlessness, the foundation is comfortable, even as it gets bent by belt loops. It's clear that the primary objective was weight reduction.

GBRS Group Assaulter BeltDoes the GBRS Group Assaulter Belt base layer make for a good EDC belt? Yes and no. Until a Black version is released, it comes in Multicam, which in some places it is viewed as a mere random fashion choice, in others, like Minneapolis, it'll draw attention at the time of writing. Make no mistake, you're not taking off your pants in a steamy, sexy slow-motion smooth maneuver, instead, it's the tearing sound of hook and loop fastening. In regards to EDC gear, this is chastity belt secure, however. What's attached is staying attached.

Wrapping the GBRS Group Assaulter Belt

To answer the easy question, the GBRS Group Assaulter Belt is worth the cost of entry, without a doubt. In a progression from early 2000's frameless belts, to VTAC Brokos Belt, to Ronin Tactics Senshi, this belt is the next step in the natural progression.

The worst thing that can be said about it is that it's not for casuals, at all times. The inner belt and cover are not going to ultimately replace everyone's EDC belt, and is the most likely wear point on the belt as a whole. This is easily solved by purchasing a spare set, should they become available.

GBRS Group Assaulter Belt Full Kit

True to its roots as an end-user designed piece of gear, the GBRS Group Assaulter Belt would greatly improve the lives of those going to war. For those on the homefront, it stands out amidst a sea of options, distinguishing itself as a adept fusion of lighter weight, supporting semi-rigidity, and secure attachment, if you'll put in the work for it.


GBRS Group Assaulter Belt

Sizes: S/M, L/XL
Colors: Multicam, Black (as of 1300 Eastern, 1 July 2021)

S/M Specs
Fits: 30-35 waist size
Inner Belt Weight: 1.9 ounces
Outer Belt Weight: 11.1 ounces
Outer Belt Webbing OAL: 46 inches, with 13 inches of adjustability.

L/XL Specs
Fits: 36-42 waist size
Inner Belt Weight: 2 ounces
Outer Belt Weight: 11.5 ounces
Outer Belt Webbing OAL: 51 inches with 14.5 inches of adjustablilty

MSRP: $255
URL: gbrsgroupgear.com