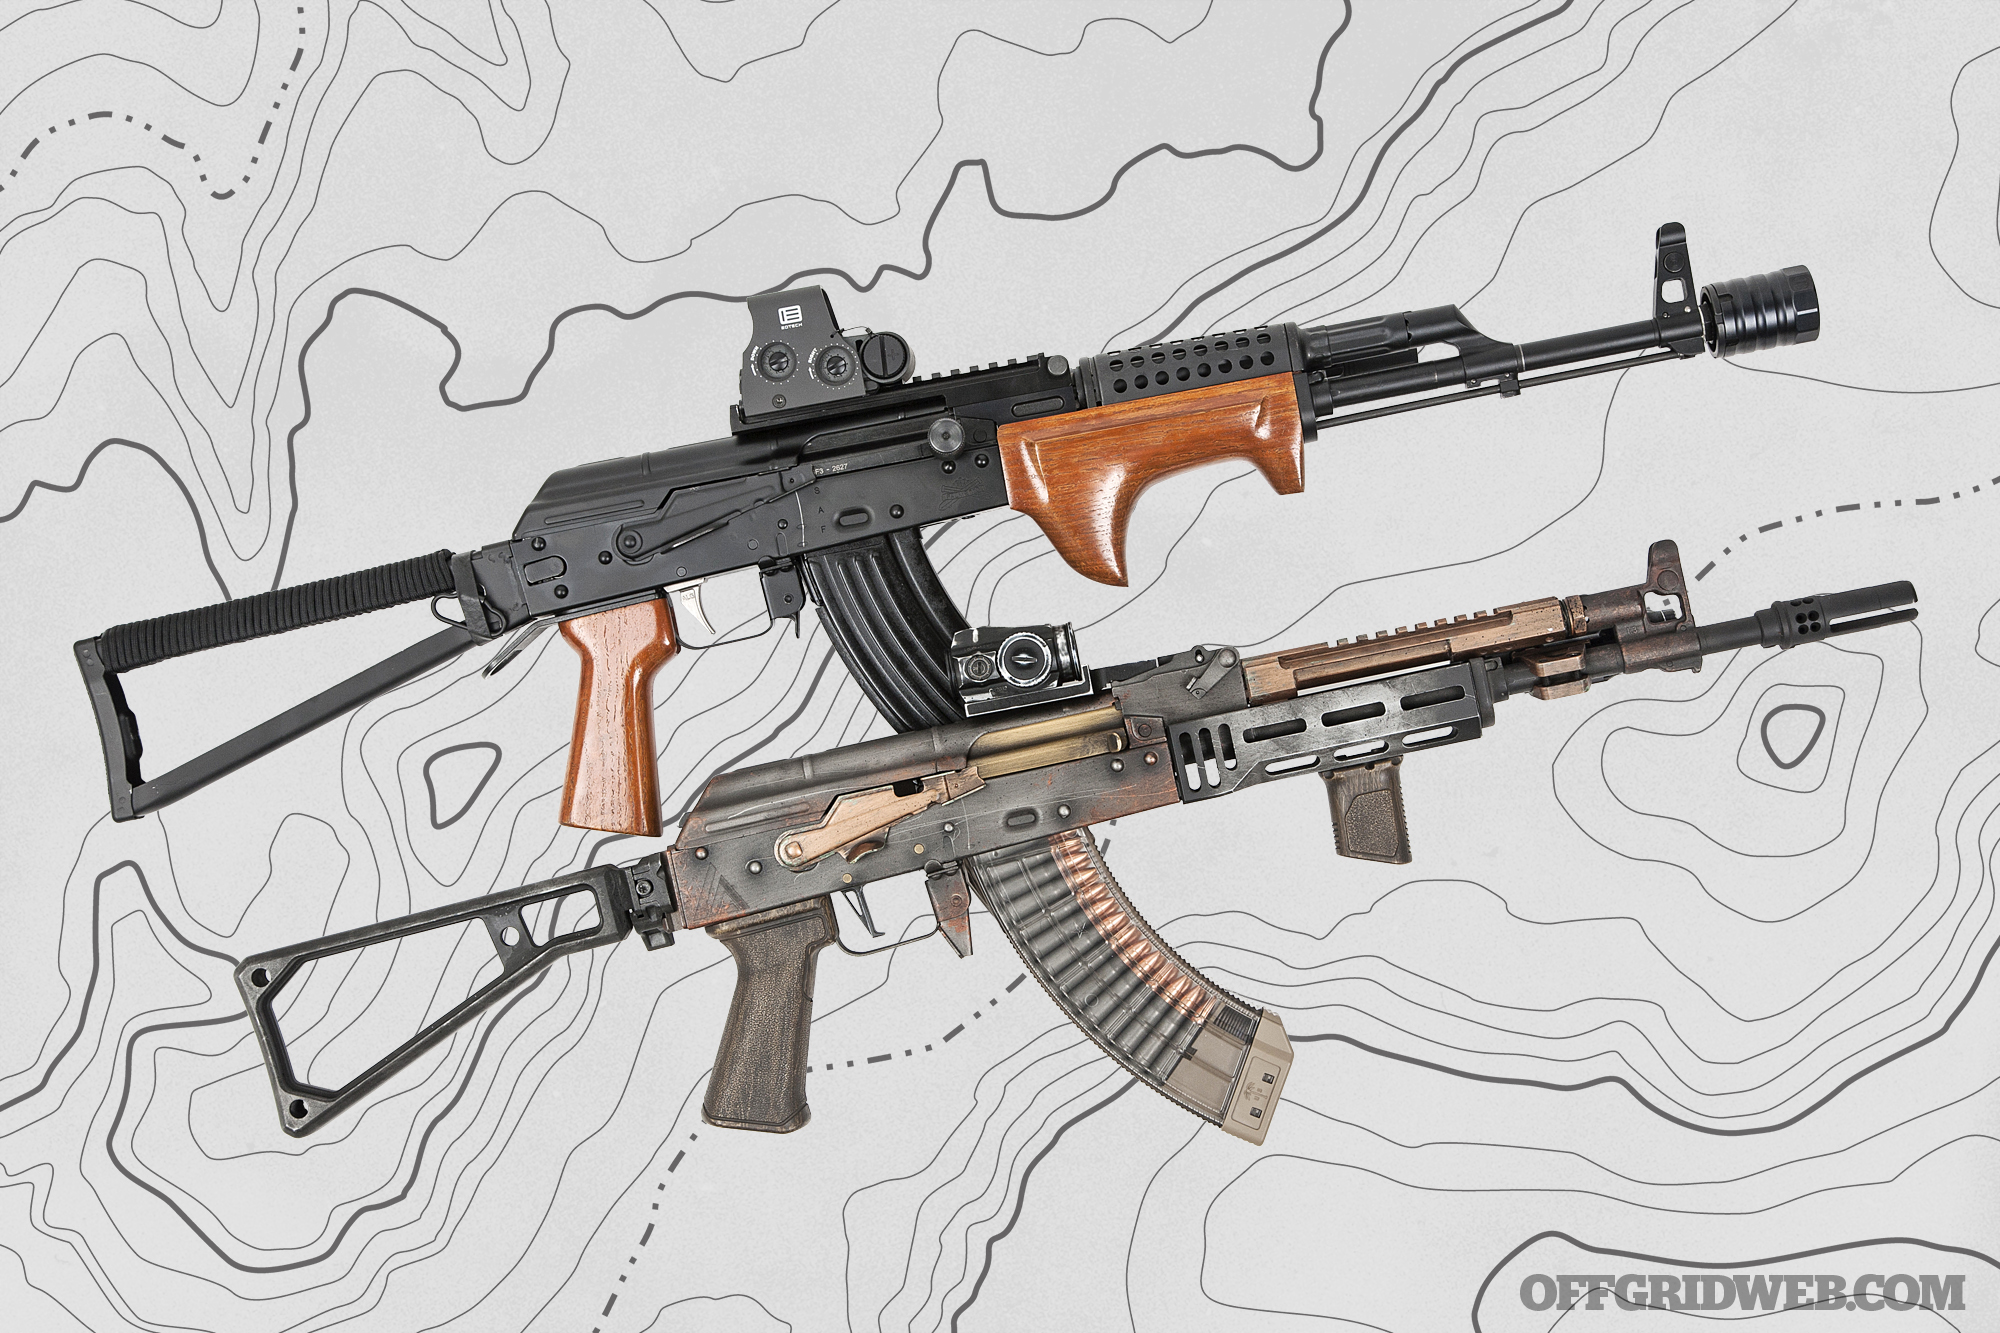
In This Article
If you haven’t already read Part One of our AKs Two Ways series, we recommend you go do so now. It sets the context of this comparison between two approaches to building customized AK-47s. For our full custom build, we teamed up with the AK experts at Lee Armory in Phoenix, Arizona. With their help, we learned how to convert a bare Lee Armory AK receiver and a pile of parts into a fully functional custom rifle, pressing in every rivet and polishing every surface for the best possible results.
Photos by Patrick McCarthy
The Blank Slate Lee Armory AK Build
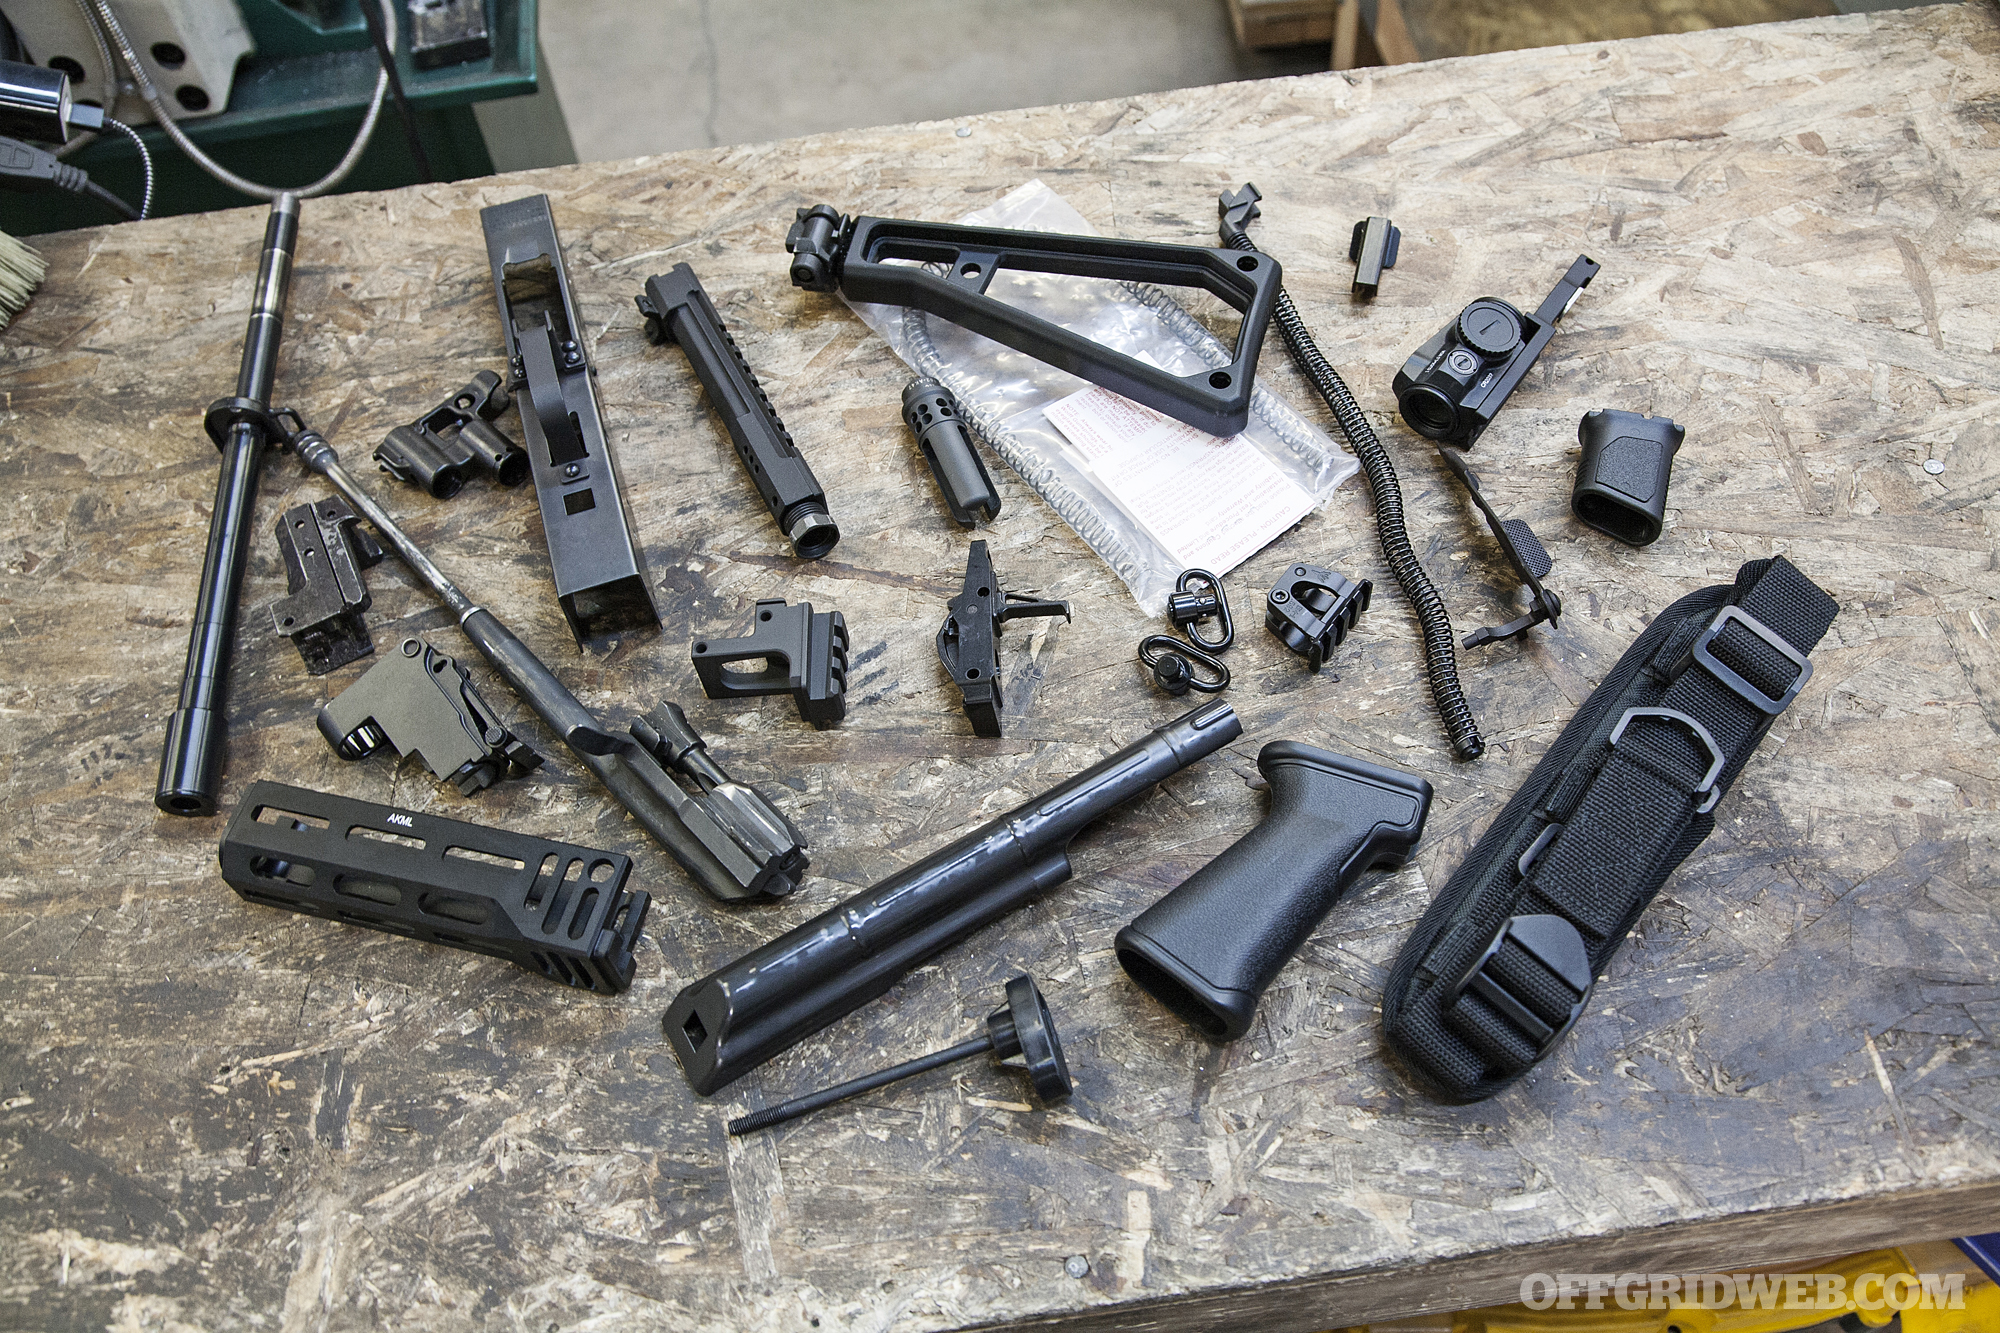
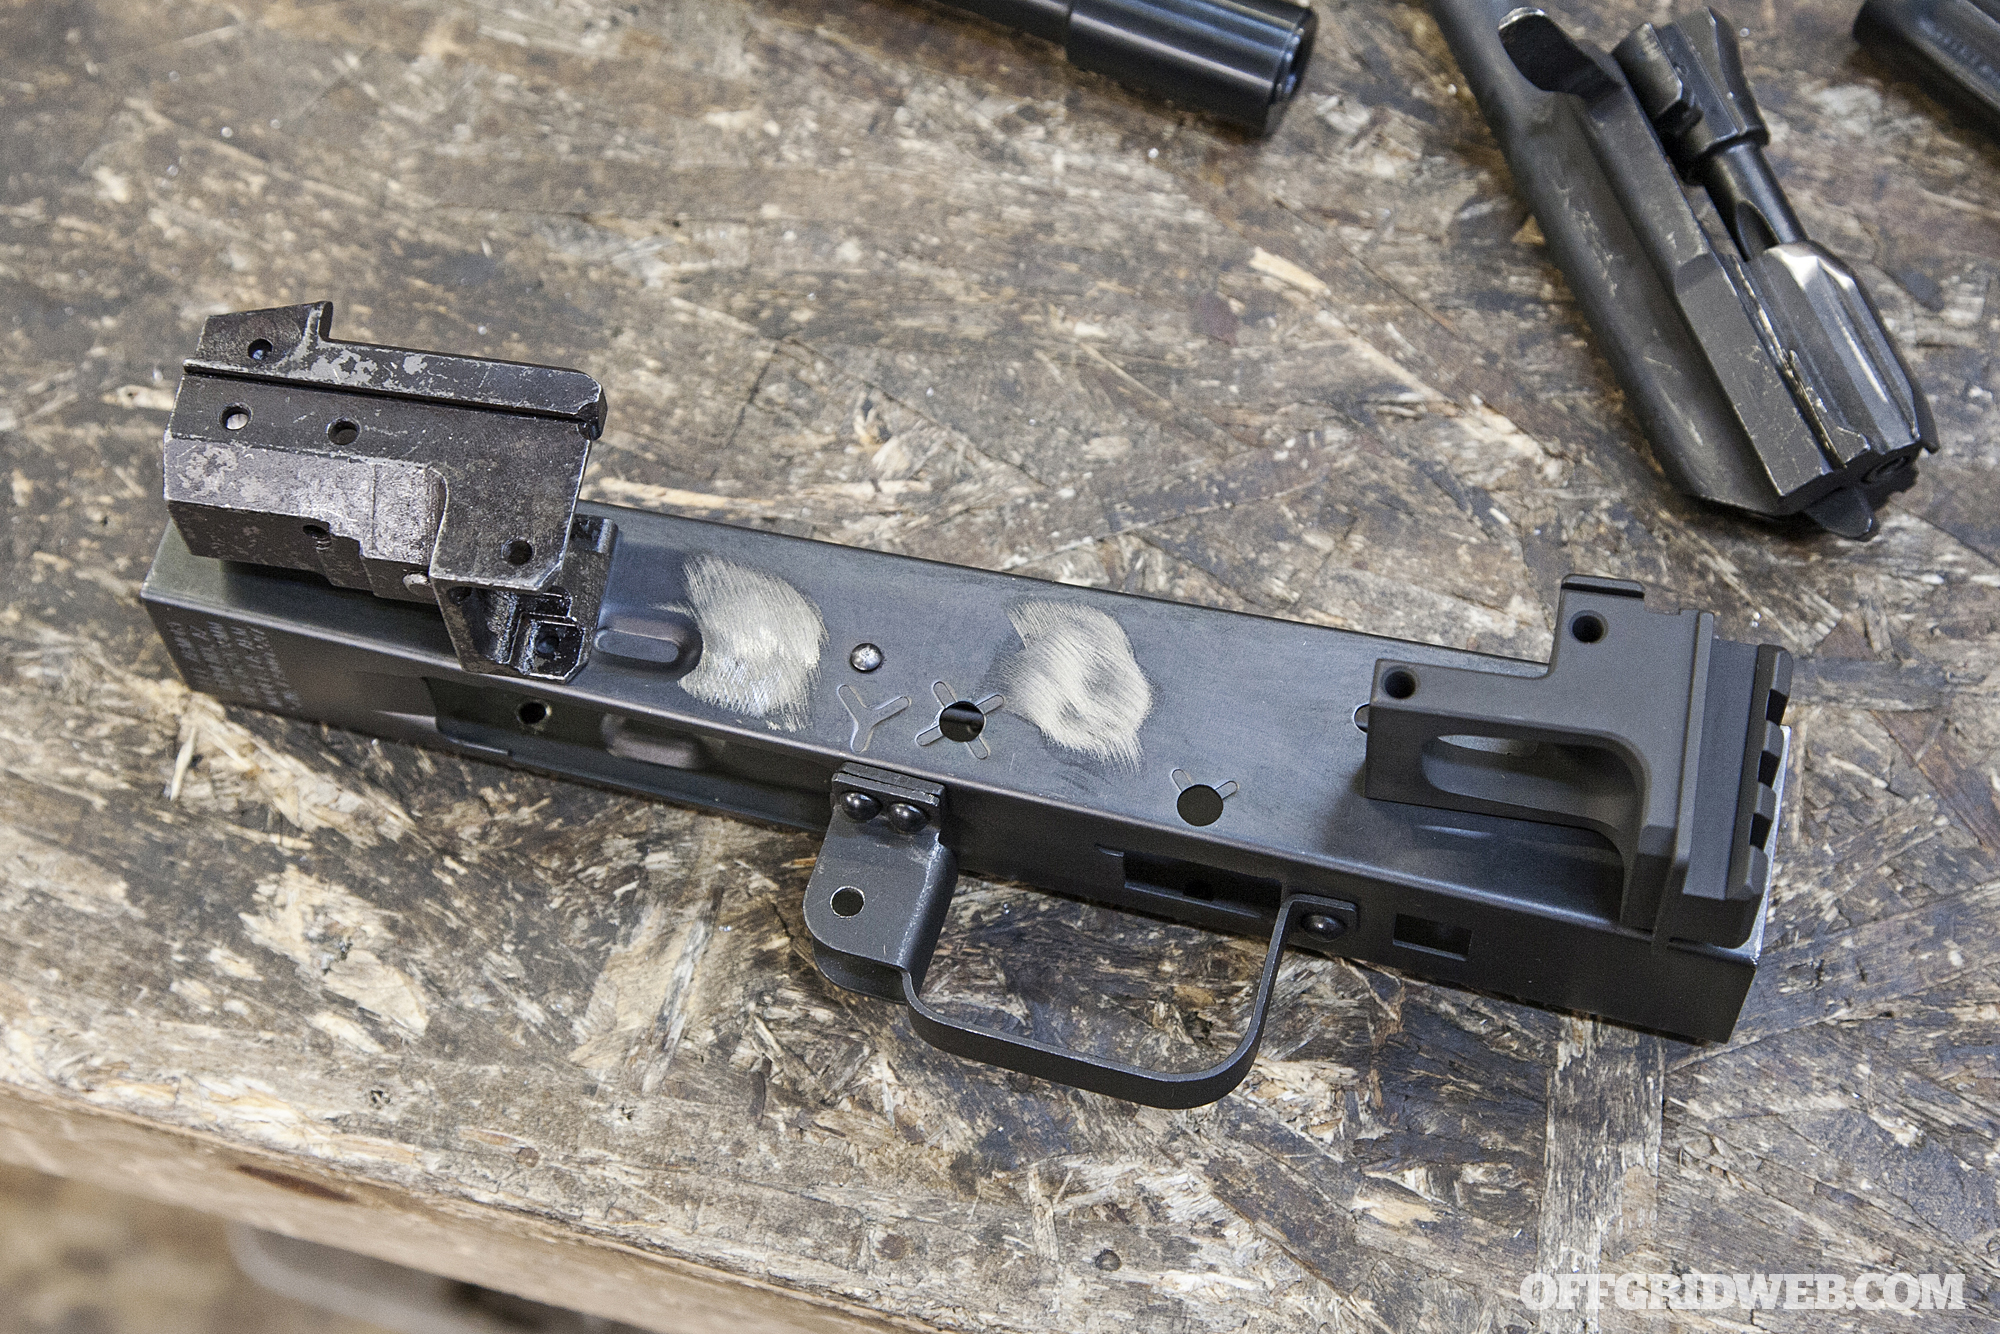
Above: The “pile-o-parts” in raw form, before the builders at Lee Armory worked their magic with them.
Our full-house custom build is based on a Lee Armory AK stripped receiver and parts kit. As previously mentioned, the days of extremely cheap, reliable AKs are probably fully in our rearview mirror. While modding an off-the-shelf rifle does allow the advantages of immediate gratification and financial burden spread out over time, the amount of money you save total may not be a significant incentive for some.
By contrast, a true custom-built AK is the long-game solution to those looking for a single AK-for-every-occasion. We know that there are true Kalashnikov aficionados who’d rather (and do) rely on this Soviet-era workhorse instead of an AR. For them, we suspect there are both practical and existential advantages to having an AK platform built not just for them, but to them.
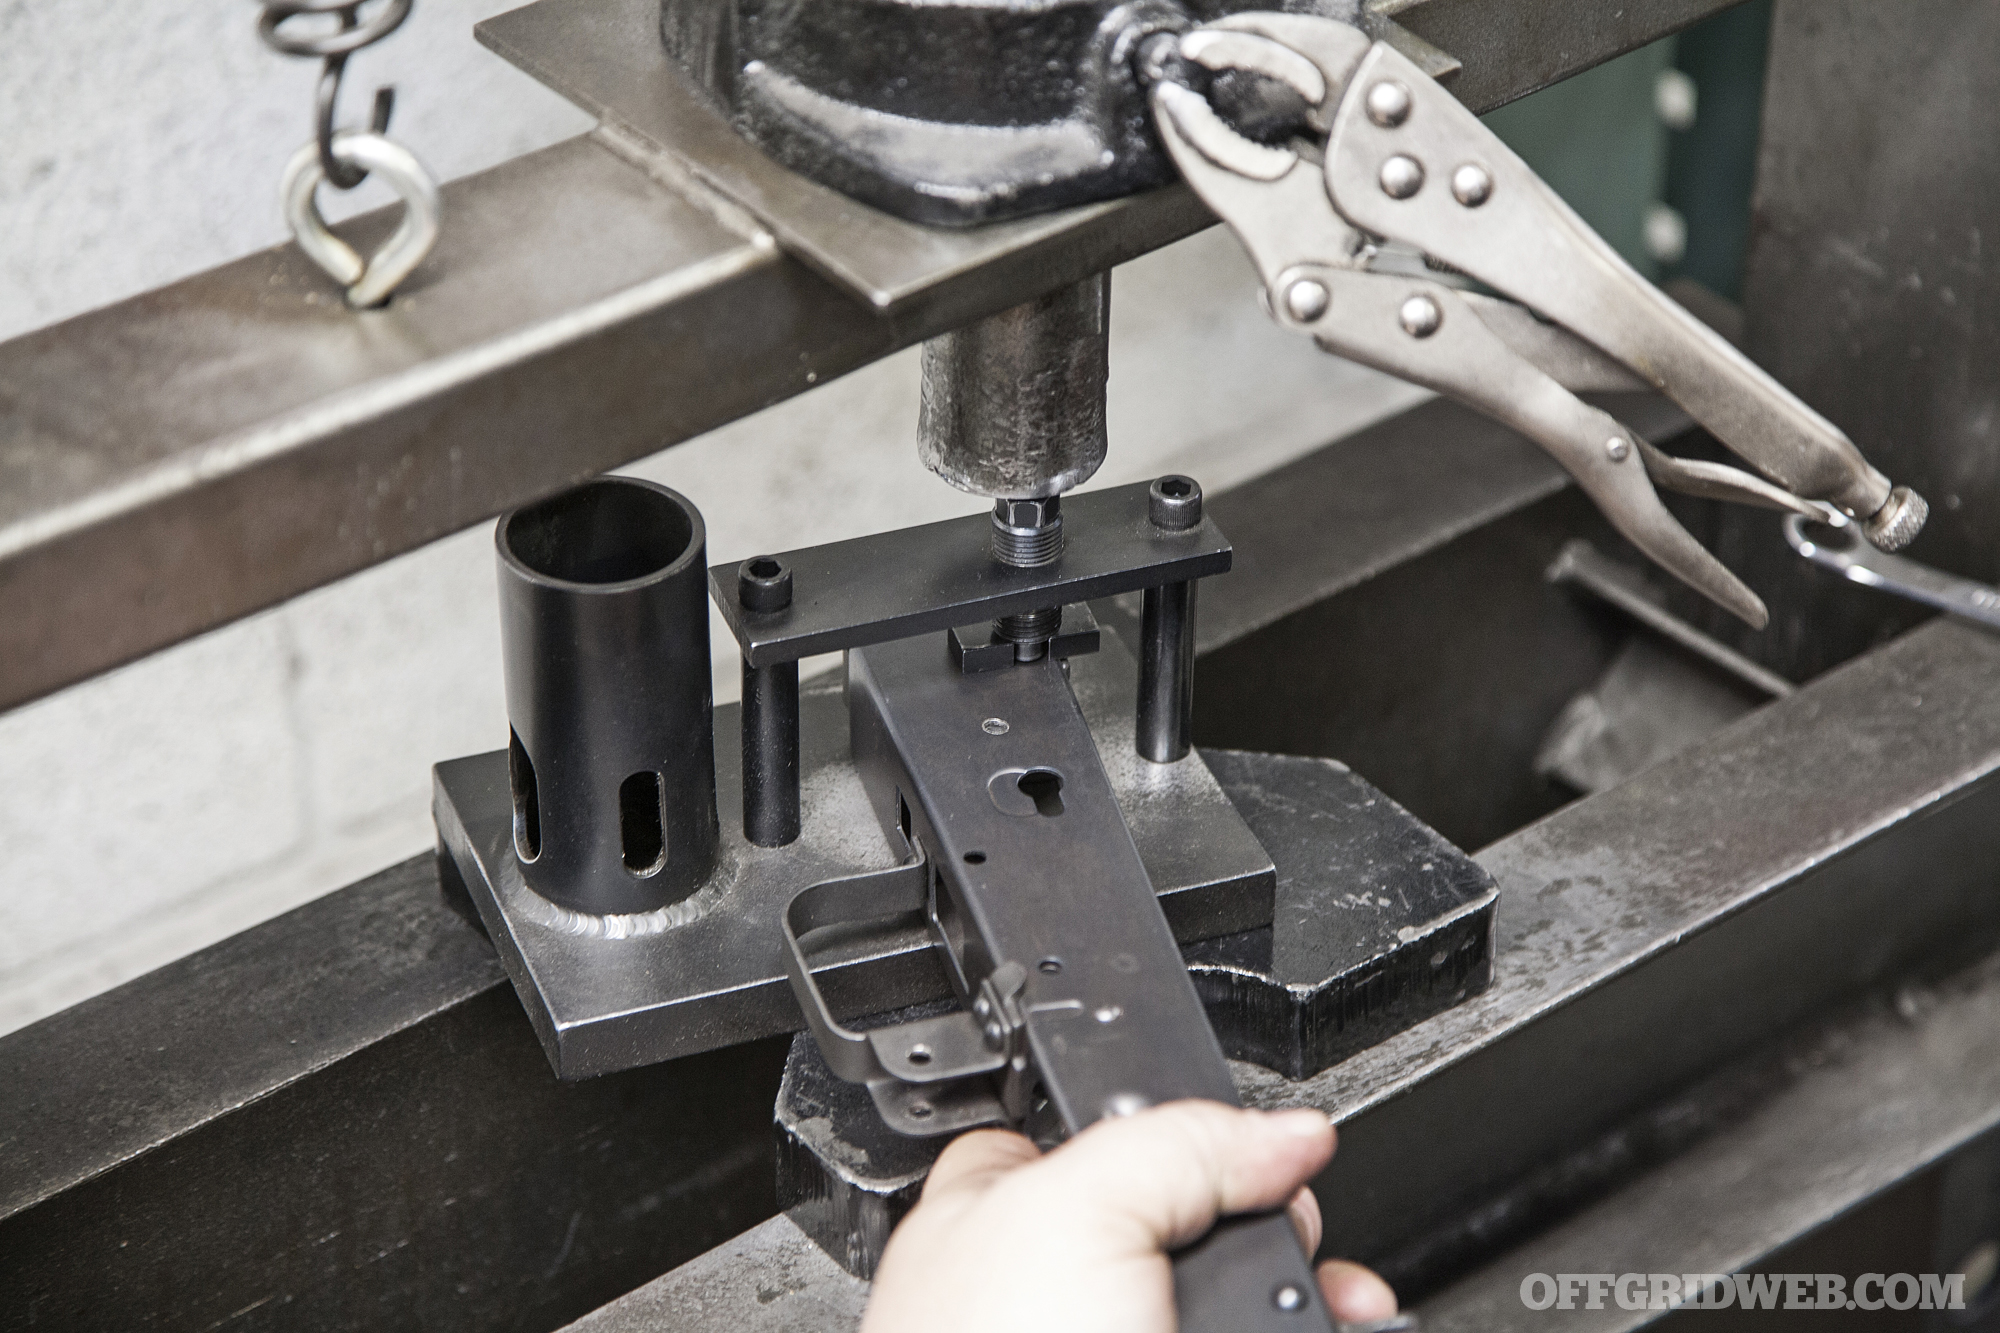
Above: Unlike an AR parts kit, which can be assembled while watching TV on your couch with hand tools, AKs require a more artisan approach to put together properly.
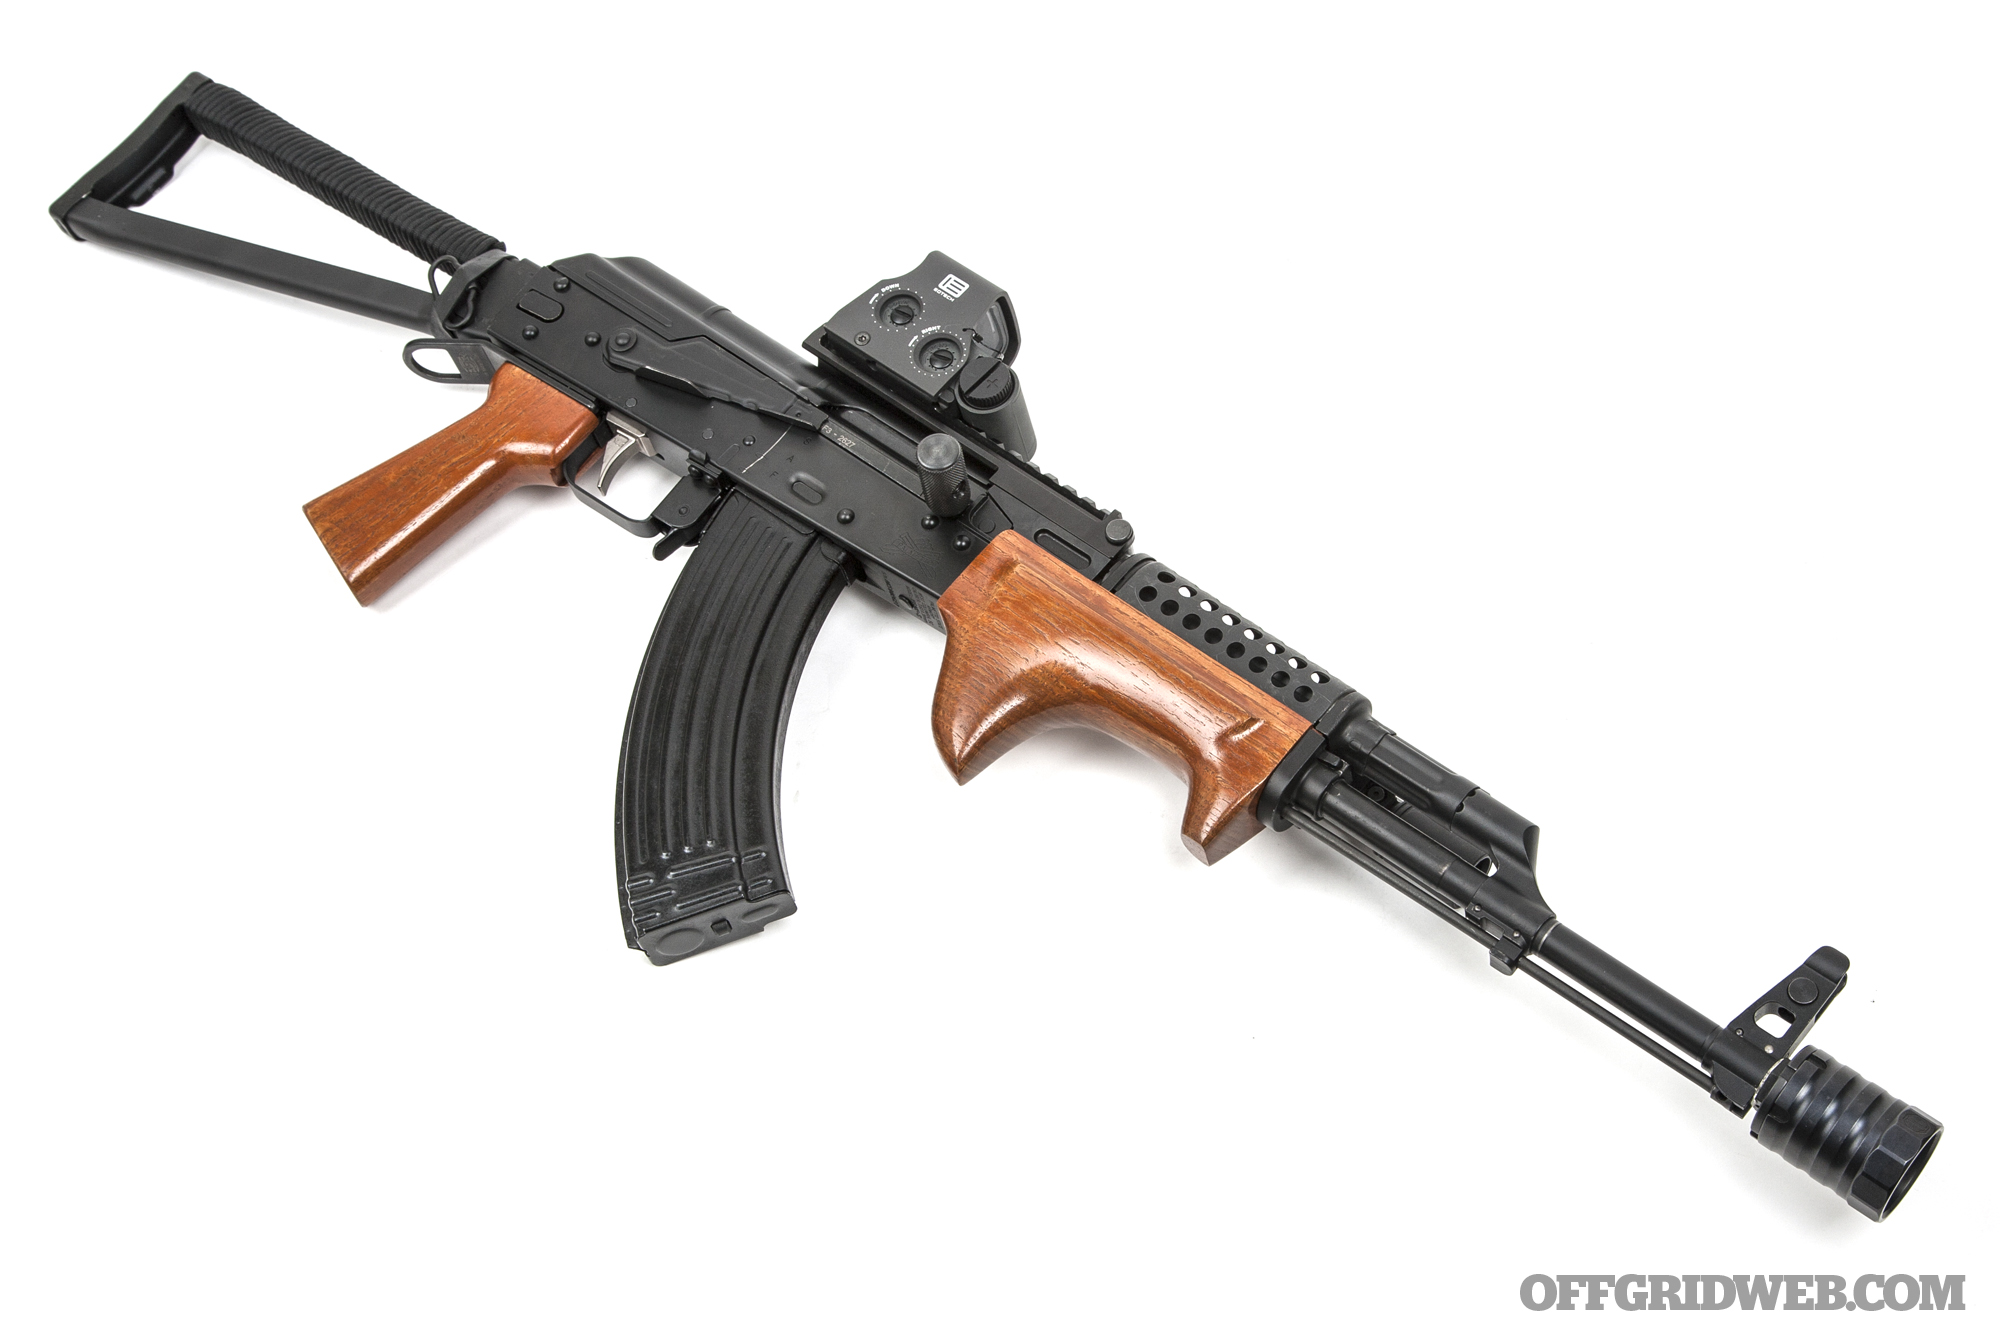
We decided on a fixed-stock pattern, stamped receiver to maintain maximum access to aftermarket accessories. On that note, we’ll start by pointing out that “fixed-style rear trunnion” no longer means the same thing as “fixed stock.” To that end, we capped the back end with a 1913 Picatinny rear trunnion from Occam Defense. We then clamped their Hex 2.0 folding stock onto it. The beauty of the 1913 rear trunnion is it allows you to convert from fixed to folding stock, and swap stock styles, ad infinitum per personal preference.
For internals, we used a standard bolt and bolt carrier, beefed up with the same ALG Defense enhanced recoil spring used in off-the-shelf conversion. But instead of the ALG trigger, we chose the cassette-style counterpart from CMC Triggers. CMC has been in the AR trigger game for a long time with a well-established track record for performance. Admittedly, we’ve had their AK trigger in our parts bin for longer than we care to remember, just waiting for a Kalash to drop it into. The wait was worth it. The crisp, single-stage 3.5-pound trigger is almost frighteningly good when compared to legacy AK service triggers. There’s an audible click during reset, but the reset is so immediate you might miss it under recoil. It makes running this trigger at speed too easy, given the skyrocketing prices of 7.62x39mm ammo.

We finished off the fire control suite with a Krebs Custom safety — another enduring staple in the AK aftermarket — and a RAM Tactical extended magazine release. It took us a fair amount of digging to find RAM Tactical, but this is the second AK build we’ve used this magazine catch on and we’re very happy with the result. It’s extended and easier to actuate without being intrusive or ungainly.
Above: We elected to delete the side scope rail from our receiver to better accommodate the Occam folding stock.
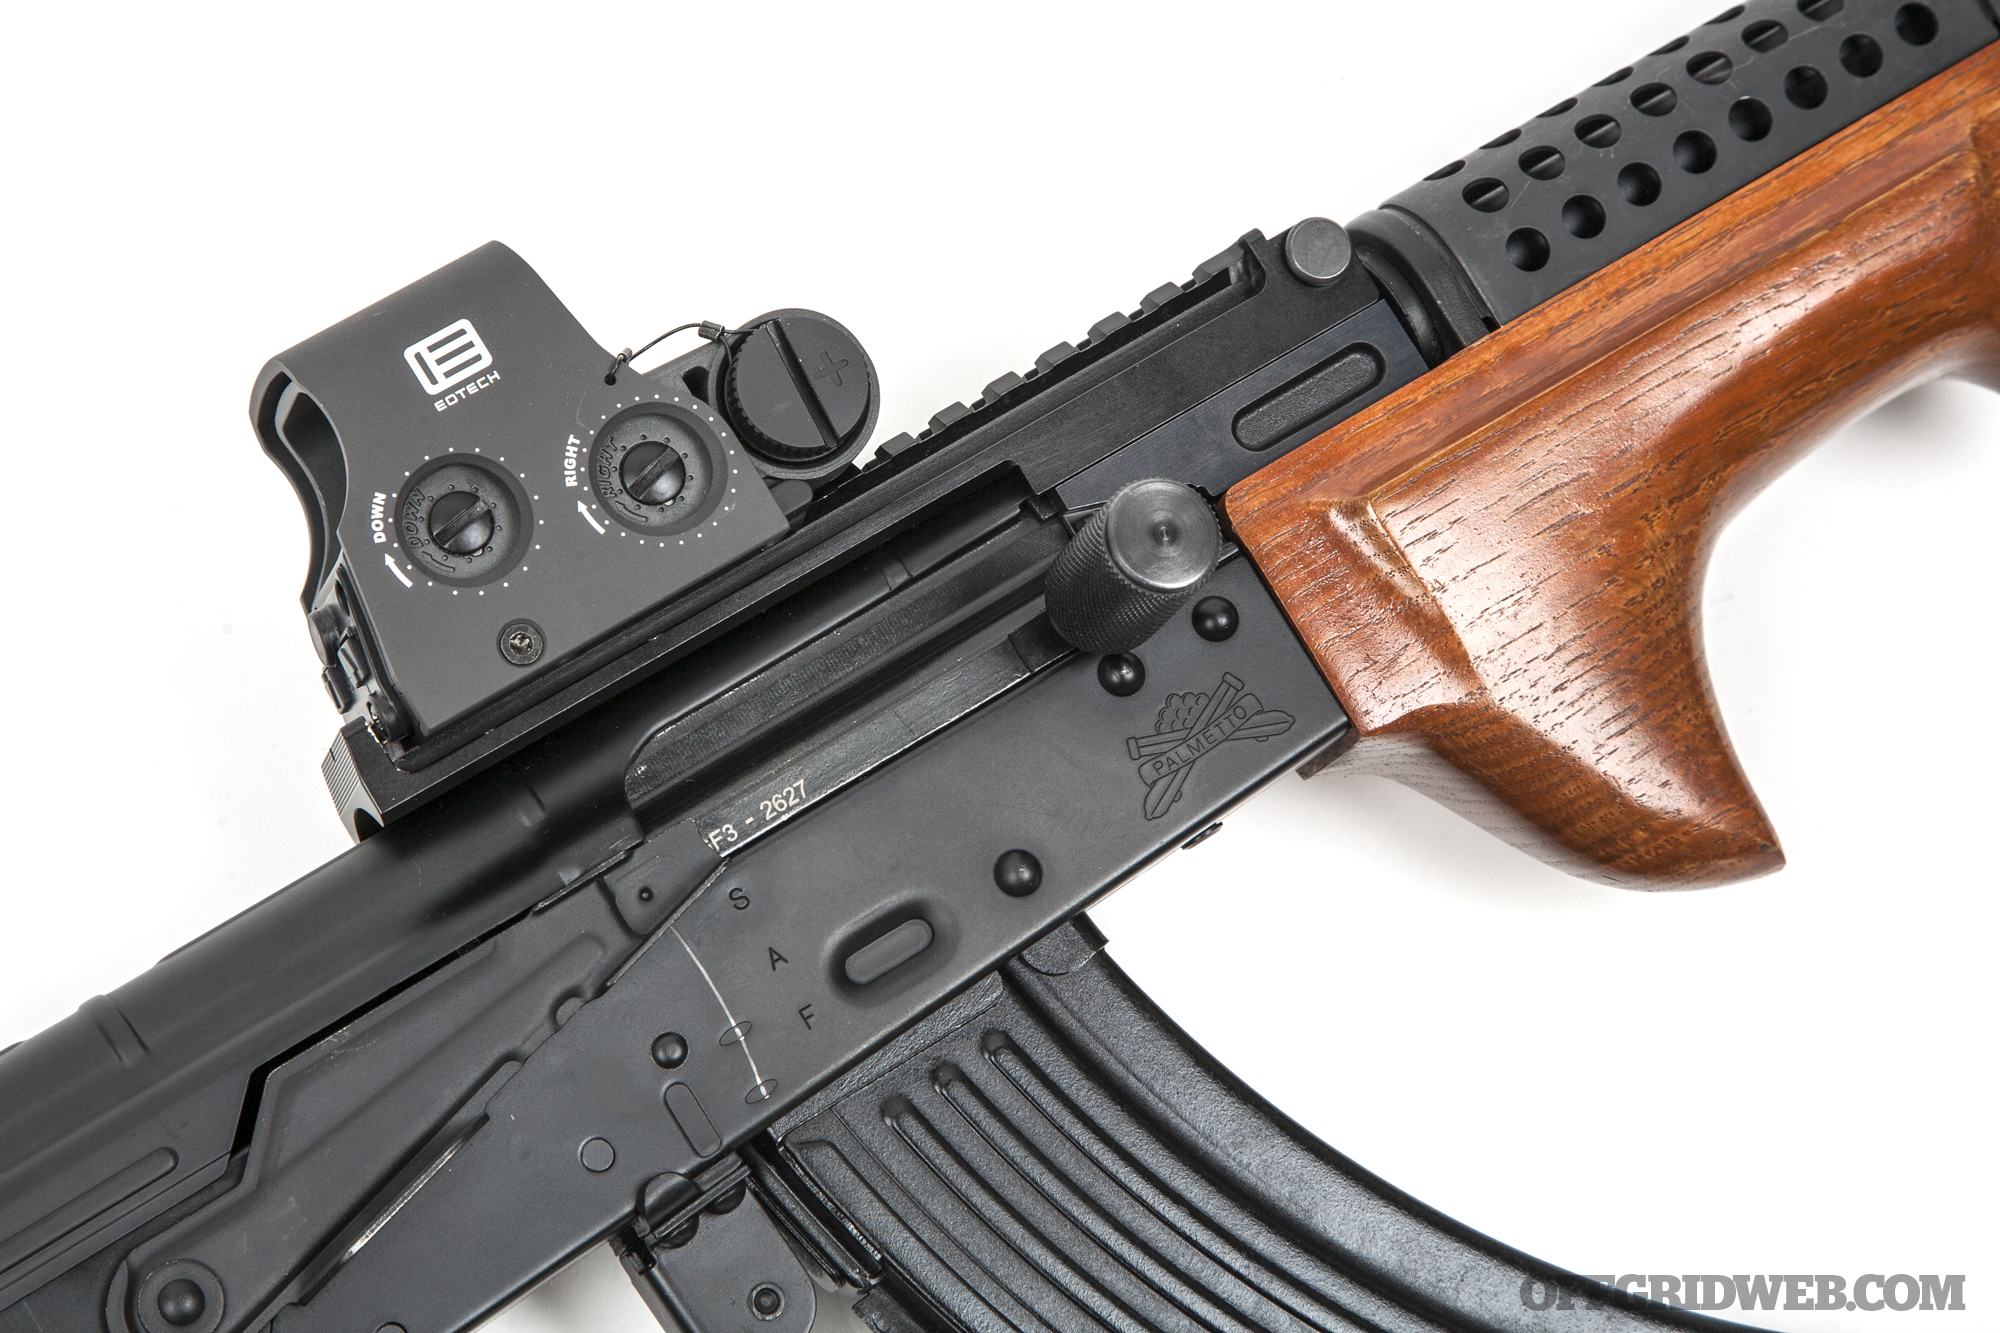
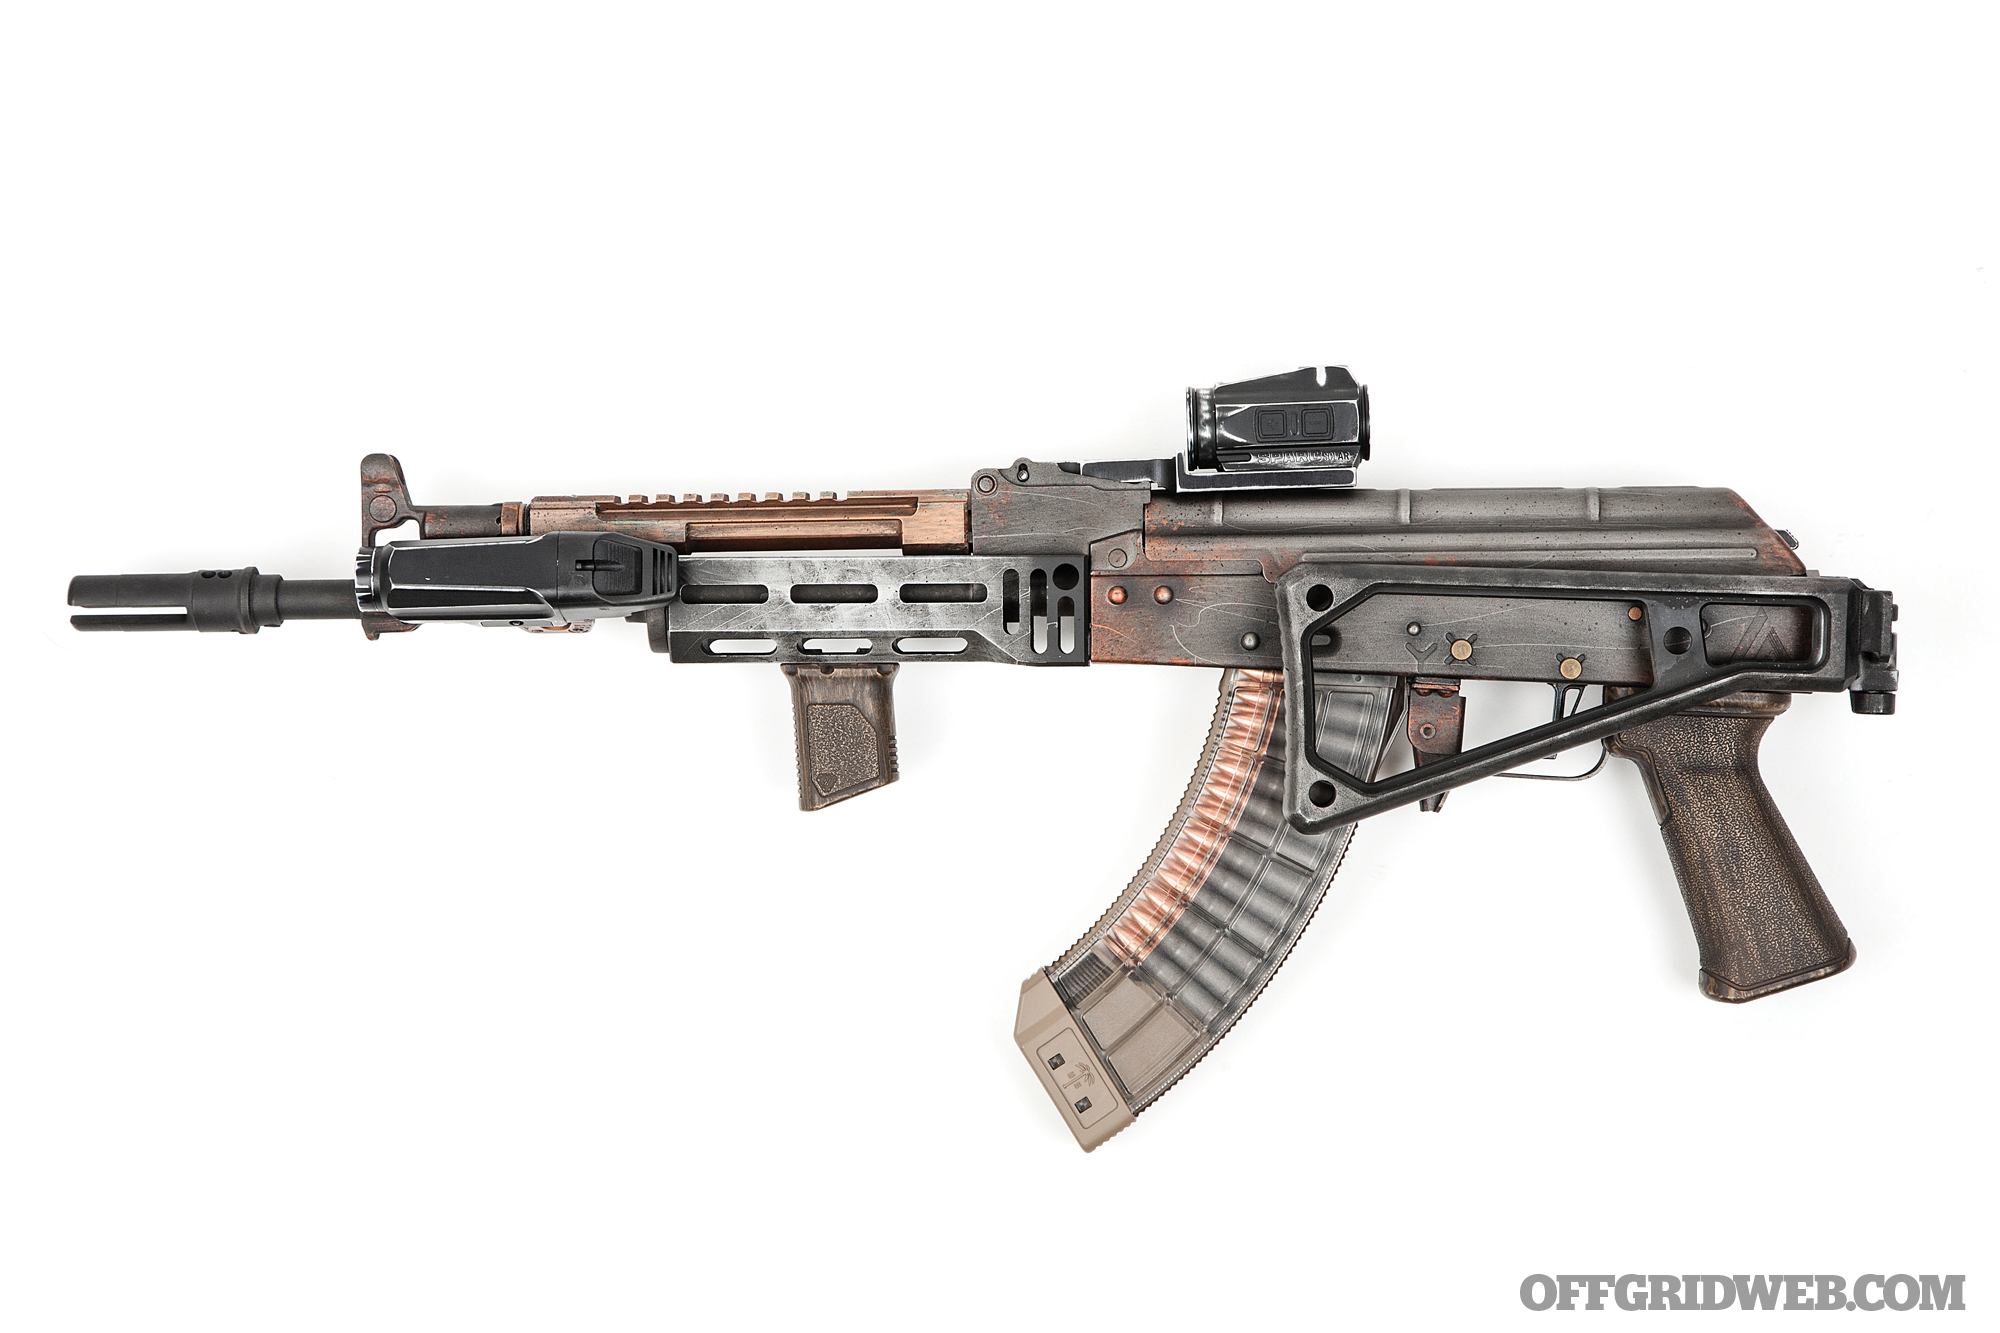
Our Lee Armory AK omits the standard side rail optics mount to allow the Occam Hex folding stock to sit tighter against the receiver. In its place, Lee Armory installed an Attero Arms Bravo Mount. This mount replaces the rear iron sight with a low-profile, footprint-specific tail for direct-attaching optics. The Bravo version will accept any optic with an Aimpoint Micro-style footprint. In this case, we used a Vortex SPARC Solar. The SPARC has gone well above-and-beyond to prove its reliability — one of our contributors literally smashed one against a tree and threw it in a fire, and it still worked — and, last year, Vortex upped the SPARC’s capability by adding a solar backup. We figured, on a survival AK, an optic that can be supplemented with solar power was a good thing to have on hand. It should be noted that the Attero line of mounts also feature a built-in backup iron sight in the form of a pistol-style rear notch. While this doesn’t offer the adjustability for range found on a standard AK-style rear sight, for quick shots up close in the event of an optic failure, it’s a good repeatable option to have.

Our handguard setup took some serious thought. There are an ever-increasing number of modern handguard options for AKs. Many are extended to the gas block or muzzle to give you more room for both hand position and accessory mounting. Some of those require you to grind off either the sling loop or the entire handguard retainer. That’s not the worst thing in the world if you’re confident in your choice of handguard, or at least handguard style. We decided to play conservative and go with a setup that wouldn’t require any permanent removal of the lower handguard retainer. TDI Arms specializes in AK accessories and theirs have seen both law enforcement and military service in a couple of locations around the globe. We also used their Enhanced Russian Grip for our pistol grip.
TDI’s lower handguard is a light, rugged, effective way to incorporate a few M-LOK slots into your AK setup. It also features a left-side QD socket for direct attachment of a sling. We didn’t feel there was enough room to comfortably mount a weapon light on the handguard — we’ll get to our solution for that shortly — but we did want to attach a forward grip or stop to increase controllability under rapid fire.
When people first attempted to mount early gen vertical grips to AKs, problems were encountered during reloads. AR mags drop straight down, so you can mount a forward grip anywhere you want. But the longer, curved AK mags have to be “rocked” out and a long vertical grip too far back could make reloads literally impossible. We still wanted a way to maximize control on the front end of the gun without road-blocking our own reloads. Our goldilocks fit came from Strike Industries. Their short angled vertical grip measures a demure 2.3 inches tall and weighs less than 2 ounces. Even on the shorter TDI Arms lower handguard, there’s no interference with reloads and no substantial mass added to the front of the gun. These grips also feature a channel through the bottom to manage excess cable from lights and laser switches. We wound up not needing this feature, since we decided to equip our build with a Streamlight RM-2 weapon light.
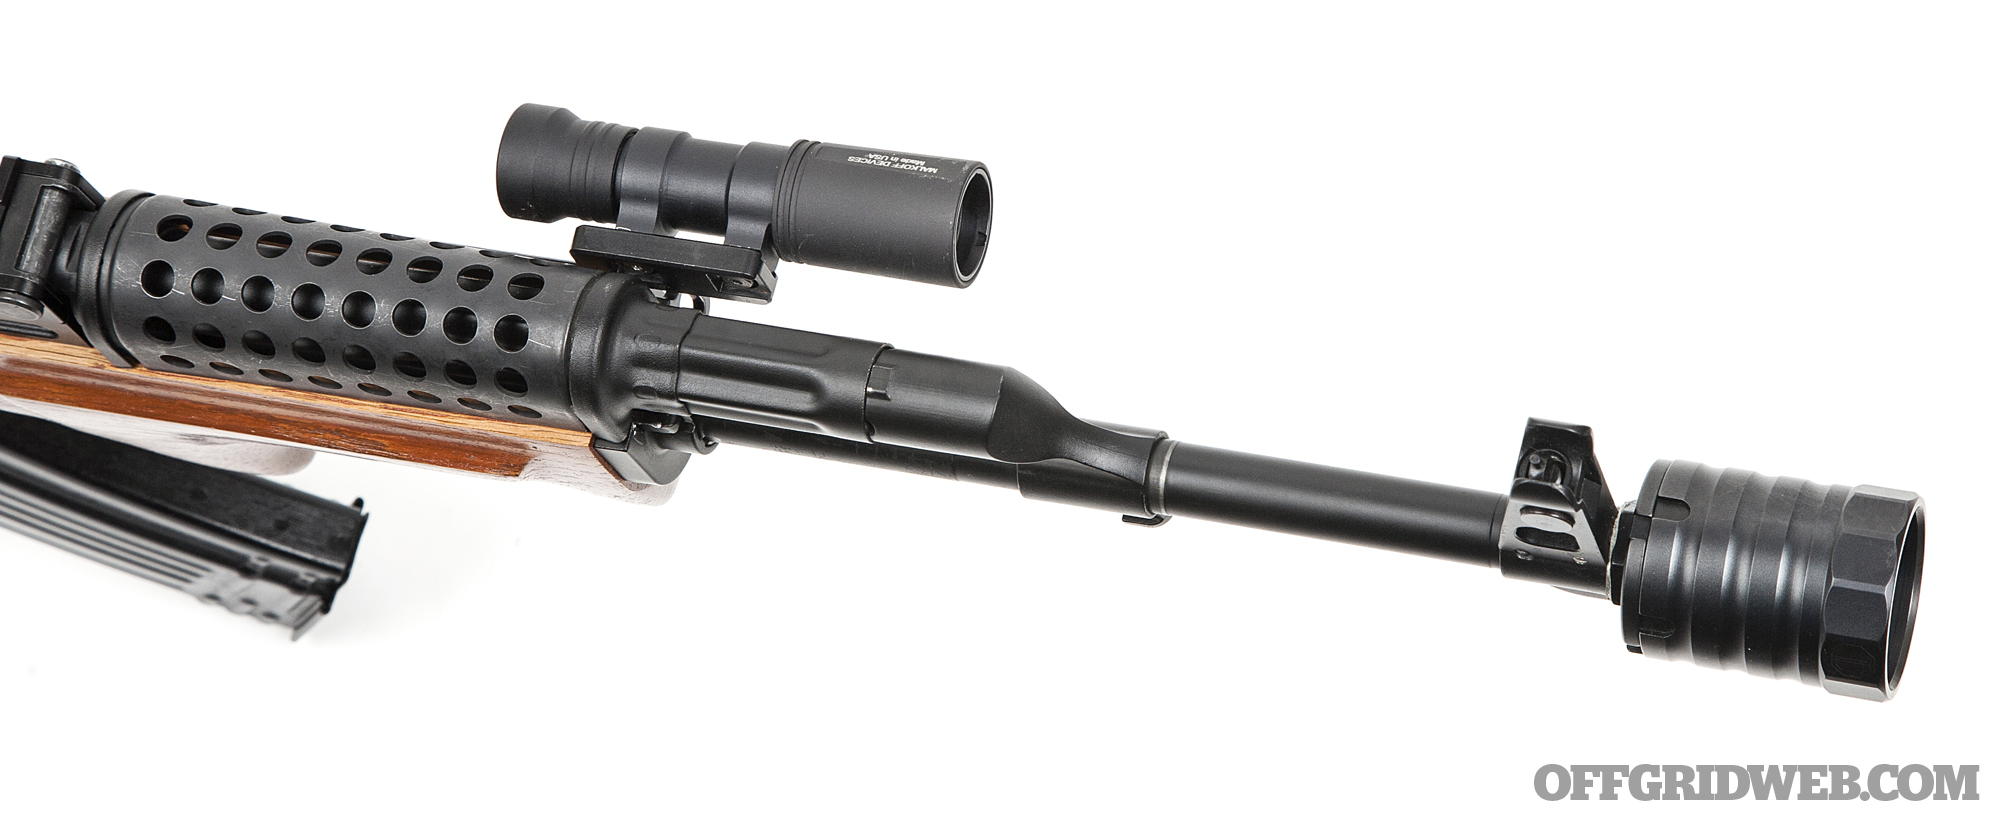
The RM-2 is a 1,000-lumen rifle light that can be activated with either an included tape switch or a pressure pad built into the rear tail cap. We chose the latter option and mounted it directly to the barrel via an RS Regulate BM-1 light mount. The BM-1 is essentially a short section of Picatinny rail with a hinged clamp for attachment directly to the barrel. We were able to get the BM-1 attached between the handguard and gas block, which put the light close enough to our hand to make the tape switch unnecessary.
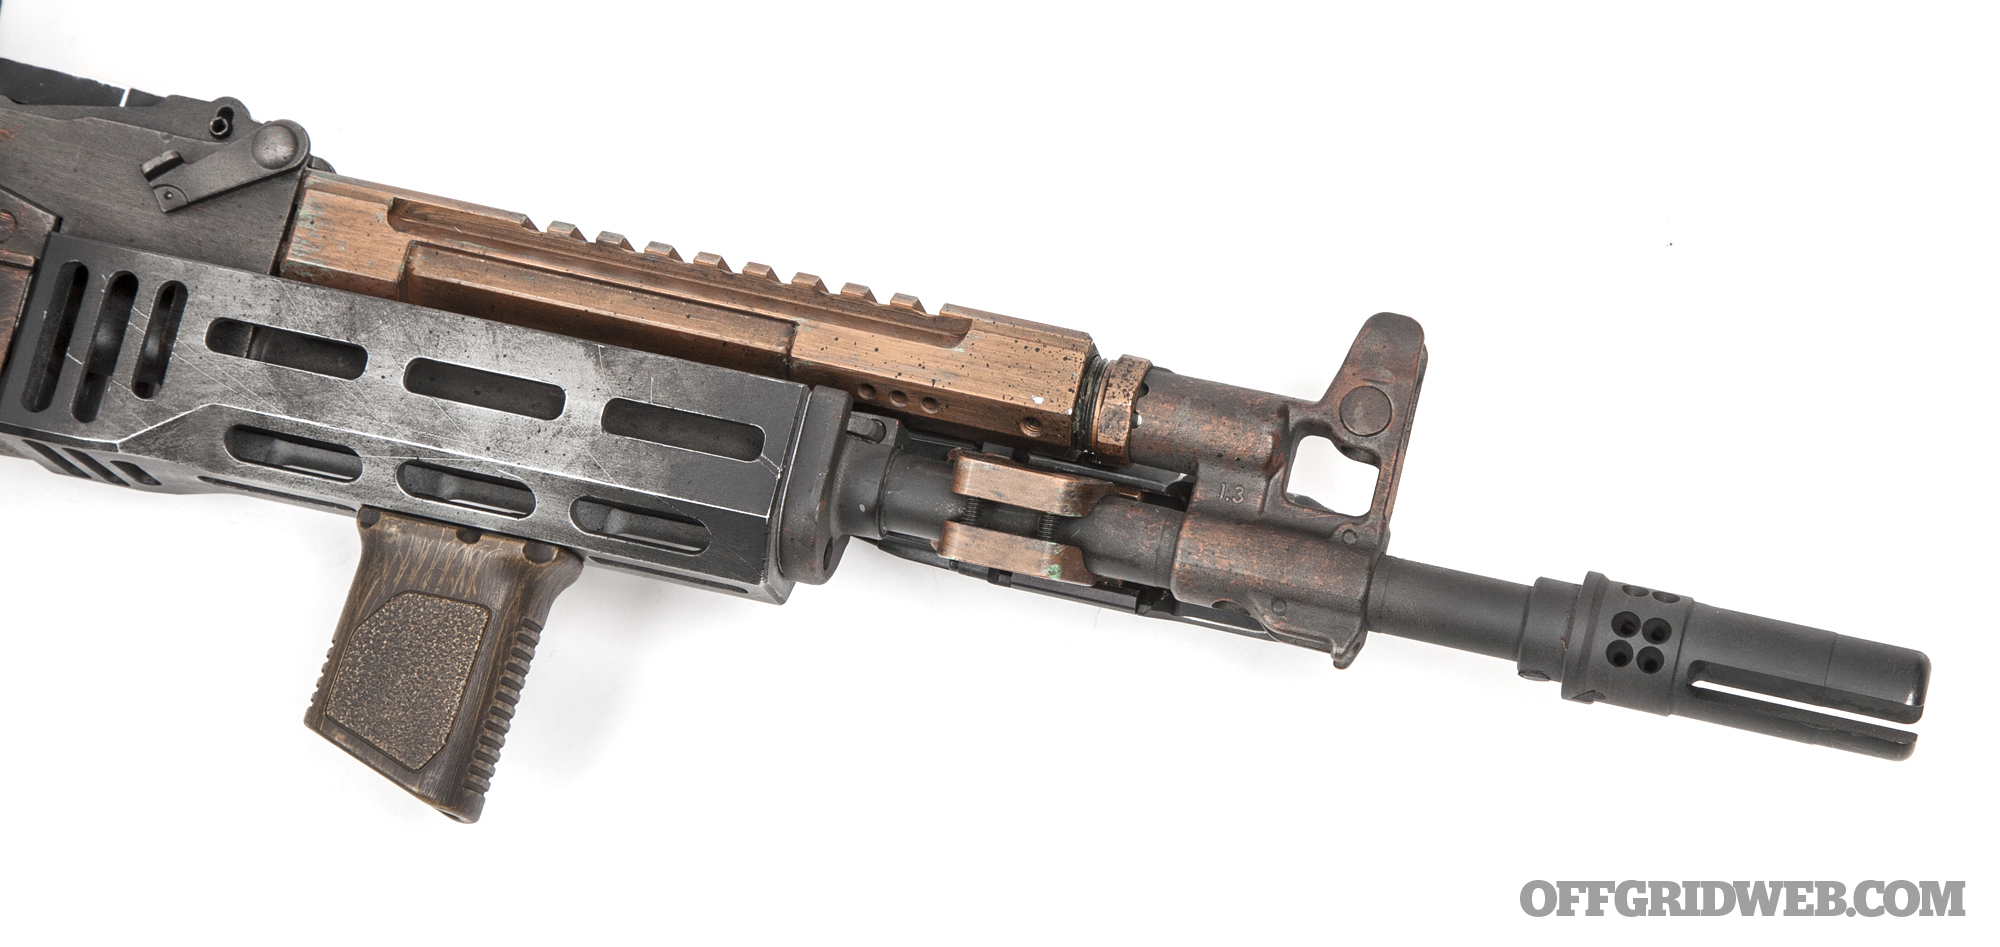
We did still decide to install a railed gas tube on this build. Even though it remains unused at time of writing, “rail estate” on the AK is in short supply as-is, so we wanted to build in some additional mounting space on the off chance it’d be needed in the future — whether we add more accessories or just change the configuration of the existing ones. There are a couple of different options out there, and we went with Midwest Industries. The folks at MI have a well-established track record for durable, ergonomic meat-and-potatoes accessories at reasonable prices, and their railed AK gas tube was an easy drop-in addition to add to the adaptability of this rifle.
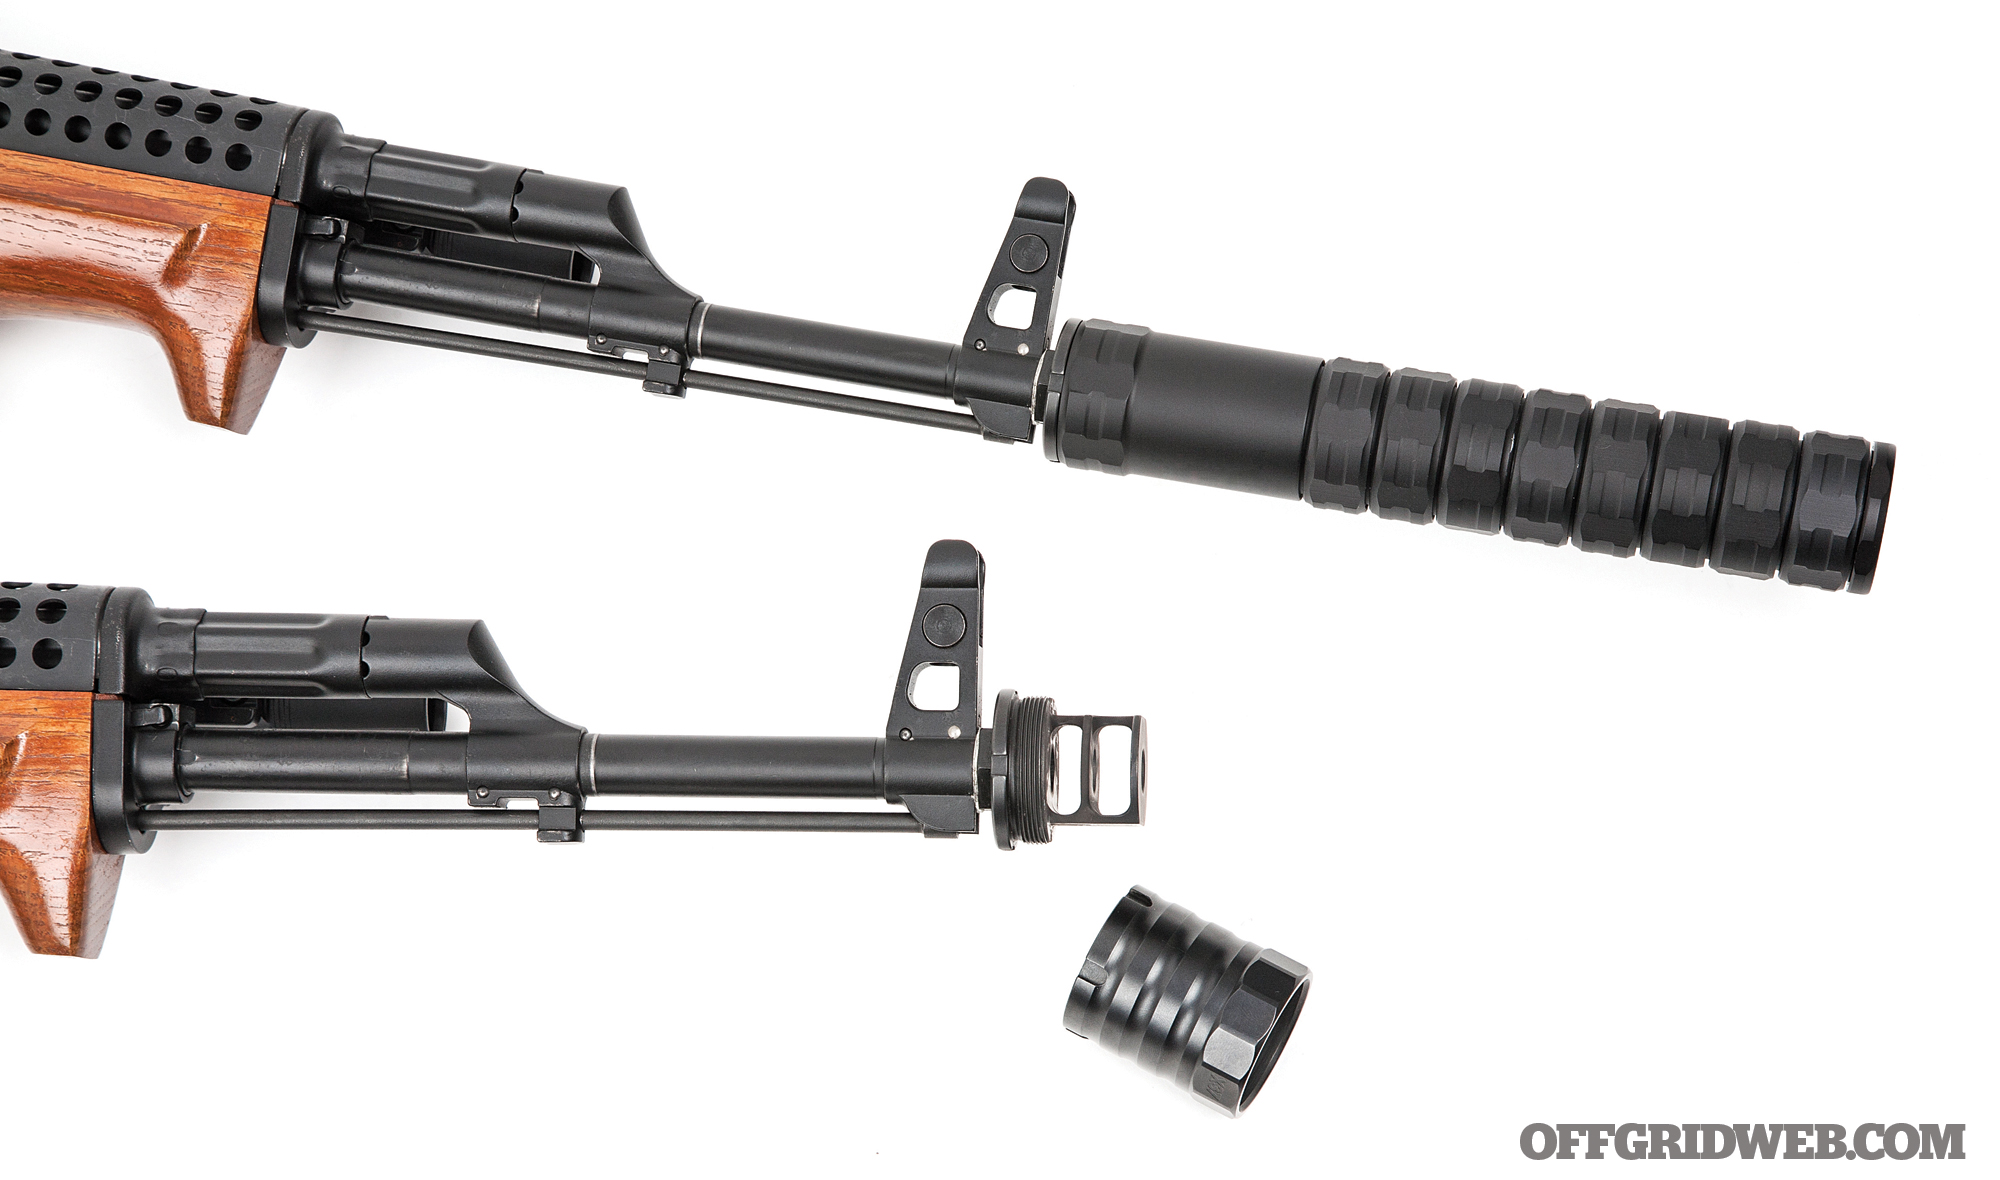
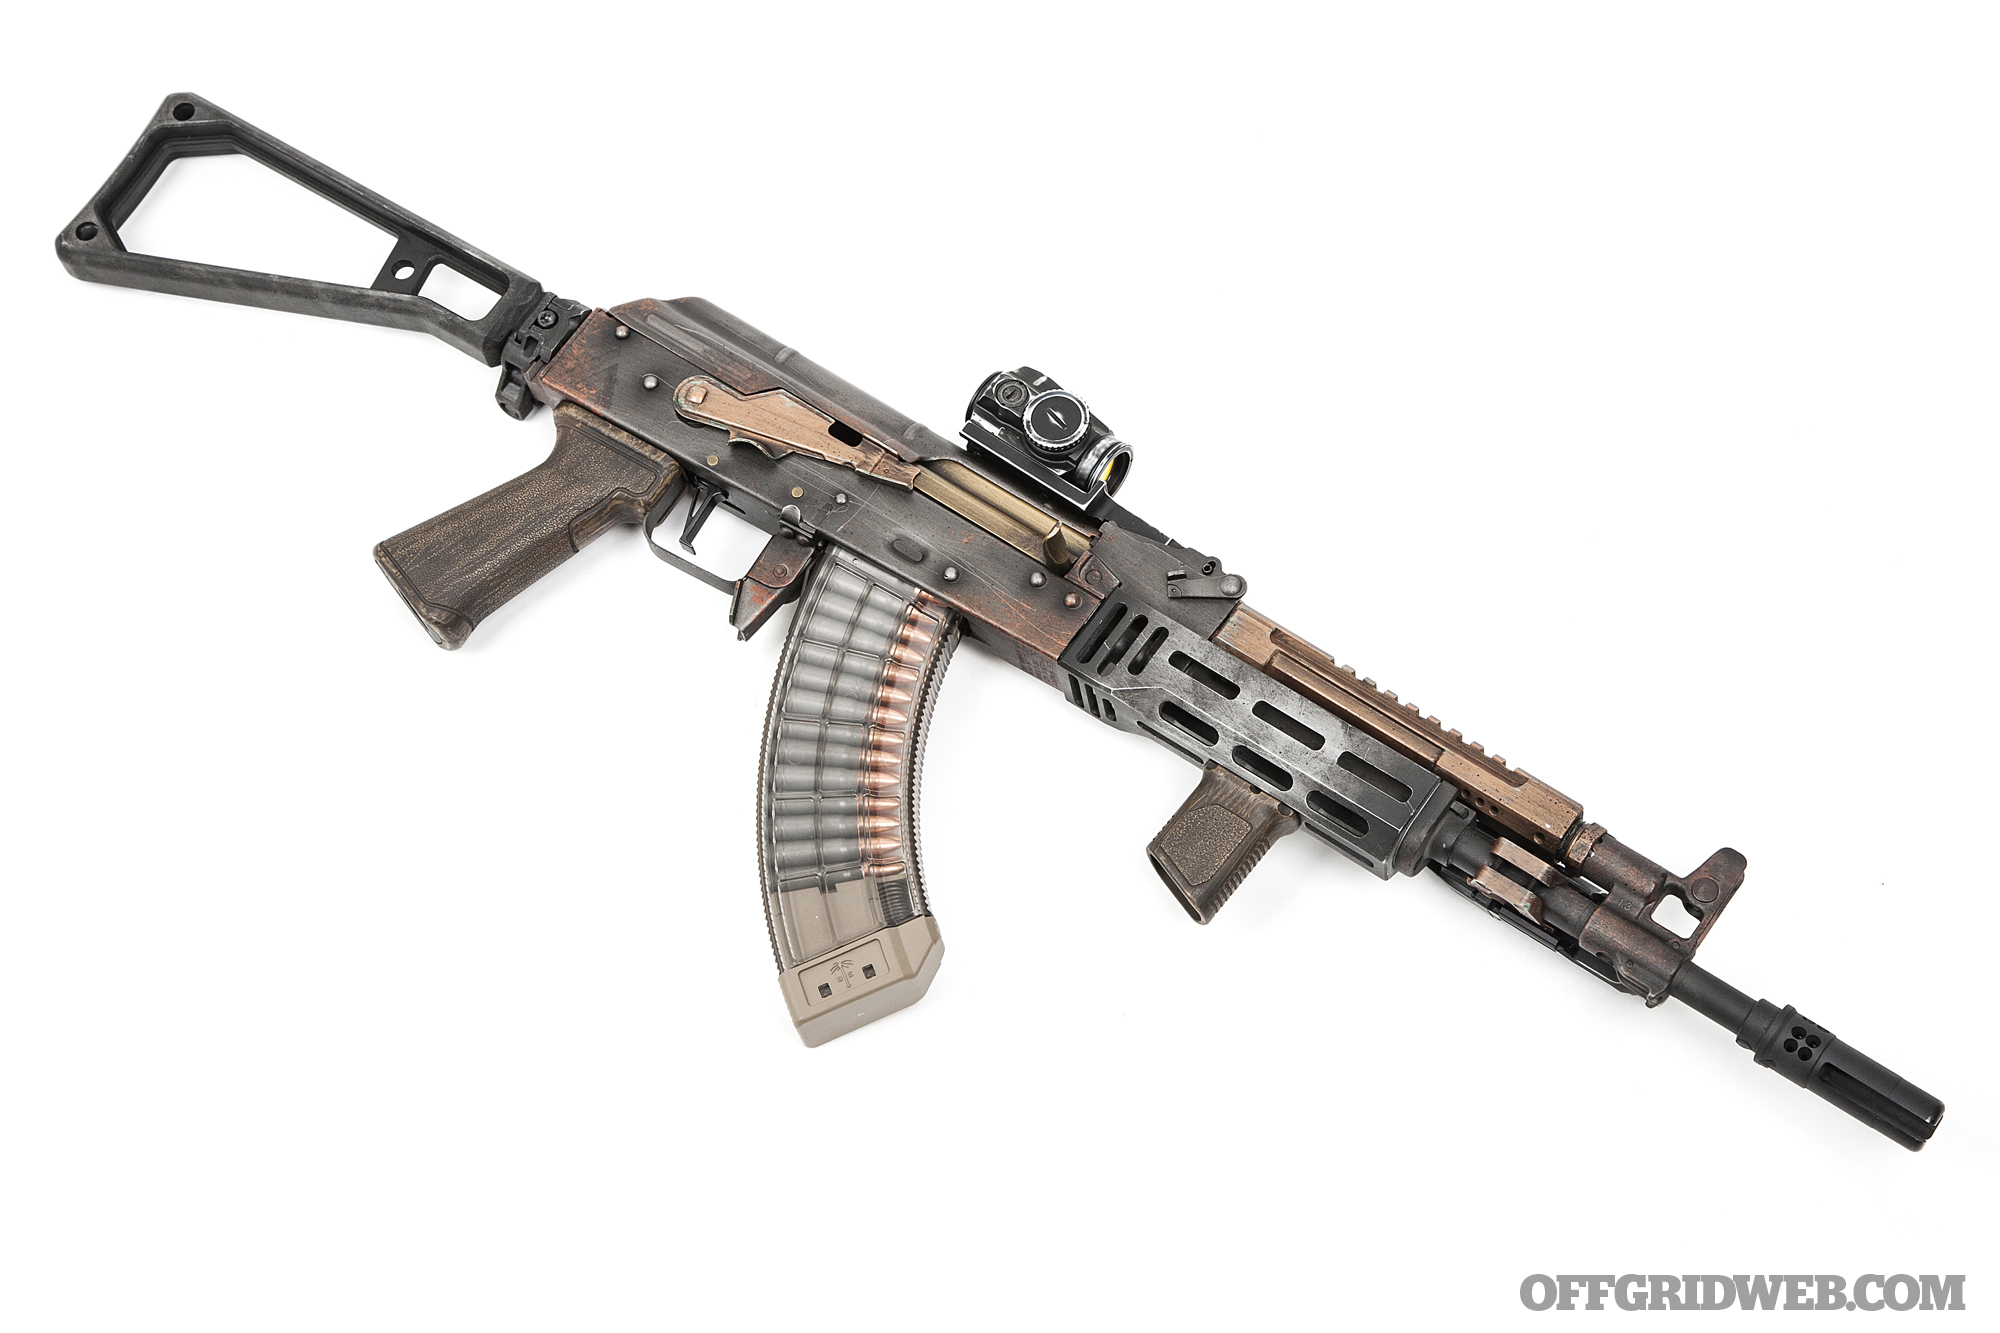
The gas block is a combination gas block/front sight base from JMac Customs. While gas block setup is largely a function of personal preference, we prefer the combo gas block because it’s fewer parts and a little less weight on the front of the gun. It also allows you to shorten up the front end if you choose to pin and weld your muzzle device, which we did. In this case, we used a SureFire Warcomp in 7.62mm, threaded for the AK’s 14×1 LH threads, perched on the end of a Faxon Firearms AK barrel. This allowed the folks at Lee Armory to trim the barrel down to just over 13 inches and permanently attach it for an overall barrel length of 16 inches. This gave us the “shortest” 16-inch barrel setup we could get away with while providing compensation, flash suppression, and the ability to run a SureFire can in the future if we so choose.
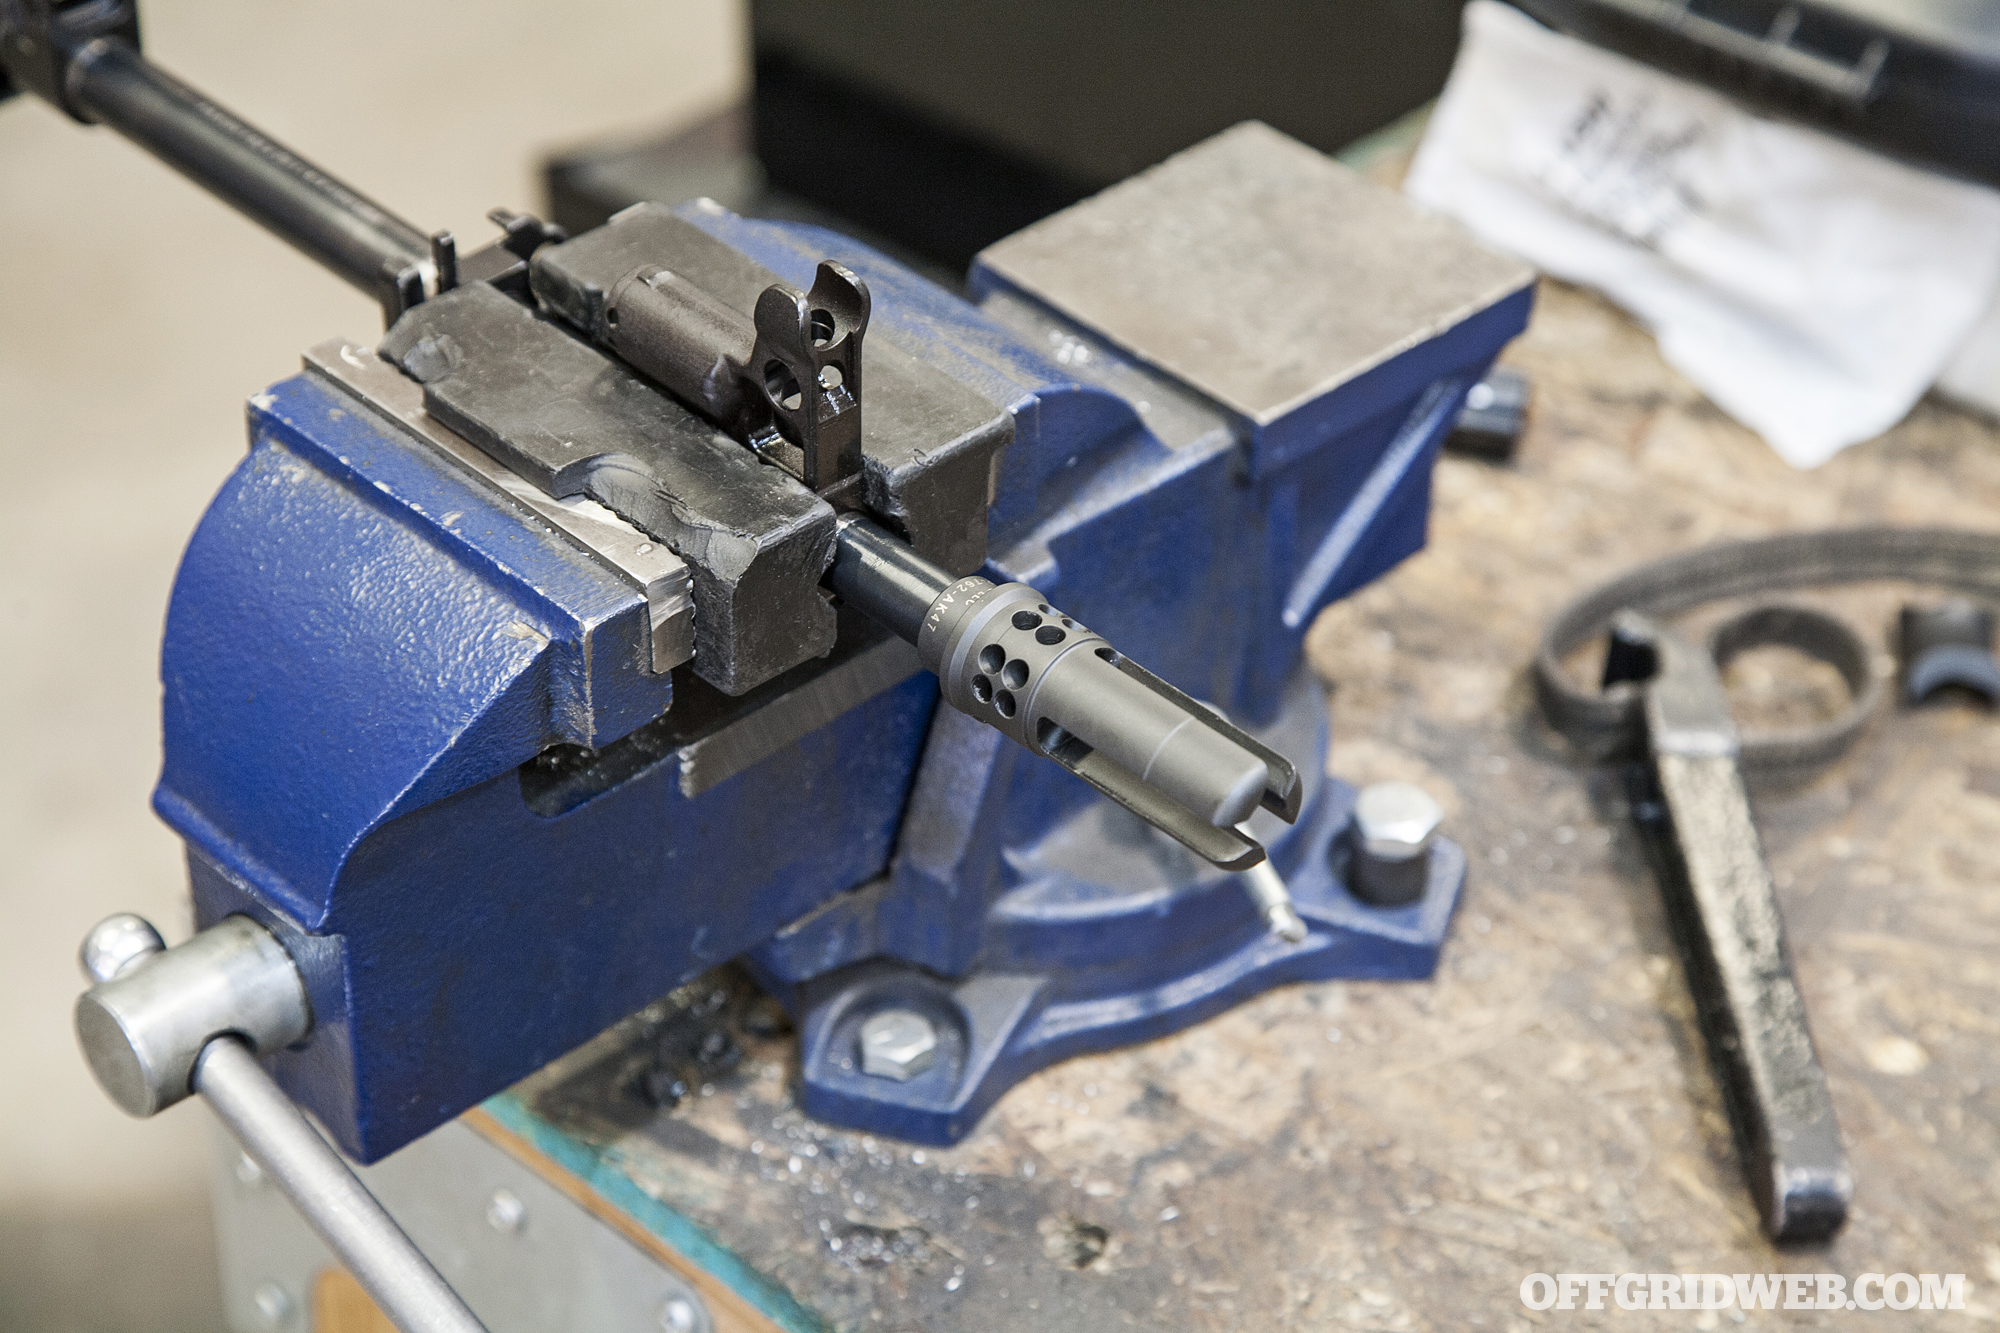
Above: We chose to have our Faxon barrel cut to minimum legal length for the SureFire Warcomp, which was then pinned and welded into place.
The Faxon Firearms AK barrel is U.S.-made from 4150 CMV that’s finished inside and out with a salt bath nitride finish. The barrels are magnetic particle inspected and individually gauged for headspace. The button rifling is a 1:8 twist that finishes at an 11-degree target crown. Weighing in at a deft 1.21 pounds, we felt the use of a high-quality U.S.-made barrel, combined with the streamlined combo gas block, would produce a highly nimble carbine that feels more like an SBR than standard AK configurations, while still avoiding the $200 permission slip.
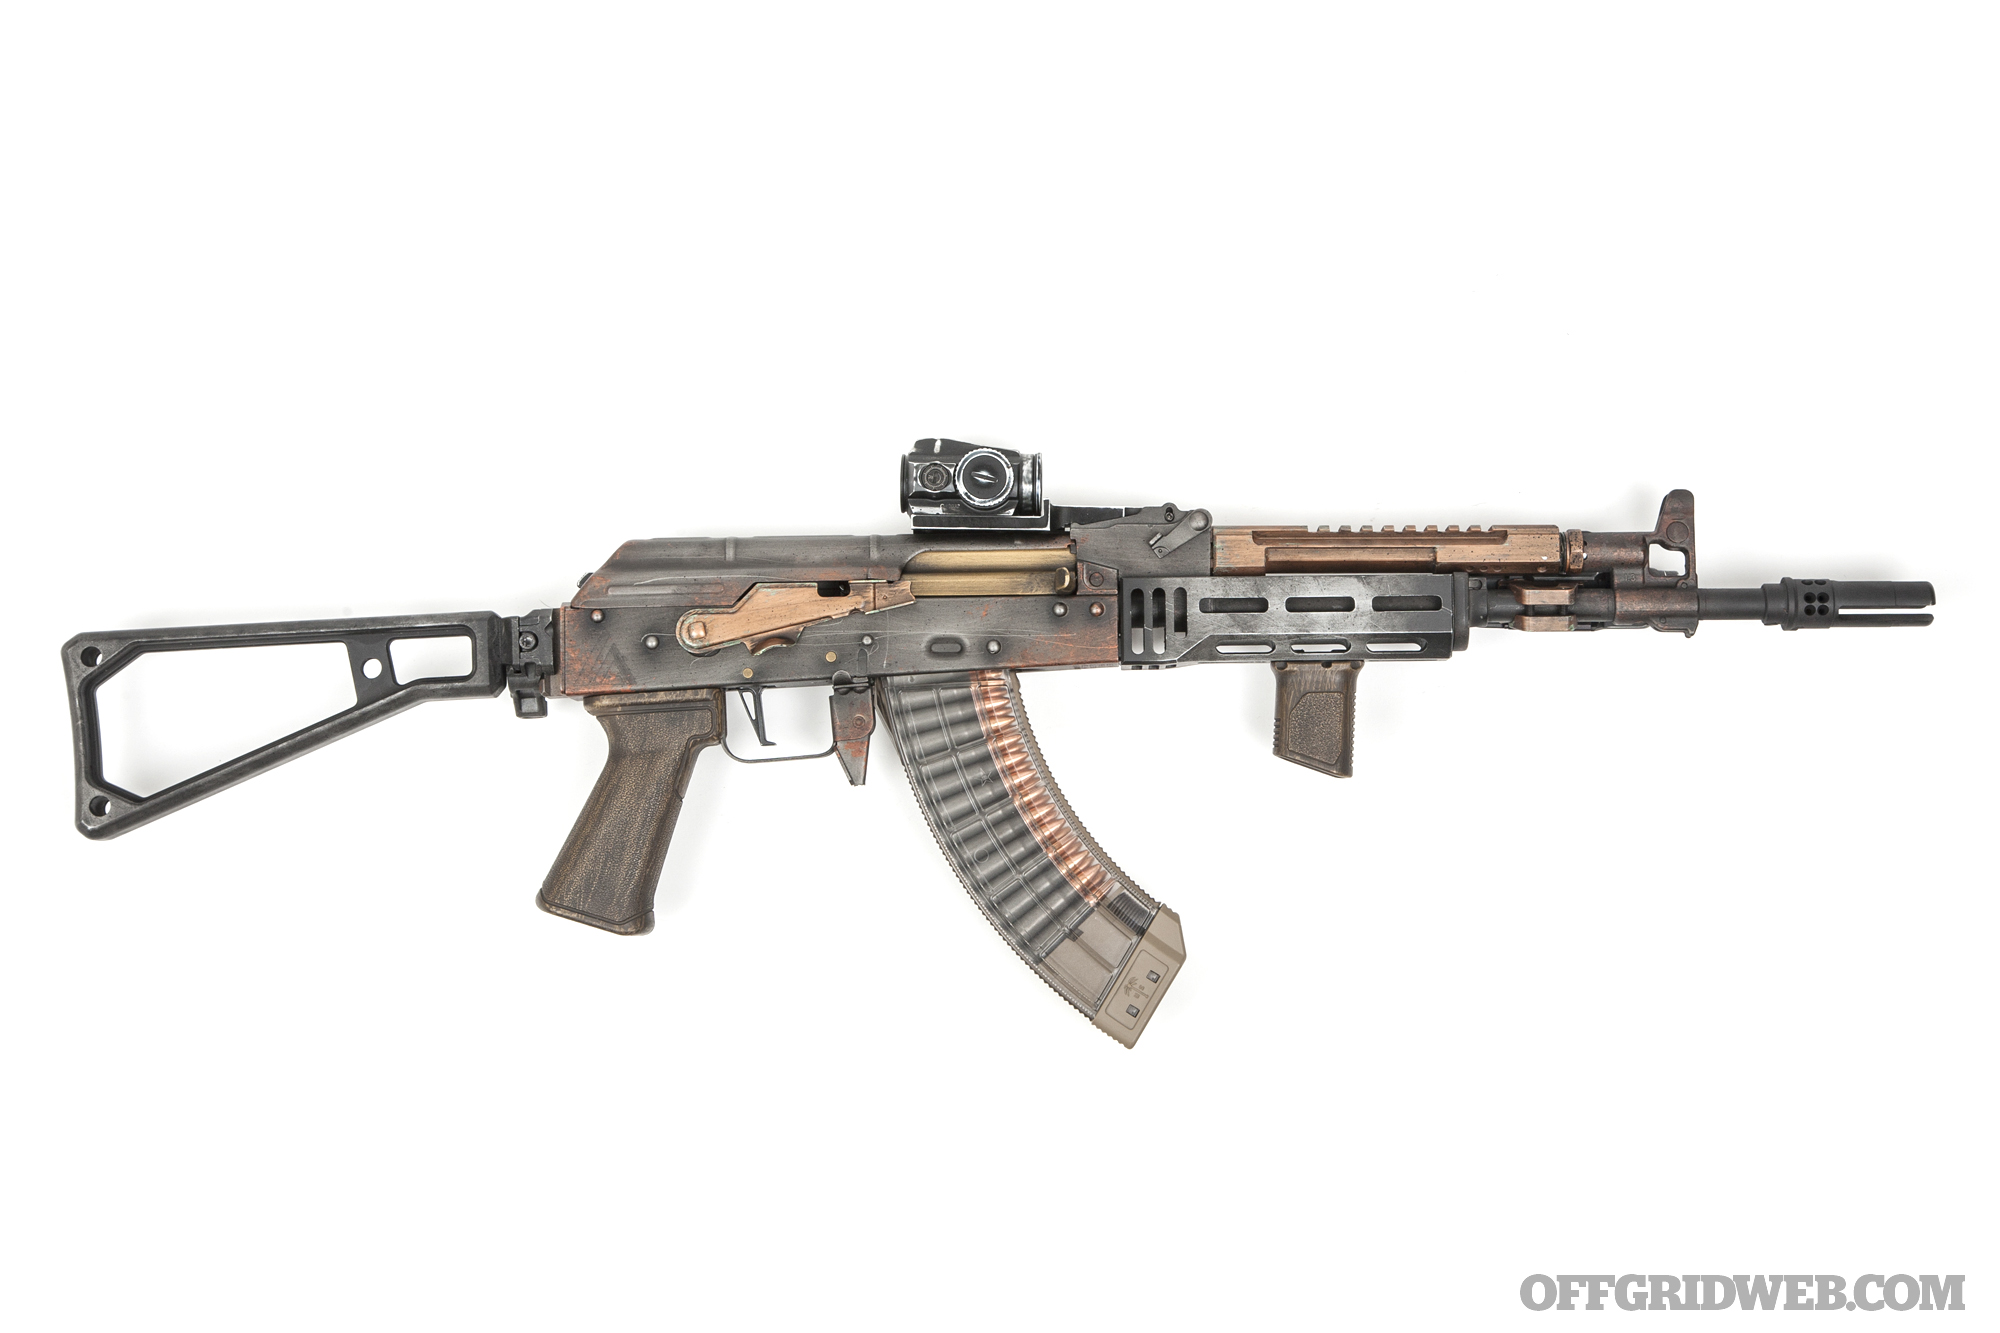
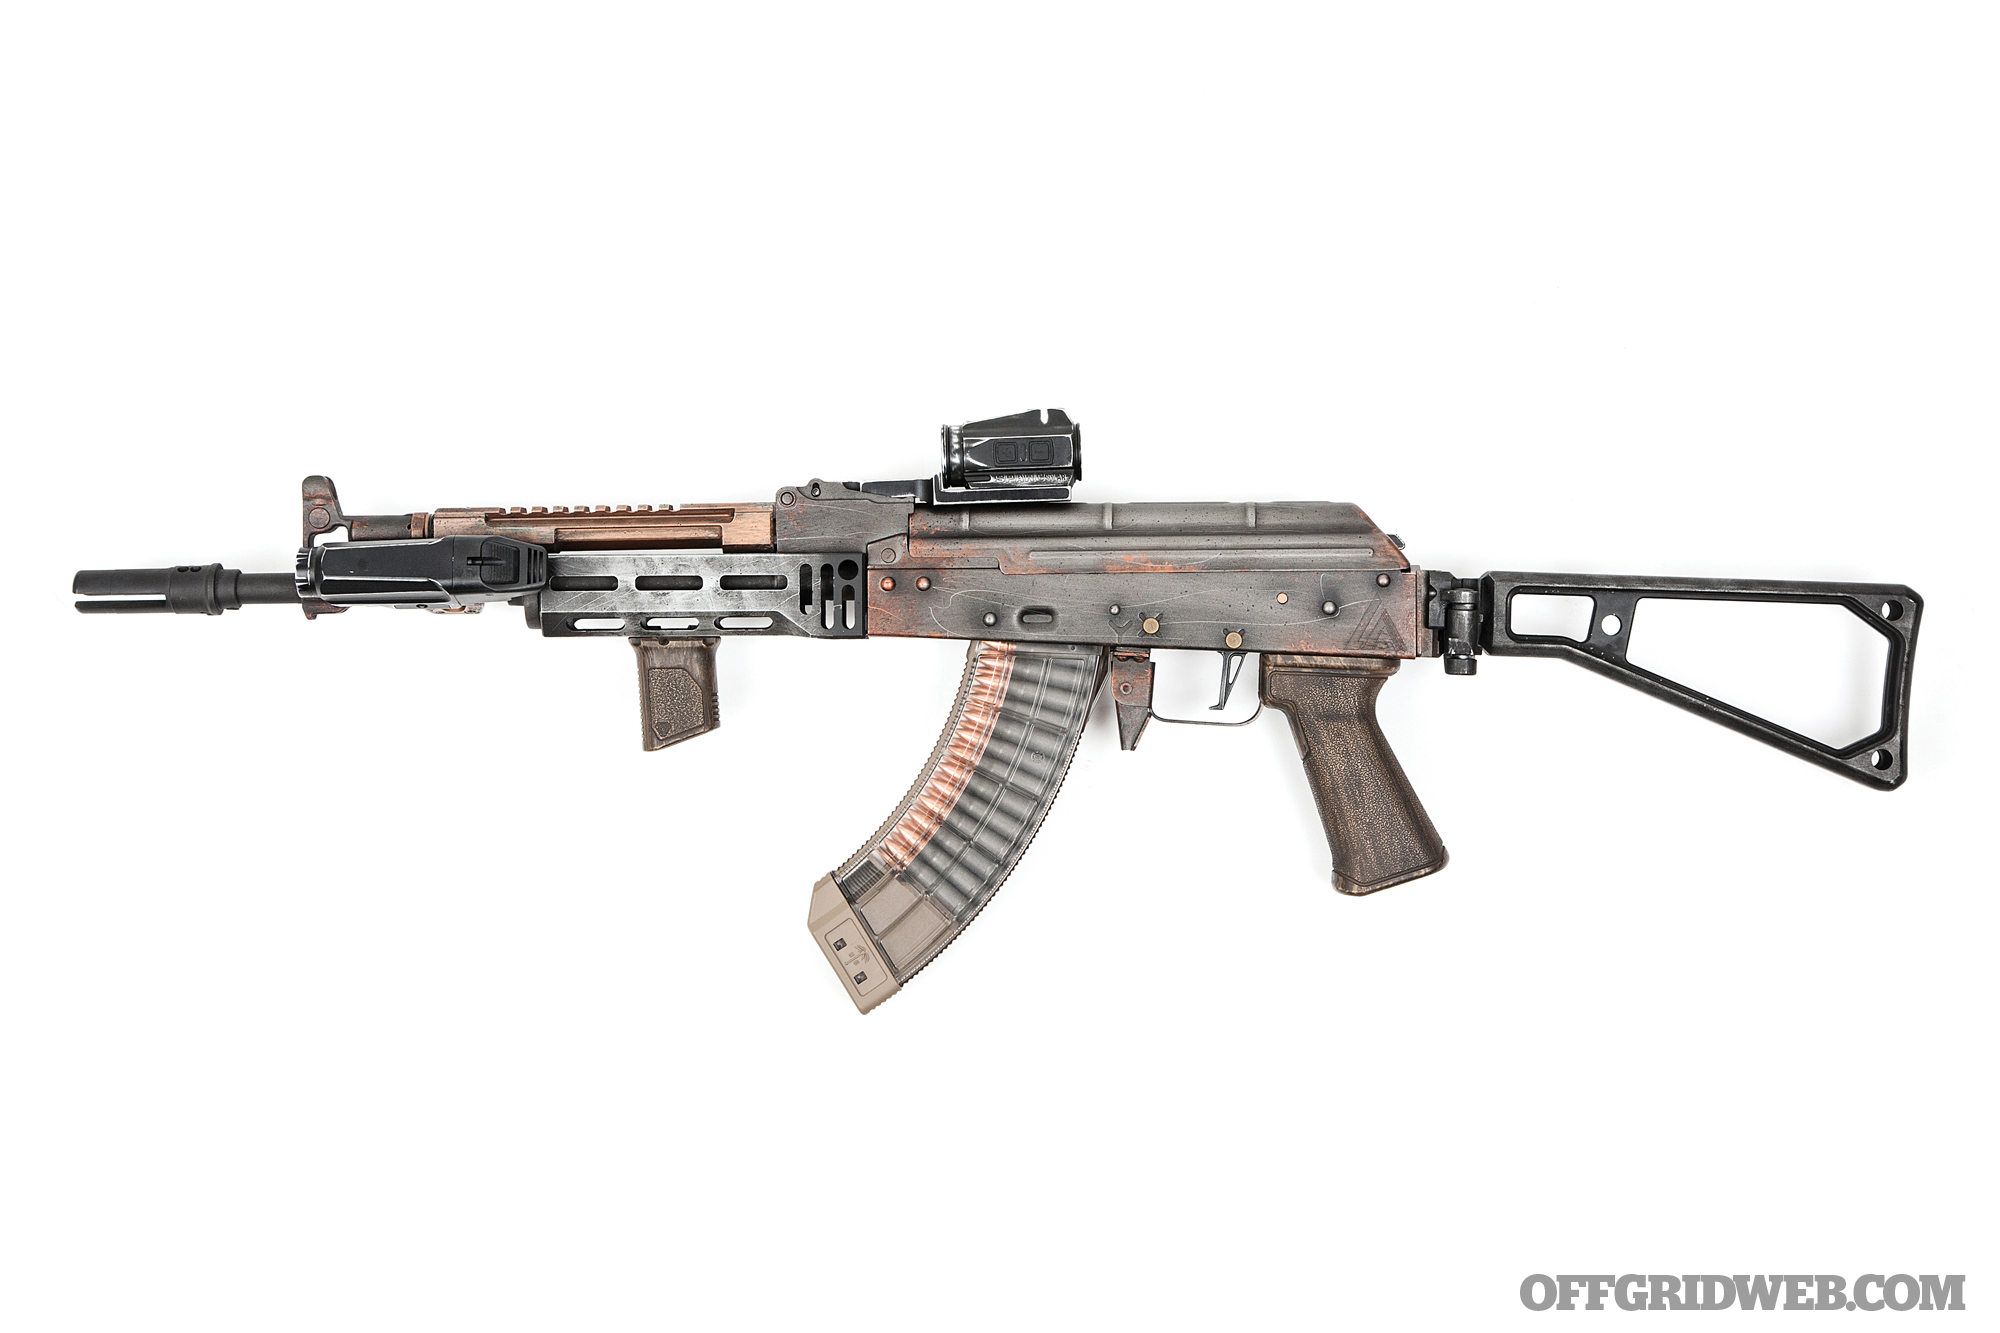
Finally, in the spirit of a truly custom Lee Armory AK befitting a RECOIL OFFGRID feature, we sent the rifle to Pro 2 Customs (formerly known as We Plead the 2nd) for a unique Cerakote job. We asked them to give us their take on a “post-urban-collapse” Kalashnikov. Something that looked beat up, worn down, cobbled together, and maintained with whatever parts could be scavenged. Beyond that guidance, we left everything up to the artistic talents at Pro2Customs, and we were proven right to have done so. The level of detail in this finish is not done true justice by the photos included here — although we did try. In an effort to keep with the industrialized look of the Cerakote work, we loaded this rifle with a US PALM AK-30R magazine, produced by Century Arms. The clear body gives you a fast visual index of available ammo and, when loaded with steel case, looks downright dapper against the copper-and-rust tones of the finish work.
What Did We Learn About AK Builds?
The bottom line is that no matter how you slice it, a bespoke AK-platform rifle is no longer the cheaper, easier alternative to a similarly outfitted AR. The progression in manufacturing quality and the growth of the AK accessories market has put the Iron Curtain arch enemies on equal financial footing. While we have no desire to turn this into an AK-vs.-AR discussion, suffice it to say that a well-appointed defensive rifle takes both time and money, regardless of what specific type of rifle you choose.
Modding an off-the-shelf rifle comes with immediate gratification as well as the benefit of having a rifle that is still usable right now, even as you take the time to perfect its configuration. The full custom option takes longer, but lets you walk away with a no-compromises workhorse that looks, feels, and performs exactly as you want it to in one fell swoop.
At the end of the day, the choice is yours. It must be decided based on personal preference, performance requirements, and budgetary constraints. Neither of these builds is a universal answer, but instead should serve as a healthy dose of inspiration for what could be possible when outfitting your survival AK with knowledge, research, and TLC.
Lee Armory AK Parts List
| RECEIVER AND PARTS KIT | MSRP |
|---|---|
| Lee Armory AK | $1,939 |
| COMPONENTS | MSRP |
| Occam Defense 1913 Rear Trunnion | $150 |
| Occam Defense Hex 2.0 Stock | $200 |
| TDI Arms Enhanced Russian Grip | $19 |
| Krebs Custom Safety Selector | $50 |
| Attero Arms Bravo Mount | $75 |
| Midwest Industries Railed Gas Tube | $110 |
| TDI Arms AKML Lower Handguard | $99 |
| Faxon Firearms AK-47 Barrel | $155 |
| JMac Customs GBC-13 Front Sight/Gas Block | $110 |
| SureFire Warcomp | $150 |
| CMC AK Trigger | $160 |
| Century Arms US PALM AK-30R Magazine | $16 |
| ACCESSORIES | MSRP |
| Vortex SPARC Solar | $400 |
| Streamlight RM-2 Light | $142 |
| RS Regulate BM-1 Light Mount | $70 |
| Strike Industries Short Angled Vertical Grip | $25 |
| TOTAL: | $3,870 |
Sources
Lee Armory > leearmory.com
Pro 2 Customs (formerly We Plead the 2nd) > wepleadthe2nd.com
Occam Defense > occamdefense.com
Krebs Custom > krebscustom.com
Attero Arms > atteroarms.com
RS Regulate > rsregulate.com
Midwest Industries > midwestindustriesinc.com
Strike Industries > strikeindustries.com
Vortex Optics > vortexoptics.com
Faxon Firearms > faxonfirearms.com
SureFire > surefire.com
Streamlight > streamlight.com
CMC Triggers > cmctriggers.com
TDI Arms > tdi-arms.com
US PALM > centuryarms.com