
In This Article
“Carjacking” is a term first coined in 1991 by writers of The Detroit News to describe an epidemic of auto thefts at gunpoint that plagued their city. The crime first became prevalent in the 1980s, when anti-theft alarm systems made old-school car theft more challenging for criminals. Unlike an ordinary car thief, who wants your vehicle but wants nothing to do with you, a carjacker plans to meet you face-to-face and is ready and willing to use violence in the process.
Despite the fact that it’s been around for decades, many states still don’t have specific carjacking laws. Instead, they categorize it as robbery, auto theft, or aggravated assault, so tracking it statistically is challenging. The most comprehensive study of carjacking was done by the Bureau of Justice Statistics (BJS) National Crime Victimization Survey (NCVS), which analyzed it in detail during the period 1993 to 2002. While somewhat dated, their study still provides key insights into the nature of the crime — and an excellent basis for defending against it.
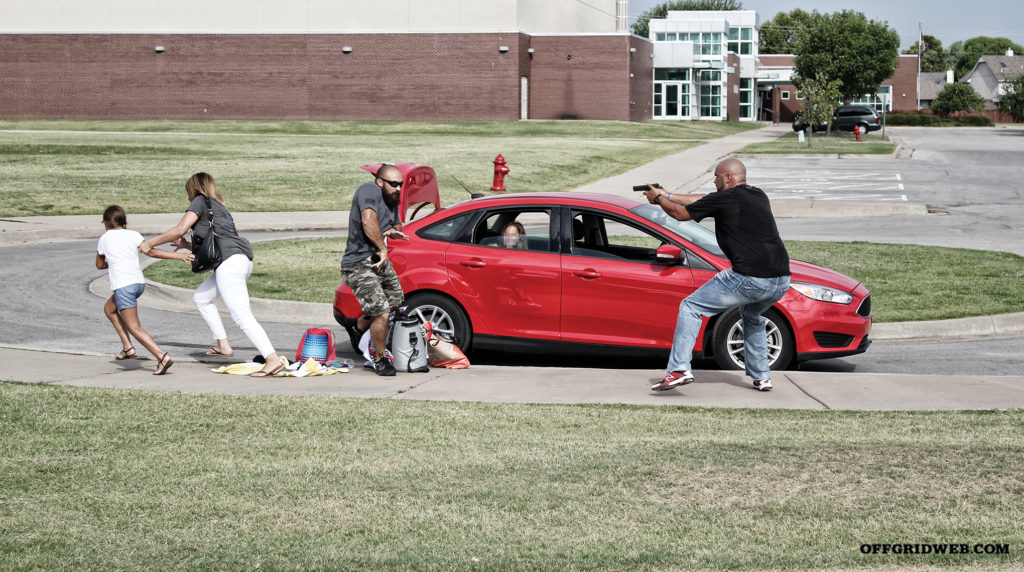
Above: Statistically, most carjackings target solitary drivers, but when other family members are involved, things quickly get much more complicated.
Carjacking by the Numbers
According to the NCVS study, about 38,000 carjackings occur each year in the U.S. Most take place in urban or suburban areas, generally not far from the victim’s home. Other revealing statistics from the report include:
- 63 percent of carjackings occur within five miles of the victim’s home
- 17 percent occurred at or near the victim’s home
- 68 percent of carjackings occurred at night
- 93 percent of carjackers are male, 3 percent female, and about 3 percent mixed male/female groups
- 56 percent involved multiple assailants
- 90 percent were committed against a single victim
- 93 percent are committed in cities and suburbs
- A weapon was used in 74 percent of carjackings
- Guns, especially handguns, were the most common weapons used (45 percent), followed by knives (11 percent) and other types of weapons (18 percent)
- 44 percent of incidents occurred in an open area (such as on the street) or near public transportation, and 24 percent happened in parking lots, garages, or near commercial businesses
- About 15 murders a year are related to carjackings
- Men were victimized more than women, and ethnic minorities more than whites
- About 45 percent of attempted carjackings are successful
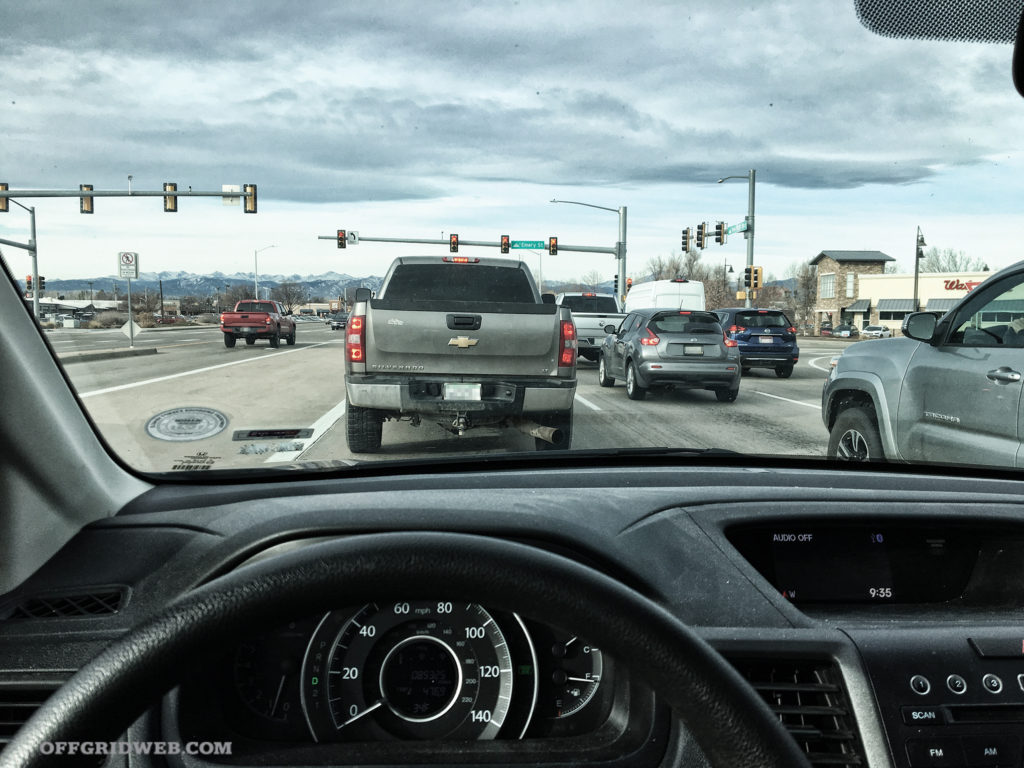
Above: Driving away from danger is always the best option. To preserve that option, don’t tailgate. When you stop behind another car, make sure you can see the rear tires so you’ll have enough turning radius to drive around if necessary.
These numbers paint a pretty clear picture of the circumstances of a typical carjacking. Armed with that knowledge, there’s a lot you can do to keep from being a victim. The more alert and aware you are, and the more precautions you can integrate into your daily habits, the safer you can be.
Even if you find yourself “behind the curve,” fighting back can still be a very viable option. According to the NCVS report, about 67 percent of carjacking victims resisted — most by running away and calling for help, and the remaining 24 percent by threatening, attacking, or chasing the offender. How effective was their resistance? About 32 percent of the victims of completed carjackings and 17 percent of attempted ones were injured, and most of their injuries were minor.
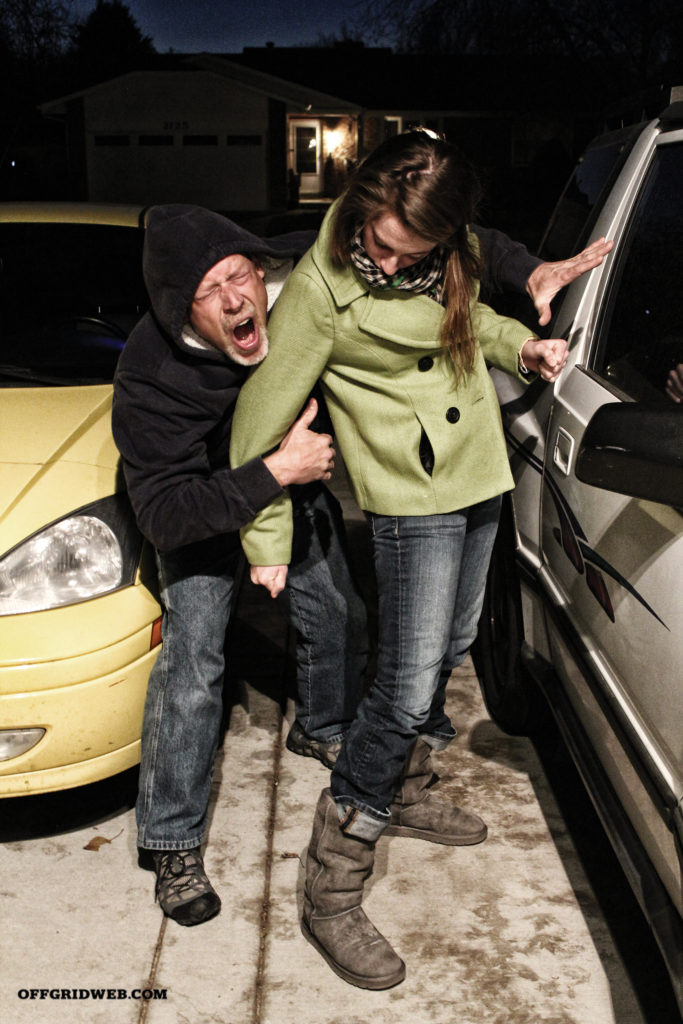
Above: Many carjackings occur as you approach or enter your vehicle. Stay alert and be prepared to fight back.
Anti/Counter-Carjacking Basics
The first thing you need to understand and accept about carjacking is that your car isn’t worth dying for, but to a carjacker, it may be worth killing for. Put your personal safety above your car and your ego. If you’re surprised by a carjacker and have no other option, give up your keys and get away. Safe escape is always the ultimate victory.
To keep from being surprised, understand that carjackings typically happen in one of two ways: Either the carjacker approaches you as you enter or exit your car, or he approaches you while you are behind the wheel and your vehicle is stopped.
Approaching and Entering Your Vehicle
Anytime you’re approaching your vehicle, you’re vulnerable and need to be aware, avoidant, and ready to react. Here are some specific warning signs you should look for:
- People loitering around your car
- People reacting to your presence or coordinating their movement with yours
- People sitting in nearby parked vehicles
- Vehicles following you or drivers paying unnatural attention to you
- Possible hiding places near your vehicle, including vans and vehicles with tinted windows
- Anyone hiding beside, behind, under, or in your car
- Anyone calling attention to supposed problems with your car, like flat tires, dents, or leaking fluids.
If you see something that concerns you, stop, maintain your distance, and use your vehicle and other things in the environment as barriers. Do not walk into a situation that makes you uncomfortable. If possible, go back and ask parking lot security or a friend to walk with you to your car.
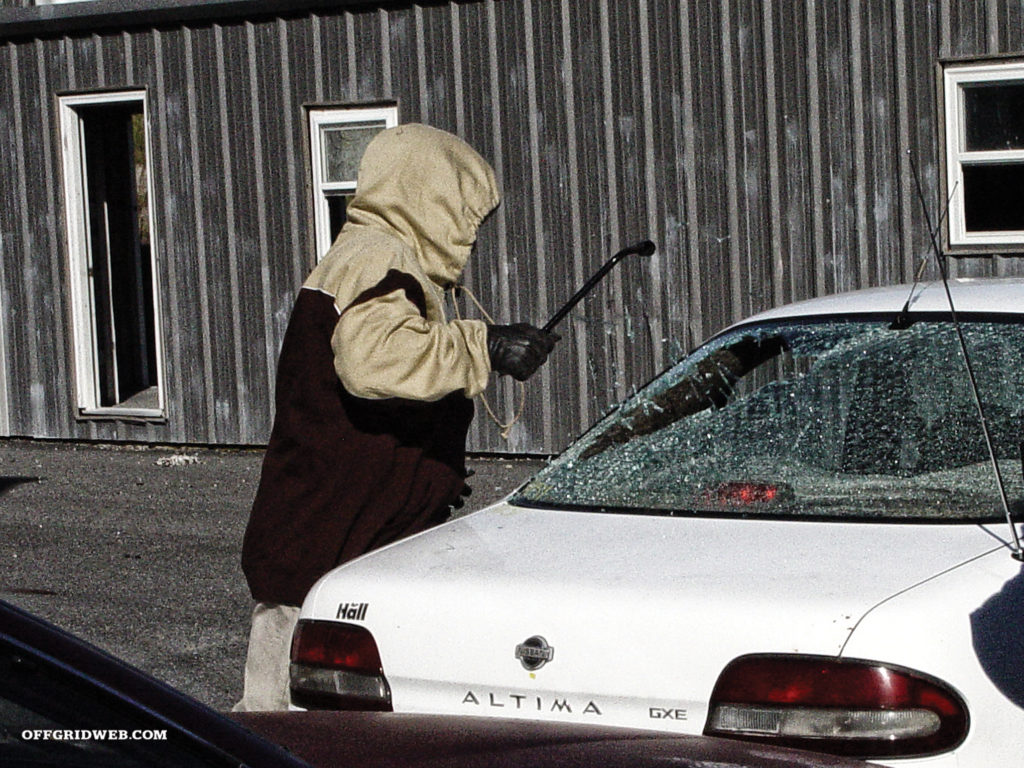
Above: Your vehicle is your best protection until its physical structure is breached. Once a carjacker has access to you, the danger level escalates rapidly.
You should also get in the habit of entering your car efficiently, maintaining awareness, and driving away in a timely manner. The longer you linger in your vehicle, the more vulnerable you are. Some specific behaviors you should adopt include:
- Have your keys in your hand before you approach your car. Keeping them in your non-dominant hand leaves your strong hand free to draw a weapon or strike empty handed.
- Carry bags or other objects in your weak hand to leave your strong hand free. If you must carry something with both hands, be prepared to drop it if you have to defend yourself.
- Use electronic key locks whenever possible. Only unlock the driver’s side door if you’re alone to prevent anyone lurking nearby from entering your vehicle through another door.
- Know how to use the panic button on your electronic key. If you sense danger and cannot either escape or enter your car quickly, activate the alarm to call attention to your situation.
- Keep separate key rings for each car you drive and for your home. Carry only the keys you need in your hand. If you’re forced to surrender your keys, you surrender only the keys to that vehicle — not the keys to your home. If your car registration or other personally identifying documents are stored inside the car, the attacker will have your address, so this is an important safeguard.
- Get in the habit of carrying a flashlight in your strong hand that you can use to illuminate things from a distance, or use as an improvised weapon.
- As you get near your car, look behind, under, and inside it before you approach the door. When something doesn’t feel right, consider walking past your vehicle at a safe distance, then circle back to observe and approach it from the opposite side (this is known as a “fish hook” reconnaissance maneuver).
- Keep your head up, continue scanning as you unlock your car, and stay alert as you enter your vehicle. If you must put packages or other items in your car, do it quickly and maintain awareness of the environment as you do.
- Once you’re in your vehicle, lock your doors and keep the windows up. Put on your seatbelt as you continue to use your mirrors to scan the area around you.
- Start the car and get moving ASAP. Do not check text messages, eat, or engage in other distracting activities immediately after getting into your vehicle. If you must do these things, drive a short distance and stop at another safe location — this will complicate the plan of any potential attackers.
- This may sound like common sense, but do not get out of your vehicle while it’s running. Stories have circulated online for years about carjackers using various distractions, such as a note under the wiper or a sticker on the back window, to lure drivers to step out of their vehicles. Some claim this is just an urban myth, but the underlying lesson is valid.
Above: Against a carjacker who’s able to get into your passenger seat, a gun set up for a left-handed draw makes weapon retention easier.
Exiting Your Vehicle Safely
Exiting your vehicle can also be a time of vulnerability to carjacking. Some carjackers prefer to catch people unaware as they get out of their vehicles and before they “tune in” to their surroundings. Again, by keeping your head in the game and taking the time to apply a few simple tactics, you can significantly reduce your risk of falling victim to this type of attack. The tactics for exiting your vehicle safely include:
- Whenever possible, back into the parking space or look for pull-through spots that allow you to drive forward to exit. This makes it much easier to drive away quickly.
- Park in well-lit areas that offer good visibility from all sides and multiple avenues of escape.
- Park within view of security cameras, if possible. Big-box chain stores are likely to have well-maintained exterior camera systems; restaurants and small businesses are less likely.
- Avoid parking areas near sources of concealment (like walls, dumpsters, hedges, and similar objects).
- Before you unlock your doors and get out of your vehicle, pause and look around. If things don’t feel right, drive away and park somewhere else.
- When you’re ready to get out, release your seatbelt, get whatever you need to take with you, organize yourself, and then unlock the doors.
- As you get out, scan the area and tune up your awareness. Be prepared to react.
- Keep your key in your hand in case you need to activate the panic button or, in a worst-case scenario, surrender it.
- As you move away from your vehicle, lock all the doors and mentally note its location. This will help you approach it directly when you return instead of wandering aimlessly in the parking lot.
- Never leave your vehicle running when unattended, and never leave your keys in a vehicle.

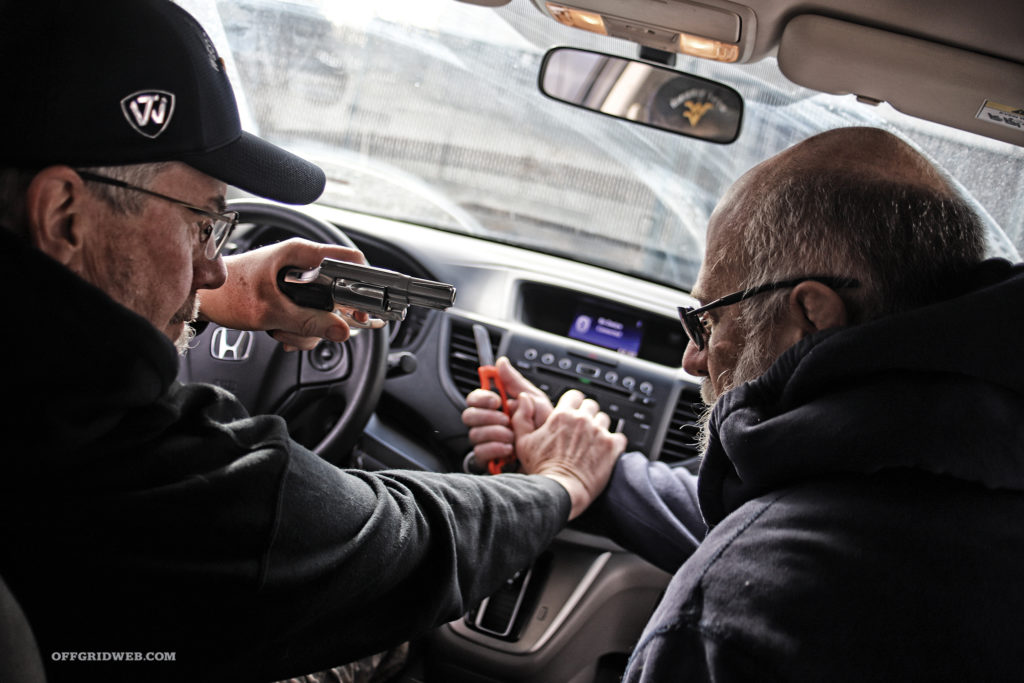
Above: If you have to fight unarmed in your car, control the carjacker’s near arm to use it as a barrier and use the dashboard and other surfaces inside the car to your advantage.
Avoiding Carjacking While Driving
Carjackers may also attack while you’re behind the wheel of your vehicle, either stopped at a stoplight or “boxed in” by other cars. They may also intentionally bump your vehicle with theirs to draw you out. Depending upon the access you give them, they can threaten you with a weapon, physically attack you, or simply pull you out of the vehicle. Your first line of defense should be to make full use of the physical security your car offers.
- Keep all your doors locked whenever you’re in your vehicle. Many new vehicles activate the locks automatically once the car is in motion.
- Keep your keys in the ignition and be prepared to start the car and drive away if necessary. In the case of vehicles with keyless ignition, keep the key fob secure on your person; don’t leave it loose in the vehicle. A carjacker will be able to drive as long as the engine is running, but will be unable to re-start the car without the fob.
- Wear your seatbelt at all times, even while stopped. This not only keeps you safer in case of an accident, it also makes you more difficult to pull out of the vehicle quickly.
- Avoid leaving your windows rolled down, and never lower your window to talk to anyone who approaches your car on foot.
- If a suspicious driver bumps you, put on your emergency flashers and slowly drive to the nearest safe, highly occupied area (ideally a police station), motioning for him to follow you.
If you’re attacked while in your vehicle, your best option is to drive away as quickly as possible. The key to maintaining that option is adjusting your driving habits as follows:
- Remind yourself every time you’re behind the wheel — “When in doubt, drive!”
- Always leave enough room so you can see the rear tires of the car in front of you. This gives you enough turning radius to drive around that car if necessary. If you pull too close, it’s easy to be boxed in and unable to drive away.
- Research the areas you drive through and know their reputations. Avoid high-crime areas where carjackings are common.
- Whenever practical, stay in the middle lane, away from curbs and sidewalks This offers multiple escape routes, and makes it harder for someone to approach on foot without warning.
- Use your mirrors constantly, both when you’re moving and when you’re stopped. Stick-on parabolic mirrors increase your field of view and help eliminate blind spots.
- Driving away from danger may include jumping curbs, ramming the vehicle in front of you, or taking other actions that you wouldn’t normally consider. Accept them and plan for them. Better still, take a course in evasive driving.
- Pre-plan your reactions based on who’s in the car with you — especially children — and adjust your reaction plan accordingly.
- If a carjacker gets the jump on you, NEVER go anywhere with him. Make it clear that you’re giving him the vehicle, get out, move to safety, and remember the details of his appearance. In a worst-case situation, you can throw the keys and run in the opposite direction, or even deliberately crash the car to avoid forced captivity.
- Get theft insurance and LoJack or a similar GPS tracking and recovery system. They don’t replace good awareness and avoidance, but greatly increase the chances of recovering your vehicle. A dash cam can also corroborate your account of an incident, and may even help law enforcement track down the perpetrators.
Taking it to the Extreme
If you happen to drive a 1964 Aston Martin DB5 and your last name is Bond, your solution to carjacking is simple: a hidden button that fires a passenger ejector seat, as immortalized in the classic film Goldfinger. While that may seem crazy, technology-based countermeasures to the carjacking threat aren’t far behind that Hollywood gadget. Some, in fact, may have outdone it.
In South Africa, carjacking is extremely common, averaging about 44 incidents per day in 2018 and 2019 according to the country’s Department of Statistics. Because of the extreme threat of violent crime there, some citizens have taken a somewhat more “aggressive” approach to personal protection. One case in point was “The Blaster,” also known as the “BMW Flamethrower.” Invented in 1998 by Charl Fourie, it was quite literally a flamethrower mounted under the doors on each side of the vehicle. If a would-be carjacker approached the car while it was stopped, the driver could simply flip a switch and send a 15-foot jet of burning gasoline up toward his face. Although the inventor claimed it was intended to merely blind the assailant, a flamethrower is, by definition, a lethal weapon and its development was quite controversial. In light of the high rate of violent crime in the country, however, the Blaster wasn’t prohibited and remained on the market in 2001. Due to slow sales and a high price tag, production was ultimately stopped, but Blaster-equipped vehicles can still be found in South Africa.
If incinerating carjackers seems a bit much, Armormax — makers of custom-crafted armored cars — offers an electrified door handle option. Their system uses a power inverter to convert the vehicle’s 12-volt battery power into a 120-volt current that’s fed directly to the door handles. Flipping a switch inside the car arms the system and ensures that anyone attempting to open the doors gets a serious jolt.
More mundane approaches to countering carjackers with technology include kill-switches that disable a car’s electrical system, making it impossible to start. If hidden, but accessible, you might be able to discreetly hit the switch before surrendering your car. Some products have also combined kill-switches with proximity sensors that you keep on your body separate from your keys. If you’re separated from your vehicle by a specific distance — usually about a quarter mile — the kill-switch activates and the car goes dead.
Technology can certainly help, but the best way to keep from becoming a carjacking statistic is to develop good avoidance habits.
Vehicle Gunfighting
Countering a carjacking attempt with a gun is certainly a viable option, but it isn’t as easy as it may seem. If you have a CCW permit and carry regularly, you know that as soon as you get behind the wheel and buckle up, your standard draw-and-shoot style of gunfighting is severely cramped. Depending on where and how you carry, getting to your gun quickly can range from difficult to nearly impossible.
One way to overcome this problem is to hard-mount a holster, magnet, or similar device inside your car that enables you to position your carry gun — or a dedicated second gun — so it’s quickly and easily accessible when you’re in the driver’s seat. Even then, however, you need to wargame the various types of threats you might face and make sure the positioning of your gun is appropriate. If your biggest fear is someone getting in the passenger seat next to you, mounting your pistol in the center console might not be as wise as mounting it in the door and accessing it with your left hand. Conversely, if you’re mostly worried about threats outside the car, the center console makes sense, but you’ll need to know how to shoot out of the vehicle effectively.
If all this sounds complicated, it is. Fortunately, you can un-complicate with good training, like Florida Firearms Training’s “Bullets and Cars” course. This outstanding course not only teaches you the proper tactics of drawing and shooting in, from, and into a vehicle, it allows you to experience the unique ballistics of shooting through vehicles, including the often-counterintuitive effects of shooting through windshields and vehicle safety glass.
For more information, visit FloridaFirearmsTraining.com.
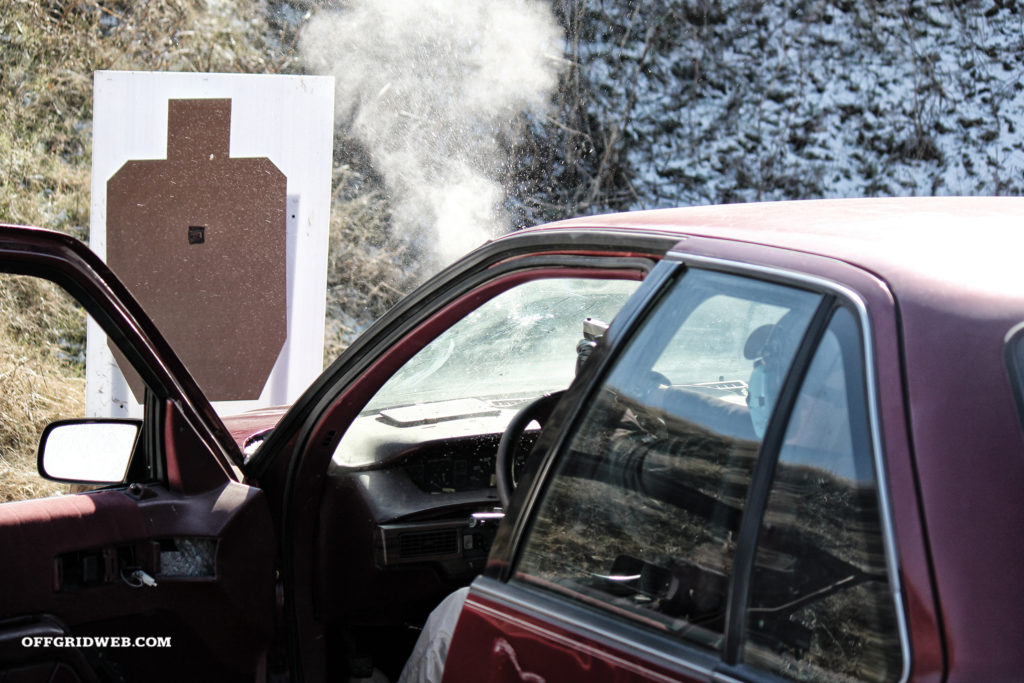
Above: Shooting through windshields changes your point of impact in surprising ways. The best way to understand that change is to experience it firsthand in the FFT course.
Fighting Back against a Carjacking
Fighting a carjacker should always be your last resort. Doing it effectively requires specialized training, sound weapon-acquisition tactics, and a solid understanding of the laws in your area. Gun-based defenses also run a high risk of collateral damage to innocent parties.
If you want these skills, go out and get the hands-on training you need to develop them. Otherwise, become a true “defensive driver” and focus on prevention rather than a cure.
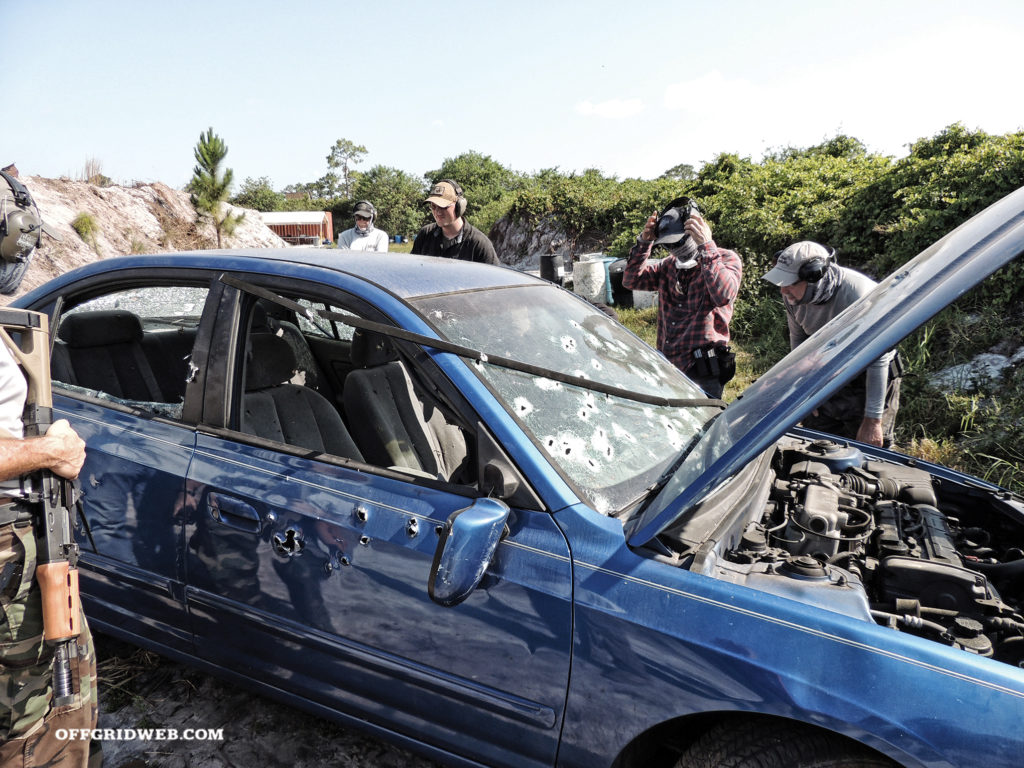
Above: Fighting in and around vehicles is a specialized problem that’s best solved with specialized training. Florida Firearms Training’s “Bullets and Cars” course is one of the best sources of this type of skill building.
More on Transportation and Survival
- What If: You’re In a Hostage Situation: Read the Scenario Here.
- What If that Stop Turns Into a Roadside Robbery: Here’s More.
- Best 9mm Handguns for Personal Defense? Here’s RECOIL’s list.
- What If Your Vehicle is Attacked by an Angry Mob.


 Joey Nickischer is a retired detective with the New York City Police Department. He currently works as a lead technical rescue instructor with several different companies covering topics from wilderness search, high angle rope, mine rescue, and off-road operations. He serves as a team leader with the Westchester County Technical Rescue Team and is the commander of the Putnam County Technical Rescue Team, as well as serving as chief of department with the Patterson Fire Department.
 Andrew Schrader is a structural engineer and an Urban Search and Rescue (USAR) specialist for the State of Florida’s USAR Task Force. In his role as a Structures Specialist (StS), his job is to advise firefighters and technical rescue teams on the least hazardous means of searching for, locating, and extricating live victims in collapsed buildings. Trained by FEMA and the U.S. Army Corps of Engineers, he has been deployed in support of rescue operations for Hurricanes Hermine (2016), Irma (2017), Michael (2018), and Dorian (2019).


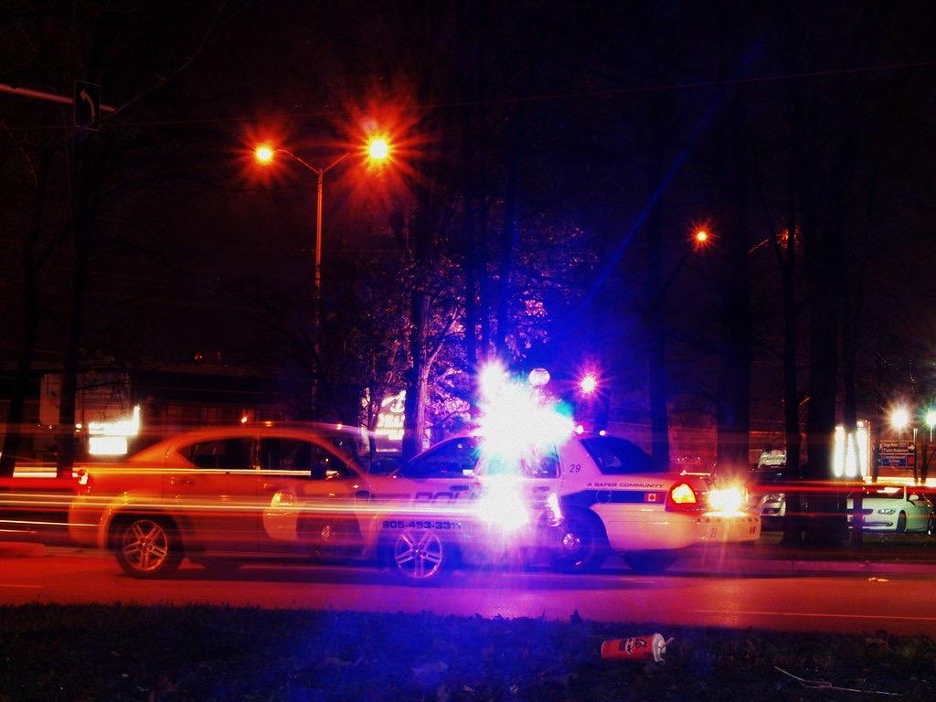 Photo credit: MSVG (
 Photo credit: landrovermena (
 Photo credit: Neal Herbert (
 Photo credit: Bold Frontiers (
 Photo credit: Bob n Renee (
 Photo credit: Markus Spike (
 Photo credit: Ell Brown (
 Photo credit: dlg_images (
 Photo credit: NCRS Montana