Like it or not, technology continues to play an ever-increasing role in the privacy concerns of our daily lives. Aside from the devices in your pockets, backpack, home, and office, tech is also being rapidly integrated into the infrastructure of our cities and towns. Some of this tech is fairly innocuous, simply meant to provide more reliable and affordable utilities through automation. Other types of smart city technology, however, have led to privacy concerns about invasive tracking of citizens or exploitation of these systems for nefarious purposes.
The Future of Privacy Forum (FPF) created the following infographic that offers an overview of smart city technology in transportation, utilities, telecom, government services, and environmental sectors. You’re probably already aware of some of these systems, like digital utility usage meters, parking sensors, and traffic monitoring software. Other systems in the graphic are still on the cutting edge, and may not have been implemented in your area yet.
What are your privacy concerns about smart cities and how their underlying tech is used? It’s worth keeping these in mind and voicing them in the future, because it seems unlikely that our cities and towns will become less tech-reliant any time soon.
Just like sh*t, violence happens. It tends to come at the worst times, in locations you thought were safe and from people you might not expect to be the provocateurs. It could be at home, work, or your local supermarket — you just never know. When it comes to defending yourself and those you love, it’s all on you. Although our tax dollars pay for law enforcement to keep the peace, it’d be foolhardy to expect law enforcement to be there instantly when violence erupts and you need them the most. When it comes to self-protection, a smart person learns from their own experiences, and a truly wise one learns from the experiences of others. With this in mind, we dug deep into our list of experts to assemble a panel of “been-there-done-that” kind of badassery.
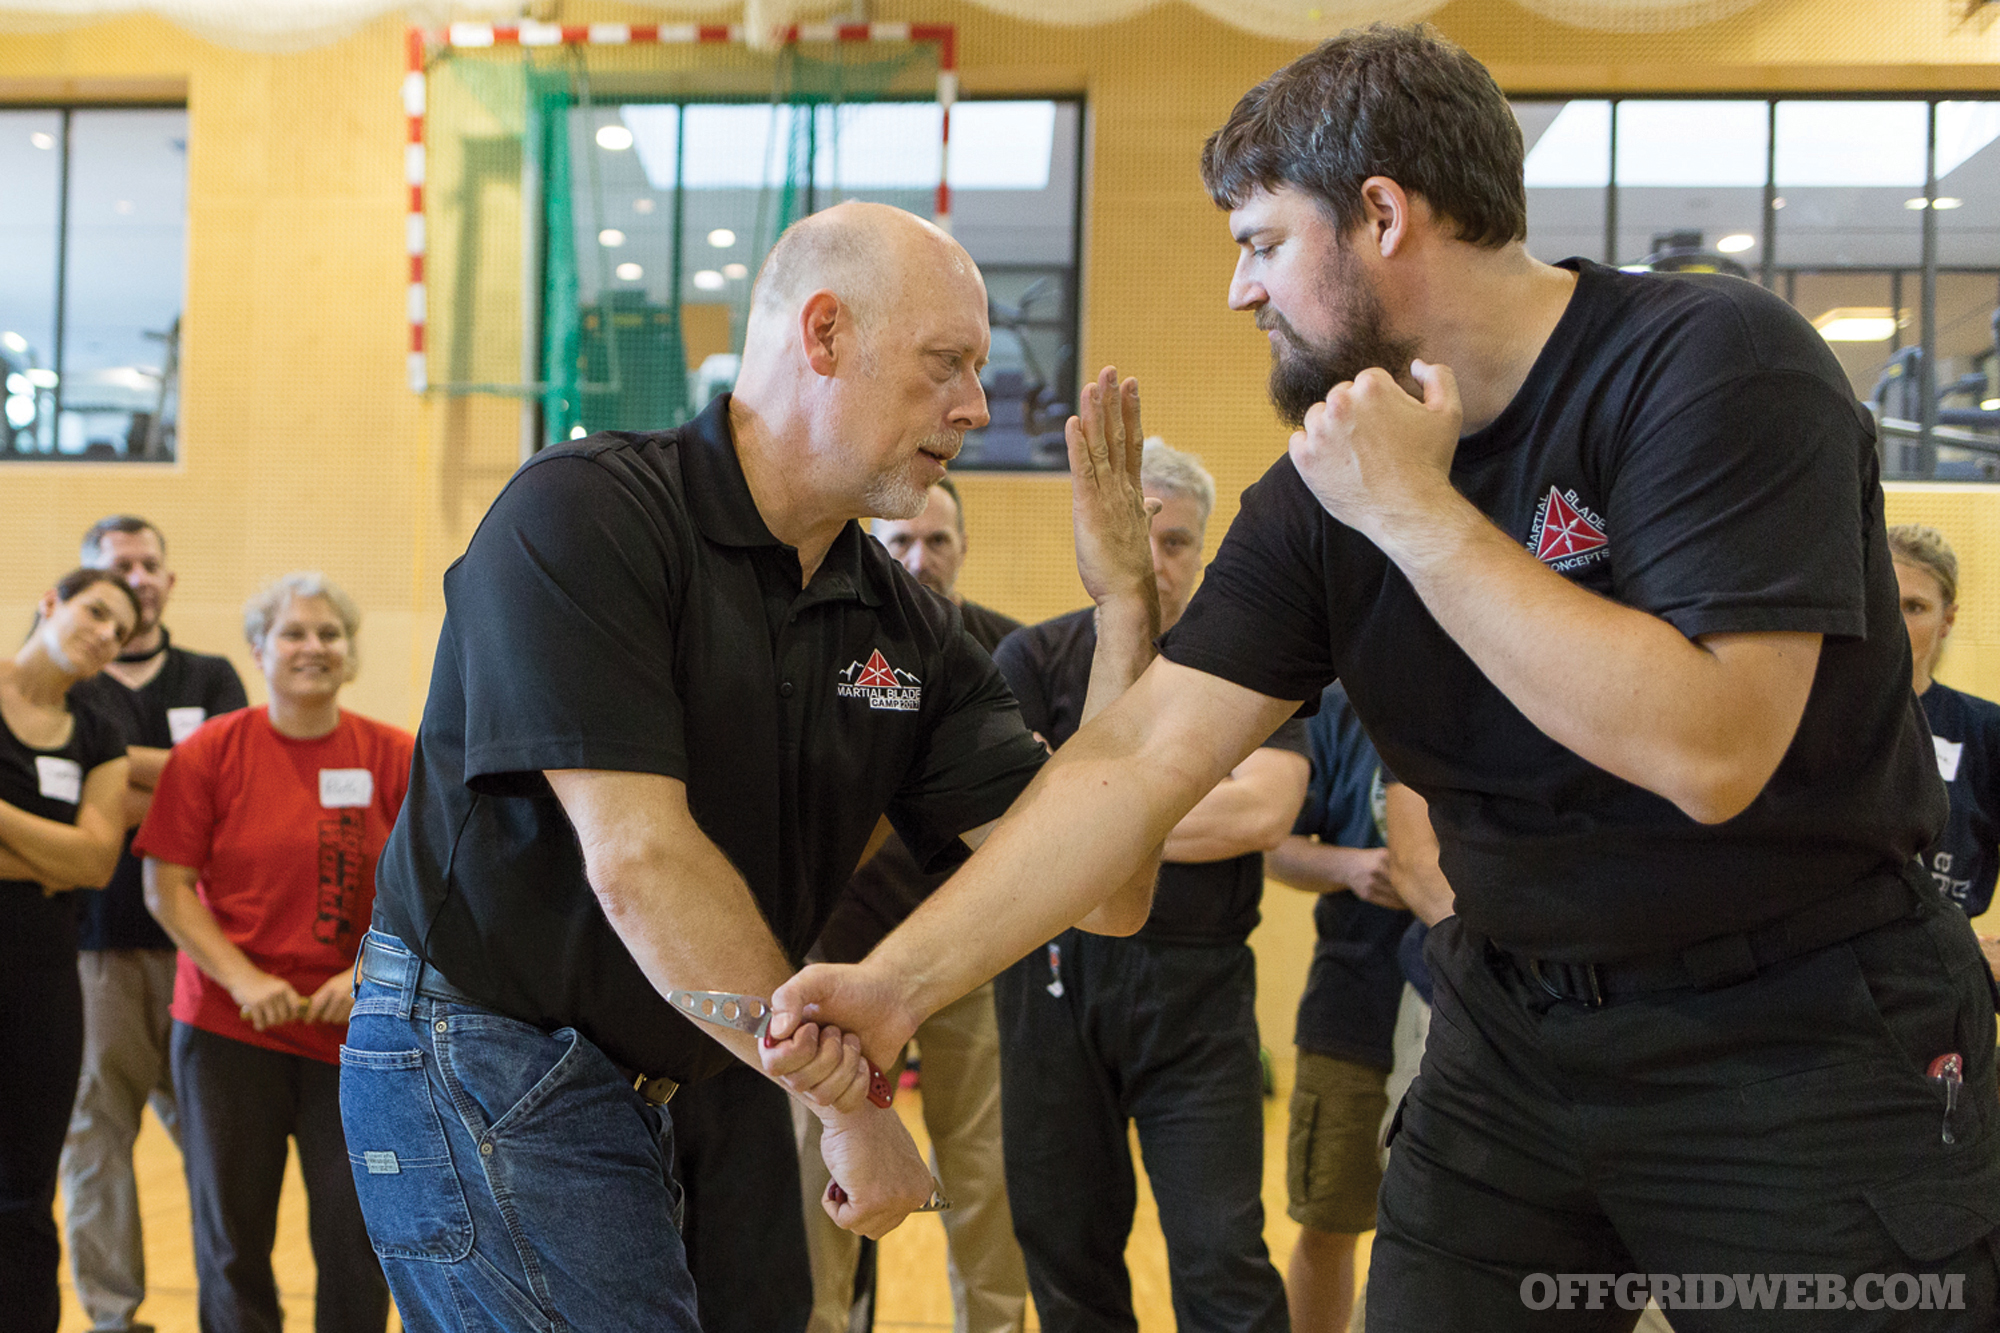
These experts may surprise you with their answers. Some statements were elegant in their simplicity, while others were downright brilliant. You’ll recognize three common recommendations: get the knowledge, get the training, and be aware of the laws in your area. Our panel consists of Jared Wihongi, a SWAT operator, head of Pekiti Tirsia Tactical, and combatives instructor to law enforcement and military agencies around the world; Hakim Isler, Iraq War veteran with Army Special Operations, holder of multiple black belts, and certified bodyguard; Michael Janich, lifelong martial artist, co-host of Outdoor Channel’s The Best Defense, creator of Martial Blade Concepts, and a U.S. Army veteran who served at the National Security Agency, Defense Intelligence Agency, and Joint Casualty Resolution Center; and George Kelakos, lifelong martial artist, attorney, and managing director of Kelakos Advisors LLC.
Lessons Learned Through Violence
RECOIL OFFGRID: Share with our readers a violent encounter from your past.
Wihongi: I’ve been in violent physical encounters several times throughout my life. The most memorable have been in my adulthood, working professionally as a nightclub bouncer in Hawaii while attending university, and during my 19 years of experience in law enforcement (including both full-time and reserve duty). One that stands out was during my early exploration of martial arts and their application. I was training Kali, Muay Thai, and Brazilian Jiu-Jitsu at the same time I was working as a bouncer in Honolulu, and frequently had opportunities to put skills I was training into practice. One particular night, a large fight broke out between a group of patrons in the club and the bouncers working the floor. I went from the door where I was working to help the bouncers expel the violators, and ended up in an altercation with one of them. Even though I always mentally prepared to only use elbows, knees, and other “hard weapons,” I ended up hitting him a few times with my fists before I entered into a clinch and took him to the ground with a hip toss. I held onto him in a cross-body position until I was helped to usher him out.
Isler: I’ve been in several altercations in my life. The one that sticks out the most is when I was a teenager. It started because two high school seniors manipulated me and another freshman into believing that we were enemies so that we would fight for their entertainment. After the heavy manipulation, we met in a parking lot near the school. The kid grabbed me, and I punched him in the face twice. Out of shock, he pushed me away and I tripped over my own foot, hit my head on a car, and then on the concrete, which knocked me out.
Hakim Isler, To-Shin Do Ninjutsu head Instructor at Elevo Dynamics.
The next thing I remember, I was surrounded by my friends and was bleeding badly from a big knot on my head. I had to go the hospital and could not lay on the back of my head for weeks. I ended up smashing my opponent’s nose and causing severe bleeding, which is why he didn’t stomp on me while I was out. Most people considered me the winner of the fight, but I didn’t feel like a winner, considering I had to deal with a concussion and a swollen mass on my head.
Janich: While living and working in Asia, I was involved in a number of incidents in which I had to defend myself with unarmed physical skills, and a couple of incidents in which I drew a weapon to defuse the situation.
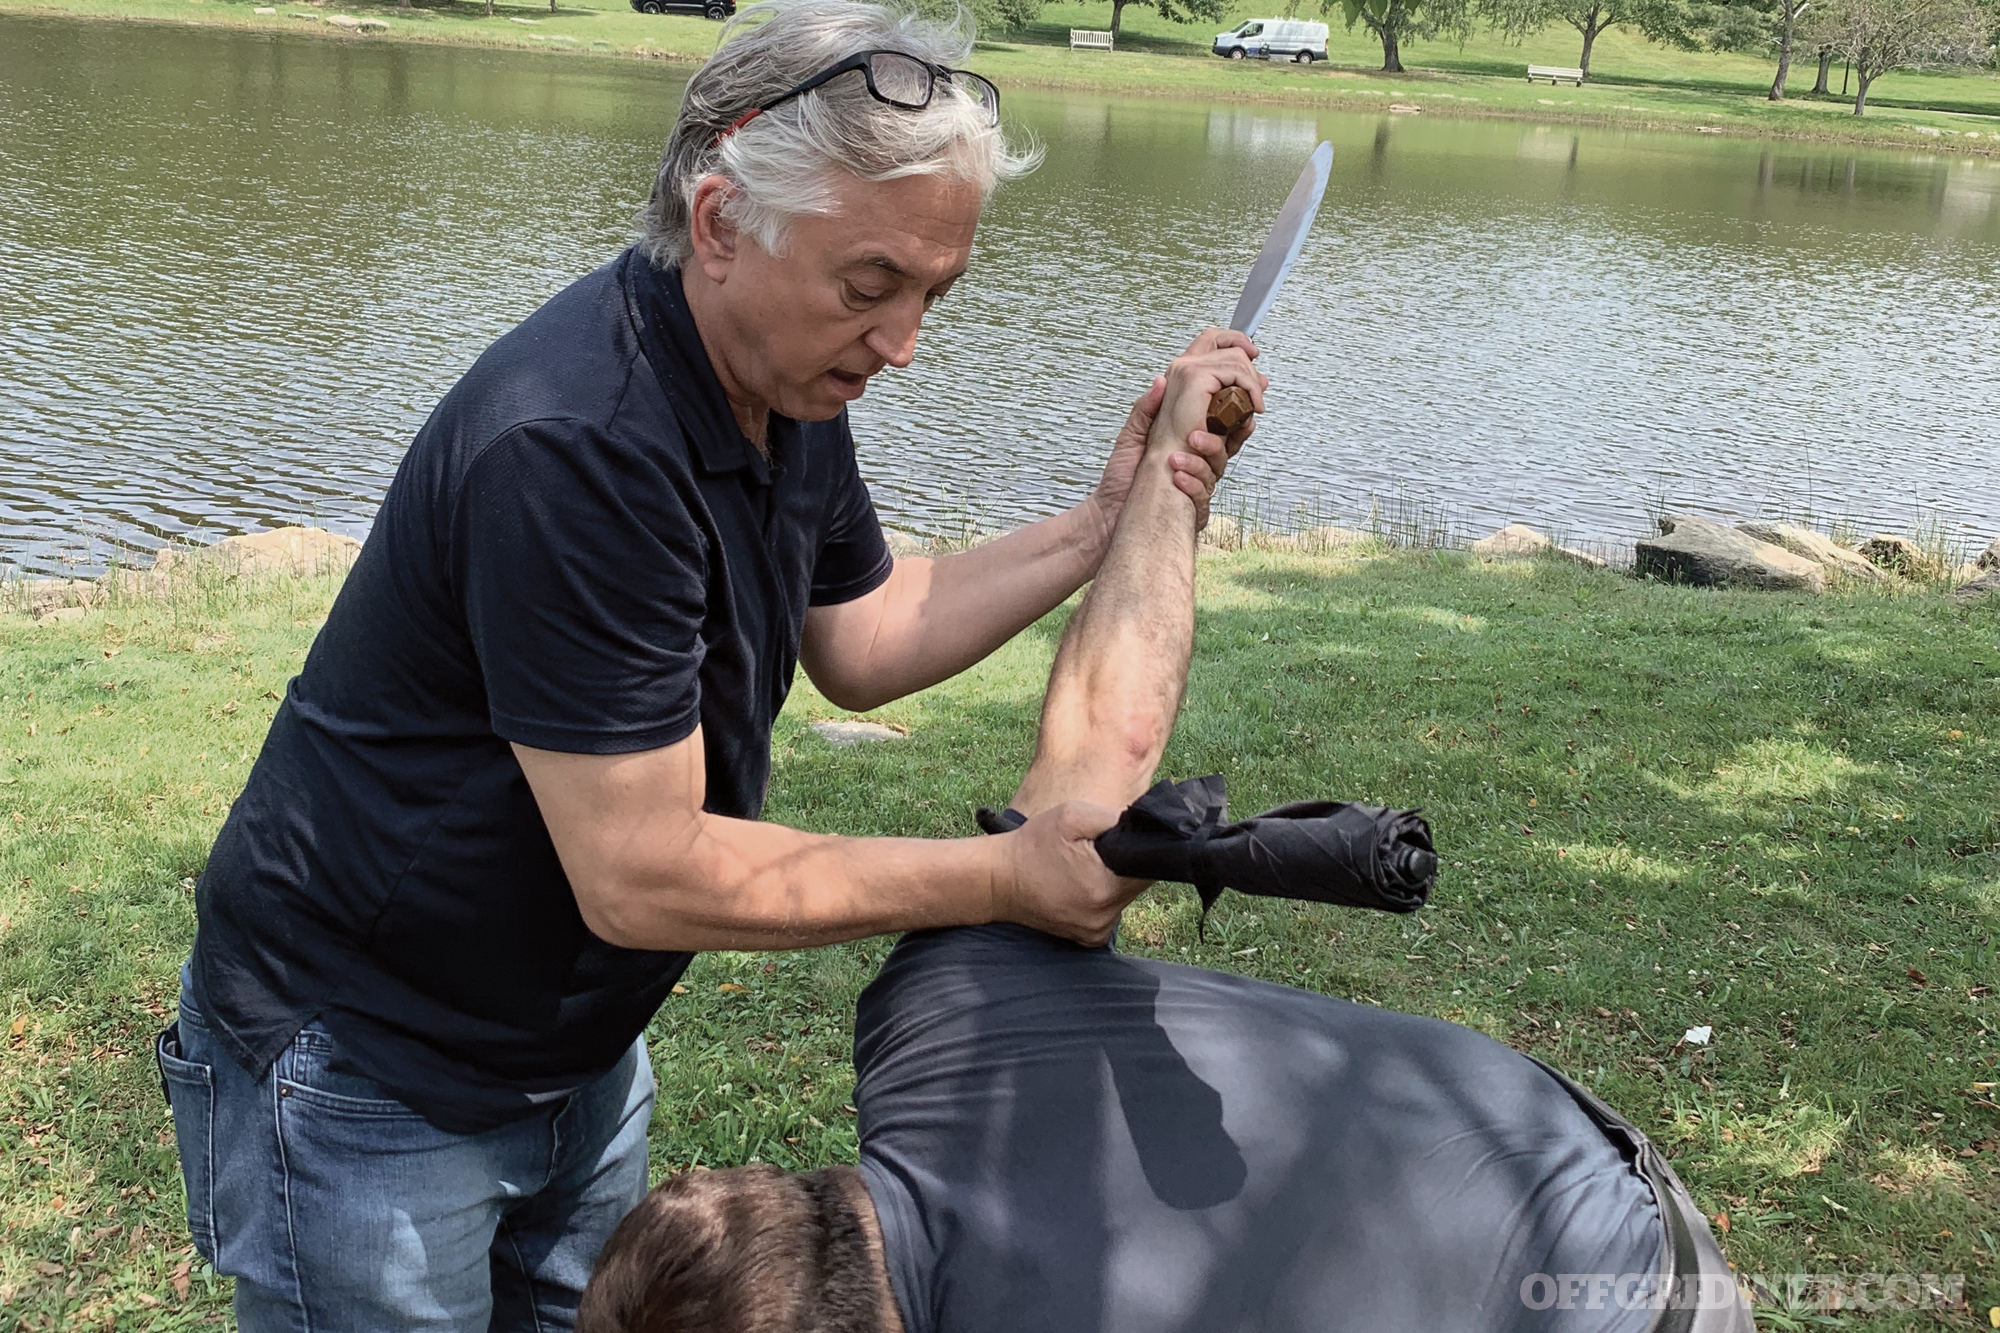
Kelakos: While living in Israel, two friends and I were surrounded and harassed by a dozen older boys who threatened to beat us up. I drew my sheathed knife — I carried a knife from the age of 9 — and we covered our escape by throwing stones at them. I’ve been attacked with broken bottles and bats by multiple assailants (I solved that problem by taking a broken bottle from the alpha and holding it to his throat); by someone who flashed a concealed handgun (problem solved when I quickly put my hand on his weapon, pressed it against his body, and put a finger in his throat); by a perp who attempted to carjack me (he threw a brick at my driver-side window, and I proceeded to drag him down the road for a few feet while keeping his hand tangled in my steering wheel); and several attempts to rob or attack me by various perps who threatened me with a knife or stick weapons (I relieved each of their weapons to defuse the situations).
What are your takeaways from these fights?
Wihongi: First, a broken bone in my hand from punches to the violator’s head. Although I mentally prepared to not use my fists, training kicked in under stress and I used what I was commonly training at that time. Second, when we hit the ground after the hip toss, I received a large laceration to my arm from broken glass on the ground. Environmental factors caused considerable injuries to me with the technique I used. This, coupled with the broken bone in my hand, put me out of training for a couple of months and limited my work. And third, while holding the violator on the ground, for a couple of minutes I felt very vulnerable in a crowded environment where several people were nearby, and I didn’t know who his friends were. My visual and auditory awareness were also obscured due to the nightclub music and strobe lights. I felt very vulnerable to third party intervention — and I was.
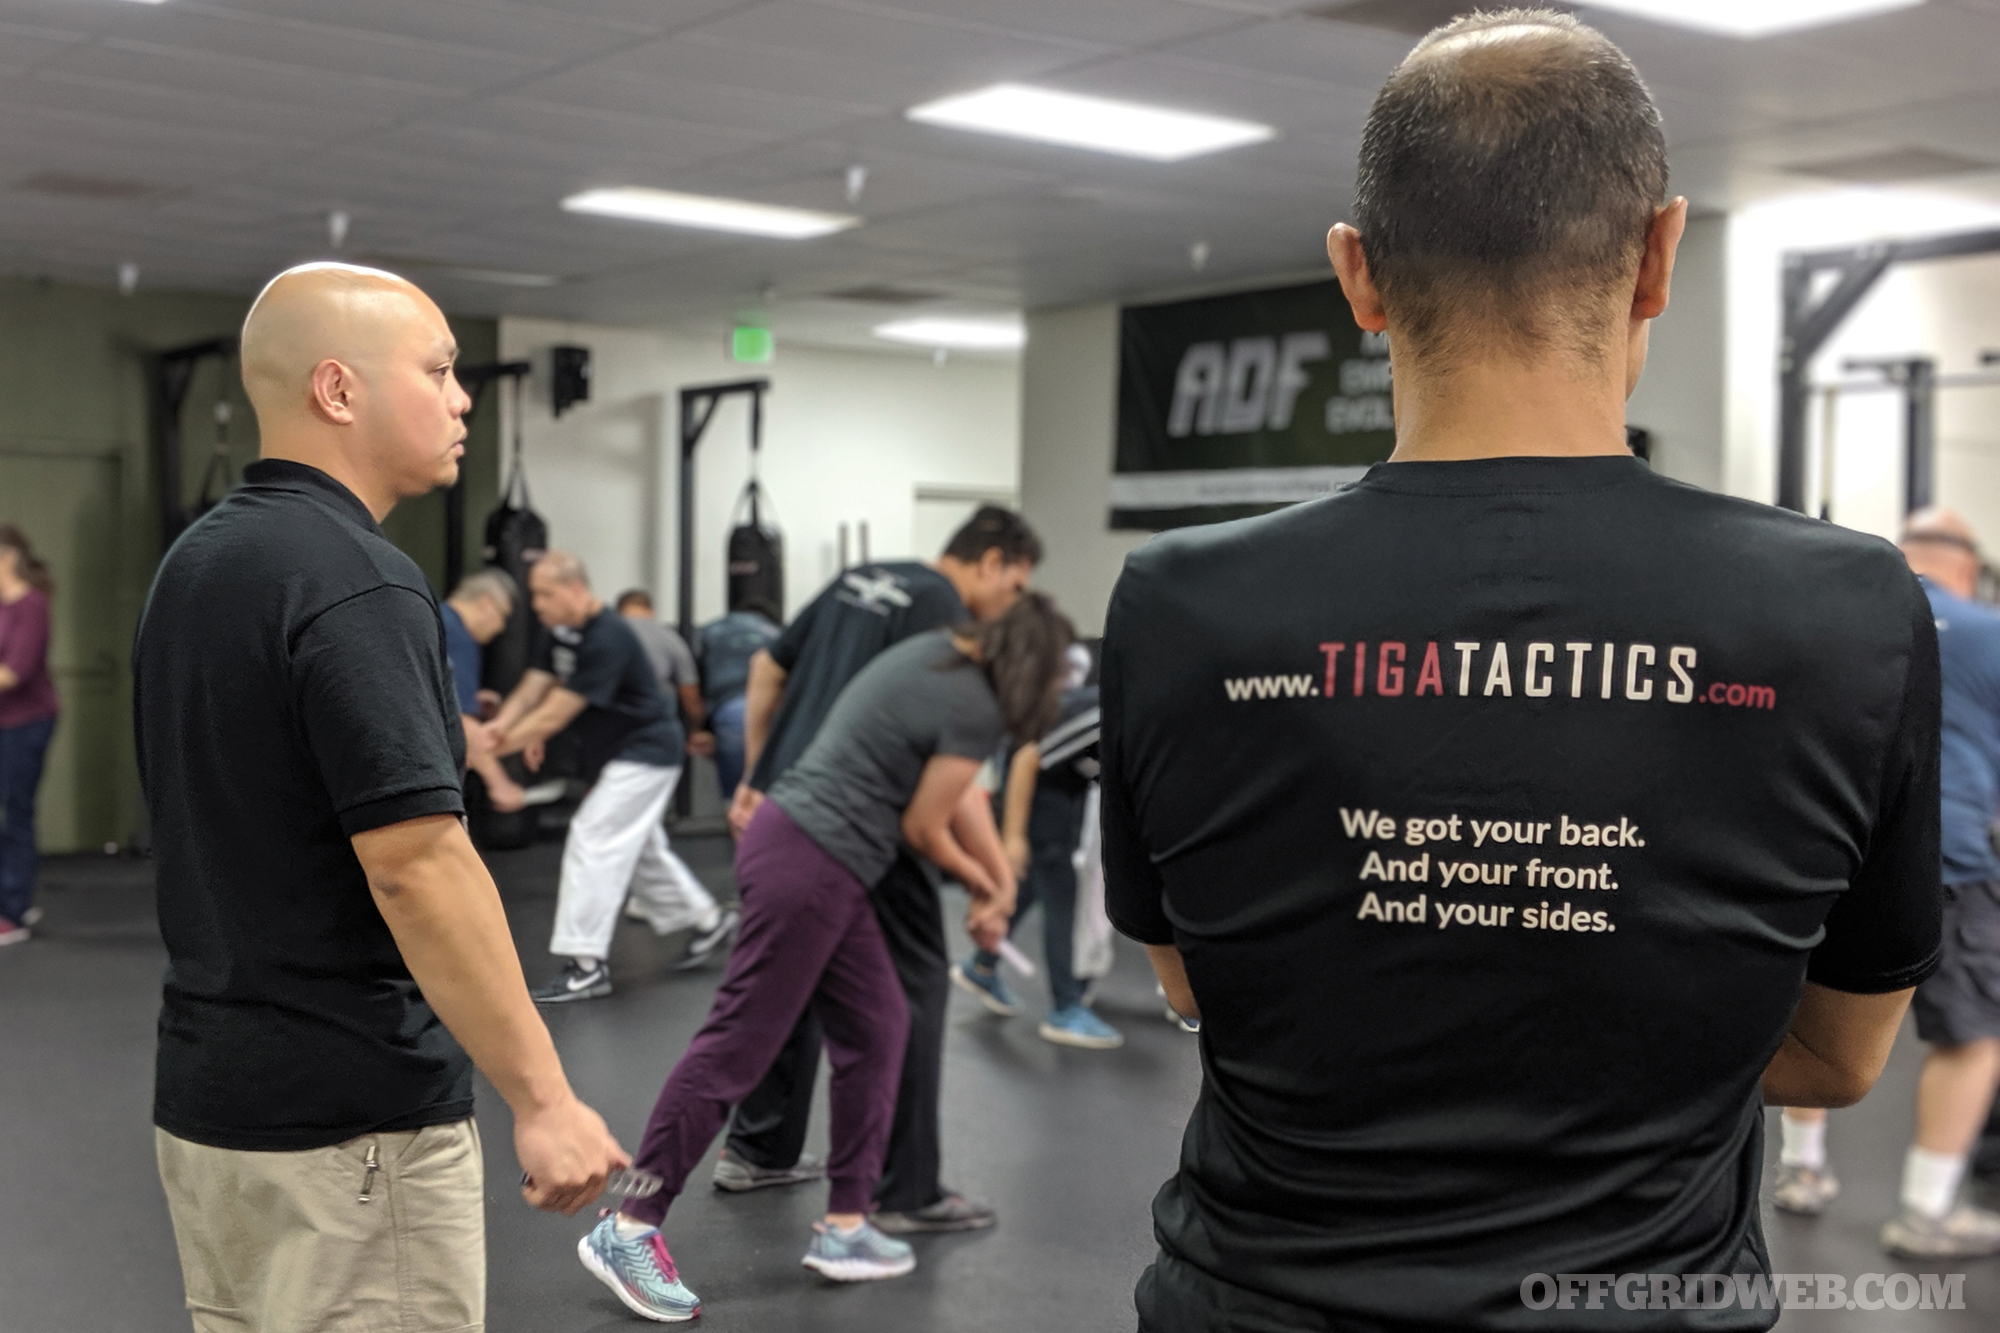
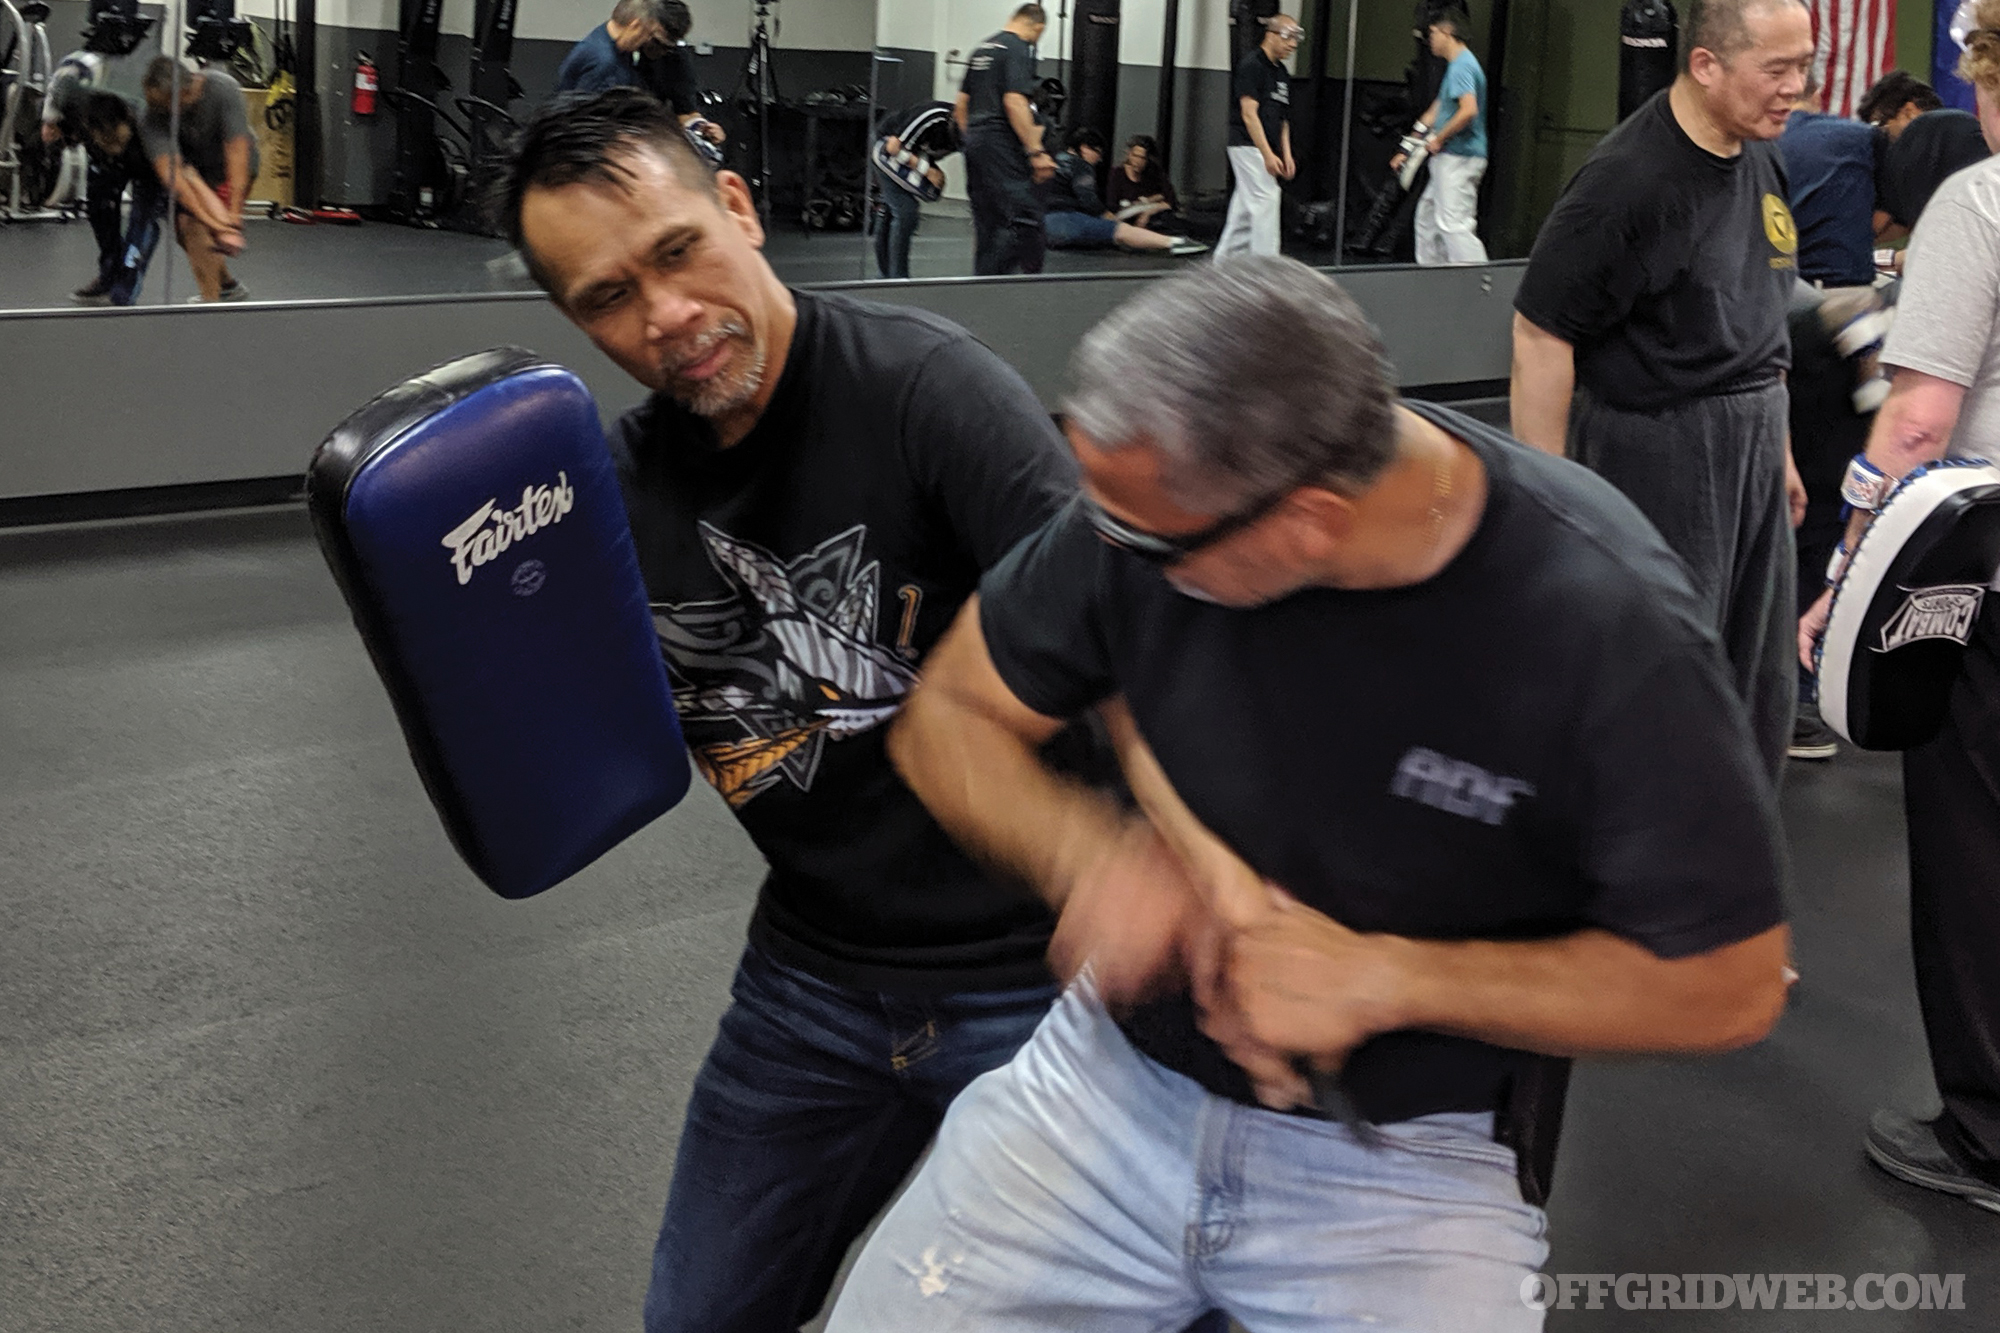
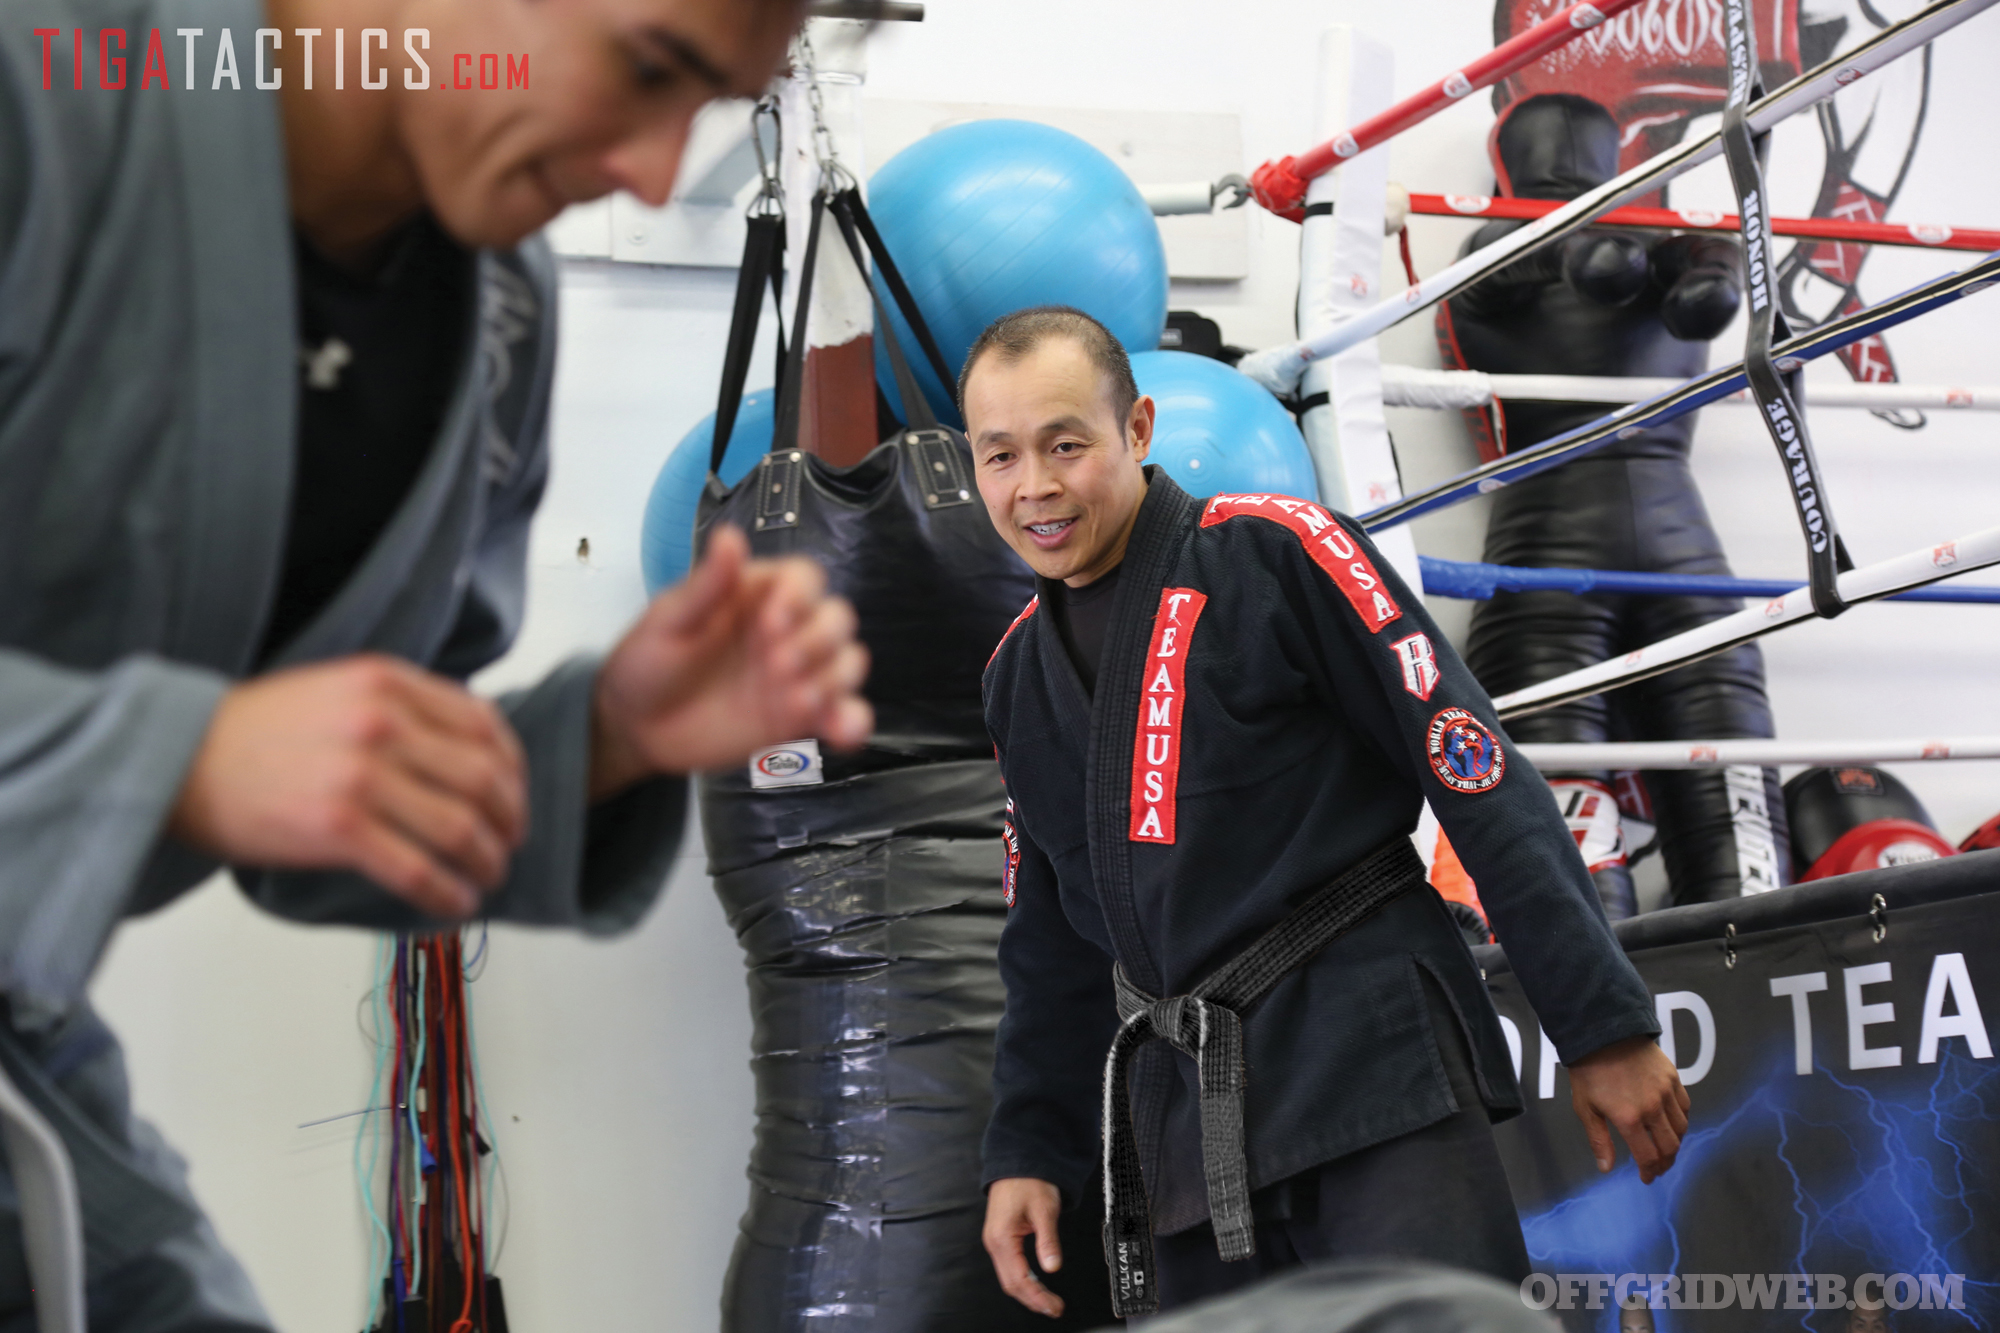
Above: Tiga Tactics owners Conrad Bui and Patrick Vuong teaching at the Academy of Combative Defense and Fitness (ADF). Photo courtesy Tiga Tactics.
Isler: Be mindful of whom you allow into your mind. Read clearly the motives of those who are feeding you information. And no one ever really wins a fight.
Janich: These incidents taught me that when it’s time to act, do so with commitment and intent. Carrying a weapon and having the ability to use it effectively also give you a tremendous advantage.
Kelakos: The important lessons learned were first, I was not “present” and my mind was elsewhere. Second, I could have taken steps to avoid the conflict, like running, or avoiding the conflict initially, but didn’t. I didn’t sense the potential for danger because I wasn’t in the moment. Third, I’ve since learned to scan and be aware of what’s going on around me and what people are doing around me. I now rely on my instincts more in sensing my surroundings. I constantly practice my ability to scan my surroundings with peripheral vision. Lastly, I’ve learned to stay calm and relaxed so that I might flow through and manage conflict. As a part of my current job, I practice all these principles and techniques during cross-border business negotiations.
General Self-Defense Tips
What advice do you give to your students in regards to self-protection?
Wihongi: The violent encounter you’ll always survive is the one you’ve been able to avoid. Next, martial arts conditioning, or attribute development, is as important as learning techniques. This includes, but is not limited to, speed and power development, timing, and precision.
Isler: The advice I always give my students is that in any altercation there’s always a before, during, and after. What could you have done to avoid the situation? If the situation is upon you, then what can you do to defuse it and keep it from escalating? If the situation is happening, what can you do to stop it with measured response? While responding, what can you do to ensure the image you’re projecting is one of intent to the aggressor, but defense to bystanders? When family is involved, it’s important to remember to teach them what to do so that everyone has a game plan. Defending when you have a young child is a very tough, dynamic role, so playing how you would handle different scenarios is of great value. Lastly, what actions happen after an altercation? Do you run, call the cops, or enlist help? Also, know how to articulate your actions.
Janich: First, understand that physical skills are a last resort, and the ultimate goal is always to go home safe. You can’t change the world, only your reaction to it, so make your brain smarter than your ego and do everything possible to avoid conflict. Second, understand and work with the body you have. Although you should do your best to develop physical endurance, strength, and stamina, ultimately, you will have to fight with the body and physical attributes you have when the attack happens, so be realistic and cultivate a personalized system that meets your needs and individual capabilities. Most importantly, you don’t have to fight like me or anyone else — you just have to fight well. Although studying organized systems of martial arts is good, for real personal protection, focus on the skills and tactics that work best for you. The individual is always more important than the system. With all due respect to traditional martial arts and sport-oriented systems, if you’re not getting practical, usable self-defense skills from an instructor, move on. It’s a free country.
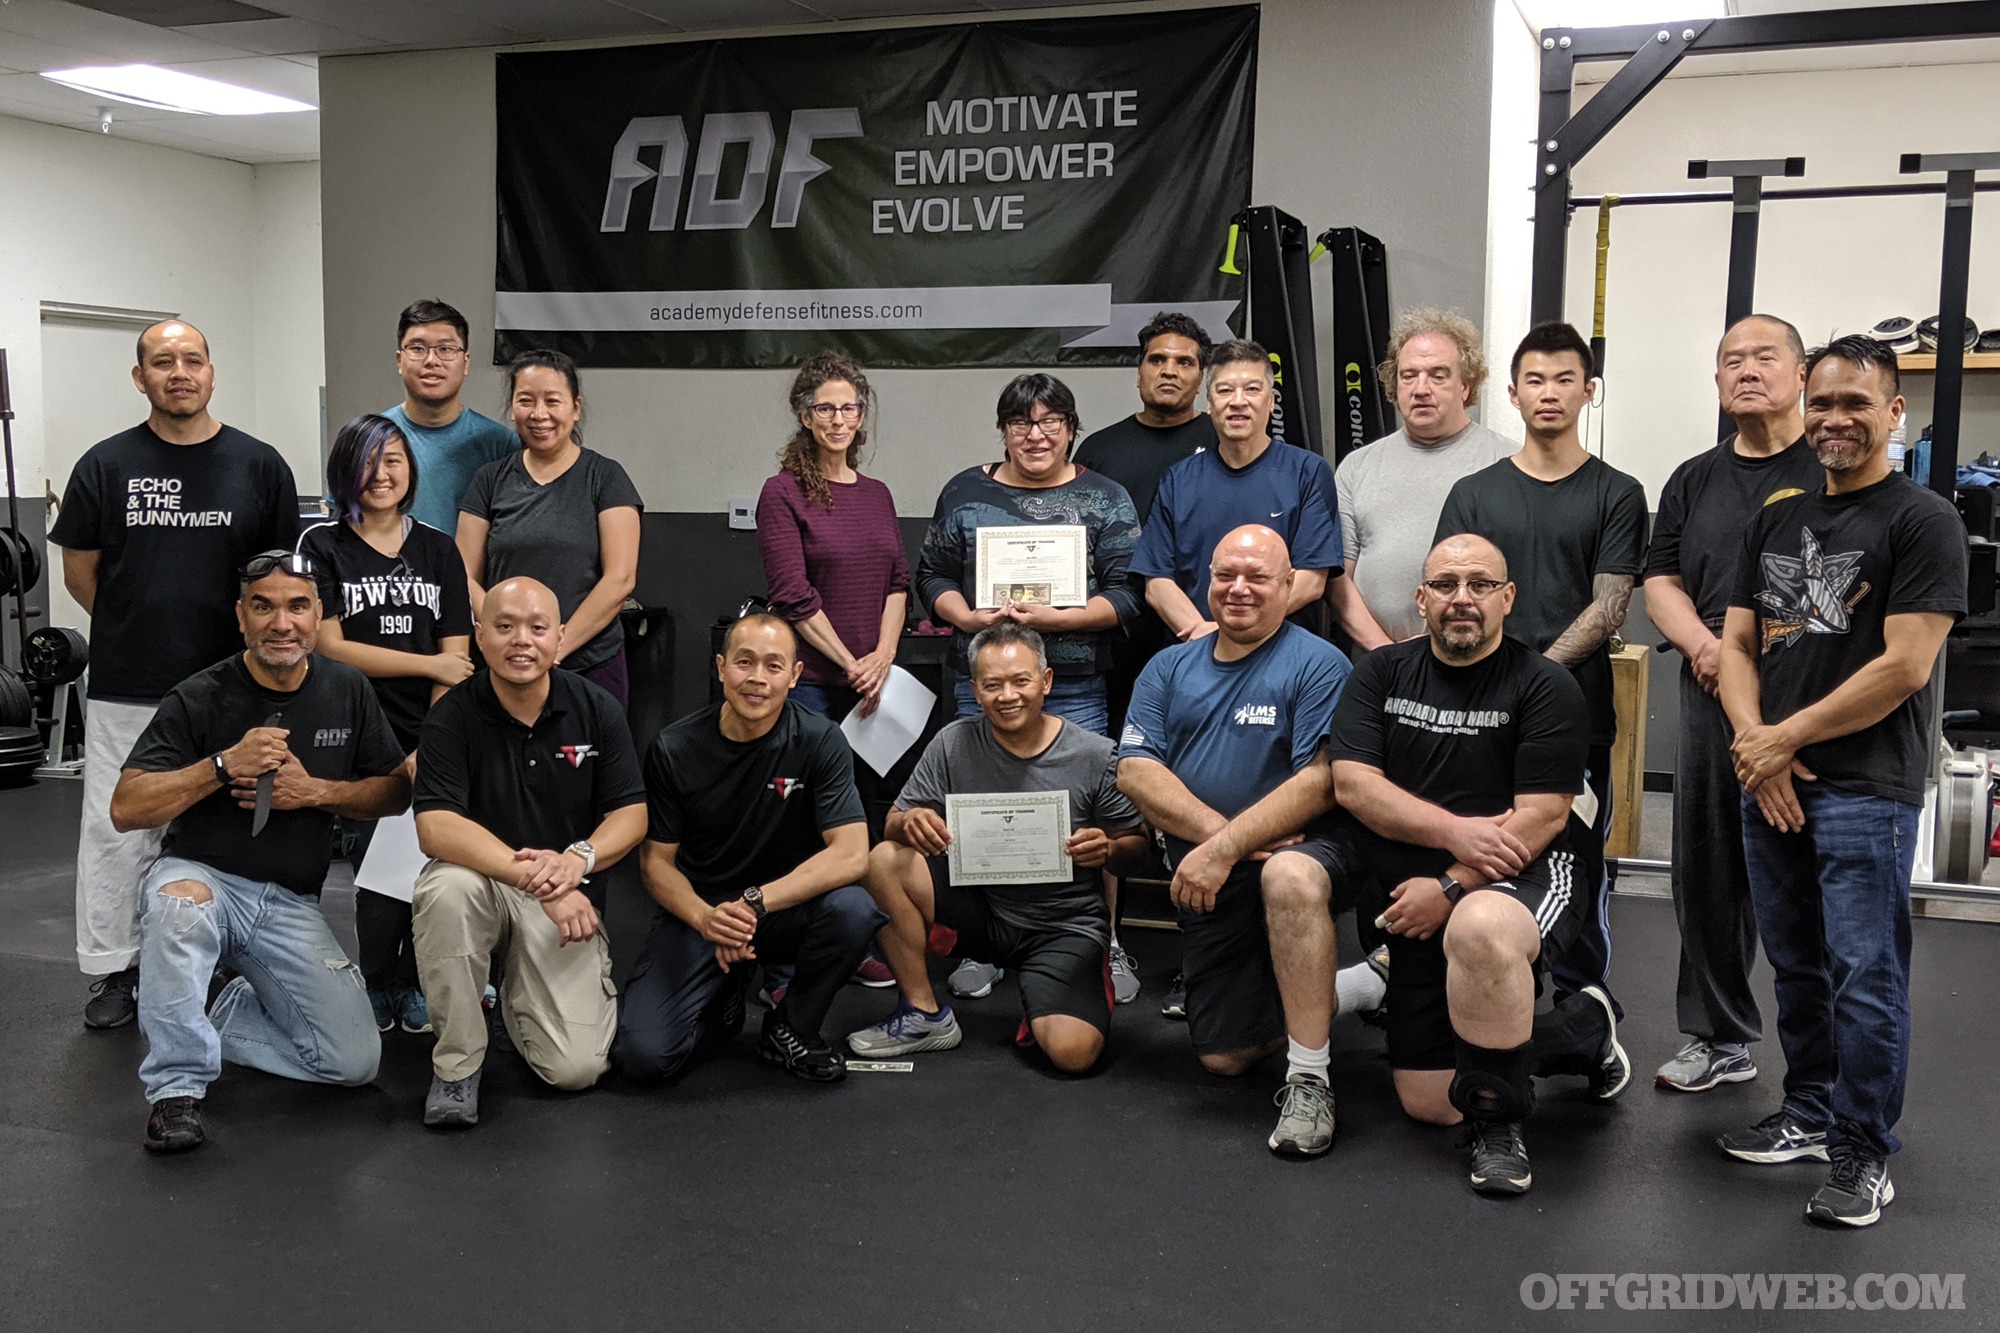
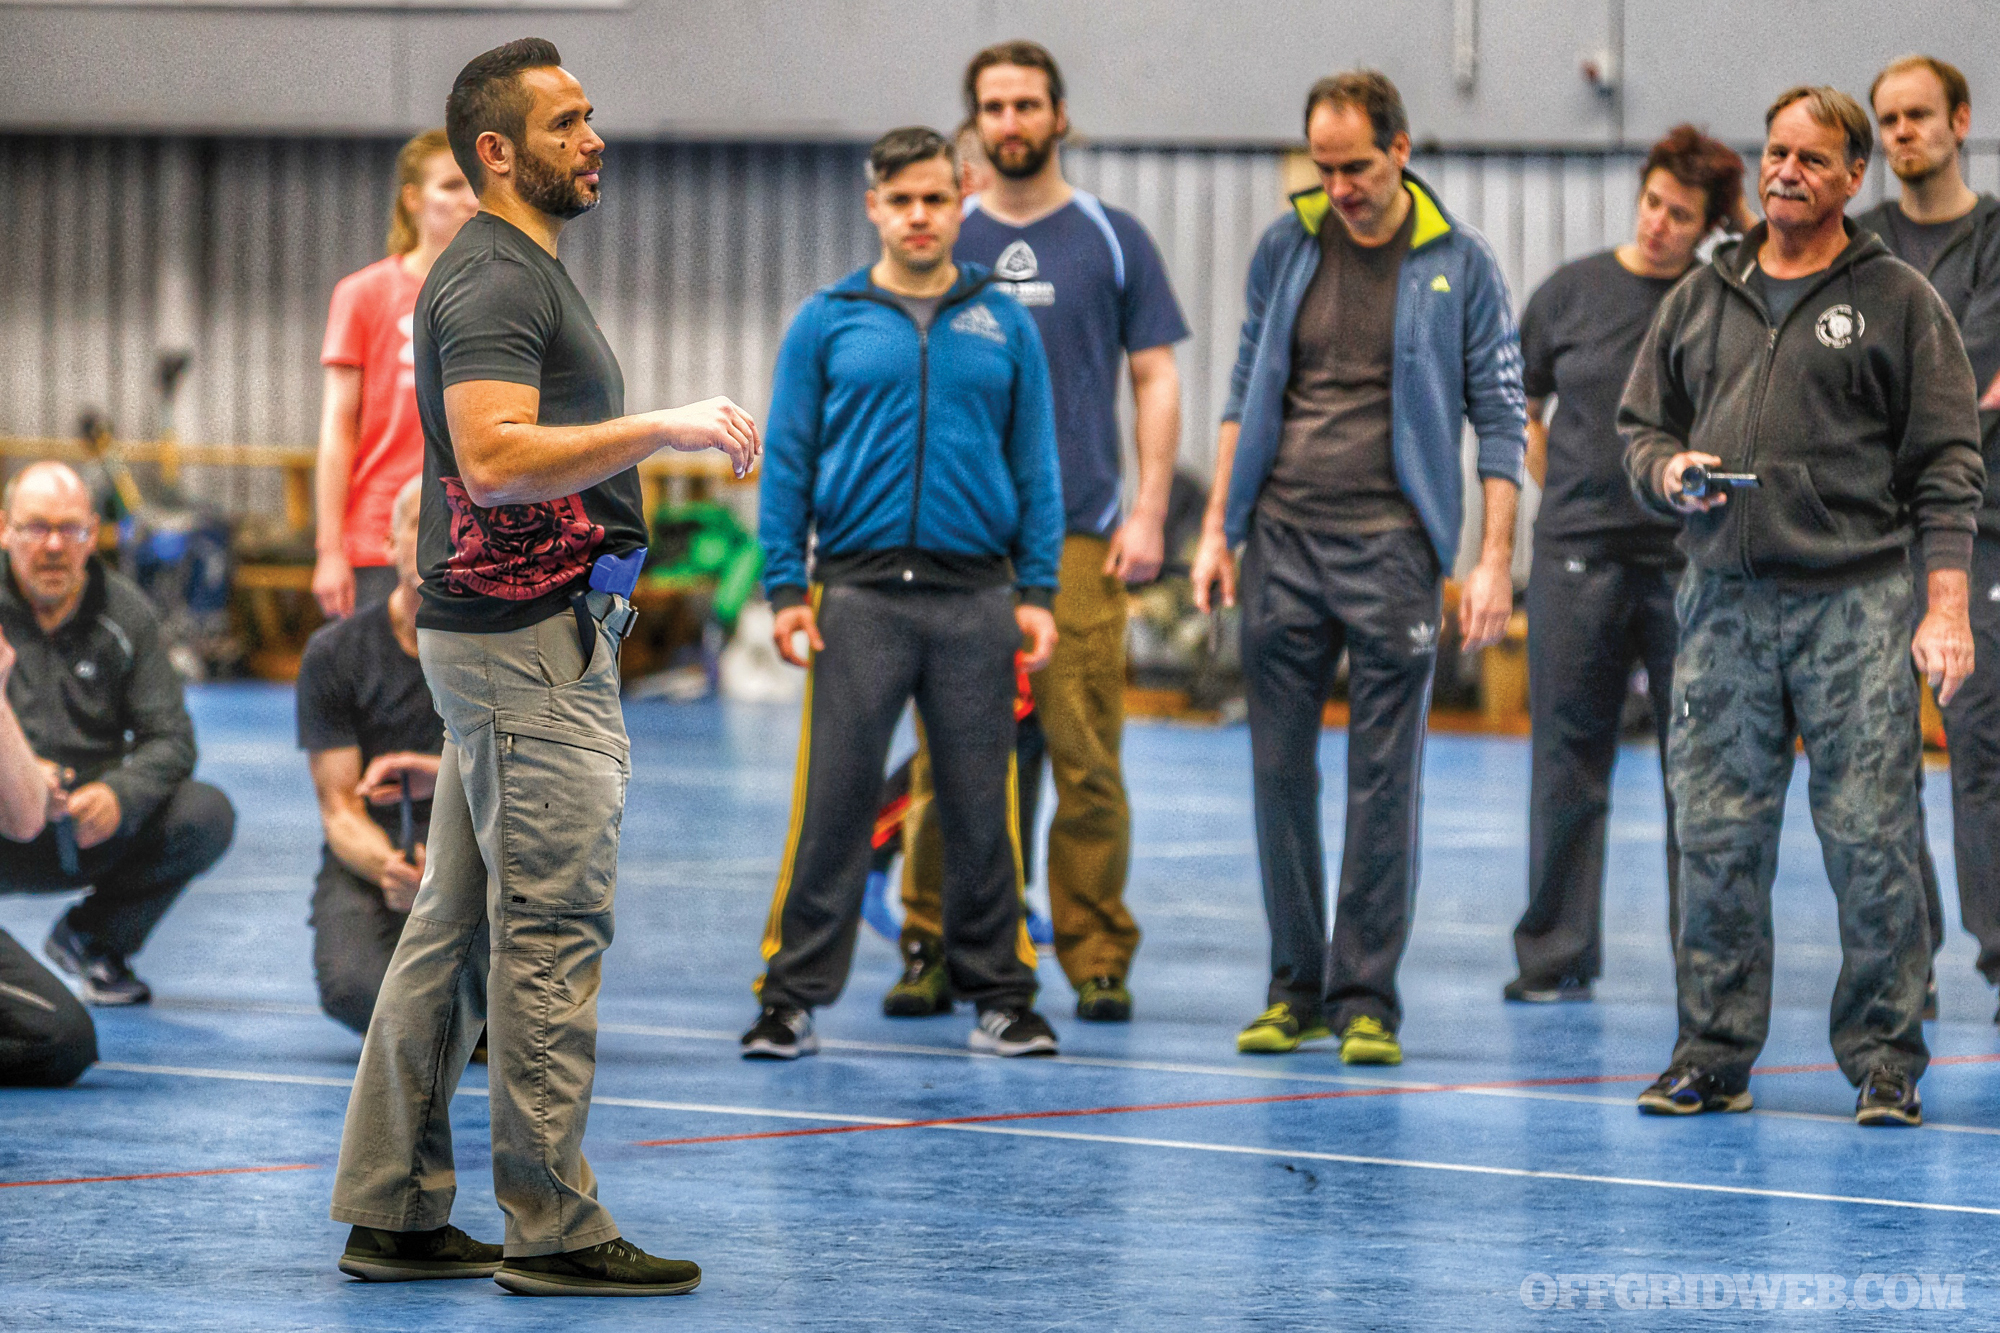
Above: See our feature “So You Want to Be the Karate Kid or Cobra Kai?” in Issue 27 about selecting a martial arts discipline. Photo courtesy Tiga Tactics.
Kelakos: I’m not an “in the box” kind of person so I’ll answer the question in this manner: Be in the present, use common sense, and when you sense danger, extricate yourself from the situation if you can. Naturally, I encourage people I meet to study practical self-defense for a variety of reasons. I often use this hypothetical situation in my conflict management training — you just arrived on a train at Grand Central Station and plan to walk to a meeting. You’re carrying a briefcase, or a purse and a briefcase. Before you begin your walk, ask yourself a few questions: Should I use my smartphone while walking to my destination? What am I thinking about as I walk there? Am I carrying items in both hands, and am I really prepared for the unexpected?
Tools & Force Multipliers
What do you recommend our readers carry for self-protection?
Wihongi: I recommend people carry a weapon that provides the highest level of protection and is within the bounds of their local laws. If that’s a weapon commonly considered as deadly force, then people should also consider carrying a less-lethal force option. However, there are two things that should be taken into consideration. How likely are you to keep the chosen weapon(s) accessible on a regular basis? If convenience of carry starts to become an issue, it’s likely you’ll eventually start to leave that weapon at home. Have you trained with the weapon you choose to carry? Being armed is not necessarily being prepared, and I always recommend people get training from a credible source.
Isler: I always recommend one medium- to long-range projectile weapon (such as pepper foam or spray) and one short-range weapon (such as a kubaton/pocket-stick or knife). I tend to recommend the less-lethal options if you’re out and more-lethal options if you’re home, since laws can be difficult to navigate when it comes to self-defense with a deadly weapon. I always highly recommend getting training — if you carry anything, you should get trained on how to deploy and use it under duress.
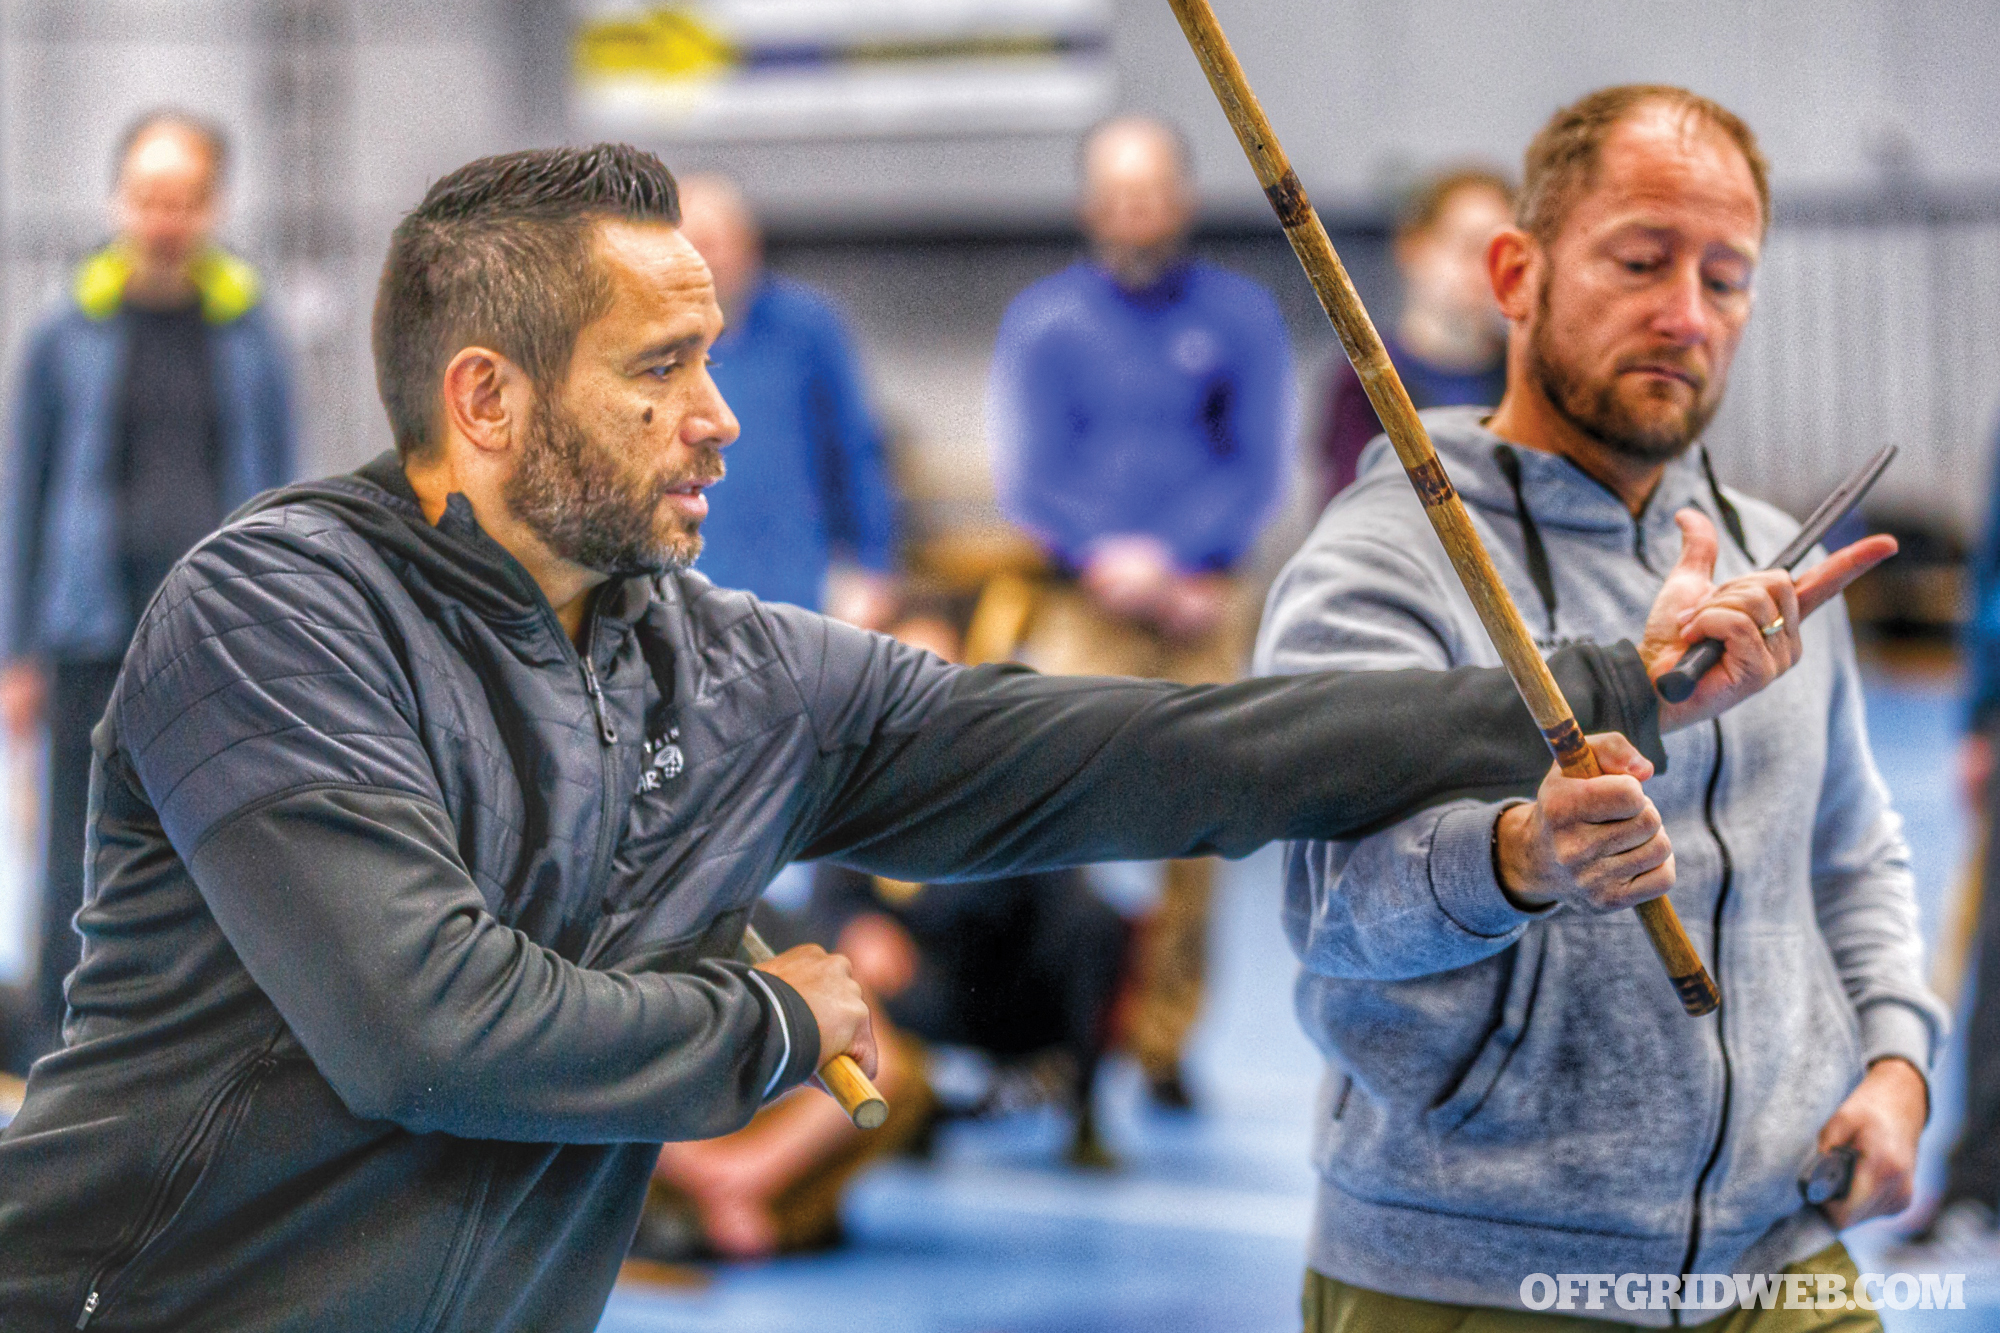
Above: Pekiti tirsia kali practitioner Jared Wihongi trains self-defense against blunt and edged weapons. Photos courtesy Michael Leukel.
Janich: Weapon carry is very much a matter of legality and personal commitment. In addition to doing your homework on the laws in your area to determine what’s legal, you should also do some serious soul-searching to make sure your commitment is consistent with the weapons — or potential weapons — you carry. For example, if you carry a knife with even the thought of using it as a self-defense weapon, you must understand what that entails and be mentally and physically prepared for that reality. The only way to do that is to actually train diligently in its use. The one item I believe everyone should carry is a tactical flashlight, which reminds you to be aware (especially at night), can be used to blind a threat from a safe distance, and can be used as an improvised striking weapon. Carrying a flashlight also gets people used to the commitment necessary to carry a weapon religiously and make it part of your lifestyle. Best of all, a flashlight can go with you virtually everywhere — including environments that prohibit other weapons.
Kelakos: This isn’t an easy question to answer. What’s the context? If you’re an operative in hostile environments, you might want to carry a concealed firearm and a backup blade (I prefer fixed blades to folders, but I always travel with a small folder). I travel for work in Asia and often find myself in sketchy environments. Where permissible under local law, I carry a small folding knife that I can pass off as a utility knife. Where carrying a knife might present a problem with local laws, such as in China, I just carry a few pens. I always carry ballpoint pens. If you take my conflict management course, you might also start carrying a cheap folding umbrella when heading into an urban environment.
Potential Legal Issues
Are there any legal pitfalls our readers need to be aware of in terms of defending themselves and their loved ones?
Wihongi: The intricacies of force in defense of person or property will differ from place to place, but a few common-sense rules can help you err on the side of caution. One is to always consider the imminence of unlawful force being threatened or perpetrated against you or those you feel a duty to protect. Your defensive actions must adjust as the imminence of that threat increases or decreases. Second is to only ever use force that can be considered reasonable and proportional. Is your force response reasonable considering the level of threat you perceive that you’re facing? For example, deadly force should only be used or threatened if you perceive that your life (or that of someone you feel a duty to protect) is in imminent danger of death or serious bodily injury. Third, is your force response completely necessary, or could you have avoided the situation? For example, could you have left the location to avoid the necessity for a force response, or did you somehow instigate the attack?
Isler: Always be aware that in our modern day, you can be bright and right, but still be considered wrong in the eyes of a courtroom. Never assume that because you feel you had to defend yourself that others will perceive it that same way. Know the laws in the areas you frequent and understand how to operate effectively within those boundaries.
Janich: Self-defense is all about the judicious, reasonable use of force. If you use physical force to defend yourself, your actions may very well be legally scrutinized, so they must be justified. This is where the techniques of many traditional martial arts can lead you astray, as they are often battlefield-oriented, not self-defense-oriented. For example, in the Filipino martial arts, many counter-knife techniques involve disarming the attacker and immediately using his own knife against him. In the eyes of the law, as soon as you’ve disarmed the weapon, you’ve most likely ended the threat to your life. Using a knife against a now-unarmed attacker is therefore not justified and immediately makes you guilty of assault with a deadly weapon and potentially attempted murder. As the saying goes, “you will fight the way you train,” so make sure your training is consistent with the principles of lawful self-defense.
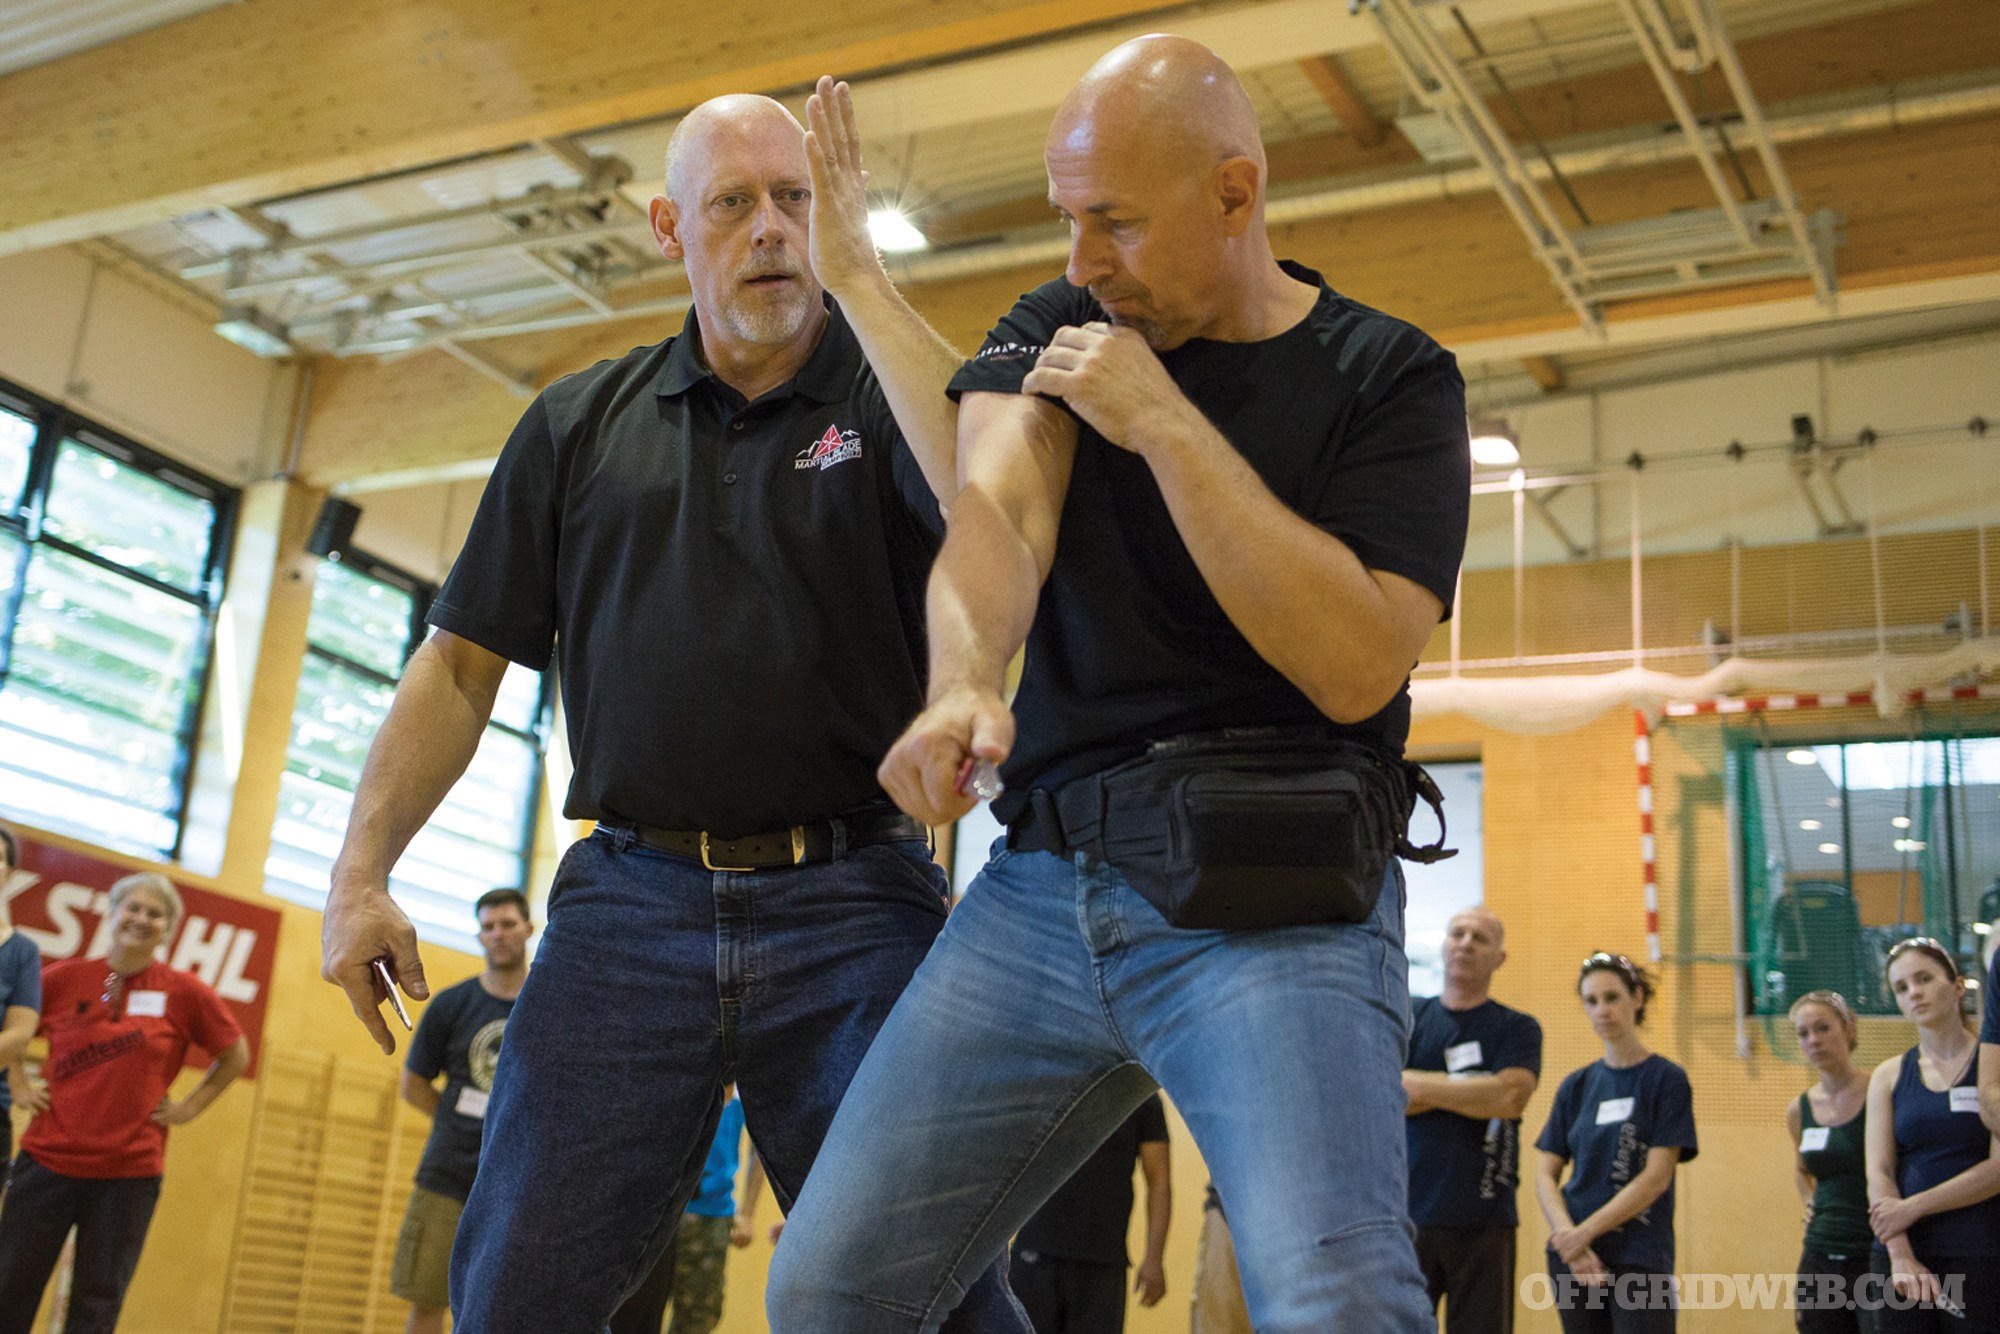
George Kelakos teaches disarming techniques to students.
Kelakos: I’m a lawyer, but not a criminal lawyer, so this isn’t legal advice. However, let me try to provide you with responses from a common-sense perspective and from a person who spends more than half of his time traveling and working in countries outside the U.S. First, be aware of local laws. Note that in the U.S., there is no “right” of self-defense. It’s a privilege and depending on your actions, you could be prosecuted for assault and battery (or worse) if you use a weapon (or wield one) at the wrong time or in the wrong situation — and even if you manage to duck the criminal charges, you could still face a civil lawsuit.
Second, use common sense. Carrying a knife or firearm may save your life or help you avoid an unpleasant situation, but balance that with the burden of carrying a weapon. I would add that you should rely on your most important weapon: your brain. If you’re threatened by a drunk thug in a bar, just walk out. If he puts his hands on you, brush his hands off and walk away. I would suggest that you use the minimum amount of force to respond to situations like this and be sure that your actions and demeanor convey to the observers that you did all you can to avoid the situation. If you’re in a conflict situation and law enforcement shows up, remember that anything you say could be used against you. Better to stay silent and request to speak to an attorney. Laws vary in the U.S. For instance, you might have more leeway in a “stand your ground” jurisdiction. Still, better to use the minimum amount of force needed.
I teach my martial arts students to evade and avoid conflict, but if necessary, intercept, disrupt, and neutralize — in one beat, if possible. If you post videos where you demonstrate disarm techniques or responses to blade attacks, just remember: If you find yourself in a courtroom as a defendant in a criminal case or a civil lawsuit, your social media postings could come back to haunt you. Full disclosure, I’ve not researched this issue as I have no experience as a criminal lawyer, but I would expect that a trained martial artist would come under greater scrutiny in a courtroom setting. Lastly, if you teach or practice violent responses to attacks and you use these techniques in a real-world situation, there could be consequences. I encourage my brothers and sisters in the martial arts world to balance their martial arts practice with conflict management training. Consider taking negotiation or mediation training courses. Again, you may avoid being prosecuted for defending yourself against the perp, but beware of the civil law consequences of putting a perp in a hospital.
Medical training hasn’t always been the most popular topic in the survivalist community, with many preppers choosing to prioritize skills that sound more exciting or impressive — the sort of thing you’d see in a James Bond movie rather than a textbook. However, in my humble opinion, medical training is just as important as being trained in the use of a firearm. With a little bit of knowledge and practice, the average person absolutely can render aid in the critical first few minutes of a trauma scenario, and those actions might make the difference between life and death.
We often hear that it takes around seven minutes for an ambulance to arrive on scene. In that time frame, someone could bleed out and die without intervention. A four-hour class on the use of a tourniquet could’ve saved a life. If the scene had multiple casualties, a two-day class could’ve started the process of organizing the scene so that EMS could focus care on the most critical patients. Think of yourself as a pre-first responder. You could make a difference and save someone’s life. Once official first responders arrive, you can hand off, report, and aid as needed.
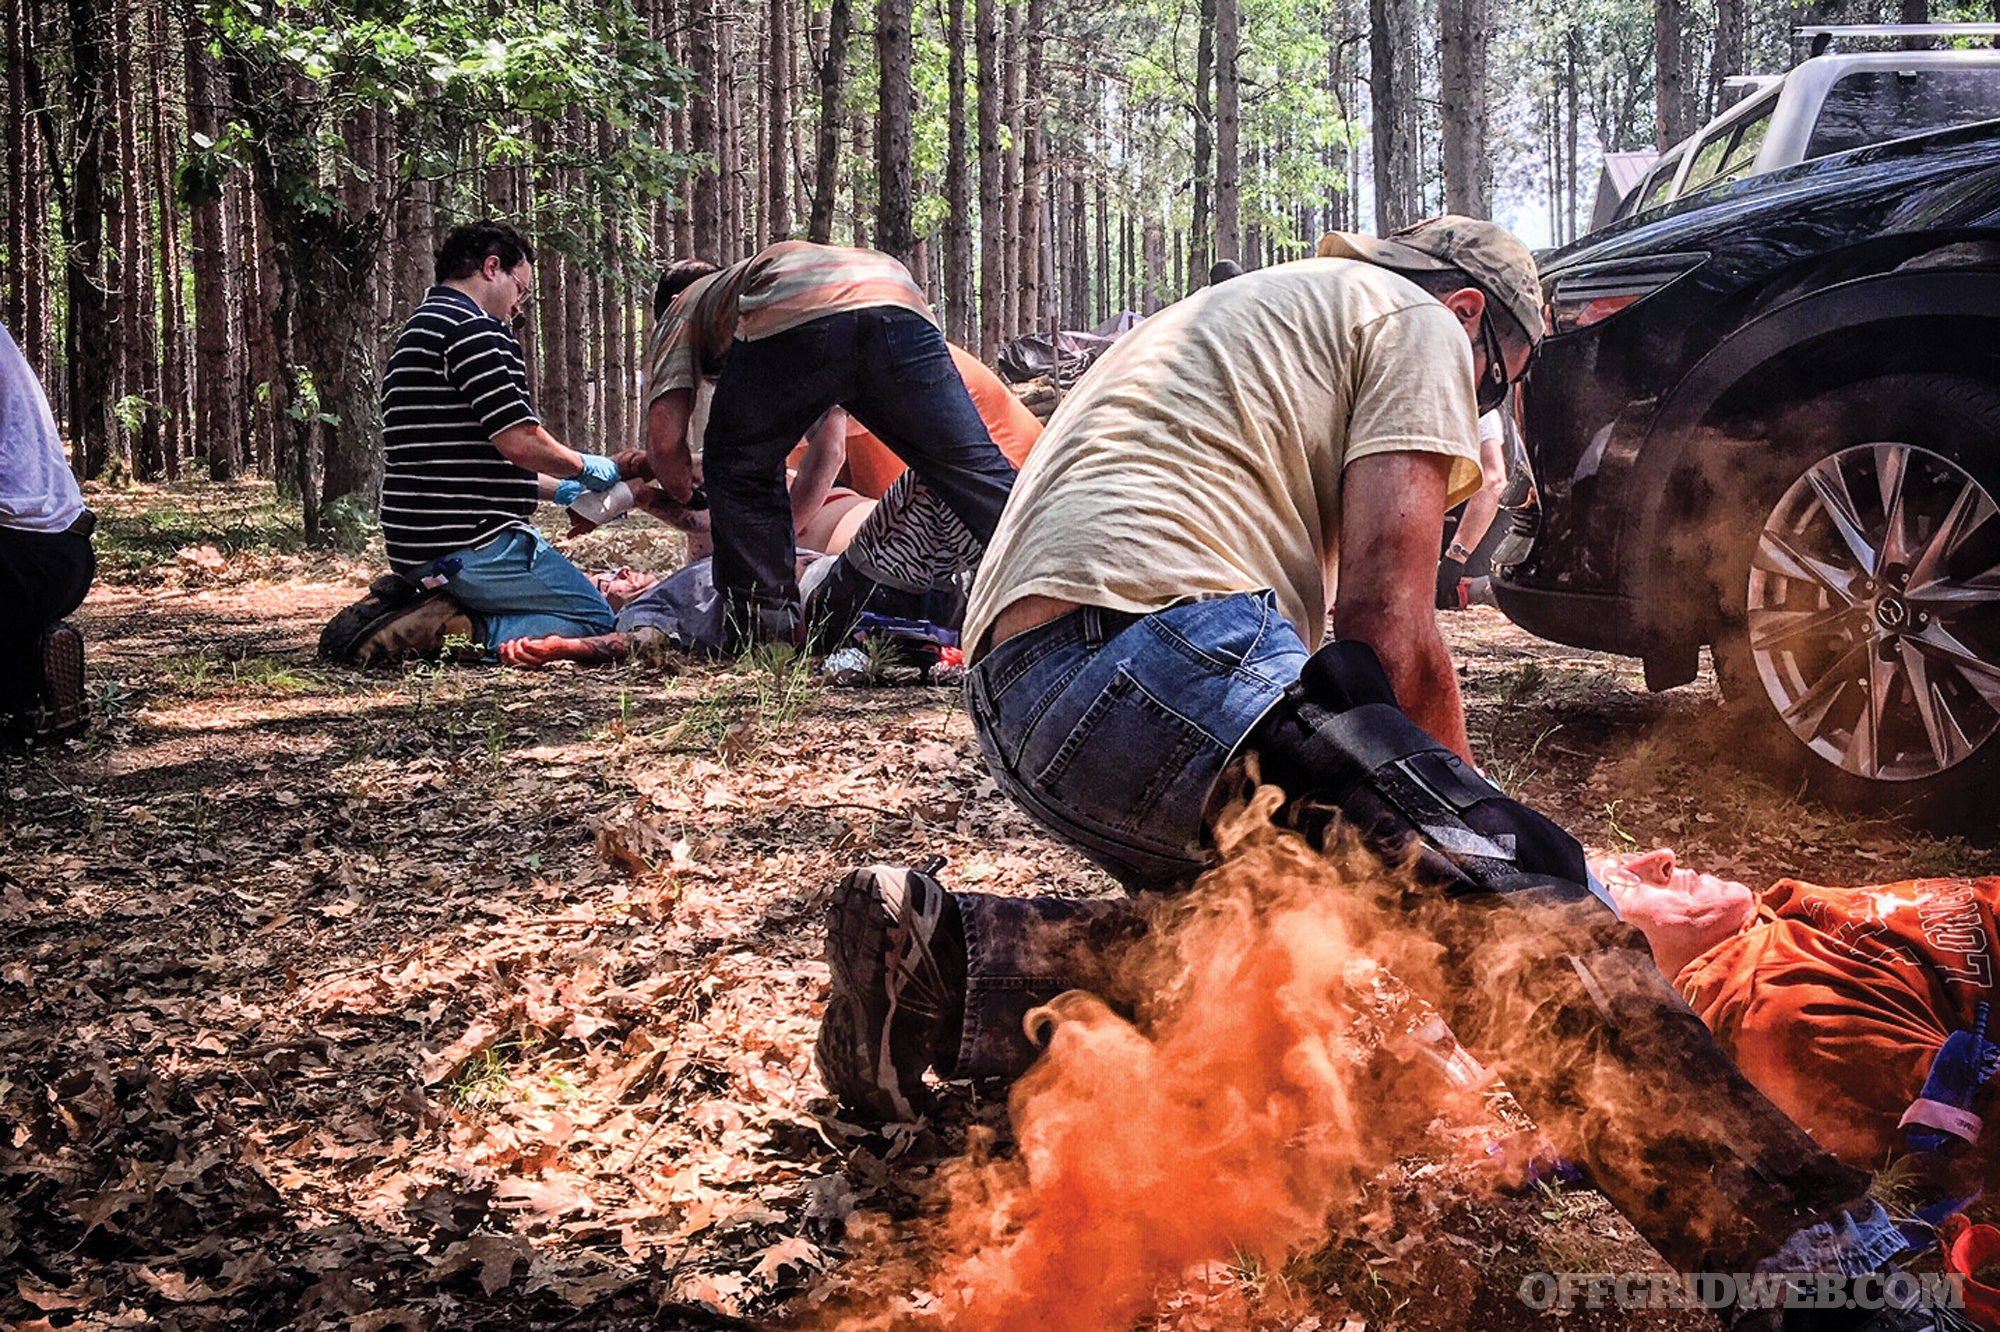
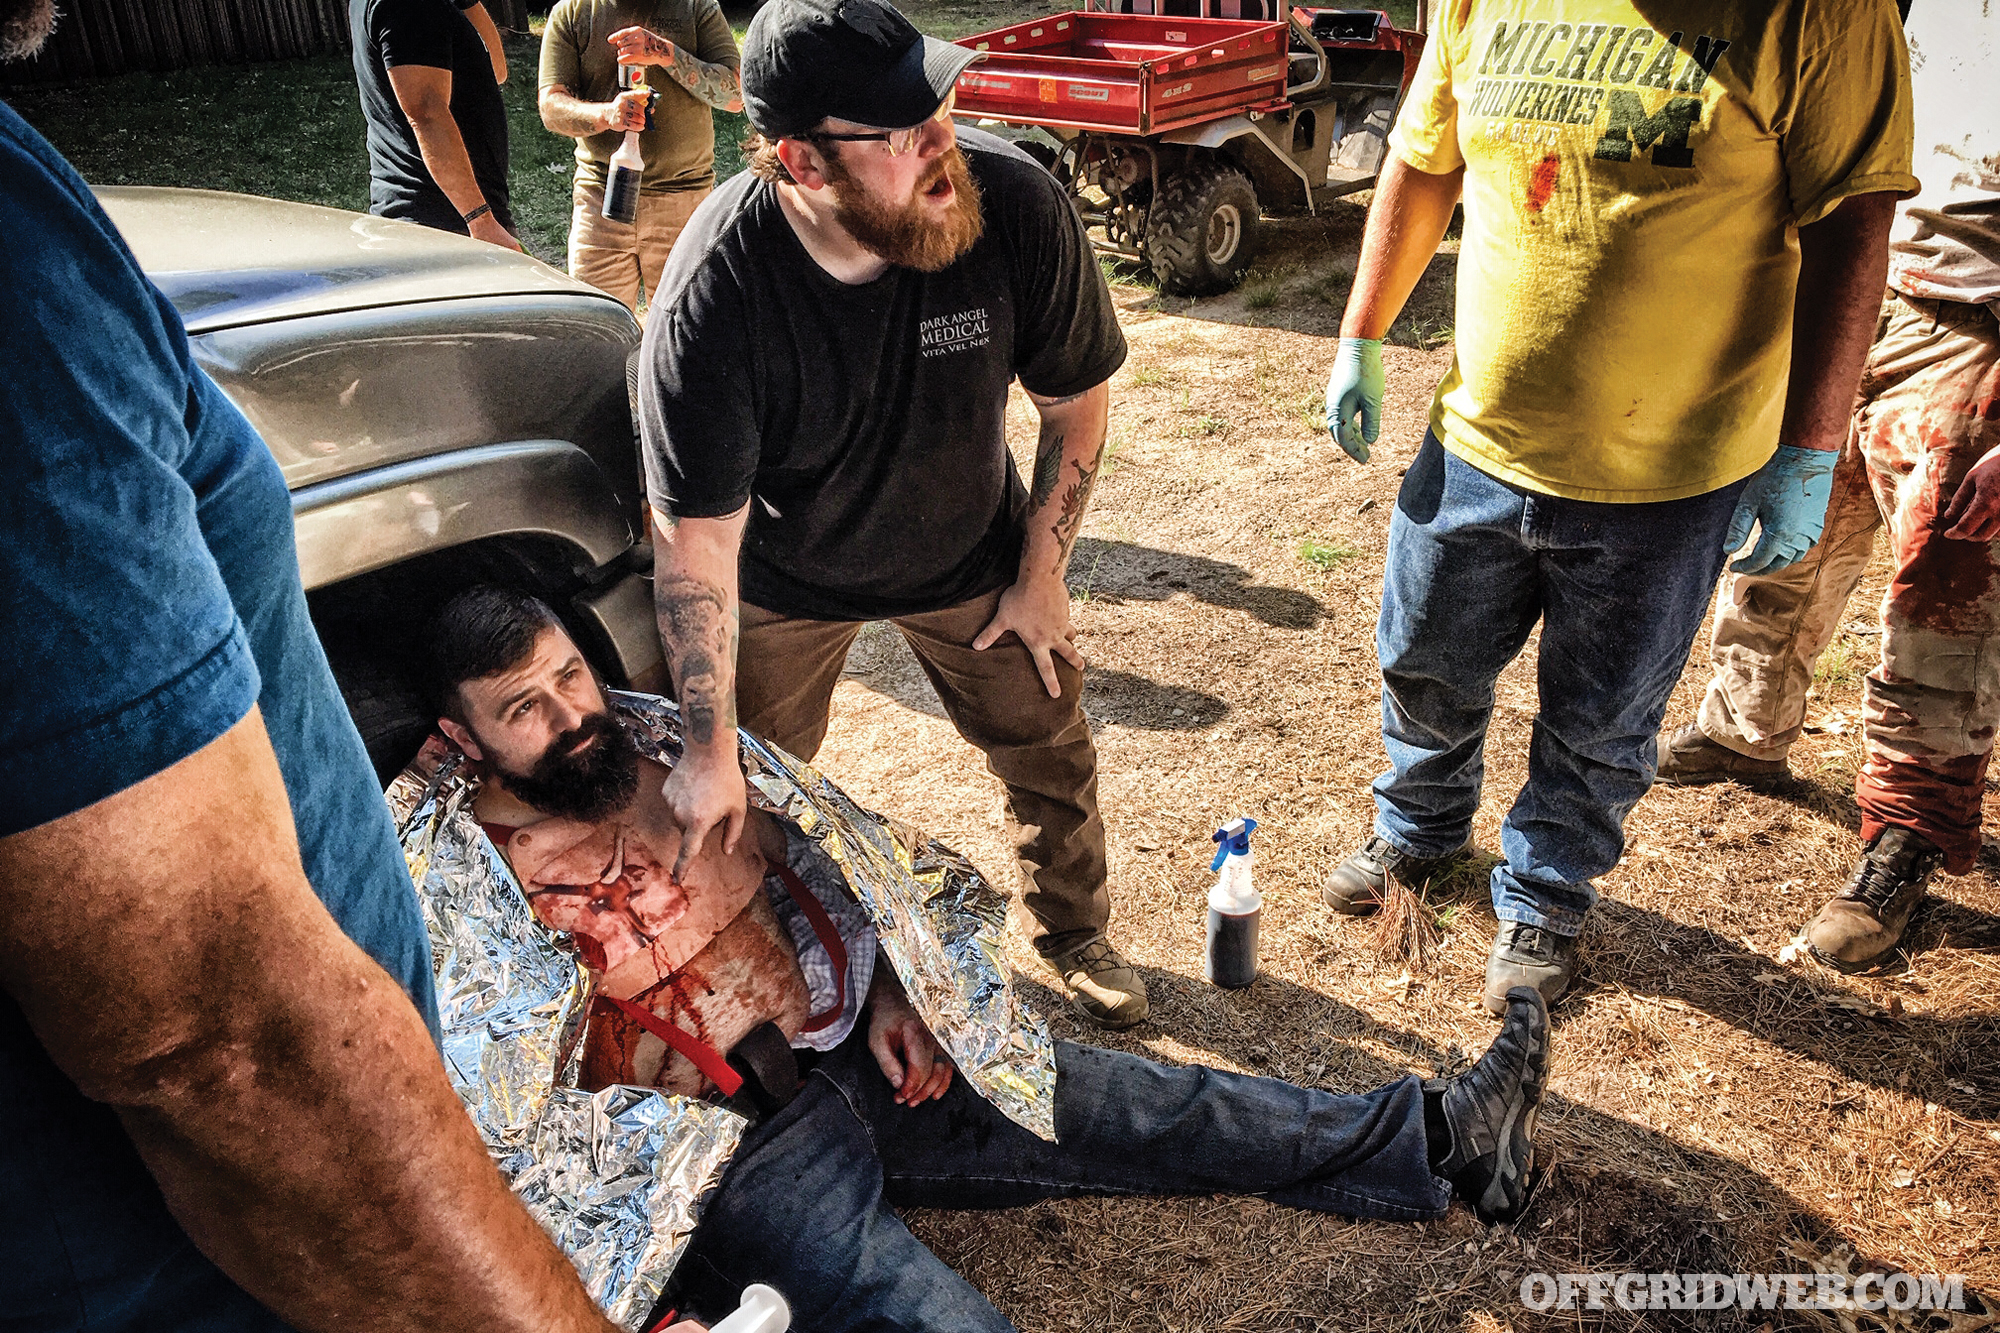
Students applying their acquired skills in a mass-casualty scenario.
Trauma Care Training with Dark Angel Medical
In an effort to check out one of the “pre-first responder” training opportunities that are currently available, I went to the Northern Woods Training Facility in Luther, Michigan, for Dark Angel Medical’s class, Direct Action Response Training (DART) 2. Kerry Davis was the lead instructor, with Doc Bridger (Mike Rohan) and Ross Francis assisting.
As the name implies, DART 2 is a continuation of DART 1, Dark Angel’s flagship course, covering their version of MARCH (M-massive hemorrhage, A-airway, R-respiratory, C-circulation, and H-hypothermia) and trauma scenarios. This came about as a way to prioritize assessment in the trauma patient and is synonymous with the Tactical Combat Casualty Care (TCCC) training courses that teach pre-hospital medical care in combat/trauma scenarios.
Dark Angel Medical interprets the MARCH acronym in their own way by using HABCDE — Hemorrhage, Airway, Breathing, Circulation, “Da brain,” and Environment. Their version expands upon the original ABC acronym (airway, breathing, and circulation) from basic life support classes. Out of necessity, hemorrhage is given its due place at the front of the line as the largest contributor to casualties in combat. I like that “Da brain” is included in the HABCDE acronym because traumatic brain injuries (TBI) aren’t always detected during initial assessments of trauma patients. The last element, environment, encompasses more than just hypothermia and can bring in to play assessing, or re-assessing, scene safety.
Dark Angel Medical’s Casualty Algorithm:
H — Hemorrhage
A — Airway
B — Breathing
C — Circulation
D — “Da brain”
E — Environment
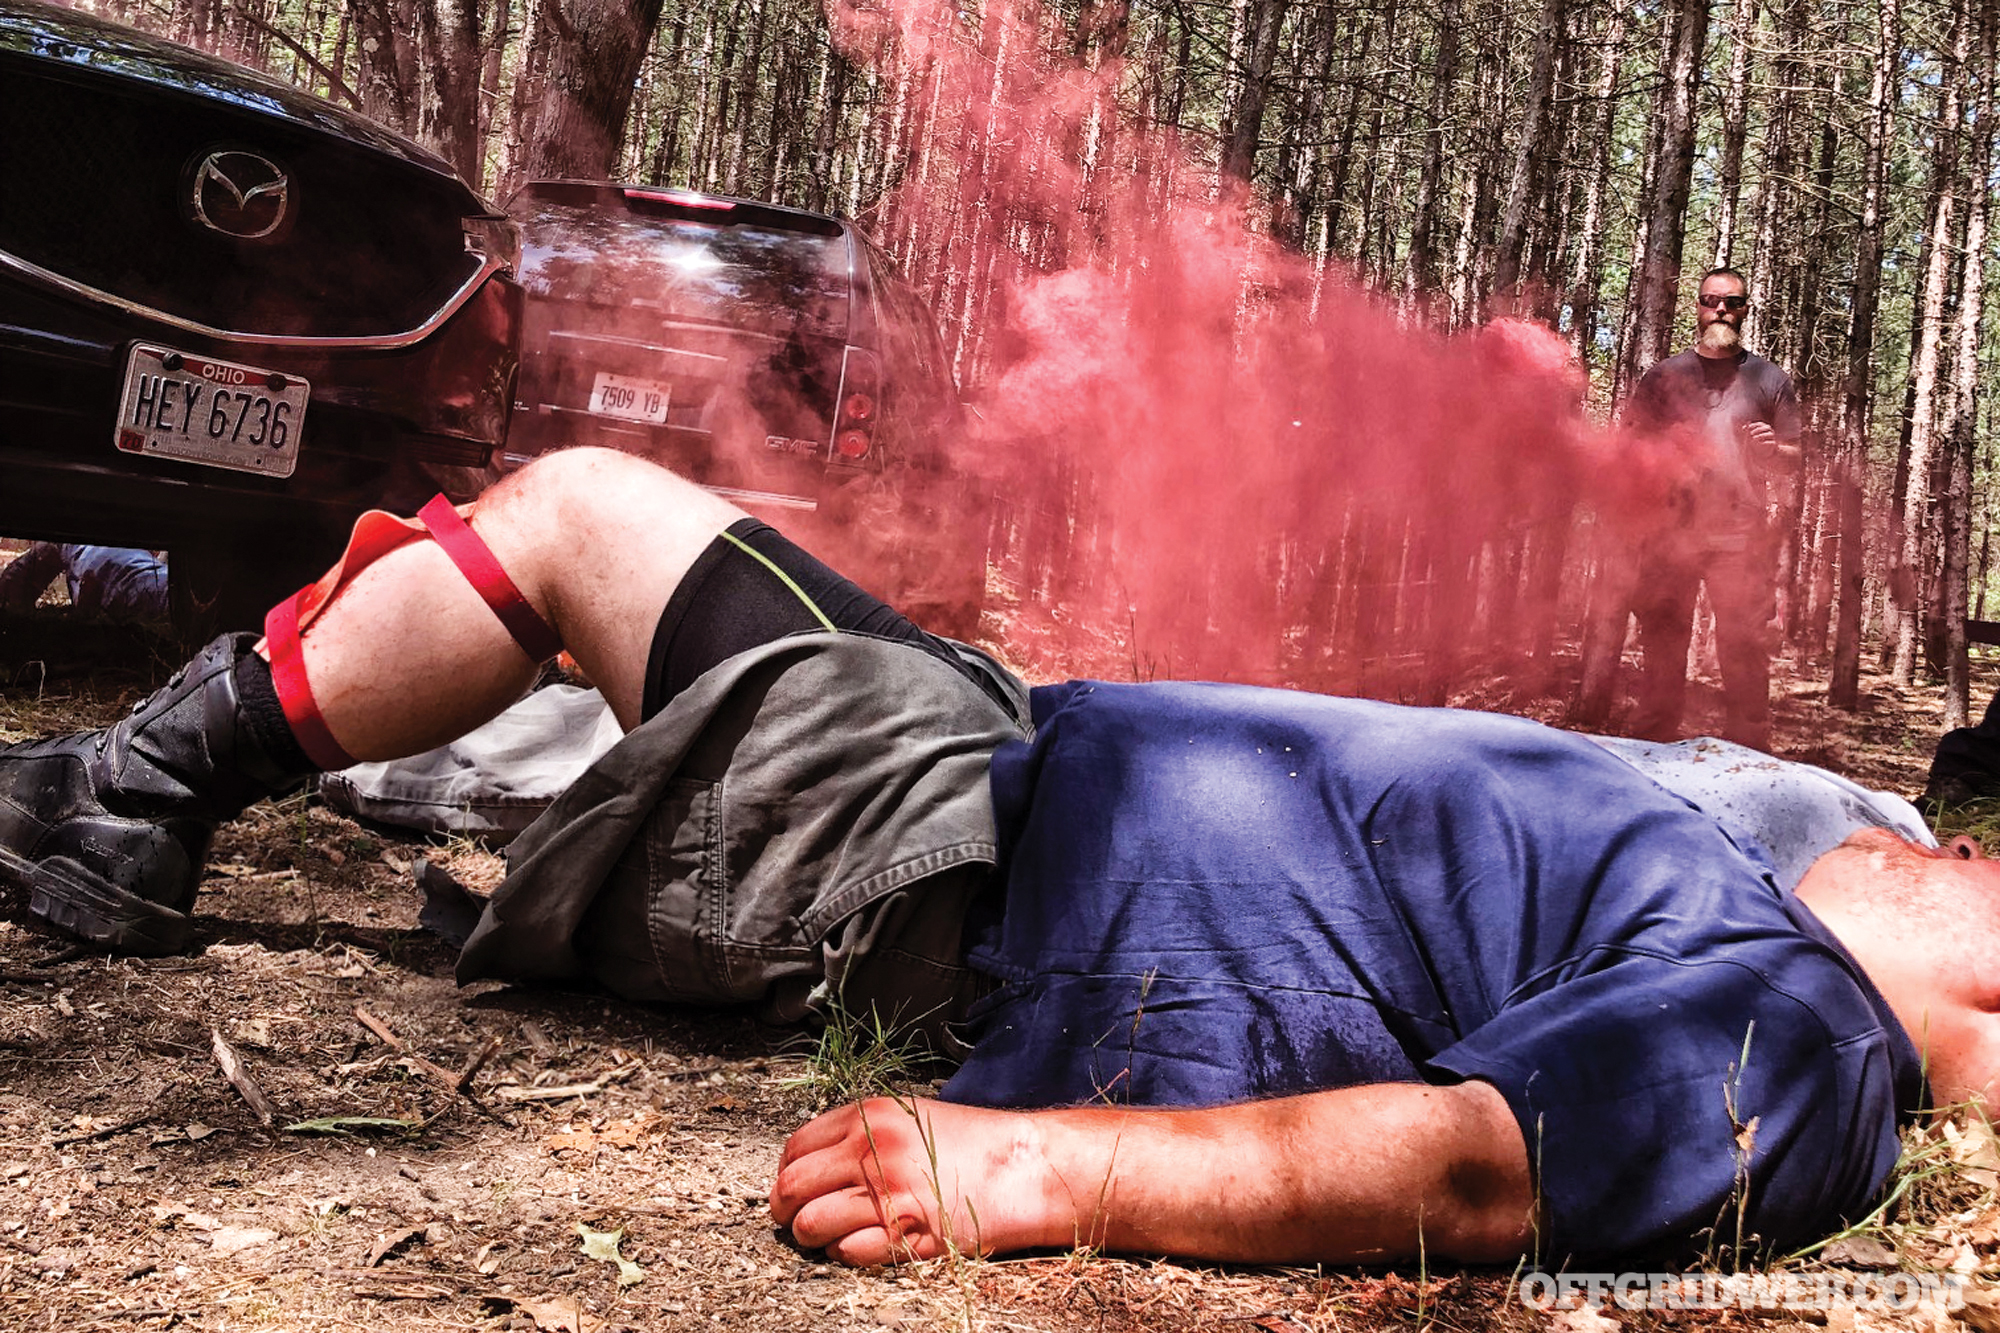
Another key concept that was emphasized, as the scenarios became more complex, was the use of the color-coding system to categorize, or triage, trauma patients in a mass-casualty scenario. The color coding helps to organize and prioritize what patients need to be evaluated and transferred to higher care. The colors used are Green, Yellow, Red, and Black.
Green is commonly called the “walking wounded,” consisting of minor injuries. When you’re the first to come upon a mass-casualty scenario, you should stand in one place and say, “If you’re able to walk, please come toward my voice now.” These patients are now in one area and may be able to start providing basic first aid for themselves by taking care of minor cuts or injuries. Next, you have to quickly move through the remaining patients to see who falls into the Red category. These patients have life-threatening injuries, such as massive hemorrhaging, and need immediate treatment.
Triage Categories:
RED: Immediate — These patients will die if care isn’t rendered immediately.
YELLOW: Delayed — These patients are wounded, but have no immediate threat to life, limb, or eyesight.
GREEN: Walking Wounded — These patients have injuries, but are able to ambulate or provide self-care.
Once relatively stabilized, move these patients to an area where they can then be transported to higher levels of care. Next are the Yellow patients. These are people who may not have immediate life-threatening injuries, but will need higher levels of care in the next few hours. These people could move up to the Red category as their condition changes. Reassessment of these patients is more easily accomplished if they’re all moved to a common area. Black patients are those who have died due to their injuries or whose death is imminent.
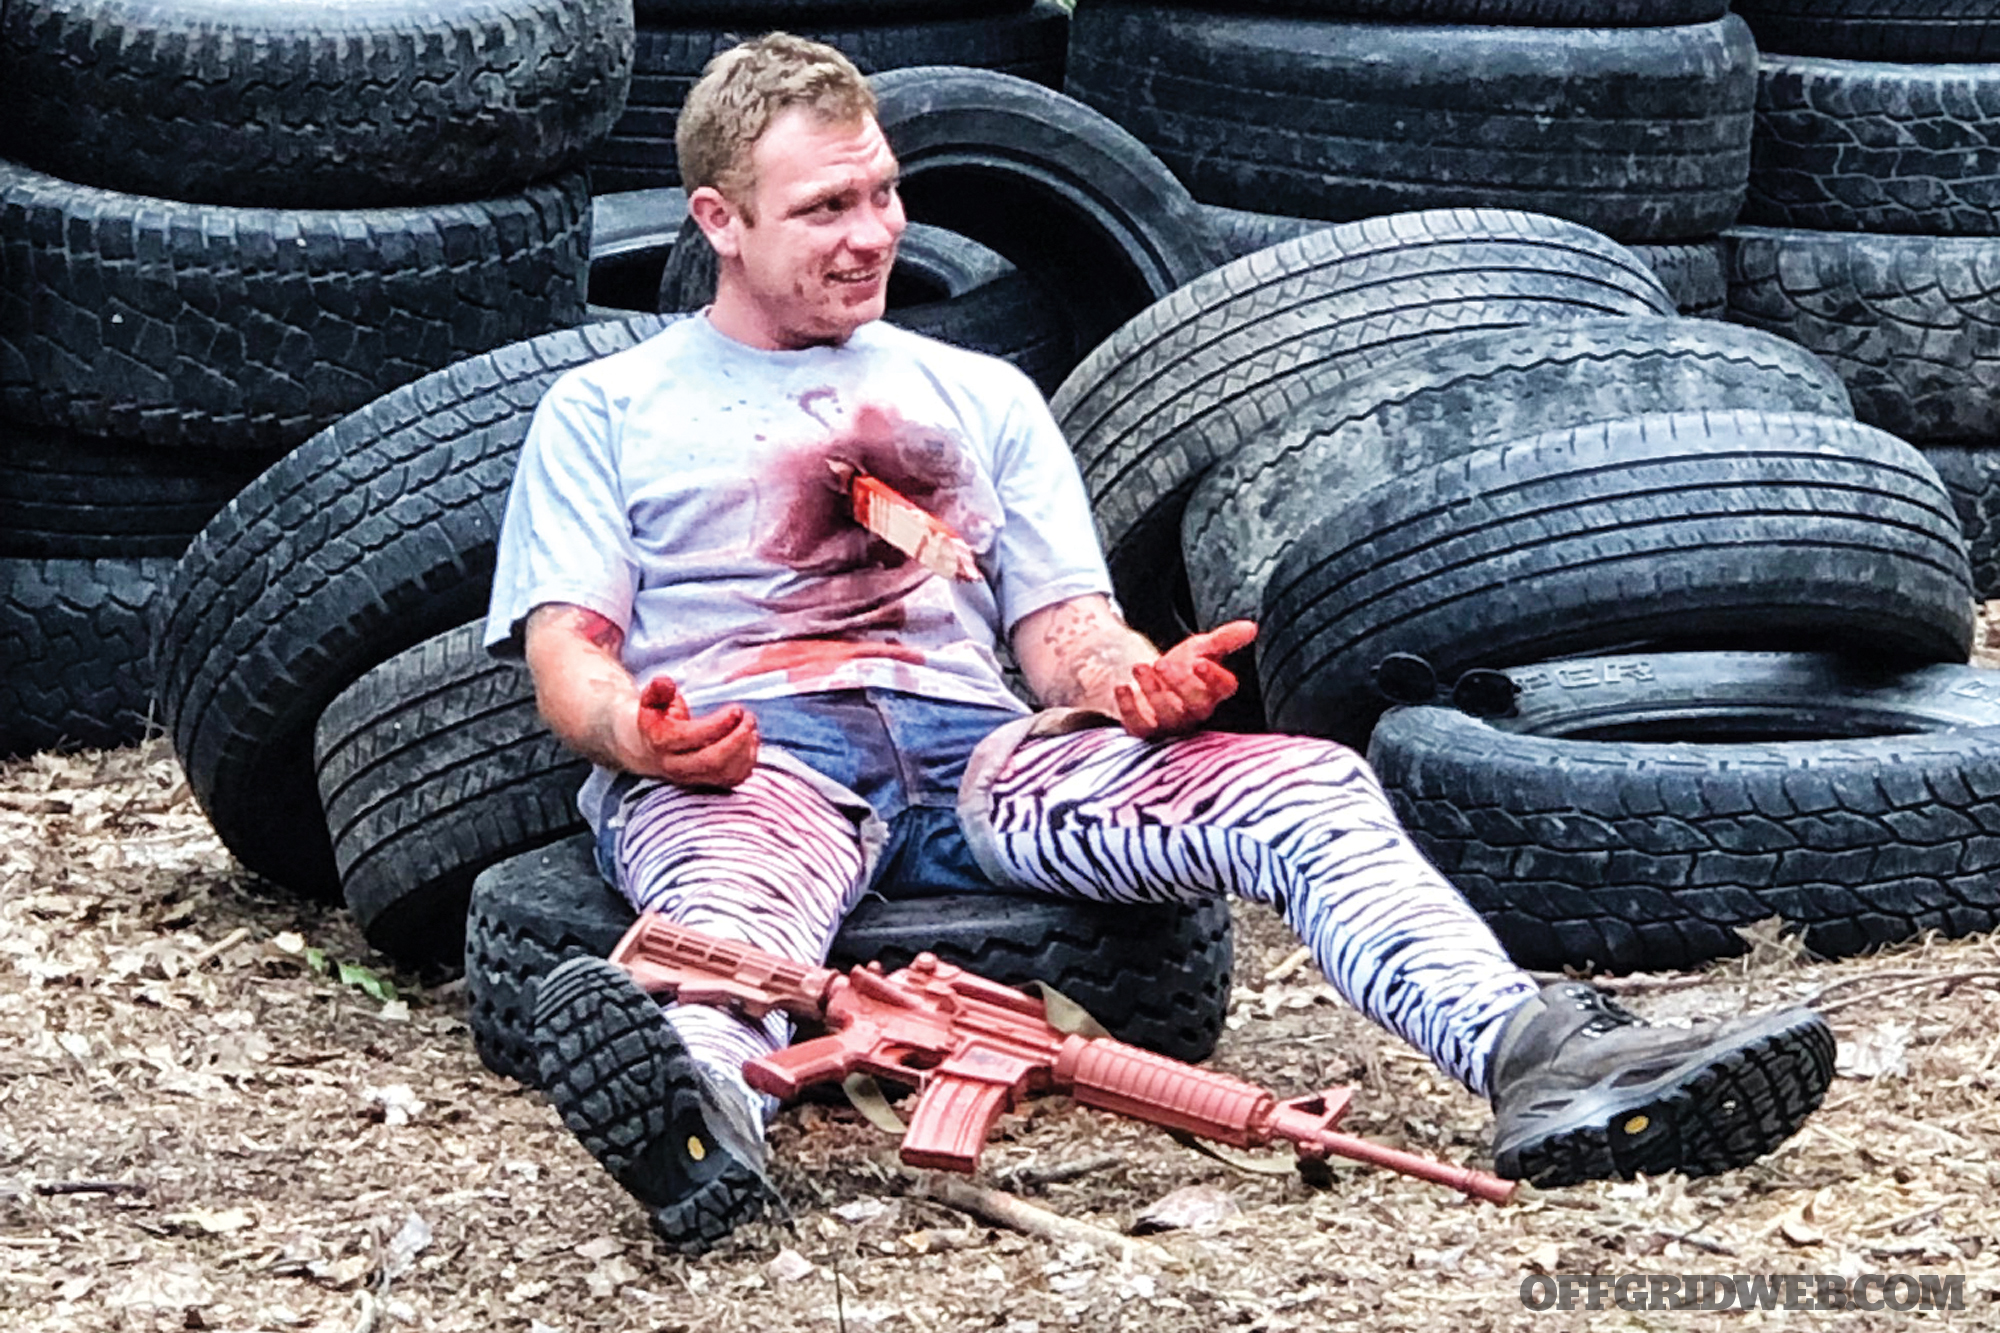
The hardest part of this system is hammered home in Day 2, when the scenarios get complex and you’re the one determining triage levels. In fact, Day 2 of DART 2 is all scenario-based. There was no down time, as every opportunity to learn was maximized during scenario setup. The amount of work put into this class was abundantly clear. Nobody came away disappointed and everyone learned something valuable. Here are some of the takeaways from the class.
Moulage was utilized to enhance the learning environment.
Nobody is Coming to Save You
While the firearms and preparedness communities have an inherent focus on self-reliance, most of society doesn’t. The concept that nobody is coming and that, in an emergency, you’ll likely be on your own, should be embedded in your noggin. Medical training is as important as self-defense or survival training when preparing for threats unknown. We always train as if we’re going to win the fight but what if we, or other members in our cadre, have been significantly injured in an altercation? Without medical training, you’d probably call 911 and wait. Sometimes you wait for seven minutes, and sometimes you wait for 20. In a remote wilderness setting or a widespread disaster, you might not be able to reach anyone for hours or days.
You need to have the mindset that you’re the pre-first responder by starting triage and treatment immediately once the scene is safe. Whether the trauma is a gunshot wound, an edged-weapon wound, a broken bone sticking out of the skin, or some other injury, you can be the difference between life and death if you’ve invested in some medical training. It’s absolutely up to you to get medical training and to carry medical gear every day.
Initial Patient Assessment Questions:
S — Signs and symptoms
A — Allergies
M — Medications
P — Past medical and surgical history
L — Last oral intake
E — Events leading up to the medical situation
Medical Skills Are Perishable
Just as firearm skills are perishable, so too is your proficiency with medical skills. Although you have the ability to put on a tourniquet, how fast can you do it effectively under stress? Can you place a tourniquet with your weak hand only? How about in the dark and upside down while whistling Dixie? No? Well then, keep practicing! During intermediate and advanced medical classes, like DART 2, you often learn the basics of the medical gear and how to apply it. Each of those skills, in turn, becomes part of a larger scenario where you use several pieces of gear during an absolutely chaotic situation.
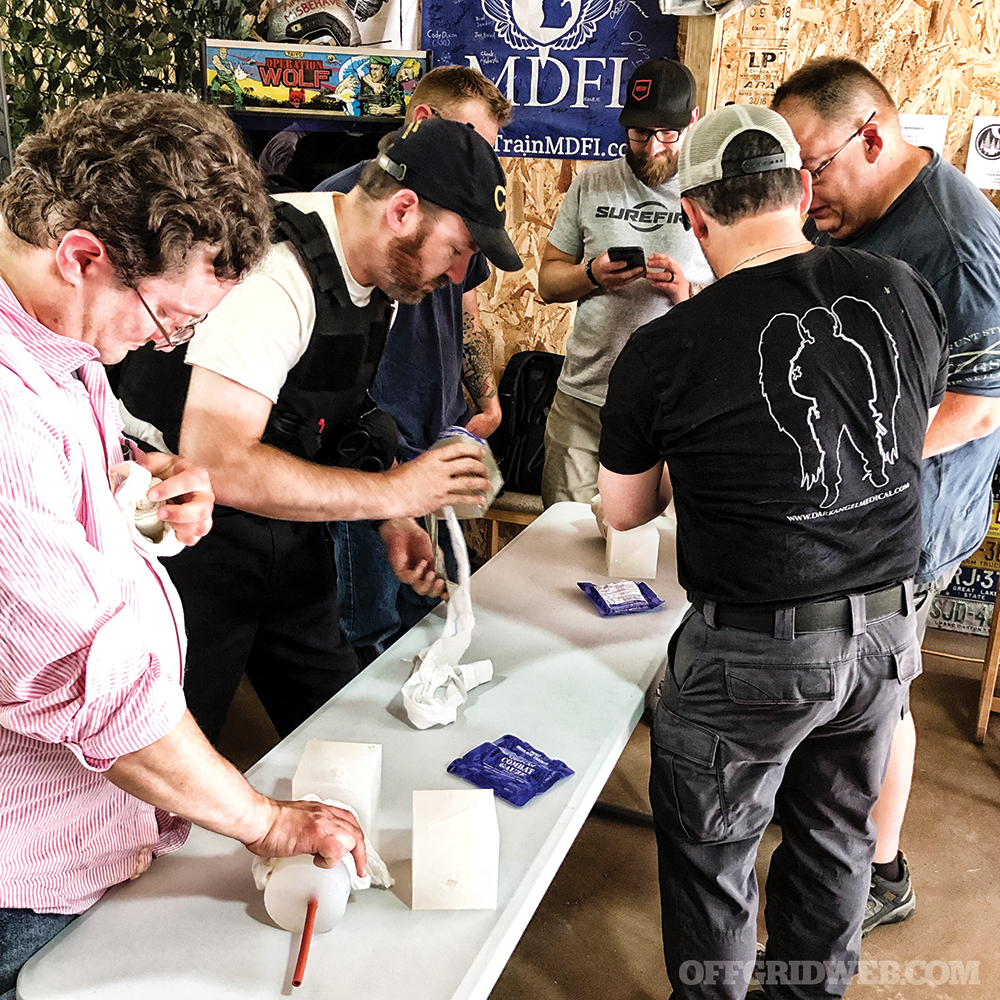
Above: Students honing their wound-packing skills using Phokus Wound Cubes, as seen in in Issue 28.
The stress is compounded by sensory overload as the scenarios become more complex. These skills, like tourniquet application, chest-seal application, and triage, are all part of the big picture of scene management covered in this two-day class. The bottom line is to keep practicing your medical skills. It’s easy to cut corners when you’ve let these skills perish. Sure, you might get most of the scenario correct; however, the one part you missed could cost someone their life.
Improvise as Needed
Hopefully you have your everyday-carry medical gear (EDC-M) with you at all times. It’s just as important as your standard EDC. Both can be specific to you, your needs, and your training. Neither should be ignored. Maybe your EDC-M is a tourniquet and a cravat. Maybe it’s one or the other. Maybe it includes your favorite clotting agent. If you don’t carry any of it, what’s your backup plan for medical gear? Should you use your belt for a tourniquet? It’s not ideal, but I have one patient who’s alive, minus a leg, because the responding officer used the patient’s leather belt as a tourniquet to slow his bleeding.
Improvising should be a planned alternative in which you’re aware of the risks involved. You’ll also need to pay extra attention to the improvised method and constantly reassess to make sure that it’s working as you intended. That’s not to say that if you used your favorite tourniquet, you shouldn’t reassess, but it becomes absolutely imperative with an improvised device.
Change is Constant
Things always change, so we need to constantly reassess the scene, the patient, and ourselves. Perhaps the scene safety has shifted, requiring you to take cover or move the patient to a safer location. Perhaps the patient’s condition has changed, and they’re now bleeding despite having a tourniquet in place. Maybe the patient’s mental status has changed, suggesting a bump up in triage from yellow to red. Taking care of one patient can be hard enough, but when there are multiple casualties, reassessing and communicating are critical.
Unless you’ve trained for a mass-casualty event, it’s impossible to conceive the level of chaos that occurs. By taking a scenario-based class like DART 2, you’ll be more comfortable at managing multiple patients and their injuries. As a result of this element, I think the attendees, including myself, all had a better perspective of the importance of a solid knowledge base, communication, improvising, and constant reassessment in the event of a mass-casualty situation. Be prepared to handle one casualty, but understand there may be multiple casualties. Seek out training to test your skills in complete chaos. You’ll come away with an understanding of your strengths and weaknesses. Practice often, because your level of confidence is guaranteed to diminish without regular refresher courses. Hopefully your skills are good enough to save a life someday.
David L. Miller, DO, FACOI, is an internist in private practice for 20 years. His experiences away from the office have included time as a fight doctor in regional MMA events and as a team physician for 10 years at a mid-major university in the Midwest. Currently, he serves as the lead medical instructor for the Civilian Crisis Response team based out of Indianapolis.
It’s a new year, and a new decade. A time to reflect on successes, shortcomings and what we learned from each. Over the last month or so, I have made some significant changes to my EDC loadout – in some cases, ditching or altering gear that I have been using for most of the last decade. I figured that maybe some of the lessons I’ve learned, and the logic behind my changes, might be useful to some of you. So, without further ado, here’s what I’ll be carrying into the new decade…
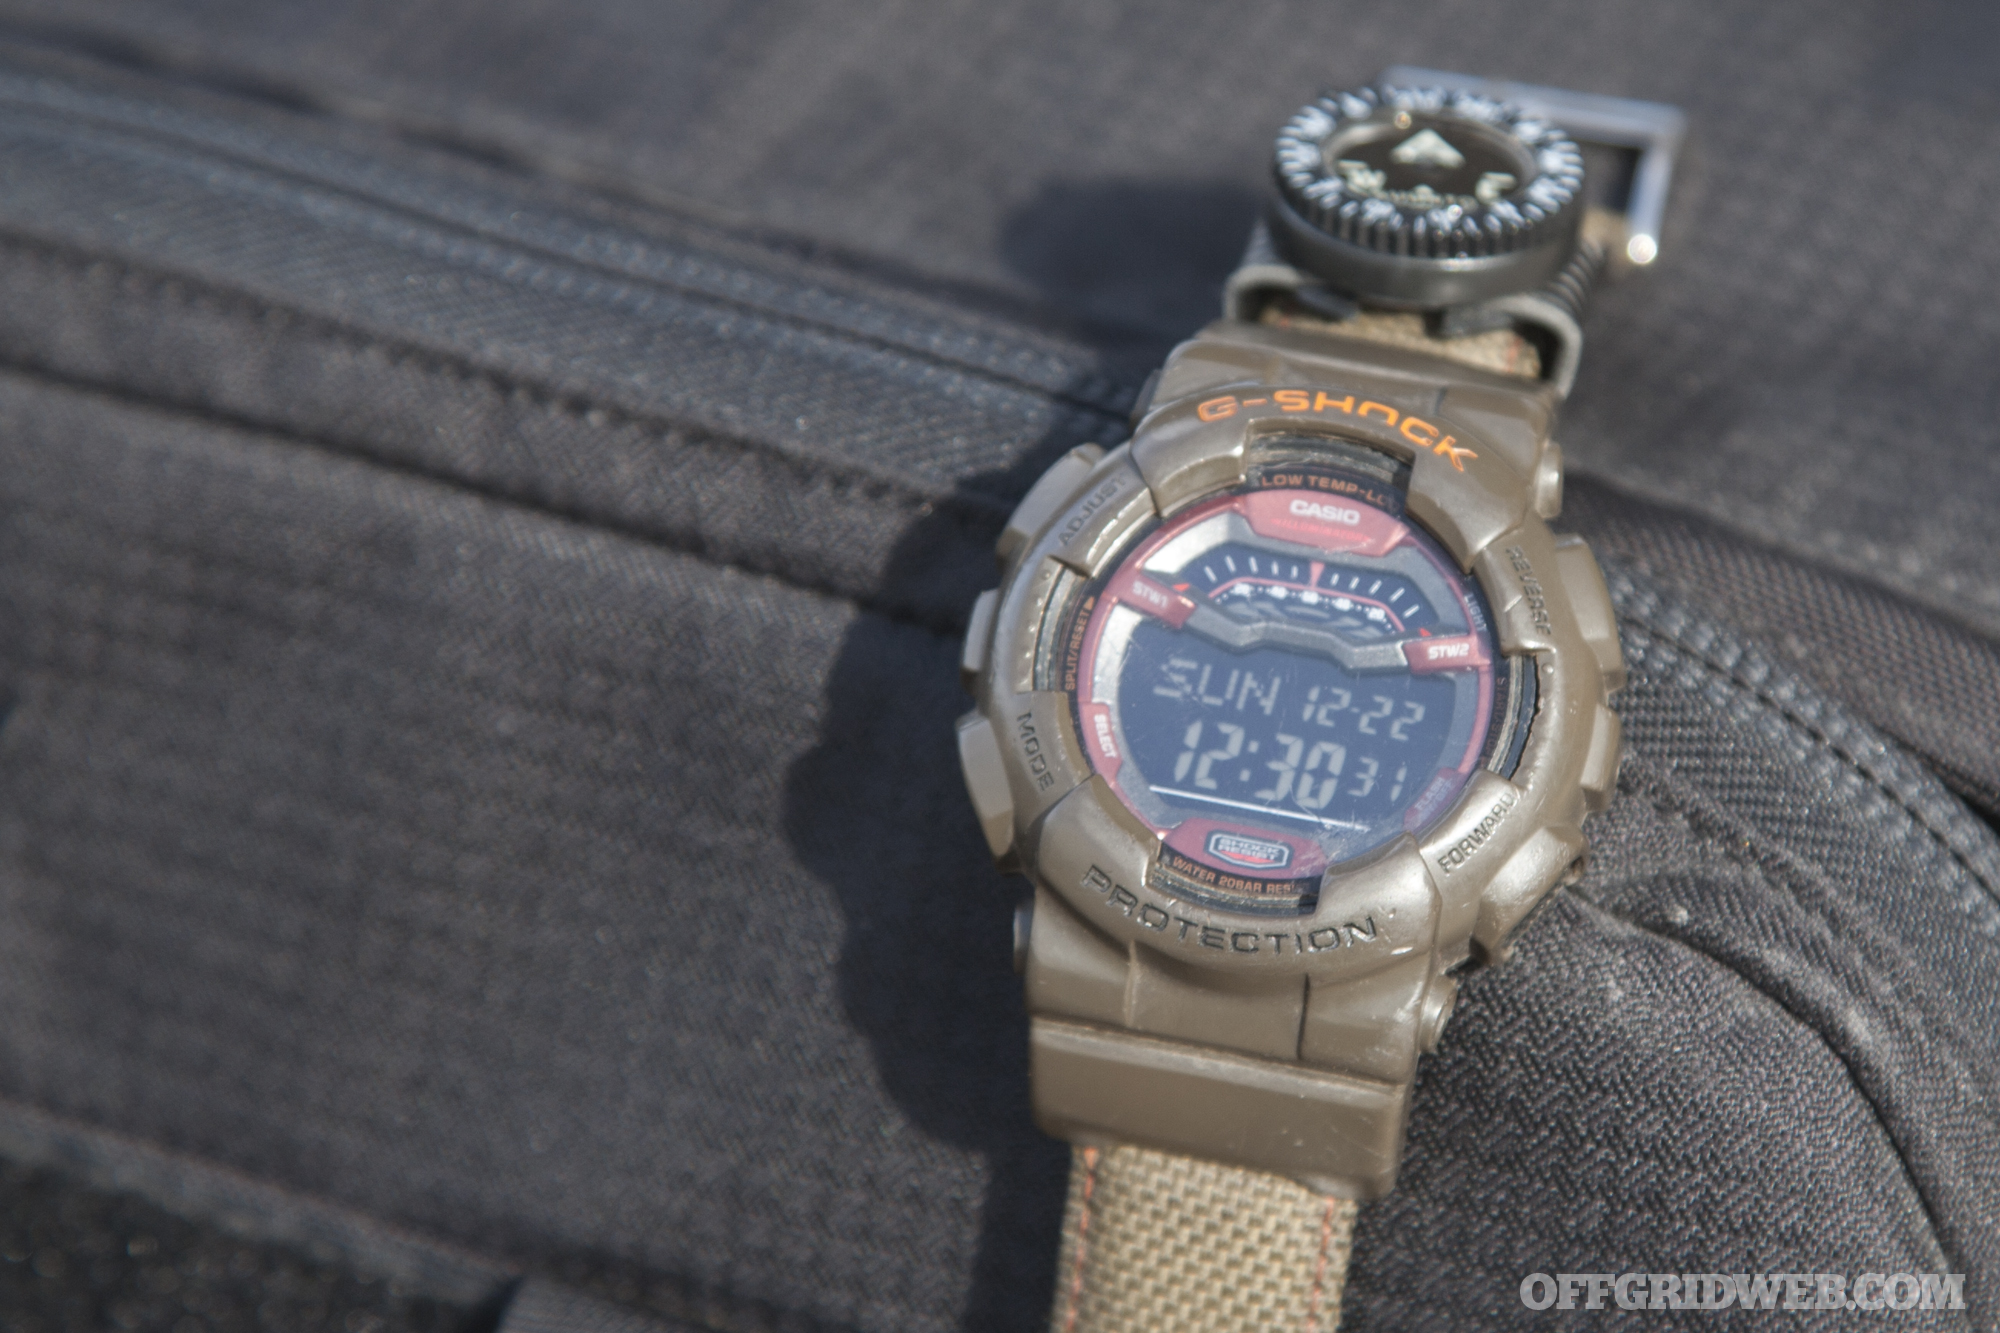
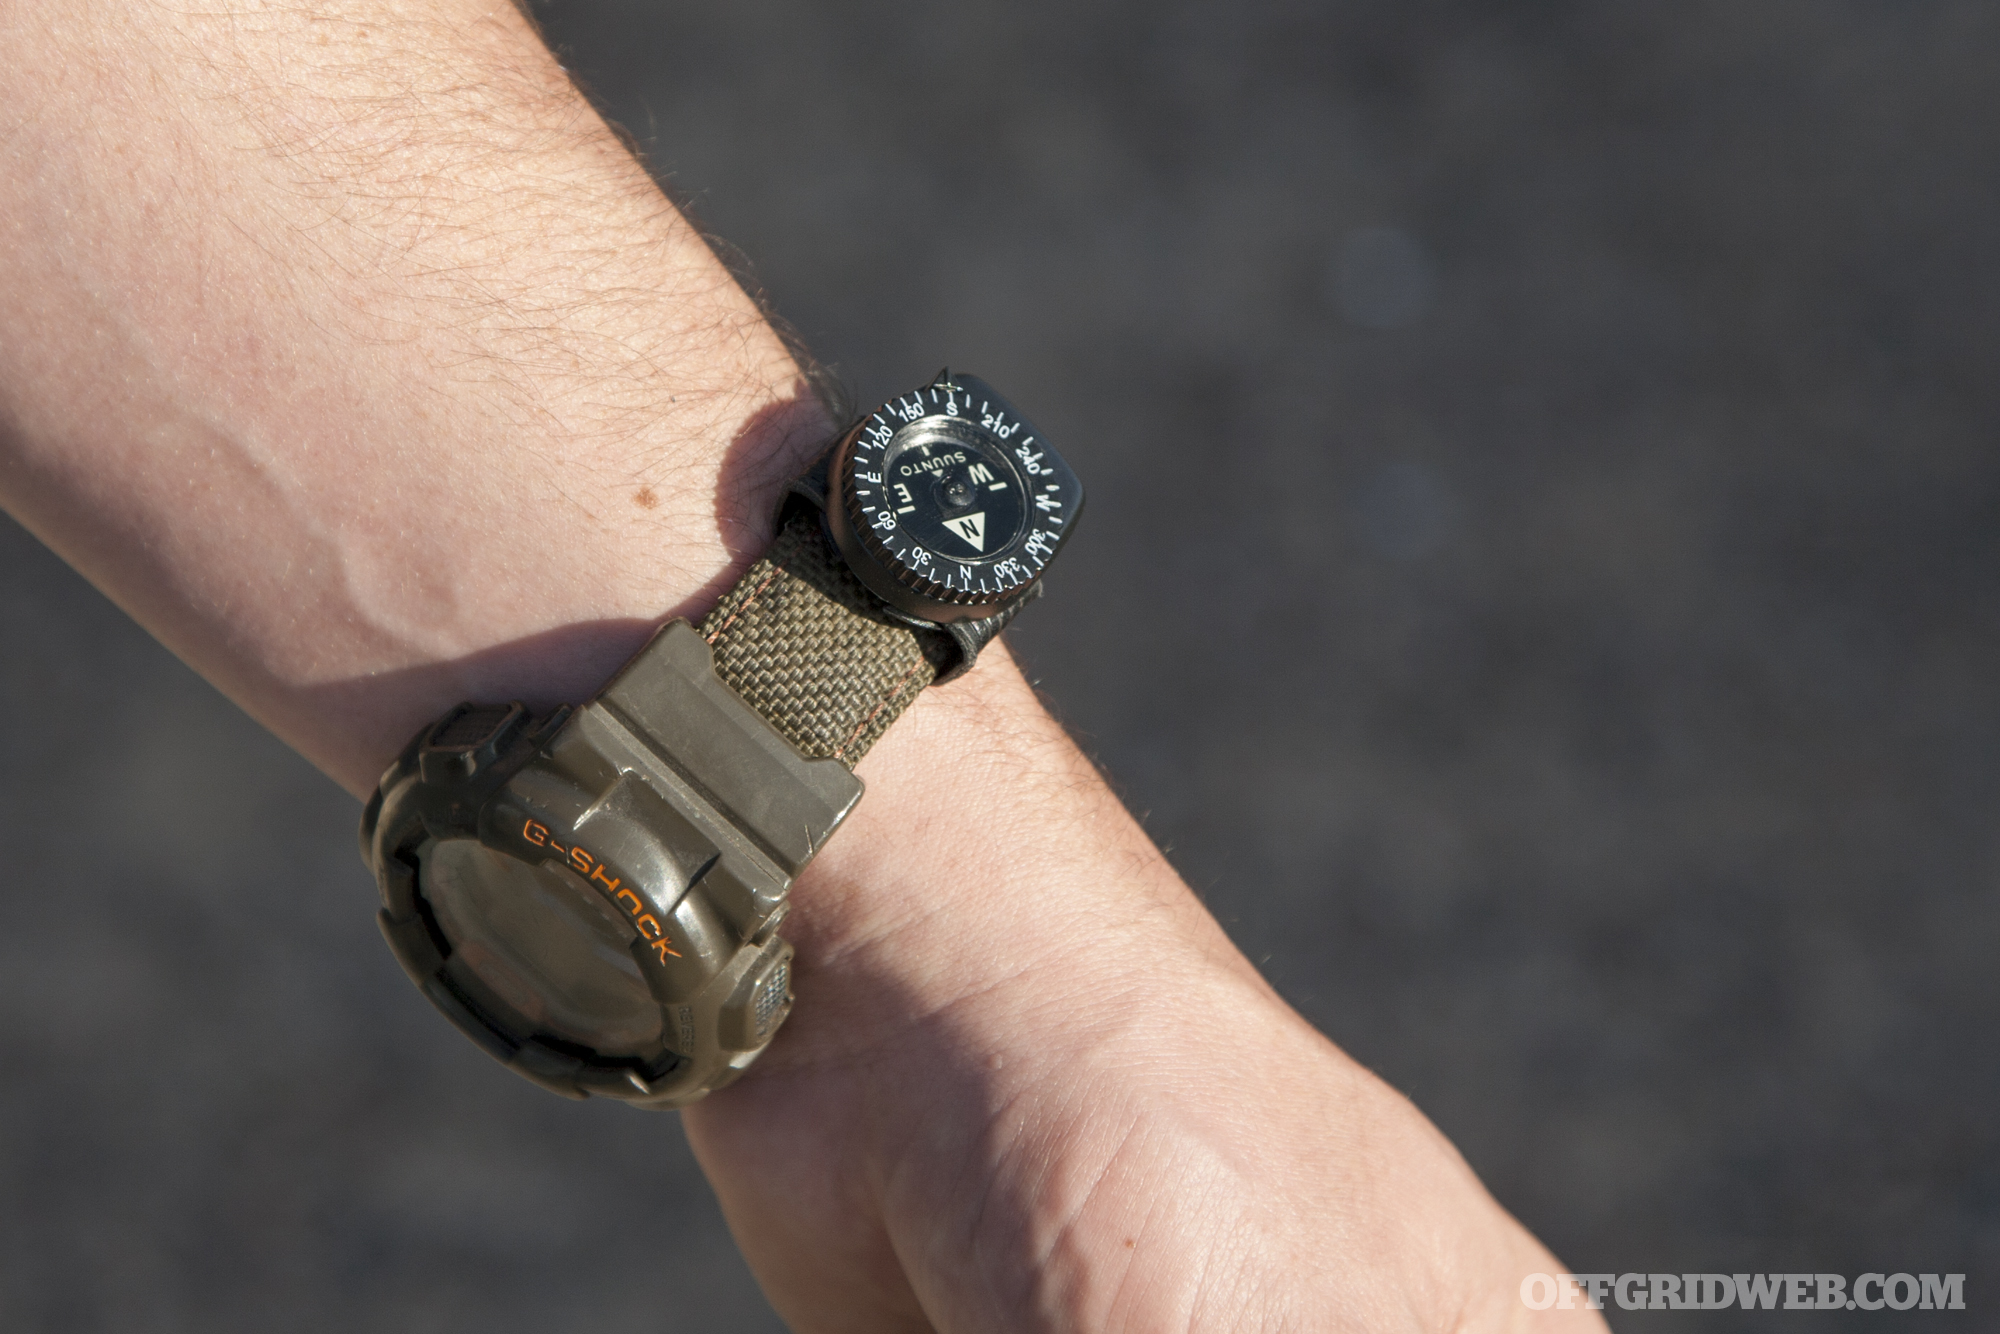
Lessons Learned: I saw no need to get a new watch. This particular G-Shock survived 13 deployments to Afghanistan with me as a Private Military Contractor. It has a stopwatch, dual-time-zone function, military time and backlight. That’s pretty much everything I need a watch to do. However, I did bulk it up a little bit with two accessories.
The first is a Suunto Clipper compass. This traditional button compass is a clip-on, no-frills accessory that does…well…compass things. I have always been directionally challenged. (Veterans: insert your favorite jokes about Lieutenants and LandNav) And since my watch does not have a built-in GPS function, I figured I should at least have a way — besides the sun — to orient on the cardinal directions.
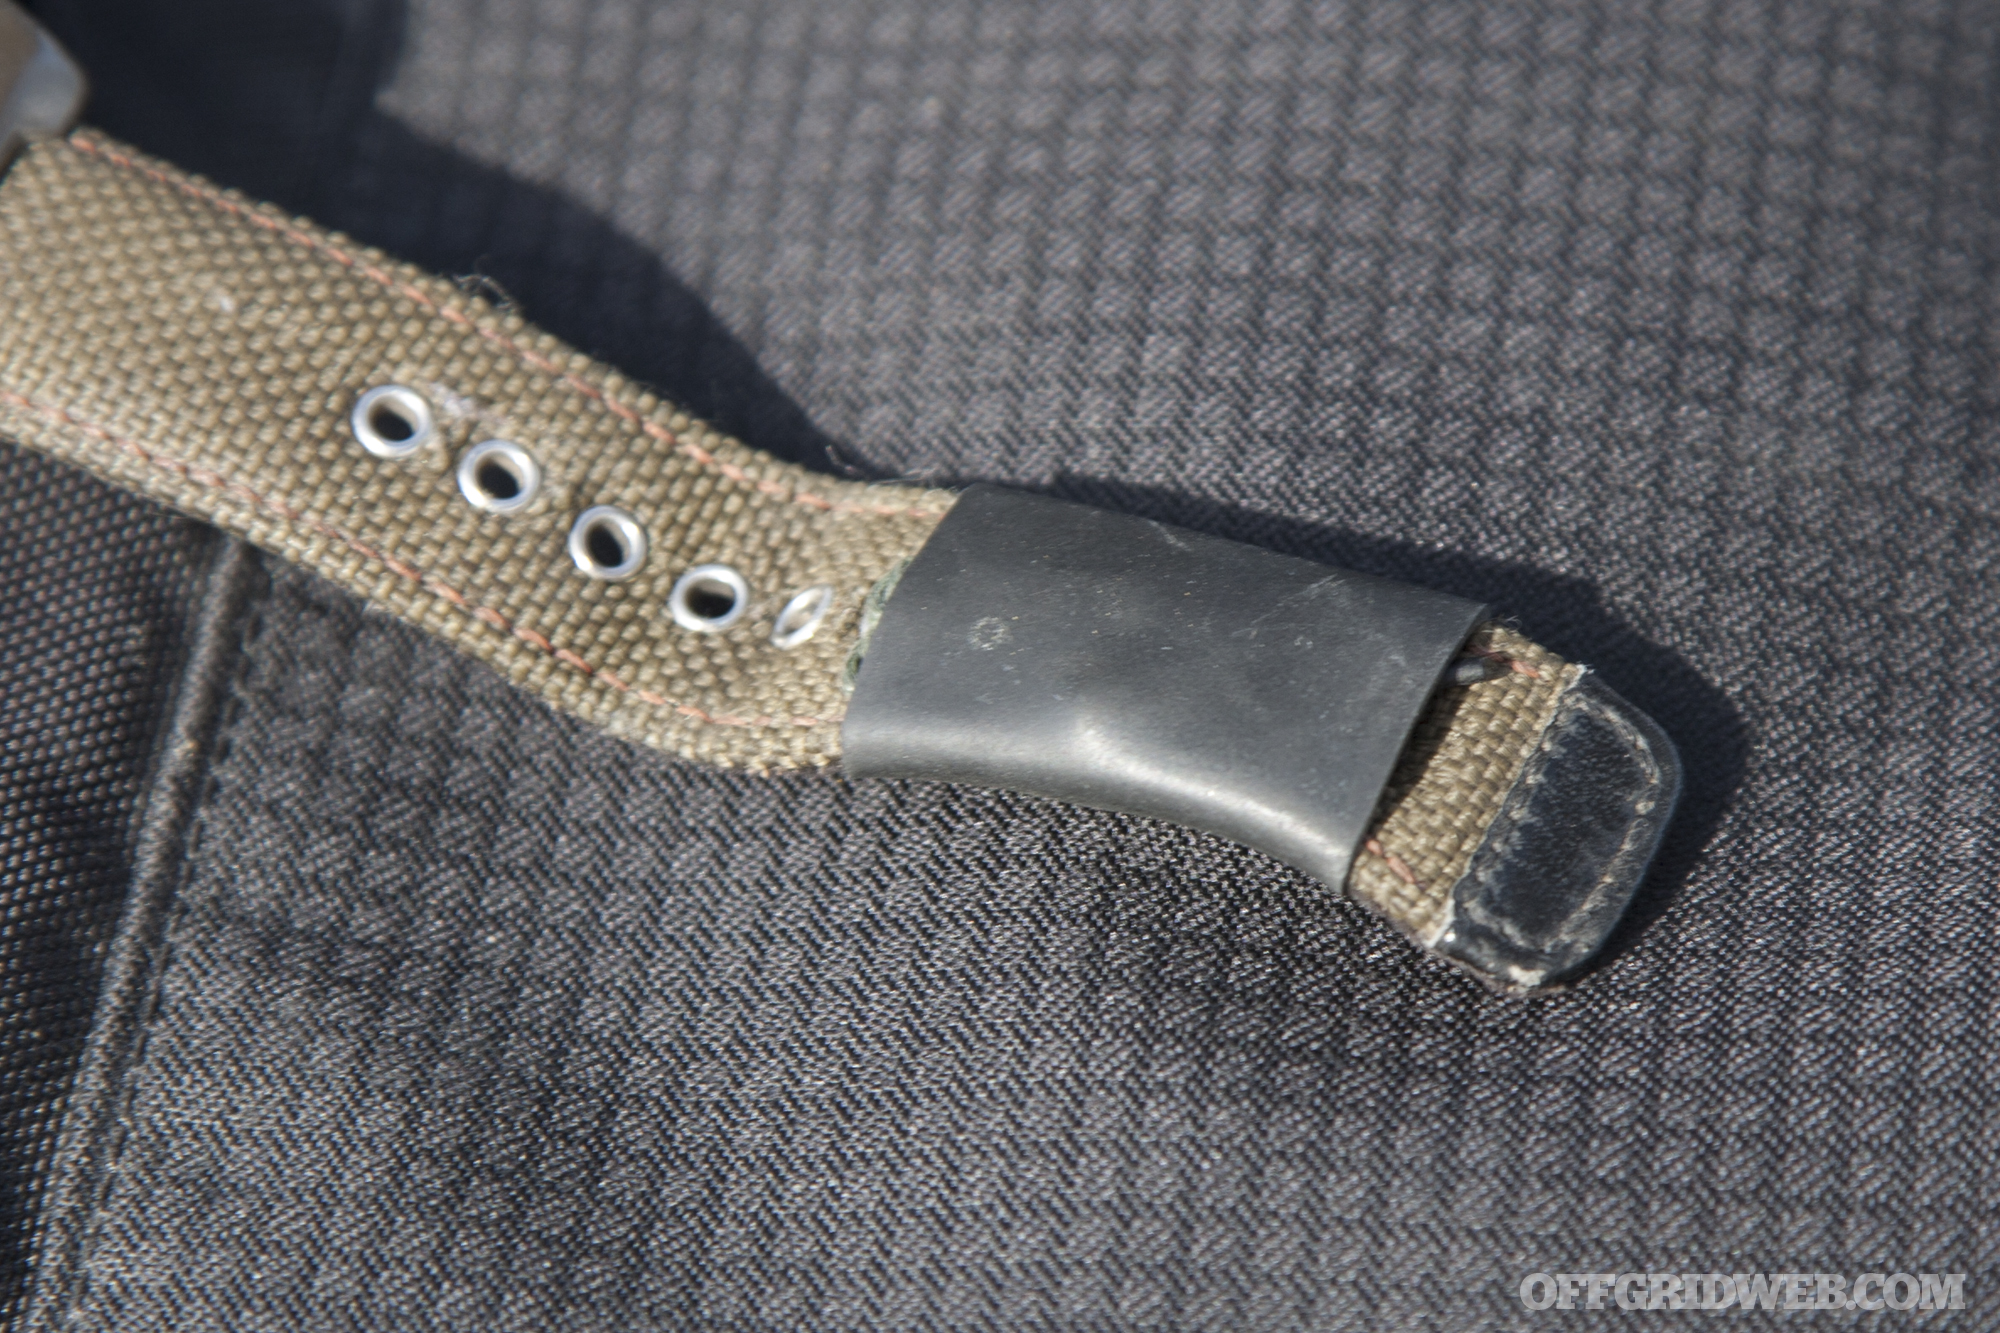
The other is the A-K Band, by Gearward. The Anti-Kidnapping band is a length of bike tire innertube that slides over your watch band to conceal a few key escape and evasion tools, which are included as a package. Specifically, a plastic handcuff key, a length of Kevlar line, and a ceramic razorblade. These tools, combined, give you methods to overcome the three most common restraints: handcuffs, zip ties and duct tape. The A-K band is far from invisible, but it’s more discreet than a paracord bracelet.
Lessons Learned: I’ve wanted to carry a small fixed blade for self-defense for years. I’ve tried several, none lasting more than a week or two before being put in the spare gear box in the garage. My two top priorities are a double-edged blade and a grip shape that facilitates both point up (saber) and point down (ice pick) grips. Nothing I came across seemed to do what I wanted while still being comfortable to carry – until I found JB Knife & Tool. Their fixed-blade collaboration with OFFGRID alumni Ed Calderon has turned out to be my Goldilocks knife. It’s slim, lightweight, razor sharp on both edges and comes with a kydex sheath that can be configured for multiple modes of carry. The one you see here was recently “proofed” in one of Ed’s Organic Medium classes, wherein I was able to repeatedly sink this blade into a pig torso wrapped in Level IIIA soft body armor, with no issues except a small ding in the tip and a little discoloration. (Both of which will be remedied shortly.)
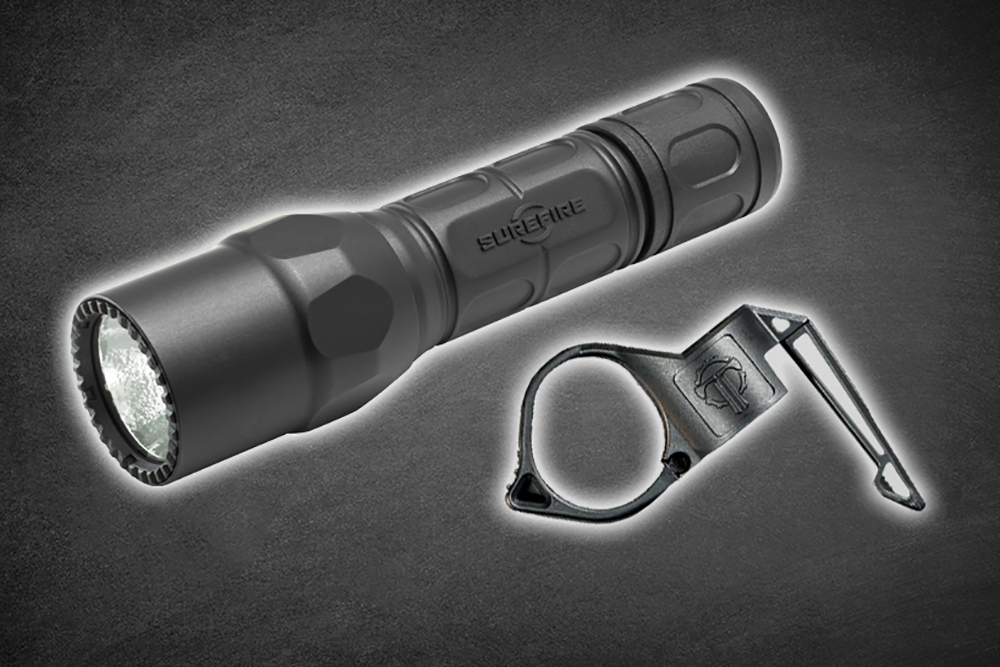
Note: The G2X LE and Switchback (pictured above) hadn’t arrived at the time our pictures were taken. As a result, the old EDCL1-T is shown in our photos throughout this article.
Lessons Learned: The EDCL1-T is an awesome, dual output single-cell carry light with built-in pocket clip. Output is 500 lumens on high, 5 on low. Refer to our previous review of the light for more info on it. The only gripe I have with this light is the switching. This features SureFire’s “tactical” tail cap arrangement: press halfway for low, press all the way down for high, twist down for constant on. As much as I like the L1-T it seems I could never find that pressure sweet spot to get low mode on quickly. More often than not I end up blinding myself with a blast of high output before easing my thumb off just enough to get low. For this reason, I have always been a huge fan of “clicky” tail caps, which are standard on the G2X line.
The G2X button is press halfway for momentary, press fully for a hard click constant-on. The “LE” version is setup to offer high-output on first click for emergency use. To reach low mode, click off and back on in less than 2 seconds. (The G2X Pro runs the opposite, with low mode being the first output.) I prefer having high-output on tap, which drew me to the LE variant. I also added a Thyrm Switchback 2.0, which allows use of the light while maintaining a two-handed grip on a pistol – much more difficult to do with a traditional pocket clip. The 2.0 update of the Switchback includes a break-away feature which allows the ring to open up and free itself, as opposed to breaking your finger in a grappling match.
Pistol
Old: Gen 3 Glock 19, modified by TMT Tactical (above left)
My previous EDC Glock 19 build has served me well for many years.
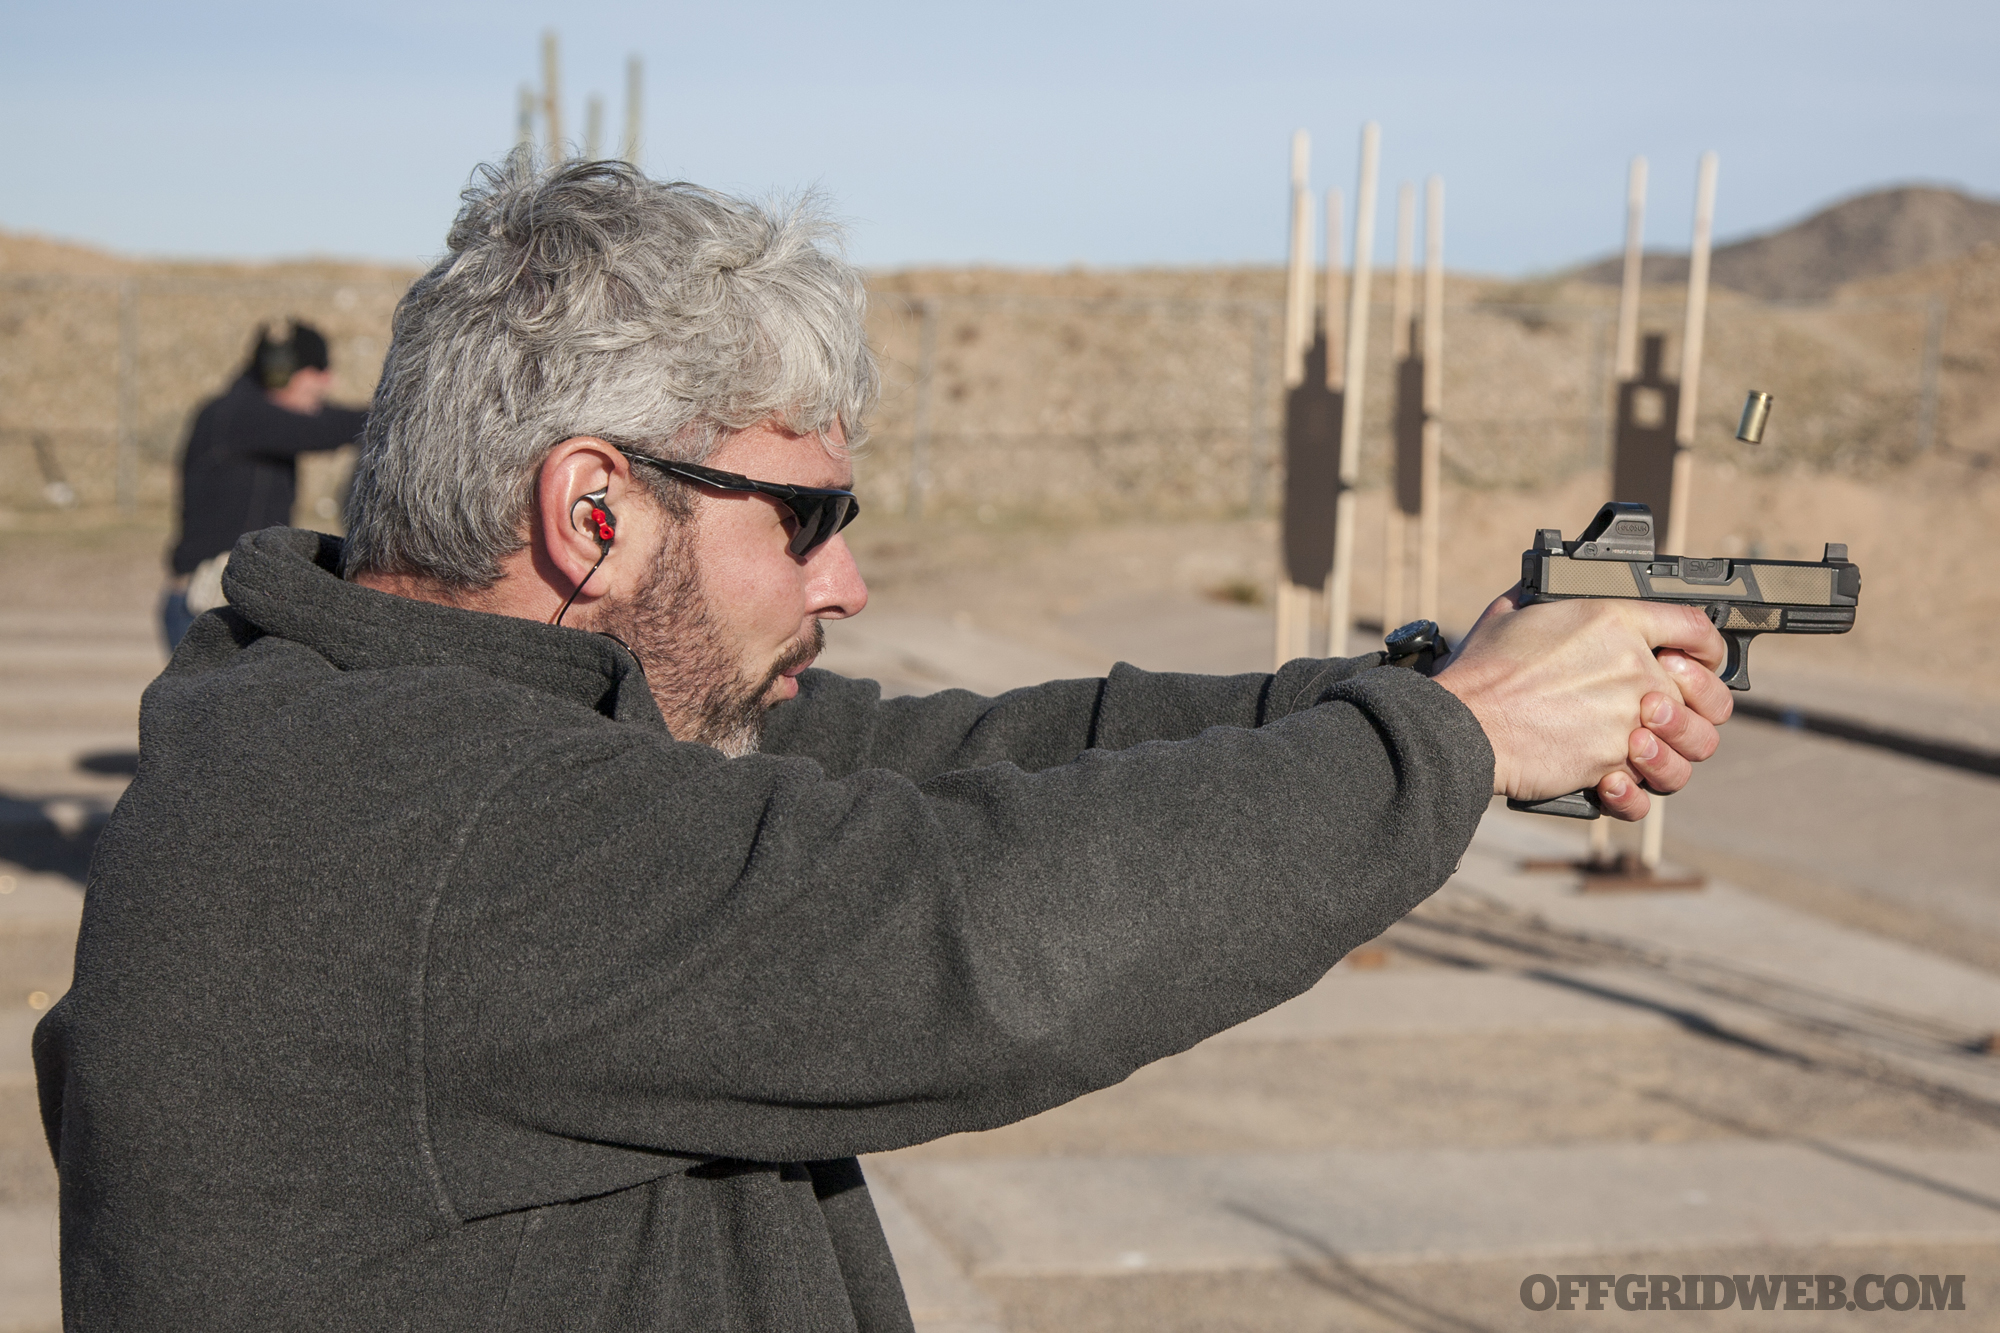
Lessons Learned: Our TMT Glock has served a stellar career as an EDC pistol that ran through countless range sessions, multiple thousand-round classes and any other pistol-centric event I’ve attended in the last decade. The modifications to the slide and grip were spec’ed out by me directly with TMT, to deliver exactly what I wanted: enhanced grip traction on the front and back straps with the sides left slick for comfort during AIWB carry. The slide includes textured areas at the front and rear to increase traction during manipulations, regardless of what grip or method is used to run the slide.
But as the years have gone on, two very significant features previously considered boutique have become commonplace on duty and defensive pistols. The first is miniature red dot sights. Long maligned as unreliable and slower to acquire at close range, developments in both technology and training have made these complaints all but fictitious in today’s pistol-slinging market. This slide, milled by Southwest Precision Arms and coated by P4 Coatings, included a cut to accommodate the Holosun 508T which features a 35 MOA ring around a 2 MOA dot for rapid sight picture at even across-the-table distances, as well as titanium housing for lightweight ruggedness.
The other feature is recoil reduction. This has come primarily in the form of thread-on compensators to divert exhaust gasses from the muzzle in such a way to reduce muzzle flip and felt recoil. There are dozens of these comps on the market in a variety of sizes, shapes and designs. But all add length to the gun, which could require a new holster or changing your method of carry. But Southwest Precision’s Shoot Flat ported barrel package offers aggressive recoil reduction without adding a millimeter of length to the pistol. The package includes this barrel, as well as a stainless steel guide rod and reduced-weight (13-pound) recoil spring for smoother functioning.
The frame work here is from Sonoran Defense, which actually uses lasers to texture frames. This is their Hybrid Atrox package which, again, features a more aggressive texture on the front and back straps with a less aggressive texture on the rest of the frame.
One thing I did not change was the trigger. I started out with an amazing trigger from Johnny Custom Glocks, which I have been running exclusively since about 2014. This trigger is so effective for me that I transplanted it from my TMT Glock into the new Sonoran/Southwest hybrid gun. You will notice that the triggers look different. This is because Johnny recently released flat-faced, branded trigger shoes. When it came time to move the trigger into the new gun, I had this shoe added in. But the internals were unaltered in the move — they were perfect (for me) as-is. While a Johnny Glocks trigger is one of the pricier options on the market, it might also be the last Glock trigger you ever have to buy. To us, it is an overwhelmingly worthwhile investment.
Lessons Learned: I have been, and will remain, a fan of appendix carry. It keeps my pistol close to center line, and my body type allows total concealment with a t-shirt. But the LAS Ronin’s design offers some superior design features – primarily the flexible joint between holster and spare mag pouch. This allows the holster to move with my body, making it more comfortable for longer wear. It also is molded to accept red dot optics and suppressor height sights out of the box. The steel belt clips are, admittedly, a bit of a pain to get off at the end of the day. But the flip side of that is the confidence of knowing once your holster is clipped in, it’s not going anywhere for any reason unless you make it.
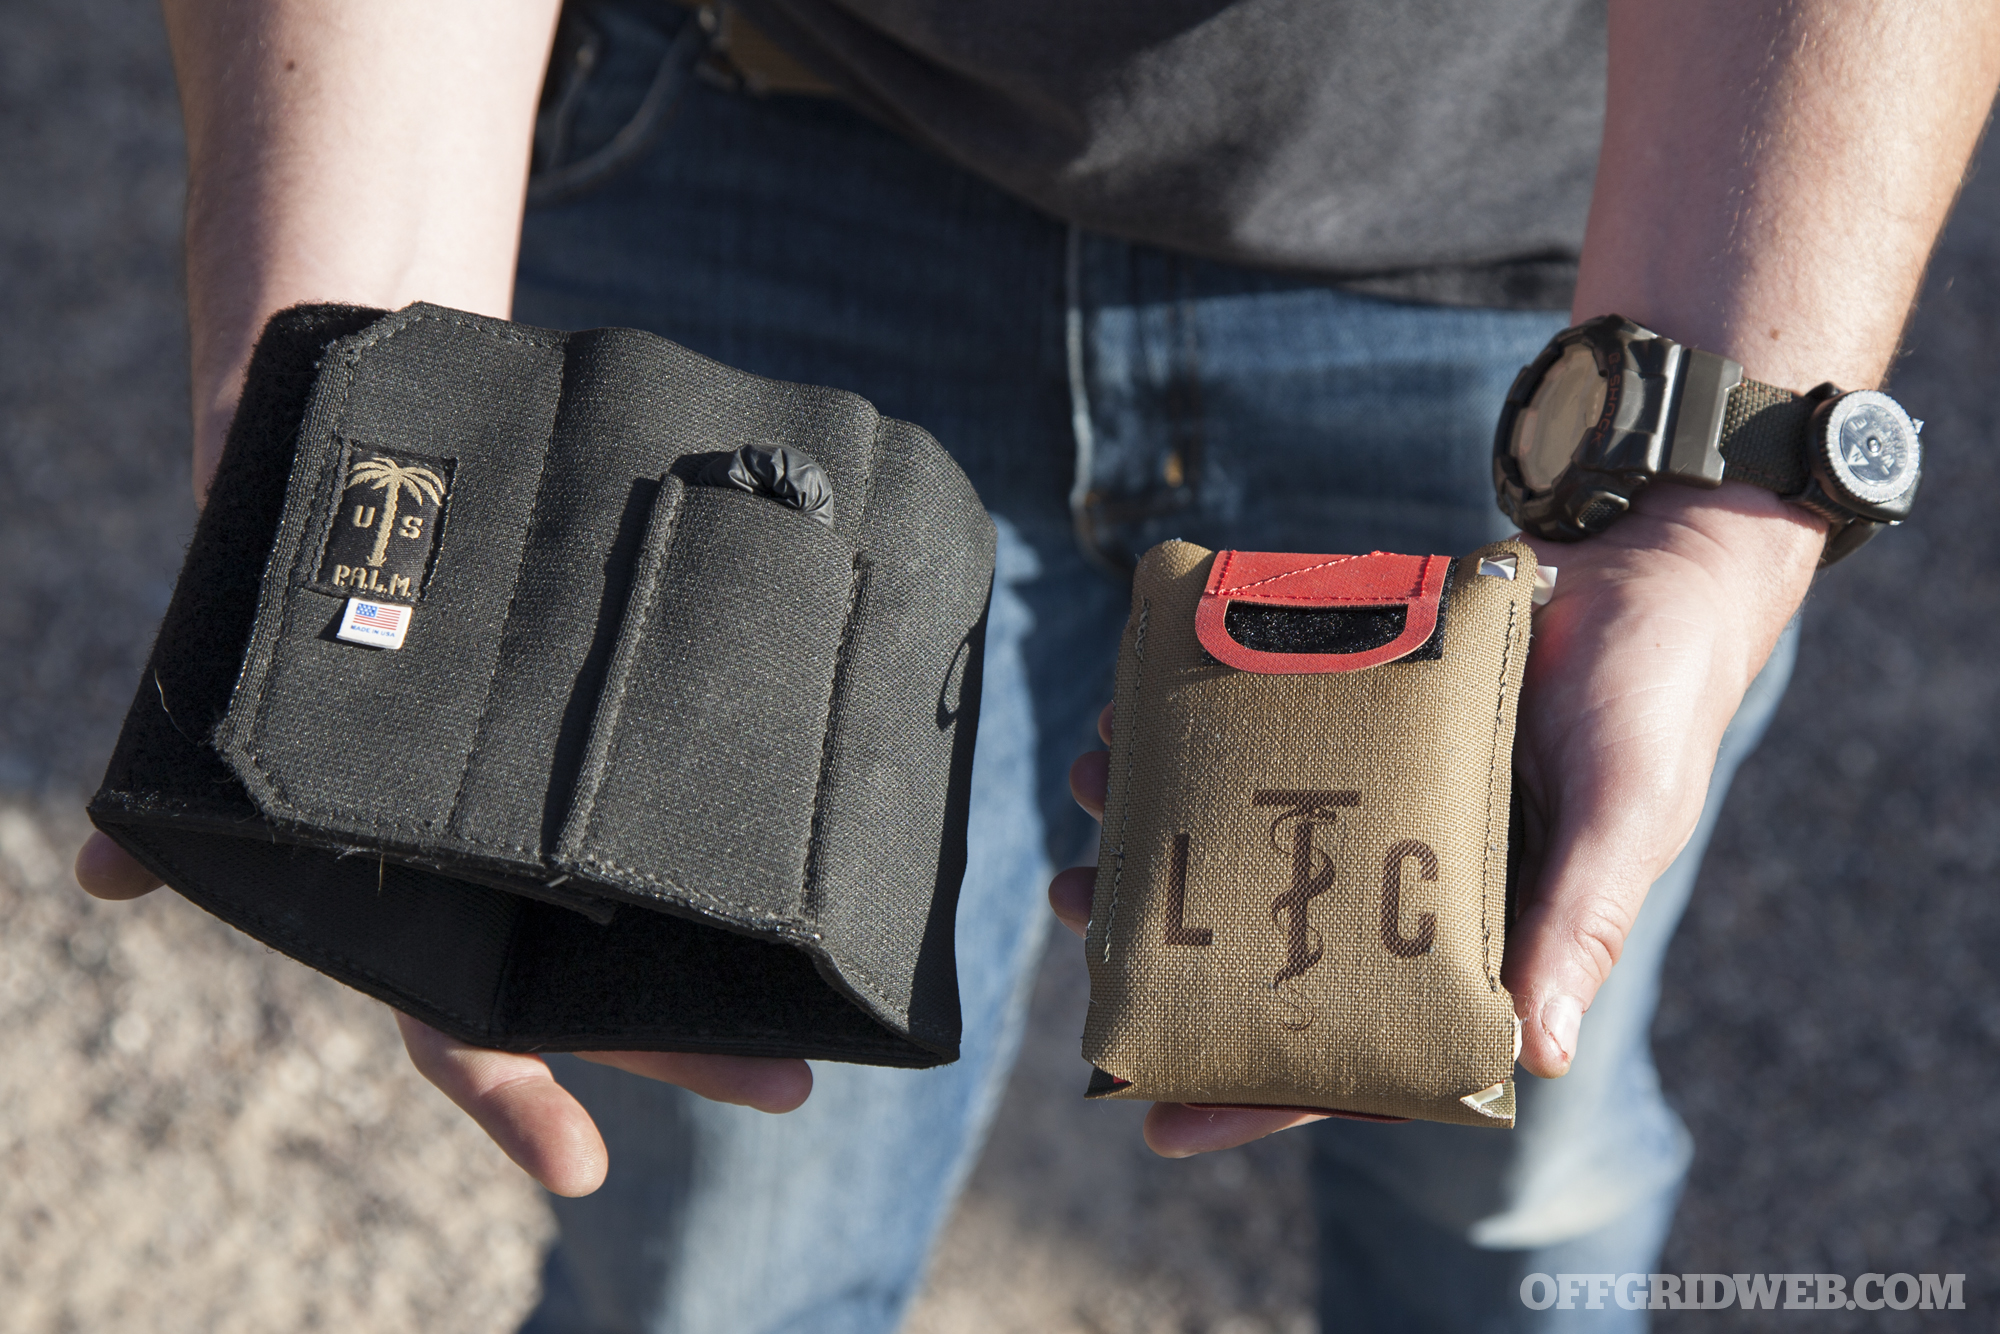
Lessons learned: The now-defunct USPALM was one of several companies producing a velcro-and-elastic trauma kit for wear around the ankle. This particular kit worked really well for me awhile. It offers a lot of carry capacity, but did require some wardrobe considerations. It’s not really any good with shorts, which makes it a hassle in Arizona summers. Also, it requires the use of taller, thicker socks than I normally wear. Your mileage may vary on these constrictions, depending on your natural wardrobe trends. But the ankle kit is also a little too bulky to transition well to off-body carry when I choose to do that.
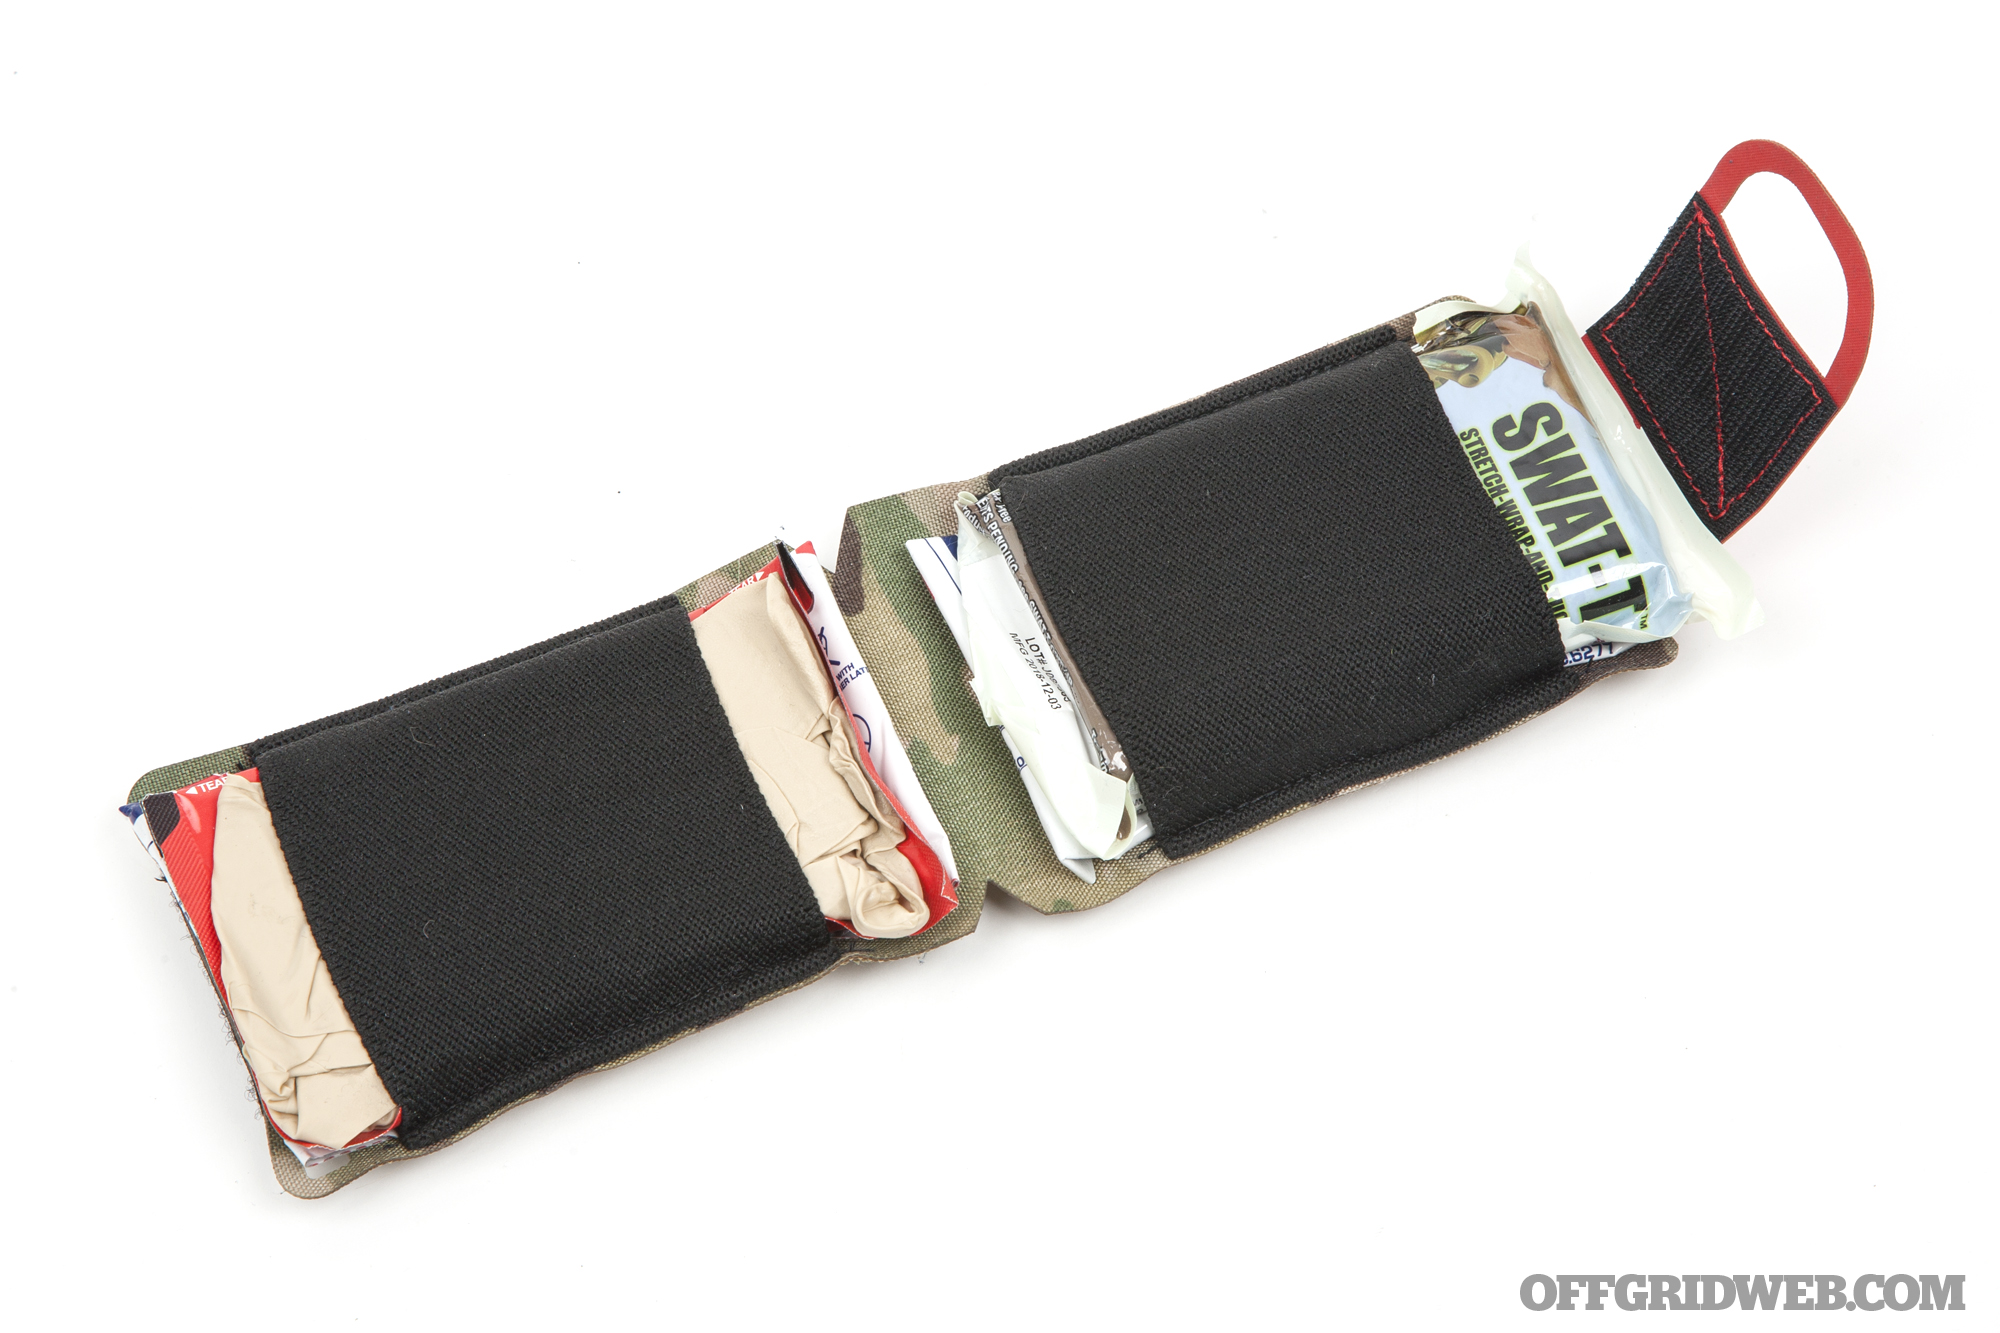
My chosen replacement kit comes from Live The Creed. Their pocket IFAK is barely larger than my wallet, which makes it beautifully convenient to drop into the back pocket of my jeans, or in the admin pocket of a backpack or purse. However, you do lose some load capacity. For me, the biggest downside is not being able to carry a “hard” tourniquet (the CAT is my preferred). In its pre-loaded configuration, the LTC kit comes with a SWAT-T, which functions as both a tourniquet and pressure dressing. This dual-use potential maximizes utility while keeping bulk/weight to a minimum. But I still prefer a dedicated hard tourniquet, and have mitigated this by carrying one in my day pack. In higher-threat situations, a CAT or SOF-T can be carried horizontally on your belt with a rubber band. (I carried like this for several years while contracting overseas.) All in all though, the LTC pocket IFAK is a much leaner, more convenient way to carry trauma medical supplies and I suspect I’ll be sticking with it for the duration.
Accessories
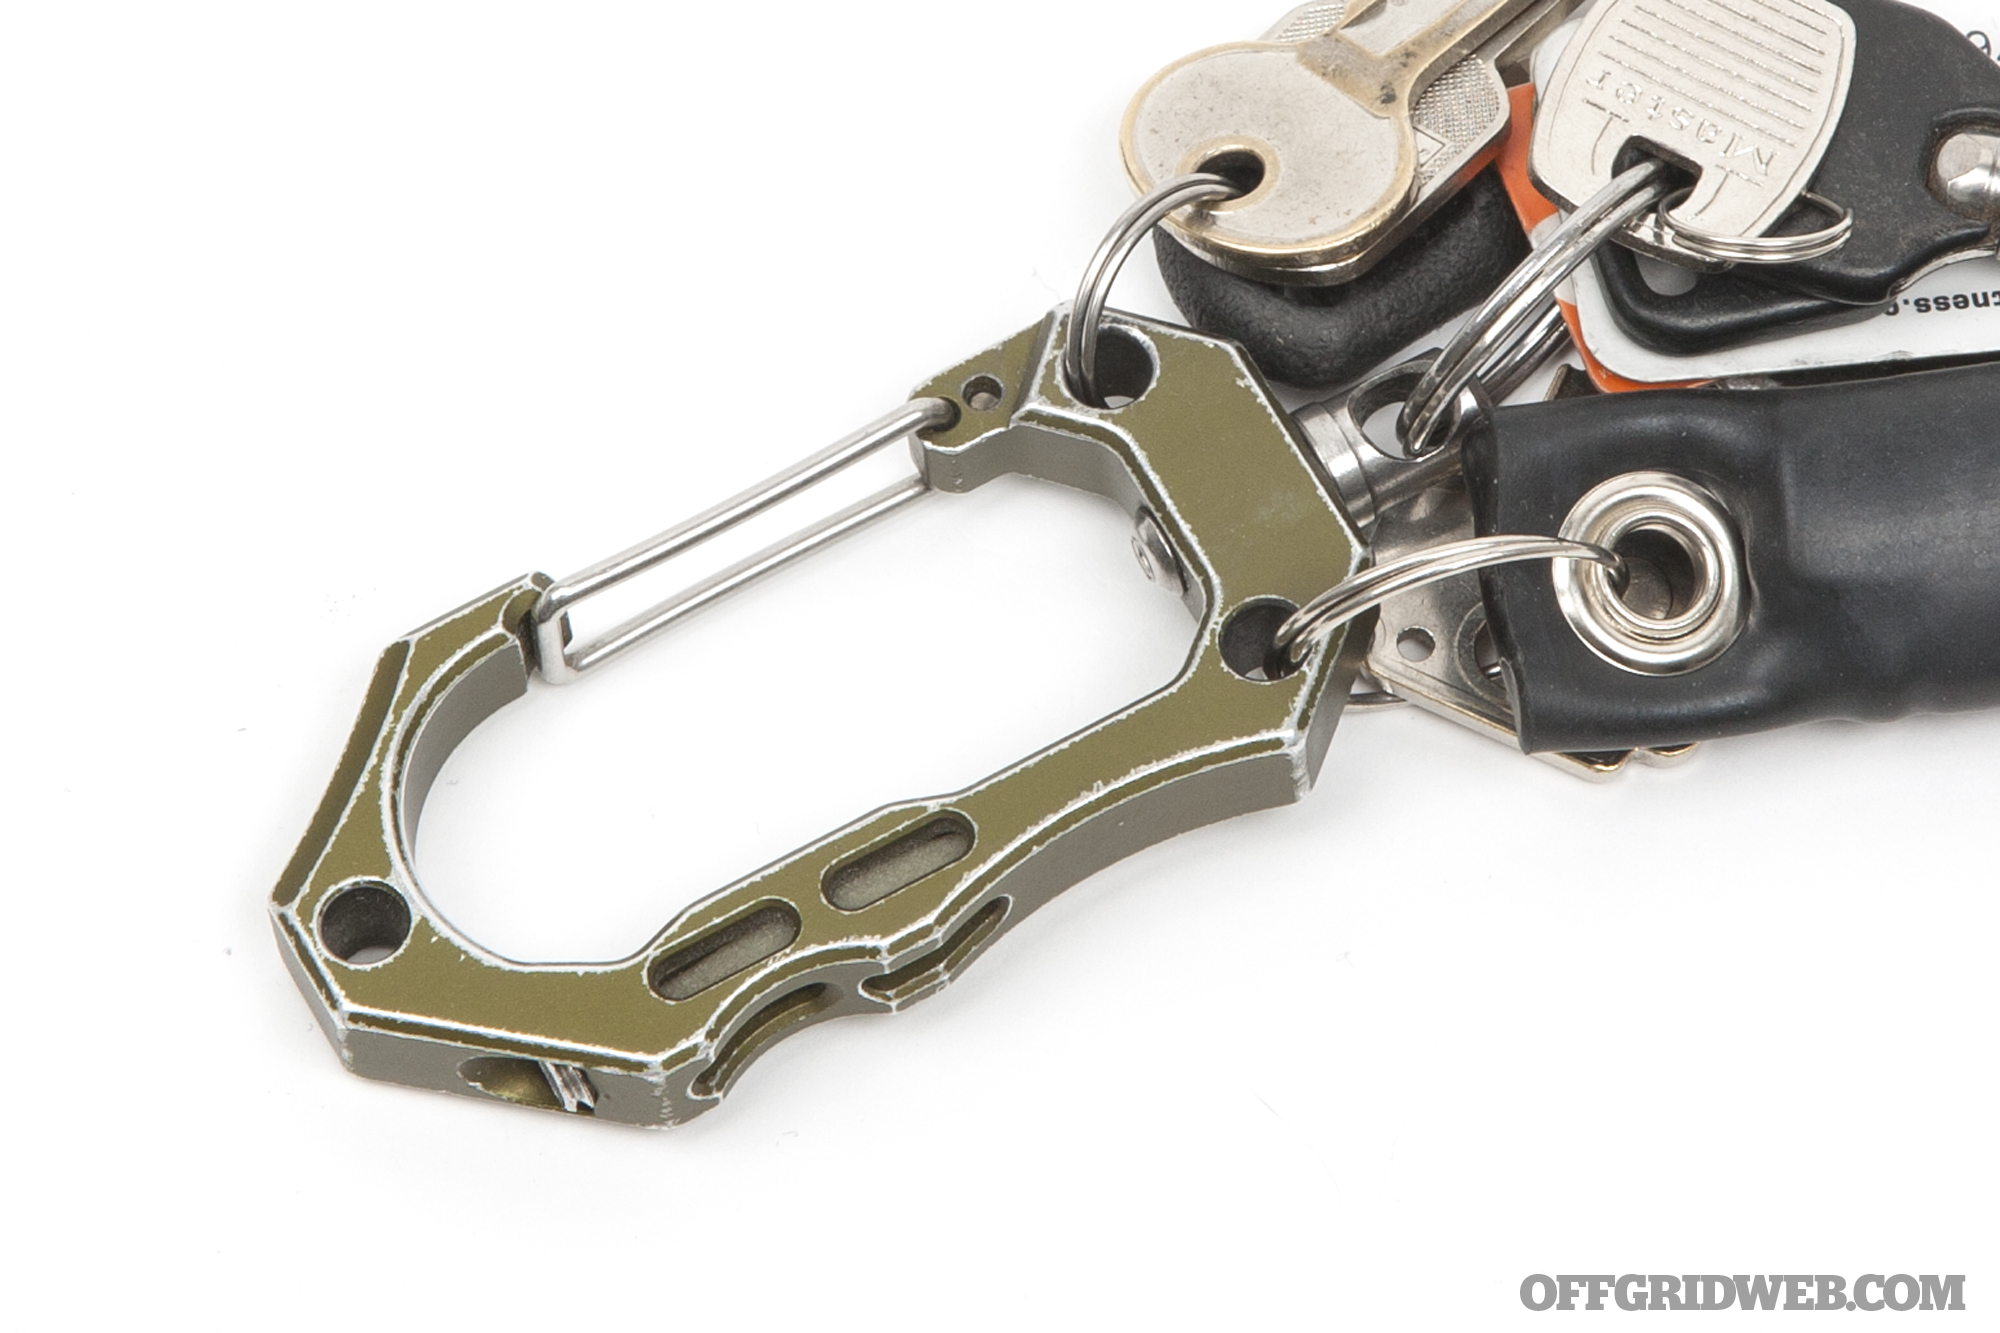
Finally, I clipped two new accessories on my Tuff Writer carabiner/key ring. One is the Carbon Tactics TiSlice. This well-machined little chunk of titanium and brass is basically a miniature box cutter. This gives me a dedicated “household chores” blade to avoid dulling the blade on my Ditch Pik or defensive folder.
The other accessory is another Gearward gadget – the Ranger Bic lighter holder. The Ranger Bic is specifically designed to hold a mini-Bic lighter, inside a section of bike tire inner tube with a grommet at one end to attach a lanyard or key ring. When you insert the lighter top first, it offers a waterproof seal and the rubber material itself can be cut up and burned as tinder.
The ability to create fire on demand is a primary, immediate-need capability in both bushcraft and urban survival scenarios. While I usually carry a cigar lighter for recreational use, having a dedicated survival lighter, and built-in tinder in a package that dangles from my key ring is a key redundancy to have.
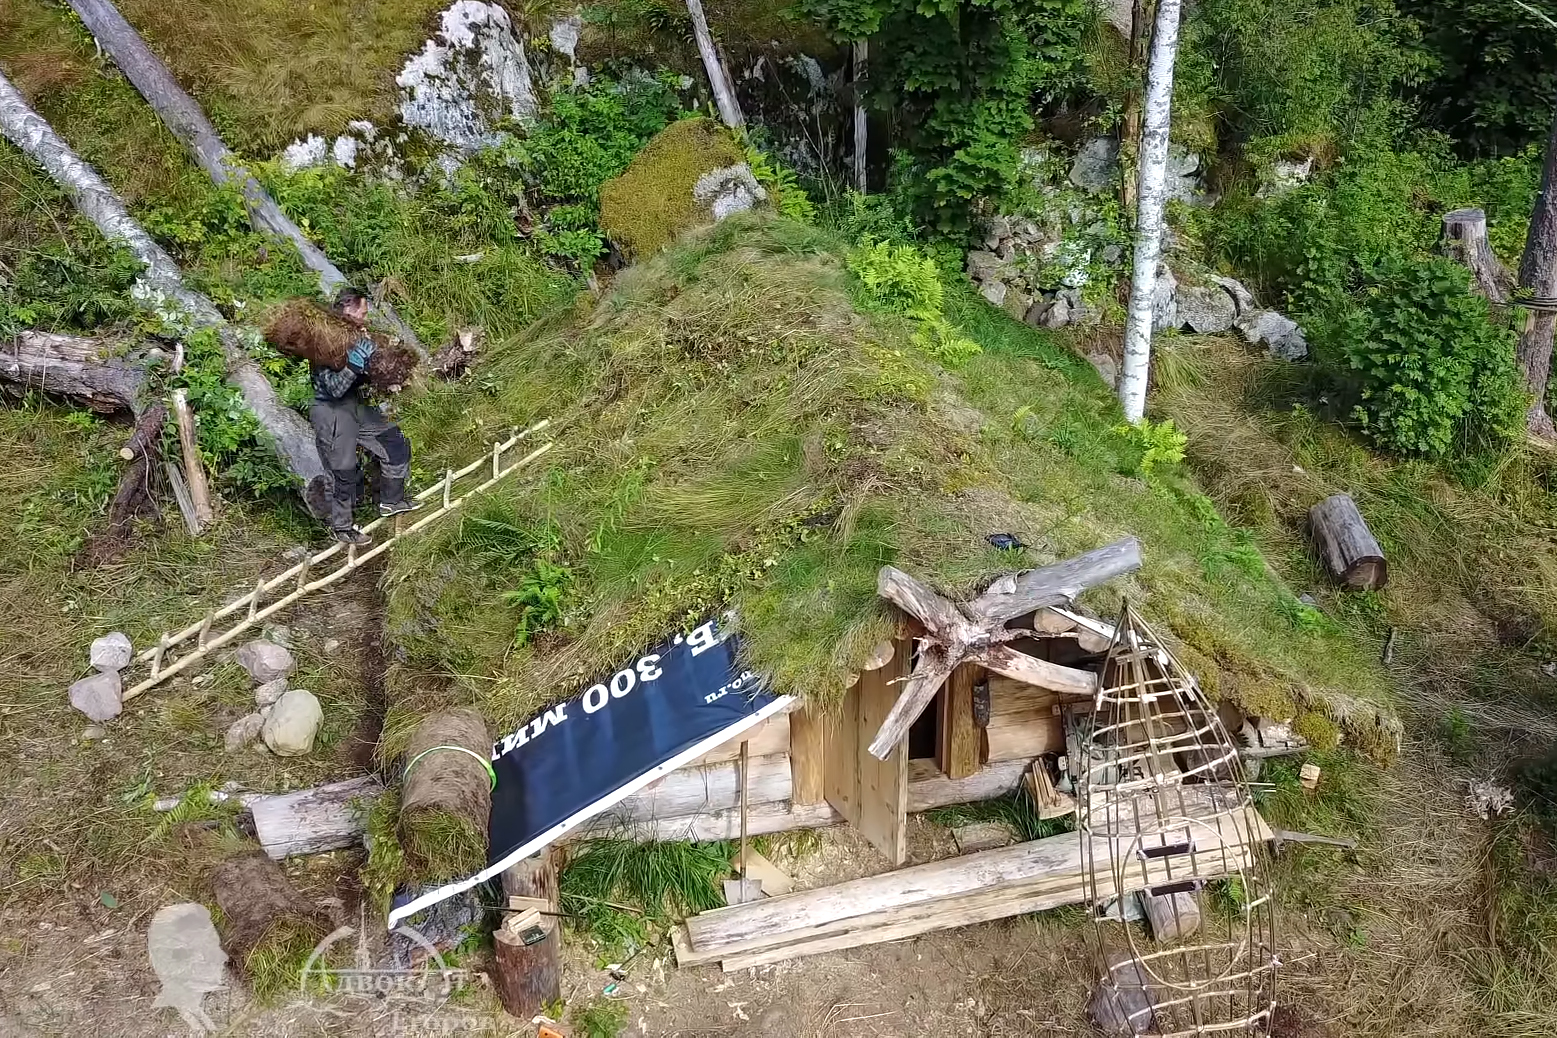
If you’re into bushcraft or off-grid, self-sufficient life skills, the Advoko Makes YouTube channel is a wealth of information. Its creator, Max Egorov, is a lawyer who lives in St. Petersburg, Russia most of the year. However, he takes every opportunity to escape his urban life and retreat to his second home — a custom log cabin he built from scratch near Lake Ladoga in northwestern Russia. Max is constantly working on new projects to improve his cabin and the woods surrounding it. If you haven’t already read our previous article introducing this ongoing build, we’d encourage you to check it out now.
Some of Max’s latest updates are documented in the recent video below, which has now been translated for his English-language channel (the original videos were all created in his native language). These alterations include a water-resistant natural sod roof, round plexiglass windows, and a large door handmade from dovetailed slabs of a nearby pine tree. As with all of the projects on the Advoko Makes channel, the attention to detail and craftsmanship is impressive.
Max’s DIY vise made from a single tree is flat-out genius, and we like the addition of a hand-inflated air bag (the type used by locksmiths to pry open car doors) to precisely adjust the vise pressure. It’s also cool to see Max bringing in new trees to replenish the forest and provide natural resources for future projects. After all, if you’re planning to use a homestead property for many years, it would be unwise to deplete the surrounding trees.
As always, we’ll be looking forward to future updates from Max on his bushcraft log cabin.
A fitness guru once said, “If you’re craving something and you don’t know what, it’s water. It’s always water.”
Indeed, water is our most basic human need, a resource that we’d only survive for three days without, so water availability naturally ranks high on wish lists of the self-reliant. Local governments have lobbied hard over the last decades to carry public water to even the most rural areas. As a result, 87 percent of the U.S. population has access to a public water supply, which explains why we never hear home seekers on those real estate-themed reality shows ask, “Does this place have water?”
If your chosen dwelling has access to a municipal water supply, an argument can be made for embracing that. The federal government regulates public water to ensure its quality against bacteria, heavy metals, and other contaminants, but when it comes to the purity of well water, the property owner is essentially on his or her own.
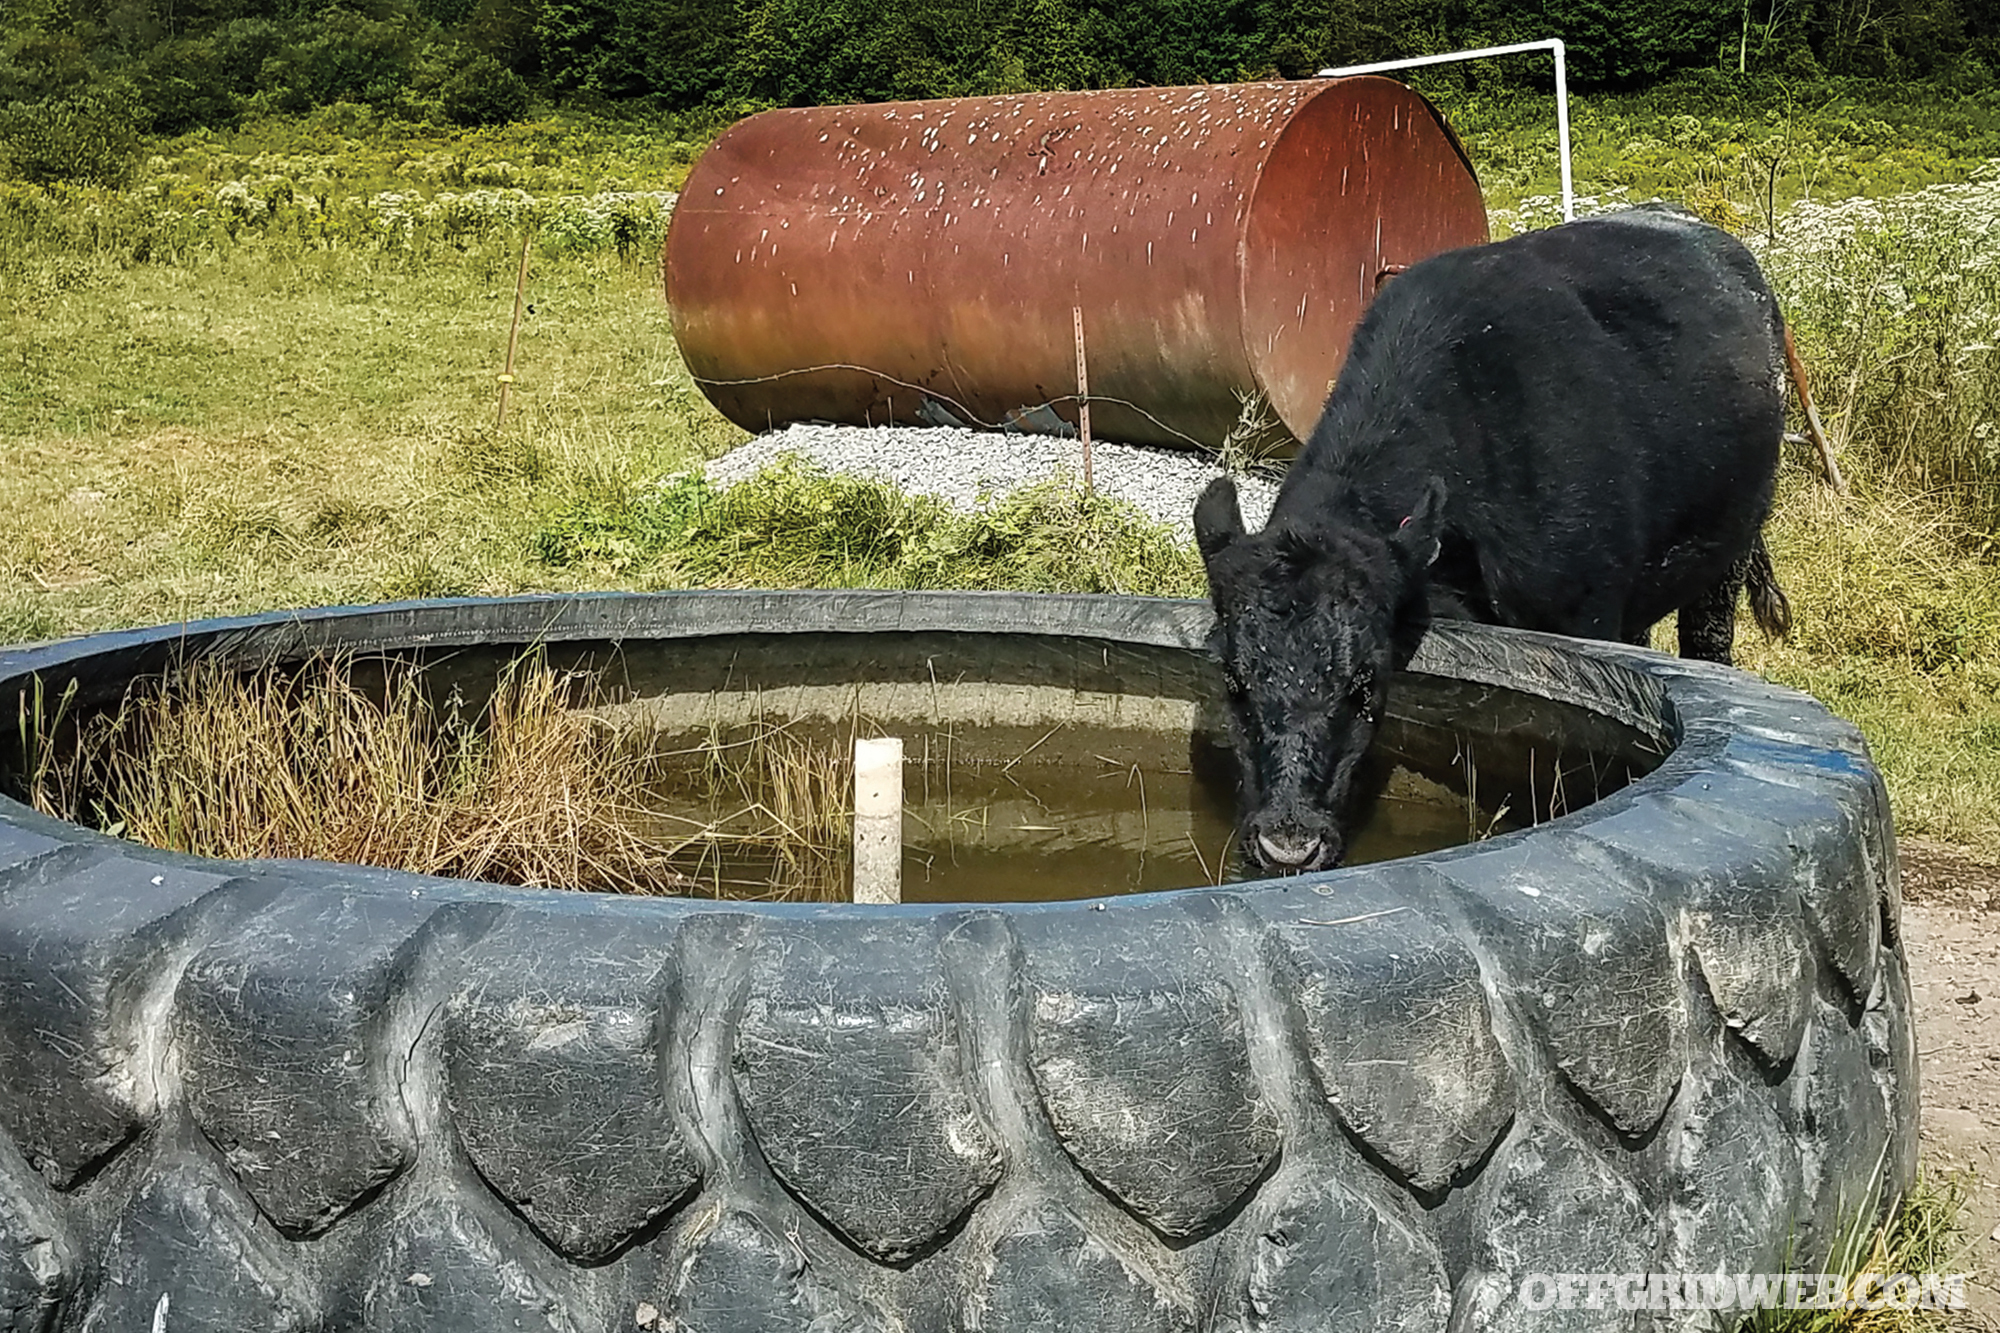
But 13-million homes in the U.S. still rely on wells, whether by necessity or choice. If you aren’t blessed with a spring or an idyllic mountain stream in your backyard and you desire to meet or supplement your family’s water needs without “city water,” then a well could be a viable option. Furthermore, with proper construction and regular monitoring of water quality, it’s entirely possible to have well water that’s as safe and reliable as your neighbors’ public supply.
Not all wells will require a storage tank, but it is an option.
“In some regions, there may be a large cost barrier for drilling a well, maintaining it, and treating the water,” explains Ryan Bushong, president and owner of Bushong Drilling LLC in Marysville, Ohio, and a fourth-generation driller. “For the most part, however, a complete private water well system will cost less to install than a private septic system, and the toughest barrier to overcome is the age-old stigma that well water is stinky, stains everything it contacts, tastes bad, and is unsafe.”
How Wells Work
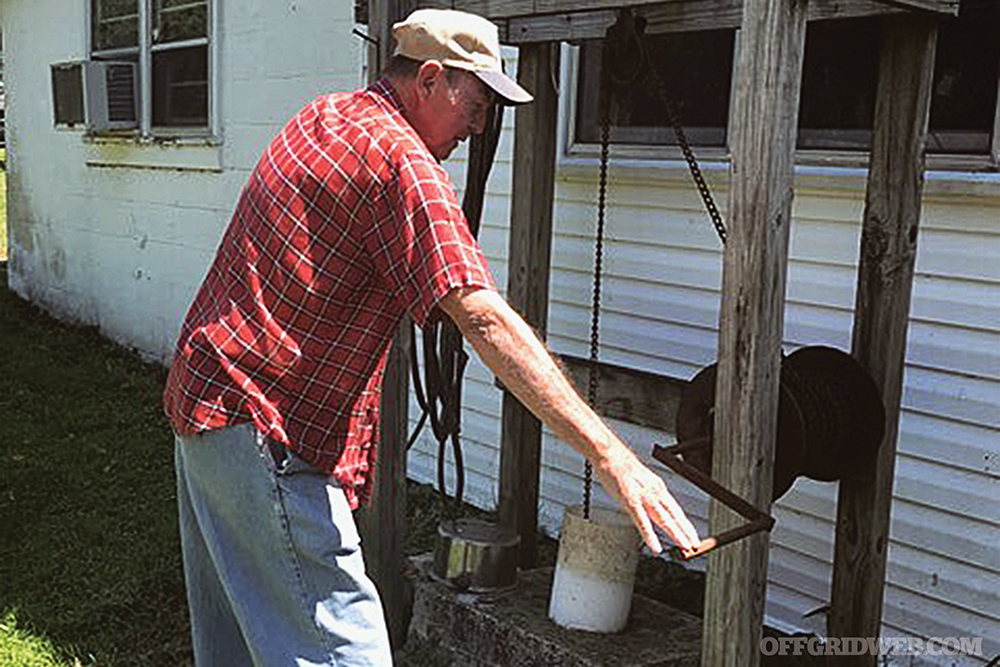
A hand-cranked well is simple, but can be susceptible to contamination. Photo by Elizabeth Farris.
A portion of surface water will make its way deeper and deeper into the ground, eventually accumulating in the pores and fractures of a layer of soil and rock. This accumulated water is known as an aquifer, and aquifers can be classified as either confined — bound both above and below by impermeable layers — or unconfined.
Confined aquifers tend to be deeper than unconfined, and because the water can’t move directly down into them, it may enter from a considerable distance away. The water contained in a confined aquifer may be thousands of years old.
A well is simply a drilled or dug hole that intersects that aquifer, allowing the water to accumulate in the bottom of the hole to be carried to the surface as needed by a well bucket or a pumping system.
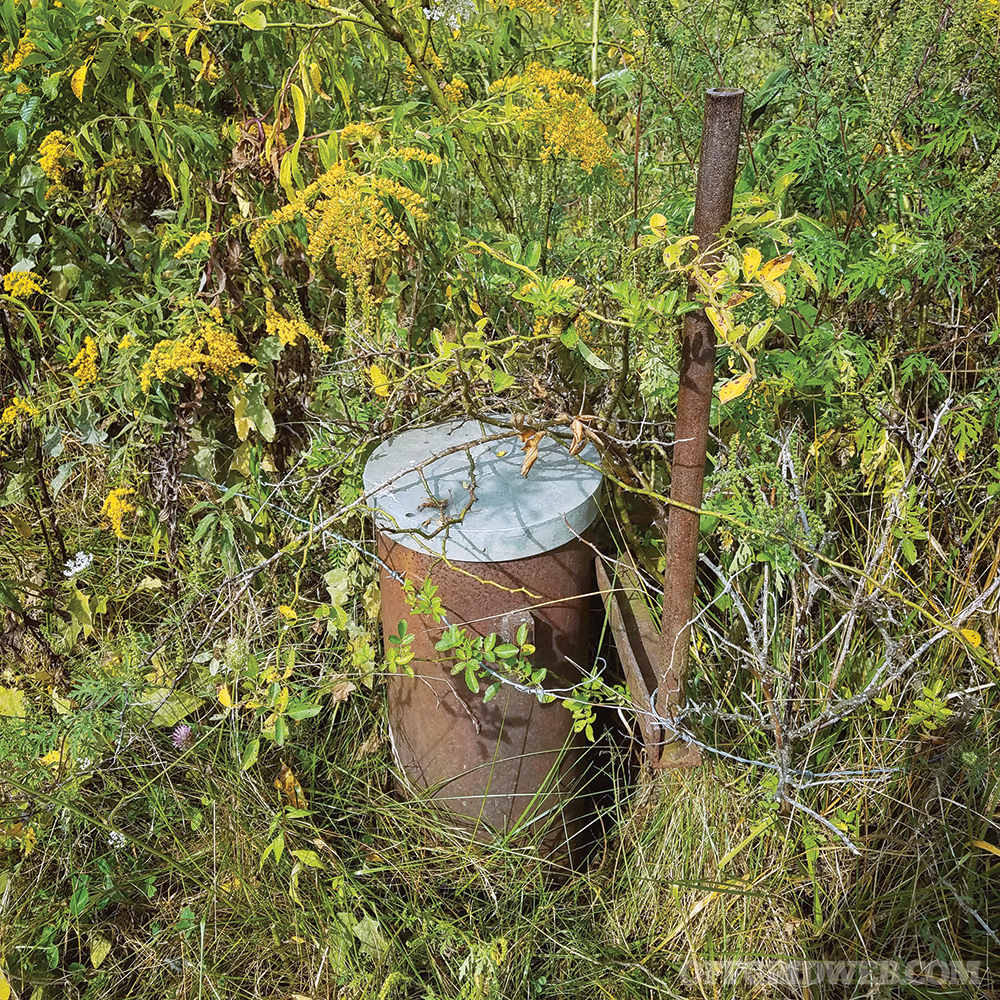
A forgotten well can be both a safety hazard and a source of groundwater contamination.
Depending on the depth of the well and the hydrogeology of the site, it may take hours or years for water to move from the surface into the aquifer. Therefore, a seasonal drought won’t necessarily impact the availability of water in the well, at least not immediately.
Generally, the closer to the surface the aquifer, the more the water will be influenced by surface conditions, such as pollution or climate. Unconfined aquifers are more prone to contamination from the surface, due to the limited buffer between what goes on above and what makes its way below.
Types of Wells
There are three types of wells that may be used in supplying water to a home: bored, driven, and drilled.
Bored or dug wells are what most of us past a certain age may remember from our childhoods. Imagine the picturesque, stone-lined wells with a bucket on a rope dangling at the top. These are typically only 10 to 30 feet deep, with a relatively large diameter. Again, because they tend to be accessing aquifers that are relatively close to the surface, this type of well is most directly impacted by surface activity.
Driven wells are the result of a pipe being driven 30 to 50 feet into the ground. This is usually done in areas with large deposits of sand or gravel, where the depth to the groundwater table is only 15 feet or less. As with bored wells, contamination from the surface is a moderate to high risk.
“Most people want a drilled well, so it’s drilled into bedrock with casing at the top,” explains John Jemison, an extension professor for soil and water quality at the University of Maine. “The well head sits up above the ground, and it has to be separated from the septic system.”
Drilled wells typically extend 500 feet or less, but modern drilling technology makes it possible to drill in excess of 1,000 feet.
Preliminary Steps
Bushong suggests a bit of homework for anyone contemplating a well, including requesting a database of historic well records for your area from your state’s department of natural resources. This will provide an idea of the quantity and quality of water, as well as average depth. This is also a good time to talk with neighbors, as their experiences with the process and with certain contractors can be invaluable.
“Be careful to ask others in the area how productive their wells are,” advises Jemison. “If your well recharge is less than a gallon a minute, you may need to install a cistern to hold water in times of greater use.”
In determining the placement of the well, the contractor’s expertise in the local hydrogeology will guide you toward the most reliable water. Beyond that, the goal is to avoid anything that could contaminate your water supply.
Vet any contractors and speak to previous clients to determine the quality of their work before hiring them.
“Well placement is usually done based on access, distance from septic systems, and drainage,” says Jemison. “You would not want to drill where water might sit around the well head.”
Distances can vary from region to region, but as an example, Texas law requires wells to be at least 50 feet from septic tanks, cisterns, non-potable water, and property lines; 100 feet from septic leach lines and drain fields; 150 feet from where fertilizer, pesticides, and animal feeds are stored and from pet and livestock yards; and 250 feet from any liquid waste disposal area.
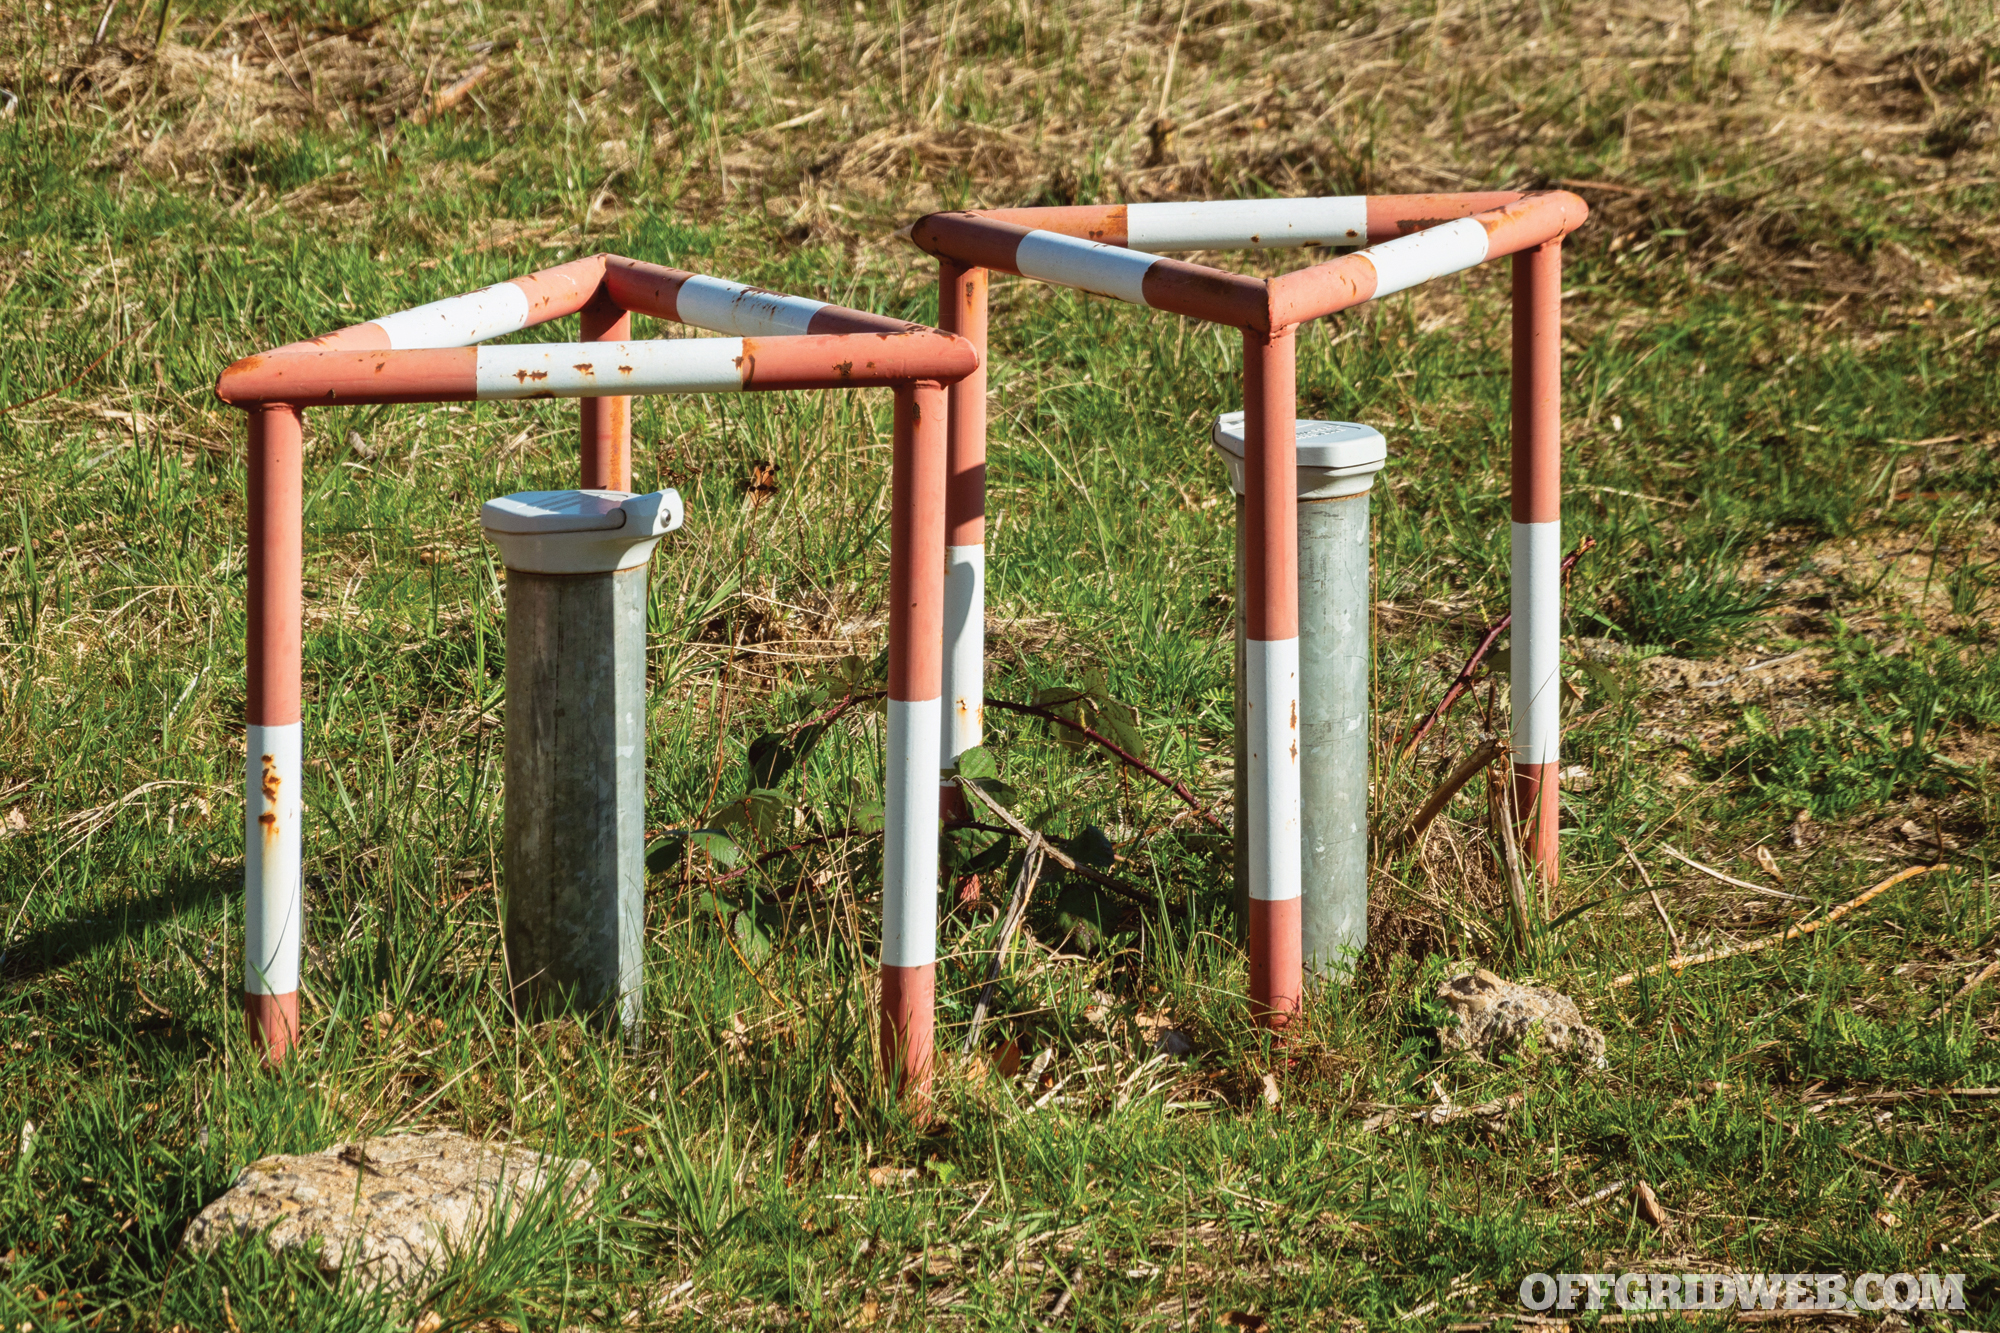
During this fact-finding phase, consider any old wells on the property, which can provide a direct link from the surface to the aquifer, in addition to being hazardous to people, pets, and livestock. If old, unused wells are present, it would be wise to factor their decommissioning into the overall project cost.
Finally, a phone call to the local courthouse or reputable contractor can help determine what permits and other paperwork, such as a well completion report, may be applicable. The red tape can be confusing. Legal requirements vary from state to state and even across counties, so enlist someone in the know to help navigate. If a permit is needed in your situation, that’s likely to cost a few hundred dollars.
Construction
The website of the National Groundwater Association (NGWA), wellowner.org, has a contractor lookup feature, allowing users to pinpoint professionals based on location and certification.
“Contractors who are actively involved in their industry — and who undergo continuing education — are more likely to construct a well in compliance with industry standards and governmental regulations,” explains Bushong, “and more likely to construct for you a water well that can last a lifetime.”
He furthermore suggests that potential well owners seek a contractor who’s certified by NGWA and who’s licensed and/or registered and bonded through the appropriate state. Don’t be afraid to ask for references when seeking a contractor and speak with two or three customers about their experiences.
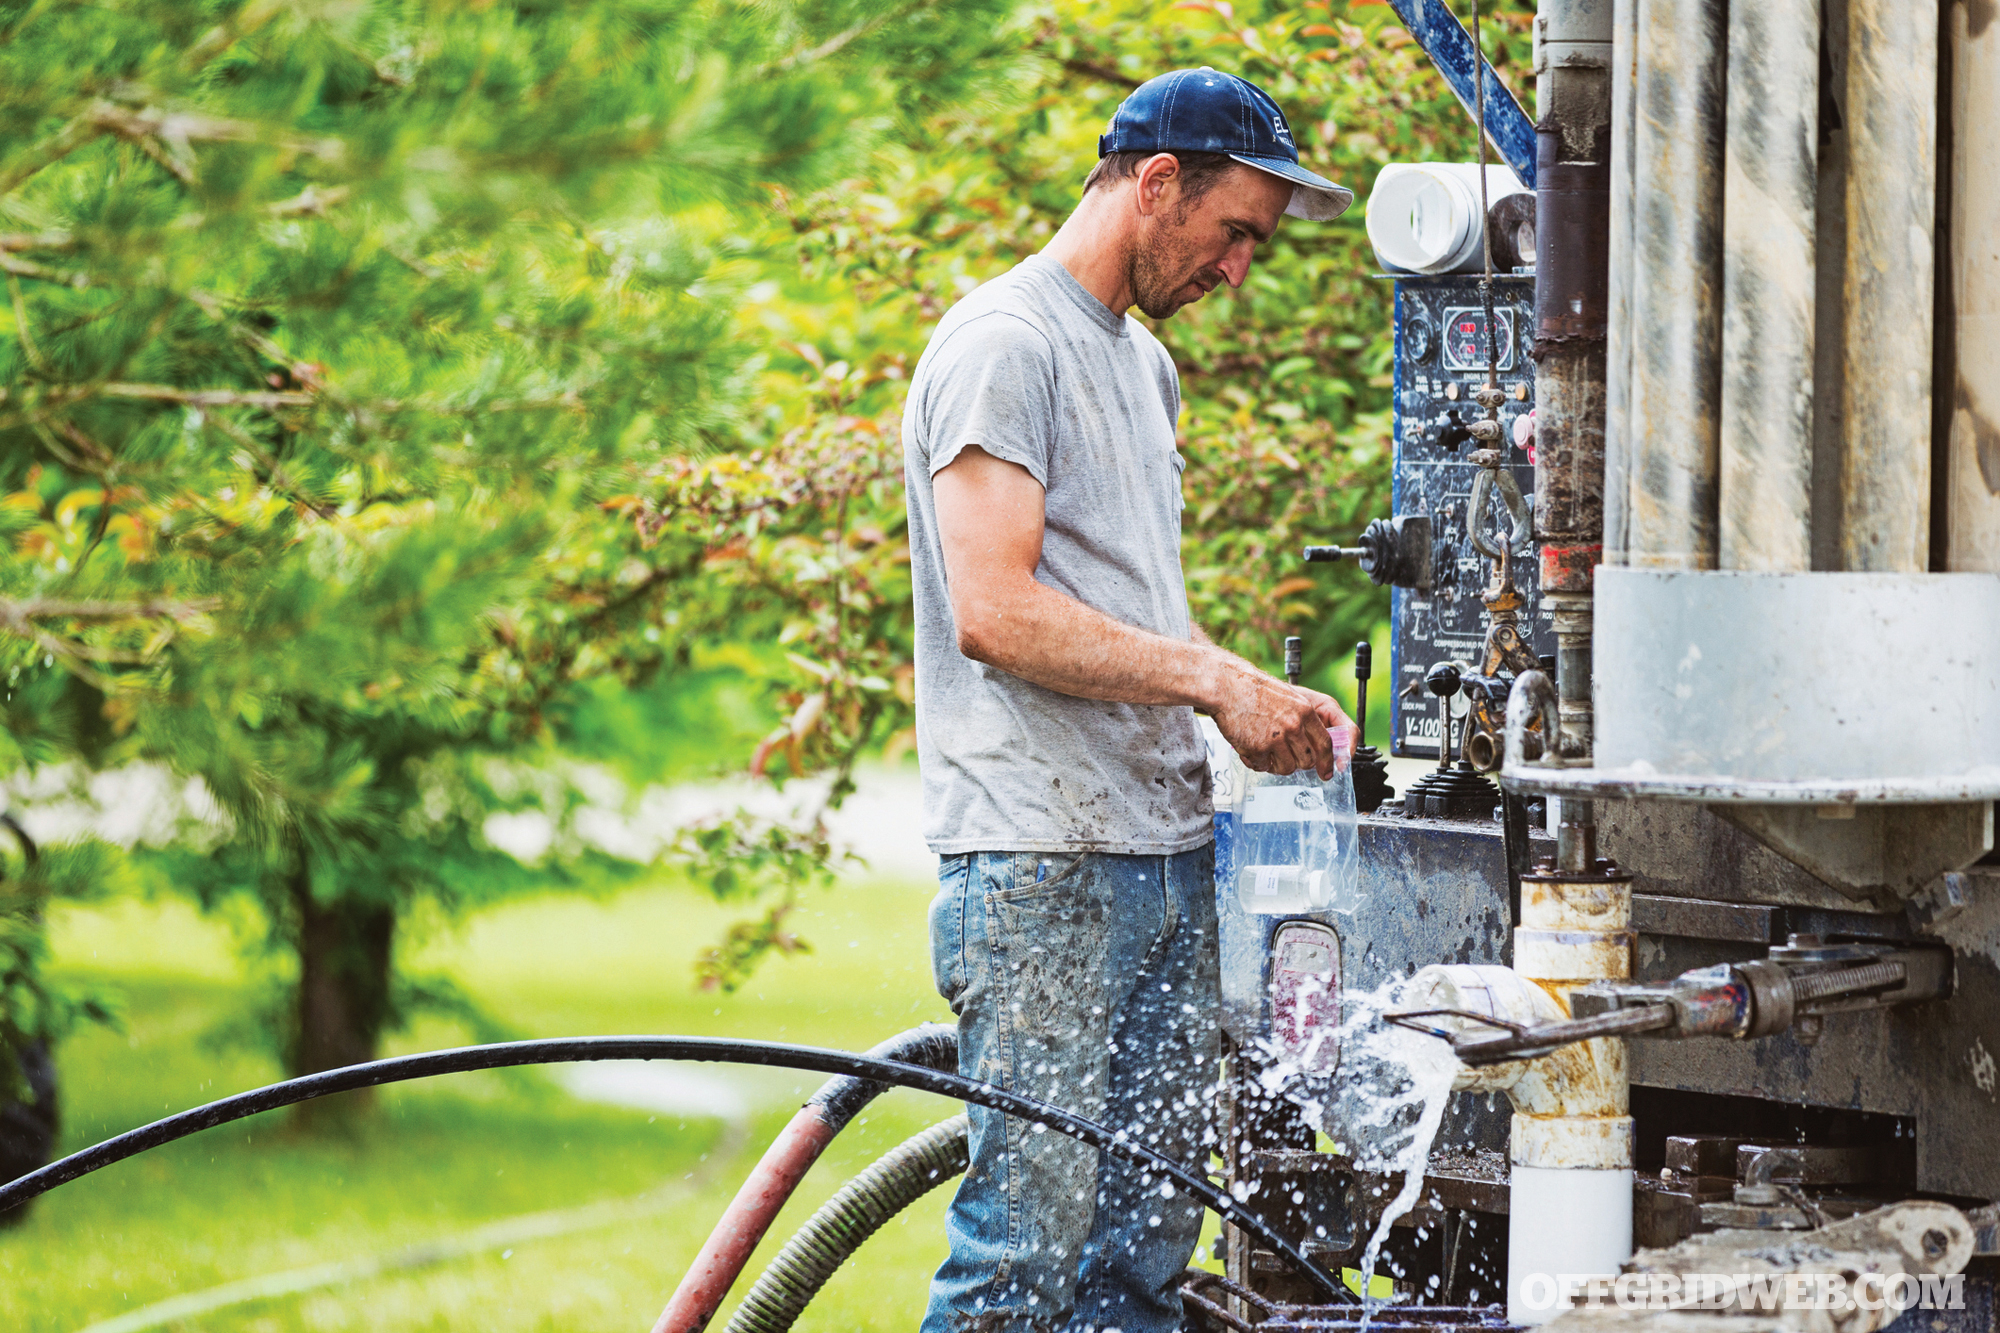
The process of constructing a well will include the actual drilling, followed by the installation of the casing, a steel or plastic tube that protects the borehole from contamination.
“In most areas with abundant water from precipitation,” says Jemison, “the key is getting a good seal — getting the casing fitted into the bedrock so that water can’t run right down the well head and drip into the well without getting adequately filtered. That’s the biggest issue I have found over time with new wells.”
The space between the casing and the sides of the drilled hole will be “grouted” with cement or bentonite. The depth of the casing and grouting will be determined by the geology of the site and/or by local or state law.
Finally, a watertight well cap can prevent contamination. Older types of well caps allowed insects to move inside, thereby transferring any bacteria or chemicals to which those bugs had been exposed. Modern well caps exclude that type of exposure and may be required by local ordinances.
In some instances, water flowing downward into a confined aquifer will create enough pressure to push water to the surface without the aid of a pump. This is known as a flowing artesian well. However, most water wells will require some type of pump, be it electric, solar, manual, or wind-powered.
A pump house is one way to both protect the investment and lessen liability.
Says Bushong, “Pump technology has come quite a long way in the last hundred years — from hand pumps to jet pumps to submersible pumps to variable frequency drive (VFD) pumps. The conventional pump systems of yesteryear could provide pressure varying between 30 and 50 psi, and later, between 40 and 60 psi. Today’s VFDs are constant pressure systems that can provide a constant 70 psi at every tap.”
When the well is up and running, a minimum flow rate of 6 gallons per hour (gpm) should be sufficient to meet the demands of most households. However, even with lower gpm, a plastic or concrete storage tank or cistern can ensure that water is available during peak demand.
Well construction costs alone will range from $2,500 to $8,000, not counting the pumping system and water treatment. According to Bushong, expect to invest an additional $2,500 to $4,500 on a pumping system and $1,800 to $4,900 on water treatment.
Keeping it Clean
The quality of well water isn’t static, but can be influenced by a number of factors. The hydrogeology of the area can certainly influence water quality, as can construction, agricultural, mining, and other surface activities near the well. The integrity of the well itself, as well as the condition of household plumbing can have negative impacts on water quality.
Yet, with all these variables that can lower drinking water purity, it’s estimated that 80 percent of wells have never had a maintenance inspection. Most well owners tend to fall into the rut of being reactive, addressing maintenance only when a problem is noted.
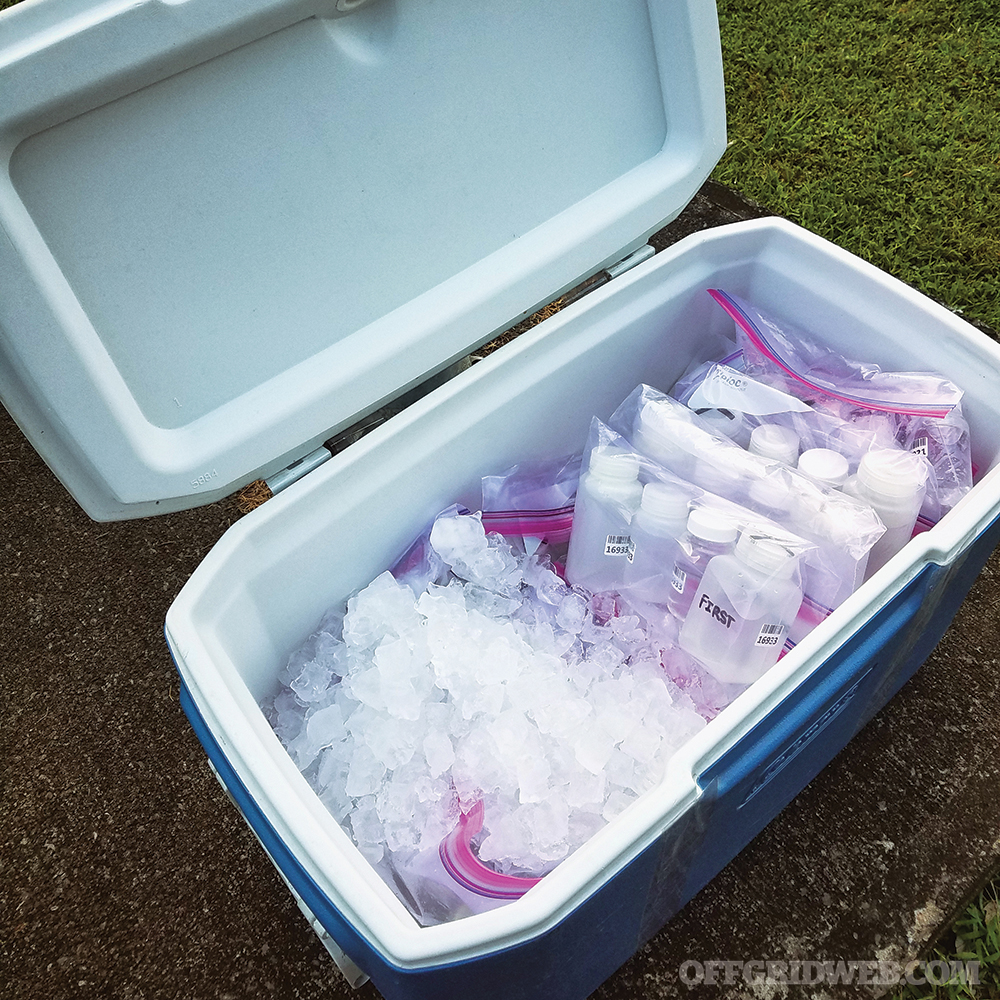
It’s important to handle samples according to the lab’s instructions.
The U.S. Environmental Protection Agency monitors the public drinking water supply via the 1974 Safe Drinking Water Act, setting standards for biological and inorganic contaminants, but private wells are unregulated at the federal level. That means the well owner is solely responsible for ensuring the quality of his or her drinking water.
Testing for coliform bacteria should be conducted annually. Coliform bacteria isn’t harmful in and of itself, but it’s an indicator organism that can signal that surface water is moving into the well, and more serious bacteria such as E. coli could be present.
Every three years, the pH of the water should be checked, and a sample should be tested for total dissolved solids (TDS). Depending on observed water issues or surrounding land use, other testing may focus on lead, arsenic, copper, iron, manganese, nitrates, water hardness, sulfates, fluoride, iron, and sodium.
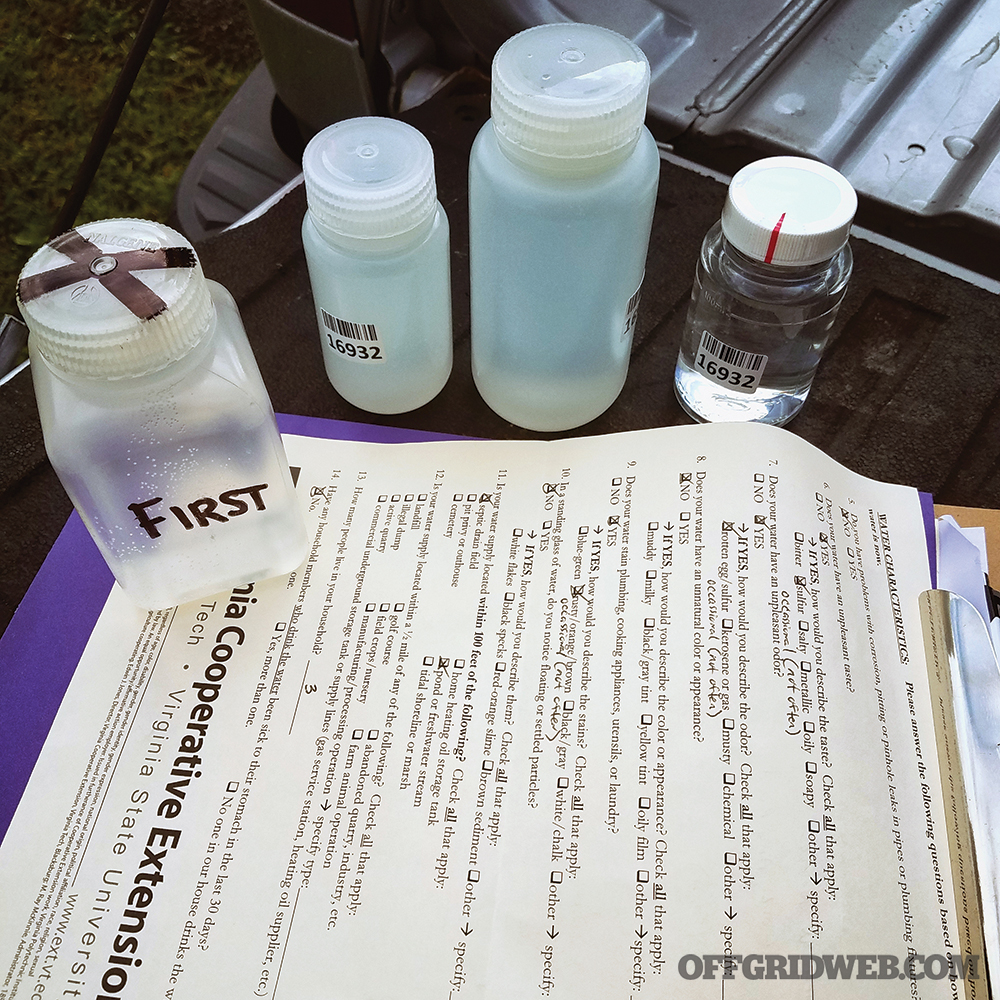
Well water testing through a land-grant university looks at several parameters of water quality.
Some land-grant universities offer formal well-owner education through their Cooperative Extension program. Texas A&M University, Pennsylvania State University, Montana State University, and Virginia Tech all offer programs that include classroom training on well construction and maintenance, as well as water testing. Water sampling may cost in the neighborhood of $300 through a private lab, but can run considerably less than $100 through one of these programs.
To find out if this type of outreach is available near you, do an internet search for “[your state] extension well water program,” or ask Cooperative Extension personnel who serve your county.
Specific Contamination Issues
Lead: Likely due to older plumbing; there’s no acceptable level.
Arsenic: Naturally occurring in some types of rock; linked to cancer, stomach pain, paralysis, blindness.
Copper: Blue-green staining; nausea, vomiting, stomach cramps; children and infants most susceptible.
Iron and manganese: Often occur together; reddish-brown staining; metallic taste; not usually a health concern.
Sodium: Salty taste; corrosion of plumbing.
Nitrate: Could indicate contamination by sewage, livestock manure, fertilizers; serious health threat to infants.
Hydrogen sulfide: Rotten egg smell; naturally present near coal or oil fields.
Fluoride: Naturally occurring, as well as added to public water supplies; long-term exposure linked to bone cancer.
Total dissolved solids: General indicator of water quality; sources may be either natural or man-made.
Hardness: High levels of calcium and magnesium; not a health risk; shortens lifespan of plumbing and fixtures.
pH: Mainly associated with the geology of site; general indicator of water quality.
Is Dowsing a Real Thing?
Dowsing or “water witching” is the process by which an individual walks across a parcel of land with a forked stick or bent wires in search of water. The claim is that, once the person walks over top of water, some form of subtle energy causes the stick to bend downward or the wires to cross.
The scientifically minded will argue that the practice is based on the outdated belief in underground rivers. The fact is that, in an area that receives sufficient rainfall, water will be encountered practically anywhere you dig, so the spot signaled by the water witch is no better or worse than a spot 100 feet away.
On the other hand, believers share stories of the almost supernatural success that their own dowsers had in finding just the right spot. See “Debunked” in RECOIL OFFGRID Issue 28 for more on this topic.
Conclusion
Constructing a water well is within the realm of possibility for most folks in the U.S., but it isn’t a do-it-yourself project, nor is it a drill-it-and-forget-it endeavor. It will take an investment and ongoing commitment, but the prize is the one thing that life on this planet needs the most.
Says Bushong, “Please understand, especially if you are a self-reliant type, you can own your own personal low-maintenance water plant on your own property for a reasonable cost that provides you and your family with water pressure and quality that meets or exceeds municipal water pressure and quality. Knowing this, why would anyone want to rely on a public water system when you can tap into Earth’s most precious resource right beneath you?”
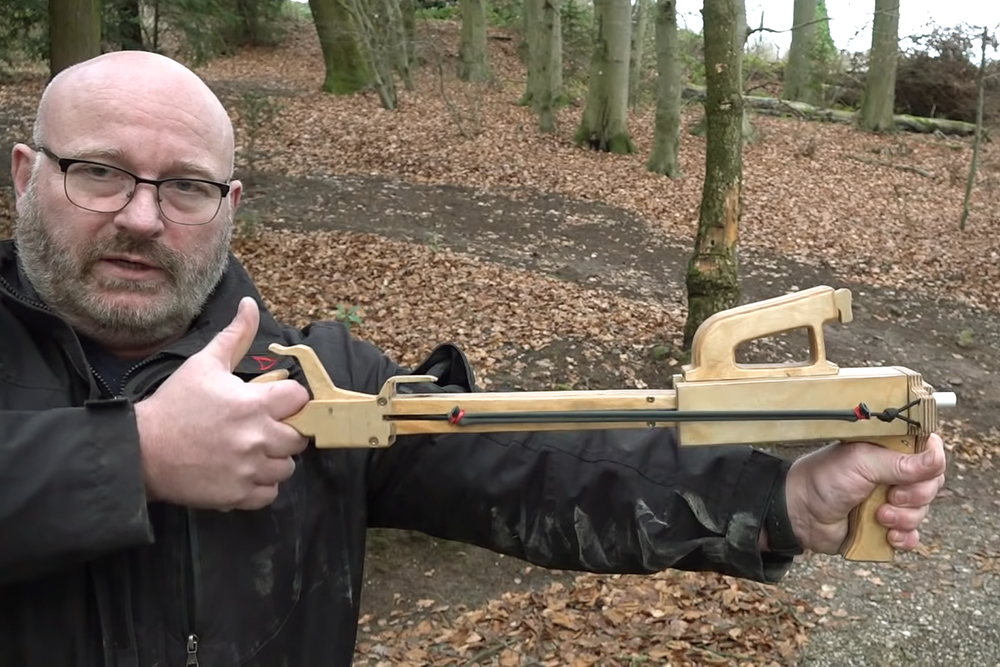
It’s all too easy to think about survival weapons in terms of commercially-made items you can buy at a local gun store or hunting gear retailer. However, there may come a day when what you can buy is less important than what you can make. If you’re able to use some ingenuity to build a tool for small-game hunting or even self-defense in your garage, you won’t be dependent on store-bought consumables. German YouTuber Joerg Sprave is famous for creating many such weapons, especially DIY slingshots and bows.
We’ve previously written about some of Sprave’s grin-inducing inventions, such as the full-auto crossbow he built based on a power drill. In his most recent video, he shows off a magazine-fed, pump-action slingshot he named the Instant Rufus after famed slingshot marksman Rufus Hussey. The Instant Rufus slingshot is an extremely cool device, and is designed to fire 12mm steel ball bearings in quick succession.
Clever touches like the magnetic feed mechanism, thumb trigger, and metal barrel appear to make this into a reliable and accurate weapon. Sprave says it also avoids legal issues because it’s not classified as a firearm under Germany’s weapon laws, but is instead part of the same category as blowguns. Although it’s not as powerful as it could be given its short pump length, he says with a smile that it’s “powerful enough” — after watching it in action, we’d definitely agree with this assessment. We want one.
Red teaming (sometimes abbreviated as just RT) can be described as executing an operation against a corporation or government entity to identify various gaps in their security policies. This could cover physical security, digital security, personnel/employee screening, and so on. The goal of a professional Red Team is to find as many shortcomings as possible so they can be brought to light and fixed before they can be exploited by a bad guy.
Taken down to the individual level, RT can also be used as a way to take an inward look into yourself to find a solution to an internal struggle you’re dealing with. Ultimately, anything and everything can be red teamed. It’s not all code, MultiCam, and tradecraft. It can be as simple as looking at an issue or situation and assessing it from various angles.
In this article, we focus on the mindset used by “red teamers.” When it comes to this way of thinking, it’s commonly referred to as the adversarial mindset — which is a fancy way of saying “think like a bad guy.” Now, why would the adversarial mindset be helpful to the average person? How can you filter this down to make it useful for the prepared citizen? If you approach your personal security (or PERSEC) not from your own perspective, but from the vantage point of a potential bad guy, you’ll be able to defend yourself, your family, and your property more effectively.
I’ll give you a simple example. Let’s say you’re thinking about installing a CCTV camera somewhere on your property. Where would you put it? Probably someplace that has the best view of the area you wish to monitor, right? But would you mount it at a height of 6 feet? No? Why not? Maybe because it would be easy for someone to reach and tamper with? That’s a good point. Congratulations, you just used the adversarial mindset. Now, how many other ways you can apply that same line of thinking to protect yourself either at home or in your workplace? The following are a couple of lessons that I’ve learned from red team assignments throughout my career. Hopefully they can provide a foundation for you to take a hard look at your routine and find some safety gaps to fill.
When I was asked to do this article, I was posed this initial question: “What are some of the lessons learned from your work on a red team?” My immediate response was “Lessons learned are simple; it’s really easy to park a car somewhere and blow it up. Everyone’s too busy looking at their phones to notice a guy park a Buick in the always-open handicapped spot and start walking across the street to another waiting car and take off.” Although accurate, this scenario was hypothetical. The rest of these events actually took place.
A Hardhat, a T-Shirt Transfer, and a Clipboard Can Get You Anywhere
Is this a legitimate utility company representative, or a fast-talking con man?
How often has a service provider or utility company employee knocked on your door unannounced to read a meter, check your internet cable, offer you a today-only discount on extermination services after a free on-the-spot assessment? How do you know they were actual employees with sincere intentions? Was it their attire? Or the plastic ID badge they had on? Was this enough for you to let them in your home? One of my favorite red team covers or MOs (modus operandi) is to pose as a utility worker. An MO is generally defined as “someone’s habits of working.”
What do you know about a utility worker’s MO? Probably not much, when you think about it. Just that they usually wear a hardhat and have a clipboard — both are cheap and very easy to obtain. Usually they have a shirt with “Electric Company” on it. Maybe a logo, which is also easily obtained off of the company’s website. With a quick trip to the local office supply store, I can print said logo onto transfer paper, and iron the name and logo onto a shirt. While working on an assignment, I was able to gain entry to the client’s office building while dressed as utility worker.
When I checked in with security, I provided a fake company ID and driver’s license. The guard attempted to scan the bar code on the back of the ID, which didn’t work. But I had already created a very convincing crack in the ID which explained the lack of scanning ability. I told him I had cracked it while attending a baseball game after sticking it into my pocket without a wallet. I also built in an ample amount of “aging” to my fake ID by lightly rubbing the freshly printed card on my blacktop driveway prior to deployment. The guard then entered my info manually, took my picture, and I was granted entry under the guise of “checking feeder line equipment.” Don’t know what that is? Neither did he.
The gist: Perception isn’t reality. As Ronald Reagan once said, “Trust, but verify.” If an unfamiliar or unannounced person comes to your home or place of business and wishes to be granted entry, you can be kind but cautious. Look at their attire and identification, then verify it. If you’re at your place of business, contact your security staff if you have one. Or, based on the person’s perceived business (utility worker, construction foreman, etc.), contact that specific department to see if they’re expecting anyone.
Ultimately, if a visitor is granted entry to your place of business, they should never be without an escort. If you’re at home, check their attire and identification (company issued and driver’s license). Make sure the names and pictures match and the license is local, then ask for their main office number so you can verify their identity. Before dialing the number, type it into Google to make sure it’s not a cell phone and that the number is prominently published on the company’s website. Never accept cell phones or unpublished numbers as a means of verification.
Above: Generic “Security” badges can be bought online. When paired with matching shirt and slacks, a false air of authority can ease most people’s suspicions. Don’t be afraid to question.
Don’t take the “that’s my supervisor’s cell phone” excuse. Once you’re able to verify the person’s intent and identity, it’s still up to you if wish to grant them entry. If you’re a stay-at-home mother with children running around or napping in the next room, schedule an appointment when your spouse is home. Especially when there are two or more people requesting to enter your home, don’t put yourself in a situation behind closed doors where you’re outnumbered. And above all, trust your intuition.
Even if everything checks out and you have that “bad feeling” or the hairs on the back of your neck start to stand up, listen and dismiss the unannounced visitor(s). Remember, most companies advertise that their personnel are “background checked,” but there are many different types of background checks and they aren’t all created equal. Every bad guy who has ever lived has had a clean background at one time or another. A clear background means the person doesn’t have a known history of criminal activity, nothing more.
Tip: Check to see if your locale has “solicitation licenses.” Many areas have started requiring these for door-to-door salesmen and the like. They usually require a background check prior to issuance. In many cases, just asking if they have a solicitor’s license will cause them to leave. If they do, ask to see it and then call your local police department’s non-emergency number and ask them to verify the license, then check with business that they’re supposedly representing to verify their identity (just as I described above). Also see if your area has a “no-knock list.” This is something else that many locales have started using to cut down on the number of people going door to door unannounced. If your area has one, take steps to get your address on it.
A Backstory, a Smile, and the Fog of Legitimacy
During a job, I was asked by the client to measure the risk of the “ex-employee route” to see if I could gain entry to their facility while having a moderate understanding of what the business’s culture was like — their internal system for identification, access control, etc. They wanted to know if I could circumvent their physical security using only internal information about day-to-day operations — the kind of information any current or former employee would know. After taking some time to understand how the business functioned, I noticed that in many cases, associates who predominantly worked from home, or worked closely with clients, weren’t normally issued access badges since they weren’t coming into the office on a regular basis. That meant there was a good possibility that the security guards had no idea what some of these people looked like.
On top of that, in many cases the company’s internal employee directory system provided no individual photos either. So, if you were a remote employee who knew specific internal information, you’d be granted entry. I then chose an employee who worked on the opposite side of the country who was a “remote employee” as my cover and fabricated the remainder of the MO. I created a fake driver’s license from my cover’s home state (harder to identify since it’s not local and unfamiliar), memorized his employee ID number, and created a backstory about why I needed to be there.
When I approached the receptionist, I explained who I was (the cover’s name, an active employee); gave her my (fake) license; provided the employee ID number; explained that I was on vacation, a deal with a client was going south, and that I needed to access the LAN (local area network) to assist my team. I then off-handedly complained about my hotel’s Wi-Fi. Because I had a driver’s license with the correct name, as well as an employee ID number that was valid and matched the name in the employee directory, I was eventually granted entry. There was no picture available to provide verification and no one called the employee’s supervisor to verify my identity. Just a backstory, a smile, and the fog of legitimacy. They even offered to create an access badge for me so I could access that building, or any of the client’s other sites, going forward.
The gist: If someone wishes to gain access to your place of business and they present themselves as a fellow employee, that doesn’t mean they aren’t a former employee who has knowledge of internal information. Take all appropriate steps to verify their identity — a name and an employee ID number aren’t enough. A picture should be included in the verification process (and if it isn’t, you should take steps to have your business leadership implement a system that includes pictures). If you’re provided an unfamiliar or out-of-state license, a quick Google search of that state’s name followed by “driver’s license” should bring you to that state’s DMV or similar department. Then verify that it’s a current license type.
Also, be sure to utilize internal assets to verify the employee’s perceived identity. In the scenario above, if the receptionist had placed a call to the supervisor of the individual of which I assumed his identity, my cover would have been completely blown. Also, if your business utilizes an internal messaging system, check to see if that person is logged in. Also check to see if the individual has an out-of-office message on their email or internal phone number. In many business and corporate settings, it’s considered bad form to go on vacation without setting an out-of-office message on your voicemail and email.
Curiosity Killed the Katz
Let’s remove physical access from the picture altogether and focus on digital information security. Could you let someone in your home or workplace without even opening a door, or even giving them a key? Of course you can. Digital intrusion is the way of the future. If I can gain entry to your life without having to worry about creating an MO or spending large amounts of time on preplanning or reconnaissance, why wouldn’t I?
(Note: This isn’t my technique, I didn’t invent it, but I’ve used it and so have many others.) What if you found a memory card or USB stick laying on the ground in a public place or in the cafeteria in your office? Would you want to be the Good Samaritan and return it to the rightful owner? Would you maybe be curious about what’s on it? It’s the modern-day equivalent of finding a blank VHS tape. Let’s say curiosity, or your intentions of trying to find a “rightful owner,” get the best of you, and you insert the device into your computer. You know enough to know not to download or run any software or program files since that could install a virus.
When you open up the device on your computer, it only looks to be pictures and video files. You commence to opening the pictures and they open just fine. But you’re not installing anything, right? Wrong! The pictures had malicious code in them and they’re creating a “back door” for me to access your computer. Ah, but you have virus protection software and a whole gaggle of cyber-security software that’ll protect you. Maybe. Or maybe not, since there are plenty of ways to subvert these applications and malware designers are constantly evolving and updating their code. The news showcases examples of this on prime time what seems to be almost monthly. So, if I gain entry to your home or office computer, what do I have access to? Think about what’s stored on those computers and what could be done with that information. All because you looked at a picture.
The gist: Be just as suspect of things that you plug into a computer as you would of people who you grant entry into your home or place of business. No amount of curiosity should supersede your goals of maintaining your personal or professional INFOSEC (information security). If trusted friends or family give you a memory stick to copy family photos, then you’re most likely safe, just be sure your virus and digital security software are up to date. Beyond that, only use memory sticks that you’ve purchased yourself from a trusted source, and ensure they’re unopened and show no signs of tampering. Never use USB devices that are sent through the mail for promotional purposes. Promotional material is very easy to fake and doesn’t even have to be sent through the mail, it can be easily placed in your mailbox while you’re at work.
There are several examples of this being successfully executed across the globe. In 2017, a major U.S. insurance provider created the perfect opportunity for this attack to be launched on a large scale, but luckily no one, to my knowledge, exploited it. Someone thought it would be a good idea to provide USB devices in a mailer that would give you information on the services you could expect from their insurance company. Because of the sheer number of these that were mailed out and the very real danger that it posed, INFOSEC professionals and digitally savvy civilians alike took to the internet to scold this prominent insurance provider of their clear violation of what should be common sense protocols.
Perhaps the most famous use of the technique was discovered in 2010, allegedly part of a multinational cyber-warfare initiative. The Iranian nuclear program was disrupted after a sophisticated malware known as Stuxnet targeted its uranium enrichment centrifuges, causing them to fail to produce usable nuclear material. Analysts believe the malware was covertly introduced to those secure facilities on infected USB sticks.
If you didn’t buy it, it didn’t come from a trusted source, or has been exposed to the general public out of your control (left at a coffee shop or received in the mail from your new insurance provider) consider the device compromised and destroy it. It’s not worth the risk.
Conclusion
Utilizing the adversarial mindset in your everyday life comes down to applying a few different “lenses” to your outlook: observing what’s happening around you, thinking about how actions or decisions could be exploited by those with ill intent, being kind but cautious when dealing with people you don’t know, and the old adage of “trust but verify.” Every day, we go to work and are posed with problems that we are tasked with solving. The adversarial mindset allows you to be proactive, troubleshooting the problems before they arise so you, your family, and your workplace can be as safe as possible. Never forget to think like a bad guy.
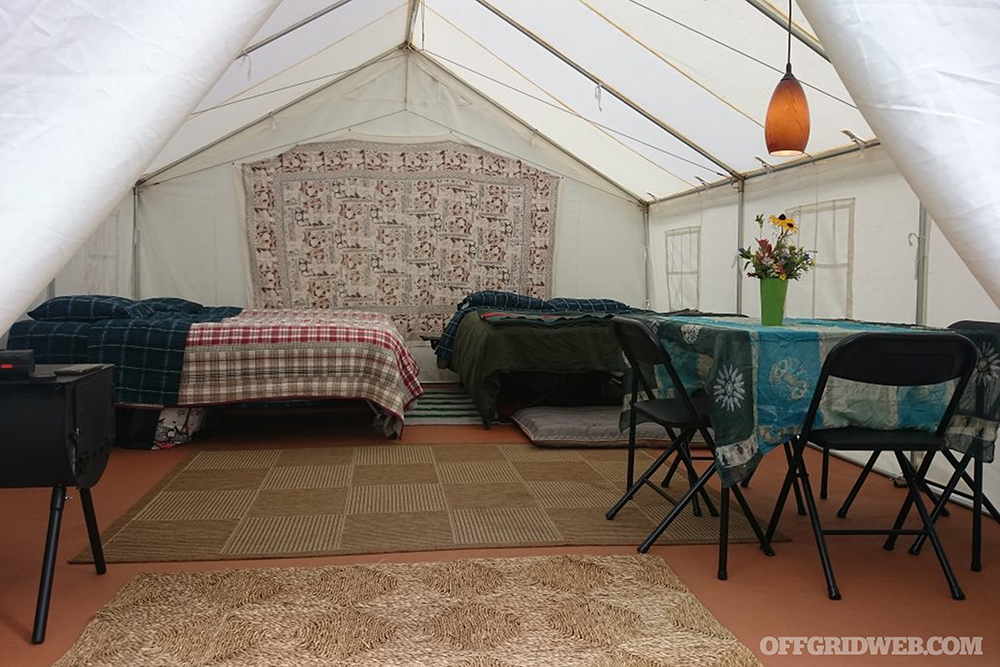
Finding shelter is not only vital to one’s survival, it’s also vital for peace of mind. Be it for hunting, recreation, or in a survival situation, having a good tent that’s easy to set up makes life easier. If you plan on living out of a tent for an extended period of time, having a comfortable, safe place to unwind and relax at the end of the day is crucial. It’s also ideal to have plenty of space for fellow travelers and gear, rather than returning to a cramped shelter at the end of a long day. There are plenty of manufacturers of large canvas tents on the market, but Elk Mountain Tents decided to do things a little differently.
Whether the primary use for the tent is hunting, camping with family, or as an emergency shelter, these tents offer a roomy space to keep your family and gear out of the elements. We decided to check out an assortment of items from Elk Mountain’s shelter lineup, evaluating first-time setup and long-term viability. This included the following items:
An example of how much you can do inside one of these tents — interior decorator not included.
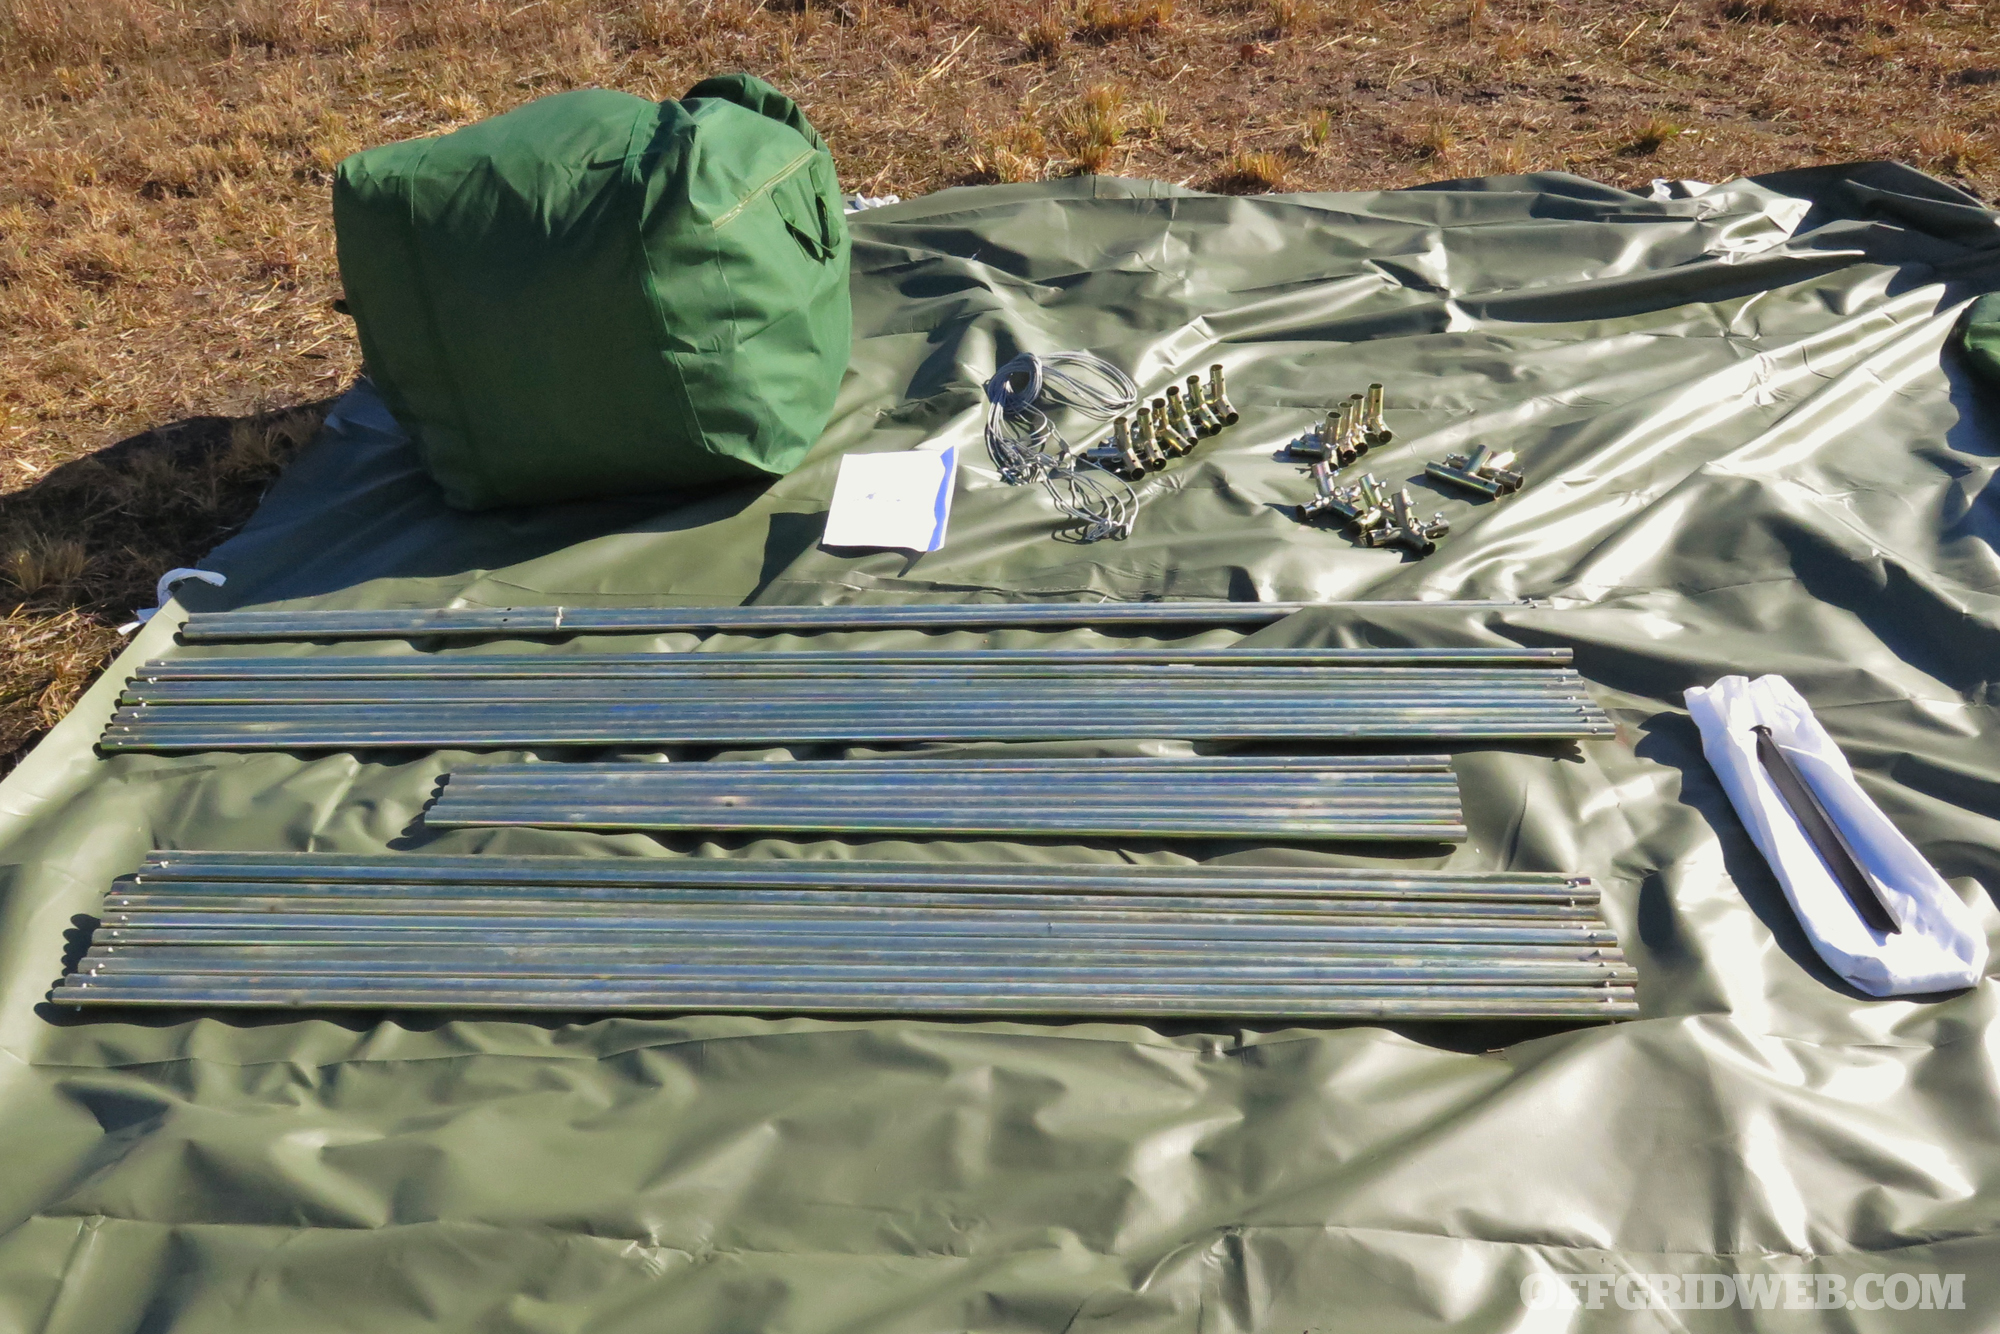
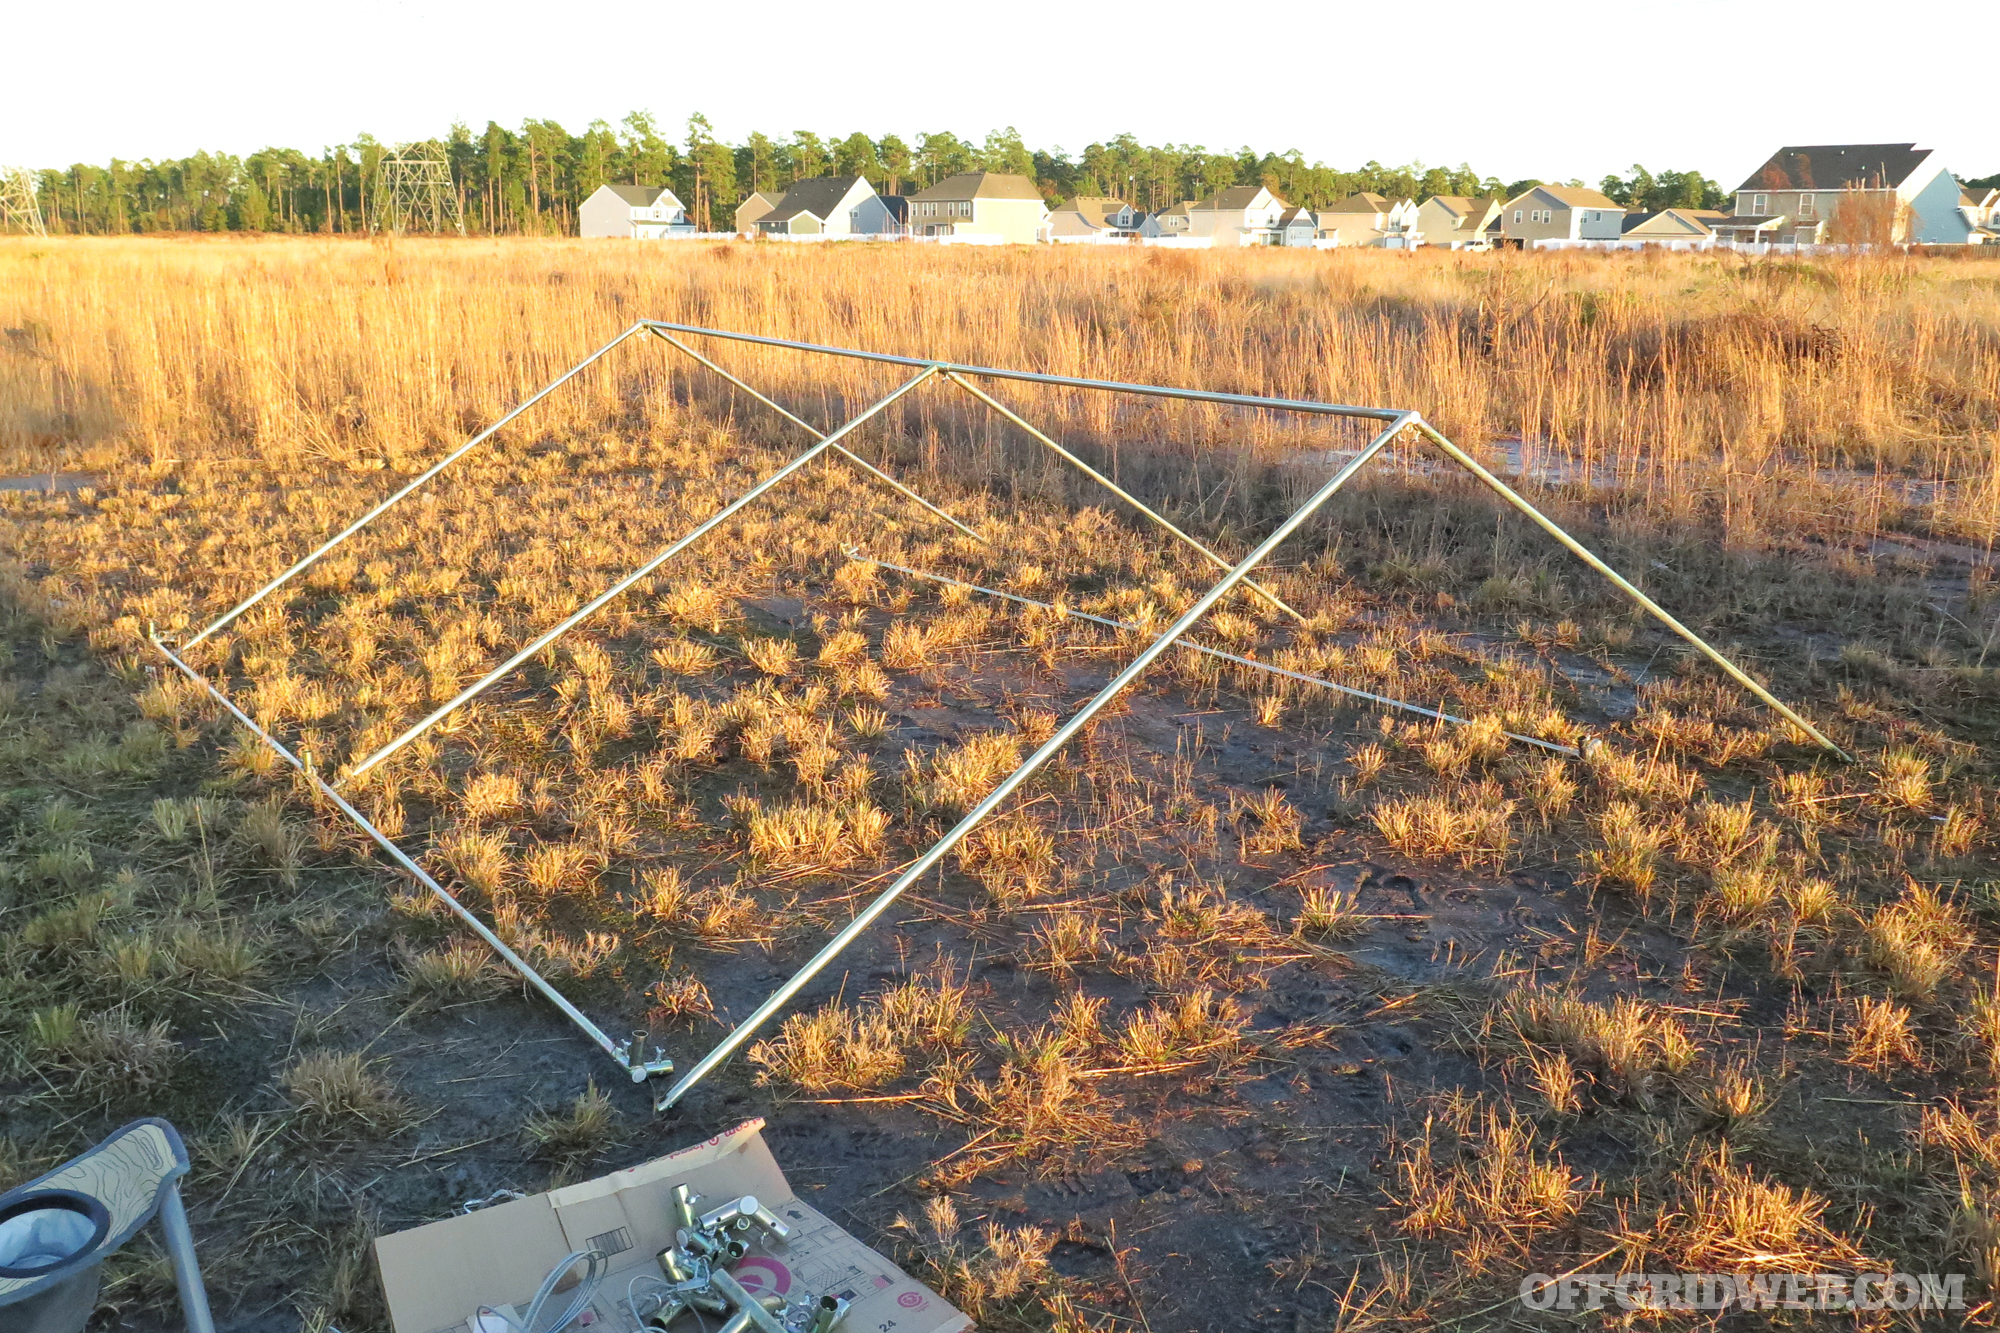
Each tent includes the canvas structure with storage bag, frame angle kit with its own storage bag, wire support system, fiberglass stove pipe jack with cover, eave ropes and tensioners, and eight 18-inch steel stakes. Elk Mountain sells the frame poles and floor separately, which is nice if you have a specific need for the tent, or if you’d rather build your own frame or omit the floor kit to save some cash. We also picked up an optional large canvas storage bag, which is easier to pack the tent into than the compact bag it arrived in.
All packed up, the tent takes up very little room and weighs around 125 pounds total.
So, let’s take a look at this tent to see what makes it stand out.
Elk Mountain Tent Materials
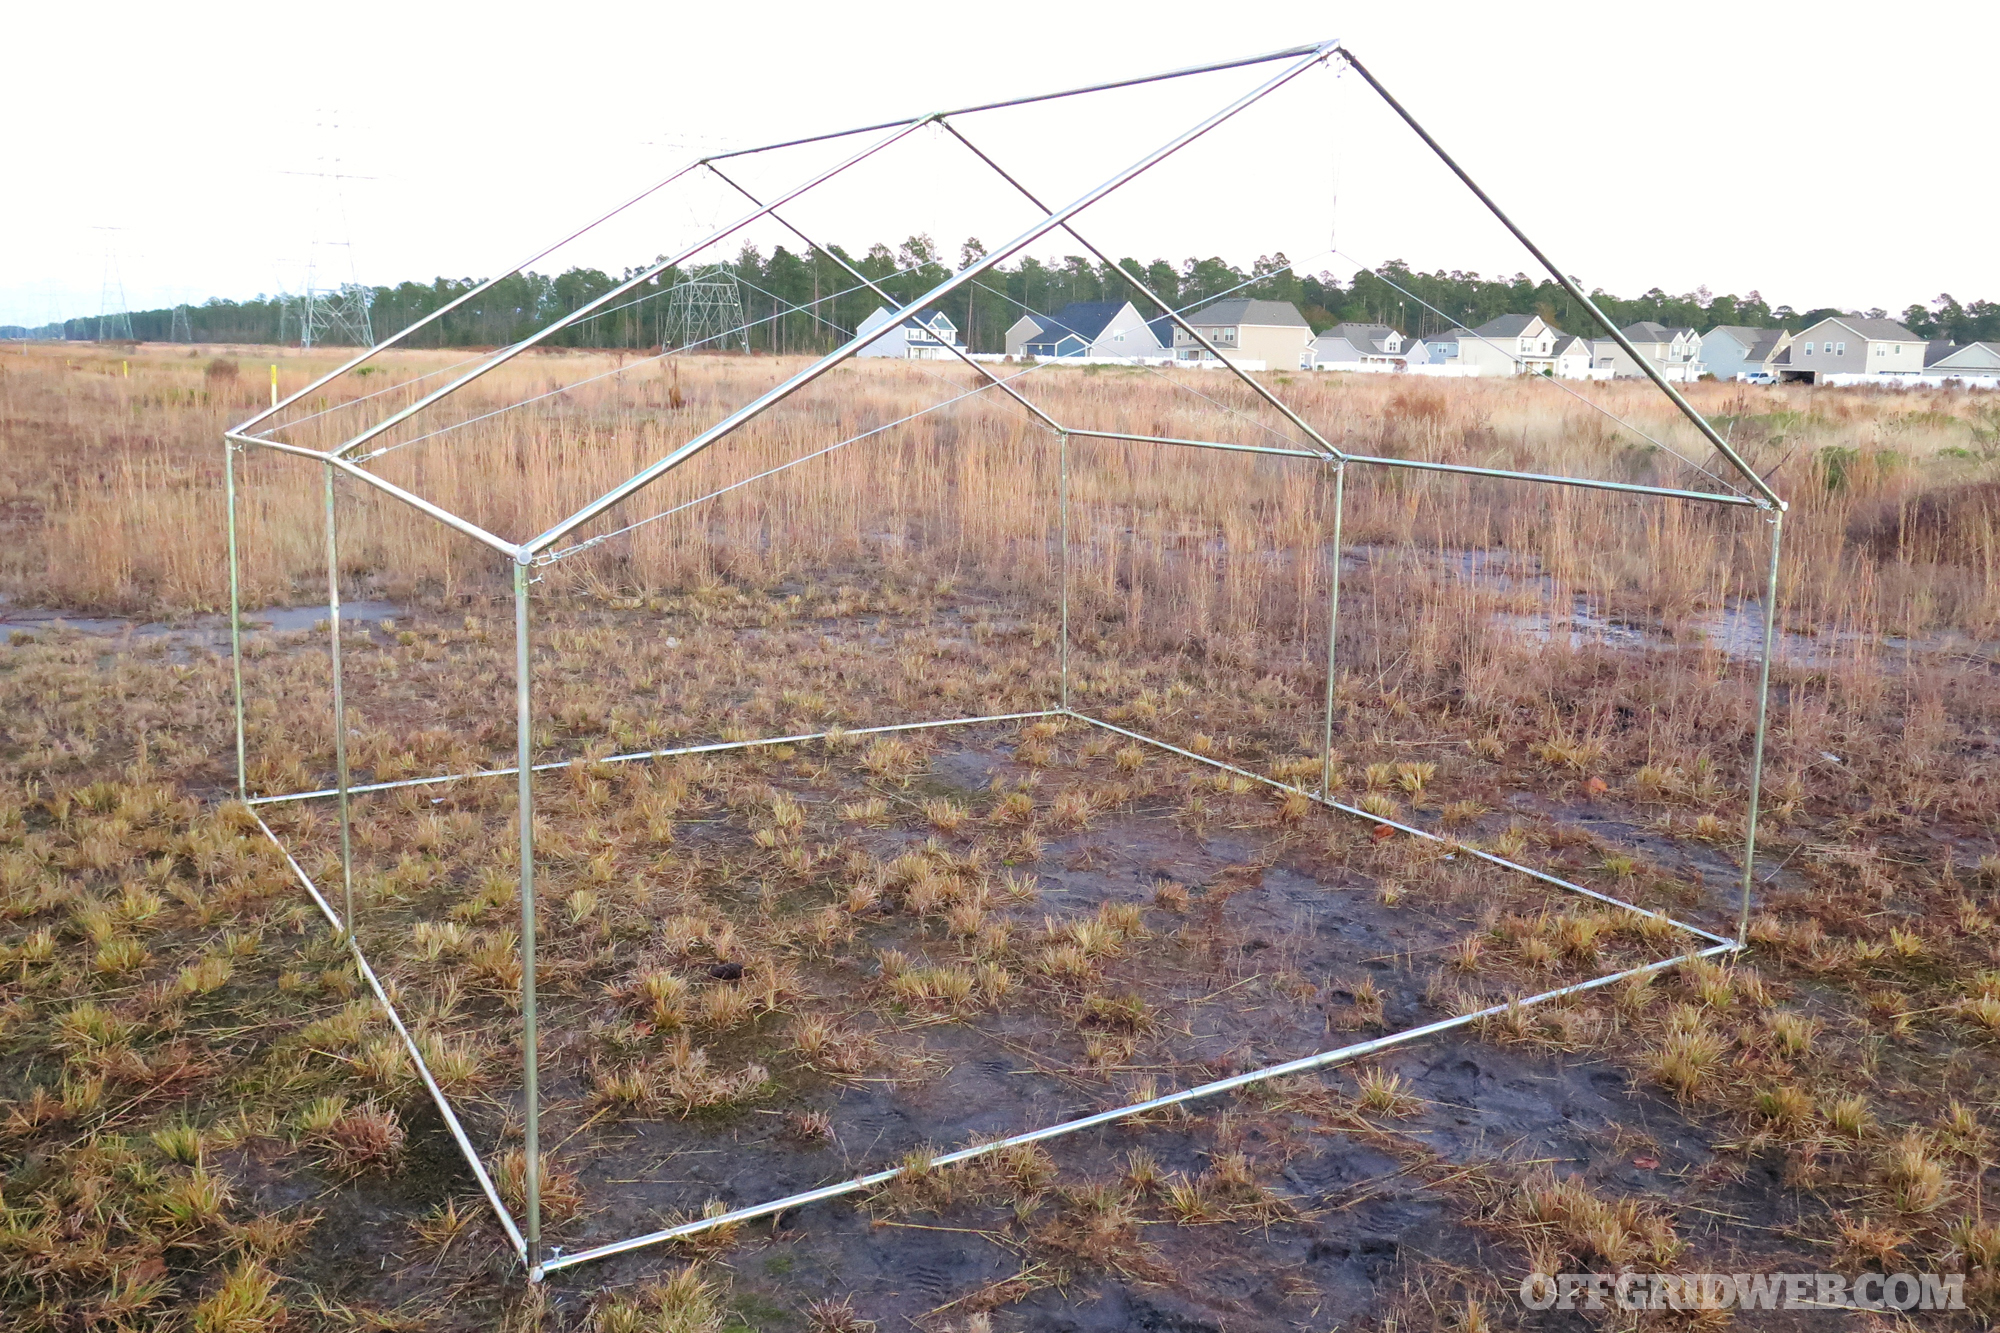
Before setting up the tent for the first time, it’s a good idea to get acquainted with all the components.
As opposed to traditional cotton canvas, Elk Mountain Tents are made from a polyester synthetic that closely resembles a cotton-blend fabric. This solves several issues present with cotton tents. First, there’s no need to weather it before use. This usually requires leaving a new cotton tent out in the rain or soaking it with water and letting it dry, then repeating the process several times to make it waterproof. The second major issue with cotton tents is mildew. Storing a damp cotton tent is not advisable and will quickly ruin a rather expensive tent. The one benefit that cotton offers over polyester is its breathability, not only to let air in but also to help prevent condensation. To address this, Elk Mountain Tents uses a proprietary blend of polyester fibers that are designed to prevent condensation build up.
These tents can be used with or without an Elk Mountain metal frame. The tent comes with the necessary angle kit corner pieces for the frame. These pieces have wing bolts integrated into them to tighten down on the conduit pipes after assembly. To complete the frame, a list of lengths of 3/4″ EMT conduit is provided. You’ll need to buy and cut this material before building the shelter.
The frame locks into the included corner pieces with wing bolts to help with rigidity.
Alternatively, Elk Mountain offers a full frame kit for purchase. The nice thing about this frame kit is that the poles come with pole clips installed inside them to enable the frame to snap together, making assembly by yourself a breeze. It took us about 45 minutes to assemble the frame the first time. However, much of that time was spent trying to figure out which pieces went where — a common process with any new tent. We are confident we could get that time down to around 20 minutes.
Optional Accessories
Along with the tents and frame kits, Elk Mountain Tents offers a selection of accessories for purchase. These include a rubberized PVC floor kit that ties into the base of the frame. You may be asking yourself, how can a tent come without a floor? Well, having no integrated floor makes assembly much easier, saves on cost of the tent itself, and allows you to remove the floor and wash it separately. Other accessories include storage bags, stoves, tent flies, and other upgraded equipment.
Initial Assembly
It is essential with any piece of equipment to familiarize yourself with it before you intend on actually using it. With that in mind, we decided to do a dry run and assemble the tent before our first trip in it. This was a wise choice, because it took some time to figure it all out.
The directions that came with the tent were not very well written or descriptive. So, after taking inventory of the components, we began assembly by laying out the floor pieces. We then built the individual rafters and assembled them into the roof of the tent.
We assembled the base of the frame first, then the rafters, and finally connected them with the six side poles.
Before lifting the roof up and installing the side poles, we connected all of the tensioning cables from one side to the other. This stiffens up the whole tent overall and helps it keep its shape. Finally, we lifted the roof up and inserted the side poles into the floor frame and roof.
The cable tension system in the ridge of the frame keeps the frame square and secure.
Once the frame was fully assembled, we grabbed a helper and laid the canvas over the frame. This was a challenging task as the canvas weighs roughly 50 pounds and was quite unwieldy. We’re sure it would be a real struggle if the wind picked up. However, you probably won’t be alone if you’re setting up a tent this large — make use of all those helping hands.
Extra material creates eaves over the walls to prevent water from running down the side of the tent.
With the canvas fully draped over the frame, which was done with the poles on one side removed for ease of placement, we adjusted the canvas to fit properly. Then the corner and side tie straps were tied around the frame. To finish it off, the tie-downs were staked into the ground and pulled taut.
Once it was all set up and secured, the tent was very stable. This was a good feeling knowing that our potential home for an extended period of time would not be blown down by a stiff breeze.
These heavy-duty stakes keep your tent secure. Eight came with our 13×13 tent.
Added Features
The floor kit extends out past the front of the tent to create a porch area to store gear away from the dirt.
The Elk Mountain Tents canvas wall tent has a lot of useful features to help make long stays inside quite comfortable. Our model features a full front screen door. This is great for summer and early fall trips.
Above: Our 13×13 tent included two windows on each side of the tent. One thing to note is that these can only be opened or closed from the outside.
All of the company’s tents feature Velcro opening windows — our 13×13 tent includes 4 windows, each with built-in screens. For trips during colder months, all of their canvas tents include stove jacks built into the roof, which can be cut to the size of your stove pipe and then covered with an included Velcro cover. The walls on the tent have an extra six inches of cloth at the bottom to create a sod cloth to seal the bottom of the tent.
Above: Every Elk Mountain canvas tent comes with a stove jack that can be cut out to be used with a stove pipe. There is also a Velcro cover that seals it if not in use.
Ridge openings at the front and back can be opened and closed with a string system for added ventilation. This also helps prevent the aforementioned condensation buildup issue. Unfortunately, these ridge vents do not have screens built in, which is quite odd seeing as that would be an open invitation to bugs, especially the biting variety. Overall, however, the tent was well made, fit the frame beautifully, and was very secure and most importantly water-tight. This will give us a comfortable place to stay with the whole family during any season.
Above: Both front and back ridges have openings to help ventilate the tent. We wish these were screened to help keep bugs out in the warmer months.
Closing Thoughts
Elk Mountain Tents sought to take a new approach to a traditional canvas tent with some useful added features. We have to say they accomplished that goal. If you’re looking for a large canvas tent and dread the thought of maintaining cotton fabric, check out what Elk Mountain Tents has to offer. For more information on this tent and all of Elk Mountain Tents’ other products, visit them online at elkmountaintents.com.
Pros:
Polyester offers many benefits over cotton, including natural weather-resistance
Lots of well-thought-out features make the design more livable
Entire system is customizable to your needs and budget
Packs down to a relatively small, transportable footprint
Cons:
The instructions were not very well written or helpful, leading to trial and error during initial setup*
We wish the ridge openings were screened to keep out insects
It would be nice if the windows opened from the inside, rather than the outside
*Update – 12/24/19: Elk Mountain Tents let us know that the instructions for the tents have recently been revised with more detailed diagrams. We’re glad to hear they’re listening to user feedback and implementing it to improve their products.
There’s a huge misconception that game wardens are nothing more than glorified park rangers. Spend a few minutes talking to Lt. John Nores, and you’ll quickly realize nothing could be further from the truth. During his service with California Department of Fish and Wildlife (CDFW), he was on the front lines of illegal grow sites embedded in our national parks and forests that not only seek to avoid government regulation, but do so at the cost of our precious resources. Stream diversions, highly toxic banned pesticides, and anti-personnel boobytraps were just a smattering of the devastation Nores encountered during his 28-year tenure.
When people think of California’s illegal marijuana trade, images might come to mind of the recent series Murder Mountain or cops serving a warrant at some tract home rigged up with a greenhouse hidden in a garage — but there’s a much larger war going on that’s hidden in plain sight and rapidly escalating. The environmental impact and danger to nearby residents gets little, if any, mass media coverage. On August 5, 2005, Nores and his colleagues came under fire while preparing to raid an illegal marijuana grow operation in the densely wooded hills of California’s prestigious Silicon Valley. Nores’ partner sustained life-threatening injuries after taking a bullet through both legs from a cartel member’s AK-47.
Although the 2005 bust netted a large seizure of drugs and his partner survived, it gave everyone involved just an inkling of the cartel’s willingness to engage in violence and ecological degradation to make a few bucks. It also led to a recalibration of how to handle this ongoing problem, with the formation of the CDFW’s first dedicated Marijuana Enforcement Team (MET) aimed at targeting trespass grow sites throughout the west. After Nores shared his firsthand knowledge of this conflict with us, we walked away with a sobering realization that it’s not happening in some far-off land. It’s entrenched in locations only miles from major cities, where average citizens may inadvertently stumble upon a drug trafficking operation that could cost them their lives.
John Nores Interview
RECOIL OFFGRID: What made you want to go to work for California Department of Fish and Wildlife?
The Nores Wolfpack
John Nores: It really started with my grandfather’s influence. He was a Navy diesel mechanic and engineer on one of the cruisers in Pearl Harbor and survived that. Before he deployed, he and his high school buddies discovered Montana, and it blew their mind. When he got out of the service, he bought some property up there to make it a homestead for the family and anyone else who wanted to come. My dad, who has since passed away, got that whole service mentality, conservation, hunting, and shooting from him; really all my aunts and uncles did, and that trickled down through the generations. I was shooting trap and skeet at 9 years old; I passed the hunter’s safety course at 9 with dad’s help. My dad was a champion trap and skeet shooter and hunted everything from waterfowl to big game, so he was my hero.
John Sr. and Jr. — first white-tailed deer, 1992
I grew up in a rural part of south Silicon Valley in a little town called San Martin. When I was in college at San Jose State University in 1986, I wasn’t really feeling passionate about the civil engineering courses I was pursuing, but on winter break that first semester, my childhood friend and I took a pack horse and went on a 75-mile loop through Henry Coe State Park, which is 105,000 acres of epic wildlands. We took off on a Friday night in a downpour and hiked 13 miles through the night, getting soaked.
The next morning, we got this fire going because we were trying to dry off, and there was no one else around because no one was dumb enough to go there in the middle of winter [laughs]. Then, here comes this green 4×4 just winding down this really steep trail to get to us, and it was a game warden who thought we might be deer poaching. After he realized we weren’t a threat, I kept him there for two hours asking questions. He said it was an amazing career. I was like on fire and really inspired by that. As soon as I got home, I went back to school and talked to a criminal justice program advisor, told him my predicament — and it was perfect because San Jose State has one of the best criminal justice schools in the country.
I changed my major, targeting the profession, and that was it. In ’92, they had slots for four civilians who scored high enough that weren’t military veterans or other law enforcement officers to lateral over, and I got into the academy at Napa College. I was in working on my master’s and got halfway through that and put it on hold temporarily to take that opportunity. I passed everything and then off to the races, and that was almost 30 years ago.
RTO Nores: Cadet Academy Inspection, 2005
What’s your advice to people looking to enter that line of work?
JN: Know what the job really entails. Joe Rogan said this before I went on his show, and everybody says this. When they think of a game warden, they think of someone driving around in a truck checking a fishing or hunting license, looking for illegal fish, and telling hunter education stories — things like that. Understand that it’s a very challenging law enforcement profession now. You deal with a lot of violent people periodically. Now, granted, 90-plus percent of everyone you deal with are people you really want to see. They’re lawful firearms users being stewards of the environment. It’s that 1 or 2 percent you run into who might be heavily armed and dangerous, so you need to treat it like any other law enforcement officer, because you might be by yourself with backup two to three hours away.
I recommend that people not only go through the hiring process, but talk to a recruiting officer in any state they want to be in. I’m getting a lot of inquiries from across the country right now as a result of all the podcasts, book tours, and things we’ve been doing. It’s been really cool, but don’t just start the application online. Look at the state you want to apply in, talk to somebody in the recruiting office, and get a few ride-alongs with game wardens in the particular state or area you want to work to see what they do, because the job is so much more diverse than people think.
Teaching wildlife investigations in Cambodia, 2007
It’s gotten more challenging in the last 20 years. There’s the cartel/foreign invasion/marijuana/poison issue that I kind of specialized in, but there’s also the wildlife trafficking and ivory trade coming in from all over the world. Now there’s wildlife trafficking teams fighting that fight within a Fish and Game agency that was mandated under the Obama administration — and rightfully so to make sure every state had teams doing that if they didn’t. Those are just a few different things that only came up in the last few years that weren’t around when I started.
Tell me about the books you’ve written.
JN: I’ve got two. War in the Woods wasn’t planned. It came about at the request of people starting to see the cartel/trespass marijuana-grow front and black market stuff in Silicon Valley. I found my first grow site in 2004. When I went into that site and saw the level of devastation environmentally and the public safety threat from the growers we witnessed and didn’t have any contact with that day, that completely changed my perception of what my efforts and our agency’s efforts needed to be.
The first chapter of War in the Woods goes into this. A very good friend of mine who’s a wildlife biologist was working on his master’s thesis, by observing this transect of two creeks in Coe Park that spanned about three miles and is one of our last viable migrating steelhead channels left in the Bay area. He was studying frogs and their vitality, and I got a call in April from him that the creeks were running the previous week just fine, and all of a sudden one side of it was bone dry and everything in it was dead. Keep in mind that steelhead trout are endangered species, so I was super concerned about this. He found black pieces of plastic and other debris that had washed down and didn’t know what it was.
The next day we went up to the top of the canyon to get to the creek at its source. I expected to see an illegal water diversion from maybe a rancher or a development where someone was trying to create their own pond. We dropped down the canyon and found this beautiful creek dammed up with a garden hose and siphoner in it that was basically diverting it down the edge of the creek. So, we started following the diversion about 100 yards down, and I started to see some 2- to 3-foot marijuana plants.
EPA banned poison-tainted cartel MJ grow — Bodfish Creek, 2012
Then, we saw a couple cartel growers, and these guys had long rifles — one had an AK, they had knives on their hips, and were in battle dress gear. This was on public land and an “oh crap” moment, because I had a civilian with me and we’re hiding on the bank of a creek. I had the red-dot on my AR carbine aimed at these guys, and I’m thinking if we got into a gunfight, it might be the crappiest moment of my career, if not the end of it. Fortunately, they didn’t see us, but I realized by the way they were operating that they weren’t the typical poachers.
We got out of there, called narcotics task forces, and started to integrate with drug teams — we became the guides to help those guys get into that canyon, do the eradication, and hopefully arrest these growers. We had a couple game wardens, the Santa Clara County Sheriff, and multiple different agencies. When we went in and did that raid they didn’t really put a lot of emphasis on catching these guys that I knew could’ve been caught and they ran off. We eradicated all the plants; it was a 7,000-plant grow. I’d already been on about 15 years and had done a lot of operations, but I’d never seen anything this devastating — and it was in my backyard. It was also against a type of poacher who was very violent, well-armed, and had complete disregard for public safety and environmental purity.
After we eradicated all these plants, we left and I looked around at the team leaders and remarked that there was still propane, a diverted waterway, the creek’s still dry, all these fish are dead, and there was all this trash. I didn’t even know yet about all the banned toxics that were there, and we had no idea we were potentially exposed to it. But they were like, “We don’t clean this stuff up, that’s not our job.” I thought that was total bullsh*t. The fact that we didn’t do any reclamation on the site to protect our wildlife and deter these guys from coming back really upset me. I talked to my chief at the time about it, and she agreed that if we’re going to get involved, we have to bring in that environmental component. That’s when we started to ramp up, and a handful of us began specializing in this with the sheriff’s department, Forestry Service, and other federal agents on these types of grow operations.
Cartel grower gunman — Croy Creek, 2012
Fast-forward to August 5, 2005, which was only about the third operation we’d done after this one. We walked into a very fortified, very calculated grow site. My partner was shot through both legs by a grower who was lying in wait to defend their site before harvest time. It was a lot bigger than we thought. It was like 11,000 plants in one area and 32,000 for the whole mountainside, all spread out. So we probably got 20 growers, all armed, in a location that probably had no law enforcement presence in over a decade. The one shot that hit my partner did a lot of damage. I probably worked on him for three hours, trying to keep him from bleeding out before we had an air rescue. That gunfight shook up the perception of what game wardens do. The governor’s office was in disbelief about it. Nancy Foley, our chief at the time and very progressive, stuck to her guns and did a lot of TV interviews explaining that we were tactically trained just like every other officer and discussed that this wasn’t some mom-and-pop marijuana garden.
After we got ambushed that day, I knew we needed a specialized team with more trauma gear, more support, K9s, more air assets, and training to catch these guys safely and get them out of circulation. It changed everything, not only for us in California, but nationally. It was a long process of over a decade to get to the point where Hidden War, the second book, goes into. Another of my mentors who helped craft my career became chief in 2013 after Nancy’s retirement. I and another captain had a meeting with him and agreed we needed to test a tactical unit dedicated to doing this with no red tape, no traditional patrol duties, that worked strictly for headquarters with straight-line supervision to the top, basically modeled after SOCOM in the military.
I got to handpick 12 of us and incorporate our two best K9 handlers. Building that team and testing it proved it was effective, and six weeks into our pilot program we were just running out of money and looking for funding to keep doing what we were doing. We developed an operation called “Pristine,” where we worked every day of the month because the counter-drug 129th Rescue Wing out of Moffett Field had an airship or two and two ground crews to assist any law enforcement agency in California on an operation dealing with the cartels. They wanted to pick an agency who was really going to work hard to not only go chop down dope, but bring in the apprehension and environmental element — so they asked us.
Toxically tainted weed processed for sale in cartel MJ grow — Silicon Valley foothills, 2012
In Operation Pristine alone, I think it was like 500,000 of these toxically tainted cannabis plants we eradicated, we caught around 200 guys, confiscated several hundred weapons, and did a lot of restoration. We proved ourselves throughout that process, and word got out very quickly because the military was talking up what we did together. There were so many things we’ve learned that I teach now to law enforcement and civilian groups.
War in the Woods goes into just finding the problem as a game warden, working side by side with other agencies, and being looked at as equals. We weren’t just the bird and bunny cops anymore. They saw us for the trained professionals we were, who could do a lot of hiking, hold up in the heat, and move around quietly, because we’d all grown up in the woods and learned how to track. In Hidden War, when we got to build the specific agency game warden team, some agencies and people within our own couldn’t get past the stereotype of what it was that we did — and that changed. It took about two years. We went full time January of 2014. The chiefs didn’t want to wait. They told us to develop all the protocol for testing, and that we’d be equipped and get all the support we needed. The gloves were off. We ran with it, and it was really effective.
Since it’s been really successful; we don’t have that resistance anymore. When I speak to other conservation agencies throughout the country, it’s amazing to see how much this problem is popping up in other states and how ill-equipped they are to handle it. The whole thin-green-line thing that I’m all about in retirement is putting a good message out there, and I’m getting a lot of support for it. Hidden War goes into all the politics of building a non-traditional team and doing something that hadn’t been done before.
What do you think the biggest threats are to the resources you were tasked with protecting?
JN: Water, for sure. When it comes to the trespass marijuana grow problem, they’re diverting and putting the worst types of poisons in our waterways at the source headwaters. This carbofuran that’s banned in America and is a felony to possess, is the one thing besides the growers that the cartels need to smuggle up here. The other infrastructure they need is already here. Two tablespoons of this stuff can kill several miles of every living thing in a creek. Growers put a couple drops of it out in tuna cans for bears to find before they can get to the plants, and that’s enough to kill a 400-pound black bear.
It gets in the soil, the water that they pump to the plants; it’s sprayed all over the plants and looks like liquid paper. That’s not only an environmental crime, but it’s poisoning cannabis consumers because they’re ingesting it. It dissipates a little and falls off after it’s cut down, so you don’t necessarily see it, but it’s there. I’ve never seen so much concentrated dead wildlife, from big to small, in these grow sites.
Being a lifelong hunter, I know how critical genetics are in one area for deer to have a thriving population and a buck to have good genetics to put back big deer into the system. In one grow site, sometimes you see five or six trophy-sized animals that have ingested poison and their heads are on sticks like trophy caps. They’re just getting killed so they don’t impact their cash crop. That’s killing a herd for miles, because it can kill on contact and affects all the other biodiversity in the area.
Cartel grow MET mission — filming for Patriot Profiles, 2016
Have you had any game wardens or others working these sites get affected by these toxins?
JN: We haven’t had anyone die, but we have had exposures where guys almost died. In fact, two years ago, a couple federal officers who were back east were exposed to carbofuran on plants, had temporary respiratory failure, and went partially blind. They were in the hospital for days. Had they not been immediately evacuated from the site and had the right injections, they likely would’ve died. When that happened, OSHA came in and looked at the protocol of how we deal with grow sites on a federal level, because this stuff is in forests all over the country, and we started to come up with more personal protection equipment requirements. That was the first wake-up call.
Even though there were others who’d had exposures that hadn’t made the news, we had two officers in California who had dropped into a grow and started to feel headaches, nausea, blurry vision, but they were OK because they got out quickly and were treated. We know now that a lot more people are getting exposed in the law enforcement realm and still having symptoms months after treatment. When the growers dilute it with liquids, it usually looks like Pepto-Bismol, and they carry it around in a water bottle in their backpack with a sprayer. They call it el diablo, which means “the devil.” They know it’s nasty, but they use it because it’s so effective at keeping everything off the plants. Since they’re not a legitimate cannabis group, they don’t care about health issues. They just know it’s really potent weed and is about half of what anything else costs on the black market, and they sell it all over the nation.
What do you think the biggest misconceptions are that the public has about the war on drugs?
JN: When people think of marijuana, many think it’s a waste of time. People wonder why we’re spending time on it with game wardens, and since it’s legal to leave it alone and the problem will go away. They think the war on drugs is a farce for revenue generation and to get cops jobs. These same organized crime groups out of Mexico are dealing in tainted cannabis all the country, but also in the off-season they’re cooking meth, dealing in fentanyl that’s killing thousands, dealing in human trafficking, and gun running to fuel the fight down in Mexico, so this is a bigger issue than just cannabis.
CDFW-MET team, 2018
To talk about the war on drugs issue, the biggest misconception is that it’s not just a war on drugs, it’s a war on environmental destruction and threatening our public safety. Let’s not make it about drugs, let’s make it about environmental purity, the security of Americans within our borders, and the safety of everyone, even internationally. This whole issue isn’t necessarily about drugs; that just happens to be the black market product that’s fueling all this violence, environmental destruction, and is making it unsafe to be out in our wildlands. I was quoted by the Associated Press not long ago saying that if cherry tomatoes were on the black market and the demand was so high that they were $4,000 per pound, we’d probably have poisons on them, gunfights, and some war on vegetables. You could make it about any product there’s a desire to have, there’s no regulation, and you can’t get on the open market. The war on drugs has validity from the standpoint of environmental protection and public safety. Are we doing it correctly? Not necessarily. Is there any easy solution? In the last chapter of Hidden War, I go into the challenges of regulation and if it will it help in the cannabis world.
Like I spoke to Joe Rogan about on his show, because he’s obviously an advocate, if we’re going to legalize and regulate, we need to do it right. We need to do whatever we can do to eliminate a black market that’s gotten so big it’s generating massive amounts of environmental crime and public safety threats. If we’re going to do it, we’re going to have to do it in such a way that we don’t encourage more of a black market — which we’ve started to see in California and in other states with red tape, fees, and lack of trust in government by growers who’ve traditionally been in the black market after Prop 215 that goes back 20 years. They’re not registering or regulating because it’s too costly for them to do so. They’re staying in the black market still, but they’re not putting a bunch of poisons on their crops. There’s still that demand in many other states that want good weed, and they can’t get it through legitimate channels.
In addition to that, since we have regulated for two years in California, the cartel thing hasn’t slowed down at all. Those guys have just continued to see that the black market is thriving, and now there’s all this enforcement attention on growers who are regulating and getting registered. About one-quarter of the game wardens in my old agency are dedicated to cannabis enforcement. We were a tactical elite unit dealing with the cartel threat, so we’re not the private land inspection teams, but there’s watershed enforcement teams, marijuana permitting teams, all funded to just regulate and make sure everything’s done right under the new requirements. That’s taken a lot of enforcement pressure away from the cartels in public lands. We’re one of the few teams doing it. The Forestry Service is doing it, sheriff’s departments, and a lot of other regulatory units like DEA and BLM in certain cases, but they’re too overwhelmed to handle the unregulated growers.
Nores MET Reclamation Op, 2018
The penalties for public land trespass grows went from a felony to a misdemeanor, and a misdemeanor to an infraction for a juvenile cartel grower. We’re seeing a lot of teenagers within the organization working with the older, vetted grow bosses on these sites, and they’ve watered down their crimes. The DAs can’t even prosecute this without environmental enhancements so we bring that in to get felony status of water pollution, deer poaching, or whatever the case may be. So when someone says, “Let’s just legalize it, and the problem will go away,” it’s not that simple. It’s something we have to look at federally and not just state by state. Every time we do something right in one state, another state sucks in the black market from the state that made a change, and it becomes a revolving cycle of never being unilaterally successful.
It seems like with proliferation and incremental legalization that the war on drugs is tougher now than it was 30 years ago. What do you attribute that to?
JN: The thin-green-line officers of Border Patrol agents, conservation officers, military, and park rangers haven’t grown in numbers, but public demand has. Population in America has skyrocketed in the last 30 years. I’m approximating, but the last statistic I read was 40-million-plus cannabis users in America, and that’s growing every day. A lot of that is black market users in states where you don’t have regulation. Law enforcement is taxed so much in other areas with limited numbers; I think that’s why it’s gotten worse.
California Senate-Assembly MET and K-9 Phebe Resolution Award, 2017
One of the things we did in Hidden War was a comparison from when War in the Woods was published. We did a breakdown of how many game wardens were in each state, the total number nationally, and the population in each state. It’s been exactly 10 years in between books. We did that same analysis, and it’s crazy. We’ve gone up like 1,000 game wardens nationally, and you can only imagine how population growth and the impacts it’s had on our wildland areas. It’s kind of free game for the cartels, because they realize law enforcement is so overwhelmed. They keep doing their thing and understand they’re going to lose a few grows, but even if it’s two out of 10, they’re still going to make like $100,000,000 or more. Law enforcement just can’t keep up with it.
There’s tons of money being poured into the border wall. What kind of effect, if any, do you think it’ll have?
JN: I think a wall could slow things down if it was built the right way, but it’s not just surface level we’re dealing with. There’s an established tunnel system underground, stuff coming in from the coast on panga boats delivering dope, people, and weapons from Mexico into America. A wall could slow the flood down a little bit, but I don’t think it’ll solve the problem. In gathering intelligence and talking with the people we’ve captured, they laugh when we talk about border control. At best, it’s a speedbump on the I-5 freeway.
If they put up a few hundred-thousand dollars, they’ll get their operatives into America and pay a small amount for the money they’ll generate. Case in point, we’ve had multiple deported felons, classified as such because of heavy criminal history, and have deported them well into the double digits from site to site — and they keep coming back. Different K9s have apprehended the same guy multiple times. That makes me skeptical that a wall will solve the problem. The bigger thing we have to look at is what’s happening on both sides of the border. How can we hopefully have an impact down there with Mexico helping us on the problem?
Why do you think there’s so much resistance to federal legalization?
JN: I think it’s frame of reference and different contexts of what people consider drug abuse or how they classify marijuana. You have certain states with varied perceptions and, until we get the testing and things happen federally or more progressive states work together to address this problem, we won’t get on the same page of how we perceive what cannabis really is. Things like what the medical benefits are and if we’re going to test it federally to validate that it has medical benefits. If it’s going to happen federally, it’s not going to happen overnight, so what can we do on the ground to hold back the tide as best we can right now? Whether you’re for or against, let’s just take all that out of the equation and look at what’s going to be good for our public safety and environmental purity throughout the country. Let’s try to make some decisions based on that.
What involvement do game wardens have with wildlife trafficking in the U.S.?
JN: California is one of the most progressive Fish and Game agencies in the country with its training level, resources, and diversity of teams. In California, you have a little bit of everything. You have the coast, with abalone which are heavily threatened and there’s a black market for. Sturgeon eggs are very high dollar on the black market. There’s the ivory trade in L.A. and San Francisco, with people wanting legitimate ivory pieces for multiple reasons. All the states have these problems, and that’s why these teams were built. In California, we’d been doing that even before the formalized wildlife trafficking team had been built. It came about right after our MET team got built, and it’s been very effective to the point they’re out there doing covert buy busts and surveillance, catching everything from the things I just mentioned to people selling black bear gallbladders.
The ivory trade, though — that’s where these animals are so impacted over in Africa because there’s such a huge amount paid for a rhino horn or elephant tusk. By the time it gets into the black market, you’re talking hundreds of thousands of dollars, if not more, on just a few animals. That’s where we’ve embedded and are working very closely with the African officials and their game wardens. We’re sending people over there, communicating, and sharing information at the source. When we start communicating country to country and get into these black market circles, we now have a team that can go anywhere in the state and embed on a particular suspect as long as they need to, and basically intercept the ivory coming in. We’ve really stepped up the game with our federal colleagues.
I used to do a lot of covert undercover work on wildlife illegal sales and buys with our special operations unit. What we’ve learned is when you catch a guy like that red-handed at the source, the ripple effect it has on national and international commercial poachers is overwhelming because you never know who’s who. It doesn’t have to be ivory; it can also be prohibited reptiles or primates. We’ve had celebrities with an illegal primate that’s endangered and not supposed to be here, but they paid a huge amount of money and it got into the black market. There’s a black market for everything wildlife; it’s nuts. There’s tons of money in it, and second only to the drug trade when you look at the statistics.
What can private citizens do to aid in the conservation effort?
JN: Be aware, know who to contact if you run across this, and spread the message. The more people who can spread that message, the better. So few people know this is really going on and the magnitude of it. One thing we need to do is unify. The more people get involved and shed light on it, then you see more funding, more education, it getting in the press more. Then, we start to feel more empowered as citizens to stand up and say we’re not going to allow this. That’s how they can be a force multiplier. Hunters, fishermen, and outdoorsmen and women are our best reporting parties through things like the CalTIP Program to turn in poachers and polluters. Every conservation agency has a turn-in-a-poacher hotline. Use it. Help your game wardens out.
Explain how legal, regulated hunting and fishing assists in the conservation effort.
JN: Glad you asked that. What we need to remember is, even if you’re not a consumptive user of wildlife or don’t believe in hunting or fishing, try not to chastise those who do it ethically and legally. Conservation is based on a balance of species, natural depredation in the wild, and environmental changes. Ethical and legal hunters and anglers are actually helping all of those species numbers, because they’re buying into a program that has studied the population and determines how many need to be taken to keep the population in balance so too many don’t die of starvation or from predatory kills. That meat is being eaten, appreciated, respected, and done so humanely.
All of us as conservationists who hunt and fish — our license fees, ammunition, firearms, and the equipment we buy, percentages of that fund go right into agencies like California Department of Fish and Wildlife to study and make sure that population thrives. When we talk about the increase of urbanization and population, which leads to less open spaces, once we start to impact that through development, we’re impacting wildlife many times in a negative way because we’re leaving less habitat for larger numbers of animals within particular species to thrive. If we don’t manage, help, or support a species in a population increase where it’s depleted, as conservationists from all that funding at the agency level, it couldn’t be done without anglers, hunters, and conservationists.
That’s not saying everyone should be a hunter. I’ve spoken to preservation groups on the animal rights front as much as I’ve talked to people who are like-minded. It’s interesting when I talk to the Humane Society, PETA, or Mountain Lion Society in California and give a presentation on the cannabis thing and all the dead wildlife. We don’t get into a debate about it, because whether you hunt and fish legally and ethically or absolutely don’t want to, no one wants to see an animal die this way from a banned poison by someone who isn’t even here legally and working for groups committing felonious crimes all over the world, especially here in America. A majority of our tips to find these grows come from hunters, anglers, and hikers getting into those pristine waterways to check them out. They’re making one of the biggest dents by finding it and turning this stuff in for the sake of everyone’s wildlife, no matter where you sit on the spectrum.
What other non-drug-related threats should people know about that you’ve encountered in your line of work?
JN: You also have the environmental issues as well, with everything from rattlesnakes to wild animal attacks. Something that’s drug related that we didn’t really talk about is stuff like pungi pits, tripwires, boobytraps, and hidden holes. All outdoor public should know to be careful of where they’re at. Be aware of your surroundings and know that some of this stuff is on trails. There are boobytraps in and around roads, and it doesn’t even have to be drug related. It can be felons on the run, and they can have some nomadic camp where they’re trying not to be found. The public can run into that to. It’s a small amount of people who can be that threatening, but they’re out there.
I ran across that a lot, and we still do. We get the guy who has an arrest warrant or there’s a group of criminals doing something. Where are they going to go to get off the grid into an area that has as little law enforcement as possible? They’re going to get into our wildlands and remote areas. Who’s going to run into them? It’s going to be someone like the game warden.
About John Nores
Age: 51
Hometown: Silicon Valley, CA
Required reading list:
Fearless by Eric Blehm
Ghost Rider: Travelling the Healing Road by Neil Peart
River by Colin Fletcher
Into the Wild by Jon Krakauer
Marine Sniper by Charles Hendersen
Time to Hunt by Stephen Hunter
Favorite quotes:
The woods are my church
Change is inevitable, but growth is optional.
Favorite hunting: Big game
Favorite fishing: River or high altitude in Montana
Favorite firearm: Axial Precision Convergence and Himalayan rifles; Glock handguns
Favorite knife: My upcoming signature blade, the Thin Green Line Trailblazer folder co-developed, manufactured, and marketed by Mike Vellekamp’s VNIVES
Accolades:
California Governor’s Medal of Valor
San Jose State’s Criminal Justice Hall of Fame induction, 2018
Regional Officer of the Year, 1999
Nores’ MET and K9 Phebe were recognized in both the California Senate and Assembly in January 2017 with Resolution Awards for service, the first congressional resolution for our officers in the agency’s history