If you enjoy collecting and using knives like we do, it's important to know the terminology associated with blade designs. You can probably get away with referring to “the stabby part”, “the sharpened bit”, and “the thing you hold onto”, but you're not exactly going to sound educated on the subject. Using the correct knife anatomy terms eliminates confusion and shows you know what you're talking about.
Every knife has its own unique characteristics and variations—like snowflakes, but deadly.
We'll admit that knife terms can be confusing and hard to remember at first. So, we've created the infographic below to illustrate 20 different parts of a fixed blade knife. Specifically, we used the TOPS Knives Hazen Legion 6.0 for this illustration—you can read our complete review of this fixed blade here.
Here's some more detail on each term, since we couldn't fit it all in the diagram above:
Grind Line – The meeting point of a grind with a flat surface or opposing grind. In the illustration above, the line shown is where the swedge meets the flat and the primary bevel.
Swedge (also spelled swage) – A tapered or beveled false edge (usually not fully sharpened) along the spine of the knife. It reduces the point thickness for improved piercing ability.
Jimping – Repeating ridges or cuts. These may be decorative (such as those on the spine), or used for additional grip on the knife (such as those on the thumb rise).
This knife features jimping on the thumb rise and further forward on the spine.
Spine – The top edge of the knife, opposite the blade edge. The spine runs all the way from the tip to the butt.
Thumb Rise (also called thumb ramp) – A slight incline in the spine, meant to provide a place for the user's thumb while cutting.
Tang – A continuation of a fixed-blade knife's metal into the handle. The TOPS knife above is “full tang”, meaning the metal continues through the entire handle, all the way to the butt.
Pin/Rivet – Hardware that holds the scales onto the handle.
An Emerson logo and model information are etched onto the flat of the CQC blade.
Flat – The unground face of the knife. You'll often find etching or emblems applied to this flat surface.
Handle – The part you hold. This one's easy to remember.
Tip (also called point) – Exactly what it sounds like. Technically, the tip is the very end of the point, and the point includes the first few inches of the knife.
Belly (also called sweep) – The upwards-curved section of the blade edge. Some knives, such as the Wharncliffe design, lack a curved belly.
The ZT 0630 features a prominent swedge and compound grind.
Primary Bevel or Primary Grind – The first grind applied to the knife edge. Many knives only have a single bevel that forms the blade edge.
Secondary Bevel or Secondary Grind – The second grind applied to the knife, which alters the primary bevel to a new angle. Knives with two bevels (like this TOPS knife) are considered “compound” or “double” beveled.
Plunge Line – The abrupt ending of the bevel, where it meets the flat near the handle.
Choil – A curved indentation or notch at the end of the blade edge. Sometimes this can be large enough to fit a finger into, but on the knife above, it's quite small.
Ricasso – A thick, flat, unground portion between the end of the bevel(s) and the beginning of the handle.
The Gerber Strongarm has serrations, a prominent plunge line, and a short ricasso.
Front Quillion or Front Guard – Part of the knife handle that prevents your fingers from slipping onto the blade while pushing the knife forward.
Rear Quillion or Rear Guard – Part of the handle that prevents your fingers from slipping while drawing the knife backward.
Scales – Pieces of handle material (such as wood, bone, or polymer) that are attached to the knife's tang via rivets, pins, or other hardware.
Butt – The rear end of the knife, which may contain a lanyard hole or glass breaker. Some knives may have separate metal pommels attached here.
The TOPS Anaconda has decorative elements cut into its wide spine.
Our infographic on knife anatomy should give you a good head start on the key elements of a blade, but there are a few other terms that we didn't show there. Here are a handful of additional terms you might hear:
Bolster – A thick junction between the handle and the flat of the blade. Bolsters can be found at the front and the rear of some knives, and they strengthen the knife and add balance.
Guard – Part of the handle that prevents the user's hand from slipping. A curved quillion on the handle may form the guard, or a knife may have a separate guard plate installed between the handle and blade.
Fuller (also called cannelure or blood groove) – A groove cut into the blade, often at the center of double-edged knives and swords. These have been called “blood grooves” due to the myth that they release suction or vacuum created by stabbing a living thing, thus allow blood to run out more easily. However, there is little to no evidence that this actually happens. In reality, a fuller lightens the blade by removing steel, and may also stiffen some blade designs (such as a broadsword).
Serration – Repeated jagged cuts into the blade edge, providing the ability to saw and tear through tough materials.
This CRKT Liong Mah 6 has three distinct serrations on its edge.
Pivot – Only found on folding knives, this is where the blade attaches to the handle. Some knives feature caged ball bearing pivots for smoother opening.
Liner – Flat metal plates inside the handle of a folding knife. These provide structure for the pivot and handle scales, and may also serve as part of the locking mechanism (called a “liner lock”).
Line Cutter or Seatbelt Cutter – A sharpened notch in the blade, which is designed to slice through cordage or seatbelts. Some knives use a slotted opening in the handle or sheath, rather than a notch in the blade edge itself.
The SOG Seal Strike features a line cutter built into its sheath.
Glass Breaker – A sharpened point on the butt of the knife, designed to crack and shatter glass. Some knives may feature a dedicated carbide point, while others may use a pointed extension of the tang for this purpose.
Finger Groove – Distinct grooves or notches on the handle, designed to fit between the user's fingers and provide extra grip.
Clip – A portion of the spine near the tip that is angled down (or “clipped off”) for improved piercing ability. Knives with this feature are often called “clip point” knives.
Read More
Subscribe to Recoil Offgrid's free newsletter for updates, offers and more.
The Ruger 10/22 is an extremely popular platform in the survivalist community, especially in its bug-out-friendly Takedown form. It's easy to shoot, affordable to reload, compact and light enough to stash in a backpack, and supported by a massive variety of aftermarket parts and accessories. That last point brings us to the topic of today's article.
Ruger's standard 10/22 Takedown stock is functional, but nothing to write home about. It's composed of hard black polymer with a few textured sections and a metal barrel band on the forend. Ruger also offers models with an upgraded Modular stock, which features replaceable high and low cheek rest combs, sling mounts, and more extensive texturing. However, this still leaves something to be desired for many owners. Aftermarket 10/22 stocks offer improved comfort and control, more color choices, modularity, and other helpful features such as hidden storage compartments.
The Starting Point
10/22 Takedown Lite pictured with Harris bipod and Vortex Diamondback Rimfire scope.
We began this review with a Ruger 10/22 Takedown Lite, one of the company's factory-upgraded Takedown models with an MSRP of $659. It includes the aforementioned Modular stock, as well as a cold hammer forged 16.1-inch barrel tensioned in a lightweight, .920-inch diameter aluminum sleeve. This barrel also features 1/2-28 threads to accept a suppressor (such as Ruger's own Silent-SR) and includes a knurled thread protector. Ruger provides a zippered nylon carry case with each rifle.
The original Lite stock served us well for a few years, but we were ready for a change, so we began looking at replacement stocks. This search yielded three substantially different choices: the Adaptive Tactical TK-22, the Hogue Rubber OverMolded Stock, and the Magpul X-22 Backpacker. Before we get to these stocks, we'll discuss one other upgrade we added to the rifle at the same time.
Vortex Diamondback 2-7×35 Rimfire Scope
Prior to testing any of the new stocks, we picked up a Vortex Diamondback Rimfire scope for our 10/22. It features 2-7x magnification, a 35mm objective lens, and a simple V-Plex reticle with parallax set to 50 yards (as opposed to 100 yards for the non-rimfire models). At 11.6 inches long and 14.2 ounces, it doesn't sacrifice much of the Takedown's portability — if that's your top priority, you'll probably be using a micro red dot sight, but we prefer the versatility of a variable-magnification optic in this case.
Vortex says the Diamondback is “virtually indestructible and highly resistant to magnum recoil,” so we're certainly not worried about it putting up with .22LR. The variable magnification and clear multi-coated glass makes it great for short-range varmint hunting, even in low-light conditions. Overall, it's an excellent choice for this platform.
We mounted the scope on a pair of Vortex Hunter 1-inch Low scope rings ($25 MSRP). This combo fits nicely on the standard Ruger scope rail and clears the Lite barrel without sitting excessively high. Factoring in the scope's $260 MSRP, this setup certainly won't break your bank account.
Adaptive Tactical TK-22 Stock
The first of the three stocks we evaluated is the biggest departure from the rifle's original form. The TK-22 has a pistol grip as well as what Adaptive Tactical calls an “adjustable M4 type butt-stock.” This stock is compatible with standard 10/22 barrels as well as .920 bull barrels, such as those on the Lite and Fluted 10/22 Takedown models. Since we fell into the latter category, we removed the included forend insert (pictured below at bottom right).
Out of the box, we noticed some unappealing blemishes on this stock. The finish is visibly uneven in some areas, as seen above, and rough edges left behind by the mold weren't cleaned up, as seen below. These flaws didn't inspire confidence in the build quality. The TK-22 fit our 10/22 easily, but the gap between the forend and receiver housing was wider than the other stocks we tested (including the original Ruger stock).
The so-called “M4 type butt-stock” is simply Adaptive Tactical's EX Performance AR-15 stock, so it's 4-way adjustable and will fit any mil-spec buffer tube. This explains the presence of the huge cushioned rubber recoil pad, which would be more at home on a 12-gauge than it is here.
Thankfully for those of us who aren't concerned about getting pummeled by the immense recoil of .22LR rounds, it's removable via two Phillips screws. The stock also features an attachment point for a standard sling swivel, as well as a QD sling swivel socket.
A rubber stopper in the base of the pistol grip fills a cavity that's designed to accept Adaptive Tactical's TacTred Monopod. It can also be used to stash various small items, although heavier objects may dislodge the friction-fit stopper and fall out. The grip itself is relatively comfortable. We appreciated the cutaways on each side of the magazine well, since these make reloads easier — prying some 10-round magazines out of the original Ruger stock can be tricky.
The stock we received was bundled with a Takedown Firearm Backpack from Copper Basin. This pack looks reasonably unassuming and has pockets for each half of the 10/22 Takedown plus various accessories. It serves its purpose and protects the gun, but isn't as sleek as the original Ruger carrying case. The backpack is priced at $100 on its own or $190 bundled with the TK-22 stock.
If you're hoping to take your 10/22 in a more modern and “tactical” direction, the TK-22 may appeal to you. We're not big fans of the look — one onlooker compared it to a Hi-Point Carbine — and were disappointed by the build quality issues we noticed, especially given the stock's $130 MSRP (the highest of the group).
Hogue Rubber OverMolded Stock
Hogue's 10/22 Takedown stocks are coated in the company's signature OverMold, a soft and grippy rubber material. These stocks are available in either standard or thumbhole configuration, and are offered in various colors ranging from plain black to bright purple or Red Lava swirl. Hogue sells versions for standard barrels, as well as .920-inch barrels.
We chose a standard stock with Ghillie Green rubber OverMold and .920-inch barrel compatibility. The stock is slim, but feels sturdy and well-made. The design is relatively minimalistic, with subtle chevron cuts on either end of the receiver, stippled texture in key areas, and a Hogue logo stamped on the underside.
The butt pad is held in place with two Torx/flat-head screws; removing these reveals a cavity that can be used to store emergency gear. Traditional sling swivel attachments are present on each end of the stock.
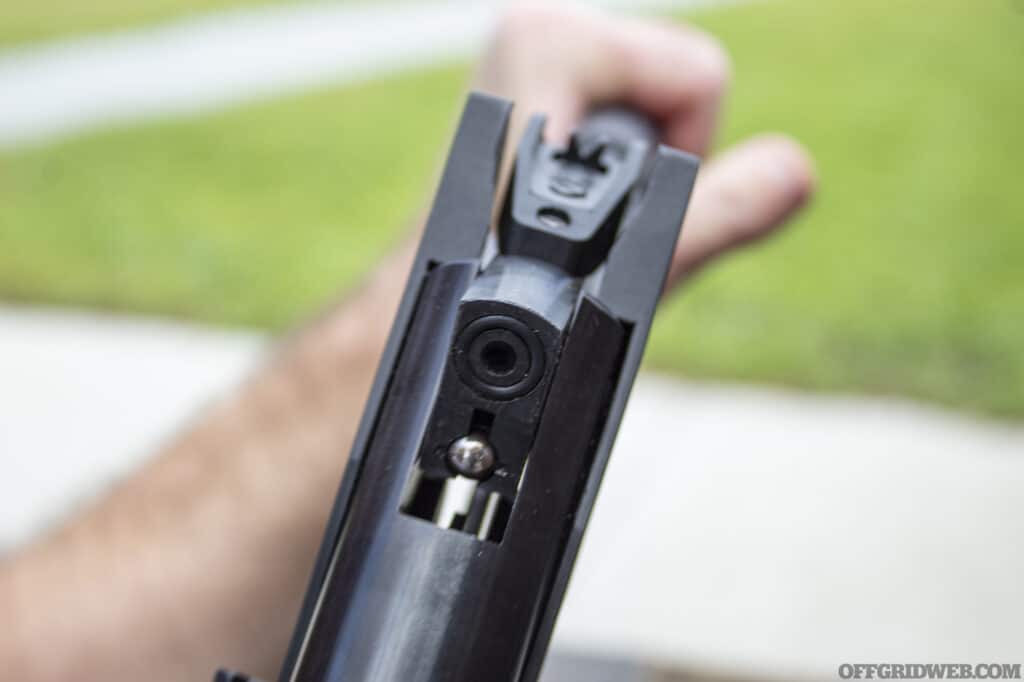
Installing the Hogue stock for the first time was somewhat tricky — the screw hole in the stock was slightly off-center from the hole in the front of our 10/22's receiver, and the stock's tight tolerances didn't give it much wiggle room. After pushing firmly against the receiver and being careful not to strip the screw, we were able to install the stock.
With this initial hiccup out of the way, we liked this stock a lot. The two halves fit well with no unsightly gap, and the rubberized coating made the gun easy to hold and carry. If you're looking for a 10/22 stock that maintains a traditional appearance, the Hogue OverMold series is a solid choice. MSRP is $120 for colorful finishes or $110 for plain black.
Magpul X-22 Backpacker
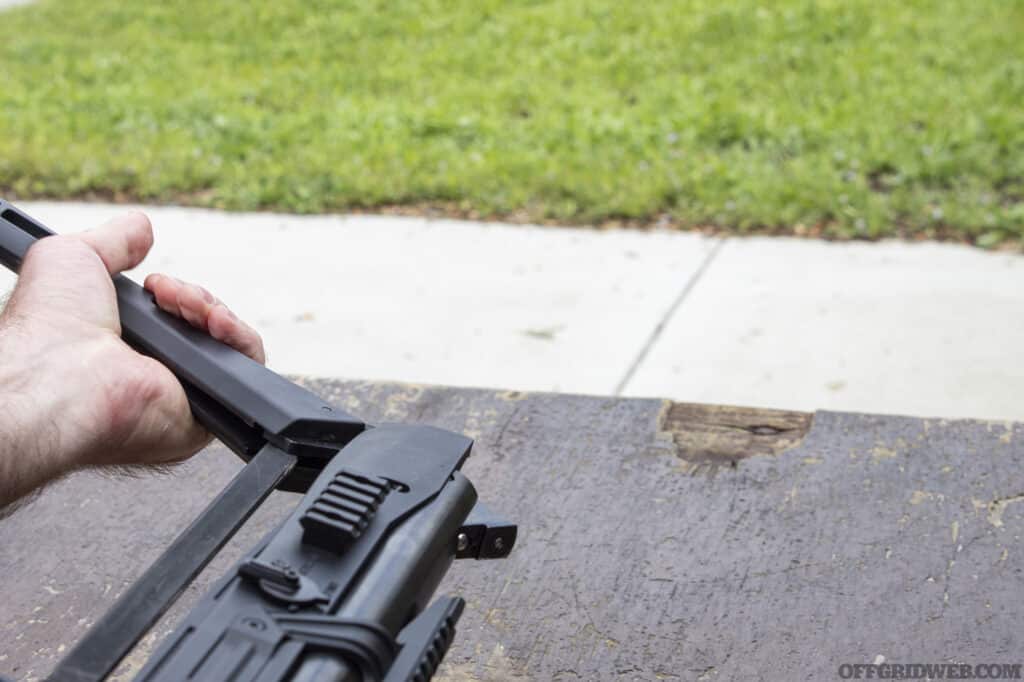
Magpul offers two stocks for the 10/22 Takedown, the X-22 Hunter and X-22 Backpacker. The Hunter stock is designed for customization, with interchangeable cheek risers, removable butt pad spacers, and M-LOK slots on the forend. The Backpacker is designed as a packable survival rifle platform, with multiple storage compartments and an ingenious mechanism that locks the barrel assembly onto the stock body for easy transport.
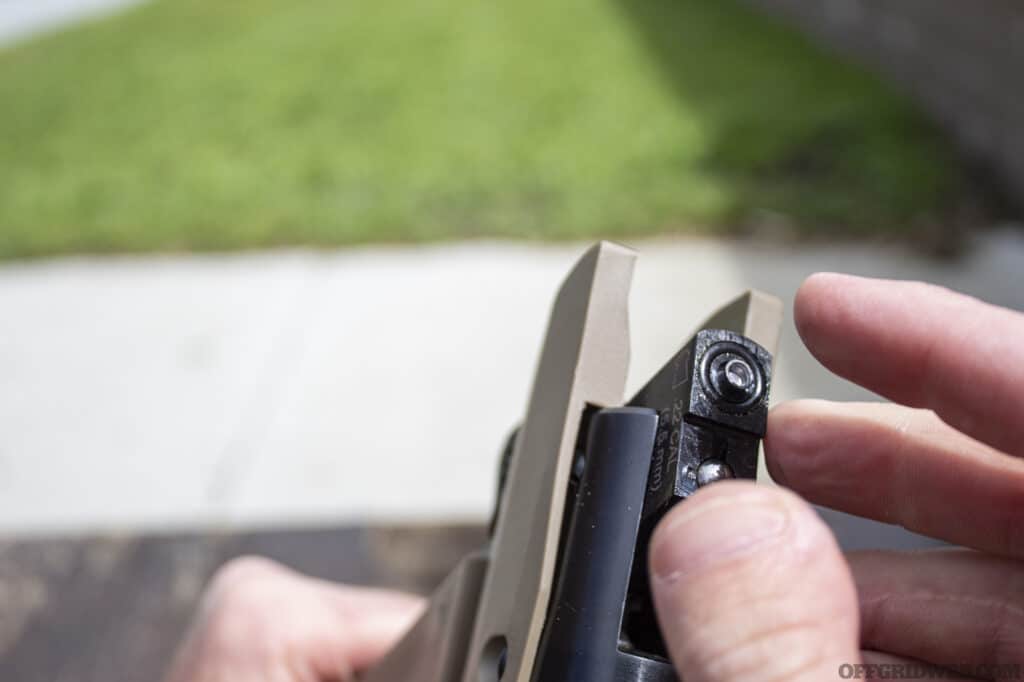
We selected an X-22 Backpacker stock in desert-friendly FDE finish ($110 MSRP). We also picked up an X-22 Optic Mount ($60 MSRP) that attaches to the barrel, replacing the factory barrel block and adding a Picatinny rail. We test-fitted the optic mount and found that it works well for small red dot sights. It also has a channel to preserve the functionality of iron sights, if your 10/22 has them. But since we're currently using the Vortex scope and its objective bell doesn't clear the Magpul mount, we left it off the gun for now. Regardless, it's a good accessory to have on hand.
The X-22 Optic Mount offers a way to mount a small sight directly to the barrel.
The X-22 Backpacker has a wealth of storage compartments, allowing this rifle to serve as a full-fledged survival kit. Pressing the button at the back of the cheek piece reveals the largest of these compartments, which can house up to three 10-round magazines. Installing the optic-height cheek piece adds more room, and we were able to squeeze in a 10-round mag, a 50-round box of ammo, fire tinder, water purification tablets, a mini folding knife, and numerous other small items. Whatever you choose, pack it tightly, otherwise the contents will shift and rattle as you carry the gun.
Check out Alexander Crown's video for some great ideas on how to use and modify this compartment.
There's a second sealed compartment inside the grip. We filled this with a Bic lighter wrapped in duct tape, ensuring we'll have a quick (and dry) way to start a fire. Removing the butt pad reveals another small cavity where a strand of kevlar cordage or a fishing kit can be concealed.
Installing the stock was easy, and we had no fitment issues. Build quality is exactly what you'd expect from Magpul, and all the mold seams are smooth. A pair of holes in the stock can accept Magpul sling mounts ($15) but after watching the video above we learned that paracord loops can serve as an improvised solution.
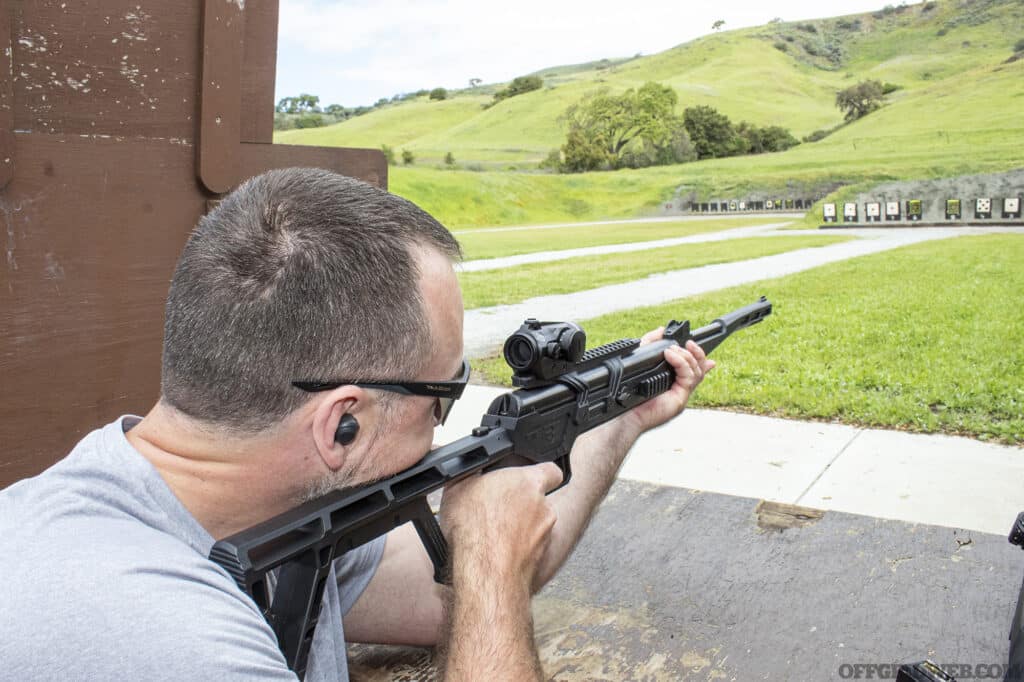
Shooting our 10/22 with the X-22 Backpacker stock was comfortable, and the taller cheek piece worked well with our scope setup. We also liked the steeper grip angle on this design, although traditionalists may not be as fond of it. If you're planning to store your 10/22 in your bug-out bag and use it for hunting small game in a survival setting, the Backpacker is ideal for this role. And even if you're not living off the land after SHTF, it's extremely convenient to have storage for spare mags and ammo built into the rifle.
Conclusion
These three 10/22 Takedown stocks represent drastically different approaches to modifying your rifle, and show the versatility of the platform. Whether you want a modernized plinker, a traditional small-game hunter, or a bug-out gun for the apocalypse, the 10/22 can be taken in any of these directions. A stock upgrade is a simple way to make this iconic .22 even better.
SAFETY DISCLAIMER: This article is meant to be an overview and not a detailed guide on rescue carrying and dragging techniques. Seek professional training before attempting to use any tools or techniques discussed in this story.
I have been a firefighter for over 20 years and relocating people away from precarious or deadly incidents is an essential component of my job. Among the seemingly endless tactics a firefighter is taught from day one, the ability to remove someone from harm is near the top of the list. Life safety is the top priority and whether you're moving someone from danger or delivering them to lifesaving medical aid, knowing safe and effective ways to conduct these maneuvers can make all the difference.
For many people, the general inclination is to carry someone as they've seen on television. Despite what Hollywood would have you believe, you will rarely, if ever, see someone carrying an adult victim out in front of them “cradle in arms” style. This can be used for an infant or child, but carrying a full-sized adult victim for any distance greater than a few feet, particularly over uneven terrain, is impractical and dangerous. Therefore you'll need to know the correct techniques to use when moving a victim and when you should employ them.
Once you've determined there's a need to remove someone from harm or get them to a position where they can receive help, quick but careful thought must be given to how this will be performed. There are two different categories of emergent victim removal: carries and drags. Each has their place and which one you should apply depends on several factors.
Victim Carries: When one or more rescuer is able to lift the victim and carry them to a location of safety.
Victim Drags: The movement of a victim by lifting part of their body as the other part drags — often used when a carry isn't possible or practical.
Regardless of whether you carry or drag a victim to safety, you must remember to keep your own safety a high priority. It doesn't sound heroic to say, but it does no good for anyone if you injure yourself and become part of the problem rather than the solution.
Moving a victim is harder than most realize. If the victim is conscious, pain from their injuries may cause them to shift their weight around while you're moving them, creating a scenario where your back or joints are forced into unnatural or unsafe positions — leading to a strong likelihood of rescuer injury. The victim may be vocal, crying or shouting, distracting you from your task, which also lends itself to injury.
If the victim is unconscious this creates a deadweight situation. They're unable to assist you in any way, tell you if you're hurting them, or causing greater injury by your movements. Also, the mental demands of moving an unconscious victim already increase the rescuer's anxiety out of concern.
The techniques discussed in the article are tried-and-true first responder techniques that are applicable to any survival situation. The way you choose to relocate a victim will depend on several factors and exact steps may vary depending on victim injury:
How many victims are in need of rescue?
How many rescuers are available?
What are the capabilities and conditions of the rescuers?
What is the size and condition of the victim(s)?
What is the safety and stability of the environment?
One-Person Carries
You may be the only person available to help, or perhaps your team has already split up to render aid to multiple victims. Either way, there are times when you'll be forced to move someone by yourself. Carries conducted by a single rescuer can be extremely taxing on the rescuer. Adrenaline will work both for and against you. You may feel a sudden burst of energy and strength, but will lose it just as quickly. The body will compensate by relying on large muscle groups, such as the back, as this could result in rescuer injury. One-person carries should only be performed with the confidence that you won't cause injury to yourself or further injury to the victim.
One-Person Walk Assist
In mass-casualty training, we refer to people who can self- extricate with little or no assistance as walking wounded. If your victim is able to walk with only minor help from you, let them. The one-person walk assist offers the least chance for injury to both rescuer and victim.
Steps:
1. Place victim's arm around your neck and hold their wrist:
2. Place your arm nearest to them around their waist and walk with them to safety:
Above: Although the one-person walk assist is one of the easiest carrying and dragging techniques, never attempt to move anyone you think may have neck or spinal injuries without proper training.
Firefighter Carry
Made famous by the occupation, this type of carry should only be conducted by a very strong rescuer and a smaller victim. It'll require good lifting techniques as well as good core and lower body strength. Traversing uneven ground can be difficult because, with the victim in place, the rescuer becomes very top heavy. The firefighter carry can be used on either a conscious or unconscious victim.
1. With victim lying down, hook your elbows under their armpits:
2. Raise them to a standing position:
3. Place your right leg between the victim's legs:
4. Grab the victim's right hand with your left:
5. Squat and wrap your right arm around the victim's right knee:
6. Stand and raise the victim's right thigh over your right shoulder
Pack Strap Carry
The pack strap carry has been utilized by the military for decades. It's a quick, down-and-dirty way to move a victim quickly. If not done correctly, this carry can be extremely uncomfortable for the victim. This is typically used on a conscious victim. For an unconscious victim, it can be done, but you may require assistance getting them into the position for you to safely follow the steps.
1. Facing away from the victim, place their arms over your shoulders:
2. Cross the victim's arms grasping the opposite wrist and pull close to your chest:
3. Squat, lean slightly forward, and drive your hips into the victim as you stand:
Two-Person Carries
The most safe and efficient way to carry a victim is by two rescuers. The rescuers can share the weight, help each other watch for hazards, and work together efficiently without crowding too many people around the victim. It also reduces rescuer fatigue, which allows the rescuers to cover a greater distance or to return to aid more victims.
Two-Person Extremity Carry
This is a common carry that's used by first responders and the military. It's easily performed, but best suited for moving a victim over even terrain, such as along a paved path or within a building. Both conscious and unconscious victims can be carried in this manner.
Steps:
Help the victim to a seated position:
2. First rescuer kneels behind the victim, reaches under their arms, and grabs their wrists
3. Second rescuer backs between the victim's legs, squats down, and grabs behind the knees:
4. Stand at the command of the rescuer at the head, focusing on using your legs rather than your back:
Chair Carry
One universal truth when speaking with anyone who prepares for catastrophe is that you use what's available to you. Moving victims is no different. A chair, for example, makes the transport of a victim significantly easier on the rescuers. This method is easier to perform with a conscious victim, but can be done with an unconscious victim as long as due care is taken.
Steps:
Place victim in a sturdy chair:
2. First rescuer stands behind, grabs the back of the chair, and leans it back on its hind legs:
3. Second rescuer backs to the chair, squats down, and grabs the front legs of the chair:
4. Stand at the command of the rescuer at the head:
Two-Handed Seat Carry
The two-handed seat carry should only be conducted on conscious victims. Rescuers will utilize their arms to create a seat and the victim will need to be able to hold on for balance and stability.
1. Each rescuer should kneel on either side of the seated victim:
2. Link arms behind the victim's back:
3. Place your free arms under the victim's knees and link arms:
4. Place victim's arms around the shoulders of rescuers and stand together:
Drags
A victim drag is typically employed when victim removal is time-critical, or when the size of the victim prevents a safe carry. A coordinated carry is always the safer option, but under certain circumstances, a “grab ‘n' go” is necessary, particularly if the victim is unconscious. Oftentimes, though, when victims need to be relocated the terrain is uneven and treacherous, creating a dangerous scenario for both the rescuer and the victim. However, when a rapid extraction is necessary, a drag may be the only option. If at all possible, debris should be cleared from the path of the drag to reduce the chance for injury to the rescuer and further injury to the victim.
Blanket Drag
Along the same line of thought as the chair carry, utilize what you have available to you when performing a victim drag. The blanket drag can be performed with a blanket, or a sheet, curtains, towel, tarp, or anything else that'll accomplish the same goal.
Steps:
Tuck the blanket under one side of the victim:
2. Roll the victim onto the blanket:
3. Adjust the blanket so the victim is centered:
4. Grab the blanket by the end near the victim's head and drag to safety:
Shoulder Drag
The shoulder drag is another emergent maneuver for when a person needs to be moved quickly. This drag is difficult to perform over long distances as it's physically taxing on the rescuer.
Steps:
Place victim in a seated position:
2. Squat behind the victim and reach under their arms grasping your own wrist:
3. Stand, lean back, and walk backward dragging the victim to safety:
Feet Drag
The feet drag is a last resort. Moving a victim in this manner will most certainly be uncomfortable for the victim and will likely cause greater injury. It's a “life over limb” technique. This can really be accomplished only if the victim is unconscious because of the pain of dragging their torso and head along the ground.
Steps:
Squat at the feet of the victim and grasp their ankles:
2. Stand, lean back, and drag:
About the Author
Scott Finazzo has over 20 years of experience as a firefighter. He's a member of his department's technical rescue team and has served as an instructor since 2000. Scott has written five books, including the national bestselling The Prepper's Workbook and The Neighborhood Emergency Response Handbook, as well as his narrative of a kayak journey through the Virgin Islands called Why Do All the Locals Think We're Crazy? Follow Scott at www.scottfinazzo.com.
Read More
Subscribe to Recoil Offgrid's free newsletterfor updates, offers and more.
In the ever-evolving world of survival and preparedness, the wisdom of experience often provides the most valuable insights. For this reason, we've tapped into our community of avid readers as a resource for survival knowledge, and are sharing tips that stand out for their simplicity and effectiveness. This Readers' Survival Tip is yet another tip from the great state of Texas and will help you level up your wild food game.
Readers' Bio
Name/Alias: Grim Workshop
Location: Texas
Age: 37
Grim Workshops' Survival Tip
Using an old two liter bottle you can easily and quickly make an improvised trap for insects, or bait fish. Cutting the top off just as it starts to straighten out and inverting it so it points in towards the bottle. You can poke a few holes in it to wire, or zip tie the top on and poke some holes along the sides to help it sink easier. You can also throw some rocks into it so it sinks faster in the water (just don't forget to tie a line to it so you can check it regularly and not have it drift off!)
Learn more survival tips, and check out the products from Grim Workshop at: grimworkshop.com
Submit Your Own Tip
Want to see your own survival tip featured in our publications? Simply fill out the form here: Share Your Survival Tips
We are looking for your best tips, tactics and techniques to share with our audience!
Read More
Subscribe to Recoil Offgrid's free newsletter for more content like this.
Warning! If you’re caught with a metallic, or nonmetallic weapon in a non-permissive environment, the consequences may be severe. RECOIL OFFGRID assumes no responsibility for these consequences. Observe all local laws and only carry these weapons at your own risk.
Non-permissive environments (NPEs) are a common roadblock for those of us who carry weapons for self-defense. This category includes any environment which attempts to restrict or prohibit you from carrying traditional weapons — for example, guns, knives, or even pepper spray. Of course, the actual enforcement of these restrictions varies wildly. Some may simply post a worthless “gun free zone” sign, others will threaten legal action against anyone seen with a weapon, and a few actively search every individual with pat downs and/or metal detectors. The final category is the most difficult to deal with and leads us to the subject of this article.
Keep in mind that carrying a weapon in any NPE is risky at best and a federal felony at worst. Either way, willful disregard of posted regulations isn’t a decision to be taken lightly. However, there are also countless examples that prove NPEs aren’t violence-free zones. Schools, movie theaters, public festivals, and political events are all examples of legally declared NPEs where active-killer events have occurred. We say all that to say this: break the rules at your own peril, but the consequences of being unable to defend yourself may be far more serious than getting caught with a prohibited item and asked to leave. Even if you’re already training in hand-to-hand skills, a concealed weapon can serve as a force multiplier to give you the advantage you need to survive.
Nonmetallic blades and spikes are harder to detect than their steel counterparts, whether you’re being searched by a security guard who’s just doing his job or a criminal who’s attempting to ensure you’re disarmed and vulnerable. Not every tool in this article is fully nonmetallic, and you should never assume they’re undetectable. We attempted to locate each using a cheap $30 metal detector wand from Amazon — those that failed this test are guaranteed to be noticeable to professional-grade equipment. Beyond this, many will show up on a full-body scan, and all can be found during a thorough pat down or strip search.
That said, these weapons offer a lightweight and highly concealable means of self-defense — either as a backup to your primary tools under normal circumstances, or as a stand-alone tool for non-permissive environments.
Bastion Carbon Fiber EDC Knife
OAL: 5.3 inches Weight: 0.3 ounce / 1.2 ounces with sheath and chain Metal Detector Test: Fail MSRP: $30 URL: bastiongear.com
Although carbon fiber is often used for decoration, this lightweight material originated as a structural composite for the aerospace industry. It has plenty of strength and flexibility to cut and pierce and holds an edge surprisingly well. This simple knife is constructed from solid 1/8-inch-thick carbon fiber with a drop point and straight handle. A similar model is available with a curved handle and finger grooves. A Kydex sheath and beaded chain are included, making this featherweight blade comfortable to wear around the neck, even while running.
Pros:
Impressive materials and finish for the money
The shiny weave and marbled grind look good, and also result in impressive strength.
Cons:
Won’t pass metal detectors — despite common misconceptions, carbon fiber is identifiable by common eddy-current metal detectors because it disturbs an electromagnetic field.
Kopis Designs El Valiente Nonmetallic Minipick
OAL: 6.2 inches Weight: 1.1 ounces / 1.4 ounces with sheath and cord Metal Detector Test: Pass MSRP: $125 URL: kopisdesigns.com
El Valiente — Spanish for “the brave man” — is a reference to a card used in Lotería, a centuries-old game of chance. The image engraved into the handle of each spike is a spin on this classic illustration of a hatless man holding a blade, and it’s one you’ll find on Kopis Designs’ collaborations with Ed Calderon. Various El Valiente picks are available, including solid steel, hollow “ventilators,” and nonmetallic polymer. They can be ordered in several sizes and colors — we tested the nonmetallic Minipick with canvas Micarta handle.
Pros:
Despite its smooth finish, the oblong handle offers a surprisingly secure grip.
Low-profile sheath includes retention cord and a hook to catch on pocket hems
Available in numerous sizes, styles, and materials
Cons:
Made in small batches, so if you want one, you’ll need to be patient and keep an eye out for availability.
Concealment doesn’t necessarily mean hiding your weapon from view. In some cases, you can hide it in plain sight. A sharp writing instrument makes a decent improvised weapon, but wood and graphite lack the strength to withstand multiple hard impacts. The fiber-reinforced polymer known as G10, however, is exceedingly durable. The GLG Lumber Crayon resembles a pencil, but it’s actually solid G10 with a stained “lead” in the middle. Jon Gray, the maker, suggests slipping it behind your ear or under a ball cap — a clever way to keep this tool accessible at a moment’s notice. Pros:
Completely nonmetallic construction and slim shape make it exceptionally easy to conceal
Even when it’s carried openly, its innocuous appearance won’t draw attention in many environments.
Cons:
While it’ll easily pass visual inspection, anyone who tests its writing ability will instantly realize it’s not what it seems.
JB Knife & Tool G10 Ice Pik
OAL: 6.9 inches Weight: 0.7 ounce / 1.2 ounces with sheath and cord Metal Detector Test: Pass MSRP: $40 URL: jbknifeandtool.com Contributing writer and weaponologist Ed Calderon introduced us to several makers featured in this article, including JB Knife & Tool. John and Brian make a wide range of defense-oriented blades — the Ice Pik is one of the simplest, but not at the expense of effectiveness. It’s available in steel with a variety of options, as well as this solid G10 configuration. The flared handle features a notch that indexes with the forefinger for a secure grip. The tool gradually tapers to a sharp point and includes a Kydex sheath. Pros:
Long spike pierces deeply and effortlessly.
Kydex sheath has nice retention and doesn’t occupy much space.
Also available in O1 tool steel with various options
Cons:
The handle shape works well considering how thin it is, but would be more comfortable and secure with a little added thickness or texture.
Greg Moffatt Knives MG1 Solid G10
OAL: 7 inches Weight: 1.8 ounces with sheath and cord Metal Detector Test: Pass MSRP: $60 URL: gregmoffattknives.com
Greg Moffatt is a classically trained furniture maker who first got into knife making to create his own woodworking tools. Today, he makes quite a few defense-oriented blades, and this one is particularly concealable thanks to its G10 construction. It features a classic drop-point shape with a slender hollow grind. The handle is comfortable and offers full four-finger grip as well as thumb jimping for additional control. Wrapping the handle in thin cord would improve it even further, especially in wet conditions — fortunately, it’s pre-drilled to make this an easy mod. Pros:
Nice craftsmanship, from the clean hollow grind to the secure sheath
Timeless drop-point shape makes it effective for slicing as well as piercing.
Cons:
With polymer blades, there’s always a compromise between sharpness and durability. The ultra-thin grind means this will most likely be a one-time-use item, rather than one you can re-sharpen.
Boker Plus Anti-Grav
OAL: 7.6 inches Weight: 2 ounces Metal Detector Test: Fail MSRP: $114 URL: bokerusa.com Boker describes this ceramic blade as “100% non-magnetic” — an accurate but misleading statement. While the blade itself isn’t magnetic, the liner lock, pocket clip, pivot, thumb studs, and screws certainly are. Between this and the aforementioned issue with carbon fiber, the Anti-Grav lights up a metal detector like a Christmas tree. As the name indicates, these materials are used to minimize weight rather than increase concealability. The result is an elegant and impressive knife, but one we didn’t find particularly practical. Pros:
The mirror-finished ceramic blade is beautiful and razor-sharp.
Extremely slim and lightweight
Cons:
Definitely won’t pass a metal detector as a result of its many steel parts
Ceramic is notoriously prone to chipping and difficult to sharpen.
Fixed pocket clip is only suitable for tip-down right-handed carry.
VZ Grips Don Dagger
OAL: 8.1 inches Weight: 1.4 ounces / 3.2 ounces with leather sheath Metal Detector Test: Pass MSRP: $70 (+$10 for the sheath) URL: vzgrips.com It’s not surprising that a company known for its G10 gun grips would try its hand at making knives from the same material. VZ Grips offers several polymer dagger designs; the Don Dagger is a midsized option between the large Diamante and small Discrete. Its hourglass-shaped handle features deep textured cuts that ensure it won’t slip in your hand, plus a flat spot at the end for your thumb. The leather sheath design seen here has been discontinued and replaced with an updated design, which attaches to a belt vertically or horizontally ($10 with purchase of a knife).
Pros:
Rugged handle texture eliminates any doubts about grip slipping.
The diamond-shaped arrowhead point is very tough.
Cons:
Large size makes it difficult to conceal — G10 might make it past a metal detector, but not if the handle is obviously printing through your clothes.
Read More
Subscribe to Recoil Offgrid's free newsletter for updates, offers, and more.
A plate carrier, a modular handgun, and an AR-15 go hand in hand for more than one reason. First of all, they belong in the hands of military, law enforcement, and civilians. Second, each carries a sense of urgency and personal responsibility. Finally, each takes a shape of its own depending on how the owner chooses to set it up. While a plate carrier setup will inherently bear some subjectivity to the wearer, some rules should be followed as well. Here's how to set up a plate carrier.
Know the Plate Carrier Rules
The fit of the body armor comes first, before pouches are incorporated. The process of continual refinement reflects both on individual users, and those developing new gear. In the past, plate carriers have gone through something of a pattern resembling orthodoxy-reform-new orthodoxy, where a certain setup was considered absolute and gospel, only to be eventually challenged replaced with a new trend. Many of these were highly directed by various military and police standard operating procedures, or SOP's.
But in the last years, a much broader approach has become mainstream, with more focus on the end user's performance and a little more room for experimentation. As a result, a short list of rules cannot be broken, but outside that small circle, guidelines, suggestions, and trends shift depending on use. Above all other rules, propper plate carrier fit reigns supreme.
A Level III, Level VI, or Special Threat Plate is designed to stop a specific set of projectiles. By protecting the heart and lungs, it gives the wearer a distinct, but limited advantage in a violent encounter. The body is made up of timers and switches, and the heart and lungs have the shortest timers if damaged, short of the brain and spine. The front plate, then, needs to ride roughly from the center notch of the collar bone and cover down to about the base of rib cage. The rear plate mirrors this, though typically rests a little higher, with the top edge sitting about even with the tops of the shoulder blades.
Above: First Spear Plate Bags with a Crye AVS Harness. Custom assembly. HSGI Tacos, and KAGWERKS Kit, Disco 32 Tactical PTT, to Kenwood Connector on a Baofeng UV5R.
A properly fit plate carrier keeps the plates secure when running, climbing, moving through buildings, and diving for cover, all while not inhibiting one's range of motion too much. The shoulder straps should adjust to set height, and the cumberbund to prevent the plates from bouncing when running. Mags, pouches, and plates jostling and bouncing around rapidly wear out the bearer, and pose a risk of injury when climbing. While most of the weight will rest on the shoulders, a slightly tighter cummerbund reduces this pressure.
Propper Plate Carrier Loadout
As a principle, loaded pouches should ride as close to the body as possible. This may sound like a pithy maxim, but it goes unheeded far too often, at the wearer's expense. The emphasis on minimalism has gone a long way since earlier days, but can be mistaken for trimming the wrong gear. Those buying their own kit have the opportunity afforded by years of development to choose between a variety of equipment manufacturers, mixing and matching where they see fit.
The four categories of gear worn divide into ammunition, medical supplies, admin, and the ever ambiguous mission-specific equipment. Though lighter gear of the same capability will almost always be preferred, so long as it performs the same or better, this imperative often pits the good against the great.
Ammunition
The 3-wide, single layer mag “shingle” reigns as as the clear de rigueur of our time, with a mag sometimes referred to as the “speed mag” mounted to the cumberbund on the non-dominant arm side. In the last ten years, the trend has pushed some magazines typically carried on the Plate Carrier to the Belt, with many opting to reload off the belt first as habit. As magazines are expended, fresh mags are shifted first to the speed pouch, so that in the event of an emergency reload, the shooter can go straight to their fastest mag.
Above: Belt: Ronin Tactics Senshi Belt, with G-Code Scorpion Caddies, Blue Force Gear Micro Trauma Kit, Unknown Drop Pouch.
Magazines worn on the front of the carrier should only “double-up” in very rare, specific circumstances. It's nearly impossible to translate how badly more gear directly turns into an inability to effectively lay prone behind low cover.
Medical
Often personal medical gear gets stowed on the belt, or according to unit SOP's. If able to choose for yourself where a personal first aid kit will integrate, pick a location accessible by both hands in the event one receives disabling injuries. Outside of the kit, tourniquets should be distributed across the body where they can again be accessed by both hands.
Individual application will vary, but generally speaking at least one tourniquet should be attached to the plate carrier, even when worn in conjunction with a duty belt. This serves as insurance in the event the belt is lost, or one does not have time to put it on. Recently various forms of “danglers” have sought ot accomplish this, while others opt to use a breakable rubber band or shock chord.
Admin
Before chest-mounted cellphones were a thing, the top section of a plate carrier was typically kept slick or an admin pouch with maps, pens, and spare batteries and other miscellaneous items were often placed just above the magazines for easy access. Lately, gear like KAGWERKS or Juggernaut cases have dominated this space, offering users a video-game-like access to information with programs like ATAK.
Above: Toor Knives Vandal, fits on Kit and as a Belt Knife.
Even when using a chest-mounted computer, it is recommended to have a dedicated admin pouch if one is not designated on a uniform. The U.S. Army's attempt at putting pen holders on their sleeves might have looked like a good choice, but more often than not, “in the field” those pens were broken before use. Dedicating a specific admin pouch on a plate carrier takes one step out of putting on one's gear, saving time and making it easier to keep stocked up.
Radios have always presented a difficult decision to the bearer. If carried on the front, they could be accessed easier, at the cost of real estate. If carried on the back, a radio would be out of the way but often forcing the wearer to depend on a teammate to access it if a battery needed to be changed out or a frequency was lost. The black magic element of radios is their propensity to attract Murphy's Law.
Either way, the most common location to integrate a push-to-talk or PTT, which connects a radio to a communications capable headset, has long been the front non-dominant side of a plate carrier, to allow access while keeping a finger on the trigger of a firearm. Attempts have been made to drop it onto to cumberbund, but this has mixed opinions. If carrying two radios, one does not want to have to think about which PTT they are activating while in the middle of a tense situation.
The back of the plate carrier draws the ire of many a zealous minimalist, as it follows the same rule of motorcycle saddlebags and backpacks: if there is free space, something will end up filling it, quickly adding both weight and bulk. A survivalist plate carrier setup, those preparing for a longer operation, or when carrying larger gear, it is possible to opt for a full backpack instead, worn over the plate carrier. If this is the case, once again, less is more. If not carried in the pack, a water bladder can be attached to the back, so long as it is protected by some sort of sleeve or pouch.
Mission Specific Gear
Those in the military or law enforcement should be able to look to their leadership for guidance with mission-specific gear. Allowing for ingenuity should be encouraged, but limited to training scenarios and vetted for some time before potentially seeing combat.
With a plate carrier load-out, the little things have a big impact, such as finding out where gear pinches, or moves. As each piece is added, the bearer should test it for movement and jostle by donning the plate carrier. Like a backpack, heavy equipment stored further from the body only exhausts precious energy, and potentially gives away one's position by banging against walls, cars, and other objects.
Keeping a small amount of shock or bungee chord on hand can take the extra play out some things that move, and if a thing can fall out on it's own, expect it to when needed most. Dampen the noise of metal buckles with electrical tape, Ranger Bands, and elastic sleeves. Trim loose ends, and make sure nothing dangles off the belt or back of a carrier. It will inevitably snag, risking injury, exposure, or destroying equipment in the middle of a high-speed airsoft match.
Final Thoughts
Building a plate carrier is a highly personal process, and requires a fair bit of humility to acknowledge just one is doing so. The difficulty with this kind of equipment is much like a permit to carry: we should truly hope that we never have to use it, and a responsible owner will be honest about their capabilities. A weighted vest helps greatly for improving fitness, and things like the Tactical Games have brought a new opportunity landscape to popular firearm competitions. Accessible by all, and physically demanding, Tactical Games Skirmishes make excellent gut checks to ego, and help trim the dead weight off a plate carrier.
Two extremes stand out in regards to plate carrier setup: the hyper orthodox who demands compliance to a rigid SOP without explaining it to his men, and the rogue experimenter who sticks out by challenging the norm, often with no specific problem to solve. Millions of hours of experience from the last near 20 years of war slowly trickle into gear companies, and the change is often slow, tempered by the reality that we're dealing with serious life-saving equipment.
Read More
Subscribe to Recoil Offgrid's free newsletter for updates, offers and more.
Ninety years ago, gas was only $0.18 per gallon. Although this statement is accurate, it's also a little confusing, because $1 in 1932 is equivalent to more than $21 today. This is also why the prices for many consumer goods — from a $3,500 Corvette to a $200 Thompson submachine gun to a $0.05 bottle of Coca-Cola — sound staggeringly low these days. If we want a more accurate perspective on how gas prices have changed over time relative to the rest of the economy, we should adjust prices in previous years to 2022 dollars. The following infographic from TitleMax did exactly that, showing average gas prices from 1929 through the present.
Update:The average price of gasoline dropped 5.3% in the 12 months ending October as compared to the annual increase of 3.0 % in September, according to the most recent inflation data published Nov. 14, 2023, by the U.S. Labor Department's Bureau of Labor Statistics (BLS).
More Gas Data
In addition to the raw prices and 2022-adjusted gas prices, this infographic includes some markers for major historical events that influenced these numbers, such as wars, recessions, and the OPEC crisis. Following the bar graph, there's a line graph that shows gas price compared to electricity and common household staples (milk, bread, and bananas). While the prices for these other items have risen over time, they're clearly less volatile than gas prices, and have not matched the skyrocketing price per gallon over the last two years.
Final Thoughts
So, as preparedness-minded individuals, what can we learn from this? Gas prices are inherently volatile due to factors outside our direct control (unless you happen to be an oil sheik or high-ranking politician) and they have become much more volatile in the last 20 years. Gasoline expiration makes it almost impossible to stockpile fuel safely for more than a few years, so we should do our best to avoid being overly dependent on it as a fuel source — obviously, that's easier said than done. It may be worthwhile to consider acquiring a fuel-efficient motorcycle, e-bike, or vehicle converted to run on biodiesel to weather the storm in times such as these.
Read More
Subscribe to Recoil Offgrid's free newsletterfor updates, offers and more.
It usually starts with one of those conversations: If you could only have one gun …
Personally, I really don’t want to live in a world where I’d be restricted to one firearm. However, if you go on an extended trip off the grid in a hunting or survival situation, you probably won’t be able to tote your entire collection of firearms with you.
You can pick out a rifle and handgun for your situation, but you’ll still find gaps between the two. Your rifle may be able to reach out at long ranges and your pistol may be enough to keep you safe from two-legged predators, but will either excel at harvesting game, keeping varmints in check, or providing defense against a four-legged predator?
What if you did have one gun that could do it all, or at least get you close to that goal?
When it first debuted in 1967, the Thompson Center Contender was mostly a curiosity. The barrels were all below 10 inches in length, were octagonal, and represented the lower end of the power spectrum (.22 Jet, .22 LR, .38 Special, etc.). They were accurate, but not particularly useful beyond the firing line at the local outdoor range. By the 1970s, the barrels became round and were offered in rifle calibers such as .223 Remington, .30-30 Winchester, .35 Remington, and .45-70. Magnum. Handgun calibers such as .357 Magnum, .41 Magnum, .44 Magnum, .357 Maximum, and .45 Winchester Magnum followed, and the Contender was reborn as a highly accurate long-distance pistol for metallic silhouette shooting and a suitable hunting arm in either rifle or pistol configuration.
Although they were never intended or marketed as a “bug-out” gun, it’s a role at which they can excel.
Part of the beauty of a Contender is that you can change calibers in a matter of minutes. Remove the forend with a screwdriver, pop out the hinge pin, remove the barrel, install the new one, replace the hinge pin and the forend, and you’re done.
There’s no need to fit, check headspace, or set cylinder gap. Additionally, there’s no need to re-sight the Contender, as the sights or optics are mounted on the barrel. Your zero is always maintained.
Because there’s a 52-year manufacturing period with small changes here and there, some older barrel and frame combinations may require fitting. This has mostly been eliminated with the newest incarnation of the Contender known as the G2 frame, which debuted in 1998. However, even the most accurate barrels and custom frames can still be a bit tight-fitting. The biggest complaint outside of being a single-shot firearm is having to slap the barrel down to get it to break open at times with the older models. The older models do have a better trigger than the G2, however.
Rifle length barrels and a buttstock can be attached to the Contender to give the shooter a single shot rifle. We will not delve into this here, as it doesn’t fit the nature of keeping a battery of several calibers in a small package, but the option is there.
The Thompson Center Contender breaks open like an old-school single-shot shotgun.
My personal favorite combination for the Contender as a bug-out handgun is the following three 14-inch barrels: .45-70 Government, .223 Remington, and .410/.45 Colt.
Each one covers a potential need in most survival scenarios, particularly if you’re looking to hunt your own game. Most importantly, Thompson Center Arms still makes these three barrels for the G2 series.
.45-70 Government
When most people think of the .45-70 round, either single-shot rolling block or falling block rifles come to mind, or possibly a 19th-century lever-action carbine.
The .45-70 barrel represents the upper threshold of power for the Contender in a currently produced factory barrel. It’s capable of taking any animal in North America, from feral hogs and whitetail deer to brown bear, elk, moose, or buffalo.
Because of its power level, many shooters are put off by this caliber in a 14-inch-barreled pistol. When I bought my first Contender barrel in this caliber, the salesman at the counter called me “a f***ing nut” and said he saw someone fire it and break every bone in his hand. Like most gun shop sages, I ignored him and found the recoil somewhere between a .44 Magnum and .454 Casull. I won’t lie; the pistol has quite a bit of kick to it. The high bore axis and the recoil from the large, heavy slow bullet push the Contender back sharply into your hand. My barrel has the factory muzzle brake installed and is topped with a Leupold extended eye relief 2x scope.
As with most Contender barrels of this length, accuracy is outstanding.
Above: The versatile Contender from top to bottom — 45-70 with 2x Leupold scope; stainless 410/45 Colt with ventilated rib and brass bead; .223 with threaded barrel and rail; wood forend and grip on a blued frame.
.223 Remington
This has always been one of the most popular choices for the Contender pistol. It’s an outstanding varmint round, and if you stick to the 14-inch-barreled version, your velocity, accuracy, and power levels will be on par with what you’d get from an AR rifle with similar-length barrel.
I’ve had my barrel for many years and used it on various frames with no problems. My barrel is threaded ½x28-inch and serves well for silencer testing. If you run suppressors, the Contender makes for one of the quietest hosts out there, because it’s a completely closed action for the entire duration of the firing sequence.
Most often, I mount a red-dot sight on the rail. My barrel started life in a factory blue finish that rapidly deteriorated in service as a field gun for over 20 years. Today, it’s coated in a black Cerakote finish by Nevada Cerakote. My next stage in the world of Contenders is to have all my non-stainless barrels coated the same way.
The Contender tool, used to remove the forend, hinge pin, and barrel.
.45 Colt/.410 Shotgun
The .45 Colt/.410 barrel for the Contender is a bit controversial, like most firearms that fire this cartridge combination. This is because a sub-16-inch barrel needs rifling or else it’s considered an NFA item, requiring a $200 tax stamp. That rifling doesn’t help the .410 shot pattern at all. Likewise, the 3-inch chamber for the shotgun shell means the .45 Colt bullet has a significant jump in the chamber before it makes contact with the lands and grooves in the barrel. As a result, the accuracy of the .45 Colt will suffer in the Contender. This is a shame, because you can really bump up the power level of the .45 Colt in this pistol to outshine the .44 Magnum.
Still, with the factory choke and the right ammunition, the .410 shotgun round in a Contender is more than adequate for rabbit, grouse, quail, pheasant, and dove within 50 yards. It’s a good option if you find yourself in a situation where you need to forage for small game and neglected to bring a full-size shotgun.
This barrel is legal in every state except California, where a sub-18-inch barrel on any firearm capable of discharging a shotgun shell makes it a short-barreled shotgun under state law.
Above: A well-used 44 Magnum barrel, synthetic forend, and Pachmayr rubber grip can be practical accessories to have on hand.
Other Options
I have other barrels in various calibers, as a lifetime of shooting and hand-loading has gotten the better of me. All the Magnum handgun calibers work extremely well in a Contender. Another surprisingly good round is the old .30-30 Winchester. In the Contender, you can really tap into the accuracy inherent in this round by loading conical, pointed bullets instead of the old round-nosed ammunition designed for use in lever-action rifles.
Ironically, the .300 Whisper designed by JD Jones was not only intended for use in the AR, but in the Contender as well. This round is known today as the .300 Blackout and some folks might prefer this to the .223 or .30-30 chamberings.
Additionally, you can find sub-caliber chamber inserts that’ll allow you to fire .22 LR or .22 Magnum out of your .223 Remington barrels, for example. These inserts are cheap, and although they don’t provide the accuracy of a dedicated barrel in that caliber, they can be fun to play around with.
The .22 long rifle Contender barrels are among the most accurate you can find this side of a European Free-Pistol. I left them out as part of the bug-out barrel battery because I find a dedicated .22 semiauto or revolver more useful for the same amount of weight as the Contender barrel.
Handloading
While the three barrels I specified were chosen because they fill certain needs, another factor was that there’s an abundance of off-the-shelf ammunition choices for those barrels. The real magic of the Contender platform is that you can tailor your handloads to your individual barrel to increase performance.
If you’re not already reloading ammunition, the Contender will easily get you into it as well as turn you into an accuracy nut!
More Power
Thompson Center Arms offers another option if you find these choices lacking, although all three are available in this platform as well in 15-inch instead of 14-inch barrels. It’s called the Encore and was designed to allow the shooter to fire rounds such as .308 Winchester, .30-06, .460 Smith & Wesson, and in the long-gun configuration, shotgun and muzzle-loading options. Barrels don’t interchange between Contenders and Encores, but a battery of potent hunting guns can be built from a single frame.
Shooting the Contender
My way of shooting the Contender is with a standard two-hand grip that you’d use on any large revolver. I’ve mounted bipods on them, shot them across the hood of my truck, or from a rest built into an ATV. I’ve even laid on my back in the Creedmoor position with the side of the forend braced on the top of my boot for long range with open sights.
Some people cradle the forend in their non-shooting hand, and for a flicker in time there were companies making extremely tall scope mounts to allow the shooter to fire from the mid chest area and the ability to get closer eye relief from a more powerful scope. Those particular mounts are no longer made for good reason.
Ignore the forend — it’s there to look nice and protect the hinge pin. You don’t and probably shouldn’t use it for shooting unless you installed a stud to mount a bipod or are using a rest of some sort.
Pricing
The Contender used to be a more affordable firearm in the $400 price range, and the average price of a barrel would run from $50 to $199 with used ones at the lower end of this spectrum. The current MSRP on a new G2 Contender pistol frame runs from $523 for walnut furniture and blue finish to $548 for stainless and synthetic. New pistol barrels are about $229 each. A complete handgun in one caliber starts at $729 from the factory.
In Summary
I wouldn’t recommend a Contender as an “only gun,” although some old-school preppers have used one successfully as such. I think they have a place as a hunting and varmint gun, especially when keeping your loadout on the lighter side. The single-barrel lockup and single-action trigger make them accurate and very reliable. Their size and weight make them easily portable, whether you add sling swivels to the grip and forend or keep them in a holster of some type on the hip or across the chest. Other firearms may come and go from my collection, but I’ll always make room for a Contender (or two).
FAQ
Q: How much is a G2 Contender?
A: Presently (2023) around $799
Q: What is the difference between a G1 and G2 Contender? A:Due to the changes in the trigger mechanism, and to differences in the angle of the grip relative to the boreline of the gun, the buttstocks and pistol grips are different between the G1 and G2 Contenders.
Q: How many barrels were made for the Thompson Contender? A: By removing a few pins and screws, the modern Contender can be transformed from a carbine to a pistol, and there are more than 40 different barrel options, which allow the shooter to quickly swap between chamberings.
Read More
Subscribe to Recoil Offgrid's free newsletter for updates, offers and more.
In the ever-evolving world of survival and preparedness, the wisdom of experience often provides the most valuable insights. For this reason, we've tapped into our community of avid readers as a resource for survival knowledge, and are sharing tips that stand out for their simplicity and effectiveness. This Readers' Survival Tip comes from the great state of Texas, and will help you get that friction fire roaring.
Readers' Bio
Name/Alias: The Bearded Burton
Location: Dallas, TX
Age: 37
The Bearded Burton's Survival Tip
Increasing Your Success with Friction Fire This tip/trick works for any method of fire, but it truly shines when your source of heat is small and fragile. We always want to stack the deck in our favor when it comes to fire. Fire is one of the most valuable tools we have in nature and truly separates us from the wild. When we are able to freely create it with instant flame methods like lighters and matches, we often are more careless. But when we have to sweat and work for a flame, we don’t want to waste all of our hard work!
While there are many friction fire methods and resources out there now to learn how to be successful with achieving flame, this trick is one I don’t see very often.
What we choose to use as a catchment for the ember is very crucial. The ember that comes from friction fire is fragile and we need everything to work a certain way for it to grow into flame. Grabbing a quick leaf or piece of bark is usually what I see done and there’s nothing wrong with that. But, why not add to our success by using something the ember can immediately start consuming as it grows? This is where using a piece of “punkwood” as your catchment under the hearth board takes your success up a notch!
Punkwood is rotted, spongy wood that one can find on dead and decaying trees. It’s lightweight and accepts sparks very easily. It can be placed in a metal tin and placed in a fire to be turned into charred material for flint and steel fire techniques. What we want though, is the raw piece that has not been charred.
By using it as the place mat for our ember to fall onto, it immediately allows the heat the ember creates to have fuel to grow on. The Punkwood will begin to smolder and even if the ember we worked hard for falls off or gets blown away in the wind, the Punkwood will stay burning. We have a longer window of time now to turn this smoldering material into flame by utilizing this trick and we essentially have an ember that’s doubled in size as well. Being able to move and transport the ember becomes much easier by using this method as opposed to just a leaf or piece of bark.
The pros definitely outweighs the cons here but we do need to be aware of a few things. The Punkwood we use MUST be dry. It cannot have any moisture lest it rob the ember of the precious heat it needs to continue burning. We also need a piece of Punkwood that is appropriately sized to fit under the board without creating a lot of movement and wiggle during the friction fire process. What is nice though is Punkwood squishes down to form fit into the notch of the hearth board.
I hope this trick helps with the success of your friction fire practices! There is always more to learn and fun things to keep the hands busy. Keeping rubbing sticks together and doing the things that connect us to nature! Get Outside and Enjoy the Woods!
Have recent weather events across the United States, and across the world, given you pause to contemplate preparedness? If you are like me, and find yourself constantly asking what if, then perhaps the idea of firearms operation in winter environments, or making a winter ready AR, has become a source of concern. This is certainly not a new topic.
Above: Simple tasks, such as aiming, become more difficult when wearing bulky winter clothing.
On the contrary, as long as firearms have been available, they have been used successfully in cold conditions. However, there are some major differences between filling a muzzleloader with a colonial powder horn, and cycling through a malfunction on 21st century AR.
After scouring through a multitude of online sources regarding operating an AR in the winter, and spending hours outside at a snow-covered range, I have collected a few key takeaways that may come in handy the next time you encounter a tactical or self-defense situation when the flakes are flying.
Dealing With Bulk
When the mercury drops, the first thing most sane people do before they venture into the cold, is cover exposed skin with bulky, insulative apparel. The more cold it gets, the more layers get added. This excess clothing bulk is the first friction point a cold weather AR user will encounter.
Hunters who spend time in higher elevations or in northern latitudes, typically find a suitable location to hunker down, get set up, and train their firearms where they believe a target will present itself. This extra time makes it easier for a cold-weather hunter to position the buttstock in a way that compensates for added clothing.
Unfortunately, in a tactical or defensive situation, this extra prep time will most likely not exist. Extra attention must be given to the way bulky winter gear changes the way an AR is slung and shouldered. It may mean giving the sling extra slack, or making shouldering movements more exaggerated so the firearm clears the extra girth of additional clothing.
Reducing bulkiness to the optimal level is an art in itself. In many cases, bulk can be reduced by investing in what is known in snow-sports as technical clothing. These are garments with synthetic or modern wool fibers that have been weaved and coated in such a way so as to minimize the risk of penetration from the elements, maximize heat retention, and afford greater maneuverability.
The layers of technical clothing can be added to or taken away depending on the level of activity. For still hunting, more layers at the expense of extra bulkiness will be preferred. But for activity that is physically intense, like trudging long distances through the snow, layers can be reduced to the point where it feels like nothing but a spring jacket is being worn.
Above: Manipulating small items, or trying to grab magazines can feel clumsy and awkward when wearing thick gloves. Adding things like paracord straps or rubber grips will aid in these endeavors.
Gloves, hats, boots and face masks have all experienced similar modernization and it is well worth upgrading those decades old items to something more efficient. Getting the right combination takes a little experimentation, but once it's dialed in, going out in the cold no longer seems formidable.
It seems like an overly simplistic step, but having modern cold weather clothing can drastically reduce the amount of added bulk that needs to be dealt with. As the old saying goes, “there is no bad weather, only unsuitable clothing.”
Keeping it Functional
Other than polymer grips and buttstocks, the AR is metal, which means it quickly mirrors the ambient temperature. Thin gloves will be a one-way ticket to frostbite, and no gloves could lead to contact freezing when bare skin contacts the hand guard or receiver. Thick gloves or finger mitts are a must, especially if the situation demands an extended time outside.
An ideal pair of winter gloves will have a thin liner, and an outer shell component This will keep your fingers toasty, but it will make manipulating the functioning elements of an AR a real challenge unless a few modifications are made to the platform.
Probably one of the most important modifications to an AR adapted to the cold, should be to widen the trigger guard. For a bare hand, or shooting gloves, the stock trigger guard is just fine. But try adding an extra inch of padded diameter to your trigger finger. Many people experience how gloves can get in the way of simple activities without even giving it a second thought.
Above: Taking your gloves off when temperatures are below freezing can cause bare skin to freeze to metal. Even “shooters gloves” can lead to cold injuries due to their lack of insulation.
Just put gloves on and try getting house keys out of a pocket while holding a grocery bag. A pocket that fits an ungloved hand with room to spare, suddenly becomes a warded lock and the source of much irritation. Before long, there is a glove being held between teeth, while one hand is blindly fumbling for the right key to use.
It's not an identical scenario to firing an AR, but it highlights the convenience of having extra room to access the trigger. Without this extra wiggle room, it becomes a recipe for negligent discharges, or preventing the shooter from being able to fire at all.
Firing the weapon is important, but other functions can be adapted for cold environments as well. When fingers are covered with extra padding, their dexterity is greatly reduced. Instead of the charging handle meeting the stiff resistance of skin tissue, it is met with the soft give of insulated fabric. Maybe you will assert enough pressure to compensate for this and chamber a round.
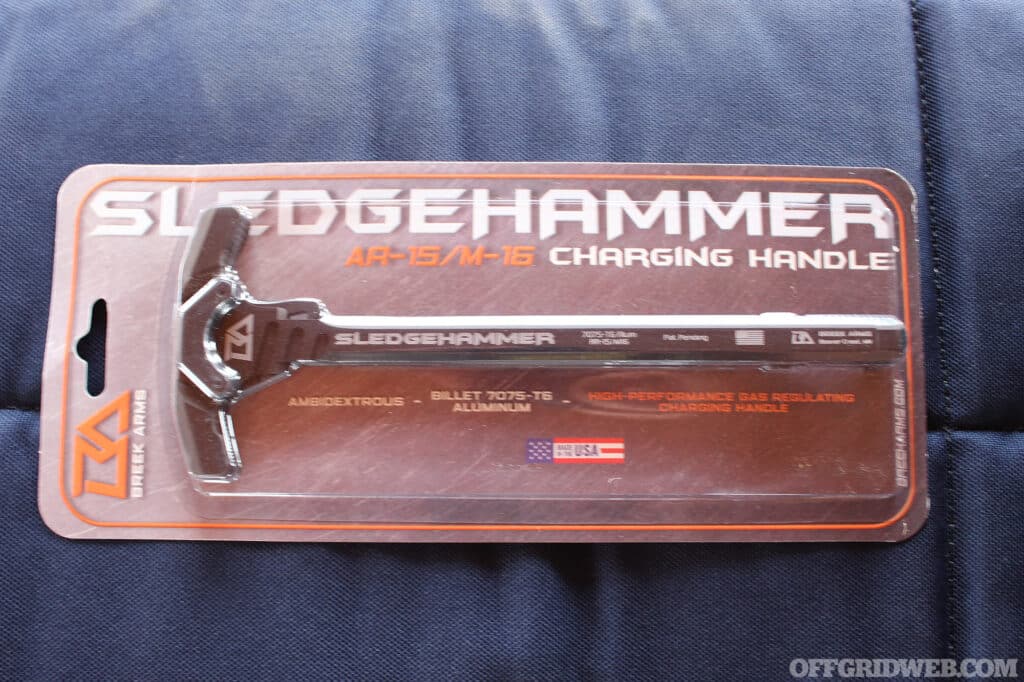
Or maybe the glove will slip, costing extra time that you may not have. Either way, why take an unnecessary chance? Things like the bolt lock, charging handle, safety and magazine release can be replaced with inexpensive upgrades that offer larger access points for gloved hands. These simple changes will make operation and manipulation much easier while still being able to keep your fingers and hands safe from cold weather injuries.
A Little Lube Goes a Long Way
There is a lot of conjecture about lube and its functionality in cold conditions. Thankfully, a lot of progress has been made over the past century in synthetic petroleum products. One of the most common gun lubricants available, CLP, can be used in temperatures ranging from -60° to 160°F. Many gun lubricants operate well within this temperature range, and it is difficult to find a better substitute.
Operating an AR at the coldest end of the spectrum, may result in the lube becoming more viscous, but unless you are located in Antarctica, Greenland or Siberia, it should not be too much of a concern.
Above: Utilizing magazines made from composite materials instead of the old-school aluminum mags, will prevent them from sticking due to condensation.
There is a lot of back and forth about using dry graphite lubricants in cold weather, which may work for some firearms, but it should be avoided with the AR due to the composition of its upper receiver. Turns out that graphite has a corrosive effect on aluminum if a little moisture is added. Which means if you are using graphite lube in the cold, and you fire a few rounds, the condensation created from the heat will create damage to the inside of the AR’s receiver.
A handy item to have in the cold is a cloth soaked in silicon spray, kept in a plastic bag, and stored in an inside pocket next to your body to keep it warm. This can be any silicone based lube, including the ultimate remedy for any stuck metal, WD-40. If the lube on the AR starts to get gummy because of the cold, or some mechanism seems to be sticking, the residual silicone on the cloth can be wiped on it to get it back up and running smoothly again.
Snow Hazards
As snow accumulates, it creates potential hazards. Anyone who has wandered too close to a snow-laden tree may have succumbed to the startling, and aptly named tree well. Tree wells occur when tree boughs capture large quantities of snow, while snow accumulates around the outer perimeter of the boughs. This creates a deep and hidden cavity that the unaware could fall into and become trapped.
They are more prevalent near evergreen trees. Snow piled up on the boughs can also drop to the ground due to wind, radiant heat from the sun, or bumping into them by accident.
Drifting occurs when the strong wind blows snow, piling it into powdery waves, concealing tripping and slipping hazards. Drifts conceal the topography of the land, making it difficult to determine the depth of the snow at any given point. When walking through an unknown area that has been drifted over, becoming mired in a snow depression could be a costly mistake.
Above: Moving with a firearm can present challenges in the best of conditions. Moving with a firearm in thick snow can be potentially fatal.
They may be fun to bust through with a car, or throw your neighbor’s misbehaving child into, but snow drifts may present an underestimated risk in a tactical situation.
Moving with an unprotected AR barrel through these obstacles will most likely result in frozen flakes or ice particles getting inside the barrel, maybe even plugging it. The last thing anyone needs is a critical barrel malfunction when firing.
There are a variety of barrel covers and plugs that will easily prevent this, but even a simple layer of electric tape will do the trick in a pinch. It is crucial that, when traveling through the snow, extra caution and increased muzzle awareness be practiced.
Frosty Concerns
Keeping an AR lightly lubed and modified for easier access will keep it firing well for sentient snowmen. But for those of us who may have to come back inside, or transition from warm to cold or vice versa, there are a few additional measures that are worth taking. Moisture from breath, smoke, or making quick temperature transitions will cause the lenses from optics to fog up.
A simple step to mitigate this is to apply your favorite anti-fog product to the glass, ensuring a safe and effective aim.
Breath can fog an optic, but it can also stop your AR from firing in a bad way. Breathing in freezing air causes the sensitive lining of your nose and lungs to become irritated. To prevent this, your body will start secreting more mucus, the reason why freezing temps seem to make your nose run constantly.
Above: Smaller components used to manipulate the function of an AR should be replaced with larger versions.
This biological feature to prevent damage to your airways, could become a serious problem if you are not paying attention to where your nose is dripping. Be aware of where your AR is slung. If it is in the path of a drippy nose or beard stalactite, the mucus could be collecting and freezing, causing components to seize until they have been thawed out.
Many optics these days, especially popular red dots, have batteries. As the temperature drops, chemical reactions taking place within a battery slow down, producing less current. After becoming cold enough, there is no longer enough energy produced to power the device. One technique is to wear a tactical harness with an admin pouch close to your body, underneath your technical clothing layers.
The heat from your core will keep anything stored in the admin pouch warm, including extra batteries. Although there is not a great way to mitigate frozen batteries, it pays to be cognizant that, if there is a powered optic or light on your AR platform, your operating window to use those devices is limited in cold weather.
Spend Some Time in the Cold
A common adage in military circles is to train how you fight, and nothing will prepare you more for AR use in cold weather, than to go out in cold weather and practice operating it. It is easy to watch videos, read articles, and become lulled into a false sense of security by thinking this has made you prepared. Avoid this common mistake by being proactive, and going through the motions in as realistic of a setting as possible.
Above: Training with your gear in realistic conditions is the only way to know for sure what needs to be altered, replaced, or removed.
Even if there are no nearby outdoor ranges open in the winter, simply going outside wearing all of your winter gear and physically going through motions will give you a much better understanding. Start with it unloaded, or with dummy rounds, and practice shouldering, aiming, loading/unloading, swapping mags, charging, and correcting malfunctions.
By going through the motions, it will become quickly apparent where changes need to be made, and how to operate the AR more effectively. No two biomes are the same, even across relatively short distances, and the only way to find out what works in yours is to get out there and rehearse.
Read More
Subscribe to Recoil Offgrid's free newsletter for more content like this.