The Suunto Sonic bone conduction headphones are a refreshing break from traditional in-ear or over-ear options, offering a unique combination of high-quality sound and an open-ear design that allows you to stay aware of your surroundings. These headphones are ideal for outdoor enthusiasts, fitness junkies, and anyone who needs to stay connected to their environment without sacrificing audio quality.
Key Features
Bone conduction technology for sound delivery through the jawbone, leaving the ear canal open.
IP55 sweatproof and water-resistant rating, suitable for various weather conditions.
Up to 10 hours of battery life with a quick 5-minute recharge providing 3 hours of playback.
Enhanced bass and rich sound quality, with minimal noise leakage.
Bluetooth 5.2 connectivity with support for multiple audio codecs and dual device connections.
Lightweight, durable design with a comfortable fit for all-day wear.
Head movement control for hands-free navigation through music or phone calls.
Whether you’re running, cycling, or just walking through busy streets, the open-ear design lets you listen to music while staying fully aware of your surroundings—an excellent choice for personal safety or keeping an ear out for important ambient sounds.
Above: When connected via bluetooth and playing audio, these unassuming headphones make no noise by themselves.
Comfort and Design
The Suunto Sonic boasts a minimalist, lightweight design. Weighing just 31 grams, these headphones rest lightly on your jawbone, leaving your ear canal unobstructed. The silicone and titanium alloy construction ensures durability without adding bulk.
Because the sound is transmitted through vibrations along your jawbone, you won’t have to worry about common issues with traditional headphones like earwax buildup or uncomfortable earbuds that won’t stay in place. And despite the bone conduction method, the sound quality is impressive, with rich bass tones and clear audio across various music genres.
Durability and Performance
These headphones are designed to handle a wide range of environments, thanks to their IP55 rating for sweat and water resistance. Whether you’re sweating it out during a summer hike or facing down a cold, rainy day, the Suunto Sonic is built to stand up to a wide range of elements.
With an operating temperature range of -20°C to +60°C (-5°F to +140°F), you can take these headphones from the gym to the trail without missing a beat. The battery life holds up too, offering up to 10 hours of music playback, and a full recharge takes just 60 minutes. If you’re in a pinch, a quick 5-minute charge provides an additional 3 hours of listening.
Connectivity and Features
The Suunto Sonic connects via Bluetooth 5.2, offering a strong connection with a range of over 10 meters. The headphones support various audio codecs, including SBC and APTX Adaptive, ensuring compatibility with most smartphones and delivering excellent sound quality even at a distance. They also feature dual device connection, so you can easily switch between your phone and another Bluetooth-enabled device.
Paired with the Suunto app, these headphones offer customization options, allowing you to adjust sound settings or manage the dual device connection directly from your smartphone. In terms of ease of use, the head movement control lets you manage music or calls with simple taps and gestures:
One tap to play/pause music or answer/hang up calls
Two taps to skip forward a track
Three taps to skip backward
Volume control via dedicated buttons
Sound Quality: Better Than Expected
For bone conduction headphones, the Suunto Sonic delivers surprisingly good sound quality. The specially designed transducer enhances bass and minimizes noise leakage, making it an excellent choice for outdoor use where maintaining awareness of your surroundings is crucial. Whether you’re blasting bass-heavy tunes or listening to a podcast, the clarity remains impressive.
One of the standout benefits of bone conduction is that your ears are left open, allowing you to stay aware of nearby traffic or nature sounds. It’s an ideal setup for runners, cyclists, or hikers who need to stay safe while enjoying their favorite playlists.
Frequency Range: 20Hz–20kHz
Sensitivity: 117dB@1kHz
Impedance: 6Ω±15%
Above: Although this charging port magnetically connects in a satisfying way, the lack of USB-C compatibility means you better not lose that charging cable.
Real-World Use: Pros and Cons
In practical use, the Suunto Sonic excels at keeping your ears free to monitor your surroundings while delivering high-quality sound. It’s especially useful for outdoor athletes or commuters who need to stay aware of their environment.
Pros:
Open-ear design keeps you aware of your surroundings, enhancing safety.
No in-ear discomfort or earwax buildup like traditional earbuds.
Durable and sweat-resistant, perfect for all weather conditions.
Fast charging, with a 5-minute charge providing 3 hours of playback.
Lightweight and comfortable for long sessions.
Intuitive control with simple taps and gestures for calls and music.
Cons:
Not suitable for noise isolation, meaning they won’t block out ambient noise in loud environments like the shooting range.
Specialized charging cable is required, which could be a hassle if you misplace it. No USB-C compatibility.
Not ideal for protection against high-decibel environments like concerts or machinery-heavy workplaces.
Final Thoughts: A Unique Listening Experience
Overall, the Suunto Sonic bone conduction headphones offer a unique listening experience that stands apart from traditional earbuds or over-ear designs. The ability to listen to music while still hearing your environment is perfect for those who prioritize safety without sacrificing audio quality. Even worn indoors, you can listen to the audio of your choice will still remaining aware and available to anyone around you. These headphones are not designed to replace traditional noise-canceling headphones but rather to complement them. If you’re looking for a way to listen to music, podcasts, or take calls while still being aware of what’s happening around you, the Suunto Sonic is an excellent option.
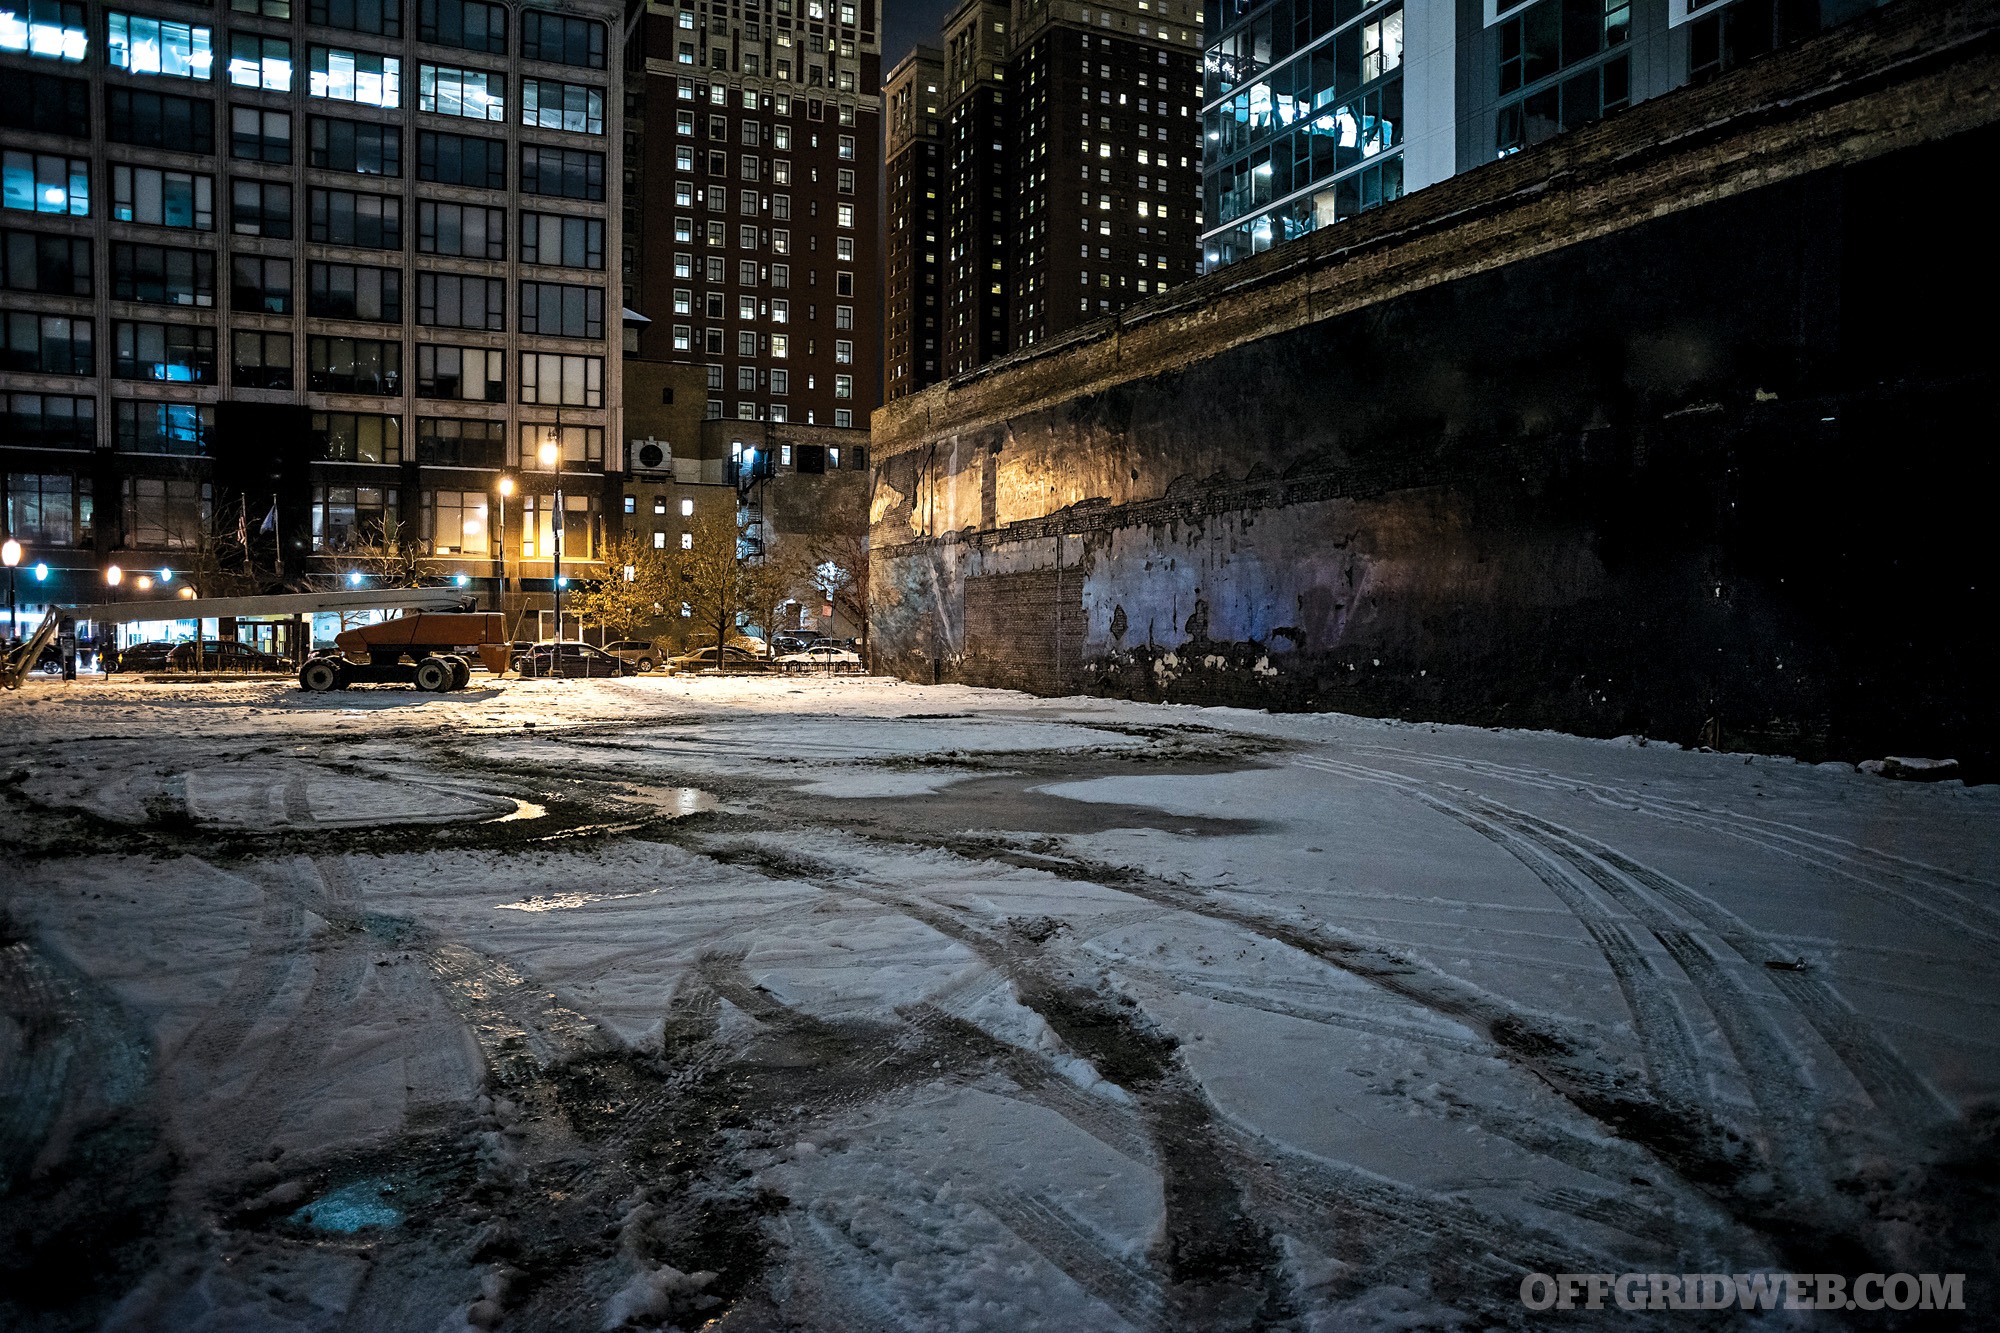
Whether used for business or pleasure, hotels have become an integral hub for today’s traveler. They’re inexpensive, convenient, and generally accepted as a safe, comfortable alternative to sleeping in a car or under a bridge. But hotels come with their own laundry list of pitfalls and potential travel security threats. By the time you see this, it’ll be the height of the American holiday travel season. So we felt like this was the perfect time to dive deep into some best practices for keeping your safety, security, and privacy fully intact during your current and future travels.
For a broader perspective, we talked to two people well-versed in domestic and international travel security. William Echo (a pseudonym necessary for his current career) is a corporate security professional and former law enforcement officer with more than a decade of experience in developing, implementing, and testing protective security protocols. Opposite him is Micah Dalton, a true modern-day nomad who has spent the better part of the last decade roaming the planet in search of good whiskey and great adventure. Along the way, he has made himself a perpetual student of street lessons and trained with some very specialized experts, including OFFGRID contributor Ed Calderon. The sheer volume of his practical street wisdom is nearly unmatched, even among our own cadre. Hopefully, these gentlemen and their varied experiences will help you develop a keen eye to keep yourself safe, regardless of where your travels take you.
Travel Security Preparations
RECOIL OFFGRID: How would you go about finding a safe part of town in an unfamiliar city?
William Echo:www.crimereports.com and www.crimemapping.com are great resources. However, there are times where information for that specific area isn’t available (because LE agencies aren’t feeding them). I’d do a Google search for that specific area with the words “local news.” Often the news media have crime-mapping capabilities on their websites. If not, just use the search function on the local media’s website for the word “shooting” and sort the results by date and look for patterns.
Micah Dalton: I have a travel notebook. This is one of the most important steps you can take to ensure safe and successful trips. If I had to attribute my success to one “secret tip” it would be this. I don’t see a lot of people doing it, but they really should. I know at first the thought of a “travel notebook” conjures the image of a weathered, leather-bound book where poetry litters the pages. However, the travel notebook I’m speaking of is a bit more practical and utilitarian. It’s a learning tool, which will allow you to catalog and research the city that you want to visit.
When researching the safety of a potential destination, I use a funnel system, starting big and going small. On a large scale, the U.S. Department of State website (travel.state.gov) is an optimal starting point. It provides a foundation of general travel safety information as well as travel advisories you may not have been aware of. Check out a couple alternative news sources from other countries to build a solid framework. From there, the internet is a wealth of knowledge at your fingertips.
My top two searches for any new destination are always “the most dangerous area in …” and “the best neighborhood to visit in …” This will quickly provide you with an area you should definitely avoid as well as an area that’s likely safe for the average traveler. Expand on this information by checking local lifestyle publications — every city has one; you just have to look. Police bulletins, activity, and arrests are all public domain. This should give you a functioning understanding of the different neighborhoods of the city. Google Street View is also great for reviewing an area that you’re considering.
Record all this in your journal, leaving space for discoveries, corrections, and enlightenments. With each city, you’ll refine your technique and soon see what information proves most useful for your specific type of travel. This one simple practice will aid you in cultivating an essential skill for being a better and safer traveler — not to mention provide a safe place if you feel inspired to write a little poetry.
Are more expensive or upscale hotels necessarily safer? Why?
WE: Absolutely not. You can find a five-star hotel anywhere, including in “Chiraq.” There are plenty of metro areas around the country that have lavish hotels that would recommend not walking around the hotel after dark. Furthermore, lavish hotels spend more money on the aesthetics and amenities than they do on security. If you don’t believe me, look at the lobby of a five-star hotel and see if you can locate the security devices (if any). Now go to a motel outside the projects — I bet they’ll have at least CCTV, and in some cases, doors with electronic locks where you have to get “buzzed” in to the lobby by someone with a .38 behind the counter. The floors may not be made of marble, but they at least have some proactive measures.
MD: In my experience, high-end hotels are generally safer for the average traveler for a couple of reasons. Expensive hotels have a tendency to be in nicer areas and have better on-premises security. That being said, you should still be on alert in your transitional zones — on the way there, checking in, leaving the hotel, and most importantly, entering your room. Luxury hotel security though, like all casual security, isn’t so much about making your stuff objectively secure as it is making it relatively secure. A small-time thief is less likely to follow you or try to break into the room of a hotel with 24-hour security and reception, and keycard-operated elevators. Someone who doesn’t belong will also be more easily spotted in this type of establishment versus a seedy place where everyone avoids eye contact. However, it’s still very possible and not terribly difficult to do if that’s your goal. The only thing that can really keep you safe is you.
You should know the local method of transportation, how to navigate it, and if your lodging is close to a main hub.
What are some additional lodging considerations for international travel?
WE: I approach domestic and international lodging the same way. However, I will say that if it’s in an area that’s frequented by American tourists, don’t believe the online reviews. Do a lot of research and see if you can find someone — even a friend of a friend — who has visited that area before to gather some trusted information. I’m sure if Ted Bundy had a hotel nowadays, it would have five stars on Yelp. Again, I do this for domestic travel as well, but it’s overlooked in both avenues: law enforcement and (more likely) EMS/hospital capabilities. You don’t want to pass out from food poisoning and wake up with a witch doctor standing over you … unless you’re into that kind of thing.
MD: One of the biggest considerations that I’m surprised some people don’t look into is proximity. If you’re visiting a new city, you usually have a general idea of what you’ll be doing there. So, get on Google Maps and take a look at the city to see where those things are. Your hotel should be in that area or at least nearby. This will not only save you money on transportation, but also save time getting from one place to another. I also like to make note of where certain things are in relation to my hotel — hospital, police station, nearest bar, public transportation. You should know the local method of transportation, how to navigate it, and if your lodging is close to a main hub. If you’re prepared ahead of time, you can avoid the telltale tourist look of checking a map for directions, or not knowing which bus to get on.
A big plus when you’re choosing a hotel is if they have a 24-hour reception desk. This not only acts as a line of defense against anyone getting into the hotel that shouldn’t be there, but is also one of your greatest resources in an unfamiliar city. The receptionist most likely speaks decent English and can give you local recommendations. If an emergency were to come up, you can use the receptionist as a point of contact. They know you because you’re staying at their hotel and are usually willing to help you communicate with local authorities if necessary.
When researching lodging online, what are some dead giveaways for establishments that may be unsafe to stay in?
WE: All five-star reviews — everybody bitches about stuff online, so if it’s all five stars, the reviews are fake. Even the Biltmore has bad reviews from rich folks whose bidet didn’t work properly. So tread lightly. The other extreme — all bad reviews — definitely believe that because (once again) everybody bitches about stuff online. Make sure you check the Crime Reports and Crime Mapping websites for info. And last but not least, do a Google-street-view drive-by of the area. If the environment looks sketchy during the day when the Google car drove by, it won’t turn into Shangri-La once the sun sets.
MD: You see a great deal on a nice-looking hotel, but it only has five reviews. This is a huge red flag! While it doesn’t always mean something is wrong, there are plenty of options out there, so why risk it? Read the reviews, and not just the rating or number of stars, but actually go through and read a bunch of reviews. When I’m picking my next hotel, I’ll read down a good 15 to 20 reviews. The ones at the top are typically good, but once you scroll down a bit, you’ll start to see the negative reviews, and these are the most important ones. Pay attention to a problem that multiple people mention— this likely means it’s not just a one-off issue that occurred. Another good practice is to read reviews on multiple sources. Check out Agoda, Expedia, the hotel’s website, etc. Pick at least two different sources to really get a good picture of the place. Chances are, if there are very few reviews, or the reviews are overwhelmingly negative, you should pick a different place to stay.
Don’t forget, if it looks too good to be true, it probably is. A really great-looking hotel that’s suspiciously cheap? There’s probably reasons for that. Don’t be fooled by the pictures either. Traveling through Asia, I can tell you from experience that lower-end hotels can and will use straight-up fake pictures on their websites. And if they’re willing to do that, chances are you’ll run into all kinds of problems there.
Hotel Travel Security Procedures
Are there any general safety procedures you follow when staying in a hotel, such as what floor you stay on, having your room in proximity to stairwells/elevators, devices you use to bolster your room’s security from intruders, etc.?
WE: I always ask for a room next to the stairwell, or as close as I can get. If it’s not right next to the stairwell, make sure to find the closest emergency stairwell and count how many doorframes are between you and the exit. This way, in the event that the hallway is full of smoke or in complete darkness, you know how many doorframes to count when making your way to the exit. Another advantage to this is that most hotels allow for ingress and egress with the use of a proximity card (or some other form of key access control) on doors that are connected to the emergency stairwell, or just outside of it. Once you park your car (backed in) to a parking space outside the emergency exit door (at the bottom of the stairwell closest to your room) you now have a way of coming and going without being observed by the hotel staff and any other “guests” that may frequently hang out in the lobby. This way, it becomes more difficult for these strangers to track your daily routine.
As far as what floor, always consider your (and your loved ones’) physical capabilities. If you have to take the stairs in an emergency, you can make it down, but can grandma? Your pregnant wife? How far can you carry your children down a hot stairwell crammed with panicking people? In the event that your chosen hotel is a high-rise, make sure to factor all these in. But also remember that even the biggest ladder trucks can only reach about eight stories up — and that’s only relevant if you haven’t succumbed to smoke inhalation by the time they arrive. So as a worst-case scenario, don’t go for a room above that point.
To increase your security while in a hotel, one of the first things to consider is your mouth. Be careful what you tell people — where you work, where you live, if you’re staying at the hotel because you’re working on a crew doing a refresh of a local Walmart or installing expensive (and sensitive) equipment for a client. Remember, only fully fabricate your story unless you’re able to support it. Using generalities or omitting specific items that would make you a target is perfectly acceptable.
Beyond utilizing the “loose lips sink ships” mantra, there are a few other practices that can help increase your security posture while travelling. First, the do-not-disturb sign. Use it when you have equipment or specialty items you wish to keep from prying eyes. If it comes off when you open the door because it’s 160-percent recycled paper and weighs nothing, add a little tape. You can use the same towels a couple days in a row. You’re a grown-ass man or woman — you can make your own bed.
For an entry alarm, the good ol’ empty beer bottle on the handle trick still works great. Even if the interior handle of the door handle doesn’t move when the outside is turned, the forward inertia of the door (and sudden stop) will send the bottle airborne and onto the ground, alerting you of entry. You can also purchase doorstop alarms from Amazon. You place the edge of the device under the door and any movement will cause the alarm to sound. It’ll definitely wake you up.
If there’s a privacy bar/arm (instead of a chain) installed on the inside of the door frame, don’t trust it — it’s almost completely useless. Extend it so it’s pointing directly at you, then locate the ice bucket in the room and hang it on the extended bar/arm. If someone opens the door while you’re sleeping, the sound of the empty bucket hitting the floor will wake you up. Toss in a few bottle caps or the caps off the complimentary shampoo and conditioner bottles in there to add even more noise. Every little bit helps. There are a plethora of door alarms on the market; take your pick. Everything from tripwire alarms to lasers and infrared beams. Just be careful with the lasers and the IR beams; they’re usually pretty cheap and some lighting can cause interference. This interference can also lead to false positives that wake you and/or your family up, leading to a “cry wolf syndrome” where you’ll ignore them.
You are keeping the light above the door on during the night, right? What’s the sense of the alarms if you can’t see who or what set them off?
When it comes to defense when you’re away, your options are limited. You may want to hide your valuables, but you could use your laptop’s webcam as a CCTV camera. Download software with motion detection and make sure you’re securely logged into the hotel’s internet. If someone comes in while you’re away, you’ll receive an email alert with a picture of what’s happening, and the laptop will be recording during the time they’re in your room. Need to take the laptop with you to work? No problem. You can use an old cellphone in the same manner (and it’s easier to hide). Or just take a piece of tape or a hair from your head with a little spit and spread it across the closet door or a couple of drawers so you’re aware if someone opened it. You can also place something (like a cup of water or coffee) one to two thumb lengths away from your suitcase, your laptop, or your iPad. (Make sure you take a pic before you leave, just to confirm its position.) Then check it when you return to see if it’s been moved.
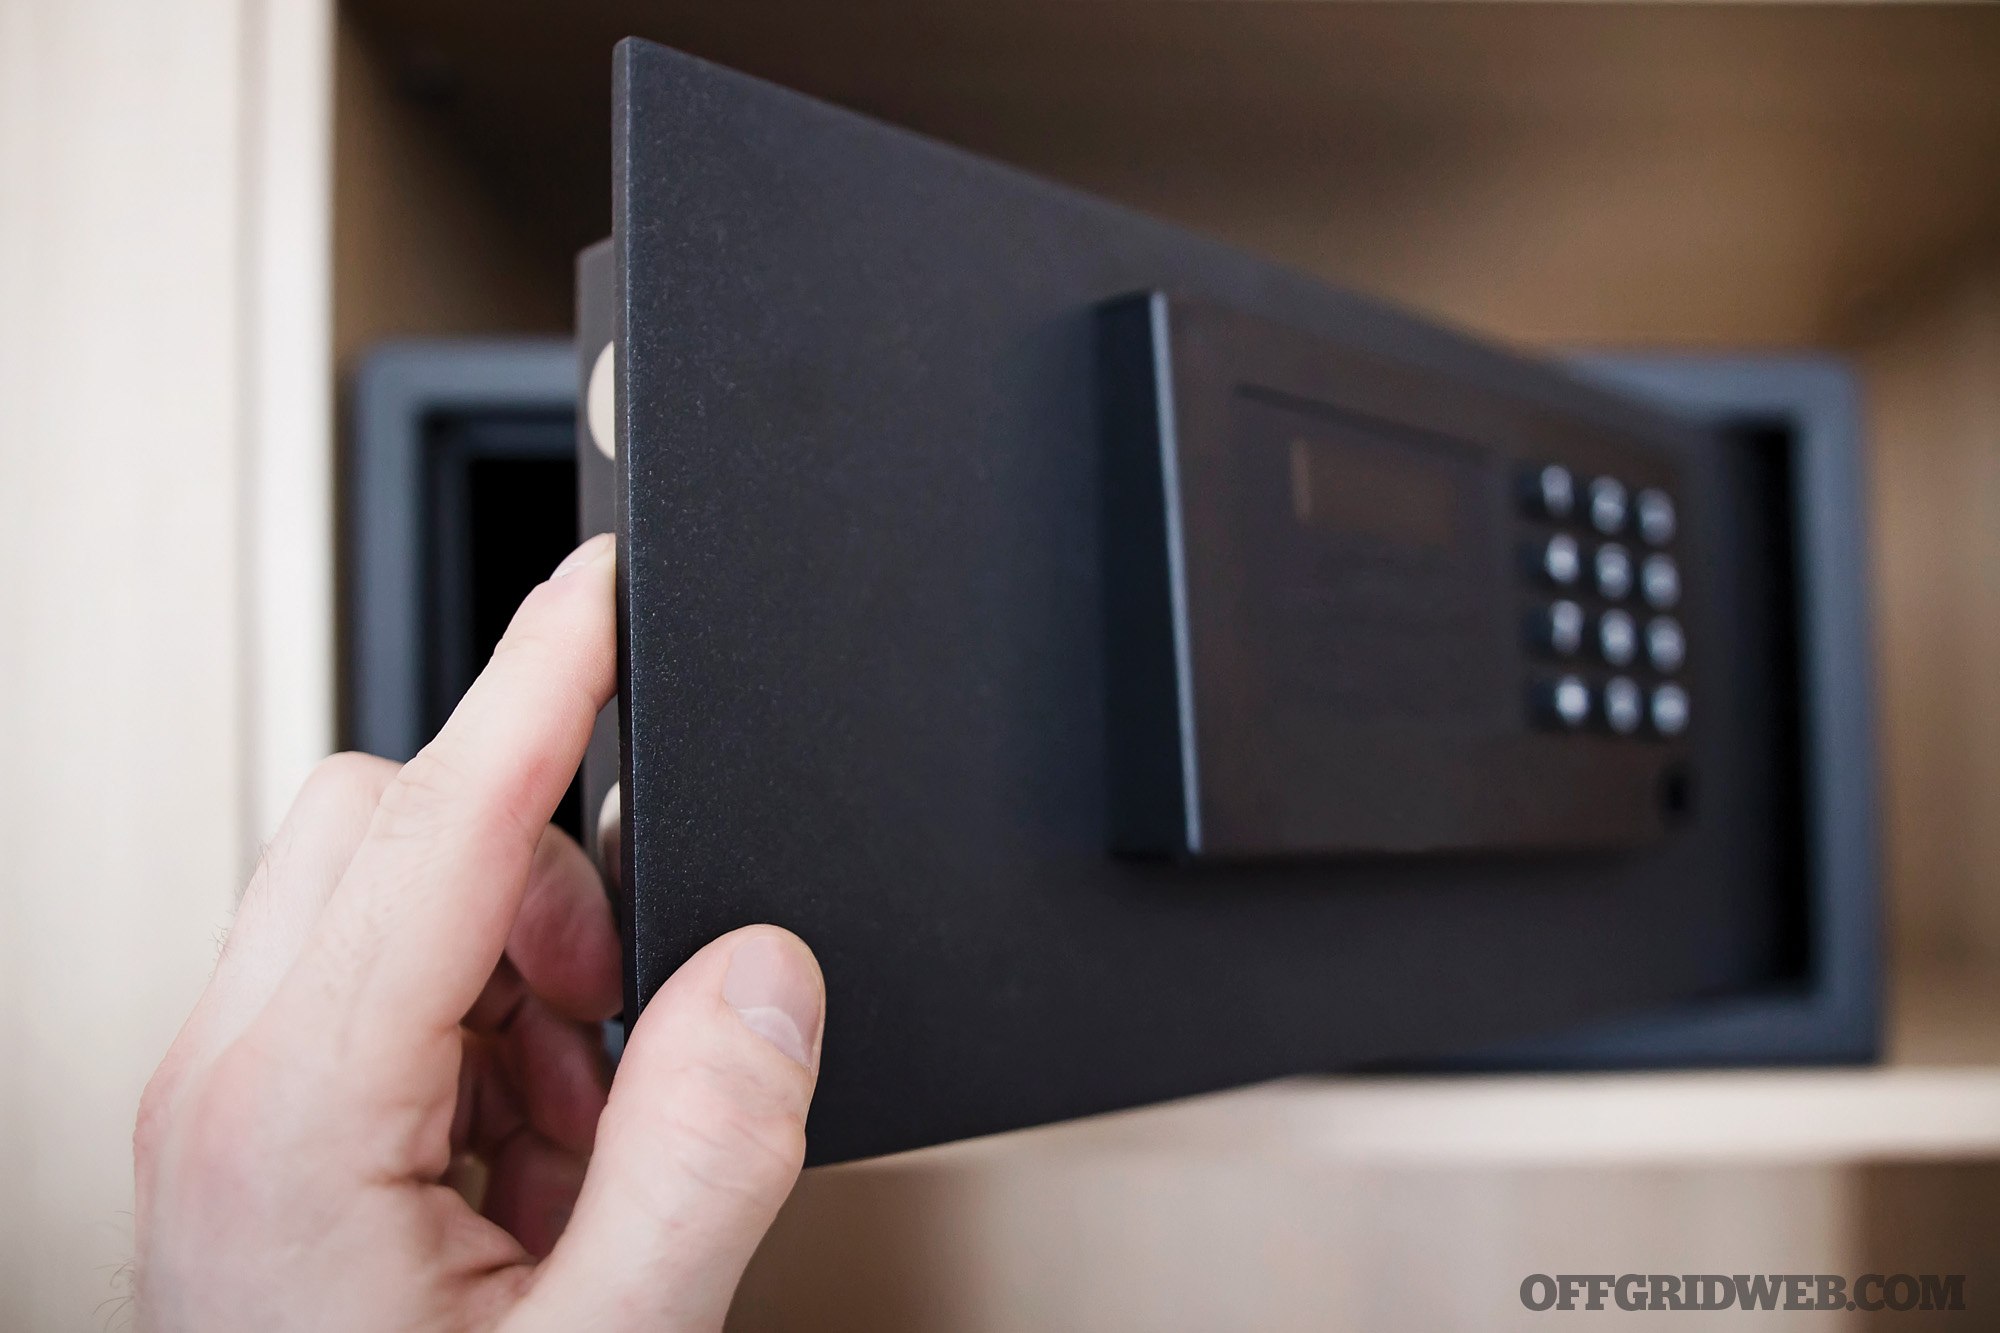
Never use a hotel safe! Exploiting hotel electronic (and analog) locks has been done for ages, and there’s really not much you can do about it. When it comes to unauthorized entry into your room that doesn’t involve a staff member master key or someone picking an analog lock (or “loiding” the striker with a thin celluloid strip), there’s the under-the-door tool. It’s a device that slides under the door, then is flipped upward, attaches to the door handle, and is retracted to open the door (mimicking a hand opening the door). To combat this, take one of those plush bath towels and roll it up. Then stuff it between the edge of the door handle (the side closest to the hinges of the door) so a tool can’t grab the lever.
MD: This stuff is pretty well known with seasoned travelers, but I always choose rooms above the first or second floors, but beneath the sixth floor. The first two floors will have a higher percentage chance of being targeted for robberies. Anything higher than the sixth floor won’t be reached by ladders. In a worst-case scenario, floors three through five are low enough that you could potentially survive a fall if you needed to jump. Ideally, I’d also like to be close to the stairs. When I was in Spain, there was a hotel fire and I was able to quickly grab my belongings and exit while everyone else was swallowed by chaos and panic. When making your reservations, use the “special requests” section for these requirements. If you just show up and ask, the probability is a lot slimmer of getting what you want.
“The Sweep” is a prerequisite for hotel safety. It’s when you get to the hotel room and check the overall quality and security of your room. My personal sweep looks something like this … I don’t even think about it anymore.
This is a big one, and seems laughable, but how many people really do this? With the door open, make sure there’s nobody in the room.
Check that all appliances and lights work.
Make sure the room quality is acceptable.
Check that all windows and doors work.
Make sure the locks are fully functional.
Check the security of the room safe — is it attached? Does a master code unlock it?
Cover the peephole.
Use a laser detector to check for cameras. If you don’t have one, get one. However, an alternative method is dimming the lights and using a flashlight. If you shine it on a device that’s has a small pinhole camera, you can catch the reflection. [Editor’s note: Some cell phones and digital cameras can also detect infrared light sources, such as those used by CCTV systems. To test this, go to a dark place, hold down a button on a TV remote, and see if the emitter lights up on your camera’s display. If it’s a cell phone, test both front- and rear-facing lenses — newer phones often have IR-blocking filters built into at least one of these.]
After the internal sweep is done and everything checks out, I leave my room and count doors to the staircase. This is an easy but important thing I do just in case something happens and I can’t see. When I get to the exit, I follow it all the way. Better to find out now if a hotel exit is blocked or even locked. If there’s a problem, I’ll contact the hotel and have them sort it out and find an alternate exit.
Anytime I leave my room, I leave the TV or music on. I also put out the “do not disturb” sign and instruct the front desk that I don’t want anyone to enter my room.
Safety should be as much of a consideration as your comfort when planning travel. These are some essential habits that will ensure that a bad situation doesn’t turn into a catastrophic event. All this safety and security can feel daunting and like an endless routine; however, so did driving a car when you first started. Now it’s an effortless habit — the same will be true of security when you travel. Once it becomes habit, you no longer have to pay it the conscious attention you once did. Always trust your intuition. If something feels off, don’t ignore it or look for a “why.” I’ve left hotels because something wasn’t right. I’ll gladly eat the money it costs for my peace of mind and safety.
Never use a hotel safe! Exploiting hotel electronic (and analog) locks has been done for ages, and there’s really not much you can do about it.
Are there any steps you take before lights-out to prepare for an incident during the night?
WE: I complete most of the pre-action steps above. Make sure if you’re traveling with a weapon that it’s accessible — if you sleep on a specific side of the bed at home, make sure to replicate that while traveling. Muscle memory is key. If you wake up at home with a bump in the night and grab a pistol from the nightstand with your left hand, you’d put yourself at a disadvantage to reverse this.
Beyond that, make sure to have a flashlight next to your bed. Also prepare your communications device, like a cell phone, radio, or the room’s courtesy phone — assuming you made sure it works — and your weapon (if applicable).
Utilize either a commercial or improvised alarm option as previously mentioned. If you have a suite with a shared bathroom with two doors (one coming from the living space, the other coming from the bedroom), then the same type of alarm should be applied to the door handle of the door leading from the living space into the shared bathroom. If an adversary should make entry to your room in the middle of the night, they’re either coming through the bedroom door or through the door leading into the bathroom from the living space. If they come through the bathroom, you’re going to know. If you’re armed with a firearm (utilizing your standard safety rules, especially knowing what’s beyond your target), make sure you’re aiming below the doorknobs. Unless they’re proned out, you’re going to hit something.
Always keep a single light on that’ll lightly illuminate the common area(s) of the room, even if it means turning on the bathroom light and leaving the door cracked. You’ll need something for observation and target acquisition at 0300. Make sure you know the location of your critical gear (and the doorknobs). If need be, purchase glow-in-the-dark talismans to mark your critical gear. Also, if this is a house or multistory condo, make sure to relay your plan to your guests so they know what to do when they hear something.
To summarize: alarm, illumination, weapon(s), and escape route.
MD: While it’s definitely important to do the standard door and window check, one of the most beneficial things you can do is set up your nightstand. Wherever I travel I always have the same setup next to my bed. This has come from experiencing a variety of different scenarios, from a fire in the hotel to someone trying to get into my room.
I set aside a flashlight, a blade, gloves, and a small grab bag that has my passport, money, and documents in it. I also have my backpack next to the nightstand — that way I can grab it and go if time allows. For door security, I always have a door wedge. They’re incredibly strong and easily locally sourced. Also, if the door has an arm on the inside, some paracord or a strap tied around will keep it from opening.
Precautions for Unwanted Guests
How would you confirm whether someone entered your room or tampered with your luggage while you’re away?
WE: I described some of these options before, such as a webcam or old cellphone as a CCTV camera, the hair tripwire technique, or photographing specific item locations so you know when they’ve been moved. Also, use the towel technique so no one uses a bypass bar to enter the room. A cheapo mousetrap can work wonders in conjunction with the hair tripwire method. If someone sets off a mouse trap, then they’re going to jump and rush out. If the trap is activated and there’s no one there, you can bet someone set it off since very few would go back to reset it.
MD: There are plenty of variations to this trick, but the business card is my favorite and I use it religiously. It’s easy and low tech. Upon checking in, grab a couple business cards from the front desk. When you leave your room, wedge a folded card in the crack of the door at a specific height. Make sure to push it into the crack far enough that it cannot be easily seen if someone walks up to your door. Use something like a comb or flashlight to precisely measure the height at which you place the card. If someone enters your room, the paper will fall out. While they may notice this little trap and replace the card, it’s highly unlikely that they’ll replace it at the exact height you measured. If they see this upon entering your room, it may also deter them from stealing if they think they’ve already been caught. Just make sure to measure the card height when you get back to your room before opening the door.
Another easy trick is to take a picture of your room or your luggage before you leave. When you come back, check the picture against your stuff to see if anything is clearly out of place.
Do you hide valuables, money, or other items in your room? (For example, using any place other than your luggage, cabinets/dresser, or in-room safe.)
WE: If you roll your clothes in your luggage and/or just roll your socks, this is a great place to hide valuables. Also, if you checked a bag, you should have your pocket knife and/or multitool. Hide valuables in the duct work, making sure to adjust the thermostat and listen for noticeable vibration. Once you’ve checked that, you can turn the thermostat back to normal. Also, depending on the size of your item(s), the room’s ice bucket is a good option. Put your valuables in the bottom of the bucket and place a plastic bag (usually provided) over the top of the valuables. Now, go fill the plastic bag up. If there’s a pull-out couch, turn the couch in such a way that it would be easy to notice if it was moved, and wrap up your valuables in the pullout. Also, use the plastic bag from the ice bucket to hide items in the toilet’s tank.
MD: I’ve been doing this for years whenever I frequent “seedy” places or places with little to no security. A telephone jack or cable jack box will usually be hollow behind the faceplate, which makes it perfect for an added step of security for valuables. It’s not foolproof and you can’t fit much in there, but it’ll definitely hold a few key valuables that you don’t want to live without.
Web Exclusive: More Hotel Travel Security Security Q&A
Our travel security discussion with these experts went on to cover several other topics, including the AirBnB alternative, keeping your vehicle safe in a parking lot, detecting hidden cameras, and maintaining communication security. We couldn’t fit these questions in print, but they’re available now at OFFGRIDweb.com/preparation/hotel-security.
About the Authors
William Echo (a pseudonym) has 14 years of combined experience in IT security, law enforcement, close protection, and corporate security operations. He has served various roles, ranging from training officer, EMT, communications chief, red team leader, infrastructure protection, anti-money laundering investigations, and intelligence gathering. With both parents in the IT industry and an aptitude for technology, that’s the direction he headed. After college, a family friend who was former law enforcement introduced him to a volunteer program that the local police department had available. Not long afterward, he ditched IT and used his police department contacts to land a job doing security work for a large financial firm, including performing infrastructure and facility protection during the aftermath of Hurricane Katrina. After spending a few years in law enforcement, he returned to corporate security/protection and has been there ever since.
Micah Dalton is a global adventurer, photographer, and travel writer. Told at a very young age by his grandmother that he had “gypsy blood,” he hasn’t stayed in one spot since. A bona fide travel addict, his adventures have taken him to over 35 countries and all seven continents. He’s studied Buddhism in Thailand, knife fighting with a South African master, motorbiked the jungles of Vietnam, and hitchhiked all across America. After over a decade of dangerous adventure travel and specialized training with Ed Calderon and other high-level instructors, Micah has now distilled his experiences into a series of travel and safety compositions for major publications. Join the adventure on Instagram at @classic_mcqueen.
The world has slowly returned to some semblance of normalcy after COVID, and with it comes an increasing desire to travel. Technology has made travel significantly easier, but this convenience also brings new cybersecurity risks.
When I began traveling full-time over 10 years ago, travel safety was merely a matter of personal physical safety. Never leave a bag unattended, always pay attention to surroundings, and so forth. However, in the current day and age, digital life presents new and significantly heightened cybersecurity threats. When you travel domestically or internationally, you’re now traveling with personal information that’s far more valuable (and that can be accessed far more readily by predators) than the contents of your bag. This shouldn’t be a deterrent to travel, so long as you prepare with a few simple measures to safeguard yourself and your devices.
In the weeks leading up to your trip, there are a couple things you can do to protect yourself and prevent an incident from turning into a catastrophe.
Always remember: The best way to protect your stuff is to leave it at home.
People have a tendency to overpack. I always say once you’re completely packed up, cut that load in half. The same applies to your electronic devices. People own multiple devices and feel like they need to bring them all “just in case.” Don’t. You exponentially multiply your risk with each device that you bring.
If you do have to bring a laptop, tablet, or other device, make sure you clean all personal information off of it before you leave. This should go without saying, but you should have a lock and password on all of your devices. Avoid face recognition and fingerprint recognition features, since they can be bypassed against your will through physical force. Furthermore, all of your passwords should be changed every three months. Before you leave home, I’d recommend that you update all your devices’ software and operating systems. This will improve their ability to ward off attacks from known vulnerabilities. Also, back up your information — that way, if something does happen to your device, you won’t lose all of its contents.
You never want to connect to unfamiliar networks that have limited connectivity, or worse, that could be hijacked. A general rule of thumb I employ in my travels is that you’re always being watched, physically and digitally.
VPNs
The most important way to protect your information is to use a quality VPN service with end-to-end encryption. Essentially, what a VPN does is route your traffic through a secured pipeline from your device to the destination server. This will mask your IP address and location, making it much more difficult to track your online activity. Avoid surfing the net with standard browsers — they will all track you to some extent. Instead, use a proxy tool like JX Browser, ZAP, or Burp for anything sensitive so you can see the chain of supply to and from the sites you’re trying to visit.
Chrome and Firefox are rife with third-party plug-ins that can get you hacked, so if you must use mainstream browsers, make sure you keep them updated and avoid add-ons. Turn on the built-in cybersecurity features such as pop-up blockers and cookie blockers, but be extremely careful about using third-party ad blockers. They are, in fact, malware in many cases.
Booking Securely
Another great buffer is to set up a “travel” or burner email that you can use for any reservations or activities that require email. In addition to using disposable emails, pay attention to the security of smaller sites when you’re booking local excursions or tour trips. These sites aren’t going to be as secure, and you’re therefore more prone to attack when completing an online booking. At the very least, look for the padlock icon in your browser’s URL bar, which indicates that the site is using up-to-date SSL encryption. Best practice is to just call them and make arrangements over the phone; in the rare case that they won’t book over the phone, find a different company that’ll respect your privacy.
Physical Security
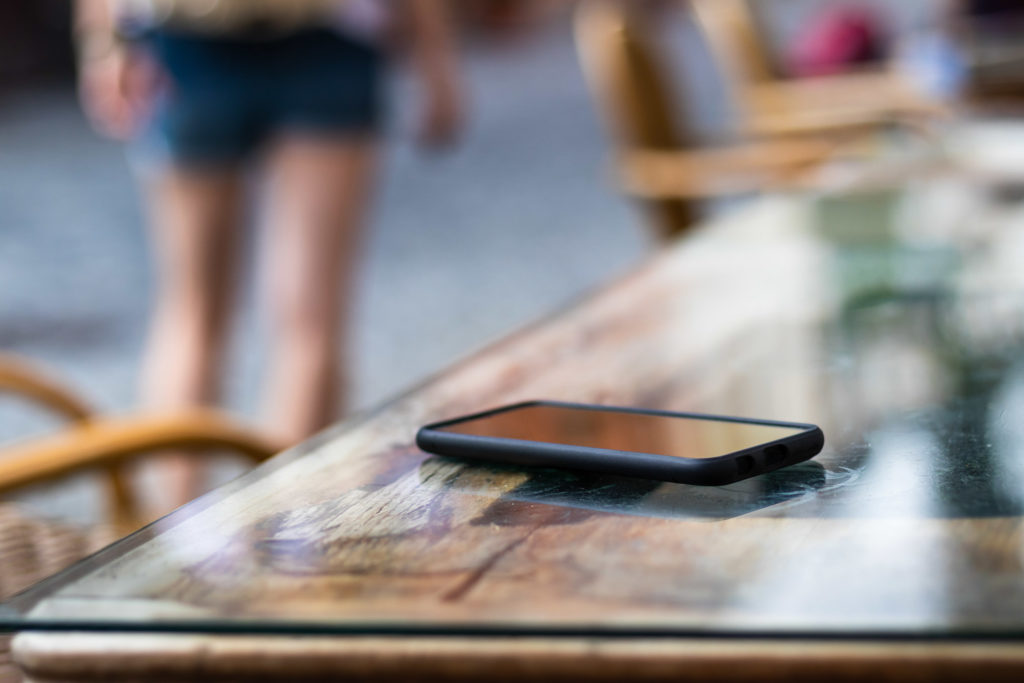
While there are virtual safeguards that can prevent you from becoming a victim of an attack, there are also some physical cybersecurity measures you should be taking as well. Never let your device out of your sight. It sounds like a very basic, common-sense thing, but you’d be shocked at how many occasions I’ve seen people leave unattended devices in hotels, restaurants, coffee shops, or other public places. Don’t leave your phone on the table when you aren’t using it; keep it in your pocket.
When I was living in Vietnam, on several occasions I saw someone walk by a cafe and grab a phone that had been left unattended on a table. In addition, when you leave your hotel room, make sure you don’t leave valuable or sensitive material exposed. If you do have to leave devices behind in the room, always make sure they’re turned off, password-protected, and placed out of sight.
USB Condoms to Prevent “Juice Jacking”
One of the most common mistakes I see being made while traveling is something most people have never heard of — not using a USB condom. A what??? Yep. A digital condom. Every time you plug in devices such as smartphones that use the same port for data and charging, there is an exchange of information. Airports, public spaces, and even cafes are prime spots for this kind of attack — basically, everywhere you go while traveling. An attacker can subtly modify any port to house malware that’ll penetrate your device once you connect it with a USB cable. The malware will affect your device’s performance, but more crucially, it can steal your texts, emails, photos, and other data you probably don’t want to give out to strangers.
So how does the USB condom work? It doesn’t have data pins, thus automatically blocking data transfer should you use an unsecured public USB socket. They aren’t expensive and can be easily incorporated into your cyber protection regimen. Just leave one connected to the end of your USB charging cable, so it’ll already be in place when you need it.
Phones
Your smartphone is probably as essential to your travels as your passport. And that’s no exaggeration. Think about it: It’s your currency converter, personal translator, camera, and navigator. It’s how you stay in touch with friends, and probably the first thing you reach for if you get into trouble. I usually have at least two backup “burner” phones with me at all times, just in case. I really like to pick up older unlocked Apple phones, so I can simply plug in local prepaid SIM cards instead of using a stateside plan. It’s cheaper, especially when you’re not relying on free Wi-Fi. You should always sterilize your phone from any personal information, like financial info.
A cheap cybersecurity travel hack I implement is an aluminum-foil-lined Pelican case, just large enough to fit a few phones inside. Foil is easily sourced wherever you’re traveling. Tear out two layers of run-of-the-mill oven aluminum foil and wrap the inside. This should work as an improvised Faraday cage, blocking signal ingress and egress to the devices. I also put my bank and credit cards in here to protect from skimming.
The smartphone is an amazing multi-tool, and there are established apps that can help you navigate danger. I put together a quick list of six essential apps that I recommend you download before you start your adventures.
1. Google Translate: I can’t stress this enough to aid in communication during your travels. It has text and audio translation functions, and it can be used with your camera to instantly scan and interpret signs, menus, and more.
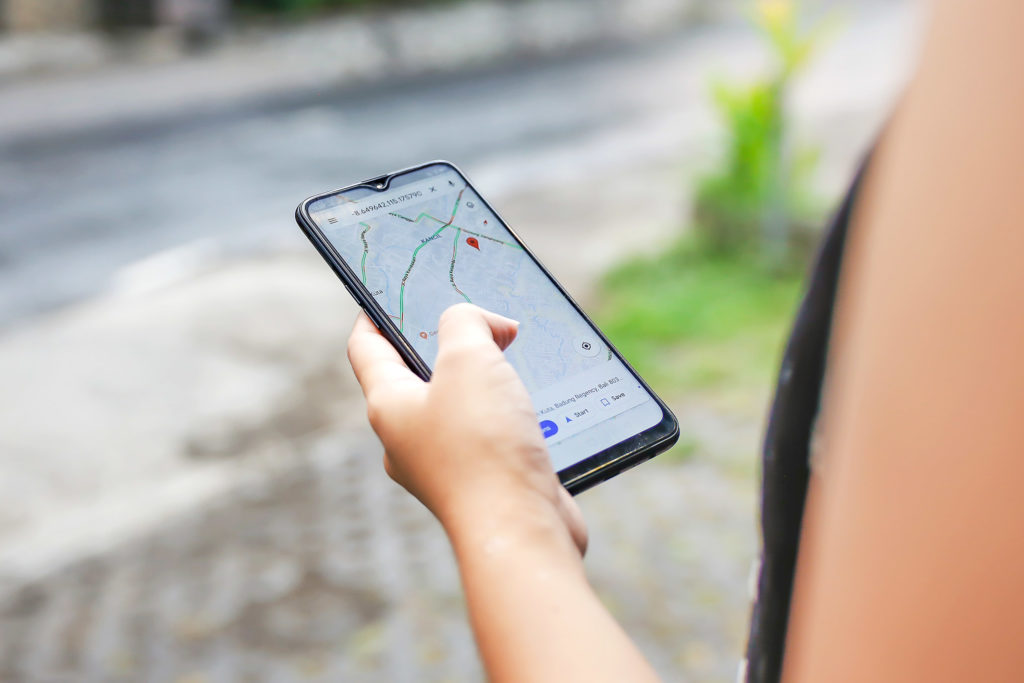
2. Google Maps: I download an offline map for any large city I plan to visit, and also the smaller neighborhoods. I then study streets and landmarks, so I have an understanding of the area, with routes to hospitals, public transportation, police stations, and embassies.
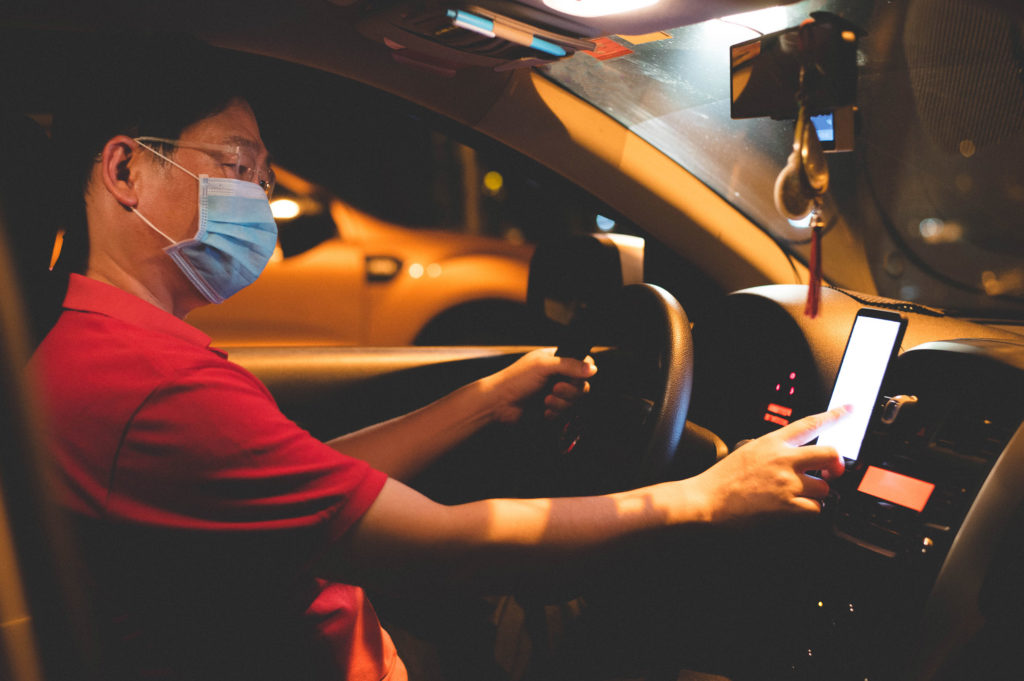
3. Grab or Uber: These apps will save you literally hundreds of dollars and negate the hassle of dealing with shady cab drivers. Bonus tip: Attach your credit card and pay through the app to avoid direct cash exchange with strangers.
4. Agoda or another hotel location app: This is a great money and timesaver. However, once I get a quote, I will call the hotel and see if they can do better. A lot of times they can.
5. Facebook: I hate Facebook. Nevertheless, it’s not just for getting harassed by exes and people you used to go to high school with who are trying to sell you weight-loss tea. It’s a fantastic tool for networking in a new city. Look up traveler and expat groups ahead of time wherever you’re planning to visit. They’ll help you discover local hangouts, events, live music, and places to eat and drink. They can also help you become aware of dangerous areas and common scams.
6. WhatsApp: You can use this to talk and text on a data plan all over the world.
It’s important to not be dependent on technology and to discover things on your own. However, at the same time, you should be using technology to maximize your time and experience. These apps will do just that.
Disable Connectivity
The majority of phones are set to automatically connect to Wi-Fi and Bluetooth. This setting is huge cybersecurity risk. Your phone will automatically connect to any nearby open Wi-Fi network, leaving it vulnerable to attack. The same applies for Bluetooth connectivity. Anyone can automatically connect to your phone without your knowledge and hack it, just by being in your relative proximity. This isn’t a difficult issue to address, just change the settings on your phone until you need to use these features.
Public Wi-Fi
The allure of public Wi-Fi is undeniable, be it an airport or coffee shop. However, the harsh reality is that people intending to steal personal information and identities create free access points that resemble trustworthy networks. They can name this network anything, making small changes to a letter or number so it still resembles the real network. As a cybersecurity general rule of thumb, I never connect to Wi-Fi when traveling. I just use the phone’s data connection instead.
When traveling internationally, internet cafes are ubiquitous. Always be skeptical of security measures at any unfamiliar or public place. Never log in to personal or financial accounts at these public access points. They can have keystroke logging software and general malware as well. When using these computers, you always want to operate under the assumption that the information you’re accessing can be seen by someone else.
Location Sharing
In this age of social media, if you don’t share a picture, it didn’t happen. However, “sharing” a picture could put you at risk of unwanted attention from strangers or social media followers, and even put your home or valuables in jeopardy. If you’re posting that you’re in some exotic location, you’re advertising to predators where you are and where you’re not. I advise waiting at least an hour or two after you’ve left a location, or better yet, a day or two. You can still stay in touch and connected without letting people know your exact location in real time.
RFID
Skimming is a very popular form of digital theft whereby credit cards can be read and duplicated at the point of sale, just by inserting, swiping, or waving over a contactless reader for a routine purchase. Make sure you have RFID sleeves on all your credit and bank cards any time you’re not using them. This simple and inexpensive tip will help to keep your cards from being compromised by criminals in public.
Passwords
This was a tough one I had problems with until I had my identity stolen. Now, I’m extremely vigilant in using different, complex passwords on all my devices. Remember that longer and random is better. Swapping a letter with a number — for example Gr33nland — is not any more secure than the original, because a modern password cracker can check the different permutations in seconds. However, gibberish passwords are tough to remember, so I use a long passphrase with a lot of words put together — for example, heyyoustoptryingtotakemybeer. Avoid common quotes and catchphrases like showmethemoney or youcanthandlethetruth. Always use different passwords for different devices. A password manager can help you to keep track.
Electronic pitfalls are everywhere, but they’re especially common when you’re traveling and preoccupied with other tasks. It’s better to take these small measures to protect yourself rather than fall victim. The consequences can reverberate for weeks and even years if identity theft or bank fraud is involved. By following these steps and staying vigilant, you’ll significantly reduce your chances of being a soft target.
About the Author
Micah Dalton is a global adventurer, photographer, and travel writer. Told at a very young age by his grandmother that he had “gypsy blood,” he hasn’t stayed in one spot since. A bona fide travel addict, his adventures have taken him to over 35 countries and all seven continents. He’s studied Buddhism in Thailand, knife fighting with a South African master, motorbiked the jungles of Vietnam, and hitchhiked all across America. After over a decade of dangerous adventure travel and specialized training with Ed Calderon and other high-level instructors, Dalton has now distilled his experiences into a series of travel and safety compositions for major publications. Come join the adventure on Instagram at @classic_mcqueen.
More on Security in the Digital World
What if you are the victim of Doxing? Security in the Digital Age.
We at CANCON and Offgrid are deeply saddened by the devastation and loss experienced by communities impacted by Hurricane Helene. We know the road to recovery can be long and challenging, and to support those affected, we’re partnering with Silencer Central to offer a limited number of free tickets to CANCON Carolinas on Friday, November 8th. This offer is available to those from the hardest-hit areas, giving local residents a chance to step away and join us for a day focused on resilience and readiness.
To claim a free ticket, eligible attendees from affected areas should follow these steps:
Step 1: Eligibility Check
To ensure these tickets reach those who need them most, attendees must present a government-issued ID showing residency in one of the following zip codes:
27830
28801
28720
28735
28778
Only government-issued IDs with addresses in these zip codes will be accepted. Please bring your ID to the event as it will be verified at the gate.
Click ‘Have an access key?’ and enter the code HELENERELIEF in the box.
Click the link and enter the code HELENERELIEF into the box that appears. Click the UNLOCK button. A free Hurricane Helene ticket for Friday, November 8th should now be available to you.
After unlocking, set the Hurricane Helene ticket dropdown to ‘1’ and proceed to checkout.
You will receive your ticket via email. Be sure to bring your digital ticket along with your ID to CANCON in Clinton, South Carolina.
Please note: only one free ticket per eligible resident will be issued. We hope this small gesture can bring some light to your day and serve as a reminder of the strength within the preparedness community.
We look forward to standing together at CANCON, where Offgrid and our partner Silencer Central will highlight the knowledge, tools, and community that support resilience in trying times.
Fall is an exciting time of year, the weather starts to cool down, we get a coloring show of leaves changing here in New England, and it’s when the Georgia Bushcraft Fall Gathering happens! The Fall Gathering is the annual event where bushcraft and wilderness survival enthusiasts get together for a 3-day camp out at the Georgia Bushcraft Property in Watkinsville Georgia.
If getting together with some like-minded bushcraft and survival enthusiasts wasn’t enough, the good folks at Georgia Bushcraft ensure there is always something to do by hosting over 100 classes throughout the weekend from many of the industry’s top instructors including, but not limited to, Craig Caudill of Nature Reliance, Joe Flowers of Bushcraft Global, Jacks Genega of Wildcard Wilderness and Dr. Mark “Merriwether” Vorderbruggen of Foraging Texas. If you want to check out some of the best bushcraft and wilderness survival gear out there, head on over to the exhibitor area where you can see, handle, and purchase a wide assortment of knives, bags, pouches and more from the 100+ different makers and manufacturers in attendance.
Find Out More About Georgia Bushcraft
Georgia Bushcraft is much more than just a Fall Gathering! They host classes and events all year long that attract both local attendees and people from all over the country.
Many people mistakenly think that bushcraft and wilderness survival are the same thing. While there are common elements, bushcraft is more of the art and skill of surviving from the resources found from the land. Many bushcraft skill subsets revolve around crafting tools, shelter, and even cooking equipment from foraged materials. Ancestral skills also play a key role in bushcraft such as making friction fires. It is common to see true bushcraft experts have very minimal gear kits, with just the basics to be able to process the natural materials they need to build their entire camp.
I am far from a bushcraft expert; I continue to learn and practice bushcraft skills to enhance my wilderness survival savvy. The value of these skills are not to be underestimated in a wilderness survival scenario. Having the ability to live off the natural resources found on the land can easily make an emergency situation much more manageable.
Bushcraft Gear for the 2024 Fall Gathering
Now that we’ve talked about what the Georgia Bushcraft Fall Gathering is all about, lets dive into some of the gear I’m bringing along with me this year. I always try to bring a mix of reliable favorites and some brand-new gear I want to test out! While much of this exists in my standard wilderness survival and bushcraft kits, it has been modified for a more controlled environment. Much of the gear you see here will eventually have full reviews written, so enjoy the preview of what’s coming up!
Above: The TM Hunt M18 is an all purpose outdoor and bushcraft tool.
T.M Hunt Custom Knives M18
This handmade, beast of a knife is a new addition to my line-up that I have had my eyes on for years! Calling the M18 a knife is really an understatement; it is an all-purpose bladed wilderness tool! The M18 is capable of chopping, batoning, and shaving wood, both for wilderness tasks and general woodworking.
The shape lends itself well to digging tasks and the thick 01 high carbon steel blade will have no reservations when it comes to prying tasks. The comfortable handle, multiple jimping points and the hole at the end of the blade open a host of potential detailed work options. The T.M Hunt M18 truly presents itself as a jack of all trades outdoor and bushcraft tool!
Above: The Knives by Nuge Primitive Wicket is a compact knife built for outdoor use.
Knives By Nuge Primitive Wicket XL
The Wicket XL is based on KBN’s best-selling Wicket. While the original Wicket is a handy neck knife the XL upsizes the design to give it a full-size handle while still being compact. The Wicket XL is compact enough that it fits perfectly in your pocket with the available Badger Claw Outfitters Sheath. Despite the small size this fixed blade is all business!
The primitive model is an excellent bushcraft knife featuring a scandi grind 80CRV2 high carbon steel blade that is ideal for all your wood processing and foraging tasks. The spine is ground to 90 degrees making it ideal for striking a ferro rod or performing scraping tasks. The Wicket XL also works well for EDC thanks to the size, ergonomics, and excellent design.
Specs
Overall Length: 6.5 Inches
Blade Length: 3 Inches
Blade Steel: 80CRV2 High Carbon
Handle Material: G10, Micarta, or Jute Wrap
Sheath: Kydex of Badger Claw Outfitters Pocket Sheath
Above: The Woods Monkey Banana Peel is a versatile friction folder
The Woods Monkey Banana Peel
The Woods Monkey is a division of LT Wright Handmade Knives that hit the scene a few years ago with the Banana Peel Modular Friction Folder. When you see the knife in a closed position the name is obvious, it looks like a banana! Don’t let the name fool you, this is a serious bushcraft tool! Being a friction folder, it is a remarkably straightforward design with no locking mechanisms.
Minimal parts means minimal risk of failure due to breakage or gunk getting inside the frame. While the knife doesn’t lock the design uses your own hand grip to keep the blade from closing during use. This design works so well, it is one of the few knives that I have never accidently cut myself using. The modular part allows you to swap out different style blades or handle scales in minutes to suit your needs!
Specs:
Overall Length: 6.9″
Blade Length: 2.5″
Blade Steel: Varies
Handle Material: Varies
Sheath: Optional kydex neck sheath or PNWBUSHCRAFT Slip
Above: The Tuff Possum Shackleton EDC Satchel is a versatile bag that can easily switch between outdoor and EDC duty.
Tuff Possum Shackleton EDC Satchel
The Tuff Possum Shackleton is a modular shoulder satchel style bag that is big enough to carry all your minimalist bushcraft gear and can quickly convert to double duty as an EDC gear bag if needed! The Shackleton has a single front flap that is held closed with a durable polymer cobra buckle. The buckle itself is attached by adjustable webbing so you can loosen it for a heavy gear load out or cinch it tighter when you have less in the bag.
The inside has two large pockets that can accommodate nice sized pouches. The rear wall is loop lined laser cut MOLLE webbing so you have a few different mounting options for gear organization. The outside of the bag has a deep pocket on either, which is perfect for storing gear you want quick access to. For Georgia Bushcraft this is a great bag choice because it keeps everything I need at hand and allows me to keep as little as possible in my pockets which greatly increase comfort when doing a lot of crouching a kneeling. The next few pieces of bushcraft and survival gear will cover what I plan to carry in the bag during my trip.
Specs
Dimensions: 12 Inches wide x 9 Inches tall x 4 inches deep
Above: The Tuff Possum PSK pouch is highly water-resistant and the bright orange material will be hard to lose!
Personal Survival Kit
My personal survival kit is stored in a bright orange Tuff Possum PSK Pouch. The pouch is made of XPAC material which is waterproof and has a highly water resistant YKK zipper. My personal survival kit is designed for emergencies, so if all my other resources are used up and some of my tools are lost or damaged, I can turn to this kit for added Bushcraft gear. The highly water-resistant nature of the pouch ensures my emergency gear is protected from the elements until I need them! For more info on what’s inside my personal survival pouch, check out my Mini Survival Kit article as it is essentially the same type of equipment just in larger quantities.
Above: the Tuff Possum Med pouch features a glow in the dark reflective cross to make it easier to locate in low visibility situations.
Tuff Possum Med Pouch
I carry basic first aid and bleed stop equipment with me. Any outdoor activity or event is bound to result in some kind of minor injury. Last Fall Gathering, I managed to clip the tip of my thumb with a hatchet within 30 minutes. I was able to keep the wound clean and dry thanks to having first aid supplies. Beyond the basics, I like to keep allergy medication, basic anti-inflammatory medication, electrolytes, burn gel, and sting relief in the pouch. For major bleeds, I keep quick clot sponges and a high-quality tourniquet in the kit just in case!
Above: The Pocket Boy is compact and functional bushcraft tool.
Silky Pocket Boy Folding Saw
Processing wood is a top bushcraft priority. The Pocket Boy is a compact and reliable folding saw. While I can use my M18 to hack away at a small log or thick branch, sometimes using a saw is easier and expends far less energy. While I’m not as concerned with energy expenditure in a controlled environment like the Fall Gathering, in a real wilderness survival situation every calorie counts!
Above: The Black Beard Fire Ferro Rod is part of a robust line-up of easy to use fire starting gear
Fire Starting Gear
Fire is a priority when camping or in any long-term wilderness survival situation. I keep a Bic Lighter, a Ferro Rod, and some Black Beard Fire Plugs in my kit. This is everything I need to get a fire started with the help of foraged natural materials.
Above: The Nite Ize T8R features a water-resistant and dust-resistant body to ensure reliability in the outdoors.
Nite Ize Inova T8R Flashlight
The T8R is one of my go-to outdoor flashlights. With 762 max lumens, an 875-foot beam throw, and the option to switch between red and white light combined with a durable water and dust resistant body makes this an ideal light. For an extended outdoor trip. The light has a max run time of 30 hours on low, with nearly 4 hours on high and can be easily recharged in the field with a battery pack.
Above: Badger Claw Outfitter produces high quality, American made leather work gloves.
Badger Claw Outfitters Leather Gloves
A good pair of leather work gloves are a life saver when doing any kind of outdoor work! keeping your hands protected from injury and reducing hand fatigue. Reduced fatigue will keep you working longer and more comfortably. Avoiding injuries can ensure that you can keep working in an emergency. It can also reduce the use of first aid supplies and prevent a costly medical bill when you get home!
Above: The Wazoo Gear Foraging Bandana can serve multiple purposes when outdoors.
Wazoo Foraging Bandana
A bandana has many potential uses from protecting your head, neck, or face from the elements to making a quick carry bag. The Wazoo Foraging Bandana has useful information on commonly found edible and medicinal plants which can be used as a quick reference guide or a teaching tool if you have more foraging experience.
Above: The ability to take notes when in the field is highly underrated!
Notebook and Pen
The ability to take notes is one of the most underrated tasks when in any off-grid situation. Sure, I could use my phone, but pen and paper doesn’t run out of battery! I carry a water resistant Field Notes book and Steel Zebra F-701 Pen.
Above: Tissues are the unsung hero of off grid excursions!
Satchel Odds and Ends
Tissues are the unsung hero of an off grid or outdoor situation, a leaf will work, but it’s not pleasant! Shop rags are always helpful for quick clean up tasks. Battery packs and charging cables can keep your small electronics going!
Above: The PNWBUSHCRAFT Foraging Pouch and EDC Travel Tray 3.0 along with a Wazoo Spark Necklace, Fenix PD25R, and Outdoor Element Sparky.
On Body Bushcraft Gear
I try to keep my pockets relatively free during an extended outdoor trip. It goes a long way for personal comfort and mobility. In a real wilderness scenario, I would aim to keep more on me. Becoming separated from your bag or unable to get back to camp is something we should always account for. In a controlled environment I am comfortable keeping it minimal, most of these items are here for redundancy.
Basic Tools and Organization:Leatherman PS Style, Sagewood Gear Pocket Strop, as well as a Foraging Pouch and EDC Travel Tray 3.0 from PNWBUHCRAFT
More To Come…
This about covers my current bushcraft gear and wilderness survival kit content for the trip to the Georgia Bushcraft Fall Gathering. Next week I will cover my camp gear set up before heading off! If you happen to be in the Watkinsville, Georgia area November 8th – 10th come on down and say hello! I’m happy to show off any of this gear in person or chat about what’s going on at Recoil Offgrid. It is also a fantastic opportunity to attend a class, check out vendors, or hang out with like-minded enthusiasts. Day passes and weekend camping passes are still available!
In a world brimming with unforeseen challenges, being prepared for the unknown is essential. The military thinks so too. But even so, does the military plan for every scenario, even seemingly fictitious ones? An intriguing document, CONPLAN 8888, available on the U.S. Strategic Command’s website, piques the interest of those interested in contemplating unforeseen threats. The document is not your typical governmental plan, in that it explores a strategy to counter a hypothetical zombie apocalypse. Though perhaps on the more fantastical side of preparedness, the document reveals serious insights into how defense strategies are conceptualized. It also subtly underscores the importance of readiness against unanticipated threats.
DISCLAIMER: Although fictitious, this article contains videos and images that viewers may find disturbing.
What Is CONPLAN 8888?
While reviewing Concept of Operations Plan (CONPLAN) 8888, a series of notable points emerge. The narrative begins by setting the stage for a fictitious zombie apocalypse, painting various scenarios of zombie-human interactions. The document extensively covers the operational concepts, tasks, and coordinating instructions to tackle such an improbable menace. It melds humor with serious undertones of strategizing against unforeseen threats, making it an intriguing read for anyone vested in emergency preparedness.
Several zombie variants are discussed in CONPLAN 8888, and although they are fictitious in nature, it could be argued that there are real-world parallels. Pathogen bearing zombies will definitely resonate with humanities recent collective experience with pandemics, and irradiated zombies with strike a chord with those dealing with disaster aftermath in places like Chernobyl or Fukushima. However, if you thought the only types of zombies that will emerge will be the “fast” or “slow” types, you would be mistaken. CONPLAN 8888 is so thorough, it identifies numerous zombie threats and, what humanity might be up against.
Above: AI depiction of military generals planning how to survive the zombie apocalypse.
Zombie Threat Summary
The following zombie threats are taken directly from CONPLAN 8888:
Pathogenic Zombies (PZ): PZ’s are zombie life forms created after an organism is infected by a virus or bacteria or some other form of contagion.
Above: AI generated depiction of a pathogenic zombie.
Radiation Zombies (RZ): RZ’s are zombie life forms created after an organism is infected by a extreme dosage of electromagnetic and/or particle radiation.
Above: AI depiction of a radiation zombie.
Evil Magic Zombies (EMZ): EMZ’s are zombie life forms created via some form of occult experimentation in what might otherwise be referred to as “evil magic”.
Above: AI depiction of an evil magic zombie.
Space Zombies (SZ): SZ’s are zombie life forms originating from space or created by toxic contamination of the earth environment via some form of extra-terrestrial toxin or radiation.
Above: AI depiction of a space zombie.
Weaponized Zombies (WZ): WZ’s are zombie life forms deliberately created via bio/bio-mechanical engineering for the purpose of being employed as weapons.
Above: AI depiction of a weaponized zombie.
Symbiant-Induced Zombies (SIZ): SIZ’s are zombie life forms originating from the introduction of a symbiant life form into an otherwise healthy host Although the symptoms of symbiant zombieism is similar in most regards to pathogenic zombeism, the symbiant does not kill the host organism quickly, or at all.
Above: AI depiction of a symbiant-induced zombie.
Vegetarian Zombies (VZ): VZ’s are zombie life forms originating from any cause but pose no direct threat to humans because they only eat plant life.
Above: AI depiction of a vegetarian zombie.
Chicken Zombies (CZ): Although it sounds ridiculous, this is actually the only proven class of zombie that actually exists.
Above: AI depiction of a chicken zombie.
Potential Military Actions
In the event of a zombie incursion, CONPLAN 8888 suggests several phases for global governments and militaries to implement. The phase descriptions within the plan are vague, but his allows for military planners to adapt to a zombie threat in an agile way. There are six phases in total, (Phase 0 through Phase 5), and each phase suggestions both offensive and defensive actions, as well as contingencies for civil authorities. On a note unrelated to the topic of surviving a zombie apocalypse, this type of planning mirrors how military strategists deal with real world scenarios, and you may notice similarities to how threats and conflicts are handled on a global scale even today.
Phase 0: Shape Offense – Conduct normal combat operations training. Ensure forces conduct annual Hazardous Materials (HAZMAT) and Continuity Of Operations (COOP) training. Defense – Conduct general zombie awareness training. Ensure readiness of Chemical, Biological, Radiological, Nuclear, and Explosives (CBRNE) equipment. Monitor vectors of zombie contamination for increased threat. Support to Civil Authorities – Form Joint Interagency Contingency Group (JIACG), to ensure contingency plans are synchronized with other federal, state and tribal agencies.
Phase 1: Deter Offense – Conduct large scale training to demonstrate ability to decisively target and negate zombie-creating pathogens, toxins or similar capabilities developed by nations states, or large corporations to terrorist/criminal groups. Defense – Zombies cannot be deterred themselves. Conduct large scale training to demonstrate ability to survive and operate in a toxic/contaminated environment in order to deter nations states from pursuing development or deployment of zombies. Creating pathogens, toxins or similar capabilities developed by nations states, or large corporations to terrorist/criminal groups. Support to Civil Authorities – As authorized by the President of the United States (POTUS) and the Secretary of Defense (SECDEF), initiate intelligence sharing and provide technical advisory services to federal, state and tribal agencies. Provide Intelligence Surveillance and Reconnaissance (ISR) assistance to the Department of Homeland Security (DHS) to identify and curtail migration of lifeforms and//or toxic materials from areas where zombie-related disease vectors originate.
Above: AI depiction of the military fighting the zombie horde in an urban center.
Phase 2: Seize Initiative Offense – If necessary, begin limited scale military operations to negate zombie threat. Defense – Recall all personnel to duty stations. Begin fortification of all operating locations and initiate distribution of CBRNE protection equipment. Activate COOP Plans. Place deployable command and control capabilities on alert. Support to Civil Authorities – On order form POTUS or SECDEF, provide security to civilian areas, evacuation zones, and assist other federal, state, and tribal agencies with the surveillance of and enforcement of quarantine areas.
Phase 3: Dominate Offense – Issue orders for defensive forces to kill all non-human life on sight. Initiate bomber and missile strikes against targeted sources of zombie infection, and zombie support infrastructure using all available forces. Ensure all zombie corpses are immolated. Defense – Lock down all operating locations for 30 days. Assume Mission Oriented Protective Posture (MOPP) 2 inside all work stations and direct MOPP-4 for all personnel who venture outside fortified positions. Support to Civil Authorities – Be prepared to participate in “render-safe” operations within the Continental United States (CONUS), U.S. territories, or other foreign territories as directed by POTUS and SECDEF.
Phase 4: Stabilize Offense – Target all main body and hold out vectors of zombie influence and contagion using all avaliable military capabilities. Continue all actions from previous phase Defense – Deploy recon teams after D+30 to ascertain general safety of environment near locations for human habitation. Execute a counter-zombie ISR plan to identify holdout pockets of zombie resistance. Support to Civil Authorities – Provide support to follow-on “render-safe” operations in areas contaminated by zombie-inducing pathogens, toxins, magic, or other malign influence as directed by POTUS and SECDEF.
Phase 5: Restore Civil Authority Offense – Reconstitute combat capabilities at Offutt, Whiteman Airforce Base’s, Vanderberg Space Force Base and Ft. Meade. Prepare to redeploy the forces to attack surviving zombie holdouts. Defense – N/A Support to Civil Authorities – As directed by POTUS and SECDEF, provide support to federal, state, and tribal agencies efforts to restore basic services in zombie-related disaster areas.
Assumptions and Fallacies
CONPLAN 8888 goes on to list what the planners believed are going to be the conditions under which the zombies will be affected. Some include the fact that the threat will grow larger with each human death, since their body will be incorporated into the zombie horde. Planners also recognize that supply lines and resources could be inhibited. They even had the foresight to recognize that some zombies, such as the EMZ’s, may not be destroyed by fire (the preferred method to completely eradicate the threat).
There are a few glaring oversights in these assumptions, including the nature of viruses. Some viruses have long incubation periods. Symptoms of malaria can manifest as long as 30 days after being infected. If humanity had to face off against a PZ threat, huge swaths of the population could quickly become infected without anyone knowing before it’s too late. In this case, pre-emptive identification of the pathogen would be crucial if the human race wanted survive.
Above: AI depiction of an aerial view of a zombie vs. military battle.
Using kinetic operations against zombies may also be a poor choice. If organic matter was dispersed with munitions, or incinerated fall-out from destroying zombie corpses was spread on atmospheric currents, that in itself could have disastrous unintended consequences. Then there are infinite unknowns of what capabilities space zombies or EMZ’s might have.
Conclusion
Examining CONPLAN 8888 closer unveils a broader theme – the imperative of imaginative thinking in the realm of defense and survival strategies. The whimsy of the plan ironically aligns with the current wave of interest in dystopian scenarios, fueled further by the global pandemic. The document, though created pre-pandemic, resonates with the modern-day emphasis on preparedness against novel and unexpected threats. While zombies remain confined to fiction, the exercise reflects the military’s creativity in devising plans for any contingency, no matter how bizarre. CONPLAN 8888 not-so-subtly imparts a lesson in thinking outside conventional frameworks when devising survival strategies, a tenet crucial in today’s unpredictable world.
FAQ
Q: What is the Conop 8888 plan? A:CONPLAN 8888, also known as Counter-Zombie Dominance, is a U.S. Department of Defense Strategic Command CONOP document that describes a plan for the United States and its military defending against zombies.
Q: What are the chances of a zombie outbreak? A:The possibility of a human zombie pandemic is extremely unlikely but, as said by the CDC, it always pays to be prepared.
Q: Will zombies come in future? A: They are fictional, like werewolves and vampires, so one should not worry about a zombie apocalypse. Marc Lawrence, an author, said “there is zero possibility of a zombie apocalypse due to necrosis.” Corpses would rot away within a few weeks, if not sooner.
Read More
Don’t forget to subscribe to Recoil Offgrid’s free newsletter for more content like this.
The ZT 0308 is currently the largest and most robust folding knife in the Zero Tolerance line-up. I ordered my first ZT 0308 shortly after it was initially released in 2020 with some slick customization from USA Made Blade and it has been a mainstay in my daily carry rotation since then. When the Scott over at USA Made Blade gave me the opportunity to take a look at the newest variation, the ZT 0308CF, I couldn’t say no!
About Zero Tolerance Knives
Zero Tolerance Knives, commonly known as ZT Knives, started back in 2006. Their goal was to produce hard use knives for first responders, law enforcement officers, and military personnel. The premium overbuilt knives drew the attention of knife users who wanted a tool they could rely on at work or in the field.
Over the next few years ZT continued producing hard use knives designed for professionals, but they also started producing smaller folding knives that had greater appeal to EDC knife users. While these new knives were not as large as many of their counter parts, they continued to be made in the USA with the same exacting standards and overbuilt using premium materials.
Above: The Lock Side of the ZT 0308CF
ZT 0308 Design
The 0300 Series of Zero Tolerance knives has long been known to fit into ZT’s design origins, big, overbuilt, and tough. The ZT 0308 is no exception to this rule! This design first hit the market back in 2020 and it featured a tan G10 scale, titanium frame, and Premium CPM-20CV blade steel.
The 0308 pivot runs on KVT ball bearings and snaps open thanks to a low-profile flipper tab. Once deployed the blade is held securely in place with a steel reinforced titanium lock bar. The drop point blade provides a robust tip and excellent belly giving it excellent slicing capabilities.
Both the titanium lock side and the scale on the “show side” have a deep laser engraved texture pattern that provides excellent grip, especially beneficial when working in wet conditions. There is a ramp on the spine which provides a comfortable place for your fingers to sit when using the knife. The first third of the ramp has jimping provide traction to reduce the possibility of your finger slipping off. The flipper tab also has jimping to ensure there is no finger slip when attempting to open the knife.
Since the original release several other versions came out, including one of the models we will be looking at Factory Special Series 0308CF. This limited run adds a carbon fiber scale, a heavily stonewashed titanium frame, a M390 super steel blade, and an updated clip design.
ZT 0308 Spec Sheet
Overall Length: 8.9 inches
Blade Length: 3.75 inches
Blade Thickness: .156 inches
Weight: 8–6.9 Ounces
Blade Steel: CPM 20CV, M390
Blade Shape: Drop Point
Lock Type: Frame lock with steel reinforced lock bar.
Scale Material: G10 or Carbon Fiber
Liners: Steel liner below the scale
Clip Info: Clip mounted on titanium frame side, can be reversed on the stock scale.
Price: $376-$420
Made In: Oregon, USA
The ZT 0308CF with some of my for urban oriented EDC Gear including the Fenix PD25R, Hinderer Extreme Duty Pen, Tuff Possum Bogata V2 Picks, and ITS Tactical Slim Line Pouch with First Aid Kit.
EDC Performance
Despite its beefy size the ZT 0308 performs very well in daily tasks. The blades flat grind performs very well when it comes to slicing tasks. It easily cuts through cardboard when opening or breaking down boxes, those little plastic zip ties often found in product packaging present no challenge, and the robust tip is very helpful when it comes to getting into those hard plastic packages that I know we all hate!
While cardboard is notorious for dulling knife blades, the edge holds up well through consistent use thanks to the premium CPM-20CV super steel. When it come’s to edge retention 20CV is one of the best steel options on the market, which also makes it a little more difficult to sharpen, but with a quality sharpening system it is easy enough for any one to do with a little practice.
Like most stainless steels used in folding knives, 20CV is not as tough as many of the high carbon or stainless steels used in fixed blades, but it is still a tough steel that can easily handle typical daily tasks and more with no concerns of breaking.
Above: My original ZT 0308 is a staple in my outdoor gear line up, it is pictured here with my Wazoo Spark Necklace, Tuff Possum Med Pouch, Badger Claw Outfitter Gloves, and Knives by Nuge Big Boi.
Outdoor Performance
When it comes to folding knives, many are not built to hold up to the rigors of extensive wilderness use. Fortunately, The ZT0308 does not fall into that category and is very capable in the great outdoors.
Being it is a very capable slicer, the ZT 0308 performs very well in my foraging tasks and has served me well when doing camp food prep. The blade easily cuts through most plant and animal material with ease. The tip of the 0308 does a good job piercing and has enough “meat” behind it to not be fragile. The blades belly makes the 0308 very capable of processing a fresh caught fish or animal possible.
The corrosion resistance of 20CV is great for plant and animal processing tasks. Plant and animal materials can be highly corrosive and cause rust build-up if not thoroughly cleaned shortly after use, especially with high carbon steel. However, with 20CV you have some wiggle room and if you don’t clean it right away there is less of a chance of harmful rust occurring.
While a folding knife would be my first choice in processing an animal because the post processing maintenance would require disassembly to remove blood and tissue from the pivot and interior frame, I like knowing that my folding knife could do the job should my fixed blade become lost or damaged.
When it comes to wood processing tasks the ZT 0308 does an admirable job in basic fire prep essentials. Breaking down small twigs and branches for tinder and kindling was no problem. I have no issues doing minor carving tasks, especially when working with softer wood like pine and cedar. While I normally wouldn’t use a folding knife for prying anything, the ZT 0308 does well at both prying bark and bracket fungi off fallen trees.
Ultimately the 0308 won’t replace a dedicated fixed blade that can perform tasks like chopping or batoning of wood, it makes a great solo companion for less labor-intensive trips to the woods and an excellent back up knife when carrying a larger fixed blade.
Above: The pocket clip of the original 0308 has very little rise making it somewhat difficult to get in in an out of your pocket. This has been improved in the ZT 0308CF.
Carry System
The ZT 0308 is a big knife and has considerable heft to it. It carries well in heavy weight pants like jeans, work pants, or tactical pants. Light weight pants like “swishy” pants or basketball shorts make carrying comfortably it a bit more challenging, but not impossible.
The Clip on the original 0308 sits almost flat against the frame making it difficult to negotiate over reinforced pockets commonly found on work and tactical pants. The clip would sometimes catch slightly when removing it from the pocket, this is annoying but far from a deal-breaker. The clip has been significantly improved in the ZT0308CF model, and even if you have the original there are a ton of aftermarket clip options available if you wanted to switch.
Above: Jimping on the thumb ramp of both the ZT 0308 and ZT 0308CF helps prevent finger slip when using the knife.
Comfort in Use
In hand the ZT 0308 feels very good. The frame has a great shape that allows a solid full hand hammer grip for my large glove sized hands with plenty of left over handle for those of you who have sasquatch sized hands. I did not experience any significant hot spots during use and while that flat clip may have been annoying in the pocket, it does not dig into your hand at all during use, which to me makes it a worthwhile trade off.
The Thumb Ramp on the 0308 is incredibly well done. It is a comfortable place to rest your thumb when doing push cuts or want a little more control. The ramp goes up to about a third of the total blade giving you more than enough room to rest your index finger on when you are looking for the most blade control when doing detailed cuts.
Above: The Steel reinforced lock bar insert prevents wear on the titanium lock bar.
Safety
When it comes to hard using a folding knife, my biggest concern is lock slip. If the lock slip during use this can cause the blade to fall into closing position, unfortunately that is where your fingers usually are! In all my years of use I am happy to report that my ZT 0308 has never once experienced lock slip!
The jimping on the spine and flipper tab provide good purchase without being so aggressive that it hurts. Having the jimping on the flipper tab is a great design choice as the 0308 has a heavy detent that requires heavy push to open. The jimping ensures that your finger isn’t slipping off the flipper tab leading to a failed or partial deployment.
The textured grip on the handle scale and titanium frame helps provide a positive grip while in use, especially when wet and the flipper tab acts as a blade guard when opened. Both factors play a key role in safety during hard use tasks.
The ZT 0308CF
The ZT 0308CF is the newest version available as a special run Zero Tolerance Knives calls the Factory Special Series. As with any F.S.S. series knife, a limited amount are made and once they are gone they are not made in that configuration again.
The CF stands for carbon fiber and that is what the handle scale of this version is made of. Carbon Fiber has been a popular handle material for years in the premium knife market both for its unique looks and its durability. Carbon Fiber is significantly more expensive and more difficult to work with than the more common G10 or Micarta handle scale options out there, so seeing a price increase to the end user is typical.
Another change in for the ZT 0308CF was the use premium M390 super steel for the blade. From a usage standpoint, expect no noticeable differences and M390 and 20CV are remarkably similar in both composition and properties.
The Titanium frame on the 0308CF has a heavy stonewash giving it a muted non-reflective finish. The liner behind the scale was also given a black finish, wrapping the whole package for a much darker look than the original.
The only major design change lies in the clip, which now has been lifted slightly off the frame, making it significantly easier to get in and out of your pocket. Thankfully, this change has not negatively affected the overall ergonomics of the knife!
While I have not had the ZT 0308CF in my line up for years, I have found it to perform equally as well as the original. The darker aesthetic is a great decision on Zero Tolerances part as it is far less flashy in the pocket, and it blends in very well with any dark colored pants.
My original USA Made Blade Customized ZT 0308 with aftermarket micarta scale and the new ZT 0450CF
ZT 0308 Pros and Cons
While no knife is inherently perfect, many pros and cons are entirely subjective and the environment you are in, the intended work you plan on doing with the knife, and user preferences all play a big role. From my personal experience using and testing hundreds of different knives, no single knife is designed to be everything for everyone.
Pros
Premium materials and excellent build quality ensures years of reliable use.
Excellent ergonomics and comfortable in hand during extended use.
The blade provides good piercing and excellent slicing capability.
Solid blade lockup, with no lock slip during hard use tasks.
One of the best thumb ramp designs I’ve worked with on a folding knife.
Both M390 and 20CV provide excellent corrosion resistance and edge retention, reducing the need for constant maintenance especially during extended use in harsh environments.
Fit, finish and deployment action are excellent.
Made in the USA
Cons
Size and weight make this knife less compatible for carrying with thinner pants or shorts.
The original versions clip can be frustrating especially with pants that have reinforced pockets, but recent updates have improved the clip significantly.
Both M390 and 20CV can be more difficult to sharpen in the field than standard stainless-steel options.
The price may be prohibitive for some buyers.
Final Thoughts
Writing a review of a knife that I have owned and used for the better part of 4 years is always so much more gratifying than one I have simply evaluated for a few weeks. My original ZT 0308 has seen just about every variety of environment and use situation that I expect to find myself in, and through all that you really develop an appreciation for the its’ design and build quality.
Simply put, the ZT 0308 is an excellent knife. The design harkens back to the original ethos the Zero Tolerance Knives was built upon, overbuilt hard use knives. This is not your slim, discreet EDC folder, this is a big, tough, ready to take on any challenge you throw at it knife! The ergonomic design ensures comfort over extended use with no major hot spots to wear your hand down. The drop point blade and flat grind makes it great for any of your day-to-day tasks, while bringing versatility for some serious field use if the need arises.
From a build quality standpoint Zero Tolerance Knives has always impressed me. I have owned and used roughly 15 different models over the years, and while not every design was for me, the quality of the build was never in doubt. This is evident in the 0308, especially considering outside of adding more premium materials and a darker overall look, the only design change I have seen between my original and the newest carbon fiber model was a minor quality of life improving clip update.
Bottom line
If you’re in the market for a robust, American made, hard use folder with premium build quality and don’t mind paying a premium price, the ZT0308 or the ZT0308 CF is for you!
Above: My original ZT 0308 with custom stars and stripes anodized frame by USA Made Blade.
Where to Get It: USA Made Blade
Both my original ZT 0308 and my ZT 0308CF came from USA Made Blade based in North Carolina. USA Made Blade only deals in knives made in the USA and specializes in high end production and custom knives from some of the best American Knife companies.
In addition to their robust online sales platform USA Made Blade owners, Scott “Whitty” Whittington and his wife Ellen, recently opened a physical store front called Sasquatch Knife Shop in Salisbury, North Carolina where you can see their selection of knives in person.
USA Made Blade has partnered with Zero Tolerance to allow Scott to create stunning in-house custom versions of ZT Knives with specialty scales and anodized finishes. They offer free and fast shipping on most orders and top notch customer service.
As of the time of writing both standard and customized ZT 0308CF models can be found at usamadeblade.com
Above: My Wife’s ZT 0450 with custom “Anomascous” pattern by USA Made Blade.
A Smaller Alternative: The Zero Tolerance 0450
Looking for something that is overbuilt but not as large? The Zero Tolerance 0450 is a great alternative! This Sleek folder comes in at 7.4 inches overall with a 3.25-inch blade and weighs 2.9 ounces! While this is not a small knife by any means, it is light in the pocket thanks to its full titanium frame and thin profile. The blade is made from S35VN steel which provides many of the same qualities as the M390 and 20CV found in the ZT0308. While these come from the factory looking sterile Scott over at USA Made Blade can use that blank canvas for some impressive custom work!
Welcome back to Gear Up, your go-to guide for the latest in survival gear and preparedness tools. This edition is packed with innovations and tried-and-true classics that are essential for staying ready for any situation. From cutting-edge tech to reliable gear, we aim to equip you with the knowledge and tools you need to stay ahead of the game. Whether you’re gearing up for the unexpected or fine-tuning your survival kit, join us as we take a closer look at this month’s must-haves.
These pants are designed to provide comprehensive protection against insects while ensuring comfort and breathability in hot, humid conditions. Engineered with SITKA-developed fabric, the Equinox Guard Pants offer a lightweight, moisture-wicking solution that promotes maximum airflow. The raised internal grid pattern enhances breathability, while zippered leg vents with mesh gussets allow for heat to be expelled during high-intensity activities, providing the flexibility to zip up for added protection when needed. SITKA’s Scent-free Insect Shield material repels mosquitoes, ticks, ants, flies, chiggers, and midges (no-see-ums), reducing the risk of insect bites. Internal leg gaiters provide an additional layer of defense, preventing ticks and chiggers from crawling up your legs when worn under socks. Functional features include two YKK zippered side leg vents for ventilation and storage, a dedicated knife pocket, and hidden suspender attachment points.
Alpha Evolution Boots are crafted with features to enhance performance and comfort for demanding outdoor activities. The boots feature a 17-inch height and a slip-on closure for easy wear. Constructed with hand-laid, natural rubber over insulating neoprene, they offer both durability and complete waterproof protection. A jersey knit liner ensures quick drying and moisture-wicking, keeping feet dry and comfortable even during extended use. Equipped with a Vibram XS TREK rubber compound outsole, the Alpha Evolution provides traction on wet surfaces and responsiveness on unpredictable terrain. A rubberized EVA midsole adds cushioning and shock absorption, enhancing comfort during long treks. The fiberglass shank offers stability without compromising flexibility. Weighing 5.3 pounds per pair, these boots are rugged yet comfortable, designed to perform in temperatures ranging from 0 to 70 degrees F.
Tasmanian Tiger’s Medic Pack MKII was built for carrying essential medical equipment in the field. With a 3-liter capacity, this compact hip bag is designed for quick and efficient access to your supplies, featuring parallel zippers that allow for easy opening and closing. The LP MOLLE system ensures secure attachment to vests, hip belts, or other equipment-carrying systems, providing flexibility in how the bag is carried. Included is a detachable shoulder strap, allowing the bag to be used as a shoulder bag when needed. Interior fixation points for scissors and other tools keep your gear organized and ready for immediate use. Measuring 10 by 6 by 5 inches and weighing just 25 ounces, it’s lightweight yet sturdy, making it an ideal choice for medical professionals and first responders. Note: Medical supplies are not included.
Bushnell 30 Can Soft Cooler
COLORS: Blue, Green, White MSRP: $150 URL: bushnell.com
NOTES
This cooler is engineered to keep your refreshments cool and secure, offering over three days of ice retention at 70 degrees F when pre-chilled. Designed with both durability and practicality in mind, this cooler is built to handle outdoor pursuits. The cooler features a waterproof and leakproof design, keeping surrounding surfaces dry. A generous capacity allows ample space for all your essentials, whether you’re packing for a picnic or a weekend getaway. The 3D front pocket, equipped with a hook-and-loop panel, provides secure and customizable storage for personal items like keys, wallet, or phone, keeping them easily accessible yet safe. Integrated bottle openers add a convenient touch, ensuring you’re always prepared to enjoy a cold drink without the need for extra tools.
The Optika5 2-10×42 SFP PA is designed to meet many hunting and shooting needs, with its classic 1-inch tube design and 5x zoom capability. It features an adjustable parallax from 10 yards to infinity, ensuring precise focus at any range. The 2-10×42 model includes second focal plane reticle options, such as the Z-Plex and MOA-based Z-Plus, catering to different preferences and shooting styles. Standard 1/4 MOA adjustments provide fine-tuned accuracy with each click, while the scope’s 91-percent transmission rate ensures clear, bright images even in challenging lighting conditions. With a 12.1-inch length and weighing 20.8 ounces, the Optika5 is compact and built to withstand the rigors of the field. The scope also offers a generous eye relief of 3.54 to 3.39 inches, enhancing comfort during extended use. The turret elevation and windage ranges both extend to 60 MOA, providing ample adjustment for long-distance shots.
REVENANT CORPS Grackle – Blood Moon
SHEATH: Belt Clip, Pocket Hook/Static Line, or both MSRP: $130 ($155 with both sheaths) URL: revenantcorps.com
NOTES
The “Blood Moon” edition Grackle is a precision-crafted tool engineered for those who demand both stealth and durability. Featuring a 1/4-inch Ruby red G10 construction, the knife has a double-edged, hand-sanded blade, ensuring sharpness and balance for various tasks. The Tsukomaki wrap, coated with epoxy, offers a secure grip while maintaining a traditional aesthetic, enhanced by a rayskin underlay that adds texture and authenticity. Accompanied by Carbon Fiber Print Ruby Sheaths, the Grackle offers a complete non-metallic system, ideal for environments where rust resistance and discretion are essential. If red isn’t your style, Revenant Corps offers various colors ranging from plain black to Toxic green or Bubblegum pink; a single-edged variant is also available.
Former CIA Officer Jason Hanson shares his knowledge with 52 cards packed with life-saving knowledge that few people are aware of. Learn how to covertly set up an invisible tripwire with the “tired traveler” trick, ensuring you’re always aware of unwanted snoopers in your home or hotel room. Discover the truth about burner phones and how they can still be traced, a tactic often used by spies against criminal organizations. Get practical advice on how to wear your gear and backpack inside a vehicle. Even in a thorough frisk, carry invisible survival gear undetected, and use the “Spy Paper” trick to know if someone has entered your private space. Loaded with real-world survival strategies, these cards are both a useful source of knowledge and a fun way to pass the time playing card games with friends and family members.
The Double Clutch IV is an out-the-front automatic knife with a lightning-fast action. Measuring 4 1/2 inches, the aluminum handle provides a secure, comfortable grip, ensuring optimal control during use. The handle’s design features textured surfaces and ridges that enhance grip even in challenging conditions. The D2 tool steel blade with a Rockwell hardness between 59-60 delivers excellent edge retention and resistance to corrosion. It’s available with either a clip point or a tanto-style blade. The knife has a wide, tip-down pocket clip, allowing for easy carry and quick access. A lanyard hole adds to the versatility, providing additional carrying options.
FENIX TK20R UE Rechargeable Flashlight
COLORS: City Gray, Copper Camo, Metallic Sand, Tropical Green MSRP: $140 URL: fenixlighting.com
NOTES
Fenix TK20R UE Rechargeable Flashlight is a high-performance lighting tool designed for demanding situations. Equipped with a powerful Luminus SFT70 LED, this flashlight delivers an impressive maximum output of 2,800 lumens, providing exceptional brightness for a wide range of tasks. The beam distance reaches up to 1,546 feet (471 meters), making it suitable for long-range illumination. Built with durability in mind, the TK20R features an aircraft-grade aluminum body with a HAIII hard-anodized finish, ensuring resistance to wear and corrosion. The flashlight is also IP68-rated, offering full protection against dust and water immersion up to 2 meters. Powered by a rechargeable 21700 Li-ion battery, it offers extended runtimes, and the USB-C charging port allows for fast and convenient recharging. Tail switches provide easy access to the five brightness levels and strobe mode.
This DECON Kit provides a comprehensive solution for securing safe drinking water in various environments. Compact and portable, it’s ideal for outdoor adventures, emergency preparedness, or travel. The included purification tablets are highly effective against bacteria, viruses, and other harmful microorganisms, making most water safe for consumption. Individually packaged tablets maintain their potency, allowing you to carry just the right amount for your needs. Anti-diarrheal tablets are included to fight dehydration in situations where contaminated food or water has already been consumed. A sturdy pouch offers protection for the tablets and also includes alcohol pads, adhesive bandages, and antibiotic ointment for treating cuts and blisters in the field. Designed with user convenience in mind, the kit features clear instructions and a straightforward approach to water purification.
The Nomad Strop is a versatile sharpening tool designed for maintaining a keen edge on various cutting instruments. Crafted with precision, this strop features high-quality leather that ensures smooth and consistent sharpening results. The leather surface is firmly attached to a sturdy wooden base, offering stability during use. This strop is lightweight and compact, making it easy to carry on outdoor adventures or store in your workshop. Its design includes a comfortable handle for a secure grip, allowing for precise control while stropping. The Nomad Strop also comes with a convenient hanging loop, ensuring easy storage and accessibility when needed. Whether you’re honing knives, axes, or other edged tools, the Nomad Strop provides a reliable solution for keeping your blades in top condition. Dimensions are thoughtfully designed for portability, and the durable construction guarantees long-lasting performance. This strop is an essential addition to any sharpening kit, offering a simple yet effective method to maintain a sharp and polished edge on your tools.
The Chronos PVD is a robust and stylish timepiece engineered for those who demand both functionality and durability. This watch features a 44mm case crafted from PVD 316L surgical-grade stainless steel that ensures longevity. The unidirectional bezel is equipped with clear markers for precise time tracking, while the 3mm Flat sapphire crystal glass with anti-reflective coating offers clarity and protection against scratches. The Chronos is powered by a VK 63 Mecaquartz chronograph, providing consistent and accurate timekeeping. The dial is designed with luminescent hands and markers, ensuring visibility in low-light conditions. A date window at the 4:30 position adds practical functionality to this timepiece. It’s water-resistant up to 200 meters, making it suitable for various aquatic activities, and the screw-down crown enhances its water-tight integrity. The Chronos PVD also comes with a both a two-piece Horween leather strap, and a one-piece nylon pass through strap in a four-pocket waxed canvas case.
Not all grid down scenarios are created equal, and in most cases, we see localized and sometimes regional grid down scenarios. There is a good chance that most of us have experienced some sort of grid down situation in our lifetimes, and they are occurring with increasing frequency due to major storms, cyber-attacks, and strain on antiquated utility systems.
When we look at grid down scenarios we often plan for the supplies, gear, and equipment we need to sustain our homes for both short term and long-term situations. This planning is essential to maintain a healthy and functional home system for us and our loved ones, but what if we are presented with a situation where we need to move from the relative safety of our homes?
The reality is we will be faced with a variety of reasons that we will have to travel, especially in a long-term grid down scenario. The need to bug out is often top of mind, but not all movement during a grid down situation is as dramatic, and while we may face challenges from power outages, loss of cell phone service, or contaminated water supplies some semblance of normal life will generally need to continue.
Even with careful planning, there may come a time when we have to travel for supplies, seek medical care, or even commute to work if our job is outside the affected area. In a grid-down situation, being ready to move is crucial. However, the lack of essential utilities, damaged infrastructure, and limited access to food, water, and fuel can make travel not only difficult but also potentially dangerous.
Armed with a few essential survival skills and the right gear we can decrease the likelihood of being stuck in a bad situation while on the move, and increase our ability to thrive during adverse situations!
Let’s take a look at two real life grid down scenarios I faced over the last few years and discuss some of the skills and gear I relied on to keep me safe while on the move during these events.
Grid Down Scenario: Hurricane Sandy, Long Island New York
Back in 2012 I was living in New York on the western end of Long Island. I lived a very different lifestyle back then. I was working in the financial industry, wore suits to work and thought more about impressing my clients than I did survival. Despite that I still spent much of my free time getting out into the woods to learn skills, participating in GORUCK events, and taking urban survival and SERE courses.
All that training got its first real world test when we got hit with “Superstorm Sandy.” While it was not a hurricane when it hit Long Island, it still brought record rainfall and high winds to the area.
It had already been a particularly wet season, so the ground was saturated before the storm hit. Additional water and high winds quickly started taking down trees, many of which destroyed power lines and crashed through people’s homes. Areas near the coast saw massive storm surges that destroyed people’s homes and flooded the entire first floor of many apartment buildings. Coastal facilities that the Island relied upon to bring fuel and other resources in were badly damaged. The antiquated infrastructure could not handle the flood waters and roads, subway stations, and basements quickly filled up with water.
The aftermath of the storm was like nothing I had ever seen before in person, downed trees blocked roadways and left power lines in shambles. Some of my neighbor’s homes were badly damaged or destroyed. Roads that were passable were clogged up due to abandoned cars and none of the traffic signals were working.
Having no power and no means of driving anywhere we spent the first few days hunkered down. We had a gas-powered generator hooked up to the house and ran it for a few hours each day to take care of cooking, cleaning, and allowing my young daughter to have a little entertainment.
As the days passed and crews worked diligently to clear the roads, we quickly realized we were facing a new problem. None of the gas stations could pump gas because the electronic pumps had no power. With a limited supply of gas, and no means of getting more, we decided that we should stay home as much as possible as we had adequate supplies to last some time.
About five days in, we learned that power wouldn’t be restored in my area for at least two weeks. Nearby towns, with less damage, were expected to have theirs back a bit sooner. Feeling a bit stir-crazy and craving some comfort food, I decided to head out on foot to find any stores with power or running backup generators. The distance wasn’t an issue for me, as I regularly rucked with 50 pounds over 5 to 7 miles a few times a week. Not knowing what to expect on my first trip, I geared up with a solid kit to stay safe and healthy. That setup worked well for a few weeks, until power began to return and vehicle travel became more feasible.
Above: I did my best to faithfully recreate this kit from 2012, the bag is a substitution for the Original GORUCK pack I had back then.
Urban on Foot Kit
Shoes and Socks – Salomon Xa and Merino Wool Socks: I am fairly confident I was wearing Salomon Forces Xa trail runners at the time. I typically wore these while rucking since they provide a good fit and arch support. Any time I plan to cover distance with no means of drying socks I always pack an extra pair. Moving miles with wet socks (either from water or sweat) is one of the most uncomfortable and tissue damaging things your feet can experience.
Rain Gear – Kuhl Packable Rain Shell Jacket and Pants: While getting wet in an urban environment is usually not that serious, getting caught in the rain several miles from home in cool weather can present a situation that can lead to hypothermia if you can’t get out of those wet clothes for a while.
Pack – GORUCK Pack: More than likely a GR1 (since I no longer have that pack, I subbed in the Bullet Ruck for the Photos). Either way these solid black pack packs are pretty sleek, ride tight to the body, and don’t stand out. In grid down scenarios, people are on edge, and you don’t really want to look like someone who has stuff that other people want when out in public. The pack itself is comfortable and is designed to move weight over long distances so it was an ideal choice for the task.
Water – 1 Liter Nalgene and a LifeStraw: Having a liter of water is a good baseline for a trip that is expected to take a few hours, especially when it isn’t too hot outside. Being prepared for the unexpected is always a good idea, not knowing if I would need more water or have access to water, I packed a LifeStraw just in case I had to filter tap water that was potentially contaminated. As it turns out, the LifeStraw came in handy!
Food – Protein Bars and Beef Jerky: Keeping your body fueled is essential. Under normal conditions, finding food in most places is easy. But during power outages, with no certainty about which stores are open or stocked, it’s always smart to carry some nourishment with you—just in case.
Light – Pocket Flashlight: I don’t remember what I carried back then, but a pocket flashlight is a valuable tool to have on you while traveling in any grid down scenario. Those of us who are accustomed to living in urban environments quickly forget how dark it is at night without all those street and building lights.
Backup Power – Power Bank: I packed a power bank and USB cord in my bag, though they were bulkier than today’s models. Having backup power for your phone and other small electronics is crucial, especially during a grid-down situation. If cell towers are down, your phone will drain its battery quickly while searching for a signal. Having extra power on hand ensures your phone stays ready when you need it.
Currency – Cash: Cash is king when the grid is down! No power and no landline internet means credit card and debit cards are pretty much useless.
Self Defense – Pepper Spray and Spyderco Yojimbo: I know you’re thinking these were not the best options—remember I lived in New York and getting a permit for a handgun was next to impossible. Pepper Spray can be a highly effective deterrent, and having training in Martial Blade Concepts I was comfortable with using a Yojimbo for defensive purposes if need be. I was fortunate enough to not have to use either, but many others were not so lucky as violence escalated as time went on.
First Aid – Basic First Aid Kit and Bleeding Control: As I general rule of thumb I always keep first aid supplies on me for treating my own injuries of those around me. I also carry bleeding control equipment like Quikclot and a Tourniquet. Bleeding control is particularly important during grid down situations as first responders are already overwhelmed and may have a tough time getting to you.
Entry Tools – Lock Pick Set: Having and knowing how to use entry tools is valuable in everyday life, and even more so during a grid down scenario. While I don’t advocate breaking into anything that you should not be, if a true emergency occurs, I am far more concerned with safety and security than anything else.
Fire – Bic Lighter, Boat Matches, and Man-Made Tinder: Fire is often overlooked in urban survival, but it serves the same purpose in the city as it does in the woods. It provides heat, cooks food, and can be used for signaling. While it is less likely you’ll need to start a fire in an urban setting where you are not very far from your home, it always better to have something and not need it, then need it and not have it.
Above: The minimal kit I carried was both lightweight and functional.
Vehicle Travel became possible after a couple of weeks as power was being restored in surrounding towns. Gas was accessible but in high demand and short supply. Gas rationing reminiscent of the 1970’s was put in place leading to long waits and high frustration among people. Fights were becoming a common occurrence at gas stations, and I saw multiple reports of increasing aggression including stabbings, people brandishing firearms, and at least one shooting. Outside of self-defense equipment there wasn’t really any gear to help here, but there is a very valuable skill that helped keep me safe.
Situational Awareness
Situational awareness is one of those skills that applies to nearly any survival scenario. It’s the ability to observe what’s happening around you, process it quickly, and identify potential threats or resources. In a grid-down situation, it’s especially important to assess the mental state and actions of those nearby. With heightened tensions, feelings of being trapped, fear, and desperation, the situation becomes a powder keg, increasing the chances of violence.
The best way to come out on top during a violent situation is to not get yourself in that situation in the first place. Having a keen understanding of body language, vocal tone, and behavior—and the ability to quickly assess when these things are off in a person or group—is the key to avoiding a dire situation. There were quite a few instances where I made the decision to leave a gas line and go somewhere else because it was clear to me that the tension was building at that location. In those cases, it was better to get out of there instead of being placed in a self-defense situation.
Above: Even a basic first aid kit can help out in bad situation.
Lessons Learned During Hurricane Sandy
After a few weeks, things slowly started to return to normal and a month or so later it was pretty much life as usual outside of a few lingering inconveniences. I can honestly say it was an eye-opening experience for me of just how unstable an urban environment can be when the modern amenities that people have become so accustomed to were stripped away. There was little concept of community and much more of a “every man for themselves” mentality.
Most importantly I learned a valuable lesson of how difficult vehicle travel can be in an urban environment during a grid down scenario. Even after the road were cleared the lack of gas, non-functioning traffic signals, and a large population led to roadways being largely impassible for extended periods of time. Travel on foot, was the best option in this scenario and having the right equipment made that process safer and generally more pleasant.
Above: A ruined intersection after catastrophic flooding in western Connecticut.
Grid Down Scenario: 1000 Year Flood, Western Connecticut
After my experience with Hurricane Sandy, I became increasingly uneasy living in densely populated areas. When the pandemic hit in 2020, and I saw the same unrest as before, I knew it was time for a change. I moved my family to a rural town in Connecticut, a charming place filled with woodlands, hiking trails, rivers, farms, and many original buildings from the 1700s. The population is much smaller—spread over 33 square miles compared to the dense two square miles of my previous town. The people are friendly, with a strong sense of community. But even in a place like this, a grid-down scenario still presents significant challenges.
In August 2024, we were hit by an unexpected storm that dumped over 13 inches of rain in just a few hours, leading to catastrophic flooding. Rivers and streams quickly overflowed, and the intense rain caused widespread damage. Roads, bridges, homes, and businesses were severely affected, with many destroyed. Power outages were widespread, vehicles were swept away, and tragically, a few lives were lost to the floodwaters.
Above: A bridge that partially collapsed with a car on it.
The aftermath of this storm left much of our critical infrastructure in bad shape. Drain systems were decimated, power lines and dams were damaged, mudslides knocked out entire sections of roads, and the rising rivers washed away many of the water crossing bridges.
Unlike my experiences with Hurricane Sandy, power was restored in just a few days, but the roads were another story. I was fortunate to not have any damage to my home, but because of our location and the damage to the surrounding roads we were essentially trapped for a few days until road crews could clear downed trees and fill large holes with gravel.
When we were finally able to leave the immediate area, I quickly realized how difficult it was to reach basic places like the grocery store, my doctor’s office, or the schools. Trips that usually took just a few minutes were now taking over an hour, thanks to having to navigate winding back roads, and what seemed like an endless number of detours.
After that first trip out, it became clear that I needed a plan. Walking wasn’t an option in most parts of town—there are no sidewalks, and the trails I’d normally use to reach the nearest stores were washed out and blocked by fallen trees. Driving was my only choice, but that wasn’t entirely safe either. There were massive potholes, unfamiliar detours, and I had to cut through a local state forest to reach some of the places I needed. If my vehicle broke down, I’d likely be stuck in an area without cell service, making it impossible to call for help.
The gear needed to travel in this area had to be much more rugged than what you’d typically need in a more populated setting. I had to be ready for extended travel through wooded areas, as even a simple trip to the store could leave me over 10 miles from home, with several miles of hiking required just to get a cell phone signal.
Fortunately, I’ve learned a lot in the 12 years that have passed since Hurricane Sandy, and I keep most everything I needed for this situation in my vehicle already.
Above: A Pod-X Jump Starter from Battlbox can jump start your vehicle and charge small electronics.
Grid Down Vehicle Equipment
Jump Starter – POD-X Extreme Industrial Grade Jump Starter: I have a small rechargeable jump starter in the vehicle to ensure I can jump start the engine without the aid of another vehicle if necessary. This also doubles as a backup battery that can charge small electronics, such as cell phones, flashlights, and GPS units.
Tire Repair Kit and Spare Tire: I keep both a spare tire and a tire repair kit in the vehicle. Small punctures can be quickly repaired without having to remove the tire and reinflated. While the spare serves if a tire is destroyed beyond repair.
Simple Tools While I do not claim to be a mechanic, I can perform minor vehicle maintenance procedures that will hopefully get me out of a jam. Keeping a few simple tools in the trunk ensures that I can remove or tight bolts, screws, etc.
Light – LED Lensor ML6 Lantern and Nite Ize Inova T4R: I keep a full-sized flashlight and a lantern in the car. It is dark up here at night even when the grid is functioning normally. These are essential if I end up on foot walking down a road or through the woods at night. These can also serve as a signaling device to help flag down help on the road or make it easier to find me in the woods.
Navigation – Garmin 64 Series GPS: Our phones all come with navigation features which is convenient but largely useless if we have no cellular internet connection. Stand alone GPS units can be much more reliable as they connect directly to satellite and have no need for a data connection. The unit I carry is also suited for use on foot.
First Aid – Basic First aid Kit and Bleeding Control:This is essentially the same kit I carried in my bag back in 2012, but now with more trauma supplies as my skills have improved over the years. I keep everything organized in Tuff Possum Gear’s Med Pouch and Nicks and Scrapes Pouch.
Above: My trunk bag, The Hidden Woodsmen Day Ruck with an attached Tuff Possum Gear Med Pouch.
Wilderness Survival Kit
The rest of the gear I keep in the vehicle is geared toward short-term wilderness survival, in case I need to navigate through the woods on foot or spend a night outdoors. I keep the kit as streamlined as possible to save space and make it easy to carry if I have to abandon the vehicle.
The Bag – Hidden Woodsman Day Ruck: This 25-liter pack features a single large interior section with two side pockets. The outside has webbing on the side to attach other pouches if desired and a slot underneath the main flap for a hatchet or axe. It is a great size to hold everything I need to survive in the woods for a few days if needed.
Water – Gryal GeoPress or UltraPress: These are easy-to-use water filter bottles that remove microbial, chemical, and particulate contaminants from tap or wild water sources. I prefer to use a system like this because it acts as a filtration system and water container all in one.
Food – Nutrient Survival: Nutrient Survival offers both freeze dried and shake meal options. If I need to move quickly I can use the powdered shake packet and some water to give my body the fuel it needs, and if I have more time on my hands I can easily heat the freeze dried food in a small pot.
Fire – Ferro Rod, Storm Matches, and Black Beard Fire Plugs: Everything I need to quickly start a fire. The Ferro rod can easily ignite the Black Beard Fire Plugs, and the storm matches can be used as back up or if the weather is particularly harsh.
Cookware – Solo Stove Titan and Uberleben Pot: The Solo Stove Lite is a small twig stove that produces a hot flame thanks to the air flow design which allows me to quickly boil water or heat food.
Shelter – Tarp, Atwood Ready Rope Paracord, and Space Blanket: The Tarp and paracord allows me to easily set up a makeshift shelter without having to do any serious bushcraft. The space blanket is great for providing a little extra warmth if needed and its bright orange color can help it double as a signaling device.
Navigation – Silva Ranger: I keep a basic compass in my kit, just in case my GPS fails or battery runs down to ensure I have some form of direction bearing to go on if needed.
Workspace – PNWBUSHCRAFT Jr. Ground Cloth: This waxed canvas and wool cloth has a variety of uses, including providing a dry surface to sit in in the damp woods or give me a clean dry work area to process wood and food. In a pinch, I’ve even used it to carry wood from one place to another.
Above Wilderness Tools of the Trade: TOPS Knives Hammer Hawk Hatchet, Knives By Nuge Big Boi, Silky Pocket Boy Saw, and Badger Claw Outfitters Gloves all laid out on a PNWBUSHCRAFT Jr. Ground Cloth.
Wilderness Tools
Knives By Nuge Big Boi: Based on his best-selling Wicket model the Big Boi is a no-nonsense full sized fixed blade. The Big Boi comes in at 9 inches overall with a 1/8 inch thick 4.5 inch long Scandi grind blade. The spine of the blade is ground to 90 degrees to perform scraping tasks and strike a ferro rod. The Micarta handle scales are fixed on by chemical epoxy and flared brass tubes to ensure those scales are never coming off during hard use. My version has a leather belt sheath with a dangler made by Badger Claw Outfitters so I can keep it in my pack or put it on my belt for easy access.
TOPS Knives Hammer Hawk: This hatchet is made from a single piece of high-carbon steel with micarta handle scales for grip and comfort during use. One side of the head has a flat hammer that can be uses for any number of tasks, such as pounding tent stakes or driving wedges. The sharpened end of the head will make short work of smaller branches and even chop through large pieces of wood if needed.
Silky Pocket Boy: This folding saw is one of my go-to tools for its compact size but great capability. Keeping a small saw on hand is always valuable is it takes far less physical effort and less caloric burn to saw through a small log then aggressively chopping at it with a hatchet.
Leatherman Wave: The Wave is a robust multitool with a number of valuable tools on board. While I don’t find myself needing to use it often in the woods, there are times when having a solid set of pliers or a small back up saw can be very useful. It’s not big or heavy so I’d rather have it and not need it, than need it and not have it!
Above: a Grayl UltraPress, Solo Stove and Uberleben cook pot.
Assorted Vehicle Supplies
Clothes: In addition to the rain gear that I kept in my urban bag back in 2012, I also keep a full change of clothes in the trunk just in case I find myself soaking wet in the cold.
Hiking Shoes: I keep a backup pair of water-resistant hiking boots in the trunk just in case the footwear I have on is not appropriate for moving through the woods.
Toilet Paper: While this is not a necessity, believe me when I say you’ll be glad you have it!
Assorted Rags: Rags have a million uses, from cleaning a spill to checking your oil. Its always good to have a few on hand.
Badger Claw Outfitters Leather Gloves: A good pair of work gloves is hard to beat, keeping your hands protected allows you to keep using them.
Lessons Learned During the 1000-Year Flood
It’s been 2 months since the storm, and while much headway has been made on road and infrastructure repairs, it is expected to take upwards of a year to completely rebuild. Ultimately, I have become less inclined to travel if not needed and look to consolidate trips through damaged areas as much as possible.
Just as we discussed in the first scenario, the best way to come out on top of a bad situation is to avoid putting yourself in one altogether. When travel is necessary, having the right equipment and the skills to use it provides the confidence to know I am prepared to handle an emergency should it occur.
While tensions are high in the area, living in a small town provides a much tighter knit community, where people are more focused on supporting each other rather than just looking out for themselves. While living in a wooded area presents more geographical challenges and has more animal threats—such as bears—I generally feel that people are not a significant threat, especially since I can identify most of the adults in the town. Those who don’t live here would stand out.
Above: As my skillset grew so did my First Aid and Trauma Kit.
Final Thoughts
My experiences through two grid down scenarios offered valuable lessons. Environment plays a big part in both your access to resources, and the challenges that are faced when on the move. An urban grid down scenario may require less equipment, but vehicle travel is still difficult due to heavy reliance on traffic signals and a higher population density. The higher demand for resources puts a strain on the population that already does not have much of a connection with much of the rest of their community, which can quickly lead to aggression and violence.
In a rural or heavily wooded area, the terrain adds extra challenges, making travel on foot more difficult. The infrastructure, especially roads and bridges, isn’t as sturdy as what you’d find in a larger city, which means more damage and potentially impassable routes for vehicles. While people may be more community-focused, lowering the risk of violence, the threats from wildlife and difficult terrain are higher.
In either case having the right equipment and skillset to use the gear can go a long way to increasing your safety while moving in a grid down scenario. Like dealing with any other emergency, being on the move requires preparation and while we can’t account for every possibility by having a plan in place will greatly reduce possible gaps.
You must first be able to assess your environment and understand the challenges that unique environment presents.
You should develop a good sense of why and where you may need to travel should a localized grid down event occur.
Having an emergency kit based on your unique environment and skillset ready to go will save you time, and ensure you have what you need.
Identify skills and equipment gaps you may have and work to obtain those as soon as possible.
Finally, the ability to remain calm and objective during a grid down scenario is key to making it through the initial trigger event, and the inevitable aftermath. In both cases, panic and fear lead to tragedy. During Hurricane Sandy people lost their lives because tension brought violence, and during the 1000-year flood lives were lost because panicked people were attempting to navigate through fast moving flood waters instead of staying put.
Staying calm, being well-prepared, and knowing your own skills and limits are key to making smart decisions when traveling during a grid-down event. Understanding where it’s safe to go and where it’s not is crucial, and the best way to stay safe is by avoiding unnecessary risks and dangerous situations altogether.
Above: Give your body the fuel it needs! Nutrient Survival offers both preserved foods and shakes to ensure you get all the resources you need to keep moving.
Resources for Building Your Own Grid Down Go Kit
Below you will find links for much of the gear I mentioned in this article and the places I got the gear from. All the equipment I mentioned in the article is gear that I have used and rely upon to get me through emergency situations and during my regular activities both in day-to-day life and when training my skills in the woods.
Fuel is a necessity for everyday life. We rely on it to heat our homes, cook our food, and power our vehicles, to name just a few uses. We quickly realize how dependent we are on different fuel sources when an emergency occurs, and we can’t get the fuel we need. Consider how many people were stranded recently when Hurricane Milton hit the west coast of Florida, just outside Tampa Bay. Still recovering from Hurricane Helene, they weren’t prepared for Milton’s arrival.
I bet those people could tell us a thing or two about the importance of fuel. Our ease of access to fuel has made us complacent and underprepared when it comes to recognizing how much we rely on power grids and gas stations. Whether you’re looking to go a little more off-grid or simply want to be prepared for the next emergency, it’s time we discussed fuel storage.
What is the Best Emergency Fuel?
Fuel, by definition, is any substance used to produce heat or power by burning. With so much modern access and convenience, the guidelines of safely handling fuel so it’s ready to use when needed have become forgotten knowledge for some, even though fuel is becoming increasingly important in our day-to-day lives.
As we become more reliant on different types of technology, fuel becomes essential not only for heat and cooking but also for running engines and generating electricity for our gadgets. In this article, I’ll discuss different types of fuel, how to safely store them for long-term use, and the pros and cons of each for various purposes to help you choose what fuel storage systems works best for you.
Gasoline
Let’s start with one of the most widely known and common fuel type, gasoline. Gasoline is commonly used in generators, vehicles, and other small engines. It’s a liquid petroleum product made from refining crude oil. It is highly favored for most applications because it is easily accessible, portable, and highly combustible, providing a high energy output of about 125,000 BTUs per gallon.
The downside is its relatively short shelf life of only 3-6 months. Even with stabilizers such as Sta-bil or StarTron Enzyme Treatment, gasoline might only last around 12 months. Additives are readily available online or at your local hardware store and are usually mixed in with a full tank of fuel according to the directions on the bottle.
Gasoline must be stored in approved containers. In the USA, it must be a leak-proof, vented, red container. Storage containers should be kept in a cool, dry area away from heat sources and in a well-ventilated space. Some municipalities regulate how much gasoline you are allowed to store on your property, which could be as little as five gallons, depending on local regulations.
What Uses Gasoline: Vehicles, lawn mowers, emergency generators, some heating systems, and commercial construction equipment.
Pros:
Widely available and accessible.
Portable and highly combustible, providing high energy output (125,000 BTUs per gallon).
Cons:
Short shelf life (3-6 months, up to 12 months with stabilizers).
Must be kept in approved fuel storage containers with strict regulations on storage limits.
Diesel
Next on our list is diesel, gasoline’s cousin, which has additional factors to keep in mind. Diesel is commonly used in heavy-duty machinery, generators, and increasingly in smaller passenger vehicles. It’s a byproduct of gasoline production and, therefore, widely available. Diesel has a higher energy output than gasoline, at about 139,000 BTUs per gallon, and can be stored longer—up to 2-5 years if stored properly and with the correct additives.
Diesel is not as volatile as gasoline but is still flammable. It should be stored in clean, dry areas away from heat sources and in a well-ventilated location. In the United States, diesel should be kept in yellow, airtight, UV-resistant storage containers and treated with anti-microbial stabilizers like Diesel 911 or Hot Shots Everyday Diesel Treatment to prevent algae or microbial growth, which can clog injectors and fuel filters.
In extremely cold temperatures, diesel can freeze or gel, so it’s common to treat it with a cetane booster like Boostane when storing it in freezing conditions. In cold enough temperatures, it is not uncommon for a working diesel-powered truck or machine to “gel up,” so many operators will use these products when the weather gets cooler, regardless of how long the fuel will be stored.
These products are also easy to come by at any fuel station that sells diesel, as well as auto parts stores, big box stores like Walmart, or online.
What Uses Diesel: Vehicles, Tractors and other farm equipment, and electric generators.
Pros:
Higher energy output than gasoline (139,000 BTUs per gallon).
Longer shelf life (2-5 years with proper storage and additives).
Less volatile than gasoline.
Cons:
Requires careful storage in yellow, UV-resistant fuel storage containers with anti-microbial stabilizers.
Can freeze or gel in cold temperatures, requiring additives.
Algae or microbial growth can clog systems if not properly treated.
Biodiesel
Biodiesel is similar to diesel in terms of usage but is made from old cooking oils, animal fats, or plant materials. While it’s not as widely available, biodiesel is cheaper and has lower emissions than regular low-sulfur diesel. It’s more common to find biodiesel mixed with low-sulfur diesel to make a bio blend.
Some diesel engines may not be compatible with biodiesel, so check compatibility if you’re considering switching. Unlike petroleum diesel, biodiesel is made from renewable resources but produces about 8-10% less energy than regular diesel. It has a shorter shelf life of about a year and is more susceptible to degradation. While it’s cheaper and better for the environment, it might not be the best fit for everyone.
What Uses Biodiesel: Some Vehicles, heating systems, cooking systems, and some electric generators.
Pros:
Made from renewable resources.
Cheaper and produces lower emissions than traditional diesel.
Cons:
Shorter shelf life (about 1 year).
Less energy output than regular diesel (8-10% less).
Compatibility issues with some diesel engines.
Camp Fuel (White Gas)
Camp fuel, otherwise known as white gas, is a highly refined form of gasoline that’s primarily used in camping stoves, lanterns, and portable heaters. White gas burns cleaner and produces less odor than regular gasoline, making it ideal for outdoor activities. Camp fuel comes in convenient fuel tanks directly from manufacturers like Coleman or Crown, with a long shelf life.
Due to its lack of impurities, white gas is known to last up to ten years if container remains sealed, making it the longest-lasting fuel we’ve covered so far. White gas should be stored in its original metal container and, like other fuel types, kept in a well-ventilated area that is cool and dry. Camp Fuel is small and portable making it an ideal fuel type for essential equipment when on the move.
What Uses Camp Fuel: Small portable camping equipment including stoves, lanterns, heaters, and grills.
Pros:
Burns cleaner and produces less odor than regular gasoline.
Long shelf life (up to 10 years).
Cons:
Should only be stored in original containers.
Requires careful storage like other fuels in cool, dry areas.
Propane
Propane is another common fuel used for heating, cooking, and power generation. It is a byproduct of natural gas production and is readily available, efficient, clean-burning, and has a long shelf life. Propane produces about 91,000 BTUs per gallon, making it a strong competitor in energy output. However, propane requires large fuel storage tanks and specialized equipment for refilling.
These pressurized tanks should be stored in well-ventilated areas, away from heat sources, and inspected regularly for leaks. Always store propane tanks outdoors and upright. When stored properly, propane can last indefinitely, which is arguably the most important factor when discussing fuel storage.
What Uses Propane: Heating systems, stoves, grills, water heaters, large home appliances, and backup generators.
Pros:
Readily available, efficient, and clean burning.
Long shelf life (can last indefinitely with proper storage).
High energy output (91,000 BTUs per gallon).
Cons:
Requires large, pressurized tanks and specialized refilling equipment.
Must be stored outdoors and inspected regularly for leaks.
Natural Gas
Natural gas is a fossil fuel made up almost entirely of methane and is widely used as a clean-burning fuel, commonly found in homes for heating, cooking, and generating electricity. Unlike other fuels, natural gas is delivered directly to homes via pipelines. However, it can also be stored in specialized tanks for off-grid living.
Natural gas is odorless and invisible, so additives like mercaptan are introduced to detect leaks. If you’ve ever smelled it, you know the scent. It can be stored as compressed or liquefied natural gas (CNG or LNG), making it suitable for off-grid use. While natural gas is not affected by temperature, it’s crucial to inspect fuel storage tanks regularly for corrosion or leaks.
What Uses Natural Gas: Home and commercial buildings, large outdoor appliances, and some vehicles.
Pros:
Clean-burning and commonly available through pipelines.
Can be stored as CNG or LNG for off-grid use.
Odorless and invisible, with additives like mercaptan for leak detection.
Cons:
Requires specialized tanks for storage.
Regular inspections are needed to prevent corrosion or leaks in storage tanks.
Wood/Biomass
Wood or biomass is primarily used for heating and cooking in wood stoves or heaters. It’s renewable, widely available in many areas, and can often be locally sourced. There’s an old saying that heating with wood warms you twice—once when you cut it and once when you burn it. While inefficient and dirty, wood can be labor-intensive, requiring cutting, splitting, and stacking.
The type of wood you burn profoundly affects how it burns. Wood should be burned in proper stoves or well-ventilated areas, as improper burning can lead to air pollution issues like smoke, particulate matter, and carbon monoxide. Store wood off the ground, covered to prevent moisture, and away from the home to avoid pests and fire hazards.
Wood should be dried for at least 6-12 months before burning, with a moisture content of around 20%. Burning wood also requires regular maintenance, including ash removal and chimney cleaning to avoid creosote buildup. Despite these challenges, wood remains a widely used fuel source due to its low cost and availability.
What Uses Wood/Biomass: Home heating, outdoor cooking, campfires, portable stoves, and fire pits.
Pros:
Renewable and widely available.
Low cost and can be locally sourced.
Cons:
Labor-intensive (cutting, splitting, stacking).
Can lead to air pollution (smoke, particulate matter, carbon monoxide).
Requires long drying times and maintenance (chimney cleaning, ash removal).
Solar, Wind, and Water
Finally, solar, wind, and water are not technically fuels but methods for generating electricity, crucial for off-grid living. These methods are clean, renewable, and have low ongoing costs once installed. However, they can be expensive to set up, rely on favorable weather conditions, and require maintenance, especially in remote areas. Electricity can be generated from solar panels, windmills, or even water wheels.
For a 2,500 sq ft house, you would need about 40 solar panels to produce enough power to run your whole house. Likewise, a small residential windmill can put out between 5 and 15 kilowatts of power depending on wind speeds, while a house of the same size uses, on average, about 1,000 kilowatts a month, so a windmill alone might not be enough to power a home. A water wheel in a flowing river, on the other hand, can produce up to 75 kilowatt-hours per day, which might significantly reduce your energy needs.
The energy created from these renewable methods is stored in batteries.
Batteries used to store generated energy can take up significant space. Proper surge protection and regular battery maintenance, including checking for corrosion, are essential. A well-thought-out system installed in the right location can provide plenty of power with minimal work.
What Uses Renewable Power Sources: Large Systems can power entire buildings. Smaller systems can be used to power small electronics and some full sized appliances.
Pros:
Clean and renewable energy sources.
Low ongoing costs once installed.
Cons:
Expensive initial setup.
Dependent on favorable weather conditions.
Requires battery maintenance and surge protection for optimal storage.
Fuel Storage: Rotation and Maintenance
Fuel rotation and maintenance are key to long-term fuel storage. You should have a regular schedule for rotating your fuel. Your oldest stock should always be used before newer stock, and you should keep a running tally of what needs to be used first. If you can use an alternate fuel source for a project that’s nearing its expiration before your ideal fuel source, it might still be in your best interest to do so.
Fuel quality impacts the longevity of the equipment it’s used in. If your pickup truck breaks down on the highway when you’re trying to escape because the fuel was contaminated with water, you’ll find yourself in a tough situation.
Fuel Storage: Safety and Tips
By now, it should be clear that most fuel types need to be stored in approved containers and kept in cool, dry, well-ventilated areas. All of these fuel types are potential fire hazards at varying levels of concern. It is important to follow local and state regulations when storing fuel.
Flame-retardant materials, fire extinguishers, and properly marked storage cabinets should be used where required.
Safety tips apply across the board when handling fuel. Regularly inspect containers for imperfections or corrosion. A fire extinguisher should always be nearby when handling any type of fuel, and carbon monoxide alarms should be used in confined areas.
Conclusion
Fuel types play a critical role in off-grid living. It’s important to choose the right fuel based on your needs, availability, and application. I think now that we’ve explored the conditions surrounding each of these fuel types and the conditions in which they can be beneficial and where each of them has drawbacks you can now make an educated decision about which would be best for you.
In a true off-grid situation, it’s likely you’ll use a combination of these fuels because each has its strengths and weaknesses. As the world faces increasing challenges related to energy security and sustainability, being proactive in these discussions can enhance our resilience.
By regularly rotating and maintaining our fuel supplies, and staying informed about evolving technologies and regulations, we not only prepare for potential emergencies but also contribute to a more sustainable future.
Gear Spotlight: Emergency Fuel On The Go
This article details a number of fuel sources that can be utilized if needed, but what if you need power on the go? Having back up fuel and power sources while on the move can make a difficult situation a lot easier. White gas in small camp appliances is a great option to ensure your food is cooked, you have some light, and maybe even a portable heater.
What if we need multiple electronics powered or the trucks fuel tank runs dry? Let’s take a look at some options to ensure you can keep your vehicle running and your comms working!
In-Bed Auxiliary Fuel System
Having a back up fuels system that that mounts to the bed of your pick up truck is an ideal way to haul extra fuel for a long trip or ensure you have enough in off grid scenario.
With options ranging from 40 gallons all the way to 100 gallons you can keep your truck fueled up and ready to go when you need it most! For more information on these systems check out transferflow.com
Portable Jump Starter/Power Bank Combo
Having the ability to jump start your vehicle in a pinch is valuable, but having the ability to charge your phone, navigation system, and other other small electronics with the same device saves space and money.
While these devices are not going to give you as many jumps as a traditional jump box they are small enough to charge up while your vehicle is running and can be easily thrown into your backpack as a charger for all your other devices should you need to leave your vehicle. Check out more of these at battlbox.com