Here in my home state of Michigan we get our share of snow in the winter months — however, you may fall asleep to snow and wake up to rain and mud. If you want to enjoy the outdoors, you’ll need to be prepared to play whatever hand nature deals you. When I’m stepping off into wild areas or prowling for game animals, I like to keep things as simple as possible, which means taking the same gear with me regardless of the duration of the trip. The chance of getting turned around on a hike or a stalk — as much as you can attempt to stalk in Michigan — means taking your gear with you when you’re in remote or unfamiliar territory. This Northwoods Stalking Bag was built to ensure everything I need is with me and accessible.
About the Bag
The base of my winter kit is a 5.11 Tactical Rush 72-hour pack. Ripe with exterior pockets and lots of internal zippered organization, its overall size is enough to take everything I need with extra space for some of what I want. I’m careful not to buy big packs because I tend to fill them with gear I don’t really need. Having a sternum strap and a padded waist belt is recommended for a pack this size, as it allows you to shift weight from the shoulders to the hips to fend off fatigue.
Sleep System
Sleeping gear takes up the bulk of the main compartment. I’ve grown very particular about what I’ll use for sleep systems. The gear must be easy to set up or stow in darkness or low-light conditions with cold fingers or gloves. This typically steers me away from the use of a tent.
For my money, nothing beats an insulated Klymit inflatable sleeping pad. You need something to insulate yourself from the ground to keep from losing heat via thermal conductivity. It takes less than a minute to fully inflate, it rolls up nicely, and I find it comfortable enough to get a good night’s sleep when paired with one of Klymit’s inflatable pillows.
Enlightened Equipment makes a variety of excellent sleeping bags and quilts. I like the APEX 20-degree quilt with a synthetic fill. The end is able to be cinched off or opened up in case you need a little air flow. I’ve found 20-degree bags to be a good cold weather option for overall comfort and packability. It’s important to point out that the terms “warm” and “comfortable” are relative. What is not relative is hypothermia. You may find that you’re cold in a 20-degree bag, but you probably won’t freeze to death in it. Comfort is what I find to be good enough to allow me a few hours of sleep at a time. I’m not getting Tempur-Pedic sleep in the woods.
Down is great if you’re sleeping in a tent or a cozy cabin, but once down gets wet it has lost its ability to insulate and keep you warm. You might think, “So don’t get it wet. Make a better shelter.” Even in the cold, sometimes it’s humid enough to kill the insulation quality of down. I slip the sleeping pad and quilt into a Snugpak bivy and place it under a tarp or a lean-to structure depending on the weather.
Above: An emergency sleep system can transform an emergency into an inconvenience.
Other Essentials
An extra watchman’s hat, clean Merino wool socks, and fresh underwear stored in Ziploc gallon-size freezer bags are at the bottom of the main compartment. They’ve always been a welcomed morale boost at the end of a long day to change into before to bed.
A Defense Mechanisms Hand Warmer waist-mounted pouch is perfect to keep your hands warm when you’re stationary or taking a break. The pocket in the front is great to tuck a couple chemical hand warmers in to kick up the heat.
Two or three contractor trash bags. The thicker mil bags are tough as nails and have dozens of uses.
In a zipped inner compartment, I keep a medical kit. My medical pouch is very basic. Keeping a stack of different sized bandages and blister covers, Tylenol or Advil, a roll of antacid tablets, anti-diarrheal pills, and a few Liquid IV packets has proven to be useful on more than one occasion.
A BIC lighter in an Exotac protective container wrapped in Gorilla Tape. The tape is great for repairs and starting fires. As a matter of fact, I keep a BIC lighter wrapped in tape in every pocket of my pack and one in my Kit Bag. They’re inexpensive and light enough that it makes sense.
Above: I’ve never needed all of this gear in a single situation, however I have needed every item at one time or another. After spending one cold unplanned night in the woods, you’ll be glad to have some extra supplies.
Sustenance
I include a HellFire Bushcraft stainless steel grill, because sometimes Mountain House or MREs aren’t exciting to me, or I’ve successfully hunted something.
Side storage pockets hold a titanium 20-ounce Snow Peak cup and lid, a handful of instant coffee packs, a Jet Boil with extra can of fuel, and an extra broken down MRE main meal.
The small upper pocket has gallon-size freezer bags and exam gloves for cleaning wild game.
The pack’s Shove-It Compartment between the body and rear-facing flap — originally designed to carry a helmet — is usually reserved for hauling something I’ve hunted or found along the way.
Front Pocket Tools
There’s is an extra knife, foldable Silky Saw, LifeStraw water filter, book, several lengths of 550 cord, extra cold weather gloves and exam gloves, and a Petzl headlamp with high, medium, low, and red light settings.
Above: A chest rig is great for keeping vital tools close and accessible.
Outside the Bag
I’ve always got a Thyrm CellVault-5M mounted to the webbing of the front pocket. Make sure any batteries you take into the cold are lithium ion as they’ll withstand the cold better than alkaline. If it’s really cold, put them inside a coat pocket so your body heat will help protect them.
On the bottom of my shoulder strap, I keep a Dark Angel Medical direct action response kit (D.A.R.K.), not to be confused with a basic medical kit. Given the speed blood can leave the body, a trauma kit needs to be always at the ready. Trauma kit bare minimum requirements are a tourniquet, hemostatic gauze, chest seal, a roll of standard gauze, and an emergency blanket.
Along the base of the pack, I stash 30 feet of 1-inch nylon tubular webbing daisy chained with two climbing grade rings. If you’ve ever pulled a deer up a hill, you’ll understand.
Two Nalgene water storage containers are housed in Spiritus Systems pouches. One of my bottles is the usual plastic fantastic with 4 to 6 feet of Gorilla tape wrapped around it, the other is single-walled stainless steel. Should the water freeze, the steel container can be set near a fire to melt. Keep in mind that single walled steel — not dual walled/vacuum insulated — is the only option for direct heating over fire.
Ranger beads are tied to my shoulder strap for tracking distance traveled while navigating.
It may not be the ideal place for a knife, but while wearing a padded waist belt from the pack, I like my Bradshaw Blades fixed blade knife mounted to my shoulder strap ’80s style for easy access.
Camp axes and tomahawks have proven to be an indispensable piece of gear both for shelter building and processing firewood. The Wenger Blades Loki has been a great addition to my hunting pack.
Above: I never go into the woods without a Hill People Gear Kit Bag. This little chest rig keeps my pants and coat pockets available for warming my hands, and ensures high-usage items are readily available.
Kit Bag from Hill People Gear
Carried across my chest, this pouch allows me to quickly access small, frequently used items. It can also serve as an emergency sustainment kit should I become separated from my main pack. It contains my area maps and map tools, compass, ham radio and extra battery, 25 feet of 550 cord, a Gerber multi-tool, small tape measure, travel-size dental floss, Chapstick, a sleeve of Compawipes, IR beacon and 9-volt battery, extra ammunition for my rifle or shotgun, red electrical tape, BIC lighter wrapped with tape, SOL emergency blanket, Streamlight ProTac 2L-X flashlight, CAT 7 tourniquet, and a ferro rod from SouthPaw Knots.
Pack It In
Over the years I’ve found this to be a good set up for me. Make sure you test all your gear before you bet your life on it. Any time you’re heading into the woods or wild parts, let someone responsible know where you’re going. Show them on a map and circle the area. Set up regular communication windows with them as well. Remember that comfort is relative. Have an adventure with campfires, chilly nights, and beautiful snowy days, then come home to truly appreciate your furnace.
It doesn’t really snow here.” This is a statement you’ll often hear from residents of the more temperate areas of the country. Through previous experiences, they’ve been conditioned to expect a typical range of seasonal weather conditions. Occasionally, there may be a heat wave or cold snap that pushes temperatures slightly outside the norm, but these events rarely do more than make locals a bit uncomfortable for a few days.
At worst, there might be a dusting of snow in the deep of winter on rare occasions, leading to traffic jams and school closures, but it fades away quickly, and life goes on. This cycle can lead to a condition psychologists call normalcy bias — the tendency to expect that events will always happen the way they’ve happened in the past. Normalcy bias is one of the greatest enemies of preparedness, since it causes us to underestimate the likelihood and destructive power of a disaster that doesn’t fall in line with previously observed historical patterns.
For one example of this phenomenon in action, look no further than the Great Texas Freeze of February 2021. The National Weather Service described it as a “brutal and enduring cold that enveloped the entire state of Texas,” and it marked the coldest winter storm since 1989 — far enough in the past that many Texans had no memory of a winter so harsh.
With nearly nine days of freezing temperatures throughout much of the state, it was also the longest freezing streak in Texas’ recorded history. The impact was disastrous. A total of 246 deaths were attributed to the storm, the majority of which were a result of hypothermia. Power outages affected nearly 10 million people. Grocery store shelves were picked bare.
Iced roads became impassable in cities and caused fatal pileups on highways. Pipes burst in homes and municipal infrastructure, causing many counties to advise residents to boil their water before drinking it. More than $1 billion in damages were caused by the Great Freeze.
So, how can you prepare for a deep freeze of this magnitude if you live in an area where it’s practically unheard of? Even if your household is ready, will you be able to cope with the widespread impact of infrastructure and roads shutting down for weeks? We asked cold weather survival instructor Jerry Saunders and search-and-rescue training officer Patrick Diedrich to share their thoughts on how to approach this chilling scenario.
The Scenario
Situation Type: Unexpected deep freeze
Your Crew: Yourself, your wife, two children (ages 2 and 6), and your mother-in-law (age 77)
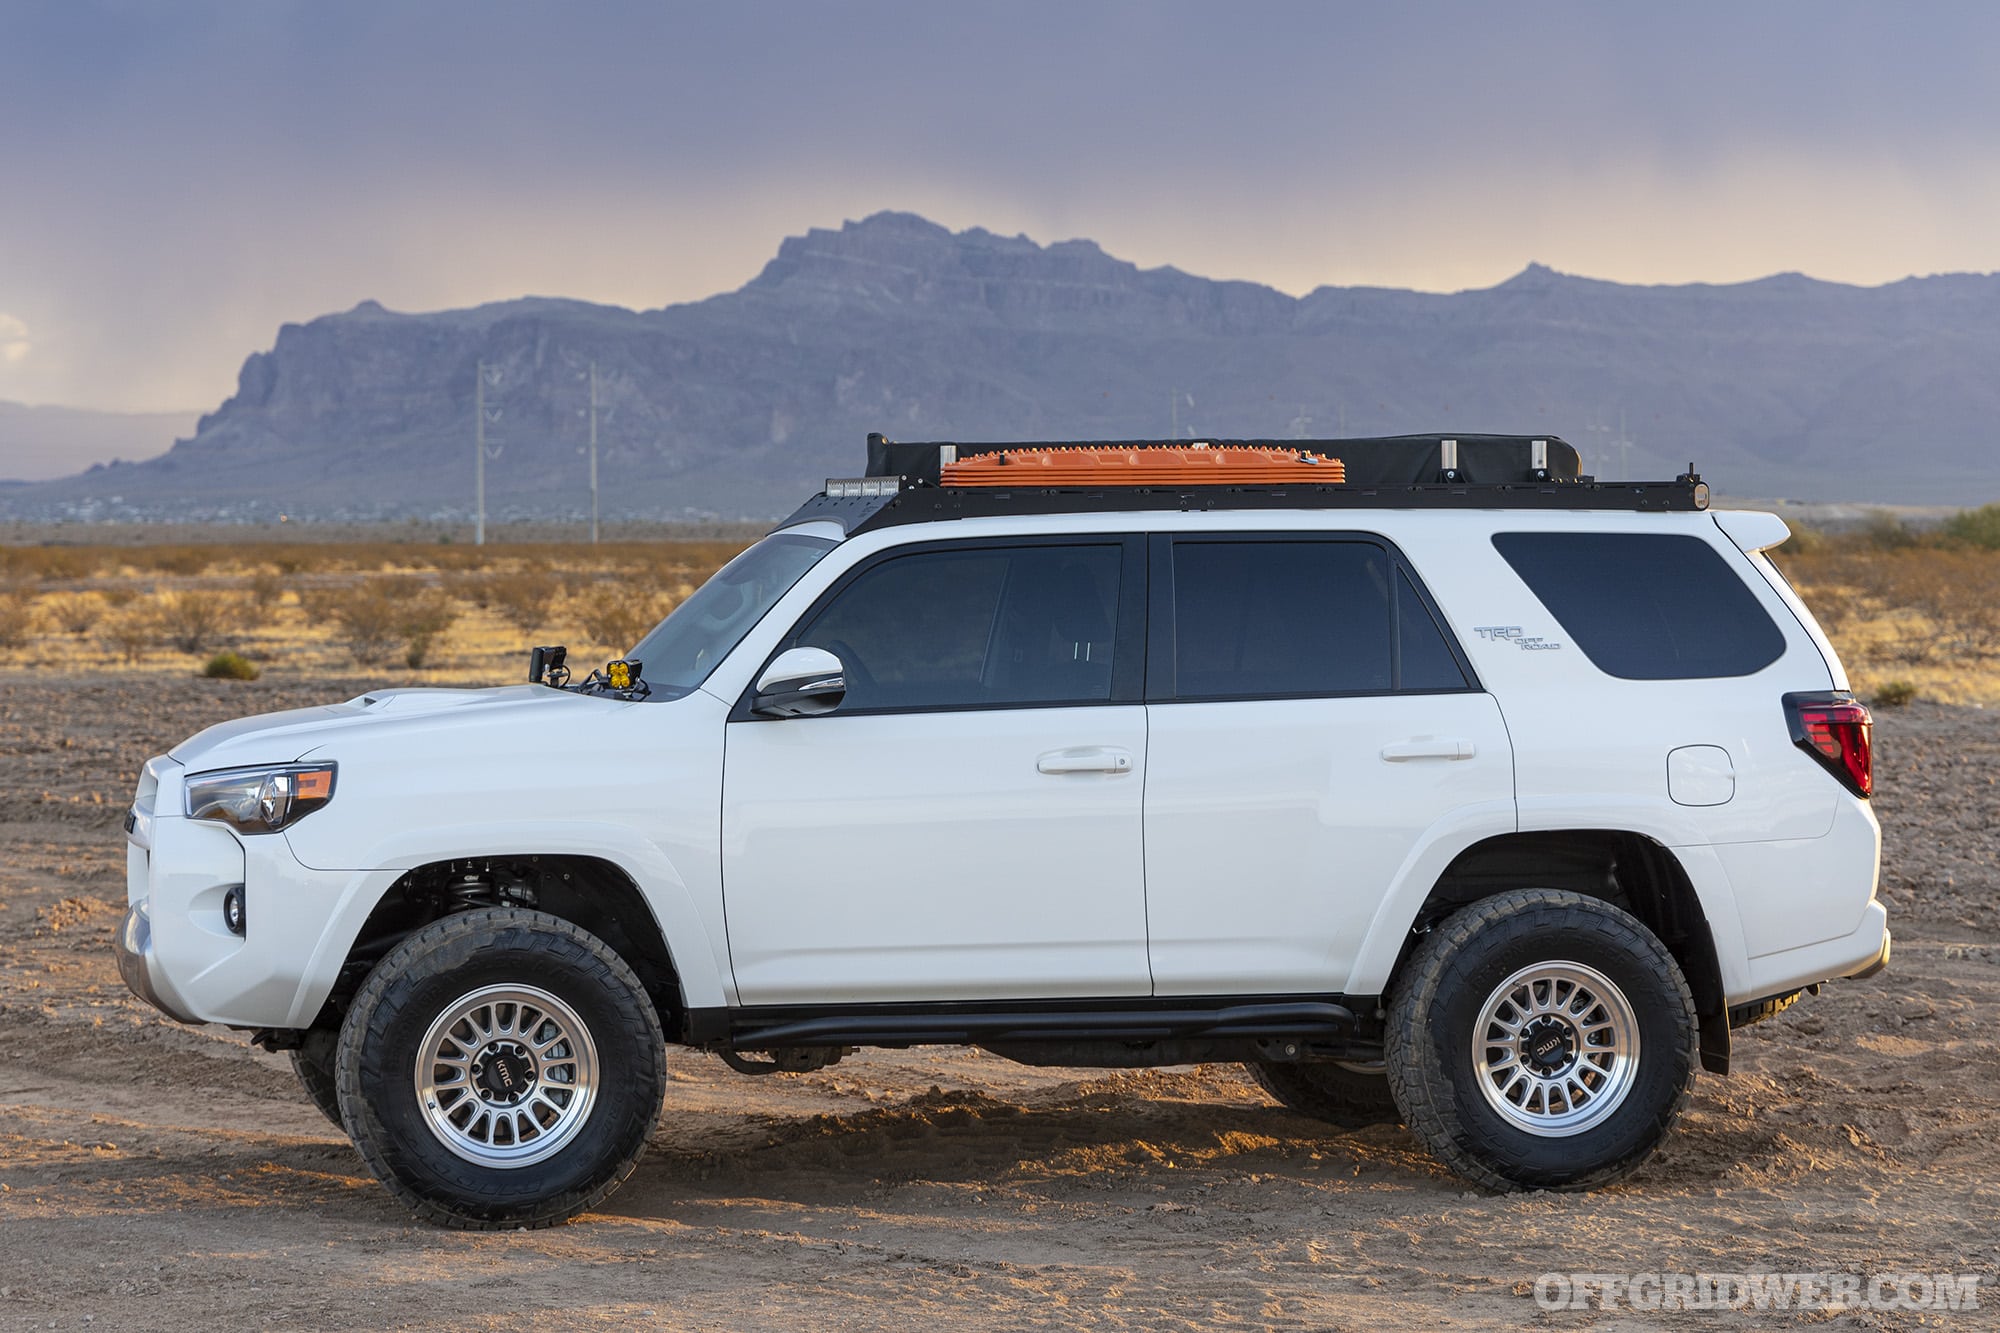
Location: Southern Arizona
Season: Winter
Weather: Snow and freezing rain, high 25 degrees F, low 3 degrees F
Above: Areas that rarely get snow lack snowplows and road treatment procedures. Combine this with motorists who aren’t used to driving on ice, and it’s a recipe for dangerous roadways.
The Setup
Your family lives in Sahuarita, Arizona, about 30 minutes south of downtown Tucson. You’ve resided here your entire life, and your wife grew up in Florida, so neither one of you has much experience dealing with cold weather. You have two kids — a toddler and a 6-year-old — as well as your wife’s elderly mother, Lynn, living at the house. Lynn has had chronic health problems recently, so she takes several medications and needs help with daily tasks. As a result of caring for her and the kids, your wife hasn’t been able to work, and money has been especially tight lately.
The Complication
About a week ago, news stations started talking about an incoming weather system that could lead to heavy snow and freezing temperatures throughout much of southern Arizona. They say it could be worse than anything the state has experienced in more than 100 years. You initially rolled your eyes at the sensational headlines and round-the-clock Winter Apocalypse 2024 coverage, but the seriousness of the situation became clear as freezing rain began to fall.
Ice has coated every building, vehicle, and roadway. Dozen-car pileups have become a daily occurrence on local interstates, and your neighbor couldn’t even get his truck out of his driveway. If you could make it to the grocery store, there wouldn’t be much left to buy — videos on social media show panicked shoppers rushing through bare aisles. The time to stock up has already passed.
Yesterday, the power went out. The utility company says it may be several days before it’s fixed. The local cellular network also seems to be down because of the power outage. Your home isn’t plumbed for natural gas; it relies on an electric heater and electric appliances, so you’re going to have to find another way to stay warm and cook food. You’re worried about the kids, since they don’t have much cold-weather clothing, and your wife is even more worried about her mom.
She’s starting to run low on medications and you’re not sure how you’ll be able to get to a pharmacy for a refill. This morning, you noticed you have no running water. You’re unsure if it’s affecting the whole neighborhood or if the pipes in your home have frozen; if it’s the latter, you’ll need to ensure the pipes don’t burst and flood your home when they thaw.
How will you deal with all these challenges related to the plummeting temperatures? What can you do to keep your family healthy during this deep freeze, and protect your home from costly damage? If you need to venture out for medication refills and other supplies, how can you do so safely?
Above: A portable propane heater can be worth its weight in gold if the power goes out during a winter storm. Just make sure to use them in large, well-ventilated areas. (Photo courtesy of Mr. Heater)
Cold Weather Survival Specialist Jerry Saunders’s Approach
Preparation:
Living in a hot climate like Arizona, such an acute cold weather event might seem like a hoax or sensationalized news. You might try to rationalize it as “just another bad call by the weatherman” or take the “we’re too evolved to freeze” approach. Even sensationalized news usually holds a thread of truth. A phrase I use often is, “everything exists on a sliding scale.”
Improving something such as cold weather knowledge and preparations in an arid climate might seem absurd, but in learning to live in an extremely cold place, I’ve found some of the best survival skills are those of the tradesmen and women. Plumbing, heating, electrical, and construction all correlate to water, fire, food, and shelter.
Preparing for any low-occurrence disaster on a residential structure ideally would be more of a long game than a knee-jerk reaction. Some people would jump at the chance to do an extreme cold weather survival course, even pay quite a bit of money to learn the nuisances of existing in cold weather. But if you’re trying to be a well-rounded and self-reliant person, or your goal is to lessen the effects of this type of natural disaster, consider the following.
Most of the population occupies a dwelling that has water pipes in it, but if you cannot fix it yourself then you’re at the mercy of someone else who can. Also, the trades are in a steep decline. U.S. plumbing industry stats for 2023 state that 55 percent of contractors need a plumber to finish a job right now. That’s an indicator that your repair time on your burst water pipe will be long after your house starts to look like a petri dish.
After a free 3-ish hour class at Home Depot, I learned how to winterize a house, lag pipes, braze copper, fix breaks, and cut and crimp PEX. PEX, in some cases, is a better option for cold environments because of its ability to flex and expand, but it should be avoided if your place is prone to rodent infestations and should not be installed in locations with direct sunlight.
A solid way of preparing in advance for a cold weather event is to take classes that allow you to understand your home and the tools used to make minor to moderate repairs. Hands-on classes are preferred. I also have a small collection of books from the thrift store on electrical, plumbing, and general repair. Don’t count out the family as a good education source. You could also use online resources for those late-night deep dives, and TV shows like Ask This Old House have lots of tips for people looking to learn. All are good options, but books still work in the dark.
Focus on general repair techniques for the exterior of the structure, plumbing, and electrical. These will allow you to understand, prevent, and make repairs that could otherwise spiral out of control.
Much like your EDC pocket tools having multiple functions, your home preps should also be multifunctional. For example, one prep for the cold could be to add a “pigtail” to your house. This should be done by an electrician, but it allows you to safely hook up a portable generator outdoors to your house’s power grid. Blackouts are just as prone to happen in the summer as they are in the winter. This one addition can make your house more prepared all-year round.
Another item I have on hand is a Mr. Heater Big Buddy propane heater. It’s small enough to easily store in the closet and runs on those little green propane cylinders you see in the camping section. The addition of a small hose allows you to attach it to a 20-pound tank like you might find by your outdoor grill. A 20-pound tank will boost the burn time to 24 hours on high or a whopping 108 hours on low. On its high setting, the Big Buddy will efficiently heat a 20 by 20 room.
Above: Winter storms are rare in many parts of the United States, and this rarity can lead to complacency. No matter where you live, you should consider how prepared you are for extreme weather events.
On-Site:
Determining the severity of a pending natural disaster is nearly impossible on an individual level. This can make the news and weather station a necessary evil for things like cold front timelines, closures, shelters, and other emergency information. But this information is important for last-minute preparations. The cliche bread, eggs, and milk grocery store run as the flakes are falling rewards the unprepared with nothing but empty shelves, long lines, and an elevated risk of a motor vehicle crash.
Upon first hearing about the storm, I would take what available gas cans I own and top them off, mix fresh two-stroke fuel for my chainsaw, and fill up any equipment that needs it. I might also pick up some Heet (yellow bottle) in the automotive section. This stuff is a high-grade alcohol that’s antifreeze for gas but it’s popular amongst hikers as alcohol stove fuel. This is a good time to pick up an extra propane tank or two also.
I would want to have an axe on hand, preferably a splitting maul, but in Arizona you may only find a normal axe. Get one with fat cheeks for the best splitting capability. As soon as you hear any notifications of a pending natural disaster, if you have someone under medical care in your home, call their doctor and request a three months’ supply of their meds. If this isn’t possible, get what you can. On your drive home, note locations of drug stores closer to your house in the event you need to walk.
Maintain a reasonable supply of freeze-dried meals. These are unaffected by temperature and have a long shelf life. Keep several Jerry cans for water. Ensuring these are clean and filling them before the storm will ensure you’ve got plenty of water for a few days. Supplement these preps with dry goods like rice, noodles, and beans. Also, if you are experiencing a freeze for the first time, welcome to “your garage doubles as your freezer” season.
My emergency bin contains about 20 emergency candles that last 24 hours apiece. I have a few backup cooking stoves in there, including an MSR XGK : stove that can run on almost any fuel. I also have an Anker power pack that will charge my iPhone almost seven times. Complemented with an assortment of headlamps and lanterns, this box keeps me lit. As for spare batteries, lithium will be a better choice than alkaline due to its enhanced cold resistance.
As far as family goes, it’s important to sit down and talk things out. Have the kids play “dress up” to find all their warmest clothes and start preparing for a campout together in the living room. The 6-year-old can act as Grandma Lynn’s “doctor” and help with small tasks like getting water and tissues and such.
To prepare the house, I must refer to my favorite motto on the homestead, “caulk and paint till it is what it ain’t.” Work in a top-down fashion. Clean the roof and gutters if applicable. If you have dirty gutters, snow and ice will back up and peel your roof back like a tin can. Clear any leaves off the porch or anywhere you may need to clear snow and ice. Once wet, leaves freeze; it’s like concrete trying to remove them.
The foam gap filler Great Stuff is ideal for gaps around 1-inch thick. Turn off outside water taps and wrap a towel around them, then cover them with a plastic bag and duct tape. If you have a sprinkler system in the yard, disconnect it and try to blow it out with pressurized air. Sprinkle cat litter on the porch or high-traffic areas to add some grit to the ice. Cover any wood supply you may have.
Everyone should be gathering blankets and warm clothes in the living room. Rearranging the space for everyone to sleep and care for Lynn. To make a DIY window insulation kit, grab painter’s plastic and a couple of rolls of duct tape. This will allow you to put a tight cover on drafty windows and doors but still reap the benefits of solar radiation. There are real kits sold online for about 5 bucks, but you might want to have those well in advance.
I’d pour a little bit of that Heet in my vehicle’s washer fluid to keep it from freezing solid. RainX makes a cold weather washer booster you might find at some truck stops. Never try to clear ice with your windshield wipers. This will only succeed in gouging the silicone on the wiper blade. Truck stops sometimes stock hard-to-find items because truckers take high mountain winter routes.
While parked, I lift my windshield wipers so that they don’t freeze to the window. Many people down south like to run 100 percent water in radiators, so this needs to be drained at least partially. I have a CB radio in my truck that allows me to talk to truckers. This can be the best real-time news method for things like traffic jams and vehicle accidents when you’re near a highway.
Above: Layer up to stave off the cold but be cautious if you’re exerting yourself. Sweat-soaked base layers (especially cotton) can cause your core temperature to drop quickly and lead to hypothermia.
Crisis:
Expect the power to go out. We always have a hallway light on, and I know if it’s out, the power went. Kill the breaker to anything important to keep power surges from damaging them. Turn on faucets slightly to allow slow movement. Open any closets or cabinets to allow the smaller spaces containing pipes to stay above freezing.
Check on everyone at night, inspecting their faces, hands, and feet for frostbite. If grandma is OK and the kids are bundled, get them outside occasionally. Getting outside even if it’s cold will lessen the effects of cabin fever, and make the inside seem that much warmer when they return.
Cooking in the cold usually takes a lot of water. Use large pots to melt the snow outside by a fire and then add it to a reservoir inside. Pull from this reservoir to cook freeze-dried meals and dry goods. Save the water in the Jerry cans for drinking. Large rocks and bricks can be warmed by this fire and taken inside to capture their radiant heat. Place these on a surface capable of such hot items.
A weather radio can pick up important weather and emergency information. If you’re far enough into a disaster, the Red Cross may show up and start handing out hand-crank, portable AM/FM radios for informational purposes.
If I know my water is going to go out, fill the tub with water then shut it off. This is more water I don’t have to make from snow. This can be used for hygiene needs or boiled for cooking. If you find a frozen pipe in your house, you can rewarm it by wrapping it in a towel and slowly pouring hot water over it. Once water is restored, there can be a lot of questions about the safety of the water. You can find several test kits online between 20 and 30 bucks.
Keeping kids entertained can be a full-time job. Grandma Lynn is elderly, but if she’s still lucid she can spend time with the kids and the kids can help take care of her. Every couple of days, trade out the toys and books in the “warm room” for some new ones to keep it fresh. And like I said before, get the kids outside. Teach them what winter is and that it isn’t all bad.
It’s important to get some time alone with your wife during these times. She’s working hard indoors, and you’re working hard outdoors. You’re both working toward the same goal but doing it somewhat alone. By coming together at the end of the night and talking or going for a cold walk, it allows you to rekindle and remain resilient in hard times.
Final Thoughts:
Looking back, we know a lot of what was lost in Texas was blamed on the inability to get gasoline. I’m still reading articles that claim that, as of 2023, the gas problem, despite throwing $50 million at it, is still not solved.
I’m sure, given the extremes of our weather patterns, we’ll see freezing temps in abnormal places again. Taking some educational steps along with adding a few pieces of seemingly unnecessary winter items could make a big difference for your household.
SAR Training Officer Patrick Diedrich’s Approach
Preparation:
News these days is overly hyperbolic, carefully crafted to capitalize on the reaction to stressful situations. Storms are named, tracked, and given terrifying personas to keep our attention glued to a screen. So, when the weather forecasters started calling the latest incoming storm front Winter Apocalypse 2024, most of us brushed it off as another attempt at sensationalism and went about our day as normal.
Arizona does see days below freezing in the winters, but not much farther than that. It may surprise people living in the north, but we do have warm clothes and jackets here. When the temperature drops from 110 during the day to 70 after sunset, a 40-degree change, it does feel quite cold respectively. Snowfall in Tucson isn’t unheard of, and it’s very common in the mountains to the northeast. Puffy jackets, hats, and gloves are in most people’s coat closets. But beyond that we do not have much of the gear, tools, or supplies to deal with copious amounts of ice or snow.
Weather reports became increasingly foreboding, and with some not-so-gentle prodding from my wife and her mother, Lynn, we decided to take a few precautionary measures. Following advice on the Arizona Department of Transportation (ADOT) website, we topped off the fuel in our vehicles and installed the snow chains we typically only use in higher elevations. We also built a vehicle emergency kit with first aid supplies, flashlights, snacks, and some water. But we added a few winter extras, like warm blankets, a box of kitty litter, a small folding shovel, and an ice scraper.
For the house, we took stock of our food and water situation. Before the storm, we headed to the store to make sure our fridge is full and that our shelves have a few extra days’ worth of non-perishable items. We picked up several cases of bottled water and called in any medications eligible for a refill. Unfortunately, we’re not the only ones making last-minute preparations, and some of the food items we were forced to choose from aren’t terribly appetizing. We picked up some extra flashlight batteries, a deck of cards, and a few coloring books for the kids, just in case the power goes out.
We overheard someone in the store talking about a deep freeze they experienced in Georgia a few years back, and how the water in the pipes froze, burst, and caused serious damage. After listening to that story, we headed to the hardware store to find some heat tape — a long heating strip that uses electricity to warm up pipes and keep the cold from causing damage. However, we were too late, and they were all out of stock. They did have a few extra NOAA weather radios available. After discussing possibility of being without a heat source, we headed to the nearest camping supply store to pick up a few propane tent heaters and several bottles of extra propane.
Upon returning home, we dug out every piece of cold weather clothing we could scrounge up and began managing the emotions of the two kids. Instead of turning it into a fear-based scenario, we talked about how we might be doing some “Christmas camping” in the house, and to not be frightened if the electricity suddenly cuts out. To put everyone’s mind at ease, we rehearsed the scenario by turning off all the lights and electronics and practiced finding flashlights and meeting in the same place.
We checked on our next-door neighbors, but they didn’t seem overly concerned, and after some small talk, we found out that they’ve made no preparations. They even seemed slightly amused at the few small steps we took just in case the worst happens. When we brought up the not-so-distant winter storm that happened in Texas a few years back, they shrugged it off and returned to their evening entertainment. Back home, I voiced my own doubts about the steps we’ve taken, but my mother-in-law, having lived through more than one dangerous cold weather event, says we’re doing the right thing.
Above: For adults, a winter storm may be an inconvenience, but don’t let it make your whole family miserable. Spending a little time playing outside — as long as you can stay warm and dry — can lift everyone’s spirits.
On-Site:
That night, the news began warning that we should brace for the impact of the storm, and that it may be worse than originally reported. Checking outside, we saw that it was beginning to rain and the wind was picking up. Even so, we kept a positive attitude, changed what we were watching to something a little more uplifting, and went about the rest of the evening as we normally would. Later, we put the kids to bed and settled in for the night, assuming that the storm would pass us by without any issue.
Our sleep is interrupted as the background hum of electricity cuts out, replaced with deep silence. The house is pitch black, and the only sound is that of ice pelting the windows and the wind howling over the roof and through cracks in the poorly sealed windows and doors. Grabbing some flashlights, we go to check on everyone.
The kids are sleeping soundly through the event, so we make sure they’re bundled up warmly in their blankets and do the same to Lynn. Outside, it looks like there is a glossy sheen covering everything in sight, the entire landscape glazed in a frozen layer of ice. Broken tree limbs scatter the ground, and there is clear indication of powerlines fallen to the earth from the weight of the ice coating.
Using some painter’s tape, we try to seal the spots around the windows and doors where the frozen wind is trying to force its way through. When we run out of painter’s tape, we use an almost spent roll of duct tape. When we run out of that, we shove some towels in the large gaps beneath the doors. Even with the major drafts sealed off, the temperature inside is steadily plummeting.
Worried about the cold, we get the propane camping heaters up and running near the base of the kitchen sink, thinking we can stay warm while simultaneously keeping the water pipes from freezing. Unsure of what to do next, we turn on the NOAA weather radio.
When the radio comes to life, we’re bombarded with updates on rates of precipitation, wind speeds, storm location and other pertinent information. It sounds like the storm will go on until at least noon the following day. As the information begins to repeat itself, we scan through other channels, and it is fortunate for us that we did. On one channel, a reporter is warning the audience about the dangers of burning combustibles inside the house.
Apparently, some people who owned a gasoline-powered generator have already succumbed to carbon monoxide poisoning. Although we’re not creating as much exhaust as a gasoline generator, we still turn off the heaters and discuss how we could provide adequate ventilation.
Crisis:
It’s not long before the chill permeates the entire house and becomes uncomfortable enough to wake up Lynn and the kids. They see the flashlights in the kitchen and wander in groggy, cold, and confused. To stay warm, we don our winter outerwear and huddle together on the couch beneath as many warm comforters as we can gather. Some of us manage to catch a few winks, but as morning light finds its way through the continuing storm, it’s apparent that none of us are well rested.
With the electricity out, breakfast is cold cereal, which does nothing to boost morale. Lynn attempts to get a glass of water but nothing flows from the faucet. Feeling thirsty, one of the kids tries to grab a bottle of water, but it flash freezes solid due to a phenomenon called supercooling. All the water bottles are affected by this, and we endeavor to find a way to warm them up. I try to warm one against my body, but I am already feeling a little too cold, and a bottle of ice is just too much to deal with on top of it.
Realizing we need to start using our propane camp heaters, but safely, we crack a window for fresh air and point the heaters in the direction of cases of water. Soon we’re all huddled miserably around the heaters and water. The cold is tremendous, not something any of us have ever experienced, and it seems like everyone is rattling with shivers, becoming physically and emotionally withdrawn.
Maybe there’s a better solution. Perhaps we can warm up in our vehicles. Perhaps we can drive around, find a hotel or restaurant that still has power, and warm up more efficiently. That must be better than struggling to find warmth around a tiny heater.
I grab my keys and attempt to open the front door, but it doesn’t budge. The ice must have caked around the edges of the door, sealing us inside the house. With a more vigorous push, with my body weight behind my shoulder, the ice breaks, and the door swings open. As soon as my foot hits the stoop outside the door, I slip and land with a grunt on my back. Freezing rain is still coming down hard. Everything is coated with ice, and none of us have the footwear to find adequate purchase on its surface. Going to the garage, I find an iron garden rake, and begin scratching and breaking the surface of the ice to clear a way to the car.
The car is entirely coated in a glaze of ice, as is everything. Cautiously, I tap the edge of the rake around the outline of the driver’s side door, weakening the ice just enough to be able to open it. Sitting in the driver’s seat, and out of the freezing rain, I realize that my puffy jacket does nothing to stop the wind or keep water from permeating the material. I’m completely soaked and feel cold down to my bones. I struggle to find the physical coordination to get the key in the ignition, but I manage to do so. Turning the key, the engine sluggishly turns over a few times but doesn’t start. Dejected, I rest my forehead on the steering wheel and pray to all the gods for the car to start.
I turn the key again. Nothing.
Again. Nothing.
One more time. The engine miraculously roars to life, and I heave a sigh of relief as I turn up all the heat settings to the max. Now it’s time to get the rest of the family out here.
First is my elderly mother-in-law. My wife and I walk her to the car carefully, so she doesn’t slip and get hurt. Next are the kids, who are so miserably cold, they walk to the car in a shivering daze. I notice my neighbor carefully sliding his way across the driveway to my location.
He explains that they didn’t go shopping, they’re almost out of food and wondering if we had any to spare. I give him what’s left of the cereal, a few cans of potted meat, and suggest he follows us as we look for a warmer location. But he has no snow chains for his tires, and a quick glance down the road reveals a chaotic scene. Numerous vehicles are stranded in ditches or crashed into trees, suggesting driving without chains is a terrible idea.
Grabbing my phone, I attempt to open my mapping, but the signal reads “SOS.” Seems like the cellular towers have also been affected. Instead, I turn on the radio in the car in hopes of finding some information about what might be happening. Most of the FM stations are nothing but static, but one of the AM stations appears to be working still.
The broadcaster states that FEMA is recommending everyone shelter in place, since it is not safe to be traveling. Reluctantly, we wait out the rest of the storm, parked in the driveway in the warmth of the car, sipping water from slowly thawing bottles.
Eventually, the storm dissipates, the sun breaks through the clouds, and the ice begins to melt. But we’re not out of the woods yet. Several pipes in our house have expanded and split open in the cold, and we must turn off our water main until they can be repaired.
In the back yard, frost heave has moved the earth in such a way that the septic line to our drain field has ruptured, and now whenever a toilet is flushed, raw sewage bubbles to the surface in our back yard. And our situation is just a microcosm of what has happened to the entire region affected by the storm. It will be weeks, if not months, before everyone has working septic and water, not to mention power and internet connectivity.
Final Thoughts:
Even though we thought we were prepared by being proactive and gathering supplies before the storm, inexperience with disasters, and with cold weather conditions, could’ve led to fatal results. Things like a 5-gallon bucket with a toilet lid, a safely installed backup generator, and alternative ways of preparing food would ensure that our family and neighbors could be taken care of over the duration of the disaster.
Installing a car battery with enough cold cranking amps would keep our vehicle running when the temperature plummets. Understanding how to layer clothes properly, or how to improvise a rain shell could’ve prevented a potentially hypothermic situation. Even footwear like cleats or crampons would have been incredibly useful to stay mobile as the ice accumulated.
Conclusion
Living someplace that’s usually hot doesn’t mean we should ignore the cold entirely. Although uncommon, storms like these have occurred in the past. January 1913 was the coldest winter on record in Arizona, with temperatures down to 6 degrees, and that was a time when most Americans were much more comfortable with self-reliance and living through hardships than they are today. Back then, when things got tough, you figured it out on your own or asked your neighbors. More than a century later, we’ve grown accustomed to finding solutions to problems with the aid of a smartphone and internet connection, and this complacency can be dangerous.
Although we should be prepared for outlier weather events, it’s important to keep them in perspective. In southern Arizona, there probably isn’t a great need for a garage full of snowmobiles and firewood, but reviewing a little bit of winter preparedness before the season starts could save lives during inclement weather.
This mindset applies to all climates and seasons — if you live in an area where snow and ice are common, perhaps it’s time to consider how prepared you are for a prolonged heat wave. If your area is frequently affected by heavy rainfall and flooding, you should plan for a drought. Mother Nature is a fickle mistress. Don’t let her catch you off guard.
[meetourpanel]
Read More
Subscribe to Recoil Offgrid’sfree newsletterfor more content like this.
Have you ever considered what course of action is best when the fabric of society crumbles apart, and the rug of your worldview is pulled out from under you? Should you bug out to a safe location? Bug in and wait it out? Do you throw up your hands and decide to DIP (die in place)? It’s difficult to consider what you would do if war has never affected your life, but there are plenty of war survivors out there with compelling stories and a trove of wisdom.
In a world increasingly fraught with uncertainty, the stories of those who have faced the unimaginable and survived provide not just a blueprint for endurance but a call to introspection. “The SHTF Anthology” by Selco Begovic, a survivor of the Balkan Wars, thrusts us into the harsh realities of a life upended by conflict and chaos. Through his eyes, we witness the breakdown of society, the collapse of resources, and the human spirit’s indomitable will to persevere. This post aims to transform Selco’s harrowing experiences into a reflective journey, urging us to question, “What would I do?”
Above: A ruined building riddled with bullet holes stands as a stark reminder of the past.
How Would You Adapt?
Selco’s narrative is more than a survival manual, it’s a mirror held up to our own lives, challenging us to consider our preparedness, resilience, and adaptability in the face of crisis. Each chapter delves into aspects of survival that go beyond the physical—touching on the mental, emotional, and ethical dilemmas one might face when the fabric of society is torn apart.
Imagine, for a moment, waking up to a world where the conveniences and certainties we take for granted are obliterated overnight. Without electricity, running water, or access to food, how would you adapt? Selco’s experiences force us to confront these questions head-on, providing not just answers but a framework for survival that emphasizes resourcefulness, community, and the preservation of humanity amidst inhumanity.
Security and Violence
Security and violence become paramount concerns in such a scenario. Selco doesn’t shy away from the grim realities of protecting oneself and loved ones in a lawless environment. But it’s his reflections on the psychological toll of violence and the importance of maintaining a moral compass that strike a chord. It’s easy to theorize about what one might do when threatened, but Selco’s account compels us to ponder the deeper implications of our choices.
Above: Two men stand guard a checkpoint during the Balkan War.
Medical Challenges
Health and medical challenges are another critical aspect explored in the anthology. In a world stripped of medical infrastructure, knowledge of basic first aid, and understanding how to prevent disease, become lifesaving. Selco’s advice underscores the importance of preparedness in all forms—not just stockpiling supplies but acquiring skills that can sustain us when external systems fail.
Survival Mindset
Perhaps the most moving lessons come from Selco’s insights into the survival mindset. Survival is not solely about physical endurance but the mental fortitude to face each day with hope and determination. The stories shared in the anthology illustrate the power of human connection, the value of small kindnesses, and the strength found in shared suffering and solidarity.
As we reflect on Selco’s journey and the broader implications of his experiences, we’re reminded of the fragility of our own existence. His story is a testament to the resilience of the human spirit, but it also serves as a wake-up call. In our comfortable lives, it’s easy to overlook the importance of preparedness, community, and ethical resilience.
Above: A man carefully attempts to disarm a mine.
What Would You Do?
So, what would you do? This question isn’t just hypothetical, it’s a prompt for action. It encourages us to evaluate our readiness for the unexpected, to strengthen our mental and emotional fortitude, and to cultivate a network of support that can withstand the tests of crisis. Selco’s story, while unique to his circumstances, offers universal lessons on the importance of being prepared not just for survival but for living in accordance with our values when tested by fire.
“The SHTF Anthology” is more than a survival guide, it’s a philosophical inquiry into what it means to be human in the face of catastrophic change. It challenges us to ask ourselves how we would navigate the collapse of the familiar and emerge not just intact but stronger, wiser, and more compassionate. As we consider our answers, let’s take to heart the lessons of those who have endured the unthinkable and emerged with insights that can guide us through any storm.
In an emergency, communications can be a matter of life and death. It’s the third leg of the tactical triad: shoot, move, communicate. It’s also a crucial part of many non-combat emergency preparedness frameworks. Every aircraft pilot is reminded of three top priorities during training — aviate (keep flying the aircraft), navigate (be sure you’re traveling in a safe direction), and communicate (stay in touch with air traffic control).
Regardless of the emergency situation you find yourself in, the importance of comms cannot be overlooked.
In emergency and preparedness circles, the merits of various radio equipment and modes of communication are hotly debated. Even within the handheld radio sub-category, there are thousands of models to choose from. However, when it comes to communications, one thing sets it apart from all other gear debates: it takes two to communicate.
If you have no one to talk to, or the person on the other end can’t receive your call, it doesn’t matter how great your gear is. Every emergency communications plan must take this interoperability factor into consideration.
So, we’ve established that you need several handheld radios to help your family and friends stay in touch during emergencies, and you need each handheld radio to be able to communicate with the broadest number of people possible. The ubiquitous Baofeng UV-5R (or its sibling, the F8HP) seems to be the standard choice for a cheap and versatile radio — it’s not a bad option for beginners, but it’s far from the best choice.
If you’ve never bought a handheld radio, or you already own a few and have decided it’s time to upgrade, you should consider your options carefully. In this article, I’ll present some of my favorite radios at different price points for those who are looking for something more sophisticated and powerful than the old UV-5R.
Handheld Radio Criteria
My selection criteria for these recommendations are the following:
Availability – Firstly, are the radios in stock at retailers where the prepared citizen is able to purchase them? Some radios are only available secondhand as law enforcement or military surplus, which makes them difficult to obtain in good condition or in a timely manner. Secondly, are the radios prohibitively expensive? With regards to cost, I’ll discuss choices at three price points that should fall within the budgets of every reader.
Interoperability – Can this radio be used to talk to other radios of different makes and models, so that you have the opportunity to communicate with the broadest possible set of people?
Ease of Adoption – This addresses the learning curve associated with the radio, and whether there needs to be a major support system for users. Due to both of these issues, I’ll be focusing specifically on analog radios and avoiding those primarily or exclusively intended for digital modes of operation (DMR, P25, etc.). Digital radios are primarily designed for bulk purchase and programming by large organizations such as police departments or search and rescue teams, not for DIY setup by individuals, so analog will be much easier to adopt.
Resilience – How rugged is the radio? Consider factors such as water resistance, drop rating, button durability, antenna connection strength, and general build quality. In short, if this is the radio you must rely on in an emergency, how likely is it to stand up to hard use?
Ecosystem – This covers supporting equipment and compatibility with accessories from other manufacturers. For instance, if you buy a lower-end radio now to learn on, does it make sense to add mid- or high-end accessories to it? Some of those accessories may require the purchase of specialized adapters. Or will it be more cost-effective to move on to a better transceiver and keep the rest of your setup?
Entry-Level: Baofeng UV-9R Plus
At the low-end, I’m starting with a Baofeng UV-9R Plus. Yes, I know, it’s odd for me to be suggesting a Baofeng to replace another Baofeng (UV-5R/FH8P), but based on my criteria, I think this is either a good first radio, or one you should strongly consider as a replacement for your old UV-5R.
Above: The Baofeng UV-9R Plus is a cost-effective alternative to radios such as the UV-5R, giving the user the same capabilities but in a rugged package more suitable to hard use in a disaster or civil defense scenario.
Availability
The UV-9R Plus can be had for only $30 – depending on color – as of the time of this writing and can be obtained from retailers such as Amazon. For about $50, you can get a package with two batteries, programming cable, shoulder-mounted speaker mic, earpiece, charger, etc.
Interoperability
The UV-9R is an analog VHF/UHF, FM ham radio that is software unlockable to get out of the 2m and 70cm ham bands. As such, you’re able to talk with anyone else using analog FM on or around the 2m and 70cm bands, from other Baofeng users to those running high-end rigs.
Adoption
From a user perspective, the UV-9R is just another Baofeng, so anyone with experience using a Baofeng will be able to pick it up and go. The menu interface is the same as a UV5R, and it works with the popular Chirp programming software as well.
Above: Disco32 and Armorwerx both make PTTs for the water-tight Baofeng multi-pin connection. The radio also ships with an Abree shoulder mic.
Resilience
The UV9R Plus is IP67 rated for dust and water resistance. This means the radio is completely protected from dust and can survive immersion in 1m of water for a short period of time. Dropping this radio in a puddle or using it in a rain or dust storm is no problem.
The radio also claims to be drop-proof. Possibly related to this — and definitely an improvement over a UV-5R — is an extended collar protecting the volume/power knob, helping reduce the likelihood that it gets accidentally turned at a tactically inopportune time. The collar may also protect it from breakage to a degree.
Where this radio shines, even in comparison to the next one that I’ll be discussing, is the screw-down, three-point connector for shoulder mics and push-to-talk (PTT) add-ons. This radio enables you to use tactical accessories without compromising the waterproofing.
Above: The major difference between the UV-9R and the UV-5R is the screw-down, multi-pin connector.
Ecosystem
The greatest drawback to the UV-9R Plus is that this transceiver is essentially the “end of the line” in terms of where you can go from here. This is a result of the proprietary nature of its pinout connection. While the body is similar in form to, say, a Motorola or Hytera connector, the pinout isn’t compatible. This is a notable difference from the UV-5R, which uses a non-proprietary Kenwood two-pin connector.
However, that doesn’t mean you can’t accessorize or run the radio with high-end accessories. This is because multiple vendors, such as Disco32 and Armorwerx provide NATO-spec U94 PTTs with Baofeng Multipin downleads. They can be had in amplified or non-amplified version, depending on whether you’re using a military-grade, low-impedance headset (such as Peltor Comtacs) or using a more budget-friendly, high-impedance rig (such as Howard Leights with a multi-mount microphone). But before you spend hundreds of dollars on adapters and specialized accessories for your Baofeng, consider if that money would be better spent on a more capable radio.
Overall Impression
I give the Baofeng UV9R Plus a rating of 7 out of 10. For the price, you really can’t beat it. It makes a much better first option than a Baofeng UV-5R. Even in the most inexpensive package, it comes with a lot of supporting equipment out of the box that even lower-end Yaesu radios (which come in at a slightly higher price point) don’t have.
The only downside really is the proprietary connector, which may make some people think twice, at least if they wanted to work this into a tactical kit.
Mid-Level: Radioddity GS5B
The Radioddity GS5B may seem like a strange choice for a recommendation at a mid-level price point. Its $109 MSRP puts it in the range where you might want to consider a Yaesu FT-65 or maybe even a Yaesu FT-60. However, for many people, such as those for whom preparedness is about things such as natural disasters or public safety, the GS5B really shines. In fact, my personal radio for my search and rescue kit is a GS5B.
Above: The GS-5B, in addition to being more rugged than a UV-5R, has a SWR meter on the display and can simultaneously monitor and receive A and B channels.
Availability
The GS5B is almost always available from retailers such as Amazon and is often on sale for about $85 with Prime shipping.
Interoperability
The GS5B is a dual-band, VHF/UHF radio that’s software unlockable and functions in the MURS and FRS/GMRS bands as well.
Above: Disco32 (pictured) and Armorwerx both make NATO-spec PTTs for the water-tight, Yaesu screw-down connector, making this a prime choice for an analog radio to be integrated into your plate carrier, chest rig, or other civil defense gear.
Adoption
The GS5B has its own proprietary programming software, and to be honest, it isn’t the best. However, this is mitigated by the fact that the radio can also be programmed via Bluetooth with a phone app while on the go. Both of these options have some learning curve associated with them, and this may be the weakest point of the radio for many people.
Resilience
The GS5B is IP56 rated, meaning it’s not entirely dust or water-tight, but is definitely rain-proof and should be good to go for dust in most areas of operation. I’ve personally used this radio for over a year, both as a SAR volunteer and personally. I keep it in my car in Texas heat, take it with me on family trips from the East Coast to the Grand Canyon, and use it during search and rescue operations. I’ve never had an issue with this radio at all.
Above: The features and construction of the GS5B make it an excellent choice for use in a public safety role. Mine is a key part of my Search and Rescue kit, living on my Hill People Gear SARv2 chest rig.
Ecosystem
The GS5B uses a two-pin Kenwood connector just like your old UV-5R does. All your UV-5R accessories should still work with it — all of mine do. If this radio is just a step up from a Baofeng for you while you consider moving on to a higher-end radio, you could buy all the high-end accessories such as PTTs you want right now and leverage any other radio using the Kenwood connector in the future.
Above: UV-5R users should recognize the two-pin Kenwood connector on the side of the GS5B. It makes this radio compatible with existing UV-5R radio accessories, such as PTTs and shoulder mics.
Overall Impression
The Radioddity GS5B does fairly well in all the evaluation criteria, with adoption perhaps being the lowest score because of lack of Chirp software support. However, it has specific features which make it attractive over other radios in a similar price point, depending on personal use case.
The first is dual monitor combined with dual PTT. This radio can simultaneously receive both the A and B channels you have configured, even if they are in different bands. The dual PTT allows you to talk on either, without having to switch between your A and B channel first (as you’d need to on most other handheld radios). This can also be used to monitor a broadcast channel for news and a group or family communications channel.
The high-visibility color and integrated flashlight make this an excellent choice for use in public safety situations such as search and rescue, hurricane or earthquake preparedness, etc. These features do, however, detract from the value of this radio in a civil defense/minuteman type of use case where concealment may be a necessity.
High-End: The Yaesu VX-6R
The Yaesu VX-6R is my personal favorite handheld radio, and the one analog ham radio that I’d really trust my life to. That’s a tall claim, but this is one that has never let me down over many years of frequent use.
Above: Yaesu’s VX-6R is an outstanding, dependable choice in the premium handheld radio category. Unless your needs are more specialized or you’re switching to digital, it might be the last handheld you need to buy.
Availability
All major ham radio stores carry the VX-6R. Unlike its Chinese compatriots, it may not always be readily available on Amazon, though certain accessories may be had from there. Expect to spend approximately $250 on one of these radios.
Interoperability
The VX-6R does a lot out of the box, and far surpasses the other radios that I’ve discussed in terms of information gathering. Its wide-band receiver capabilities enable it to listen in on HF and shortwave transmissions, AM airband traffic, and broadcast radio. However, since it is an FCC-compliant ham radio, it does come locked to the 2m/1.5m/70cm VHF and UHF ham bands.
Unlike the Chinese radios, which often play fast and loose with FCC rules, the VX-6R does require a hardware MARS (Military Auxiliary Radio System) modification to open it up for use on FRS/GMRS and MURS frequencies. This can be purchased as a $35 add-on service from distributors such as Ham Radio Outlet and Gigaparts, or it can be done yourself, if you’re so inclined. (See sidebar for details.)
Adoption
Recently, support for the VX-6R has reached Chirp, so it’s no longer necessary to purchase a third party programmer such the one from RT-Systems, though their programming cable is quite good. The radio doesn’t come with a programming cable.
The requirement of a hardware MARS/CAP mod is probably the biggest hurdle to adoptability of this radio for non-HAM purposes. One must either be comfortable with working on electronics or willing to spend a little extra to purchase the radio from a source that can do the modification on your behalf.
Unlocking Your VX-6R with the MARS Mod
Unlocking the VX-6R is straightforward but does require some basic electronics skills and tools. You will need a soldering iron and soldering wick to perform the operation.
Step 1. Remove the battery and peel back the protective film in the battery compartment to expose the circuit board.
Step 2. Identify the soldered jumpers (4th and 5th from the left) underneath the cutout on the PCB.
Step 3. Use your heated soldering iron and soldering wick to loosen and remove the jumpers, and make sure that everything is cleaned up.
Step 4. Replace the covering and battery.
Step 5. Reset the microprocessor by holding down the [mode], [0], and [V/M] buttons simultaneously while powering on the unit.
Step 6. Press the [F] key when prompted to do so.
If you have any pre-existing channel settings, this will wipe them out, so you’ll need to reload them with your programming software. However, at this point in time, you’re good to go and can transmit outside of the amateur radio bands.
Resilience
Resilience is another place where the Yaesu VX-6R shines. It’s marketed as submersible and has a JIS7 rating that’s roughly equivalent to an IPx7 rating. It can be submerged in about 1m of water for 30 or so minutes without any damage. The waterproofing is bolstered by both a gasket-and-screw system on the accessory jack, as well as a locking battery compartment.
Underneath the battery is a removable waterproof membrane that allows access to the circuit board area necessary for conducting the MARS/CAP mod or for installing expansion modules.
Ecosystem
The Yaesu VX-6R has a solid accessory system. Amplified and unamplified PTTs with the waterproof connector can be had from Disco32 or Armorwerx, allowing you to use both high-impedance commercial and low-impedance military headsets with the radio. While this handset’s dimensions are shorter than many of its competitors, including the others covered in this review, there are vendors such as Spectre Gear which make MOLLE-compatible radio pouches specifically for its form factor.
Additionally, while the VX-6R is an analog radio (though it does support the proprietary Wires protocol for talking to Internet-linked radio systems), the same waterproof connection is used by the Motorola/Vertex Standard EVX-S24 digital (DMR) radio. Thus, for groups leveraging Tier 2 DMR to communicate, you can have one gear setup which supports both radios as needed.
Overall Impression
With a wide-band receiver, tri-band transmit, good third-party support, and rugged construction, the Yaesu VX-6R is perhaps the ultimate analog radio for the preparedness-minded individual. Perhaps its only drawback is the belt clip, which lacks spring loading and should not be clipped through PALS webbing without a dummy cord.
Head-to-Head Comparison
For those who like quantifiable points of comparison, here’s a breakdown my rating on a scale of 1 to 10 (10 being the highest rating) for each radio against each criteria:
Communications is key to mission success and survival. Just like firearms, having the best you can afford and will carry and train with regularly is important. The quality, availability of aftermarket accessories, and ease of operation is also a key consideration. But unlike firearms, you can’t make your choice solely based on your own preferences — your radio needs to work with the radios carried by everyone you need to talk to.
While none of these radios are perfect, they each have their strengths, and I own them all for different purposes. The UV-9R is a rugged radio that anyone who has ever used another Baofeng platform will instantly understand, but which will hold up to more abuse than the UV-5R at a similar price point.
The Radioddity GS-5B’s unique features make it an excellent choice for public safety volunteers, and it’s earned a place in my SAR turnout kit. The Yaesu VX-6R’s rugged reliability, wide-band receiver, and capacity for expansion makes it a tool I’d trust my life to.
Regardless of your budget or what you’re preparing for, you should ensure you have multiple methods of communication with as many people as possible. Even if your cell phone is your primary day-to-day comms device, don’t forget that it’s fragile, susceptible to fast battery depletion, and reliant on signal from a network of towers that can be easily disrupted.
A quality handheld radio can communicate directly with your friends and family — no network or monthly payments required — and will be durable enough to withstand a variety of outdoor activities. These radios are my personal recommendations depending on your budget, but that doesn’t mean they’re the last word. I encourage you to use this framework to determine what’s important to you and evaluate your options accordingly.
Read More
Subscribe to Recoil Offgrid’s free newsletterfor more content like this.
Let’s take a look at something interesting that’s stirring up the camping and survival scene. Meet the latest Outdoor Element entrants that are set to improve how we interact with the wild: Flicker Feather and Scout Feather. These aren’t just any knives, they’re innovative, merging tradition with cutting-edge design to cater to adventurous spirits.
Kickstarter Campaign
For those unfamiliar, Kickstarter is the launchpad for creative minds to bring their visions to life. It’s a place where backers and creators build a community around projects worth believing in. Remember, backing a project is a journey filled with updates and engagement, not a mere transaction. Outdoor Element is utilizing this platform to get these products out to the masses, and they have already surpassed their goals. You can checkout the campaign here:
Flicker Feather & Scout Feather
What makes these blades stand out? The Flicker Feather and Scout Feather come equipped with four essential features: Cut, Combustion, Sharpen, and Signal. These tools aren’t just about surviving, they’re about thriving in the wild.
Constructed from VG10 steel and boasting a Rockwell hardness of 57-59, along with a 15.5% Chromium content, these knives are built to last. Whether you’re preparing a meal at the campsite or splitting wood for a fire, these blades are designed for resilience and versatility.
The knives feature a 90° spine, perfect for sparking fires with the integrated hex ferro rod. They also come with a built-in sharpener in the sheath, ensuring your blade remains as sharp as your wits. And in case of emergency, the 115dB whistle is your call to be found.
G10 handles ensure a secure grip, and a reconfigurable belt clip makes for easy carry. The option to wear it as a neck knife adds to its versatility and ensures it’s always within reach when you need it.
Unique Features for Each Blade
Each knife brings something special to the table. The Flicker Feather, with its EDC Chisel Blade, is engineered for fine cuts and woodwork. The Scout Feather, on the other hand, with its EDC Drop Point Blade, combines strength and sharpness for great durability in the field.
A Nod to Heritage and Craft
The names Flicker and Scout Feather draw inspiration from nature and a rich heritage. These names pay homage to the spirit of adventure and the deep-rooted connections with the natural world and Native American culture.
Feedback from bladesmiths, fieldcraft experts, and wilderness survival instructors speaks volumes. Without a single paid review, the genuine, enthusiastic endorsements highlight the impact and quality of these knives.
The Team Behind the Blades
Outdoor Element, based in Colorado, is the brainchild of a passionate team led by Mike, a former aerospace engineer turned outdoor gear innovator. With a track record of successful Kickstarter campaigns and a portfolio of patented products, they’re no strangers to bringing groundbreaking gear to the market.
With a 10-year manufacturer warranty and a focus on sustainable practices, including eco-friendly packaging and long-lasting design, Outdoor Element stands by their products and the planet. You can learn more about Outdoor Element and their other projects here at OutdoorElement.com
Read More
Subscribe to Recoil Offgrid’s free newsletterfor more content like this.
In survival first aid, the triangular bandage is an important item that should be part of every medical kit. Available as a stand-alone item or improvised from a bandanna, neckerchief, or shemagh, the triangular bandage has proven to be a versatile and lightweight tool in the off-grid medic’s toolbox. Every medical kit should have several.
Over the centuries, bandannas — which originated from a colorful headdress in India called bandhana, from the Sanskrit word for “bond” — have morphed into an item which can be seen on the outfits of everything from scouts to sailors to cowboys. In some cases, kerchiefs have become part of ceremonial costumes or uniforms. In practical terms, however, they can serve to wrap a wide variety of injuries incurred in the backcountry or other austere settings. The triangular bandage is useful for any situation where immobilization is helpful for healing or for transport. It can be used to treat sprains, broken bones, bleeding injuries, and much more.
Above: Every medical kit should have more than one triangular bandage.
The bandage can be used in conjunction with a number of other medical items to achieve stabilization. It can be improvised into a tourniquet with a stick or used as a wrapping to pad and immobilize a sprain in tandem with a splint. By itself, it can serve to help apply pressure to and pack an open wound.
Today, we’ll demonstrate a number of different ways for the family medic to use a standard-sized triangular bandage.
DISCLAIMER: This is a general overview and not a comprehensive guide to treating sprains, broken bones, or other injuries. If symptoms worsen, seek professional medical advice as soon as possible. Photos by Amy Alton
Making A Triangular Bandage
Commercially produced triangular bandages are cheap and can be bought in quantity, but if you have some old cotton sheets, you can easily make your own supply. Simply use scissors to cut out a 40×40-inch cloth square, then either fold it into a triangle or cut diagonally to make two separate triangular bandages.
Above: Standard triangular bandage dimensions are 40 by 40 by 56 inches.
Sanitize the bandage by boiling in water, using a pressure cooker, or soaking in a disinfectant solution. This will allow you to use it safely in an open wound. Store in a fresh plastic bag. It might not be entirely sterile from a medical standpoint, but it’ll stay clean. Other, less conventional, options include baking in an oven for two hours at 300 degrees F or ironing at a high heat for three minutes.
Above: Old sheets work well as improvised bandages.
Arm Injury
The most well-known use for a triangular bandage is the classic sling. With arm injuries, a sling will provide both immobilization and comfort. Securing the arm against the body reduces the chance of further damage.
In a rib injury, this sling is sometimes used, with added padding against the chest, to decrease pain experienced by moving the arm.
The simplest way to make a sling is to lay out the bandage under the injured arm so that one pointy end goes over the shoulder, another points to the floor, and the third extends beyond the elbow.
Above: Step 1 – Drape in front with the tip of the triangle toward the elbow.
Bring the lower end of the bandage up over the other shoulder, leaving the arm cradled.
Above: Step 2 – Lift the bottom end over the shoulder and tie. Make a knot at the elbow to stabilize.
Tie the ends of the bandage behind the neck. Fasten the edge of the bandage by the elbow with a safety pin or by tying a knot. If needed, add some padding behind the neck.
Above: Step 3 – For added support, wrap a swathe around the torso.
For even more support, an additional bandage can be used around the injured arm and chest horizontally. This wrapping is known as a “swathe.”
Ankle Sprain
One of the most common injuries on the trail is the ankle sprain. Uneven terrain in the form of rocks and roots cause an unbalanced traveler to end up with a painful injury. In this case, elastic wraps are most commonly used for this injury, but a properly placed triangular bandage will also work to provide the stabilization needed.
Fold the bandage until it is 3 to 4 inches wide, then place the center on top of the foot and wrap once under the foot. Bring each end behind the ankle, cross once, and move them together in front of the ankle. Cross the ends again.
Slide each end underneath the vertical straps created when you moved the wrap from under the foot to the back of the ankle. Tug on each end to tighten and secure with a knot in front of the ankle.
Above: Step 1 – Start on top of the foot.
Above: Step 2 – Go around the back of the ankle.
Above: Step 3 – Slide each end back under the ankle strap.
Above: Step 4 – Pull each end up to stabilize.
Above: Step 5 – Tie the ends in front.
Head Injury
A head wound can be significant in various ways. Superficial cuts on the scalp can bleed profusely and require bandaging. A concussion can alter mental status and even cause loss of consciousness. Bleeding could also occur inside the skull, putting the victim’s life at risk. Even vision could be affected in certain injuries.
The family medic can’t control all of these issues, but a simple head wrap can help control the superficial bleeding that often happens with a traumatic injury. Although gauze rolls are most commonly used, a triangular bandage can serve the purpose as well.
Above: Step 1 – Wrap around the forehead with the triangle covering the head.
Starting at the long side of the bandage, fold it over 2 inches and wrap this section around the forehead above the eyebrows, leaving a triangle covering the scalp. Cross both ends of the bandage around the back of the head and over the triangle covering the scalp. Then, cross around to the front and tie. Tuck loose ends under the folds of the wrap.
Above: Step 2 – Tie the ends together over the edge of the triangle.
If you’re dealing with a burn, you should moisten the bandage to avoid sticking.
Shoulder Injury
Ordinarily an awkward area to wrap, a triangular bandage works well to cover an open shoulder wound and help stabilize the area.
Fold the top of long end of the triangular bandage down about 4 inches, then flip up the bottom of the triangle until the tip meets the long side. Drape diagonally so one of the pointy ends is below the unaffected armpit (axilla) and the other is over the injured shoulder. Then, wrap around the back of the shoulder, under the affected armpit, and around so that the end of the bandage meets the other end. Tie to secure.
Above: Step 1 – Drape across with the wide end over the affected shoulder
Above: Step 2 – Go in back and around the armpit.
Above: Step 3 – Tie in back.
Hand Injury
Performing activities of daily survival can lead to injuries relating to the hand, especially if protective gloves aren’t used. In many situations, group members will be asked to carry out duties to which they’re not accustomed. The family medic should always be prepared to prevent and treat injuries relating to the hand; family members who can’t use their hands lose the ability to be an asset in the fight for survival.
If the hand injury is a burn, moisten or use some salve beforehand to keep the bandage from sticking to the skin. If there’s a chance of re-bleeding, use extra bandages to provide a bulky barrier for added pressure.
Spread out the triangular bandage on a table or other flat surface. Place the victim’s back of the hand on the center area of the bandage. Fold the bandage over the palm so that the point is at the level of the wrist. Roll both ends of the bandage down until you reach the wrist on each side. Cross the rolled ends over the wrist and around the back of the hands at least twice. Then, tie. This covers the hand completely.
Above: Step 1 – Spread out the triangular bandage and position the hand.
Above: Step 2 – Bring the tip of the triangle down over the wrist.
Above: Step 3 – Roll the ends until they reach the wrist on each side.
Above: Step 4 – Wrap the end around the wrist.
Above: Step 5 – Tie the ends.
Eye Injury
An eye injury can disorient and disable a person, and a tight wrap could worsen the situation. In chemical emergencies, be sure to irrigate and flush out the affected eye(s) thoroughly before applying a bandage. Using an improvised or a commercial eye shield, a triangular bandage can hold such a barrier in place to prevent further injury. This is especially useful if a foreign object has impaled the eye.
With eye injuries, it’s important to realize that both eyes move in tandem with each other. Therefore, it’s best to cover both eyes if further eye movement would worsen the situation.
If you don’t have a commercial eye shield in your kit, you can improvise a shield with the bottom of a paper cup. Take a gauze 4×4 pad and cut an opening that fits the cup tightly enough to keep it stable and add some padding under the rim for comfort. Place over the injured eye. Use some padding over the other eye as well, and then use your triangular bandage, folded to about 4 inches wide, to cover both eyes. Go around the head twice, tie in the back to secure, and tuck the loose ends.
Above: Step 1 – Cover the injured eye with the bottom of a paper cup.
Above: Step 2 – Cover the other eye with padding.
Above: Step 3 – Use the triangular bandage to stabilize the dressings over each eye.
Jaw Injury
A number of circumstances can lead to trauma to the jaw, possibly even a fracture. A triangular bandage can be used to immobilize the jaw in place.
Fold the bandage flat lengthwise until it’s 4 inches wide. Start on the chin and bring ends behind the ears to the top of the head. Cross the ends and slide the crossed section just over one ear. Wrap one end behind the head and the other across the forehead. Tie both ends over the opposite ear.
Above: Step 1 – Start over the chin and pull each end over the head.
Above: Step 2 – Cross the ends over one ear.
Above: Step 3 – Tie the end over the other ear.
Stabilizing A Splint
Splints perform the important task of immobilizing an injured limb in a natural position. They help prevent re-injury that can occur as a result of jostling during transport. Splints facilitate the healing process. To keep them in place, triangular bandages can be used as padding or in the place of elastic wraps. There should be at least two securing points.
Above: Stabilizing and padding splint with triangular bandages.
Improvised Tourniquet
A tourniquet is a mandatory item for any medical kit. In most cases, commercial tourniquets like the C-A-T have proven their worth in everything from the battleground to the backcountry. A purpose-built tourniquet will be easier to use and more consistent than any improvised solution. However, when a military-style tourniquet isn’t available, a triangular bandage can be used as an effective way to stop even heavy bleeding.
Fold the triangular bandage so it’s flat on the extremity and at least 2 inches wide. Wrap around the limb tightly, but evenly. Tie the two ends in a single knot, then place a rigid object like a stick across and tie another knot. The stick serves as a “windlass” device similar to that used in military-style tourniquets. Twist the stick until bleeding stops, then secure it by placing a knot underneath the extremity to maintain pressure.
Above: Step 1 – Fold to 2 inches wide, tightly wrap above the bleed, then tie down.
Above: Step 2 – Place stick or other “windlass” and tie once over it.
Above: Step 3 – Windlass stick in place; twist to provide pressure.
Above: Step 4 – Secure windlass stick in place by wrapping and placing a knot.
Other Uses For Triangular Bandages
As a component of a water filter. The permeable nature of the fabric allows the bandages to filter out algae and debris from questionable water in advance of disinfecting by boiling, bleach, iodine, water purification tabs, or UV light.
As a face mask. A triangular bandage can be used, cowboy-style, to protect against dust and other irritants. It doesn’t prevent the passage of microbes, however.
To make fire. If your triangular bandage is made of cotton, it’ll work well as emergency tinder to make fire. Shred the fabric into a nest of fibers for easier ignition.
As improvised cordage. Paracord is a lot better, but you can cut your triangular bandage into strips to tie together and fasten materials in a pinch.
To signal for help. Attach to a long stick and wave like a flag, or unfold and lay the bandage on the ground with rocks at the corners to create a directional marker that’s visible to passing aircraft.
To get the most out of your medical supplies, it’s worthwhile to brainstorm different possible uses for each item. As you expend materials, you’ll find that your improvisations may make the difference between success or failure off the grid.
About the Author
Joe Alton, MD, FACOG, FACS, is a retired Fellow of the American College of Surgeons and a Life Fellow of the American College of OB/GYN. He’s a disaster medical preparedness advocate, outdoor enthusiast, and New York Times/Amazon bestselling author of several award-winning books, including The Survival Medicine Handbook: The Essential Guide For When Help Is NOT On The Way now in its 700-page fourth edition. He’s also the designer of an entire line of quality medical kits for the austere medic at his website at doomandbloom.net, which has over 1,400 articles, podcasts, and videos on medical preparedness.
Read More
Subscribe to Recoil Offgrid’s free newsletterfor more content like this.
Recently, the Editor in Chief of Recoil Offgrid, Patrick McCarthy, was a guest on the Anderson Overland Podcast. He discussed an array of topics and delved deep into the realms of self-reliance, survival skills, and the exciting journey of overlanding. Listen to the entire podcast below, or read on for the key takeaways:
Survival isn’t just about the gear, it’s a lifestyle. Patrick McCarthy’s transition from a graphic designer to the editor-in-chief of Recoil Offgrid Magazine stands testament to the power of embracing change, seeing challenges for the opportunities they are, and preparing for the unexpected. His story is one of resilience, adaptability, and the continuous quest for knowledge — qualities that are the bedrock of survival.
During the podcast, the question was posed: “what is the best vehicle for overlanding?” While modern vehicles come packed with capabilities, Patrick emphasizes the significance of the driver’s knowledge of the vehicle’s limitations and potential. It’s not about the fanciest mods but understanding the terrain, knowing your vehicle, and mastering the skills to navigate through challenges. This principle applies beyond the road, and can just as easily be adapted to one’s life.
The bottom line is: vehicle modifications and survival gear should augment your own knowledge and experience, not replace it.
Above: Patrick’s 4Runner has been an ongoing project, featuring an assortment of carefully chosen overland and off-road upgrades. It’s important to remember that modifications may enhance a vehicle’s capabilities, but they’re not a replacement for the driver’s skill and judgement.
Preparedness and Real Lessons
Recent global upheavals such as wars and COVID have pushed emergency preparedness from the fringes into the mainstream. Being prepared isn’t about doomsday scenarios, it’s about being ready for the things that have a high probability of occurring. Things like blowing a tire, or making it through a power outage. Patrick shares insights into creating a well-rounded survival strategy — balancing the acquisition of practical skills through regular training, with the thoughtful collection of gear.
To drive home his point, Patrick recounts an eventful drive to Sedona with his family, an experience that underscored the unpredictability of trails and the importance of real-world experience over reliance on social media or secondhand reports. His journey highlights the importance of being prepared for the variance between expectations and reality.
The Overland Community
Above: Patrick met Joey Anderson on a recent Overland Summit media event in Big Bear, California, where attendees had the opportunity to drive some seriously challenging trails.
The overlanding community, as Patrick and the podcast host discuss during the show, is more than just a group of enthusiasts. It’s a collective of shared experiences, a place to test one’s mettle, and a family that grows with every mile added to the odometer. Plug into the Anderson Overland Podcast for more stories that inspire, conversations that educate, and experiences that transform. You can also check out their latest projects at AndersonOverland.com. And if you’re looking to dive deeper into the world of survival skills and overlanding, continue reading all the great content in Recoil Offgrid, where Patrick McCarthy continues to share his knowledge and experience.
Read More
Subscribe to Recoil Offgrid’s free newsletterfor more content like this.
If you’re building an off-road or overland vehicle, lighting upgrades are almost certainly on your to-do list, and for good reason. Stock headlights can usually illuminate a dimly-lit road just fine, but if you’re out on a treacherous trail in total darkness, the quality and placement of your vehicle’s lighting becomes much more important. A good set of ditch lights could be the difference between staying on the road and getting stuck, and a forward-facing light bar can outperform the best factory high-beams. However, there’s one type of lighting that’s often overlooked: tail lights. They ensure your vehicle is visible to other motorists, signal lane changes, serve as hazard flashers and reverse lights, and most importantly, tell the car behind you when you’re braking. With this in mind, I recently upgraded my 2022 4Runner overland project with a set of new “Gen 2” Morimoto LED tail lights.
Morimoto’s New 5th Gen 4Runner Tail Lights
As one of the biggest names in aftermarket vehicle lighting, Morimoto is well-known for their LED headlight upgrades, auxiliary light pods, retrofit kits, and individual bulbs. They’ve offered a replacement tail light for the 2010+ 5th Gen Toyota 4Runner for many years, but they recently went back to the drawing board to develop a completely redesigned Gen 2 version. In my opinion, it’s a dramatic improvement.
Above: Here’s a comparison between the Morimoto 4Runner Gen 2 light (left) and the older Gen 1 design (right). The new Gen 2 lights are available in red (pictured) or smoked versions.
The Morimoto Gen 2 4Runner tail lights ($650 MSRP) feature a sleek, horseshoe-shaped running light that creates a unique visual signature. In contrast to the factory lights — which have a simple grid of individual LEDs — I think it gives the truck more of an upscale look, along the lines of a modern Lexus, BMW, or Audi. It also separates the running light from the brake light, making it easier to distinguish the two functions at night.
Sequential Turn Signals & Reverse Lighting
In addition to the running light, there’s a set of three brake light/turn signal LED arrays. When I hit the brake pedal, all three illuminate bright red immediately. But when I flip on a turn signal, the three segments illuminate sequentially in a one-two-three pattern with an orange hue.
Above: Here’s a comparison between the brake light color (left) and turn signal/hazard light color (right).
This sequential operation is common on newer luxury cars as well as sports cars like the Ford Mustang, and it adds to the upscale, modern look of these lights. It’s a big step up from the old-school bulb-and-reflector design of the stock Toyota lights.
Lastly, there’s a clear strip with a line of extremely bright white LEDs that serve as reverse lights. These, too, are a big improvement over the single bulb inside a reflector that the 4Runner came with from the factory. For those who want even more light for backing into dark areas, Morimoto offers an optional Backup Light Boost Bar ($77.50 MSRP) that can be installed above the license plate. It plugs directly into one of the taillights, so there’s no need to run new wiring to the battery or tap into factory harnesses.
I chose not to buy the Boost Bar since I already have two extremely bright, rear-facing Baja Designs lights on my roof rack, but it’s a great option for those who want to preserve a stock look.
Closing Thoughts
If you want to upgrade your 5th Gen 4Runner’s visibility or just want to give it a more modern look, a new set of tail lights is a quick and easy way to do both. It only took me a few minutes to install them using the included instructions, and I’m really happy with the results. As someone who remembers the “Altezza tail light” fad of the late 1990s, I’m not a big fan of ostentatious tail light designs, so I appreciate the understated and classy look of the Morimoto Gen 2 lights. Put simply, they’re a functional and aesthetic improvement.
Stay tuned for more updates on our 4Runner build, and for more information about the new Morimoto 4Runner Gen 2 tail lights, go to MorimotoHID.com.
Howling winds and bone-shattering waves crash against the moonlit shore. Trees bend and uproot from the earth. Power lines snap, and the city plunges into darkness. This narrative is a reality for those who have lived through a hurricane or a similar natural disaster where devastating storms wipe out entire sections of the power grid. With critical infrastructure such as cell towers and internet service provider nodes gone, how can first responders or prepared citizens stay connected to assist rescue operations and inform others about what’s happening in the area?
Enter the Tactical Assault/Awareness Kit (TAK). Over the past decade, you’ve probably seen photos online of Samsung Galaxy phones used by our military. Usually, you’ll see them encased and mounted on their body armor. The app loaded on those devices is known as ATAK, short for Android Tactical Assault Kit.
Above: The UAS plug-in offers seamless integration of unmanned aerial surveillance devices — in other words, drones. The drone’s map position, field of view, and live video feed are visible to users within the TAK app.
ATAK allows a military member to view and share geospatial information, such as friendly and enemy positions, danger areas, and casualty reports. The Cursor on Target (CoT) protocol is at the center of TAK, and this feature is used to share information between users. This can include specific target information such as team member locations, route information, sensor data (video feeds from a drone), text messages, or medevac information.
The TAK ecosystem includes ATAK for Android, iTAK for Apple iOS, and WinTAK for Microsoft Windows; the latter two systems are oriented primarily toward civilian first responders and may lack some of the features of the original ATAK. In addition, the TAK ecosystem has an extensive list of available plug-ins and tools to extend functionality.
With TAK, your team can get oriented quickly, make better-informed decisions, and respond rapidly to a situation. Rather than radioing a teammate to ask how close they are to your position, which direction they’re traveling, or where they last saw a person of interest, you can simply look down at a screen that overlays this information on a map in real time. Some of the other capabilities of TAK are:
Map rendering/imagery support
Route navigation
Range and bearing tools
Personnel location and tracking
Direct messaging and team chat
Intelligence, surveillance, and reconnaissance (ISR) tools
Fire tools (e.g., artillery targeting; disabled in the public release)
Tactical survey tools
TAK was initially developed in 2010 by the Air Force Research Laboratory (AFRL) for use by U.S. Special Forces. It has been tested through years of real-world usage in combat by thousands of active warfighters. After its success in various military operations, it was modified and adapted to fit the mission of other federal, state, and local agencies, as well as the prepared citizen.
Situational awareness, or the lack of it, rears its ugly head when forced to deal with a particularly stressful situation such as a natural disaster. Not being able to see the whole picture sinks us deeper into a spiral of real and imagined dangers, which can make us respond in a maladaptive way. TAK can be that beacon of light on dark days, making it easier to work together with our loved ones and our community. This article will highlight what you need to run TAK and tips to get you and your team up to speed with this powerful tool.
Above: The WinTAK application allows PC users to access most of the same information as mobile device users. This can help admin personnel at a nearby command post keep an eye on each team member’s position and movements.
Hardware Considerations
For users to run ATAK, each member will need a Samsung Galaxy S5 phone or better. Samsung Galaxy devices work best with ATAK, as they have the necessary processing speeds to run ATAK efficiently. Another viable option is the Blackview BV6600. This phone is built for rugged use and runs on Android OS. Finally, for iTAK, use any iPhone that supports iOS 14.1 or later.
Small Single Board Computers (SBCs) such as the Raspberry Pi allow you to create a small TAK environment for communication-denied environments with minimal equipment needed for situational awareness. If configured correctly, this setup will be able to federate to a larger TAK Server environment. A federated network is a set of linked networks that have the ability to transfer data and messages between members. An excellent example of a federated network is the mobile phone network. You place a call on your Verizon phone to your friend who has an AT&T phone. These are two separate networks, but they have the ability to link with each other. If using a Pi as a server, you’ll need:
Raspberry Pi 3 Model B+ or later
32GB+ SD card
Keyboard and HDMI monitor
Raspbian (Buster Lite) operating system
Etcher for MAC or Win32DiskImager for Windows (all GUI)
Wireless router (or internet access for initial setup)
WinSCP, Filezilla, or some sort of SCP/FTP application
TAKServer Version 1.4 or later
USB GPS dongle that has GPS/GLONASS functionality
Network Connectivity
The easiest way to operate TAK is over the existing cellular network, since coverage is nationwide, there’s plenty of bandwidth for high-definition video feeds, and your smartphone is already set up with a cellular plan. However, if you’re using this device for emergencies such as natural disasters, you can’t rely fully on the cellular network, since it may be disabled or overloaded.
When cellular networks are non-existent, or if you’re using a device that doesn’t have an active cellular plan, off-grid mesh communication devices such as Meshtastic or goTenna can be used to provide mesh networking options for the team. These devices are vital for any scenario where cellular connectivity isn’t guaranteed, but remember that their range is much shorter than you’d get with a cellular network.
Much like a handheld radio, mesh networks may only reach a few miles under optimal conditions. A second option when operating in critical communication infrastructure-denied environments is employing a wireless ad hoc network (WANET) or a mobile ad hoc network (MANET). These networks are a decentralized type of wireless network. These networks are ad hoc because they don’t rely on outside networks.
Military MANETs are used by members of the military who need to establish a network with an emphasis on an all-wireless network that is robust and secure. Common radio waveforms that the military uses are Silvus Technologies’ MN-MIMO Waveform Streamcaster Radios, and Persistent Systems’ WaveRelay MPU5 Tactical Network Radios. There are civilian options for creating a MANET — one great example is the Human MANET Portable Radio (HaMPR).
This is a human-carried portable Amateur Radio Emergency Digital Network (AREDN) wireless Mobile Ad-hoc Network (MANET) access device that encompasses both a MANET radio and an End User Device (EUD; the device you’re using to interact with the TAK app). The HaMPR was developed by Greg Albrecht for the San Francisco Bay Area Emergency Mesh Network.
One final option for teams to connect members on a local TAK server to a larger TAK server environment is employing Starlink. Starlink is a satellite internet constellation operated by SpaceX, providing satellite Internet access coverage to 40 countries. Employing satellite-based communications and connectivity is a viable option in cellular denied environments.
Above: An example of a HaMPR setup from the system’s developer, Greg Albrecht. It includes a Samsung Galaxy in a Juggernaut case connected to a Ubiquiti Rocket M5 MANET radio with two 5GHz antennas. The entire system is powered by a portable USB-C power bank.
Protecting Your Device
Although it’s possible to just shove your phone in your pocket, it’s beneficial to carry it in a manner that’s protected against damage and able to be monitored hands-free. You’ll want an End-User Device (EUD) case for your phone, with the best options coming from Juggernaut Case and Kägwerks.
Though the market does have some excellent 3D-printed options at a fraction of the price, I would advise that if you work in austere environments, you should go with one of the former highly durable cases. Both Juggernaut and Kägwerks offer a variety of mounts for attaching your phone to gear and vehicles; Tom Marshall discussed some of the mounts offered by Juggernaut Case in RECOIL OFFGRID Issue 53.
Above: A device loaded with ATAK shows map data and a drone video feed. (Public domain photo courtesy of Michigan National Guard).
Server Options
A TAK Server connects a small team of people using internet connectivity (or a mesh network) to provide essential situational awareness, chat, and streaming services. The connection can be encrypted for security and provides user control. To allow networking between teammates, you’ll need to set up a multicast network or a central server that all team members can connect to.
One multicast communication consideration is setting up a free Zero Tier VPN (www.zerotier.com). For client-server topologies, several open-source TAK servers are available on GitHub that can be installed on a Raspberry Pi or similar device.
FreeTakServer can be extended with its built-in API and optional Node-RED server and includes an easy-to-use “zero-touch” installer (github.com/FreeTAKTeam/FreeTakServer). Taky is another Python-based server (github.com/tkuester/taky). These servers also have data package servers for distributing larger information packs to team members.
Additionally, the app enables multiple types of encrypted data communications, such as text and file sharing. These communications can be set for user to user, user to select teams, user to command posts, or user to entire force. TAK can be configured to encrypt all mesh communication using AES-256 (see our article on encrypted radios in Issue 53 for more info on this encryption standard). When mesh encryption is enabled, TAK will no longer send or receive unencrypted traffic on the local network. You’ll only be able to communicate with other devices on the local network if they’ve also been configured with the same encryption key.
Generating an Encryption Key
1. Launch ATAK.
2. Select Additional Tools (3 lines) > View all tools & plug-ins > Settings > Show All Preferences > Network Preferences.
3. Select Network Connection Preferences.
4. Select Configure AES-256 Mesh Encryption.
5. Generate Key.
6. Enter a file name for the generated key.
7. Select OK. The key will be saved on the ATAK device’s local storage in the atak/config/prefs directory, with the file name entered in the previous step.
Loading an Encryption Key
After a key file is generated, it must be loaded onto every ATAK device on the local mesh network for all the devices to successfully communicate in mesh mode.
1. Copy the generated key file to the ATAK device’s local storage.
4. Select Load Key and browse to the location of the key file.
5. After selecting the key file, a message should appear saying, “Mesh Encryption Key Loaded.”
Expanding Functionality with Plug-Ins
TAK starts to truly shine when you add plug-ins to extend its features. Even the most basic TAK functionality is offline and unusable in communication-denied environments (e.g., a natural disaster that has wiped out infrastructure, or a war against an enemy that’s implementing electronic warfare tools). However, with plug-ins like the goTenna Pro X, team members in the operating area can share information, text, and locations even when terrestrial networks are unavailable.
Another off-grid networking plug-in is HAMMER, which acts as an audio modem to end CoT data using commercial off-the-shelf “walkie-talkie” radios (github.com/raytheonbbn/hammer). ATAK-forwarder (github.com/paulmandal/atak-forwarder) works with LoRa-based Meshtastic radios, or you can use APRS-TAK with ham radios (github.com/pinztrek/aprstak). Finally, the UAS plug-in available on TAK.gov can pull data from a commercial off-the-shelf drone (aka Unmanned Aircraft System or UAS) like a DJI Mavic Pro or an Autel Evo II.
Above: A group of Marines checking ATAK as part of a littoral mobility and detection exercise at Camp Pendleton. (U.S. Marine Corps photo by Sgt. Hailey D. Clay)
How to Download & Install ATAK
The Team Awareness Kit for Android (ATAK) application, some auxiliary/plug-in applications, and supporting documentation are available for download at TAK.gov. First, download the .apk installer(s) to a PC, transfer them via USB cable to an Android device, and launch the installer. The other option is downloading the Civ-Tak version at CivTak.org from your mobile device. You can access other Civilian TAK-related resources on this site.
Launching the Installer
Use the Android file manager to locate the folder containing the ATAK apk. Select the ATAK apk and respond to installation prompts. Once ATAK has been installed, select the apk for any desired plug-in to initiate the installation. ATAK requires that the release numbers of any plug-ins match the release number of ATAK.
When ATAK is launched for the first time, a passphrase prompt may appear if it detects encrypted data from a previous ATAK installation. To continue using this data with the new ATAK installation, enter the passphrase and select OK. Otherwise, choose Remove and Quit to discard the old data, and then relaunch ATAK. To quit ATAK while leaving the existing data intact, select Quit. Note that the prompt will reappear on the next launch unless the encrypted data is removed, or the correct passphrase is supplied.
Above: A radio operator with the USMC Maritime Raid Force uses ATAK during a Visit Board Search and Seizure (VBSS) mission in the South China Sea. (U.S. Marine Corps photo by Cpl. Brandon Salas)
Installed plug-ins and bundled support applications must be loaded into ATAK via TAK Package Mgmt. Once ATAK is launched, select Additional Tools (3 lines) > View all tools & plug-ins > Settings > TAK Package Mgmt. Installed plug-ins and bundled support applications that match the current release will appear in the list with the current availability status. The user can filter the current view by using the Search (magnifying glass icon). Tap on the plug-in or bundled support application name to initiate loading or installation.
Maps aren’t included in TAK by default, so you’ll have to download and import ATAK-Maps packages found on GitHub or CivTak.org. Some familiar map sources will be Google Maps and OpenStreetMap. TAK can also cache maps and imagery for offline use. ATAK only has low-resolution elevation data included by default. Still, you can download and import more detailed elevation data from the USGS website.
Above: Publicly accessible IP cameras, such as traffic cams and wildfire monitoring cams, can be integrated into ATAK by pasting in the video feed URL.
TAK Server Considerations
Before you begin to operate TAK within your team, some serious thought has to be given to how you’re going to deploy your TAK server. You have a few options that you can use.
1. Cloud – A Digital Ocean (DO) or other virtually hosted servers. This option will allow your team the fastest means to deploy a TAK server without any serious headache.
2. VPN – An RPi (Raspberry Pi) server running as a ZeroTier client will allow any TAK client on the ZeroTier network to access the RPi server regardless of internet connection method.
3. Hybrid Off-Grid – A Digital Ocean server or RPi with one or more of the TAK clients connected as a “bridge” to an off-grid mesh network such as Meshtastic LoRa. This configuration allows any off-grid Meshtastic clients to have their communications reach all “internet-connected” TAK clients via a TAK client who is simultaneously connected to both the internet and mesh sides of the network. This is where you could have a Starlink Device act as that bridge from the off-grid network to a Digital Ocean Cloud-hosted server.
Above: Optional weather overlays can help you track a storm’s progress while you coordinate with your team.
Closing Thoughts
TAK is a game-changer, as it transforms the team’s understanding of the situation in any given area. Multiple organizations have used TAK to coordinate searches and rescues, respond to criminal activity, and establish perimeters in combat zones. Having TAK on your team is like having the connectivity of a command center at your fingertips.
Additional Resources
There are many different paths to setting up TAK for your group. The following sites provide helpful resources and information:
Christopher Rance has 19 years of professional experience in the realm of precision shooting and field communications, having served in a variety of sniper positions within the U.S. Army. During his tenure as an Army Sniper Instructor, he trained hundreds of soldiers, including elements of Air Force Combat Controllers, Air Force Special Reconnaissance Airmen, the 75th Ranger Regiment, law enforcement, and foreign allies. He’s also the creator of The Light Fighter Manifesto zine. The zine focuses on emergent warfare topics including drones, off-grid communications, and small unit tactics. lightfightermanifesto.org
Read more
Subscribe to Recoil Offgrid’s free newsletterfor more content like this.
If you’re a Boomer or Gen-Xer, you may have a fond memory of your father or other relative giving you a pocket knife at a young age. It may have been a lock-back or a fixed blade, but for most of us it was a simple slip-joint folding pocket knife with no locking mechanism. The blade was held open under simple spring pressure. Sometimes it was a single blade Barlow style or Jack knife. In other cases, it may have been a Trapper with a drop-point knife blade and a Spey blade. If you were really lucky, it could’ve been a multi-blade Congress knife or a Swiss Army Knife.
Many of us who were more serious about knives may have graduated on to something with a Walker liner lock, frame lock, or Axis lock-type mechanism. That was the goal from the 1980s onward, to have a folding knife that locked up like a fixed blade. Still, many of us look back on fond memories of that first knife type. Custom knife makers often offer a few slip joints in this category as a testament to modern craftsmanship and materials or for customers with a bit of nostalgia.
These knives are still very capable in our modern age and will still perform over 90 percent of common daily tasks. They tend to be on the smaller side and are easily stowed in a pocket, so you always have a knife. Additionally, if you travel outside of the U.S., you’ll find that they’re usually the only knife that won’t land you in prison in most of Europe.
Because slip-joint knives are typically carried loose in a pocket, a lanyard of some type makes more sense as a means of being able to locate and retrieve the knife. Unfortunately, this is a small detail that is often overlooked to keep with tradition. In the past, slip joints were cheaper knives sold in hardware stores, gun shops and department stores. Modern slip joints are a little bit more expensive in many cases, but still more affordable on average than typical tactical folding knives.
Spyderco
Roadie
After 9/11, carrying any type of knife aboard an airplane was prohibited. In early 2013, the Transportation Security Administration (TSA) announced a plan to allow certain knives on airplanes again. Although the plan was later withdrawn, Spyderco had already designed a non-locking pocketknife that would conform with proposed guidelines. The Roadie is an evolved penknife that is more practical than typical slip joints. It relies on a pair of symmetrical dimples in the blade that allow a fingernail-free two-handed opening. Far superior to a traditional nail nick, they also don’t collect dirt or debris. The Roadie also features a subtle index-finger choil that acts as a safeguard against unintentional closure.
Overall length:5.1 inches
Blade Length:2.1 inches
Weight:1 ounce
Blade Material:N690Co
Pros:
The blade slices like a surgical scalpel.
Its handle scales are extremely comfortable.
Lanyard hole makes it easily accessible
Cons:
This knife would be better with a pocket clip.
The sheepsfoot blade worked well for its original design, but a clip-point or drop-point variant would be welcome.
Mikov is a classic European knife manufacturer that has been making knives in the Czech Republic since 1794. The Rybicka or “Little Fish Knife” has been in their catalog for over 100 years and is a traditional slip joint design that is often passed down from father to son. Original knives of this type sported carbon steel blades and often had carved wooden handles. Mikov began offering these knives with a 420 steel blade and Zinc alloy handles a few decades ago. This makes them more durable and actually quite a bit cheaper.
Overall length:5.5 inches
Blade Length: 2.2 inches
Weight: 1.5 ounces
Blade Material:420
Pros:
This is a small and unobtrusive knife that can attach to a key ring or be worn around the neck for ease of access.
This is a classic Czech design of a very distinct model.
Properly sharpened, it’s a very capable little slicer.
Cons:
The handles are a cast zinc alloy, which means it’ll corrode and degrade over time.
Heretic Knives has a long and consistent history in the realm of tactical automatic knives. So, to see a slippie in their lineup made us sit up and take notice. As can be expected, Heretic doesn’t screw around when it comes to materials. The CPM Magnacut for the blade is the star in this show, along with titanium handles and a pocket clip. This is definitely not grandpa’s Barlow knife. The blade is a sheepsfoot design and if you’re in a locale that restricts you based on the locking mechanism of your knife, this is the one you want. This is a slip-joint knife for a new generation.
Overall length:6.8 inches
Blade Length:3.1 inches
Weight: 2.4 ounces
Blade Material:CPM Magnacut
Pros:
It’s made from CPM Magnacut, which may be the future super steel for the next decade or two.
Razor sharp out of the box, the way all knives should ship
Titanium handles with amazing texture really blows the doors off everything else in this category
Cons:
These knives are handmade one at a time to order or in small batches, so availability may be an issue.
The Weekender is a multi-bladed pocketknife equipped with tools to improve your weekend — or any day. It features a 3-inch clip-point blade for your EDC cutting needs, and a 2-inch drop-point blade for smaller cutting jobs; the bottle opener ensures all your favorite beverages can be opened with ease. The Weekender is a USA-made folder to enhance your life. The blades are made of CPM-S30V steel, ensuring that they stay sharp when you need them. The Micarta handle offers a great gripping surface and will last virtually forever. There are other versions of this model in the works with different blade options and colors of Micarta.
Overall length:7.1 inches
Blade Lengths: 3 inches, 2 inches
Weight: 3.5 ounces
Blade Material: CPM-S30V
Pros:
Very sharp out of the box with nice thin edges for slicing
CPM-S30V is a premium knife steel with superb edge retention.
The bottle opener comes in handy when you need it.
Cons:
As good a steel as S30V is, it can be difficult to sharpen.
There’s no lanyard hole on this to help you secure the knife.
The name Venandi comes from a Latin word meaning “hunter,” and this design is a collaboration between custom knife maker Richard Rogers and Columbia River Knife and Tool. Rugged G10 handle scales mean that the handles will probably outlast the rest of the knife. Its 3.1-inch clip-point blade is made from 8Cr13MoV stainless steel. The steel is good, but it’s not exactly Magnacut. This is a great first knife for someone who is just getting into knives. It’s an ultra-modern take on a classic and timeless design.
Overall length:7.2 inches
Blade Length:3.1 inches
Weight: 1.8 ounces
Blade Material:8Cr13MoV
Pros:
The blade is sharp out of the box and ready to tackle virtually any cutting chore.
The knife excels at cutting and slicing with its clip-point blade.
You almost never think of G10 handles with a slip joint, but it works well on this model.
Cons:
Like most slip joints, there’s no lanyard hole.
A pocket clip could have worked well on this model, even though that’s not a common slip-joint feature.
This is Cold Steel’s take on the classic slip-joint Trapper knife. It features handles with authentic jigged bone, highlighted with polished metal bolsters. The rugged handles are substantially sized for hard work, even with gloved hands. It’s constructed in a traditional Jack Knife pattern, with two polished blades: a clip-point for piercing and cutting, and a Spey for skinning and gutting, both folding out of the same end. Popular folklore has placed the Trapper as the preferred choice of rugged outdoorsmen and frontier hunters, but its practicality makes it useful for all sorts of chores.
Overall length:7.4 inches
Blade Length:3.3 inches
Weight:4 ounces
Blade Material: 8Cr13MoV
Pros:
This knife reminds me of one of the Trappers I used from the age of 7 until my early 20s as a hiker, hunter, Marine, and ranch hand.
The blades slice like razors and open easier than a traditional nail nick due to scalloping.
Compact, many options for daily carry.
Cons:
Like most slip joints, there’s no lanyard hole.
The handle material may degrade over time with a lot of use. Bone isn’t Micarta.
Kershaw’s Federalist is a U.S.-made non-locking slip joint. It relies on a double-detent system to hold the blade in place while closed, and the half-stop offers controlled opening and closing action. The green canvas Micarta handle feels good in the hand, and it’ll prove to be extremely durable. The blade is made from CPM 154 steel and has an impressive edge when first taken out of the box. The custom pivot forms a shield detail to complete the distinct look of a slip joint knife. In spite of that, the Federalist moves the design several steps forward by blending characteristics of a tactical folder with that of the old-school Jack knife.
Overall length:7. 5 inches
Blade Length:3.3 inches
Weight: 2.1 ounces
Blade Material:CPM 154
Pros:
This slip joint has lanyard hole, which makes it easily accessible or locatable in the pocket with a lanyard.
The handle is extremely comfortable and ergonomic.
The blade is made from 154 CM; it’s tough, razor sharp, rust resistant, and sports an easily maintainable edge.
Cons:
The blade could have been a hair sharper out of the box.