Have you ever wondered what might happen if a nuclear bomb hit the nearest major city to your home? What about a major population center, such as New York City or Los Angeles, or an island like Hawaii? There are many variables involved in these hypothetical scenarios, such as the yield of the bomb, detonation altitude, and the various effects of the blast, including heat, pressure, and lingering radiation. Regardless of these conditions, it’s clear that a nuclear attack would cause serious devastation — but how much?
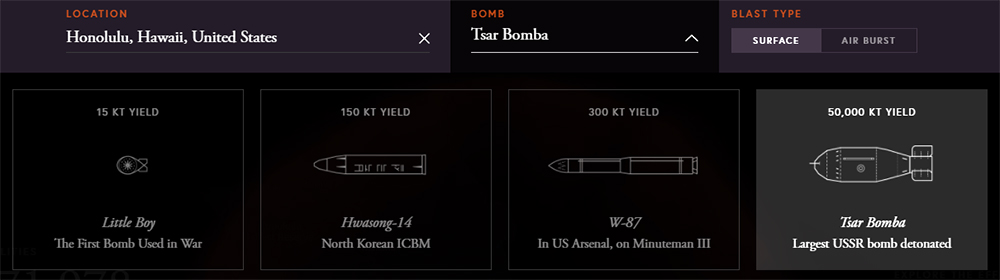
An interactive tool from Outrider.org estimates and visually depicts the effects, fatalities, and injuries that might occur in a nuclear weapon explosion. It allows the user to enter any country, city, or specific address as the target of the simulated attack. The tool also lets the user select from four bomb types:
Little Boy – First Bomb Used in Warfare – 15 kilotons
Tsar Bomba – The Most Powerful Explosive Device Ever Detonated – 50,000 kilotons
These bombs can also be simulated as a surface or air burst attack. The former causes more extreme destruction at the center of its target, while the latter would spread the destruction across a wider geographic area. The calculations are based on NUKEMAP, a tool created by nuclear weapon historian Alex Wellerstein. You can read more about the simulation models involved here.
Based on statements on its “What You Can Do” page, the goal of this tool is to advocate for worldwide nuclear disarmament. No matter your stance on that issue, it’s still interesting to learn what could happen if a nuke was dropped on your doorstep — and how far you’d have to bug out to avoid its effects.
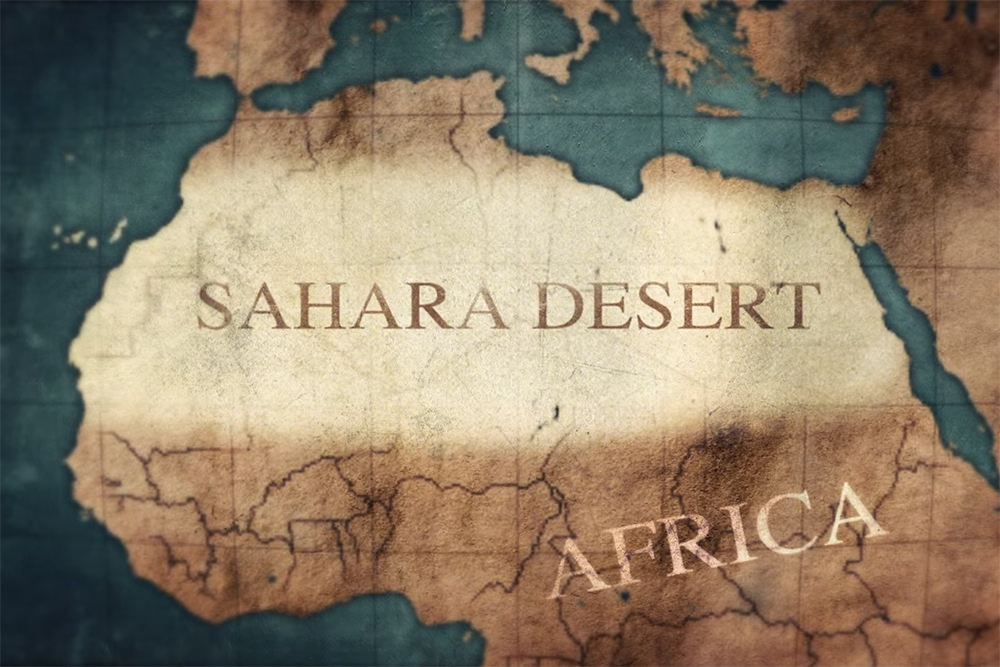
What would you consider the most challenging survival environment on Earth? There are many potential candidates, ranging from the windswept Antarctic to the vast Amazon rainforest. No matter how you rank these regions, the Sahara desert is sure to be near the top of your list.
This 3.6-million square mile desert is nearly as large as the entire United States (including Alaska), and is known for its intense heat. The surface temperature of the Sahara’s dunes has been measured at more than 180°F. Rainfall and vegetation growth is minimal, and the odds of encountering another person are extremely low. It’s about as close as you can get to a barren wasteland without traveling to the polar ice caps or the Moon.
The rolling dunes of the Sahara in Algeria. Photo: Flickr.com/habibkaki
However, humans love a challenge, and we’re no strangers to overcoming nature. Adventurers have climbed the highest peaks and dove to the pitch-black depths of the ocean. For these bold individuals, the Sahara is just another obstacle to conquer.
The Marathon des Sables
Also known as the Marathon of the Sands or the Sahara Marathon, the Marathon des Sables has been called the toughest foot race on Earth. This six-day annual ultramarathon covers 156 miles — roughly the same as six regular marathons. It takes place in the Sahara desert, specifically southern Morocco. The marathon’s website describes it as follows:
“MdS is a truly grueling multi-stage adventure through a mythical landscape in one of the world’s most inhospitable environments – the Sahara desert. You have to be self-sufficient and carry all your own food and equipment for the week on your back. Communal goat’s-hair Berber tents are pitched every night but, apart from that you have to take it with you. Water is rationed and if you exceed the ration, you get a time penalty.”
The following promotional video shows the sights of the 33rd annual Marathon des Sables, which will commence this month.
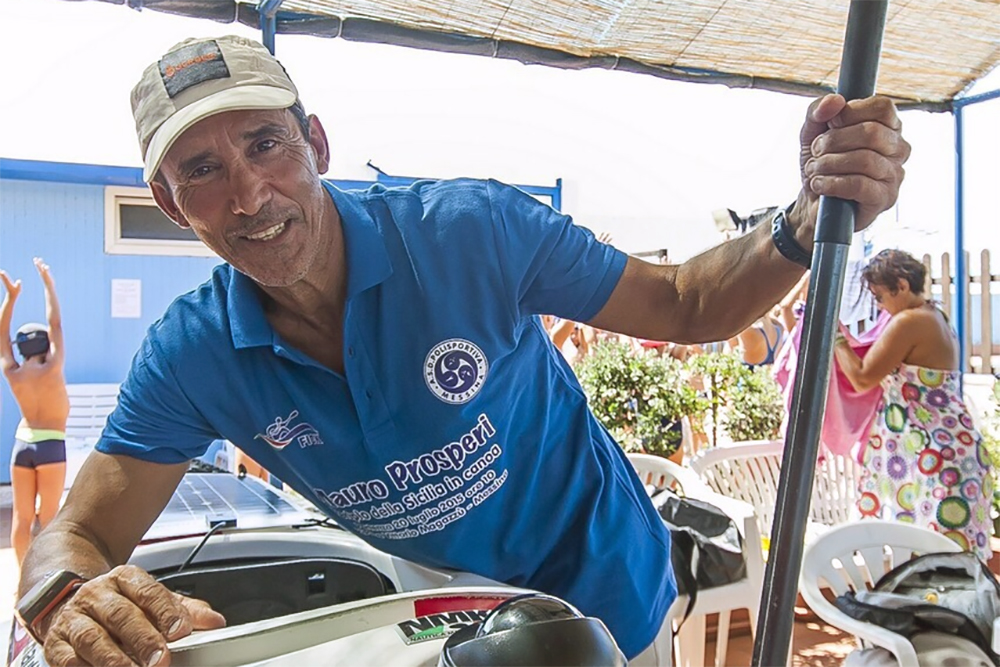
Mauro Prosperi
In 1994, Italian police officer and former Olympic pentathlete Mauro Prosperi was looking to push his physical limits. At the time, he was 39 years old and married with three young children.
Prosperi recalled his reaction to learning about the infamously-difficult ultramarathon:
“I love a challenge so I started training immediately, running 40km (25 miles) a day, reducing the amount of water I was drinking to get used to dehydration. I was never home. My wife, Cinzia, thought I was insane – the race is so risky that you have to sign a form to say where you want your body to be sent in case you die.”
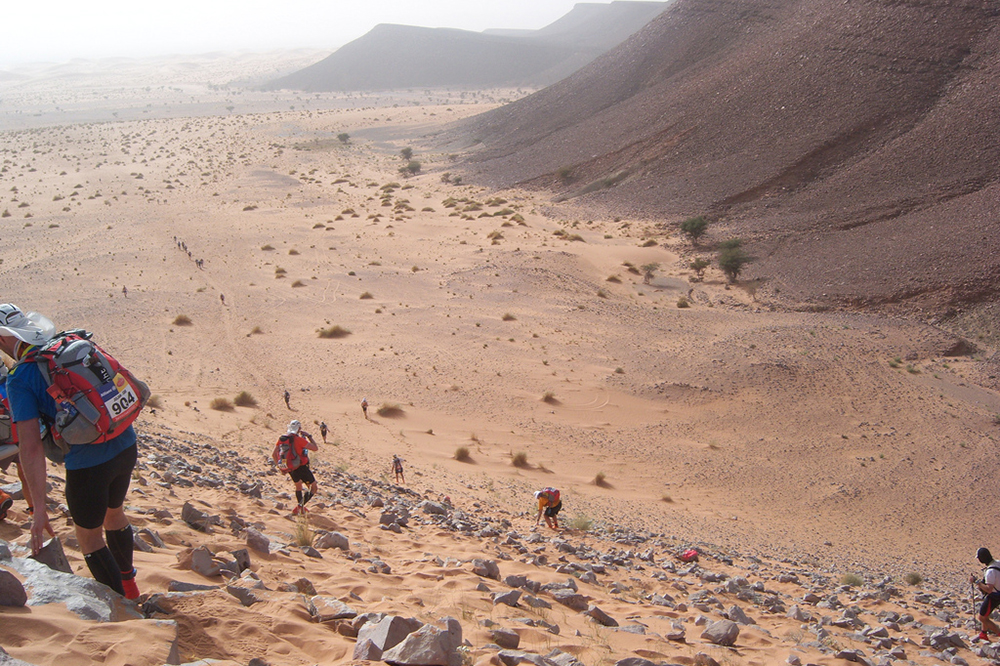
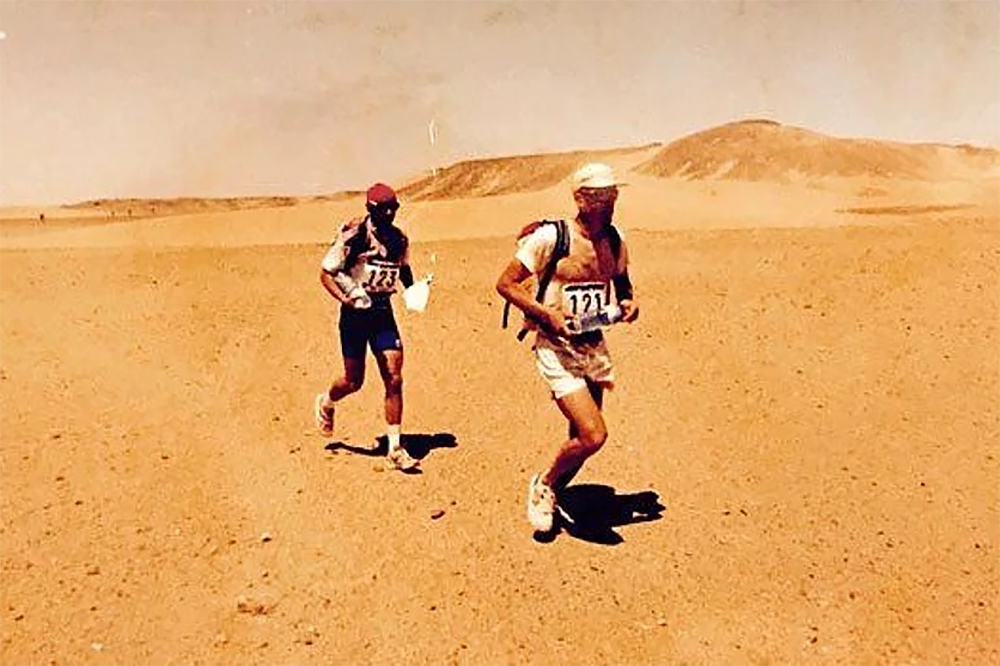
After intense preparation, he flew to Morocco to begin the race. Although it now draws roughly 1,300 participants each year, providing a heightened sense of safety in numbers, the 1994 event reportedly had only 134 competitors. As a result, Prosperi says he was on his own for most of the six-day journey.
The present-day MdS has far higher attendance than it did in ’94. Photo: Flickr.com/61680535@N07
Where it Went Wrong
The fourth day of the Marathon des Sables constitutes its longest single stage, with a 57-mile trek through the desert between campsites. On April 14th, 1994, blistering sun elevated temperatures to 115°F as Prosperi passed the third checkpoint, 20 miles into the day’s journey. Per regulations, he picked up his allotted 2 liter ration of water and continued running.
Shortly after 1:00, high winds brought on an unexpected sandstorm that caused organizers to pause the race for the day. Other competitors waited out the storm and eventually made it to the fourth checkpoint by nightfall, but Mauro Prosperi had disappeared. The following morning, ground and air search parties were sent out to look for him. The Moroccan military and Bedouin trackers aided in the search. However, they found no trace of Prosperi.
“When the sandstorm started to blow, I lost sight of everybody else. I kept running, though, because I thought I could see the trail. I was in seventh place and didn’t want to lose my standing. It was nearly dark before the winds relented. I started running again, but after a few minutes it occurred to me that I had lost the trail.”
Prosperi says he backtracked for hours, but it soon became too dark to continue searching for the trail markers. He made camp and resumed the search at dawn, only to find his surroundings completely unfamiliar. He had little food and almost no water left.
Prosperi with fellow Italian runner Mario Malerba in the 1994 marathon.
Following race guidelines to remain stationary and wait for rescue, Prosperi sat on the sand dune all day. In the afternoon, he says a rescue helicopter flew almost directly above his position, but failed to notice him. The next day, he decided to begin walking again. He later told the BBC, “I had a compass and a map so I thought I could navigate perfectly well, but without points of reference it’s a lot more complicated.”
Finding Shelter
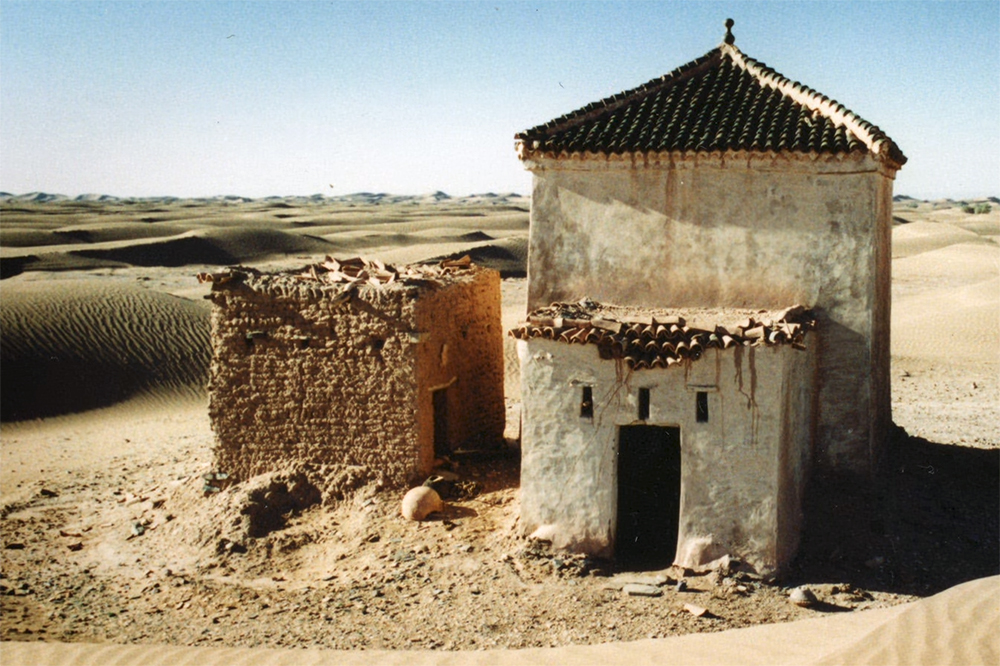
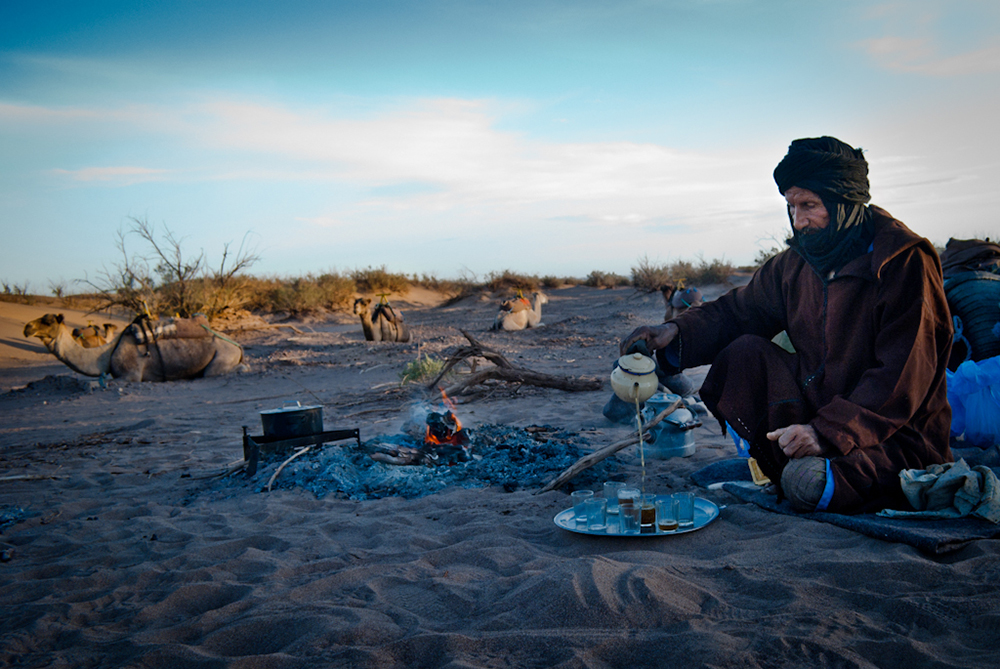
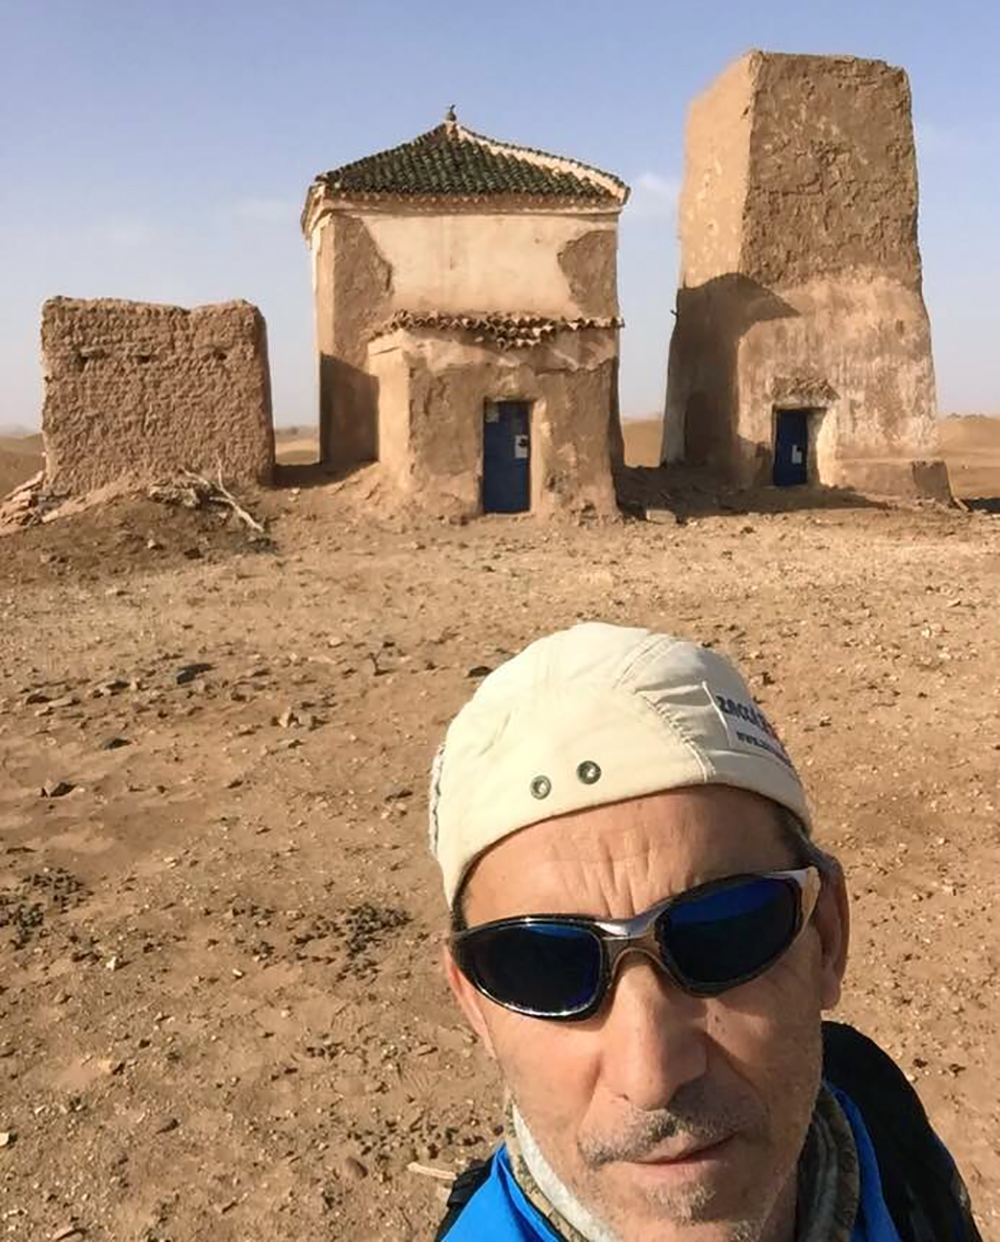
In the distance, Prosperi noticed what appeared to be a solitary structure. As he approached, he recognized it as a marabout shrine — an abandoned tomb for a Muslim religious leader. Although there was no rescue to be found here, the shrine provided shade and other resources.
The marabout shrine Prosperi used as shelter is still standing in the Moroccan desert.
In an attempt to stay hydrated, Prosperi sucked on wet wipes from his pack, licked morning dew off rocks, and drank his own urine while it remained relatively clear. He also used urine to rehydrate and cook the freeze-dried food in his pack, since no other water was available. (Editor’s Note: Although Prosperi did what he thought was best at the time, it is not advisable to drink urine, since it may lead to further dehydration and/or organ failure.)
When his food stockpiles ran out, Prosperi says he ate bird eggs and beetles; he also says he killed and consumed raw bats and lizards he found near the shrine, hoping to absorb any moisture that might be removed by cooking the flesh. Anti-diarrhea medicine in his pack helped him avoid losing more water despite this extreme diet.
Yet again, an airplane passed near Prosperi’s location. He says he tried to signal by lighting a small fire and writing “SOS” in the sand, but the plane continued towards the horizon. Distraught and suicidal, Prosperi took his pocket knife and cut his wrist — in a cruel twist of fate, his dehydrated blood coagulated and prevented his death.
On the Move Again
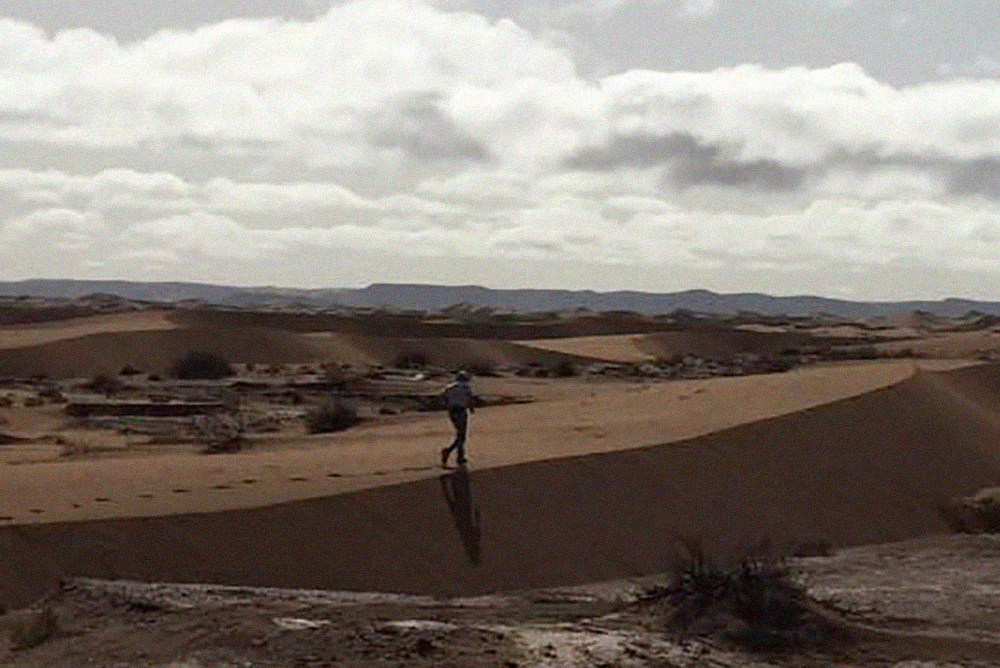
Continuing through the desert, Prosperi headed for distant mountains. Photo: Mauro Prosperi / Facebook
In a final attempt to reach safety, Prosperi set out from the shrine and began walking towards mountains in the distance, traveling in the early morning and late evening to avoid the heat of the day. He left pieces of his gear behind to form a trail of breadcrumbs. Although he believed the mountains to be in the direction of the marathon’s trail, this route would actually take him even further into the Sahara.
As he passed dry riverbeds, he squeezed liquid from plant roots. Then, after eight days in the desert, Prosperi found a desert oasis. He told the BBC, “Really it was only a large puddle, a mirror of water in a wadi. I threw myself upon it and gulped with abandon, but I could hardly swallow. I managed to force a mouthful of it down, and almost immediately I vomited. I couldn’t hold anything. I found I had to take tiny sips, one every 10 minutes.”
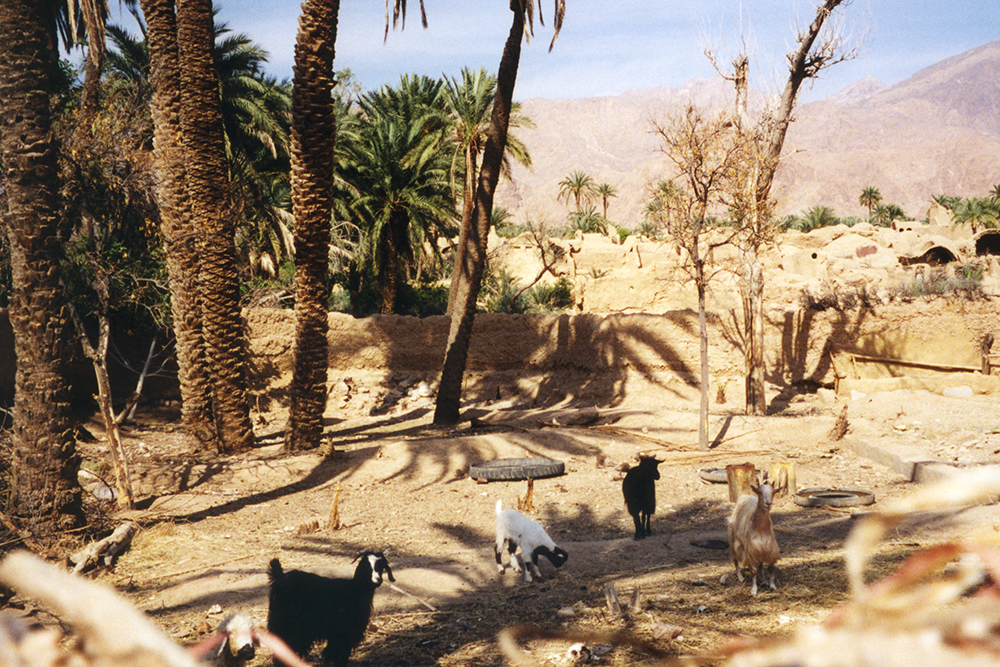
Signs of livestock led Prosperi to civilization. Photo: Flickr.com/jmenj
With his thirst finally quenched, Prosperi filled his water container and kept walking. Eventually, he found some dried-up goat droppings, and continued searching for more. The droppings led him to human footprints. He recalls, “I crested a hill and beheld an incredible sight. There was a nomad girl, maybe 8 years old, tending a flock in the sparse greenery of a wash. I ran toward her and begged for help.”
Finally Rescued
Tuareg tribesmen helped Prosperi return to a nearby town. Photo: Flickr.com/acquimat
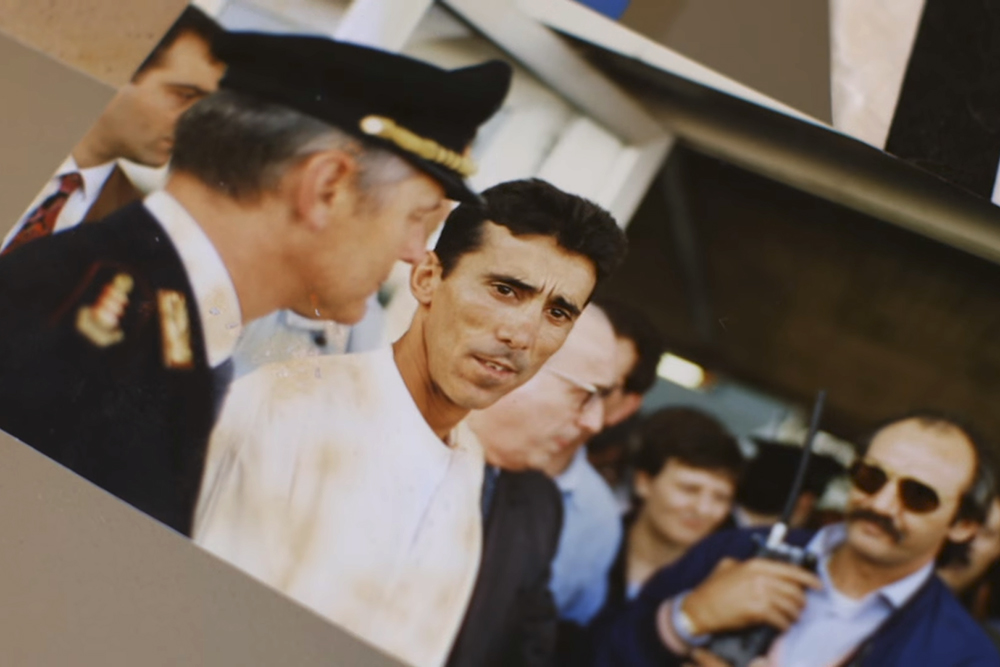
The girl was part of a caravan of nomadic Tuareg, who immediately gave Prosperi goat’s milk, then took him via camel to the nearest village. Despite starting in Morocco, Prosperi had traveled 180 miles from where he disappeared, unknowingly wandering into Algeria. Local military police initially confronted him due to tensions between the two countries, but after finding out who he was, they took him to a hospital.
Prosperi reportedly lost 35 pounds, weighing in at just 99 pounds when he was rescued. Doctors said his liver had almost completely failed, and hospital staff gave him 16 liters of intravenous fluids. He was reunited with his family and received a warm welcome back to Italy, although he was unable to eat solid food for several months after the ordeal, and he says that he didn’t recover for almost two years.
In the following short film, Prosperi discusses the experience:
Skepticism and Evidence
A few adventurers and journalists have doubted the accuracy of Prosperi’s story, considering the near-superhuman feats it entailed. Some claimed he staged or exaggerated the ordeal for money and fame. Marathon des Sables founder Patrick Bauer told Men’s Journal that the story is “a fabrication” and “physiologically impossible” — these statements caused Prosperi to consider a lawsuit against Bauer, but he eventually dropped it, stating that the dispute was personal rather than legal.
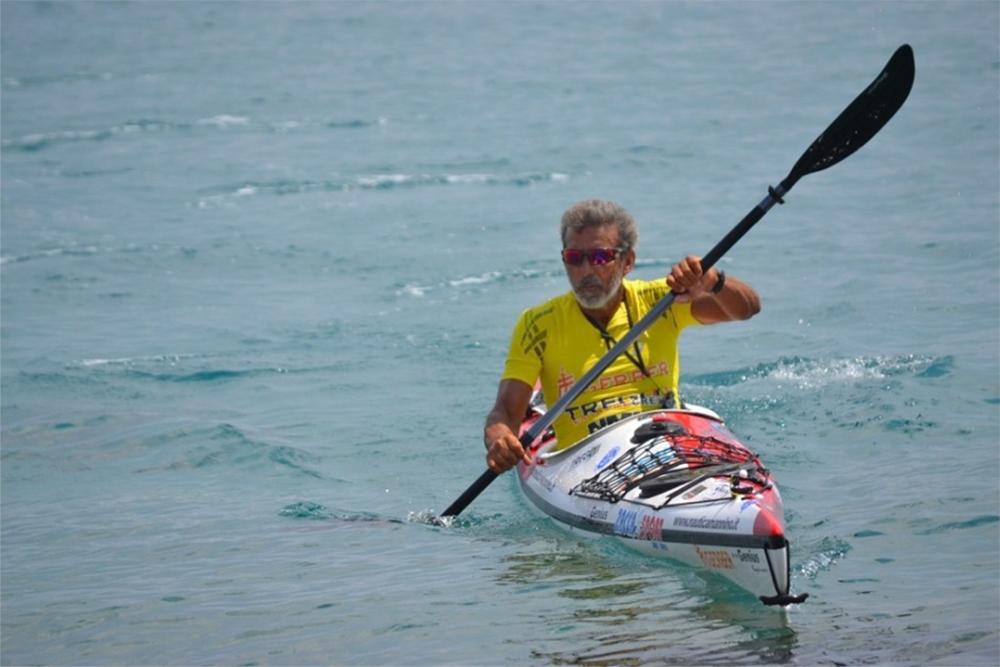
Prosperi re-entered and completed the Marathon des Sables in 2012. Photo: Mauro Prosperi / Facebook
However, the well-documented physical damage Prosperi endured would have been excruciating, and it left lasting effects on his body. The Men’s Journal interviewer said he had a visible scar on his wrist, allegedly from his suicide attempt in the desert. Documentary teams have also revisited the marabout shrine, identifying bat skeletons and discarded personal belongings that corroborated his account.
Prosperi has returned to the shrine where he nearly died in 1994.
The survival story of Mauro Prosperi may be hard for some to believe; even by his own account, he made choices that would have reduced his chances of survival. But after nine days in one of the harshest environments on Earth, Prosperi narrowly made it to safety, and that is undeniably an impressive feat. In the book Surviving the Extremes, author Kenneth Kamler, M.D., writes:
“Mauro Prosperi was a world-class endurance runner, acclimated to the heat, inured to physical hardships through years of training and discipline. Mauro didn’t lie… [his] body provides compelling testimony to the kind of damage the desert can inflict and, at the same time, evidence of what the body can sustain when pushed to its extremes. He competed against the desert as a decided underdog, but he won, turning in the performance of his life.”
Despite his lasting injuries, Prosperi remains athletic and active to this day.
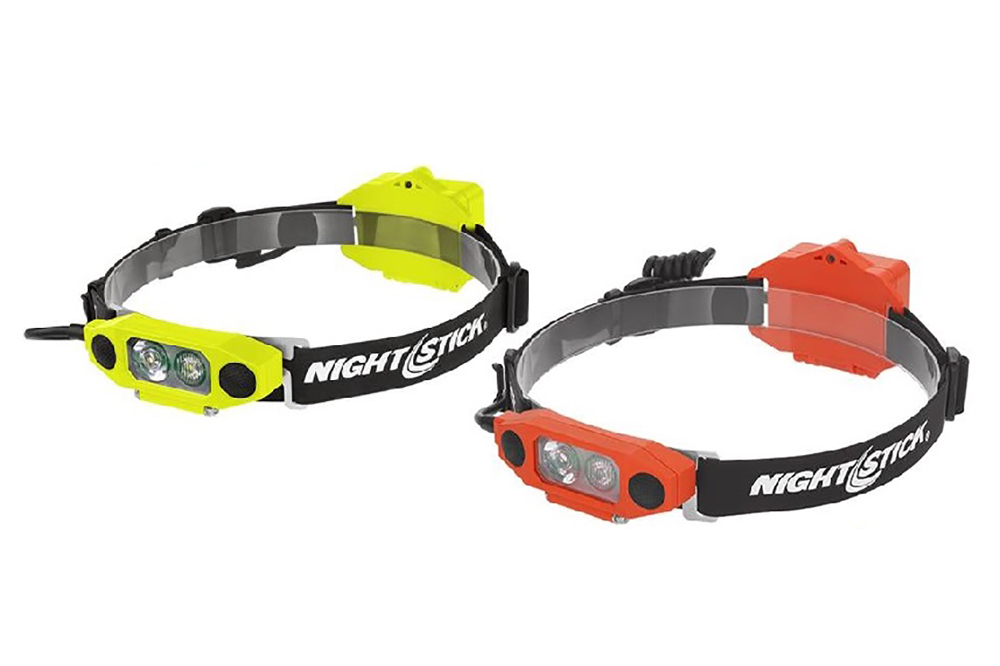
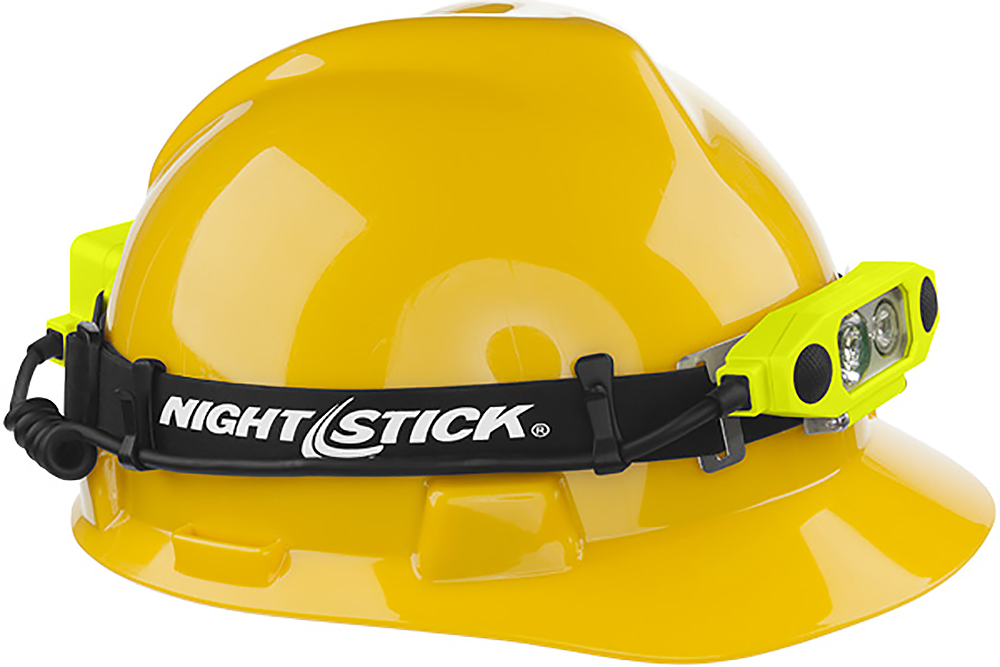
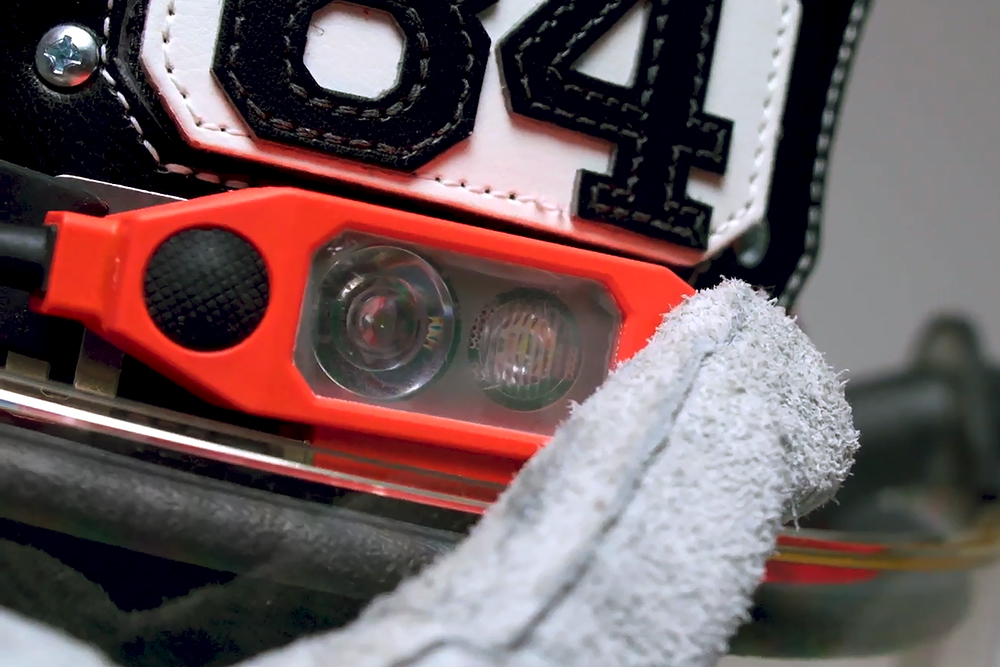
Just about any flashlight on the market can provide illumination in ideal conditions. However, it takes a completely different category of light to reliably continue providing illumination despite exposure to heat, water, dust, pressure, impact, chemical spills, and flammable gases. In these extreme conditions, you’ll need a seriously robust light source, and that’s exactly what NightStick set out to create with the new DICATA headlamp.
The NightStick DICATA is an intrinsically-safe headlamp, meaning that it can be used in areas with dangerous concentrations of flammable gas and dust particles without acting as an ignition source for these substances. This is especially relevant to firefighters, rescue personnel, and other professionals who work in these environments. On top of this, the DICATA is based on an impact- and chemical-resistant glass-filled nylon polymer body, and features an IP-67 dustproof and waterproof sealed design.
To get more technical, this light has been certified under cULus, ATEX, and IECEx safety ratings. It also meets the requirements of NFPA 1907-8.6 (2013). For those who aren’t familiar with these ratings, they mean that this headlamp has been tested extensively for safe use in the extreme environments we previously described.
Beyond this durable design, the NightStick DICATA headlamp features dual light sources: a 275-lumen spotlight and a 250-lumen floodlight. Both can be activated simultaneously for a combined output of 310 lumens. There’s also an independently-controlled rear-facing amber light to make others aware of your position from behind.
The DICATA’s low-profile housing and tough rubber head strap are intended for use on a helmet or hard hat without obstructing face shield movement, and its controls are enlarged for easy access while wearing gloves. It runs on 3 easy-to-find AA batteries, and is available with either a red or green high-visibility housing. For more info on these headlamps, go to NightStick.com.
Learning how to evacuate an injured person from a hazardous or remote location, such as an active-shooter event or a backcountry hike gone wrong, is like paying down your credit card bill rather than buying new stuff every month — in your heart you know you should do it, but it’s just not as fun or as sexy as other options.
We believe in a holistic approach to preparedness and recognize that it’s just as important to know how to save the lives of others as it is to protect your own. To find out more, we spoke with Eric Soderlund, who has worked as a detective for a large Florida county law enforcement agency for the last 13 years. Prior to that, he served as U.S. Army military policeman (95B, now 31B) for eight years. He’s on the board of advisers for the Committee on Tactical Emergency Combat Care (CTECC) and serves on the training cadre for the Florida SWAT association’s tactical EMS course.
“It’s great to have a gun on you,” Eric says, “But it’s about more than just being armed. Like we saw in Las Vegas, all of those 3,000 people in the crowd could have had a gun on them, and it wouldn’t have done any good. So we need to be a student of the game. And these days the game includes medical training and knowing how to move injured people.”
Disclaimer: This article is meant to be an overview and not a detailed guide on evacuating injured individuals to safety during an emergency. Seek professional medical training before attempting any of these techniques.
Use Your Surroundings
In the event that casualty evacuation becomes necessary, Eric encourages trainees to first take a good look around them. This doesn’t mean to go all MacGyver and build an ultralight hang-glider to escape out a window. Instead, keep it simple and just think about what makes sense. “Look at the environment and see what’s ready to use,” Eric says. “If you have a minute to look around, see if there’s something that can make your life a little easier.”
Look at your environment and ask yourself what you have at your disposal that could serve as an improvised gurney or wheelchair to evacuate someone from danger quickly.
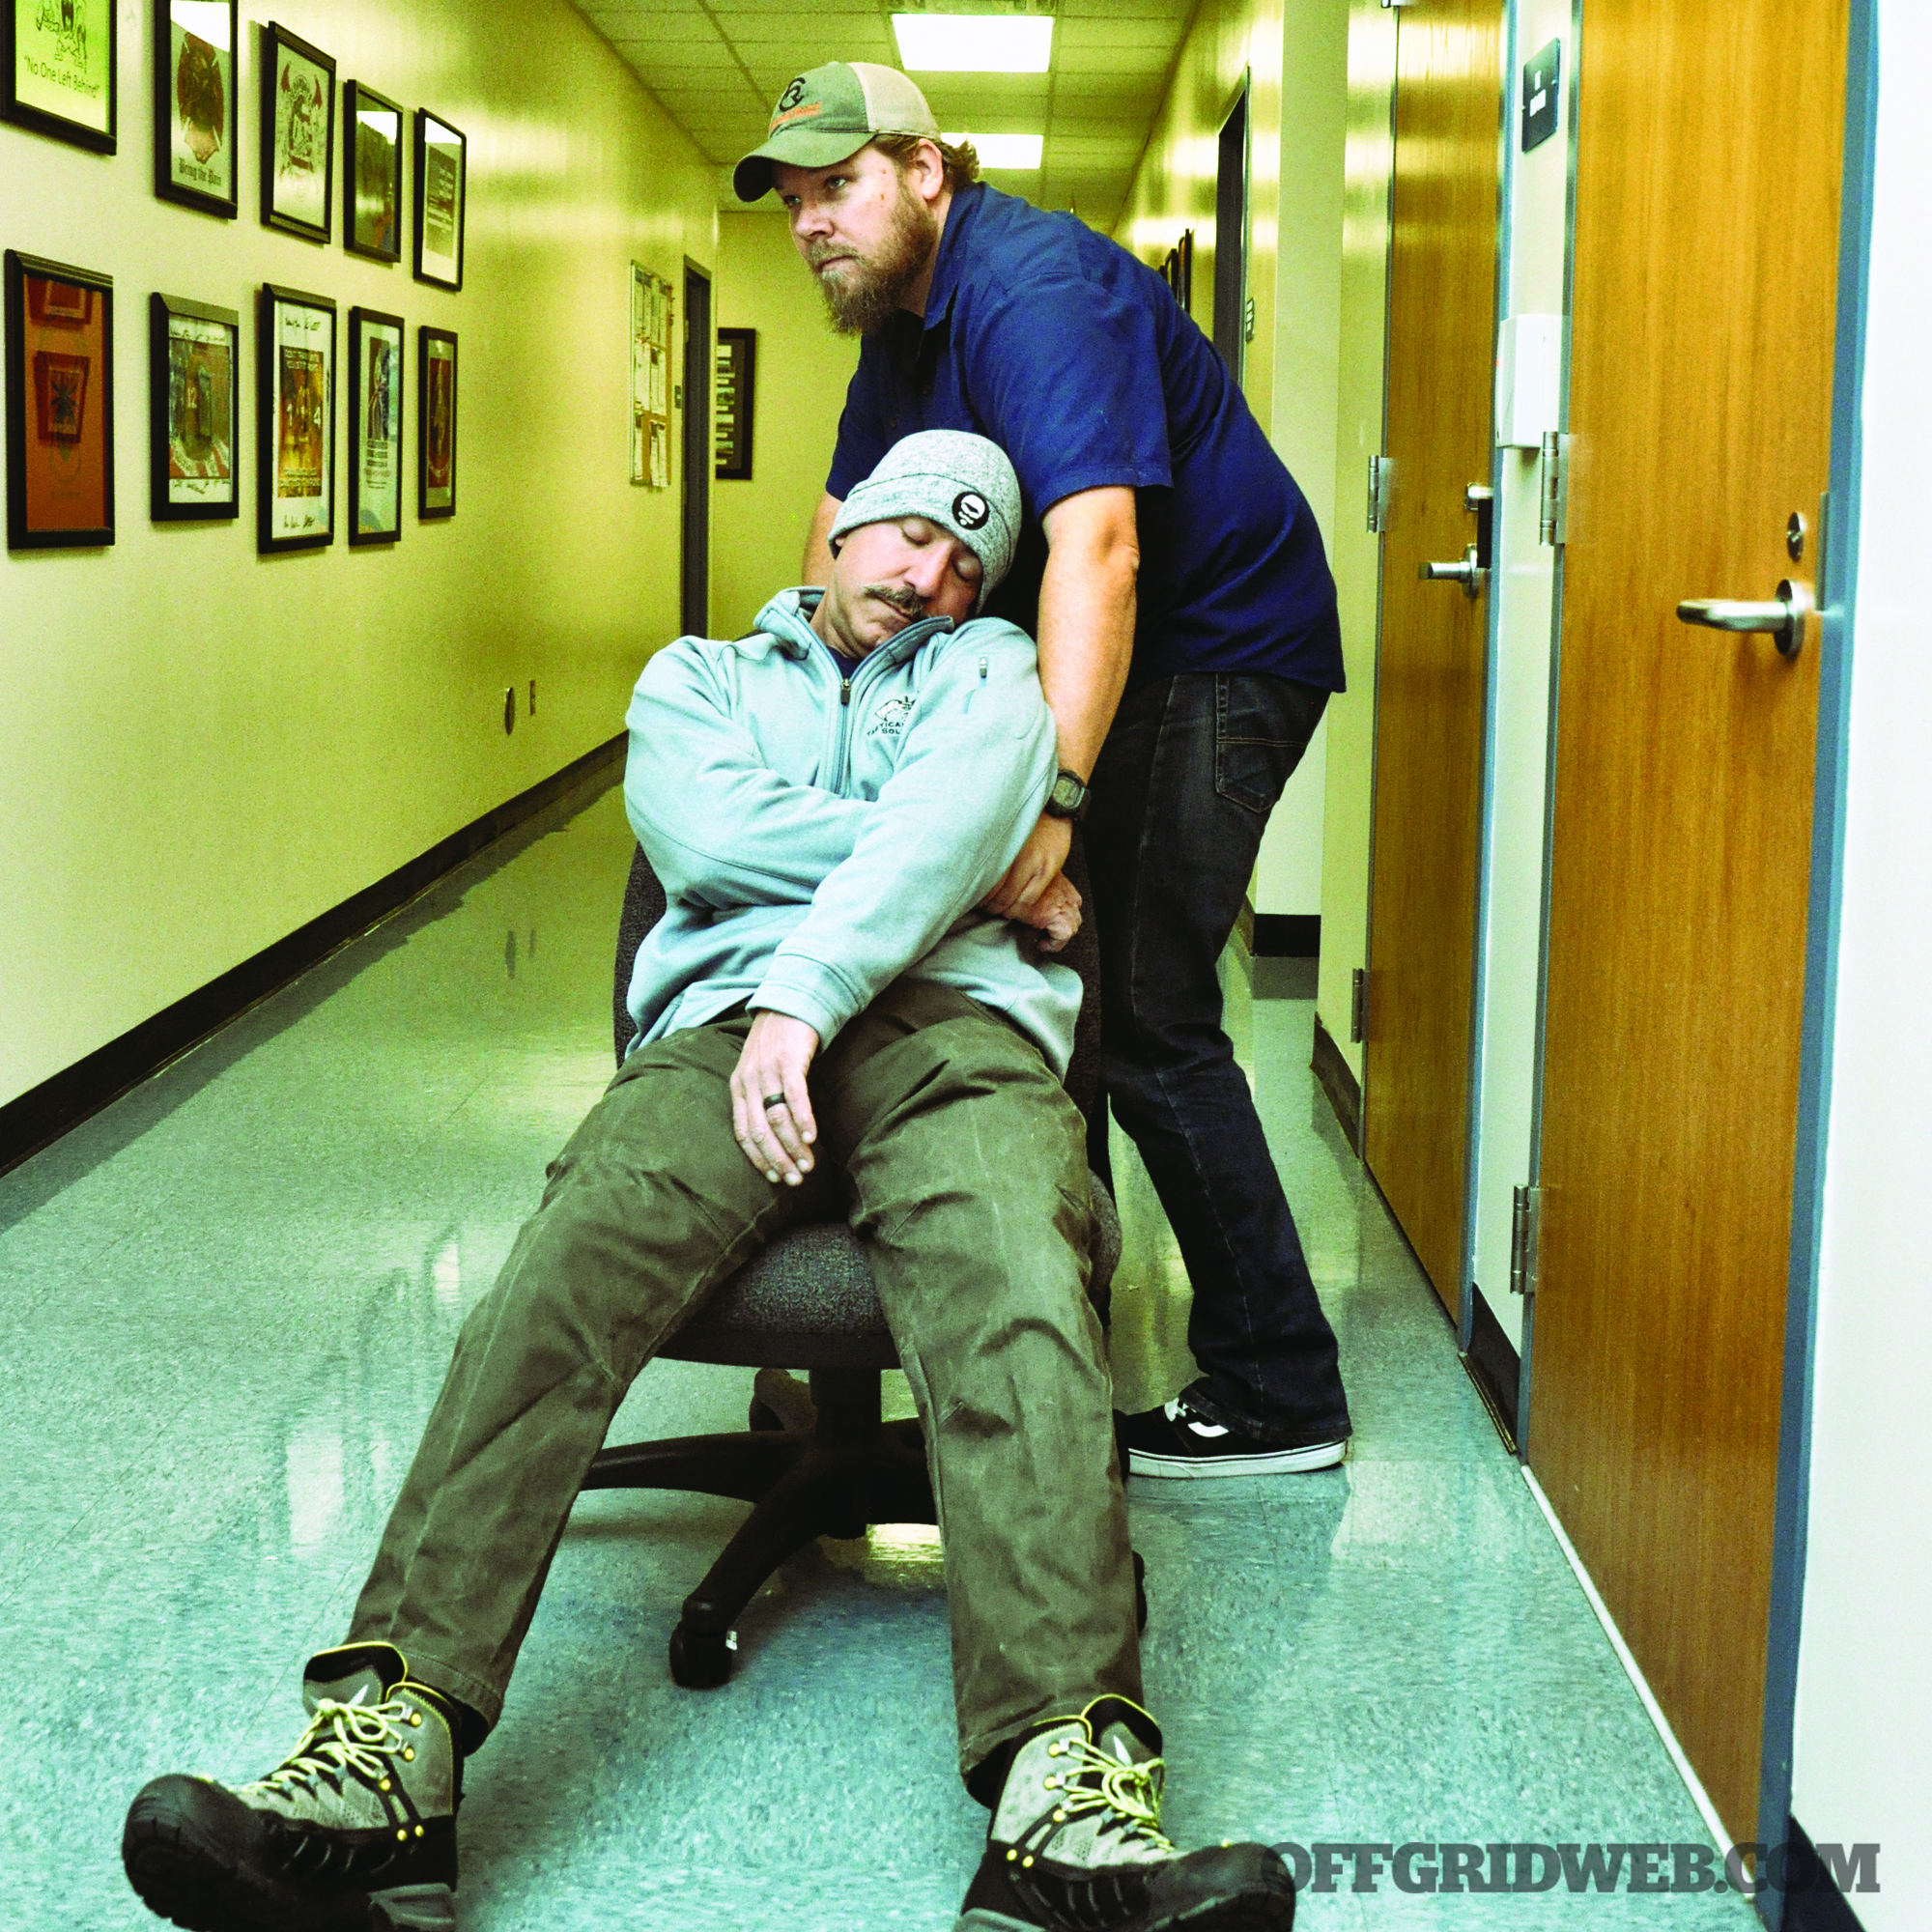
If you’re in an office environment and a casualty can’t walk, consider grabbing one of those ever-present rolling desk chairs, placing them in the chair, and wheeling them out. You may have to hold them from behind to keep them upright, but it’ll still be easier than simply trying to drag them out with your bare hands. “You don’t necessarily have to be Captain Caveman, and lift and carry everything,” Eric adds. “Work smarter, not harder.”
Otherwise, if you’re not immediately faced with a direct threat and you have at least one other person to help you, you could improvise a litter (like a flexible stretcher) out carpeting on the floor. With the casualty laying down, cut an outline around them using your knife. Then cut slits for handholds on the sides and another at the head, and roll your patient inside the carpet Corleone-style just like you’ve seen in all those mafia movies. This will allow you to grab the carpet much more easily and slide the casualty along the floor with much less friction than otherwise. And if you decide that you do want to add a dash of MacGyver, threading a pole or mop handles through the cutout slits provide an even easier handhold and improve the rigidity of the litter as well.
Find Alternate Paths
For those who work in the same place every day, it makes sense to occasionally look around and think about what you could use, and how you might be able to get out. “Think about your situation ahead of time,” Eric says. “If you’re in a high-rise building where a fire on top and bottom is a real possibility, would you consider base jumping off the roof? That’s an extreme example, but the idea is to look at your environment and consider the possibilities. Think outside the box of leaving the building using the stairs or an elevator.”
Many wooden doors can be broken down with a mule kick. However, metal doors, as we’d find in a commercial or office environment, aren’t quite so easy. But if we think outside the box we might find that the walls either side of that door are made from drywall and metal studs. In that case, there’s a good chance you can bust through the drywall to access the other side.
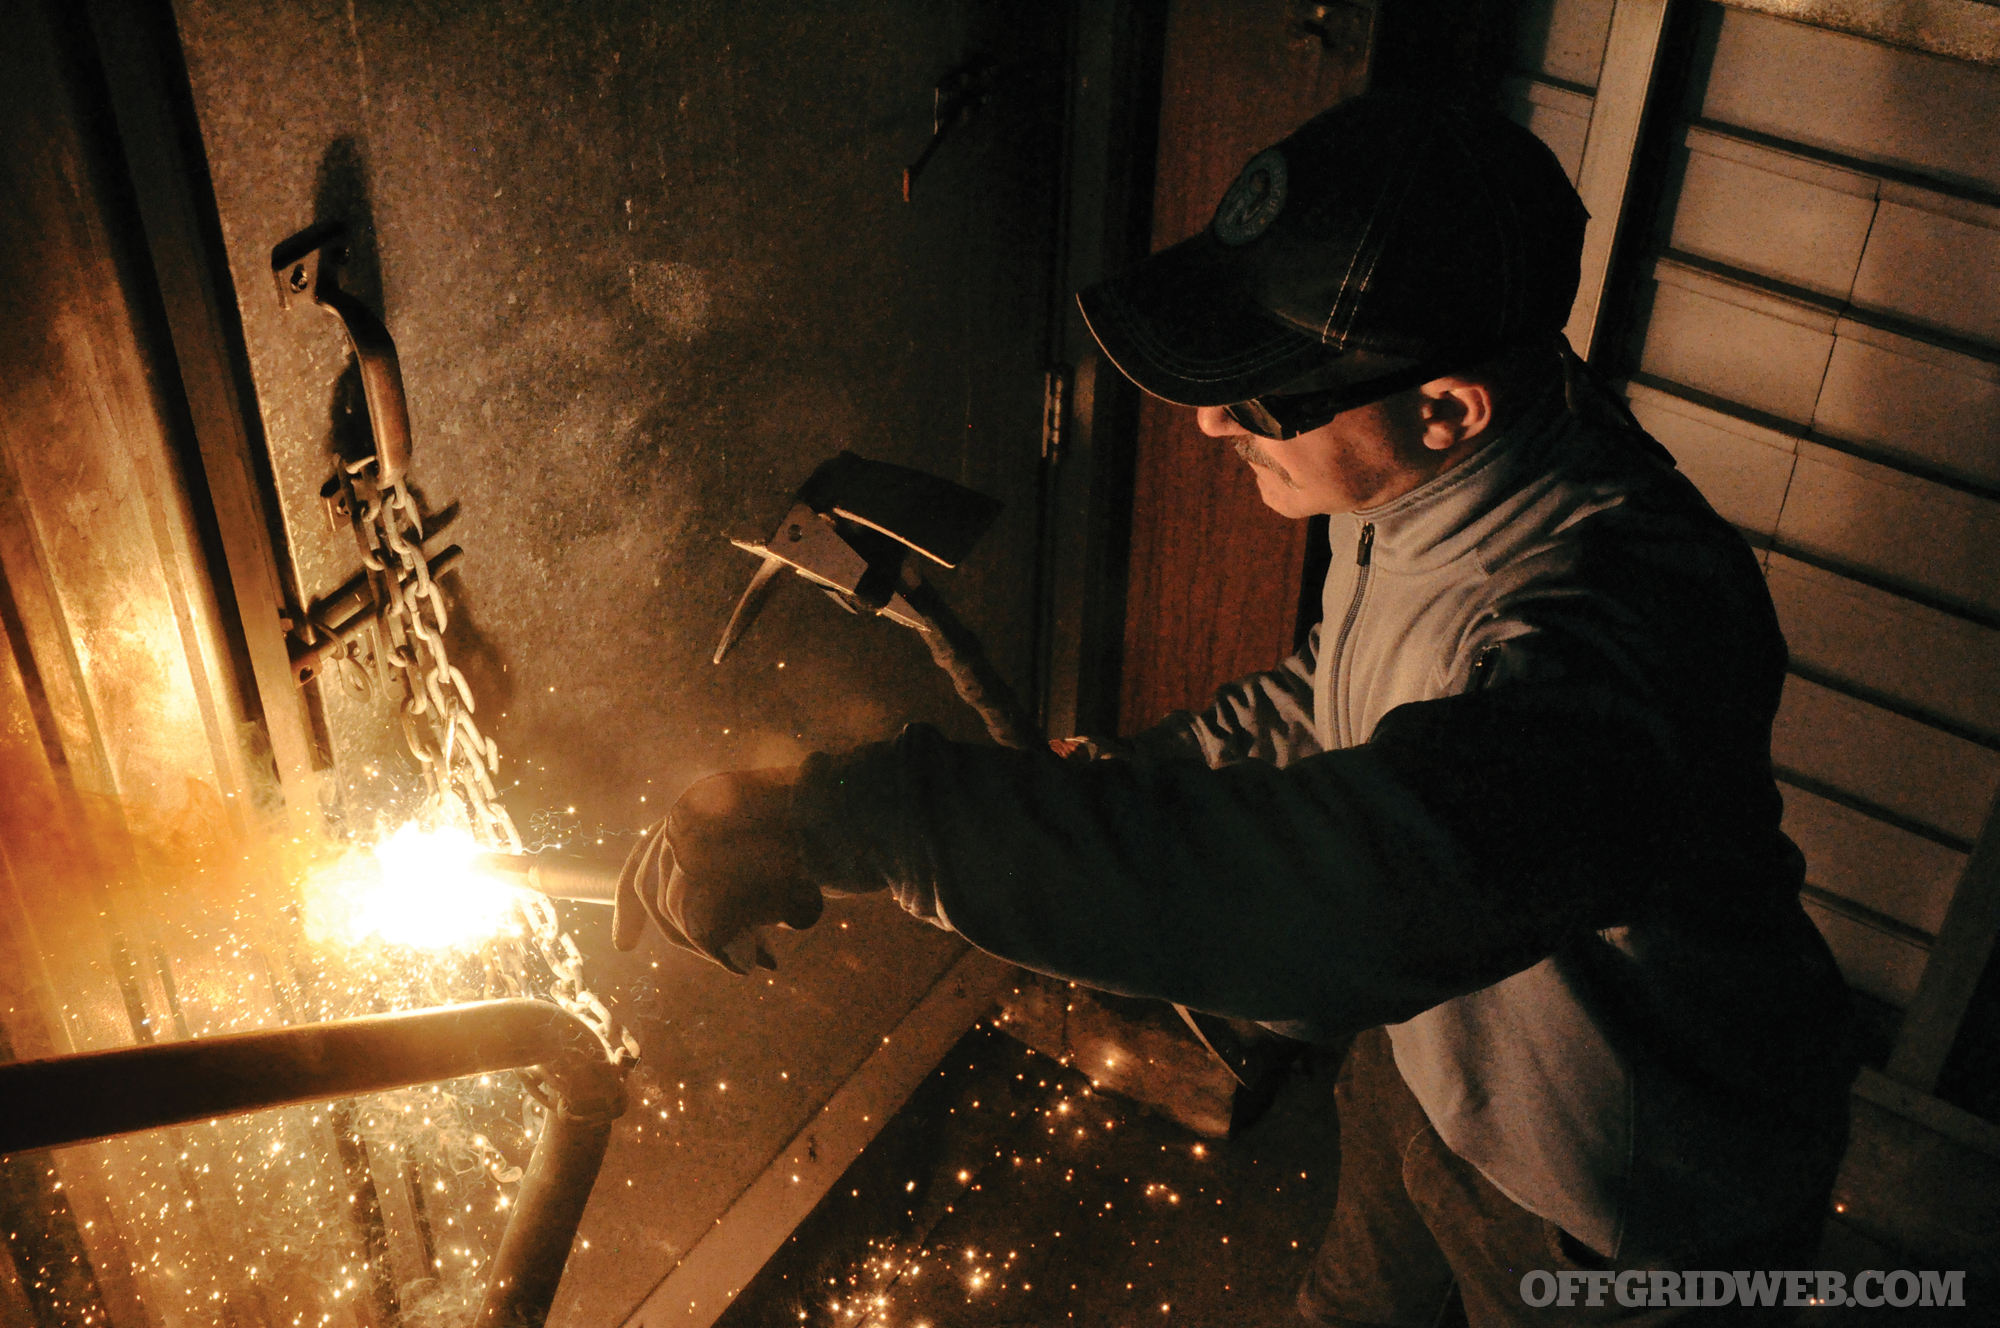
A commercially available Breach Pen cutting tool can be used to burn your way through padlocks or chained doors, and is much more portable than a bolt cutter. This lightweight and packable tool, about the size of a small flare, allows you to burn your way through any number of barriers. Additionally, also consider keeping a fire-suppression tool on hand, like a compact aerosol spray can fire extinguisher, such as those from Blaze Defense Systems, which can quickly cool red hot metal to hand-holdable temperatures.
Breach Pen is a small, portable tool to quickly cut through locks and other metal materials that may be impassable otherwise. Like any heat-conducting device, proper training is important.
Additionally, many office buildings have drop ceiling tiles. If you can climb into the dropped ceiling space, you may well be able to bypass locked doors and access other areas.
Last, consider breaking through windows to get out. Ten to 15 years ago it’d never be an issue to break glass. But depending on your location, the glass might be impact or hurricane-rated, so you can’t necessarily just throw a chair through it. To mitigate this, you could consider using a glass-breaking tool offered on some fire-rescue–style knives such as the TOPS/BUCK CSAR-T. If necessary, you might also think about shooting through the glass, after taking a look to see what’s outside first.
“Just remember,” Eric says, “you own every single round that comes out of that barrel, regardless of what kind of crazy situation is going on. So maybe consider shooting out a lower corner of the window so you’re aiming at the ground, reducing the likelihood of collateral damage.”
Consider Aftermarket Solutions
In an ideal situation, you’ll have a full-size EMS stretcher next to you, like the ones you see EMTs load into rescues (ambulances). It’s 100-percent rigid, so all of the force you use to push (or pull) the stretcher translates directly into moving the stretcher. Realistically, of course, that’ll never happen. So we trade rigidity for improved portability, and we use packable soft litters instead of stretchers.
As litters get lighter and more portable, they also get more flexible, which isn’t necessarily a good thing. With a more flexible litter, the force that would’ve moved your patient is more likely to just bend your patient. It’s analogous to pushing a sturdy wooden crate versus trying to push a canvas sack, or worse, a thin plastic bag filled with oranges.
Can’t find anything nearby to move someone who is injured? Why not carry something with you? The Foxtrot Litter by Tactical Medical Solutions is a portable, lightweight platform that can be used to move someone to safety when seconds count.
Eric recommends training with commercial products where available, because having trained with good products will help show you how to improvise a solution when the time comes. “The more you use the commercial devices and formalized training,” Eric says, “the better you’ll be at building improvised solutions because you’ll better understand the concepts behind it.”
“Consider a commercial tourniquet, for example. If you’ve used one you’ll know that you need a strap, a windlass, and something to clip the tensioned windlass to. So don’t eschew the commercial options just thinking you can ‘wing it’ when you have to. Training with the real gear will help you wing it.”
When it comes to commercially available products, Eric has used several from Tactical Medical Solutions (TacMed Solutions) that he favors. First is the Foxtrot Litter. “The Foxtrot is the Cadillac of litters, and it’s relatively inexpensive,” Eric says. “It’s semi-rigid, striking a compromise between usefulness and portability. For its size you can use a two- or four-person carry, or just drag it on the ground as you would in a wilderness situation. A Skedco Sked (sled) is also cool, but usually that’s not available unless you’re traveling in a large vehicle or into overlanding with 4×4 Jeeps.”
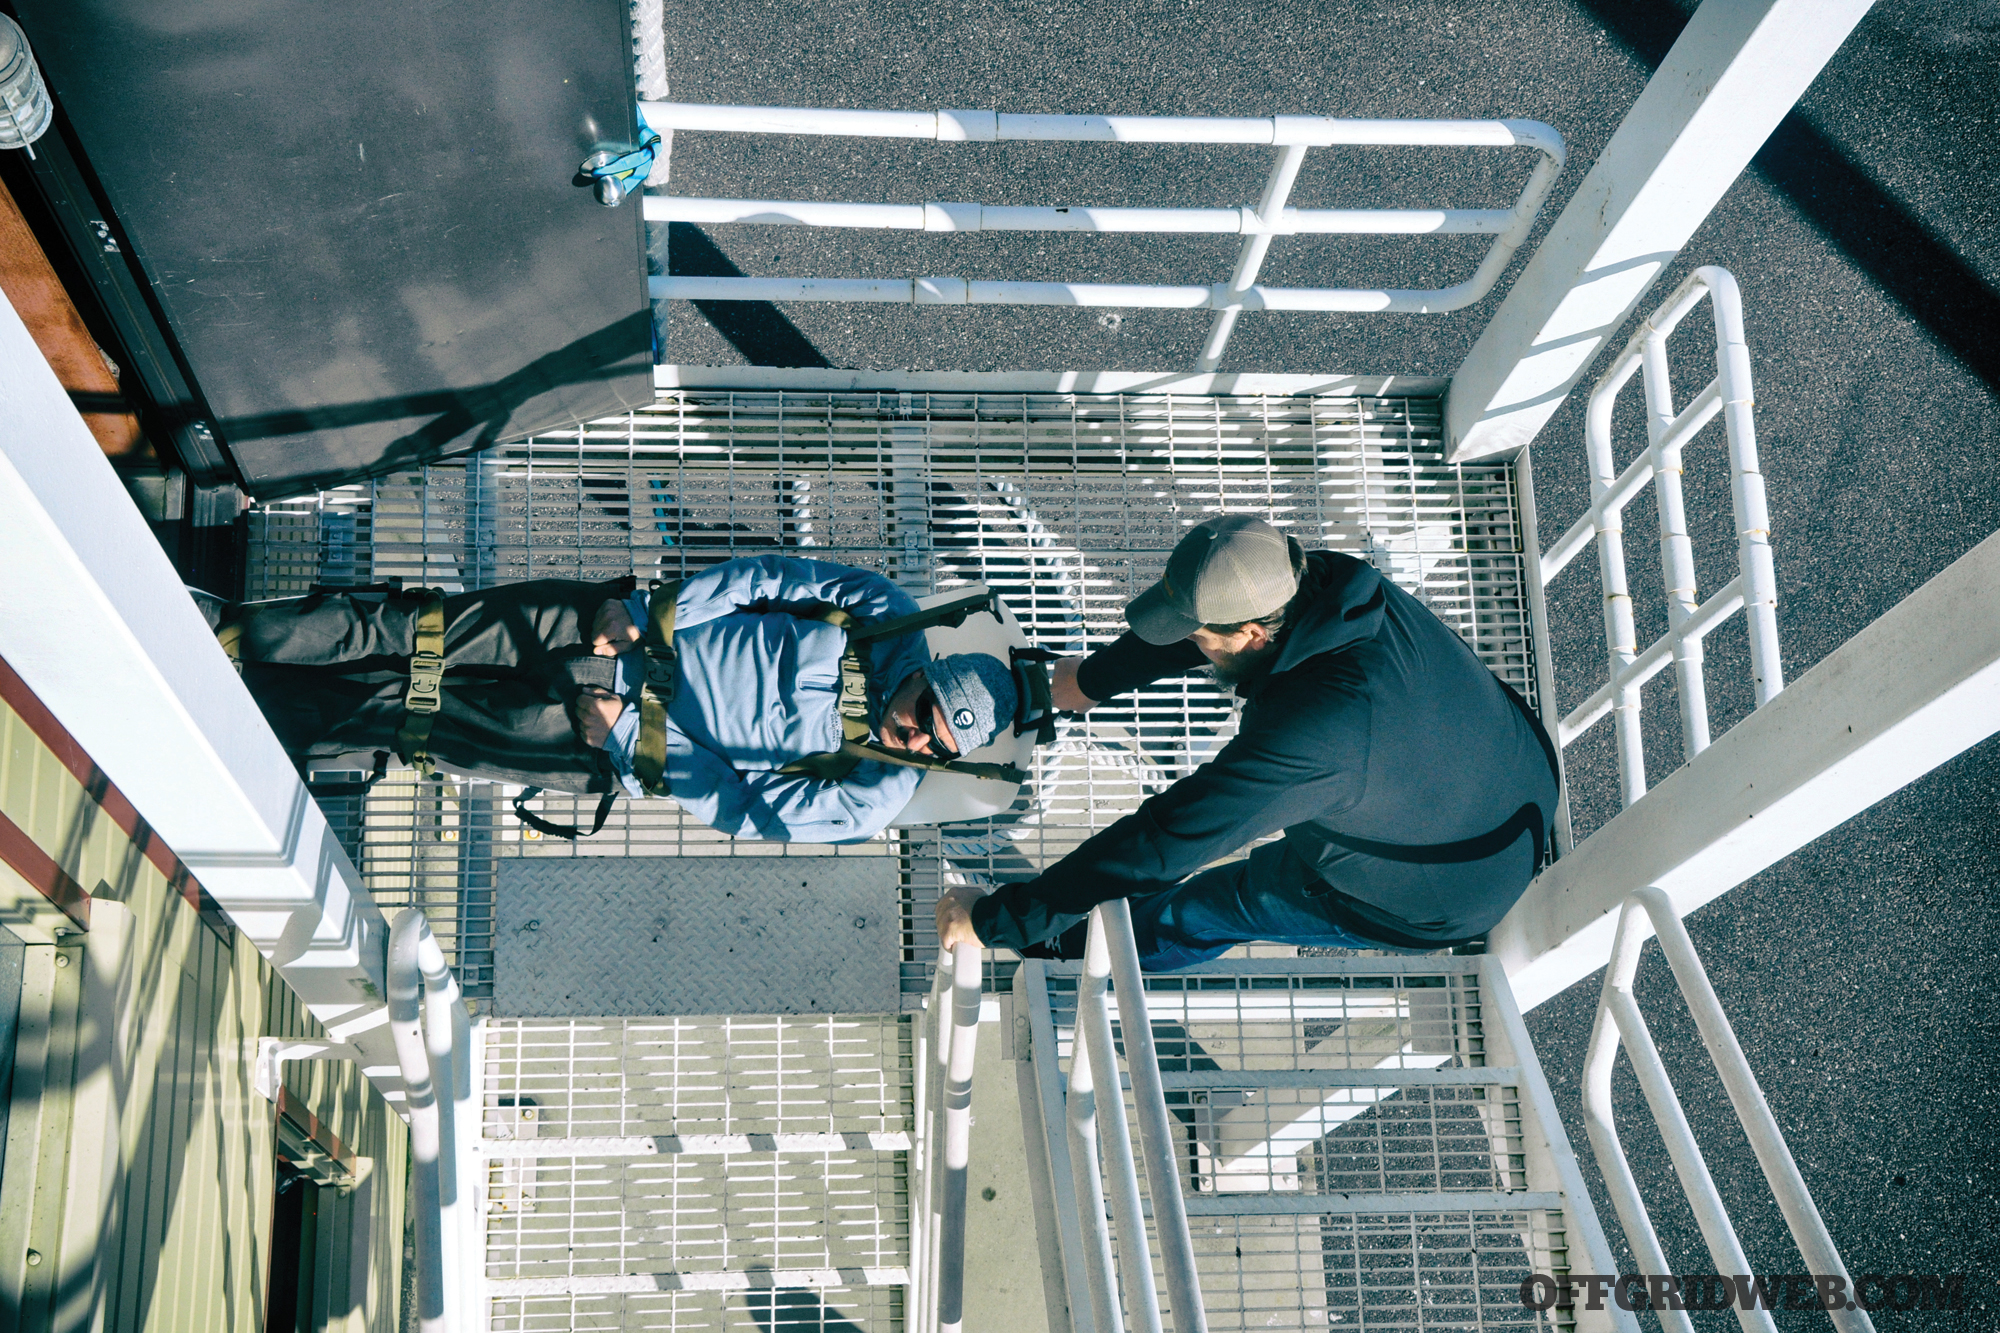
For the photos seen in this article, we used a Rescue Task Force (RTF) version of the Foxtrot Litter, which uses somewhat beefed-up materials but is a similar concept. We also used the Evacuation and Rigging Strap (ER-S) from TacMed Solutions, which is inexpensive, small enough to be packed inside any bag, and lets you perform a drag, a backpack carry, or a modified half-litter carry on a casualty with a few simple loops of the strap around them.
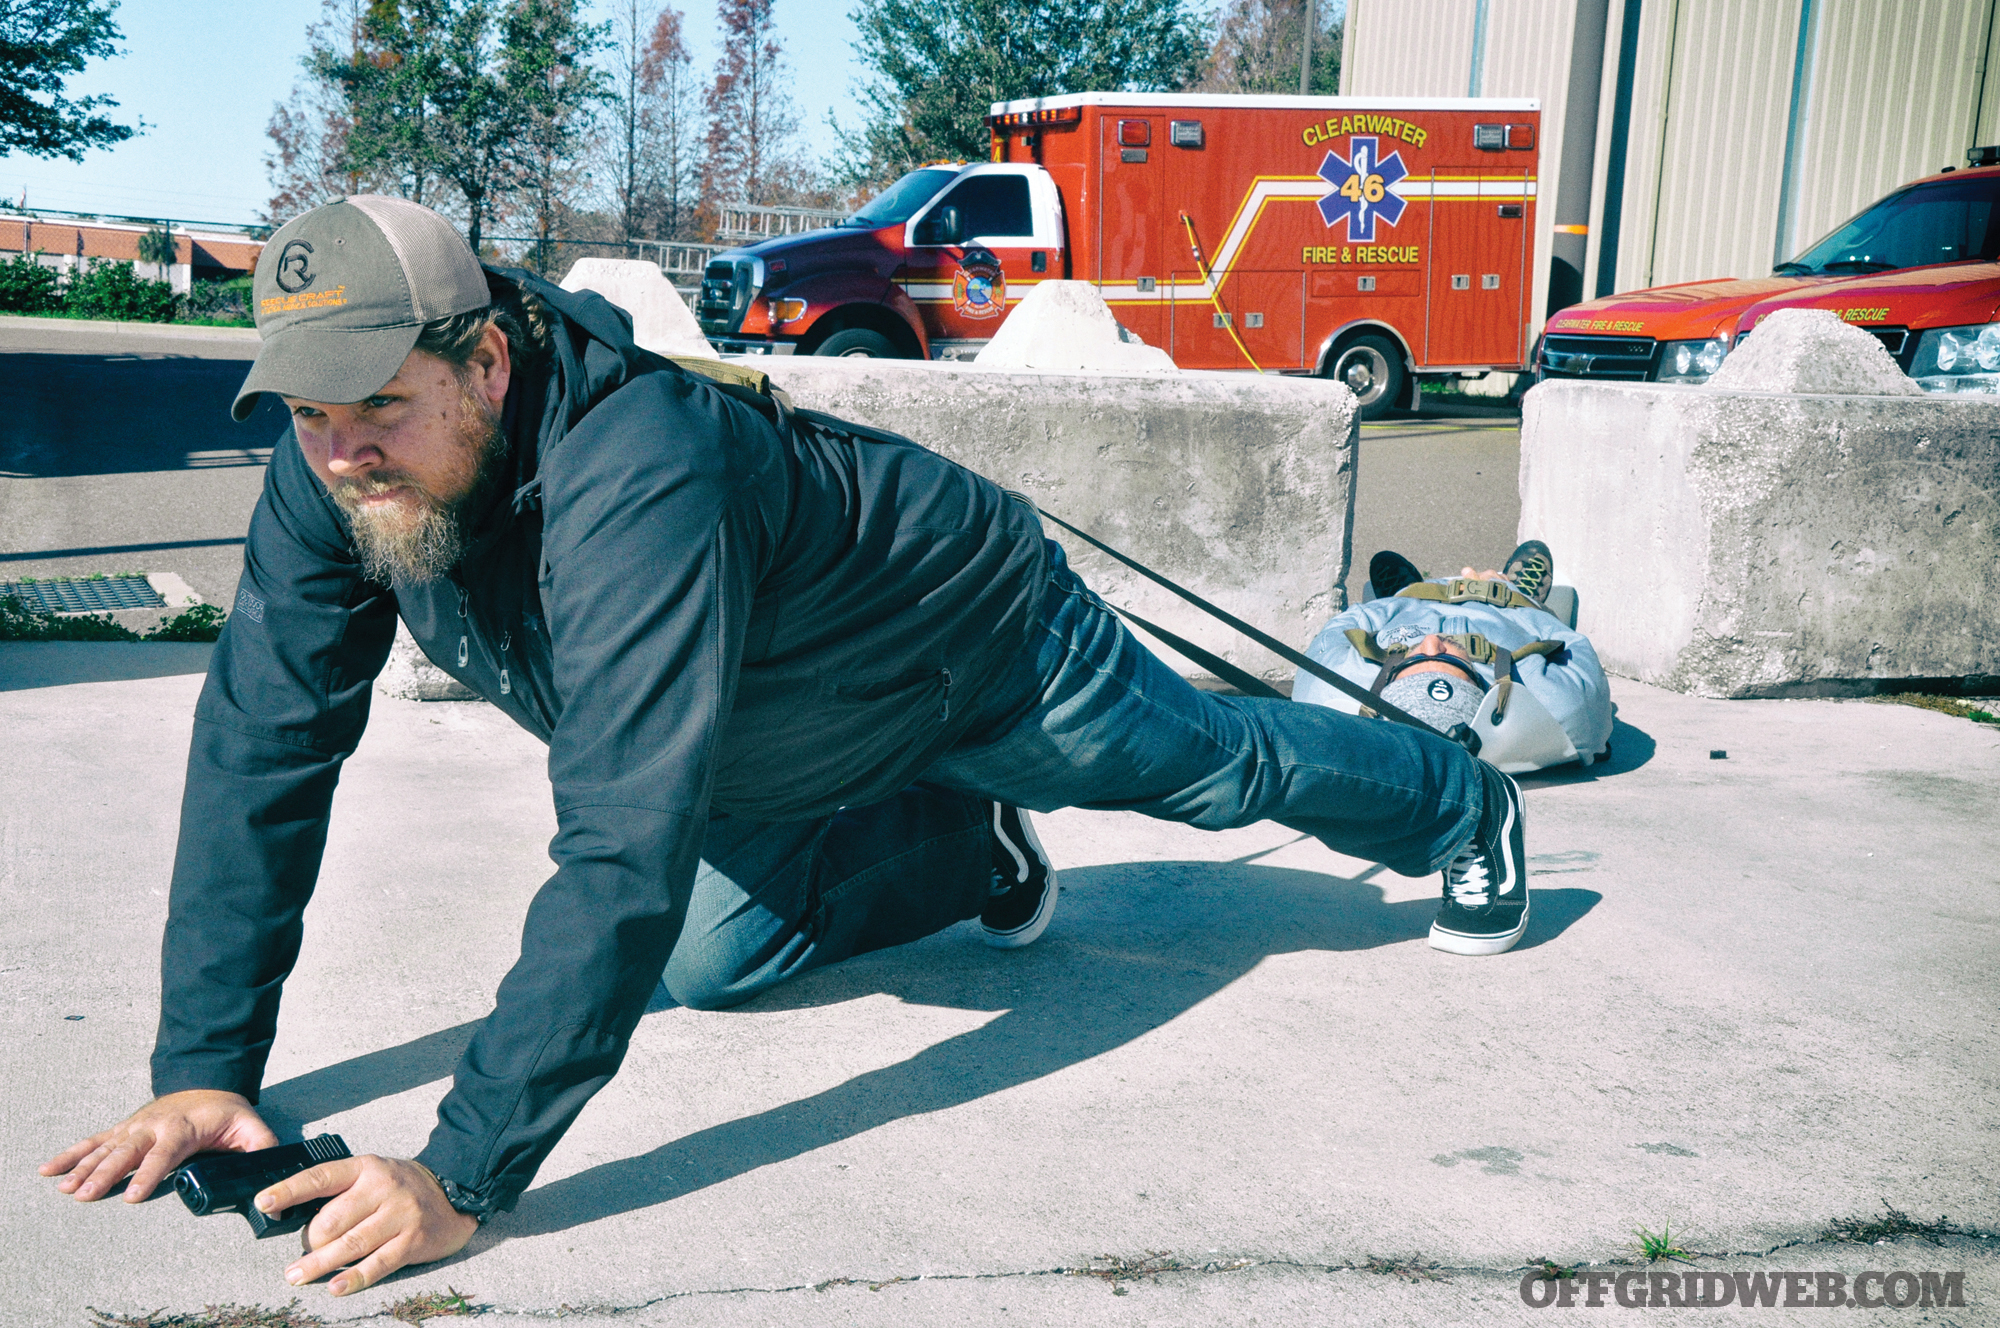
It can be used to carry a casualty in a low “bear-crawl” position, minimizing exposure by maintaining a low profile when needed.
“Another soft litter is the Phantom from TacMed Solutions,” Eric says. “It can be thrown into a backpack or bag easily. The trade-off is that you can’t drag it very far or you’ll rip the sh*t out of it. It’s also super flexible, which actually makes it harder to carry when you consider the patient naturally flexing their knees and bending their hips.”
Decision to Move
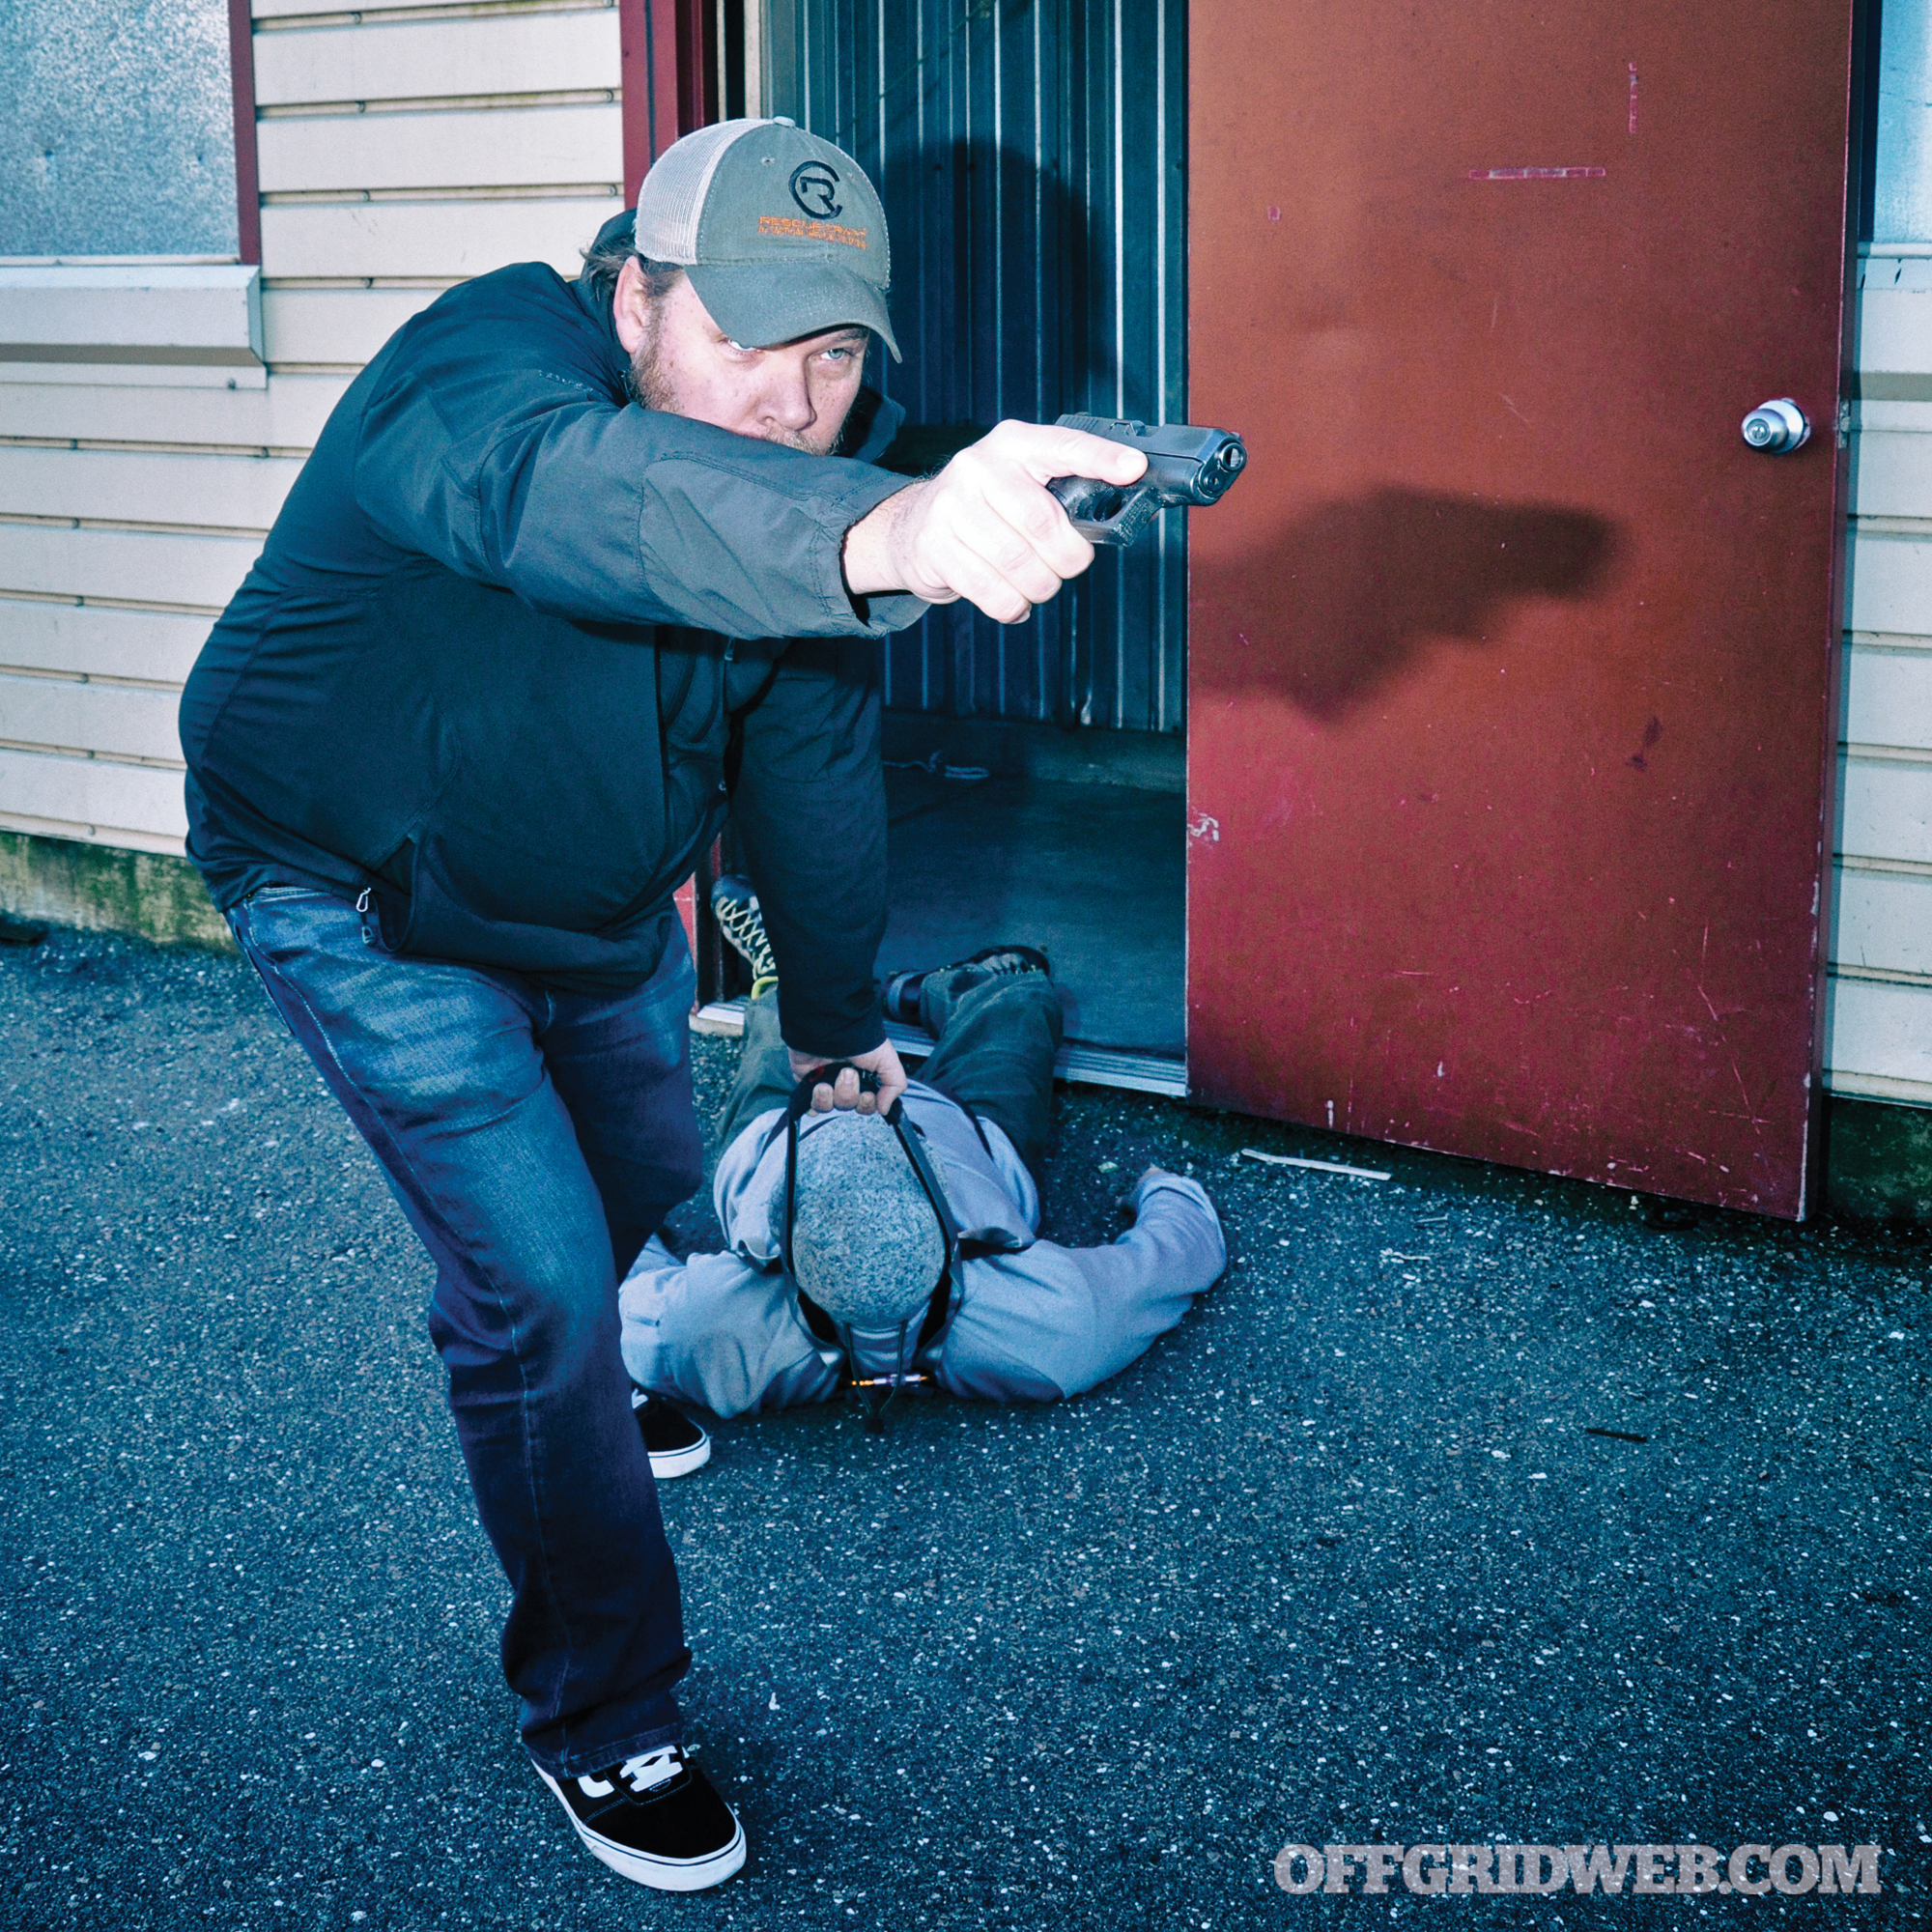
When it comes to deciding whether or not you should attempt to move casualties during an active shooter event, the recommendations are fairly simple. If the casualty is dead, then there’s no need to move them. And if you’re in a “hot zone” where the shooter is a direct threat to you, you should worry about protecting yourself with your own firearm if possible or evading instead. Otherwise, if you’re in a “warm zone” where the threat is still out there, but not directly in front of you, then you should attempt to move the injured casualty to safety.
Regardless of whether or not you suspect neck or spinal injuries, unless you have advanced tactical medical training, don’t spend time trying to stabilize the patient’s neck or spine prior to evacuation. Chances are that you’ll just do it wrong anyway, compounding the issue and wasting invaluable time. Instead, focus simply on getting the casualty to professional care as soon as possible.
One way to use the ER-S strap from TacMed Solutions is to lay the casualty on their back and use the ER-S as a convenient drag strap, looped around the casualty’s arms and chest.
In a backcountry hiking or wilderness situation, it can be difficult, if not impossible, to evacuate an injured party to safety by yourself. In most situations it’ll be safer for both you and the casualty if you leave him or her to shelter in place, and speed off by yourself to go find help. Otherwise, you run the risk of running out of supplies or dying of exposure on your way out because of the slowed pace when transporting casualties. The delay in medical care alone may doom the casualty. The better option is to quickly alert the local authorities, who can deploy a wilderness search-and-rescue team.
Litter Use Tips
When you strap the patient into an aftermarket litters, consider strapping them so that they’re laying on their side as opposed to on their back, like you see in all the movies. This makes it easier for them to bend their bodies (or you to bend their body for them) in order to navigate tight corners or stairwells.
Think about it this way — if you’re laying on your back it’s quite difficult to arch your body into any configuration besides straight up and down. But if placed on your side, it’s easy to bend into an S-shape or maneuver to help you fit where you need to. This also has the added benefit of the patient being in the “recovery” position already, reducing the chances of choking on vomit or blood, and making it easier for them to breathe. You can also utilize a backpack, jackets, towels, etc., to prop them up into the recovery position, or use these items to place in “hot spots,” bony areas of the body that can take a beating if dragged in a litter over rough terrain.
To summarize our tips: Try to use your environment to help you, consider other ways besides doors to get out, and consider purchasing aftermarket litters to train with and carry with you. This way you’ll be helping not just yourself and your family, but possibly the larger community as well.
Applied in a different configuration, the ER-S can also be used to hoist a casualty and attach them to you like a backpack, which is more appropriate for certain conditions.
“Part of being prepared is being able to enable the laypersons around you — showing them how to help others while you do it yourself,” Eric says. “So get your family involved, and your kids and community. Get them involved and thinking, it’ll suck to have to carry some random casualty or your wife by yourself down three flights of stairs in order to escape a threat.”
Get Formal Training to Learn Improvisation
It’s not easy to tell someone how to improvise ahead of time, for the same reason that it’s hard to predict the future. But formal training will give you a good foundation of skills to build on and make it easier to recognize improvisational opportunities when you find them. Here are some companies Eric recommends that teach patient/casualty movement as part of their courses.
Lone Star Medics
Medicine X Course: This two-day “ambush medicine” course focuses on providing casualty care while being fired upon and includes coverage of rescue rigging and rapid trauma assessments. lonestarmedics.com
Special Operations Aid & Rescue (SOAR)
Tactical Emergency Casualty Care (TECC) Course: Based on national TECC committee guidelines and endorsed by the National Association of Emergency Medical Technicians (NAEMT), this two-day course teaches students how to treat casualties in wounded environments, but also includes treatment of pediatric patients and techniques for dragging and carrying victims to safety. www.soarescue.com
Talon Defense
Combatant Casualty Care: An advanced four-day course that includes coverage of patient drags using both improvised and commercial litters and rigging, it also teaches more advanced medical treatment techniques which can be incorporated to treat casualties in place prior to evacuation. talondefense.us.com
If you can’t make it to one of these in-person classes, check out these two online resources that provide expert-approved guidance for civilians in active shooter situations.
www.ready.gov/until-help-arrives – This reference guide, produced with input from the Committee on Tactical Emergency Combat Care (CTECC), includes a helpful interactive video to teach kids in addition to more advanced discussion for adult civilians.
www.avoiddenydefend.org – Developed by Texas State University, this 12-minute video eschews the common “hiding” advice regarding active shooters. It also expands beyond the common office or school shooting environments to include reasonable (and possibly life-saving) response techniques for open retail store environments, churches, movie theaters, and more.
About the Author
Andrew Schrader recently served as an Advisor/Reviewer for the San Bernardino (California) City Fire Department’s After Action Report (AAR) of the Active Shooter Incident Response which took place in December 2015. His company, Recon Response Engineering LLC, educates firefighters and search and rescue teams on the subject of urban search-and-rescue and building collapse. Most recently, he was deployed in Florida to support rescue operations following Hurricane Irma. www.reconresponse.com
Memorizing a few useful knots can help you deal with a variety of tasks, ranging from rigging a ridgeline for your survival shelter to simple tasks around the house. If you’re carrying cordage, you need to know how to use it effectively or it won’t do you much good. Fortunately, even if you only know a handful of knots, you can learn to make do.
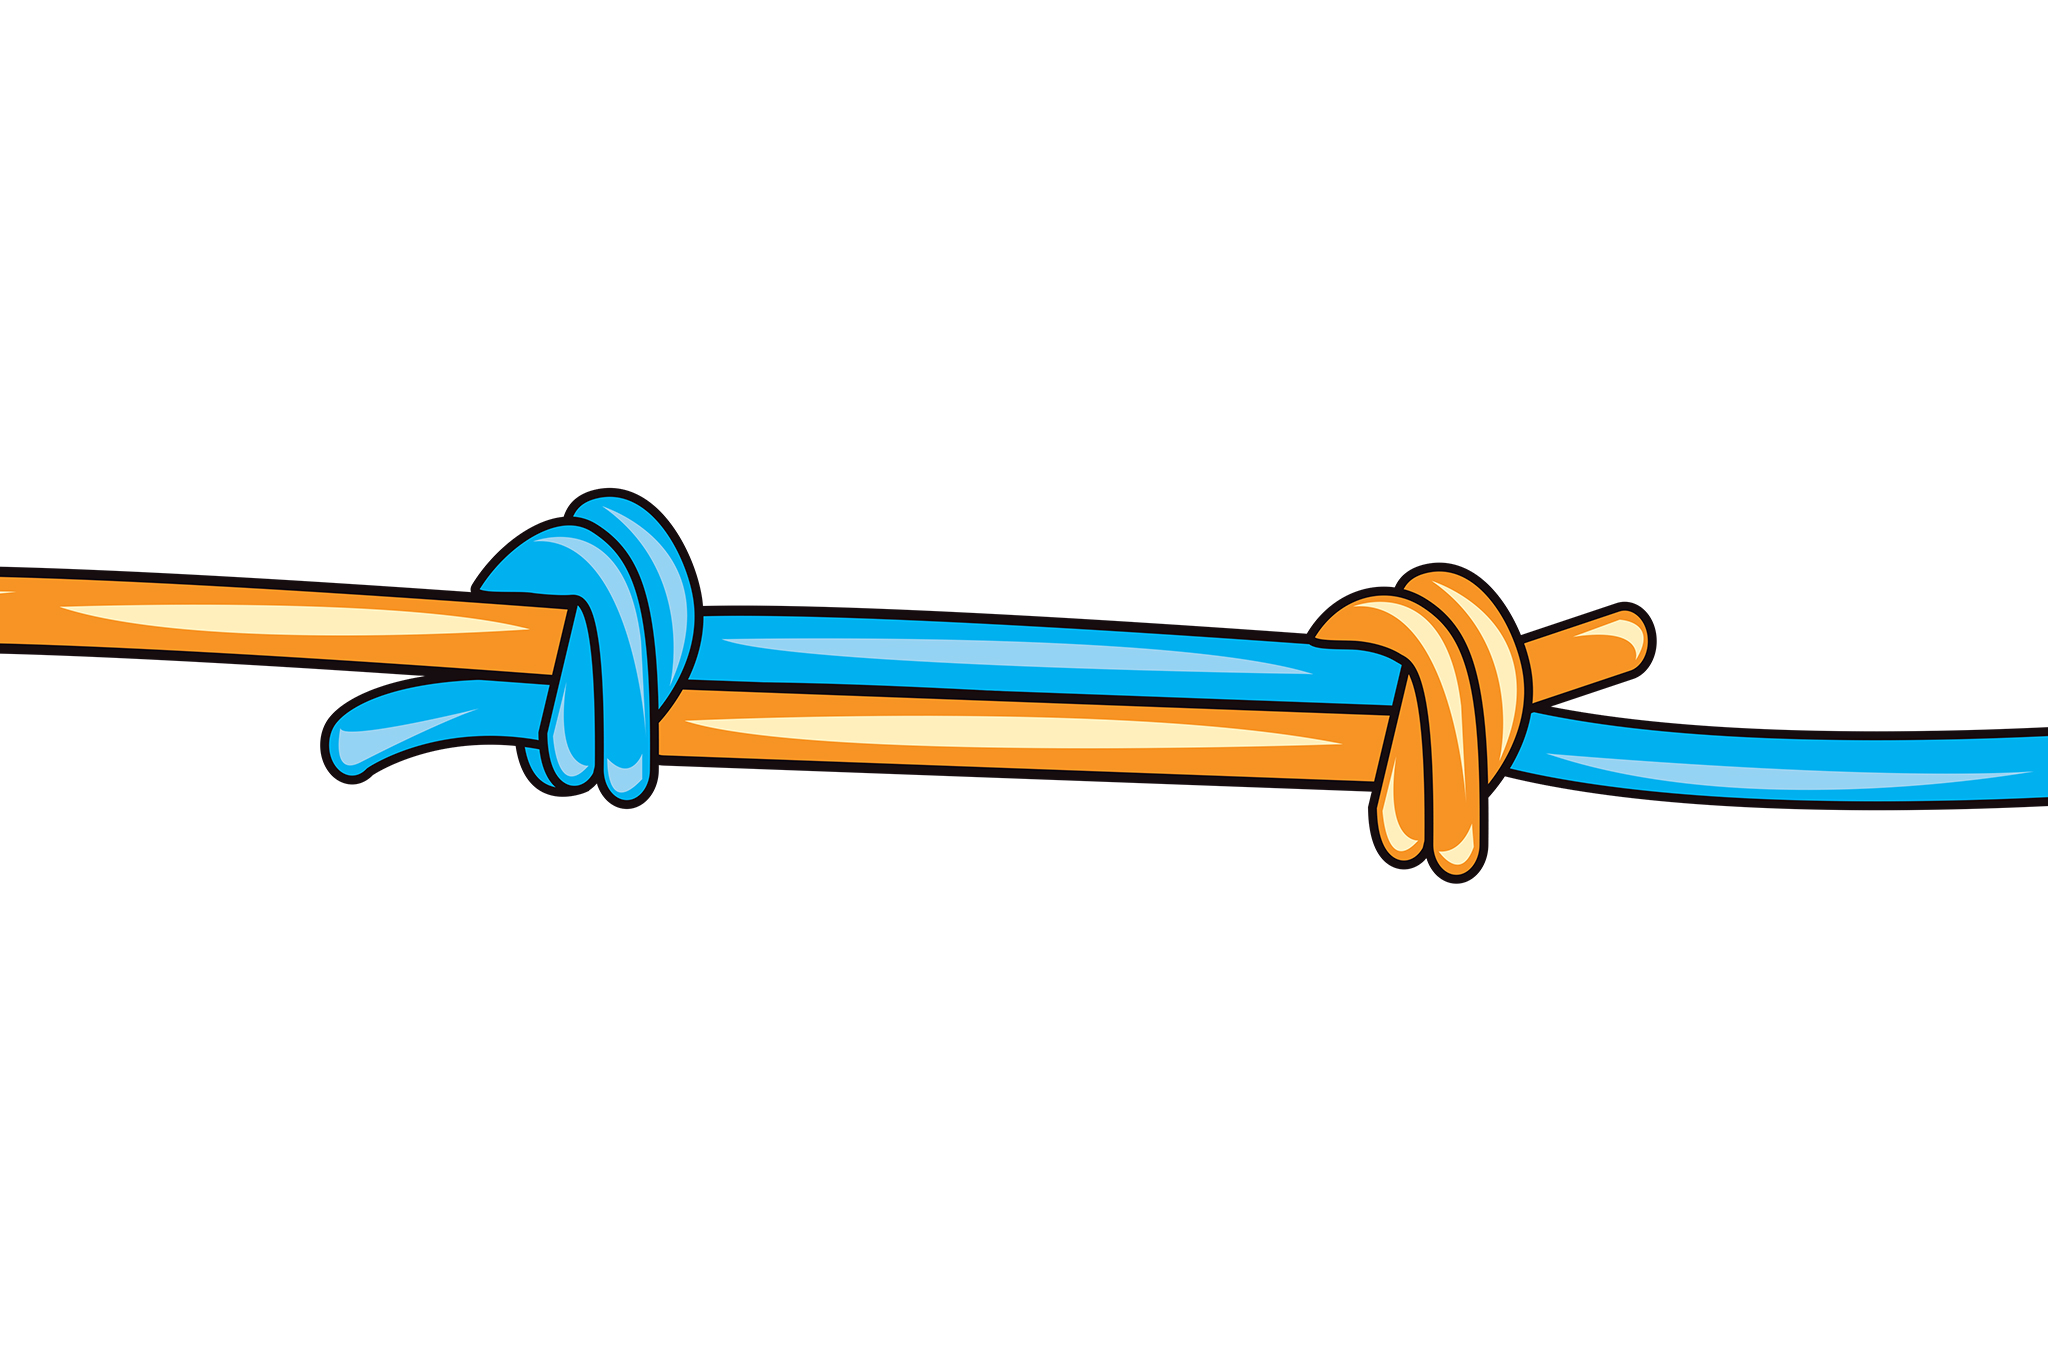
One situation you’ve probably run into is dealing with scraps of paracord or rope. Tying together two loose ends can extend your cordage, but if done incorrectly, these ends may slip or loosen over time. This is where the double fisherman’s knot comes in handy.
The double fisherman’s knot is an extremely secure way of connecting two pieces of cordage. Each end of the cord is looped around the other twice and tied off, so when the ropes are pulled apart, the knots slide together and cinch down. The following video from Paracord Guild shows how it’s done:
For added security, the ropes can be looped three or four times before tying — this would create a triple or quadruple fisherman’s knot.
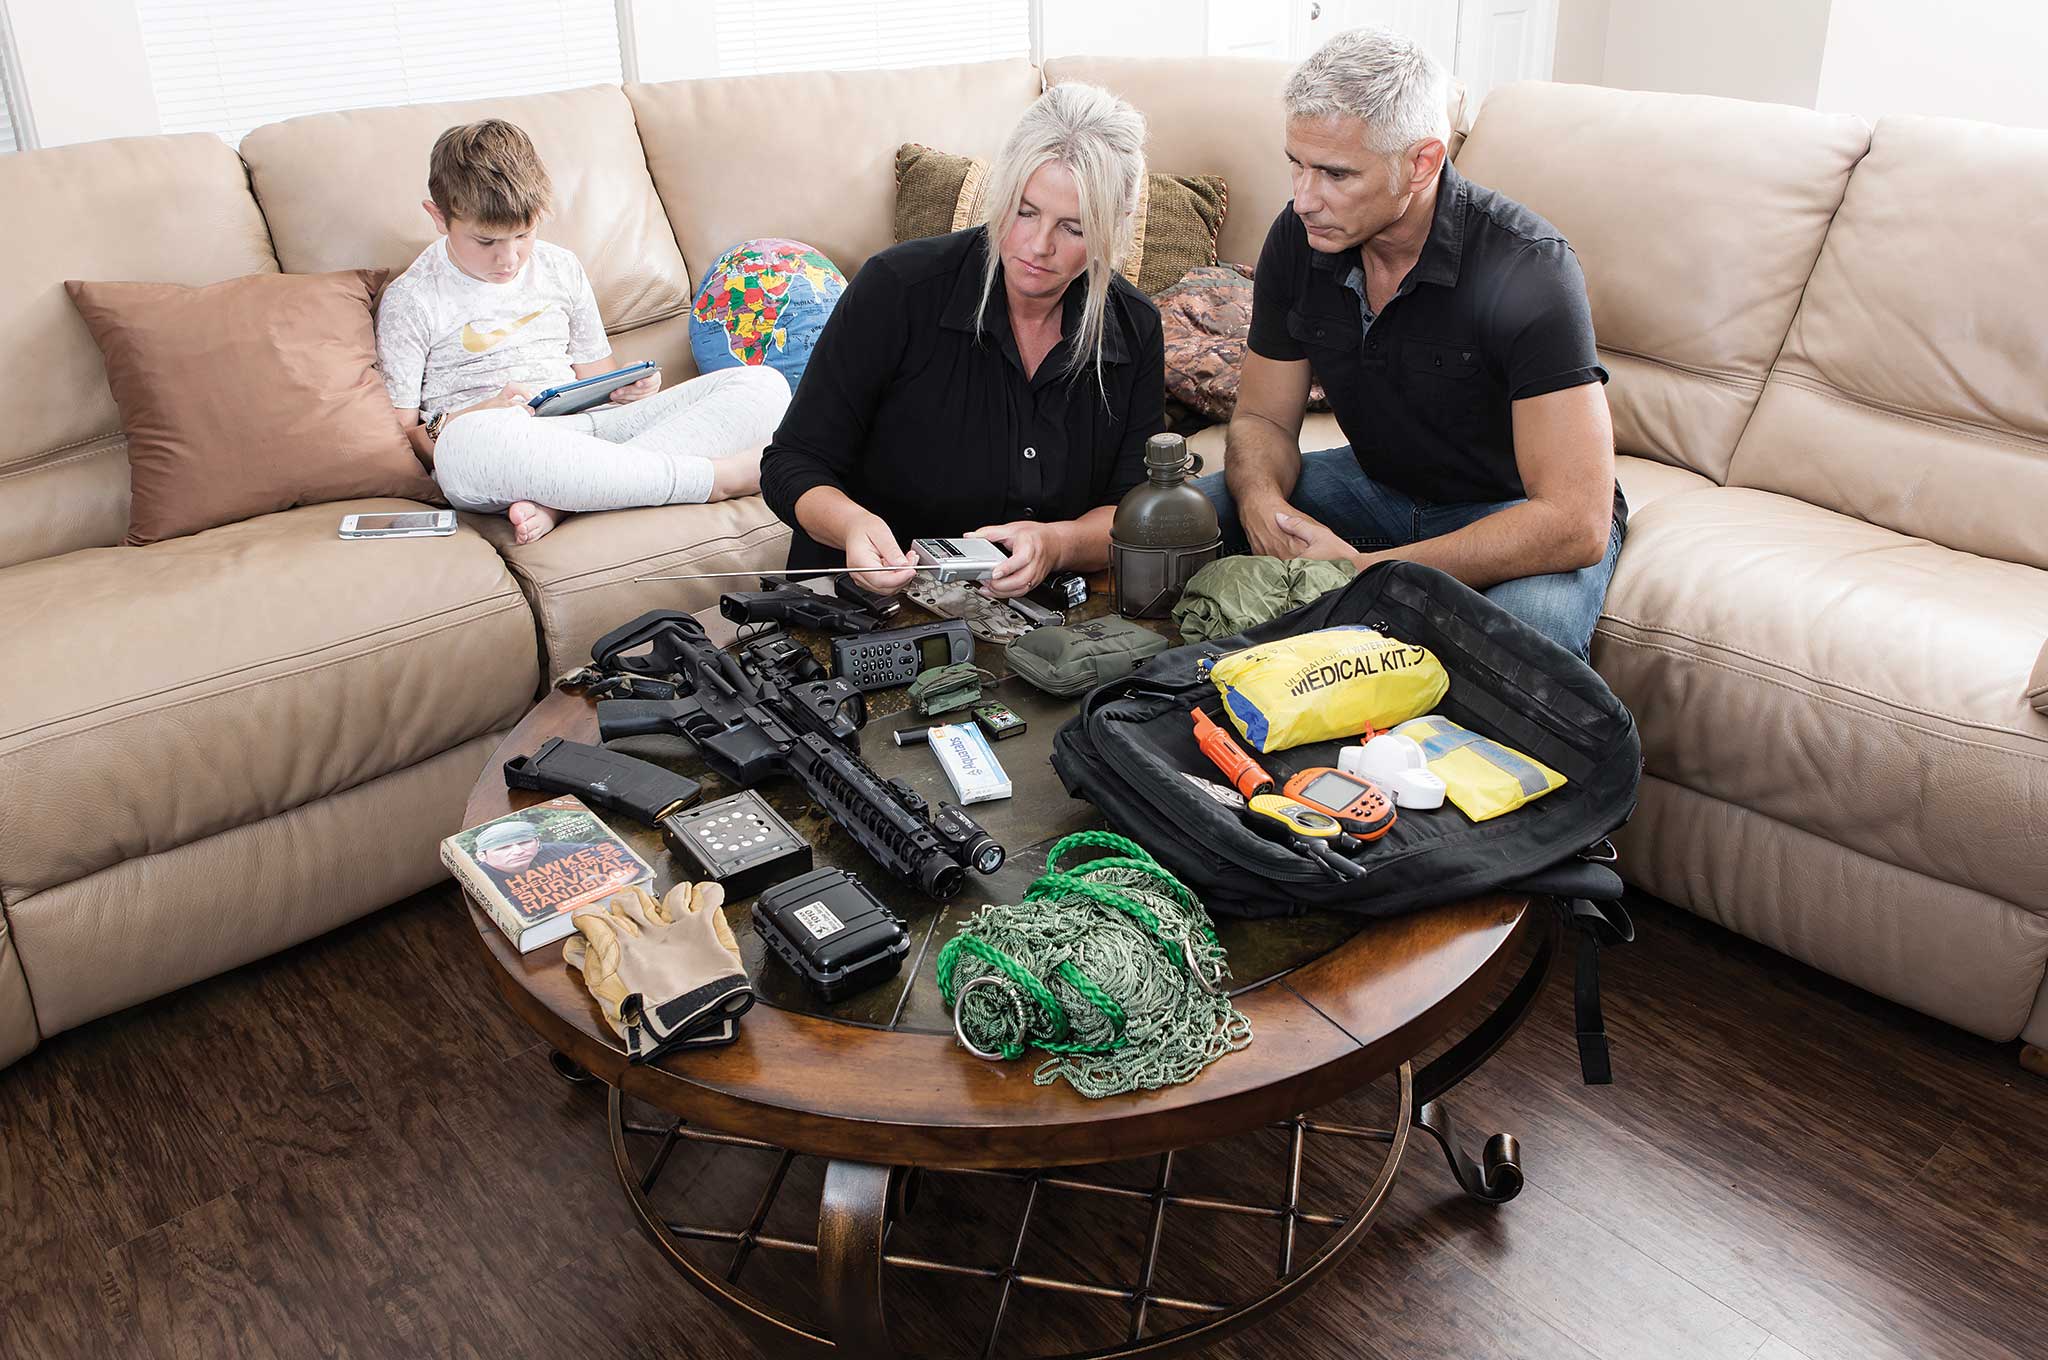
The sound of a roaring engine wakes you from your sleep. You leap out of bed and look out the window, only to see your truck speeding backward out of the driveway with a stranger behind the wheel. As the man slams your truck into gear and takes off down the block, you notice the neighbors frantically throwing suitcases into their van. You can hear sirens echoing in the distance. Whatever’s happening, it’s not good. Now’s the time to get your family to a safer location, but the highways are sure to be jammed with frantic drivers, so you grab your bug-out bags and prepare to hit the road on foot.
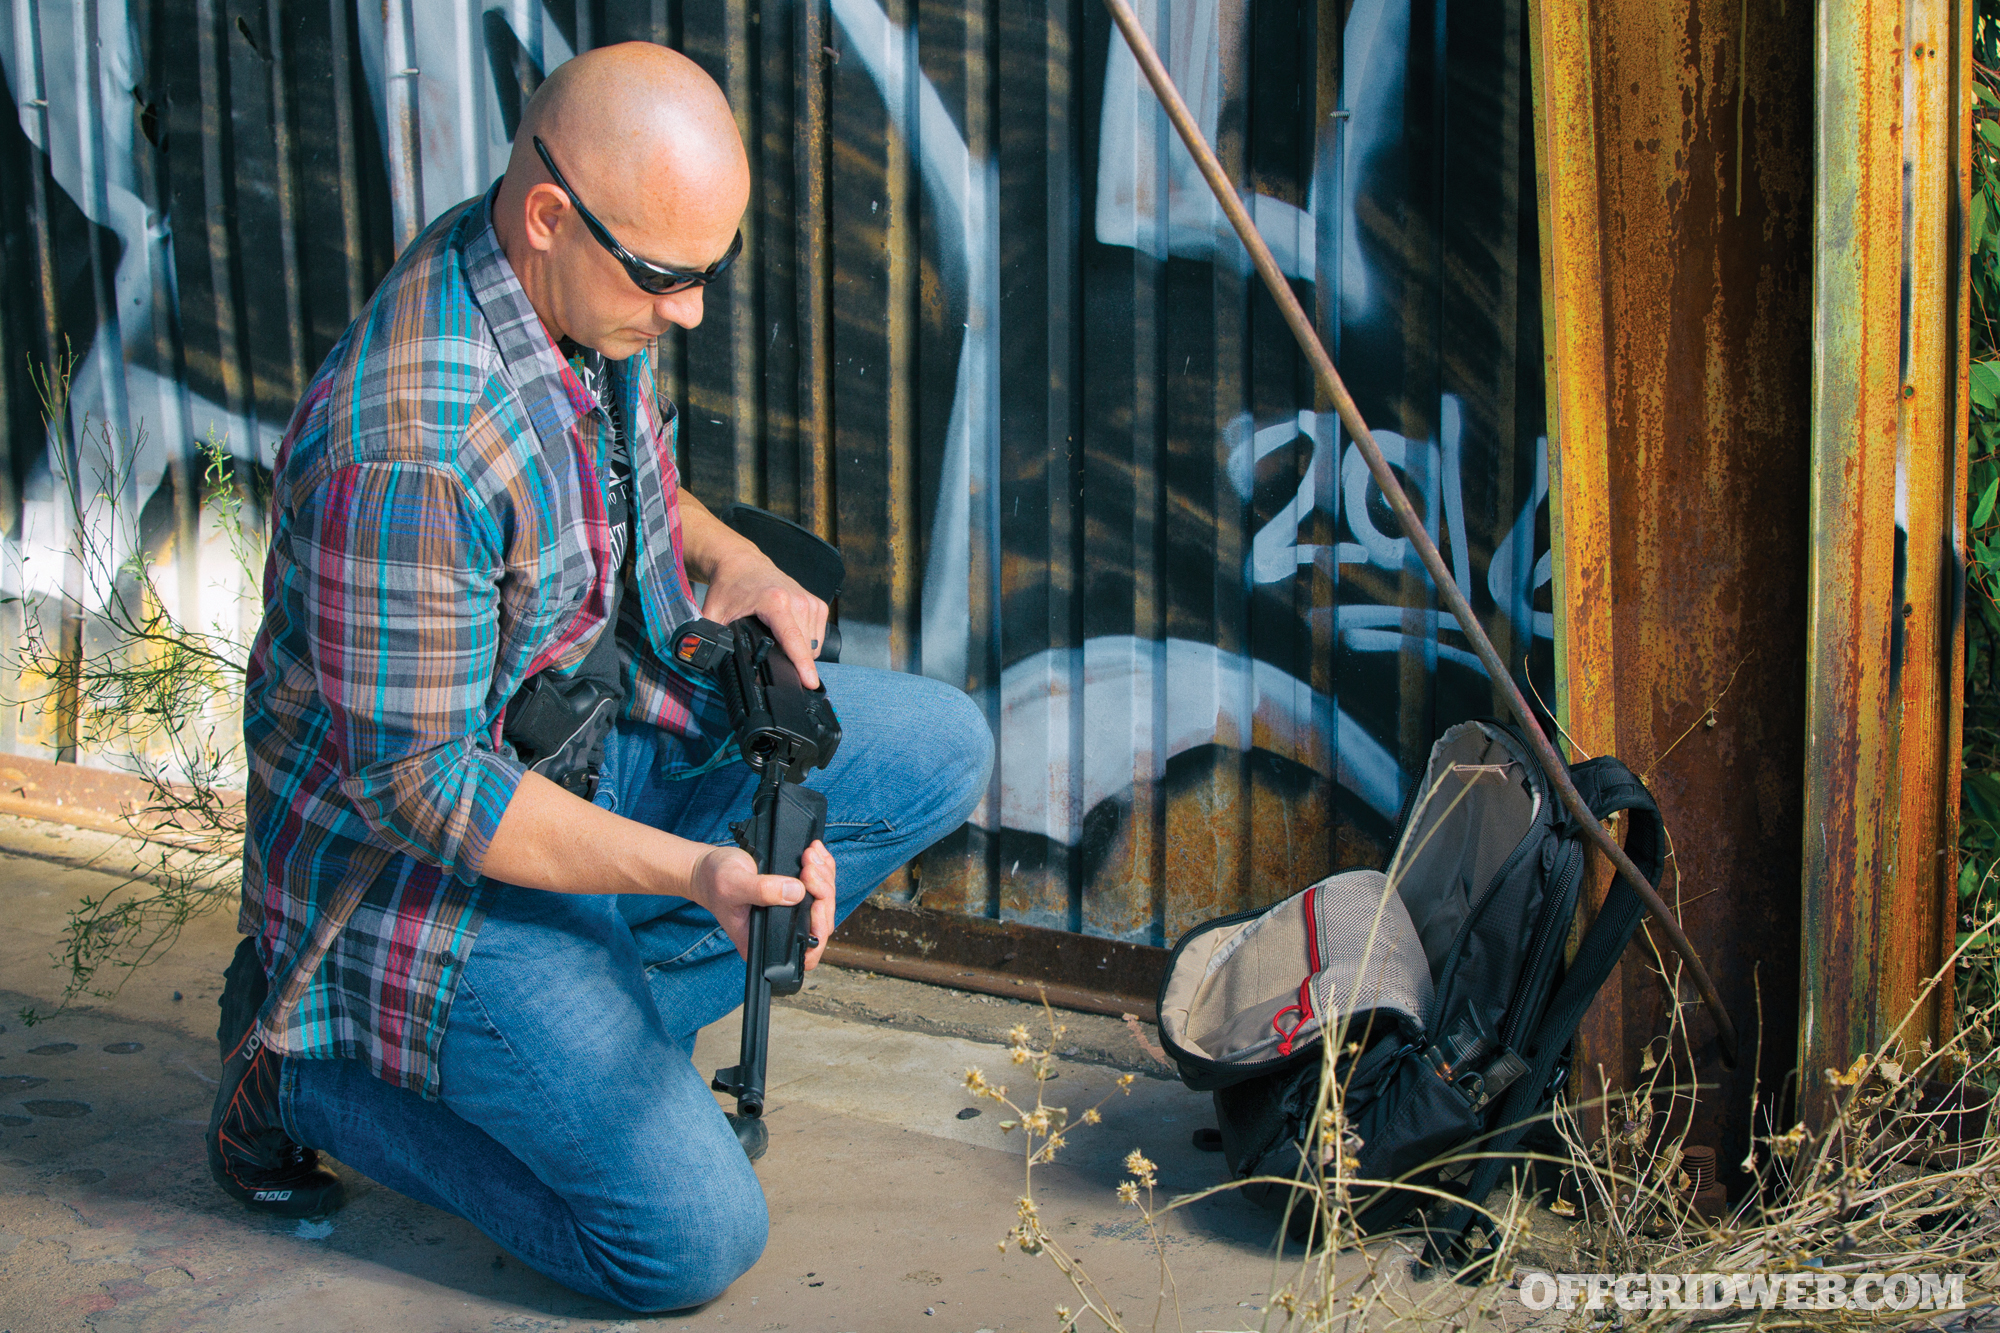
In this hypothetical scenario, what weapons would you bring? A compact 9mm handgun, such as a Glock 19, provides a concealable means of personal protection, so it would be a good place to start. However, relying entirely on a pistol might be unwise in the long run. The limited range and accuracy of a handgun may not suffice when the time comes to hunt for food. On the other hand, running out of the city with a rifle in hand may draw unwanted attention.
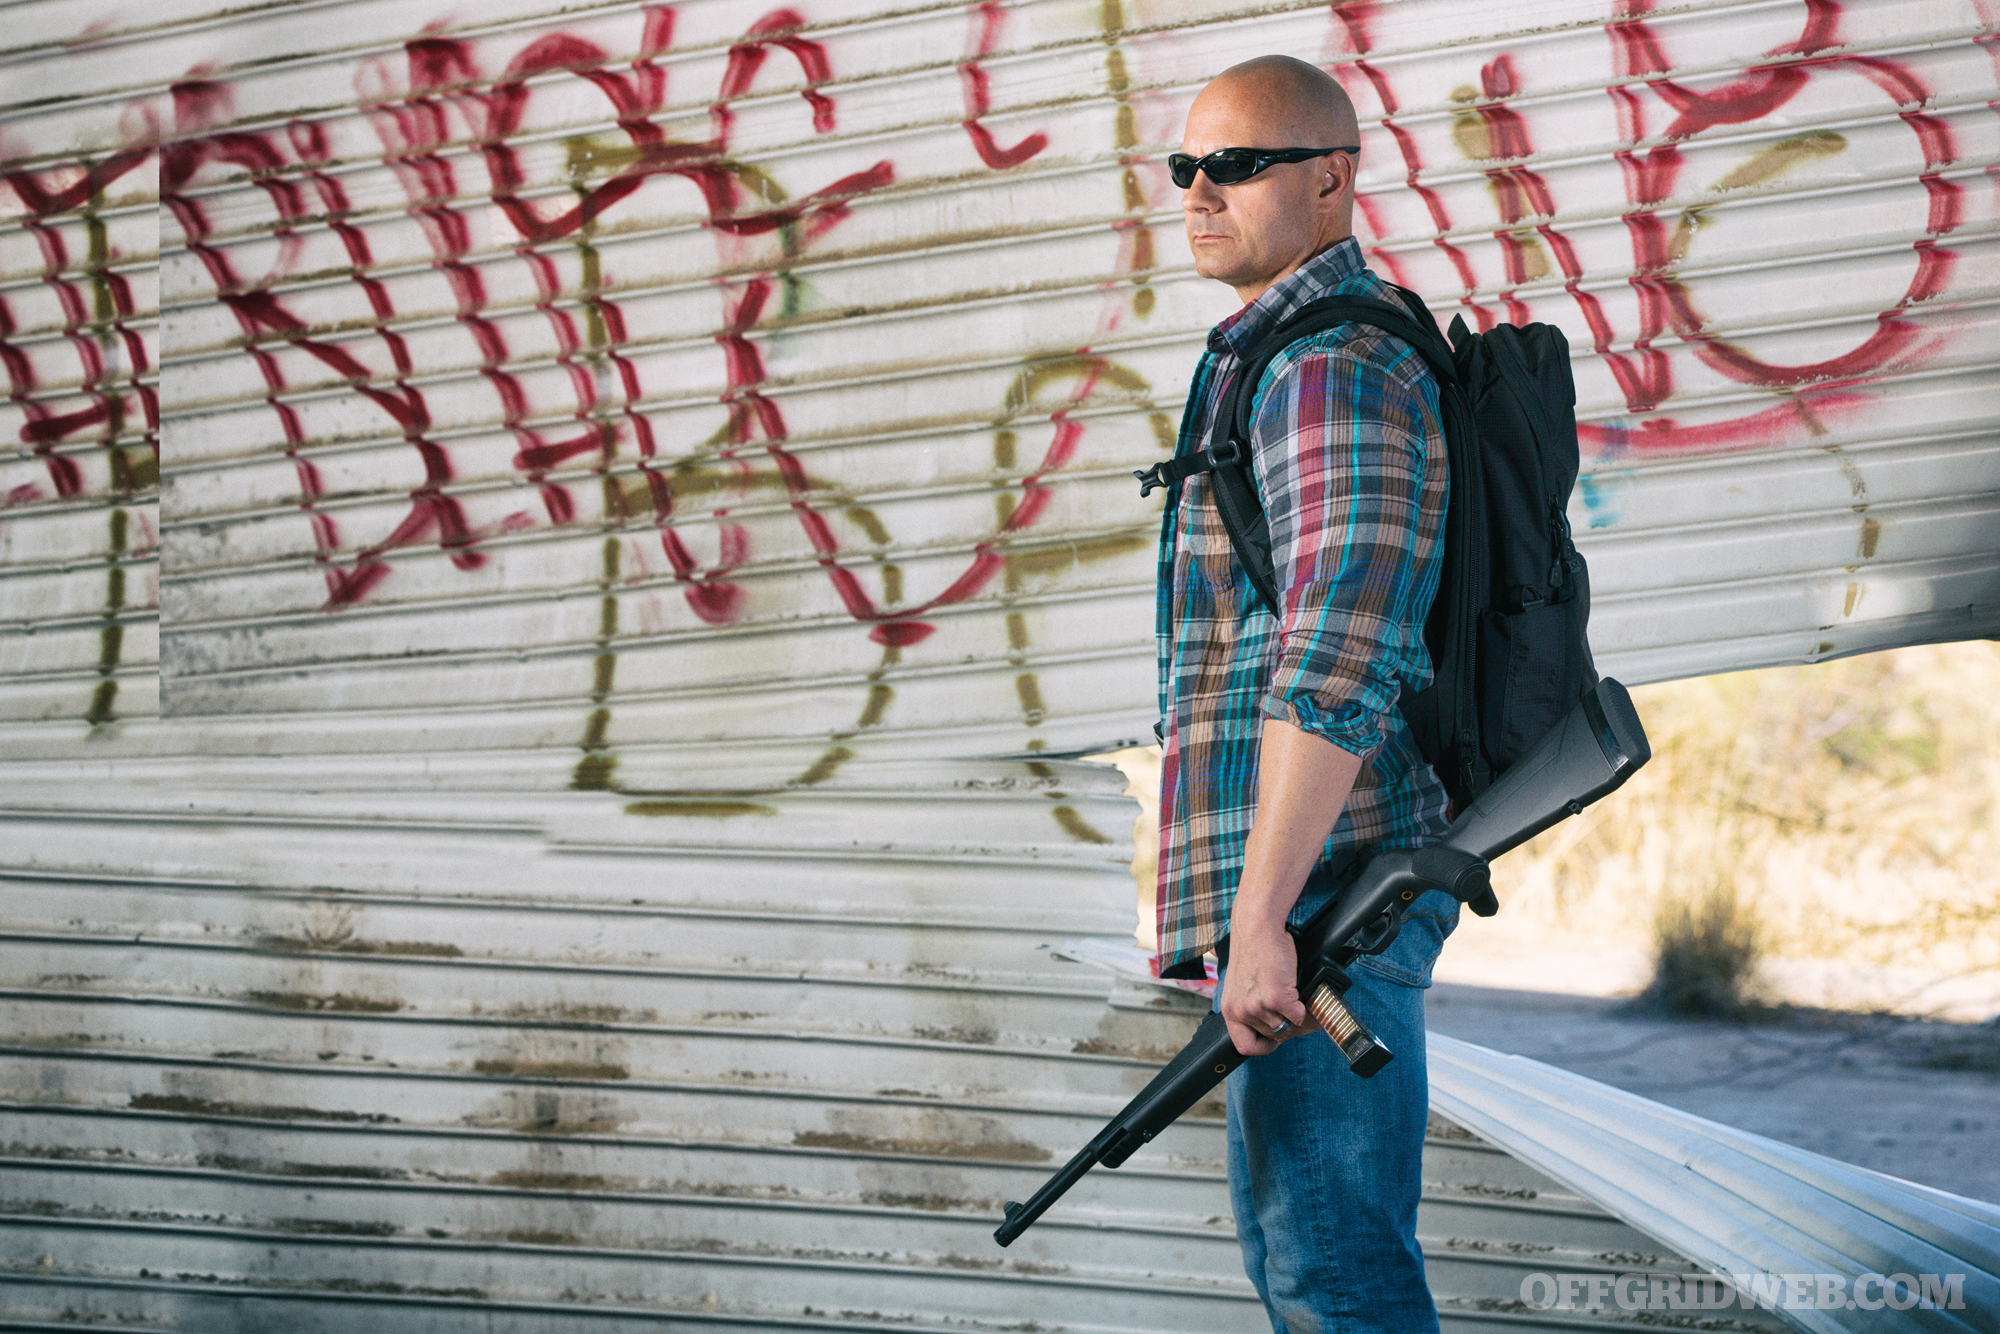
Long-time readers of this magazine might recall the Ruger 10/22 Takedown survival rifle we built in Issue 8. Such a rifle is lightweight, packable, great for hunting small game, and could make a strong addition to your bug-out loadout. However, it would also require carrying extra magazines and .22LR ammo, a caliber that isn’t optimal for personal defense or hunting larger animals.
Ruger has released a new rifle that shares the spirit of the 10/22 Takedown, but potentially offers more versatility and stopping power. The Ruger PC Carbine is a takedown model chambered in 9mm rather than .22LR. Better yet, it’s compatible with the extra Glock magazines you’d already be carrying in the scenario above. This means you’d need to carry fewer mags and only one type of ammo, simplifying your load out.
Intrigued by the potential value of this rifle, we set out to learn more about it and test one firsthand at the range.
Ruger PC Carbine Background
Ruger’s first attempt at a pistol-caliber carbine came in the Ruger Police Carbine that hit the market in 1996. The Police Carbine was marketed as a shoulder-fired companion for use alongside Ruger’s P-series pistol, as both used the same feeding source. Citing low demand, the Police Carbine was discontinued by Ruger in 2006.
Over the years, loyal customers have refused to accept the demise of Ruger’s pistol-caliber carbine line and, according to president and CEO Chris Killoy, “have long been requesting the return of a Ruger pistol-caliber carbine.” Ruger obliged its customers’ requests with the reincarnation of its pistol-caliber carbine in the form of the PC Carbine. This versatile and highly customizable firearm brings many desirable features that are sure to be as popular with RECOIL OFFGRID readers as its price tag.
With lines drawn from the Mini 14, the PC Carbine is undeniably Ruger. The compact profile of a MRDS makes it a perfect match for this packable carbine.
We met this lovechild of the Ruger Police Carbine and the Ruger 10/22 Takedown a few weeks before its official release date. After spending some time disassembling, reconfiguring, reassembling, and shooting this lovely medley of glass-filled nylon and steel, here’s what we learned.
Like its Police Carbine predecessor, this new carbine utilizes a dead-blow action. The bolt is held forward by its inertia and spring pressure. A custom tungsten dead-blow weight shortens bolt travel and reduces felt recoil and muzzle rise.
Barrel
The Ruger PC Carbine has a cold hammer-forged, chrome-moly steel barrel with precision rifling. The barrel is fluted for weight reduction, bringing the gun in at just 6.8 pounds with an empty tank. The Model 19100 featured here is threaded with a ½-inch-28 thread pattern for use with standard muzzle accessories and comes with a screw-on thread protector. For those living in more restrictive locales, the Model 19101 includes all the same features, minus the scary barrel threading. (NOTE: This is the same muzzle thread pitch as standard AR-15 barrels. Make sure any muzzle device you attach to the PC Carbine is, in fact, a 9mm muzzle device and not a 5.56mm muzzle device.)
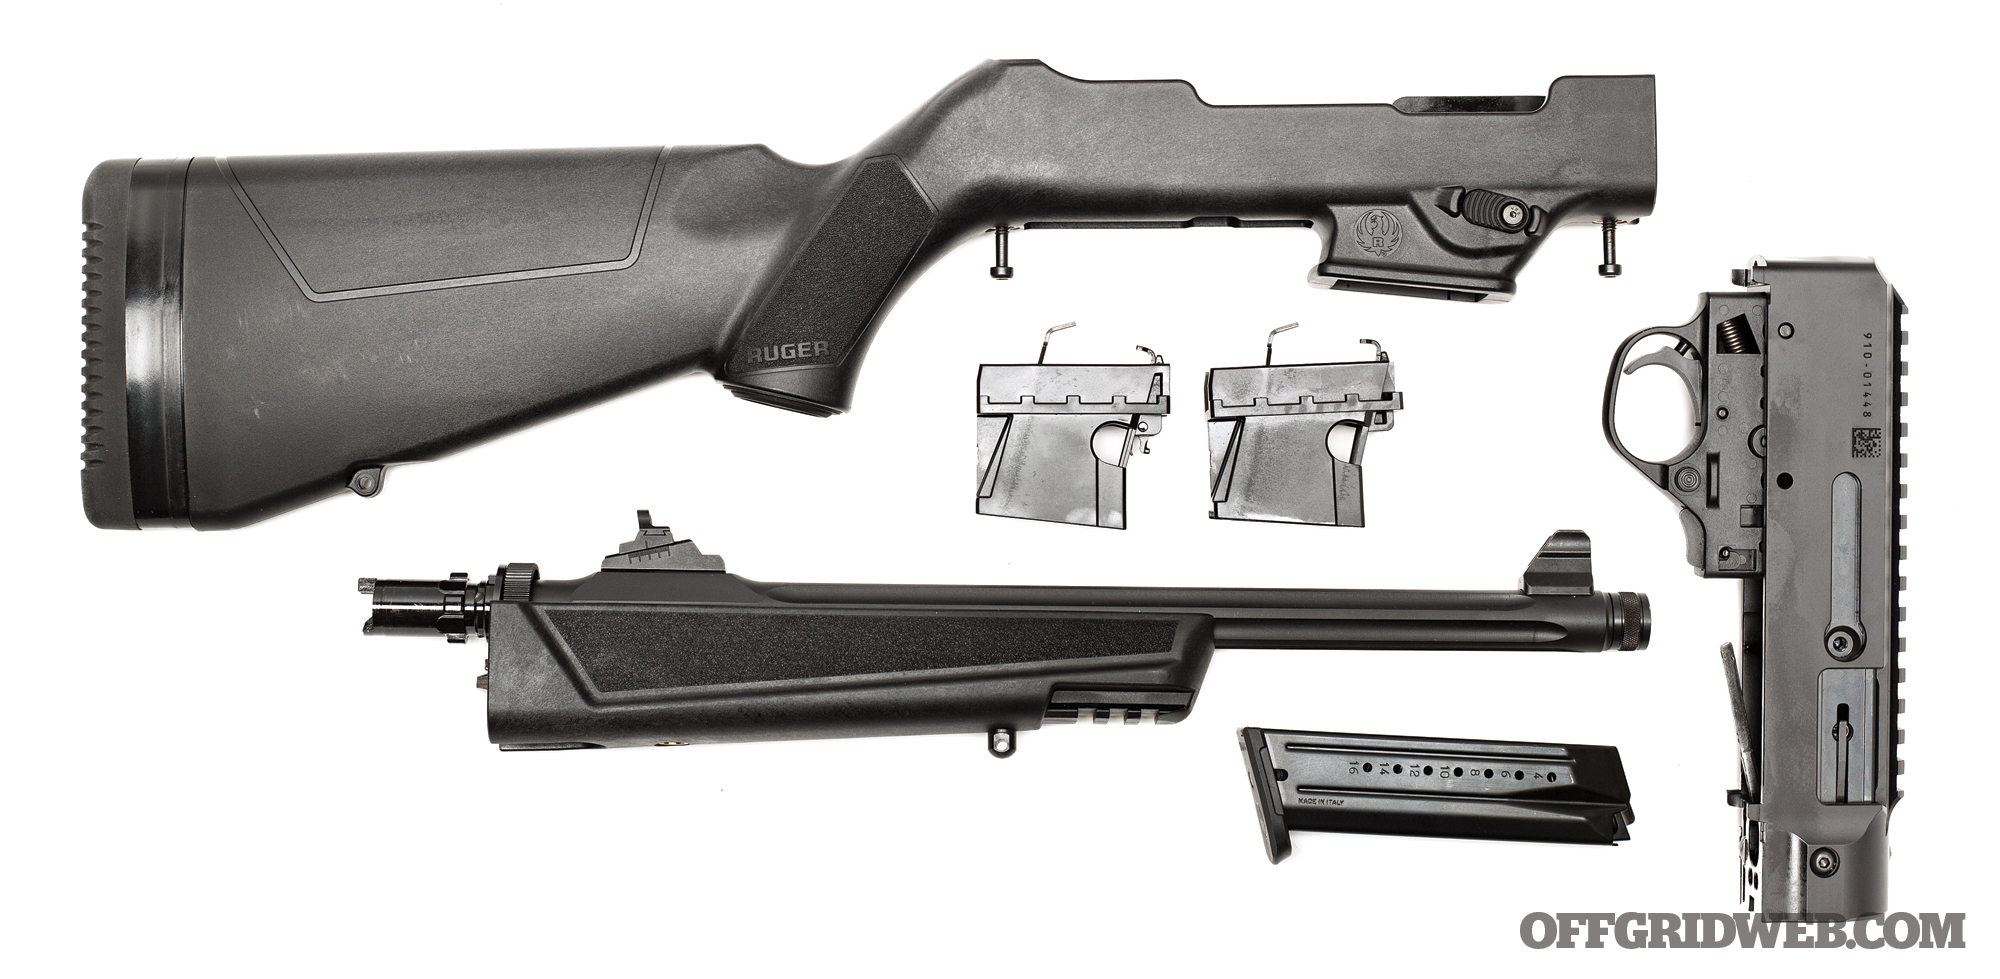
Barrel Assembly Takedown
The PC Carbine can be fully disassembled with a 5/32 Allen wrench. Note the plug-and-play magazine well assemblies accept either Ruger SR-Series or standard Glock magazines.
The Ruger 10/22 Takedown has been a popular weapon among outdoorsmen and survivalists because the barrel assembly can be quickly, easily, and safely disassembled and reassembled without losing zero. Capitalizing on a good thing, Ruger designed the PC Carbine in the same fashion, using the already proven locking system of the 10/22 Takedown. Simply push the recessed locking lever and rotate the barrel/fore end assembly counterclockwise to unlock the barrel from the receiver and break the carbine in half, making it backpack compatible.
Interchangeable Magazines
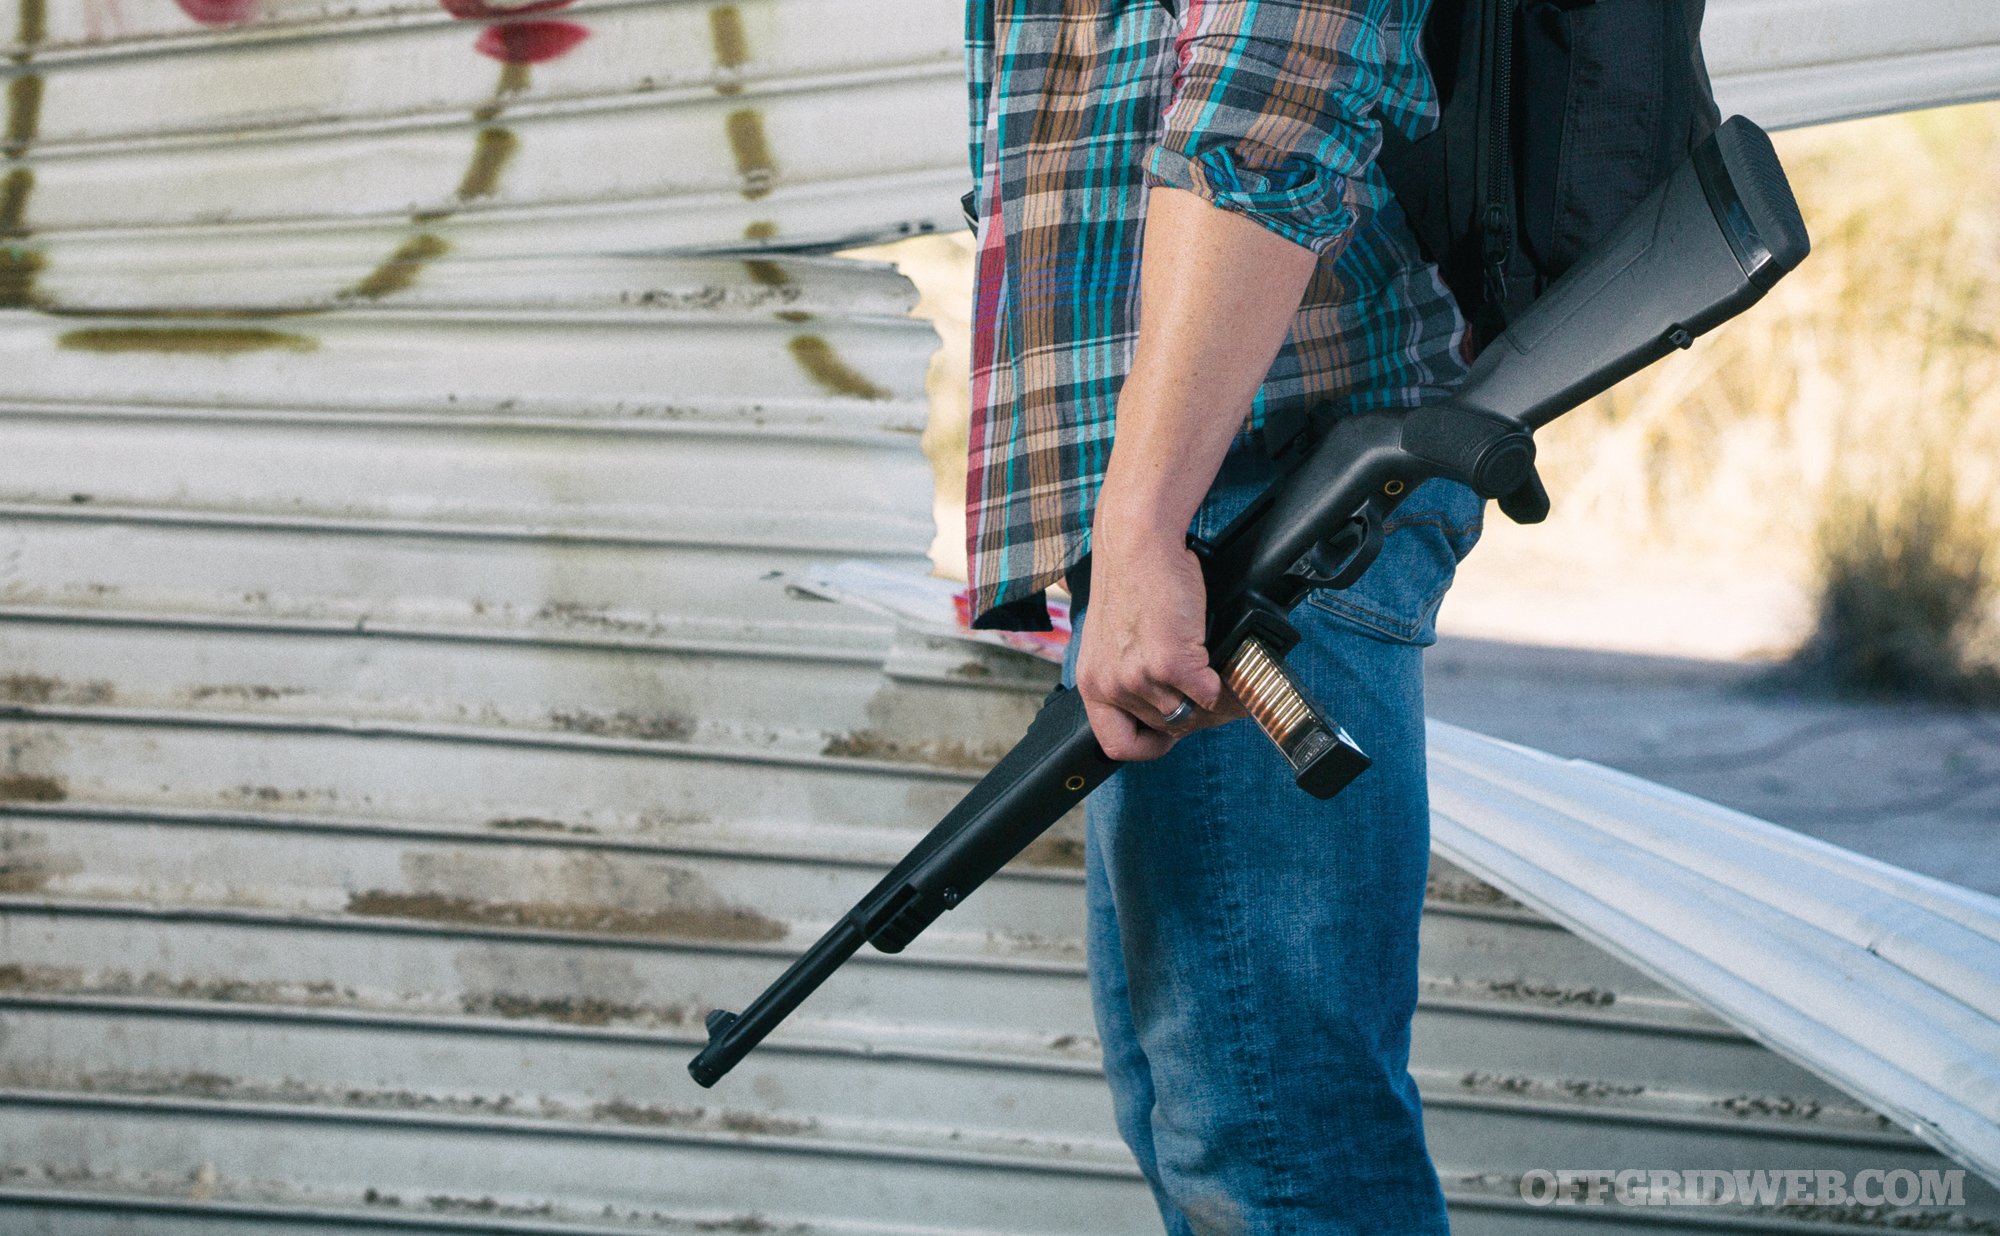
The most notable feature on the PC Carbine is its interchangeable magazines. Ruger designed the PC Carbine to accept common Ruger 9mm pistol magazines like the SR-Series and Security 9. It can also accept Ruger American Pistol magazines, but that will require the purchase of an optional magazine-well adapter ($30). Ruger could have stopped there and called it a day, but they took things one step further to ensure that this new carbine would be a draw to more than just die-hard Ruger fans. With a quick and easy swap to a mag-well that’s included with every PC Carbine, the gun will accept standard Glock 9mm magazines. This is a somewhat unexpected move by Ruger, as they aren’t known for being particularly well supported by the aftermarket or even concerned with ease-of-compatibility for the end user. We’re thankful to see it and, if the S ever really does HTF, you’ll probably be thankful too.
The Elite Tactical Systems Gen4 Glock 17, 19, and 18 magazines make a great companion to the PC Carbine.
Swapping out magazine well assemblies couldn’t be any easier. Even without the aid of a user’s manual, we were able to figure out how to exchange the preinstalled SR-Series/Security 9 magazine well with the included Glock-compatible magazine well in a matter of minutes. With the barrel/fore end assembly removed, simply remove the receiver from the stock via the two 5/32-inch hex takedown screws, then compress the magazine release and remove the magwell assembly from the top. Slide in the other magwell assembly, and you’re ready to feed lead from your favorite Glock magazine.
User Customization
Having options like ambidextrous controls used to be a concern for only the small percentage of left-handed shooters out there, but as shooting techniques and tactics have continued to develop along with firearms technology, the need for customization has become more apparent. That need is compounded when we break away from familiar tactical platforms like the AR-15 and try to carry over our well-ingrained tactics. The customizable features of the PC Carbine help bring the shooter to a happy place where their weapon manipulation skills can be familiar and efficient. Out of the box, the PC Carbine is set up with the magazine release button on the left side and the charging handle on the right side. Since we here at RECOIL OFFGRID tend to look at things from the aforementioned SHTF perspective, we decided to reconfigure this setup to make it more combat friendly.
The takedown capability of the PC Carbine makes it a welcome addition to a bug-out bag. The gun can be quickly reassembled by inserting the barrel assembly into the receiver and turning it clockwise until it locks in place.
After working through some reloads and figuring out the most efficient order of operations, we moved the charging handle to the left side and the mag-release button to the right side. Swapping the charging handle to the left side allowed for FAL-style support-hand operation of the bolt assembly. Having the mag-release on the left side required us to hit the release at an awkward angle using the thumb and reducing the efficiency of the reloading procedure, whereas moving it to the right allowed us to slide the support-hand straight back and hit the release with the middle finger while en route to a fresh magazine on the belt.
To account for body size and length of pull variations between shooters, the PC Carbine comes with three ½-inch spacers that allow the length of pull to be adjusted from 12 5/8- to 14 1/8-inch in ½-inch increments. These spacers sit between the buttstock and recoil pad and are held in place with two hex screws.
Trigger
The bang switch on the PC Carbine uses 80-percent 10/22 components. The trigger is decent out of the box — it has a crisp pull and positive reset with minimal overtravel. Although we didn’t have a chance to test this theory, it’s quite possible that if one were to obtain certain quality 10/22 aftermarket trigger parts, one might end up with an enhanced trigger worthy of the highest accolades. But again, it’s just a theory.
Sights
The PC Carbine is outfitted with a ghost-ring adjustable rear sight and a non-glare, protected front sight. Both sights are mounted on the barrel forward of the receiver. This reduces the sight radius but ensures consistency during takedown and reassembly. All adjustments are made with the rear sight by loosening the windage or elevation set screws and sliding the aperture in the direction you want bullet impact to shift.
The sighting system is probably the PC Carbine’s biggest downfall. The free-sliding aperture and lack of positive click adjustments make small sighting corrections more difficult than necessary, but it’s still a functional system. Fortunately, the PC Carbine has plenty of rail space on the receiver, so in keeping with the compact, packable nature of the gun, we installed an EOTech Mini Red Dot Sight (MRDS) for use during testing. It proved to be a perfect companion for the PC Carbine.
Lead Downrange
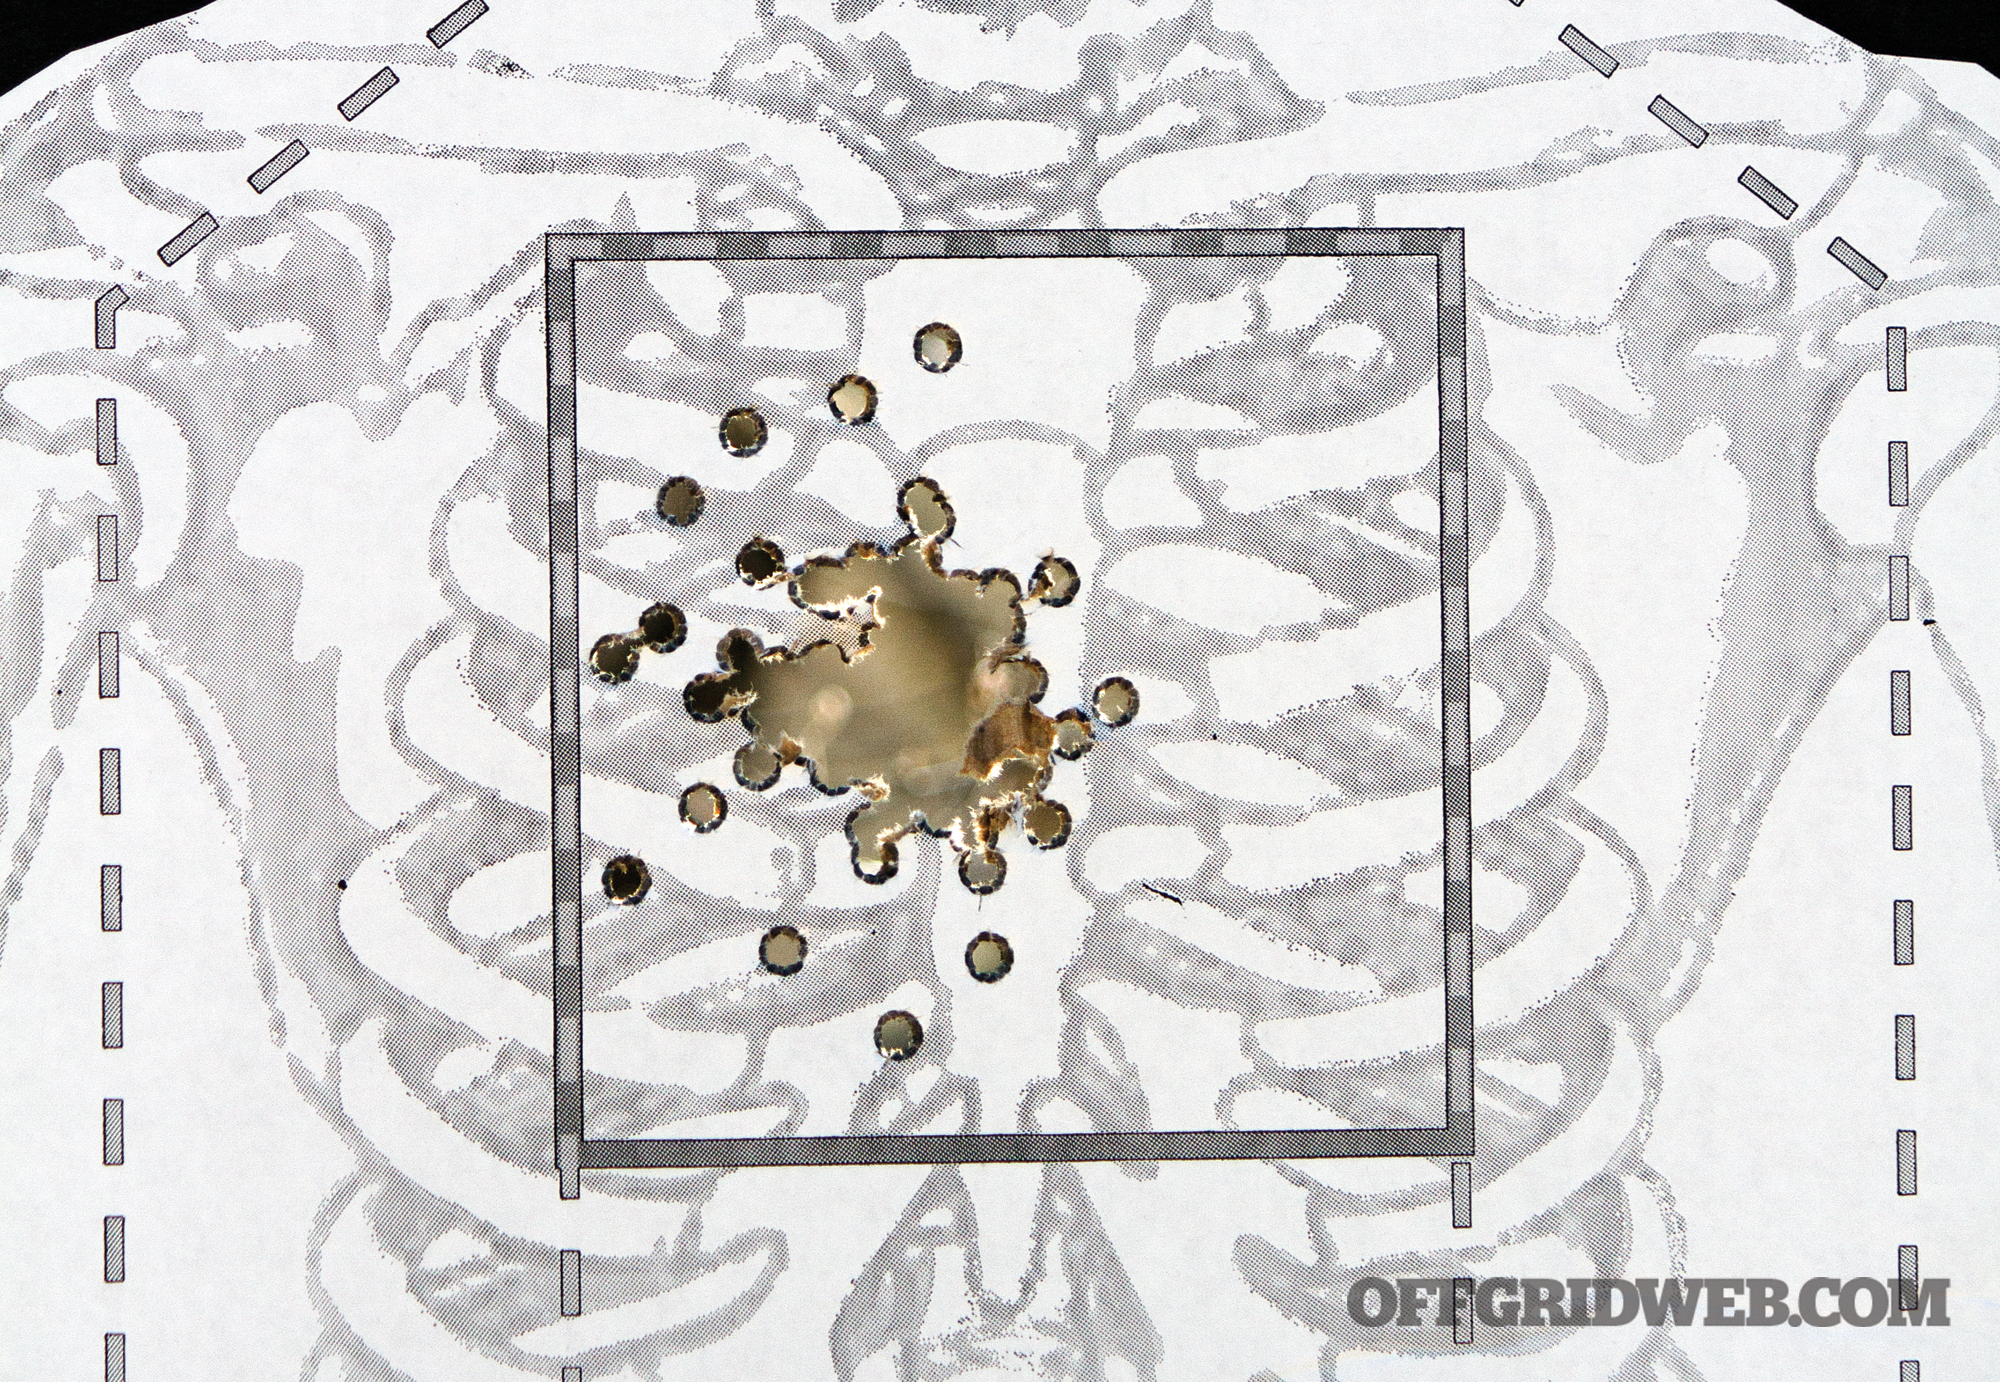
Even with a less-than-perfect zero, keeping rapidly executed shots in the upper A-zones at 15 yards was an easy task.
With the PC Carbine reconfigured to our liking, we dropped in the Glock magazine well, grabbed a handful of Gen4 9mm Glock magazines, courtesy of Elite Tactical Systems, and headed to the range to see what this baby could do. Included in the range bag were several boxes of Federal’s 115-grain Train + Protect VHP and the newly released 124-grain American Eagle Syntech ammunition.
After getting a quick zero with the MRDS at 25 yards to make sure we were on paper, we moved back to the 50-yard line to get a more suitable zero. At 50 yards, shot grouping was consistently within 1.5 inches with both the 115- and 124-grain. This is quite an acceptable level of accuracy for a pistol-caliber weapon. What’s more, the PC Carbine retained its zero after takedown and reassembly, even with the optic mounted on the receiver.
We spent most of the range time running “up drills” at 15 yards — two- to three-round volleys. The barely noticeable recoil and red-dot optic made target acquisition and follow-up shots quick and accurate. Our chief complaint from a tactical standpoint would be the push-button safety, which requires the shooter to break their shooting grip to put the gun on safe. Not a deal-breaker, though, as this is a common and reliable safety design.
Functionally, the PC Carbine performed quite well. In almost 400 rounds of hard running, we failed to experience a single malfunction. This brings us to our final word of caution. The PC Carbine is extremely fun to shoot, so if you’re not careful, you can easily blow through several boxes of 9mm before you remember you’re not shooting a 10/22.
Conclusion
If you’re looking for a packable long-arm that won’t break the bank and is compatible with your beloved Glock or Ruger-family 9mm pistol, the Ruger PC Carbine might just be the answer. Your bug-out bag will welcome the addition.
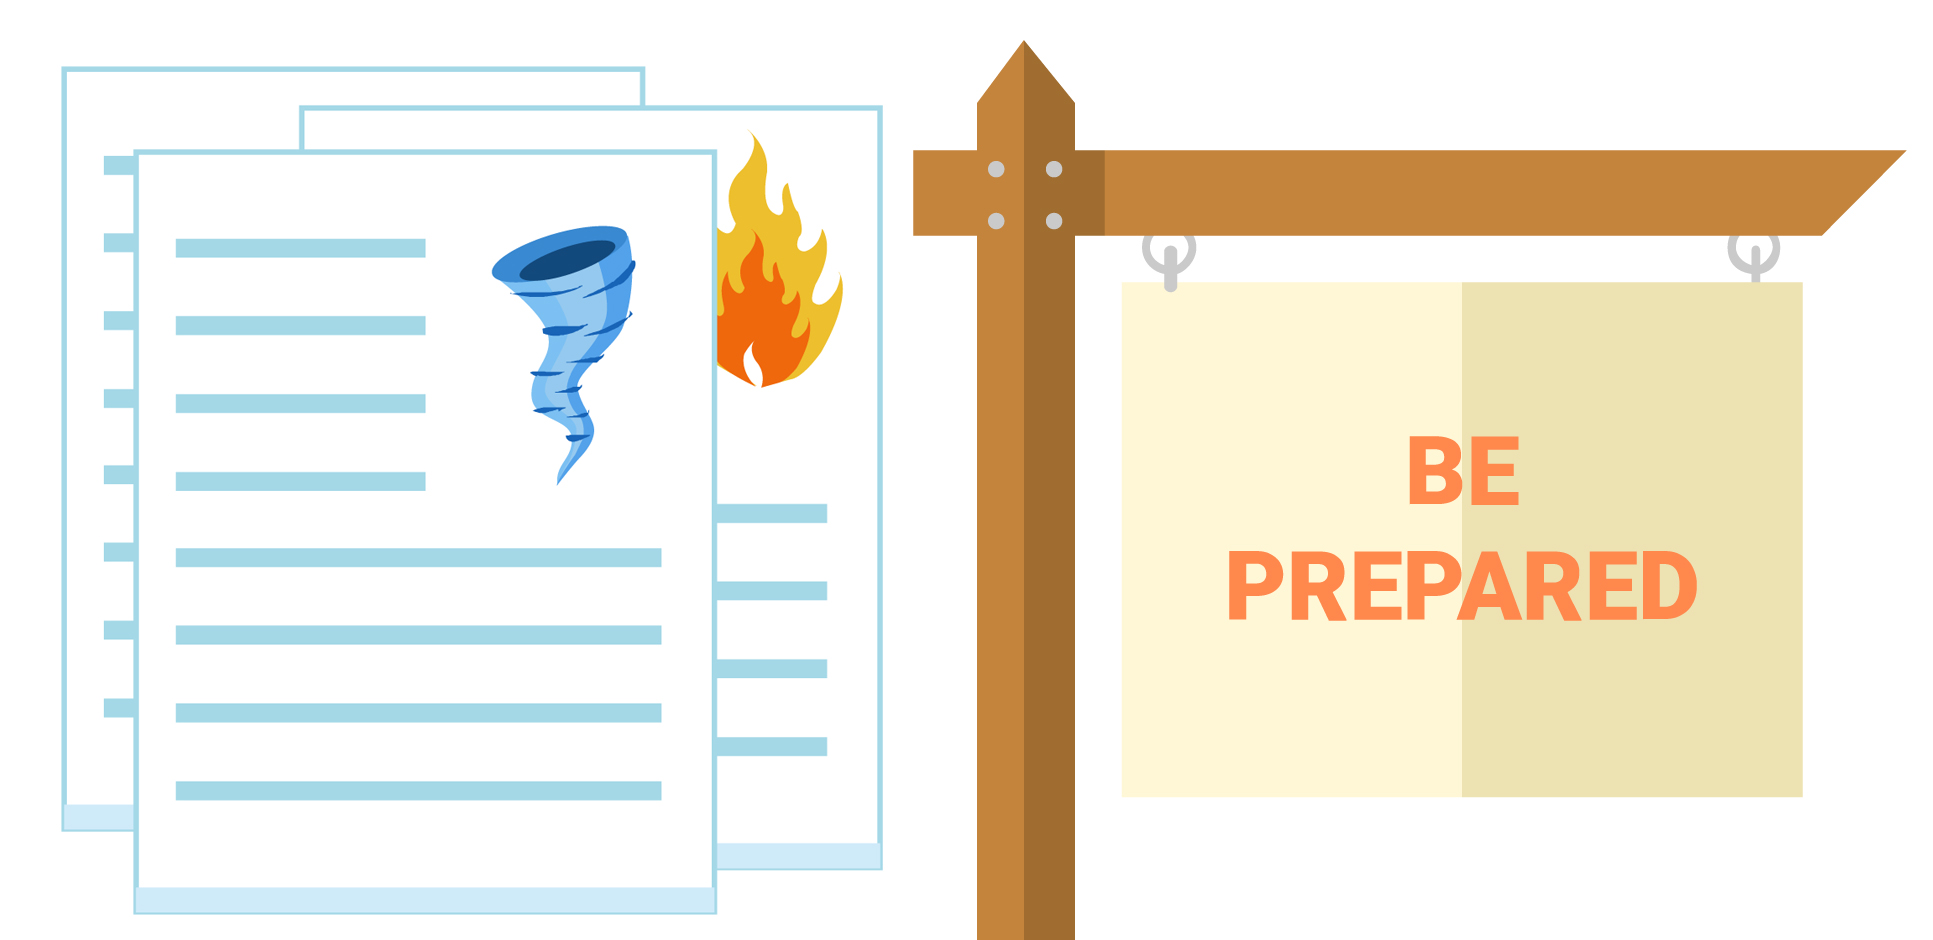
We’ve said it before and we’ll say it again: emergency preparedness is important for everyone. Far too often, preppers are stereotyped as some sort of fringe group, but in reality every man, woman, and child can (and should) take steps to be better prepared for disasters. This can mean stockpiling extra food and water, setting up early warning systems, or simply talking to your family, friends, and neighbors about how to work together in an emergency. This sort of proactive preparedness saves lives.
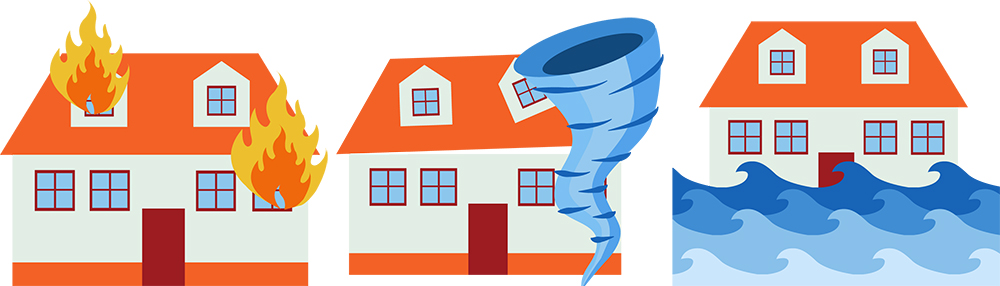
That said, preparedness has to start somewhere, and it’s likely that some people you know haven’t even given it a second thought. For those individuals, it may be helpful to reiterate the importance of simple disaster preparedness, and outline some of the steps that can be taken to be ready for a house fire, tornado, flood, earthquake, or other disastrous event.
We recently came across an article on CouponChief.com written by Monique Dugaw, the regional director of communications for the American Red Cross. It describes some of the basics of disaster preparedness, including why it’s important, how to implement and practice your plan, and the bare minimum of gear to have on hand. The introduction is particularly appealing to those who may not consider themselves preppers:
“Fear and stress are killers. They kill us from the inside out. We must find constructive ways to defuse the situation. Faith practices, physical exercise, counseling and peer groups… all can help, but there’s one thing everyone should consider: Get prepared. When you take the initiative to recognize potential problems and prepare to deal with them when and if they come, you not only position yourself to face those difficulties, but knowing you’re ready helps lower stress.”
Check out the full article here and consider if any of the people you know might benefit from this basic guide. This info might seem rudimentary to us, but it’s a good starting point for those who are new to emergency preparedness.
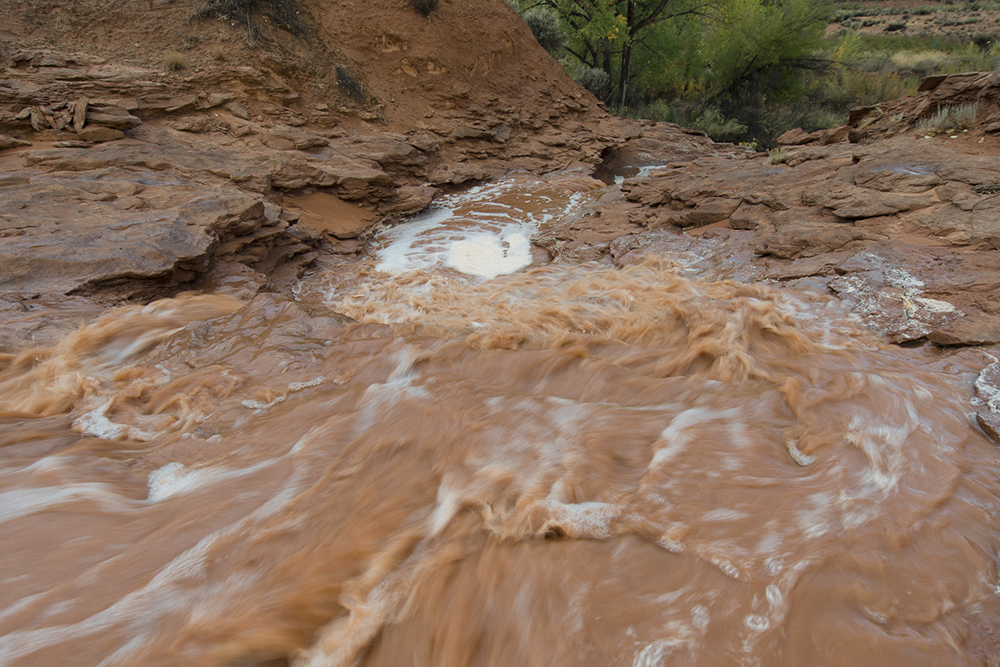
Flash flooding is a devastating weather phenomenon that causes fast-moving water to suddenly rush through low-lying areas, submerging or carrying away everything in its path. These floods can turn a small creek into churning rapids in a matter of minutes, often with little to no warning. The skies may be clear where you are, but heavy rainfall miles upstream can cause water to rise to dangerous levels before you have time to escape.
Floods have been the most deadly weather hazard in the United States in both 2015 and 2016, according to reports by the National Weather Service, and each year they kill more people than tornadoes, hurricanes, or lighting. In fact, during those years floods killed more people than all three of those natural disaster categories combined. The risk of finding yourself in the middle of a flash food is especially serious if you’re traveling through canyons or mountainous areas in the backcountry. According to the National Severe Storms Laboratory, “a creek only 6 inches deep in mountainous areas can swell to a 10-foot deep raging river in less than an hour.”
Flickr.com/snowpeak
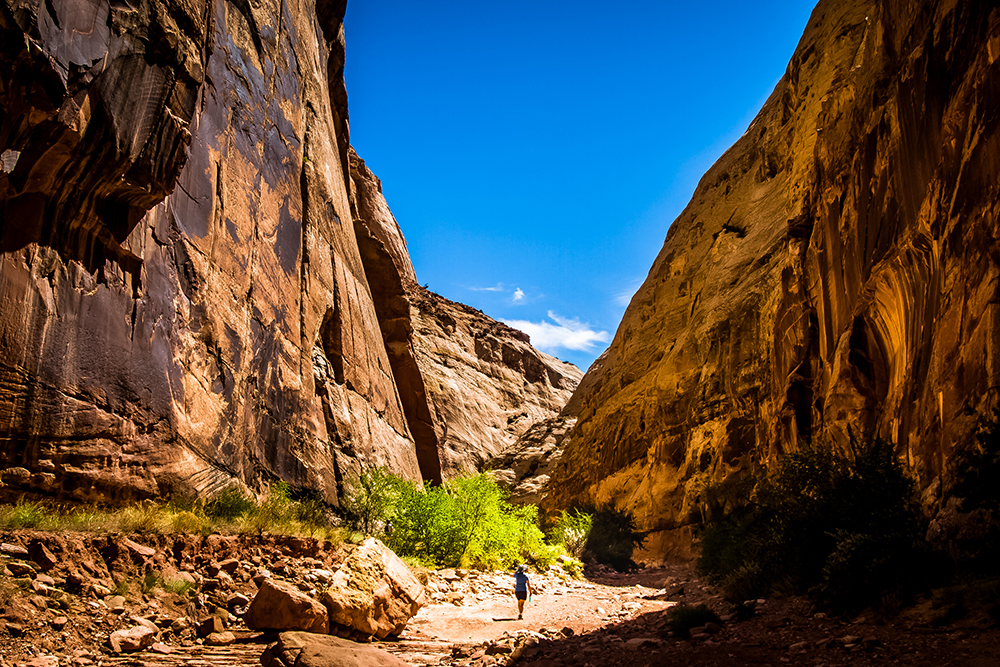
Considering the seriousness of finding yourself trapped in a canyon with an incoming flash flood, our Survival Scenarios question for today addresses how you might deal with this danger. What would you do if you were hiking through a deep canyon in Utah and the rising waters of a flash flood came barreling through? Would you run for the canyon exit, or attempt a risky climb up the canyon wall to safety?
In case you’ve missed our previous installments of Survival Scenarios, here’s how it works. We ask you how you’d handle a difficult choice in a hypothetical survival situation. These exercises can help you mentally prepare for an event you might encounter in real life someday. Previously, we asked which survival tool you’d rather have on a desert island, and whether you’d rather be snowed-in or snowed-on in a fierce blizzard. As always, today’s post ends with a poll where you can make your choice, and see how others felt about the scenario.
Background Info
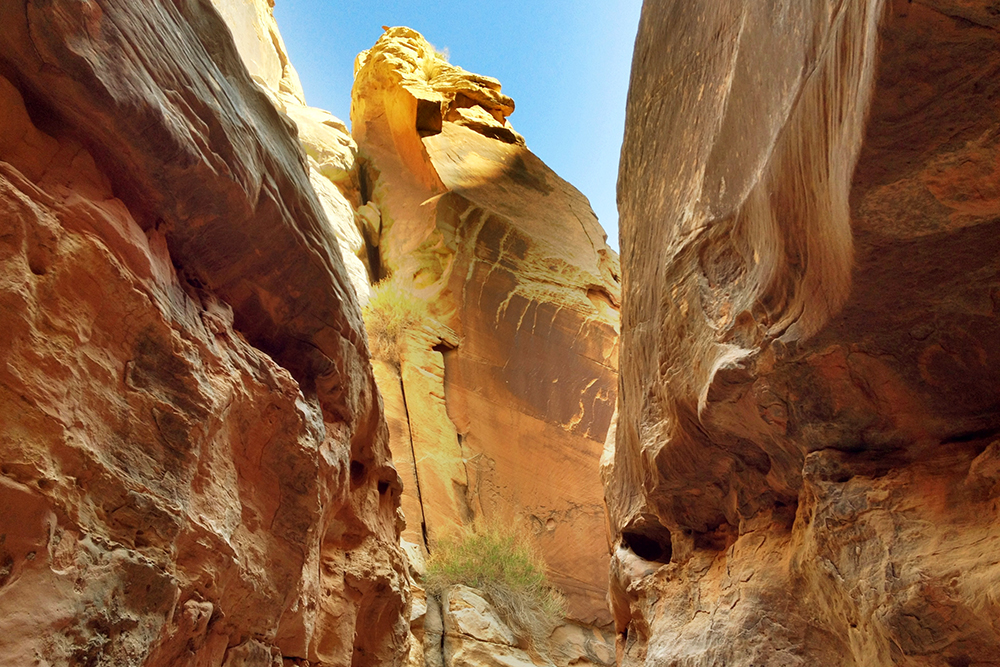
Before you make your decision on what to do in this flash flood, we’ll share some background info that may affect your choice. As we mentioned above, the scenario occurs in Utah, specifically Canyonlands National Park in the southeast corner of the state. It’s late spring, and the weather is beautiful with clear skies.
Flickr.com/kenlund
You headed out for a three-day backpacking trip inside the national park, accompanied by your friend Paul. Both of you are experienced hikers, but neither of you had visited this part of Utah before, so you wanted to do some exploring and camp off the beaten path. You’re each carrying 30-pound backpacks that contain lightweight one-person tents, food and water, spare clothes, and an array of basic survival tools.
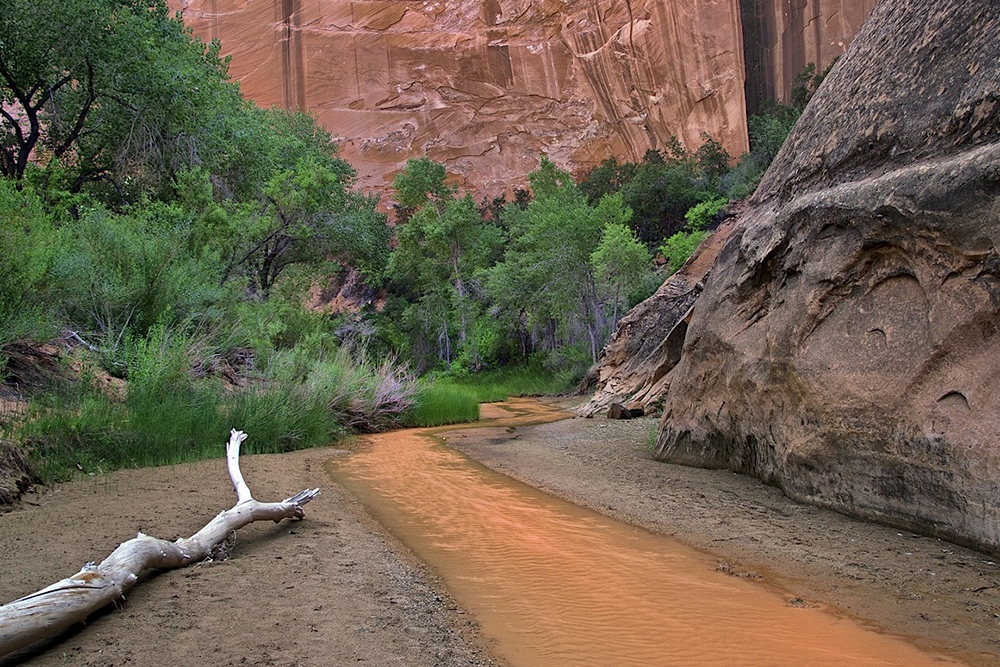
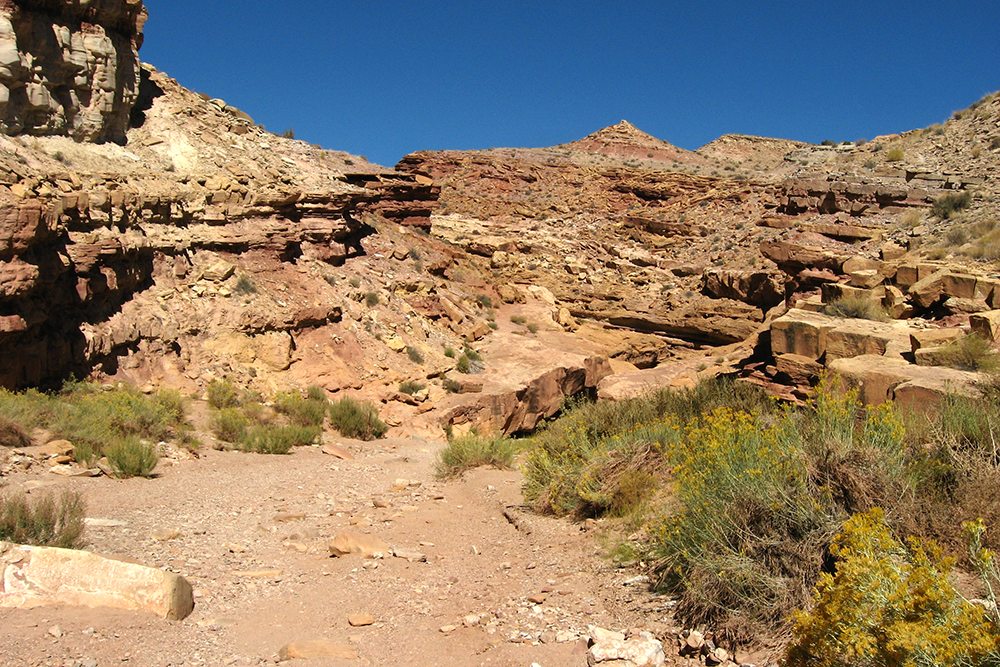
On the morning of the second day of your trip, you and Paul head down a trail that meanders through the bottom of a canyon. The trail descends steeply, and the walls rise to what you’d guess is three or four stories tall at their lowest point. In some places, the walls are much higher than that. This is wider than the narrow slot canyons you know to be notorious for flash flooding, but you can tell from patterns in the sandy canyon floor that large amounts of water have passed through here. There’s a small creek on one side of the canyon, but it’s not more than a few inches deep.
Flickr.com/ian-arlett
The Flash Flood Begins
After about an hour of walking through the canyon, you sit down to eat some lunch. During your meal, Paul points out that the creek appears to have grown and is now flowing faster. You stand up and look upstream — in the distance over the edge of the canyon wall, you can see rain clouds. Those weren’t there this morning when you started your hike.
You and Paul discuss the possibility of a storm upstream leading to flash floods, and you both agree that the best choice is to play it safe and head downstream towards the exit of the canyon. If a flood is coming, the obvious solution is to get to higher ground. But as you quickly walk back down the trail, you watch the water level in the creek swelling with every passing minute.
Flickr.com/archesnps
First the fast-moving river occupies one quarter of the canyon floor, then half, then three-quarters. Tree branches and other debris are being swept downstream by the muddy water. The skies darken. You begin to run along the steep rock wall, but each footstep splashes as the flood water continues to rise.
You know now that this is a life-threatening situation. If you can’t get to higher ground soon, you and Paul may be swept away. Considering your options, you see two possible courses of action: continue running downstream and hope to reach the exit of the canyon in time, or attempt to climb up the steep rock walls to reach safety.
Flickr.com/kenlund
Run for the Exit
If you choose to continue running, you’ll need to move as quickly as possible. You remember reading that just 6 inches of fast-moving water can knock over an adult, and 12 inches can carry away a car, so there’s not much time to spare.
As you run, it’ll be necessary to stick to the edges of the canyon since they’re still mostly dry. This means weaving around shrubs and scrambling over boulders, instead of following the established path that has now disappeared into the river. Your heavy backpack isn’t helping any either, but even if you leave it behind, you’re not sure if you’ll reach the exit in time. It seems like a long way off, and the water is still rising.
Attempting to outrun the flood is a major gamble, because you’re not sure if the pace of the rising water will slow down or continue accelerating. However, if you and Paul manage to make it to the exit in time, you’ll be able to walk right out of the canyon unscathed.
Climb to Safety
If you decide that attempting to run is futile, you’ll need to consider moving vertically. The rock walls of the canyon are certainly imposing, but they’re also not what you’d consider completely insurmountable. Some parts of the wall are 40-foot sheer cliffs, but other 30-foot sections slope more gradually. You see some cracks and crevices that could serve as potential hand- and foot-holds.
Flickr.com/trailsource
Climbing the walls won’t be an easy feat, and it carries a substantial risk of falling and becoming injured. Also, this choice guarantees you’ll need to leave your pack behind, although you may be able to work with Paul to use cordage in your pack to hoist gear up as you climb. Either way, you know there’s no way you’re scaling a steep canyon wall with 30 pounds strapped to your back, weighing you down and throwing off your balance.
If you try and fail to make the ascent, you might end up in an even worse position as the flash flood progresses. But if you’re successful at climbing to a ledge even 15 or 20 feet up, you’ll probably be able to escape danger until the flood subsides.
You’ve probably seen a movie or TV show where the intrepid hero is trapped in a blizzard or snow cave and snuggles up with the hot blonde to conserve body heat. Although this trope has been thoroughly played-out by Hollywood, there’s truth behind the claim. Staying close to another warm body can help you keep your core temperature up throughout the night and avoid hypothermia. So although the hero probably has something else in mind, his survival logic is sound.
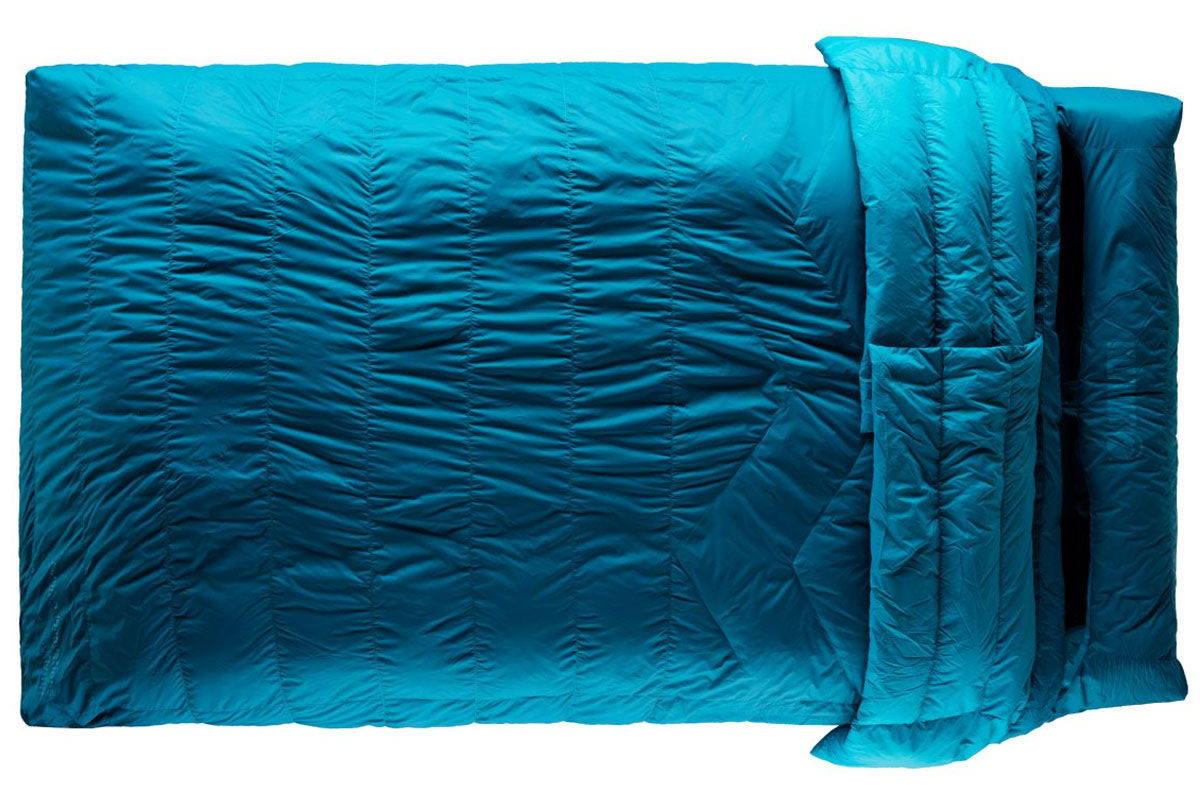
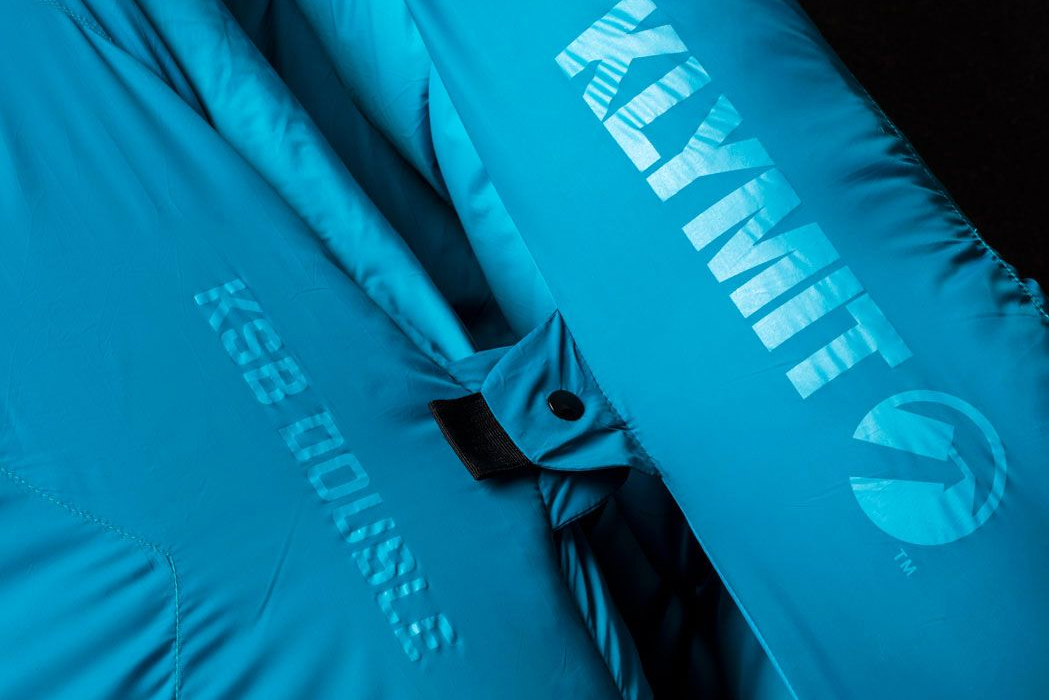
If you go camping with your spouse or significant other, you might rely on separate sleeping bags, or you might zip together your sleeping bags to form a larger blanket. Klymit has developed what it says is a better solution. The company’s new Klymit KSB Double sleeping bag that allows enough space for two people, and also offers some clever features to help each individual regulate his or her body temperature.
The Klymit KSB Double sleeping bag contains 650-fill-power white duck down inside a soft-touch sil-nylon fabric shell with DWR coating. The bag is rated to 30˚F, and packs down smaller than two full-size bags thanks to its integrated design. The oversized hood can fit two large pillows, and the bag’s top is removable for conversion into a full-size comforter blanket.
Knowing that every individual prefers a different level of warmth at night, Klymit made the collar, hood, and zipper adjustable on each side of the bag. A pad sleeve on the underside of the bag is also designed to retain two individual sleeping pads or one of Klymit’s Double V or Insulated Double V pads. This feature prevents the sleeping bag from sliding off the pad during the night.
The new Klymit KSB Double sleeping bag weighs 4.7 pounds, packs down to 9″ by 18″, and is available at an MSRP of $400. For more info, go to Klymit.com.
When it comes to survival, an often overlooked but seriously critical skill is language. You might be thinking, how is a language going to help me survive? It may not be able to start a fire, but let’s look at how language is the spark that ignites teamwork, a critical component of survival.
First, if you’re not leaving the country, how can a foreign language help you survive? What if you’re lost, hurt, or need help from a stranger who doesn’t speak English? Or stuck in the middle of a large-scale disaster and good folks around you only speak Spanish? Or if someone is conspiring to steal from you, and you’re linguistically oblivious to their intentions?
Even if you have no plans to travel internationally, language skills at home could wind up being critical to saving your life or helping others. Think of the predominant cultures concentrated in different regions of the U.S. Throughout the country, Spanish is the best foreign language to study, as it has the highest potential for use. But if you’re in Louisiana or the Northeast near Canada, French will serve you better. On the West Coast, Chinese might be another survival language to study. Ask yourself where you’re headed and examine some of the U.S. Census data to determine which languages have a strong presence in various areas of the country.
Familiarization with a second language for international travel is also an important survival skill. Overseas, not everyone speaks English or is willing to use it even if they know it. In this case, asking for a lighter in the native language of wherever you are could indeed help you get a fire started — touché!
Fluency vs. Functionality
Most people who study a foreign language get discouraged quickly for one main reason — time. Teachers operate on the logical premise that you want to become fluent, which requires a strong foundational base and a lot of time. They start with the alphabet and grammar rules, and it could be months or years before you get to really use the language.
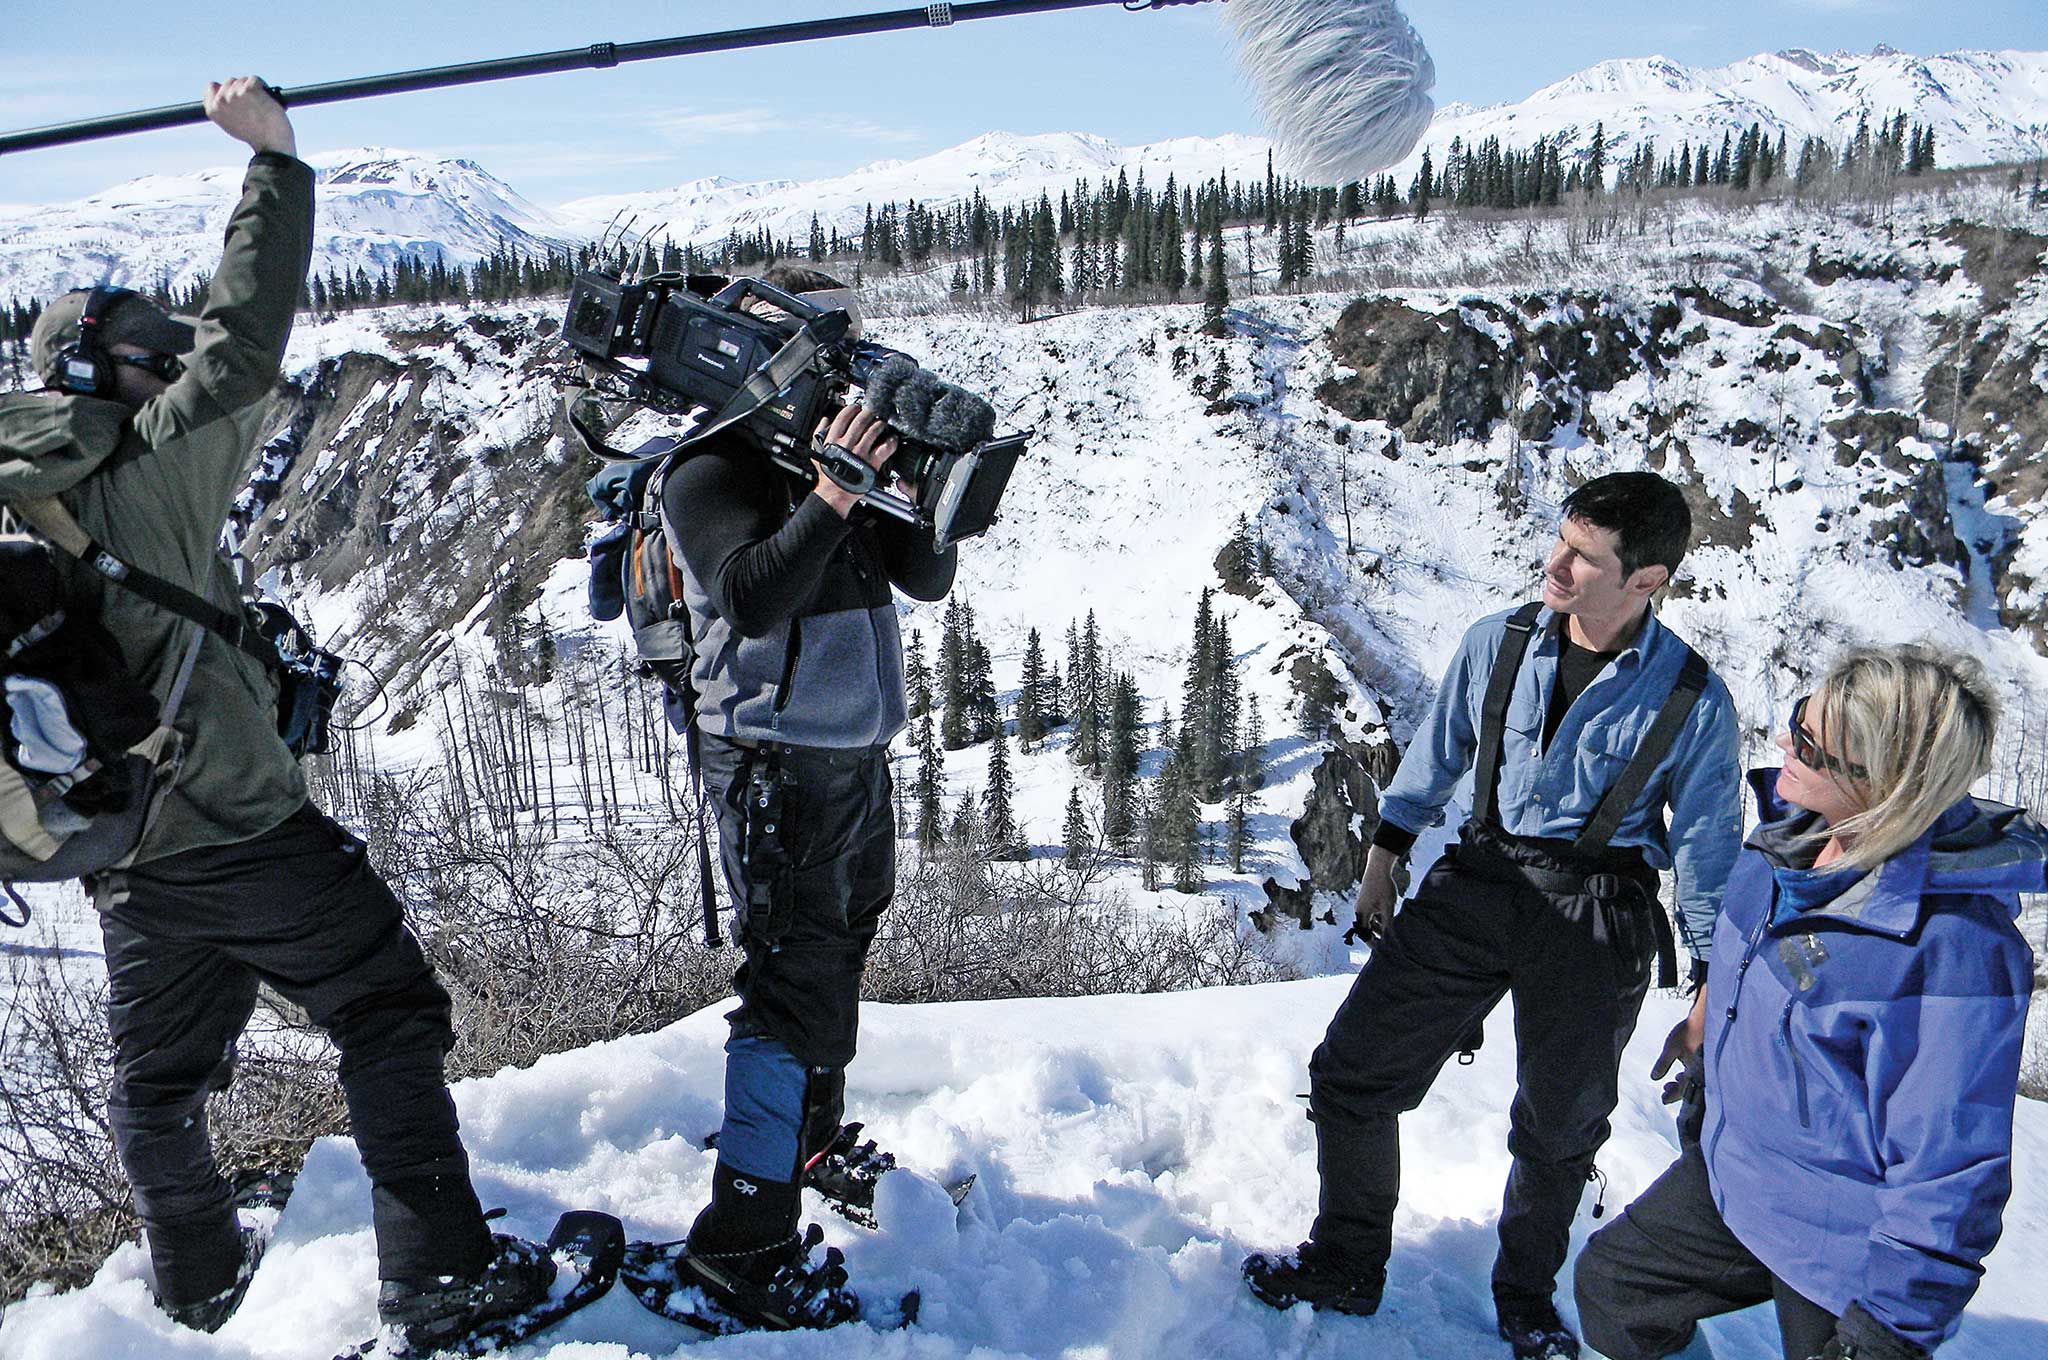
As a former Green Beret, we were often deployed on short notice to strange locations around the globe. Usually, no one spoke English, and we rarely had an interpreter or linguist on the team. Without a translator, and back then with no software or apps, we faced a lot of challenges and misunderstandings. Sometimes the results were hilarious. Sometimes, not so much.
After a few of these short-fuse missions, I realized there was a pattern of what components of language were actually used. I wrote them down on paper and saw a pattern of how to speak in a purely functional manner. It wasn’t perfect, but it was mostly grammatically correct. I certainly didn’t sound like a native, but I wasn’t trying to. Often, I spoke like a simple child, but all my thoughts could be conveyed and my mission could be accomplished. And that’s the survivalist’s way of learning a language on the fly.
Learn it the guerilla way — focus on the stuff that matters. Analyze your own vocabulary in the course of a normal day with family, friends, and coworkers, and you’ll find you typically only use about 200 words. Focusing your early effort on learning basic vocabulary allows you to communicate basic needs and maybe understand the gist of an overheard conversation.
Even basic vocabulary building still requires time and effort, but it’s not hard and you can start functioning on day one. By week one, you can communicate the basics. There are many books, apps, and other learning aids available to help you learn the language info you need.
Forming Common Expressions
We’ll skip basic grammar and head directly into which words are the most useful. Let’s break it down by familiar parts of speech.
Nouns: people, place, and thing. Make a list of key nouns you’ll use in tough situations such as food, water, and help.
Verbs: to need, to go, to do
Adjectives: good, bad, big, little. Start with one, and learn its opposite.
Adverbs: well, poorly, quickly, and slowly. Again, learn one and its antonym.
Prepositions: in, out, above, below, etc.
Conjugations: Start with two: I want and you want, for example. Many languages have a root verb that changes according to who says it. For example, I want versus she wants.
Time: now, later, today, tomorrow, yesterday, before, after
Interrogatives: Who, what, when, where, why, how, how much
Courtesy: If you open every time with please and close with thank you, no matter how badly you hack their language, you’ll know you’re trying and you’ll score points for politeness.
Salutations: hello, goodbye, my name is, what’s your name
So, putting it all together, it may look something like: “Hello. My name is John/Jane. I need water. Where, please? Thanks.”
Bam! Day one, speaking and communicating. Now, pick your language, and we’ll look at some tools to help get you there. An hour a day is a good start.
Training Tools
Books: A dictionary is key, but start with a youth version, as it’ll help you learn how to pronounce and conjugate, while utilizing simpler words. A phrase book showing the language, your language, and phonetic pronunciation is vital to quick learning.
Music: Buy some slower music, even children’s music, as a great way to help your ear and brain adjust to the language and pick up words. Stuff like “Old MacDonald” and other common nursery rhymes will turn what you’re already familiar with into a new form. You can download them onto you phone, tablet, or computer and listen whenever time allows.
Media: Watch children’s shows in the target language. Buy some DVDs or watch some shows online. Download them so you can watch when traveling or not connected to the net. Try not to start with movies you know by heart, as the speed and complexity of the spoken language with plot subtexts is often not quite right in the translation and you may learn some things wrong — and for sure you’ll be overwhelmed.
Also, if you have satellite radio or TV, try to find programming in your desired language. You can watch with subtitles, which always helps, but without is still OK. The more you’re exposed, the more you’ll begin to pick up the basics. Bottom line, self-imposed immersion is a proven method. So listen and watch, with or without subtitles — it all goes in. Even if it sounds like machine gun rapid fire, the more you listen the more your brain gets attuned and reprogrammed to pick it up.
For study aids, check out: Berlitz, Barron’s, Lonely Planet, Langenscheidts, Oxford, Fodors and Pimsleur. Find the ones that fit your style, needs, and budget. There are many free products out there; try those first and then invest more as you’re ready to get more out of it.
Mobile Applications
There are so many great mobile apps for learning languages. You can find free ones or pay for one. Usually, the premium ones are ad free and work better.
There are apps that use your mobile device’s camera to translate written language, and some that allow folks to speak into your phone and they’ll attempt to translate. These are awesome, but often slow, flawed, and, if not connected to the internet, they don’t work at all. Don’t become reliant on technology to do the work for you. You need to shoulder the bulk of the learning process in case you’re in a situation where technology isn’t accessible.
Google Translate is one of the best. You can type in passages and translate more than 100 languages when connected to the internet — about half that when you’re not. It can work with more than 30 languages when translating photos of signs, watching videos, and translating spoken language.
Microsoft isn’t quite able to match up to Google overall; however, its real-time language translator is simply the best one out there right now. SayHi is one of the better apps for speech-to-speech translation, and, in general, Speak & Translate as well as TripLingo are other excellent apps.
For Asian languages and their unique characters, some apps specialize in these and are really good for native European language speakers, such as Papago and Waygo.
There are also wearable translating devices, such as the iLi and The Pilot. They have limitations, but are way cheaper than hiring a personal translator.
Finally, there are some photo-translating apps that allow you to take a photo of a sign or billboard, for example, and then translate it. They require internet connectivity, so they have some limitations on their utility, but signs are often in a city or you can type the letters in your translator app when not connected and read your downloaded dictionary info to figure it out.
Not Everything Translates Equally
In the U.S., we take this generally accepted hand gesture to mean “OK.” However, it’s not universally understood that way, and you may unintentionally offend someone using it in another country. Do your research and be cognizant of what’s acceptable in other cultures.
Gestures: A simple “OK” sign in America equates to calling someone an “a**hole” in other countries. Do your homework.
Culture: In some places, people can become highly offended if you stop and ask a woman for directions or show the bottoms of your feet, for example. Be smart.
Don’t assume you’ll get off the hook for these offenses because you’re a foreigner. And learn the common signs of other cultures if you plan to travel there; not every nation uses U.S. or EU-style signage.
Also, some cultures yell as a way of communicating — don’t take it personally. Yelling back doesn’t make them understand you any better, so don’t get frustrated and become the ugly American. Stay calm, expect mistakes, and have a sense of humor. You’ll get through it. You may make some lifelong friends along the way.
In the sidebar, we compiled a list of the top 10 phrases to learn. The first key to success in using them is to choose the easiest one for you to learn, remember it, and then use the heck out of it! The next key is to maximize use of the interrogatives and always use polite words (please, thank you, excuse me, I’m sorry) to cover any mistakes you make with general words associated with kindness, as way to ensure the maximum willingness and helpfulness from those you query.
Memory Keys
Spend a day writing down words in your target language and listen online how to say them. Then, write down how that sounds to your ears, commit it to memory, and you can speak in a day. Use memory keys or associations that help you remember.
For example, the Russian word for “key” is pronounced “clootch.” I associate that with “she uses a key to lock her clutch bag,” and I can always recall the word via that association in my brain.
Kid’s Stuff
For media, always start with kid’s stuff, and work your way up. Get as many things with subtitles as you can. It’s like studying a martial art, don’t try to get into the ring and fight competitively until you’ve mastered your own moves first. Slow is fast, fast is slow — you’ll learn bad habits (getting words and meanings wrong), and it’ll take twice as long to unlearn the bad and relearn them correctly.
Working in nine different conflicts over three decades, when we had to find translators in a place where almost no one spoke English, we mainly encountered two kinds — professors and young adults. It wasn’t hard to understand how the professors learned English, but when asked, the kids almost all said they learned English the same way — from MTV!
Top 10 Phrases to Learn in Any Language
While technology is great, there’s no substitute for committing things to memory. Learning key phrases like these in the target language can help get you out of a bind in an emergency situation.
1. Hello. My name is _______. What is your name? 2. I need help or Can you help me, please? 3. Can, would, or are you able to show me, please? 4. How do I get there or do that, please? 5. Where is that person/place/thing, please? 6. When is that or this, please? 7. What is that? or What do I do, please? 8. Who can help? or Who is that, please? 9. How much is best instead of how long or how far, as you can always say how much time, how much distance, as well as the usual how much does something cost. 10. Thank you, goodbye, until later, go in peace.
Key Things to Remember
Always repeat what you think someone said in the simplest way you know. They’ll respond either “Yes, blah, blah blah” and you’ll know you understood the gist or they’ll say “No, blah, blah, blah” and say more words, and you can then focus on key words. Then you can focus on listening for vital info like “go left” or “right,” etc.
Constantly listen and read, trying to understand everything you can. Listen when folks are speaking to hear how the language is used.
Challenge yourself by asking, “How would I say …” Then try to say it without learning aids. This way, you’re using spare time to do mental language training, converting passive vocabulary into active vocabulary and usable phrases.
About the Author
Mykel Hawke is a retired Special Forces combat commander and former Green Beret sergeant in medicine, communications, and intelligence with a bachelor’s in biology and a master’s in psychology. He holds black belts in Aikido and Judo, and has ratings in seven languages. www.mykelhawke.com