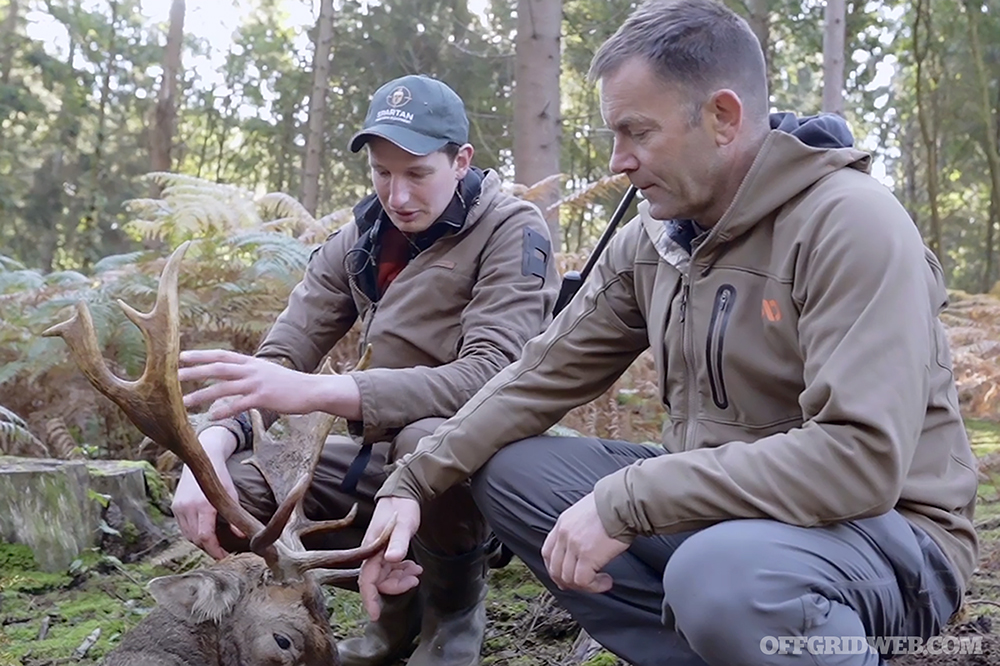
RECOIL‘s editor in chief Iain Harrison understands the threat of gun confiscation because he experienced it firsthand. Twenty years ago, the British government confiscated his weapons, along with those of many other law-abiding citizens. As a result, he moved to the United States to preserve his rights and pursue his career in the firearms industry. However, there are still many shooting enthusiasts and hunters who remain in the UK — as Harrison puts it, “the ties that bind us as hunters transcend national and geographic boundaries.”
In a new CARNIVORE short film posted on RECOILtv, Iain Harrison travels back to the UK to take a look at the persistence of hunting culture in a country that’s generally unfriendly towards gun owners. There, he meets with Hugo Campbell, a local hunting guide who takes him into the Ashdown Forest. This area is roughly 30 miles south of London, but remains densely-populated by deer.
Watch the full 25-minute short film below to see the results of the hunt, as well as Harrison’s impressions of his first time pulling a trigger on British soil in 20 years.
This article was originally published in Issue 4 of our magazine.
Disease-producing biological agents are among the most feared weapons ever used against humanity. Terrorism is the use of violence and threats to frighten, intimidate, and coerce a group of people, especially for political purposes. Combine the two and you get one of the most powerful and horrific instruments of death and destruction. According to some experts, bioterrorism poses one of the most significant threats currently facing the United States. It’s estimated that just one well-calculated attack could result in innumerable victims and cause enormous damage to critical infrastructure. Multiple attacks could potentially wreak havoc and destruction on a scale never before experienced on American soil.
There are many reasons to be concerned — unlike other types of terrorist attacks, a bioterror attack could infect large portions of the population before any of the victims begin to develop any obvious symptoms. The deployment of a biological agent in an urban area could not only result in a high number of causalities, but could also potentially shut down commerce and disrupt vital public services. The threat of bioterrorism is very real; even though it’s one of the biggest threats we face as a society, it’s also one of the least understood. The first step in preparing for this unimaginable risk is to be informed — it also doesn’t hurt to make some basic preparations.
An Overview of Bioterrorism
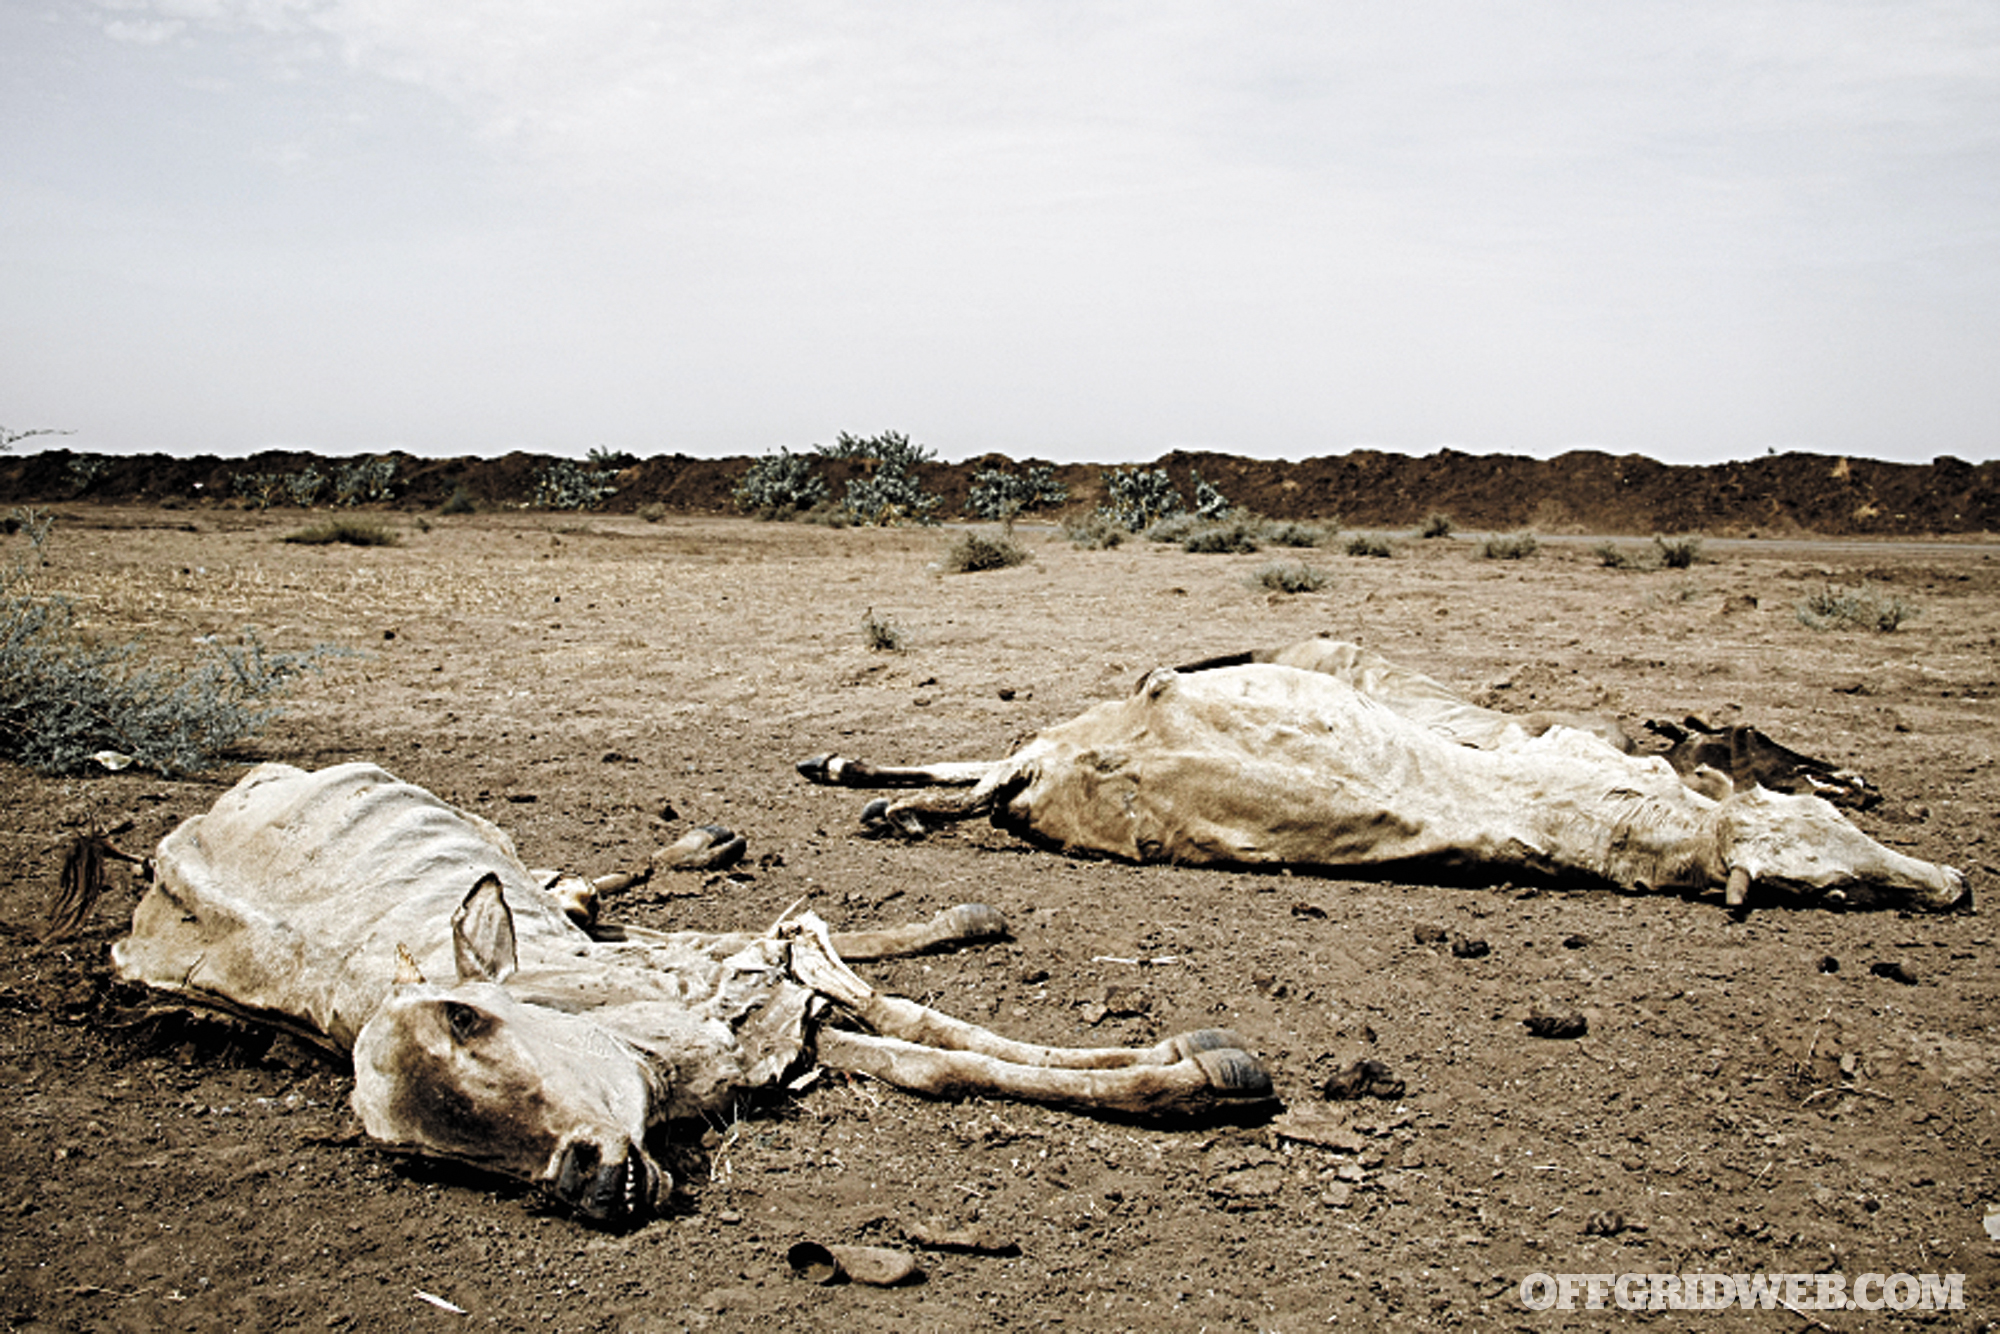
A bioterrorist attack involves the intentional spreading of biological agents such as bacteria, viruses, toxins, and germs with the specific intent of causing injury, illness, and death. A bioterrorist is similar to a conventional terrorist, except the attack can be silent, invisible, and highly contagious. Biological weapons can often continue causing illness and death well beyond the initial attack. A highly contagious agent can be deployed and systematically continue to spread indefinitely among the population far outside of the primary geographical target area. Moreover, humans need not always be the objective of an attack. Bioterrorists can also target crops, livestock, and the water supply, effectively compromising a substantial portion of a region’s food and drinking water.
Since detecting and confirming a suspected contamination takes time, immediately after an attack, portions of our food and water supplies can be potentially infected without our even knowing it.
Science vs. Nature
The term “bioterror” may be relatively new, but biological warfare has been around for many hundreds of years. One of the first accounts of biological attacks dates back to the year 1347, when the Tartar army catapulted bodies of plague victims over the walls of the port city of Caffa, on the Black Sea, to infect the occupants who refused to surrender. Many of the infected, who later escaped, went on to carry the disease to other cities and towns.
Today, bio-agents can be altered into incredibly effective killers by enhancing their natural ability to spread. With advances in technology, it’s now easier than ever, and far less expensive, to obtain raw materials and convert (weaponize) them into biological messengers of death.
Infographic: 6 Deadly & Contagious Agents
A Potential Biological Attack
For most people, the full extent of a biological attack is difficult to imagine. Prior to the terrorist attacks on September 11, 2001, and the subsequent anthrax letter attacks, few people would have given the risk of bioterror a second thought. Today, however, a number of experts have repeatedly warned that it’s just a matter of time before there’s a significant bioterrorism attack on U.S. soil. Since 2001, senior government officials have placed bioterrorism among the top of the list of national security concerns.
How an actual biological attack would unfold depends on many variables, including which biological agent is used and how it’s dispersed. For the average person, trying to anticipate and prepare for every possible biological scenario is almost impossible. It makes more sense to plan and prepare to address the basic survival needs that are common to all disasters — food, water, security/self-defense, first-aid/medical, sanitation/hygiene, and of course, knowing when to stay put and when to get out. If the unthinkable happens, having a plan and appropriate supplies will be essential, especially in the days following the initial attacks.
Here are some things to consider:
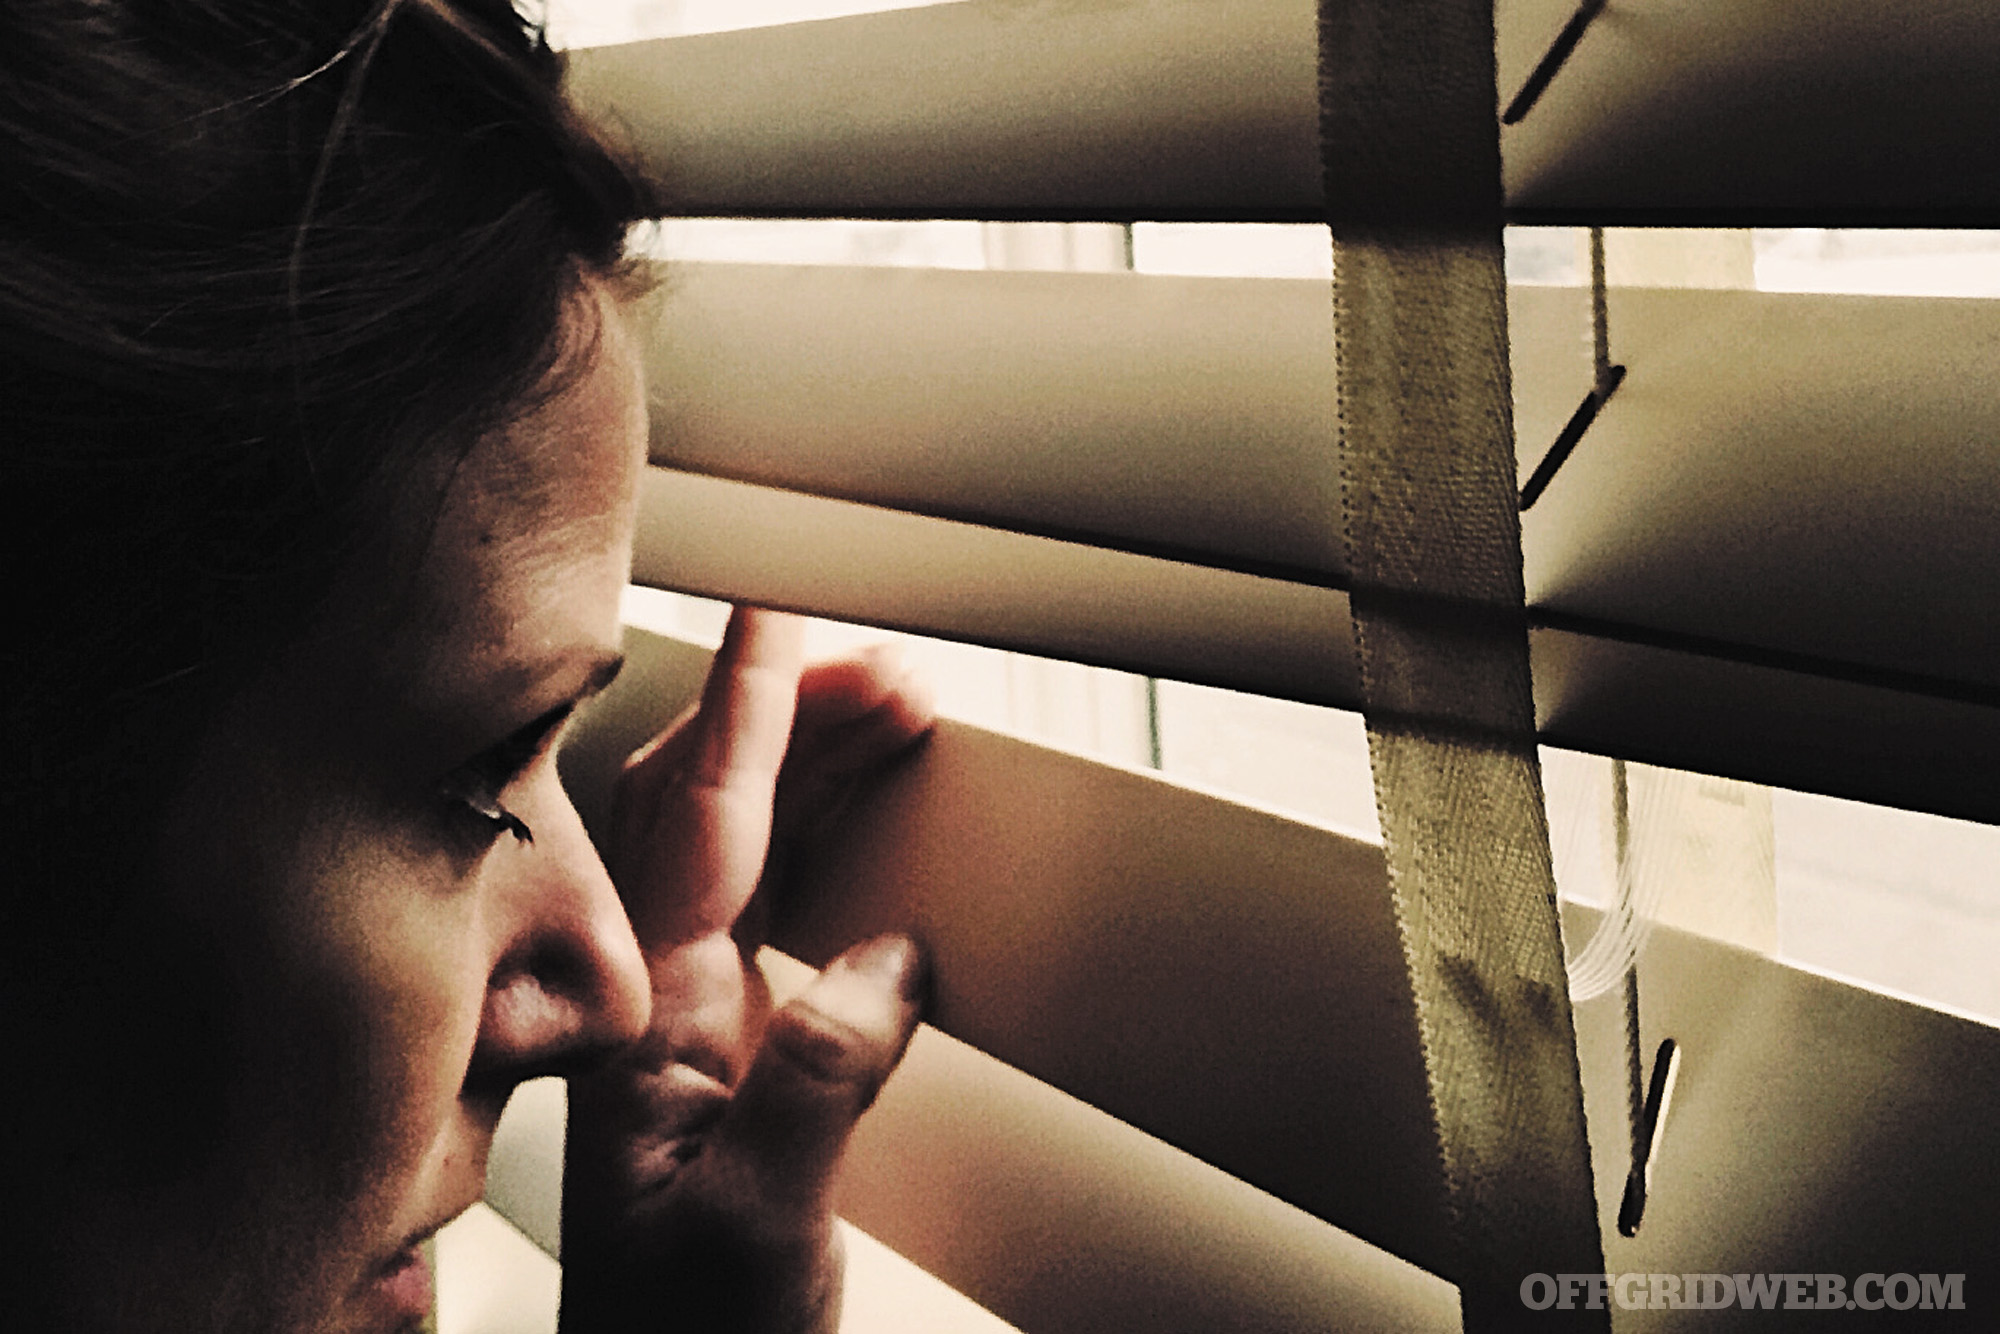
Staying Informed: Upon learning of a bioterrorism attack, the public will most likely look to local, state, and federal authorities for guidance and direction. Since the average person will have no clue what sort of bio-agent was used, how it was dispersed, or how far or in what direction it has traveled, knowing how best to respond will be difficult. Without substantial guidance, the public will be at a tremendous disadvantage. Although the best possible course of action may be to get as far away from the attacks as possible, that option may not be feasible. For instance, if the source of the attacks is unknown, leaving may be the worst thing to do since large crowds of departing residents may actually be unknowingly heading straight into an area of heavy contamination. Staying alert for critical warnings and alerts from government officials will be key to surviving the initial stages of a suspected attack.
Sheltering In Place: In some instances, the best option may be to shelter in place, avoiding all exposure to the infected and waiting for more detailed information. In the absence of a clearly defined plan with clear objectives — for example, knowing where to go and how to get there safely — staying put may be best. To shelter in place, however, you need supplies. Plan ahead and store an inventory of all the essentials.
Having Food and Water: Having supplies will allow people to avoid exposure to potentially contaminated food and water, at least in the early stages of any attacks. Having supplies also makes it much easier to stay home and off the streets (i.e. sheltering in place). People who lack sufficient supplies will have no choice but to take to the streets in search of food and water.
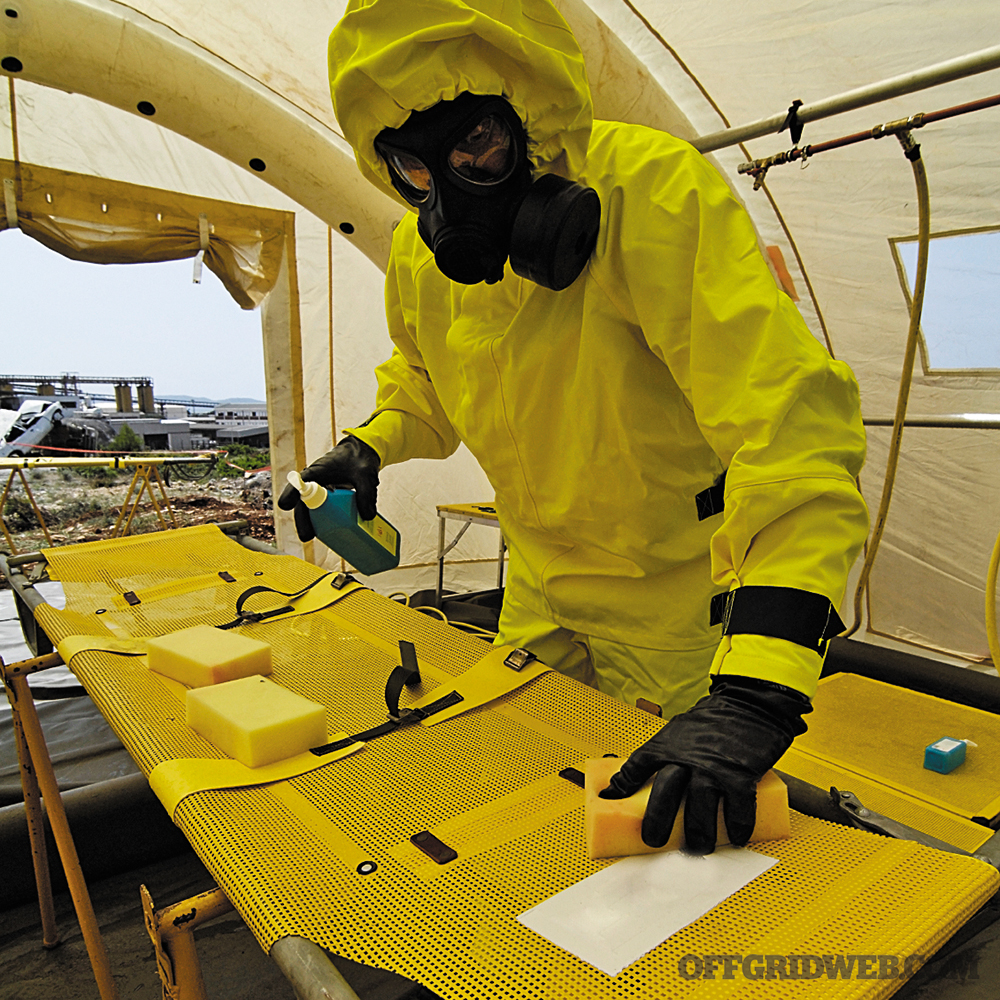
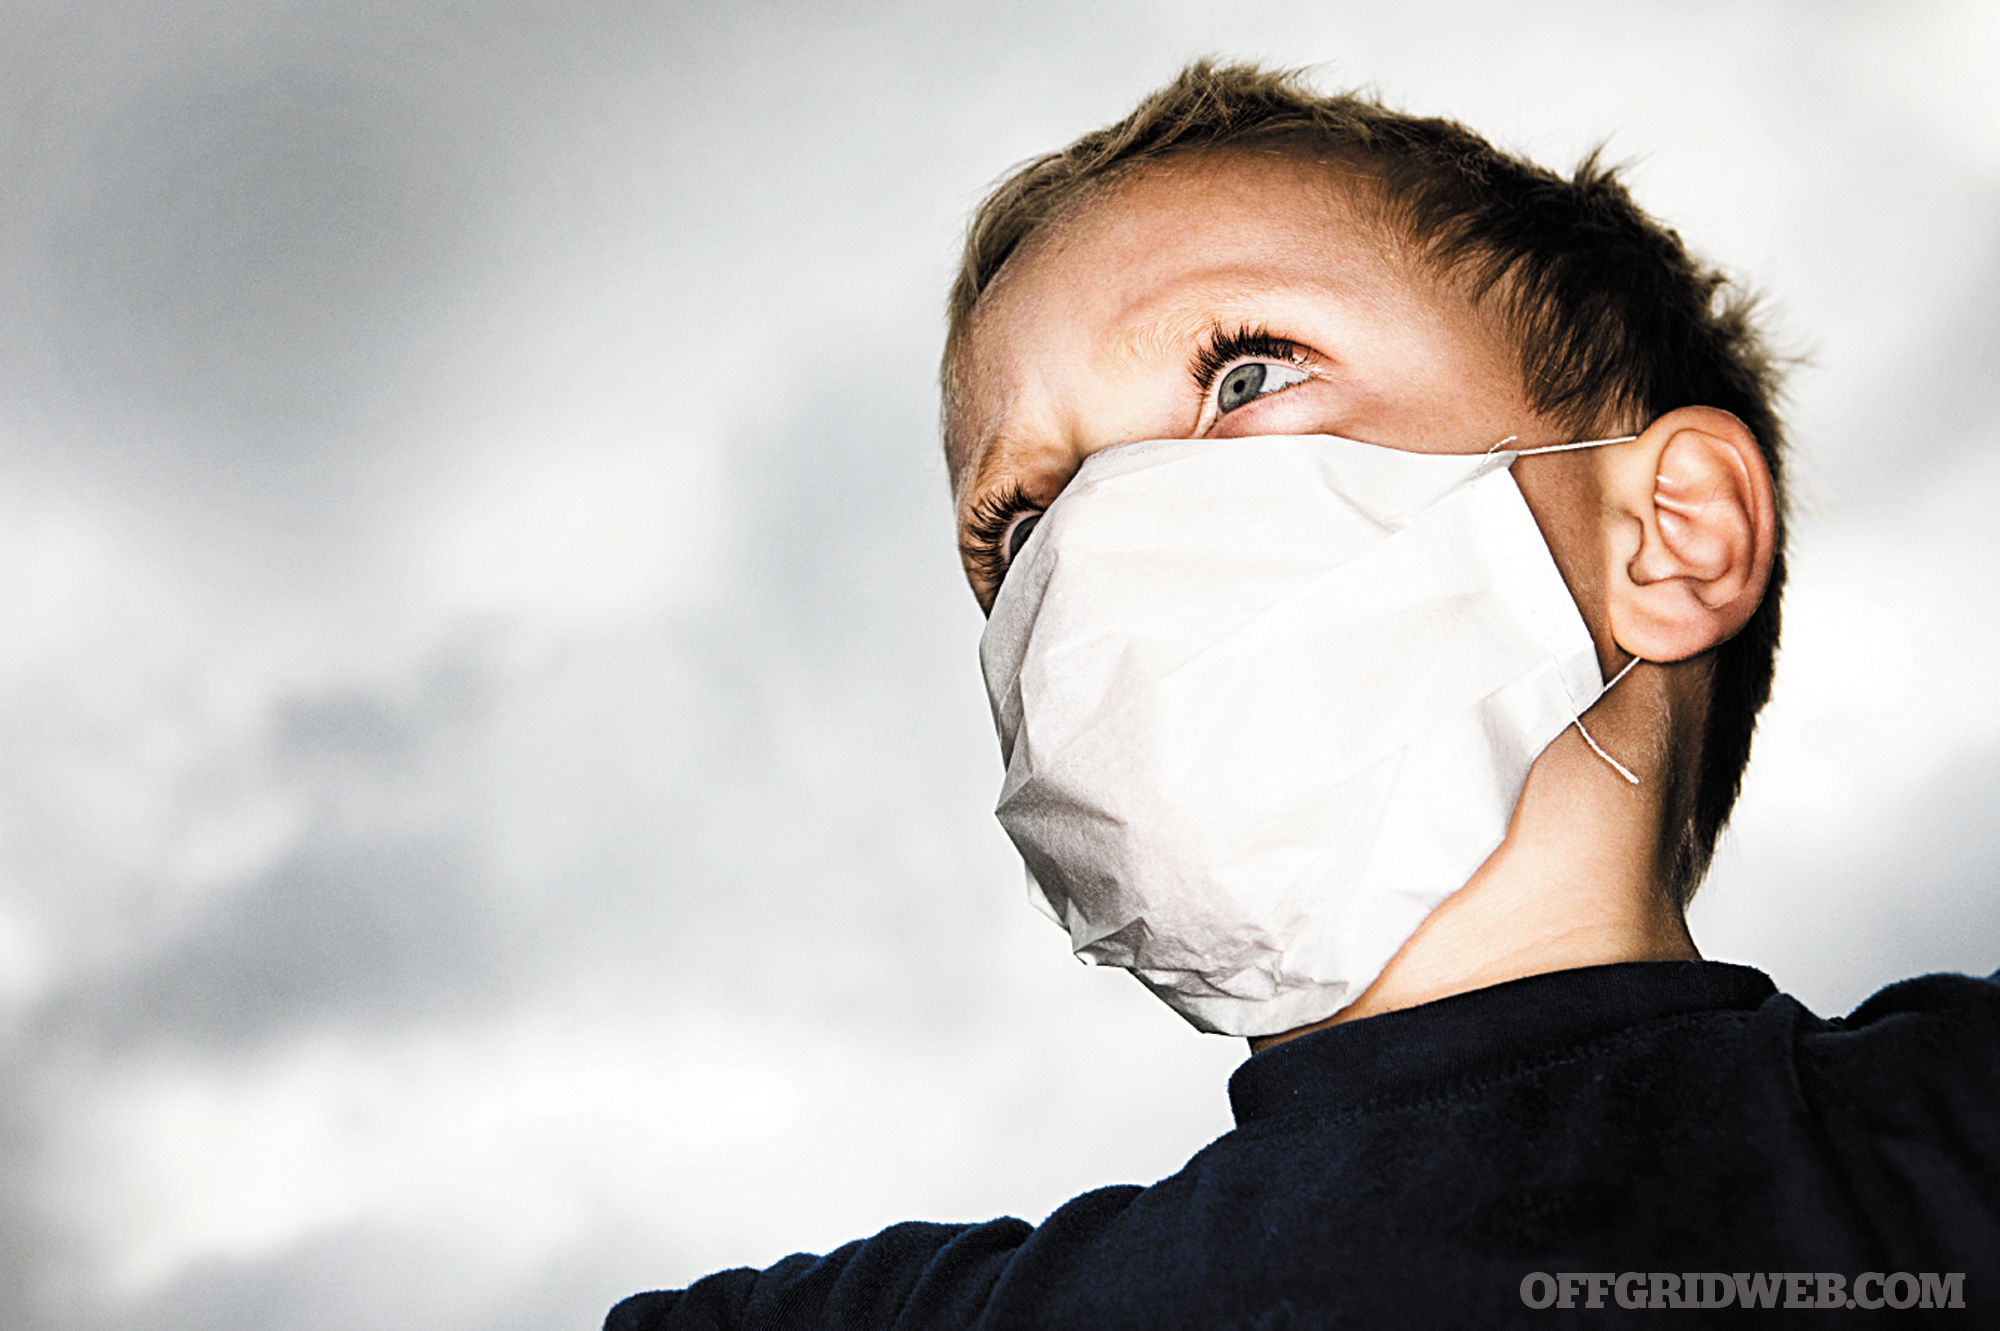
Avoiding Exposure: Avoiding anything that may have been touched by an infected individual will reduce the possibility of exposure. During a potential attack, the public will need to protect itself not only from other people, but also from domestic animals, objects, food, and water. If the agent is airborne, staying indoors may be the only option for most people.
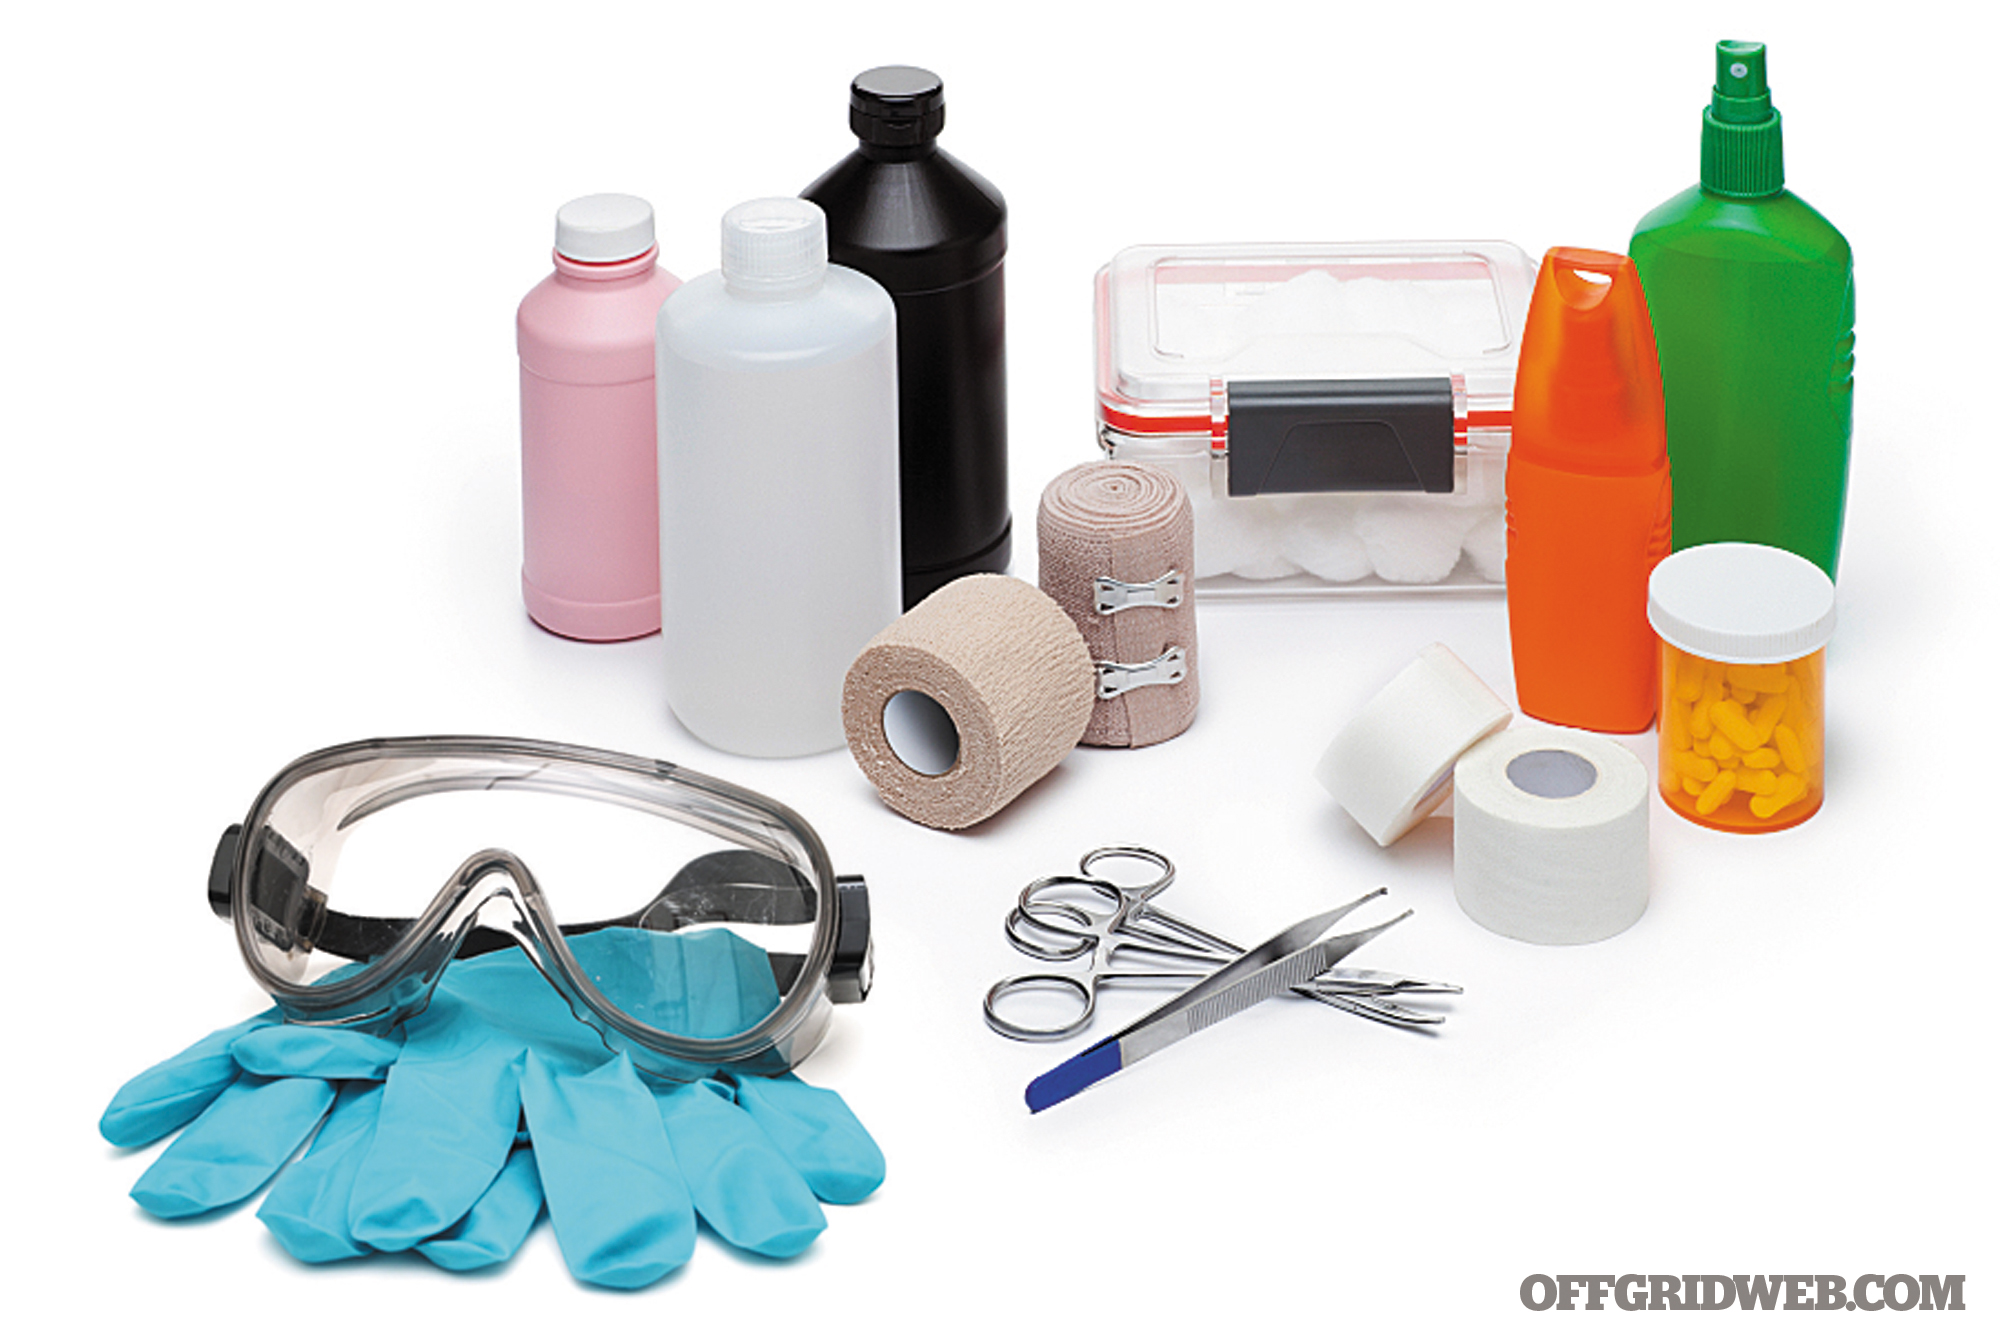
Having Medical Supplies: First-aid kits, prescription medications, particulate masks (N95), goggles, and surgical gloves are some of the basic supplies every household should maintain.
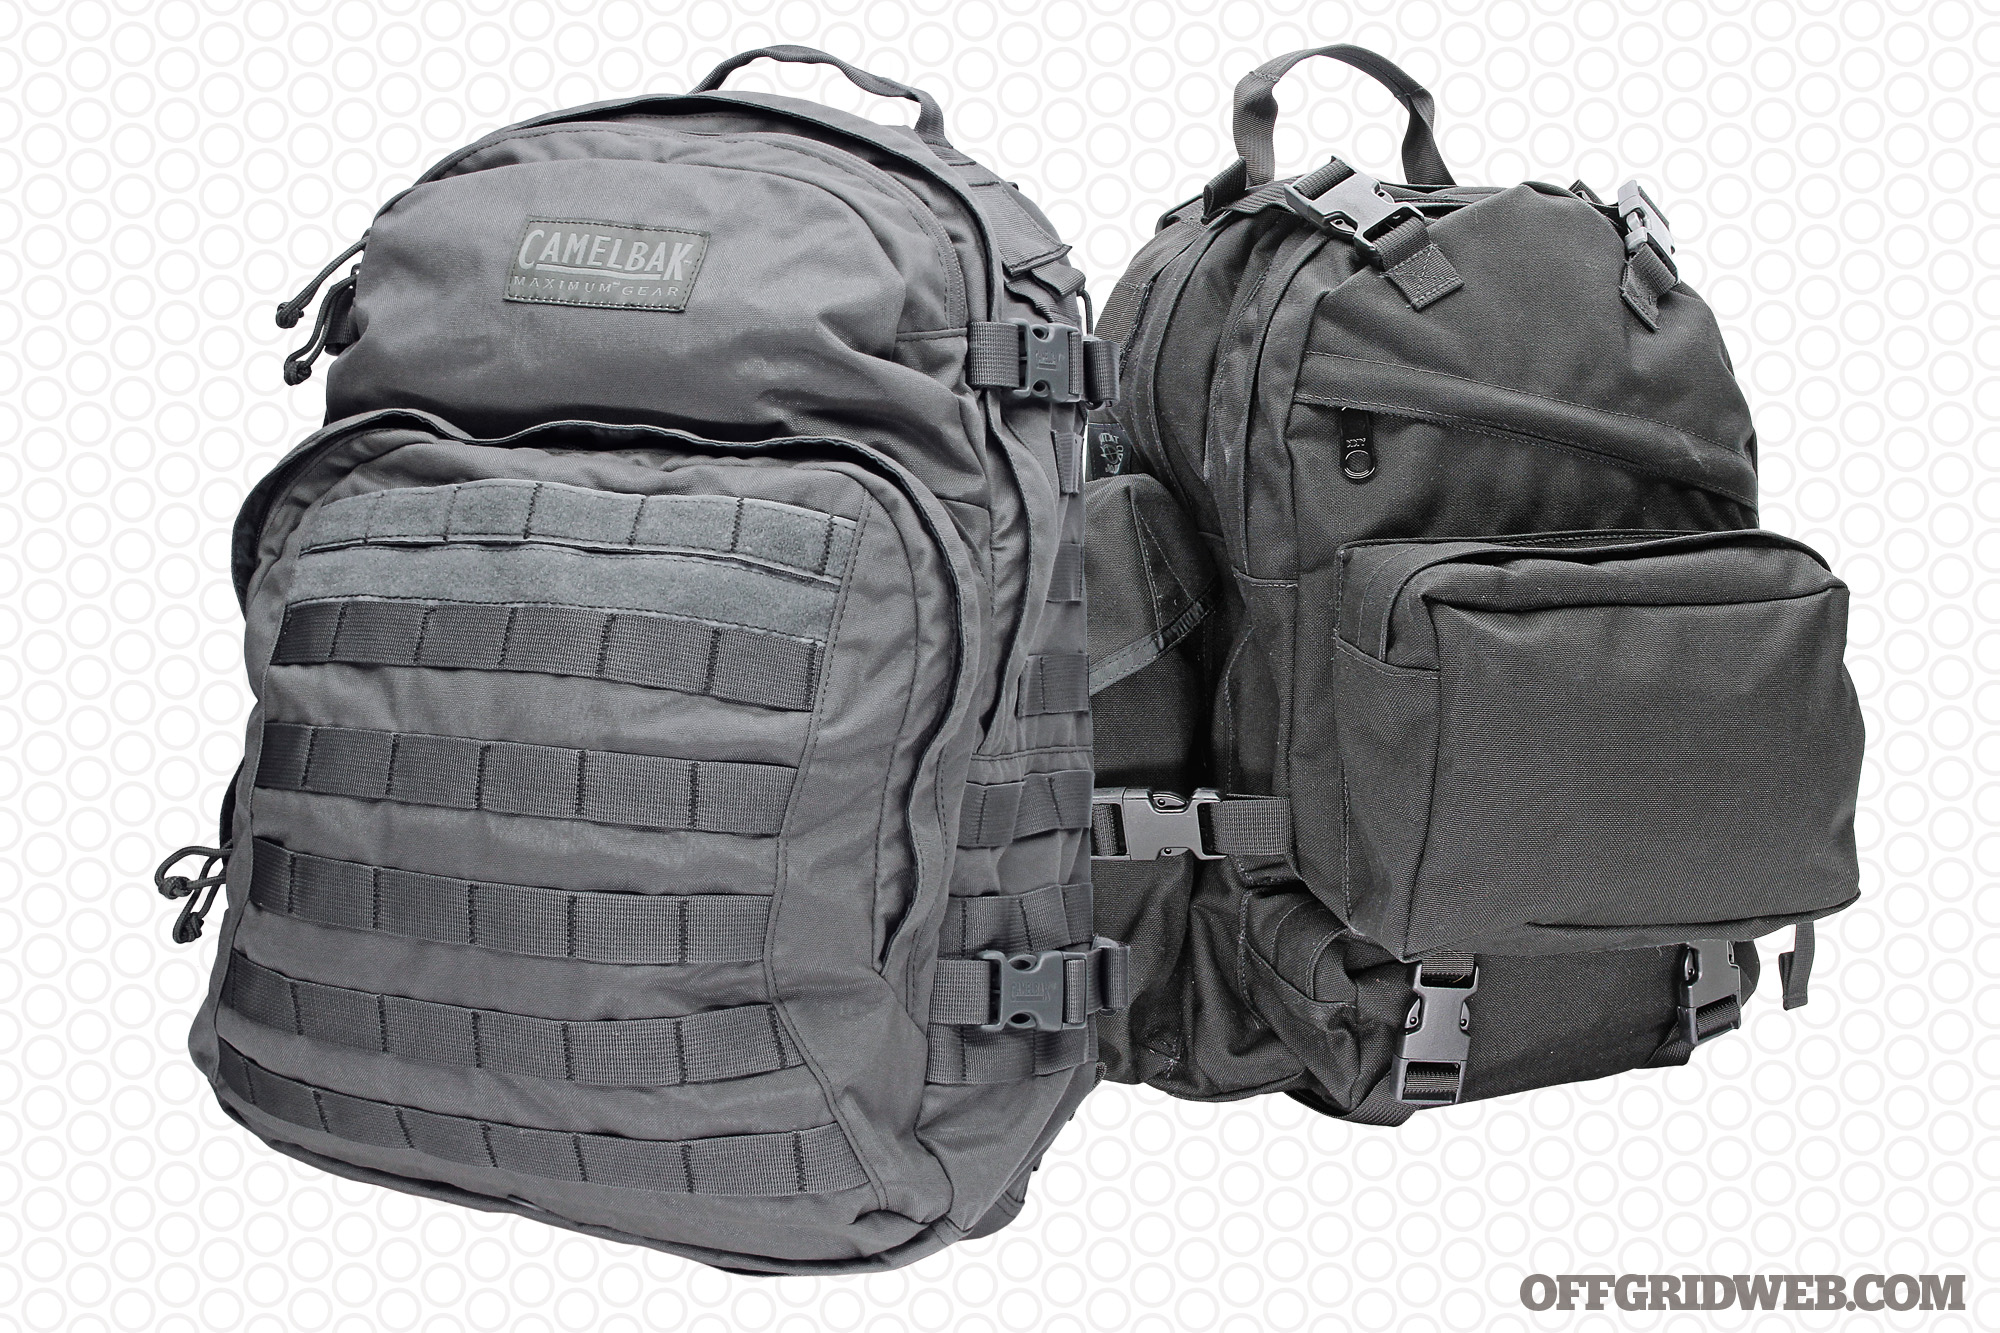
Having a Bug-Out Bag (BOB): Bugging out, or getting out fast to an alternate location, is usually not recommended unless you have a secure place to go and a safe way to get there. But if the authorities advise the public to evacuate, there will probably be no time to pack for the trip. In the event of an emergency evacuation order, having a pre-packed BOB can help your group get out quickly. Food, water, self-defense, eye and face protection, and important personal papers are just some of the things to have packed and ready to go.
5 Bioterrorism Quick Facts
1. Bioterrorism is a very real threat, especially to urban dwellers in densely populated areas. Terrorists also know that the most devastating aspects of a bioterror attack could be psychological — millions of people reacting to news of the attacks with fear and panic, causing inevitable waves of chaos.
2. Biological agents come in many different forms — some occur naturally, others are designed in a lab to be more effective. All can be lethal.
3. Biological agents can be spread in many different ways — person to person, through the air, or via water.
4. As with other kinds of terrorism, the objective of bioterrorism is to cause disruption, fear, and mass hysteria. Biological weapons appeal to terrorists because they are highly effective at achieving these goals. Agents can be released to spread far and wide, before the first person ever begins to show any symptoms.
5. A large metropolitan area, with a high population density, would be a most attractive target for terrorist. A well-coordinated series of attacks could have a devastating and long-lasting impact on society, the economy, civil order, and essential public services.
Summary
Bioterrorism is the stuff of nightmares. Terrorists know that one of the most devastating aspects of any bioterror attack will be the chaos that follows. In the aftermath of such a disaster there will be two groups of people — the prepared and the unprepared. Being prepared is not just about having supplies; it’s also about having a viable plan and being able to respond quickly to changing conditions. In the face of uncertainty, preparations can tilt the odds in your favor and expand your options. Stay safe and be prepared.
About The Author
Richard Duarte is a practicing attorney and a survival and firearms enthusiast; he currently teaches and consults in the areas of urban survival planning and preparation. He is the author of Surviving Doomsday — a Guide for Surviving an Urban Disaster. For the latest news and updates, connect with Richard at www.quickstartsurvival.com.
Digital security is a complex subject, and understandably so. Few of us have the technical knowledge to explain exactly what happens every time we click a web link, send an email, or upload a file to the cloud — much less who is privy to these interactions. However, it’s also unwise to shrug your shoulders and not give it another thought. At the very least, we should all have a general awareness of what we reveal about ourselves online, and how the spread of this information can affect us in the real world.
Flickr.com/jeroenbennink
If you take online security seriously, there are many tools that can help protect your digital identity and keep your activity private. A VPN, or virtual private network, is one well-known tool that has seen a recent surge in popularity, but it’s far from the only one available to you. Proxies, secure browsers, private search engines, and even your existing browser’s private or “incognito” mode all offer benefits and drawbacks.
Varonis Systems published an infographic that analyzes the pros and cons of various online privacy tools. The following quick reference guide provides an overview:
You may see this and think that there’s no single tool that provides total privacy online — you’d be correct in that assessment. However, it’s still worth looking into how each of these tools (or some combination thereof) can help you keep your online activity private. Check out the full infographic below, or download the full-size version here.
This article originally appeared in Issue 3 of our magazine.
Warning! This article is meant to be a quick overview and not a detailed guide on procedures relating to the treatment of concussions. To be prepared for any emergency, we encourage you to enroll in a certified medical course or, at a minimum, a familiarization course, which will deliver comprehensive knowledge of how to treat different types of concussions.
Recent news has brought the problems of concussions to the forefront of the sports world. However, concussions not only affect overpaid jocks (and seemingly our lawmakers), they can also afflict regular people — so be wary of those clumsy friends you hold so dear.
Concussions are brain injuries caused by a force applied to the head area. Any blow to the head, or even a slight fall, will cause a rapid head movement that displaces the brain from its normal position. This displacement can cause an impact between the brain and inside wall of the skull, causing temporary injury.
Above: Obvious physical signs of concussions include headaches, dizziness, vomiting, impaired motor skills, and fatigue.
Diagnosis
Once you suspect a concussion has occurred, remove the victim from any environment that might cause any additional trauma to the head. Obvious physical signs of concussions include headaches, dizziness, vomiting, impaired motor skills, and fatigue.
Look for confusion, temporary amnesia, vision or speech problems, and unresponsiveness. If the victim finds himself suddenly enjoying Justin Bieber or One Direction, this may be another clue. Loss of consciousness can be a sign, but is not a prerequisite for the majority of concussions. More importantly, symptoms are not always seen instantly and can take hours to manifest.
SCAT
No, not that scat. A tool developed by the professional sports community is the Sport Concussion Assessment Tool (SCAT), and its key points can be used to evaluate concussions. It was originally developed for athletes and is a standardized method of evaluating injured people for concussion. It can be used on people 13 years and older. The SCAT5 is the most current version and it supersedes the previous versions of SCAT. It is available for download from the British Journal of Sports Medicine.
First, take note of the magnitude of each symptom listed on the SCAT card — these can help you differentiate between a mild or severe concussion. Cognitive assessment should also be done, which includes asking the victim simple questions. Test the victim’s short-term memory by making them repeat five random words that you say. Have them recite the months of the year in reverse order, which requires some concentration. Check for correct eye movement and simple arm and hand coordination. Failure to perform one or several of these tasks will further elucidate the degree of injury.
Treatment
Closely monitor the victim for at least 24 hours after the concussion. Many believe that a victim should never fall asleep after a concussion and should be forced to stay awake. There is very little scientific evidence to support this theory.
The proper treatment for a concussion is rest; therefore, allowing the victim to fully sleep is recommended. However, if the victim does fall asleep, wake them up every two hours to make sure that they can regain consciousness normally. Once awakened, check whether symptoms have worsened and if new ones have appeared. If so, immediate professional medical help may be required.
Physical rest is necessary for proper recovery. More studies have now shown that cognitive rest will also quicken this recovery, so restrain from thinking about complex quantum physics, solving world hunger, or trying to sign up for health insurance. Do not take painkillers immediately as they mask both the symptoms and severity of the concussion. Only after a few days should acetaminophen be taken for headaches — avoid aspirin, Advil, or other non-steroidal anti-inflammatory drugs (NSAIDs) that can cause bleeding at the site of injury.
When alone, suffering any head trauma can be difficult. If your memory is intact, yet you show signs of a severe concussion, you should immediately attempt to contact someone to get medical help. If this is not an option, stop what you are doing and rest. Move yourself to a warm spot away from imminent danger, whether incoming artillery fire or your ex-spouse. Due to the complex neurological nature of concussions, rest is your only form of treatment in a survival setting.
Full recovery is generally expected, given enough time to heal. The danger lies in a secondary injury during the initial healing process, which can cause brain swelling and permanent damage. Take it from your friendly neighborhood NFL quarterback — prevention is a must. Though not all concussions are life threatening, proper measures taken after a concussion will reduce the chances of any future neurological problems.
It’s often said that those who cannot learn from history are condemned to repeat it. This statement isn’t just applicable to shortsighted warlords who choose to invade Russia during the winter — it also holds true when we discuss individual survival.
Studying the mistakes and misfortunes of hikers, backpackers, campers, and hunters who ended up in survival situations can often help us avoid them entirely. Even if we end up in a disastrous circumstance through no fault of our own, knowing survival statistics can guide us to make wise choices and increase our odds of making it home safely.
A recent article on SmokyMountains.com titled “Safe & Found” compiled and analyzed the survival stories of more than 100 individuals. These experiences ranged from 1 to 90 days in duration, and occurred throughout the United States and Canada.
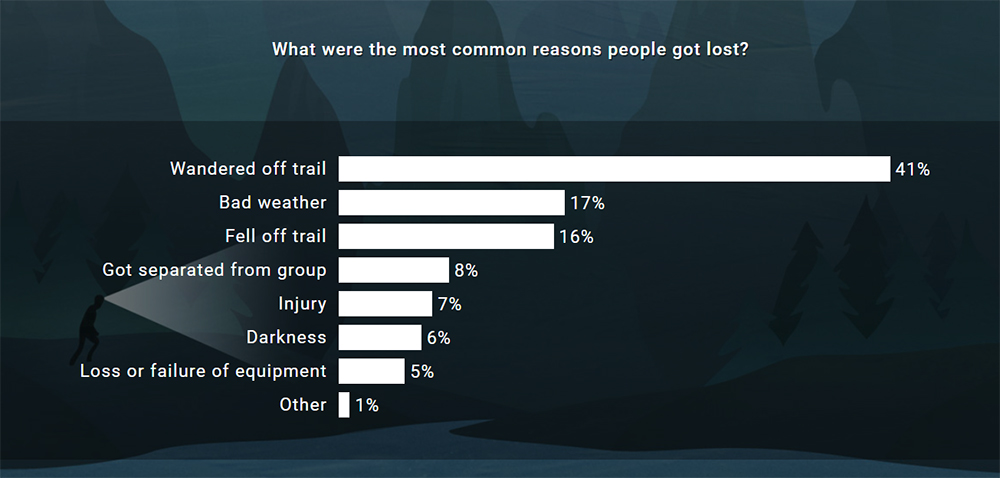
First, the article delves into how these hikers got lost or stranded:
The majority left the established trail and were unable to get their bearings, as was the case in the story of Sajean Geer. Weather was the second-most likely cause of trouble, so if you’re able to stick to the path and watch for incoming storms, your odds of survival will increase substantially.
Several individuals said they huddled together with their pets to stay warm.
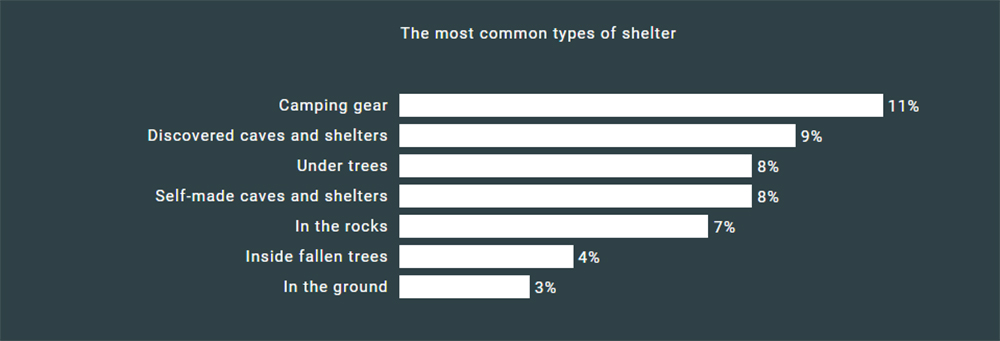
Next, the article explains how each person found warmth, shelter, water, and food, assuming they were able to do so.
Warmth — 12% relied on clothing alone, 10% built a fire, and 10% used camping gear they had on hand. Other heat sources included body heat from other people or pets, physical exercise, or digging in to shelter from the elements.
Shelter — 11% of survivors used camping gear, while 9% found existing shelter in the form of caves or structures. The remainder improvised shelter from trees, rocks, snow banks, or the ground itself.
Water — Unsurprisingly, most were able to find natural water sources, either as large bodies of water or small deposits of snow or rainwater. Those who weren’t so lucky tried to make existing supplies last as long as possible, or returned to safety fast enough that they didn’t need a water source to survive. A handful drank their own urine — as we’ve said many times before, this is never a good idea, yet the harmful myth persists.
Food — Aside from those who relied on existing food supplies or their bodies’ fat reserves to sustain them, this graph is pretty much an upside-down food chain. Finding berries, fruit, or other edible plants is usually possible, while hunting for a consistent source of calories is much more difficult.
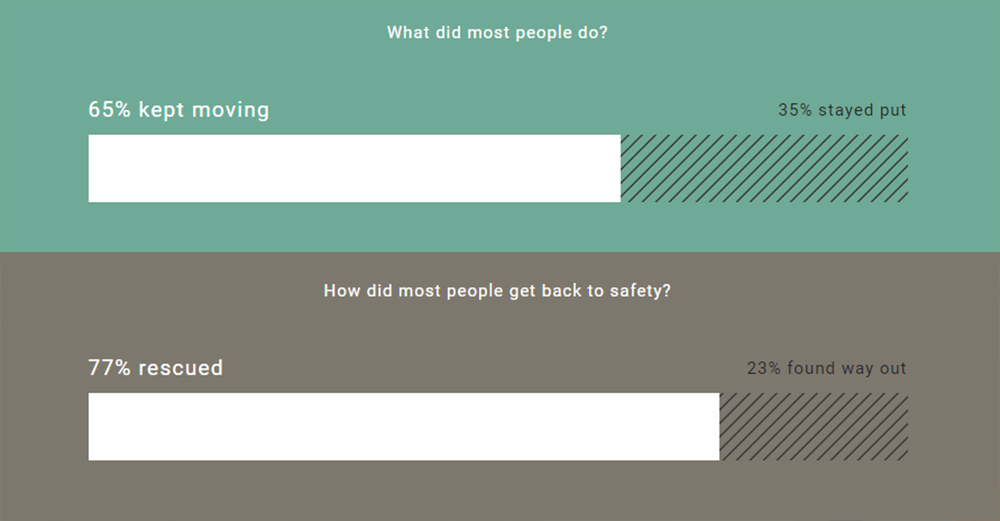
The SmokyMountains article also discusses how these survivors returned to safety. While most experts agree that it’s best to stay put if there’s a reasonable likelihood of being found, a majority of the study’s subjects kept moving. More than three quarters were rescued — only 23% managed to get out on their own.
Finally, SmokyMountains asked survival instructor Andrew Herrington to share his overall recommendations and advice on each of the above categories. He extols the importance of preparedness before any adventure, and shares numerous valuable tips that are simple enough for anyone to remember. To read Herrington’s input and browse a table of the data from all 103 survivors, go to SmokyMountains.com/safe-and-found.
Take a look at any prepping organization, social media group, or event, and you’ll probably see far more men than women. We know that just over half of the U.S. population is female, so why don’t we see this reflected in our prepping community? When I first got into preparedness, there were some women speaking about being prepared, but it seemed as if their voices were drowned out by the comparatively large number of men who take an active interest in prepping. Honestly, it was intimidating and often times made me feel like I had to have the mindset, clothing, and gear of a man in order to be properly prepared.
That mindset quickly changed as I dove deeper into preparedness, but it’s something that I see a lot of new female preppers struggling with to this day. They see that preparedness is typically male-dominated and may feel discouraged to jump in when there are fewer female role models to look to.
Now let me be perfectly clear: both men and women need to be prepared. It’s easy to misinterpret this attempt to encourage more women to get involved with preparedness as an attempt to silence men. This couldn’t be further from the truth. We need to get more women involved so that both men and women can cohesively work together during an emergency.
I hear it all too often, though: “My wife/daughter/sister/girlfriend doesn’t want to get prepared.”
If trying to convince them through conversations about the value of preparedness isn’t working, then maybe showing them this article about how women have impacted the history of prepping will encourage them to get involved. I dare to say that women have always been the original ‘preppers,’ even when that label hasn’t been applied to them. In many cases, these daughters, wives, and mothers just had to survive and figure out a way to make life easier on themselves and their families.
Here are five ways that women have changed the course of prepping history.
Pioneer Days
A pioneer family prepares to head West in their covered wagon, Nebraska, 1866. (U.S. National Archives)
Women in pioneer days were responsible for much of what the family needed to survive. They were the backbone of the homestead. It was tough at times. They endured hard winter months while taking care of children, and in some cases also tended to the farm or assisted their husbands in doing so.
In addition to taking care of the home and farm as well as raising children, pioneer women provided medical care and grew vegetable gardens to supplement the family’s diet. They made basically everything from scratch including butter, candles, soap, and clothing. They also preserved food for the winter months.
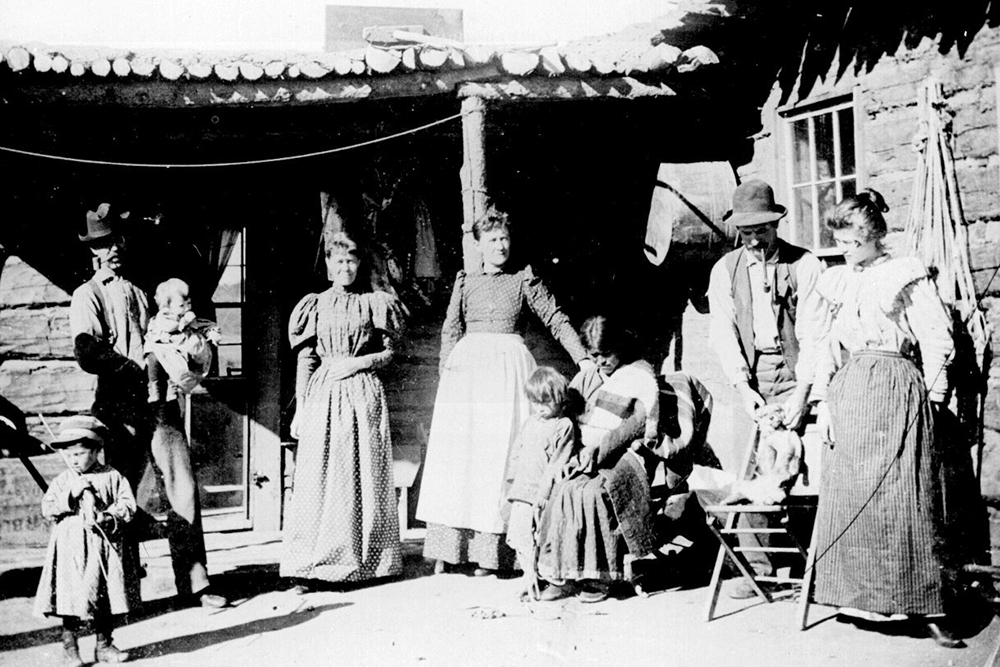
A family outside their log cabin in New Mexico Territory, 1895. (U.S. National Archives)
Pioneer women made significant contributions to their communities. Women were particularly influential in developing churches and schools, believing that these institutions had a civilizing effect on pioneer society. In some cases they would also work as school teachers.
According to Ohio History Central’s article on frontier women, “Women operated businesses, either in partnership with their husbands or alone if widowed. There are accounts of women who ran sawmills, gristmills, and inns. Some women even weaved and sewed things that they could later sell to bring in some extra income.”
Pioneer women were tough as nails and they did whatever they had to in order to survive and thrive.
The Great Depression
Families often repurposed fabrics and made their own clothing. (Russell Lee / Library of Congress, FSA-OWI Collection)
The Great Depression was an extremely difficult time for everyone. Unemployment reached 25 percent in the United States, and most people’s bank savings were wiped out. Those who lived through the Great Depression learned quickly that wasting anything wasn’t an option.
They learned to live with less and to better budget their finances.
In addition to making their own clothes, linens, quilts, soap, bread, and home remedies, women would pick up a hammer and saw and make a new table if they had to. They learned to repair anything and everything themselves.
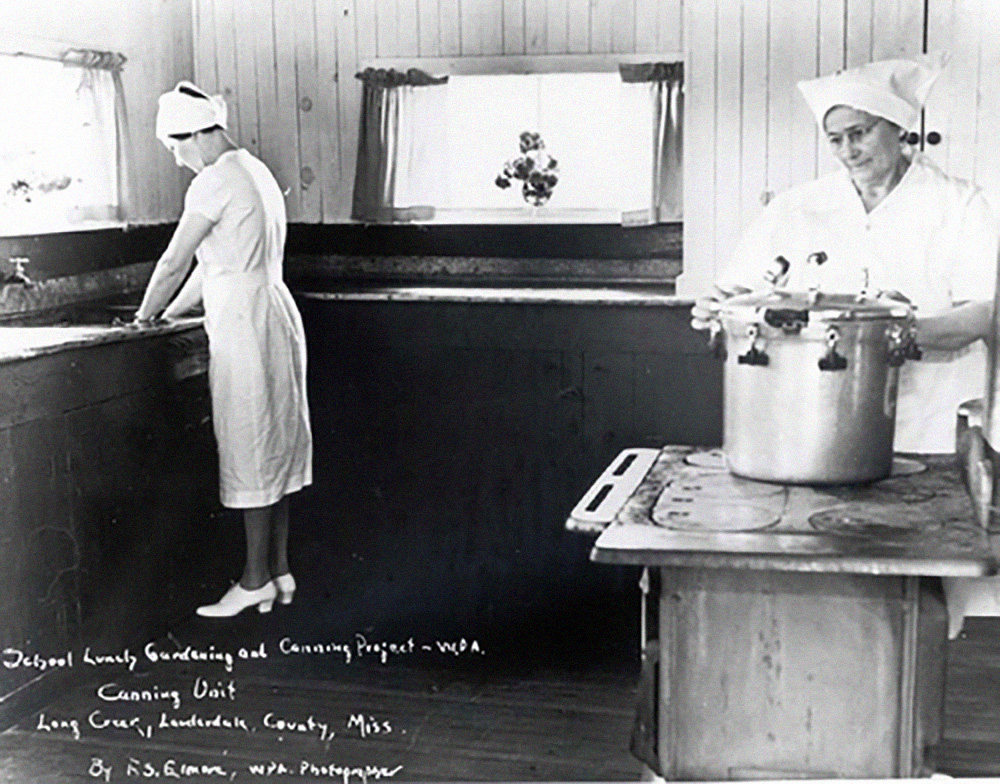
The WPA Gardening and Canning Project in Mississippi helped preserve food to reduce waste. (Mississippi Department of Archives and History)
Nothing was thrown away. Old clothes were cut down to make new clothes or quilts. Bread bags could be used as freezer bags or garbage bags. Containers, jars and boxes were all reused or repurposed into something else.
The Great Depression taught people everywhere to re-evaluate how they lived their lives, placing an increased emphasis on reducing waste, saving money, and becoming more self-sufficient. For more details on what we can learn from those who survived this era, read our previous article, 6 Timeless Survival Lessons from the Great Depression.
Women Inventors
Women are to thank for inventing many of our modern conveniences. Some of these products reduce the amount of time spent on mundane or repetitive tasks, while others directly improve our emergency preparedness.
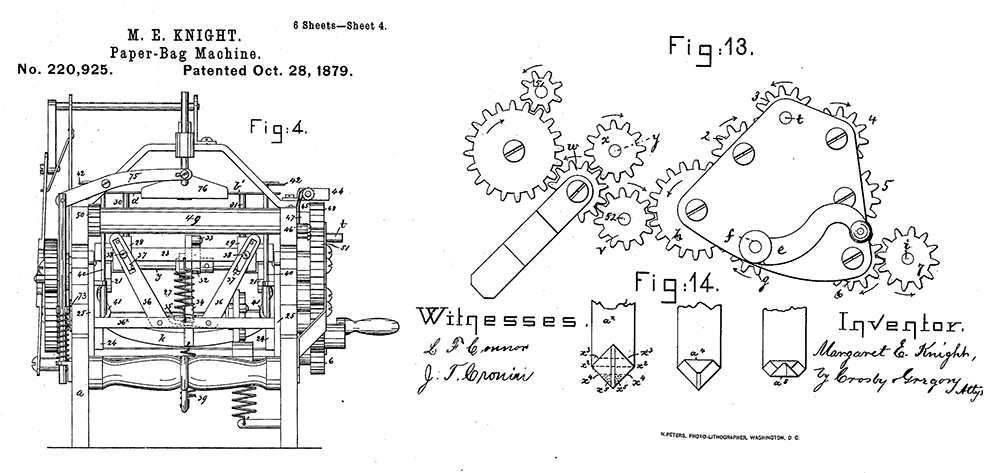
A cotton mill worker named Margaret Knight invented a machine to make paper bags with a flat square bottom in 1868, a fundamental design that impacted how we produce grocery bags to this day. She went on to patent 86 additional inventions, and was posthumously inducted into the National Inventor’s Hall of Fame.
This paper-bag machine was one of many sophisticated inventions by Margaret Knight. (Wikimedia Commons)
Chemist Stephanie Kwolek invented Kevlar while trying to perfect a lighter fiber for car tires and earned a patent in 1966.
Marion Donovan invented waterproof disposable diapers. Her first prototype was constructed from a shower curtain, and later modified with snaps that eliminated the need for safety pins.
Inventor Josephine Cochrane patented the dishwasher in 1886. Though she was affluent enough to never need to use it herself, it sure helped her servants. And the rest of us are glad to avoid wasted hours of scrubbing dishes.
A stamp from Romania honors Josephine Cochrane for her invention that changed the world. (Wikimedia Commons)
Martha Coston invented marine signal flares, taking an incomplete idea mentioned by her deceased husband and going through the lengthy process to develop it into a successful product.
Tabitha Babbitt noticed that lumber workers needed a better solution to work more efficiently so she invented the circular saw which would be used instead of the two-man pit saw. The first prototype was made in 1813.
Anna Connelly invented the first outdoor fire escape with an external staircase, patented in 1897. It has saved countless lives that might have otherwise been lost to residential fires in urban areas.
Support During WWII
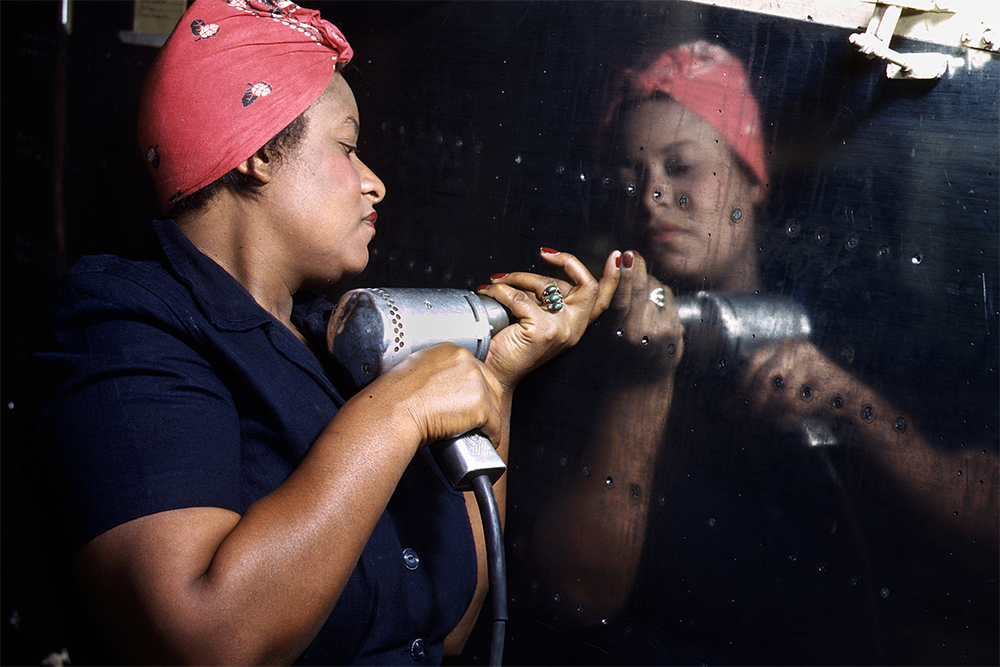
A technician helps prepare panels for an A-31 Vengeance bomber in Tennessee, 1943. (Alfred T. Palmer / Library of Congress)
During WWII, around 350,000 women served in the U.S. Armed Forces in some way. Between 1940 and 1945, the female workforce in the U.S. increased from 27 percent to nearly 37 percent.
Before WWII many of the working roles women held were primarily traditional jobs such as sewing, and women weren’t expected to work if they had families to raise. WWII changed not only the type of work women did but the amount that they did. They were working jobs they had never worked before and on a full-time basis.
A lathe operator at the Consolidated Aircraft Corporation plant in Texas, 1942. (Howard R. Hollem / Library of Congress)
According to History.com, “In May 1942, Congress instituted the Women’s Auxiliary Army Corps, later upgraded to the Women’s Army Corps, which had full military status. Its members, known as WACs, worked in more than 200 non-combatant jobs stateside. By 1945, there were more than 100,000 WACs and 6,000 female officers.”
Women played a huge role in the factories as well as office positions that were once occupied by men.
Women were also able to obtain their pilot’s license to fly American military aircraft. They transported cargo and participated in simulation strafing and target missions, which freed thousands of male pilots for active duty.
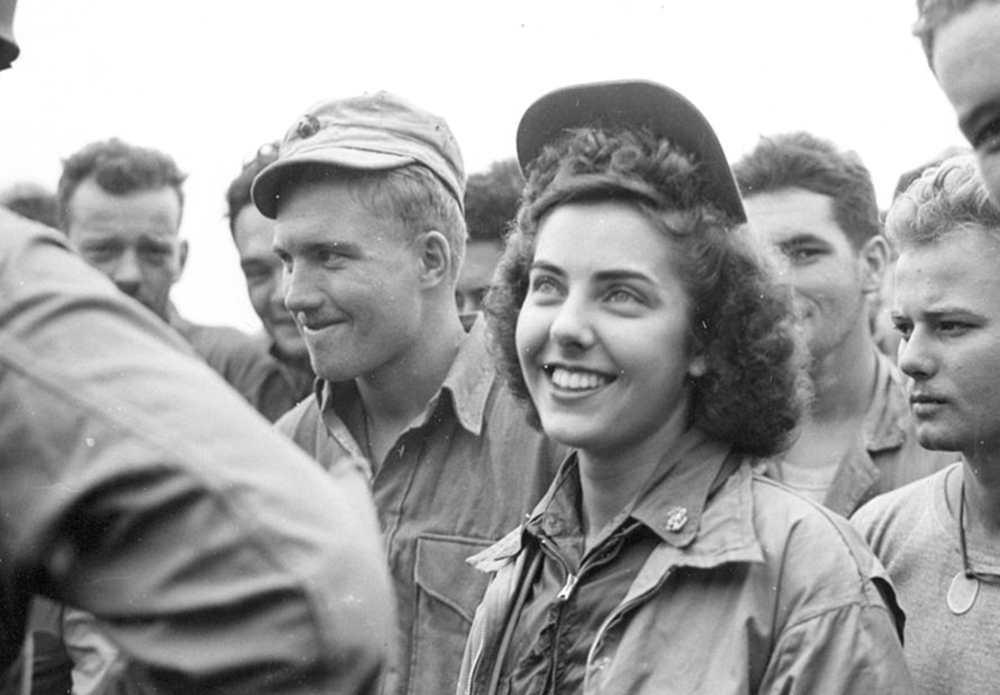
Above: Jane Kendeigh embarked on an evacuation mission to Iwo Jima in 1945, becoming the first U.S. Navy flight nurse to set foot on an active battlefield. The mission resulted in the successful evacuation of nearly 2,400 wounded Marines and sailors. (US Department of the Navy, Bureau of Medicine and Surgery)
Because women were working more while their families still needed to be taken care of, Eleanor Roosevelt urged her husband to enact the Community Facilities Act of 1942 which opened up the way for childcare for their workers.
Safety Program
The AMBER Alert system was implemented to stop child abductions. (Bob Bobster / Wikimedia Commons, CC BY 2.0)
In 1996, while riding her bike with her brother, Amber, a 9-year-old girl, was abducted in Texas. A neighbor witnessed the abduction and called authorities. Amber’s mother, Donna, called the media and FBI who later discovered Amber’s body.
This tragedy led Donna to become a vocal advocate for tougher laws governing kidnappers and sex offenders. Amber’s parents were also the driving force behind the establishment of People Against Sex Offenders (P.A.S.O.). This organization collected signatures in an effort to compel the Texas legislature to pass more stringent laws against this category of offenses.
Donna testified in front of the U.S. Congress in June 1996, asking legislators to create a nationwide registry of sex offenders.
For several years, alerts were manually distributed to participating radio stations. Then in 1998, the Child Alert Foundation created a fully automated Alert Notification System which notified surrounding communities when a child was reported missing or abducted.
The America’s Missing: Broadcast Emergency Response (AMBER) alert has been implemented many places worldwide:
Canada implemented the AMBER alert system in 2002.
Australia implemented a similar version in 2005.
Mexico joined in the AMBER alert system in 2011.
As of January 2019, the National Center for Missing and Exploited Children estimated that 941 children had been successfully recovered as a result of the existence of the AMBER Alert program.
Conclusion
As we evaluate all of these instances in which women have had an impact on prepping history, we can see a strong pattern: when something needs to get done, it gets done. Time and time again women have been instrumental in improving the way we work, care for our families, and live a fulfilled life.
Throughout our everyday routines, we should be prepared for whatever may come our way; whether that’s a harsh winter, a large-scale economic collapse, inventing out of necessity, supporting our country, or enacting laws which help our society as a whole.
Being prepared comes in many different forms, and we must always remember that it isn’t just about enduring an apocalypse — it’s about surviving and thriving every day.
About the Author
Morgan “Rogue” resides in Texas with her husband, daughter, and two dogs, with their second daughter on the way. Her family is always venturing into the wilderness and challenging themselves, as well as others, to love the outdoors. Through Rogue Preparedness, she works toward making the world a more prepared place, where people can feel confident in knowing that they possess the skills, knowledge, and items to get them through any emergency or disaster. She educates and entertains on her YouTube channel, website, and social media platforms, as well as in-person events held in Texas. You can find Morgan at roguepreparedness.com
A sharp knife is a safe knife — this saying may sound counterintuitive to some, but anyone who has ever struggled with a dull knife knows just how dangerous it can be. A razor-sharp blade glides effortlessly through materials with surgical precision, while a chipped and rolled edge tends to wander and snag with every slice. At best, this makes using your knife frustrating and tedious; at worst, it can lead to serious injury as you apply more force in an effort to persuade the tool to do its job. A pocket-sized knife sharpener easily makes an every day carry knife more safe.
Choosing a knife with appropriate edge geometry, durable steel, and properly applied heat treat will go a long way in keeping its edge sharp. It’s also advisable to avoid abusing your knife by cutting against abrasive surfaces, pounding it through hard materials, or using it as a prybar. However, even if you follow every one of these best practices, all knives are bound to require maintenance eventually. This is where sharpeners come in.
You may already have a sharpening system in your kitchen, workshop, or garage, but these tools are generally far too large and elaborate to take into the field. For the times when you may not have access to your home sharpening system — whether that’s during a normal workday or a long-term survival situation — it’s wise to have a portable knife sharpener in your pocket or backpack. These compact tools can keep your knife cutting smoothly and safely, no matter where you are.
We collected seven pocket-sized knife sharpeners and evaluated each tool’s effectiveness on a variety of blades. Read on to see if one of them can help your favorite cutting implements stay sharp.
Notes As indicated by its name, the Knife Maintenance Tool is more than just a knife sharpener. It was designed by mechanical engineer Tom Stokes for CRKT, and features two draw-through notches for edge repair and maintenance: a tungsten carbide sharpener and a ceramic honing surface. CRKT doesn’t advertise the angle of these notches, but they appear to be about 20 degrees. It also includes two flip-out bit drivers with T6 and T8 Torx bits — these are handy for adjusting a knife’s pivot or tightening clip screws. The bits are removable and retained magnetically. The top of the tool has a bottle opener, flat screwdriver/pry bar, and key ring or lanyard hole.
Pros:
Perfectly sized for a keychain accessory
The bit drivers are very handy, but …
Cons:
… the included hex bits are 0.9-inch long; standard bits are 1 inch. Replacement bits fit extremely tight unless filed down.
Draw-through carbide sharpeners don’t produce the cleanest edge and can be destructive if used excessively.
Notes New from DMT, the EDC-Sharp is a multipurpose pocket tool with an integrated diamond sharpening surface. It’s constructed from 1/8-inch-thick 5CR steel and features a 5-inch ruler on one side, a metric ruler on the other side, a wire stripper/cutter, bottle opener, two flat screwdrivers, and a small file edge. A cutaway in the center serves as a 7mm, 8mm, and 10mm wrench. A lanyard hole is also present, although this tool’s size would be excessive for a keychain item. The sharpening plate is 1 by 2.7 inches and has a fine texture suitable for touching up slightly dull blades. This diamond sharpener is made in the USA; the rest of the tool is made in China.
Pros:
Recessed holes in the knife sharpener keep its surface clear and maintain abrasive performance
All-metal construction feels solid
Cons:
We like the multi-tool concept, but wish there was slightly more focus on the primary function. Adding features doesn’t always add value.
Notes One of the most popular portable knife sharpeners on the market, the Blademedic fits easily on a keychain and includes four sharpening features in a metal case. The carbide and ceramic draw-through notches are set to 22.5 degrees on each side; instructions recommend three or four strokes through each to restore an edge. An additional ceramic section fits into serrations. Lastly, the tapered diamond rod can be used on serrations or for general sharpening. We’d favor this rod over the carbide notch as a starting point for sharpening, since it’s much gentler. It’s held in the open or closed position by strong magnets inside.
Pros:
Good variety of tools in a small package
Magnets ensure the diamond rod stays put while you work and doesn’t rattle loose in transit
Cons:
Surprisingly heavy for its size
Be careful how often you use the carbide knife sharpener, since it aggressively removes steel.
Notes Contained in a diminutive pen-shaped case, the Diamond Sharpener S can be carried almost anywhere. It features a small diamond rod with one flat side and a groove for fish hook sharpening. After close examination, we spotted something strange. The packaging says “Made in Mora Sweden,” but the pocket clip says “EZE-LAP Carson City, Nevada.” After some Googling, we found that this knife sharpener appears to be identical to an EZE-LAP Model S sharpener except for a Morakniv logo. Private-labeling is nothing new, but the EZE-LAP tool retails for $7. You could buy three of them for the price of one Mora-branded sharpener, and still have money left over.
Pros:
Extremely small and lightweight, fits anywhere a pen would
Grooved shaft can be used to sharpen fish hooks
Cons:
Mora products usually offer excellent value, but not this time. You’d be better off buying an EZE-LAP Model S … or three.
Spyderco Golden Stone
Sharpening Material Fine ceramic (approx. 1,200 grit)
Notes To use the Golden Stone, grab the narrow end with one hand and hold it upright. Then place the scalloped end of the stone against a flat surface and tilt it to the left or right. With your other hand, hold your knife blade vertical and draw it straight down along the edge of the stone. This creates an even 20-degree sharpening angle on either side. There’s also a groove for sharpening fish hooks, as well as radiused and flat surfaces that can sharpen virtually any other blade. The included suede leather case doubles as a non-slip tabletop pad. We noticed that Spyderco’s site lists this product (#308F) as a 1×5-inch stone, but it’s substantially larger than that.
Pros:
Easy to use while maintaining a consistent angle
Leather case doubles as a strop to remove burrs
Made in the USA
Cons:
Must be used on a bench or other flat surface
Ever dropped a plate and watched it explode into fragments? Dropping this slick ceramic stone would be equally disastrous.
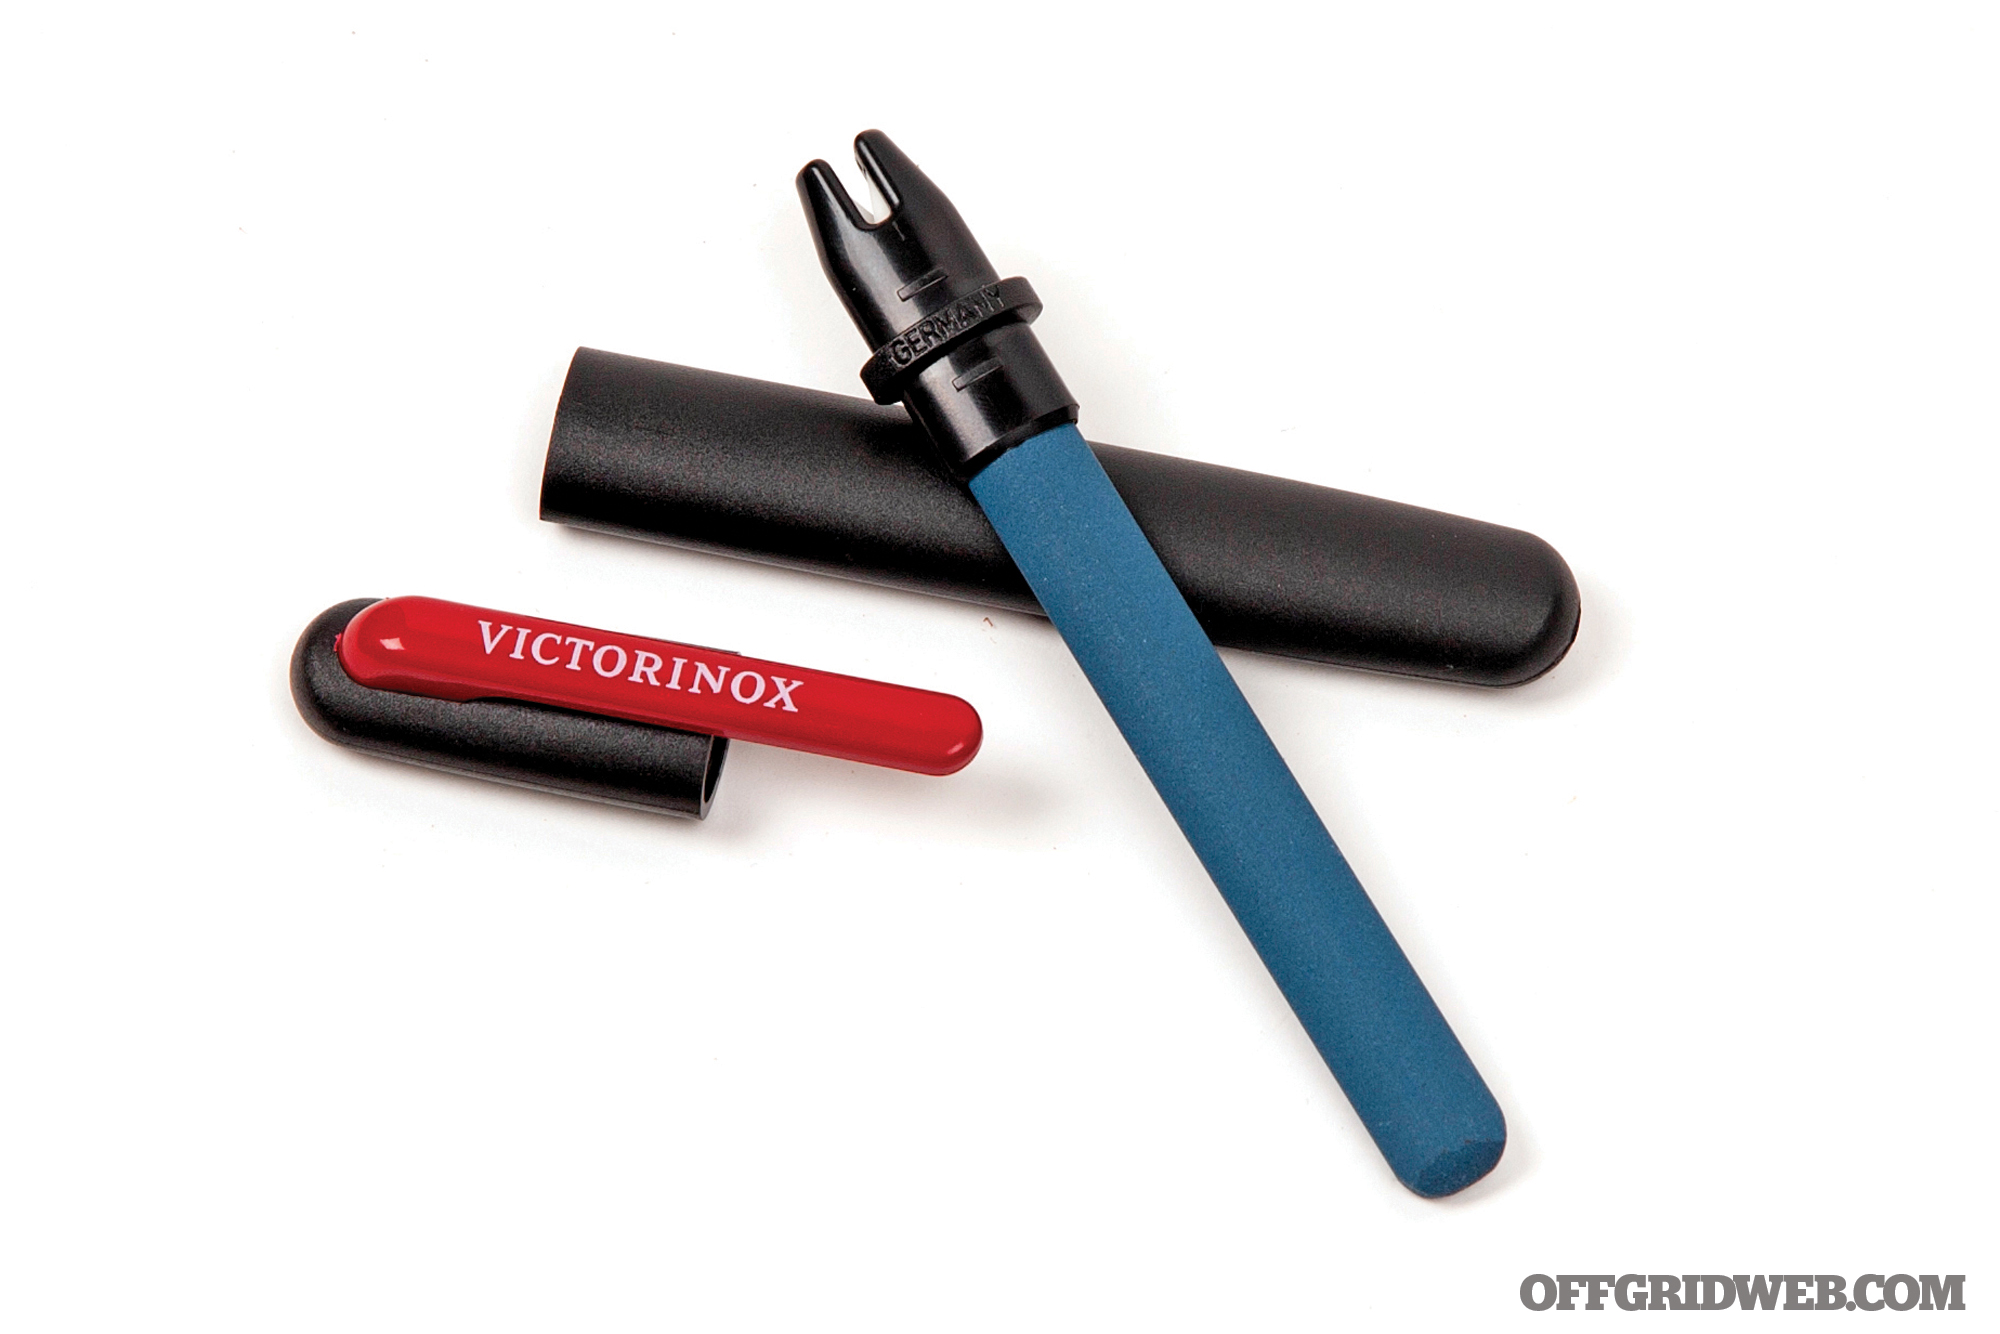
Notes Victorinox is known around the world for its multi-function Swiss Army knives, but the European company has a wide range of other products to offer, including a few different knife sharpeners. As you probably guessed from its name, the Dual-Knife Sharpener has two functions. An oval 3.2-inch stone serves to grind away larger edge imperfections; its narrower sides can be used on serrations, and its grooves can sharpen fish hooks. Opposite the stone, there’s a V-shaped ceramic notch for refining a blade’s edge. These items are packaged in a tough black polymer case with the Victorinox logo emblazoned on a bright red pocket clip. Made in Germany.
Pros:
Oval stone makes it easy to sharpen a variety of blade and serration types
Simple and durable case fits easily into a pocket
Cons:
Using the ceramic hone necessitates working with the blade pointed down at the support hand. Most other tools avoid this by turning the notch 90 degrees.
Work Sharp Guided Field Sharpener
Sharpening Material 220-grit diamond surface, 600-grit diamond surface, coarse and fine ceramic rods, leather strop
Notes This compact tool from Work Sharp offers an impressive array of five stages. First, the coarse and fine diamond surfaces are used to remove large imperfections and restore the edge. Next, turn the red knob to “C” or “F” to reveal coarse and fine ceramic honing surfaces. Each of these stages includes a 20-degree angle guide. Lastly, run the edge against the leather strop on the side to polish away burrs with the embedded micro-abrasive compound. There’s also a ceramic rod for small serrations, a fish hook sharpening groove, and — after removing the diamond plates from their magnetic retainers — an arrow broadhead wrench and a small storage compartment for hex wrenches or other items.
Pros:
Five-stage system can quickly revitalize even the dullest blades
20-degree guides help maintain edge geometry
Cons:
Coarse plate is highly abrasive and should be used sparingly
Thumb grip could be more comfortable
Web Exclusive: More Sharpeners
For our thoughts on three more knife sharpeners that didn’t make it into this guide, refer to our web-exclusive article, Review: 3 EDC Knife Sharpeners.
This article originally appeared in Issue 3 of our magazine.
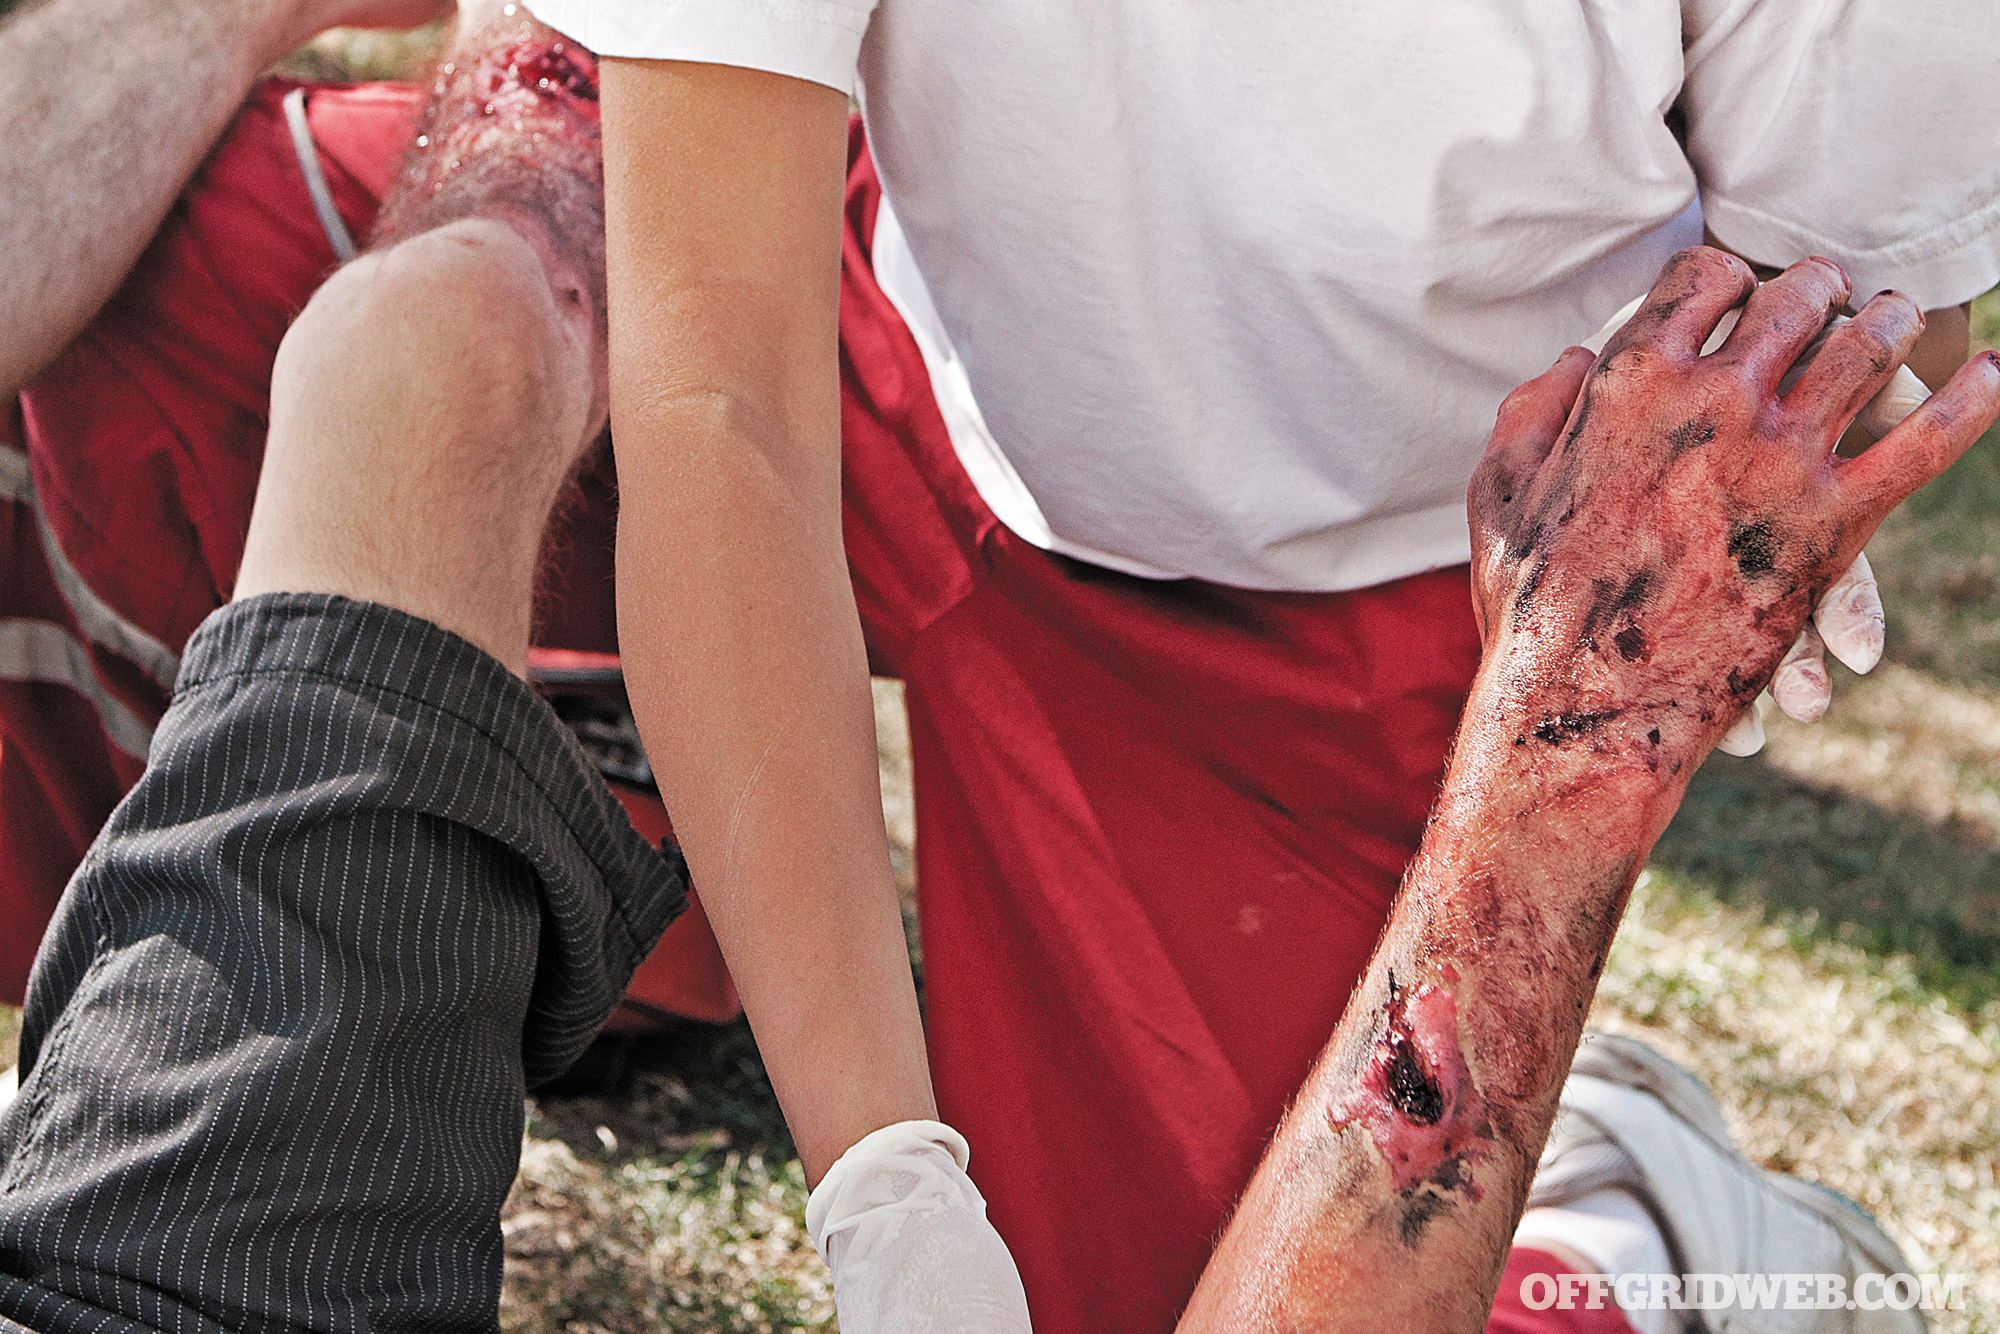
WARNING: This article is meant to be a quick overview and not a detailed guide on procedures relating to the treatment of burns. To be prepared for any emergency, we encourage you to enroll in a certified medical course or, at a minimum, a familiarization course, which will deliver comprehensive knowledge of how to treat different types of burns.
When early mankind discovered fire and its many wonderful uses, mankind surely also quickly became aware of one of its painful consequences — burns. Though we have evolved since then, some more than others, modern man continues to deal with burn injuries and treatments. Most burns are caused by thermal heat, which we will discuss further, but some are due to a chemical or an electrical source.
First Action
The first action to take is to move the burnt area away from the heat source, and measures must be taken to stop any residual flames. Remember your schoolyard teachings…no, not “don’t eat glue,” but rather “stop, drop, and roll.” Second, assess the damage in terms of location, extent, and degree of the burn.
TBSA and the Rule of Nines
You can determine the extent of the damage in terms of Total Body Surface Area (TBSA) by using the “palmar method” and the “rule of nines.” The area of a victim’s palm is considered to be equivalent to 1 percent of TBSA. The “rule of nines” estimates the surface area of each main body part in multiples of nine (see diagram).
Since burns are never uniform, a quick estimate can be made by combining the two rules. Using the palmar method, if a victim has a burn the size of three of their palms on their leg, you can estimate that they have a burn on 3 percent of their body. If one entire arm has burns on it, a quick assessment using the rule of nines would conclude that the victim has 9 percent of their body burnt. If one leg was completely burnt, that would represent 18 percent.
Classifications
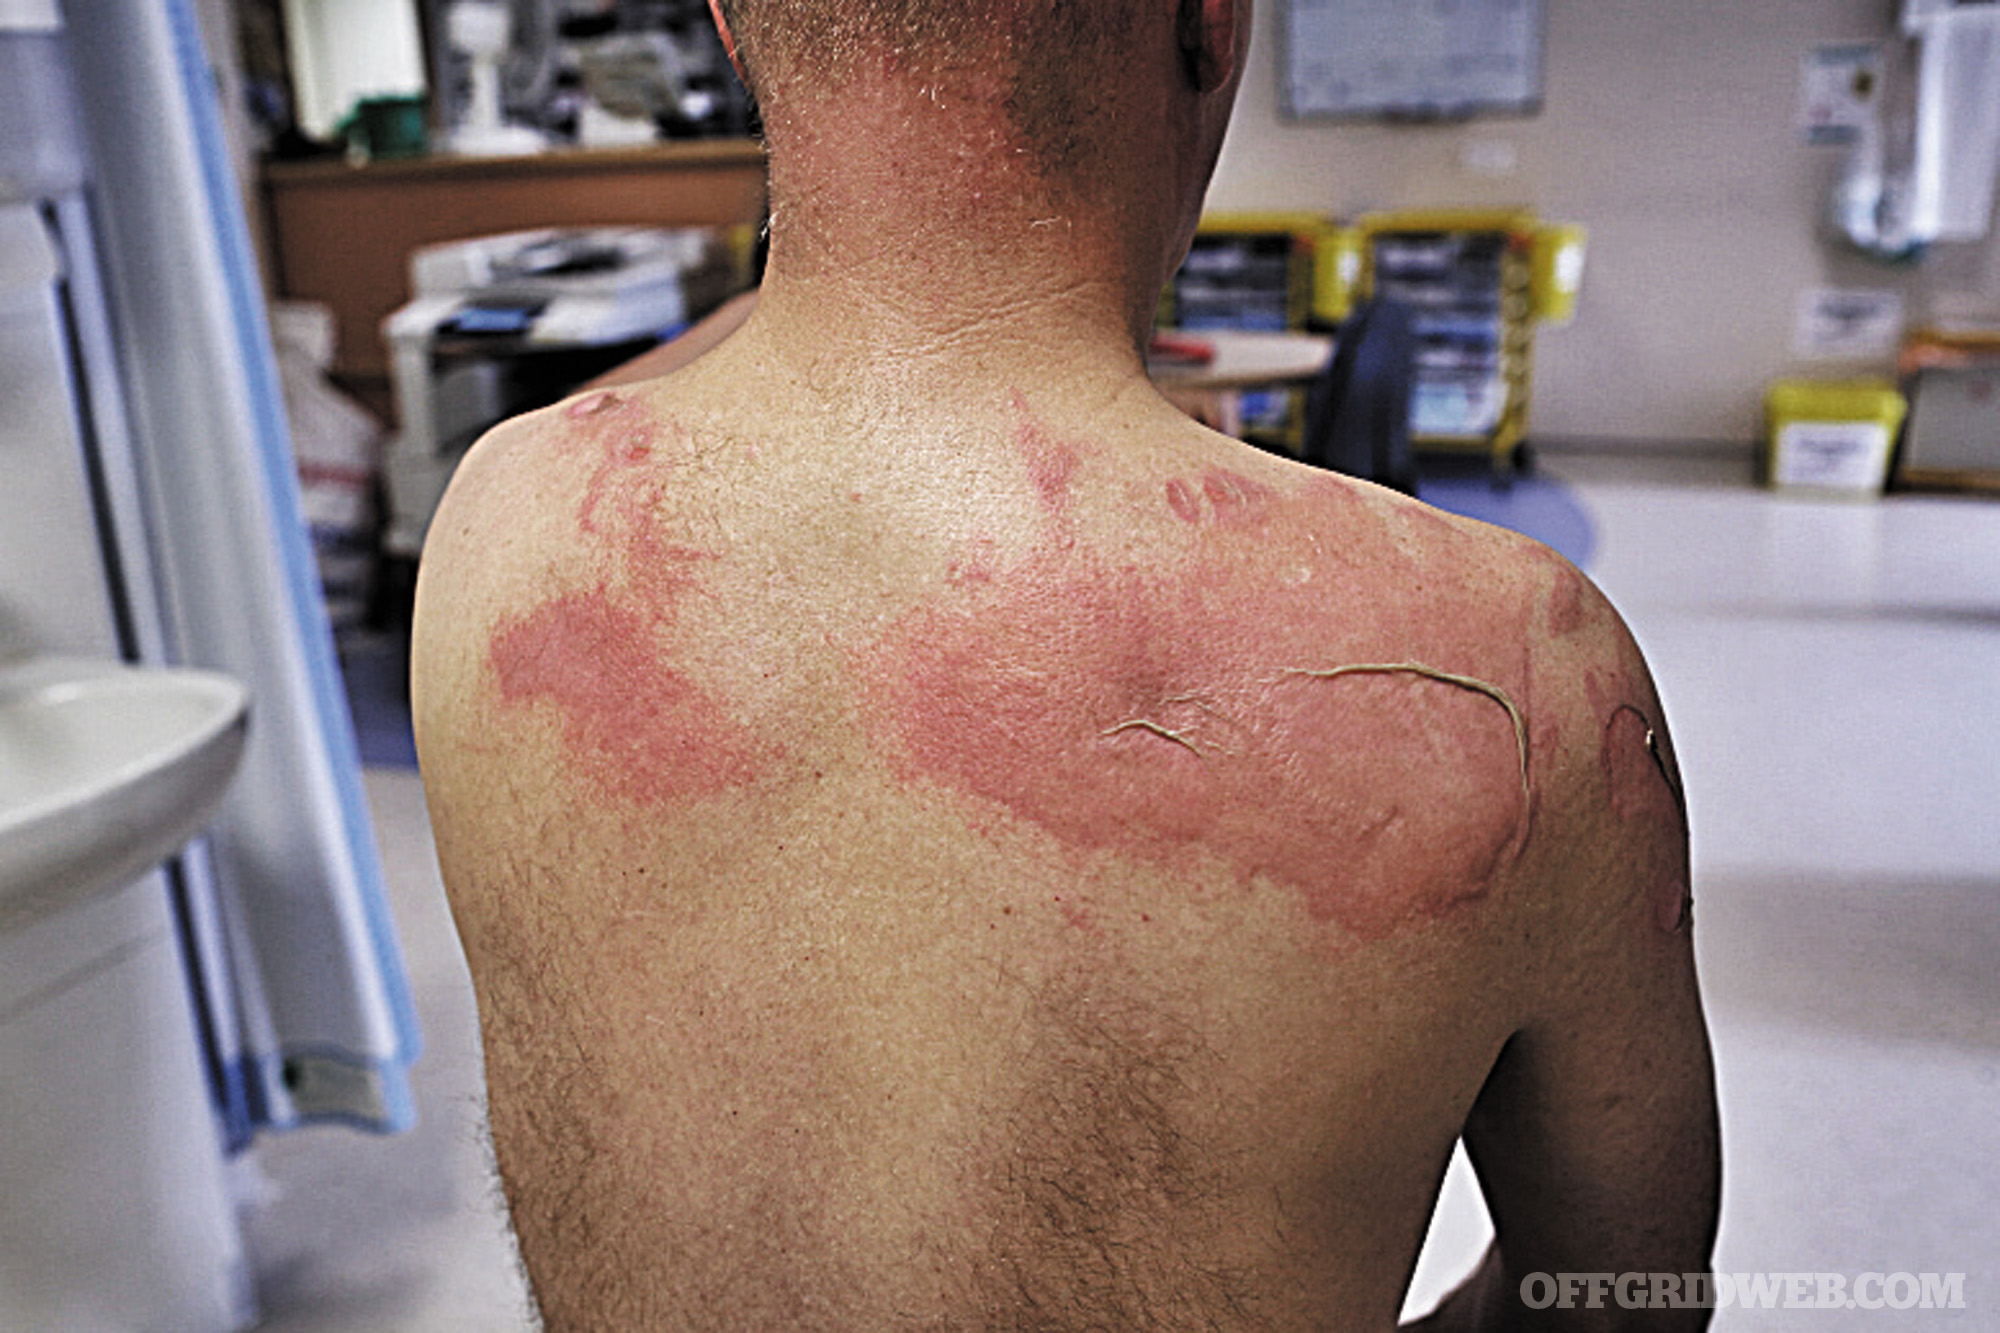
Burn classifications — first-, second-, or third-degree — can be used to assess the severity of the injury. The majority of burns are first degree, which affect the outer layer of skin, causing redness, light pain, and some swelling. Symptoms are similar for second-degree burns, which also have additional blister formations at the burn site. Serious second- and third-degree burns are discussed later in this article.
First Degree (Superficial)
Layers Affected: Epidermis
Appearance: Redness
Texture: Dry
Healing Time: 2-10 days
Complications: Increase of skin cancer, typically no scarring
Second Degree (Superficial Partial Thickness)
Layers Affected: Extends into superficial dermis
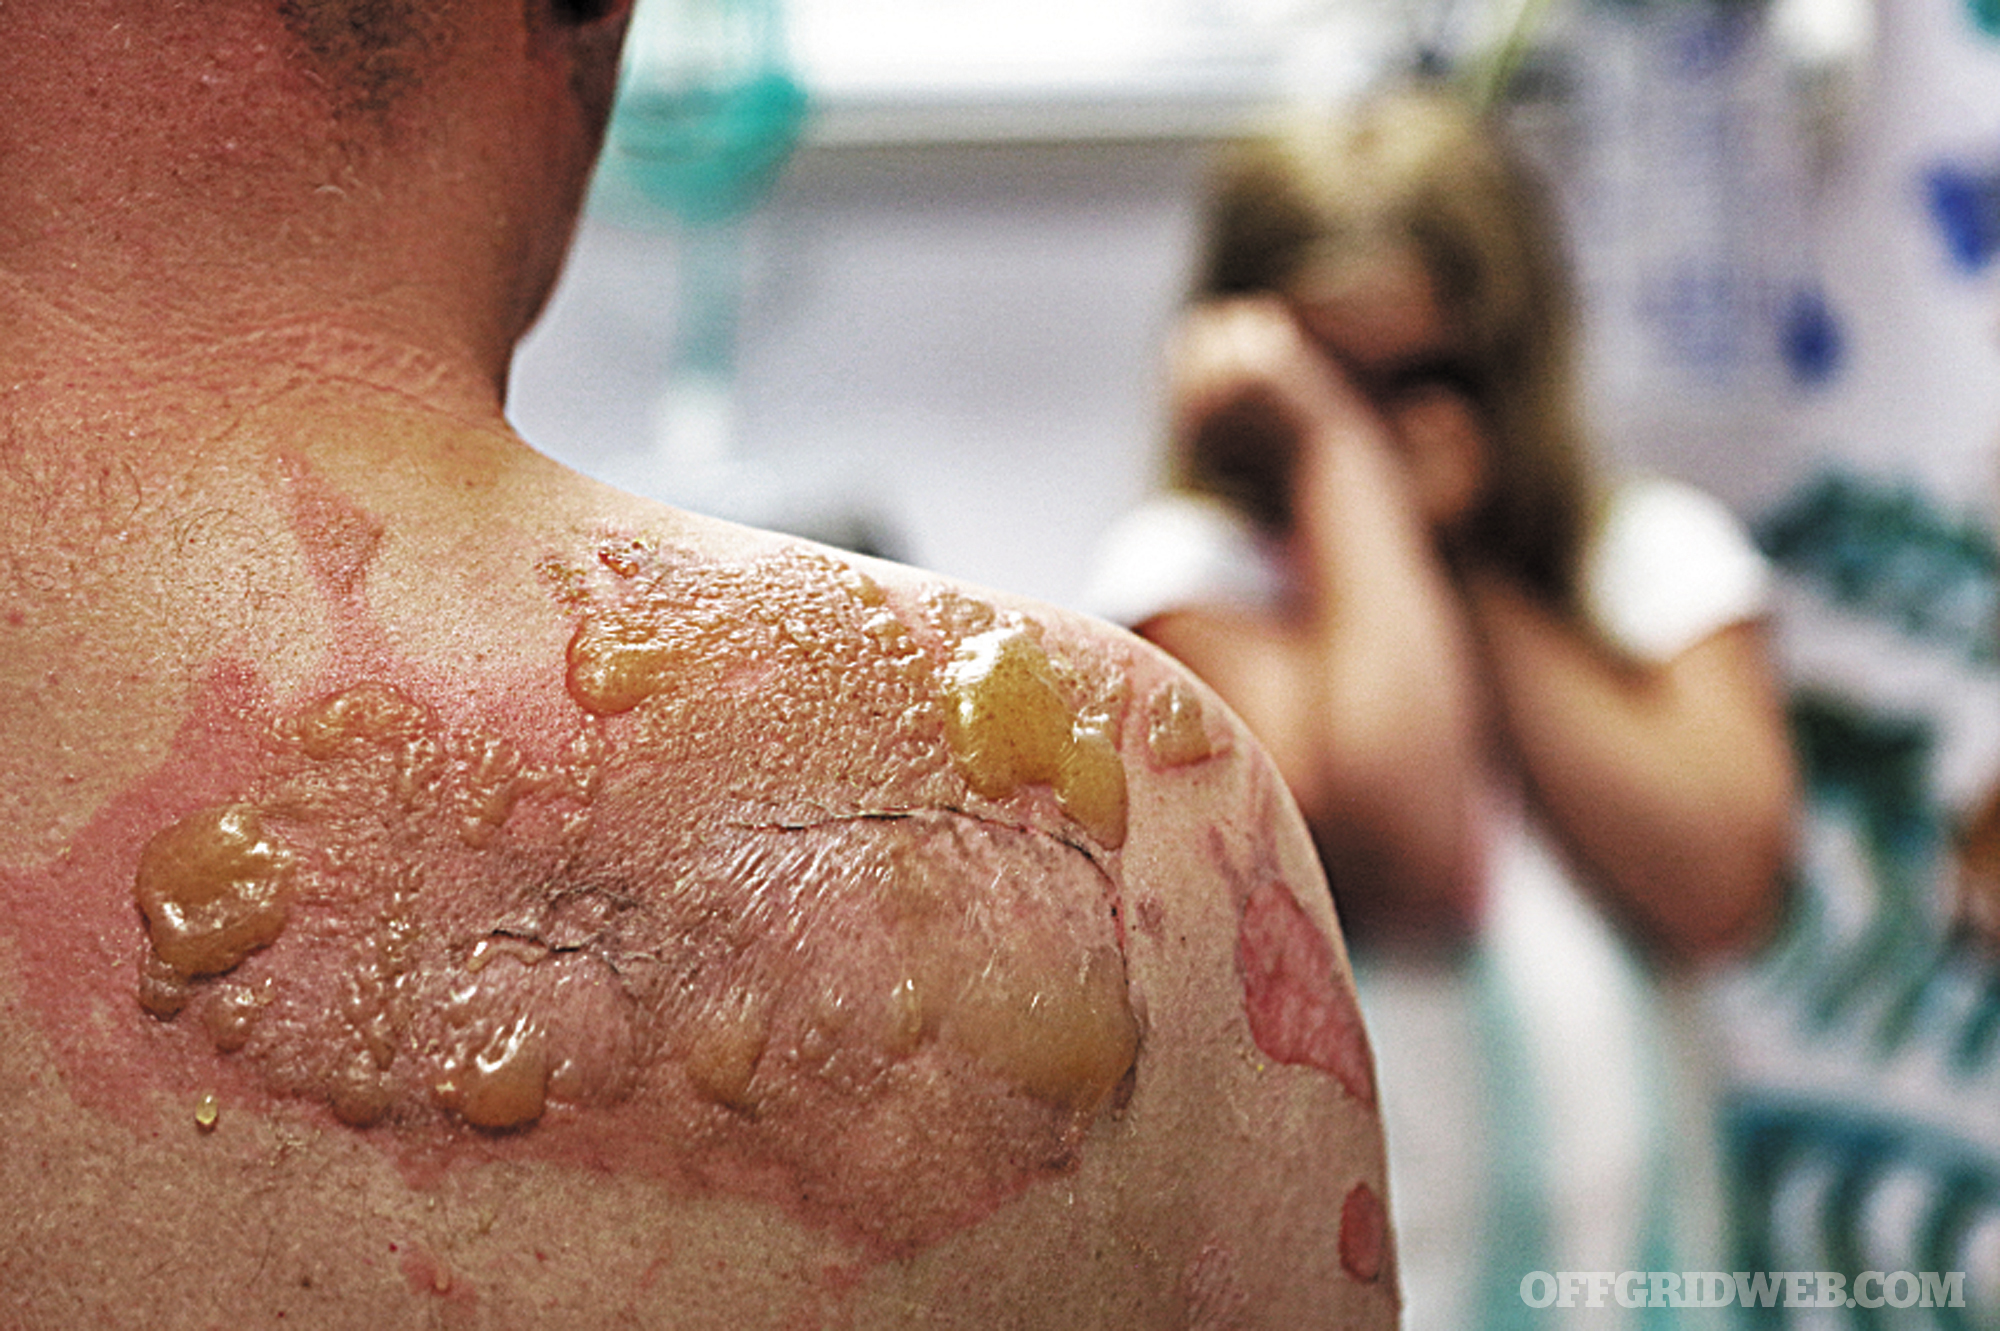
Appearance: Redness with clear blister
Texture: Moist
Healing Time: Less than 2-3 weeks
Complications: Local infection, typically no scarring
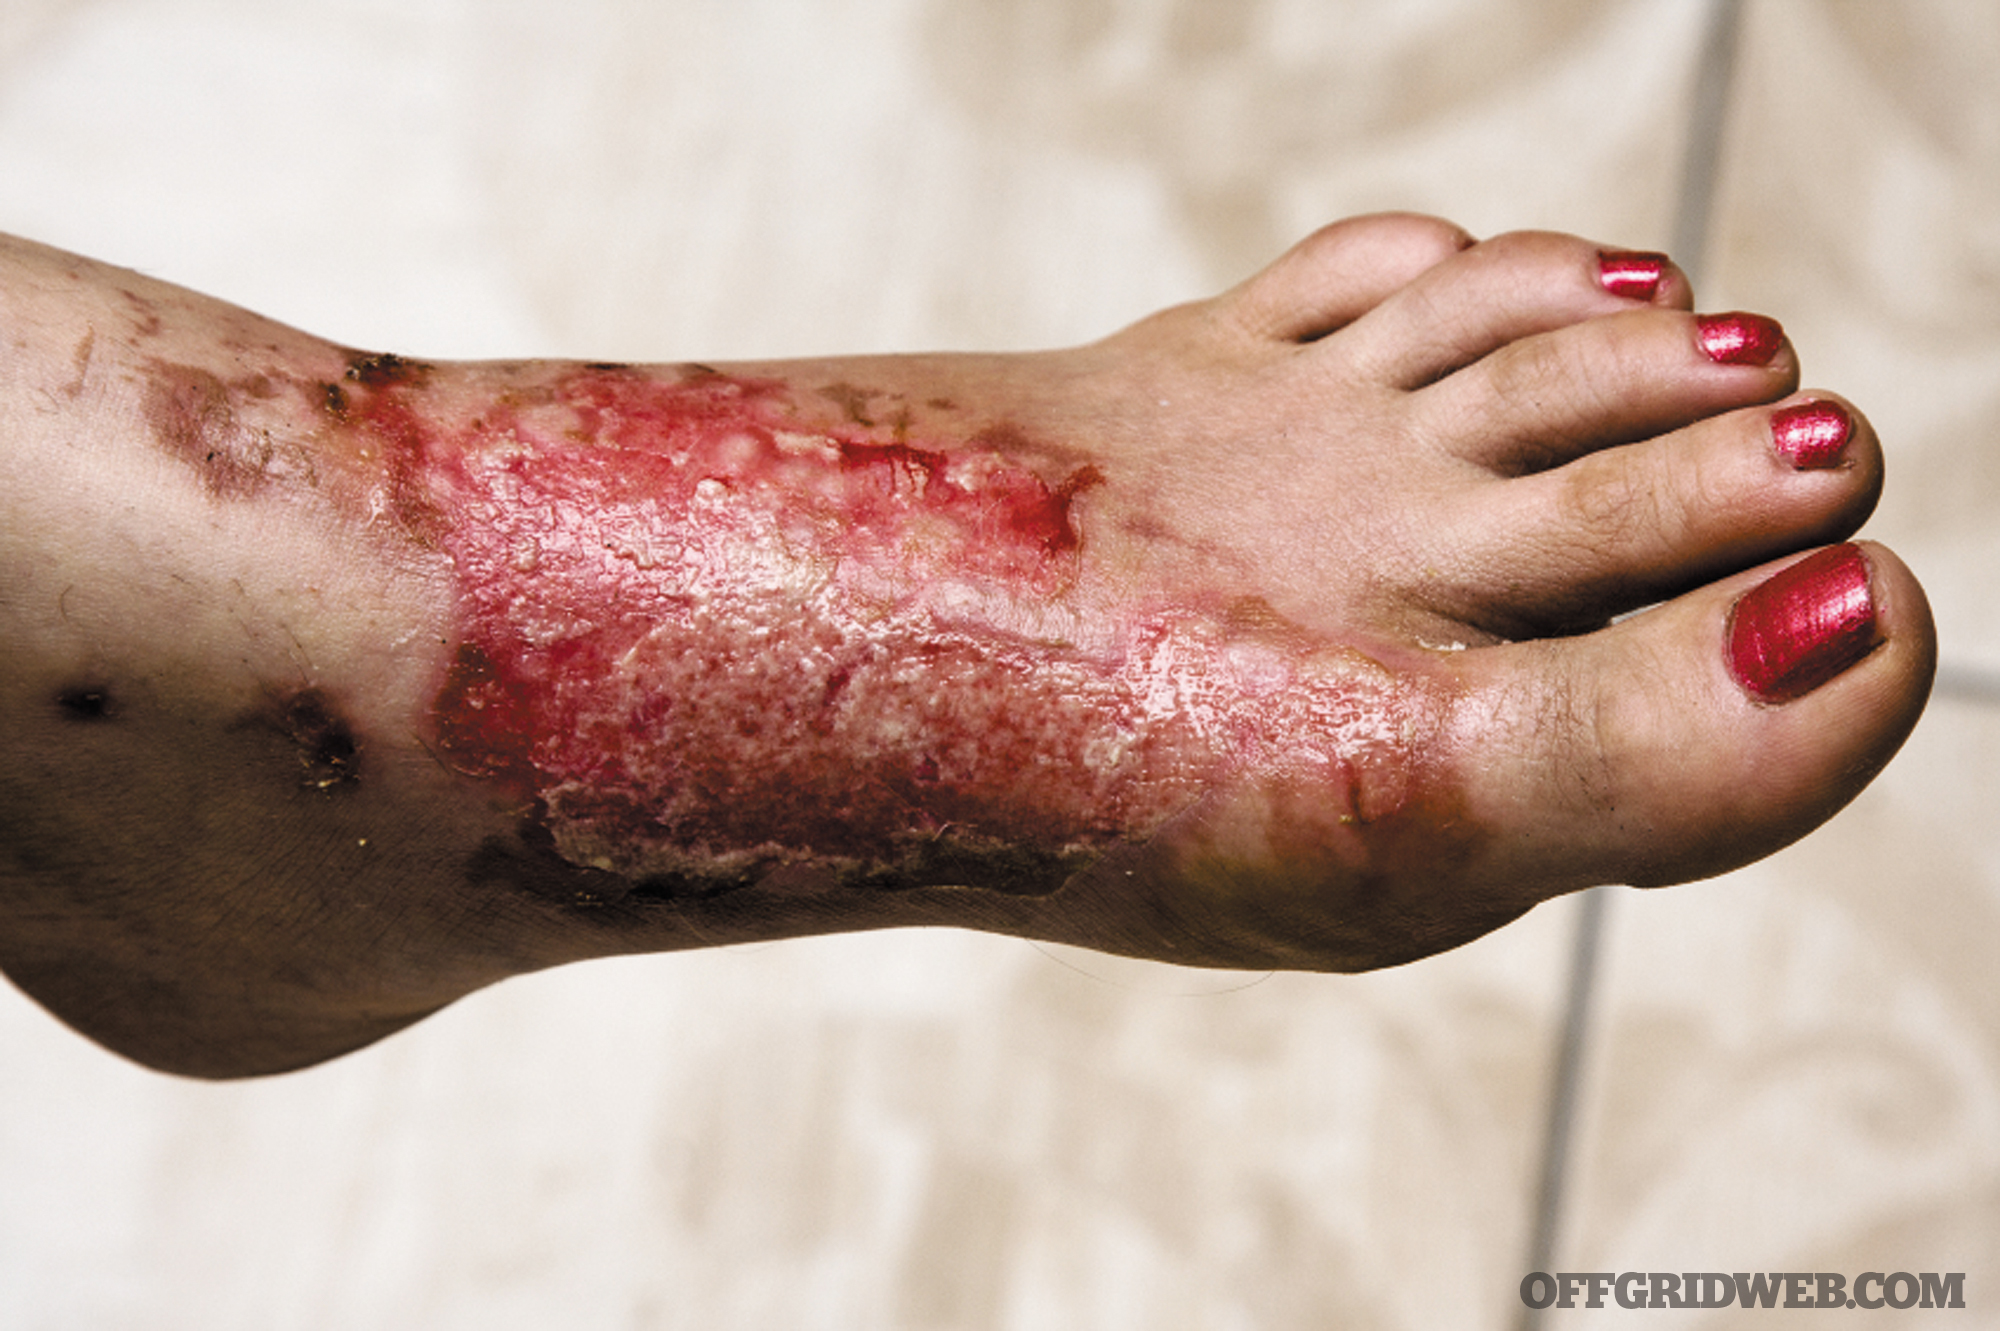
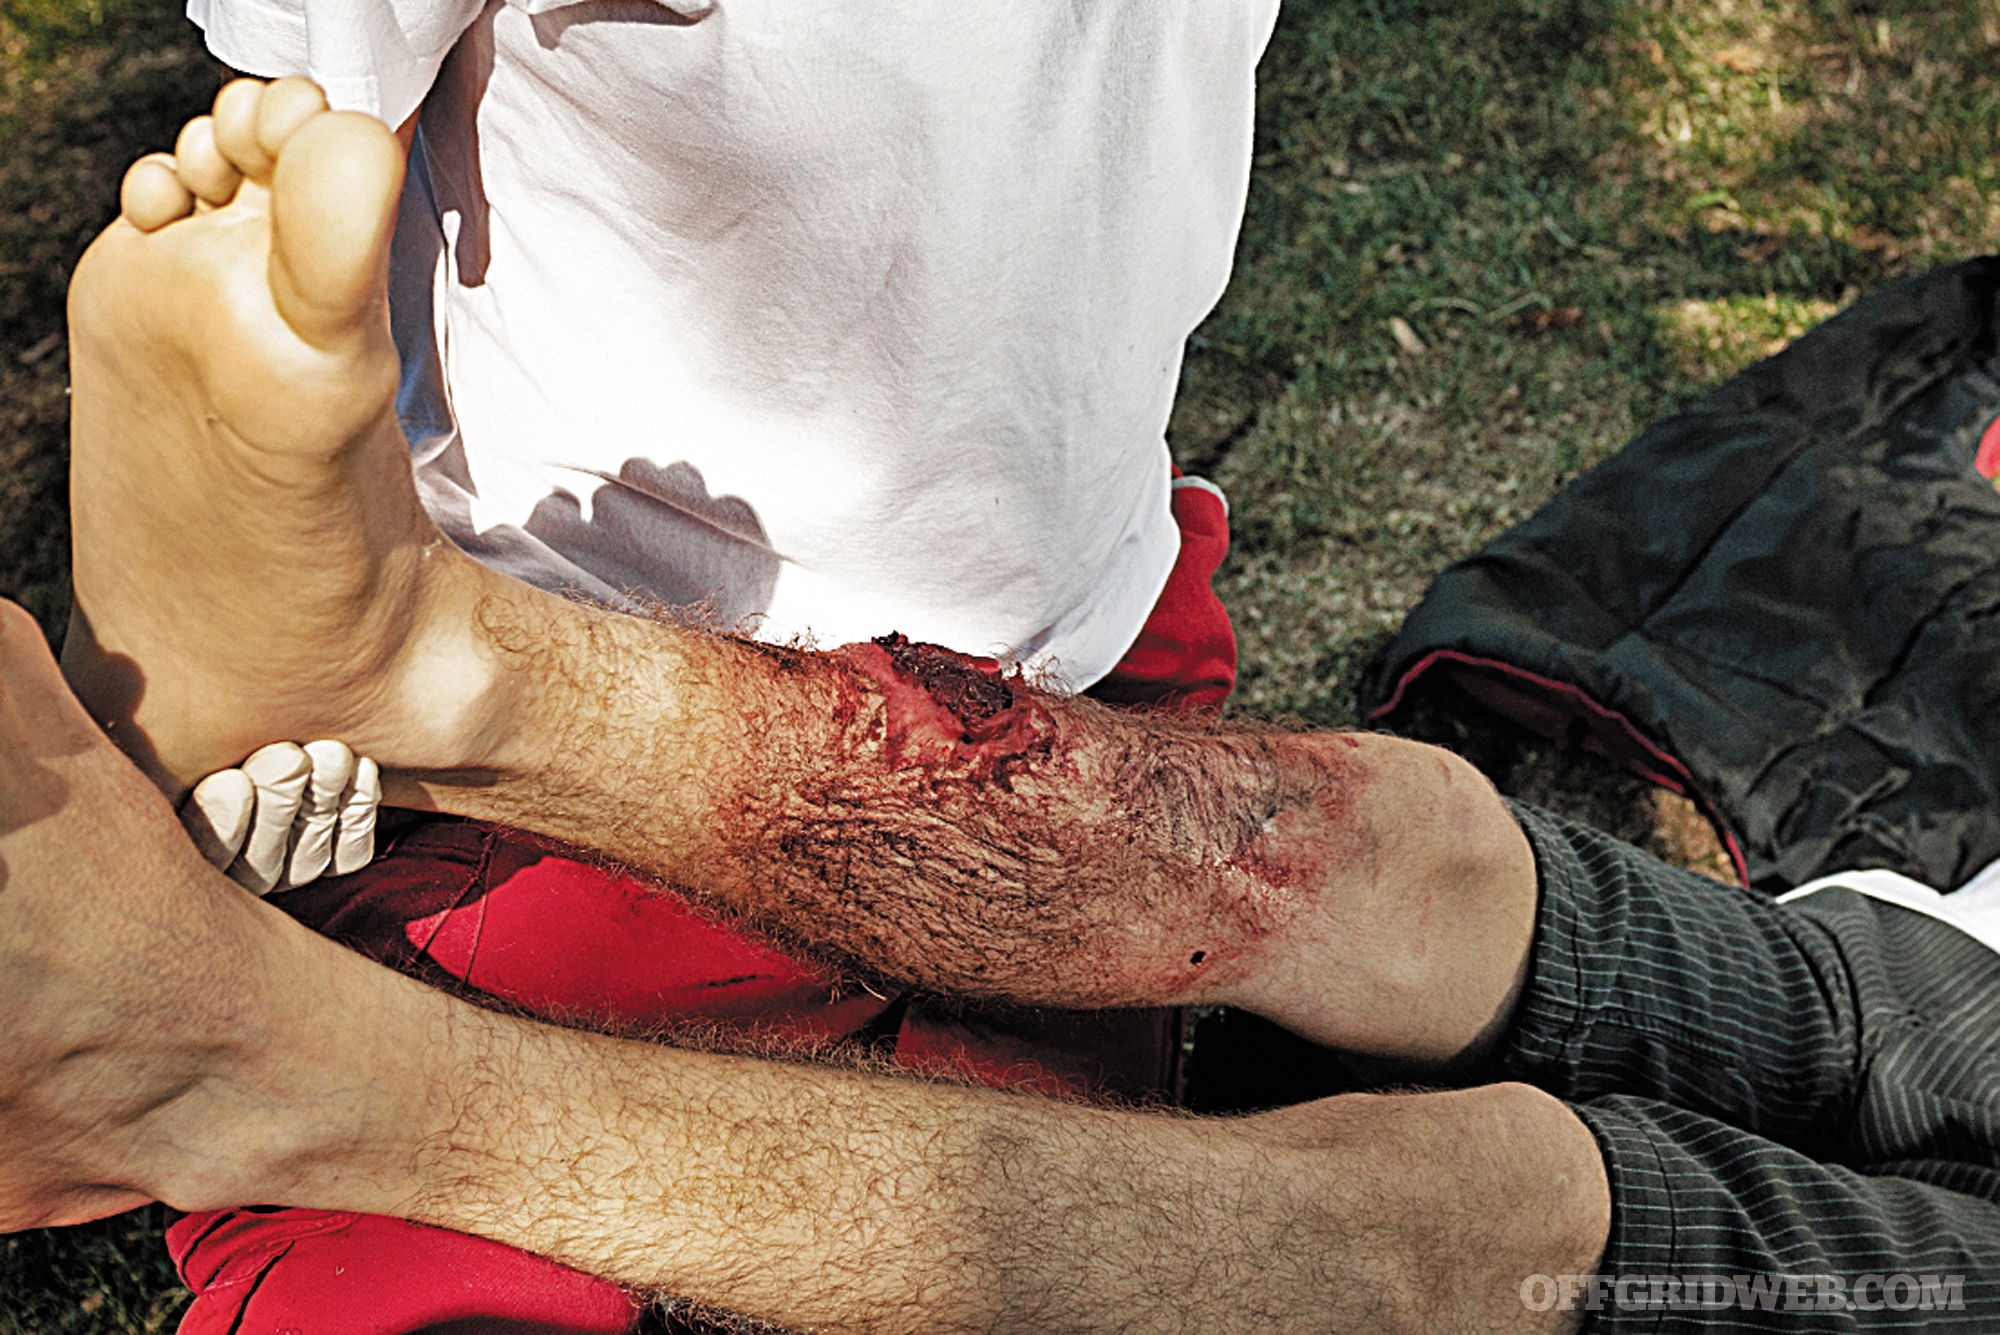
Second Degree (Deep Partial Thickness)
Layers Affected: Extends into deep dermis
Appearance: Red with white and bloody blisters
Texture: Mostly dry
Healing Time: 3-8 weeks depending on severity
Complications: Scarring, contractures (hardening of tissue), possible skin grafting
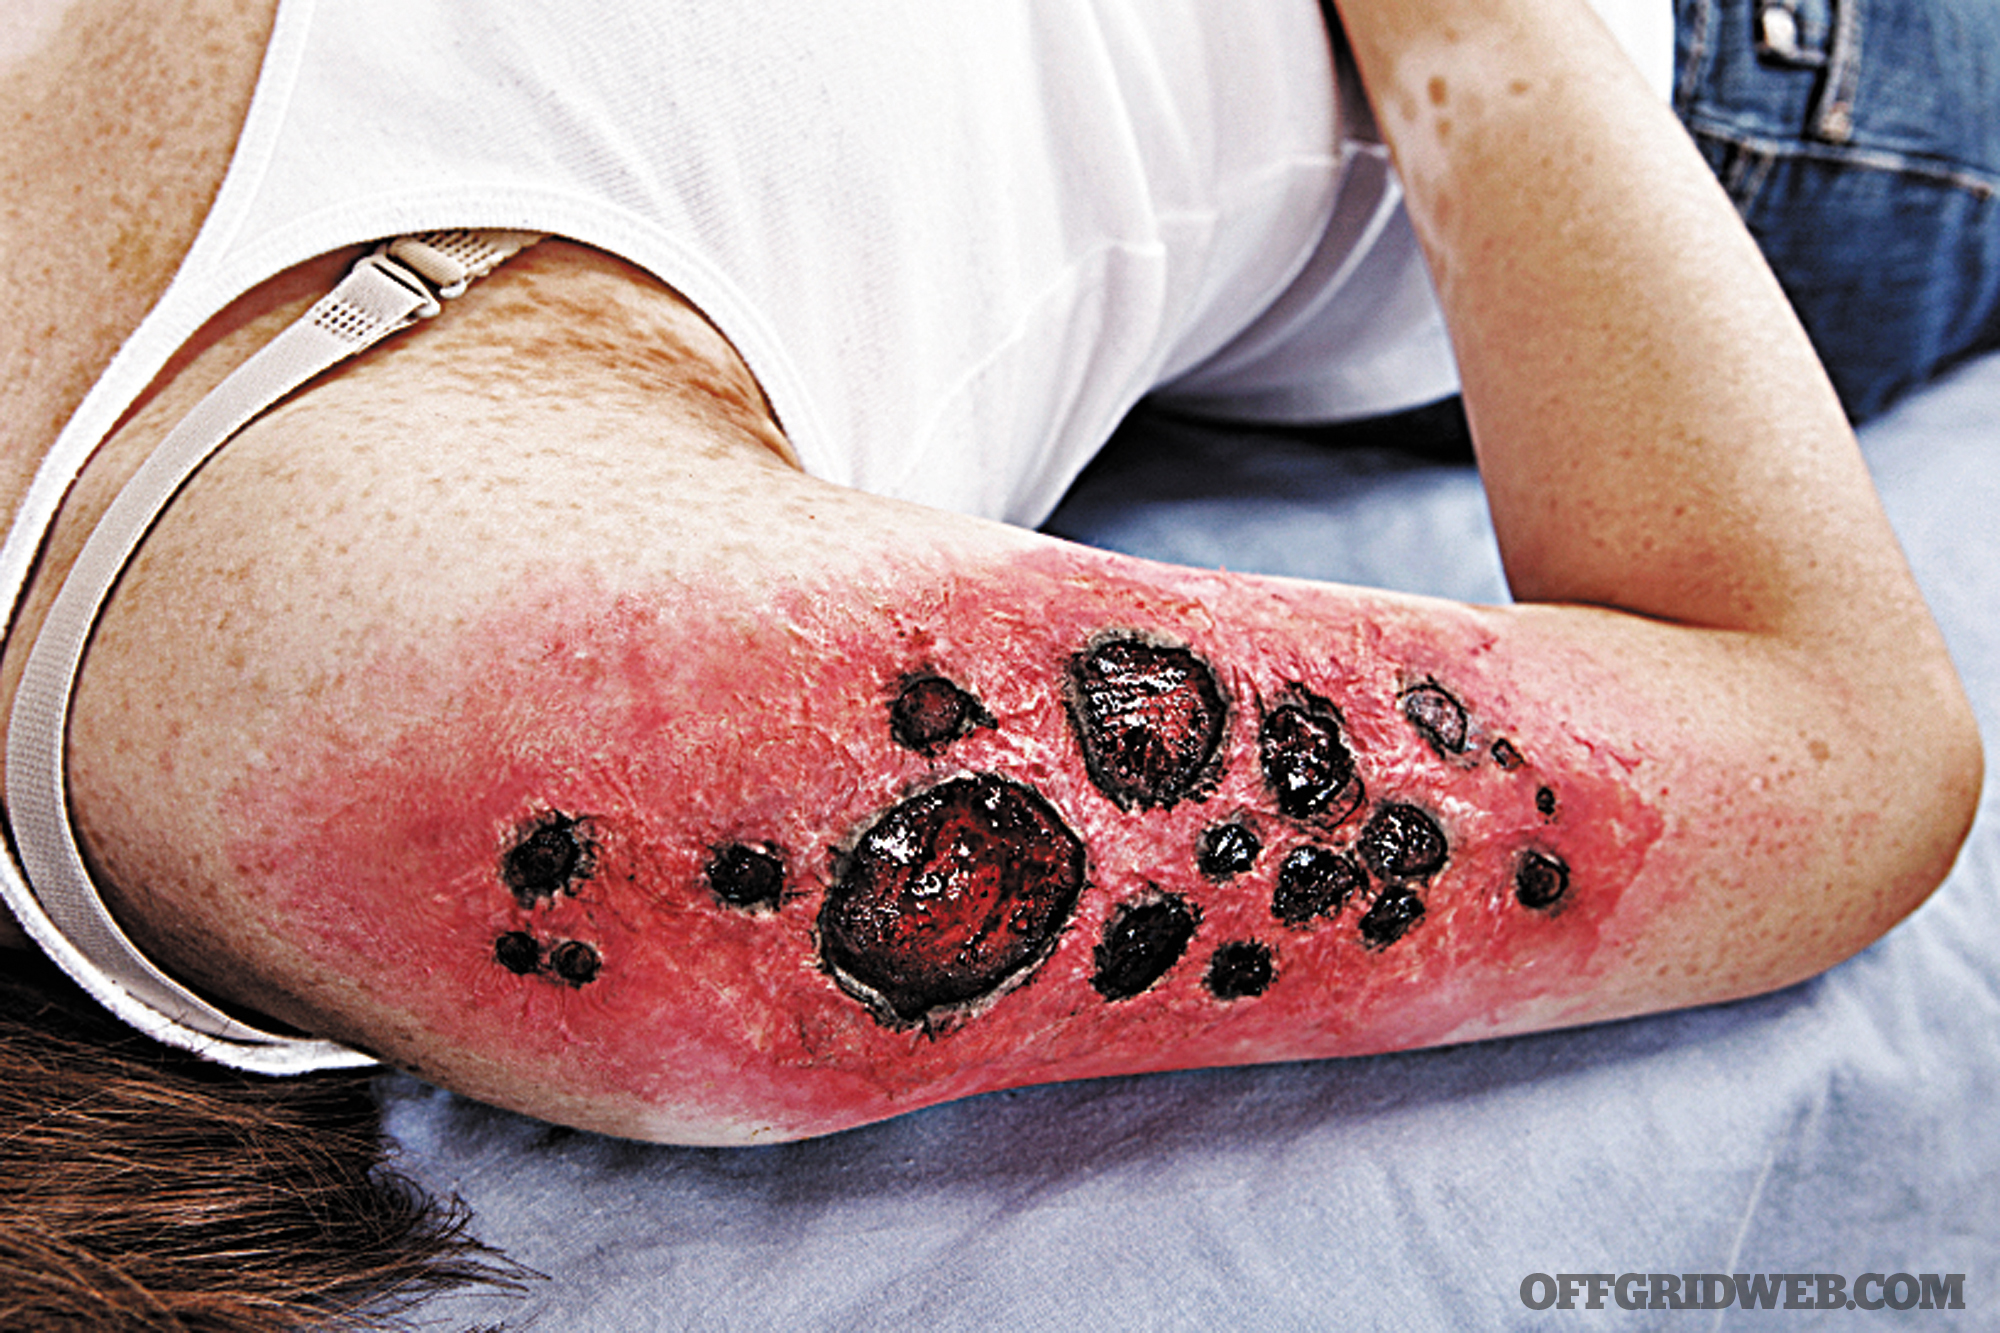
Third Degree (Full Thickness)
Layers Affected: Extends through entire dermis
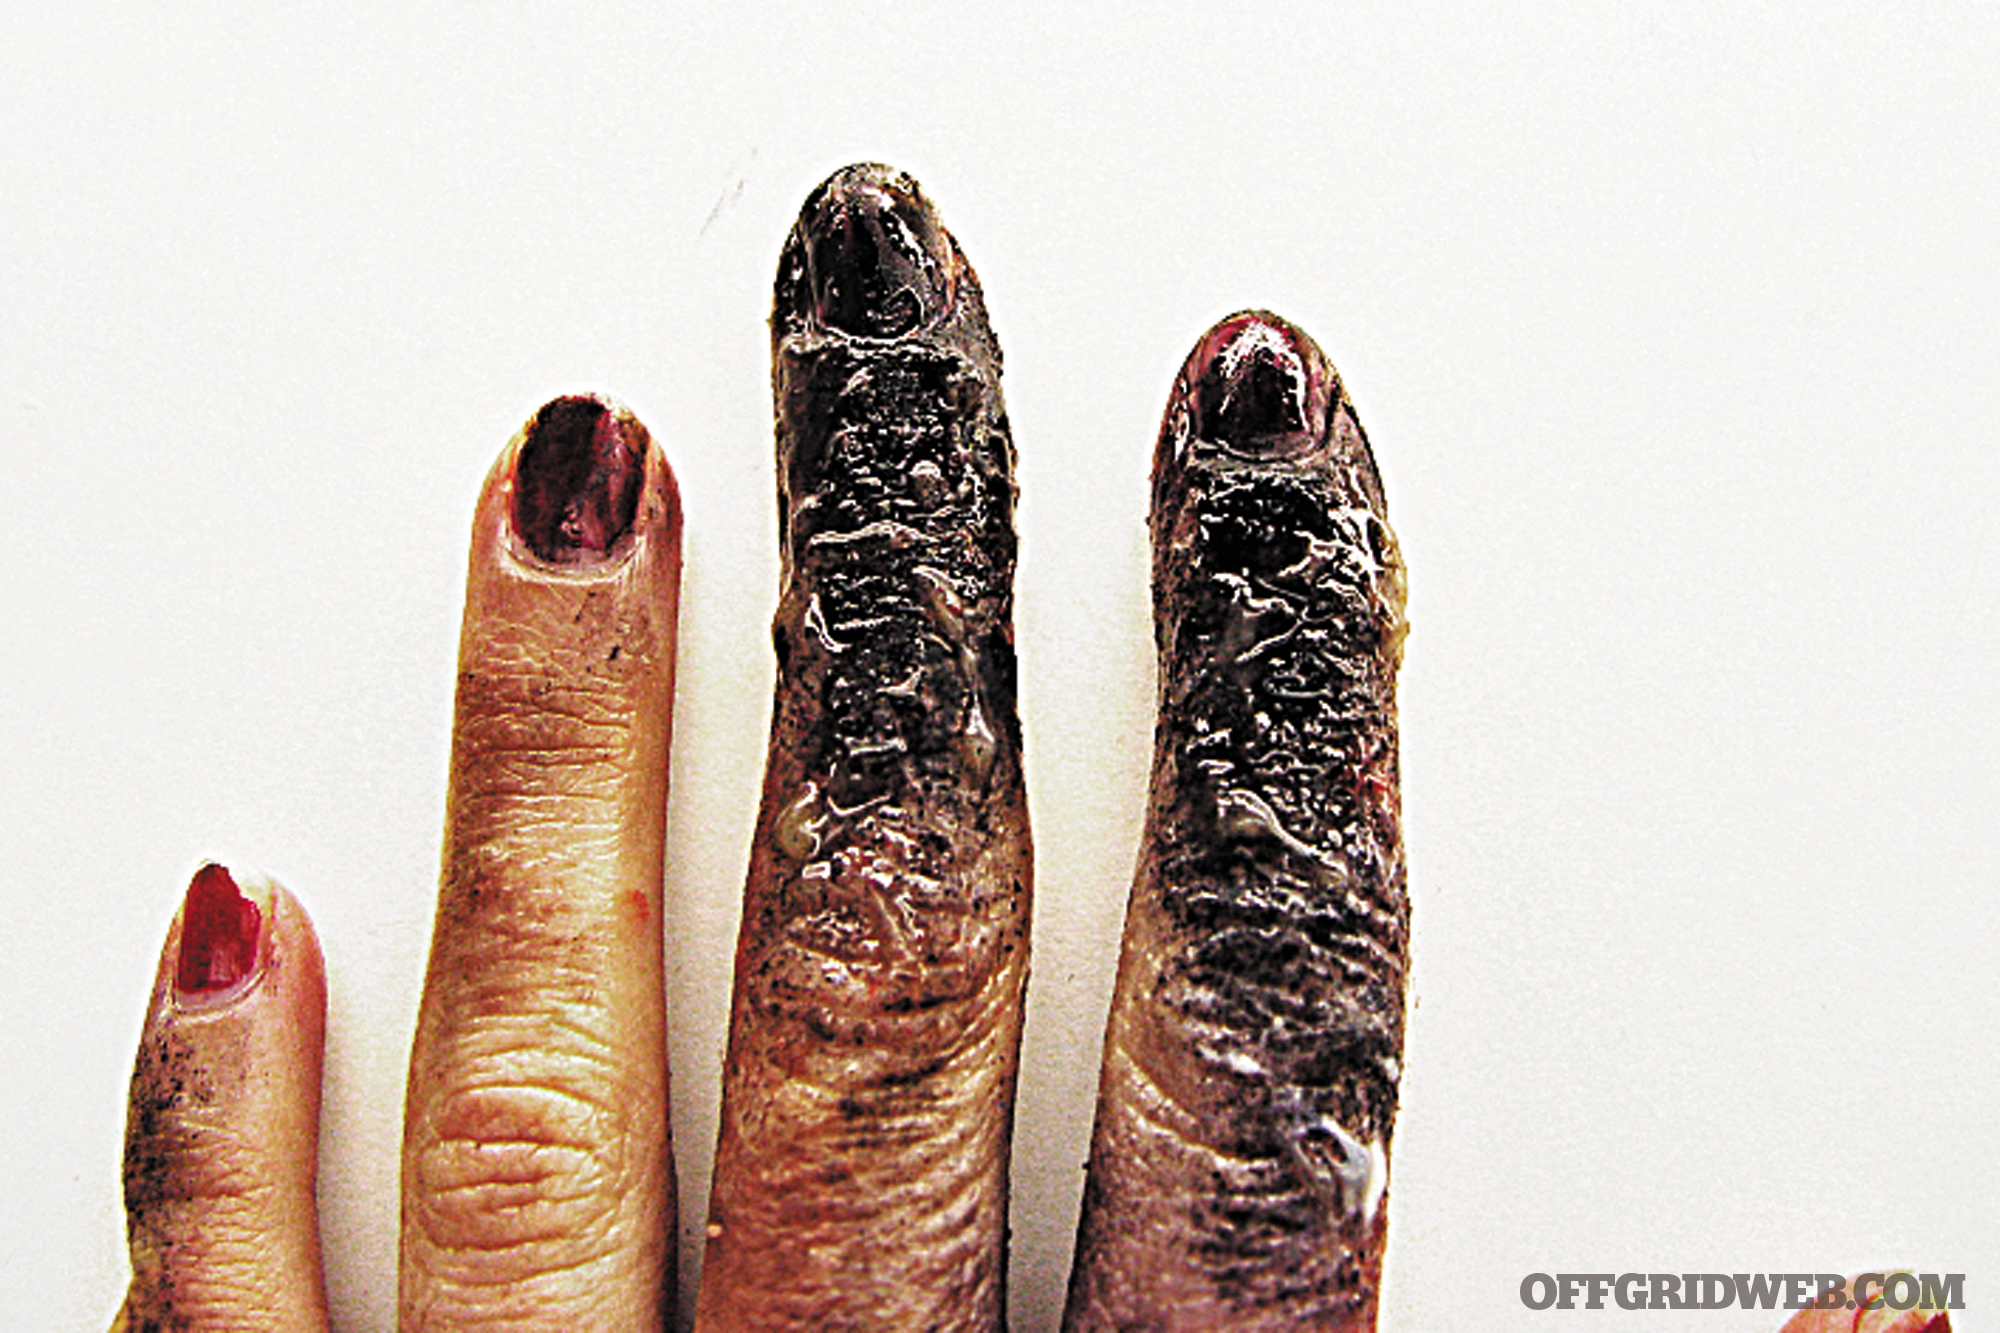
Appearance: Stiff, white/brown
Texture: Tough, leathery
Healing Time: Months
Complications: Scarring, contractures (hardening of tissue), possible amputation
Fourth Degree
Layers Affected: Extends completely through to muscle and bone
Appearance: Black, charred
Texture: Dry
Healing Time: Little to no chance of recovery
Complications: Amputation, loss of function, possible death
Treatment
Treatment for first-degree and small second-degree burns (less than 3-4 inches in size) involves running cold water or placing a cool compress over the injury for 10-20 minutes. Never directly apply ice on the wound — several studies have shown this may constrict local blood vessels, which may lead to further damage to the affected tissue. Though blisters may be painful, do not attempt to pop them because open blisters reduce healing time and are magnets for infections.
Immediately after cooling, gently wash loose debris from the area, dry it off, and dress the wound loosely with any available clean gauze or clothing. When possible, wash and redress the wound twice a day. If a clean dressing is not available, do not apply anything to the burn, but rather allow the area to form a dry hardened layer, which is your body’s own natural protection.
Topical antibiotics can be applied to the wound to prevent infection. It is important to remember the advice of your cardiologist, “hold off on the butter.” Contrary to popular belief, butter is not a wise treatment and can lead to delay in recovery. Of all the home remedies, applying honey on the wound has some street cred because many studies have shown it effectively improves healing time and prevents infection. Most first-degree burns will heal completely within a week, while second-degree burns take two to eight weeks with some scarring.
Serious Burns
Deep second-degree burns covering more than 10 percent TBSA and third-degree burns are a whole ’nother beast when it comes to treatment, because you will also need to address problems that are not located at the burn site. First, it is important to check breathing and blood circulation. If needed, perform CPR.
Never treat large body areas with cold water because this can cause both hypothermia (drop in body temperature) and traumatic shock (drop in blood pressure and circulation). To prevent hypothermia, wrap the victim in a blanket or any other covering. In case of shock, have the victim lie down on their back, then elevate and support both legs and arms up high above the heart to keep blood flow near the center of the body.
Clothing, or any other object, can get lodged into the burn area due to the high amount of heat. Do not attempt to forcibly remove these objects, as this may cause additional tissue damage and possible bleeding problems. Loose clothing around the lodged material can be carefully cut away.
Third-degree burns can turn the skin ash white, brown, black, or gray with charring effects. Due to the extreme damage to the skin, pain may be actually be absent and blisters will not form at the site. For mild third-degree burns and those covering less than 5 percent TBSA, the burn area can be treated like first- and second-degree burns.
Head and Neck
Serious second- and third-degree burns or major burns to the head area will require a rapid response by medical experts. Once the victim is fully stabilized, immediately execute an evacuation plan to get the victim to a trained professional. Some burns involve the inhalation of hot fumes that can damage the respiratory tract. Burns around the face and neck or burnt debris in the nasal and mouth cavity may signal airway damage, which will also require immediate evacuation.
Play it safe and seek trained help when in doubt. In the worst-case scenario where help is not available, keep the victim calm and stable while continuing to monitor their vitals, breathing, circulation, hydration, and body temperature. Preventing infection is crucial, so oral antibiotics can be administered, if available. Allow the victim to rest, while giving them time to recover from the traumatic ordeal.
In all burn cases, stay calm, but react quickly while paying attention to how the victim responds. Whether smoking while using hairspray or sipping a bit too much moonshine around a campfire, be careful. But when the time comes, treating burns correctly will ensure proper healing and prevent life-threatening situations.
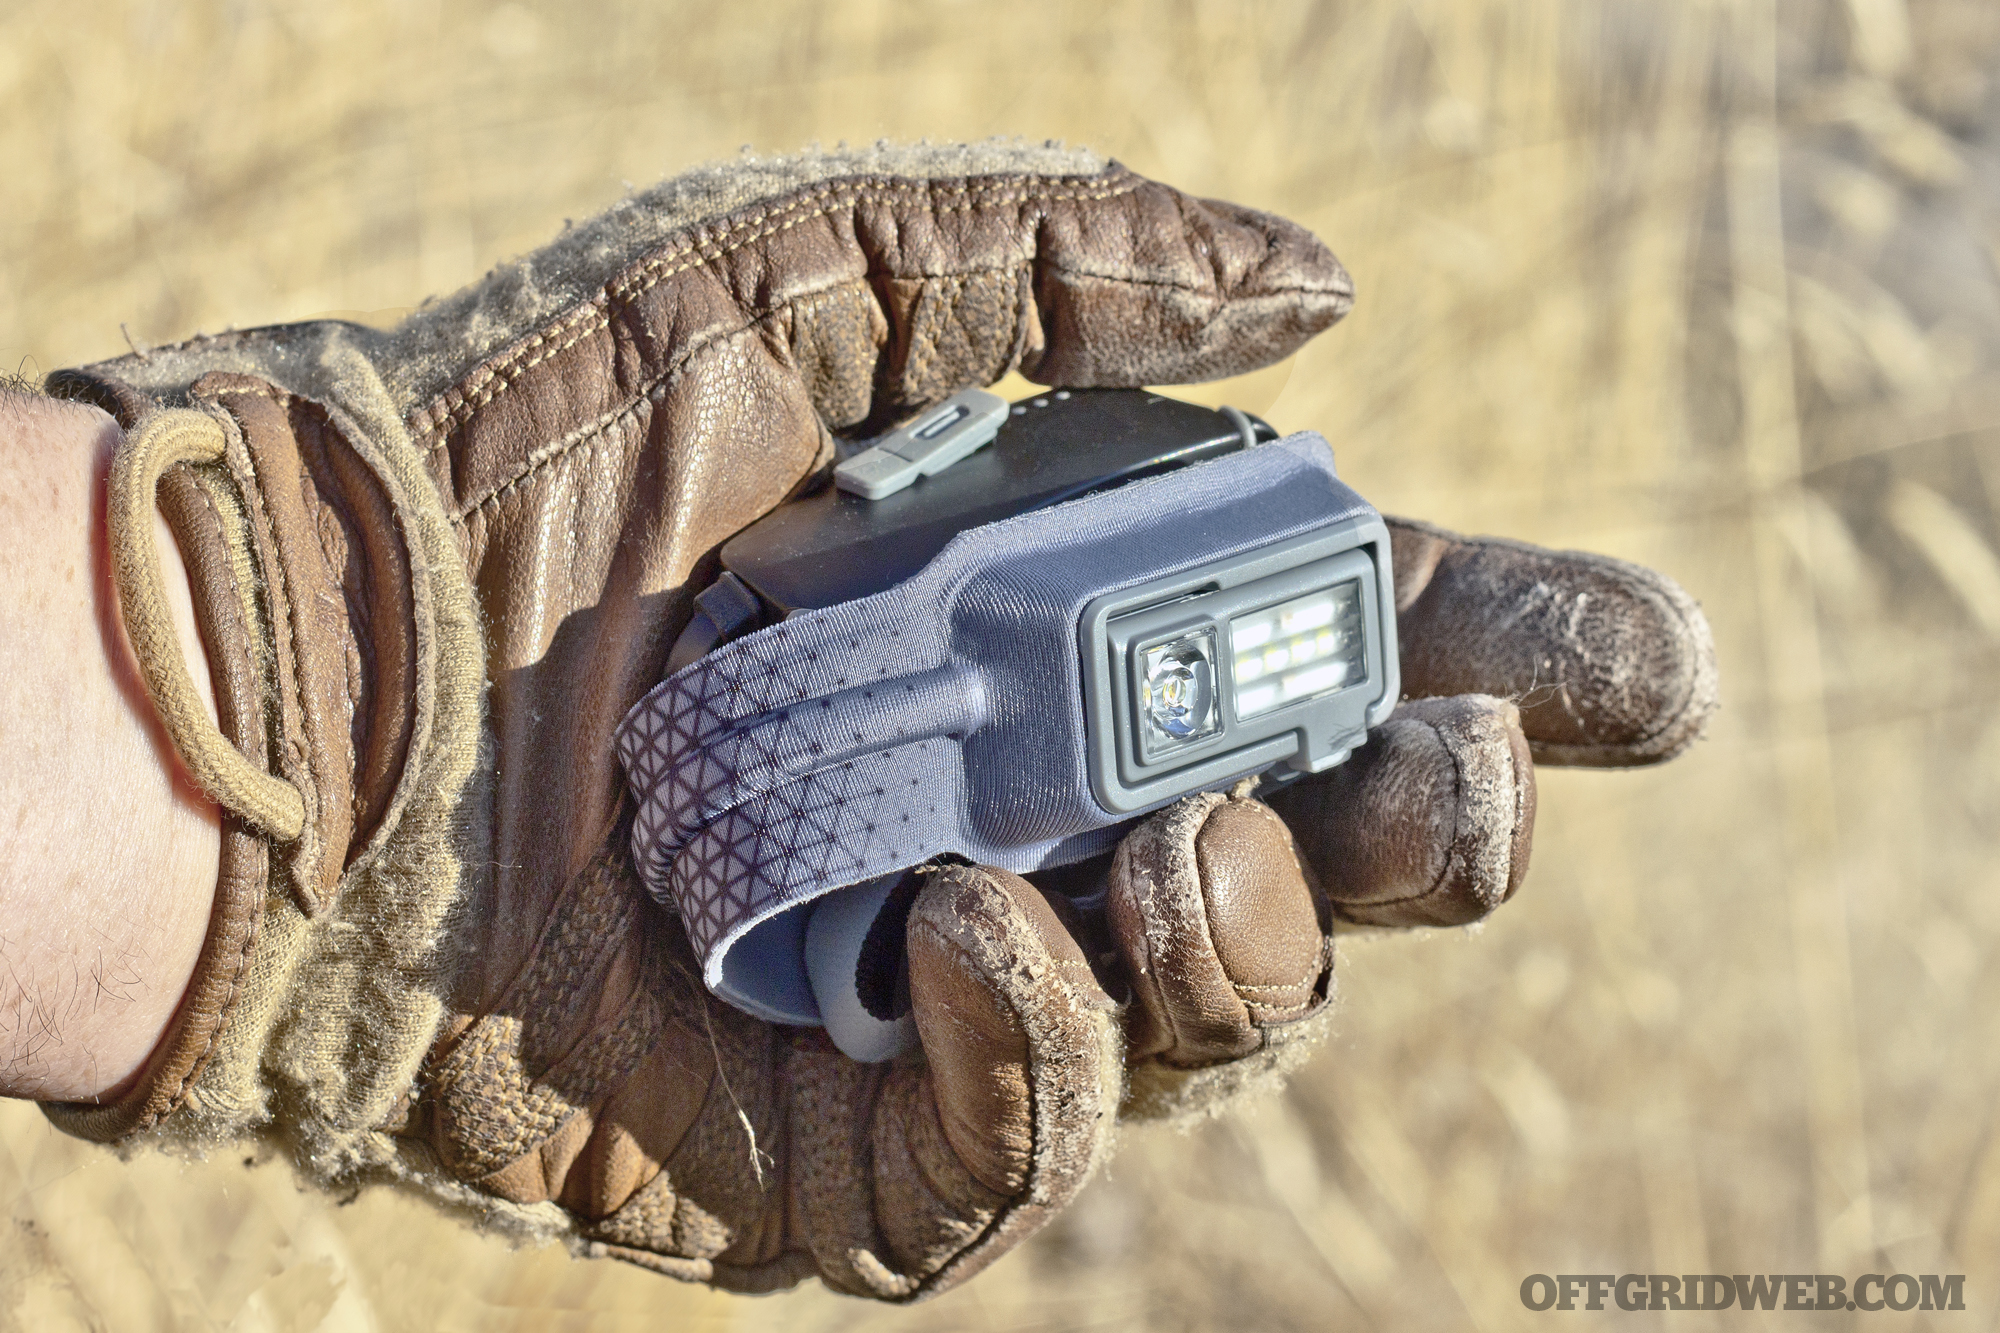
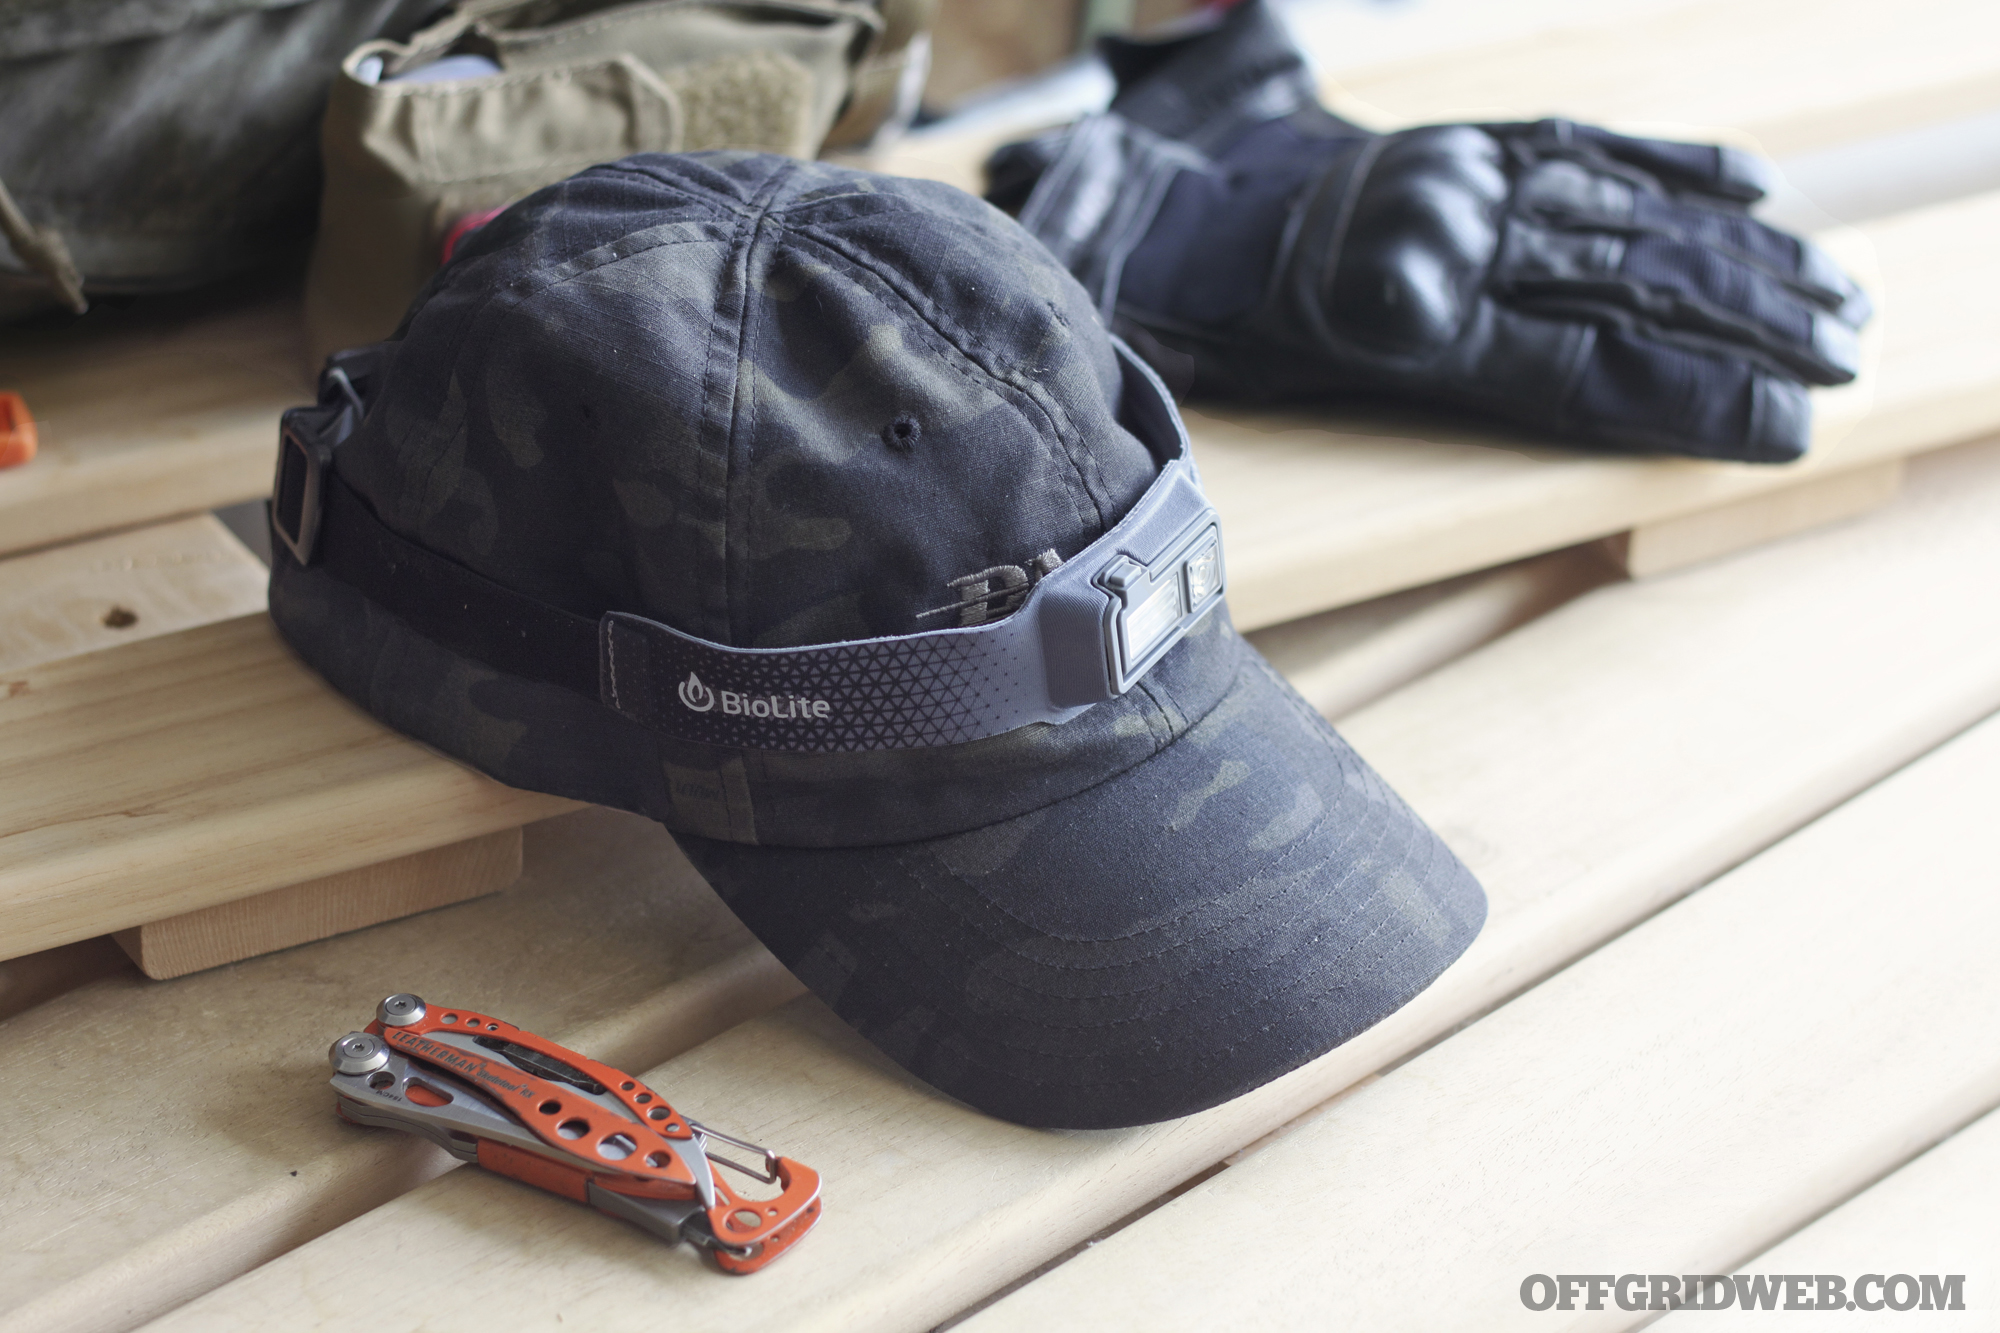
You may recall the BioLite HeadLamp from our initial review back in September 2018. At that point, the HeadLamp was still in the Kickstarter phase, generating funding for a full production run. We received a pre-production sample and shared our impressions of it. Recently, we learned that the pre-production HeadLamp we received had a defect, but fortunately BioLite has already corrected this for all retail models (now called the HeadLamp 330).
Here’s the statement we received from a BioLite representative:
“The earlier samples were part of a pilot test, meaning that while all the hardware was ready to roll, BioLite was still in the finishing stages for the firmware, which spoke to the battery system. The pilot had a temp sensor built into the programming which cut the unit off from the battery at 40 degrees – that was updated immediately after the pilot, and all retail models function in freezing weather. But, as with any battery, the colder the weather the faster the discharge. If you plan to be in extreme cold, wearing a hat over the back (where the battery is located) can help keep the battery warm.
The earlier versions will operate normally in warm temperatures – BioLite recommends marking the band of the earlier version with a sharpie so you know which one to take out in the colder temps.”
Although the testing we did prior to our review didn’t reveal this cold-weather issue, we’re glad to hear that BioLite caught and proactively resolved it. No one but the handful of pre-release testers would have been affected by this problem, but the fact that BioLite fixed it, notified those who were affected, and sent free replacement headlamps speaks to the company’s dedication to making a reliable product.
Many companies boast about standing behind their products, but in our experience, few actually follow through when a problem arises. We commend BioLite for announcing this defect and correcting it rather than letting users find out about it the hard way.
This article originally appeared in Issue 3 of our magazine.
City dwellers are well accustomed to — and largely spoiled by — the conveniences and wonders of modern plumbing. A twist of the wrist unleashes a never-ending flow of the wet stuff for drinking, cooking, bathing, cleaning, and more. The benefits and convenience of having large quantities of fresh water available to you at an instant are obvious. However, in an environment where clean water may not flow freely from the tap, those benefits become a necessary luxury and rare commodity.
On January 9, 2014, a massive chemical spill near a water treatment facility in West Virginia affected roughly 300,000 people spanning nine counties. The root of that spill came from a single source, a company that produces chemicals used in the mining, steel, and cement industries. The chemical spilled was toxic enough that warnings went out to not use the contaminated water even after it was boiled.
Government officials immediately ruled area tap water off limits, bottled drinking water disappeared from store shelves just a couple of hours later, and the National Guard was called upon to truck in fresh water. Although the water was ruled safe to use about a week later, the effects of a regional water disruption were clearly felt. Considering the spill was an accident that originated from a single source, the consequences of a more widespread event would be more devastating. Surely the effects of a deliberate attack or large-scale environmental disaster on water resources in multiple areas would cause much more strain on clean water supplies.
This is where being prepared for the unimaginable comes into play. Unless you’re blessed with a sixth sense, you don’t have a crystal ball that tells you what calamities will fall upon you. You do, however, have the benefit of foresight and the ability to be proactive. There’s no question that having extra water stored for a rainy day (bad pun intended) can be a lifesaver. Sure, storing water in bottles in your closet or garage are viable options, but if you want to store water in real quantities (like 55 gallons at a time) you’ll need a viable alternative.
Rainwater Diverter Kits
Our gardening friends have long discovered the easy answer to storing respectable quantities of water — best of all, the water is free. Rain barrels can be set up to trap and hold rain water. The water comes from rain collected on your home’s rooftop and funneled directly into storage barrels. Garden aficionados store rainwater during the rainy months and use this water to keep their gardens watered — and their water bills down — during drier seasons. Adapting this concept to fit the survival mindset is simple enough.
Rain barrel kits are readily available at hardware and gardening supply stores. The methods of installation for our purposes are the same, with a couple of exceptions. While gardening water doesn’t need to be potable, we need to take into consideration the drinkability of the water for survival purposes. Instead of using any old barrel, we want to use food-grade barrels, which can be found at restaurant supply stores and at various online retailers. Make sure you get one where the top can be removed so that it is easier to work on and clean.
Most rain barrel kits come with filters that take out large debris, but we want to add finer filters or mesh to further keep debris out. After all, the water is rolling down your roof into your rain gutter and finally into your barrel. If the water is being used to wash up or to do the dishes with, you should be good to go. If you intend on drinking or cooking with it, you’ll want a separate water filtration system too. Boiling works, or you can get fancier with the many water filtration methods and gizmos on the market.
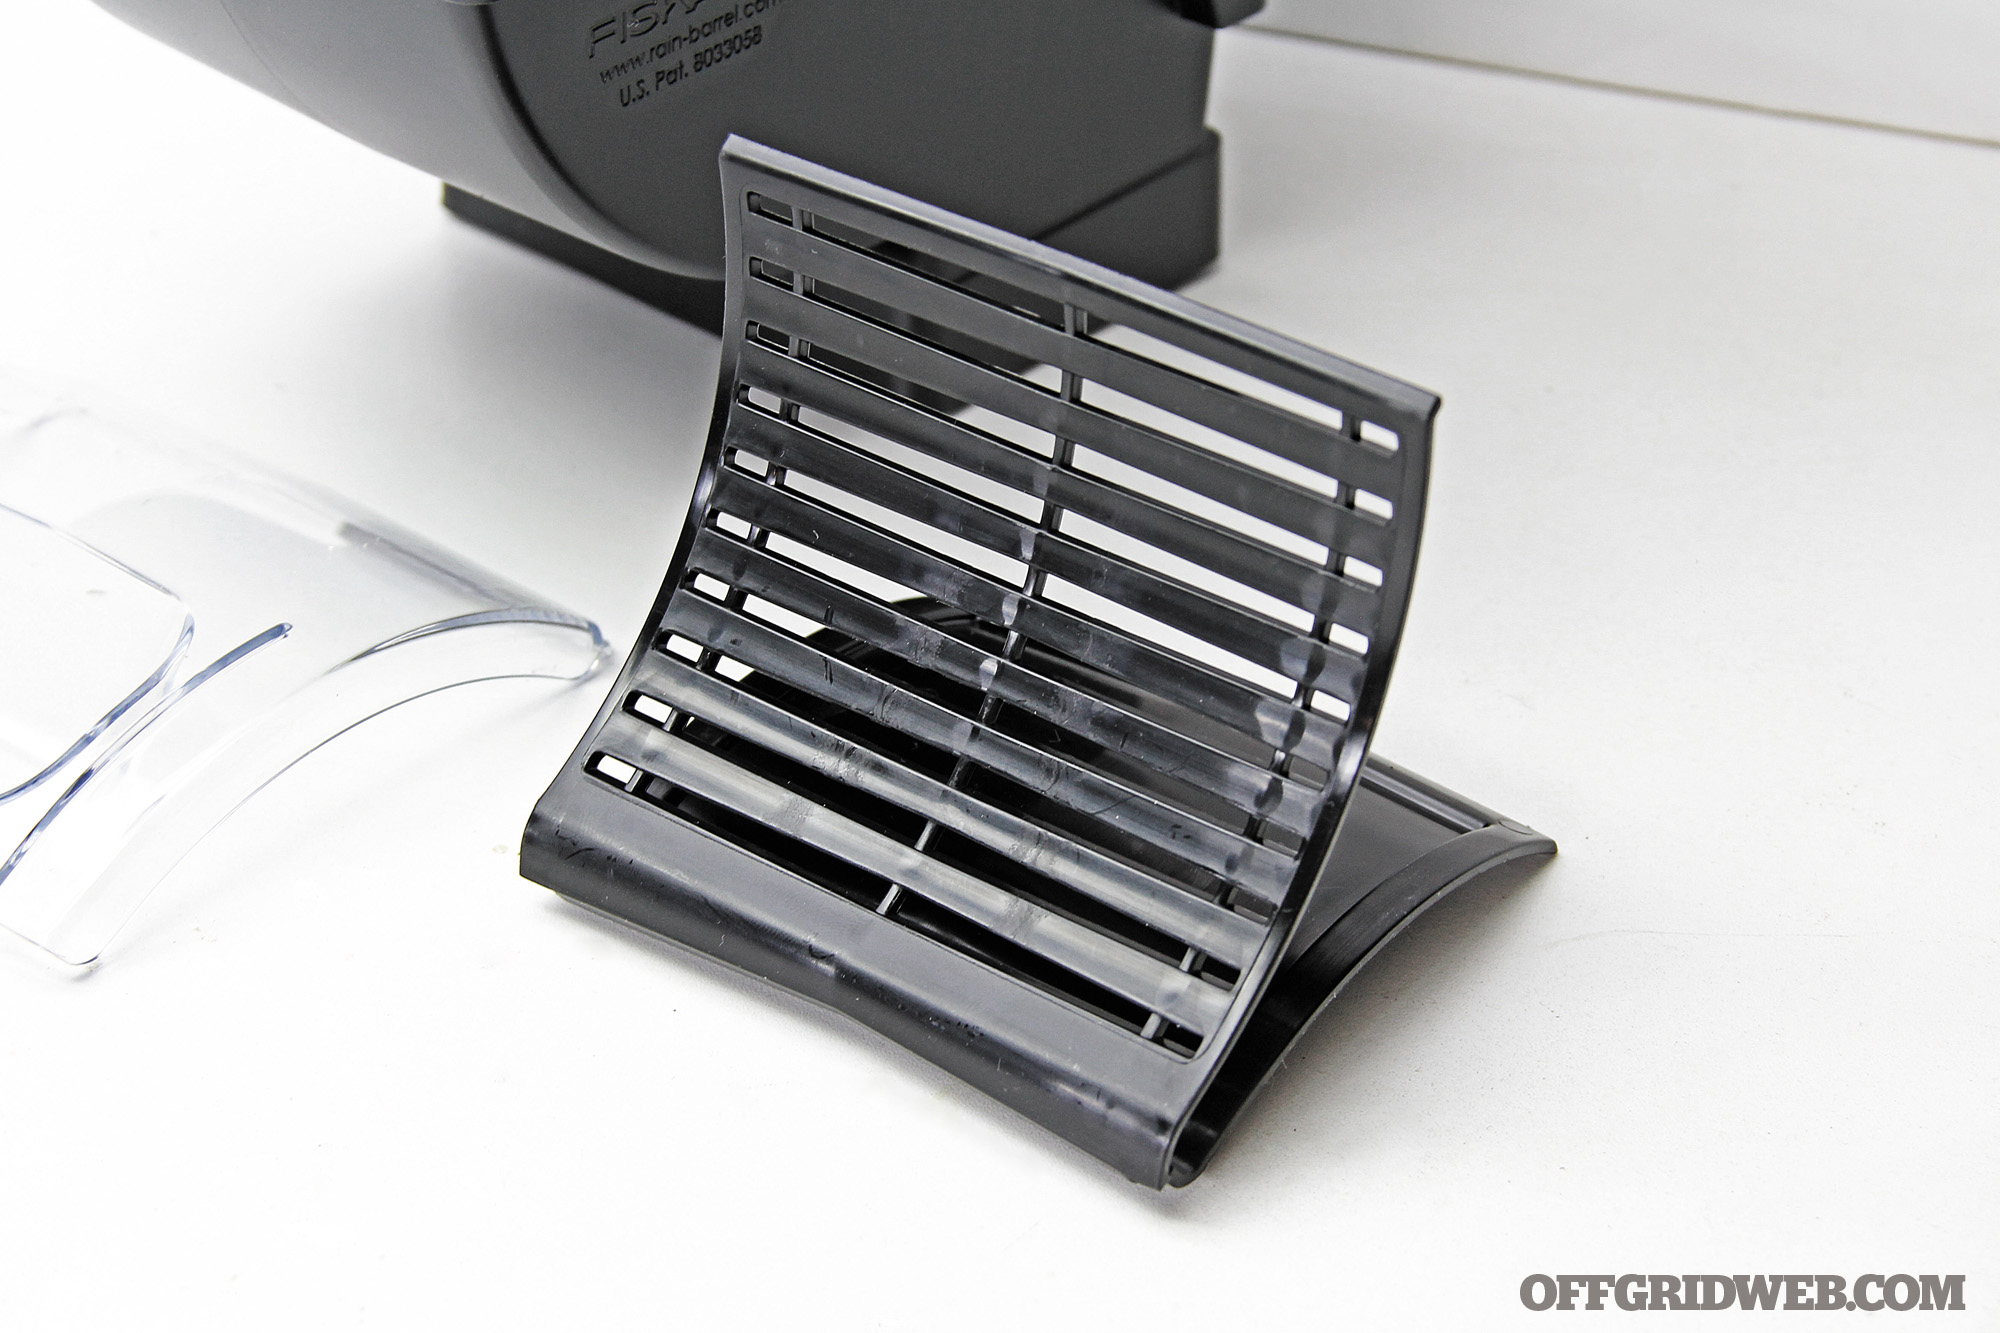
We took a look at the many rain barrel kits on the market and decided to go with a unit by Fiskars. We like how the Fiskars DiverterPro Rainwater Diverter fits different-sized rain gutters and especially liked the built-in filter that is easy to view, access, and clean. The filter’s slats are pretty fine so we didn’t need to enhance it any further. Also, when the rain barrel fills up, the water diverts back into the downspout and is directed away from your home as usual.
Each kit differs slightly, so make sure you go through the instructions of your chosen kit carefully. Here, we detail the installation of the Fiskars diverter kit. We begin by preparing our food-grade barrel. You can choose a size that best fits your needs; we chose a larger 55-gallon size to maximize the amount of stored water.
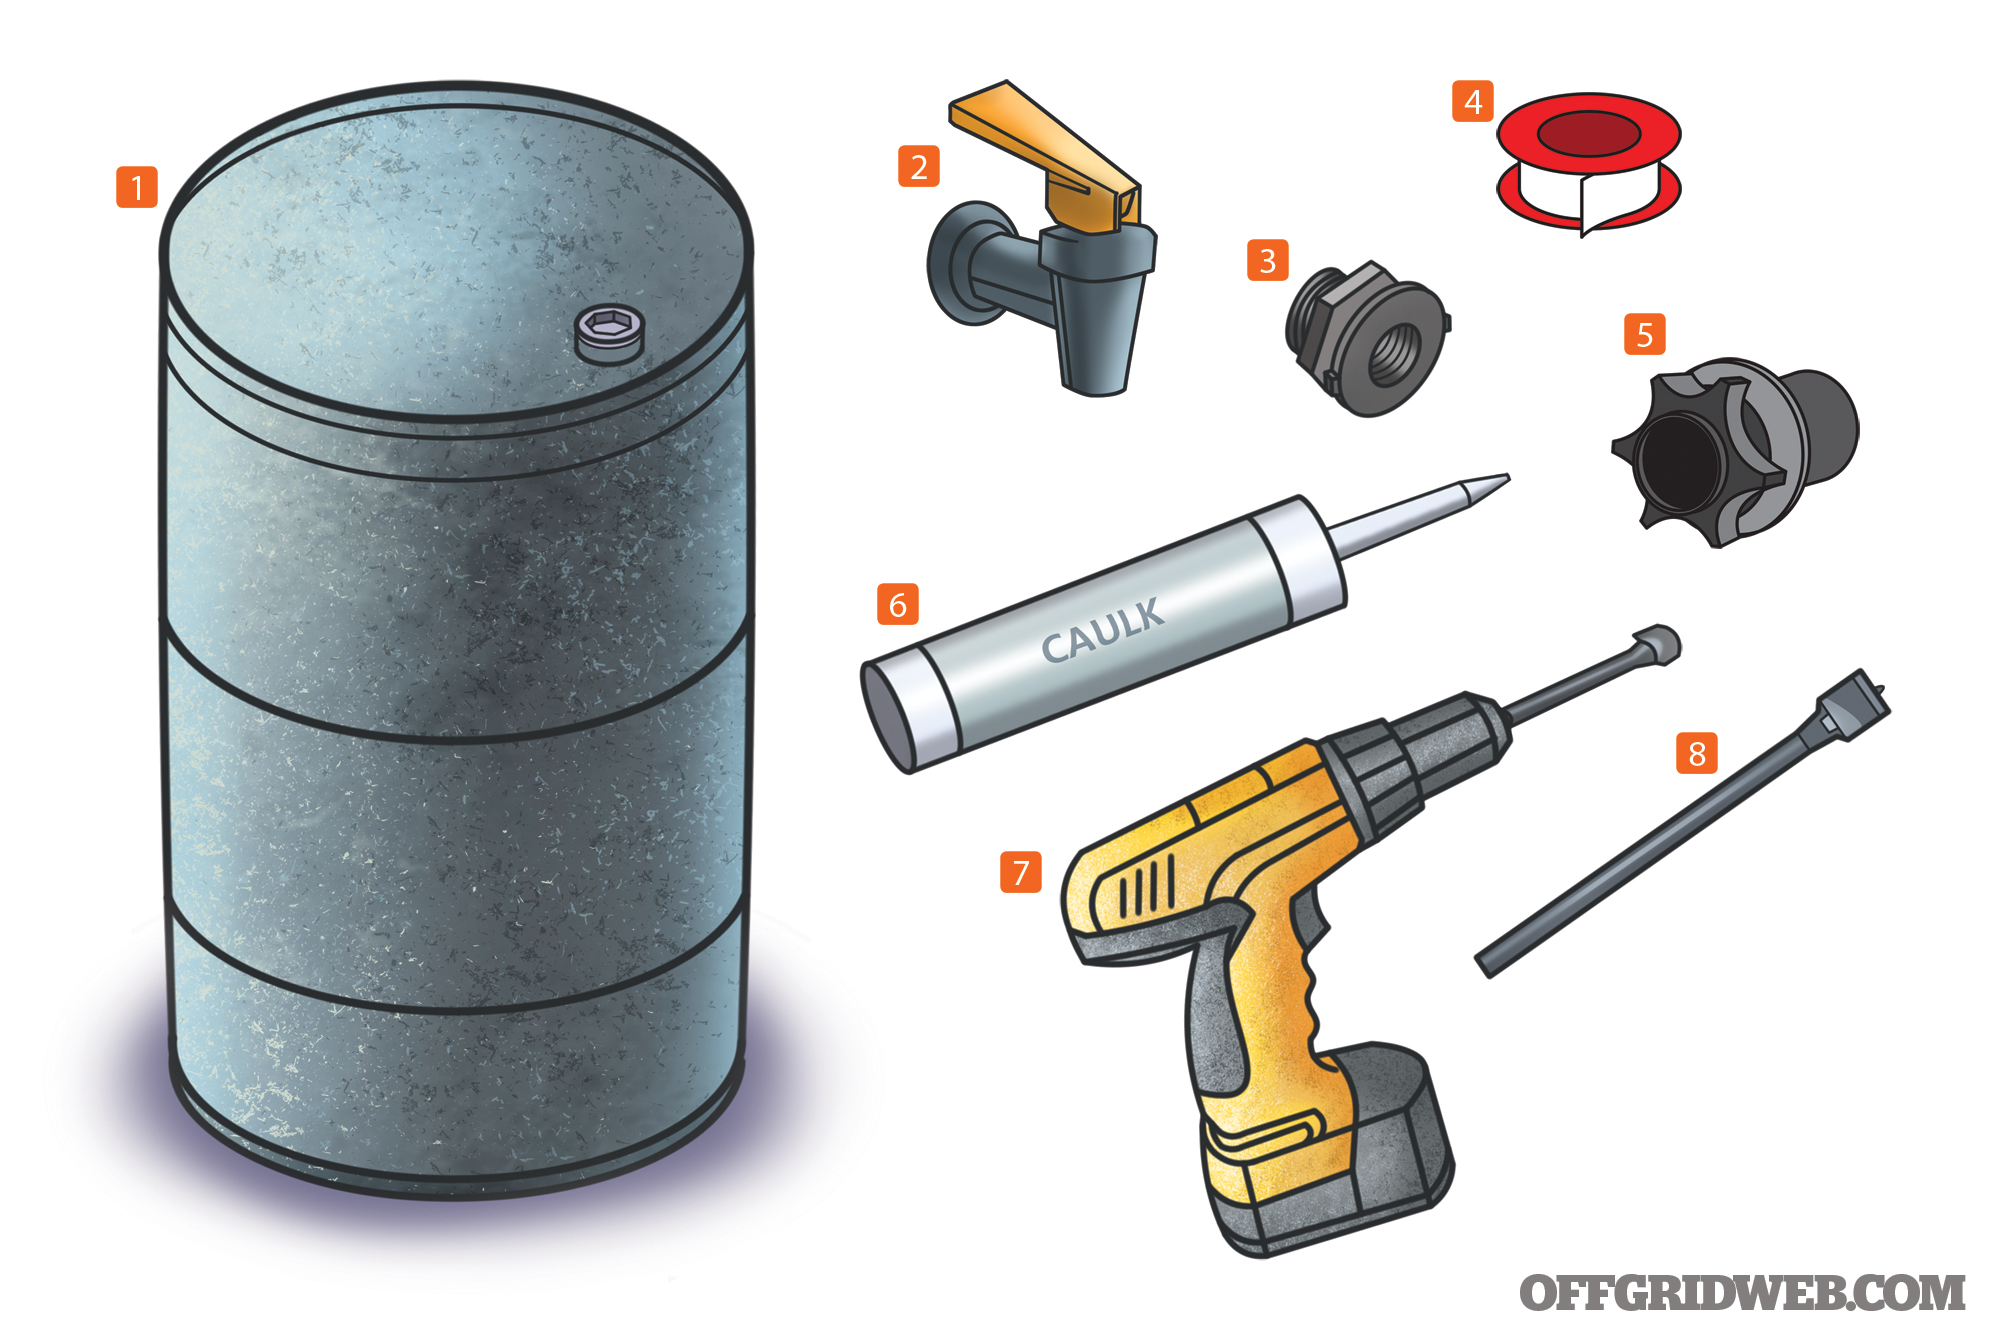
What you’ll need:
Food-grade barrel
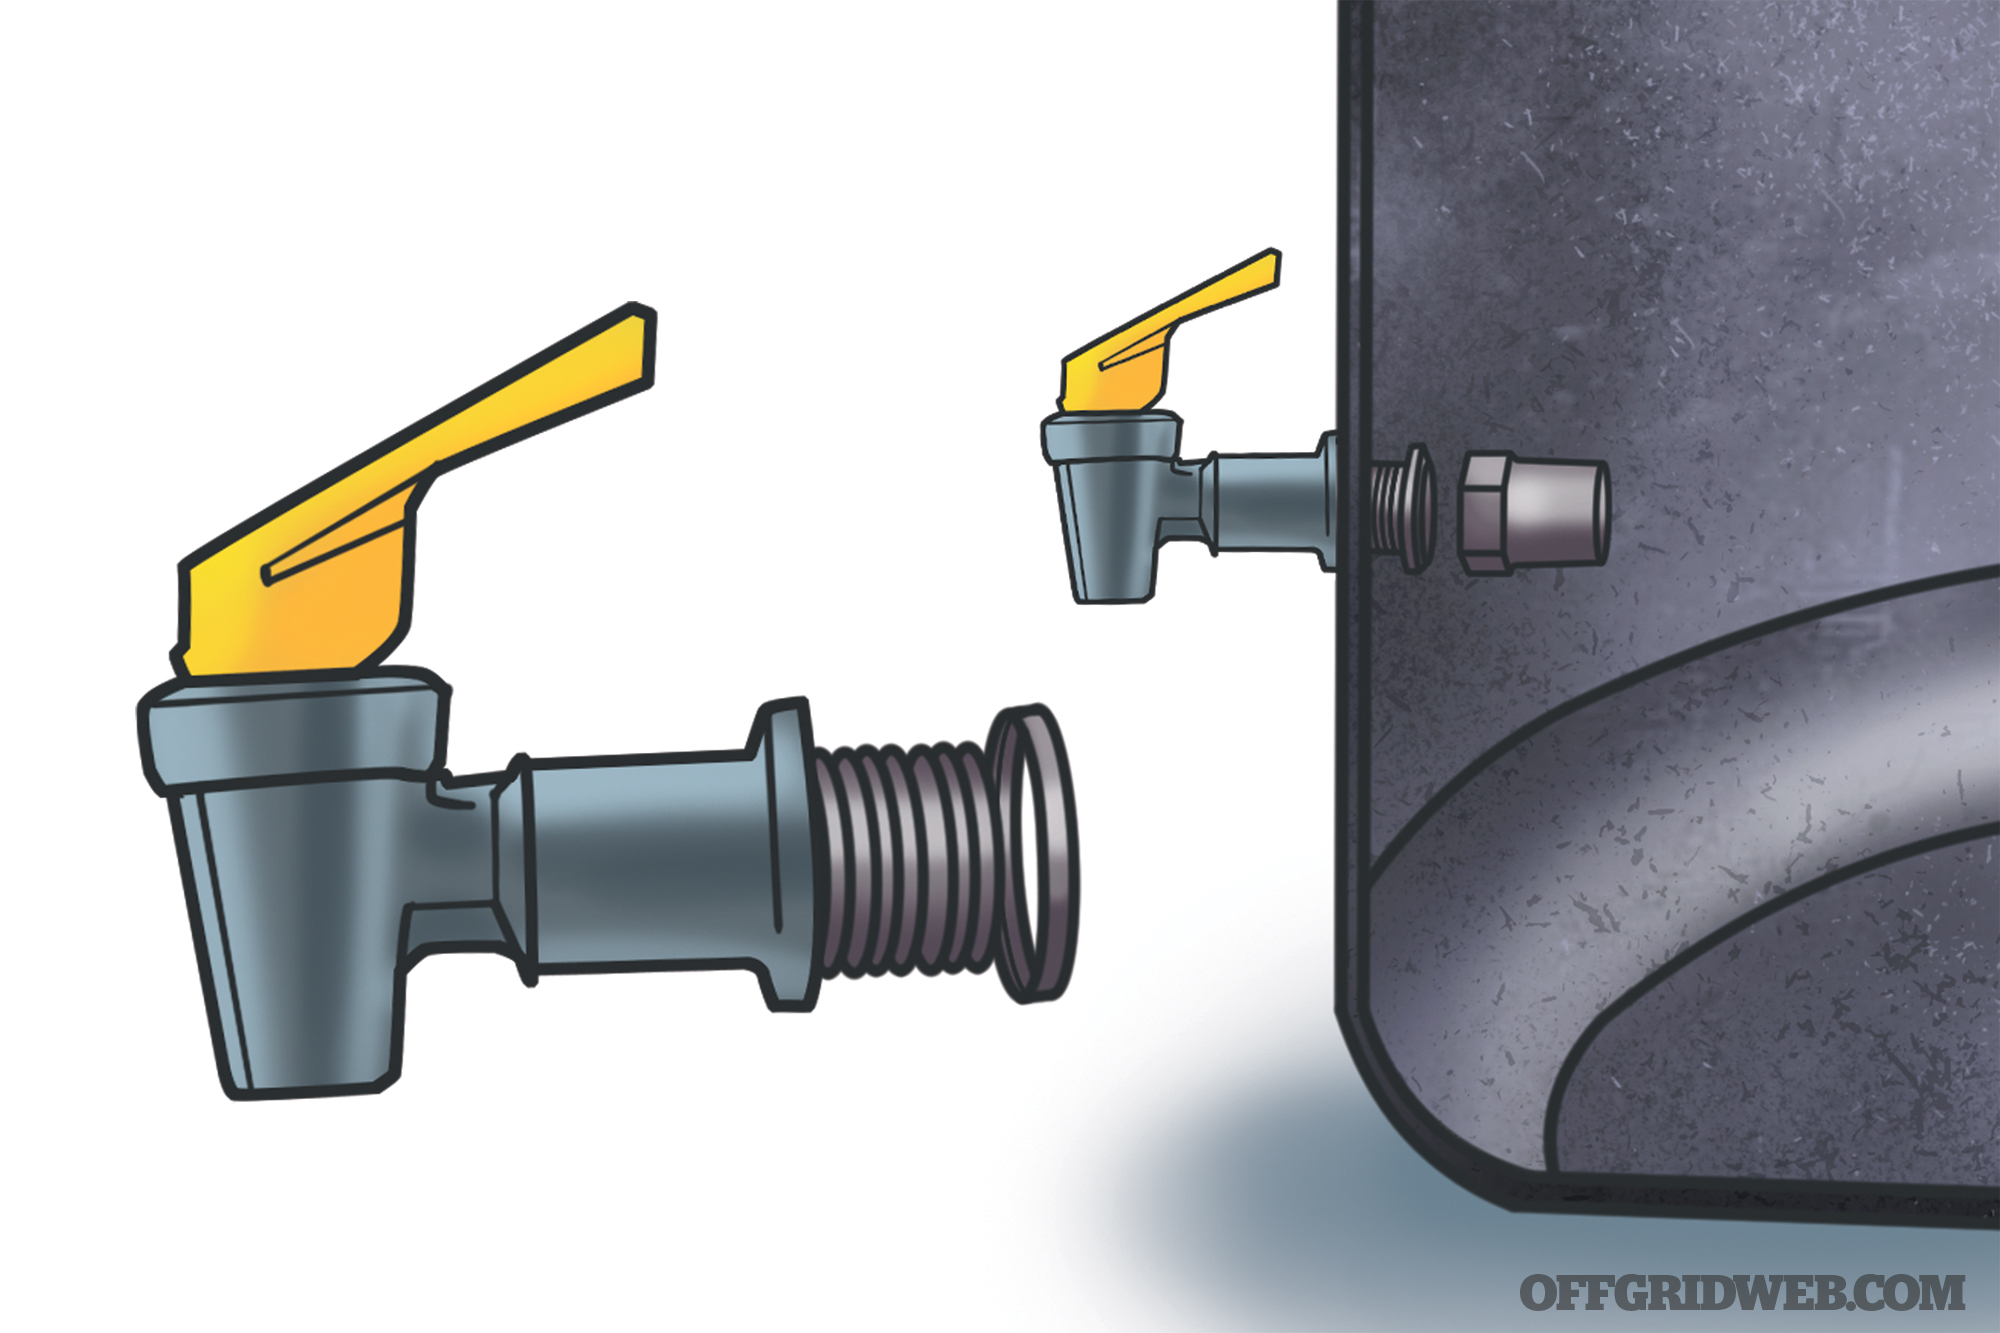
Water spigot for 3⁄4-inch opening
Trap adapter with nut
Teflon tape
Hose connector from Fiskars kit
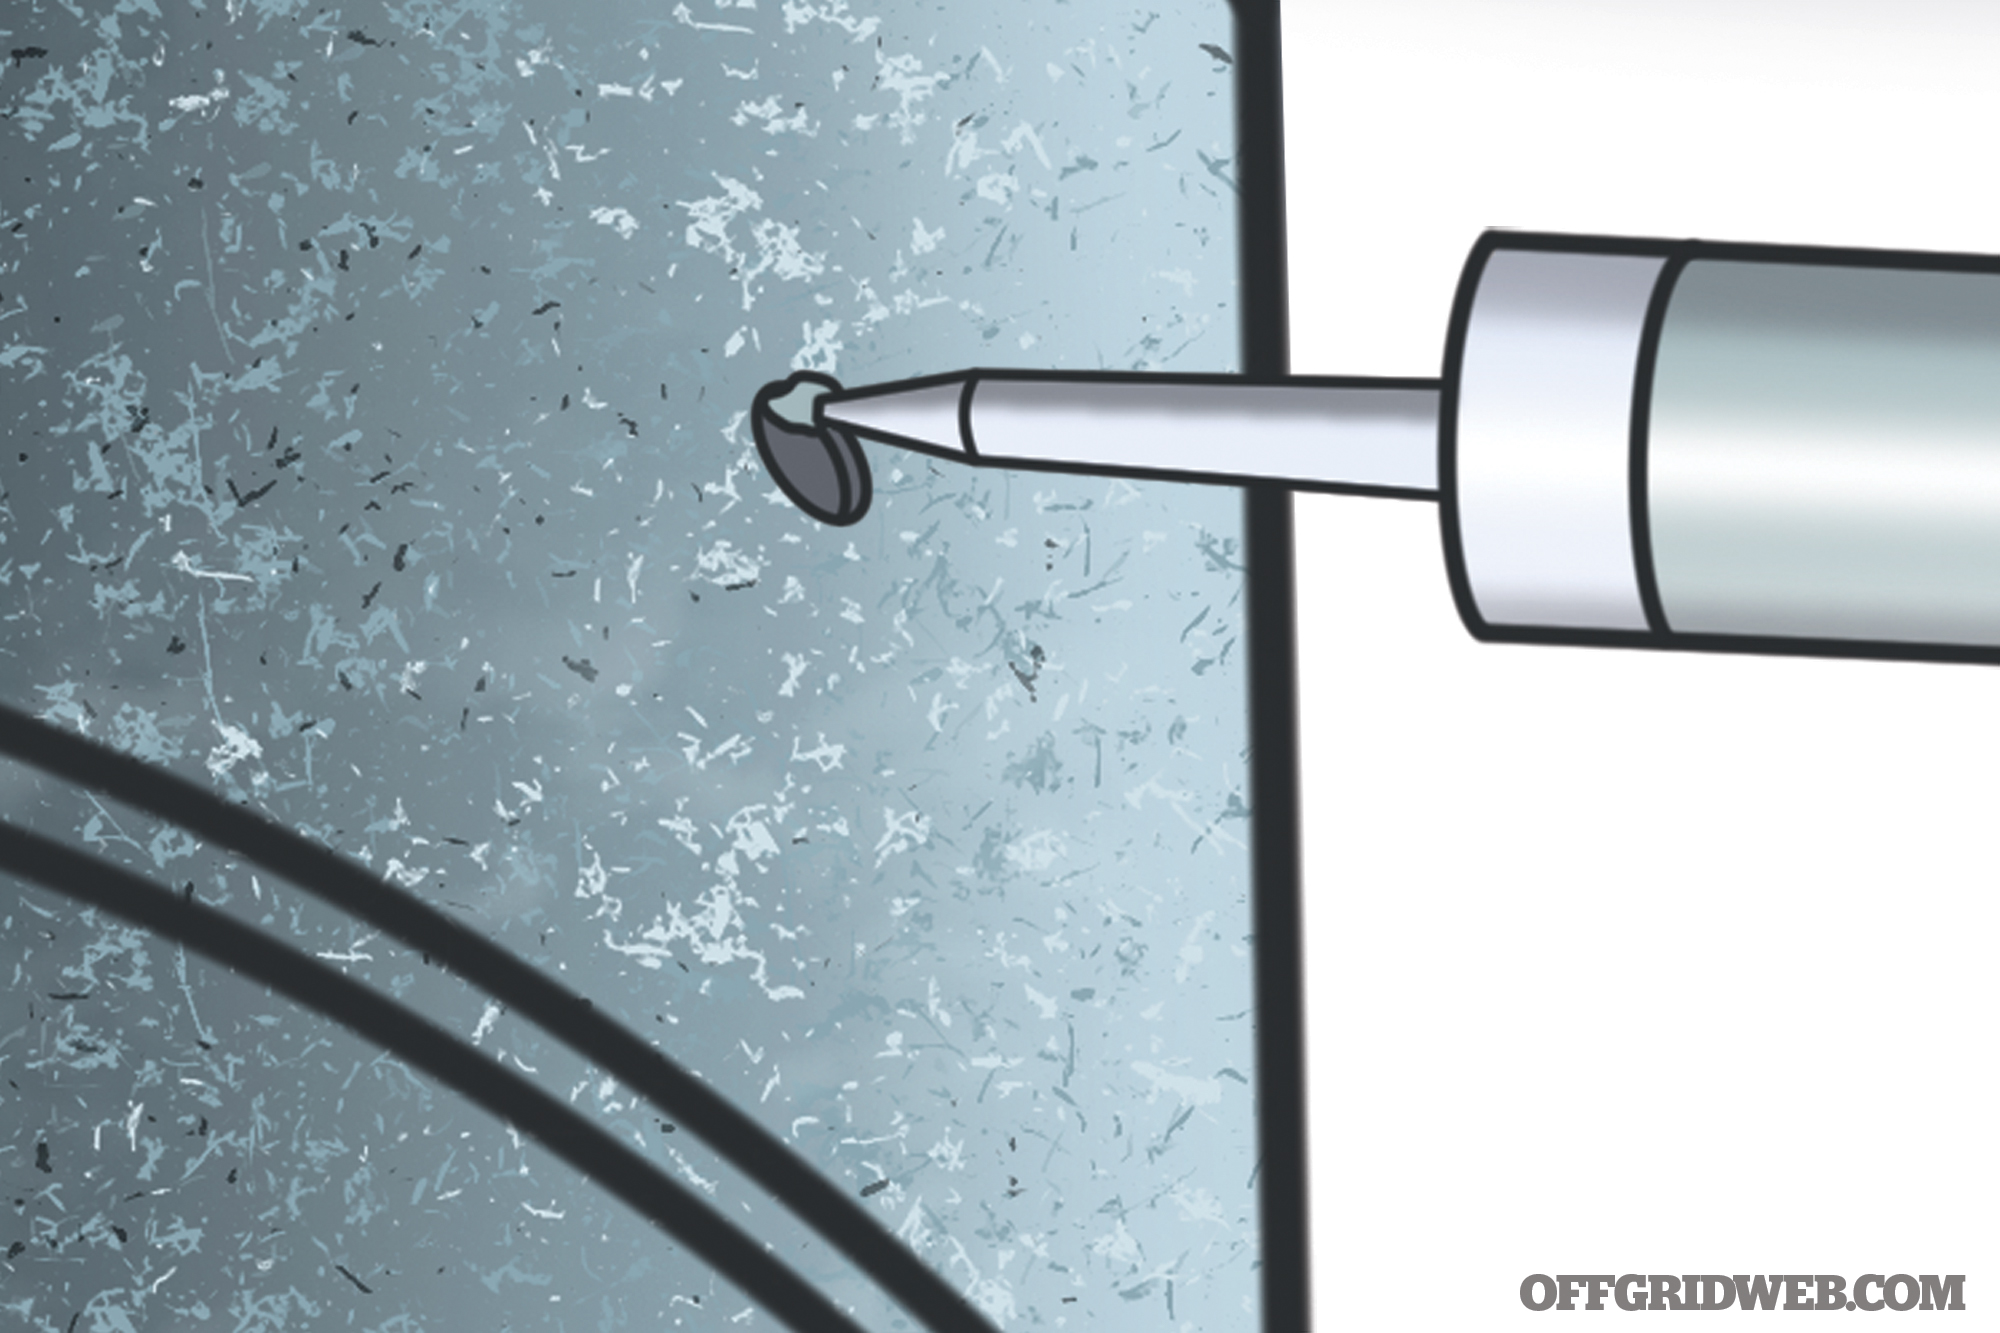
Caulking
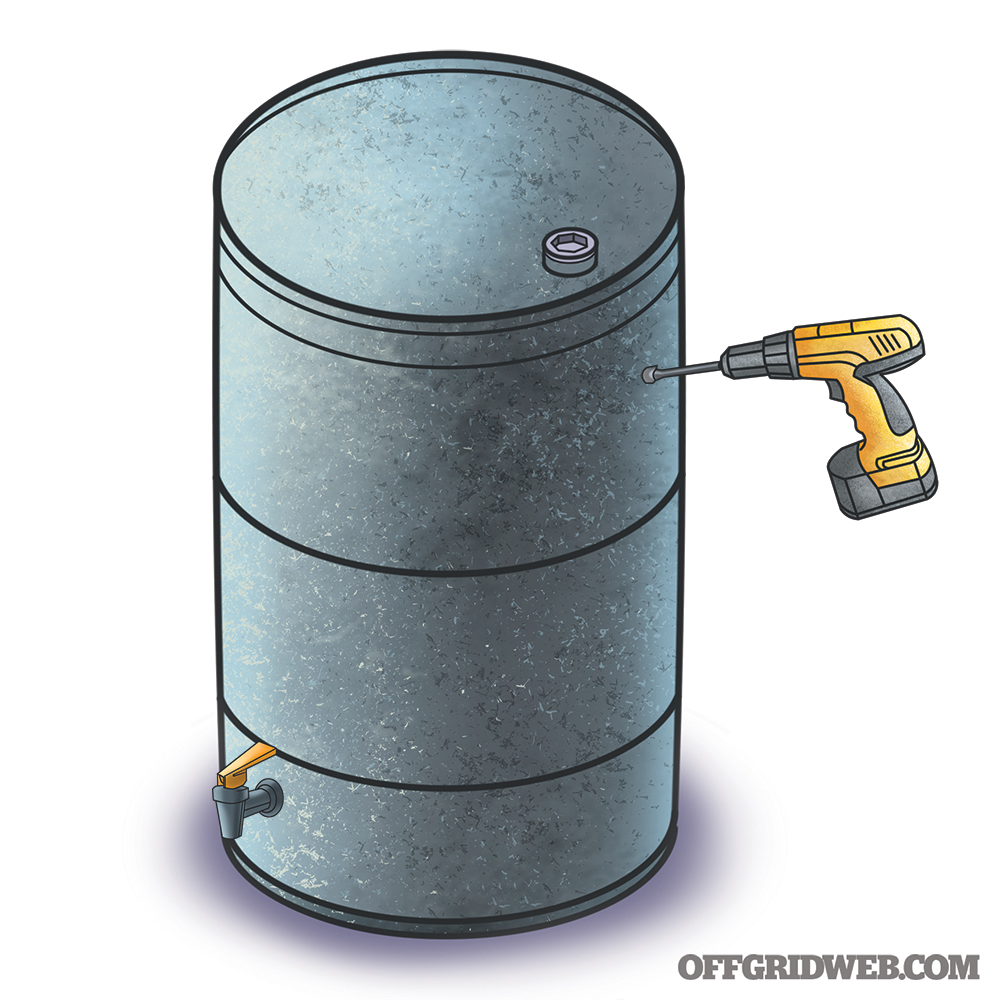
Power drill
3⁄4-inch spade drill bit
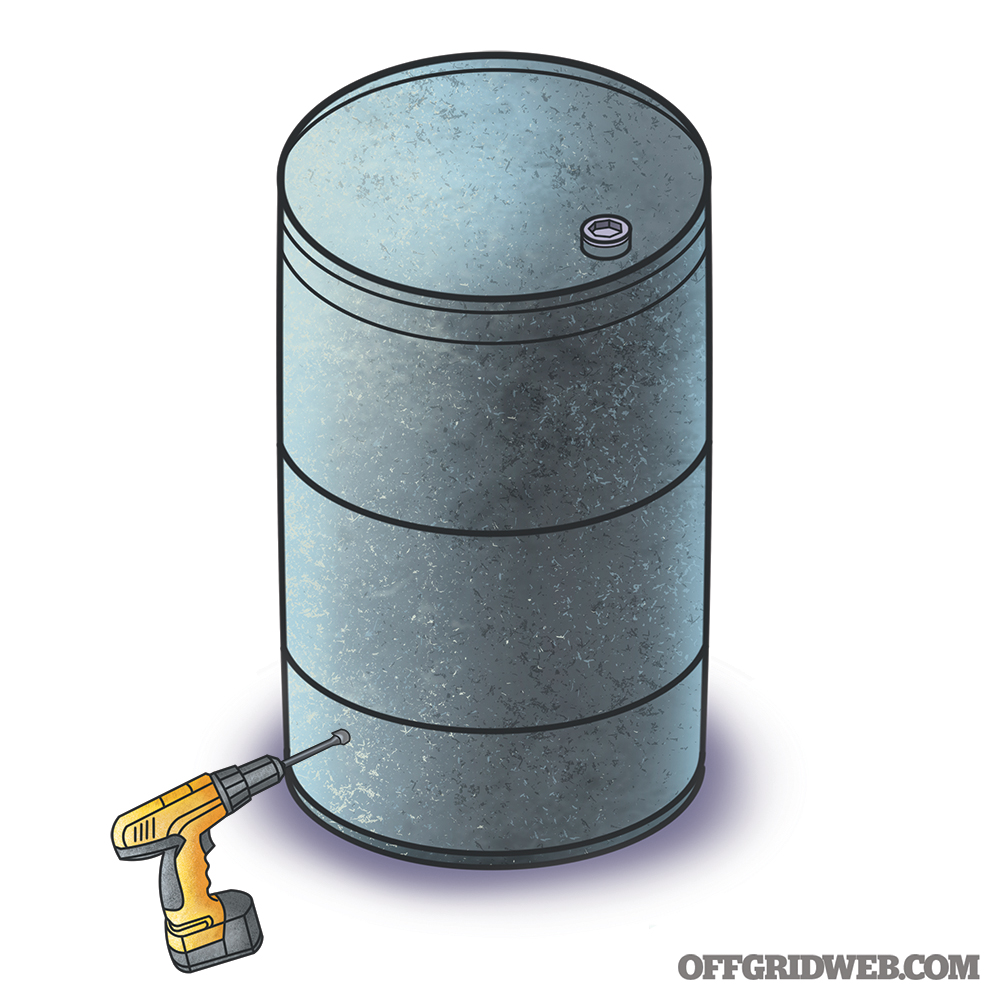
1. Being mindful of how much room you will need under the spigot to fill a water container such as a pitcher or bottle, use the ¾-inch spade drill bit to drill a hole at the bottom of the barrel for the water spigot. We drill our hole about a foot from the bottom.
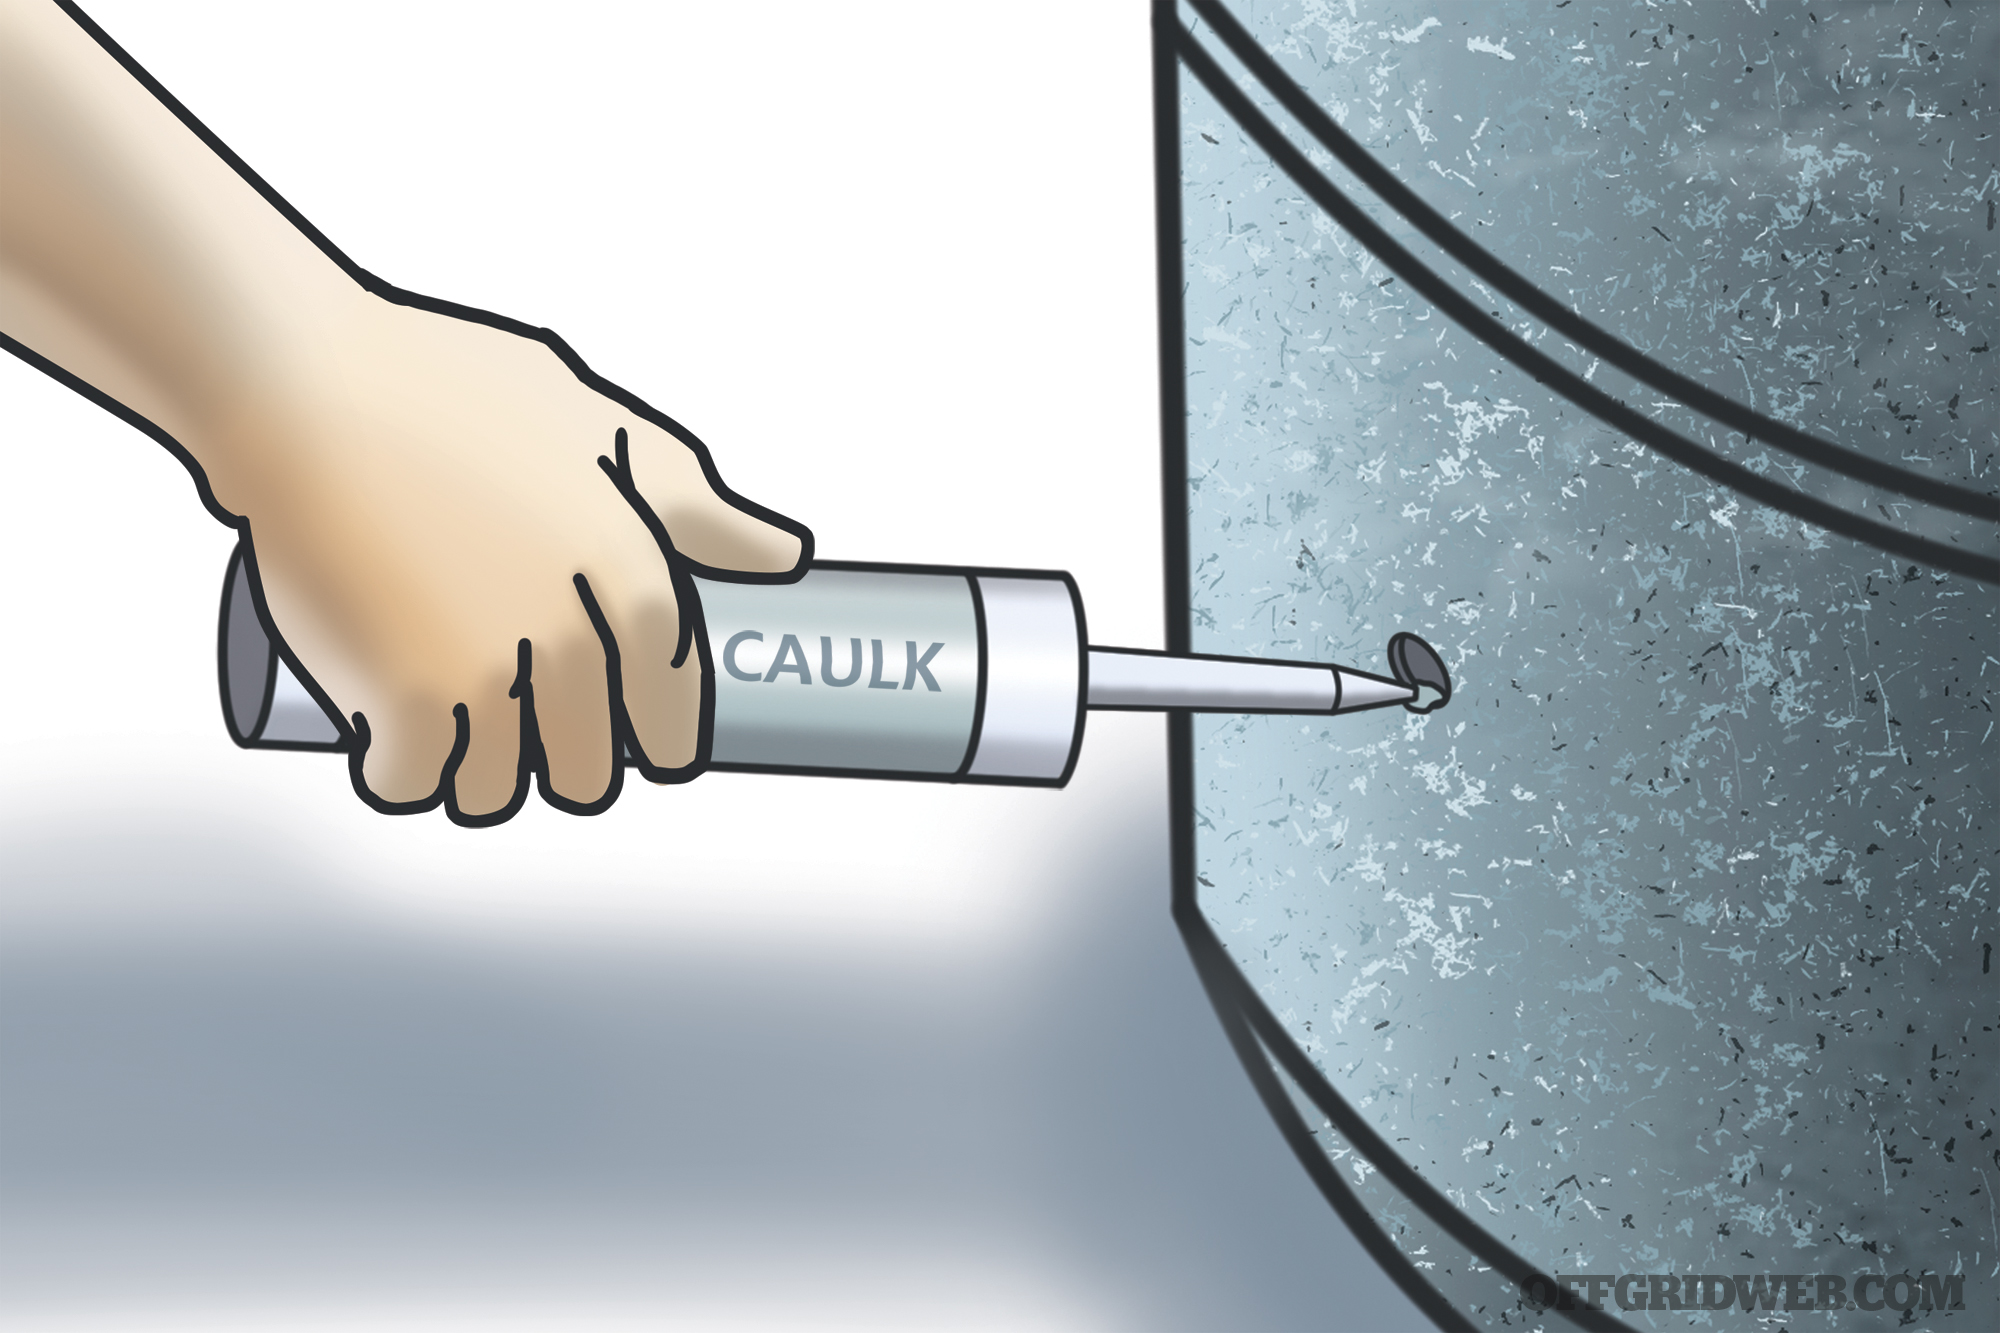
2. Spread caulk around the hole inside and outside of the barrel. Apply Teflon tape to the trap adapter’s threads and attach the spigot to the coupling.
3. Install the water spigot onto the barrel and secure it on the inside with the trap adapter nut. You may need a wrench to get it on tight enough to avoid water leakage.
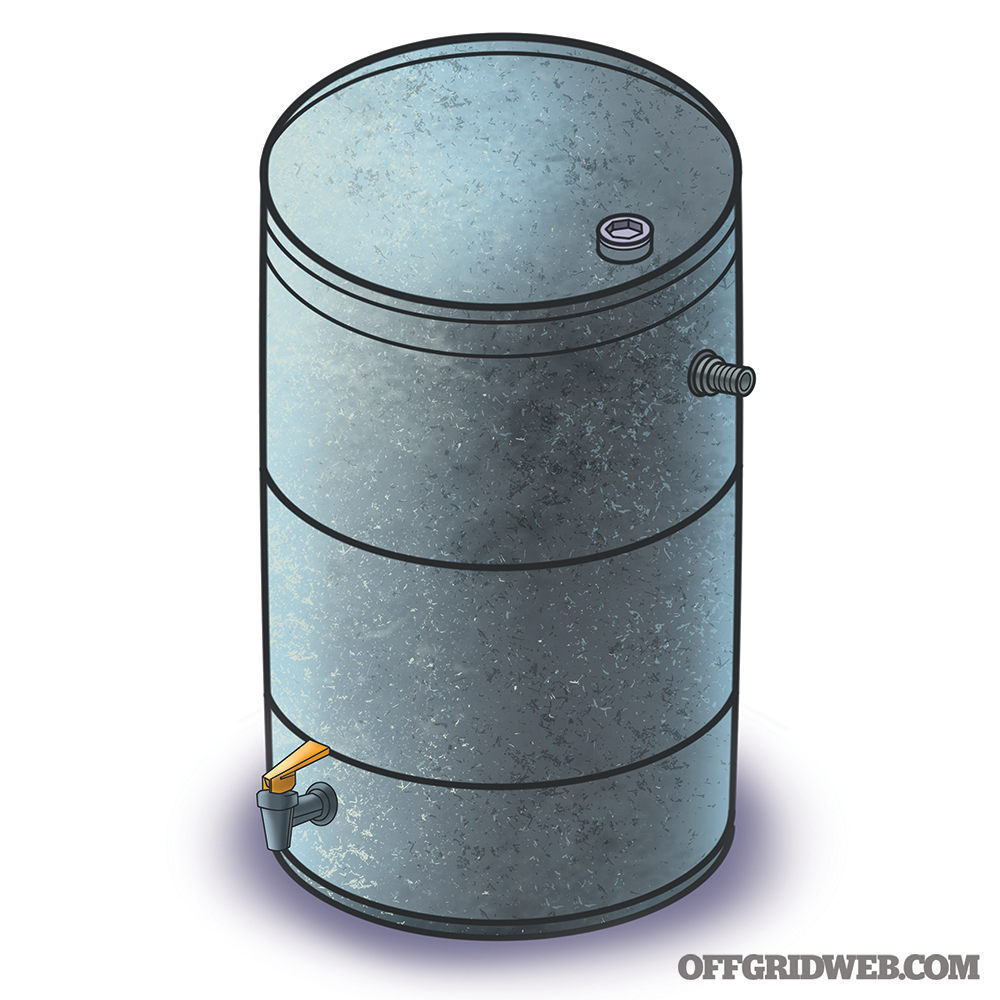
4. Near the top of the barrel, about 2 inches down from the lid, drill another hole for the kit’s hose connector.
5. Again, spread caulk around the holes inside and out.
6. Install the hose connector according to the kit’s instructions. (Basically, screw it onto the barrel snugly.)
7. Your barrel is ready.
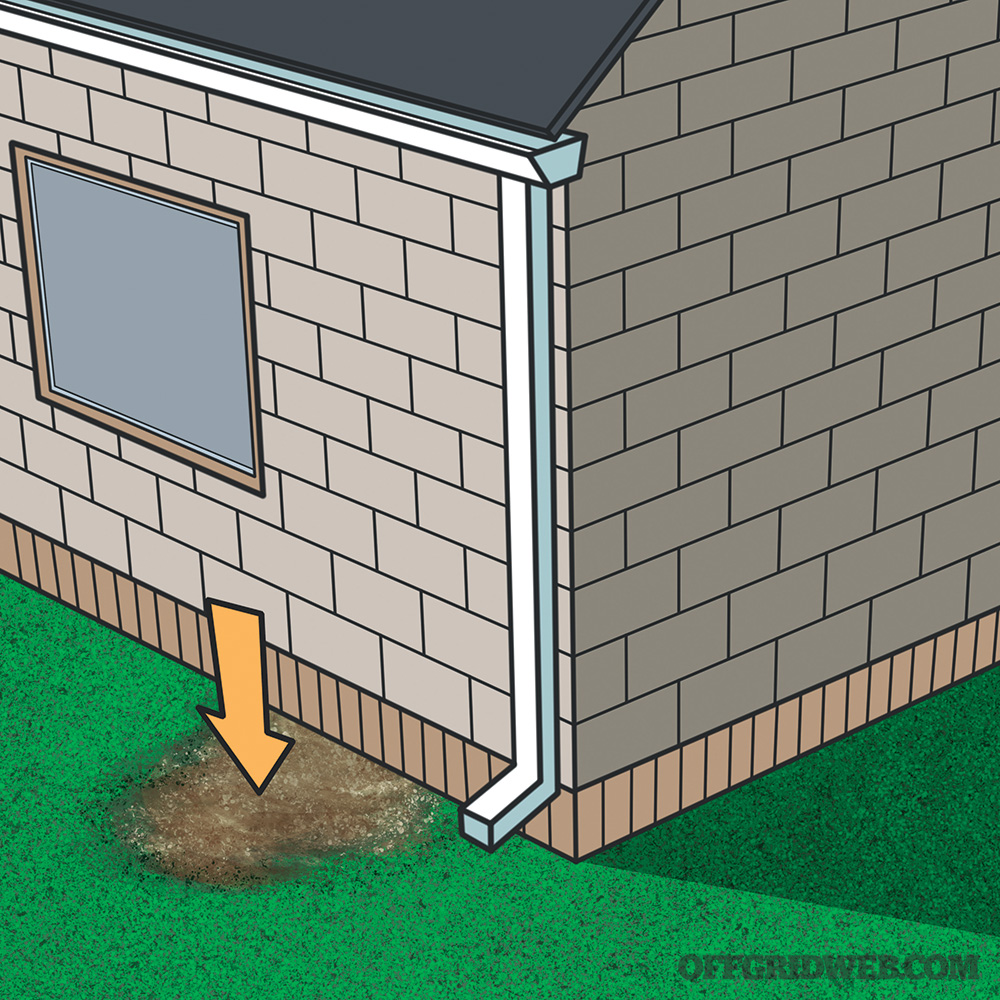
Location Prep and Installation
Select a location near your rain gutter’s downspout. Rain barrels are very heavy when full of water, so you want to make sure the area is flat and firm.
What you’ll need:
Fiskars DiverterPro Rainwater Diverter Kit
Concrete tiles
Marker
Tape measure
Shovel
Hacksaw
8. If the surface isn’t flat, take the time to prepare the ground so that it is.
9. You want the barrel to sit on a firm surface. If the area isn’t, lay down some hard material such as concrete tiles. It’s a good idea to have your barrel slightly higher than ground level to allow gravity to help the water flow out, especially when the water level is low. If you want to put your barrel on a higher surface such as a platform, now’s the time to do it.
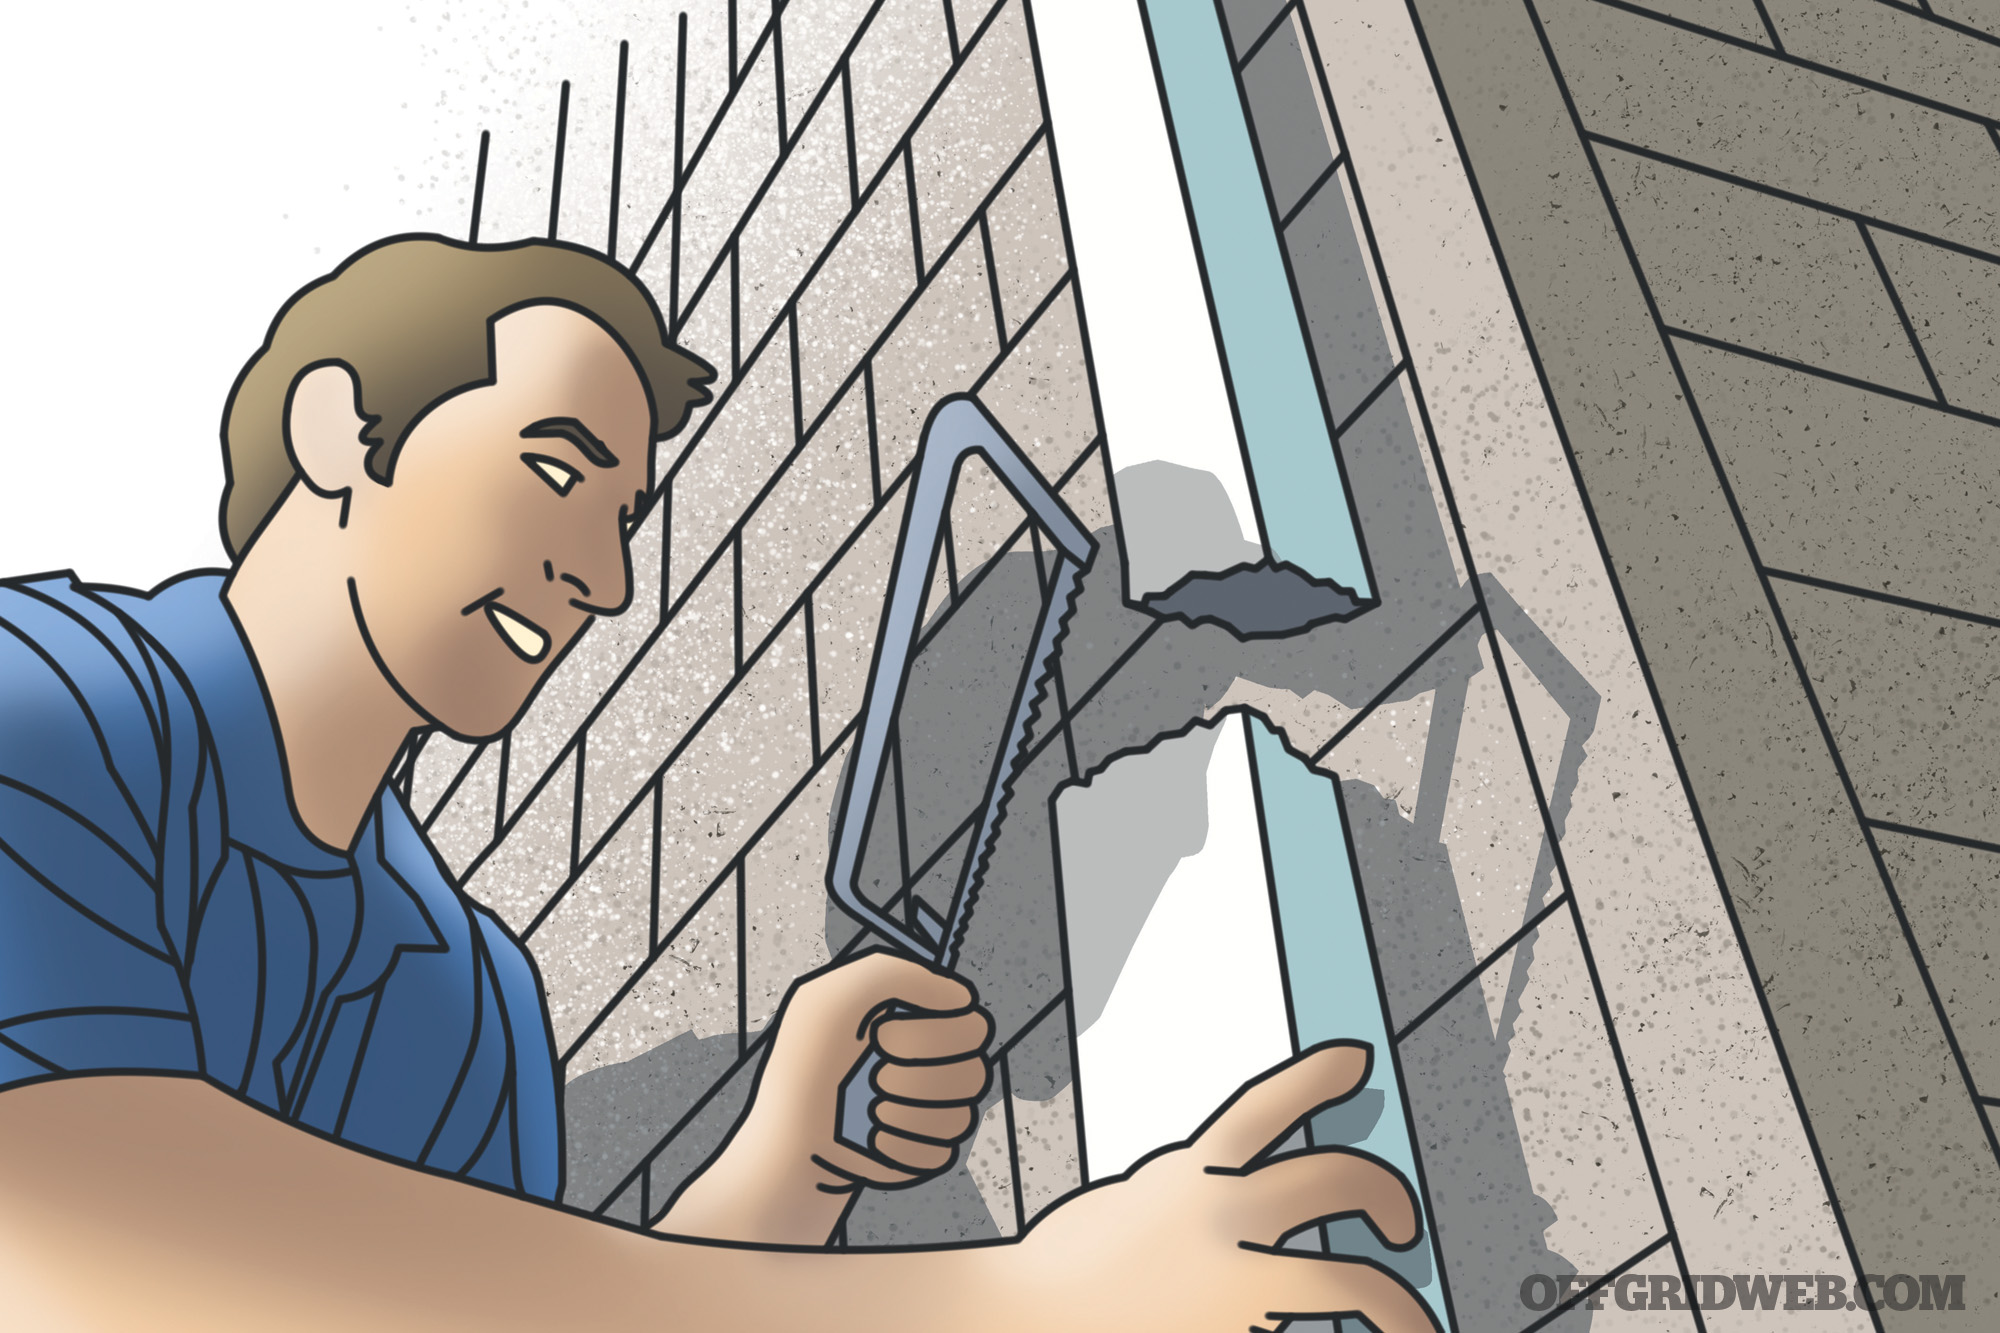
10. Now saw the downspout at the same height as the barrel. (You might want to measure and mark the height before you begin sawing.)
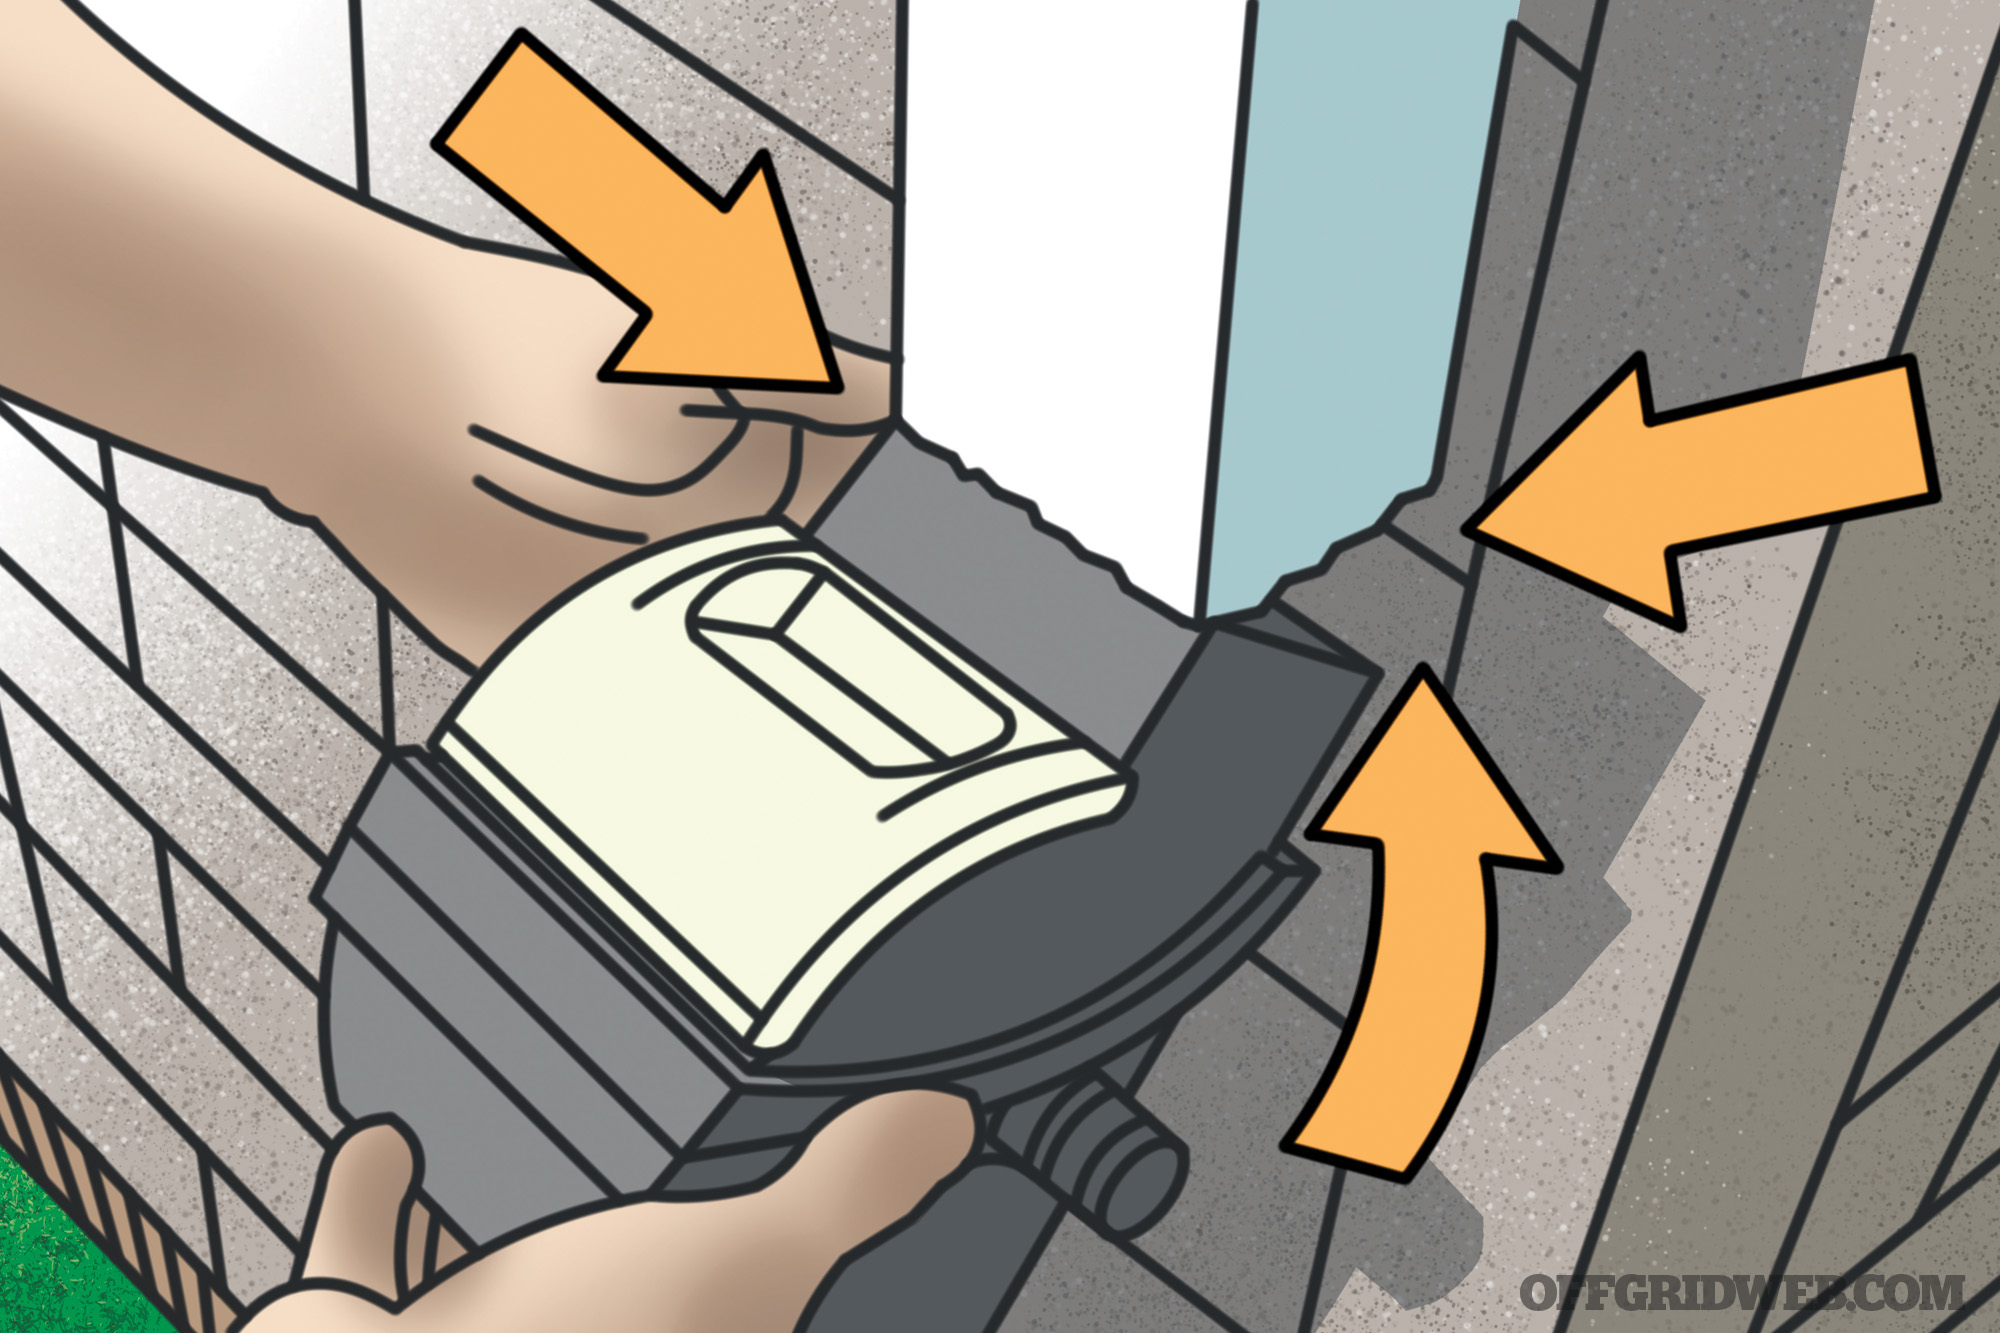
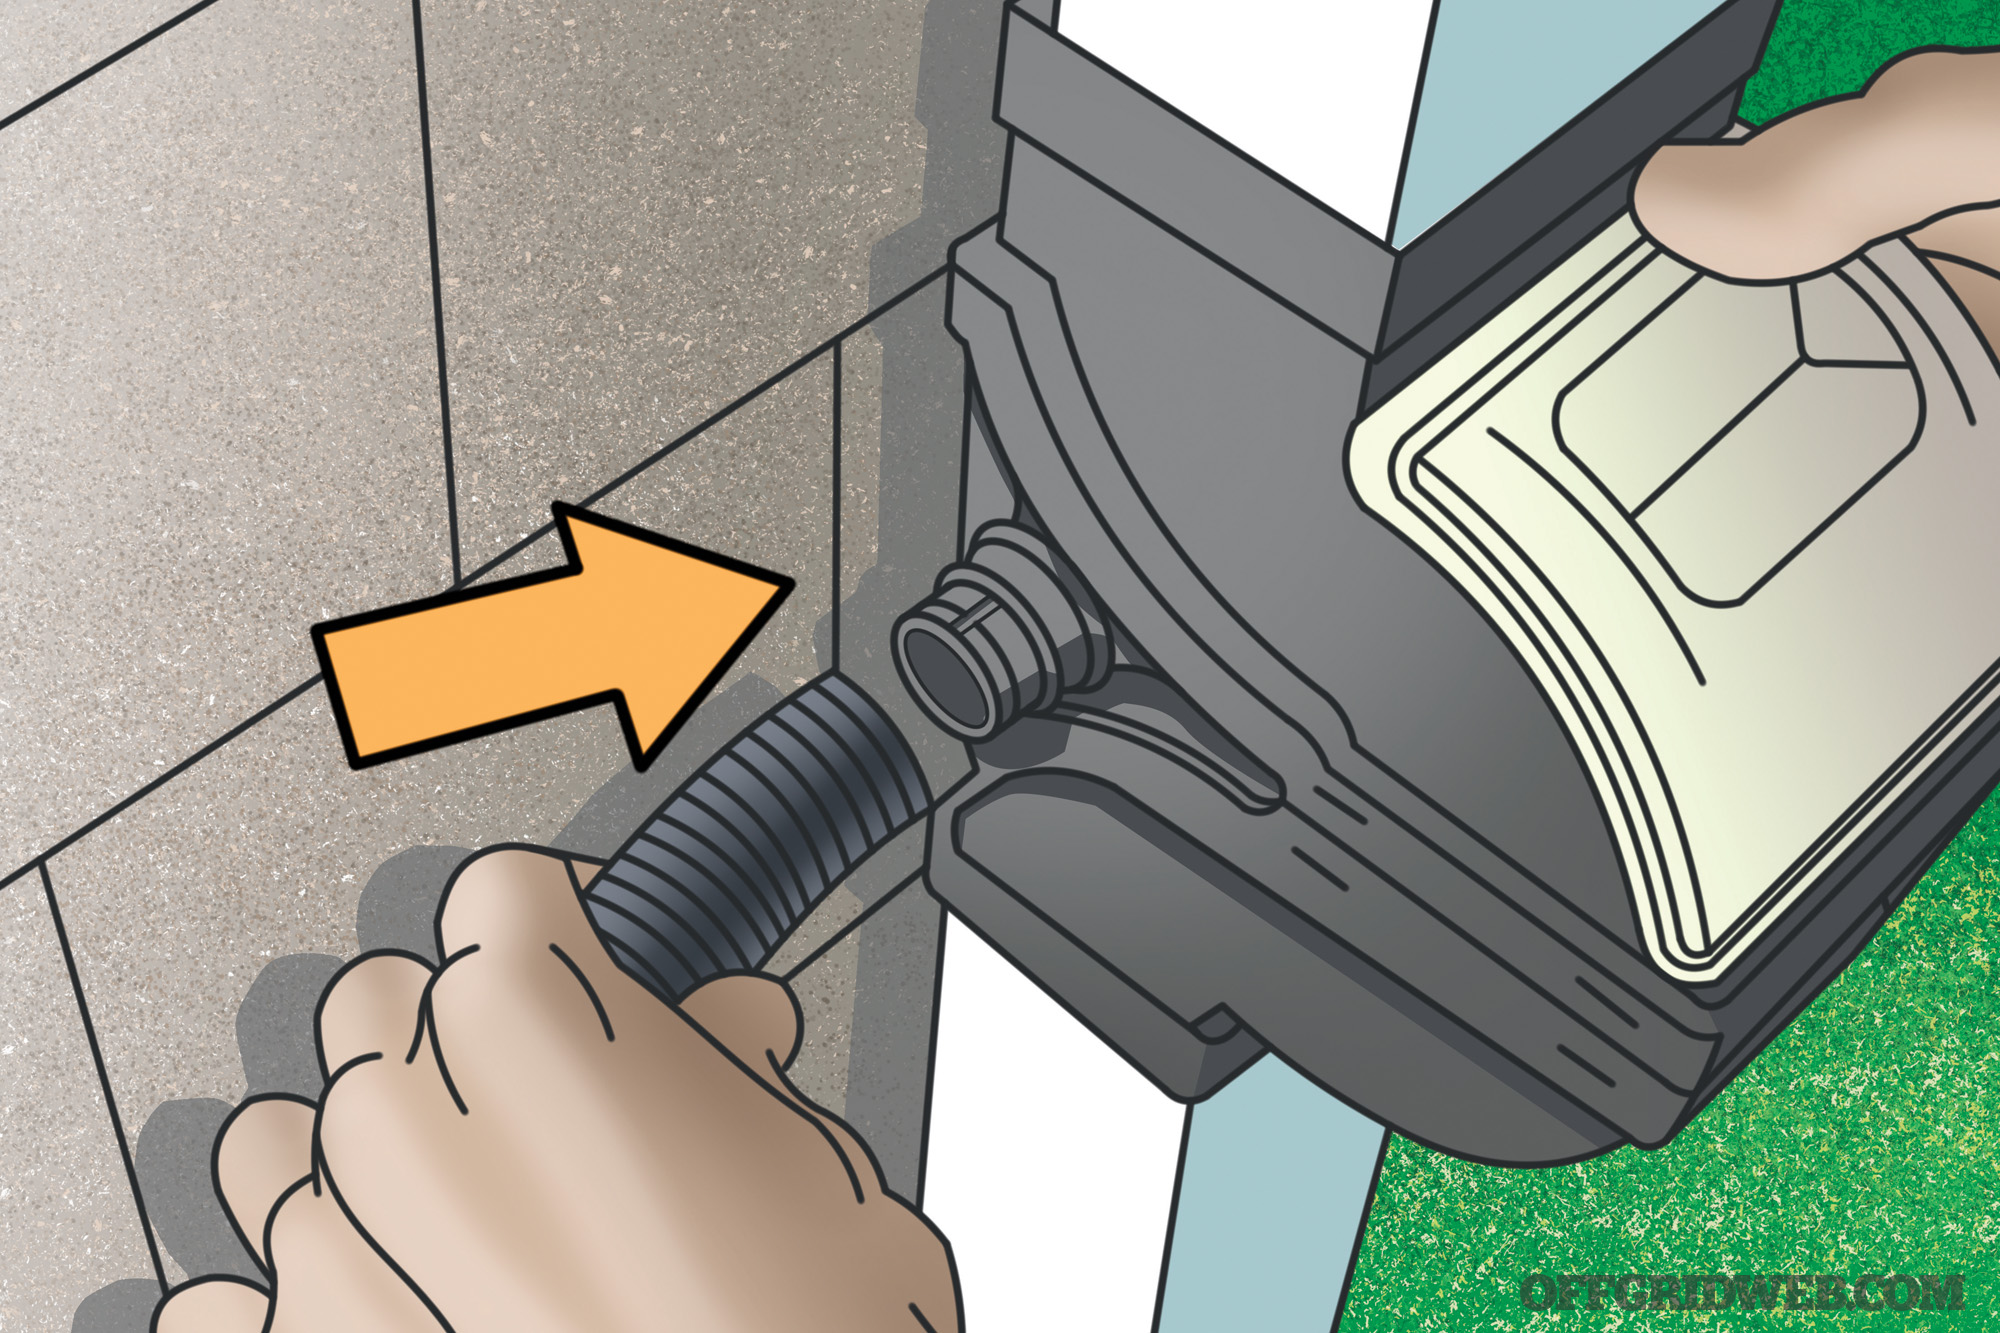
11. Next, slide the Fiskars diverter up onto the upper piece of the downspout. Measure and cut the lower downspout piece to make room for the diverter. Reattach the remainder of the lower downspout.
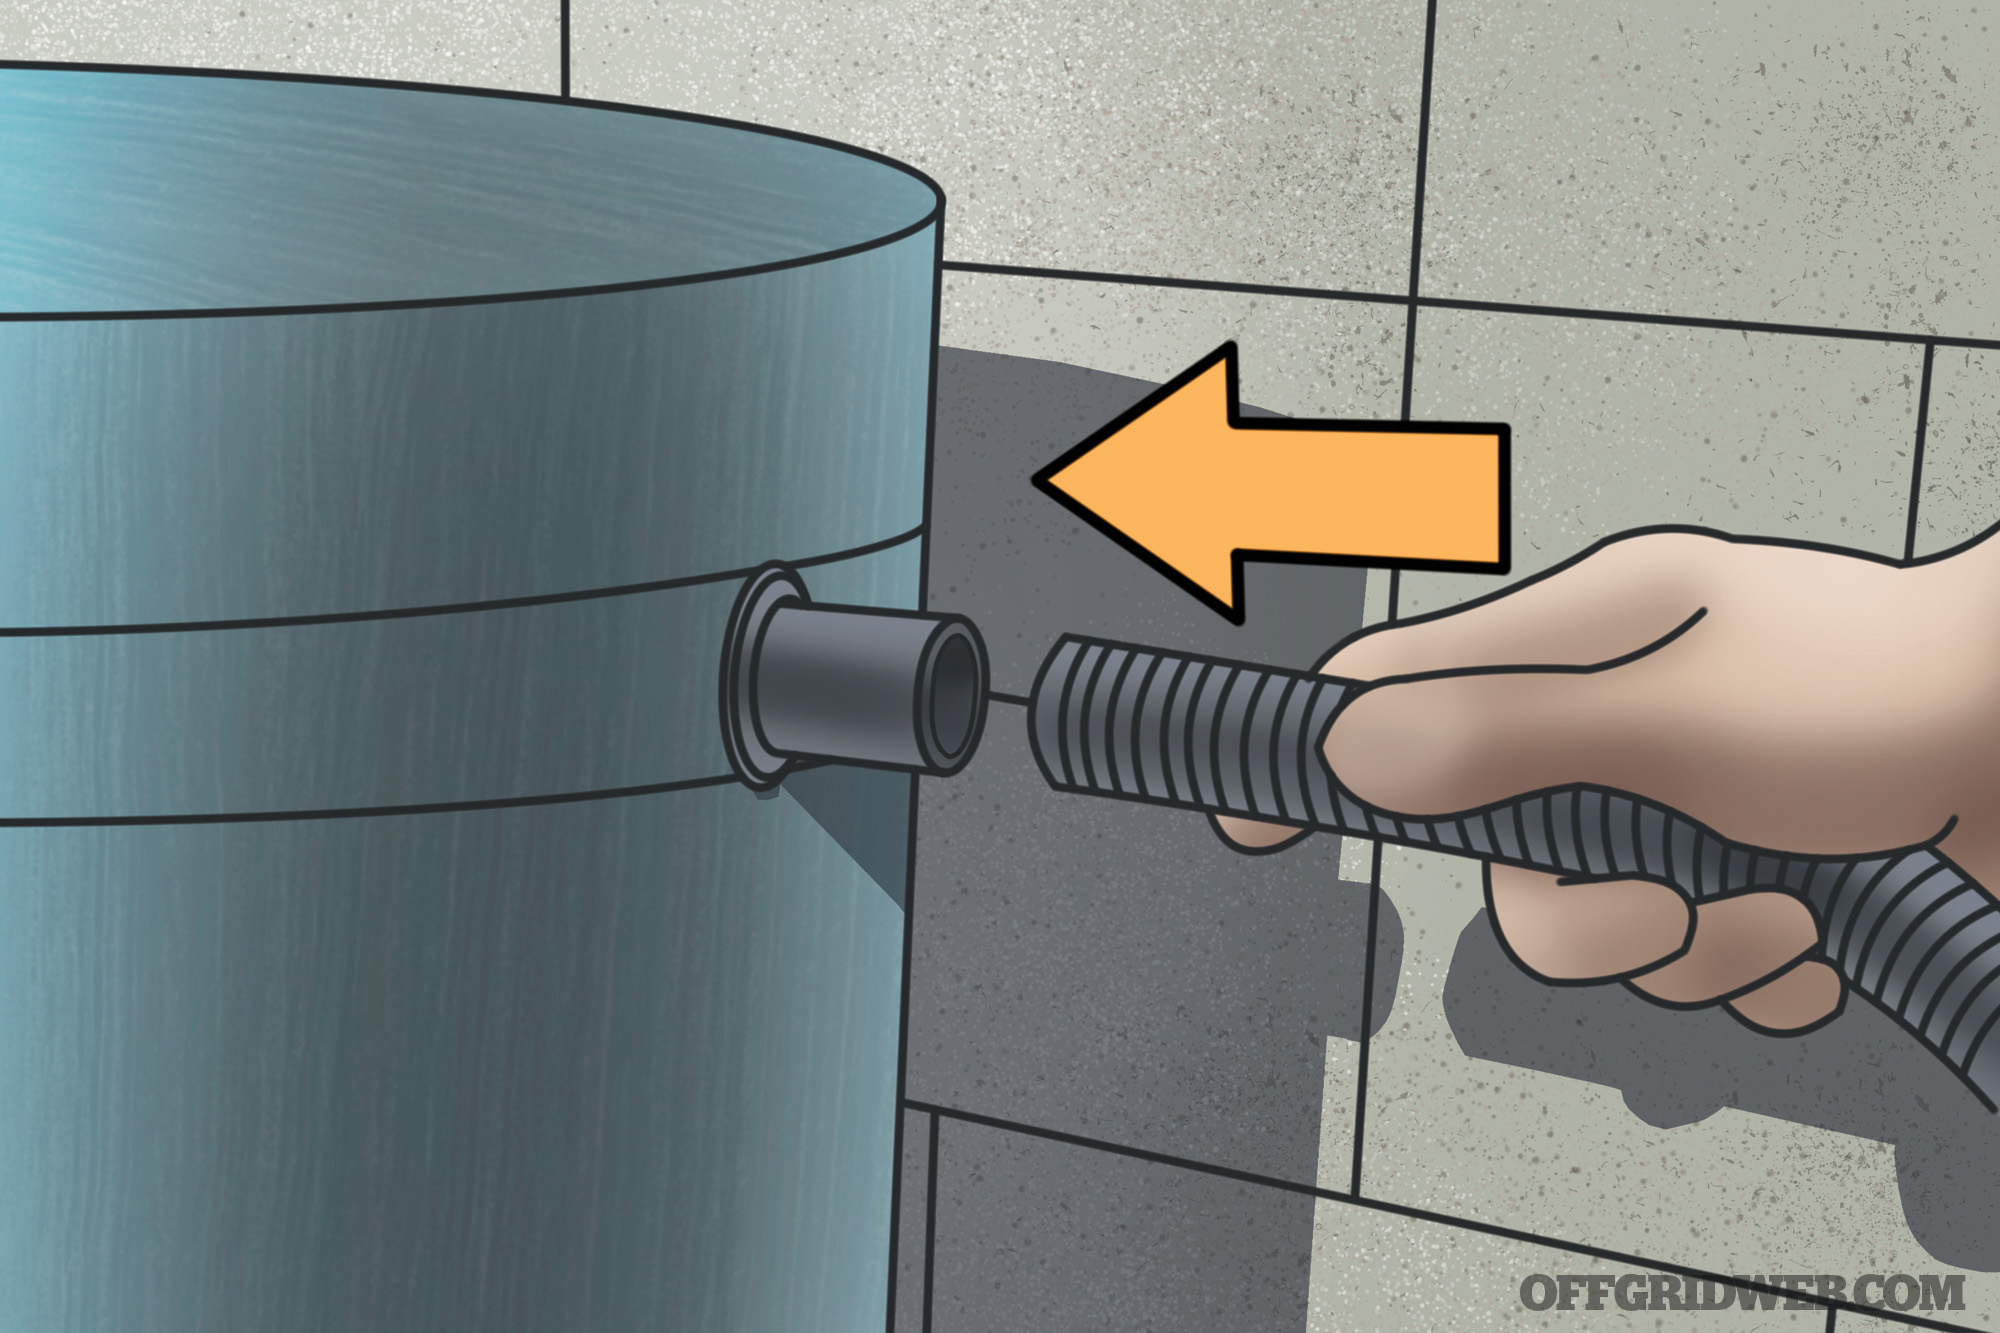
12. Measure, cut, and connect the connector hose to the barrel.
13. Then connect the hose to the diverter.
14. You’re done. Now all you need is some rain.
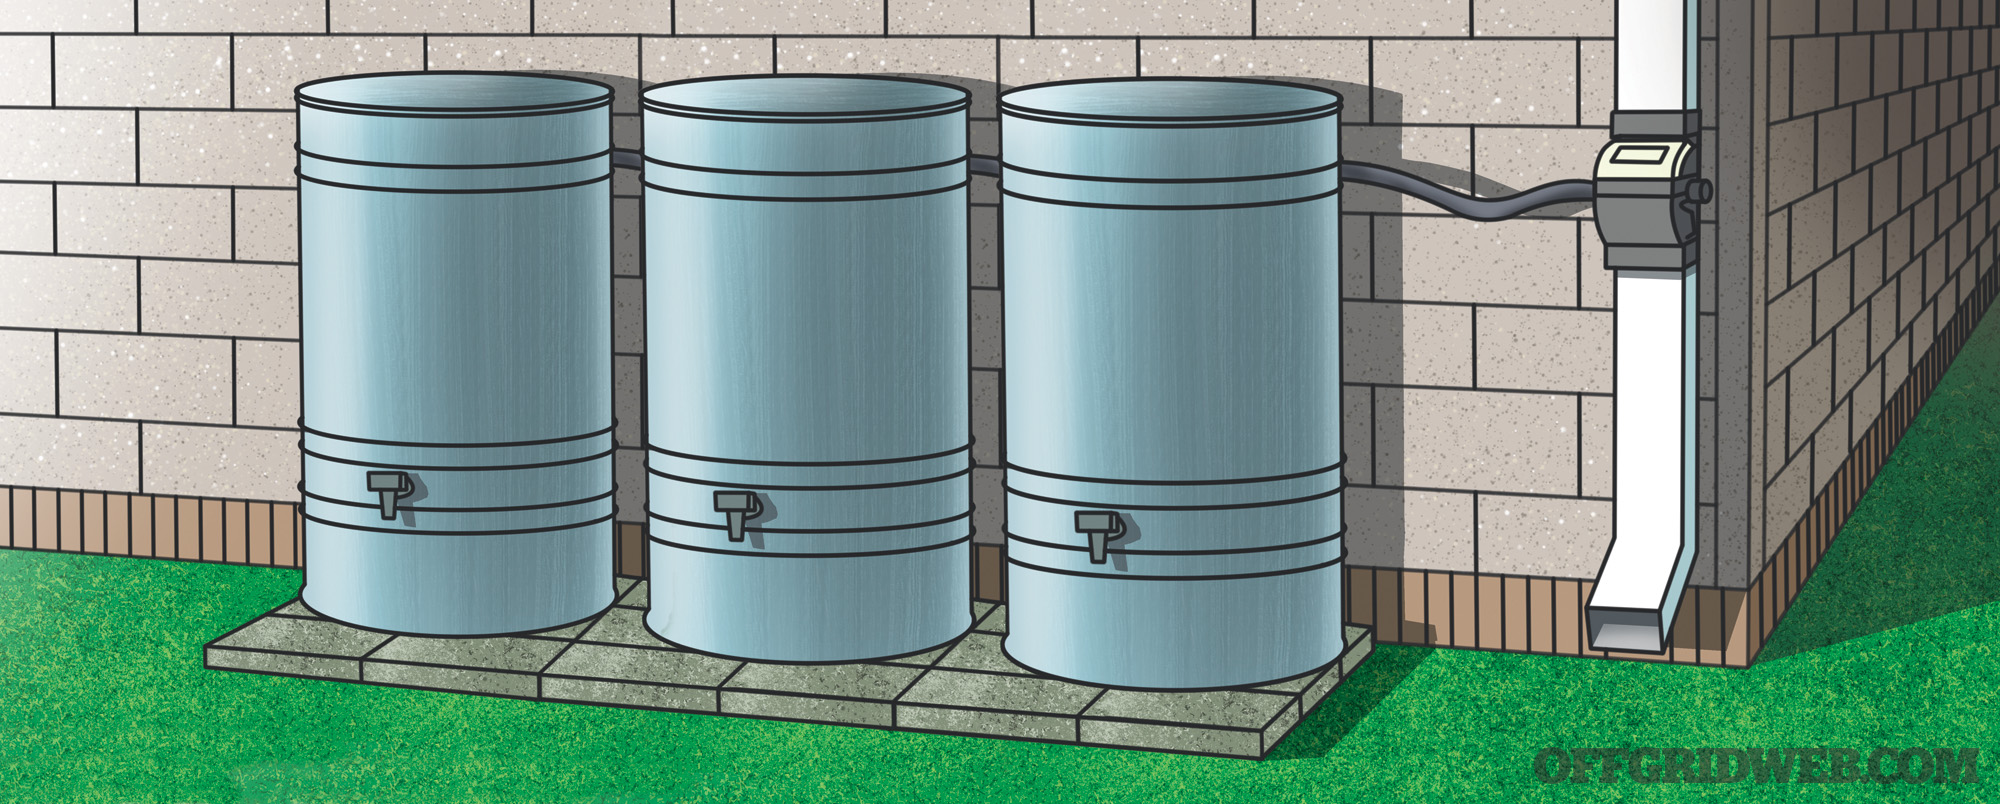
More Storage
If you want to collect even more rainwater, you can daisy chain barrels together by attaching them together on their opposite sides with connector hoses. When one barrel gets full, it will overflow to the next.