In This Article
Illustrations by Cassandra Dale
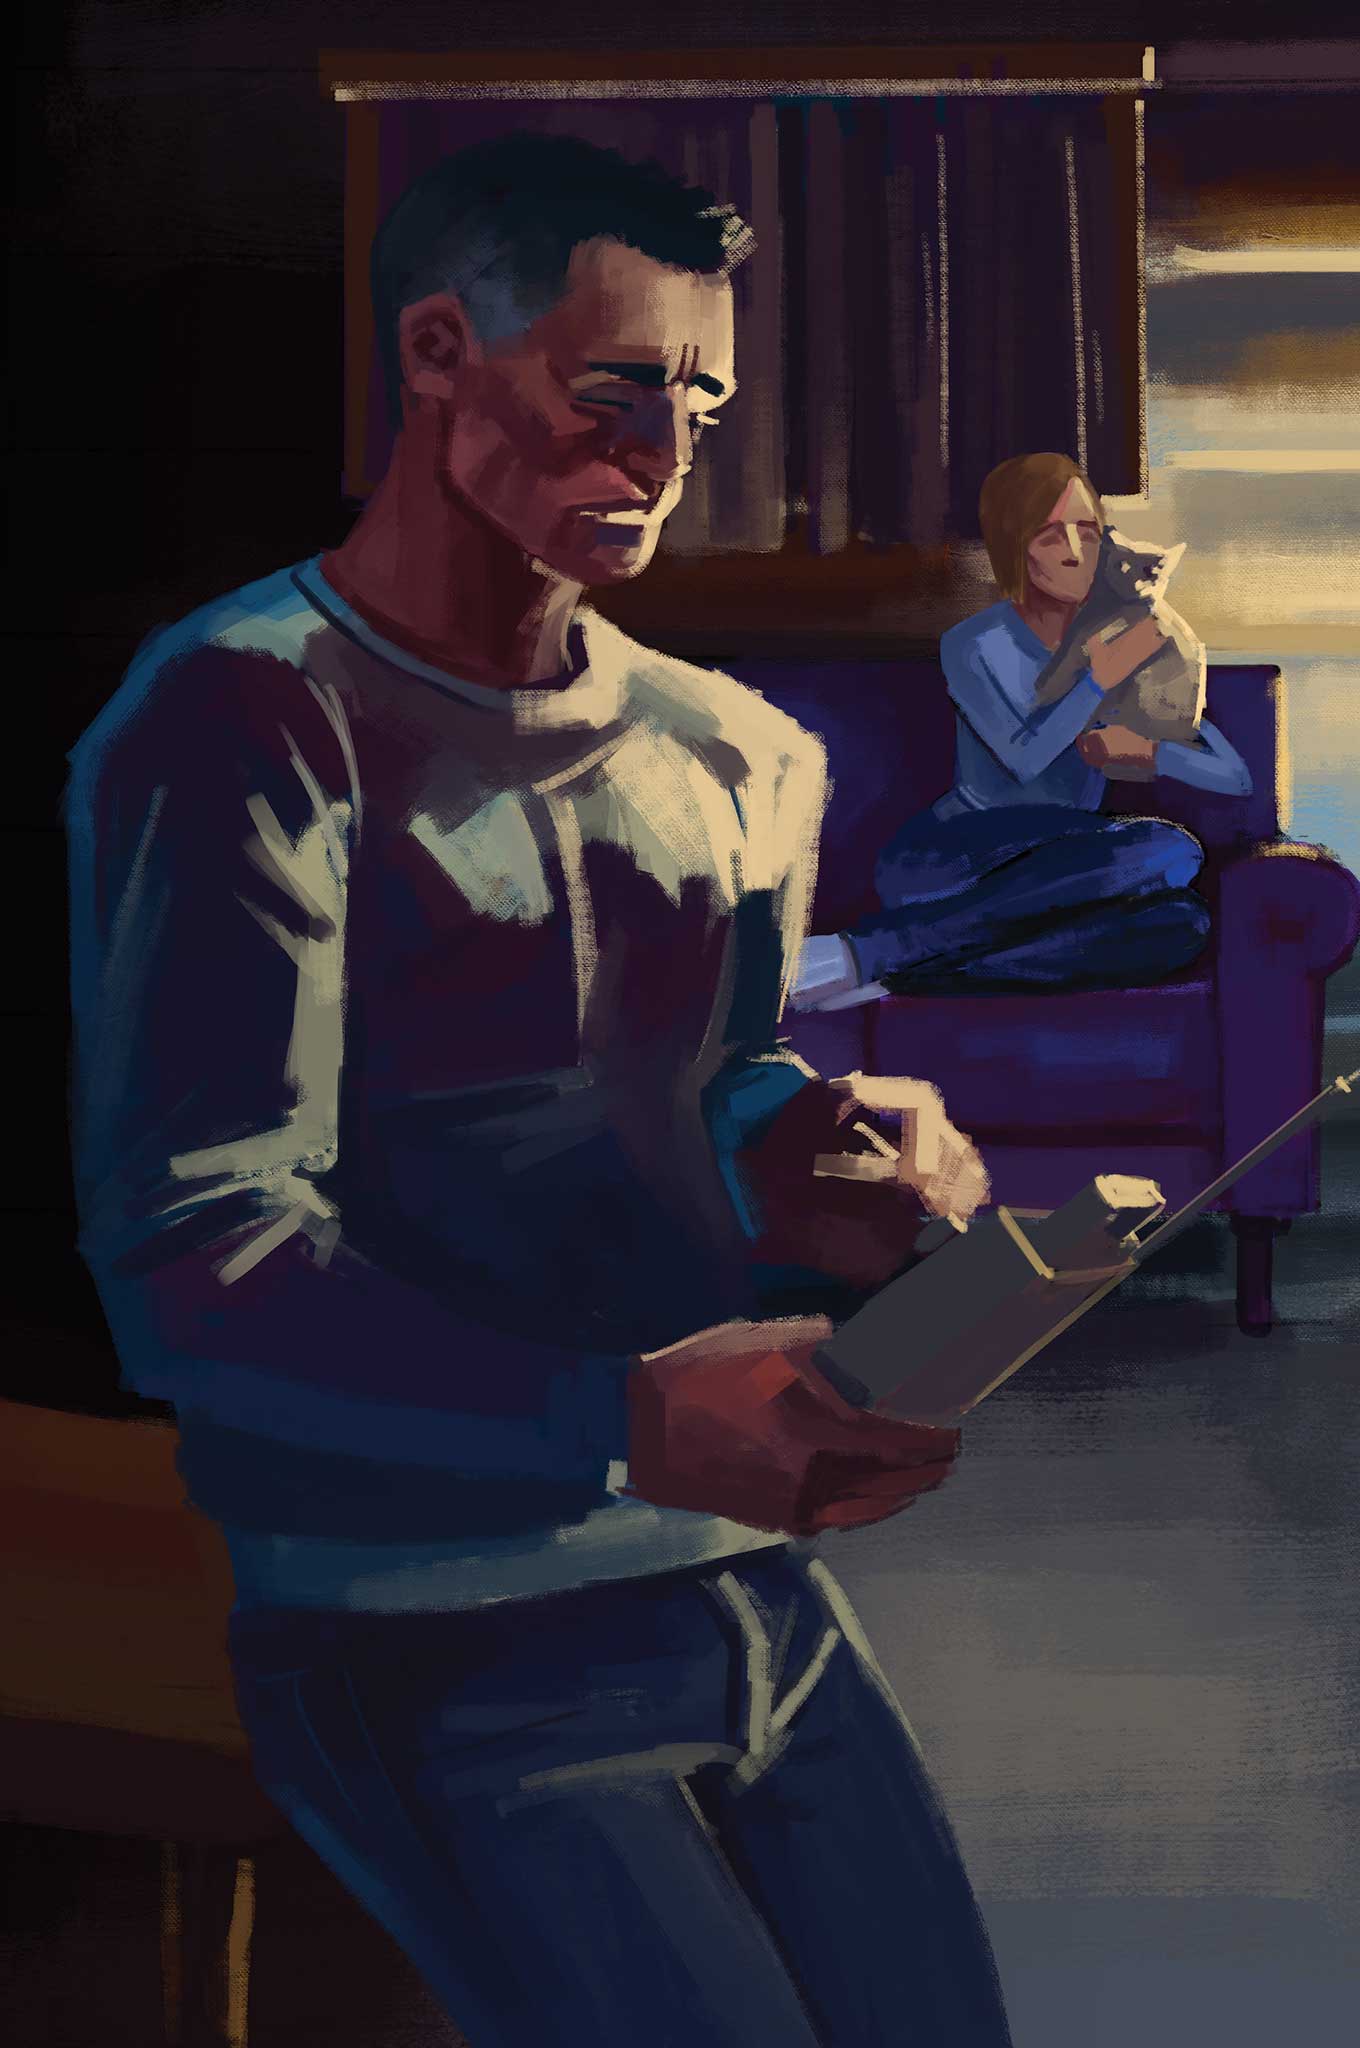
I wasn’t exactly sure what woke me, and I didn’t even remember dozing off. A strange scent stung my nose and the cat was acting weirder than normal. The tubby feline was making some very odd noises — peculiar even for that psycho of a cat. I lifted my head, and my groggy mind started to process the information that was streaming into it. That scent was smoke. And the room was far too warm. A jolt of alarm shot through me.
I was fully awake and something was very wrong. There was a haze in the air and a crackling sound coming from the room behind me. I stood up and coughed a bit, then turned around to find the room behind me in flames. My God, I thought, the cabin’s on fire! And with the ice-covered roads, there’s no way the fire trucks can get to us.
This installment of RECOIL OFFGRID’s What If? marks a change in the formula. It’s an alteration that many readers have requested, and we hope that everyone will see it as an upgrade. Rather than recounting a fictional tale about fictitious characters, we’ve been asked to explain what we would personally do if we found ourselves in the given survival situation. From preparation to the execution of skills and survival tactics, we’ll be sharing our own plans and reactions to the upcoming survival scenarios. We hope you find this feature to be an enjoyable read, and we hope it provides you with even more valuable information than it did before.
The Scenario
- Situation Type: Short-term survival
- Your Crew: You and your fiance, Candy
- Location: Acadia National Park, Maine
- Season: Winter
- Weather: Cloudy; high 32 degrees F, low 13 degrees F
The Setup: Your goal is to turn this Christmas vacation into the most romantic marriage proposal ever. After a roughly one-hour drive from your hometown of Bangor, you make it on December 20 to a gorgeous lakefront cabin in Acadia National Park that you booked through Airbnb. With no one but Candy’s cat tagging along, you’ve planned an unforgettable weeklong getaway that’ll climax with you surprising her with a 1-carat diamond ring on Christmas morning.
The Complication: On the fifth morning, Christmas Eve, darker clouds roll in. Then, the freezing rain starts to fall — water droplets that freeze upon contact and cover everything with sheets of ice. Hours later, the lights go out. Total blackout. You check your smartphone for an update, but data and reception are almost nonexistent. Fortunately, you find a battery-powered radio and turn it on. Reports confirm a massive ice storm has moved in, and authorities urge people to stay indoors. Realizing you’ll have to hunker in place indefinitely, you start up the fireplace and try to assuage Candy’s fears.
After she finally falls asleep, you light a candle so you can find a place to secretly set up a GoPro camera to record your marriage proposal the next morning. Exhausted, you end up nodding off at the kitchen table. You wake up at some point later to Candy’s cat making all manner of strange sounds. You find that the candle you lit has tumbled over and the flame has spread from the polypropylene floor rug to the Christmas tree, the drapes, and the couch in the living room. A quarter of the cabin is in flames and filling up with thick smoke!
The New Plan: If you were at home, you’d call 911 and grab your fire extinguisher. But you’re at a rented cabin, you have no idea if there’s an extinguisher, there’s no mobile phone reception, and the steps and sidewalk outside look like a skating rink (let alone the roadways!). So how do you deal with the fire? And if you’re successful, how do you vent the house, survive the power outage, and endure the rapidly dropping temps?
Fire and Rescue Expert: Scott Finazzo’s Approach
Prep
If we were to be honest, it’s safe to say the majority of people — preppers included — would not bring much in the area of “supplies” to a romantic getaway. Even though there are some who would bring survival provisions, if there’s any chance for success, the focus on packing would more likely be comfort and romance.
So, let’s assume that not much was brought in terms of survival gear. But, like any good traveler, I did a little bit of homework on the cabin, the weather forecast, and the surrounding area. Acadia National Park is a secluded but popular island destination. Visitors can expect mountains, miles of shoreline, and plenty of wildlife scenery. Any supplies brought from home would likely be a basic survival kit kept in the car (food, water, knife, rope, first aid, flashlights, etc.) and items for warmth: blankets and fire starters.
Knowing that sketchy weather is in the forecast, I’d ensure the car is as full of fuel as possible when we arrive and contains the aforementioned basic survival kit. Anyone who has endured any type of dangerous weather knows that running out of fuel, when it’s desperately needed, is a stressful and potentially deadly scenario.
On Site
Hotels have specific requirements that are dictated by municipal life safety codes such as working smoke detectors, sprinklers, and posted egress paths. Airbnb is different. Their policy is that the homeowner shall meet all local safety requirements, meaning they’ll vary from location to location.
Being safety-minded, any time I stay at a rental, I identify the presence and location of a few things: smoke detector(s), carbon monoxide detector, fire extinguisher(s), and utility (gas, electric, water) shutoffs. I also check egress paths, determining the safest ways out of each room, particularly any rooms above the first floor. I would also make sure the egress paths are clear. Being startled in the middle of the night by an emergent situation and needing to quickly leave a structure can be greatly hampered by clutter between you and an exit. These steps take only a few minutes and equip me with peace of mind and a few critical emergency plans.
My girlfriend and I would discuss the importance of staying together. Because of the ominous weather forecast and the potential isolation, neither of us should wander away from the cabin alone for any reason. We’d agree to keep cell phones charged and turned off, but near us at all times. No one wants social media notifications distracting them from a romantic getaway. But, in the event of an emergency, a cell phone can be invaluable, and I consider it part of my vacation and emergency preparations.
I also believe it’s important to keep car keys, shoes, and a flashlight nearby when I sleep. Any type of unexpected event can occur overnight (fire, tornado, earthquake) and you will be at a serious disadvantage if you’re barefoot and cannot see. And if you need your vehicle to escape or to use as shelter, digging through pant pockets isn’t feasible when there’s an imminent threat.
We’d also establish a meeting place. If we become separated for any reason, there should be a mutually agreed-upon location where we’d meet. I’d say the cabin itself is a meeting place, but if something were to happen to the cabin, we’d determine a nearby landmark (a distinct tree, rock, a boat dock, etc.) to reconvene at.
Crisis
The first and foremost priority in any emergency is life safety. In the fire service we have Incident Priorities: 1. Life Safety, 2. Incident Stabilization, and 3. Property Conservation. Human life should always be the most important consideration in any crisis. The order may change, but the priorities don’t. For example, one may stabilize the incident in order to achieve life safety. In the case of our cabin fire, the most important factor is our lives. Getting out is a priority. Regardless of the perilous weather outside, it’s a far better environment than the firestorm building inside.
The absolute first thing that must be done is to wake my girlfriend. She should grab her shoes and flashlight while I locate the cat. Hand her the cat and car keys. Instruct her to go get in the car, start it for warmth, and call 911. Even if we have “no service,” network providers must transmit emergency calls, whether we use their network or not. So, there’s a chance. If possible, she should back the car a safe distance away from the house. In icy conditions, that may not be possible, but as long as the car isn’t inside the structure, it’s the safest alternative. Pet owners never like this next statement, but if I can’t quickly and easily locate the cat, it’ll be left to fend for itself for the time being. The good news is that pets have instinctive survival skills, and, at the very least, will attempt to rescue themselves. As soon as I direct her to the door, it’s critical that I turn my attention to the fire.
Based on over 20 years in the fire service I’ll tell you that a nonprofessional extinguishing a fire of moderate size or greater is nearly impossible. It requires quick action, a good understanding of fire, and more than a little luck. First, a little bit about fire.
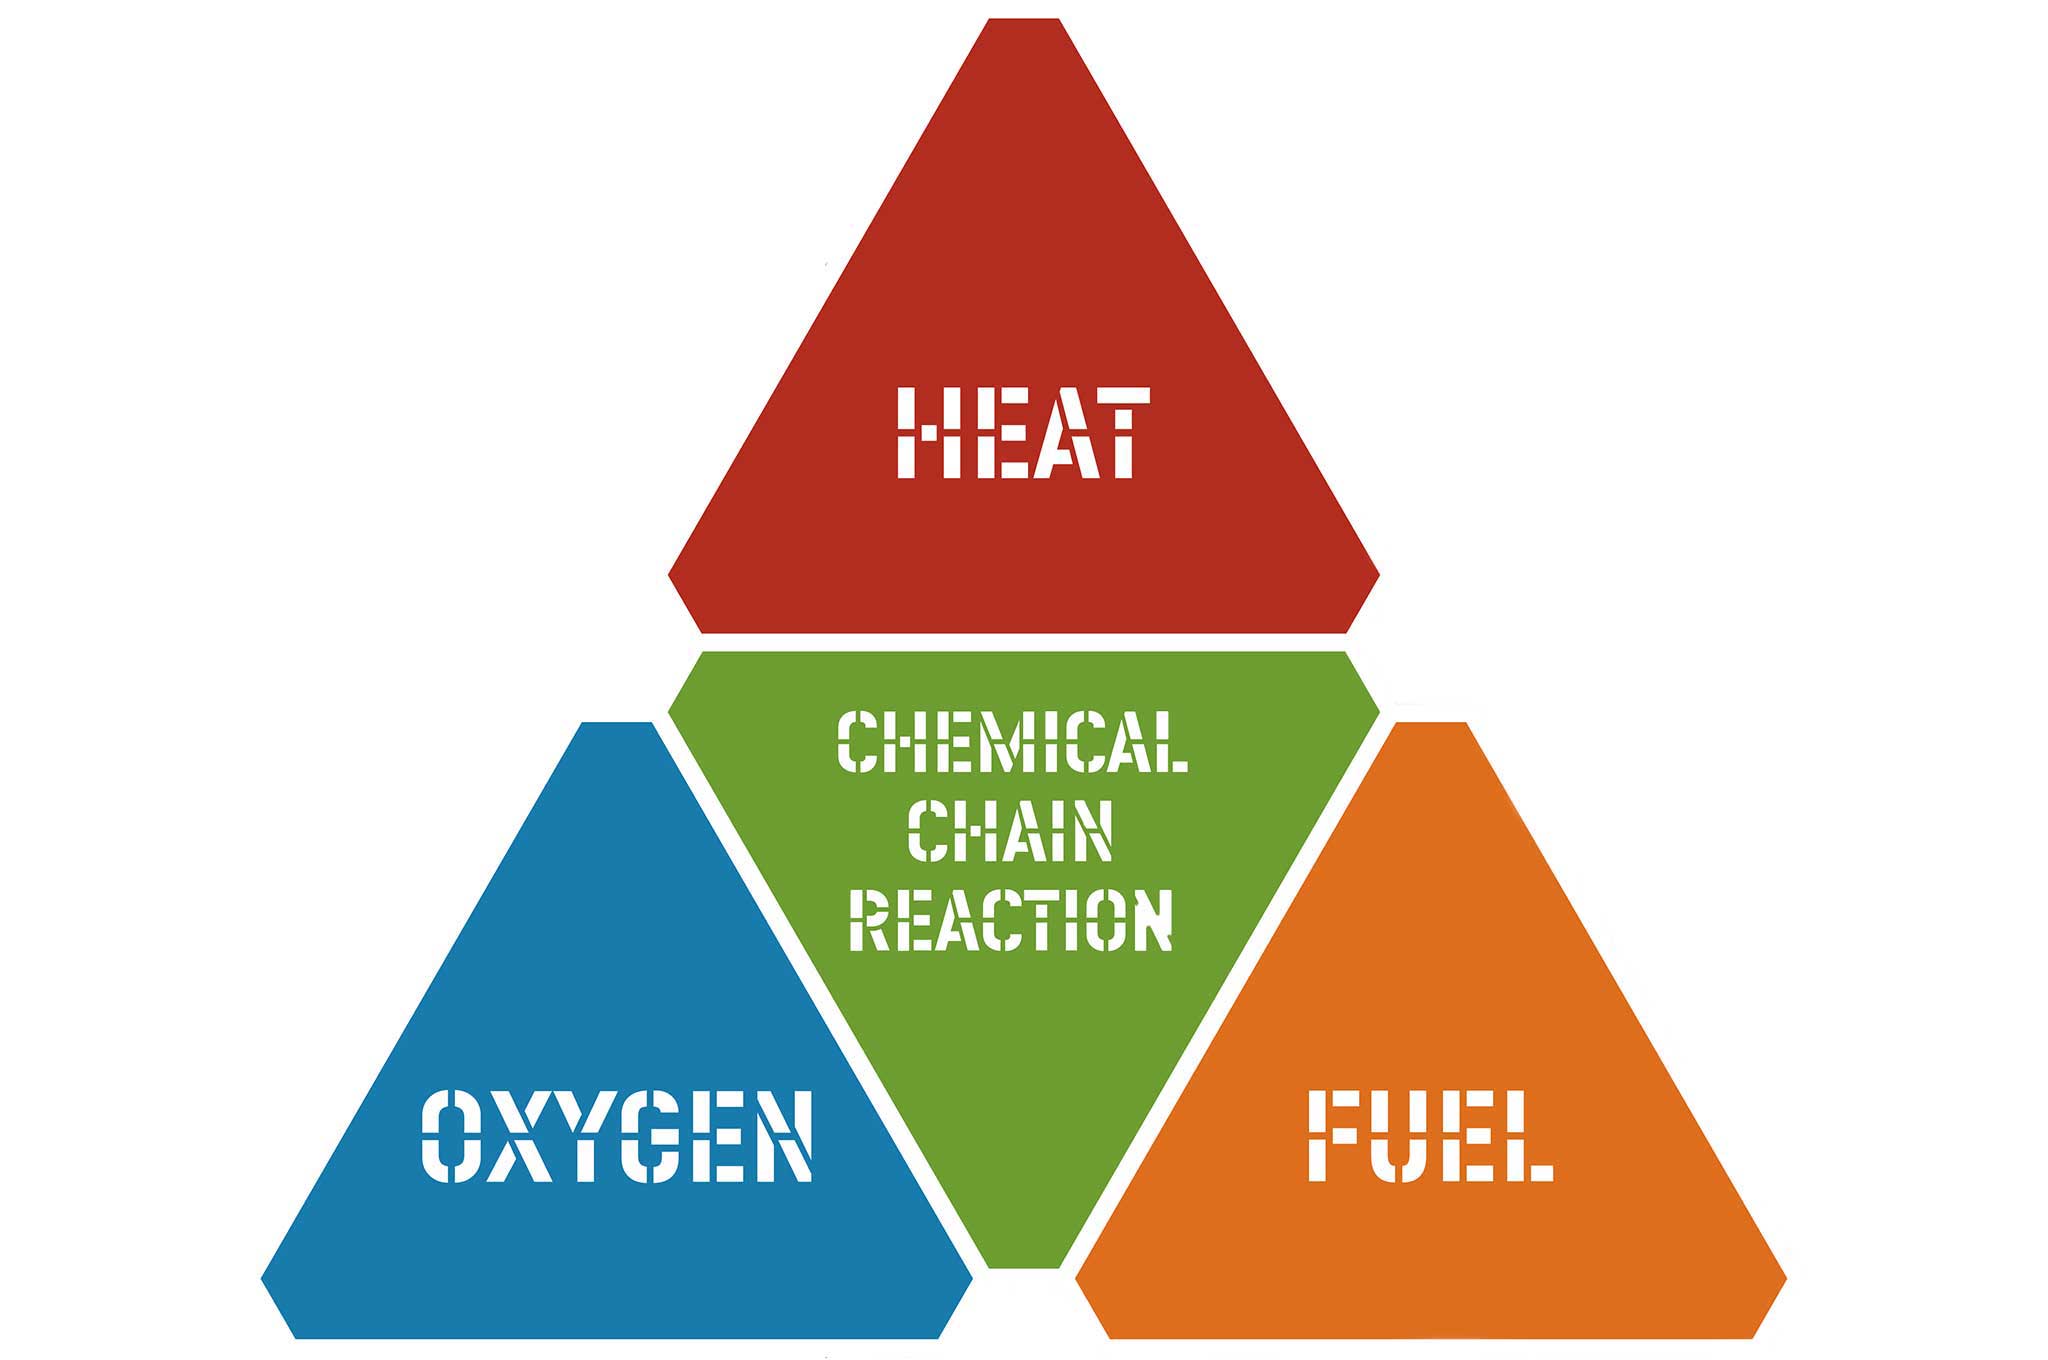
There are four factors necessary for fire to exist: oxygen, fuel, heat, and a chemical reaction. Without getting into too much chemistry, heat is applied to a fuel (wood, paper, cotton, plastic, etc.), which causes it to release vapor. The oxygen in air acts as an oxidizer allowing the fuel to burn and the chemical reaction brings them all together. By removing any one of these factors, fire cannot exist. So I’ll need to eliminate at least one of those elements.
A common theory is that fire doubles in size every 30 seconds. Obviously this will depend on several factors, but the bottom line is the fire in our cabin is large and getting larger. I also know that fire is only part of the problem. It’s releasing superheated deadly gases, such as carbon monoxide and hydrogen cyanide, which can instantly be lethal.
If the fire hasn’t broken out the window near the burning drapes, smoke will be filling the cabin. I need to act fast! The window may soon rupture, which will allow some heat and smoke to escape (good), but will also feed the fire. The cool, ambient air will likely bank the smoke down, and, depending on wind direction, could blow it right toward me (bad).
There isn’t enough accessible water to fight a fire of this size. For the sake of this scenario, let’s assume a fire extinguisher isn’t available. I need to reduce the fire to a manageable size. I grab a blanket, preferably a heavy one, and squeeze one end together like I’m holding a club. I beat it against the leading edge of the fire. Remember the fire tetrahedron? This action removes the necessary oxygen.
Making sure I hit the fire firmly helps to avoid creating a counterproductive fan effect. The fire won’t fully extinguish until I get to the seat of it, but snuffing out the leading edge will buy critical time. I should be very cautious to not draw the products of combustion back toward me as I draw back the blanket.
If I act quickly enough and some things go my way, I can reduce the fire to a point where water can be utilized. Then, a sink sprayer (if it’ll reach) would be a great tool, or pots/buckets of water from the sink can be employed to finish the job. Applying water to the seat of the fire will aid in rapid extinguishment, and then I can continue to apply water to any embers or smoldering objects.
Once the fire is out, ventilation is critical. I must get the poisonous gases created by the fire out of the house. The best way is to determine wind direction and open windows and doors at opposite ends of the cabin, in the direction of the wind, creating a flow path through the cabin. This will let cold air in, but that is an unfortunate necessity. Without proper ventilation, carbon monoxide (odorless, colorless, tasteless) can accumulate in fatal concentrations. Finally, I’ll locate the electrical panel and ensure the breakers associated with the affected parts of the cabin are turned off.
The best chance for success in this scenario lies in the preparation and taking some basic fire safety precautions. At all times, particularly when you’re snowed-in and utilizing open flames for heat or ambiance, extreme caution and care must be taken. The flame must be in a safe location and monitored. When we’re finished with the fire, it must be fully extinguished and the firewood, candle, cigarette butts, etc., left in a non-combustible container or area.
This scenario combines several extremely dangerous situations occurring simultaneously. The ice storm is a major factor until the fire occurs, then becomes secondary. I’m forced to prioritize. When a fire develops, regardless of the ambient conditions, it must be dealt with as quickly as possible. The reality is that when there’s as much fire as in our scenario, it’ll be extremely difficult to overcome. Heat is measured in British Thermal Units (BTUs), and as the fire grows exponentially, the BTUs become so great that they’re difficult or impossible to overcome with the tools at our disposal. But considering all the factors, I have no choice. My life and the life of my girlfriend (and her cat) depend on it. I must be prepared and act quickly.
Survival Expert: Tim MacWelch’s Approach
PREP
Do Your Homework: Before travelling anywhere new, I like to study the area, research the accommodations, and try to uncover anything else that might be relevant. A paper map of the area is an excellent resource to acquire and study. I can even bring it with me, and it works whether there’s power or not. I make note of important sites, like police and fire stations, and even jot down extra information on the map, like non-emergency phone numbers for local police, fire, and rescue squads.
The map can be used to determine multiple ways in and out of the area, too. And if I want to place information on the map that I don’t want others to see, I’ll use a UV marker. An ultraviolet (UV) marker is a pen whose marks are transparent under normal lighting, but glow under an ultraviolet light. These markers can be purchased online or in specialty shops. To then read the invisible writing, I use a “pet stain finder” light, which is a little battery-powered UV flashlight commonly available in pet stores.
Check The Weather: This part of preparation is vital, since it can help me plan the gear I’ll bring and make decisions on my course of action. I probably wouldn’t find myself in a predicament as severe as the one depicted here. I check the weather forecasts often, particularly during the winter. When any hint of ice is mentioned, I go home and stay there. Ice storms are fairly predictable events, and we wouldn’t have gone to a remote cabin in the northeast — we’d have gone home. But let’s say that the weather guessers got it wrong. They might have predicted snow, and I would certainly view a little snow as nice backdrop for an amorous getaway.
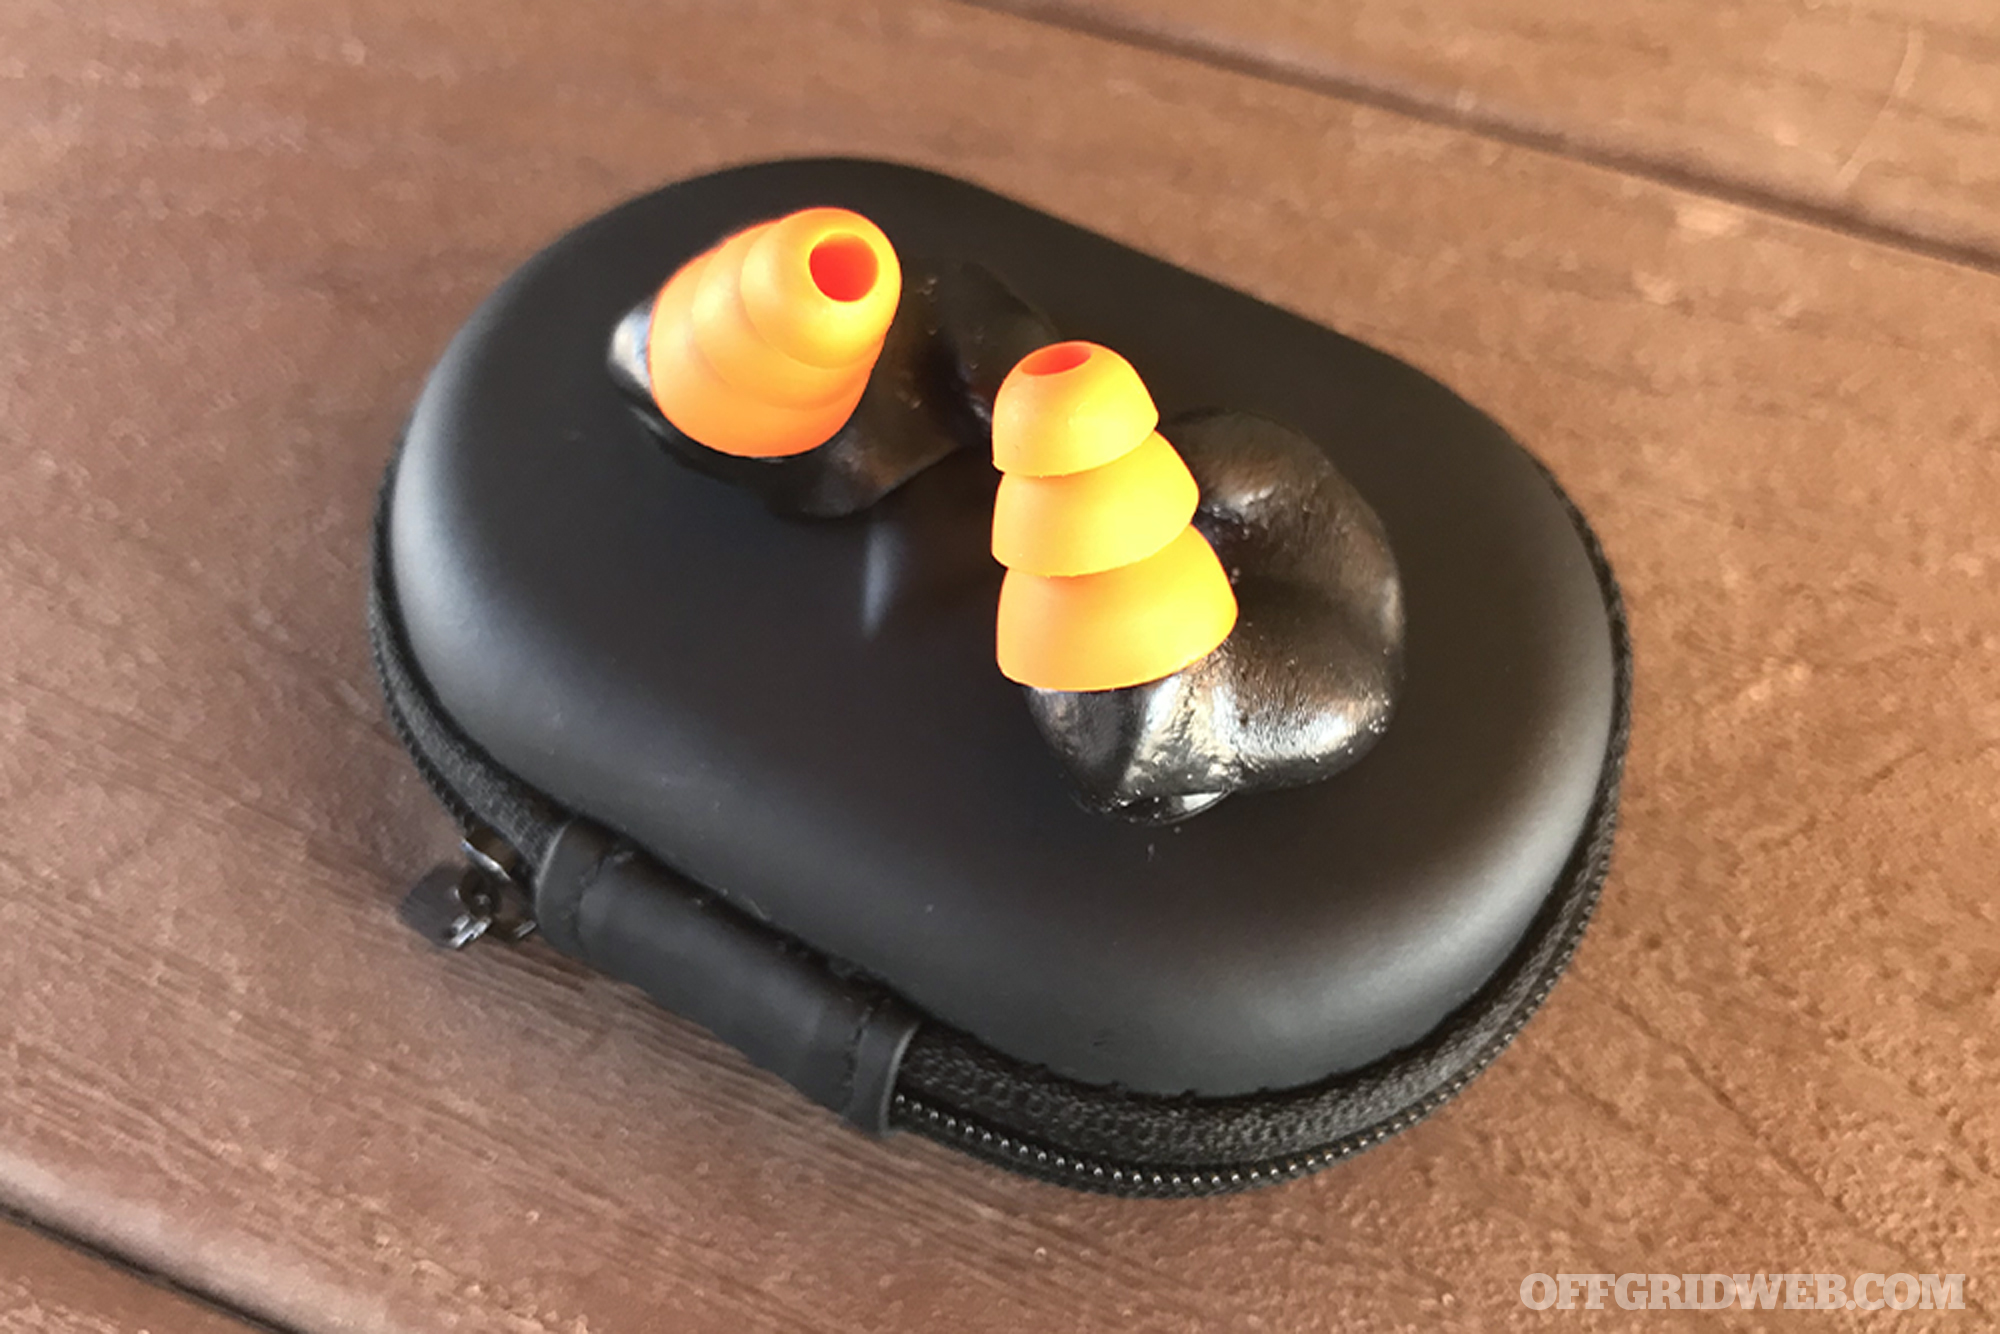
Bring the Supplies: For a weeklong winter vacation in a private cabin, I’d bring enough supplies to last more for than a week, just in case we had to stay longer. This is in addition to my normal vehicle supplies. I like to treat each of my family’s vehicles as a rolling warehouse of survival supplies. There’s always extra food in there, along with a full-sized fire extinguisher, a first aid kit with commonly used OTC meds, an assortment of handtools, and a solar charger for my mobile phone. On top of that, for the stay I’d bring plastic bins filled with the following:
- Food (both fresh and shelf stable)
- Water (bottled water, 16-ounce bottles for easy rationing)
- Lighting (non-flame preferred, LED flashlights can run for days on one set of batteries)
- Batteries
- Extra winter clothing and outerwear
- A battery-powered mobile phone charger, or a car charger if the vehicle stays nearby
While On Site
Once I reach the cabin with my lady and her feline friend, we’d naturally take a look around inside and outside of the cabin, checking out the amenities and the features. I’d pull the vehicle close and unload all of our things. As we settle in, the food would go in the kitchen, the flashlight would go on the nightstand, and the fire extinguisher would come out of the vehicle and go into the same room as the fireplace (but not right next to it).
In the given scenario, a big emphasis of mine would be the firewood supply. Not only useful for a romantic fire, that firewood represents a source of backup winter heat (also a backup light source and a way to cook food). I’d make sure we had an ample supply, and that it was covered to stay dry.
After settling into the cabin, we’d check the weather periodically to stay aware of changing conditions. When the phones stop working and the power goes out, we’d use a radio to stay informed (even if we had to sit in the vehicle periodically to listen to the car radio).
Crisis
Holy crap, the cabin’s on fire! Once I spot the fire, the first thing I’d do is yell for Candy and try to get to her. Ideally, she’d wake up, yell back, and be able to crawl out of the cabin with me — toting her cat and at least one of our mobile phones. But I’d have to be prepared to drag her out of the structure, if she had lost consciousness. Why drag her? Because I can crawl while dragging her — keeping both of our faces in the clearer, cooler air by the floor. If I scooped her up and carried her, we’d both be breathing more smoke. Once outside, we’d use the vehicle for shelter, continuing to try 911 on our phones and running the engine for warmth.
But what if we were dropped off at the cabin, and there was no vehicle or any neighboring cabins for shelter? Then we may have no choice but to deal with the fire ourselves. There may be a fleeting moment when we could stop a small fire with a handheld extinguisher (or even a kitchen sink sprayer). Everyone should know how to use a modern fire extinguisher and which type to have. Class A extinguishers are the most practical for household fires, as they put out fires involving paper, plastics, cloth, wood, and rubber. Spray the extinguishing dust at the base of the fire, sweeping back and forth — this would be done after you’ve called 911. Again, you’d only try to act as your own firefighter if the fire is small with minimal smoke. Make sure you check the gauge on your extinguisher seasonally to make sure the pressure needle is in the “green.”
In the event that we had successfully killed the fire, but had no vehicle or any other place to get out of the ice storm, we would have to vent the smoke and fumes from the cabin. Despite the frigid temps outside, every window and door would need to be opened, and we’d need to stay out of the dwelling for as long as we could, ideally several hours. During this time, the burned materials could be removed to lessen the smell and the fumes in the cabin. The rug, drapes, charred Christmas tree, and burned couch cushions would have to go. The smoke and invisible gases of a house fire are very dangerous to breathe, and these would need to be fully vented before occupancy is resumed. Of course, this “open house” would remove all warmth from the cabin, and with the power out too, running a fireplace or woodstove would be the only practical option for warmth (unless we had cold-weather sleeping bags).
Jump forward to Christmas morning, after a frightening evening with little sleep, warmth, or holiday cheer — we’d have to wait for the salt trucks to hit the community before we could get out of the cabin and head for home. This could be hours, or days, depending on the severity of the storm. Thankfully, we’d have a fire for warmth and cooking, with plenty of food to eat since I always overpack.
Conclusion
Sorry extremists — no volcanoes, pandemics, or zombies in this edition of What If?, just a very dangerous and disturbingly common emergency — a house fire. We did, in RECOIL OFFGRID style, however, make the situation a little trickier. With the added complications of the ice storm, the power failure, the impassible roads, useless phones, and the remote location of the cabin, the basic house fire protocol of “get outside and call 911” doesn’t seem as clear cut.
Since every emergency is different, you’d have to weigh the pros and cons of fleeing a dwelling or playing firefighter if you’re caught in a house fire during dangerous weather conditions. When a fire breaks out under normal conditions, get out and stay out unless it’s a very small fire that you know you can extinguish. Of course, every home should have smoke detectors with fresh batteries to assist in early fire detection.
Furthermore, every house that uses combustion-based heating (fire places, wood stoves, oil furnaces, and gas heat) should also have a carbon monoxide detector. And just be careful folks! Frayed holiday lights and deep fryer cooking can spark a raging fire inside your home while frigid conditions exist outside. We hope that this What If scenario reminds you to heed all fire prevention warnings during this winter season. Stay safe and happy holidays!
[meetourpanel]